1
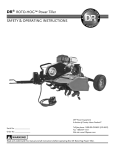
DR® ROTO-HOG™ POWER TILLER
OPTIONAL ACCESSORIES
SAFETY & OPERATING INSTRUCTIONS
READ AND UNDERSTAND THIS MANUAL AND ALL INSTRUCTIONS BEFORE USING YOUR NEW
ACCESSORY.
Congratulations on your purchase of a new OPTIONAL ACCESSORY for the DR ROTO-HOG POWER TILLER!
We have done our utmost to ensure that your OPTIONAL ACCESSORY for the DR ROTO-HOG POWER
TILLER will be one of the most trouble-free and satisfying pieces of equipment you have ever owned. Please
let us know of any questions you may have. We want to answer them as quickly as possible. When you do call,
please have your order number handy. For technical assistance, please call Toll-Free 1-800-DR-OWNER (3769637) and one of our Technical Support Representatives will be happy to help you. We also hope to hear from
you on how much you like your new helper.
And, please tell your friends about your new OPTIONAL ACCESSORY for the DR ROTO-HOG POWER TILLER!
Having DR Owners spread the word about our products and our way of doing business is the best advertising
we can have, and the best way to help us provide even better service in the years to come.
Thanks once again!
for all of us at
Country Home Products, Inc.®
Sales Manager
COPYRIGHT
©2007 Country Home Products, Inc. All rights reserved.
DR® Power Equipment
A division of Country Home Products®
127 Meigs Road
Vergennes, VT 05491
Toll-free phone: 1-800-DR-OWNER (376-9637)
Fax: 1-802-877-1213
Web site: www.dr-owner.com
ii
DR® ROTO-HOG™ POWER TILLER - OPTIONAL ACCESSORIES
Table of Contents
CHAPTER 1 ..........................................................................................................................................1
INTRODUCING THE DR ROTO-HOG POWER TILLER OPTIONAL ACCESSORIES ................1
Conventions used in this manual.................................................................................................1
DR ROTO-HOG POWER TILLER OPTIONAL ACCESSORIES Specification Sheets ..................2
CHAPTER 2 ..........................................................................................................................................3
GENERAL SAFETY RULES ............................................................................................................3
Labels ..........................................................................................................................................4
Additional Information and Potential Changes ...........................................................................4
CHAPTER 3 ..........................................................................................................................................5
SETTING UP YOUR ACCESSORY for the DR ROTO-HOG POWER TILLER..............................5
SETTING UP YOUR DR POWER SPREADER...............................................................................5
Unpacking the DR Power Spreader ..............................................................................................5
Major Components .......................................................................................................................6
Hardware Package Contents.........................................................................................................7
Installing the DR POWER SPREADER ..........................................................................................8
Instructions ...................................................................................................................................8
Wiring Instructions .....................................................................................................................11
Mounting the Flow Control Lever Assembly ..............................................................................12
SETTING UP YOUR DR CULTI-PACKER....................................................................................13
Unpacking the DR Culti-packer...................................................................................................13
Major Components .....................................................................................................................13
Hardware Package Contents.......................................................................................................14
Assembling the Culti-packer .......................................................................................................15
Installing the Culti-packer ...........................................................................................................16
CHAPTER 4 ........................................................................................................................................19
OPERATING YOUR OPTIONAL ACCESSORY...........................................................................19
OPERATING YOUR DR POWER SPREADER .............................................................................19
Setting the Flow Control Lever....................................................................................................19
Starting the DR Power Spreader .................................................................................................19
Stopping the DR Power Spreader ...............................................................................................19
Using Your DR Power Spreader..................................................................................................19
Removing the DR Power Spreader .............................................................................................20
OPERATING YOUR DR CULTI-PACKER ....................................................................................21
Setting the Culti-packer to Operating Position ..........................................................................21
Operating tips .............................................................................................................................21
CHAPTER 5 ........................................................................................................................................23
MAINTAINING THE OPTIONAL ACCESSORY .........................................................................23
MAINTAINING THE DR POWER SPREADER ...........................................................................23
Regular Maintenance Check List before each use .....................................................................23
Storage ........................................................................................................................................23
CALL TOLL FREE 1-800-DR-OWNER
iii
MAINTAINING THE DR CULTI-PACKER...................................................................................24
Regular Maintenance Check List before each use .....................................................................24
Replacing Parts............................................................................................................................24
Cleaning.......................................................................................................................................24
Storage ........................................................................................................................................24
CHAPTER 6 ........................................................................................................................................25
TROUBLESHOOTING YOUR OPTIONAL ACCESSORY...........................................................25
TROUBLESHOOTING YOUR DR POWER SPREADER .............................................................25
Troubleshooting Table ................................................................................................................25
TROUBLESHOOTING YOUR DR CULTI-PACKER ....................................................................26
Troubleshooting Table ................................................................................................................26
Notes ........................................................................................................................................27
CHAPTER 7 ........................................................................................................................................28
PARTS LIST AND SCHEMATIC DIAGRAMS..............................................................................28
Parts List - DR POWER SPREADER ............................................................................................28
Schematic - DR POWER SPREADER ..........................................................................................29
Parts List - DR CULTI-PACKER ...................................................................................................30
Schematic - DR CULTI-PACKER..................................................................................................31
Daily Checklist for the OPTIONAL ACCESSORY .......................................................................32
DR POWER SPREADER CHECKLIST..........................................................................................32
DR CULTI-PACKER CHECKLIST .................................................................................................32
iv
DR® ROTO-HOG™ POWER TILLER - OPTIONAL ACCESSORIES
CHAPTER 1
INTRODUCING THE DR ROTO-HOG POWER TILLER
OPTIONAL ACCESSORIES
This manual will help you set up and safely operate your new OPTIONAL ACCESSORY for the DR
ROTO-HOG POWER TILLER. Careful adherence to the safety and operating instructions in this manual
will ensure many years of productive use. Please let us know of any questions you may have. We want to
answer them as quickly as possible. When you do call, please have your order number handy. For
technical assistance, please call Toll-Free 1-800-DR-OWNER (376-9637) and one of our Technical
Support Representatives will be happy to help you.
Conventions used in this manual
THIS INDICATES A HAZARDOUS SITUATION, WHICH, IF NOT FOLLOWED, WILL RESULT IN DEATH
OR SERIOUS INJURY.
THIS INDICATES A HAZARDOUS SITUATION, WHICH, IF NOT AVOIDED, COULD RESULT IN DEATH
OR SERIOUS INJURY.
THIS INDICATES A HAZARDOUS SITUATION, WHICH, IF NOT AVOIDED, COULD RESULT IN MINOR
OR MODERATE INJURY.
THIS INFORMATION IS IMPORTANT IN THE PROPER USE OF YOUR SPREADER. FAILURE TO FOLLOW
THIS INSTRUCTION COULD RESULT IN DAMAGE TO YOUR SPREADER OR PROPERTY.
Tip: This is a helpful hint to guide you in getting the most out of your OPTIONAL ACCESSORY for the
DR ROTO-HOG POWER TILLER.
Tools Needed: This indicates you will need a special tool to perform an assembly function on your new
OPTIONAL ACCESSORY.
NOTE: This information may be helpful to you.
If you are ever unsure about an action you are about to take, don’t do it. Contact Country Home Products’ tollfree support at 1-800-DR-OWNER (376-9637) for help or information.
CALL TOLL FREE 1-800-DR-OWNER
1
DR ROTO-HOG POWER TILLER OPTIONAL ACCESSORIES Specification Sheets
DR POWER SPREADER SPECIFICATIONS
Spreader Dimensions
Shipping Dimensions
Shipping Weight
Spreader Capacity (Weight)
Spreader Capacity (Volume)
34" X 30" X 32"
29.78" X 21.38" X 24.25"
35 lbs.
125 lbs.
14 gal.
DR CULTI-PACKER SPECIFICATIONS
Culti-packer Dimensions
Shipping Dimensions
Shipping Weight
2
20" X 12" X 38"
18" X 12" X 39"
Approx. 87 lbs.
DR® ROTO-HOG™ POWER TILLER - OPTIONAL ACCESSORIES
CHAPTER 2
GENERAL SAFETY RULES
ANY POWER EQUIPMENT CAN CAUSE INJURY IF OPERATED IMPROPERLY OR IF THE USER DOES
NOT UNDERSTAND HOW TO OPERATE THE EQUIPMENT. EXERCISE CAUTION AT ALL TIMES
WHEN OPERATING EQUIPMENT.
•
READ THIS OWNERS MANUAL BEFORE ATTEMPTING TO ASSEMBLE OR OPERATE THE
ACCESSORY.
•
READ THE VEHICLE OWNER’S MANUAL AND KNOW HOW TO OPERATE YOUR VEHICLE,
BEFORE USING THE ACCESSORY.
•
DO NOT ALLOW ANYONE TO RIDE ON OR SIT ON SPREADER OR CULTI-PACKER FRAME.
•
NEVER ALLOW CHILDREN TO OPERATE THE VEHICLE OR ACCESSORY.
•
DO NOT ALLOW ADULTS TO OPERATE THE VEHICLE OR ACCESSORY WITHOUT PROPER
INSTRUCTIONS.
•
WE RECOMMEND WEARING SAFETY SHOES WHEN USING THIS MACHINE. WEAR SHOES
WITH NON-SLIP TREADS TO IMPROVE FOOTING ON SLIPPERY SURFACES. DO NOT USE THE
MACHINE WEARING OPEN SANDALS OR WHILE BAREFOOT.
•
WEAR EYE AND HAND PROTECTION WHEN HANDLING AND USING LAWN CHEMICALS.
•
ALWAYS BEGIN WITH THE VEHICLE TRANSMISSION IN FIRST (LOW) AND GRADUALLY
INCREASE SPEED AS CONDITIONS PERMIT.
•
WHEN USING THE ACCESSORY DO NOT DRIVE TOO CLOSE TO A CREEK OR DITCH AND BE
ALERT FOR HOLES AND OTHER HAZARDS WHICH COULD CAUSE YOU TO LOOSE CONTROL
OF THE ACCESSORY AND VEHICLE.
•
ALWAYS OPERATE VEHICLE AND ACCESSORY UP AND DOWN A SLOPE, NEVER ACROSS A
SLOPE.
•
READ INSTRUCTIONS AND CAUTION NOTES FOR HANDLING AND APPLICATION OF
MATERIALS PURCHASED FOR SPREADING.
•
FOLLOW MAINTENANCE AND LUBRICATION INSTRUCTIONS AS OUTLINED IN THIS MANUAL.
CALL TOLL FREE 1-800-DR-OWNER
3
Labels
Your OPTIONAL ACCESSORY for the DR ROTO-HOG POWER TILLER carries prominent labels as
reminders for its proper and safe use. Shown below are copies of all the labels that appear on the
accessories. Take a moment to study them and make a note of their location on your OPTIONAL
ACCESSORY for the DR ROTO-HOG POWER TILLER as you assemble and before you operate the unit.
Replace damaged or missing safety and information labels immediately.
DR Power Spreader:
# 234971
Additional Information and Potential Changes
Country Home Products, Inc. reserves the right to discontinue, change, and improve its products at any
time without notice or obligation to the purchaser. The descriptions and specifications contained in this
manual were in effect at printing. Equipment described within this manual may be optional. Some
illustrations may not be applicable to your machine.
4
DR® ROTO-HOG™ POWER TILLER - OPTIONAL ACCESSORIES
CHAPTER 3
SETTING UP YOUR ACCESSORY for the DR ROTO-HOG
POWER TILLER
This chapter outlines a few simple steps you will need to follow to set up and use your new DR ROTOHOG POWER TILLER OPTIONAL ACCESSORIES. If you have any questions at all, please feel free to
contact our Customer Service Representatives at our toll free number 1-800-DR-OWNER (376-9637).
SETTING UP YOUR DR POWER SPREADER
Unpacking the DR Power Spreader
Parts Supplied:
• Hopper/Frame Assembly
• Screen
• Vinyl Cover
• Hardware Package
• Impeller Shaft
• Deflector
• Mounting Bracket, R.H.
• Mounting Bracket, L.H.
• Impeller
• Motor Mount Assembly
Hopper/Frame
Assembly
Tools Needed:
• Pliers
1.
Open the shipping container by pulling the staples out
with pliers and opening the top flaps (Figure 1).
2.
Remove the contents to a flat open area (the Mounting
Brackets are located under the bottom box flaps).
3.
Open the cardboard that is wrapped around the Motor
Mount Assembly to remove the Motor Mount
Assembly, Vinyl Cover, Impeller Shaft and Hardware
Package
4.
See the unpacked “Major Components” (Figure 2).
NOTE: Do not discard your packaging material until you are
fully satisfied with your new DR POWER SPREADER.
Motor Mount
Assembly
Figure 1
CALL TOLL FREE 1-800-DR-OWNER
5
Major Components
Hopper
Closure
Plate
Hopper/Frame
Assembly
Impeller
Motor Mount
Assembly
Impeller
Shaft
Flow
Control
Lever
Assembly
Vinyl Cover
Mounting
Bracket, R.H.
Mounting
Bracket, L.H.
Deflector
Figure 2
6
DR® ROTO-HOG™ POWER TILLER - OPTIONAL ACCESSORIES
Hardware
Package
(see next
page)
Screen
Hardware Package Contents
The item numbers listed below are the same item numbers listed in the parts list and schematic
diagram in the “Parts List and Schematic Diagrams” section of chapter 7. This reference will aid in the
proper location of parts as you assemble the spreader.
Parts not to scale
35
26
7
21
28
25
6
32
5
39
48
37
46
17
ITEM
NO.
35
28
21
7
26
6
32
5
41
33
QTY.
DESCRIPTION
4
2
5
2
4
2
8
2
Hex Bolt, 5/16" x 1"
Hex Bolt, 1/4" x 3/4"
Carriage Bolt, 5/16" x 1-3/4"
Nylock Hex Nut, 1/4"
Nylock Hex Nut, 5/16"
Flat Washer , 1/4"
Flat Washer, 5/16"
Nylon Washer
ITEM
NO.
25
39
37
17
33
46
41
48
QTY.
DESCRIPTION
1
3
1
5
2
1
2
1
Hair Pin Agitator
Cotter Pin, 1/8" x 1-1/4"
Impeller Coupler
Wing Knob
Angle Bracket
Mounting Clamp
Nylon Tie
Spreader Cable
Table 1
CALL TOLL FREE 1-800-DR-OWNER
7
Installing the DR POWER SPREADER
Tools Needed:
• 7/16" Wrench and Socket
• 1/2" Wrench and Socket
Instructions:
1.
Remove two 5/16-18 X 2-1/4" Hex Head Bolts,
Washers and Nylock Nuts (1/2" Wrench) from the
back face of the ROTO-HOG POWER TILLER Fender
(Figure 3).
2.
Position the left hand Mounting Bracket onto the back
face of Tiller Fender (Figure 4), with mounting tabs
facing in, and replace the hardware you removed in
step 1. Install a 5/16-18 X 1” Hex Head Bolt (on top),
Washer and Nylock Nut (1/2" Wrench) to secure the
Bracket to top of the Tiller Fender. Repeat this step to
install the right hand Mounting Bracket.
3.
Use the top and bottom holes of the Mounting Tubes
on the Hopper/Frame assembly to attach the
assembly to the Spreader Mount Brackets with four
5/16-18 x 1-3/4" Carriage Bolts (1/2" Wrench), four
5/16" Washers and four Wing Knobs (Figure 5). Make
sure that the Carriage Bolt square goes fully into the
square holes of the Spreader Mount Brackets and the
Wing Knobs and Washers are on the Mounting Tube
side.
Tiller Fender
Hex Head Bolts,
Washers and
Nylock Nuts
Figure 3
Hex Head Bolt,
Washers and
Nylock Nut
Tiller Fender
Mounting
Bracket
Mounting
Tab
Figure 4
Carriage
Bolts
Wing Knobs
and Washers
Figure 5
8
Hopper
Mounting
Tubes
Hopper
Assembly
DR® ROTO-HOG™ POWER TILLER - OPTIONAL ACCESSORIES
4.
Remove two 1/4" Nylock Nuts (7/16" Wrench) from
the Hopper Assembly and position the two Angle
Brackets and secure (hand tight) with the two Nuts
you removed (Figure 6).
5.
Position the Rear Deflector onto the Angle Brackets
and secure with two 1/4-20 x 3/4" Bolts, Washers and
Nylock Nuts.
6.
Tighten the Nylock Nuts that secure the Angle
Brackets to the Hopper Assembly.
Angle
Bracket
Nylock
Nut
Hopper
Assembly
Rear
Deflector
Bolt,
Washer and
Nylock Nut
Figure 6
7.
Position the Impeller Coupler over the Output Shaft of
the Motor Mount Assembly and secure with 1/8" x 11/4" Cotter Pin (Figure 7).
Impeller
Shaft
NOTE: The Impeller Shaft has three holes in it. It should be
mounted so that the center hole is furthest away from
the Impeller Coupler.
Impeller
Coupler
8.
Insert the Impeller Shaft into the Impeller Coupler and
secure with 1/8" x 1-1/4" Cotter Pin.
Cotter
Pins
Output
Shaft
Motor Mount
Assembly
Figure 7
9.
Slide the Impeller Shaft through the hole in Spreader
Screen and insert the Agitator Hairpin thru the center
hole in the Impeller Shaft (Figure 8).
Impeller
Shaft
Agitator
Hairpin
Spreader
Screen
Figure 8
CALL TOLL FREE 1-800-DR-OWNER
9
Motor Mount
Assembly
Spreader
Screen
Impeller
Shaft
10. Position the Motor Mount assembly with the Spreader
Screen into the Hopper and slide the Impeller Shaft
through the hole in the bottom of the Hopper (Figure
9). Secure the Spreader Screen into the recessed
portion of the Hopper by sliding the edge of the
Screen under the Clips on both sides.
Hopper
Clip
Figure 9
Hopper
Motor Mount
Bracket
11. Line up the Motor Mount Bracket with holes in
Hopper. Secure Motor Mount Bracket to Hopper with
two 5/16-18 x 1" Hex Bolts, two 5/16" Washers, two
Nylon Washers (against outside of Hopper) and two
5/16" Nylock Nuts (1/2" Wrench) (Figure 10).
Bolt, Washer,
Nylon Washer
and Nylock
Nut
Figure 10
Impeller
Shaft
Spreader
Impeller
12. Slide the Spreader Impeller onto the Impeller Shaft
with the large fins facing up and secure with 1/8" x 11/4" Cotter Pin (Figure 11).
Cotter Pin
Figure 11
10
DR® ROTO-HOG™ POWER TILLER - OPTIONAL ACCESSORIES
Wiring Instructions
1.
“ON”
Move the "ON-OFF" Switch on the ROTO-HOG
Control Box to the “OFF” position (Figure 12).
“OFF”
ROTOHOG
Control Box
“ON-OFF”
Switch
Figure 12
2.
Attach the Spreader Cable Connector to the Motor
Mount Assembly Connectors (Figure 13).
Tiller Wire Harness
Connector
Motor Mount
Assembly
Connectors
Flow Control
Cable
Figure 13
3.
Plug the Green Wire Connector from the Spreader
Cable into the Green Wire Connector from the Tiller
(Figure 14).
4.
Remove the Nylock Nut from the Ground Stud on the
Battery Mounting Bracket.
5.
Install the Black Wire Terminal from the Spreader
Cable onto the Ground Stud and reinstall the Nylock
Nut.
6.
Use the Nylon Ties provided to safely secure the
wiring and Flow Control Cable away from hot engine
parts, rotating parts and pinch points.
Ground Stud on
Battery Mounting
Bracket
Black Wire
from
Spreader
Cable
Green Wire
from Tiller
Green Wire
from Spreader
Cable
Figure 14
CALL TOLL FREE 1-800-DR-OWNER
11
Mounting the Flow Control Lever Assembly
Bracket
Mounting
Clamp
Figure 15
12
Flow Control
Lever
Assembly
1.
Find a place on your tow vehicle to mount the Flow
Control Lever Assembly where you can operate while
sitting on the vehicle. If there is not a hole in the area
to mount a 5/16” bolt then you must create one.
2.
Using a 5/16" x 1-3/4" Carriage Bolt and Wing Knob
from the Hardware Package, mount the Flow Control
Lever Assembly to your Tow Vehicle (Figure 15).
3.
If a different mounting position is required, use the
Mounting Clamp from your Hardware Package to
change the position of the Flow Control Lever
Assembly. You will need to provide the hardware to
mount the Mounting Clamp to the tow vehicle.
DR® ROTO-HOG™ POWER TILLER - OPTIONAL ACCESSORIES
SETTING UP YOUR DR CULTI-PACKER
Unpacking the DR Culti-packer
Parts Supplied:
• Frame and Wheel Assembly
• Hook Assembly
• Hardware Package
Frame and
Wheel
Assembly
Tools Needed:
• Pliers
• Utility Knife
1.
Cut the plastic away from the box with a Utility Knife.
2.
Open the shipping container by pulling the staples
out with pliers and opening the top flaps (Figure 16).
3.
Remove the contents to a flat open area.
4.
See the unpacked “Major Components” (Figure 17).
Hook
Assembly
Hardware
Package
Figure 16
NOTE: Do not discard your packaging material until you are
fully satisfied with your new DR CULTI-PACKER.
Major Components
Frame and
Wheel
Assembly
Hook
Assembly
Hardware
Package
Figure 17
CALL TOLL FREE 1-800-DR-OWNER
13
Hardware Package Contents
The item numbers listed below are the same item numbers listed in the parts list and schematic
diagram in the “Parts List and Schematic Diagrams” section of chapter 7. This reference will aid in the
proper location of parts as you assemble and install the Culti-packer.
Parts not to scale
14
10
15
6
5
ITEM
NO.
14
15
6
QTY.
DESCRIPTION
2
2
4
Extension Spring
“S” Hook
Hairpin Clip
ITEM
NO.
10
5
Table 2
14
DR® ROTO-HOG™ POWER TILLER - OPTIONAL ACCESSORIES
QTY.
DESCRIPTION
2
1
Clevis Pin
Hook Axle
Assembling the Culti-packer
1.
Position the Hook Assembly and line up the holes
with the Frame Assembly (Figure 18).
2.
Insert the Hook Axle so it is flush on both sides.
Hook
Axle
Frame
Assembly
Hook
Assembly
Figure 18
3.
Insert two Hairpin Clips into the holes in the Hook
Axle (Figure 19).
Hook
Axle
Hairpin
Clip
Figure 19
4.
Install the springs onto the two Eye Bolts on the
Frame Assembly (Figure 20).
Springs
Eye Bolt
Figure 20
CALL TOLL FREE 1-800-DR-OWNER
15
Installing the Culti-packer
ROTO-HOG
Power Tiller
1.
Rotate the ROTO-HOG Power Tiller Wheels to their
halfway position with the ROTO-HOG Control Box
(Figure 21).
2.
Position the Culti-packer at the rear of the Tiller near
the wheel axle (Figure 22).
3.
Rotate the Hook Assembly away from the Tiller.
4.
Slide the Slotted Tubes of the Frame Assembly onto
the Lower Wheel Axle of the Tiller until the Axle is
seated into the slot base of both Slotted Tubes (Figure
23).
Set at
approx.
45°
Figure 21
Tiller
Hook
Assembly
Figure 22
Slot
Lower Wheel
Axle of Tiller
Assembly
Slotted Tube/
Culti-packer
Frame Assembly
Figure 23
16
DR® ROTO-HOG™ POWER TILLER - OPTIONAL ACCESSORIES
5.
Insert the Clevis Pins into the holes at the ends of the
Slotted Tubes from the top and secure the Clevis Pins
with Hairpin Clips (Figure 24).
Slotted
Tube
Clevis Pin
Hairpin
Clip
Figure 24
6.
Use the ROTO-HOG Control Box to Raise the Tiller
Tines to their uppermost position (Figure 25).
approx.
90°
Figure 25
7.
Place the “S” Hooks onto the Support Rod on the
Tiller Wheel Frame Assembly (Figure 26).
“S” Hooks
NOTE: The “S” Hooks have a large and small end. The large
end is for the Support Rod and the small ends are for
the Springs to attach in the next step.
Support
Rod
Figure 26
CALL TOLL FREE 1-800-DR-OWNER
17
8.
Rotate the Culti-packer up towards the Wheel Frame
and Hook the Springs onto the “S” Hooks (Figure 27).
9.
Slowly lower the Culti-packer to the ground.
Springs
Figure 27
Hook
Assembly
10. Lift the Culti-packer as you rotate the Hook Assembly
forward until the Lower Slots of the Hook Assembly
can be hooked over the Support Rod (Figure 28).
11. The Culti-packer is now in transport mode.
Lower
Slot
Figure 28
18
DR® ROTO-HOG™ POWER TILLER - OPTIONAL ACCESSORIES
CHAPTER 4
OPERATING YOUR OPTIONAL
ACCESSORY
Adjustable
Stop
Flow
Control
Lever
“OFF”
OPERATING YOUR DR POWER SPREADER
Setting the Flow Control Lever
1.
2.
Slide the Adjustable Stop to the desired setting
(“OFF” is fully closed, “10” is fully open) (Figure 29).
Figure 29
Leave the Flow Control Lever at the “OFF” setting
until you use the spreader.
“ON”
Starting the DR Power Spreader
1.
Toggle the "ON-OFF" switch of the ROTO-HOG
Control Box to the “ON” position (Figure 30). Leave
the Flow Control Lever at the “OFF” position until you
use the Spreader (Figure 29).
“OFF”
ROTOHOG
Control Box
Stopping the DR Power Spreader
1.
Move the Flow Control Lever to the "OFF" position
(Figure 29). Toggle the “ON-OFF” Switch to the
“OFF” position (Figure 30).
“ON-OFF”
Switch for
Spreader
Motor
Figure 30
WE DO NOT RECOMMEND THE USE OF ANY POWDERED LAWN CHEMICALS, DUE TO DIFFICULTY
IN OBTAINING A SATISFACTORY OR CONSISTENT BROADCAST PATTERN.
APPLICATION RATES SHOWN IN THE CHART (TABLE 3, P. 20) ARE AFFECTED BY HUMIDITY AND BY
THE MOISTURE CONTENT OF THE MATERIAL (GRANULAR AND PELLET). SOME MINOR SETTING
ADJUSTMENTS MAY BE NECESSARY TO COMPENSATE FOR THIS CONDITION.
Using Your DR Power Spreader
1.
Determine approximate square footage of area to be covered and estimate amount of material
required.
2.
Verify that the Spreader Motor turns on and off and that the flow control is operating properly.
3.
Make sure the Flow Control Lever is in the “OFF” position.
4.
Set the Adjustable Stop to the desired flow rate, keeping the Flow Control Lever in the “OFF”
position. Refer to the application chart (Table 3) and the instructions on the Material Package to
determine the proper flow rate setting. The application chart is calculated for a vehicle speed of 3
mph (100 ft. in 23 seconds). Faster speeds require higher flow rate settings to maintain the same
application rate.
CALL TOLL FREE 1-800-DR-OWNER
19
APPLICATION CHART
TYPE
MATERIAL
FERTILIZER
Powder
Granular
Pelleted
Organic
GRASS SEED
Fine
Coarse
FLOW SETTING
3 MPH
SPREAD
WIDTH
3-5
3-5
3-5
6-8
3'-4'
8'-10'
10'-12'
6'-8'
3-4
4-5
6'-7'
8'-9'
WHEN SPREADING WEED CONTROL FERTILIZERS, MAKE
SURE THE BROADCAST PATTERN DOES NOT HIT
EVERGREEN TREES, FLOWERS, SHRUBS OR VEGETABLE
GARDENS.
FOLLOW THE INSTRUCTIONS, WARNINGS, ETC. FROM THE
MANUFACTURER OF THE MATERIAL YOU ARE SPREADING
TO ENSURE SAFE OPERATION.
DO NOT EXCEED THE 125LBS. WEIGHT LIMIT OF MATERIAL
IN THE HOPPER.
Table 3
5.
Break up any lumps as you fill the Hopper with the
material to be spread.
6.
Start the vehicle in motion and then toggle the ROTOHOG Control Box switch to "ON" and move the Flow
Control Lever up to lock with the Adjustable Stop.
NOTE: Move the Flow Control Lever to off (“OFF”) before turning
or stopping.
Figure 31
Motor
Mount
Assembly
Vinyl
Cover
7.
To insure uniform coverage, make each pass so that
the broadcast pattern slightly overlaps the pattern
from the previous pass (Figure 31). The approximate
broadcast widths for different materials are shown in
the application chart on this page.
8.
Heavy moisture conditions may require a cover over
the hopper to keep contents dry. The Vinyl Cover acts
as a wind and moisture shield, but should not be used
as a rain cover (Figure 32).
9.
If fertilizer is accidentally deposited too heavily in an
area, soak the area thoroughly with a garden hose or
sprinkler to prevent burning of the lawn.
Removing the DR Power Spreader
1.
Disconnect the Wire Harness Connector from the
Motor Mount Assembly Connector. Remove the Flow
Control Valve Assembly from the rear of the vehicle if it
is attached there.
2.
Support the Spreader and remove the Wing knobs,
Washers and Carriage Bolts from the Spreader Bracket
Tubes.
3.
Remove the Spreader from the tiller.
Hopper/Frame
Assembly
Figure 32
20
DR® ROTO-HOG™ POWER TILLER - OPTIONAL ACCESSORIES
OPERATING YOUR DR CULTI-PACKER
Setting the Culti-packer to Operating Position
NOTE: The following procedure assumes the Culti-packer is in
the transport position.
1.
Lower the tines on the Tiller to halfway position with
the Tiller Control Box.
2.
Lift up on the Culti-packer as you lift up on the Hook
Assembly to disengage the Hook Assembly Slot from
the Tiller Wheel Mount Assembly (Figure 33).
NOTE: Holding down on the Hook Assembly Handle will help
to engage the slot when you reach that point.
3.
Slide the Hook Assembly down until the end slot
engages with the rod of the Tiller Wheel Mount
Assembly.
4.
Raise the Tiller Tines to their uppermost position with
the Tiller Control Box.
5.
The Culti-packer Wheels are now engaged with the soil
and the Tiller Wheels are lifted off the ground.
6.
The Culti-packer is now ready to use.
Hook
Assembly
Upper
Slot
Figure 33
Operating tips
•
For best results it may be necessary to pack the
soil before seeding and then pack the soil a
second time after seeding.
•
The Culti-packer can be used to break up clumps
and to give soils a smooth finished appearance.
•
If desired, the Culti-packer can be left in the
“operating” position when the Tow Vehicle is
being reversed.
CALL TOLL FREE 1-800-DR-OWNER
21
22
DR® ROTO-HOG™ POWER TILLER - OPTIONAL ACCESSORIES
CHAPTER 5
MAINTAINING THE OPTIONAL ACCESSORY
Regular maintenance is the way to ensure the best performance and long life of your OPTIONAL
ACCESSORY. Please refer to this manual for maintenance procedures.
MAINTAINING THE DR POWER SPREADER
WHEN PERFORMING ANY MAINTENANCE ON THE DR SPREADER ATTACHMENT WHEN THE UNIT IS
STILL ATTACHED TO THE TILLER, YOU MUST FIRST MAKE SURE THE SWITCH ON THE TILLER CONTROL
BOX IS IN THE “OFF” POSITION AND THEN DISCONNECT THE WIRE HARNESS OF THE MOTOR
MOUNT ASSEMBLY.
Regular Maintenance Check List before each use
CHECK FOR LOOSE FASTENERS
1.
Before each use make a thorough visual check of the Spreader for any bolts and nuts which may
have loosened. Retighten any loose bolts and nuts.
CHECK FOR WORN OF DAMAGED PARTS
1.
Check for worn or damaged parts before each use.
2.
Repair or replace parts if necessary.
FOLLOW ALL WARNINGS, CAUTIONS ETC. FROM THE MATERIAL MANUFACTURERS FOR PROPPER
CLEANING AND DISPOSAL PRACTICES BEFORE CLEANING YOUR EQUIPMENT.
CLEANING
1.
Rinse inside of Hopper and exterior of Spreader and dry off before storing (even though the
Spreader Motor is sealed, avoid spraying the Motor and wires if possible).
2.
Clean out any build up of material from the Hopper Closure Plate.
3.
Clean any build up of material from your ROTO-HOG Tiller.
Storage
1.
Rinse inside of Hopper and exterior of Spreader and dry off before storing (even though the
Spreader Motor is sealed, avoid spraying the Motor and wires if possible).
2.
Store in a clean, dry area.
CALL TOLL FREE 1-800-DR-OWNER
23
MAINTAINING THE DR CULTI-PACKER
Regular Maintenance Check List before each use
GREASE BEARINGS
1.
There are two grease points on the culti-packer. There is a bearing at each end of the wheel shaft.
Greasing the bearings at least every 4 hours with all purpose grease is recommended. More
frequent greasing may be necessary in very dusty conditions.
CHECK FOR LOOSE FASTENERS
1.
Before each use make a thorough visual check of the Culti-packer for any bolts and nuts which may
have loosened. Retighten any loose bolts and nuts.
CHECK FOR WORN OF DAMAGED PARTS
1.
Check for worn or damaged parts before each use.
2.
Repair or replace parts if necessary.
Replacing Parts
REPLACING BEARINGS
Culti-packer
Wheels
1.
Loosen the Bearing Set Screw (Figure 34).
2.
Remove the Bolts and Washers then remove Bearing.
3.
Position the new Bearing Over the Axle.
Bolts and
Washers
4.
Install Bolts and Washers.
Bearing
5.
Tighten the Set Screw.
REPLACING WHEELS
1.
Loosen both Bearing Set Screws (Figure 34).
2.
Slide the Axle from the Bearings, Frame and Wheels.
3.
Replace damaged Wheel with new Wheel.
4.
Slide Axle through Bearings, Frame and Wheels.
5.
Tighten Set Screws.
Axle
Set Screw
Figure 34
Cleaning
1.
Rinse the Culti-packer and dry off before storing.
2.
Clean out any build up of material from the Culti-packer Wheels.
3.
Clean any build up of material from your ROTO-HOG Tiller.
Storage
24
1.
Rinse the Culti-packer and dry off before storing.
2.
Store in a clean, dry area.
DR® ROTO-HOG™ POWER TILLER - OPTIONAL ACCESSORIES
Frame
CHAPTER 6
TROUBLESHOOTING YOUR OPTIONAL ACCESSORY
Most problems are easy to fix. Consult the Troubleshooting Tables below for common problems and
their solutions. If the procedures for fixes are not in your OPTIONAL ACCESSORIES Safety and
Operating Instructions or if you continue to experience problems, please feel free to contact our
Customer Service Representatives at our toll free number 1-800-DR-OWNER (376-9637).
TROUBLESHOOTING YOUR DR POWER SPREADER
WHEN PERFORMING ANY MAINTENANCE ON THE DR SPREADER ATTACHMENT WHEN THE UNIT IS
STILL ATTACHED TO THE TILLER, YOU MUST FIRST MAKE SURE THE SWITCH IS IN THE OFF POSITION
AND THEN DISCONNECT THE WIRE HARNESS.
Troubleshooting Table
SYMPTOM
Hopper closure plate
does not open to the
correct position.
POSSIBLE CAUSE
Spreader motor
doesn't run.
⇒
⇒
⇒
⇒
⇒
⇒
Motor runs when
switch is shut off.
⇒ Spreader on-off switch is broken. Replace the switch.
⇒ Material packed around plate. Clean out around closure plate.
Loose connection in spreader wiring. Check and reconnect.
Loose battery connection. Tighten battery terminals.
Battery is run down. Recharge the battery.
Broken spreader wiring. Replace damaged wiring.
Spreader on-off switch is broken. Replace the switch.
Spreader motor is broken. Repair or replace motor.
CALL TOLL FREE 1-800-DR-OWNER
25
TROUBLESHOOTING YOUR DR CULTI-PACKER
Troubleshooting Table
26
SYMPTOM
Culti-packer wheels do
not turn when in use.
POSSIBLE CAUSE
Culti-packer does not
raise and lower when
the tiller control panel
is operated.
⇒ Check that the culti-packer handle assembly is locked in the desired
groove. Lock the handle assembly into the desired groove.
The culti-packer does
not touch the ground
when in operation.
⇒ The culti-packer is in the transport position. Move the culti-packer into
the operating position.
⇒ Material packed around wheels. Clean out around and between wheels
⇒ Bearings not working properly. Grease or replace bearings as needed.
DR® ROTO-HOG™ POWER TILLER - OPTIONAL ACCESSORIES
Notes:
CALL TOLL FREE 1-800-DR-OWNER
27
CHAPTER 7
PARTS LIST AND SCHEMATIC DIAGRAMS
Parts List - DR POWER SPREADER
NOTE: Part numbers listed are available through Country Home Products.
Ref# Part#
Description
01
02
03
04
05
06
07
08
09
10
11
12
13
14
15
16
17
18
19
20
21
22
23
24
25
26
27
28
29
30
Hopper
Plug, 1/4"
Bolt, Hex, 1/4-20" x 2-1/4"
Bolt, Hex, 1/4-20" x 2"
Washer, Nylon
Washer, 1/4 Std .312 X .734
Nut, Hex 1/4-20 Nylock
Clip
Plate, Side
Bushing, Hopper
Plate, Guide
Rivet, Pop, 3/16"
Cable Assembly, Control
Bracket, Control Mount
Bolt, Carriage, 1/4"-20 x 1-3/4"
Nut, Hex Sims, 1/4"
Knob, Wing
Washer, Star
Impeller, Spreader
Tube, Hopper Mount
Bolt, Carriage, 5/16"-18/ x 1-3/4"
Screen, Spreader
Bracket, Mount RH
Bracket, Mount LH
Hairpin, Agitator
Nut, Hex 5/16-18 Nylock
Cover, Vinyl
Bolt, Hex 1/4-20 X 3/4 G5
Deflector, Rear
Cover, Motor
28
234851
234811
234761
234791
234911
232891
233031
234651
234641
234731
234591
234711
234681
234621
234751
234801
234701
234741
234901
234871
234721
234891
234661
234671
234861
233081
234881
232841
234831
234821
Ref# Part#
31
32
33
34
35
36
37
38
39
40
41
42
43
44
45
46
47
48
DR® ROTO-HOG™ POWER TILLER - OPTIONAL ACCESSORIES
234931
232871
234581
232951
232851
234631
234601
234841
234691
234771
234921
234611
234781
232931
233021
234571
234971
233721
Description
Washer, Lock. #10
Washer, 5/16" Std .375 X .875
Bracket, Angle
Washer, SAE. #10
Bolt, Hex 5/16-18 X 1 G5
Shaft, Impeller
Coupler, Impeller
Seal, Motor Lip
Pin, Cotter, 1/8" x 1-1/4"
Bolt, Pan Slot, #8-32 x 1/2"
Tie, Nylon
Bracket, Motor Mount
Motor, 12 Volt
Bolt, Slotted, #10-32 X 5/8"
Nut, Nylock, #10-32
Bracket, Mounting
Label, Spreader Operation
Spreader Cable
Schematic - DR POWER SPREADER
48
CALL TOLL FREE 1-800-DR-OWNER
29
Parts List - DR CULTI-PACKER
Parts List - DR CULTI-PACKER NOTE: Part numbers listed are available through Country Home Products.
Ref# Part#
Description
01
02
03
04
05
06
07
08
09
10
11
12
13
14
15
16
Frame Assembly
Hook Assembly
Axle
Wheel
Hook, Axle
Clip, Hairpin, 1/16" X 1-3/4"
Bearing, Flange
Bolt, Hex, 7/16" X 1.25"
Washer, Lock, 7/16"
Pin, Clevis, 3/8" X 2.25"
Bolt, Eye, 5/16" X 3"
Nut, 5/16"-18
Washer, Lock, 5/16"
Spring, Extension
Hook, “S”
Ring, Axle Spacer
30
234171
234181
234301
234791
234311
234191
234201
234211
234221
234231
234241
234251
234261
234271
234281
234321
DR® ROTO-HOG™ POWER TILLER - OPTIONAL ACCESSORIES
Schematic - DR CULTI-PACKER
CALL TOLL FREE 1-800-DR-OWNER
31
Daily Checklist for the OPTIONAL ACCESSORY
To help maintain your OPTIONAL ACCESSORY for optimum performance, we recommend you follow
this checklist each time you use your Accessory.
DR POWER SPREADER CHECKLIST
[ ] Before each use make a thorough visual check of the Spreader for any bolts and nuts which may have
loosened. Retighten any loose bolts and nuts.
[ ] Check for worn or damaged parts before each use.
[ ] Repair or replace parts if necessary.
DR CULTI-PACKER CHECKLIST
[ ] Before each use make a thorough visual check of the Culti-packer for any bolts and nuts which may
have loosened. Retighten any loose bolts and nuts.
[ ] Check for worn or damaged parts before each use.
[ ] Repair or replace parts if necessary.
[ ] Check that the Culti-packer wheels are turning freely.
[ ] Grease the bearings with all purpose grease if needed.
COUNTRY HOME PRODUCTS, Inc.
MEIGS ROAD, P.O. BOX 25, VERGENNES, VERMONT 05491
1-800-DR-OWNER (376-9637) • www.dr-owner.com
©2007 CHP, Inc. 234291