1
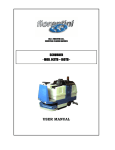
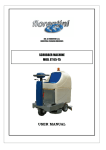
Sanitaire®
14” Autoscrubber
SC6200A
Part No. SC6200A Rev 2 (11/13)
Owner’s Guide
IMPORTANT
Do not return this product to the store.
Call 1-800-800-8975*
Monday - Friday 8:00 AM to 7:30 PM
and Saturday 10 AM to 6:30 PM
Central time or visit our web site,
www.sanitairevac.com for any of the
following:
• assembly problems
• replacement of broken or missing
items
• to review repair parts list
• to order replacement parts and
accessories
• to locate the nearest sanitaire
warranty station
*En Mexico llame al 5670-6169
www.sanitairevac.com
PLEASE RETAIN
We suggest you record the model, type, and serial numbers
below. They are located on the silver rating plate on your
unit. For prompt and complete service information, always
refer to these numbers when inquiring about service.
Model & Type____________________________
Serial No._______________________________
It is also important to keep your receipt as proof of date of
purchase.
©2013 Electrolux Home Care Products Ltd.
1
THE SANITAIRE® COMMERCIAL
LIMITED WARRANTY
WHAT THIS WARRANTY COVERS
Your Sanitaire commercial cleaner is warranted to be free from all defects in material and workmanship in normal use
FOR A PERIOD OF ONE YEAR. The warranty is granted only to the original purchaser of the cleaner. The warranty is subject to the following provisions.
WHAT THIS WARRANTY DOES NOT COVER
• Parts of the cleaner that require replacement under normal use, such as bumpers, belts, batteries, and hoses.
• Damages or malfunctions caused by negligence, abuse, or use not in accordance with the Owner’s Guide.
• Defects or damages caused by unauthorized service or the use of other than Genuine Sanitaire parts.
WHAT ELECTROLUX HOME CARE PRODUCTS NORTH AMERICA WILL DO
Electrolux Home Care Products North America will, at its option, repair or replace a defective cleaner or cleaner part that
is covered by this warranty. As a matter of warranty policy, Electrolux Home Care Products North America will not refund
the consumer’s purchase price.
WARRANTY REGISTRATION
Please fill out and return the warranty registration card accompanying your cleaner.
OBTAINING WARRANTY SERVICE
To obtain warranty service you must return the defective cleaner or cleaner part along with proof of purchase to any
Sanitaire Authorized Warranty Station. You will find the nearest location in the Yellow Pages under “Vacuum Cleaners–
Service and Repair.” Be certain that the Warranty Station is “Sanitaire Authorized.”
For the location of the nearest Sanitaire Authorized Warranty Station or for service information, telephone toll free:
USA: 1-800-800-8975
Mexico: 5670-6169
2
If you prefer, you can write to:
Electrolux Home Care Products North America
Service Division
P.O. Box 3900
Peoria, IL 61612 USA
In Canada write to:
Electrolux Home Care Products North America
866 Langs Drive
Cambridge, Ontario N3H 2N7
If it is necessary to ship the cleaner outside your community to obtain warranty repair, you must pay the shipping charges to the Sanitaire Authorized Warranty Station. Return shipping charges will be paid by the Warranty Station. When
returning parts for repair, please include the model, type and serial numbers from the data plate on the cleaner.
FURTHER LIMITATIONS AND EXCLUSIONS
Any warranty that may be implied in connection with your purchase or use of the cleaner, including any warranty of
MERCHANTABILITY or any warranty for FITNESS FOR A PARTICULAR PURPOSE is limited to the duration of this warranty.
Some states do not allow limitations on how long an implied warranty lasts, so the above limitations may not apply to
you.
Your relief for the breach of this warranty is limited to the relief expressly provided above. IN NO EVENT SHALL
ELECTROLUX HOME CARE PRODUCTS NORTH AMERICA BE LIABLE FOR ANY CONSEQUENTIAL OR INCIDENTAL
DAMAGES THAT YOU MAY INCUR IN CONNECTION WITH YOUR PURCHASE OR USE OF THE CLEANER. Some states
do not allow the exclusion or limitation of incidental or consequential damages, so the above limitation or exclusion may
not
apply to you.
This warranty gives you specific legal rights. You may also have other rights which vary by State.
3
GROUNDING INSTRUCTIONS
This appliance must be grounded If it should malfunction or breakdown, grounding provides a path
of least resistance for electric current to reduce the risk of electric shock. This appliance is equipped
with a cord having an equipment grounding conductor and grounding plug. The plug must be inserted
into an appropriate outlet that is properly installed and grounded in accordance with all local codes
and ordinances.
WARNING - Improper connection of the equipment grounding conductor can result in a risk of
electric shock. Check with a qualified electrician or service person if you are in doubt as to whether
the outlet is properly grounded. Do not modify the plug provided with the appliance, if it will not fit the
outlet, have a proper outlet installed by a qualified electrician.
This appliance is for use on a nominal 120-volt circuit and has a grounding attachment plug that looks
like the plug illustrated in sketch (A). Make sure that the appliance is connected to an outlet having
the same configurations the plug. No adaptor should be used with this appliance.
4
SAFETY INSTRUCTIONS & WARNINGS
IMPORTANT SAFETY INSTRUCTIONS
READ AND UNDERSTAND ALL INSTRUCTIONS BEFORE USING THIS UNIT
Read and understand this owner’s manual and all labels on the unit before operating. Safety is a
combination of common sense,staying alert and knowing how your unit works. Use this unit only as
described in this manual. Use only manufacturer’s recommended attachments. To reduce the risk of
personal injury or damage to your unit use only Sanitaire recommended accessories
Important Safety Advice
WARNING: TO REDUCE THE RISK OF FIRE, ELECTRICAL SHOCK OR INJURY:
• When using electrical equipment basic safety precautions should be followed.
• Read all instructions carefully before use.
• Please note that the safety information described in the manual supplements and does not replace local, state, and federal regulations or those standards in force in the country in which the
machine is used.
• This machine is not intended for use by children or people with reduced physical, sensory or mental capabilities, or lack of experience and knowledge, unless they have been given supervision or
instruction concerning use of the machine by a person responsible for their safety.
• Keep children and unauthorized persons away from the machine when in use.
• Before using the appliance, check that the main power supply voltage corresponds with the voltage shown on the rating plate.
• All parts are to be positioned as indicated in the instructions before using the machine.
• Do not operate the machine if it malfunctions or is damaged in any way. Contact an authorized
service agent for repair or adjustment.
• Do not operate switches or touch the power cord plug with wet hands as this may cause electric
shock.
• When unplugging pull on the plug, not the power cord.
• Do not pull or carry by cord, use cord as a handle, close a door on cord, or pull cord around sharp
edges or corners.
• This scrubber creates suction and has a revolving brush. Keep hair, loose clothing, fingers and all
parts of body away from openings and moving parts.
• Keep cord away from heated surfaces.
• Do not use where hazardous dust is present.
• Do not use in an explosive atmosphere.
• Do not pick up oil or other flammable material.
• Do not operate the machine while the charger is plugged in.
• The battery charging lead must be inspected regularly for signs of damage. If the lead is damaged, it must be replaced by the manufacturer, its service agent or a similar qualified person in
order to avoid a hazard.
• Replace the supply cord only with the type specified in the instruction manual.
• Do not charge the machine with a damaged battery charging lead or plug, or after the machine
malfunctions or is damaged in any way. Contact an authorized service agent for repair.
• When re-charging ensure the area is sufficiently ventilated.
• Take care when using a machine near the top of stairs to avoid overbalancing
• Use only the battery charger provided to recharge the batteries
5
• Leaks from battery cells can occur under extreme usage or temperature conditions. If liquid gets
on the skin, wash quickly with water. If the liquid gets into the eyes, flush them immediately with
clean water for a minimum of 10 minutes. Seek medical attention.
• While there is no shock hazard from electrical terminals located on the vacuum, a burn could result from metal objects being inserted onto the terminal areas. Battery terminals should always be
kept free of objects.
SAVE THIS MANUAL FOR FUTURE REFERENCE
EXTENSION CORDS
When using an extension cord with your unit, refer to the following table to determine the required
A.W.G. wire size. Before using the battery charger make sure the power cord and extension cord are
in good working condition. Make repairs or replacements before using the unit. Only use extension
cords that are rated for outdoor use.
110V-120V
Amps
0-6
7-10
11-12
13-16
Length of Extension Cord
25 Feet
50 Feet
100 Feet
150 Feet
7.5 Meter
15.25 Meter
30.5 Meter
45.7 Meter
A.W.G. Wire Size
18
16
16
14
18
16
14
12
16
16
14
12
14
12
Not recommended
6
10
1
11
13
12
14
15
2
3
4
5
9
6
8
7
16
17
18
19
1. Handle
12. Handle Adjusting Lever
2. Recovery Tank Lid
13. Squeegee Lifting Lever
3. Recovery Tank 14. Recovery Tank Drain Hose
4. Solution Tank Filling Opening
15. Vacuum Hose
5. Solution Tank
16. Battery Charger Lead
6. Brush Guard
17. Battery Charger Indicator
7. Brush/Pad
18. Solution Flow Adjustment Valve
8. Squeegee 19. Solution Filter
9. Wheels
10. Control Panel
11. Lever for Starting Brush Rotation and/or Dispensing Solution
7
1 Product Information
1.3 Guidelines for the operator
WARNING
Operators must be fully trained in the use of the machine in accordance with these
Maintenance free (gel) batteries must be used. A battery life instructions, able to perform user mainteindicator allows the operator to check the degree of batnance and the correct selection of accessories.
tery life available, and an on board battery charger provides • Operators should be physically capable to maneuver,
convenient charging.
transport and operate the machine.
• Operators should be able to recognize unusual operation
This machine must only be used for the manufacturer’s ap- of the machine and report any problems.
proved application. Using the machine for any other purpose• Only use the machine on firm level surfaces, with no more
will void the warranty. Do not use the machine where it is
than a 2% slope.
suspected that the floor contains health endangering dust or • Wear suitable footwear to avoid slipping.
debris such as asbestos or chemical waste. If this is sus• Wear suitable clothing to keep dry and warm.
pected do not proceed, contact your supervisor.
• Where possible implement job rotation and adequate rest
periods to avoid continuous use of the same muscles.
This appliance is suitable for commercial use. For example • Do not leave machine running unattended
in hotels, schools, hospitals, factories, shops, offices, rental • Do not smoke when using the machine.
businesses and other housekeeping purposes.
• Do not put any objects into openings. Do not use with any
opening blocked. Keep openings free of dust, debris, hair, or
The following instructions contain important information
anything that may reduce air flow.
about the machine and safety advice for the operator.
• Keep hands and feet well clear of rotating pads and
brushes.
Equipment must be operated, serviced and maintained in CAUTION - This machine is for indoor use accordance with the manufacturer’s instructions. If in doubt only and should not be used or stored out
contact the supplier of your machine.
doors or in wet conditions.
This commercial automatic scrubber is designed for the
scrubbing/cleaning of hard floors in indoor areas.
1.1 Non intended use of the machine
CAUTION - If it is suspected that there is hazardous dust or flammable materials stop cleaning the area immediately and consult WARNING
• Washing floors with water which is hotter your supervisor.
than 122°F
WARNING Only use accessories and spare • Using diesel/gas or corrosive detergents to wash floors
parts provided with the machine or those • Washing and sucking up corrosive, flammable and/or
approved by the manufacturer. The use of explosive liquids, even if diluted.
other accessories may impair the safety of
the machine and void the warranty.
1.2 General warnings about batteries
WARNING Use appropriate personal protection equipment to avoid contact with the skin (see standards in force in the country in which the machine is used).
• Do not inhale the vapor, it is dangerous.
• Do not smoke and/or use naked flames within 7 feet of
the battery during charging, in the charging area and while
the battery is cooling after charging.
• Report any liquid leaking from the battery. Leaks are
dangerous and highly polluting.
WARNING The machine must be switched off before adding or changing accessories.
1.5 Transporting the machine
CAUTION - THIS MACHINE IS HEAVY
Do not attempt to lift the machine without
mechanical assistance.
CAUTION – Incorrect lifting techniques may result in personal injury. Do not lift large and heavy machines without assistance. Please WARNING In case of fire, use approved
refer to the specifications page for details on
Class B or C dry chemical powder
weight of machine. When transporting the machine, be sure
extinguishers only. Do NOT use water to put that all components, tanks and removable parts are securely
out the fire.
fastened, and that the battery charging cord and plug are not
trailing.
8
To move the machine to the work area lock handle and tilt
• Remove the recovery water tank (Fig 2).
backwards to raise the front off the floor, and wheel into position.
CAUTION – Bumping over thresholds, curbs and similar obstacles can damage the machine. Pull the machine backwards to go over small obstacles.
1.4 Symbols & Markings
In order to highlight information and procedures regarding
safety, maintenance etc, the following symbols have been
adopted in the manual:
Fig 2
• Connect the battery connectors (Fig 3 & 4).
1.5 Electrical connection
Before connecting the machine to the power supply, check
that your supply voltage matches the rating on the machine
label.
Fig 3
IMPORTANT - If the battery charging lead is damaged, it
must only be replaced by an approved cord available from
the manufacturer or an authorized service agent.
WARNING – THIS APPLIANCE MUST BE GROUNDED
Fig 4
• Replace the recovery water tank and screw into place.
WARNING Make sure that the building power supply is equipped with GFI (circuit breaker).
2 Preparing for use
2.1 Connecting the batteries
• Unscrew the bolts that fasten the tank to the handle support
(Fig 1).
2.2 Charging the batteries
WARNING Charge batteries in a well ventilated area which complies with local, state and federal regulations and with standards in force in the country of use.
• Move the machine close to a electrical socket.
• Unwind the battery charging lead at the rear of the
machine and connect to the outlet.
WARNING Check that the building power supply matches the operating voltage of the battery charger (100 – 120V, 50/60Hz).
Fig 1
9
• Let the batteries charge until the “Green” LED comes on,
then remove the plug and wind the battery charging around
the cable holder (Fig 5).
Fig 5
NOTE: 10 hours are required for complete battery
charge.
• IMPORTANT - Overcharging will damage the batteries.
This will cause run time to be reduced and overall battery life
will be affected. AVOID OVER CHARGING.
2.3 Adjusting the handle height
Select the most comfortable handle height using the
adjustment lever (#6 on Fig 10) on the handle. Release
the lever and lock in position.
Fig 7
IMPORTANT Never allow the cleaning head to rest on the
brush or pad when not in use.
2.5 Filling the solution tank
WARNING Only add clean water to the tank at a temperature no greater than 122º F.
2.4 Attaching the brush and pad driver
WARNING – This appliance has been designed for use with quality brushes and pads only. The use of inappropriate brushes and pads may affect its performance and • Remove the filter from the solution tank opening.
• Connect one end of the filling hose to a faucet and insert
safety.
WARNING Be sure the machine is switched the other end in the solution tank (Fig 8).
off before adding or changing accessories.
• The solution tank and recovery tank must be empty prior to
changing brush/pad.
• Ensure handle is in upright position and the squeegee is in
the up position.
• Carefully lift the front of the machine to expose the clutch
plate (Fig 6).
Fig 7
• Turn on the faucet and fill the tank.
• Pour the liquid detergent into the tank.
IMPORTANT - Only chemicals recommended by the appliance manufacturer should be used, i.e. non foaming.
Follow the chemical manufacturer’s directions regarding
Fig 6
use, handling and health and safety warnings.
WARNING If the chemical comes in contact with the eyes and/or skin or is swallowed, • Attach the brush/pad driver onto the clutch plate and rotate refer to the MSDS information provided by the brush/pad driver until secure (Fig 7).
the manufacturer of the chemical.
• Return the machine in the upright position.
After the tank is filled, remove the filling hose and reinsert
the filter into the tank opening.
• The tank capacity is 4.5 gal. Do not overfill the tank as
spills may occur when in use.
• IMPORTANT - When the solution tank has emptied, switch
off the machine and empty the recovery tank
10
before refilling the solution tank.
3 Controls
The operating controls are located on the handle. (Fig 9).
The icons adjacent to each switch identify the functions.
5
5
6
2
3
Fig 10
4 5 – Brush rotating and/or water dispensing lever
Pressing and holding lever 5 will start the rotation of the
brush. Cleaning solution will be dispensed if button 4
(Fig 9) is on. The left of right lever can be used. (Fig 10).
6 - Handle adjustment lever
Used to adjust handle to comfortable working height.
1
Fig 9
1 - LEDs status of battery charge
The LED lights will indicate the charging status.
Green LED (1A) maximum.
Yellow LED (1B) half
Red LED (1C) minimum
A
4 Operation
4.1 Checks before use
• Check that the drain hose tube of the recovery tank is
properly coupled and sealed.
• Check that the squeegee vacuum hose is correctly
coupled and inserted in the recovery tank (See Fig 11).
C
When the battery is completely discharged, (Red LED
(1C) of the battery charger flashes for a few seconds.
At this point the battery requires recharging.
2 – Vacuum motor switch
Used to switch the vacuum motor ON and OFF. Provides
suction at the squeegee. Button illuminated when in the on
position.
3 – Brush motor switch
Used to switch brush motor ON and OFF. Button illuminated
when in the on position. To start the brush rotating press the
lever on the right hand side.
4 – Water dispensing button
Fig 11
The solution is controlled by pressing both switch 3 and
by pressing the lever used to dispense solution for scrubbing.• Check that the connector (#3, Fig 12) on the squeegee
Button is illuminated when on. (#5, Fig 10)
is not blocked and that the hose is connected correctly.
11
• Washing, brushing, drying cycle
Press button 2 to start the vacuum, button 4 (Fig 9) to
release solution and press the lever 5 (Fig 10) to start
the cycle.
4.3 Using the machine
WARNING! Never start the machine without a brush or pad attached.
Fig 12
• Check the status of the battery charge by pressing
brush switch 3. (Fig 9)
• Check that the water filter is clean and free of debris
(Fig 13).
• Set the handle set at a comfortable working height.
• Start the machine and select the type of cycle. Start the
cleaning operation by pressing the levers and holding
them pressed to start rotation of the brush or pad and
to dispense cleaning solution, then push the machine
in a forward direction using handles on the handle bar.
• Releasing the lever stops the rotation of the brush and
the dispensing of solution.
WARNING – to avoid damaging the floor DO NOT use the machine in a fixed position with the brush rotation activated. The machine must be moving while the brush is rotating.
• IMPORTANT – the correct way of cleaning and drying
the floor is to move the machine forward. Moving the
machine backwards damages the blades and does not
allow water to be vacuumed from the floor.
• If necessary, adjust the volume of solution using the
tap (See Fig 15 & 16).
Fig 13
4.2 Preparing the machine and choosing
the cycle
• Press the brush motor button (#3, Fig 9). The light
illuminates.
• Pull the squeegee lifting lever and release it to lower
the squeegee to the floor (Fig 14).
Fig 15 Solution tap fully opened
Fig 14
The machine can perform 4 working cycles:
• Drying only cycle
Press and hold lever 5 (Fig 10) for brush rotation; then
press button 2 (Fig 9) to start the vacuum.
• Brushing only cycle
Press and hold lever 5 (Fig 9). Releasing the lever
stops the brush.
• Washing, brushing cycle:
Press button 4 (Fig 9) to enable dispensing of solution.
Press lever 5 (Fig 10) to release solution onto floor.
Fig 16 Solution tap fully closed
• Check the status of the battery charge by the indicator
(Fig 17).
• Proceed to operate the machine in the normal manner,
releasing cleaning solution from time to time as
required.
• For heavy soil, scrub floor with cleaning solution but
12
with vacuum motor OFF. Scrub floor again, picking up the 5.2 Draining and cleaning the recovery tank
solution.
At the end of the cleaning cycle or when the recovery
WARNING - If foam or liquid is leaking, turn tank is full, it is necessary to empty the tank by proceeding
the machine off immediately and empty the as follows:
recovery tank. Leaking liquid could be • IMPORTANT – To dispose of the solution in the recovery
hazardous due to its temperature, or
tank, comply with the local, state, and federal
chemical content.
standards in force in the country in which the machine
• To STOP the machine, release solution feed levers,
is being used.
switch off brush motor then vacuum motor.
• Position the machine near a drain outlet.
IMPORTANT! If it is necessary to replace the
• Disconnect the hose from the support on the back of
brush or pad during cleaning please follow
the machine.
instructions in section 2.4.
• Remove the cap from the hose and drain all water
from the tank (Fig 18).
5 Machine error codes
• While using the machine, errors are indicated by flashing
and lit LEDs
• LED 1 is flashing and LED 2 is constantly lit – Suction
unit outlet overcurrent.
• LED 1 is flashing and LED 3 is constantly lit – Brush
unit outlet overcurrent.
• LED 1 is flashing and LED 4 is constantly lit – Suction
unit outlet open circuit.
• LED 1 is flashing and LED 5 is constantly lit – Brush
unit outlet open circuit.
Fig 18
WARNING! After each use, it is necessary to clean the
recovery tank to prevent deposits or scaling and the growth
of bacteria, odors or mold.
• Remove the cover, and clean the inside of the cover
and the vacuum safety float with running water.
• Leaving the hose lowered and the cap off, run water
though the upper opening, cleaning the inside of the
tank until clean water comes out of the drain hose.
• Replace all components in reverse order.
Fig 17
NOTE: When any of the above mentioned error signals
are displayed, it is necessary to turn off the machine and
then turn the machine back on again in order to clear the
error and re-set the machine back to normal functioning.
5.3 Draining and cleaning the solution tank
WARNING! – After each use, it is necessary to drain
and clean the solution tank to prevent deposits or scaling.
• Position the machine over a drain outlet.
• Turn the drain connector outwards (Fig 19).
5.1 When cleaning is finished
• Before turning off the machine, stop the dispensing of
solution and the rotation of brush by releasing levers.
Continue with the vacuum ON to remove all of the
liquid present on the floor. Then turn off the vacuum by
pressing button 2. (Fig 9)
• Raise the squeegee by pulling the squeegee lifting
lever and releasing it. The lever remains in an upper
position keeping the squeegee blades in the raised
position.
WARNING – always lift up the squeegee at the end of the cleaning in order to prevent the deformation of the rubber blades.
1
• Remove brush or pad from machine and wash in warm
soapy water.
Fig 19
• Push the hose clip (1) inwards while removing the cap,
letting all the water drain out.
13
6.1 Prolonged storage
• Wash the inside of the tank, leaving the drain cap open
and adding clean water though the front opening.
• After cleaning, replace the cap, pushing inwards.
• IMPORTANT – To dispose of unused cleaning solution,
comply with the local, state, and federal standards
in force in the country in which the machine is
being used.
• Drain the clean water contained in the tank.
• Place the machine under cover, in a place where the temperature is between 40°F and 105°F.
• Charge the batteries and, once they are charged, disconnect them from the charger. Refer back to section
2.1 and follow in reverse order.
• Charge the batteries once a month.
5.4 Cleaning the squeegee blades
7 Maintenance
To clean the squeegee correctly (1) it is necessary to
remove it as follows (Fig 20)
WARNING - Before making adjustments or performing maintenance, switch off the machine, unplug from the power supply and disconnect the positive pole of the battery.
• Do not rest tools and metal objects on the batteries;
danger of short circuits.
• Do not use harsh detergents, acid, lye etc. during
cleaning and washing. Take particular care with electrical
parts.
• Do not wash the machine with direct or pressurized
jets of water.
• When the machine must be lifted for any maintenance
operations, it is necessary to work safely by placing
fixed supports underneath it.
• Contact an authorized support center for repairs and
request ORIGINAL spare parts only.
The machine requires minimal maintenance apart from
the following checks by a trained operator.
• Battery charge cord - Regularly inspect sheath and
plug for damage or loose connections. Replace the
supply cord only with the type specified in these instructions.
• Recovery tank – Check condition and clean tank
• Squeegee blades – Check condition and replace
worn or damaged blades.
Fig 20 (1).
• Pull the squeegee unit outwards
• Disconnect the hose (2) from the squeegee (1).
• Loosen the knobs (3) and remove the squeegee (1)
Fig 21
• Wash the squeegee unit, and specifically the rubber
blades (4) and the inside of the vacuum hose connector
(5). (Fig 21)
If the rubber blades are damaged or worn, it is necessary to
replace them or turn them over.
7.1 Replacing the squeegee rubber blades
(Fig 21).
When it becomes clear that drying the floor is difficult
or traces of water remain on the floor, it is necessary to
check the wear on the squeegee rubber blades (3):
• Remove the squeegee unit (1) as indicated in the
6 Storage
“Cleaning the squeegee” section 5.4.
• Always switch off, empty, wipe down and dry the machine • Loosen the finned nuts (2) and remove the rubber
after use.
blades (3).
• The solution tank and recovery tank must be emptied
NOTE: When the rubber blades (3) are worn on one
and flushed out with clean water.
side, they may be turned over one time.
• Wrap the battery charger cord around the cable winder,
• Replace or turn over the rubber blades (3) without
ensuring that the plug is not trailing on the floor.
inverting them.
• When storing the machine for long periods, remove the
• Replace all the components in reverse order.
brush and put the squeegee is in the upright position.
• Store the machine in a dry indoor area only.
14
7.3 Changing the brush or pad driver
• Lift the machine up slightly at the front
• Press the brush rotation button (3) to enable the rotation
of the brush, then press lever (5) and release it; the brush
becomes disconnected (Fig 23)
Fig 21
NOTE:
It is possible to have two types of rubber blades. Para
rubber blades for all types of floors and polyurethane
rubber blades for mechanical workshop floors which are
dirty with oil.
7.2 Squeegee set up (correct position)
(Fig. 22)
• Lower the squeegee using the squeegee lever.
• Start the vacuum and move forward several feet before
stopping the suction unit and the machine.
• Check the angle of the rubber blades (1) on the floor.
Fig. A = too low
Fig. B = too high
Fig. C = correct position
• Remove the squeegee unit from the machine
• To reposition the blade, loosen the screw (2) of the wheel
(3) and move the wheel vertically in the slot lifting or lowering the wheel, to achieve the correct
position (C).
(Fig 23)
7.4 Replacing the fuses (Fig 24)
WARNING Replace the blown fuse with one with the same amperage.
• Unscrew the two bolts (1) that fasten the external box
(2) and remove it.
• Unscrew the two bolts (3) of the printed circuit board
(4) and remove it.
• Replace Fuse (5) Green 30A
• Reverse steps above to replace components after
fuse is replaced.
Fig 22
15
7.5 Operations to perform weekly
Cleaning the clean water filter (Fig. 25)
Fig 25
• Make sure that the solution tap is fully closed. Refer to Fig
16.
• Unscrew the transparent filter cover (1) and remove the
filter (2).
• Clean the filter (2) in running water. If it is blocked, replace
it.
• Replace all the components in reverse order.
16
8 Technical specification
Model
SC6200A
Battery Scrubber
110-120/50-60
24
10
80
14
16
35
130
11,945
4.5
5.8
260
250
59
28
68
<2.5
35.4 x 15.75 x 43.3
29.5
167.6
125.7
205
Charging Voltage/Frequency
DC Voltage
Charging Time
Run Time
Brush Cleaning Width
Squeegee Width
Brush Pressure
Brush Speed
Working capacity (Theoretical)
Solution Tank Capacity
Recovery Tank Capacity
Brush Motor Rating
Vacuum Motor Rating
Air Flow
Vacuum
Sound Pressure Level *
Handle Vibration **
Size (L x W x H)
Height (Handle Folded)
Weight - with Batteries
Weight - without Batteries
Weight - GVW
VAC/Hz
V
Hours
Minutes
Inches
Inches
g/cm2
RPM
Sqft/Hour
Gallons
Gallons
Watts
Watts
Cfm
Inches
db (A)
m2/5
Inches
Inches
lbs.
lbs.
lbs.
Class I construction. Enclosure to IPX3.
• *Noise levels measured at a distance of 10 inches from machine and 5 feet above floor, when scrubbing a hard floor. Measurements recorded using a hand held meter.
• **Handle vibration does not exceed 2.5 m ²/5, when operating on any surface with brush or pads.
Measurements recorded by an independent test laboratory
17
TROUBLESHOOTING
CAUSE:
1) Low battery
2) Main 30A fuse blown
THE MACHINE DOES NOT START UP
SOLUTION:
1) Check/Charge battery.
2) Replace GREEN 30A fuse.
THE BRUSH DOES NOT ROTATE
CAUSE:
1) Brush unit outlet overcurrent error or brush
unit open circuit error
2) Brush rotation button not pressed on handle
controls
SOLUTION:
1) See paragraph ‘Warning signals while using
the machine (Section 5)
2) Press the button
THE VACUUM DOES NOT WORK
CAUSE:
1) Suction unit outlet over current error or
vacuum unit circuit error
2) Vacuum button not pressed on handle
controls
SOLUTION:
1) See paragraph ‘Warning signals while using
the machine (Section 5)
2) Press the button
CAUSE:
1) Vacuum off
2) Vacuum tube blocked
3) Squeegee rubbers not correctly set up
4) Recovery tank full
5) Squeegee rubber blades worn
SOLUTION:
1) Start the vacuum
2) Check, and if necessary, clean the vacuum
tube that connects the squeegee to the
recovery tank
3) Correct squeegee position
4) Empty the recovery tank
5) Replace or tun over the squeegee blades
THE MACHINE LEAVES SOLUTION ON THE FLOOR
NO SOLUTION COMES OUT
CAUSE:
1) Solution tank empty
2) Solenoid valve button not pressed on handle
controls
3) Tap turned off
4) Filter blocked
5) Solenoid valve does not work
SOLUTION:
1) Fill the tank
2) Press the button
3) Turn on the tap located at the bottom of the
machine
4) Clean the filter
5) Replace solenoid valve
THE MACHINE DOES NOT CLEAN WELL
CAUSE:
1) Unsuitable brushes or cleaning solution
2) Brush worn
SOLUTION:
1) Use brushes or cleaning solutions which are
suitable for the type of floor or dirt to be cleaned
2) Replace the brush
* If the fuse blows several times, the machine should be checked by an authorised Service Agent
18