1
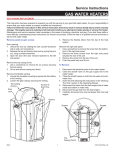
PRO.FORM o
CR
K
DUAL
.-
MOTION
ROSS
"
TRAINER
OWNER'S MANUAL
Model No, 831.297311
Serial No.
The serial number can be found in
the locationshown below. Write the
serial number in the space above.
Serial
Number
Decal'-_
EO
IJ
_-I,!
! P
III
H
ELPLINI:"
M
I-!
F_ NT
_ II
!
1-800-736.6879
_CAUTION:
Read all precautions and instructions in this manual before using
Ibls equipment. Keep this manual in
a safe place for fulure reference.
SEARS, ROEBUCK AND CO., HOFFMAN
ESTATES, IL 60179
TABLE OF CONTENTS
LIMITEDWARRANTY ......................................................................
IMPORTANT PRECAUTIONS
_
2
.3
BEFOREYOU BEGIN ......................................................................
ASSEMBLY
4
.5
OPERATION AND ADJUSTMENT .............................................................
TROUBLE-SHOOTING AND MAINTENANCE ....................................................
6
9
CONDITIONING GUIDELINES ..............................................................
PARTUST .............................................................................
11
14
EXPLODEDDRAWING ....................................................................
ORDERING REPLACEMENTPARTS .....................................................
15
Back Cover
i
FULL 90 DAY WARRANTY
For 90 days from the date of purchase,when proper
Owner's Manual are followed, SEARSwill, free of char
any defective pert, when the CROSS WALK is
f and maintenance proceduresdetailed in the
or replace and installa replacement part for
manner.
Thiswarranty does not
or rental purposes.
SERVICEIS AVAILABLE
THE UNITED STATES.
SEARSSERVICECENTER/DEPARTMENTIN
This warranty gives you specificlegal rights,and
SEARS,
2
rightswhich vary from state to state.
DEPT.817WA,
ESTATES,IL 60179
I
IMPORTANT
LWARNING:
PRECAUTIONS
To reduce the risk of burns,
fire, electric shock or injury to persons, read the following important precautions and information before operating the CROSSWALK.
1. Place the CROSSWALK on a level surface, with at
least 8 feet of clearance behind the treadmill. Do
not place the CROSS WALK near water, outdoors
or on a surface that blocks any air openings. Do
not operate the treadmill where aerosol products
are used or where oxygen is being administered.
2. To connectthe power cord (see PLUGGING IN THE
POWER CORD on page 6), plug the power cord
directly into a grounded circuit capable of carrying
12 or more amps. No other appliance should be on
the same circuit. Keep the power cord away from
heated surfaces. If an extension cord is needed,
useonly a 14-gauge general-purpose cord of five
feet or less in length, with a three-wire conductor.
3. Never move the walking belt while the power is
turned off. Do not operate the Imadmill if the
power cord or plug is damaged, or if the CROSS
WALK is not working properly. (See BEFOREYOU
BEGIN on page 4 if one of these conditions exists.)
4. Wear appropriate clothing when exercising. Never
wear loose clothing that could become caught in
the CROSS WALK. Always wear athletic shoes;
never use the CROSS WALK with bare feet, wear-
6. To reduce the possibility of the CROSS WALK overheating, never operate the CROSS WALK continuously for longer than 1 hour.
7. The CROSS WALK should be used only by persons
weighing 250 pounds or less. Never allow more
than one person an the CROSS WALK at a time.
8. Use the CROSS WALK only as described in this
manual.
9. Keep small children away from the CROSS WALK at
all times. Never leave the CROSSWALK unattended
while the walking belt is moving. Always remove the
safety key when the CROSS WALK is not in use.
10. Never drop or insert any object into any opening.
11. The CROSS WALK is capable of high speeds. Adjust
the speed in small increments to avoid sudden
jumps in speed.
12. Unplug the power cord before performing any of
the maintenance and adjustment procedures
described in this manual. Never remove the motor
hood unlessinstructedto do so by an authorized
service representative. Servicing other than the proceduresdescribed in this manual should be performed only by an authorized service representative.
WARNING: Before beginning this or any
ing only stockings or in sandals. Athletic support
clothesare recommended for both men and
exercise program, consultyour physician. This is especially important for persons over the age of 35 or per-
women.
sonswith pre-existing health problems. Read all
instructionsbefore using the CROSS WALK. SEARS
assumesno responsibility for personal injury or proper-
5. Never start the CROSSWALK while you are standing on the walking belt. Always hold the upper
body arms while exercising on the CROSS WALK.
ty damage sustained by or through the use of the
CROSSWALK.
SAVETHESEINSTRUCTIONS
3
BEFORE YOU BEGIN
Congratulations for selectingthe PROFORM®CROSS
WALK Dual Motion Cross Trainer. The CROSS WALK
Foryour benefit, read this manual carefully before
usingthe CROSSWALK. If you have additional ques-
combines the best features of today's most papular home
exercise equipment in one compact unit. The natural
tions, please call our toll-flee HELPUNEat
1-800-736-6879, Monday through Saturday, 7 a.m.
motion and versatility of treadmills have made them the
most papular way to get an effective lower body and
cardiovascular workout. Now with the dual motion
design of the CROSS WALK, you can get a complete
until7 p.m. Central Time (excludingholidays). To help us
assistyou, please note the productmodel number and
serialnumber before calling. The model number is
831.297311. The serial number can be found on a
upper body workout as well. And the adjustability of the
CROSS WALK allows every user to work at their own
decal attached to the CROSS WALK (see the drawing on
the frontcover for the locationof the decal).
level. Whether you are a beginner or a seasoned athBefore reading further, please review the drawing below
lete, you'll enjoy the performance and uncompromising
quality that only the CROSS WALK offers.
and familiarize yourself with the parts that are labeled.
Upper Body Arms_
Knob
Lever
Console
FRONT
ht
Lock
,Tabs
Resistance
Walking Belt
Walking Platform
Motor
Foot Rai
BACK
PowerCord _
LEFTSIDE
Rear Leg
Rear Roller
Adjustment Bolts
4
Note: The rear leg pad may mark somelypes of linoleum. Mild household cleaning agents will remove any marks.
ASSEMBLY
The CROSS WALK is shipped in the compact stowaway position. Set the CROSS WALK in a cleared area and remove
all packing materials. Make sure that all ports have been removed before you dispose of the packing materials.
Follow the instructionsbelow to convert the CROSS WALK to the operating position.No tools are required.
1. Raise the Upright (1O) to the vertical position. Slide the Lock Knob
Washer (78) onto the Lock Knob (77). Tighten the Lock Knob into the
Upright.
1
10
2. Remove the paper backing from the Wrench Clip (65). Press the
Wrench Clip onto the Right Roller Bracket (62) in the indicated location. Press the Allen Wrench (66) into the Wrench Cli p.
62
Make sure that all parts are tightened securely before using the treadmill. Note: To protect the floor, a covering should be placed under
the treadmill.
65
5
OPERATION
AND ADJUSTMENT
APPLYINGSIUCONE LUBRICANT
has a grounding plug as shown in Drawing 1 below.
To reduce the frictionof the walking belt and minimize
wear, a non-oil, non-petroleum-bosesiliconelubricant
Grounded Outlet Box
must be applied to the walking platform before the
CROSS WALK is used. WITH THE POWER CORD
Grounding Plug
UNPLUGGED,lift each side of thewalking belt and
spray lubricantgenerouslyonto the area shaded in the
drawing below. Reapply lubricant after every ten hours
of use, or whenever performancedecreases. Lubricantis
available at hardware and automotive stores.
Grounding Pin
Grounded Outlet
Uni°SportTM spray is recommended.
Apply silicone to the
entire shaded area.
A temporary adapter like the adapter shownin Drawing
2 may be used to connect this plug to a 2-pole receptacle as shown in Drawing 2 if a properly grounded outlet
isnot available.
Grounded Outlet Box
Silicone
Adapter
Grounding Pin
PLUGGING IN THE POWER CORD
Grounding Plug
Thisproduct must be grounded. If it shouldmalfunction
or break down, grounding provides a path of least resistance for electriccurrent to reducethe risk of electric
•
shock.Thisproduct is equipped with a cord having an
Lug
'_
Metal Screw /
equipment-grounding conductor and a grounding plug.
Plug the power card into an appropriate outlet Ihat is
properly installed and grounded in accordance with all
local codesand ordinances.
The temporary adapter shouldbe used only until a properly grounded outlet (Drawing 1) can be installedby a
4k DANGER:Improper connectionof the
qualified electrician. The green-colored ear, lug, or the
like extending from the adapter must be connected to a
equlpment-grounding conductor can resultin a risk of
electricshock.Check with a qualified electricianor serviceman if you are in doubt as to whether the productis
properly grounded. Do not modify the plug provided
with the product--if it will not fit the outlet, have a proper outletinstalledby a qualified electrician.
Thisproduct is for use on a nominal 120-vott circuit, and
6
permanent ground suchas a properly grounded outlet
box cover. Whenever the adapter is used, it mustbe
held in place by a metal screw.
Some 2-pole receptacle outlet box covers are not
grounded. Contact a qualified electrician to determine
if the outlet box cover is grounded before using an
adapter.
DIAGRAM
OFTHECONSOLE
Battery Coverfi_
m
m
m
I
ltrol Knob
LI ' .t
I
I
D/STANCE
I
I
_N_Speed
SPEED
CONTROL
C,
_
INCUNEADJUST
Incline Control Lever--Power Indicator "_Power
Switch
w
i
,
The CROSS WALK features the innovativeACCUSMART
BODY ARMS on page 8.) Locate the clip attached by a
console, designed to help you get the most from your
workouts. The ACCUSMART console offers electronic
cord to the safely key. Slide the clip onto your waistband.
speed control, finger-touch inclinecontrol and a motivational fitness monitor with four independent displays.
Pleaseread the instructions below before operating the
CAUTION: Do not stand on the walking belt while turning on the power. Always wear the clip while operat-
console. Note: If there is a sheet of clear plastic an the
face of. the console, remove it before operating the console.
ing the CROSS WALK.
INSTALLING BATTERIES
The motivational fitnessmonitor requires two "/_" batteries (not included); alkaline batteries are recommended. Slide the baltery cover open. Remove the battery clip
from the console. Find the markings inside the battery
clip showing which direction the batteries shouldbe
turned. Pressthe batteries into the battery clip. Replace
the battery clip in the console and close the battery
cover.
Insert the safely key into the power switch.The power
indicator will light. The four displays of the motivational
fitnessmonitor will not appear until the ON/CLEAR button is pressedor the walking belt begins to move. (See
CONTROLLING THE SPEEDOF THE WALKING BELT
below.) Note: If batteries were just installed, the four displays will appear already.
CONTROLUNG THE SPEEDOF THE WALKING BELT
For your safely, the walking belt will be motionlesseach
time the power is turned on. To startthe walking belt,
first turn the speed control knob to the "RESET" position.
Next, turn the knob slowlyclockwise until the walking
Battery Cover
,_
Battery Clip
"t-.--Ij
belt begins to move at slow speed.
CAUTION: After the knob is turned, there will be a
brief pause before the walking belt begins to move.
..-..
Adjust the speed slowly until you are familiar with the
operation of the CROSS WALK.
TURNING ON THE POWER
Step carefully onto the walking belt and begin exercis-
Step onto the foot rails of the CROSS WALK and hold
ing. Change the speed of the walking belt as desired by
turning the speed control knob. To stop the walking belt,
the upper body arms. (See OPERATING THE UPPER
turn the knob to the "RESET"position.
7
CHANGING THE INCLINE
In the dual motion position, you can move the arms forward and back as you walk or run, exercising your
To vary the intensity of your exercise, the inclineof the
CROSS WALK can be changed using_thelever on the
arms, back and shoulders for a total body workout. To
tailor the intensity of your exercise, the resistance of the
right side of the console. To increasethe incline, stand
toward the back of the foot rails and pull back the lever
until the desired inclineis reached. To decrease the
arms can be changed. To increase the resistance, turn
the resistancecontrol clockwise;to decrease the resistance, turn the control counterclockwise.
incline, stand toward the front of the foot rails, lean forward, and pull back the lever. You may need to raise
and lower the treadmi!l several timesto break in the
CAUTION: Always insert the lock pin through the safely
tabs when using the upper body arms in the dual
inclineshock.CAUTION: Do not change the incline
while you are walking or running on the CROSSWALK.
motion position. If you fall while exercising, the lock
pin will limit the downward movement of the arms.
When the lock pin is inserted through the safely tabs,
OPERATING THE UPPERBODY ARMS
do not lean on the upper body arms or the lock pin
may be damaged. If the hairpin cotter is not attached
The upper body arms can be used in either the stationary
to the lock pin as instructed,the lock pin may slip out,
resulting in injury to the user.
positionor the dual motion position. To use the upper
body arms in the stationaryposition,insertthe lock pin
through he arms and the upright (seethe drawing
below). Important: If it is difficultto insertthe lock pin, do
not hit the end of the lock pin; twist each upper body
OPERATINGTHE MOTIVATIONAL FITNESSMONITOR
arm slighttyin order to align the holes. Do not twistthe
upper body arms too far or the treadmillmay be dam-
designed to provide you with instantexercise feedback.
To reset the displays, pressthe ON/CLEAR button.The
aged. Firmly tighten the resistance control. Insertthe hairpin cotter through the hale in the end of the lock pin (see
the insetdrawing.)
four displays are described below:
LockPin
.......
The four displays of the motivational fitness monitor are
TIME--This display showsthe elapsed time. Note: When
_e walking belt is stopped, the TIME display will go into
a pause mode after a few seconds.
CALORIE--This display showsthe approximate number
\
of nutritional Calories that you haveburned.
SPEED--Thisdisplay showsthe current speed of the
walking belt, in miles per hour.
Resistance
Control
DISTANCE--This display showsthe total distance that
you have walked or run, in miles.
Note: if the walking belt is stoppedand remains stationary for about five minutes,the four displays of the motivational fitnessmonitor will be reset and will darken,
Lock
althoughthe power will remain on. The four displays will
Hairpin
Cotter
appear again when the ON/CLEAR button is pressed,or
the walking belt is restarted.
TURNING OFF THE POWER
To usethe upper body arms in the dual motion position,
8
first make sure the resistancecontrol is tightened.
Removethe lock pin from the upper body arms and the
To turn off the power, remove the safety key from the
console. The power indicator will darken. Store the safe-
upright, and insertit through the safetytabs at the base
of the upright. Insertthe hairpin cotter into the lock pin.
17'key in a secure location.
TROUBLE-SHOOTING
AND MAINTENANCE
Most treadmill problems can be solved by following the simple steps below. Find the symptom that applies, and follow the stepslisted. If further assistance is needed, call our toll-free HOTUNE at 1-800-736-6879, Monday through
Saturday, 7 a.m. until 7 p.m. Central Time (excluding holidays).
1. SYMPTOM: THE POWER DOES NOT TURN ON
a. Make sure that the power cord is plugged in properly. (See PLUGGING IN THE POWER CORD on page 6.) If an
extension cord is needed, use only a 14-gauge general-purpose cord of five feet or less in length.
b. Make sure that the safety key is inserted fully into the console. Turn the speed control knob to the "reset" position.
(See DIAGRAM OF THE CONSOLE on page 7.)
C°
Check the circuit breaker located on the front of the frame. The
circuit breaker is designed to protect the electrical system.If the
circuit breaker has tripped, the switch wil! protrude as shown.
To reset the circuit breaker, allow the CROSS WALK to cool for
five minutes, and then push the switch back in.
Tripped
Reset
2. SYMPTOM: THE POWER TURNS OFF DURING USE
a. Make sure that the power cord is plugged in.
b. Check the circuit breaker located on the front of the frame. If the circuit breaker has tripped, the switch will protrude. (See the drawing above.) To reset the circuit breaker, allow the CROSS WALK to cool for five minutes, and
then pushthe switchback in.
c. Remove the safety key from the console. Reinsertthe safety key fully into the console.Turn the speed control knob
to the "RESET"position.
3. SYMPTOM: THE MOTIVATIONAL FITNESSMONITOR DOES NOT FUNCTION PROPERLY
a. Check the batteries in the console. (See INSTAllING BATTERIESon page 7.) Most problemsare the resultof
drained batteries.
4. SYMPTOM: THE CROSS WALK DOES NOT INCLINE
a. Stand at the back of the foot rails while increasing the incline. Stand at the front of the foot rails and lean forward
while decreasing the incline. You may need to raise and lower the treadmill several timesto break in the incline
shock. (See CHANGING THE INCUNE on page 8.)
5. SYMPTOM: THE WALlaNG BELTSLOWS WHEN WALKED ON
a. Silicone lubricant mustbe applied to the walking platform before the CROSS WALK is used. Lubricantshould be
reapplied after every 10 hoursof use, and whenever a decrease in performance is noticed. (See APPLYING SIUCONE LUBRICANTon page 6 for application instructions.)Uni*Sport silicone spray is recommended. CAUTION:
ALWAYS UNPLUG THE POWER CORD WHEN APPLYING LUBRICANT.
b. If an extension cord is needed, use only a 14-gauge general-purpose cord of five feet or lessin length.
9
If the walking belt is overtightened, performance may be reduced
C.
_"-3"
Rear Roller
and the walking belt permanently damaged. UNPLUG THE POWER
CORD. Using the allen wrench included, turn both rear roller adjustment bolts counterclockwise 1/4_ of a turn. When the tension of the
_..__en_,_lts
walking belt is correct, you should be able to lift each side of the
walking belt 2-3 inches; the center of the walking belt should just
touch the surface of the walking platform. Be sure to keep the walking belt centered. Run the treadmill for a few minutes. Repeat until
the tensionof the walking belt is cprrect. Note: Store the allen
wrench in the handy wrench clip.
Wrench Clip _
_----_-_)/
6. SYMPTOM: THE WALKING BELTIS OFF-CENTEROR SUPS
a. Ifr the walking belt has shiftedto the left, first remove the safety key
°and UNPLUG THE POWER CORD. Using the allen wrench, turn the
left rear roller adjustment bolt clockwise, and the right bolt counterclockwise, 1/4 of a turn each. Be careful not to overtighten the
walking belt. Plug in the power cord, insertthe safety key and run
the treadmill for a few minutes. Repeat until the belt is centered.
b.ff the walking belt has shifted to the right, first remove the safety
key and UNPLUG THE POWER CORD. Using the allen wrench, turn
the left rear roller adjustment bolt counterclockwise, and the right
bolt clockwise, 1/4 of a turn each. Be careful not to overtighten the
_i_lking belt. Plug in the power cord, insert the safety key and run
_ the treadmill for a few minutes. Repeat until the belt is centered.
c. If the walking belt slipswhen walked on, first remove the safety key
.... and UNPLUG THE POWER CORD. Using the allen wrench, turn both
_ i rear roller adjustment bolts clockwise, 1/4 of a turn. When the
walking belt is correctly tightened, you should be able to lift each
side of the walking belt 2-3 inches off the walking platform. The
center of the walking belt should just touch the walking platform. Be
careful to keep the walking belt centered. Plug in the power cord,
in_rt the safety key and run the treadmill for a few minutes. Repeat
until the walking belt is properly tightened.
7. SYMPTOM: IT IS DIFFICULTTO INSERTOR REMOVE THE LOCK PIN
a. If it is difficultto insertthe lock pin, do not hit the end of the lock pin; twisteach upper body arm slightlyin order
to align the holes. Do not twistthe upper body arms too for or the treadmill may be damaged.
STORAGE
Before converting the CROSS WALK to the stowaway position, turn the resistancecontrol (see the drawing on page
8) counterclockwiseuntil the control turns freely. Next, unplug the power cord. Remove the lock knob and washer
from the upright and lay the upright and the upper body arms on the walking belt. Keep the lock knob and washer in a
securelocation.
10
CONDITIONING
GUIDELINES
The following guidelines will help you to plan your exer-
zone as you exercise. After a few months, your heart
cise program. Remember that proper nutrition and ade-
rate can be increasedgradually until it is near the middle
of your training zone as you exercise. To measure your
quate rest are essential for successful results.
WARNING: Before beginning Ibis or any
heart rate, stop exercising and place two fingers on your
wrist as shown. Take a slx-second heartbeat count, and
exercise program, consultyour physician. This is especially important for individuals over the age of 35 or
individuals wiib pre-existing health problems.
EXERCISEINTENSITY
To maximize the benefits of exercising, it is important to
exercise with the proper intensity.The proper intensity
level can be found by using your heart rate as a guide.
For effectiveaerobic exercise, your heart rate shouldbe
maintained at a level between 70% and 85% of your
maximum heart rate as you exercise. This is known as
your training zone. You can find your training zone in
the table below. Training zones are listedfor bath unconditioned and conditioned personsaccording to age.
CONDITIONED
TRAINING ZONE
(BEATS/MIN)
multiplythe result by 10 to find your heart rate. For
example, if your six-secondheartbeat count is 14, your
heart rate is 140 beats per minute. (A six-second count is
used because your heart rate will drop rapidly when you
stop exercising.) Adjust the intensity of your exercise until
AGE
UNCONDITIONED
TRAINING ZONE
(BEATS/MIN)
20
138-167
133-162
25
136-166
132-160
30
135-164
130-158
35
134-162
129-156
40
132-161
127-155
45
131-159
125-153
50
129-156
124-150
55
127-155
122-149
Begin each workout with 5 to 10 minutesof stretching
and light exercise to warm up. Then, increase the intensity of your exercise to raise your heart rate to your train-
60
126-153
121-147
ing zone for 20 to 30 minutes. Breathe regularly and
65
125-151
119-145
70
123-150
118-144
deeply as you exercise-never hold your breath. Finish
each workout with 5 to 10 minutesof stretchingto cool
down. This wilt increase the flexibility of the muscles,and
75
122-147
117-142
reduce sorenessand other post-exercise problems.
80
120-146
115-140
To maintain or improve your condition, complete three
85
118-144
114-139
workoutseach week, with at least one day of rest
between workouts. After a few months of regular exercise, you may complete up to five workouts each week, if
During the first few months of your exercise program,
keep your heart rate near the low end of your training
your heart rate is at the proper level.
WORKOUT GUIDEUNES
Each workout shouldconsist of three basic parts: a
warm-up, 20 to 30 minutesof training zone exercise,
and a cool-down. Warming up prepares the body for
exercise by increasing circulation, delivering more oxygen to the musclesand raising the body temperature.
desired. The key to successis CONSISTENCY.
11
WORKOUT GUIDEUNES
clothing that can interfere with the evaporation of sweat
from your skin. Always wear athletic shoes that are flexi-
A well-rounded workout developsthe heart, muscles and
body composition by including the following phases:
ble and provide good protection and support.
ADDITIONAL SUGGESTIONS
A warm-up phase, lasting 5 to 10 minutes. Begin with
slow, controlled stretches,and progress to more rhythmic
Creating a more active lifestyle, in addition to establish-
stretchesto increasethe body temperature,heart rate
and circulation in preparation for strenuousexercise.
ing a regular exercise program, will help you to achieve
your fitness goals. It's easy to improve your lifestyle by
Stretchingalso guards against muscle,tendon and liga-
making a few changes in your daily routine:
ment sprains.(See SUGGESTEDSTRETCHES
on page 13.)
Keep yourself moving throughout the day. Use the stairs
A cardiovascular phase, including 20-30 minutes of
exercisingwith your heart rate in your training zone.
instead of the elevator. Park a half mile away from work
or get off the bus a couple of blocks before your stop
and walk the remaining distance.
A cool-down phase, consisting of 5-10 minutes of activity similar to that of the warm-up phase.Thorough
stretchingoffsetsmusclecontractions and other problems
caused when you stopexercisingsuddenly.Stretchingfor
increasedflexibility is often mosteffectiveduring this
phase. This phase shouldleaveyou relaxed and comfortably tired.
Increasemidday productivity,creativity and energy by
replacing a heavy lunchwith a light meal. Spend the
extra time in physical activity suchas walking.
Substitute manually-operated devicesfor automatic
equipment such as ia,_n-care machinery, power tools
and snow removers.
Insteadof waiting for a convenient time to exercise, plan
a specifictime. The morning hours work well for many,
and the self-discipline required to riseearly and exercise
Stop smoking;smoking nearly doublesthe risk of coronary heart disease. (FramingtonHeart Study)
often carries through the day to help increaseproductivity in other areas. For some, exercisingbefore dinner ini-
R_uce or eliminate alcohol consumption. Alcohol isa
tiatesa period of winding down from the day's activities.
Whatever timeyou choose, be consistentand stickwith it.
major cause of liver problems and other health disorders. (Office of Disease Prevention and Health
Promotion)
12
. .__
To maintain or improve your condition, complete three
workouts each week, with at least one day of rest
between workouts.After a few monthsof regular exer-
Reduce your intake of fat. Lessthan 30% of the calories
you consume each day shouldcome from fat. Excessive
cise, you may complete up to five workoutseach week, if
desired. Remember,the key to successis CONSISTENCY.
fat consumption has been linked to numerouscauses of
death, includingheart diseaseand cancer.
WORKOUT ATTIRE
Know and keep a record of your cholesterol level, blood
pressure and other health information. Keep your blood
Exerciseclothing shouldbe comfortable and allow unrestrictedmovement. Do not wear rubberized or plastic
pressure below 140/90; keeping it below 125/85
preferable.
is
SUGGESTEDSTRETCHES
The following stretchescan provide a good warm-up or cool-down. Correct form for each stretchis shown in the drawings below. Move slowly as you stretch--never bounce.
TOE TOUCH STRETCH
Stand with your knees bent slightlyand slowly bend forward from
your hips. Allow your back and shouldersto relax as you reach
down toward your toesas far as possible. Hold for 15 counts, then
relax. Repeat 3 times.
Stretches:Hamstrings, back of knees and back.
HAMSTRING STRETCH
Sit with one leg extended. Bring the sole of the opposite foot
toward you and rest it against the inner thigh of your extended
leg. Reach toward your toesas far as possible. Hold for 15 counts,
then relax. Repeat 3 times for bath legs.
Stretches: Hamstrings, lower back and groin.
CALF/ACHILLES STRETCH
With one leg in front of the other, reach forward and place your
hands against a wall. Keep your back leg straight and your back
foot flciton the floor. Bendyour front leg, lean forward and move
your hips toward the wall. Hold for 15 counts, then relax. Repeat
3 timesfor bath legs. To cause further stretchingof the achilles
tendons, bend your back leg as well.
Stretches:Calves, achilles tendonsand ankles.
QUADRICEPS STRETCH
With one hand against a wall for balance, reach back and grasp
one foot with your other hand. Bring your heel as close to your
buttocksas possible. Hold for 15 counts, then relax. Repeat 3
times for both legs.
"
Stretches:Quadriceps and hip muscles.
INNER THIGH STRETCH
Sit with the solesof your feet together and your knees outward.
Pullyour feet toward your groin area as far as possible. Hold for
15 counts, then relax. Repeat 3 times.
Stretches:Quadriceps and hip muscles.
13
PART LIST--Model
Key
No.
Part
No.
1
2
3
4
5
6
7
8
9
10
11
12
13
14
15
' 16
, 17
.... 18"
....• 19
20
÷ 21
_ 22
_.'123
122635
122636
015044
013162
114575
120866
114363
110000
118173
121266
121544
109786
108404
122641
116693
110193
014086
113050
112286
120856
012108
124009
122812
' 24
• 25
26
013547
113106
109382
Qty.
016017
031238
031229
013282
123712
012056
052014
35
36
37
38
39
40
41
42
43
44
45
46
47
117806
118202
115672
054016
059019
118391
106616
106334
107503
122632
120867
124100
100994
14
Description
R595A
Key
No.
Pad
No.
1
1
1
3
Left Upper Body Arm/Foam/Housing
Right Upper Body Arm/Foam/Housing
Hairpin Cotter
Switch ScrewGround Screw
48
49
50
51
108276
122637
118332
121446
1
6
1
Safely Key/Clip
Screw
Console
52
53
54
121109
NSP
122590
1
1
Speed Control Knob
Incline Control Lever
55
56
100691
014127
1
1
1
12
1
1
2
2
Upright
Lock Pin
Controller
Hood Screw
Motor Hood w/Decal
ResistanceControl
Friction Bracket
Metal Washer
57
58
59
60
61
62
63
64
112609
122594
122591
121267
110407
121324
123347
105444
2
2
1
1
2
1
1
6
1
1
1
1
1
8
1
4
2
2
1
1
Rear Roller Spacer
Friction Plate
Incline Cable
Motor Pivot Nut
Flat Washer
Tension Washer
Tension Bolt
Hood Bracket
Circuit Breaker
Grommet
Tie Block
Choke
Power Cord
Motor Pan Screw
Motor Pan
Lock Nut
Front Wheel
Wheel Bolt
Shock Release
Shock Bracket
65
66
67
68
69
70
" 71
72
73
74
75
76
77
78
79
80
81
82
83
84
016028
045010
109788
116131
121268
118148
121323
033066
118153
121272
106939
016055
017088
014156
121269
109515
112023
101049
105477
111869
1
1
1
1
1
1
1
1
1
2
E-Clip
Shock Cushion
Incline Shock
Shock Pin
Cotter Pin
Motor PivotBolt
Motor Mount Bracket
Motor TensionNut
Motor
Motor Bolt
85
86
87
88
89
90
#
#
#
#
122412
108080
016057
109250
016029
014117
124762
115868
113203
124520
1:27 019084
,;_;_28
_
29
: 30
31
32
33
•
34
No. 831.297311
Qh/. Description
1
2
1
Pulley/Flywheel/Fan
Foot Rail
Reed Switch Extension Wire
2
1
1
Incline Leg Bolt
Incline Leg
Frame
1
6
Walking Platform
Platform Screw
3
Roller Adjustment Washer
1
Front Roller Adjustment Bolt
1
Front Roller/Pulley
1 Walking Belt
1
Upright Cover, Long
1
Rear Leg Pad
1 • Right Endcap
2
Rear Roller Endcap Spacer
2
Rear Roller Adjustment Bolt
2
Wrench Cllp
1 Allen Wrench
1
Rear Roller
1
Power Switch Wire Harness
1
1
Upright Cover, Short
Belt Guide
1
1
1
1
I
Left Endcap
Magnet
Reed Switch/Sensor Wire
Mechanism Cover
Belt
- _-_-
1
1
Wire Clip
LockKnob
2
LockKnobWasher/con_Washer
1
1
FrictionCover
PivotBolt
2
6
2
Upper Body Arm Foam Grip
Hood BracketScrew
Motor Nut
1
1
2
4
2
2
1
Cage Nut
Ground Wire
Belt Guide Screw
8" Cable Tie
Cover Screw
4"Cable Tie
Star Washer
1
1
I
1
4" Black Wire, Male/Female
12" PotExtensionWire
6" Cable Loom
Owner's Manual
Note: '#" indicates a non-illustratedpart. Specificationsare subjectto change without notice. See the back cover of this
manual for information about ordering replacement parts.
EXPLODED
DRAWING--Model
No. 831.29731
1
R595A
81
5
81
0
11
12
15
!
78
3
17
!
78
I
19
14
16
27
58
55
i
1
71
65
28
42
!_.-4
64
85
© 1995 Sears, Roebuck and Co.
15
The model number and serial number of your PROFORM®CROSS
WALK Dual Motion CrossTrainer are listedon a decal attached to the
frame. See the front cover of this manual to find the locationof the
Model No. 831.297311
decal.
QUESTIONS?
All replacement parts are available for immediate purchaseor
special order when you visit your nearest SEARSServiceCenter or the
Service Departmentof mostSEARS Stores.To request serviceor to
If you find that:.
• you need help assembling or
operating the CROSSWALK
order parts by telephone, call the toll-free numbers listedat the left.
When requesting help or service,or ordering parts, please be pre-
• a part is missing
pared to provide the following information:
• or you need to schedule repair
• The NAME OF THE PRODUCT (PROFORM®CROSS WALK Dual
service
call our toll-free HELPUNE
1-800-736-6879
Monday-Saturday, 7 am-7 pm
Cenlral Time (excluding holidays)
Motion Cross Trainer)
• The MODEL NUMBER OF THE PRODUCT (831.297311 )
• The PARTNUMBER OF THE PART (see page 14 of this manual)
• The DESCRIPTIONOF THE PART (see page 14 of this manual)
REPLACEMENT PARTS
)f parts become worn and need to
be replaced, call the following tollfree number
1-800-FaN-PART
(1-800-366-7278)
Part No. 124520 R595A
Printedin USA
SEARS,ROEBUa( AND CO., HOFFMAN ESTATES,
IL 60179 USA