1
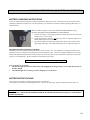
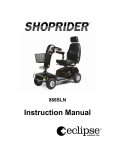
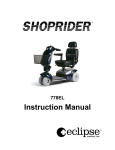
OWNERS MANUAL
FORTRESS 1700
SERIES
Three and Four Wheel
Power Scooter
SAFETY FIRST!
This manual is provided to enable you to enjoy maximum performance and
reliability from your scooter. Please take the time to read it carefully before
attempting to operate the scooter.
July 2006
Issue 2
INTRODUCTION
To Our Valued Customer:
We would like to take this opportunity to thank you for choosing a movingpeoplenet product.
We are confident that you will be satisfied with your purchase. Our goal is to provide the best
value and functional mobility product. We back this philosophy with an exclusive 3-year warranty.
At movingpeople.net. Our entire team is here to support you. Our People , Service and Product
make the difference.
If you have any questions about your movingpeople.net product, please contact your authorized
movingpeople.net dealer or feel free to contact our Customer Service department directly.
Yours sincerely,
The moving people.net Team.
KEY INFORMATION
Scooter Model:
Serial Number:
movingpeople.net
355 Norfinch Drive
Toronto, Ontario, Canada
M3N 1Y7
Tel: (416) 739-8333
1-800-514-7061
FAX: (416) 739-6622
www.movingpeople.net
e-mail : [email protected]
Color:
Seat Model
AUTHORIZED DEALER
Manufacturing Date:
______________________________________
2
TABLE OF CONTENTS
PAGE
PAGE
Lights..................................................
Front And Rear Lights.......................
Turn Signal Lights..............................
Hazards................................................
12
12
12
12
Circuit Breaker ................................
Circuit Breaker……………………….
13
13
Introduction.......................................
2
Key Information................................
2
1700 And 1704 Overview………….
4
Captain Seat………………………..
Armrest……………………………….
Seat Height…………………………..
Seat Lock…………………………….
5
5
6
6
Charging Instructions And Battery
Considerations..................................
Battery Specifications.......................
14
14
14
Tiller Angle Adjustment...................
Easy Release Adjustment……. …….
7
7
Safety Precautions............................
Safety Precautions…………………
15
16
Emi Consideration............................
17
Battery Charging Instructions...............
Assembling/Disassembling Your 1700
And 1704
Scooter...........……......………………
Disassembly Procedure......................
Handling And Loading.......................
Assembly Procedure...........................
8
8
10
10
Warranty...........................................
18
Maintenance Schedule.....................
Lubrication..........................................
19
19
Operating Your Scooter...................
Brake Release Lever...........................
Turning On..........................................
Speed Select........................................
Forward/Reverse Motion..................
Horn.....................................................
Stopping..............................................
Battery Indicator.................................
11
11
11
11
11
11
11
12
Service Record..................................
20
Features.............................................
21
Technical Specifications..................
21
3
FORTRESS 1700 SCOOTER - OVERVIEW
Thank you for purchasing a movingpeople.net
Fortress 1700 scooter. Here is a list of terms
used throughout your Owner’s Manual.
Captain Seat
Console
Tiller
Armrest
Basket
Tiller Release
Coiffe
arrière
Rear Cover
Seat Lock
Battery Cover
Rear Tires
Front Light
Floor Pan
Front Tires
4
SEATING
SEAT LOCK MECHANISM
The seat lock mechanism allows you to lock the seat in four positions (at 90°
intervals). When released, the seat can swivel in both directions or be lifted from
the scooter.
WARNING: BEFORE ROTATING THE SEAT, turn
the power off by removing the ON/OFF key plug
ROTATING THE SEAT
1.
2.
3.
Release the seat lock by pulling the lever forward.
Hold the lever while rotating and release at the desired
direction.
Find the “Engaged” position by moving slightly to the left and
right of the desired position and ensure that the Seat Lock is
properly engaged.
5
SEATING (Cont.)
ARMREST
The arm rest on either side can be rotated upwards for easier transfers.
ADJUSTABLE WIDTH ARMRESTS
The width of the armrests positions can be adjusted. The arm rest adjustment knobs
are located on the rear of the seat at the bottom.
ADJUSTABLE KNOB
To loosen armrest, turn the knob counter-clockwise. After selecting the new
width, re-tighten knobs and ensure that the armrests are secure.
SEAT HEIGHT [TOOLS REQUIRED)
With a 13 mm wrench and 6 mm Allen key, remove the seat post receptacle bolt and
nut. Select one of the four different positions reinsert the hardware and tighten.
6
TILLER ANGLE ADJUSTMENT
The angle of the tiller may be adjusted for your driving preference, for
ease of transferring on and off the scooter, and to assist with storage.
Tiller Release Lever
Easy Release Adjustment
To adjust the angle of the tiller, pull the tiller release lever outward to the side
and adjust the tiller to the desired position. The tiller can be adjusted to 5
different positions.
For storage or transportation, the tiller may be fully collapsed to make the
scooter more compact.
Pull the tiller release lever outward to the side and pull the tiller assembly all the
way back toward the batteries.
7
DISASSEMBLING / ASSEMBLING YOUR FORTRESS 1700 SERIES SCOOTER
The Fortress Power Scooter 1700 three and four wheel scooters have been designed to be disassembled and reassembled
quickly, easily, and without the use of tools. Should you have any difficulty during either the assembly or disassembly
procedures, please recheck the instructions and try again.
NOTE:
Ensure the power is off before disassembly or re -assembly of your scooter.
DISASSEMBLY PROCEDURE
Release the seat mechanism and lift the seat off the scooter. It is recommended to fold the backrest completely forward to
assist with handling of the Captain Seat.
Remove the battery cover by releasing the Velcro on each side
of the floor pan.
Remove the rear shroud by pulling outward on the back side of the
shroud to clear the positioning tab.
Unplug the rear shroud lights from the scooter before removing the
cover.
Disconnect the following connectors from the controller box.: Both battery
connectors (marked in red), the light package connector (marked in yellow),
and the charger connector located on the side of the controller box (marked
in red, white and black).
NOTE: These connectors have a safety-latching feature to prevent
accidental disconnection. Press on each side of the connector to release the latch before pulling.
8
DISASSEMBLING / ASSEMBLING (Cont.)
Unbuckle the battery hold down straps. Remove the batteries by lifting
them up by the carrying strap.
CAUTION - the batteries are much heavier than they appear!
Unplug the controller connector on the side of the controller.
This connector has the same safety-latching feature mentioned above.
Separating the Scooter
Make sure the motor brake is in the engaged position, turn the hand wheel
(located on floor pan between the two battery recesses) counterclockwise until
it is sufficiently loose. Grasp the tiller with one hand and the loosened
handwheel with the other hand. Pull up on the hand wheel (which is spring
loaded) and slide the front section of the scooter forward.
The rear section should automatically fall back on to its anti-tips
9
DISASSEMBLING / ASSEMBLING (Cont.)
HANDLING AND LOADING
The seat should be carried by grabbing the frame below the seat back and the front of the seat upholstery.
Use both hands to grab the floor pan to carry the front section. Use the tiller release lever to fold the tiller into the lowest
position.
To carry the rear section grab the rear bumper with one hand and the other side of the rear frame with the other hand.
The batteries should be carried in the carrying straps.
When placing the disassembled scooter in a vehicle, make sure that the brake lever on the rear section is in the brake
“Engaged” position. Once the front section is loaded, the batteries can be replaced in the battery recesses and buckled
down. If there is not enough room in the trunk for the seat, it can be placed on the back seat of the vehicle. Place it upside
down on the arm rests.
If your scooter can fit assembled into a vehicle, DO NOT use the scooter as a
passenger seat in a transporting vehicle. It is not designed to restrain you during
an impact of an automobile accident.
ASSEMBLY PROCEDURE
To re-assemble the scooter, reverse the steps outlined above:
•
•
•
•
•
Ensure the rear section is resting on its anti-tip wheels.
Slide the front section channel completely into the rear section tube.
Retighten by turning the hand wheel clockwise.
Ensure hand wheel is fully tightened.
Ensure the batteries are properly secured with the hold down straps.
Ensure all electrical connections are secure.
REAR SECTION TUBE
FRONT SECTION CHANNEL
10
OPERATING YOUR SCOOTER
BRAKE RELEASE LEVER
The brake release lever allows you to freewheel the scooter (i.e. push it manually). Push the lever towards the rear position
to release the brakes.
WARNING:
• Whenever
•
•
•
sitting on the scooter, make sure the brakes
are in the “Engage” position.
DO NOT release the brakes on a slope or incline.
NEVER attempt to operate the Brake Release Lever
while the scooter is moving.
NEVER operate the forward/reverse throttle lever while
releasing or touching the brake
NOTE: If the scooter is turned on when the brake is released, the scooter will not operate. To engage the brake, move the
brake release lever to the “Engage” position and re-insert the key. (It is not sufficient to simply engage the brake. The
brake lever must be engaged before the unit is initially powered on.)
TURNING ON
To turn the power on, insert the ON/OFF Jack Key into the receptacle
on the right side of the speed control console.
SPEED SELECT (in the centre of the speed console)
The speed selector allows you to change the maximum speed in
six ranges.
HORN (at bottom centre of console face plate)
To sound the horn, press the horn button.
FORWARD/REVERSE MOTION
Press the “FORWARD” side of the speed control lever to go forward.
Press the “REVERSE” side of the speed control lever to go in reverse.
Speed Control Lever (for forward/reverse direction)
STOPPING
To stop, release the speed control lever. Your scooter will come to a quick stop and the brake will be automatically applied.
To obtain a gentle stop, release the control lever slowly
11
OPERATING YOUR SCOOTER (Cont.)
BATTERY INDICATOR
Reading from left to right; the battery level indicator has three green lights, four yellow
lights and three red lights. The batteries are completely charged when all the lights are
illuminated. As the battery level decreases the lights will go off one by one, starting on
the left.
The indicator lights show the battery voltage available to the controller. It is normal that
the indicator goes down during conditions of initial acceleration, as the extra load will
cause the voltage to drop momentarily. This momentary drop is not a true reading of
battery capacity.
Also, when the scooter is first powered up, there is a momentary self-test to verify and light. The indicator may initially
show full charge even if the batteries are not fully charged. This is a characteristic of the batteries. For this reason, the
most accurate battery reading is obtained when riding on a flat surface.
If the battery indicator remains in the RED zone, it is important to recharge your batteries as soon as possible.
Never fully discharge your batteries by overuse, as this will shorten battery life and could cause damage to the battery.
LIGHTS
Your scooter may be equipped with one of two light packages.
A. FRONT AND REAR RUNNING LIGHTS
1.
2.
To turn on the front headlight and the rear tail lights, push the light
ON/OFF button located on the speed control console face plate.
To turn the lights off, push the light ON/OFF button again.
B. FRONT AND REAR TURN SIGNAL LIGHTS
(movingpeople.net installed option only)
To activate LEFT turn signal indicators: (front & rear) press the signal button on the left side of the console face plate.
Push the same button again to turn the signal off.
To activate RIGHT turn signal indicators: (front & rear) press the turn signal button on the right side of the console face
plate. Push the same button again to turn the signal off.
Hazard signal: To activate all four signal lights at once, press both the left and the right signal pads and hold for two
seconds. Repeat to de-activate.
12
CIRCUIT BREAKER
CIRCUIT BREAKER
Located on the top corner of the rear cover is a circuit breaker/cut-out fuse. This
circuit breaker protrudes out of the rear cover for easy access. Major malfunctions
or overloads will trigger the fuse. If the scooter has lost power, check whether the
automatic cut-out fuse has been triggered. Press button downward to reset if
necessary.
If it has been triggered, it will prevent the scooter from further operation. To restart the scooter after the cut-out fuse has been reset, you must pull out the key
from the receptacle to re-set the system. If the breaker immediately triggers again,
you may have to wait to give the motor time to cool off.
Subsequently, if the breaker resets, take care to drive slowly and steadily, avoiding
steep obstacles and/or hills as much as possible.
NOTE: If the breaker continues to trigger after the motor has cooled down, there could be a
malfunction or overload somewhere in the electrical system. Please contact your dealer for
assistance should this occur.
13
CHARGING INSTRUCTIONS AND BATTERY CONSIDERATION
BATTERY CHARGING INSTRUCTIONS
A new set of batteries should always be fully charged before using your scooter. New batteries may not perform to their
peak during the first few weeks of use. The life expectancy of your batteries will be increased by charging them fully on a
consistent basis.
Make sure that the charger is in the “GEL OR SEALED BATTERIES” setting.
DO NOT USE LIQUID ACID BATTERIES IN YOUR SCOOTER.
1. Connect the charger to the Charging Socket located on the tiller and connect the
charger into a 115 VAC outlet.
2. Verify that the yellow “charging” and the red “power on” indicator lights are lit
before walking away from your scooter.
3. The indicator lights will start alternating between “Green” and “Yellow” when
approaching full charge. When fully charged the “Green” light will remain on.
REQUIRED BATTERY CHARGING IN STORAGE
The batteries must be charged regularly whether the scooter is used or not. It is important to recharge the batteries even
when the scooter is in storage for a period of time such as during the winter. Failure to recharge the batteries over several
months will completely deplete the batteries and they may need to be replaced. Note: All batteries experience a decreased
capacity in cold temperature. Please consider this when planning your trips.
NOTE: The scooter will not operate when the charger is plugged in.
Call your dealer for servicing if:
• The indicator light does not show yellow shortly after plugging in the charger and you are sure that the batteries are
not fully charged.
• The indicator light does not show green after charging for over nine hours.
BATTERY SPECIFICATIONS
Your scooter is powered by two deep cycle gel cell size U1 batteries.
Gel cell batteries are spill proof and maintenance free. They are the only battery type that commercial airlines will carry.
CAUTION: BATTERY CHARGING, MAINTENANCE AND TESTING SHOULD BE DONE WHERE THERE IS
VENTILATION. GASES EMITTED FROM RECHARGING BATTERIES ARE EXPLOSIVE AND MAY CAUSE SERIOUS
INJURY OR DAMAGE.
14
SAFETY PRECAUTIONS
The following guidelines are intended to assist you in the safe operation of your Three Wheel or
Four Wheel Power Scooter. If you have any questions about the correct operation of your
Scooter, please contact your movingpeople.net Dealer.
1. ALWAYS be sure the steering tiller angle adjustment is properly engaged and that the seat is
locked in the forward position before operating your scooter.
2. DO NOT use your scooter if you hear suspicious noises coming from under the rear cover.
Call your dealer for assistance
3. DO NOT get on or off your scooter with the on/off key inserted. (engaged)
4. REMOVE key before rotating your seat.
5. DO NOT carry passengers anywhere on the unit.
6. DO NOT stand on the unit.
7. DO NOT wear clothing that may become entangled with the wheels or tiller.
8. DO NOT attempt to operate your scooter with your weight or the carrying weight greater than
the capacity specified for your model. See specifications for your scooter model.
9. DO NOT drive off or over obstacles exceeding 2” (5 cm) in height.
10. DO NOT attempt inclines greater than 12° (or a rise of 2.5” (6.3 cm) in 12” (30 cm)).
11. DO NOT use your scooter with the anti-tip wheels removed.
12. Your Scooter can handle inclines of up to 12° (or a rise of 2.5” (6.3 cm) in 12” (30 cm)).
degrees. However, negotiating inclines on a scooter is an acquired skill. If you do not feel
confident you will be able to handle inclines of that size, it is best to avoid them whenever
possible.
13. AVOID backing up onto uneven surfaces or inclines.
14. Your Scooter can occasionally be driven over other hard surfaces including gravel, dirt, sand,
grass, etc. Care should be taken to avoid surfaces too soft to support your scooter.
15. AVOID driving your scooter on slippery surfaces or wet grass.
16. AVOID traveling on streets or in other areas with heavy vehicular traffic.
17. DO NOT disengage the brakes on a slope or incline.
18. DO NOT operate the scooter while under the influence of medication that can compromise
your ability to drive a motorized vehicle. Consult with your pharmacist or physician on the
side effects of your medication(s).
19. DO NOT operate the scooter while under the influence of alcohol.
15
SAFETY PRECAUTIONS (cont.)
20. DO NOT move the scooter in Free-Wheel Mode with an occupant on it, whether it is
yourself or someone else.
21. DO NOT attempt to operate your Scooter in a stalled condition, such as traveling or on too
steep an incline. This may cause the circuit breaker to trip, rendering your unit temporarily
immobile.
22. DO NOT continue to reset the circuit breaker on your unit if it continually trips during
normal operation. If this occurs, contact your movingpeople.net dealer.
23. DO NOT make abrupt changes in direction while traveling at speeds greater than 2 m.p.h. (3
km/h) or when driving on an incline or uneven surfaces. Approach gradients HEAD-ON, not
at an angle and follow its route up or down directly, not in zigzag movements.
24. REDUCE speed when approaching sharp corners.
25. DO NOT hose down, spray, submerge, or immerse any electrical components, including the
motor, controller, speed control console, batteries or the battery charger.
26. DO NOT hang items, shopping bags, etc., on the handlebars.
27. DO NOT mount, hang, or attach any devices, options, or accessories etc., which could
interfere with the speed control lever, brake lever, seat lock lever, or any other lever or
control.
28. ALWAYS ensure that the frame locking mechanism is completely engaged before operating
your scooter.
29. DO NOT discard batteries. They should be returned to a battery recycling service in your
area.
30. DO NOT smoke or have any spark or open flame on or near your scooter while its batteries
are being recharged.
31. The batteries accumulate energy. DO NOT short circuit.
32. If the battery housing breaks, the cracked parts may leak acids. Do not allow to contact the
skin.
33. DO NOT use liquid acid batteries. Hydrogen gas released from recharging liquid acid
batteries is explosive and may cause serious injury damage.
34. Your scooter is intended to help you enjoy life. Never let children play with it.
movingpeople.net disclaims all responsibility for any personal injury or property damage which may
occur as a result of improper or unsafe use of its products.
16
EMI CONSIDERATIONS
CAUTION:
IT IS VERY IMPORTANT THAT YOU READ THIS INFORMATION REGARDING THE
POSSIBLE EFFECTS OF ELECTROMAGNETIC INTERFERENCE ON YOUR POWERED
SCOOTER.
ELECTROMAGNETIC INTERFERENCE (EMI) FROM RADIO WAVE SOURCES
Motorized scooters may be susceptible to electromagnetic interference (EMI), emitted from sources such as radio stations,
TV stations, amateur radio (HAM) transmitters, two way radios and cellular phones. The interference (from radio wave
sources) can cause powered scooters to release their brakes, or move by itself. It can also permanently damage a powered
scooter's electronic control system. The intensity of the interfering EM energy can be measured in volts per meter (V/m).
Each powered scooter can resist EMI up to a certain intensity. This is called its "IMMUNITY LEVEL ". The higher the
immunity level, the greater the protection. At this time, current technology is capable of achieving at least a 20V /m immunity
level, which should provide useful protection from the more common sources of radiated EMI.
THE IMMUNITY LEVEL OF THIS SCOOTER IS 20 V/m (Volts/meter).
There are a number of sources of relatively intense electromagnetic fields in the every day environment. Some of these
sources are obvious and easy to avoid. Others are not apparent and exposure is unavoidable. However, we believe that by
following the warnings listed below, your risk of exposure to EMI will be minimized. The sources of radiated EMI can be
broadly classified into three types:
1) Hand-held Portable Transceivers
Transmitters or receivers with the antenna mounted directly on the transmitting unit. Examples include: citizen band (CB)
radios; walkie talkies; security, fire and police transceivers; cellular telephones; and other personal communication devices.
NOTE: Some cellular telephones and similar devices transmit signals while they are ON, even when not being
used.
2) Medium-range Mobile Transceivers
Transmitters or receivers used in police cars, fire trucks, ambulances, and taxis. These usually have the antenna mounted on
the outside of the vehicle.
3) Long-range Transmitters and Transceivers
Commercial broadcast transmitters (radio and TV broadcast antenna towers) and amateur (HAM) radios.
NOTE: Other types of hand-held devices, such as cordless phones, laptop computers, AM/FM radios, TV sets,
CD players, Cassette players, and small appliances, such as electric shavers and hair dryers, so far as we know,
are not likely to cause EMI problems to your powered scooter.
Also, the scooter is itself a source of EMI and could disturb the performance of electromagnetic fields such as security alarm
systems.
17
WARRANTY : FORTRESS SCOOTERS
This warranty applies to the new scooter as set forth below:
Movingpeople.net Canada Inc. warrants to the original buyer that the new equipment sold by an authorized
movingpeople.net Canada Inc. dealer is, at the time of delivery to the buyer and for the period of three years immediately
following such delivery, free from defects in material and workmanship and meets designed performance levels.
Movingpeople.net Canada Inc. agrees that it will during such three-year period, either repair or replace, at movingpeople.net
Canada Inc.’s sole option, any part or parts of new equipment which under proper and normal conditions of use proves to
be defective or fails to meet designed performance levels. The above warranty is extended or otherwise modified for certain
components of the equipment as specified below:
Movingpeople.net Canada Inc. supplied scooter’s Main Frame Weldment is covered under a lifetime warranty.
The battery charger, seat assembly, main cable and wiring, basket, and optional accessories are covered under a one- year
warranty.
Exclusions and Limitations
• Equipment modified other than by movingpeople.net Canada Inc. is not covered by this warranty.
• Tires, inner tubes plastic covers, brake pads, motor brushes, bearings, chain, and upholstery are considered wear items
and are not covered by this warranty.
• Cosmetic appearance of items will change as a result of use and are not covered by this warranty.
• Items added to the equipment by the buyer or by a user are not covered by this warranty.
• Any damage to items added to the movingpeople.net Canada Inc. supplied equipment, caused by the movingpeople.net
Canada Inc. supplied equipment, is not covered under this warranty. Any damage to the movingpeople.net Canada Inc.
supplied equipment by the additional equipment is also not covered by this warranty.
• Any use of the equipment outside the criteria published in the current movingpeople.net Canada Inc. sales brochures,
or beyond the manner, in which a prudent person would normally use the equipment, will void this warranty (i.e. Abuse
and misuse).
• Labour and shipping are not covered by this warranty.
• Any batteries supplied by movingpeople.net Canada Inc. are covered by the battery manufacturer’s standard warranty.
All claims for warranty covered parts under the above warranty must be presented to movingpeople.net Canada Inc. by an authorized dealer
within forty-five (45) days of the event upon which any warranty claim is made. Movingpeople.net Canada Inc. reserves the right to refuse the
warranty claim should the claim not satisfy the basic requirements.
The foregoing warranty is exclusive and in lieu of all other express warranties, implied warranties, if any, including but not
limited to the implied warranties of merchantability and fitness for a particular purpose, shall not extend beyond the duration
of the express warranty provided herein. Movingpeople.net Canada Inc. shall not be liable for any consequential or
incidental damages whatsoever.
For all warranty inquiries, please contact your authorized movingpeople.net Canada Inc. dealer.
Recommendations
Please complete the movingpeople.net Canada Inc. Warranty Registration Card. Mail it to movingpeople.net within 10 days
of delivery of the equipment. This will assist movingpeople.net to initiate and to provide your appropriate warranty
coverage.
It is strongly recommended that your equipment receive an annual service inspection by an authorized movinpeople.net
dealer within 30 days of the anniversary of the purchase date.
(Revised March 5, 2003)
18
MAINTENANCE SCHEDULE
Your Fortress scooter has many unique features not found on other scooters. With proper care and maintenance, you will
enjoy many years of dependable service from your Fortress scooter.
Your scooter has been designed so that maintenance can be kept to an absolute minimum. In order to obtain maximum
results in performance and durability, please check the following:
DAILY
•
Recharge the batteries (depending on amount of usage)
WEEKLY
•
•
Check the tire pressure on all wheels. The normal pressure should be 40 to 45 p.s.i. (276 to 310 kPa).
Clean the entire scooter with a slightly dampened cloth. Clean the upholstery, plastic floor pan, covers
and all metal parts.
NOTE: Periodic cleaning of all under cover parts of the scooter will prevent accumulation of dirt on the
motor, controller, differential, etc. This is especially important if the unit is used extensively outdoors.
MONTHLY
•
•
•
Clean all mineral deposits in and around battery posts. This is natural accumulation, but interferes with
good electrical connections.
Check the tightness of all exposed nuts, bolts and screws. Ensure that they are not loose.
Check that the front wheel and the rear wheels spin freely and that the tiller does not wobble
excessively. Tighten as required.
YEARLY
•
Have your authorized movingpeople.net Dealer completely check over your scooter.
LUBRICATION
Your movingpeople.net scooter uses self contained components that do not require lubrication. Only the chain
may need slight lubrication as is commonly done on bicycle chains.
Warning: Do not hose down, spray or submerge any electrical components including
the motor, controller, speed control console, batteries or battery charger.
19
SERVICE RECORDS
Model: __________________ Serial Number: _______________________
Date Purchased: _________________________________
First service / safety check
This service was performed on:
Date: _______________________
Authorized stamp or signature: ________________________________
Second service / safety check
This service was performed on:
Date: _______________________
Authorized stamp or signature: ________________________________
Third service / safety check
This service was performed on:
Date: _______________________
Authorized stamp or signature: ________________________________
Forth service / safety check
This service was performed on:
Date: _______________________
Authorized stamp or signature: ________________________________
Notes:
20
FEATURES
•
•
•
•
•
•
•
•
•
•
•
•
•
•
Fully proportional speed control
Adjustable six position speed select switch
L.E.D. battery indicator
Single channel, solid state programmable digital controller
Adjustable angle bent tiller
Dual braking system:
⇒ Automatic electromechanical disk brake
⇒ Regenerative braking (recharges the batteries whenever decelerating traveling downhill
Powerful rear wheel drive
Reinforced rubber bumpers
Front and rear lights
Fixed anti-tip devices
Brake release lever - allows scooter to be freewheeled
Accommodates U1 batteries
Charger interlock - prevents possibility of driving with the battery charger connected
Unit easily disassembles into portable components
TECHNICAL SPECIFICATIONS
Fortress 1700
DIMENSIONS
Length (overall)
Width (overall)
Ground clearance (to bottom of floor pan)
Turning radius
Minimum seat height from floor pan (captain seat)
Minimum seat height from ground (captain seat)
Tiller height from floor pan (min - max)
3 wheel
44” (112cm)
24" (61 cm)
5” (13 cm)
49” (124 cm)
18.5” (47 cm)
23.5” (60 cm)
28” - 31"
(71 cm - 79 cm)
10" (25 cm)
10" (25 cm)
4 wheel
47” (119 cm)
24” (61 cm)
5” (13 cm)
55” (140 cm)
22” (56 cm)
23.5” (60 cm)
28” - 31"
(71 cm - 79 cm)
10” (25 cm)
10” (25 cm)
WEIGHT
Front assembly
Rear assembly
Total (without seat)
30 lbs (13 kg)
53 lbs (24 kg)
83 lbs (38 kg)
38 lbs (17 kg)
53 lbs (24 kg)
91 lbs (41 kg)
Seat assembly (Captain seat with armrests)
37 lbs (16 kg)
37 lbs (16 kg)
Tire diameter (front pneumatic)
Tire diameter (rear pneumatic)
Performance Data
Maximum Speed
Maximum Incline
Carrying Weight
Range (Depends upon battery type, terrain and weight of driver)
5.5 mph (9 km/h) 5.5 mph (9 km/h)
12o or 21%
12o or 21%
350 lbs (160 kg) 350 lbs (160 kg)
30 miles (48 km) 30 miles (48 km)
Note: Lengths and weights are approximate
movingpeople.net reserves the right to change or delete specifications without notice in the interest of product
improvements.
21
movingpeople.net Canada Inc.
355 Norfinch Drive
Toronto, Ontario, Canada
M3N 1Y7
Tel:
(416) 739-8333 * 1-800-514-7061
Fax: (416) 739-6622
www.movingpeople.net
22