1
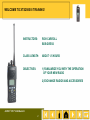
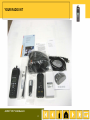
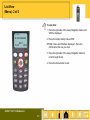
Cover ® ASTRO XTS 2500 Model III TM Digital Portable Radio END-USER TRAINING MSU REBANDING PROJECT ASTRO® XTS™ 2500 Model III 1 WELCOME TO XTS2500 III TRAINING! INSTRUCTORS: RICH CARROLL BOB GRESS CLASS LENGTH: ABOUT 1.5 HOURS OBJECTIVES: 1) FAMILIARIZE YOU WITH THE OPERATION OF YOUR NEW RADIO 2) EXCHANGE RADIOS AND ACCESSORIES ASTRO® XTS™ 2500 Model III 2 BEFORE WE BEGIN… 1. PLEASE DO NOT ASSEMBLE YOUR RADIO KIT YET. LET’S DO IT TOGETHER. 2. LET’S TRY TO STAY TOGETHER AS WE GO THROUGH EACH STEP. THAT WAY WE CAN HELP EACH OTHER, GROUP QUESTIONS AND MAY FINISH EARLY. 3. THANKS! ASTRO® XTS™ 2500 Model III 3 YOUR RADIO KIT ASTRO® XTS™ 2500 Model III 4 THE TRAINING SECTIONS Z1 Z2 C1 C2 Important Safety Information Talk Group Map Status Symbols Status Alert Tones Installation and Removal Operating Your Radio ASTRO® XTS™ 2500 Model III 5 THE TRAINING SECTIONS Important Safety Information ASTRO® XTS™ 2500 Model III 6 ELECTROMAGNETIC (RF) EXPOSURE THE BIOLOGICAL EFFECTS OF RF ENERGY HAVE BEEN STUDIED FOR YEARS. THERE ARE SOME CONFLICTING RESULTS, BUT WE KNOW SOME THINGS. RF ENERGY CAN CAUSE HEATING (MICROWAVE OVEN). THE EYES AND HEAD ARE MOST SENSITIVE. STRONG RF FIELDS CAN CAUSE CATARACTS. THERE IS NO CONCLUSIVE EVIDENCE THAT RF EXPOSURE CAUSES CANCER - BRAIN OR OTHERWISE. ASTRO® XTS™ 2500 Model III 7 ELECTROMAGNETIC (RF) EXPOSURE YOUR NEW RADIO TRANSMITS MUCH MORE POWER THAN YOUR CELL PHONE (2.3W VERSUS 1W OR LESS). THE FCC HAS REGULATED AND LIMITED THE AMOUNT OF PERMISSIBLE OCCUPATIONAL RF EXPOSURE. RF EXPOSURE DEPENDS UPON TWO VARIABLES. 1) INTENSITY OF THE ELECTROMAGNETIC FIELD. 2) TIME SPENT IN THAT FIELD. REDUCE EITHER ONE OF THESE AND YOU REDUCE YOUR EXPOSURE. ASTRO® XTS™ 2500 Model III 8 ELECTROMAGNETIC (RF) EXPOSURE REDUCE RF INTENSITY BY NOT CLOSE TALKING YOUR RADIO. Motorola recommends holding your radio 2” from your lips. ASTRO® XTS™ 2500 Model III 9 ELECTROMAGNETIC (RF) EXPOSURE REDUCE RF INTENSITY BY NOT CLOSE TALKING YOUR RADIO. The XTS2500 radios have very sensitive and clear audio. We recommend holding your radio 6” from your lips. Our tests show this cuts the intensity to your eyes and head to one-half the level when held at 2”. ASTRO® XTS™ 2500 Model III 10 ELECTROMAGNETIC (RF) EXPOSURE REDUCE TIME IN THE RF FIELD BY USING SHORT, INFREQUENT TRANSMISSIONS. Especially avoid lengthy phone conversations. ASTRO® XTS™ 2500 Model III 11 EXPLOSIVE/ FLAMMABLE ATMOSPHERES YOUR XTS2500 PORTABLE RADIO IS NOT INTRINSICALLY SAFE. NEITHER WAS YOUR LTS2000. DO NOT TRANSMIT OR OPERATE IF YOU ARE IN AN EXPLOSIVE OR FLAMMABLE ATMOSPHERE. THE SWITCHES IN YOUR RADIO MAY PRODUCE MINUTE SPARKS WHICH COULD IGNITE THE ATMOSPHERE SURROUNDING YOU. DO NOT CHANGE BATTERIES IN AN EXPLOSIVE OR FLAMMABLE ATMOSPHERE. ASTRO® XTS™ 2500 Model III 12 FOR MORE SAFETY INFORMATION See the XTS2500 safety manual on our website. Go to: www.telecom.msu.edu. Click: Support; Training; Two-Way Radio, and then Motorola XTS2500 ASTRO® XTS™ 2500 Model III 13 THE TRAINING SECTIONS Z1 Z2 C1 C2 Talk Group Map ASTRO® XTS™ 2500 Model III 14 Talk Group Map – TELECOM SYSTEMS ZONE A ZONE B ZONE C CH1 EVENT 1 DISPATCH P DISASTR CH2 EVENT 2 VOICE M DISASTR CH3 EVENT 3 BROADBAND MSU/DPPS CH4 EVENT 4 JOB TG 1 CH5 EVENT 5 JOB TG 2 CH6 EVENT 6 JOB TG 3 CH7 JOB TG 4 CH8 CENT CNTL ASTRO® XTS™ 2500 Model III 15 Talk Group Map – ATS ZONE A ZONE B ZONE C CH1 EVENT 1 DISPATCH P DISASTR CH2 EVENT 2 ATS- 1 M DISASTR CH3 EVENT 3 ATS- 2 MSU/DPPS CH4 EVENT 4 ATS- 3 CH5 EVENT 5 ATS- 4 CH6 EVENT 6 JOB ATS MEDIA CH7 JOB ATS COMP CH8 ASTRO® XTS™ 2500 Model III 16 Talk Group Map – CYCLOTRON ZONE A ZONE B ZONE C CH1 EVENT 1 DISPATCH P DISASTR CH2 EVENT 2 CYCLO 1 M DISASTR CH3 EVENT 3 CYCLO 2 MSU/DPPS CH4 EVENT 4 JOB CYCLO CH5 EVENT 5 CH6 EVENT 6 CH7 CH8 ASTRO® XTS™ 2500 Model III 17 Talk Group Map – PP MATERIAL/ LOGISTICS ZONE A ZONE B ZONE C CH1 EVENT 1 DISPATCH P DISASTR CH2 EVENT 2 MATLOG 1 M DISASTR CH3 EVENT 3 MATLOG 2 MSU/DPPS CH4 EVENT 4 JOB TG 1 CH5 EVENT 5 CENT CNTL CH6 EVENT 6 CH7 CH8 ASTRO® XTS™ 2500 Model III 18 Talk Group Map – HOUSING COMPUTER GROUP ZONE A ZONE B ZONE C CH1 EVENT 1 DISPATCH P DISASTR CH2 EVENT 2 HS COMP 1 M DISASTR CH3 EVENT 3 HS COMP 2 MSU/DPPS CH4 EVENT 4 JOB HS CO 1 CH5 EVENT 5 CENT CNTL CH6 EVENT 6 CH7 CH8 ASTRO® XTS™ 2500 Model III 19 Talk Group Map – HOUSING CONSTRUCTION GROUP ZONE A ZONE B ZONE C CH1 EVENT 1 DISPATCH P DISASTR CH2 EVENT 2 HS CONT 1 M DISASTR CH3 EVENT 3 HS CONT 2 MSU/DPPS CH4 EVENT 4 JOB HS CO CH5 EVENT 5 CENT CNTL CH6 EVENT 6 CH7 CH8 ASTRO® XTS™ 2500 Model III 20 Talk Group Map – BRESLIN ZONE A ZONE B ZONE C CH1 EVENT 1 DISPATCH P DISASTR CH2 EVENT 2 BRESLIN M DISASTR CH3 EVENT 3 CH4 EVENT 4 CH5 EVENT 5 CH6 EVENT 6 MSU/DPPS CH7 CH8 ASTRO® XTS™ 2500 Model III 21 Talk Group Map – PROJECTS & CONTRACTS (PIA) ZONE A ZONE B ZONE C CH1 EVENT 1 DISPATCH P DISASTR CH2 EVENT 2 SUPER PIA M DISASTR CH3 EVENT 3 CENT CNTL MSU/DPPS CH4 EVENT 4 CH5 EVENT 5 CH6 EVENT 6 CH7 CH8 ASTRO® XTS™ 2500 Model III 22 Talk Group Map – CENTRAL CONTROL ZONE A ZONE B ZONE C CH1 EVENT 1 DISPATCH P DISASTR CH2 EVENT 2 HVAC-CC 1 M DISASTR CH3 EVENT 3 HVAC-CC 2 MSU/DPPS CH4 EVENT 4 JOB HVAC CH5 EVENT 5 CENT CNTL CH6 EVENT 6 CH7 CH8 ASTRO® XTS™ 2500 Model III 23 Talk Group Map – LANDSCAPE SERVICES ZONE A ZONE B ZONE C CH1 EVENT 1 DISPATCH P DISASTR CH2 EVENT 2 L SCAPE 1 M DISASTR CH3 EVENT 3 L SCAPE 2 MSU/DPPS CH4 EVENT 4 CENT CNTL CH5 EVENT 5 CH6 EVENT 6 CH7 CH8 ASTRO® XTS™ 2500 Model III 24 Talk Group Map – TRANSPORTATION SERVICES ZONE A ZONE B ZONE C CH1 EVENT 1 DISPATCH P DISASTR CH2 EVENT 2 AUTO 1 M DISASTR CH3 EVENT 3 AUTO 2 MSU/DPPS CH4 EVENT 4 JOB AUTO CH5 EVENT 5 CENT CNTL CH6 EVENT 6 CH7 CH8 ASTRO® XTS™ 2500 Model III 25 Talk Group Map – SAFETY- SECURITY SERVICES ZONE A ZONE B ZONE C CH1 EVENT 1 DISPATCH P DISASTR CH2 EVENT 2 SFTY SC1 M DISASTR CH3 EVENT 3 SFTY SC2 MSU/DPPS CH4 EVENT 4 JOB ELCTR CH5 EVENT 5 JOB ALRMS CH6 EVENT 6 JOB SCRTY CH7 CENT CNTL CH8 ASTRO® XTS™ 2500 Model III 26 Talk Group Map – ELEVATOR SHOP ZONE A ZONE B ZONE C CH1 EVENT 1 DISPATCH P DISASTR CH2 EVENT 2 ELEVT 1 M DISASTR CH3 EVENT 3 ELEVT 2 MSU/DPPS CH4 EVENT 4 JOB ELEVT CH5 EVENT 5 CH6 EVENT 6 CH7 CH8 ASTRO® XTS™ 2500 Model III 27 Talk Group Map – KEY SHOP ZONE A ZONE B ZONE C CH1 EVENT 1 DISPATCH P DISASTR CH2 EVENT 2 KEY SHP 1 M DISASTR CH3 EVENT 3 KEY SHP 2 MSU/DPPS CH4 EVENT 4 JOB KEY CH5 EVENT 5 CH6 EVENT 6 CH7 CH8 ASTRO® XTS™ 2500 Model III 28 Talk Group Map – POWER & WATER ZONE A ZONE B ZONE C CH1 EVENT 1 DISPATCH P DISASTR CH2 EVENT 2 PWR PLT 1 M DISASTR CH3 EVENT 3 PWR PLT 2 MSU/DPPS CH4 EVENT 4 ELECT 1 CH5 EVENT 5 ELECT 2 CH6 EVENT 6 JOB TG 1 CH7 CENT CNTL CH8 ASTRO® XTS™ 2500 Model III 29 Talk Group Map – ENGRG & ARCH SERVICES ZONE A ZONE B ZONE C CH1 EVENT 1 DISPATCH P DISASTR CH2 EVENT 2 EAS 1 M DISASTR CH3 EVENT 3 EAS 2 MSU/DPPS CH4 EVENT 4 CENT CNTL CH5 EVENT 5 CH6 EVENT 6 CH7 CH8 ASTRO® XTS™ 2500 Model III 30 Talk Group Map – ROOFING SERVICES ZONE A ZONE B ZONE C CH1 EVENT 1 DISPATCH P DISASTR CH2 EVENT 2 ROOFING 1 M DISASTR CH3 EVENT 3 ROOFING 2 MSU/DPPS CH4 EVENT 4 JOB ROOF CH5 EVENT 5 CENT CTRL CH6 EVENT 6 CH7 CH8 ASTRO® XTS™ 2500 Model III 31 Talk Group Map – GLASS - MASONRY SERVICES ZONE A ZONE B ZONE C CH1 EVENT 1 DISPATCH P DISASTR CH2 EVENT 2 MASON M DISASTR CH3 EVENT 3 GLASS MSU/DPPS CH4 EVENT 4 JOB MASON CH5 EVENT 5 CENT CTRL CH6 EVENT 6 CH7 CH8 ASTRO® XTS™ 2500 Model III 32 Talk Group Map – SET UP SERVICES ZONE A ZONE B ZONE C CH1 EVENT 1 DISPATCH P DISASTR CH2 EVENT 2 SET UP 1 M DISASTR CH3 EVENT 3 SET UP 2 MSU/DPPS CH4 EVENT 4 JOB SETUP CH5 EVENT 5 CH6 EVENT 6 CH7 CH8 ASTRO® XTS™ 2500 Model III 33 Talk Group Map – CARPENTRY SERVICES ZONE A ZONE B ZONE C CH1 EVENT 1 DISPATCH P DISASTR CH2 EVENT 2 CARPEN 1 M DISASTR CH3 EVENT 3 CARPEN 2 MSU/DPPS CH4 EVENT 4 JOB TG 1 CH5 EVENT 5 CENT CNTL CH6 EVENT 6 CH7 CH8 ASTRO® XTS™ 2500 Model III 34 Talk Group Map – PAINT SERVICES ZONE A ZONE B ZONE C CH1 EVENT 1 DISPATCH P DISASTR CH2 EVENT 2 PAINT 1 M DISASTR CH3 EVENT 3 PAINT 2 MSU/DPPS CH4 EVENT 4 JOB TG 1 CH5 EVENT 5 CENT CNTL CH6 EVENT 6 CH7 CH8 ASTRO® XTS™ 2500 Model III 35 Talk Group Map – PLUMBING SERVICES ZONE A ZONE B ZONE C CH1 EVENT 1 DISPATCH P DISASTR CH2 EVENT 2 PLUMB 1 M DISASTR CH3 EVENT 3 PLUMB 2 MSU/DPPS CH4 EVENT 4 PLUMB 3 CH5 EVENT 5 JOB PLUMB CH6 EVENT 6 CENT CNTL CH7 CH8 ASTRO® XTS™ 2500 Model III 36 Talk Group Map – A&I SERVICES ZONE A ZONE B ZONE C CH1 EVENT 1 DISPATCH P DISASTR CH2 EVENT 2 A&I-1 M DISASTR CH3 EVENT 3 A&I-2 MSU/DPPS CH4 EVENT 4 JOB A & I CH5 EVENT 5 CENT CNTL CH6 EVENT 6 CH7 CH8 ASTRO® XTS™ 2500 Model III 37 Talk Group Map – ELECTRICAL SERVICES ZONE A ZONE B ZONE C CH1 EVENT 1 DISPATCH P DISASTR CH2 EVENT 2 ELECT 1 M DISASTR CH3 EVENT 3 ELECT 2 MSU/DPPS CH4 EVENT 4 PWR PLT 1 CH5 EVENT 5 PWR PLT 2 CH6 EVENT 6 JOB TG 1 CH7 JOB TG 2 CH8 CENT CNTL ASTRO® XTS™ 2500 Model III 38 Talk Group Map – ENERGY SYSTEMS MECH A&I SERVICES ZONE A ZONE B ZONE C CH1 EVENT 1 DISPATCH P DISASTR CH2 EVENT 2 ENERGY 1 M DISASTR CH3 EVENT 3 ENERGY 2 MSU/DPPS CH4 EVENT 4 JOB ENRGY CH5 EVENT 5 CENT CNTL CH6 EVENT 6 STEAM 1 CH7 PUMPS 1 CH8 PM 1 CH9 HVAC 1 ASTRO® XTS™ 2500 Model III 39 Talk Group Map – MECHANICAL SERVICES ZONE A ZONE B ZONE C CH1 EVENT 1 DISPATCH P DISASTR CH2 EVENT 2 DISTBUT 1 M DISASTR CH3 EVENT 3 DISTBUT 2 MSU/DPPS CH4 EVENT 4 STEAM 1 CH5 EVENT 5 STEAM 2 CH6 EVENT 6 ABSORP 1 CH7 ABSORP 2 CH8 JOB DIS CH9 JOB STEAM CH10 JOB ABS CH11 CENT CNTL ASTRO® XTS™ 2500 Model III 40 Talk Group Map – HVAC/ REFRIGERATION SERVICES ZONE A ZONE B ZONE C CH1 EVENT 1 DISPATCH P DISASTR CH2 EVENT 2 HVAC 1 M DISASTR CH3 EVENT 3 HVAC 2 MSU/DPPS CH4 EVENT 4 REFRIG 1 CH5 EVENT 5 REFRIG 2 CH6 EVENT 6 JOB HVAC CH7 JOB REF CH8 CENT CNTL CH9 CH10 CH11 ASTRO® XTS™ 2500 Model III 41 Talk Group Map – METAL SERVICES ZONE A ZONE B ZONE C CH1 EVENT 1 DISPATCH P DISASTR CH2 EVENT 2 SHTMTL 1 M DISASTR CH3 EVENT 3 SHTMTL 2 MSU/DPPS CH4 EVENT 4 PUMPS CH5 EVENT 5 BOILERS CH6 EVENT 6 INSUL CH7 JOB TG 1 CH8 JOB TG 2 CH9 CENT CNTL CH10 CH11 ASTRO® XTS™ 2500 Model III 42 Talk Group Map – CUSTODIAL ZONES ZONE A ZONE B ZONE C CH1 EVENT 1 DISPATCH P DISASTR CH2 EVENT 2 CUST ZONE M DISASTR CH3 EVENT 3 CH4 EVENT 4 CH5 EVENT 5 CH6 EVENT 6 MSU/DPPS CH7 CH8 CH9 CH10 CH11 ASTRO® XTS™ 2500 Model III 43 Talk Group Map – COMMISSIONING SERVICES ZONE A ZONE B ZONE C CH1 EVENT 1 DISPATCH P DISASTR CH2 EVENT 2 COMMIS 1 M DISASTR CH3 EVENT 3 COMMIS 2 MSU/DPPS CH4 EVENT 4 JOB TG 1 CH5 EVENT 5 CENT CNTL CH6 EVENT 6 CH7 CH8 CH9 CH10 CH11 ASTRO® XTS™ 2500 Model III 44 Talk Group Map – RECYCLING/ WASTE MANAGEMENT ZONE A ZONE B ZONE C CH1 EVENT 1 DISPATCH P DISASTR CH2 EVENT 2 WASTE 1 M DISASTR CH3 EVENT 3 WASTE 2 MSU/DPPS CH4 EVENT 4 CH5 EVENT 5 CH6 EVENT 6 CH7 CH8 CH9 CH10 CH11 ASTRO® XTS™ 2500 Model III 45 Talk Group Map – LIGHTING PM CREW ZONE A ZONE B ZONE C CH1 EVENT 1 DISPATCH P DISASTR CH2 EVENT 2 PM CRW 1 M DISASTR CH3 EVENT 3 PM CRW 2 MSU/DPPS CH4 EVENT 4 JOB PM CR CH5 EVENT 5 CH6 EVENT 6 CH7 CH8 CH9 CH10 CH11 ASTRO® XTS™ 2500 Model III 46 Talk Group Map – STANDARD ZONE A ZONE B ZONE C CH1 EVENT 1 DISPATCH P DISASTR CH2 EVENT 2 TALKGROUP 1 M DISASTR CH3 EVENT 3 TALKGROUP 2 MSU/DPPS CH4 EVENT 4 JOB TALKGRP CH5 EVENT 5 CENTRL CNTRL CH6 EVENT 6 CH7 CH8 ASTRO® XTS™ 2500 Model III 47 THE TRAINING SECTIONS Status Symbols ASTRO® XTS™ 2500 Model III 48 Status Symbols – 1 of 2 Battery Status Call Receive View Program Continued… ASTRO® XTS™ 2500 Model III 49 Status Symbols – 2 of 2 Not on our radios ASTRO® XTS™ 2500 Model III 50 THE TRAINING SECTIONS Status Alert Tones ASTRO® XTS™ 2500 Model III 51 Status Alert Tones Tone Name Tone Information Acknowledge Receipt of a call sent to the central controller Button Press A valid key was pressed on the keypad Call Alert - Receipt of a Call Alert page sent to your radio - Confirmation receipt of a page received sent from your radio Emergency Emergency alarm was sent from your radio Failsoft Radio has lost communication with the central controller Low Battery Weak battery indication No Acknowledge A call to the central controller was not acknowledged Out of Range Radio is out of range of the system Private Call I Receipt of a Private Conversation call sent to your radio Prohibit Talkgroup or channel is not accessible System Busy Channel, system or target radio is busy Time-out Timer Time-out timer limit has been reached ASTRO® XTS™ 2500 Model III 52 THE TRAINING SECTIONS Installation and Removal ASTRO® XTS™ 2500 Model III 53 Installation and Removal Procedures Antenna Battery Universal Connector Belt Clip ASTRO® XTS™ 2500 Model III 54 Antenna To install the antenna: 1. Screw the antenna (clockwise) into the antenna receptacle on top of the radio. 2. Tighten the antenna firmly with your fingers. To remove the antenna: Unscrew the antenna (counter-clockwise) and remove it from the antenna receptacle on top of the radio. ASTRO® XTS™ 2500 Model III 55 Battery To install the battery: 1. Turn the radio off. 2. Align the three tabs at the bottom of the battery with the three slots at the bottom of the back of the radio. 3. Angle the battery forward toward the radio until the battery clicks into place. To remove the battery: 1. Turn the radio off. 2. Holding the radio in one hand, push down on the battery release slides on both sides of the battery with the other hand. 3. Angle the battery away from the radio and remove. ASTRO® XTS™ 2500 Model III 56 Universal Connector Cover The universal connector cover protects the side connector near the antenna. To remove the cover: 1. Turn the radio off. 2. Carefully insert a flat-bladed screwdriver between the bottom of the cover and the connector. 3. Holding the top of the cover with your thumb, push the screwdriver gently downward and lever the cover away from the radio. To install the cover: 1. Turn the radio off. 2. Insert the hooked end of the cover into the slot above the connector. 3. Rub the ball of your thumb from the top to the bottom of the cover, applying pressure towards the radio. This will flex the cover and snap it into place. ASTRO® XTS™ 2500 Model III 57 Belt Clip To install the belt clip: 1. Remove battery before installing or removing the belt clip. 2. Hold the battery with the back of the battery facing you. 3. Hold the belt clip with the top facing upward, and align the clip with the slots on the battery back. 4. Slide the belt clip downward into the slots until it clicks into place. To remove the belt clip: 1 1. Pull away the metal tab at the top of the battery clip from the battery. 2. Slide the clip upward until it comes away from the radio. 2 ASTRO® XTS™ 2500 Model III 58 Charging the Battery The battery must be charged before use. Memory effect is a phenomenon that causes a loss in battery capacity or voltage due to repetitive shallow discharging or long-term overcharging. This memory effect has been greatly reduced in your batteries through the use of new cell technology. It is still recommended, however, that you discharge your battery as much as possible before recharging it (listen for the ‘chirp’). Recharging after each shift is good standard practice, although if you only listen you may get up to three days before charging. When charging a battery that is attached to your radio, turn the radio off to ensure a full charge. NOTE: We have given the battery installed in your radio its initial charge. You must charge the spare battery before use. Continued… ASTRO® XTS™ 2500 Model III 59 Charging the Battery – More… 1. The Impres charger and battery are both smart; they talk to each other. 2. Don’t try to charge your battery on a non-Impres charger. 3. The Impres battery has a preset number of charges it can accept. When that number is reached, the battery is deactivated and becomes a brick. Each full charge (charger LED on solid green) increments the counter and pushes it closer to ‘brick’ status. Even so, you should get 2.5-3 years out of your two batteries of you alternate them charging each every other day. 4. As you will see later, you can check the remaining capacity of your battery and the estimated number of charges it has had. ASTRO® XTS™ 2500 Model III 60 THE TRAINING SECTIONS Operating Your Radio ASTRO® XTS™ 2500 Model III 61 Your Radio 16-Position Power On/Off ff Volume Contr ol Channel Select 10 : 46AM B BROADBAND PAGE MUTE PROG Zone Select Control Top Emergency Side Buttons Phone Call (Place) Push-To-Talk (PTT) Button Display Light Menu/Keypad Options Private Conversation Call (Place) ASTRO® XTS™ 2500 Model III 62 Call Alert Page (Respond) Call Alert Page (Send) Clock (Time and Date) ID Number (View Your) Using CALL ID Number (View Your) Using PAGE Keypad Tones List Name Edit List Number Edit List View Smart Battery Zone Select GENERAL FEATURES ASTRO® XTS™ 2500 Model III 63 LED Status RED GREEN • Solid - PTT is pressed; radio is transmitting • Flashing - Channel Busy - Low Battery (lights while transmitting) • Solid - Self-test being performed • Flashing - Incoming Private Call GREEN LED RED LED ASTRO® XTS™ 2500 Model III 64 Radio On/Off/Volume To turn the radio on: Turn the On/Off/Volume Control knob clockwise. On/Off/Volume Knob SELF TEST If the power-up test is successful, you briefly see SELF TEST, then the home display. If enabled, a power-up tone is also heard. If the power-up test is unsuccessful, you see ERROR XX/YY. (XX/YY is an alphanumeric code.) To turn the radio off: Turn the On/Off/Volume Control knob counter-clockwise until it clicks. ASTRO® XTS™ 2500 Model III 65 Zone Select (3-Position Concentric Switch) To select a zone: Zone Name 1. Select zone A, B, or C using the Zone Select switch. 2. Press the Home button to confirm the displayed zone and channel. B VOICE MUTE PAGE PROG Zone Select Switch ASTRO® XTS™ 2500 Model III 66 Channel (Talkgroup) Select (16-Position Select Knob) Channel To select a channel/talkgroup: Turn the Channel Select knob to the desired position. The new name will appear on the display. Channel B TALKGROUP 1 MUTE PAGE PROG ASTRO® XTS™ 2500 Model III 67 If the channel you selected is unprogrammed, repeat the above step. Note: a ‘talkgroup’ is a virtual ‘channel’. Call Alert Page – Acknowledge (Call Alert/Private Call) PAGE RECEIVD LED MUTE PAGE PROG When a Call Alert page is received, you hear four repeating alert tones, the LED flashes green, the call received symbol ( ) flashes and PAGE RECEIVD Is displayed, followed by the name or ID of the calling person, followed by your home talkgroup each showing for about 2 seconds. This sequence will repeat until the call is answered. PRESS PRIVATE CALL BUTTON TO ANSWER Note: The radio that initiated the Call Alert page will receive a return acknowledgment when the Call Alert page is received. ASTRO® XTS™ 2500 Model III 68 Time-out Timer The time-out timer turns off your radio’s transmitter. The timer is set for 60 seconds. 1. Hold down the PTT button longer than the programmed time. You will hear a low-pitched warning tone, the transmission will cut off, and the LED will go out until you release the PTT. 2. Release the PTT button. 3. Press the PTT button to re-transmit. The time-out timer restarts. The timer will restart and the LED lights red. LED Push-to-Talk (PTT) ASTRO® XTS™ 2500 Model III 69 Transmit and Receive To transmit: 1. Select the desired zone/channel. 2. Listen for ongoing conversations; if the channel becomes clear, proceed with your call. 3. Press and hold the PTT button to transmit. The LED will light solid red. When speaking, keep the microphone 2-6" from your mouth. 4. Release the PTT button to receive (listen). LED Push-to-Talk (PTT) ASTRO® XTS™ 2500 Model III 70 3-POSITION CONCENTRIC SWITCH 3-Position Concentric Switch (Zone) ASTRO® XTS™ 2500 Model III 71 ZONE SELECT (3-Position Concentric Switch) Select a ZONE: 1. Select a ZONE from the talkgroup map provided by your system administrator. C TALKGROUP 1 MUTE PAGE PROG ZONE SELECT ASTRO® XTS™ 2500 Model III 72 2. MOVE the CONCENTRIC switch to the predetermined position. (A,B,C) TOP BUTTON Emergency ASTRO® XTS™ 2500 Model III 73 Emergency – Send (Top Button) – 1 of 2 EMERGENCY MUTE PAGE CALL Send an emergency alarm. Send an emergency call. Emergency ASTRO® XTS™ 2500 Model III 74 Emergency – Send Emergency Alarm/ Call (Top Button) – 2 of 2 To send an emergency alarm: 1. With the radio turned on, press the Emergency button. EMERGENCY MUTE PAGE PROG The current zone/channel is displayed alternately with EMERGENCY, the LED lights red, and you hear a group of short, medium-pitched tones. 2. When you receive the dispatcher’s acknowledgment, you see ACK RECEIVED, four tones sound, the alarm ends, and you may now talk to the dispatcher. 3. To exit emergency at any time, press and hold the Emergency button for about a second. LED NOTE: RADIO WILL NOT TURN OFF IN EMERGENCY MODE. Emergency ASTRO® XTS™ 2500 Model III 75 TOP SIDE BUTTON Phone ASTRO® XTS™ 2500 Model III 76 Phone Call – Place (Top Side Button) – 1 of 4 There are three ways to place a phone call from your radio. Phone Button To place a phone call: RICH BROWN 20506 LIST Select the last phone number dialed. Select a phone number from the preprogrammed phone list. Push-to-Talk (PTT) Select a phone number by using the keypad. Note: Your radio functions as a campus phone. ASTRO® XTS™ 2500 Model III 77 Phone Call – Place Select Last Number Dialed (Top Side Button) – 2 of 4 To select the last phone number dialed or received: Phone Button 1. Press the Phone button. You will hear dial tone. The last number dialed or received is displayed. TELECOM 35515 2. Press and release the PTT button to dial the displayed phone number. LIST The called phone number is momentarily displayed, then you see PLEASE WAIT. When you are connected, you see the called phone number again. 3. If your call is answered, press the PTT button to talk; release it to listen. 4. Press the Home button to hang up and return to the home display (or press the Phone button). Push-to-Talk (PTT) ASTRO® XTS™ 2500 Model III 78 Phone Call – Place Select Number from Phone List (Top Side Button) – 3 of 4 To select a phone number from the phone list: Phone Button 1. Press the Phone button. You will hear dial tone. The last number dialed or received is displayed. OPERATOR 51855 2. Press the right side of the 4-way Navigation button to find the phone number you want going through the list. LNUM Note: Press the button directly below LNUM to go to the last number dialed. 3. Press and release the PTT button to dial the displayed phone number. The called phone number is momentarily displayed, then you see PLEASE WAIT. When you are connected, you see the called phone number again. 4. If your call is answered, press the PTT button to talk; release it to listen. 5. Press the Home button to hang up and return to the home display (or press the Phone button). Push-to-Talk (PTT) ASTRO® XTS™ 2500 Model III 79 Phone Call – Place Select Number Via Keypad (Top Side Button) – 4 of 4 To select a phone number via the keypad: Phone Button 1. Press the Phone button. You will hear dial tone. The last number dialed or received is displayed. 3511111 2. Use the keypad to enter the phone number you want. LIST 3. Press and release the PTT button to dial the displayed phone number. The called phone number is momentarily displayed, then you see PLEASE WAIT. When you are connected, you see the called phone number again. 4. If your call is answered, press the PTT button to talk; release it to listen. 5. Press the Home button to hang up and return to the home display(or press the Phone button). Push-to-Talk (PTT) ASTRO® XTS™ 2500 Model III 80 Phone Call – Respond (Top Side Button) PHONE CALL LED MUTE PAGE PROG Call Response Button When a phone call is received, you hear a telephone-type ringing, the LED flashes green, the call received symbol ( ) flashes and PHONE CALL is displayed, followed by your home talkgroup each showing for about 1 second. This sequence will repeat until the call is answered. To respond to a phone call: 1. Press the Phone Call button 2. Press and hold the PTT button to talk; release it to listen. 3. Press the Home button to hang up and return to the home display (or press Phone button). Push-to-Talk (PTT) ASTRO® XTS™ 2500 Model III 81 SIDE BUTTON 1 Display Light ASTRO® XTS™ 2500 Model III 82 Display Light (Side Button 1) If poor light conditions make the display or keypad difficult to read: Turn on the radio’s backlights by pressing the Light button. These lights will remain on for a preprogrammed time before they turn off automatically (15 seconds). OR You can turn them off immediately by pressing the Light button again. Light Button ASTRO® XTS™ 2500 Model III 83 SIDE BUTTON 2 Private Call ASTRO® XTS™ 2500 Model III 84 Private Conversation Call – Place (Side Button 2) – 1 of 4 There are three ways to place a Private Conversation call from your radio. To place a Private Conversation call: FIRE CHIEF ID: 701234 LIST Select the last ID number dialed. Select an ID number from the preprogrammed call list. Private Call Button Push-to-Talk (PTT) ASTRO® XTS™ 2500 Model III 85 Select an ID number by using the keypad. Private Conversation Call – Place Select Last Number Dialed (Side Button 2) – 2 of 4 To select the last ID number dialed or received: 1. Press the Private Call button. The last number dialed or received is displayed. FIRE CHIEF ID: 701234 2. Press and release the PTT button to start the Private Call. LIST The called ID is momentarily displayed, then you see PLEASE WAIT. When you are connected, you see the called ID again. 3. Press and hold the PTT button to talk; release it to listen. 4. Press the Home button or Private Call button to hang up and return to the home display. If you forget to do this, a continuous alert tone will be heard. Private Call Button Push-to-Talk (PTT) ASTRO® XTS™ 2500 Model III 86 Private Conversation Call – Place Select Number from Call List (Side Button 2) – 3 of 4 To select an ID number from the call list: 1. Press the Private Call button. FIRE CHIEF ID: 701234 2. Press the right side of the 4-way Navigation button to find the ID you want by going through the list. LNUM Note: Press the button directly below LNUM to go to the last number dialed. 3. Press and release the PTT button to start the Private Call. The called ID is momentarily displayed, then you see PLEASE WAIT. When you are connected, you see the called ID again. 4. Press and hold the PTT button to talk; release it to listen. 5. Press the Home button or Private Call Button to hang up and return to the home display. Private Call Button Push-to-Talk (PTT) ASTRO® XTS™ 2500 Model III 87 Private Conversation Call – Place Select Number Via Keypad (Side Button 2) – 4 of 4 To select an ID number via the keypad: 1. Press the Private Call button. The last number dialed or received is displayed. ID: 701234 2. Use the keypad to enter the ID number you want. LIST 3. Press and release the PTT button to start the Private Call. The called ID is momentarily displayed, then you see PLEASE WAIT. When you are connected, you see the called ID again. 4. Press and hold the PTT button to talk; release it to listen. 5. Press the Home button or Private Call Button to hang up and return to the home display. Private Call Button Push-to-Talk (PTT) ASTRO® XTS™ 2500 Model III 88 Private Conversation Call – Respond (Side Button 2) CALL RECEIVD Private Call Button LED MUTE PAGE PROG When a Private Call is received, you hear two alert tones, the LED flashes green, the call received symbol ( ) flashes and CALL RECEIVD is displayed, followed by the calling name or ID, followed by your home talkgroup each for about 2 seconds. This repeats until the call is answered. To respond to a Private Conversation call: 1. Press the Private Call Button . 2. Press and hold the PTT button to talk; release it to listen. 3. Press the Home button or the Private Call Button to hang up and return to the home display. Push-to-Talk (PTT) ASTRO® XTS™ 2500 Model III 89 ID Number (View Your) (Side Button 2) To view your ID number: 1. Press the PRIVATE CALL button. 2. Press the left side of the 4-way Navigation button to find your ID. MY ID: 739205 Private Call Button 3. Press the Home button, or PRIVATE CALL button to return to the home display. LNUM Push-to-Talk (PTT) ASTRO® XTS™ 2500 Model III 90 MENU/ KEYPAD ASTRO® XTS™ 2500 Model III 91 Clock (Time and Date) (Menu) – 1 of 2 Using this special feature, you can program the time and date as you might with other electronic devices. The clock display is enabled by a qualified radio technician. 10 : 46AM B BROADBAND To edit the time and date: BATT CLCK VIEW 1. Press the right side of the 4-way Navigation button until CLCK is displayed. 2. Press the button directly below CLCK. The current setting is displayed. 3. Press the button directly below EDIT. The first item flashes. Continued… ASTRO® XTS™ 2500 Model III 92 Clock (Time and Date) (Menu) – 2 of 2 4. Press the up or down arrow of the 4-way Navigation button to change the selected item. Note: Press the Home button at any time to return to the home display without saving your changes. 12HR 03:54AM MDY 10/31/01 OR Press the right side of the 4-way Navigation button to move to an item you wish to change. SAVE 5. Press the up or down arrow of the 4-way Navigation button to change the selected item. 6. Press the right side of the 4-way Navigation button one or more times to move to an item in the date field. 7. Press the up or down arrow of the 4-way Navigation button to change the selected item. 8. When you have made all of your changes, press the button directly below SAVE to save your changes and return to the home display. Note: If a call arrives while the radio is in the clock-setting menu, the radio exits clock setting, your changes are lost, and the call information is displayed. ASTRO® XTS™ 2500 Model III 93 ID Number (View Your) Using PAGE (Menu) To view your ID number: 1. Press the button directly below PAGE. MY ID: 739205 2. Press the left side of the 4-way Navigation button to find your ID. LNUM 3. Press the Home button to return to the home display. ASTRO® XTS™ 2500 Model III 94 Keypad Tones (Mute or Unmute) (Menu) To turn the keypad tones on or off: 1. Press the button directly below MUTE. The current state is shown: TONES OFF or TONES ON. B BROADBAND MUTE PAGE PROG 3. Press the button directly below OFF or ON. Note: Press the Home or the PTT button to exit without changing the setting. Note: Turning off keypad tones does not affect any other tones. Push-to-Talk (PTT) ASTRO® XTS™ 2500 Model III 95 List Name Edit Call, Page, or Phone (Menu) – 1 of 2 You can use lists to store frequently used numbers and associate them with names. To edit a list name: FIRE CHIEF 701234 MUTE PAGE PROG 1. Press the button directly below PROG You see the lists that can be changed. 3. Press the button directly below the name of the list you wish to change. You see the first list member and the view/program ( ) symbol flashing, indicating the programming mode. You will also see NUM and NAME displayed as possible selections. 4. Press the left or right side of the 4-way Navigation button to select the list member to be changed. OR Use the keypad to enter the corresponding location number of the name in the list. Continued… ASTRO® XTS™ 2500 Model III 96 List Name Edit Call, Page, or Phone (Menu) – 2 of 2 5. Press the button directly below NAME. The blinking cursor shows the location of the character to be added. FIRE CHIE_ 701234 NUM 6. Press the left side of the 4-way Navigation button to erase characters. NAME If you erase the entire name and press either the left or right side of the 4-way Navigation button, you exit editing without saving your changes. 7. Press a keypad button to add a character. 8. Press the button directly below SAVE to save your changes. Return to step 4 to make more changes. OR Press the Home button to return to the home display. ASTRO® XTS™ 2500 Model III 97 List Number Edit Call, Page, or Phone (Menu) – 1 of 2 You can use lists to store frequently used numbers and associate them with names. To edit a list number: FIRE CHIEF 70234 MUTE PAGE PROG 1. Press the button directly below PROG You see the lists that can be changed. 3. Press the button directly below the name of the list you wish to change. You see the first list member and the view/program ( ) symbol flashing, indicating the programming mode. You will also see NUM and NAME displayed as possible selections. 4. Press the left or right side of the 4-way Navigation button to select the list member to be changed. OR Use the keypad to enter the corresponding location number of the name in the list. Continued… ASTRO® XTS™ 2500 Model III 98 List Number Edit Call, Page, or Phone (Menu) – 2 of 2 5. Press the button directly below NUM. The blinking cursor shows location of the number to be added. FIRE CHIEF 0072258_ NUM 6. Press the left side of the 4-way Navigation button to erase numbers. NAME If you erase the entire number and press either the left or right side of the 4-way Navigation button, you exit editing without saving your changes. 7. Press a keypad button to add a number. 8. Press the button directly below SAVE to save your change. Return to step 4 to make more changes. OR Press the Home button to return to the home display. ASTRO® XTS™ 2500 Model III 99 List View (Menu)- 1 of 2 You can use lists to store frequently used numbers and associate them with names. There are three list types: call, page, phone. ID: 740407 To view a list: LIST 1. Press PVT CALL, PHONE or PAGE button to get LIST displayed. 2. Press the button directly below LIST. 3. Press the left or right side of the 4-way Navigation button to view the names on the list. 4. Press the Home button to exit. Continued… ASTRO® XTS™ 2500 Model III 100 List View (Menu)- 2 of 2 To view lists: 1. Press the right side of the 4-way Navigation button until VIEW is displayed. 10 : 46AM B BROADBAND 2. Press the button directly below VIEW. BATT CLCK VIEW PHONE, CALL and PAGE are displayed. Press the button below the one you want. 3. Press the right side of the 4-way Navigation button to scroll through the list. 4. Press the Home button to exit. ASTRO® XTS™ 2500 Model III 101 Smart Battery (Menu) This feature allows you to view the condition of your Smart Battery. To access information about your battery: B BROADBAND 1. Press the right side of the 4-way Navigation button until BATT is displayed. BATT CLCK VIEW 2. Press the button directly below BATT. 3. Battery data is displayed as follows: RATED CAPACITY% indicates the current charge (% of rated capacity) on the battery. EST CHGS indicates the estimated number of charges performed on the battery. Note: If a Smart Battery is not powering your radio, the display will read SMART BATT DATA NOT AVAILABLE. ASTRO® XTS™ 2500 Model III 102 Thank you for your attention! For reference, see the XTS2500 user manual on our website. Go to: www.telecom.msu.edu. Click: Support; Training; Two-Way Radio, and then Motorola XTS2500 ASTRO® XTS™ 2500 Model III 103