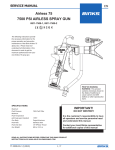
1
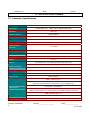
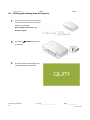
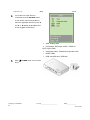
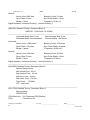
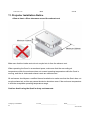
Delta Elec. Inc.
Qumi
Rev.02
DATA PROJECTOR
SERVICE MANUAL
Qumi_DP274-A13VVxA
Qumi_DP274-A13VVxB
Company Confidential
1
VIVITEK___________________
Delta________________
2011/07/05
Delta Elec. Inc.
Qumi
Rev.02
CONTENTS
1.COMPLIANCE OF SAFE REPAIR........................................................................................4
1-1.Caution During Disassembling And Assembling.............................................................4
1-2.Lamp.............................................................................................................................. 4
1-3.Lens................................................................................................................................4
2.SPECIFICATIONS.................................................................................................................5
2-1.Summary Specifications................................................................................................. 5
2-2.Views the projector……..………….………………………………………..…………..….…6
2-3.Remote control...............................................................................................................8
2-4.Optical adjustment image size......................................................................................10
2-5.BLOCK DIAGRAM....................................................................................................... 11
3.TROUBLE SHOOTING...................................................................................................... 12
4. DISASSEMBLY AND ASSEMBLY ..........................................................…………........... 17
5. Firmware Download......................................................................................................... 28
5-1. Projector USB Drivers Installation Guide………………………………….……………...28
5-2. DLP Projector Composer (firmware) User Guide…………………………….…………..33
5-3. Started with Download………………………………………………………………………34
5-4.Starting and Shutting down the Projector……………………………………………….....39
5-5.Setting an Access Password (Security Lock)………………………………….…………..41
5-6.DLP Projector security unlock……………………………………….………………………43
5-7.Factory Reset……………..…………………………………………………………..…….. 45
5-8. Status…………………………………………..…………………………………………………………45
6. Calibration…………………………….……………………………………..….………………..46
7. EDID…………………………………………………………………………………………….…50
8. Service Note..…………………………………..………………………………………………..59
9. LED Message…………………………………………………………………………………….60
10. Factory preset Display modes……………………………………………….……….…..…61
11. Projector Installation Notice……………………………………………………..…………..63
12. Projector Dimensions……………………………………………………………………...…64
13.FAN Control……………………………………………………………………………………..65
14. Spare parts list……………………………………………………………………………….…66
Company Confidential
2
VIVITEK___________________
Delta________________
2011/07/05
Delta Elec. Inc.
Qumi
Rev.02
Revised History
NO.
Description
00
Draft Edit
6-24-2011
01
Preliminary
6-28-2011
02
Page 33, Step of into MFG Mode method diagram modifies.
Date
Page 15~16 list number remark. Page 66~71 Spare part list update
Company Confidential
3
VIVITEK___________________
7-05-2011
Delta________________
2011/07/05
Delta Elec. Inc.
Qumi
Rev.02
1. Important safety information
Be sure to read this Service Manual before providing services. In the projector, full
consideration is taken to ensure safety for fire, electric shock, injury, harmful radiation, and
substance. Therefore, observe the notice described in this Service Manual so that safety is
kept when providing services. Moreover, be sure to observe the notice described in the
Instruction Manual.
Pay attention to the following items during service inspection.
1-1 Cautions during disassembling and assembling
1. This equipment contains parts under high voltage. When making repairs, etc.
Be sure to pull out the power plug beforehand to insure safety.
2. Parts may be very hot immediately after use.
Make sure the equipment has cooled off sufficiently before carrying out repairs.
3. Make sure that parts and screws and wiring, etc. are returned to their original positions.
Tube, tape and other insulation materials have been used for safety reasons.
The internal wiring has been designed to avoid direct contact with hot parts or parts under
high voltage when using clamps or other tools.
4. The parts used in this device have special safety features such as flame-resistance and
anti-voltage properties. When replacing parts, always use parts supplied from the factory.
5. After finishing operations make sure that all parts and wires have been returned to their
original position and that there has been no deterioration of the area around the location that
was worked on.
6. Be sure to use a grounding strap (wrist band) during repair and inspection.
1-3 Lens
Do not look into a lens during projection. This damages your eyes.
Company Confidential
4
VIVITEK___________________
Delta________________
2011/07/05
Delta Elec. Inc.
Qumi
Rev.02
2. SPECIFICATIONS
2-1. Summary Specifications
Model
Display type
Resolution
Projection distance
Projection screen size
Qumi_DP274-A13VVxx
TI DLP DMD 0.45” , 12deg , S310 , WXGA Dark Chip3
1280 x 800
762mm-2286mm
25.43” to
76.34” inches
Throw ratio
1.55
Aspect Ratio
16:10
Vertical keystone
correction
Video compatibility
Operation temperature
Dimensions (WxHxD)
Weight
AC Input
+/- 15 degrees
HDTV , NTSC , PAL , SECAM
5° ~ 35°C
160.0mm (W) x102.4mm (H) x32.3mm (D)
1.4 lbs typ.
AC Universal 100 ~ 240, Typical @ 110VAC (100~240)/+-10%
w/Adaptor --- Normal:70W typ , ECO:20W typ
Power consumption
wo/Adaptor --- Normal:60W typ , ECO:18W typ
Stand By
LED Brightness
Audio speaker
<0.5 watts @110Vac 60Hz
Bright Mode: 120~170 lumens
AMP 1W speaker
Digital -- HDMI C type x 1
Analog -- Universal I/O x 1
(through a transferring line of universal I/O (24 pin) to D-SUB (15 pin)
Input terminals
Component -- Thru RGB_IN
AN in -- ψ3.5 mm phone jack for CVBS and Audio R/L
(through a transferring line of 4 contact phone jack to CVBS/ AUDIO R/L RCA jack)
USB connector type A x 1
Media Card -- Micro SD x 1
Output terminals
Company Confidential
5
Audio Out -- 3.5mm earphone jack (Volume control) x 1
VIVITEK___________________
Delta________________
2011/07/05
Delta Elec. Inc.
2-2. Views the projector
Qumi
Rev.00
Front/Top/Right View
Company Confidential
6
Vivitek ______________________
Delta____________
2011/06/24
Delta Elec. Inc.
Qumi
Rev.00
B. Rear/Top/Left view
Bottom view
Company Confidential
7
Vivitek ______________________
Delta____________
2011/06/24
Delta Elec. Inc.
Qumi
Rev.00
2-3. Remote control
Company Confidential
8
Vivitek ______________________
Delta____________
2011/06/24
Delta Elec. Inc.
1.
Qumi
Rev.00
Remove the battery compartment
cover by sliding the cover in the
direction of the arrow (A). Pull out the
cover (B).
2.
Insert the battery with the positive
3.
Replace the cover.
side facing up.
Caution:
1. Only use a 3V lithium battery (CR2025)
2. Dispose of used batteries according to local ordinance regulations.
3. Remove the battery when not using the projector for prolonged periods.
Company Confidential
9
Vivitek ______________________
Delta____________
2011/06/24
Delta Elec. Inc.
Qumi
Rev.00
2-4. Optical Adjustment & Image Size
Projection Distance and Size Table
Company Confidential
10
Vivitek ______________________
Delta____________
2011/06/24
Delta Elec. Inc.
Qumi
Rev.00
2-5. Block Diagram
Company Confidential
11
Vivitek ______________________
Delta____________
2011/06/24
Delta Elec. Inc.
Qumi
Rev.00
3. TROUBLE SHOOTING
Carry out the following checks before disassembling the equipment.
Connect the power cord
< Stand-by >
Left: Blue
Right: Blue
No
< Power supply error >
Left: OFF
Right: OFF
Yes
• Power Supply Unit malfunction
•Check the connection of BATTERY DOCKING BD P31 to MB P700)
• Check MCU firmware is ok or not
•Check keypad connection ( MB P360 to Keypad P1)
No
Waiting
Power On
Company Confidential
12
Vivitek ______________________
Delta____________
2011/06/24
Delta Elec. Inc.
Qumi
Rev.00
Turn the
power ON
< Powering up >
Left: Blue
Right: Blue
Yes
< Normal operation >
Left: Off
Right: Off
No
< LED Thermistor error >
Left: 8 binks
Yes
Right: 1 blinks
• MB J0302 disconnected
• LED-Red NTC thermistor disconnected
Ready: 2 blinks
• MB J0402 disconnected
• LED-Green NTC thermistor disconnected
Ready: 3 blinks
No
• MB J0202 disconnected
• LED-Blue NTC thermistor disconnected
T2 error, Red LED Drive malfunction
Ready: 1 blinks
< LED-Lit error >
Left: 3binks
Y
T3 error, Green LED Drive malfunction
Ready:2 blinks
T4 error, Blue LED Drive malfunction
Ready: 3 blinks
Image
Display
Company Confidential
13
Vivitek ______________________
Delta____________
2011/06/24
Delta Elec. Inc.
Qumi
Rev.00
Image
Display
No
Yes
Projector logo screen
display
• Main Board Ass’y malfunction
• DMD Set malfunction
Y
No
Right: 1 blink
• HDMI/B (P201) of Fan disconnected
• Fan1 (Blower) malfunction
Right: 2 blinks
• MB (P361) of Fan disconnected
• Fan32 (System) malfunction
Yes
< Fan error>
Left: 6 blinks
No
<Over temperature >
Left: 3 blink
Right: OFF
Yes
• Temperature protector operated due to the increase in temperature based
on operating environment
• Temperature protector operated due to blocked suction and exhaust holes
or dirty fan
• Power board Assy’s malfunction
• LED chip malfunction
• T1 sensor malfunction
No
Does the LED
go off during
operation?
Company Confidential
14
No
System OK
Normal operation
Vivitek ______________________
Delta____________
2011/06/24
Qumi
Delta Elec. Inc.
Ver.02
Common problems and solutions
These guidelines provide tips to deal with problems you may encounter while using the projector. If the
problem remains unsolved, contact your dealer for assistance.
Often after time spent troubleshooting, the problem is traced to something as simple as a loose
connection. Check the following before proceeding to the problem-specific solutions.
•
Use some other electrical device to confirm that the electrical outlet is working.
•
Ensure the projector is turned on.
•
Ensure all connections are securely attached.
•
Ensure the attached device is turned on.
•
Ensure a connected PC is not in suspend or sleep mode.
•
Ensure the connected notebook computer is properly configured for an external display
Image Problems
Problem: No image appears on the screen
1.Verify the settings on your notebook or desktop PC.
2.Turn off all equipment and power up again in the correct order.
Problem: The image is blurred
1.Adjust the Focus on the projector.
2.Ensure the Qumi-to-screen distance is within the specified range.
3.Check that the Qumi lens is clean.
Problem: The image is wider at the top or bottom (trapezoid effect)
1.Position the Qumi so it is as perpendicular to the screen as possible.
2.Use the Keystone button on the remote control or projector to correct the problem.
Problem: The image is reversed
1.Check the orientation of the projection setting in the Installation I menu of the OSD.
Problem: The image is streaked
1.Set the Frequency and Tracing settings on the Computer menu of the OSD to the default
settings.
Company Confidential
15
Vivitek ______________________
Delta____________
2011/07/05
Qumi
Delta Elec. Inc.
Ver.02
2.Connect the Qumi to anther computert to make sure that the problem is not caused by a
computer’s video card.
Problem: The image is flat with no contrast
1.Adjust the Contrast setting on the Image menu of the OSD.
Problem: The color of the projected image does not match the source image.
1.Adjust the Color Temperature and Gamma settings on the Image menu of the OSD
Remote Control Problems
Problem: The Qumi does not respond to the remote control
1.Direct the remote control towards remote sensor on the Qumi.
2.Ensure the path between remote and sensor is not obstructed.
3.Turn off any fluorescent lights in the room.
4.Check to see if the battery polarity is correct
5.Replace the batteries.
6Turn off other Infrared-enabled devices in the vicinity.
7.Have the remote control serviced.
Audio Problems
Problem: There is no sound
1.Adjust the volume on the remote control.
2.Adjust the volume of the audio source.
3.Check the audio cable connection.
4.Test the source audio output with other speakers.
5.Have the projector serviced.
Problem: The sound is distorted
1.Check the audio cable connection.
2.Test the source audio output with other speakers.
3.Have the projector serviced.
Company Confidential
16
Vivitek ______________________
Delta____________
2011/07/05
Delta Elec. Inc.
Qumi
Ver.02
4. DISASSEMBLY AND ASSEMBLY
Review the Qumi and Removing the foot rubbers
D
I
S
A
S
S
E
M
B
L
Y
Look the full set projector.
Look at the IO side.
Look at the case of top side.
Look at the keypad of top side.
Remove the four foot rubbers.
Review these rubbers.
Company Confidential
17
Vivitek ______________________
Delta____________
2011/07/05
Qumi
Delta Elec. Inc.
Ver.02
Removing the Top Cover and replacing the keypad touch board
D
I
S
A
S
S
E
M
B
L
Y
Remove the four screws.
Review the four screws (S01).
Remove the Top cover like this.
Be careful this connector when you
assembly it.
Review the Top Cover assy.
Company Confidential
18
Replace the keypad touch board like
this.
Vivitek ______________________
Delta____________
2011/07/05
Qumi
Delta Elec. Inc.
Ver.02
Removing the Main Board assy
Review the Qumi.
D
I
S
A
S
S
E
M
B
L
Y
Remove the four screws.
Review the four screws (S02).
Secondly, tilt the other side like this.
Company Confidential
19
Firstly, tilt one side of the main board
like this.
Remove the main board like this.
Vivitek ______________________
Delta____________
2011/07/05
Qumi
Delta Elec. Inc.
Ver.02
Removing the Main Board assy
Be careful the Blower FAN connector
when you assembly.
D
I
S
A
S
S
E
M
B
L
Y Be careful these connectors when you
Be careful these connectors when you
assembly it.
Review the Main board assy.
assembly it.
Review the Main board assy.
Company Confidential
20
Remove the four screws.
Vivitek ______________________
Delta____________
2011/07/05
Delta Elec. Inc.
Qumi
Ver.02
Removing the Main Board
D
I
S
A
S
S
E
M
B
L
Y
Review the four screws (S02) and take
off the main board.
Be careful the two connectors when
you assembly.
Review the main board shielding.
Remove the four screws.
Remove the four screws (S03).
Company Confidential
21
Review the
MULTI-MEDIA BD and HDMI+VGA BD
Vivitek ______________________
Delta____________
2011/07/05
Qumi
Delta Elec. Inc.
Ver.02
Main Board Review
P350 Keypad
P504 DMD Connector
P351 Axial FAN
Careful area of these connectors and
Careful the connector and check the
check these right positions connection right position connection when you
when you recover main board again.
recover main board again.
D
I
S
A
S
S
E
M
B
L
Y
Main Board Review #Top side
Company Confidential
22
Vivitek ______________________
Delta____________
2011/07/05
Qumi
Delta Elec. Inc.
Ver.02
Main Board Review
D
I
S
A
SS
E
M
B
L
Y
Main Board Review #Bottom side
P501 to HDMI+VGA board
J0302 to R LED
P802 to power supply
J0402 to G LED
J0202 to B LED
Careful area of these connectors and
Careful area of these connectors and
check these right positions connection check these right positions connection
when you recover main board again.
when you recover main board again.
Company Confidential
23
Vivitek ______________________
Delta____________
2011/07/05
Qumi
Delta Elec. Inc.
Ver.02
Removing the Fan & Battery Docking Board
Take off the Axial fan like this.
Review the Qumi.
D
I
S
A
S
S
E
M
B
L
Y Remove the three screws and careful the Review the BATTERY DOCKING BD and
aluminum foil when you assembly.
the three screws (S04).
Remove the two screws.
Review the two screws (S04).
Company Confidential
24
Vivitek ______________________
Delta____________
2011/07/05
Qumi
Delta Elec. Inc.
Ver.02
Removing the Fan & Speaker
Be careful these wires when you assembly Be careful this position when you take
the Blower Fan.
off the Blower Fan.
D
I
S
A
S
S
E
M
B
L
Y
Review the Blower Fan.
Remove the speaker.
Remove the four screws.
Review the four screws (S04).
Company Confidential
25
Vivitek ______________________
Delta____________
2011/07/05
Qumi
Delta Elec. Inc.
Ver.02
Removing the Optical Engine & Front Cover ASSY
D
I
S
A
S
S
E
M
B
L
Y
Review the Optical Engine #1.
Review the Optical Engine #2.
Remove the front cover like this.
Remove the front cover like this.
Review the front cover.
Review the bottom Cover.
Company Confidential
26
Vivitek ______________________
Delta____________
2011/07/05
Qumi
Delta Elec. Inc.
Ver.02
Appendix. Screw torque
ITEM
Screw Type
P/N
Screw Driver Torque (kg-cm)
3105260800
1.1-1.6
SCREW M M2.5*0.45*4 PAN C S18C
3105145300
NI
1.8-2.2
S01 SCREW M M2*0.4*5 PAN C S18C NI
S02
S03 SCREW T φ2*0.8*5 PAN C S20C NI
3105040600
2-3
S04 STAND OFF STEEL HEX 4.7*3.1 F
3461519701
3.3-3.7
Company Confidential
27
Vivitek ______________________
Delta____________
2011/07/05
Qumi
Delta Elec. Inc.
Ver.02
5. Firmware Download
5-1. Projector USB Drivers Installation Guide
The document is to describe a Windows application software “DLP Composer Lite” for
projector firmware.
Its main purpose is to provide a detailed procedure of upgrading the application software of a
DLP projector.
The system requirement and the installation procedure of “DLP Composer Lite v10.0” are
also included in the document.
Note:
1.User must have administrative privileges on the target computer in order to
install the driver.
2.The installation target directory must not be write-protected.
User also required having the basic knowledge of Windows application installation.
Attention: This utility is for DLPTM DDP2000/2230/243x serial projectors.
System Requirement
1.IBM compatible PC (Desk Top).
2.Windows XP-SP2 operating system.
Company Confidential
28
Vivitek ______________________
Delta____________
2011/07/05
Qumi
Delta Elec. Inc.
Ver.02
Install “DLP Composer Lite” to PC
Run the “DLP Composer Lite v10.0 Setup.exe”.
The following pictures are illustrating the process of the Driver installation.
Start-up page:
Click on the “Next” button to continue.
or
Click on the “Cancel” button to cancel the installation.
Company Confidential
29
Vivitek ______________________
Delta____________
2011/07/05
Qumi
Delta Elec. Inc.
Ver.02
Click on the “I accept agree to be bound by all the terms and conditions of this License
Agreement” point to continue.
Click on the “Next” button to continue.
Click on the “Next” button to continue.
The default installation direction is C:\Program Files\DLP Composer 10.0
Company Confidential
30
Vivitek ______________________
Delta____________
2011/07/05
Qumi
Delta Elec. Inc.
Ver.02
Click on the “Browse” button to change the default directory for saving the drive file
somewhere else.
or
Click on the “Back” button to return to the previous page.
or
Click on the “Cancel” button to cancel the installation.
or
Click on the “Next” button to continue.
Click on the “Back” button to return to the previous page.
or
Click on the “Next” button to continue or
Click on the “Cancel” button to cancel the installation.
Company Confidential
31
Vivitek ______________________
Delta____________
2011/07/05
Delta Elec. Inc.
Qumi
Ver.02
Please wait for the installation to complete.
Installation Completed:
Click on the “Finish” button with the Installation Completed.
Replicate the program file “FlashDeviceParameters.txt” to PC under path:
“C:\Program Files\DLP Composer Lite 10.0\”
Company Confidential
32
Vivitek ______________________
Delta____________
2011/07/05
Qumi
Delta Elec. Inc.
Ver.02
5-2.
DLP Projector Composer (firmware) User Guide
The document is to describe a Window application software “DLP Composer Lite” for
projector firmware.
Its main purpose is to provide a detailed procedure of upgrading the application software of a
DLP projector.
The system requirement and the installation procedure of “DLP Composer Lite v10.0” are
also included in the document.
Note:
1.User must have administrative privileges on the target computer in order to
install the driver.
2.The installation target directory must not be write-protected.
User also required having the basic knowledge of Windows application installation.
Attention: This utility is for DLPTM DDP2000/2230/2430 serial series projectors.
System Requirement
1.IBM compatible PC (Desk Top).
2.Windows XP-SP2 operating system.
Note:
About Qumi enter the MFG Mode method, it's can't be entered by Qumi’s originally
attached remote control, but can enter by other kind of Vivitek’s remote control.
Please refer the corrective remote control graph shows as attached figures.
Company Confidential
33
Vivitek ______________________
Delta____________
2011/07/05
Delta Elec. Inc.
5-3.
Qumi
Ver.02
Started with Download
The section is to illustrate the procedure to upgrade the application software of a DLP
projector.
Step 1: Power on the projector, press the “power” button one time by remote control, then
press “UP” “RIGHT” “DOWN” “LEFT” button on the keypad or on the remote control, the
below OSD menu will display:
Step 2: Select the “USD Mode”, press “Right” key oh the keypad or remote control, select
the “DDP6401”.
Company Confidential
34
Vivitek ______________________
Delta____________
2011/07/05
Delta Elec. Inc.
Step 3:
Qumi
Ver.02
Launch the “DLP Composer Lite v10.0” from installed shortcut at
Program > DLP Composer(TM) Lite 10.0 > DLP Composer(TM) Lite 10.0.exe
Step 4:
While executed, The window shall appear as the following picture.
Click on the “Edit” button to continue to the “DLP Composer Preferences” page.
Step 5:
Make sure that the USB cable is firmly connected between projector and computer.
Company Confidential
35
Vivitek ______________________
Delta____________
2011/07/05
Delta Elec. Inc.
Qumi
Ver.02
Step 6: Click on the “Communications” button to continue to the “Communications” page.
Note: Please make sure the setting in Communications as bellow picture
Company Confidential
36
Vivitek ______________________
Delta____________
2011/07/05
Delta Elec. Inc.
Qumi
Ver.02
Step 7: At Flash Loader page, used the Brower button to select the correct file.
Then Pressed “Reset Bus” and next pressed “Start Download” to start upgrade flash.
Step 8:
A warning message box will appear for confirmation. Press <Y> to continue.
Company Confidential
37
Vivitek ______________________
Delta____________
2011/07/05
Delta Elec. Inc.
Qumi
Ver.02
Step 9:
When the last warning message box appears, this is the last chance to cancel the update.
Press “Confirm” button to start the firmware update.
Complete the download, power off the projector, than press the “Right” key on the keypad all
along when power on the Qumi, until the “Left” key on the keypad blink three times, that
means the EPPORM is cleaned out.
Company Confidential
38
Vivitek ______________________
Delta____________
2011/07/05
Qumi
Delta Elec. Inc.
Ver.02
5-4. Starting and shutting down the projector.
1.
Connect the AC power cord to the Qumi.
Connect the other end of the AC power
adapter to a wall outlet
Note: Adapter models mar vary
between regions.
2.
Then slide
3.
The Qumi splash screen displays and
POWER switch to turn
on the Qumi.
connected devices are detected.
Company Confidential
39
Vivitek ______________________
Delta____________
2011/07/05
Qumi
Delta Elec. Inc.
4.
Ver.02
If more than one input device is
connected, press the SOURCE button
on the remote control and use ▲▼ to
select the applicable devices or press ▲
and ▼ or ◄ and ► at the same time
on the keypad on the Qumi.
•
VGA: Analog RGB
•
Component: DVD input YCbCr / YPbPr, or
HDTV input YPbPr
5.
Slide
•
Composite Video: Traditional composite video
•
HDMI: HDMI
•
USB: microSD card / USB disc
POWER switch to turn off the
Qumi.
Company Confidential
40
Vivitek ______________________
Delta____________
2011/07/05
Qumi
Delta Elec. Inc.
Ver.02
5-5. Setting an Access Password (Security Lock)
To prevent unauthorized use of the Qumi, you can create a password.
When the access
password function is enabled, the password must be entered after the Qumi has been turned
on.
Creating a password can be done by performing the following steps:
1
Press the MENU button on the remote
on
control or press MENU and
the keypad simultaneously to open the
On-Screen display OSD menu.
2
Move the cursor to move to the
Installation I menu down to select
Advanced.
3
4
Press the cursor ▲▼ button to select
Security Lock.
Press the cursor ◄► button to enable
or disable security lock function.
A password dialog box automatically
appears.
Company Confidential
41
Vivitek ______________________
Delta____________
2011/07/05
Qumi
Delta Elec. Inc.
5
Ver.02
You can use the cursor buttons ▲▼◄►
either on keypad or IR remote control for
password entry. You can use any
combination including the same arrow five
times, but not less than five.
Press the cursor buttons in any order to set
the password. Push the MENU button to
exit the dialog box.
6.
The password confirm menu appears
when you power on the Qumi when the
Security Lock is enabled.
Enter the password in the order you set it
at step 5.
7.
Forget the password recovery (only used in the service center not to be in the end-user side)
Still pressed “MENU” key and plug the AC power cord when Power LED going to flashing=>
Phase a short time =>flash three times.
Company Confidential
42
Vivitek ______________________
Delta____________
2011/07/05
Delta Elec. Inc.
Qumi
Ver.02
5-6. DLP Projector security unlock
When you forget the password,
Please input the wrong password five times by the remote control, then the projector will
display a “Hint code” on the screen.
Write down the recall code number.
Company Confidential
43
Vivitek ______________________
Delta____________
2011/07/05
Delta Elec. Inc.
Qumi
Ver.02
Projector OSD for password check & reset
The document is to describe Windows application software “DLPunlock” for projector
password unlock. Its main purpose is to provide a way to reset the forgotten password; the
application will ship to the call-center and help the validated end-user to reset the password.
Company Confidential
44
Vivitek ______________________
Delta____________
2011/07/05
Delta Elec. Inc.
Qumi
Ver.02
5-7. Factory Reset
Press the cursor ▲▼ button to move up and down in the Installation II menu. Select the
(Enter) / ► to reset all the menu items to the factory
Factory Reset sub menu and press
default values. (Expect Language and Security Lock).
5-8. Status
Press the cursor ▲▼ button to move up and down in the Installation II menu. Select the
Installation II sub menu and press
Company Confidential
45
(Enter) / ► to enter the Status sub menu.
Vivitek ______________________
Delta____________
2011/07/05
Delta Elec. Inc.
Qumi
Ver.02
6. Calibration
Step of into Service Mode
Step 1 : Turn on the projector, press the” MENU “ button on the keypad or IR controller,
Then select “Installation II”, then press “ Down ” button and select “ Status ”
Step 2: Press “Enter” button on the keypad or on the remote controller, and will display below OSD
menu.
Company Confidential
46
Vivitek ______________________
Delta____________
2011/07/05
Delta Elec. Inc.
Step 3:
Qumi
Ver.02
Press “ Enter “ button twice by remote control, then press “ (UP) (DOWN)
(LEFT) (RIGHT)” by remote control, the service mode OSD as below shows:
Company Confidential
47
Vivitek ______________________
Delta____________
2011/07/05
Qumi
Delta Elec. Inc.
6-1.
Ver.02
ADC Adjust Procedure -- (Optional)
A. Function Description:
ADC Calibration – VGA :Calibrating Analog RGB signal
Calibration Status
:Status of VGA calibrated value
B. Calibrate Analog RGB (1024x768@60Hz XGA):
Step 1: In Service Mode select ADC Calibration - VGA In this menu input pattern with
White(240,240,240) and Black(16,16,16) for calibrate VGA Source . After input ready
press “Enter” to calibration。
Input Pattern
Step 2 : After complete the OSD will show the picture as follow , if not complete, just close the OSD。
Note : Offset & Gain Value
Offset
Gain
Default
511
511
After ADC
Step 3 : Compare internal white pattern and RGB source white pattern, if the brightness gap ratio of
these two source is bigger than 3.5%.
Company Confidential
Vivitek ______________________
48
Delta____________
2011/07/05
Qumi
Delta Elec. Inc.
6-2.
Ver.02
Calibrate Analog YUV
Equipment: VG828, must be take off H/V sync terminal from machine.
Step 1: In Service Mode select ADC Calibration - YUV. In this menu input pattern with 75﹪SMPTE
pattern for calibrate YUV Source and notice that the input source must be 480i format 。
After input ready press “Enter”key to proceed。
Input Pattern
Step 2 : After complete the OSD will show the picture as follow, if not complete, just close the OSD。
NOTE:
You can select Calibration Status – VGA or Calibration Status – YUV item to watch the
calibrated value at any time。
Company Confidential
49
Vivitek ______________________
Delta____________
2011/07/05
Qumi
Delta Elec. Inc.
Ver.02
7. EDID
Analog
(08H-09H)
ID Manufacturer Name _________________________
= DPC
(0AH-0BH)
Product ID Code ______________________________
= 74A1(t)
(0CH-0FH)
Last 5 Digits of Serial Number _______________
= UNUSE
(10H)
(11H)
Week of Manufacture __________________________
Year of Manufacture __________________________
= 01
= 2011
(12H)
EDID Version Number __________________________
=1
(13H)
EDID Revision Number _________________________
=3
(14H)
VIDEO INPUT DEFINITION:
Analog Signal
0.700, 0.300 (1.000 Vp-p)
Error: (0-5) Incorrect Video Information Byte
(15H)
(16H)
Maximum Horizontal Image Size ________________
Maximum Vertical Image Size __________________
(17H)
Display Gamma ________________________________
(18H)
DPMS and Supported Feature(s):
=
=
mm
mm
=
2.20
Preferred Timing Mode
Display Type = R/G/B Color
(19H-22H)
CHROMA INFO:
Red x - 0.698 Green x - 0.169 Blue x - 0.149 White x - 0.299
(23H)
Red y - 0.300 Green y - 0.766 Blue y - 0.027 White y - 0.350
ESTABLISHED TIMING I:
720 x 400 @ 70Hz (IBM,VGA)
Company Confidential
50
Vivitek ______________________
Delta____________
2011/07/05
Qumi
Delta Elec. Inc.
Ver.02
640 x 480 @ 60Hz (IBM,VGA)
640 x 480 @ 67Hz (Apple,Mac II)
640 x 480 @ 72Hz (VESA)
640 x 480 @ 75Hz (VESA)
800 x 600 @ 56Hz (VESA)
(24H)
800 x 600 @ 60Hz (VESA)
ESTABLISHED TIMING II:
800 x 600 @ 72Hz (VESA)
800 x 600 @ 75Hz (VESA)
832 x 624 @ 75Hz (Apple,Mac II)
1024 x 768 @ 60Hz (VESA)
1024 x 768 @ 70Hz (VESA)
1024 x 768 @ 75Hz (VESA)
(25H)
1280 x 1024 @ 75Hz (VESA)
Manufacturer's Reserved Timing:
1152 x 870 @ 75Hz (Apple,Mac II)
(38-53)
Standard Timing Identification:
Standard Timing ID 1: 800 x 600 @120Hz
Standard Timing ID 2: 1024 x 768 @120Hz
Standard Timing ID 3: 1280 x 720 @120Hz
Standard Timing ID 4: 1280 x 800 @60Hz
Standard Timing ID 5: 1280 x 1024 @60Hz
Standard Timing ID 6: 1400 x 1050 @60Hz
Standard Timing ID 7: 1440 x 900 @60Hz
Standard Timing ID 8: 1600 x 1200 @60Hz
______________________________________________________________________
(36H-47H) Detailed Timing / Descriptor Block 1:
1280x800
Pixel Clock: 83.50 MHz
______________________________________________________________________
Horizontal Image Size: 0 mm
Refreshed Mode: Non-Interlaced
Vertical Image Size: 0 mm
Normal Display - No Stereo
Horizontal:
Active Count: 1280 pixels
Blanking Count: 400 pixels
Sync Offset: 72 pixels
Border: 0 pixels
Sync Pulse Width: 128 pixels
Frequency: 49.70 kHz
Company Confidential
51
Vivitek ______________________
Delta____________
2011/07/05
Qumi
Delta Elec. Inc.
Ver.02
Vertical:
Active Count: 800 lines
Sync Offset: 3 lines
Blanking Count: 31 lines
Sync Pulse Width: 6 lines
Border: 0 lines
Frequency: 59.81 Hz
Digital Separate, Horizontal Polarity (-) Vertical Polarity (-)
______________________________________________________________________
(48H-59H) Detailed Timing / Descriptor Block 2:
1280x720
Pixel Clock: 74.25 MHz
______________________________________________________________________
Horizontal Image Size: 0 mm
Refreshed Mode: Non-Interlaced
Vertical Image Size: 0 mm
Normal Display - No Stereo
Horizontal:
Active Count: 1280 pixels
Blanking Count: 370 pixels
Sync Offset: 110 pixels
Border: 0 pixels
Sync Pulse Width: 40 pixels
Frequency: 45.00 kHz
Active Count: 720 lines
Blanking Count: 30 lines
Sync Offset: 5 lines
Border: 0 lines
Sync Pulse Width: 5 lines
Frequency: 60.00 Hz
Vertical:
Digital Separate, Horizontal Polarity (-) Vertical Polarity (-)
______________________________________________________________________
(5AH-6BH) Detailed Timing / Descriptor Block 3:
Monitor Range Limits:
Min Vertical Freq - 43 Hz
Max Vertical Freq - 120 Hz
Min Horiz. Freq - 30 kHz
Max Horiz. Freq - 100 kHz
Pixel Clock
- 170 MHz
GTF - Not Used
______________________________________________________________________
(6CH-7DH) Detailed Timing / Descriptor Block 4:
Monitor Name:
PROJECTOR
(7EH) Block No: (01) Extension EDID Block(s)
(7FH)
CheckSum OK
Company Confidential
52
Vivitek ______________________
Delta____________
2011/07/05
Qumi
Delta Elec. Inc.
Ver.02
HDMI
(08H-09H)
ID Manufacturer Name _________________________
= DPC
(0AH-0BH)
Product ID Code ______________________________
= 74A1(t)
(0CH-0FH) Last 5 Digits of Serial Number _______________
= UNUSE
(10H)
Week of Manufacture __________________________
= 01
(11H)
Year of Manufacture __________________________
= 2011
(12H)
EDID Version Number __________________________
=1
(13H)
(14H)
EDID Revision Number _________________________
VIDEO INPUT DEFINITION:
=3
Digital Signal
(15H)
Maximum Horizontal Image Size ________________
=
(16H)
(17H)
Maximum Vertical Image Size __________________
=
Display Gamma ________________________________
(18H)
DPMS and Supported Feature(s):
mm
mm
= 2.20
Preferred Timing Mode
Display Type = R/G/B Color
(19H-22H) CHROMA INFO:
Red x - 0.695 Green x - 0.168 Blue x - 0.148 White x - 0.289
Red y - 0.300 Green y - 0.766 Blue y - 0.027 White y - 0.351
(23H)
ESTABLISHED TIMING I:
720 x 400 @ 70Hz (IBM,VGA)
640 x 480 @ 60Hz (IBM,VGA)
640 x 480 @ 67Hz (Apple,Mac II)
640 x 480 @ 72Hz (VESA)
640 x 480 @ 75Hz (VESA)
800 x 600 @ 56Hz (VESA)
Company Confidential
53
Vivitek ______________________
Delta____________
2011/07/05
Qumi
Delta Elec. Inc.
Ver.02
800 x 600 @ 60Hz (VESA)
(24H)
ESTABLISHED TIMING II:
800 x 600 @ 72Hz (VESA)
800 x 600 @ 75Hz (VESA)
832 x 624 @ 75Hz (Apple,Mac II)
1024 x 768 @ 60Hz (VESA)
1024 x 768 @ 70Hz (VESA)
1024 x 768 @ 75Hz (VESA)
1280 x 1024 @ 75Hz (VESA)
(25H)
Manufacturer's Reserved Timing:
1152 x 870 @ 75Hz (Apple,Mac II)
(38-53)
Standard Timing Identification:
Standard Timing ID 1: 800 x 600 @120Hz
Standard Timing ID 2: 1024 x 768 @120Hz
Standard Timing ID 3: 1280 x 720 @120Hz
Standard Timing ID 4: 1280 x 800 @60Hz
Standard Timing ID 5: 1280 x 1024 @60Hz
Standard Timing ID 6: 1400 x 1050 @60Hz
Standard Timing ID 7: 1440 x 900 @60Hz
Standard Timing ID 8: 1600 x 1200 @60Hz
______________________________________________________________________
(36H-47H) Detailed Timing / Descriptor Block 1:
1280x800 Pixel Clock: 83.50 MHz
______________________________________________________________________
Horizontal Image Size: 0 mm
Refreshed Mode: Non-Interlaced
Horizontal:
Vertical Image Size: 0 mm
Normal Display - No Stereo
Active Count: 1280 pixels
Blanking Count: 400 pixels
Sync Offset: 72 pixels
Sync Pulse Width: 128 pixels
Border: 0 pixels
Frequency: 49.70 kHz
Active Count: 800 lines
Blanking Count: 31 lines
Sync Offset: 3 lines
Sync Pulse Width: 6 lines
Vertical:
Border: 0 lines
Frequency: 59.81 Hz
Digital Separate, Horizontal Polarity (-) Vertical Polarity (-)
Company Confidential
54
Vivitek ______________________
Delta____________
2011/07/05
Qumi
Delta Elec. Inc.
Ver.02
______________________________________________________________________
(48H-59H) Detailed Timing / Descriptor Block 2:
1280x720 Pixel Clock: 74.25 MHz
______________________________________________________________________
Horizontal Image Size: 0 mm
Refreshed Mode: Non-Interlaced
Horizontal:
Vertical Image Size: 0 mm
Normal Display - No Stereo
Active Count: 1280 pixels
Blanking Count: 370 pixels
Sync Offset: 110 pixels
Sync Pulse Width: 40 pixels
Border: 0 pixels
Frequency: 45.00 kHz
Active Count: 720 lines
Blanking Count: 30 lines
Sync Offset: 5 lines
Sync Pulse Width: 5 lines
Vertical:
Border: 0 lines
Frequency: 60.00 Hz
Digital Separate, Horizontal Polarity (-) Vertical Polarity (-)
______________________________________________________________________
(5AH-6BH) Detailed Timing / Descriptor Block 3:
Monitor Range Limits:
Min Vertical Freq - 43 Hz
Max Vertical Freq - 120 Hz
Min Horiz. Freq - 30 kHz
Max Horiz. Freq - 100 kHz
Pixel Clock - 170 MHz
GTF - Not Used
______________________________________________________________________
(6CH-7DH) Detailed Timing / Descriptor Block 4:
Monitor Name:
PROJECTOR
(7EH) Block No: (01) Extension EDID Block(s)
(7FH)
Company Confidential
55
CheckSum OK
Vivitek ______________________
Delta____________
2011/07/05
Qumi
Delta Elec. Inc.
Ver.02
Extended Block Type: CEA 861B
Detailed Timing Blocks start at Byte:(25H)
Native Format: (0x1)
(03H) DTV (Basic Audio)
(03H) YCbCr (4:4:4)
(03H) YCbCr (4:2:2)
Video Short Block Description:
(05H)
(06H)
640 x 480 P 59.94/60Hz 4:3
720 x 480 P 59.94/60Hz 4:3
(07H)
720(1440) x 576 I 50Hz 4:3
(08H)
720(1440) x 480 I 59.94/60Hz 4:3
(09H) 720(1440) x 480 I 59.94/60Hz 16:9
(0AH) 720(1440) x 576 I 50Hz 16:9
(0BH)
720 x 480
P 59.94/60Hz 16:9
(0CH)
720 x 576 P 50Hz 4:3
(0DH) 720 x 576 P 50Hz 16:9
(0EH) 1280 x 720 P 59.94/60Hz 16:9
Native Mode
(0FH) 1920 x 1080 I 59.94/60Hz 16:9
(10H)
1280 x 720 P 50Hz 16:9
(11H) 1920 x 1080 I 50Hz 16:9
(12H) 1920 x 1080 P 59.94/60Hz 16:9
(13H)
1920 x 1080 P 23.97/24Hz 16.9
(14H)
1920 x 1080 P 25Hz 16.9
(15H)
(16H)
1920 x 1080 P 29.97/30Hz 16.9
1920 x 1080 P 50Hz 16.9
Audio Short Block Description:
Company Confidential
56
Vivitek ______________________
Delta____________
2011/07/05
Qumi
Delta Elec. Inc.
Ver.02
Numbers of Audio Channels (2)
(18H)
Audio Supported:
Linear PCM(IEC60958)
32kHz, 44.1kHz, 48kHz
Audio Bit Rate:
24Bit
Speaker Short Block Description:
Playload(3 bytes 1CH-1EH)
Speakers (1CH):
FL/FR
1DH:
Reserved
1EH:
Reserved
Vendor Specific Short Block Description:
Bytes:
03H, 0CH, 00H, 10H, 00H
(25H - 37H) Detailed Timing Descriptions:
1920x1080
Pixel Clock: 148.50 MHz
______________________________________________________________________
Horizontal Image Size: 0 mm
Vertical Image Size: 0 mm
Refreshed Mode: Non-Interlaced
Normal Display - No Stereo
Horizontal:
Active Count: 1920 pixels
Sync Offset: 88 pixels
Blanking Count: 280 pixels
Sync Pulse Width: 44 pixels
Border: 0 pixels
Frequency: 67.50 kHz
Vertical:
Active Count: 1080 lines
Sync Offset: 4 lines
Blanking Count: 45 lines
Sync Pulse Width: 5 lines
Border: 0 lines
Frequency: 60.00 Hz
Digital Separate, Horizontal Polarity (-) Vertical Polarity (-)
(37H - 49H) Detailed Timing Descriptions:
1920x1080 Pixel Clock: 148.50 MHz
______________________________________________________________________
Horizontal Image Size: 0 mm
Refreshed Mode: Interlaced
Horizontal:
Vertical Image Size: 0 mm
Stereo
Active Count: 1920 pixels
Blanking Count: 280 pixels
Sync Offset: 88 pixels
Sync Pulse Width: 44 pixels
Border: 0 pixels
Frequency: 67.50 kHz
Active Count: 1080 lines
Blanking Count: 45 lines
Vertical:
Company Confidential
57
Vivitek ______________________
Delta____________
2011/07/05
Qumi
Delta Elec. Inc.
Sync Offset: 2 lines
Ver.02
Sync Pulse Width: 5 lines
Border: 0 lines
Frequency: 60.00 Hz
Digital Separate, Horizontal Polarity (-) Vertical Polarity (-)
(49H - 5BH) Detailed Timing Descriptions:
1920x1080
Pixel Clock: 148.50 MHz
______________________________________________________________________
Horizontal Image Size: 0 mm
Vertical Image Size: 0 mm
Refreshed Mode: Interlaced
Stereo
Horizontal:
Active Count: 1920 pixels
Sync Offset: 528 pixels
Blanking Count: 720 pixels
Sync Pulse Width: 44 pixels
Border: 0 pixels
Frequency: 56.25 kHz
Vertical:
Active Count: 1080 lines
Sync Offset: 2 lines
Blanking Count: 45 lines
Sync Pulse Width: 5 lines
Border: 0 lines
Frequency: 50.00 Hz
Digital Separate, Horizontal Polarity (-) Vertical Polarity (-)
(5BH - 6DH) Detailed Timing Descriptions:
720x480 Pixel Clock: 27.03 MHz
______________________________________________________________________
Horizontal Image Size: 0 mm
Refreshed Mode: Non-Interlaced
Horizontal:
Vertical Image Size: 0 mm
Normal Display - No Stereo
Active Count: 720 pixels
Blanking Count: 138 pixels
Sync Offset: 16 pixels
Sync Pulse Width: 62 pixels
Border: 0 pixels
Frequency: 31.50 kHz
Active Count: 480 lines
Blanking Count: 45 lines
Sync Offset: 9 lines
Sync Pulse Width: 6 lines
Vertical:
Border: 0 lines
Frequency: 60.01 Hz
Digital Separate, Horizontal Polarity (-) Vertical Polarity (-)
(7FH)
Company Confidential
58
CheckSum Valid
Vivitek ______________________
Delta____________
2011/07/05
Delta Elec. Inc.
Qumi
Ver.02
8. SERVICE NOTE
Cleaning the Qumi
Cleaning the Qumi to remove dust and grime will help ensure trouble-free operation.
1. The Qumi should be turned off and unplugged before cleaning. Failure to do so may result
in injury or damage to the system.
2. Use only a dampened cloth when cleaning. Do not allow water to enter the ventilation
openings on the projector.
3. If a little water gets into the projector interior while cleaning, leave unplugged in a
well-ventilated room for several hours before using.
4. If a lot of water gets into the projector interior when cleaning, have the projector serviced.
Cleaning the Lens
Optical lens cleaning solutions can be purchased from most camera and other retail stores. To
clean the Qumi lens, perform the following steps:
1. Apply a small amount of the optic lens cleaning solution to a clean soft cloth.
(Do not apply the cleaner directly to the lens.)
2. Gently wipe the lens in a circular motion.
Caution:
1. Do not use abrasive cleaners or solvents.
2. To prevent discoloration or fading, avoid getting cleaner on the projector case
Company Confidential
59
Vivitek ______________________
Delta____________
2011/07/05
Qumi
Delta Elec. Inc.
Ver.02
9. Power & READY LED Blink Code Message
Name
Usage
Menu
Open & exits the OSD
Up Cursor
Navigates or changes setting in the OSD
Left Cursor
Navigates or changes setting in the OSD
Down Cursor
Navigates or changes setting in the OSD
Right Cursor
Navigates or changes setting in the OSD
Enter Cursor
Enter selection when OSD on
LED Error Messages
LEFT LED BLINK
RIGHT LED
(BLUE)
(BLUE)
T1 error, Inlet air(LED)
3 blinks
OFF
T2 error, Red LED
3 blinks
1 blinks
T3 error, Green LED
3 blinks
2 blinks
T4 error, Blue LED
3 blinks
3 blinks
Fan 1 (Blower) error
6 blinks
1 blinks
Fan 2 (System)error
6 blinks
2 blinks
Red LED Thermistor error
8 blinks
1 blinks
Green LED Thermistor error
8 blinks
2 blinks
Blue LED Thermistor error
8 blinks
3 blinks
ERROR CODE MESSAGES
Company Confidential
60
Vivitek ______________________
Delta____________
2011/07/05
Qumi
Delta Elec. Inc.
Ver.02
10. Factory Preset Display Modes
Table of Supported Frequency For 2D Standby mode
The projector can display several resolutions. The following table outlines the resolutions that
can be displayed by the projector.
H-SYNC V-SYNC COMPOSITE COMPONENT RGB DVI/HDMI
(KHZ)
(HZ)
/ S-VIDEO
SIGNAL
RESOLUTION
NTSC
—
15.734
60.0
O
—
—
—
—
15.625
50.0
O
—
—
—
720 x 400
37.9
85.0
—
—
O
O
640 x 480
31.5
60.0
—
—
O
O
640 x 480
37.9
72.0
—
—
O
O
640 x 480
37.5
75.0
—
—
O
O
640 x 480
43.3
85.0
—
—
O
O
800 x 600
35.2
56.0
—
—
O
O
800 x 600
37.9
60.0
—
—
O
O
800 x 600
48.1
72.0
—
—
O
O
800 x 600
46.9
75.0
—
—
O
O
800 x 600
53.7
85.0
—
—
O
O
1024 x 768
48.4
60.0
—
—
O
O
1024 x 768
56.5
70.0
—
—
O
O
1024 x 768
60.0
75.0
—
—
O
O
1024 x 768
68.7
85.0
—
—
O
O
1280 x 800
49.7
60.0
—
—
O
O
1280 x 800
62.8
74.9
—
—
O
O
1280 x 800
71.6
84.8
—
—
O
O
1280 x 1024
63.98
60
—
—
O
O
1280 x 1024
79.98
75
—
—
O
O
1280 x 1024
91.10
85
—
—
O
O
1280 x 960
60.0
60
—
—
O
O
1280 x 960
85.9
85
—
—
O
O
1400 x 1050
65.3
60.0
—
—
O
O
1440 x 900
70.6
75.0
—
—
O
O
1440 x 900
55.6
60.0
—
—
O
O
1600 x 1200
75
60
—
—
O
O
PAL/SECAM
VESA
Company Confidential
61
Vivitek ______________________
Delta____________
2011/07/05
Qumi
Delta Elec. Inc.
Ver.02
640 x 480
35.0
66.68
—
—
O
O
Apple
832 x 624
49.725
74.55
—
—
O
O
Mac
1024 x 768
60.24
75.0
—
—
O
O
1152 x 870
68.68
75.06
—
—
O
O
480i
15.734
60
—
O
—
O
576i
15.625
50
—
O
—
O
480p
31.469
60
—
O
—
O
576p
31.25
50
—
O
—
O
720p
37.5
50
—
O
—
O
720p
45.0
60
—
O
—
O
1080i
33.8
60.0
—
O
—
O
1080i
28.1
50.0
—
O
—
O
1080p
67.5
60.0
—
O
—
O
1080p
56.3
50.0
—
O
—
O
SDTV
EDTV
HDTV
O: Frequency supported
—: Frequency not supported
* : Displayable level
The resolution of the panel is listed below:
Qumi
- 1280 x 800 (WXGA)
Resolution other than native resolution may display uneven size of text or lines.
Company Confidential
62
Vivitek ______________________
Delta____________
2011/07/05
Delta Elec. Inc.
Qumi
Ver.02
11. Projector Installation Notice
Allow at least a 50cm clearance around the exhaust vent
Make sure that the intake vents do not recycle hot air from the exhaust vent.
When operating the Qumi in an enclosed space, make sure that the surrouding air
temperature within the enclosure does not exceed operating temperature while the Qumi is
running, and the air intake and exhaust vents are unobstructed.
All enclosures should pass a certified thermal evaluation to make sure that the Qumi does not
recycle exhaust air, as this may cause the device shutdown even if the enclosure temperature
is with the acceptable operating temperature range.
Caution: Avoid using the Qumi in dusty environments.
Company Confidential
63
Vivitek ______________________
Delta____________
2011/07/05
Qumi
Delta Elec. Inc.
Ver.02
12. Projector Dimensions
Company Confidential
64
Vivitek ______________________
Delta____________
2011/07/05
Qumi
Delta Elec. Inc.
Ver.02
13. Fan Control Checking Table
Company Confidential
65
Fan 1
Blower Fan
Fan 2
Axial Fan
Vivitek ______________________
Delta____________
2011/07/05
Qumi
Delta Elec. Inc.
Ver.02
14. Spare part list (Qumi_DP274-A13VVxx)
Item
Type
1
P/N
Description
Q’ty
White
Black
3392166105
TOP CASE PC V-0 WHITE
1
3392174705
TOP COVER PC V-0 BLACK
1
3
3398053404
CASE BOTTOM ASSY DP274-A13VVxA
1
4
3398053704
CASE BOTTOM ASSY DP274-A13VVxB
1
3245122202
FOOT SIRUB V-0 8.5*5.6*9 WHT
1
3245120002
FOOT SIRUB V-0 8.5*5.6*9 BLK
1
3398053502
FRONT COVER ASSY
1
V
V
3398053601
BACK COVER ASSY DP274
1
V
V
3205225200
NAME PLATE ACRYLIC 116.5*22.6 T0.3 DP274
1
V
V
3398055800
FRAME IO PC V-0 BLACK
1
V
V
1
V
V
1
V
V
2
Cover
5
Rubber
6
7
Cover
8
V
V
V
V
V
V
IO
9
LABEL
10
Cover
DC FAN ASSY ASB02505HHA-SM02 L45 28.5 S
11
3622200211
AXIAL FAN
FAN
DC FAN ASSY BUB0605HC-SM00 L35 60 S
12
3622610411
BLOWER FAN
13
5600601842
PWB ASSY MAIN BD QUMI M01
1
V
V
14
5600601841
PWB ASSY BATTERY DOCKING BD QUMI V01
1
V
V
5600601845
PWB ASSY TOUCH KEYPAD BD QUMI V01
1
V
V
16
5600601946
PWB ASSY HDMI+VGA BD QUMI M02
1
V
V
17
5600601843
PWB ASSY MULTI-MEDIA BD QUMI M01
1
V
V
18
5600601846
PWB ASSY S310 DMD BD QUMI V01
1
V
V
19
0993101380
1
V
15
Board
ADAPTER
100~240VAC
19VDC
3.42A 2.5
(White)
Adapter
ADAPTER
20
100~240VAC
19VDC
3.42A 2.5
0993101280
21
V
1
(Black)
Engine
5811117177-S
OPTICAL MODULE QUMI WXGA ASSY
1
V
Carton
3517329701
GIFT BOX CRGD PAPER 264*197.5*62
1
V
3517329801
GIFT BOX CRGD PAPER 264*197.5*62
1
BAG POF 380*275 CL
1
V
1
V
V
22
23
24
25
Bag POF
3502079300
26
Cord
3090290400
V
AC POWER CORD 2P 2* 0.75mm^2 L800 WHT
(For China)
Company Confidential
66
V
Vivitek ______________________
Delta____________
2011/07/05
Qumi
Delta Elec. Inc.
Ver.02
AC POWER CORD 2P 2* 0.75mm^2 L800 WHT
27
3090290300
(For EU)
1
V
1
V
AC POWER CORD 2P 2* 0.824mm^2 L800 WHT
28
3090289900
(For USA and ROW)
AC POWER CORD 2P 2* 0.75mm^2 L800 BLK
29
3090290000
(For China)
30
Cord
1
V
1
V
1
V
AC POWER CORD 2P 2* 0.75mm^2 L800 BLK
3090290200
(For EU)
AC POWER CORD 2P 2* 0.824mm^2 L800 BLK
31
3090290100
(For USA and ROW)
32
3081333400
33
3081333500
CABLE SIGNAL IO 24PIN VGA 30C L500 BLK
1
V
1
V
V
CABLE SIGNAL MINI HDMI HDMI 32C L500
WHT
34
3081333700
CABLE SIGNAL MINI HDMI HDMI 32C L500 BLK
1
3081335500
CABLE SIGNAL MINI HDMI MINI HDMI 32C
1
36
3081335300
CABLE SIGNAL MINI HDMI MINI HDMI 32C
1
37
3081335600
CABLE USB MINI 4P 2C L1000 WHT
1
V
V
38
3081335400
CABLE AUDIO 3.5 AUDIO 3.5 AUDIO 30C L500
1
V
V
39
3072443000
1
V
V
35
Cable
V
V
V
CONN ADP AV PHONE JACK/USB/APPLE
DOCK
40
CD
3534174200
CD S/W PKG ASSY DP274 SERIES
1
V
V
41
Case
3523502701
CARRYING CASE PA 170*110*35
1
V
V
42
Remote
5041822200
REMOTE CONTROLLER 9KEYS QUMI VIVITEK
1
V
V
1
V
V
1
V
V
1
V
V
1
V
V
1
V
V
1
V
V
LABEL BARCODE PET 73*25
43
3261386100
(for inside carton label)
LABEL LOGO PLE 45*25
44
3262559100
(for inside carton of tear open label)
LABEL BARCODE PAPER 100*100
45
3200793300
(foroutside carton label)
46
3221106200
47
5012079400
TAPE OPP 72mm CLEAR
CARD WARRANTY DP274 SERIES ZH
(for china)
CARD WARRANTY DP274 SERIES EN
48
5012079200
(for USA)
Company Confidential
67
Vivitek ______________________
Delta____________
2011/07/05
Qumi
Delta Elec. Inc.
Ver.02
CARD WARRANTY DP274 ASIA
49
5012079800
(for USA & ROW)
CARD WARRANTY DP274 SERIES DE
50
5012079300
(for EU & ROW)
51
Company Confidential
68
5012079100
CARD QUICK START DP274 SERIES
Vivitek ______________________
1
V
V
1
V
V
1
V
V
Delta____________
2011/07/05
Qumi
Delta Elec. Inc.
Ver.02
1
2
3
4
5
6
7
8
9
10
11
12
13
14
15
16
17
18
19
20
Company Confidential
69
Vivitek ______________________
Delta____________
2011/07/05
Qumi
Delta Elec. Inc.
Ver.02
21
22
23
24
25
26
27
28
30
31
32
33
34
35
36
37
38
39
40
41
42
43
44
TBD
29
TBD
Company Confidential
70
Vivitek ______________________
Delta____________
2011/07/05
Qumi
Delta Elec. Inc.
Ver.02
45
46
47
49
50
51
Company Confidential
71
Vivitek ______________________
48
Delta____________
2011/07/05