1
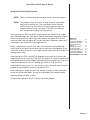
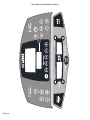
Cybex 600T Treadmill
Owner’s Manual
Cardiovascular Systems
Part Number LT-03157 Rev C
Cybex and the Cybex logo are registered trademarks of Cybex International, Inc. Stableflex and the Stableflex logo are registered
trademarks of Cybex International, Inc. Polar is a registered trademark of Polar.
DISCLAIMER: Cybex International, Inc. makes no representations or warranties regarding the contents of this manual. We
reserve the right to revise this document at any time or to make changes to the product described within it without notice or
obligation to notify any person of such revisions or changes.
© 2000, 2002, Cybex International, Inc. All rights reserved. Printed in United States of America.
10 Trotter Drive Medway, MA 02053 • 800-766-3211 • 508-533-4300 • FAX 508-533-5183
www.eCybex.com • [email protected] • [email protected] • LT-03157 Rev C • April 2002
IMPORTANT WARRANTY INFORMATION
To validate this warranty, complete the following information and return this card
to Cybex within ten days of equipment installation.
Purchaser’s Name: _________________________ Title: ___________________________
Address: _________________________________________________________________
City/State/Country/Zip Code: _________________________________________________
Phone: (
) ______________________ Fax: (
) _________________________
Email Address: ____________________________________________________________
Place of Installation: ________________________________________________________
Model Number: ____________________________________________________________
Serial Number: ____________________________________________________________
LT-00990 REV. K
Installation Date (mm/dd/yy): ______/______/______ By: __________________________
Date of Purchase: _____/_____/_____ Place of Purchase: ________________________
City/State/Country/Zip Code: ________________________________________________
Are you satisfied with your purchase? Yes
No
_________________________
Two easy ways to activate the warranty:
1. Fax - Complete the warranty card above, photo copy this page and fax it to
(508) 533-5183.
2. Mail - Complete the warranty card above, remove the card from the perforated sheet
and drop the card in the mail.
NOTE:
The serial number can be found on the base of the 600T. It is located at the back
of the treadmill, on the rear crossbar, under the running deck. You may wish to
record the serial number in the Customer Service section of this manual.
NO POSTAGE
NECESSARY
IF MAILED
IN THE
UNITED STATES
BUSINESS REPLY MAIL
FIRST CLASS MAIL
PERMIT NO. 73
MEDWAY, MA
POSTAGE WILL BE PAID BY ADDRESSEE
ATTN: CUSTOMER SERVICE
CYBEX INTERNATIONAL
10 TROTTER DRIVE
MEDWAY, MA 02053-9934
Cybex 600T Treadmill Owner’s Manual
About This Manual
For your convenience, all measurements and voltage requirements are listed in both English
and metric units. English values are listed first, followed by metric units in parentheses. For
example: 1” (2.54 cm).
An Owner’s Manual is shipped with each 600T Treadmill. To purchase a copy of the Service
Manual contact Cybex Customer Service at 800-766-3211 then press 63 or 508-533-4300.
To contact Cybex with comments about this manual you may send email to
[email protected].
FCC Compliance Information
! WARNING: Changes or modifications to this unit not expressly approved by the party
responsible for compliance could void the user’s authority to operate the
equipment.
This equipment has been tested and found to comply with the limits for a Class A digital
device, pursuant to Part 15 of the FCC Rules. Operation is subject to the following two
conditions: (1) This device may not cause harmful interference, and (2) this device must
accept any interference received, including interference that may cause undesired operation.
Page i
Cybex 600T Treadmill Owner’s Manual
Declaration of Conformity
We declare that to the best of our knowledge that the fitness
equipment listed below, and manufactured by:
Cybex International, Inc.
10 Trotter Drive
Medway MA, 02053, USA
Conforms to:
Directives: 73/23/EEC, 89/336/EEC
Standards: EN 957-1, EN60335-1, EN55022, EN55014, EN50082-1
Product Name:
Model Number:
European Contact:
NOTE:
Page ii
Treadmill
600T (220V)
Attention: European Sales Director
Room 1, Floor 3, Tredegar Chambers, 78 Bridge Street, Newport,
South Wales, NP204AQ
Phone 011-44-1633-251222
For European customers only.
Cybex 600T Treadmill Owner’s Manual
Table of Contents
Front Pages
About This Manual . . . . . . . . . . . . . . . . . i
FCC Compliance Information . . . . . . . . . . i
Declaration of Conformity . . . . . . . . . . . . ii
Table of Contents . . . . . . . . . . . . . . . . . . iii
4 Preventive Maintenance
1 Safety
5 Setup & Assembly
Important Voltage Information
Grounding Instructions . . . . .
Important Safety Instructions
Warning Labels . . . . . . . . . . .
Caution Labels . . . . . . . . . . .
.
.
.
.
.
.
.
.
.
.
.
.
.
.
.
.
.
.
.
.
.
.
.
.
.
.
.
.
.
.
.
.
.
.
.
1-1
1-1
1-2
1-4
1-5
2 Technical Specifications
Specifications . . . . . . . . . . . . . . . . . . . 2-1
Stableflex System . . . . . . . . . . . . . . . . 2-2
3 Operation
Quick Start . . . . . . . . . . . . . .
Stopping the Treadmill . . . . .
Automatic Stop Feature . . . .
Selecting Programs & Options
Displaying Heart Rate . . . . . .
The Workout Graph . . . . . . . .
Detailed Operation Guide . . .
Control During Operation . . .
.
.
.
.
.
.
.
.
.
.
.
.
.
.
.
.
.
.
.
.
.
.
.
.
.
.
.
.
.
.
.
.
.
.
.
.
.
.
.
.
.
.
.
.
.
.
.
.
.
.
.
.
.
.
.
.
3-1
3-1
3-1
3-2
3-2
3-2
3-3
3-4
Changing Data Readouts . . . . . . . . . . 3-5
Use of Programs . . . . . . . . . . . . . . . . . 3-6
Regular Maintenance Activities . . . . . . 4-1
Running Belt Maintenance . . . . . . . . . 4-3
Quick Setup . . . . . . . . . . . . . .
Choosing & Preparing a Site . .
Electrical Power Requirements
Unpacking . . . . . . . . . . . . . . .
Assembling the Treadmill . . . . .
Test the 600T Operation . . . . .
Setting Operation Options . . . .
.
.
.
.
.
.
.
.
.
.
.
.
.
.
.
.
.
.
.
.
.
.
.
.
.
.
.
.
.
.
.
.
.
.
.
.
.
.
.
.
.
.
5-1
5-1
5-3
5-3
5-4
5-8
5-9
Contacting Service . . . . . . . . . . . . .
Serial Number & Voltage . . . . . . . . .
Return Material Authorization (RMA)
Damaged Treadmill or Parts . . . . . .
Ordering Parts . . . . . . . . . . . . . . . . .
.
.
.
.
.
.
.
.
.
.
6-1
6-1
6-1
6-2
6-2
6 Customer Service
Page iii
Cybex 600T Treadmill Owner’s Manual
Cybex 600T Treadmill Owner’s Manual
1 - Safety
IMPORTANT: Read all instructions and warnings before using the treadmill.
Important Voltage Information
Before you assemble your 600T, check to make sure that the treadmill has the
correct voltage requirements for your area, and that you have the correct
model. This treadmill is for use on a nominal 115 VAC ±10%, 60 Hz and 20
amps or a 220 VAC ±15%, 50 Hz/60 Hz and 15 amps grounded, dedicated
circuit.
! WARNINGS: Do not attempt to use this unit with a voltage adapter.
Do not attempt to use this unit with an extension cord.
Grounding Instructions
This treadmill is intended for commercial use. This treadmill must be grounded.
If it should malfunction or break down, grounding provides a path of least
resistance for electric current to reduce the risk of electric shock. This
product is equipped with a cord having an equipment-grounding conductor
and a grounding plug. The plug must be plugged into an appropriate outlet
that is properly installed and grounded in accordance with all local codes
and ordinances.
! DANGER:
Improper connection of the
equipment-grounding conductor
can result in a risk of electric
shock. Check with a qualified
electrician or service provider if
you are in doubt as to whether
the treadmill is properly
grounded. Seek a qualified
electrician to perform any
modifications to the cord or plug.
Cybex is not responsible for
injuries or damages as a result of
cord or plug modification.
115V
Euro Plug
NEMA 5-20 CEE 7/7
208/220V
NEMA 6-15
Front Pages
About This Manual . . . . . . . . . . i
FCC Compliance Information . i
Declaration of Conformity . . . . ii
Table of Contents . . . . . . . . . . iii
1 Safety
Important Voltage Information 1-1
Grounding Instructions . . . . 1-1
Important Safety Instructions 1-2
Warning Labels . . . . . . . . . . 1-4
Caution Labels. . . . . . . . . . . 1-5
2 Technical Specifications
Specifications . . . . . . . . . . . 2-1
Stableflex System . . . . . . . . 2-2
3 Operation
Quick Start. . . . . . . . . . . . . .
Stopping the Treadmill. . . . .
Automatic Stop Feature . . .
Selecting Programs &
Options . . . . . . . . . . . . . . . .
Displaying Heart Rate . . . . .
The Workout Graph . . . . . . .
Detailed Operation Guide . .
Control During Operation . .
Changing Data Readouts . .
Use of Programs . . . . . . . . .
3-1
3-1
3-1
3-2
3-2
3-2
3-3
3-4
3-5
3-6
4 Preventive Maintenance
Regular Maintenance
Activities . . . . . . . . . . . . . . . . 4-1
Running Belt Maintenance . 4-3
5 Setup & Assembly
Quick Setup . . . . . . . . . . . .
Choosing & Preparing a Site
Electrical Power
Requirements . . . . . . . . . . . .
Unpacking . . . . . . . . . . . . . .
Assembling the Treadmill. . .
Test the 600T Operation . . .
Setting Operation Options. .
5-1
5-1
5-3
5-3
5-4
5-8
5-9
6 Customer Service
Contacting Service . . . . . . . 6-1
Serial Number & Voltage . . . 6-1
Warranty . . . . . . . . . . . . . . . 6-1
Return Material Authorization
(RMA). . . . . . . . . . . . . . . . . . 6-4
Damaged Treadmill or Parts 6-4
Ordering Parts . . . . . . . . . . . 6-5
The power requirements for this
Page 1-1
Cybex 600T Treadmill Owner’s Manual
treadmill are a grounded, dedicated circuit, rated for one of the following: 115 VAC ±10%,
60 Hz and 20 amps or a 220 VAC ±15%, 50 Hz/60 Hz and 15 amps. Make sure that the
treadmill is connected to an outlet having the same configuration as the plug. Do not use
a ground plug adapter to adapt the power cord to a non-grounded outlet.
Important Safety Instructions
(Save These Instructions)
! DANGER: To reduce the risk of electric shock, always unplug this treadmill from
the electrical outlet immediately after using it and before cleaning it.
! WARNING: Serious injury could occur if these precautions are not observed. To
reduce the risk of burns, fires, electric shock, or injury:
• Obtain a medical exam before beginning any exercise program.
• Keep children away from the treadmill. Teenagers and disabled persons must be
supervised while using.
• Stop exercising if you feel faint, dizzy, or experience pain at any time while exercising
and consult your physician.
• Use the treadmill handrails for support and to maintain balance.
• Use caution when mounting and dismounting the treadmill.
• Disconnect all power before servicing the treadmill.
• Use a dedicated line when operating the treadmill.
• Connect the treadmill to a properly grounded outlet only.
• Do not operate electrically powered treadmills in damp or wet locations.
• Keep the running belt clean and dry at all times.
• Stop and place the treadmill at 0 degrees incline (level) after each use.
• Do not leave the treadmill unattended when plugged in and running. After turning off the
treadmill, don't leave it until it comes to a complete stop and is level. To disconnect,
turn all controls to the STOP or OFF position, and then remove the plug from the outlet.
• Inspect the treadmill for worn or loose components before each use. Do not use until
worn or damaged parts are replaced.
• Maintain and replace worn parts regularly. Refer to “Preventive Maintenance” Section of
Owner's Manual.
Page 1-2
Cybex 600T Treadmill Owner’s Manual
• Do not operate the treadmill if the cord is damaged, if the treadmill is not
working properly, or if the treadmill has been dropped or damaged. Seek
service from a qualified technician.
• Do not place the cord near heated surfaces or sharp edges.
• Do not use the treadmill outdoors.
• Do not operate the treadmill around or where aerosol (spray) or where
oxygen products are being used.
• Read and understand the Owner's Manual completely before using the
treadmill.
• Read and understand emergency stop procedures.
• Read and understand all warnings posted on the treadmill.
• Replace any warning label if damaged, worn or illegible.
• Do not wear loose or dangling clothing while using the treadmill.
• Always wear proper footwear on or around exercise equipment.
• Keep all body parts, hair, towels, water bottles, and the like free and clear
of moving parts.
• Set up and operate the treadmill on a solid, level surface. Do not operate
in recessed areas or on plush carpet.
• Provide the following clearances: 19.7 inches (0.5 m) at each side, 39
inches (1.0 m) at the back and enough room for safe access and passage
at the front of the treadmill. Be sure your treadmill is clear of walls,
equipment and other hard surfaces.
• Do not attempt repairs, electrical or mechanical. Seek trained repair
personnel when servicing. Contact the nearest authorized Cybex dealer
or other competent repair service.
• Use Cybex factory parts when replacing parts on the treadmill.
• Do not modify the treadmill in any way.
Front Pages
About This Manual . . . . . . . . . . i
FCC Compliance Information . i
Declaration of Conformity . . . . ii
Table of Contents . . . . . . . . . . iii
1 Safety
Important Voltage Information 1-1
Grounding Instructions . . . . 1-1
Important Safety Instructions 1-2
Warning Labels . . . . . . . . . . 1-4
Caution Labels. . . . . . . . . . . 1-5
2 Technical Specifications
Specifications . . . . . . . . . . . 2-1
Stableflex System . . . . . . . . 2-2
3 Operation
Quick Start. . . . . . . . . . . . . .
Stopping the Treadmill. . . . .
Automatic Stop Feature . . .
Selecting Programs &
Options . . . . . . . . . . . . . . . .
Displaying Heart Rate . . . . .
The Workout Graph . . . . . . .
Detailed Operation Guide . .
Control During Operation . .
Changing Data Readouts . .
Use of Programs . . . . . . . . .
3-1
3-1
3-1
3-2
3-2
3-2
3-3
3-4
3-5
3-6
4 Preventive Maintenance
Regular Maintenance
Activities . . . . . . . . . . . . . . . . 4-1
Running Belt Maintenance . 4-3
5 Setup & Assembly
Quick Setup . . . . . . . . . . . .
Choosing & Preparing a Site
Electrical Power
Requirements . . . . . . . . . . . .
Unpacking . . . . . . . . . . . . . .
Assembling the Treadmill. . .
Test the 600T Operation . . .
Setting Operation Options. .
5-1
5-1
5-3
5-3
5-4
5-8
5-9
6 Customer Service
Contacting Service . . . . . . . 6-1
Serial Number & Voltage . . . 6-1
Warranty . . . . . . . . . . . . . . . 6-1
Return Material Authorization
(RMA). . . . . . . . . . . . . . . . . . 6-4
Damaged Treadmill or Parts 6-4
Ordering Parts . . . . . . . . . . . 6-5
• Do not use attachments unless recommended for the treadmill by Cybex.
• Report any malfunctions, damage or repairs to the facility.
• Do not use the treadmill if you exceed 350 lbs. (181 kg). This is the rated
maximum user weight.
Page 1-3
Cybex 600T Treadmill Owner’s Manual
Warning Labels
Warning decals indicate a potentially hazardous situation, which, if not avoided, could result in
death or serious injury. The warning decal used on the 600T is shown below.
SERIOUS INJURY COULD OCCUR IF THESE
PRECAUTIONS ARE NOT OBSERVED
1. Obtain a medical exam before beginning any exercise program.
2. Keep children away. Teenagers and disabled must be supervised.
3. Obtain instruction before using.
4. Stop exercising if you feel faint, dizzy, or experience pain at any
time while exercising and consult your physician.
5. Read and understand all warnings posted on the treadmill.
6. Read and understand emergency stop procedures.
7. DO NOT wear loose or dangling clothing while using.
8. Keep all body parts, towels, water bottles, and the like free and
clear of moving parts.
9. Use the treadmill handrails for support and to maintain balance.
10. Stop and place the treadmill to 0 degrees incline (level) after each use.
11. DO NOT use the treadmill if you exceed 350 lbs. (157 kg). This is the
rated maximum user weight.
12. Replace any warning label if damaged, worn or illegible.
13. Report any malfunctions, damage or repairs to the facility.
DE-15740
Page 1-4
Cybex 600T Treadmill Owner’s Manual
Caution Labels
Caution decals indicate a potentially hazardous situation, which, if not avoided,
may result in minor or moderate injury. The caution decals used on the 600T
are shown below.
To replace any worn or damaged labels do one of the following: Visit
eCybex.com to shop for parts online, or download the parts order form and fax
your order to 508-533-5183. To speak with a customer service representative,
in most areas call 800-766-3211 then press 63. Otherwise call 508-533-4300.
Front Pages
About This Manual . . . . . . . . . . i
FCC Compliance Information . i
Declaration of Conformity . . . . ii
Table of Contents . . . . . . . . . . iii
1 Safety
Important Voltage Information 1-1
Grounding Instructions . . . . 1-1
Important Safety Instructions 1-2
Warning Labels . . . . . . . . . . 1-4
Caution Labels. . . . . . . . . . . 1-5
2 Technical Specifications
Specifications . . . . . . . . . . . 2-1
Stableflex System . . . . . . . . 2-2
3 Operation
Quick Start. . . . . . . . . . . . . .
Stopping the Treadmill. . . . .
Automatic Stop Feature . . .
Selecting Programs &
Options . . . . . . . . . . . . . . . .
Displaying Heart Rate . . . . .
The Workout Graph . . . . . . .
Detailed Operation Guide . .
Control During Operation . .
Changing Data Readouts . .
Use of Programs . . . . . . . . .
3-1
3-1
3-1
3-2
3-2
3-2
3-3
3-4
3-5
3-6
4 Preventive Maintenance
Regular Maintenance
Activities . . . . . . . . . . . . . . . . 4-1
Running Belt Maintenance . 4-3
5 Setup & Assembly
Quick Setup . . . . . . . . . . . .
Choosing & Preparing a Site
Electrical Power
Requirements . . . . . . . . . . . .
Unpacking . . . . . . . . . . . . . .
Assembling the Treadmill. . .
Test the 600T Operation . . .
Setting Operation Options. .
5-1
5-1
5-3
5-3
5-4
5-8
5-9
6 Customer Service
Contacting Service . . . . . . . 6-1
Serial Number & Voltage . . . 6-1
Warranty . . . . . . . . . . . . . . . 6-1
Return Material Authorization
(RMA). . . . . . . . . . . . . . . . . . 6-4
Damaged Treadmill or Parts 6-4
Ordering Parts . . . . . . . . . . . 6-5
Page 1-5
Cybex 600T Treadmill Owner’s Manual
Page 1-6
Cybex 600T Treadmill Owner’s Manual
2 - Technical Specifications
Specifications
Length:
83" (211 cm)
Width:
33" (84 cm)
Running Area:
20" x 60" (51 cm x 152.4 cm)
Weight of Product:
450 lbs. (203 kg)
Speed Range:
0.5 to 10.0 mph (0.8 to 16.1 kph) in 0.1 mph or 0.1
kph increments
Incline Range:
0 to 15% grade
Levels of Difficulty:
15 per program
Manual Mode:
Yes
Programs:
Manual, Hills, Endurance, Sport,
Heart Rate Control (requires optional Polar receiver)
Optional:
Contact Heart Rate
Standard Accessories: Accessory holder, bottle holder
Connectivity:
CSAFE
Chassis Construction:
10-gauge uni-welded steel
Deck Material:
Lubricated wood composite
Power Requirement:
115 VAC ±10%, 60 Hz and 20 amps or a 220 VAC
±15%, 50 Hz/60 Hz and 15 amps grounded,
dedicated circuit
Motor:
2.5 hp, DC. continuous duty
Emergency Stop:
Pull the emergency stop key (lanyard)
Languages:
English, French, German, Japanese, Spanish
Maximum User Weight: 350 lbs. (159 kg)
83” (211 cm)
Front Pages
About This Manual . . . . . . . . . . i
FCC Compliance Information . i
Declaration of Conformity . . . . ii
Table of Contents . . . . . . . . . . iii
1 Safety
Important Voltage Information 1-1
Grounding Instructions . . . . 1-1
Important Safety Instructions 1-2
Warning Labels . . . . . . . . . . 1-4
Caution Labels. . . . . . . . . . . 1-5
2 Technical Specifications
Specifications . . . . . . . . . . . 2-1
Stableflex System . . . . . . . . 2-2
3 Operation
Quick Start. . . . . . . . . . . . . .
Stopping the Treadmill. . . . .
Automatic Stop Feature . . .
Selecting Programs &
Options . . . . . . . . . . . . . . . .
Displaying Heart Rate . . . . .
The Workout Graph . . . . . . .
Detailed Operation Guide . .
Control During Operation . .
Changing Data Readouts . .
Use of Programs . . . . . . . . .
3-1
3-1
3-1
3-2
3-2
3-2
3-3
3-4
3-5
3-6
4 Preventive Maintenance
Regular Maintenance
Activities . . . . . . . . . . . . . . . . 4-1
Running Belt Maintenance . 4-3
5 Setup & Assembly
Quick Setup . . . . . . . . . . . .
Choosing & Preparing a Site
Electrical Power
Requirements . . . . . . . . . . . .
Unpacking . . . . . . . . . . . . . .
Assembling the Treadmill. . .
Test the 600T Operation . . .
Setting Operation Options. .
5-1
5-1
5-3
5-3
5-4
5-8
5-9
6 Customer Service
Contacting Service . . . . . . . 6-1
Serial Number & Voltage . . . 6-1
Warranty . . . . . . . . . . . . . . . 6-1
Return Material Authorization
(RMA). . . . . . . . . . . . . . . . . . 6-4
Damaged Treadmill or Parts 6-4
Ordering Parts . . . . . . . . . . . 6-5
33”
(84 cm)
Page 2-1
Cybex 600T Treadmill Owner’s Manual
Stableflex System
The Cybex 600T treadmill also has a feature you can find only in Cybex treadmills, Stableflex.
Stableflex is laterally stable at the back and vertically flexible at the front. As a result of its
high internal dampening, Stableflex allows shock to be absorbed where it occurs, and
minimizes the impact. The biomechanics of running are not adversely affected because the
Stableflex system keeps the rear of the treadmill stable to optimize the propulsion of the
runner. This is the most efficient running suspension yet designed.
Page 2-2
Cybex 600T Treadmill Owner’s Manual
3 - Operation
Quick Start
Press the Quick Start key. After a 3-second countdown, the running belt will
start at 1 mph (1.6 kph) in the Manual program. Use the
and
arrows to
change speed and elevation.
NOTE: For an accurate calorie count, you must correctly set your weight
(including clothing) by pressing the Weight key.
Stopping the Treadmill
Press Pause/Stop to temporarily stop your workout. The belt will stop, but any
elevation will remain, as will all workout settings and data. Press the Quick
Start key to continue your workout. If no key has been pressed after the
amount of time set for Idle Time, usually 30 seconds, workout data will be
cleared, the display will change to Dormant Mode, and any elevation will be
reduced to zero. See Figure 1.
If, during a pause, the Pause/Stop key is pressed again, all workout data will
be cleared and elevation reduced to zero.
Front Pages
About This Manual . . . . . . . . . . i
FCC Compliance Information . i
Declaration of Conformity . . . . ii
Table of Contents . . . . . . . . . . iii
1 Safety
Important Voltage Information 1-1
Grounding Instructions . . . . 1-1
Important Safety Instructions 1-2
Warning Labels . . . . . . . . . . 1-4
Caution Labels. . . . . . . . . . . 1-5
2 Technical Specifications
Specifications . . . . . . . . . . . 2-1
Stableflex System . . . . . . . . 2-2
3 Operation
Quick Start. . . . . . . . . . . . . .
Stopping the Treadmill. . . . .
Automatic Stop Feature . . .
Selecting Programs &
Options . . . . . . . . . . . . . . . .
Displaying Heart Rate . . . . .
The Workout Graph . . . . . . .
Detailed Operation Guide . .
Control During Operation . .
Changing Data Readouts . .
Use of Programs . . . . . . . . .
3-1
3-1
3-1
3-2
3-2
3-2
3-3
3-4
3-5
3-6
4 Preventive Maintenance
Regular Maintenance
Activities . . . . . . . . . . . . . . . . 4-1
Running Belt Maintenance . 4-3
5 Setup & Assembly
Quick Setup . . . . . . . . . . . .
Choosing & Preparing a Site
Electrical Power
Requirements . . . . . . . . . . . .
Unpacking . . . . . . . . . . . . . .
Assembling the Treadmill. . .
Test the 600T Operation . . .
Setting Operation Options. .
Figure 1
Automatic Stop Feature
5-1
5-1
5-3
5-3
5-4
5-8
5-9
6 Customer Service
Contacting Service . . . . . . . 6-1
Serial Number & Voltage . . . 6-1
Warranty . . . . . . . . . . . . . . . 6-1
Return Material Authorization
(RMA). . . . . . . . . . . . . . . . . . 6-4
Damaged Treadmill or Parts 6-4
Ordering Parts . . . . . . . . . . . 6-5
The 600T is equipped with an Automatic Stop system for the running belt. If
the treadmill detects that there is nobody running or walking on it, it will stop
the belt after a user-selectable delay. (Set this delay time, called Halt Time, in
the Setting Operations Options section in chapter 5.)
Page 3-1
Cybex 600T Treadmill Owner’s Manual
Selecting Programs & Options
Every key on the display is usable during operation. Any key may be pressed at any time to
make adjustments in speed, elevation, level, program choice, workout time, or data readouts.
Displaying Heart Rate
In order for the 600T to display your heart rate, you must either use a Polar compatible heart
rate transmitter belt, or your treadmill must have the optional Contact Heart Rate.
NOTE: The Heart Rate Control program will not work with Contact Heart Rate.
1. Contact Heart Rate — Hold the handgrips on the console crossbar until a heart rate is
displayed, typically less than 30 seconds. For best results, hold the handgrips lightly and
ensure that your hands contact both the front and back sensors of each grip. Movement
can cause interference on the contacts, so hold your hands as steady as possible.
NOTE: When wearing a Polar compatible transmitter, the Polar transmitter will override
the contact heart rate.
2. Polar Compatible Reception — To use this feature, a Polar compatible heart rate
transmitter belt must be worn. To view heart rate continuously, press the heart-shaped
key in the Display Options section.
NOTE: Please note that Cybex does not recommend continuous holding of the handrails
or the contact heart rate grips while running.
The Workout Graph
The Workout Graph matrix in the middle of the display uses columns of lights to show the
progress of your workout. The height of the column represents power, specifically the highest
power you reached in that period. The exception to this is in Heart Rate Control, where
column height represents heart rate. The length of the period is 1/15 of your total workout
time when in Manual Mode or Heart Rate Control, and 15 seconds in every other program.
Page 3-2
Cybex 600T Treadmill Owner’s Manual
Detailed Operation Guide
Dormant Mode — When the treadmill is not in use, the console will display a
constantly changing geometric pattern to show that power is on. If the treadmill
is equipped with Contact Heart Rate, the console will display a beating heart.
Heart rate is displayed if a heart rate signal is detected.
Activating the Treadmill —
Follow the steps below:
1. Place the emergency stop key in the location as
shown in Figure 2.
Front Pages
About This Manual . . . . . . . . . . i
FCC Compliance Information . i
Declaration of Conformity . . . . ii
Table of Contents . . . . . . . . . . iii
1 Safety
Important Voltage Information 1-1
Grounding Instructions . . . . 1-1
Important Safety Instructions 1-2
Warning Labels . . . . . . . . . . 1-4
Caution Labels. . . . . . . . . . . 1-5
2 Technical Specifications
Specifications . . . . . . . . . . . 2-1
Stableflex System . . . . . . . . 2-2
2. Press any key on the console.
3. If you pressed a program key, this program will
be selected. Otherwise, either press a program
key to choose a program or press Quick Start,
which will select the Manual program.
Figure 2
NOTE: The Heart Rate Control program can be selected only if it detects
a heart rate signal through the Polar receiver, which requires a
Polar compatible transmitter belt.
4. If you pressed a program key to select a program, you will now be
prompted for workout Time, Weight, and (except in Manual Mode) Level.
Adjust these settings with the
and
arrows and press Enter
to proceed.
5. The treadmill will countdown 3 seconds and then the running belt will start.
The function of the immobilization method: The purpose of immobilizing the
treadmill is to prevent unauthorized use. This can be accomplished by
removing the power cord from the outlet, or most effectively, by removing the
lanyard from the treadmill. The treadmill will not start with the lanyard removed.
The emergency dismount: Should you experience pain, feel faint, or need to
stop your treadmill in an emergency situation, you should follow these steps:
1. Grip handrails for support.
2. Step onto the side rails.
3 Operation
Quick Start. . . . . . . . . . . . . .
Stopping the Treadmill. . . . .
Automatic Stop Feature . . .
Selecting Programs &
Options . . . . . . . . . . . . . . . .
Displaying Heart Rate . . . . .
The Workout Graph . . . . . . .
Detailed Operation Guide . .
Control During Operation . .
Changing Data Readouts . .
Use of Programs . . . . . . . . .
3-1
3-1
3-1
3-2
3-2
3-2
3-3
3-4
3-5
3-6
4 Preventive Maintenance
Regular Maintenance
Activities . . . . . . . . . . . . . . . . 4-1
Running Belt Maintenance . 4-3
5 Setup & Assembly
Quick Setup . . . . . . . . . . . .
Choosing & Preparing a Site
Electrical Power
Requirements . . . . . . . . . . . .
Unpacking . . . . . . . . . . . . . .
Assembling the Treadmill. . .
Test the 600T Operation . . .
Setting Operation Options. .
5-1
5-1
5-3
5-3
5-4
5-8
5-9
6 Customer Service
Contacting Service . . . . . . . 6-1
Serial Number & Voltage . . . 6-1
Warranty . . . . . . . . . . . . . . . 6-1
Return Material Authorization
(RMA). . . . . . . . . . . . . . . . . . 6-4
Damaged Treadmill or Parts 6-4
Ordering Parts . . . . . . . . . . . 6-5
3. Pull the lanyard.
The function of the emergency stop: The lanyard functions as the emergency
stop. The lanyard is designed to be attached to the user before exercising. Its
purpose is to stop the treadmill in an emergency situation. When pulled, the
lanyard will remove power from the treadmill, and the treadmill will come to a stop.
Page 3-3
Cybex 600T Treadmill Owner’s Manual
Control During Operation
Every key on the display is usable during operation. Any key may be pressed at any time to
make adjustments in speed, elevation, level, program choice, workout time, or data readouts.
Changing Speed — Use the Speed
and
keys arrows to change the speed in
increments of 0.1 mph or 0.10 kph. Maximum speed is 10 mph (16 kph).
Changing Elevation — Use the Incline
and
arrows to change the elevation in
increments of 1%. Maximum elevation is 15%. (Elevation is defined as the ratio of rise
over run of the treadmill deck.)
Changing Level — Use the
and
arrows next to the Enter key to change the level in
a program; press Enter to accept your level change.
Changing Programs — Press any program key to change to that program. Your current
workout level will be transferred to the new program, and you will enter that program at
the same place you were in the previous program. If additional setup data is required by
the new program, you will be prompted for that.
Changing Workout Time — Press Time, and use the
and
arrows to adjust your
workout time, pressing Enter to proceed. Your program profile will be automatically scaled
and adjusted to accommodate the new workout time.
Page 3-4
Cybex 600T Treadmill Owner’s Manual
Changing Data Readouts
You may request a specific data type to be displayed by pressing one of the
Display Options keys. The treadmill's data readouts may also be set to Scan,
where the data type is changed every five seconds. (Scan can be made the
default readout mode in Test Mode; see Setting Operations Options in chapter
5.) The readout options are:
Distance — The total accumulated distance, in miles or kilometers, during
your workout.
Calories — The total accumulated calories during your workout. Your
weight must be correctly set for this measurement to be accurate.
Watts — The current workload, or power, of your workout. As with calories,
your weight must be correctly set. Watts will change whenever speed or
elevation is changed.
Pace — At your current speed, how long it would take to cover a mile (or
kilometer), displayed in minutes:seconds.
Heart Symbol — Your heart rate. This display option is only available when
using the optional Polar or Contact Heart Rate systems.
Front Pages
About This Manual . . . . . . . . . . i
FCC Compliance Information . i
Declaration of Conformity . . . . ii
Table of Contents . . . . . . . . . . iii
1 Safety
Important Voltage Information 1-1
Grounding Instructions . . . . 1-1
Important Safety Instructions 1-2
Warning Labels . . . . . . . . . . 1-4
Caution Labels. . . . . . . . . . . 1-5
2 Technical Specifications
Specifications . . . . . . . . . . . 2-1
Stableflex System . . . . . . . . 2-2
3 Operation
Quick Start. . . . . . . . . . . . . .
Stopping the Treadmill. . . . .
Automatic Stop Feature . . .
Selecting Programs &
Options . . . . . . . . . . . . . . . .
Displaying Heart Rate . . . . .
The Workout Graph . . . . . . .
Detailed Operation Guide . .
Control During Operation . .
Changing Data Readouts . .
Use of Programs . . . . . . . . .
3-1
3-1
3-1
3-2
3-2
3-2
3-3
3-4
3-5
3-6
4 Preventive Maintenance
Regular Maintenance
Activities . . . . . . . . . . . . . . . . 4-1
Running Belt Maintenance . 4-3
5 Setup & Assembly
Quick Setup . . . . . . . . . . . .
Choosing & Preparing a Site
Electrical Power
Requirements . . . . . . . . . . . .
Unpacking . . . . . . . . . . . . . .
Assembling the Treadmill. . .
Test the 600T Operation . . .
Setting Operation Options. .
5-1
5-1
5-3
5-3
5-4
5-8
5-9
6 Customer Service
Contacting Service . . . . . . . 6-1
Serial Number & Voltage . . . 6-1
Warranty . . . . . . . . . . . . . . . 6-1
Return Material Authorization
(RMA). . . . . . . . . . . . . . . . . . 6-4
Damaged Treadmill or Parts 6-4
Ordering Parts . . . . . . . . . . . 6-5
Page 3-5
Cybex 600T Treadmill Owner’s Manual
Use of Programs
Using Hills, Endurance, or Sport Programs
Any workout time between one and 60 minutes may be entered. These three programs share
a common 2.5-minute warm-up and cool-down. If the time is two minutes or less, only part of
the warm-up is used. If the time is three to five minutes, the warm-up and part of the cooldown is used. The cool-down is aligned to the end of the program.
Each program interval is 15 seconds long and can take one of seven values, corresponding to
the LED columns in the workout graph (the dot matrix display). The height of the interval is
combined with the exercise level to determine the workload. There are fifteen possible
exercise levels.
The Hills program changes incline every minute in a four-minute repeating pattern.
The Sport program alternates two different intensity sections; the duration ratio of the higher
to lower intensities increases with increasing level.
The Endurance program has a constant level center section following the warm-up.
NOTE: You may select any other program at any time during your workout.
Page 3-6
Cybex 600T Treadmill Owner’s Manual
Using Heart Rate Control Program
NOTE: Obtain a medical exam before beginning any exercise program.
NOTE: This program requires the user to wear a Polar or compatible
heart rate transmitter belt. The Heart Rate Control Program
(HRCP) cannot be selected on the control console unless the
treadmill detects a heart rate signal. The HRCP will not work
with the optional handgrip heart rate system.
After selecting the HRCP, the 600T will prompt you for workout time, weight,
age, and target heart rate. Your age is required to estimate the proper range of
heart rates; the 600T will not let you select a heart rate below 60% of your
maximum heart rate nor above 95% of your maximum. (Maximum heart rate is
calculated by the normal 220 minus age formula.)
Select a target heart rate which will allow you to exercise comfortably and
safely while at the same time will allow you to reach your training goals. If you
are unsure of what to select as your target, consult your physician or a physical
training professional.
After starting the HRCP, the 600T will attempt to raise your heart rate to your
target within four to six minutes. The 600T will emphasize using the elevation of
the treadmill deck to achieve higher workloads and thus higher heart rates; this
is done to maximize the use of a walking gait, which is safer and more
comfortable for most users. As a result, many users will spend nearly the entire
program at the treadmill's maximum elevation of 15%.
After reaching your target, the 600T will attempt to keep you there within plus
one or minus two heart beats. As you tire, the treadmill will compensate by
reducing speed, elevation, or both.
Front Pages
About This Manual . . . . . . . . . . i
FCC Compliance Information . i
Declaration of Conformity . . . . ii
Table of Contents . . . . . . . . . . iii
1 Safety
Important Voltage Information 1-1
Grounding Instructions . . . . 1-1
Important Safety Instructions 1-2
Warning Labels . . . . . . . . . . 1-4
Caution Labels. . . . . . . . . . . 1-5
2 Technical Specifications
Specifications . . . . . . . . . . . 2-1
Stableflex System . . . . . . . . 2-2
3 Operation
Quick Start. . . . . . . . . . . . . .
Stopping the Treadmill. . . . .
Automatic Stop Feature . . .
Selecting Programs &
Options . . . . . . . . . . . . . . . .
Displaying Heart Rate . . . . .
The Workout Graph . . . . . . .
Detailed Operation Guide . .
Control During Operation . .
Changing Data Readouts . .
Use of Programs . . . . . . . . .
3-1
3-1
3-1
3-2
3-2
3-2
3-3
3-4
3-5
3-6
4 Preventive Maintenance
Regular Maintenance
Activities . . . . . . . . . . . . . . . . 4-1
Running Belt Maintenance . 4-3
5 Setup & Assembly
Quick Setup . . . . . . . . . . . .
Choosing & Preparing a Site
Electrical Power
Requirements . . . . . . . . . . . .
Unpacking . . . . . . . . . . . . . .
Assembling the Treadmill. . .
Test the 600T Operation . . .
Setting Operation Options. .
5-1
5-1
5-3
5-3
5-4
5-8
5-9
A two minute cool-down is built in at the end of the program.
6 Customer Service
Contacting Service . . . . . . . 6-1
Serial Number & Voltage . . . 6-1
Warranty . . . . . . . . . . . . . . . 6-1
Return Material Authorization
(RMA). . . . . . . . . . . . . . . . . . 6-4
Damaged Treadmill or Parts 6-4
Ordering Parts . . . . . . . . . . . 6-5
Page 3-7
Cybex 600T Treadmill Owner’s Manual
Page 3-8
Cybex 600T Treadmill Owner’s Manual
4 - Preventive Maintenance
Regular Maintenance Activities
Cleaning Your Treadmill — When cleaning your treadmill spray a mild*
cleaning agent, such as a water and dishsoap solution, on a clean cloth first,
and then wipe the treadmill with the damp cloth.
Front Pages
About This Manual . . . . . . . . . . i
FCC Compliance Information . i
Declaration of Conformity . . . . ii
Table of Contents . . . . . . . . . . iii
1 Safety
Important Voltage Information 1-1
Grounding Instructions . . . . 1-1
Important Safety Instructions 1-2
Warning Labels . . . . . . . . . . 1-4
Caution Labels. . . . . . . . . . . 1-5
2 Technical Specifications
Specifications . . . . . . . . . . . 2-1
Stableflex System . . . . . . . . 2-2
NOTE: Do not spray cleaning solution directly on the treadmill. Direct
spraying could cause damage to the electronics and may void the
warranty.
3 Operation
* Using a non-recommended cleaning solution can cause damage Quick Start. . . . . . . . . . . . . .
Stopping the Treadmill. . . . .
to your treadmill. Do not use an alkaline cleaner to clean your
treadmill. Read the label on the cleaning product before you use it. Automatic Stop Feature . . .
Selecting Programs &
If the ingredients list alcohol or say "not recommended for
Options . . . . . . . . . . . . . . . .
Displaying Heart Rate . . . . .
aluminum" do not use that product.
! WARNING: To prevent electrical shock, be sure that power is
shut off and the treadmill is unplugged from the
electrical outlet before performing any cleaning or
maintenance procedures.
Use the following routine to help insure your treadmill's long life:
After Each Use — Wipe up any liquid spills immediately. After each workout,
use a damp cloth to wipe up any remaining perspiration from the handrails and
painted surfaces.
Be careful not to spill or get excessive moisture between the edge of the
display panel and the console, as this might create an electrical hazard or
cause failure of the electronics.
! WARNING: Keep wet items away from inside parts of the
treadmill. Electrical shock could occur even if the
treadmill is unplugged.
Every Month — Vacuum any dust or dirt that might accumulate under or
around the 600T. Motors are especially susceptible to dust and dirt, and
restricted airflow can prevent adequate cooling that could shorten motor life.
The Workout Graph . . . . . . .
Detailed Operation Guide . .
Control During Operation . .
Changing Data Readouts . .
Use of Programs . . . . . . . . .
3-1
3-1
3-1
3-2
3-2
3-2
3-3
3-4
3-5
3-6
4 Preventive Maintenance
Regular Maintenance
Activities . . . . . . . . . . . . . . . . 4-1
Running Belt Maintenance . 4-3
5 Setup & Assembly
Quick Setup . . . . . . . . . . . .
Choosing & Preparing a Site
Electrical Power
Requirements . . . . . . . . . . . .
Unpacking . . . . . . . . . . . . . .
Assembling the Treadmill. . .
Test the 600T Operation . . .
Setting Operation Options. .
5-1
5-1
5-3
5-3
5-4
5-8
5-9
6 Customer Service
Contacting Service . . . . . . . 6-1
Serial Number & Voltage . . . 6-1
Warranty . . . . . . . . . . . . . . . 6-1
Return Material Authorization
(RMA). . . . . . . . . . . . . . . . . . 6-4
Damaged Treadmill or Parts 6-4
Ordering Parts . . . . . . . . . . . 6-5
To clean the motor components, you must remove the two Phillips head screws
that hold the motor cover in place. Lift the cover, and put it and the screws
aside. Use a vacuum attachment or hand vacuum to clean the exposed
elevation assembly, drive motor, lower electronics and the surrounding areas.
Page 4-1
Cybex 600T Treadmill Owner’s Manual
Also use a dry cloth for the areas that you can't reach with the vacuum cleaner. If the machine
has not been used for some time or is excessively dirty, use a dry cloth to wipe all exposed
areas. Replace the cover and screws when finished.
Four Times Per Year — Clean the belt and the deck surfaces to minimize the effect of
friction between the wood deck and the running belt. Clean the underside of the running belt
and the top of the running deck surface by wiping them with a clean dry towel. This should be
done four times per year to prevent premature wear of the deck, running belt, and the drive
motor system.
As Needed —
plant.
The running belt may become loose and slip on the drive roller with each foot
To Re-tension the Belt: While holding down any key on the console, turn the treadmill on;
this brings you into Test Mode. Press Speed
to increase the belt speed to 5 mph (8 kph).
Rotate both of the rear roller tension bolts 1/4 of a turn clockwise. If the belt tracks off center,
to either side, the running deck will become visible. If this occurs, it will be necessary to
adjust the running belt back to the center. See Figure 1.
Figure 1
! CAUTION: Be careful not to over tighten the belt. Over tightening the belt can
create excessive tension on the front and rear rollers.
To Re-center the Belt: Use a wrench to tighten the rear roller bolt on the side of the treadmill
towards which the belt is moving. For example: If the belt moves to the right and the deck
becomes exposed on the left, use a wrench to tighten the rear roller bolt on the right side of
the frame, tighten about 1/2 of a turn (clockwise) and wait 30 seconds. If the belt does not
move back to the center of the treadmill, make another adjustment to the same bolt. Once the
running belt has been adjusted closer to the center of the treadmill use about 1/4 of a turn
until the belt has been stabilized.
! CAUTION: While centering the belt choose one bolt to adjust. Do not adjust
both bolts.
After the belt has been centered, check the belt tension. Make sure the running belt tension is
tight enough so that the belt does not slip or hesitate when stepped on. Walk on the treadmill at
3.5-4 mph (5.6-6.4 kph) and every 4th to 5th step throw your weight into your step to feel if the
Page 4-2
Cybex 600T Treadmill Owner’s Manual
belt is slipping. If the belt does slip, use a wrench to equally tighten both rear roller
adjustment bolts 1/2 of a turn (clockwise). Adjust the belt until no further slipping
is felt.
Running Belt Maintenance
The running belt and deck should be checked periodically for any excessive
wear. The belt may need minor adjustments. Use the following section to help
keep your 600T operating properly.
Checking the Belt and Deck Surfaces — In an effort to make sure that the
running belt operates properly, visually inspect the belt on a weekly basis to
make sure that there are no tears or fraying in the belt material.
To inspect the edges of the belt, it is necessary to remove the plastic side rails.
Follow these steps:
1. Turn the power off.
A. Turn the main power switch on the front panel to the off (O) position.
B. Unplug the treadmill from the power outlet.
! WARNING: When removing or installing the side rails be sure to wear
work gloves to protect against any sharp edges.
Table of Contents
i Read All Instructions & Warnings
ii Important Safety Instructions
iv About This Manual
Important Voltage Information iv
FCC Compliance Information . iv
v Declaration of Conformity
vii Table of Contents
1 Safety
Warning Decals. . . . . . . . . . . 1-1
Caution Decals . . . . . . . . . . . 1-2
2 Technical Specifications
Specifications . . . . . . . . . . . . 2-1
Stableflex System . . . . . . . . . 2-2
3 Operation
Quick Start . . . . . . . . . . . . . . 3-1
Stopping the Treadmill . . . . . 3-1
Automatic Stop Feature . . . . 3-1
Selecting Programs
& Options. . . . . . . . . . . . . . 3-2
Displaying Heart Rate . . . . . . 3-2
The Workout Graph. . . . . . . . 3-2
Detailed Operation Guide . . . 3-3
Control During Operation . . . 3-4
Changing Data Readouts . . . 3-5
Use of Programs. . . . . . . . . . 3-6
4 Preventive Maintenance
Regular Maintenance
Activities. . . . . . . . . . . . . . . 4-1
Running Belt Maintenance . . 4-3
2. Remove the plastic end caps and side rails.
5 Setup & Assembly
A. Remove the Phillips head screws that fasten each of the plastic end
caps in place and set aside. See Figure 2.
B. Grab the side rail and firmly slide it out towards the back of
the treadmill.
Quick Setup . . . . . . . . . . . . . 5-1
Choosing & Preparing
a Site . . . . . . . . . . . . . . . . . 5-1
Electrical Power
Requirements. . . . . . . . . . . 5-3
Unpacking. . . . . . . . . . . . . . . 5-3
Assembling the Treadmill . . . 5-4
Auto Tuning. . . . . . . . . . . . . 5-10
Testing the 600T
Operation. . . . . . . . . . . . . 5-11
Setting Operation Options . 5-12
6 Customer Service
End Caps
Phillips Head
Screws
Contacting Service . . . . . . . . 6-1
Serial Number & Voltage . . . . 6-1
Warranty . . . . . . . . . . . . . . . . 6-1
Return Material
Authorization (RMA). . . . . . 6-3
Damaged Treadmill or Parts . 6-3
7 Index . . . . . . . . . . . . . . . . . 7-1
Figure 2
Page 4-3
Cybex 600T Treadmill Owner’s Manual
C. Remove the other side rail and set aside.
3. Check belt condition.
A. Run your hand under the belt on the top of the deck surface. If you notice any
excessive ridges, furrowing or cracks in the deck or if the deck feels very rough, the
surface may have worn down to a point where it could start to cause excessive wear
to the undersurface of the running belt. If belt needs replaced contact the nearest
authorized Cybex dealer or other competent repair service. See the "Running Belt"
section of the Service Manual for replacement information.
4. Replace the side rails and plastic end caps.
A. Slide the two side rails back on being sure to catch the rail guides.
B. Attach the plastic end caps with the Phillips screwdriver.
NOTE: Refer to "Running Belt" in the 600T Treadmill Service Manual for more
information. Contact Cybex Customer Service to order a Service Manual, parts,
or to locate the Cybex dealer nearest you.
! CAUTION: Do not use a running belt made for a different model treadmill. The
belts are specific for each treadmill and may be torn up or cause
excessive current and damage the electronics if used in combination
with another deck.
Page 4-4
Cybex 600T Treadmill Owner’s Manual
5 - Setup & Assembly
Quick Setup
Quick Setup - For Experienced Fitness Professionals Only
1. The power requirements for this treadmill are 115 VAC ±10%, 60 Hz
and 20 amps or a 220 VAC ±15%, 50 Hz/60 Hz and 15 amps grounded,
dedicated circuit. The location should be level, with good ventilation, and
not in an area of high humidity.
2. Assemble the treadmill using the instructions in the "Setup & Assembly"
chapter.
3. Connect CSAFE equipment (if applicable).
4. Refer to "Setting Operations Options" to see if any changes are necessary;
in most cases, the default values are the desired settings.
Choosing & Preparing a Site
Before you assemble the treadmill be sure to select a suitable site and have the
proper electrical outlet power available for optimum operation and safety. See
the Electrical Power Requirements section below for direction in locating your
treadmill's voltage requirements.
The area you select for the 600T should be well lit and well ventilated. Locate
the treadmill on a structurally sound and level surface (do not place in recessed
areas or on plush carpet) a few feet away from walls and other equipment.
Each side of the treadmill should have a 39" (1 m) minimum space. Behind the
treadmill should be 78" (2 m) minimum of space. Allow enough clearance for
safe access and passage during use of the machine. If the 600T is to be
located above the first floor, place it near or above major support beams. If the
area has a heavy, plush carpet, the airflow around the base of the machine may
be restricted or the carpeting may interfere with the moving parts. To protect
the carpeting and the machinery, place a 3/4" (1.9 cm) thick wood base under
the treadmill.
Front Pages
About This Manual . . . . . . . . . . i
FCC Compliance Information . i
Declaration of Conformity . . . . ii
Table of Contents . . . . . . . . . . iii
1 Safety
Important Voltage Information 1-1
Grounding Instructions . . . . 1-1
Important Safety Instructions 1-2
Warning Labels . . . . . . . . . . 1-4
Caution Labels. . . . . . . . . . . 1-5
2 Technical Specifications
Specifications . . . . . . . . . . . 2-1
Stableflex System . . . . . . . . 2-2
3 Operation
Quick Start. . . . . . . . . . . . . .
Stopping the Treadmill. . . . .
Automatic Stop Feature . . .
Selecting Programs &
Options . . . . . . . . . . . . . . . .
Displaying Heart Rate . . . . .
The Workout Graph . . . . . . .
Detailed Operation Guide . .
Control During Operation . .
Changing Data Readouts . .
Use of Programs . . . . . . . . .
3-1
3-1
3-1
3-2
3-2
3-2
3-3
3-4
3-5
3-6
4 Preventive Maintenance
Regular Maintenance
Activities . . . . . . . . . . . . . . . . 4-1
Running Belt Maintenance . 4-3
5 Setup & Assembly
Quick Setup . . . . . . . . . . . .
Choosing & Preparing a Site
Electrical Power
Requirements . . . . . . . . . . . .
Unpacking . . . . . . . . . . . . . .
Assembling the Treadmill. . .
Test the 600T Operation . . .
Setting Operation Options. .
5-1
5-1
5-3
5-3
5-4
5-8
5-9
6 Customer Service
Contacting Service . . . . . . . 6-1
Serial Number & Voltage . . . 6-1
Warranty . . . . . . . . . . . . . . . 6-1
Return Material Authorization
(RMA). . . . . . . . . . . . . . . . . . 6-4
Damaged Treadmill or Parts 6-4
Ordering Parts . . . . . . . . . . . 6-5
Do not install the 600T in an area of high humidity, such as in the vicinity of a
steam room, sauna, indoor pool, or outdoors. Exposure to extensive water
vapor, chlorine, and/or bromine could adversely affect the electronics as well as
other parts of the machine.
A comfortable environment will help you enjoy your exercise routine and give
you additional motivation to continue.
Page 5-1
Cybex 600T Treadmill Owner’s Manual
Item Qty Description
1
1
Base, console and uprights
2
12 Screws for uprights,
handlebar, and base covers
3
1
Motor cover
4
2
Motor cover screws
5
2
Base covers
6
8
Junction cover screws
7
4
Junction covers
Figure 1
Page 5-2
Cybex 600T Treadmill Owner’s Manual
Electrical Power Requirements
This treadmill is for use on a nominal 115 VAC ±10%, 60 Hz and 20 amps or a
220 VAC ±15%, 50 Hz/60 Hz and 15 amps grounded, dedicated circuit.
Contact your electrician if you have any doubts about your electrical service.
Do not use a ground plug adapter to adapt the 3-prong power cord plug to a
non-grounded electrical outlet. Do not use an extension cord.
Unpacking
Unpack and remove the treadmill parts from the shipping container. Leave the
base in the box at this time. Leave the hardware in the bags at this time. Check
for the following parts. See Figure 1. If any of the parts are missing contact
your Cybex dealer.
• Base
• Uprights (left and right)
• Handlebar and console
• Base covers (left and right)
• Motor cover
• Junction covers (two left and two right)
• Accessory holder
• Bottle holder
• Emergency stop key (lanyard)
• Power cord (not shown)
• Owner's Operating Manual with registration card (not shown)
Hardware Bag 1
• Hex head screws 5/16-18 x 3/4” for uprights (6)
• Hex head screws 5/16-18 x 3/4” for base cover (4)
• Hex head screws 5/16-18 x 3/4” for handlebar mounting bracket (2)
Hardware Bag 2
• Phillips head screws 1/4-20 x 1/2" for motor cover (2)
Front Pages
About This Manual . . . . . . . . . . i
FCC Compliance Information . i
Declaration of Conformity . . . . ii
Table of Contents . . . . . . . . . . iii
1 Safety
Important Voltage Information 1-1
Grounding Instructions . . . . 1-1
Important Safety Instructions 1-2
Warning Labels . . . . . . . . . . 1-4
Caution Labels. . . . . . . . . . . 1-5
2 Technical Specifications
Specifications . . . . . . . . . . . 2-1
Stableflex System . . . . . . . . 2-2
3 Operation
Quick Start. . . . . . . . . . . . . .
Stopping the Treadmill. . . . .
Automatic Stop Feature . . .
Selecting Programs &
Options . . . . . . . . . . . . . . . .
Displaying Heart Rate . . . . .
The Workout Graph . . . . . . .
Detailed Operation Guide . .
Control During Operation . .
Changing Data Readouts . .
Use of Programs . . . . . . . . .
3-1
3-1
3-1
3-2
3-2
3-2
3-3
3-4
3-5
3-6
4 Preventive Maintenance
Regular Maintenance
Activities . . . . . . . . . . . . . . . . 4-1
Running Belt Maintenance . 4-3
5 Setup & Assembly
Quick Setup . . . . . . . . . . . .
Choosing & Preparing a Site
Electrical Power
Requirements . . . . . . . . . . . .
Unpacking . . . . . . . . . . . . . .
Assembling the Treadmill. . .
Test the 600T Operation . . .
Setting Operation Options. .
5-1
5-1
5-3
5-3
5-4
5-8
5-9
6 Customer Service
Contacting Service . . . . . . . 6-1
Serial Number & Voltage . . . 6-1
Warranty . . . . . . . . . . . . . . . 6-1
Return Material Authorization
(RMA). . . . . . . . . . . . . . . . . . 6-4
Damaged Treadmill or Parts 6-4
Ordering Parts . . . . . . . . . . . 6-5
• Phillips head screws #8-16 x 1/2" for junction covers (8)
Tools Required
• Phillips head screwdriver
• 1/2" wrench
• 3/8" wrench
Page 5-3
Cybex 600T Treadmill Owner’s Manual
Assembling the Treadmill
To ensure correct assembly of the treadmill, carefully follow these steps:
NOTE:
In this manual the words “left” and “right” are from the treadmill user's point
of view.
1. Move the treadmill into position.
A. The shipping box has a small ramp at the front end of the treadmill base. After
removing the boxes, parts, and plastic wrapping from the top of the base, lift the back
end of the treadmill and roll it down the ramp.
B. Continue to lift the back of the base while you roll the treadmill to the location you
intend to leave it.
2. Pivot the treadmill into position.
A. Grasp the console and raise the console and uprights into position (they will pivot into
place). NOTE: The display cable that exits the bottom, left of the upright, is designed
to be held out of the way during installation; confirm that it is not pinched while raising
the unit.
3. Secure the handlebar.
A. Using a 1/2” wrench, secure the handlebar with two screws provided in bag 1. Be sure
to install the screws from the right. See Figure 2.
NOTE:
The two screws on the handlebar are installed from the right. See Figure 2.
Handlebar
Screws
Figure 2
4. Secure the uprights.
A. Using a 1/2” wrench, secure the upright with six screws provided in bag 1.
5. Use a 1/2" wrench to tighten all eight screws at this time.
Page 5-4
Cybex 600T Treadmill Owner’s Manual
6. Attach the base covers.
A. Locate the two base covers (metal). Place them over the base of each
upright. The left will only fit on the left side and the right will only fit on
the right side.
B. Using a 1/2" wrench, secure the base covers with four screws provided
in bag 1. See Figure 3.
Hex Head
Screws
(5 each side)
Base Cover
Front Pages
About This Manual . . . . . . . . . . i
FCC Compliance Information . i
Declaration of Conformity . . . . ii
Table of Contents . . . . . . . . . . iii
1 Safety
Important Voltage Information 1-1
Grounding Instructions . . . . 1-1
Important Safety Instructions 1-2
Warning Labels . . . . . . . . . . 1-4
Caution Labels. . . . . . . . . . . 1-5
2 Technical Specifications
Specifications . . . . . . . . . . . 2-1
Stableflex System . . . . . . . . 2-2
3 Operation
Quick Start. . . . . . . . . . . . . .
Stopping the Treadmill. . . . .
Automatic Stop Feature . . .
Selecting Programs &
Options . . . . . . . . . . . . . . . .
Displaying Heart Rate . . . . .
The Workout Graph . . . . . . .
Detailed Operation Guide . .
Control During Operation . .
Changing Data Readouts . .
Use of Programs . . . . . . . . .
3-1
3-1
3-1
3-2
3-2
3-2
3-3
3-4
3-5
3-6
4 Preventive Maintenance
Regular Maintenance
Activities . . . . . . . . . . . . . . . . 4-1
Running Belt Maintenance . 4-3
Figure 3
7. Attach the motor cover.
A. Using a Phillips head screwdriver, secure the motor cover at the front of
the treadmill with two screws provided in bag 2. See Figure 4.
Screws
5 Setup & Assembly
Quick Setup . . . . . . . . . . . .
Choosing & Preparing a Site
Electrical Power
Requirements . . . . . . . . . . . .
Unpacking . . . . . . . . . . . . . .
Assembling the Treadmill. . .
Test the 600T Operation . . .
Setting Operation Options. .
5-1
5-1
5-3
5-3
5-4
5-8
5-9
6 Customer Service
Contacting Service . . . . . . . 6-1
Serial Number & Voltage . . . 6-1
Warranty . . . . . . . . . . . . . . . 6-1
Return Material Authorization
(RMA). . . . . . . . . . . . . . . . . . 6-4
Damaged Treadmill or Parts 6-4
Ordering Parts . . . . . . . . . . . 6-5
Figure 4
Page 5-5
Cybex 600T Treadmill Owner’s Manual
8. Attach the junction covers.
A. Place the set of junction covers with the bottle holder over the right handlebar to
upright junction and secure them with four Phillips head screws provided in bag 2. See
Figure 5.
B. Place the remaining set over the left handlebar to upright junction. Secure them with
four Phillips head screws provided in bag 2. See Figure 5.
Junction
Covers
Bottle
Holder
Figure 5
9. Attach emergency stop key.
A. Remove the paper backing from the velcro on the
emergency stop key clip. Place the sticky back to one
side on the accessory holder.
B. Confirm that the emergency stop key is in place. See
Figure 6. NOTE: the treadmill will not run without it in
place. Your treadmill should now look like Figure 7.
Figure 6
10. Level your treadmill.
A. Check to see if the treadmill is level. Perform steps 10B - 10D if the treadmill is not
level.
B. Loosen the (top) jam nut located on the right foot. See Figure 7.
C. Raise or lower the (bottom) leveling nut until the treadmill is level. See Figure 7.
D. When level, tighten the (top) jam nut upward until it is snug against the top.
Page 5-6
Cybex 600T Treadmill Owner’s Manual
Front Pages
About This Manual . . . . . . . . . . i
FCC Compliance Information . i
Declaration of Conformity . . . . ii
Table of Contents . . . . . . . . . . iii
1 Safety
Important Voltage Information 1-1
Grounding Instructions . . . . 1-1
Important Safety Instructions 1-2
Warning Labels . . . . . . . . . . 1-4
Caution Labels. . . . . . . . . . . 1-5
2 Technical Specifications
Specifications . . . . . . . . . . . 2-1
Stableflex System . . . . . . . . 2-2
Top Jamb Nut
Bottom Level Nut
3 Operation
Quick Start. . . . . . . . . . . . . .
Stopping the Treadmill. . . . .
Automatic Stop Feature . . .
Selecting Programs &
Options . . . . . . . . . . . . . . . .
Displaying Heart Rate . . . . .
The Workout Graph . . . . . . .
Detailed Operation Guide . .
Control During Operation . .
Changing Data Readouts . .
Use of Programs . . . . . . . . .
3-1
3-1
3-1
3-2
3-2
3-2
3-3
3-4
3-5
3-6
4 Preventive Maintenance
Regular Maintenance
Activities . . . . . . . . . . . . . . . . 4-1
Running Belt Maintenance . 4-3
Figure 7
11. Connect CSAFE-compatible communications (optional).
5 Setup & Assembly
NOTE:
Skip steps 11A - 11F if you are not installing CSAFE-compatible
communications.
A. Remove eleven of the screws on the console back. NOTE: It is not
necessary to remove the accessory holder’s top screw (holding the
accessory holder in place on the console back).
B. Plug the CSAFE communications cable into the RJ-45 (8-pin) female
connector located on the middle bottom edge of the display board.
C. Tie a loose strain relief knot in the cable about 17” (43 cm) down from
the connector. This knot will stay inside the console housing. NOTE: Do
not pull the note tight.
Quick Setup . . . . . . . . . . . .
Choosing & Preparing a Site
Electrical Power
Requirements . . . . . . . . . . . .
Unpacking . . . . . . . . . . . . . .
Assembling the Treadmill. . .
Test the 600T Operation . . .
Setting Operation Options. .
5-1
5-1
5-3
5-3
5-4
5-8
5-9
6 Customer Service
Contacting Service . . . . . . . 6-1
Serial Number & Voltage . . . 6-1
Warranty . . . . . . . . . . . . . . . 6-1
Return Material Authorization
(RMA). . . . . . . . . . . . . . . . . . 6-4
Damaged Treadmill or Parts 6-4
Ordering Parts . . . . . . . . . . . 6-5
D. Route the cable through the small opening between the two halves of
the console. The opening is located where the right handle (from the
user's position) passes through the housing. Make sure the strain relief
knot fits correctly on the inside of the housing next to the small
opening.
E. Place the console back into position on the handlebar.
Page 5-7
Cybex 600T Treadmill Owner’s Manual
F. Fasten the back console with the screws removed during step 11A. NOTE: The two
gold screws are for the accessory holder.
! WARNING: Be sure that all electrical requirements are met as indicated in the
specifications at the front of the manual and at the beginning of this
chapter prior to proceeding.
Test the 600T Operation
Use the following instructions to test the full speed and incline range of the treadmill and to
check the belt for proper operation.
1. Locate the on/off (I/O) power switch on the front side of the treadmill. Toggle it to the on
position (I).
2. The control panel will light up and be in the Dormant Mode.
NOTE:
Cybex recommends that the treadmill be unplugged or the on/off (I/O) power
switch turned off (O) when it is not in use.
3. Press the Quick Start key. The treadmill begins a countdown (3,2,1), and sounds a tone
for each count. After it reaches one (1), the treadmill gives a steady tone, and then begins
accelerating the belt to reach 1 mph (1.6 kph).
4. The bottom left display will flash the time of and the right display will show the actual
speed.
5. Press and hold down the Speed
key until the treadmill reaches a speed of
approximately 4 mph (6.4 kph), as indicated on the display.
6. Observe the belt to see that it is running properly; it should stay centered in the middle of
the deck. If you have problems with the running belt operation, see Running Belt
Maintenance.
7. Run the treadmill through its full speed range. First press the Speed
key until the
treadmill reaches its highest speed, 10 mph (16.1 kph). Then press the Speed
key until
the treadmill is back to 1.0 mph (1.6 kph).
Page 5-8
Cybex 600T Treadmill Owner’s Manual
9. As you press the Incline or Speed
or
will show the actual incline or speed.
keys, the respective displays
10. When the treadmill reaches the set incline and speed, the displays will stop
flashing and remain steadily illuminated to indicate that the desired settings
have been reached.
11. Run the treadmill through its full % grade range. Press the Incline key
until the treadmill reaches its highest grade (15%). Then press the Incline
key until the treadmill is back to 0% grade.
12. Press Pause/Stop three times to stop the running belt, end the checkout
session, and return the display to Dormant Mode.
Setting Operation Options
1. Enter Test Mode by holding down any key while turning on (I) power.The
display will read “ test”.
NOTE:
After changing any value, you must press Enter to save that value.
2. Press Time to set time options. Change values with
time type by pressing Time:
and
keys; change
A. Maximum Time: choices are between 5 and 60 minutes; default is 60.
B. Default Time: choices are between 5 minutes and maximum time;
default is 60.
C. Idle Time: how long the treadmill retains your current workout data
during a pause in the workout or after a workout; choices are 30
seconds or 1 to 15 minutes, retaining the current workout data until a
new workout begins; default is 2 minutes.
D. Halt Time: how long the running belt will keep moving if the user steps
off the treadmill; choices are between 5 and 45 seconds; default is 30
seconds. You can also disable this feature by setting the time to None.
3. Press Weight to set units of measure and tone options with
change option type by pressing Weight:
and
keys;
Front Pages
About This Manual . . . . . . . . . . i
FCC Compliance Information . i
Declaration of Conformity . . . . ii
Table of Contents . . . . . . . . . . iii
1 Safety
Important Voltage Information 1-1
Grounding Instructions . . . . 1-1
Important Safety Instructions 1-2
Warning Labels . . . . . . . . . . 1-4
Caution Labels. . . . . . . . . . . 1-5
2 Technical Specifications
Specifications . . . . . . . . . . . 2-1
Stableflex System . . . . . . . . 2-2
3 Operation
Quick Start. . . . . . . . . . . . . .
Stopping the Treadmill. . . . .
Automatic Stop Feature . . .
Selecting Programs &
Options . . . . . . . . . . . . . . . .
Displaying Heart Rate . . . . .
The Workout Graph . . . . . . .
Detailed Operation Guide . .
Control During Operation . .
Changing Data Readouts . .
Use of Programs . . . . . . . . .
3-1
3-1
3-1
3-2
3-2
3-2
3-3
3-4
3-5
3-6
4 Preventive Maintenance
Regular Maintenance
Activities . . . . . . . . . . . . . . . . 4-1
Running Belt Maintenance . 4-3
5 Setup & Assembly
Quick Setup . . . . . . . . . . . .
Choosing & Preparing a Site
Electrical Power
Requirements . . . . . . . . . . . .
Unpacking . . . . . . . . . . . . . .
Assembling the Treadmill. . .
Test the 600T Operation . . .
Setting Operation Options. .
5-1
5-1
5-3
5-3
5-4
5-8
5-9
6 Customer Service
Contacting Service . . . . . . . 6-1
Serial Number & Voltage . . . 6-1
Warranty . . . . . . . . . . . . . . . 6-1
Return Material Authorization
(RMA). . . . . . . . . . . . . . . . . . 6-4
Damaged Treadmill or Parts 6-4
Ordering Parts . . . . . . . . . . . 6-5
A. Choose English or Metric units; English is the default.
B. Keypress tone on or off; on is default.
C. Scan: default is off. If set to on, the data readouts will scan unless a
specific data key is pressed.
Page 5-9
Cybex 600T Treadmill Owner’s Manual
D. Line Frequency: frequency of the power line that supplies power to your treadmill.
The default setting is 50 Hz for metric consoles and 60 Hz for English consoles.
NOTE: If you have an English console and a 50 Hz power line frequency, then you
must change the default setting from 60 Hz to 50 Hz for the proper elevation
frequency.
Remember: You must press Enter after changing a value for that value to be stored.
4. To exit Test Mode press the Pause/Stop key twice.
Your treadmill is now ready for use. Turn to the Operation chapter to learn how to operate the
treadmill. You should begin with walking speeds first, to be sure everything is functioning
properly.
Page 5-10
Cybex 600T Treadmill Owner’s Manual
6 - Customer Service
Contacting Service
In most areas call 800-766-3211 then press 63. Otherwise call
508-533-4300 or fax 508-533-5183. Hours of phone service are Monday
through Thursday from 8:30 a.m. to 6:00 p.m. and Friday from 8:30 a.m. to
5:00 p.m. Eastern Standard Time.
Information can be found on the web at www.eCybex.com or by email at
[email protected].
Serial Number & Voltage
Your serial number can be found on the rear crossbar under the running deck.
The voltage of your treadmill can be found on a label near the on/off (I/O)
switch. For your convenience record your serial number and voltage below so
that you will have it ready if you call Cybex Customer Service.
Serial Number
Voltage
Return Material Authorization (RMA)
The Return Material Authorization (RMA) system outlines the procedures to
follow when returning material for replacement, repair, or credit. The system
assures that returned materials are properly handled and analyzed. Follow the
following procedures carefully.
Contact your authorized Cybex dealer on all warranty-related matters. Your
local Cybex dealer will request an RMA from Cybex, if applicable. Under no
circumstances will defective parts or equipment be accepted by Cybex without
proper RMA and an Automated Return Service (ARS) label.
1. Call the Customer Service Hotline listed above for the return of any item
that is defective.
Front Pages
About This Manual . . . . . . . . . . i
FCC Compliance Information . i
Declaration of Conformity . . . . ii
Table of Contents . . . . . . . . . . iii
1 Safety
Important Voltage Information 1-1
Grounding Instructions . . . . 1-1
Important Safety Instructions 1-2
Warning Labels . . . . . . . . . . 1-4
Caution Labels. . . . . . . . . . . 1-5
2 Technical Specifications
Specifications . . . . . . . . . . . 2-1
Stableflex System . . . . . . . . 2-2
3 Operation
Quick Start. . . . . . . . . . . . . .
Stopping the Treadmill. . . . .
Automatic Stop Feature . . .
Selecting Programs &
Options . . . . . . . . . . . . . . . .
Displaying Heart Rate . . . . .
The Workout Graph . . . . . . .
Detailed Operation Guide . .
Control During Operation . .
Changing Data Readouts . .
Use of Programs . . . . . . . . .
3-1
3-1
3-1
3-2
3-2
3-2
3-3
3-4
3-5
3-6
4 Preventive Maintenance
Regular Maintenance
Activities . . . . . . . . . . . . . . . . 4-1
Running Belt Maintenance . 4-3
5 Setup & Assembly
Quick Setup . . . . . . . . . . . .
Choosing & Preparing a Site
Electrical Power
Requirements . . . . . . . . . . . .
Unpacking . . . . . . . . . . . . . .
Assembling the Treadmill. . .
Test the 600T Operation . . .
Setting Operation Options. .
5-1
5-1
5-3
5-3
5-4
5-8
5-9
6 Customer Service
Contacting Service . . . . . . . 6-1
Serial Number & Voltage . . . 6-1
Return Material Authorization
(RMA). . . . . . . . . . . . . . . . . . 6-1
Damaged Treadmill or Parts 6-2
Ordering Parts . . . . . . . . . . . 6-2
2. Provide the technician with a detailed description of the problem you are
having or the defect in the item you wish to return.
3. Provide the model and serial number of your treadmill. The serial
number is located on the rear crossbar under the running deck. The
serial number begins with a letter, for example: R09-101331100.
Page 6-1
Cybex 600T Treadmill Owner’s Manual
4. At Cybex’s discretion, the technician may request that you return the problem part(s) to
Cybex for evaluation and repair or replacement. The technician will assign you an RMA
number and will send you an ARS label. The ARS label and RMA number must be
clearly displayed on the outside of the package that contains the item(s) to be
returned. Include a description of the problem, the serial number of the treadmill and
the name and address of the owner in the package along with the part(s).
5. Forward the package through UPS to Cybex.
Attn: Customer Service Department
Cybex International, Inc.,
10 Trotter Drive
Medway, MA 02053
NOTE:
Merchandise returned without an RMA number on the outside of the package or
shipments sent C.O.D. will not be accepted by the Cybex receiving department.
Damaged Parts
Materials damaged in shipment should not be returned for credit. Shipping damages are the
responsibility of the carrier (UPS, Federal Express, trucking companies, etc.)
Apparent Damage — Upon receipt of your shipment, check all boxes carefully. Any damage
seen with a visual check must be noted on the freight bill and signed by the carrier's agent.
Failure to do so will result in the carrier's refusal to honor your damage claim. The carrier will
provide you with the required forms for filing such claims.
Concealed Damage — Damage not seen with a visual check upon receipt of a shipment but
noticed later must be reported to the carrier as soon as possible. Upon discovery of the
damage, a written or phone request to the carrier asking them to perform an inspection of the
materials must be made within ten days of the date of delivery. Keep all shipping containers
and packing materials: they will be needed as part of the inspection process. The carrier will
provide you with an inspection report and the necessary forms for filing a concealed damage
claim. Concealed damage is the carrier's responsibility.
Ordering Parts
Visit eCybex.com to shop for parts online, or download the parts order form and fax your
order to 508-533-5183. To speak with a customer service representative, in most areas call
800-766-3211 then press 63. Otherwise call 508-533-4300.
Page 6-2