Download Belkin Hi-Speed USB 2.0 User manual
Transcript
P74200_F5U228_man.qxd
1/10/03
4:18 PM
Page 2
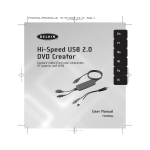
Hi-Speed USB 2.0
DVD Creator
Belkin Corporation
501 West Walnut Street
Compton • CA • 90220 • USA
Tel: 310.898.1100
Fax: 310.898.1111
Capture video from your camcorder,
PC camera, and VCRs
Belkin Components, Ltd.
Express Business Park
Shipton Way • Rushden • NN10 6GL
United Kingdom
Tel: +44 (0) 1933 35 2000
Fax: +44 (0) 1933 31 2000
Belkin Components B.V.
Starparc Building • Boeing Avenue 333
1119 PH Schiphol-Rijk • The Netherlands
Tel: +31 (0) 20 654 7300
Fax: +31 (0) 20 654 7349
Belkin, Ltd.
7 Bowen Crescent • West Gosford
NSW 2250 • Australia
Tel: +61 (0) 2 4372 8600
Fax: +61 (0) 2 4372 8603
Belkin Tech Support
US: 310.898.1100 ext. 2263
800.223.5546 ext. 2263
Europe: 00 800 223 55 460
Australia: 1800 666 040
© 2003 Belkin Corporation. All rights reserved.
All trade names are registered trademarks of respective manufacturers listed.
P74200
User Manual
F5U228
P74200_F5U228_man.qxd
1/10/03
4:18 PM
Page 4
TABLE OF CONTENTS
Introduction . . . . . . . . . . . . . . . . . .
Overview
Features . . . . . . . . . . . . . . . . . . .
Specifications . . . . . . . . . . . . . . . .
Recommmended System Requirements
Installation . . . . . . . . . . . . . . . . . .
Video Capture Quick Start . . . . . . . . .
Information . . . . . . . . . . . . . . . . . .
. . . . . . . . . . . . . . . . . . . . .1
.
.
.
.
.
.
.
.
.
.
.
.
.
.
.
.
.
.
.
.
.
.
.
.
.
.
.
.
.
.
.
.
.
.
.
.
.
.
.
.
.
.
.
.
.
.
.
.
.
.
.
.
.
.
.
.
.
.
.
.
.
.
.
.
.
.
.
.
.
.
.
.
.
.
.
.
.
.
.
.
.
.
.
.
.
.
.
.
.
.
.
.
.
.
.
.
.
.
.
.
.
.
.
.
.
.
.
.
.
.
.
.
.
.
.
.
.
.
.
.
.2
.2
.3
.4
.6
.8
P74200_F5U228_man.qxd
1/10/03
4:18 PM
Page 6
INTRODUCTION
Welcome to Belkin USB Hi-Speed Connectivity!
Congratulations and thank you for purchasing the Belkin Hi-Speed
USB 2.0 DVD Creator.
Now you can easily capture video from camcorders, VCRs, and other
analog video sources, as well as add professional-quality titles,
soundtracks, and stunning effects to your videos. The DVD Creator
lets you share your movies on tape, through e-mail, the Web, or as
high-quality DVDs or VCDs. You can now create disks you can play
on home DVD players or on computers with DVD playback software,
and it features CD- and DVD-burner hardware support.
1
P74200_F5U228_man.qxd
1/10/03
4:18 PM
Page 2
OVERVIEW
OVERVIEW
Features
Recommended System Requirements
• Compliance with Hi-Speed USB 2.0 specifications
• 1GHz Pentium® 4 processor or equivalent
• True “Plug and Play” performance
• Available Hi-Speed USB 2.0 port
• Compatible with composite video and S-video devices
• Windows® 2000 or XP
• Supports NTSC, PAL, and SECAM video inputs
• 128MB RAM
• Supports 30 frames per second at resolutions of 352x240, 640x480, and
720x480
• 500MB of free hard-disk space
• Supports high-resolution, still-image capture at 640x480
• CD-ROM drive
• Sound card, speaker, and microphone required for audio recording
Specifications
• Video Input: Composite and S-Video
• Video Capture Size: 160x120, 320x240, 640x480, and 720x480
• Power Source: Self-powered through USB port, +5VDC @ 240mA max.
• Software Interface: Microsoft® WDM, Twain interface
• Signal Input Connectors:
Composite Video—Industry-standard RCA jack
S-Video—Industry-standard female S-video connector
2
3
P74200_F5U228_man.qxd
1/10/03
4:18 PM
Page 4
INSTALLATION
INSTALLATION
Important Note: Please install the F5U228 device driver before
connecting the F5U228 to your computer.
8.
To confirm that the F5U228 has been properly installed, check the Windows
Device Manager:
a. Right-click on “My Computer”.
Windows XP/2000
b. Select “Properties”.
1.
c. Select the “Hardware” tab and click on the “Device Manager” button.
Insert the F5U228 Driver Installation CD into your CD-ROM drive.
After a few moments, the CD will auto-start and the main menu will
appear. Click the “Install Driver” button to install the required F5U228
device drivers.
d. Click the plus sign (+) next to “Imaging Devices”.
You should now see an entry for “Hi-Speed USB 2.0
DVD Creator”.
2.
The InstallShield Wizard will now launch and the driver installation
process begins. Click “Next”.
Note: The following steps assume that a composite video cable is being used to
connect your video source to the F5U228.
3.
The software license screen will now be displayed. Click “Yes” to accept
the terms of the license agreement and to proceed with installation.
9.
4.
The InstallShield Wizard will prompt you to enter a location for “USB 2.0
Image”. Click “Next” to choose the default location.
5.
Click “Finish” to complete the driver installation procedure.
10. Connect the stereo mini-plug of the supplied audio adapter cable to the
audio-out jack on your sound card. Then connect a stereo audio cable
between the audio adapter and the audio-input jacks of your source device.
6.
Plug the F5U228 into a Hi-Speed USB 2.0-compliant USB port.
11. Hardware installation is now complete.
7.
The F5U228 will be detected and the New Hardware Wizard will launch.
12. Click the “Install VideoStudio 6” button on the F5U228 installation CD main
menu, and follow the instructions provided by the installer.
Note: In Windows XP, the remainder of the installation process is automated.
No further user input is required.
In Windows 2000, a “Digital Signature Not Found” screen may be
displayed. If so, click “Yes” to continue.
4
After hardware installation is finished, connect a composite video cable
between the F5U228 and to the video-out connector of your source device.
13. Before capturing your first movie clip, it is recommended that you either
view or print the VideoStudio user guide. Select the “VideoStudio User
Guide” button located on the F5U228 installation CD main menu. The
manual is stored on your installation CD in PDF format.
5
P74200_F5U228_man.qxd
1/10/03
4:18 PM
Page 6
VIDEO CAPTURE QUICK START
1.
Launch VideoStudio.
2.
Select “Start” from the command bar on top of the VideoStudio
display screen.
3.
Click the “New Project” icon then select a capture template from the
template list. For this example we’ll choose “NTSC VCD”.
4.
Click “OK” to complete the capture template selection process and move
to the “Capture” screen.
5.
Make sure that “Hi-Speed USB 2.0 DVD Creator” is displayed in the driver
window found on the left-hand side of the VideoStudio display screen.
6.
Start your video source. The source material should now be displayed in
the VideoStudio preview window. If the source material includes an
audio track, you should also hear audio at this time.
7.
When you wish to begin capturing the source material, click the
“Capture Video” icon found in the upper left-hand corner of the
VideoStudio display screen.
Important Note: During the video-capture process, microprocessor priority is
given to recording of the source material. Video displayed in the preview
window may appear jerky with horizontal imperfections. The final rendered
movie clip will not display these imperfections.
8.
Click the “Capture Video” icon a second time when you wish to
terminate the capture process.
9.
A movie icon will now appear in the filmstrip located on the bottom of
the VideoStudio display screen. Double-click the movie icon to open
your movie clip in the VideoStudio preview window.
10. You may now use the editing and customization features of
VideoStudio to add effects and/or edit your movie clip. See the
detailed VideoStudio reference guide included on the F5U228
installation CD for further information.
VIDEO CAPTURE QUICK START
12. At this point, you may choose to create a video file to display on your
computer, or produce a Video CD (VCD). For this example, we will
produce a Video CD.
13. Click the “Create VCD” icon located on the left-hand side of the
VideoStudio display screen. Enter the file name “VCD sample” in the
“Save File” dialog box.
14. The “Ulead DVD Plug-in - Start” screen will be displayed. Select “Next”
to continue.
15. The “Ulead DVD Plug-in - Add Scene” screen will be displayed. Click
“Next” to continue.
Note: At any time during the VCD authoring process, you may click the “Help”
button to access a context-sensitive help file. The F5U228 installation CD also
includes a detailed VideoStudio user manual in PDF format.
16. Select a menu template from the “Ulead DVD Plug-in - Select Menu
Template” screen. Click “Next” to continue.
17. You may now use the “Ulead DVD Plug-in - Playback Simulation” screen
to view a simulation of your final VCD. Click “Next” to continue.
18. Use the “Ulead DVD Plug-in - Determine Output Options Settings” screen
to ready your CD-RW or DVD-RW drive for the recording process. Click
“Next” to continue.
19. The “Ulead DVD Plug-in - Finish” screen will now be displayed. You may
choose to burn your VCD at this time, or to create a disk image file. For
this example, choose the default setting of “Record to CD”. Insert a
blank, recordable CD into your CD-RW drive, then choose “Create VCD”.
20. When the burn process is completed, the finished VCD will be ejected
from your CD-RW drive. Click “OK” then click “Finish”.
21. The finished VCD is now ready to be played in your home DVD player, or
on your computer if you have DVD-viewing software installed.
11. When you are ready to produce the final movie clip, select “Finish” from
the command bar on the top of the VideoStudio display screen.
6
7
P74200_F5U228_man.qxd
1/10/03
4:18 PM
Page 8
INFORMATION
FCC Statement
DECLARATION OF CONFORMITY WITH FCC RULES FOR
ELECTROMAGNETIC COMPATIBILITY
We, Belkin Corporation, of 501 West Walnut Street, Compton, CA 90220, declare under our
sole responsibility that the product:
F5U228
to which this declaration relates:
Complies with Part 15 of the FCC Rules. Operation is subject to the following two
conditions: (1) this device may not cause harmful interference, and (2) this device must
accept any interference received, including interference that may cause undesired
operation.
CE Declaration of Conformity
We, Belkin Corporation, declare under our sole responsibility that the F5U228, to which this
declaration relates, is in conformity with Generic Emissions Standard EN 55022:1998 Class B,
EN50081-1 and with Generic Immunity Standard EN50082-1 1992.
Belkin Corporation Limited Lifetime Product Warranty
Belkin Corporation warrants this product against defects in materials and workmanship for its lifetime.
If a defect is discovered, Belkin will, at its option, repair or replace the product at no charge provided
it is returned during the warranty period, with transportation charges prepaid, to the authorized
Belkin dealer from whom you purchased the product. Proof of purchase may be required.
This warranty does not apply if the product has been damaged by accident, abuse, misuse, or
misapplication; if the product has been modified without the written permission of Belkin; or if any
Belkin serial number has been removed or defaced.
THE WARRANTY AND REMEDIES SET FORTH ABOVE ARE EXCLUSIVE IN LIEU OF ALL OTHERS, WHETHER ORAL
OR WRITTEN, EXPRESSED OR IMPLIED. BELKIN SPECIFICALLY DISCLAIMS ANY AND ALL IMPLIED WARRANTIES,
INCLUDING, WITHOUT LIMITATION, WARRANTIES OF MERCHANTABILITY AND FITNESS FOR A PARTICULAR
PURPOSE.
No Belkin dealer, agent, or employee is authorized to make any modification, extension, or addition
to this warranty.
BELKIN IS NOT RESPONSIBLE FOR SPECIAL, INCIDENTAL, OR CONSEQUENTIAL DAMAGES RESULTING
FROM ANY BREACH OF WARRANTY, OR UNDER ANY OTHER LEGAL THEORY, INCLUDING BUT NOT LIMITED
TO LOST PROFITS, DOWNTIME, GOODWILL, DAMAGE TO OR REPROGRAMMING, OR REPRODUCING ANY
PROGRAM OR DATA STORED IN OR USED WITH BELKIN PRODUCTS.
8


