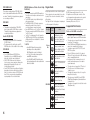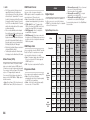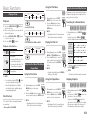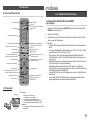
1
BD-E5200 BD-E5300 Blu-ray™ Disc Player user manual imagine the possibilities Thank you for purchasing this Samsung product. To receive more complete service, please register your product at www.samsung.com/register ENGLISH Key features Blu-ray Disc Features Blu-ray Discs support the highest quality HD video available in the industry - Large capacity means no compromise on video quality. The following Blu-ray Disc features are disc dependant and will vary. Appearance and navigation of features will also vary from disc to disc. Not all discs will have the features described below. Video highlights The BD-ROM format supports three highly advanced video codecs, including AVC, VC-1 and MPEG-2. HD video resolutions are also supported: • 1920 x 1080 High Definition • 1280 x 720 High Definition For High-Definition Playback To view high-definition contents on a Blu-ray Disc, you need an HDTV (High Definition Television). Some Blu-ray Discs may require you to use the player’s HDMI OUT to view high-definition content. The ability to view high-definition content on Blu-ray Discs may be limited depending on the resolution of your TV. BD-LIVE You can use a Blu-ray Disc that supports BD-LIVE to download content provided by the disc manufacturer through a network connection. 2 Blu-ray Disc Player Features AllShare You can play videos, music, and photos saved on your devices (such as your PC or NAS [Network-Attached Storage]) through a network connection. Playing multimedia files You can use the USB connection to play various kinds of multimedia files (MP3, JPEG, DivX, etc.) located on a USB storage device. Safety Information Warning TO REDUCE THE RISK OF ELECTRIC SHOCK, DO NOT REMOVE THE COVER (OR BACK). NO USER-SERVICEABLE PARTS ARE INSIDE. REFER SERVICING TO QUALIFIED SERVICE PERSONNEL. CAUTION RISK OF ELECTRIC SHOCK DO NOT OPEN The lighting flash and Arrowhead within the triangle is a warning sign alerting you of dangerous voltage inside the product. CAUTION: TO REDUCE THE RISK OF ELECTRIC SHOCK, DO NOT REMOVE COVER (OR BACK) NO USER SERVICEABLE PARTS INSIDE. REFER SERVICING TO QUALIFIED SERVICE PERSONNEL. Do not install this equipment in a confined space such as a bookcase or similar unit. WARNING To prevent damage which may result in fire or electric shock hazard, do not expose this appliance to rain or moisture. CAUTION Blu-ray Disc Player USES AN INVISIBLE LASER BEAM WHICH CAN CAUSE HAZARDOUS RADIATION EXPOSURE IF DIRECTED. BE SURE TO OPERATE Blu-ray Disc Player CORRECTLY AS INSTRUCTED. CLASS 1 LASER product This Compact Disc player is classified as a CLASS 1 LASER product. Use of controls, adjustments or performance of procedures other than those specified herein may result in hazardous radiation exposure. The explanation point within the triangle is a warning sign alerting you of important instructions accompanying the product. CAUTION : • CLASS 3B VISIBLE AND INVISIBLE LASER RADIATION WHEN OPEN. AVOID EXPOSURE TO THE BEAM (IEC 60825-1) • THIS PRODUCT UTILIZES A LASER. USE OF CONTROLS OR ADJUSTMENTS OR PERFORMANCE OF PROCEDURES OTHER THAN THOSE SPECIFIED HEREIN MAY RESULT IN HAZARDOUS RADIATION EXPOSURE. DO NOT OPEN COVER AND DO NOT REPAIR YOURSELF. REFER SERVICING TO QUALIFIED PERSONNEL. CLASS 1 KLASSE 1 LUOKAN 1 KLASS 1 PRODUCTO LASER PRODUCT LASER PRODUKT LASER LAITE LASER APPARAT LÁSER CLASE 1 This product satisfies CE regulations when shielded cables and connectors are used to connect the unit to other equipment. To prevent electromagnetic interference with electric appliances, such as radios and televisions, use shielded cables and connectors for connections. IMPORTANT NOTE The mains lead on this equipment is supplied with a moulded plug incorporating a fuse. The value of the fuse is indicated on the pin face of the plug. If it requires replacing, a fuse approved to BS1362 of the same rating must be used. Never use the plug with the fuse cover omitted if the cover is detachable. If a replacement fuse cover is required, it must be of the same colour as the pin face of the plug. Replacement covers are available from your dealer. If the fitted plug is not suitable for the power points in your house or the cable is not long enough to reach a power point, you should obtain a suitable safety approved extension lead or consult your dealer for assistance. However, if there is no alternative to cutting off the plug, remove the fuse and then safely dispose of the plug. Do not connect the plug to a mains jack, as there is a risk of shock hazard from the bared flexible cord. To disconnect the apparatus from the mains, the plug must be pulled out from the mains socket, therefore the mains plug shall be readily operable. The product unit accompanying this user manual is licensed under certain intellectual property rights of certain third parties. Precautions Important Safety Instructions Read these operating instructions carefully before using the unit. Follow all the safety instructions listed below. Keep these operating instructions handy for future reference. 1. Read these instructions. 2. 3. 4. 5. 6. 7. 8. 9. 10. 11. Keep these instructions. Heed all warnings. Follow all instructions. Do not use this apparatus near water. Clean only with a dry cloth. Do not block any ventilation openings. Install in accordance with the manufacturer’s instructions. Do not install near any heat sources such as radiators, heat registers, stoves, or other apparatus (including AV receivers) that produce heat. Do not defeat the safety purpose of the polarized or grounding-type plug. A polarized plug has two blades with one wider than the other. A grounding type plug has two blades and a third grounding prong. The wide blade or the third prong are provided for your safety. If the provided plug does not fit into your outlet, consult an electrician for replacement of the obsolete outlet. Protect the power cord from being walked on or pinched particularly at plugs, convenience receptacles, and the point where they exit from the apparatus. Only use attachments/accessories specified by the manufacturer. 12. Use only with the cart, stand, tripod, bracket, or table specified by the manufacturer, or sold with the apparatus. When a cart is used, use caution when moving the cart/apparatus combination to avoid injury from tip-over. 13. Unplug this apparatus during lightning storms or when unused for long periods of time. 14. Refer all servicing to qualified service personnel. Servicing is required when the apparatus has been damaged in any way, such as when power-supply cord or plug is damaged, liquid has been spilled or objects have fallen into the apparatus, the apparatus has been exposed to rain or moisture, does not operate normally, or has been dropped. Disc Storage & Management Disc Handling Disc Shape • Use discs with regular shapes. If you use an irregular disc (a disc with a special shape), you can damage the player. Holding discs • Avoid touching the surface of a disc where data has been recorded. Blu-ray Discs • Do not leave a Blu-ray Disc in the player for long periods of time. Remove the Blu-ray Disc from the player and store it in its case. • Be careful not to scratch or leave fingerprints on the surface of the Blu-ray Disc. DVD-VIDEO, Audio CD (CD-DA) • Wipe off dirt or contamination on the disc with a soft cloth. Disc Storage Be careful not to damage the disc because the data on these discs is highly vulnerable to the environment. • Do not keep under direct sunlight. • Keep in a cool ventilated area. • Store vertically. • Keep in a clean, protective jacket. • If you move your player suddenly from a cold place to a warm place, condensation may occur on the operating parts and lens and cause abnormal disc playback. If this occurs, unplug the player, wait for two hours, and then connect the plug to the power outlet. Then, insert the disc, and try to play back again. Handling Cautions • Do not write on the printed side with a ballpoint pen or pencil. • Do not use record cleaning sprays or antistatic sprays to clean discs. Also, do not use volatile chemicals, such as benzene or thinner. • Do not apply labels or stickers to discs. (Do not use discs fixed with exposed tape adhesive or leftover peeled-off stickers.) • Do not use scratch-proof protectors or covers. • Do not use discs printed with label printers available on the market. • Do not load warped or cracked discs. • Before connecting other components to this 3 player, be sure to turn them off. • Do not move the player while it is playing a disc. The disc can be scratched or damaged and the player’s internal parts can be damaged. • Do not put a flower vase filled with water or any small metal objects on the player. • Be careful not to put your hand into the disc slot. • Do not place anything other than the disc in the disc slot. • Interference from exterior sources such as lightening and static electricity can affect the normal operation of this player. If this occurs, turn the player off and on again with the POWER button, or disconnect and then reconnect the AC power cord to the AC power outlet. The player will operate normally. • Be sure to remove the disc and turn off the player after use. • Disconnect the AC power cord from the AC outlet when you don’t intend to use the player for long periods of time. • To clean a disc, wipe it in a straight line from the inside to the outside of the disc. • Do not expose the player to any liquid. • When the AC plug is connected to a wall outlet, the player will still draw power (standby mode) when it is turned off. • Apparatus shall not be exposed to dripping or splashing and no objects filled with liquids, such as vases, shall be placed on the apparatus. • The main plug is used as a disconnect device and shall stay readily operable at any time. • Do not touch the power plug with a wet hand. Otherwise, it can cause an electric shock. • Do not share one power socket with multiple electric devices. Otherwise, it may cause an overheat, resulting in a fire. • If you encounter an abnormal noise, burning smell or smoke, turn off the power switch immediately and disconnect the power plug from the wall outlet. Then, contact the nearest customer center for technical assistance. If you still use the product as it is, this may cause an electric shock or fire. 4 Maintenance of Cabinet Before you clean the Blu-ray Disc’s cabinet, be sure to disconnect the AC power cord from the AC outlet. • Do not use benzene, thinner, or other solvents for cleaning. • Wipe the cabinet with a soft cloth. Restrictions on Playback • This player may not respond to all operating commands because some Blu-ray Disc, DVD, and CD discs allow specific or limited operation and provide only certain features during playback. Please note that this is not a defect in the player. • Samsung cannot guarantee that this player will play every disc bearing the Blu-ray Disc, DVD or CD logo because disc formats evolve, and problems and errors may occur during the creation of Blu-ray Disc, DVD, and CD software and/or the manufacture of discs. Please contact the SAMSUNG customer care center if you have questions or encounter difficulty in playing Blu-ray Disc, DVD, or CD discs in this player. Also, refer to rest of this user manual for additional information on playback restrictions. Contents KEY FEATURES Audio..........................................................14 Blu-ray Disc Player Features.........................2 System.......................................................17 Blu-ray Disc Features...................................2 SAFETY INFORMATION Warning........................................................2 Precautions..................................................3 Disc Storage & Management........................3 GETTING STARTED Before using the User Manual.......................5 Accessories..................................................7 Front Panel...................................................8 Rear Panel....................................................8 Remote Control............................................9 CONNECTIONS A. Connecting to a TV..................................9 B. Connecting to an Audio System.............10 C. Connecting to a Network.......................10 SETUP The Initial Settings Procedure.....................12 Menu Navigation.........................................12 Accessing the Settings Menu.....................12 Display.......................................................13 Network.....................................................16 Language...................................................17 Security......................................................17 General.......................................................18 Support......................................................18 BASIC FUNCTIONS Playing a Video...............................................19 Using the Disc Menu/Title Menu/ Popup Menu..................................................19 Using the Search and Skip Functions.............19 Slow Motion Play/Step Motion Play................20 Using the TOOLS button................................20 Listening to Music..........................................21 Playing back Pictures.....................................22 Playing back a USB Storage Device...............22 NETWORK SERVICES BD-LIVE™..................................................23 Using the AllShare Function........................23 APPENDIX Troubleshooting..........................................23 Specifications.............................................25 Getting Started Disc types your player cannot play Before using the User Manual Disc Types and Contents your player can play Content Logo VIDEO - MUSIC PHOTO ✎ NOTE Icon Definition h z Indicates a function available on a BD-ROM or BD-RE/-R disc recorded in the BD-RE format. Z � Indicates a function available on a DVD-VIDEO or recorded DVD+RW/DVD-RW(V)/DVD-R/+R discs that have been recorded and finalized. � o - � - G Indicates a function available on a CD-RW/-R, DVD-RW/-R, BDRE/-R disc or in a USB storage media containing DivX, MKV, MP4 contents. Indicates a function available on an audio CD-RW/-R (CD-DA format). Indicates a function available on a CD-RW/-R, DVD-RW/-R, BDRE/-R disc or in a USB storage media containing MP3 or WMA contents. Indicates a function available on a CD-RW/-R, DVD-RW/-R, BDRE/-R disc or in a USB storage media containing JPEG contents. ▪▪ The player may not play certain CD-RW/-R and DVD-R because of the disc type or recording conditions. ▪▪ If a DVD-RW/-R disc has not been recorded properly in DVD video format, it will not be playable. ▪▪ Your player will not play content that has been recorded on a DVD-R at a bit-rate that exceeds 10 Mbps. ▪▪ Your player will not play content that has been recorded on a BD-R or USB device at a bit rate that exceeds 25 Mbps. • HD DVD • DVD-ROM/PD/MVDisc, etc ✎ NOTE • DVD-RAM • Super Audio CD (except CD layer) ▪▪ Some commercial discs and DVDs discs purchased outside your region may not play on this player. ▪▪ Playback may not work for some types of discs, or when you use specific operations, such as angle change and aspect ratio adjustment. Information about the discs is written in detail on the disc box. Please refer to this if necessary. ▪▪ Do not allow the disc to become dirty or scratched. Fingerprints, dirt, dust, scratches or deposits of cigarette smoke on the recording surface may make it impossible to use the disc for playback. ▪▪ When you play a BD-J title, loading may take longer than a normal title or some functions may perform slowly. ▪▪ This player may not respond to all operating commands because some Blu-ray Disc, DVD, and CD discs allow specific or limited operation and provide only certain features during playback. Please note that this is not a defect in the player. ▪▪ Samsung cannot guarantee that this player will play every disc bearing the Blu-ray Disc, DVD or CD logo because disc formats evolve, and problems and errors may occur during the creation of Blu-ray Disc, DVD, and CD software and/or the manufacture of discs. Please contact the SAMSUNG customer care center if you have questions or encounter difficulty when playing Blu-ray Disc, DVD, or CD discs in this player. Also, refer to rest of this user manual for additional information on playback restrictions. • DVD-RW(VR mode) • 3.9 GB DVD-R Disc for Authoring. • CVD/CD-ROM/CDV/ CD-G/CD-I/LD (CD-Gs play audio only, not graphics.) Blu-ray Disc Compatibility Blu-ray Disc is a new and evolving format. Accordingly, disc compatibility issues are possible. Not all discs are compatible and not every disc will play back. For additional information, refer to the Compliance and Compatibility Notice section of this user manual. Disc Types BD-ROM Blu-ray ROM discs can only be played back. This player can play back pre-recorded commercial BD-ROM discs. BD-RE/-R Blu-ray RE/-R discs can be recorded on and played back. This player can play back a BD-RE/-R disc recorded by other compatible Blu-ray Disc recorders. DVD-VIDEO • This player can play back pre-recorded commercial DVDs (DVD-VIDEO discs) with movies. • When switching from the first layer to the second layer of a dual-layered DVD-VIDEO disc, there may be momentary distortion in the image and sound. This is not a malfunction of the player. 5 DVD-RW/-R/+R This player can play back a DVD-RW/-R/+R disc recorded and finalized with a DVD video recorder. The ability to play back may depend on recording conditions. DVD+RW • This player can play back a DVD+RW disc recorded with a DVD Video recorder. The ability to play back may depend on recording conditions. Audio CD (CD-DA) • This player can play back CD-DA format audio CD-RW/-R discs. • The player may not be able to play some CDRW/-R discs due to the condition of the recording. CD-RW/-R • Use a 700MB (80 minute) CD-RW/-R disc. If possible, do not use an 800MB (90 minute) or larger disc, as the disc may not play back. • If the CD-RW/-R disc was not recorded as a closed session, you may experience delays when playing back the beginning of the disc or all recorded files may not play. • Some CD-RW/-R discs may not play on this player, depending on the device which was used to burn them. For contents recorded on CD-RW/-R media from CDs for your personal use, playability may vary depending on the contents and discs. AVCHD (Advanced Video Codec High Definition) • This player can play back AVCHD format discs. These discs are normally recorded and used in camcorders. • The AVCHD format is a high definition digital video camera format. • The MPEG-4 AVC/H.264 format compresses images with greater efficiency than the conventional image compressing format. • Some AVCHD discs use the “x.v.Color” format. This player can play back AVCHD discs that use “x.v.Color” format. • “x.v.Color” is a trademark of Sony Corporation. • “AVCHD” and the AVCHD logo are trademarks of Matsushita Electronic Industrial Co., Ltd. and Sony Corporation. ✎NOTE ▪▪ Some AVCHD format discs may not play, depending on the recording condition. AVCHD format discs need to be finalized. ▪▪ “x.v.Color” offers a wider colour range than normal DVD camcorder discs. ▪▪ Some DivX, MKV and MP4 format discs may not play, depending on the video resolution and frame rate condition. Region Code Both players and discs are coded by region. These regional codes must match for a disc to play. If the codes do not match, the disc will not play. The Region Code for this player is displayed on the rear panel of the player. Disc Type Blu-ray Disc DVD-VIDEO 6 Region Code Area A North America, Central America, South America, Korea, Japan, Taiwan, Hong Kong and South East Asia. B Europe, Greenland, French territories, Middle East, Africa, Australia and New Zealand. C India, China, Russia, Central and South Asia. 1 The U.S., U.S. territories and Canada 2 Europe, Japan, the Middle East, Egypt, South Africa, Greenland 3 Taiwan, Korea, the Philippines, Indonesia, Hong Kong 4 Mexico, South America, Central America, Australia, New Zealand, Pacific Islands, Caribbean 5 Russia, Eastern Europe, India, most of Africa, North Korea, Mongolia 6 China Copyright © 2012 Samsung Electronics Co.,Ltd. All rights reserved; No part or whole of this user’s manual may be reproduced or copied without the prior written permission of Samsung Electronics Co.,Ltd. Supported File Formats Notes on the USB connection • Your player supports USB storage media, MP3 players, digital cameras, and USB card readers. • The player does not support folder or file names longer than 128 characters. • Some USB/External HDD/digital camera devices may not be compatible with the player. • Your player supports the FAT16, FAT32, and NTFS files systems. • Connect USB devices directly to the player’s USB port. Connecting through a USB cable may cause compatibility problems. • Inserting more than one memory device into a multi-card reader may cause the reader to operate improperly. • The player does not support the PTP protocol. • Do not disconnect a USB device during a “loading” process. • The bigger the image resolution, the longer the image takes to display. • This player cannot play MP3 files with DRM (Digital Rights Management) downloaded from commercial sites. • Your player only supports the video that is under 30fps (frame rate). Video File Support File Extension Container *.avi AVI *.mkv MKV *.wmv WMV (wmv9) *.mp4 MP4 *.mpg *.mpeg PS •Limitations Video Codec DivX 3.11/4.x/5.1/6.0 MP4v3 H.264 BP/MP/HP VC-1 AP DivX 5.1/6.0 H.264 BP/MP/HP Audio Codec MP3 Dolby DIgital DTS WMA PCM MP3 Dolby DIgital DTS VC-1 AP WMA VC-1 SM MP4 (mp4v) AAC H.264 BP/MP/HP MPEG1 MPEG2 H.264 BP/MP/HP MP1, 2 Dolby DIgital DTS Resolution 1920x1080 1920x1080 1920x1080 1920x1080 1920x1080 1920x1080 -Supports up to H.264 Level 4.1 and AVCHD -Does not support H.264 FMO/ASO/RS, and VC1 SP/MP/AP L4. -MPEG4 SP, ASP : Below 1280 x 720 : 60 frames max Above 1280 x 720 : 30 frames max -Does not support GMC 2 or higher •Audio decoder File Extension Container Audio Codec Support Range *.mp3 MP3 MP3 - *.wma WMA WMA * S ampling rates (in kHz) - 8, 11, 16, 22, 32, 44.1, 48 * B it rates - All bit-rates from 5kbps to 384kbps Logos of Discs the player can play 1920x1080 1920x1080 1920x1080 1920x1080 Blu-ray Disc BD-LIVE 1920x1080 1920x1080 1920x1080 - Even when the file is encoded by a supported codec mentioned above, a file might not be played if its content has a problem. - Normal playback is not guaranteed if the file’s container information is wrong or the file itself is corrupted. - Files having higher Bit rate/frame rate than standard may stutter during sound/video playback. - The Seek (skip) function is not available if the file’s index table is damaged. •Video decoder Music File Support PAL broadcast System in U.K., France, Germany, etc Accessories Check for the supplied accessories shown below. Batteries for Remote Control (AAA Size) User Manual Remote Control -Supports WMA 7, 8, 9 and STD -Does not support WMA sampling rate of 22050Hz mono. 7 Rear Panel Front Panel a b a bc d e g 1 2 3 4 5 6 7 DISC TRAY REMOTE CONTROL SENSOR f Opens to accept a disc. Detects signals from the remote control. DISPLAY Displays the playing status, time, etc. OPEN/CLOSE BUTTON Opens and closes the disc tray. POWER BUTTON Turns the player on and off. USB HOST You can connect a USB memory flash stick here and use it as storage when the player is connected to BD-LIVE. You can also use the USB Host for software upgrades and MP3/JPEG/DivX/MKV/MP4 playback. PLAY/PAUSE BUTTON Plays a disc or pauses playback. ✎ NOTE ▪▪ You can perform software upgrades using the USB Host jack with a USB flash memory stick only. ▪▪ When the player displays the Blu-ray Disc menu, you cannot start the movie by pressing the Play button on the player or the remote. To play the movie, you must select Play Movie or Start in the disc menu, and then press the ENTER button. 8 c 1 LAN Use for network based services, BD-LIVE, and software upgrades using a network connection. 2 HDMI OUT Using an HDMI cable, connect this HDMI output terminal to the HDMI input terminal on your TV for the best quality picture or to your AV receiver for the best quality sound. 3 DIGITAL AUDIO OUT Connects to an AV receiver. Connections Remote Control Tour of the Remote Control Turn the player on and off. Turn the TV on and off. After setup, allows you to set the input source on your TV. Press to eject a disc. TV volume adjustment. Press numeric buttons to operate options. Connecting to a TV with an HDMI Cable - Best Quality 1. Using an HDMI cable, connect the HDMI OUT terminal on the rear of the player to the HDMI IN terminal of your TV. See page 11. 2. Turn on the player and TV. 3. Press the input selector on your TV remote control until the HDMI signal from the player appears on your TV screen. ✎ NOTE Use to enter the disc menu. Use to enter the popup menu/title menu. Press to skip backwards or forwards. Press to search a disc backwards or forwards. Press to pause a disc. Press to stop a disc. Press to play a disc. Press to move to the home menu. Use to access various audio functions on a disc (Blu-ray Disc/DVD). Press to switch the Blu-ray Disc/DVD’s subtitle language. Press to use Tools menu. Use to display the playback information when playing a Blu-ray Disc/DVDs. Use to select menu items and change menu value. Return to the previous menu. Press to exit the menu. These buttons are used both for menus on the player and also several Blu-ray Disc functions. Press to use the bonusview function. Press to see the full screen on a TV. Allows you to repeat a title, chapter, track or disc. Allows you to repeat A-B disc Installing batteries A. Connecting to a TV ▪▪ An HDMI cable outputs digital video/audio, so you don’t need to connect an audio cable. ▪▪ If the player is connected to your TV in the HDMI 720p, 1080i, or 1080p output mode, you must use a High speed (category 2) HDMI cable. ▪▪ HDMI outputs only a pure digital signal to the TV. If your TV does not support HDCP (High-bandwidth Digital Content Protection), random noise appears on the screen. ▪▪ Depending on your TV, certain HDMI output resolutions may not work. Please refer to the user manual of your TV. ▪▪ When you connect the player to the TV using the HDMI cable for the first time or to a new TV, the HDMI output resolution will be automatically set to the highest supported by the TV. ▪▪ A long HDMI cable may cause screen noise. If this occurs, set Deep Color to Off in the menu. ▪▪ If you use an HDMI-to-DVI cable to connect to your display device, you must also connect the Digital Audio Out to an audio sytem to hear audio. ✎ NOTE ▪If the remote does not operate properly: • Check the polarity (+/–) of the batteries. • Check if the batteries are drained. • Check if the remote sensor is blocked by obstacles. • Check if there is any fluorescent lighting nearby. ! CAUTION ▪Dispose of batteries according to local environmental regulations. Do not put them in the household trash. 9 B. Connecting to an Audio System • Please turn the volume down when you turn on the AV receiver. A sudden loud sound may cause damage to the speakers and your ears. • Please set the audio format according to the capabilities of your AV receiver. • The position of HDMI input terminals may vary depending on your AV receiver. Please refer to the user manual of your AV receiver. Case 1 : Connecting to an Audio System (HDMI supported AV receiver) - Best Quality (Recommended) 1. Using an HDMI cable, connect the HDMI OUT terminal on the rear of the player to the HDMI IN terminal of your AV receiver. See page 11. 2. Using an HDMI cable, connect the HDMI OUT terminal of the AV receiver to the HDMI IN terminal of your TV. 3. Turn on the player, TV, and AV receiver. 4. Using the input select button of the AV receiver and TV, select the correct HDMI input or each to hear sound and see video from the player. Refer to your AV receiver’s user manual to set the AV receiver’s audio input. Case 2 : Connecting to an Audio System (AV receiver with Dolby Digital or DTS decoder) - Better Quality 1. Using a coaxial cable, connect the DIGITAL AUDIO OUT (COAXIAL) terminal on the rear of the player to the DIGITAL AUDIO IN (COAXIAL) terminal of your AV receiver. See page 11. 2. Using an HDMI cable, connect the HDMI terminal on the rear of the player to the HDMI terminal of your TV. 3. Turn on the player, TV, and AV receiver. 4. Press the input select button of the AV receiver to select the correct external input and hear sound from the player. Refer to your AV receiver’s user manual to set the AV receiver’s audio input. 5. Press the input selector on your TV remote control to select the HDMI video source. 10 C. Connecting to a Network This player lets you use network based services such as BD-LIVE, and download software upgrades when it is connected to a network. We recommend using a Broadband modem (with integrated router) or IP router for the connection. For more information on router connections, refer to the user manual of the router or contact the router manufacturer for technical assistance. Cable Network 1. Using a Direct LAN (UTP) CAT 5 cable, connect the LAN terminal of the player to the LAN terminal of your modem or router. See page 11 2. Set the network options. See page 16. ✎ NOTE ▪▪ Internet access to Samsung’s software update server may not be allowed, depending on the router you use or your ISP’s policy. For more information, contact your ISP (Internet Service Provider). ▪▪ DSL users, please use a router to make a network connection. ▪▪ To use the AllShare function, you must connect your PC to your network as shown in the figure. The connection can be wired. A Connecting to a TV B Connecting to an Audio System Case 1 : HDMI cable (not included) HDMI cable (not included) Case 1 : HDMI cable (not included) C Network Broadband modem (with integrated router) Broadband service Or Case 2 : Coaxial cable (not included) Router Broadband modem Broadband service Networking with PC for AllShare function ✎NOTE : You can only connect this unit to a network via a wired connection. 11 Setup Menu Navigation The Initial Settings Procedure 1. Turn on your TV after connecting the player. When you connect the player to a TV for the first time, the player turn on automatically and the Initial Settings screen appears. Initial Settings I On-Screen Language Select a language for the on-screen displays. English Français Deutsch Español Italiano Nederlands > Move " Select 2. Use the ▲▼ buttons on the remote to select the desired language, and then press the ENTER button. 3. Press the ENTER button to select Start. 4. Use the ▲▼ buttons to select an Aspect Ratio, and then press the ENTER button. 5. Select Auto, and then press the ENTER button. If you do not have a home network, press the BLUE (D) button on your remote. You will go directly to the Home menu. 6. The Blu-ray player automatically verifies your wired network. When verification in complete, the screen displays “Your network is operating properly.” Press the ENTER button. 7. The “Initial settings completed.” message appears, and then the Home screen appears. - If you Blu-ray player does not connect to your network or you want to connect manually, go to Network Setup on page 16. 1 3 ✎ NOTE ▪▪ The Home menu will not appear if you do not configure the initial settings except as noted below. ▪▪ If you press the BLUE (D) button during network setup, you can access the Home menu even if the network setup is not completed yet. ▪▪ When you return to the Home menu, the full screen mode is cancelled automatically. ▪▪ If you want to display the Initial Setting screen again to make changes, press the PLAY/PAUSE ( ) button on the front panel of the player for more than 5 seconds with no disc inserted. This resets the player to its default settings. ▪▪ If you use an HDMI cable to connect the player to an Anynet+(HDMI-CEC)-compliant Samsung TV and 1.) You have set the Anynet+(HDMICEC) feature set to On in both the TV and the player and 2.) You have set the TV to a language supported by the player, the player will select that language as the preferred language automatically. ▪▪ If you leave the player in the stop mode for more than 5 minutes without using it, a screen saver will appear on your TV. If the player is left in the screen saver mode for more than 25 minutes, the power will automatically turn off. 4 2 1 HOME Button : Press to move to the Home menu. 2 RETURN Button : Return to the previous menu. 3 ENTER / DIRECTION Button : Move the cursor or select an item. Activate the currently selected item. Confirm a setting. 4 EXIT Button : Press to exit the current menu. • Home Menu 2 YouTube Videos 1 5 No Disc 12 3 4 a Change Device d View Devices " Enter 6 1 Selects Videos. 2 Selects YouTube. 3 Selects Photos. 4 Selects Music. 5 Selects Settings. 6 Displays the buttons you can use on the remote to access functions. Accessing the Settings Menu To access the Settings menu and sub-menus, follow these steps: 1. Press the POWER button. The Home Menu appears. 2. Press the ◄► buttons to select Settings, and then press the ENTER button. 3. Press the ▲▼ buttons to select the desired submenu, and then press the ENTER button. 4. Press the ▲▼ buttons to select the desired item, and then press the ENTER button. 5. Press the EXIT button to exit the menu. ✎ NOTE ▪▪ The access steps may differ depending on the menu you selected. The OSD (On Screen Display) may change in this player after you upgrade the software version. Display You can configure various display options such as the TV Aspect Ratio, Resolution, etc. TV Aspect Ratio Depending on the type of television you have, you may want to adjust the screen size setting. •16:9 Original : Select when you connect the player to a 16:9 TV screen. The player will display all content in its original aspect ratio. Content formatted in 4:3 will be displayed with black bars on the left and right. •16:9 Full : Select when you connect the player to a 16:9 TV screen. All content will fill the full screen. Content formatted in 4:3 will be stretched. •4:3 Letter Box : Select when you connect the player to a 4:3 TV screen. The player will display all content in its original aspect ratio. Content formatted in 16:9 will be displayed with black bars on the top and bottom. •4:3 Pan-Scan : Select when you connect the player to a 4:3 TV screen. 16:9 content will have the extreme left and right portions cut off. ✎NOTE ▪▪ Depending on the disc type, some aspect ratios may not be available. ▪▪ If you select an aspect ratio and option which is different than the aspect ratio of your TV screen, then the picture might appear to be distorted. ▪▪ If you select the 4:3 Pan-Scan or 4:3 Letter Box, pressing the FULL SCREEN button on the remote will not bring up a full screen picture. ▪▪ If you select the 16:9 Original, your TV may display 4:3 Pillarbox (black bars on sides of picture). If this occurs, pressing the FULL SCREEN button on the remote will not bring up a full screen picture. BD Wise (Samsung Players only) BD Wise is Samsung’s latest inter-connectivity feature. When you connect a Samsung player and a Samsung TV with BD Wise to each other via HDMI, and BD Wise is on in both the player and TV, the player outputs video at the video resolution and frame rate of the Blu-ray Disc/DVDs. •Off : The output resolution stays fixed at the resolution you set previously in the Resolution menu, regardless of the resolution of the disc. •On : The player outputs video at the original resolution and frame rate of the Blu-ray Disc/DVDs. ✎ NOTE ▪▪ When BD Wise is on, the Resolution setting automatically defaults to BD Wise and BD Wise appears in the Resolution menu. ▪▪ If the player is connected to a device that does not support BD Wise, you can not use the BD Wise function. ▪▪ For proper operation of BD Wise, set the BD Wise menu of both the player and the TV to On. Resolution Lets you set the output resolution of the HDMI video signal to Auto, 1080p, 1080i, 720p or 576p/480p. The number indicates the number of lines of video per frame. The i and p indicate interlaced and progressive scan, respectively. The more lines, the higher the quality. •Auto : Automatically sets the output resolution to the connected TV’s maximum resolution. •BD Wise : Automatically sets the resolution to the resolution of the Blu-ray Disc/DVDs if you have connected the player via HDMI to a TV with the BD Wise feature. (The BD Wise menu item appears only if BD Wise is set to On. See BD Wise above.) •1080p : Outputs 1080 lines of progressive video. •1080i : Outputs 1080 lines of interlaced video. •720p : Outputs 720 lines of progressive video. •576p/480p : Outputs 576/480 lines of progressive video. Resolution according to the output mode • Blu-ray Disc/E-contents/Digital Contents playback HDMI / connected Output Setup HDMI Mode Blu-ray Disc E-contents/Digital contents Max. Resolution of TV input Max. Resolution of TV input 1080p@60F 1080p@60F Movie Frame : Auto (24Fs) 1080p@24F 1080p@24F 1080i 720p 1080i 1080i 576p/480p 720p 576p/480p 576p/480p BD Wise Resolution of Blu-ray Disc Auto 1080p@60F (Movie Frame : Off) • DVD playback Output Setup BD Wise 1080p 720p HDMI / connected HDMI Mode 576i/480i Auto Max. Resolution of TV input 1080i 1080i 1080p 720p 576p/480p 1080p 720p 576p/480p 13 ✎ NOTE ▪▪ If the TV you connected to the player does not support Movie Frame or the resolution you selected, the message “If no pictures are shown after selecting ‘Yes’, please wait for 15 seconds to return to the previous resolution. Do you want to change the resolution?” appears. If you select Yes, the TV’s screen will go blank for 15 seconds, and then the resolution will revert to the previous resolution automatically. ▪▪ If the screen stays blank after you have changed the resolution, remove all discs, and then press and hold the PLAY/PAUSE ( ) button on the front of the player for more than 5 seconds. All settings are restored to the factory default. Follow the steps on the previous page to access each mode and select the Display Setup that your TV will support. ▪▪ When the factory default settings are restored, all stored user BD data is deleted. ▪▪ The Blu-ray Disc must have the 24 frame feature for the player to use the Movie Frame (24Fs) mode. Movie Frame (24Fs) Setting the Movie Frame (24Fs) feature to Auto allows you to adjust the player’s HDMI output to 24 frames per second for improved picture quality. You can enjoy the Movie Frame (24Fs) feature only on a TV supporting this frame rate. You can select Movie Frame only when the player is in the HDMI 1080i or 1080p output resolution modes. • Auto : Movie Frame (24Fs) functions work. • Off : Movie Frame (24Fs) functions are off. HDMI Color Format Lets you set the color space format for HDMI output to match the capabilities of the connected device (TV, monitor, etc). • Auto : Automatically sets the player to the optimum format supported by your device. • YCbCr (4:4:4) : If your TV supports the YCbCr color space via HDMI, select this to output the normal YCbCr color gamut. • RGB (Standard) : Select to output the normal RGB color gamut. • RGB (Enhanced) : If you have connected the player to a DVI display device such as a monitor, select this to output the enhanced RGB color gamut. HDMI Deep Color Lets you output video from the HDMI OUT jack with Deep Color. Deep Color provides more accurate color reproduction with greater color depth. • Auto : The player outputs video with Deep Color to a connected TV which supports HDMI Deep Color. • Off : The picture is output without Deep Color. Progressive Mode Lets you improve picture quality when viewing DVDs. • Auto : Select to have the player automatically select the best picture quality for the DVD you’re watching. • Video : Select for the best picture quality from concert or TV show DVDs. Audio Digital Output Set the Digital Output to match the capabilities of the AV receiver you’ve connected to the player : • PCM : This is the default setting. It is compatible with most TVs and receiver. Digital Output Selection Setting PCM Audio Stream on Blu-ray Disc Bitstream (Unprocessed) Bitstream (Re-encoded DTS) Bitstream (Re-encoded Dolby D) HDMI supported AV receiver Coaxial HDMI supported AV receiver Coaxial HDMI HDMI supported supported AV receiver or AV receiver or Coaxial Coaxial PCM Up to PCM 7.1ch PCM 2ch PCM PCM 2ch DTS re-encoded Re-encoded Dolby Digital * Dolby Digital PCM 2ch PCM 2ch Dolby Digital Dolby Digital DTS re-encoded Re-encoded Dolby Digital * Dolby Digital Plus PCM 2ch PCM 2ch Dolby Digital Dolby Digital DTS re-encoded Plus Re-encoded Dolby Digital * Dolby TrueHD PCM 2ch PCM 2ch Dolby TrueHD Dolby Digital DTS re-encoded Re-encoded Dolby Digital * DTS PCM 2ch PCM 2ch DTS DTS DTS re-encoded Re-encoded Dolby Digital * DTS-HD HRA PCM 2ch PCM 2ch DTS-HD HRA DTS DTS re-encoded Re-encoded Dolby Digital * DTS-HD MA PCM 2ch PCM 2ch DTS-HD MA DTS DTS re-encoded Re-encoded Dolby Digital * PCM PCM 2ch PCM 2ch PCM 2ch PCM 2ch PCM 2ch PCM 2ch Dolby Digital PCM 2ch PCM 2ch Dolby Digital Dolby Digital DTS PCM 2ch PCM 2ch DTS DTS Connection Audio Stream on DVD 14 • Bitstream (Unprocessed) : Choose if you want your receiver to decode all the audio. Bonusview audio will not be available. • Bitstream (Re-encoded DTS) : The original audio will be re-encoded into DTS. • Bitstream (Re-encoded Dolby D) : The original audio will be re-encoded into Dolby Digital. For more details, please refer to the Digital Output Selection table. Dolby Digital Dolby Digital DTS DTS Setup Connection Definition for Blu-ray Disc Bitstream (Unprocessed) PCM Any HDMI supported AV receiver Coaxial Decodes the main feature audio and BONUSVIEW audio stream together into PCM audio and adds Navigation Sound Effects. HDMI supported AV receiver Coaxial Outputs only the main feature audio stream so that your AV receiver can decode the audio bitstream. You will not hear BONUSVIEW audio or Navigation Sound Effects. Bitstream (Re-encoded DTS) Bitstream (Re-encoded Dolby D) Decodes the main feature audio and BONUSVIEW audio stream together into PCM audio and adds Navigation Sound Effects, then reencodes the PCM audio into DTS bitstream. Decodes the main feature audio and BONUSVIEW audio stream together into PCM audio and adds Navigation Sound Effects, then reencodes the PCM audio into Dolby digital bitstream or PCM. HDMI HDMI supported supported AV receiver or AV receiver or Coaxial Coaxial * If the Source Stream is 2ch, “Re-encoded Dolby D” Setting is not applied. Output will be LPCM 2ch. Blu-ray Discs may include three audio streams : -- Main Feature Audio : The audio soundtrack of the main feature. -- BONUSVIEW audio : An additional soundtrack such as the director or actor’s commentary. -- Navigation Sound Effects : When you choose a menu navigation selection, a Navigation Sound Effect may sound. Navigation Sound Effects are different on each Blu-ray Disc. ✎NOTE ▪▪ Be sure to select the correct Digital Output or you will hear no sound or just loud noise. ▪▪ If the HDMI device (AV receiver, TV) is not compatible with compressed formats (Dolby digital, DTS), the audio signal outputs as PCM. ▪▪ Regular DVDs do not have BONUSVIEW audio and Navigation Sound Effects. ▪▪ Some Blu-ray Discs do not have BONUSVIEW audio and Navigation Sound Effects. ▪▪ This Digital Output setup does not affect the HDMI audio output to your TV. It affects the coaxial and HDMI audio output when your player is connected to an AV receiver. ▪▪ If you play MPEG audio soundtracks, the audio signal outputs as PCM regardless of your Digital Output selections (PCM or Bitstream). PCM Downsampling Dynamic Range Control ✎NOTE • Auto : The Dynamic Range Control will be set automatically based on the information provided by the Dolby TrueHD Soundtrack. • Off : You can enjoy the movie with the standard Dynamic Range. • On : When Movie soundtracks are played at low volume or through smaller speakers, the system can apply appropriate compression to make low-level content more intelligible and prevent dramatic passages from getting too loud. Lets you set 48kHz and 96kHz PCM downsampling on or off. • Off : Select when the AV receiver connected to the player is 96kHz compatible. • On : Select when the AV receiver connected to the player is not 96kHz compatible. 96kHz signals will be down converted to 48kHz. ▪▪ Even when PCM Downsampling is set to Off, some discs will only output downsampled audio through the coaxial digital outputs. HDMI • If your TV is not compatible with compressed multi-channel formats (Dolby Digital, DTS), the player may output PCM 2ch downmixed audio even though you selected Bitstream (either Re-encoded or Unprocessed) in the setup menu. • If your TV is not compatible with PCM sampling rates over 48kHz, the player may output 48kHz downsampled PCM audio even though you set PCM Downsampling to Off. You can listen at low volumes, but still hear dialog clearly. This is only active if your player detects a Dolby Digital signal. Downmixing Mode Select Downmix method for stereo output. • Normal Stereo : Downmix the multichannel audio into normal stereo. Choose this if you hear the sound from TV or Stereo Amplifier. • Surround Compatible : Downmix the multichannel audio into surround compatible stereo. This mode helps your AV Receiver to decode stereo into surround sound. 15 Network Please contact your ISP to find out if your IP address is static or dynamic. If it is dynamic -and most are- we recommend using the Auto procedure for network setup. This is easiest and will work in the majority of cases. If it is static, you must use the manual set up procedure. Network setup directions start below. ✎NOTE ▪▪ This unit can only be connected to a Network via a wired connection. Automatic Network Setup 1. In the Home menu, press the ◄► buttons to select Settings, and then press the ENTER button. 2. Press the ▲▼ buttons to select Network, and then press the ENTER button. 3. Press the ▲▼ buttons to select Wired Network Settings, and then press the ENTER button. The Wired Network Setting screen appears Settings Wired Network Settings Display Internet Protocol Setup :Auto Audio IP Address : 0 0 0 Network Subnet Mask : 0 0 0 System Gateway : 0 0 0 Language :Auto SecurityDNS : 0 0 0 General DNS Server Support \ 0 0 0 0 > Move " Select ' Return 4. In the Internet Protocol Setup field, select Auto if it is not selected. (Press ENTER select AUTO, and then press ENTER.) 16 5. The Auto Function acquires and fills in the values for IP Address, Subnet Mask, etc., automatically. ✎NOTE ▪▪ This process can take up to five minutes. 6. After the Network Function has acquired the network values, press the RETURN button. 7. Select Network Test, and then press ENTER to ensure the player has connected to your network. 8. When the Network Test is complete, press the RETURN twice to return to the Main Menu. 9. If the Network Function does not acquire the network values, go to the directions for Manual Setup. Manual Network Setup Before you start manual network setup, you need the network setting values. To get the Network setting values through most Windows computers, follow these steps: Windows XP 1. Right click the Network icon on the bottom right of the Windows desktop. 2. In the pop-up menu, click Status. 3. On the dialog that appears, click the Support tab. 4. On the Support tab, click the Details button. The Network settings are displayed. Windows 7 1. Click the Network icon on the bottom right of the Windows desktop. 2. In the pop-up menu, click Network and Sharing Center. 3. On the dialog that appears, click the Local Area Connection or Wireless Network Connection depending on your network connection. 4. On the Support tab, click the Details button. The Network settings are displayed. 12. Enter the numbers as above. 13. Press the RETURN button on your remote. 14. Run a Network Test to ensure the player has connected to your network. 1. In the Home menu, press the ◄► buttons to select Settings, and then press the ENTER button. 2. Press the ▲▼ buttons to select Network, and then press the ENTER button. 3. Press the ▲▼ buttons to select Wired Network Settings, and then press the ENTER button. The Wired Network Settings screen appears. 4. Select the Internet Protocol Setup field, and then press the ENTER button. 5. Press the ▲▼ buttons to select Manual, and then press the ENTER button. 6. Press the ▼ button to go to the first entry field (IP Address). 7. Use the number buttons on your remote to enter numbers. 8. When done with each field, use the ► button to move to the next field. You can also use the other arrow buttons to move up, down, and back. 9. Enter the IP Address, Subnet Mask, and Gateway values in the same way. 10. Press the ▼ button to go to DNS. 11. Press the ▼ button to go to the first DNS entry field. Use to check whether a connection to the network and the Internet have been established. To enter the Network Settings into your player, follow these steps: Network Test Use this menu item to connect to the wired network or check whether your network connection is working or not. Network Status BD-LIVE Internet Connection Set to allow or prohibit an Internet connection when you use the BD-LIVE service. • Allow (All) : The Internet connection is allowed for all BD-LIVE contents. • Allow (Valid Only) : The Internet connection is allowed only for BD-LIVE contents containing a valid certificate. • Prohibit : No Internet connection is allowed for any BD-LIVE content. ✎NOTE ▪▪ What is a valid certificate? When the player uses BD-LIVE to send the disc data and a request to the server to certify the disc, the server uses the transmitted data to check if the disc is valid and sends the certificate back to the player. ▪▪ The Internet connection may be restricted while you are using BD-LIVE contents. System Initial Settings By using the Initial Settings function, you can set the language, Network Settings, etc. For more information about the Initial Settings function, refer to the Initial Settings section of this user manual (page 12). Anynet+(HDMI-CEC) Anynet+ is a convenient function that offers linked operations with other Samsung players that have the Anynet+ feature. To operate this function, connect this player to an Anynet+ Samsung TV with an HDMI cable. With Anynet+ on, you can operate this player using a Samsung TV remote control and start disc playback simply by pressing the PLAY ( ) button on the TV’s remote control. For more information, please see the TV user manual. • Off : Anynet+ functions will not work. • On : Anynet+ functions will work. ✎NOTE ▪▪ This function is not available if the HDMI cable does not support CEC. ▪▪ If your Samsung TV has an Anynet+ logo, then it supports the Anynet+ function. ▪▪ Depending on your TV, certain HDMI output resolutions may not work. Please refer to the user manual of your TV. BD Data Management Enables you to manage the downloaded contents you accessed through a Blu-ray disc that supports the BD-LIVE service and stored on a flash drive. You can check the device’s information including the storage size, delete the BD data, or change the Flash memory device. BD Data Management Screen Information : • Total Size : Total memory size of the device. • Available Size : Available memory in the device. ✎NOTE ▪▪ In the external memory mode, disc playback may be stopped if you disconnect the USB device in the middle of playback. ▪▪ Only those USB devices formatted in FAT file format (DOS 8.3 volume label) are supported. We recommend you use USB devices that support USB 2.0 protocol with 4 MB/sec or faster read/write speed. ▪▪ The Resume Play function may not work after you format the storage device. ▪▪ The total memory available to BD Data Management may differ, depending on the conditions. DivX® Video On Demand View DivX® VOD Registration Codes to purchase and play DivX® VOD contents. Language You can select the language you prefer for the Home menu, disc menu, etc. • On-Screen Menu : Select the language for the on-screen displays. • Disc Menu : Select the language for the disc menu displays. • Audio : Select the language for disc audio. • Subtitle : Select the language for disc subtitles. ✎NOTE ▪▪ The selected language will only appear if it is supported on the disc. Security When you access this function for the first time, the password setup screen appears. Enter a desired 4-digit password using the number buttons. (The default password is 0000.) BD Parental Rating Prevent playback of Blu-ray Discs with specific age ratings unless a password is entered. • Off : BD Parental Rating is not active and all Blu-ray discs will play in full. • On : This will prohibit playback of Blu-ray disc rated above Parental Rating. DVD Parental Rating This function works in conjunction with DVDs that have been assigned an age rating or numeric rating that indicates the maturity level of the content. These numbers help you control the types of DVDs that your family can watch. Select the rating level you want to set. For example, if you select Level 6, discs rated above 6 - Level 7 and 8 - will not play. A larger number indicates more mature content. YouTube Lock Restrict the use of the YouTube service unless a password is entered. • Off : Turn Off YouTube lock. • On : Turn On YouTube lock. Change PIN Change the 4-digit password used to access security functions. If you forgot your password 1. Remove any discs. 2. Press and hold the PLAY/PAUSE ( ) button on the front panel for 5 seconds or more. All settings will revert to the factory settings. ✎NOTE ▪▪ When the factory default settings are restored, all the user stored BD data will be deleted. 17 General Time Zone You can specify the time zone that is applicable to your area. Support Software Upgrade The Software Upgrade menu allows you to upgrade the player’s software for performance improvements or additional services. By Online To upgrade By Online, follow these steps: 1. Select By Online, and then press the ENTER button. The Connecting to Server message appears. 2. A popup message will appear if an update is available. 3. If you select Yes, the player will turn off automatically before restarting. (Never turn the player on during an upgrade.) 4. The update progress popup will appear. When the update is completed, the player will turn back off automatically. 5. Press the POWER button to turn on the player. ✎NOTE ▪▪ The Update is complete when the player turns off after restarting. Press the POWER button to turn on the updated player for your use. 18 ▪▪ Never turn the player off or back on manually during the update process. ▪▪ Samsung Electronics shall take no legal responsibility for player malfunction caused by an unstable Internet connection or consumer negligence during a software upgrade. ▪▪ If you want to cancel the upgrade while the upgrade software is downloading, press the ENTER button. By USB To upgrade by USB, follow these steps: 1. Visit www.samsung.com/bluraysupport. 2. Download the latest USB software upgrade zip archive to your computer. 3. Unzip the zip archive to your computer. You should have a single RUF file with the same name as the zip file. 4. Copy the RUF file to a USB flash drive. 5. Make sure there is no disc in the player, and then insert the USB flash drive into the USB port of the player. 6. In the player’s menu, go to Settings > Support > Software Upgrade. 7. Select By USB. ✎NOTE ▪▪ No disc should be inserted in the product when you upgrade the software using the USB Host jack. ▪▪ When the software upgrade is done, check the software details in the software Upgrade menu. ▪▪ Do not turn off the player during the software upgrade. It may cause the player to malfunction. ▪▪ Software upgrades using the USB Host jack must be performed with a USB flash memory stick only. Auto Upgrade Notification If you have connected the player to your network, and then set Auto Upgrade Notification on, the player automatically notifies you when a new software version is available for the player. To set Auto Upgrade Notification on, follow these steps: 1. Select Auto Upgrade Notification, and then press the ENTER button. 2. Use the ▲▼ buttons to select On, and then press the ENTER button. If there is a new software version available, the player notifies you with a popup message. 1. To upgrade the firmware, select Yes on the Pop-up. The player turns off automatically, then restarts, and begins the download. (Never turn on the player manually here.) 2. The update progress popup appears. 3. When the update is complete, the player turns off again automatically. 4. Press the POWER button to turn on the player. ✎NOTE ▪▪ Update is complete when the player turns off after restarting. Press the POWER button to turn on the updated player for your use. Never turn the player off or on manually during the update process. ▪▪ Samsung Electronics shall take no legal responsibility for player malfunction caused by an unstable Internet connection or consumer negligence during software upgrade. Contact Samsung Provides contact information for assistance with your player. Terms of Service Agreement View the general disclaimer regarding third party contents and services. Reset All settings will revert to the default except for the network settings. Basic Functions Playing a Video Playback 1. Press the OPEN/CLOSE ( ) button to open the disc tray. 2. Place a disc gently into the tray with the disc’s label facing up. 3. Press the OPEN/CLOSE ( ) button to close the disc tray. 4. Press the PLAY ( ) button. Playback related buttons PLAY ( STOP ( PAUSE ( ) Starts playback. Stops playback. • If you press the button once : The stop position is memorized. • If you press the button twice : The stop position is not memorized. ) ) Pauses playback. ✎NOTE ) button ▪▪ For some discs, pressing the STOP ( once may not memorize the stop position. ▪▪ Video files with high bit rates of 20Mbps or more strain the player’s capabilities and may stop playing during playback. Disc Structure The content of discs are usually divided as shown below. • Blu-ray Disc, DVD-VIDEO Using the Title Menu title 1 chapter 1 chapter 2 chapter 1 title 2 chapter 2 chapter 3 • Audio CD (CD-DA) track 1 track 2 track 3 track 4 track 5 • MP3, WMA, DivX, MKV and MP4 folder (group) 1 file 1 file 2 folder (group) 2 file 1 file 2 file 3 Using the Disc Menu/Title Menu/ Popup Menu Using the Disc Menu hZ 1. During playback, press the DISC DISC MENU MENU button on the remote control. 2. Press the ▲▼◄► buttons to make a selection, and then press the ENTER button. ✎NOTE ▪▪ Depending on the disc, the menu items may differ or this menu may not be available. 1. During playback, press the TITLE MENU button on the remote control. 2. Press the ▲▼◄► buttons to make the desired selection, then press the ENTER button. Using the Search and Skip Functions Z TITLE MENU POPUP ▪▪ Depending on the disc, the menu items may differ or this menu may not be available. Playing the Title List z 1. During playback, press the DISC DISC MENU MENU or TITLE MENU button. 2. Press the ▲▼ buttons to select an TITLE MENU entry you want to play from the Title POPUP List, and then press the ENTER button. ✎NOTE ▪▪ If your disc has a playlist, press the GREEN (B) button to go to the playlist. Using the Popup Menu ✎NOTE Searching for a Desired Scene hzZyx ✎NOTE 1. During playback, press the POPUP MENU button on the remote control. 2. Press the ▲▼◄► buttons or ENTER button to select the desired menu. During play, you can search quickly through a chapter or track, and use the skip function to jump to the next selection. h TITLE MENU POPUP ▪▪ Depending on the disc, the menu items may differ or this menu may not be available. • During playback, press the SEARCH ( ) button. Each time you press the SEARCH ( ) button, the playback speed will change as follows: BD-ROM, BD-RE/-R, DVD-RW/-R, DVD+RW/+R, DVD-VIDEO DivX, MKV, MP4 ) 1 ) 2 ) 3 )4)5)6)7 ( 1 ( 2 ( 3 (4(5(6(7 )1)2)3 (1(2(3 • To return to normal speed playback, press the PLAY ( ) button. ✎NOTE ▪▪ The player does not play sound in search mode. Skipping Chapters hzZyx • During playback, press the SKIP ( ) button. If you press the SKIP ( ) button, the disc moves to the next chapter. If you press the SKIP ( ) button, the disc moves to the beginning of the chapter. One more press makes the disc move to the beginning of the previous chapter. 19 Slow Motion Play/Step Motion Play Slow Motion Play hzZyx • In pause mode, press the SEARCH ( ) button. Each time you press the SEARCH ( ) button, the playback speed will change as follows: * 1/8 * 1/4 * 1/2 • To return to normal speed playback, press the PLAY ( ) button. ✎NOTE ▪▪ The player does not play sound in Slow mode. Step Motion Play hzZyx • In pause mode, press the PAUSE ( ) button. Each time you press the PAUSE ( ) button, a new frame appears. • To return to normal speed playback, press the PLAY ( ) button. ✎NOTE ▪▪ The player does not play sound in step mode. Using the TOOLS button During playback, you can operate the disc menu by pressing the TOOLS button. ✎NOTE ▪▪ Depending on the disc, the Tools menu may differ. 20 Moving to a Desired Scene Directly hzZy 1. During playback, press the TOOLS button. 2. Press the ▲▼ buttons to select Title, Chapter or Playing Time. 3. Press the ◄► or number button to select the desired Title, Chapter or Playing Time, then press the ENTER button. Repeating the Title or Chapter 3. Press the REPEAT A-B button at the point where you want repeat play to stop (B). 4. To return to normal play, press the REPEAT A-B buttons to select Off. ✎NOTE ▪▪ If you set point (B) less than 5 seconds of playing time after point (A), a prohibition message appears. ▪▪ Depending on the disc, the menu items may differ and this menu may not be available. Selecting the Audio Language hzZx hzZy Lets you repeat the disc title or chapter. Depending on the disc, the Repeat function may not be available. REPEAT 1. During playback, press the REPEAT button. 2. Press the ▲▼ buttons to select Chapter or Title, then press the ENTER button. 3. To retur n to normal play, press the REPEAT button again. 4. Press the ▲▼ buttons to select Off, then press the ENTER button. Repeating a Section hzZy 1. During playback, press the REPEAT A-B button. 2. Press the REPEAT A-B button at the point where you want repeat play to start (A). REPEAT You can also operate this function by pressing the AUDIO button on the remote control. AUDIO 1. During playback, press the TOOLS button. 2. Press the ▲▼ buttons to select Audio. 3. Press the ◄► buttons to select the desired audio language. ✎NOTE ▪▪ The ◄► indicator will not appear on the screen if the BONUSVIEW section does not contain any BONUSVIEW audio settings. ▪▪ Information about the main feature/BONUSVIEW mode will also appear if the Blu-ray Disc has a BONUSVIEW section. Press the ◄► button to switch between main feature and BONUSVIEW audio modes. ▪▪ This function depends on the selection of audio languages encoded on the disc and may not be available. ▪▪ A Blu-ray Disc can contain up to 32 audio languages and a DVD up to 8. ▪▪ Some Blu-ray Discs may allow you to select either the PCM or Dolby digital audio soundtrack in English. ▪▪ If you press the AUDIO button on the remote control, the Audio bar appears. Press the RETURN button to remove the Audio bar. Selecting the Subtitle Language hZx You can also operate this function AUDIO by pressing the SUBTITLE button on the remote control. SUBTITLE 1. During playback, press the TOOLS button. SUBTITLE 2. Press the ▲▼ buttons to select Subtitle. 3. Press the ◄► buttons to select the desired subtitle language. ✎NOTE ▪▪ Depending on the Blu-ray Disc / DVD, you may be able to select the desired subtitle in the Disc Menu. Press the DISC MENU button. ▪▪ This function depends on the selection of subtitles that are encoded on the disc and may not be available on all Blu-ray Discs/DVDs. ▪▪ A Blu-ray Disc can contain up to 255 subtitle languages and a DVD up to 32. ▪▪ Information about the main feature/BONUSVIEW mode will also appear if the Blu-ray Disc has a BONUSVIEW section. ▪▪ This function changes both the primary and secondary subtitles at the same time. ▪▪ The total number of primary and secondary subtitles are displayed respectively. ▪▪ If you press the SUBTITLE button on the remote control, the subtitle bar appears. Press the RETURN button to remove the subtitle bar. Changing the Camera Angle Setting BONUSVIEW h hZ When a Blu-ray Disc/DVD contains multiple angles of a particular scene, you can use the ANGLE function. 1. During playback, press the TOOLS button. 2. Press the ▲▼ buttons to select Angle. 3. Press the ◄► buttons to select the desired Angle. Selecting the Picture Settings hzZy This function enables you to adjust video quality when the player is connected to a TV. 1. During playback, press the TOOLS button. 2. Press the ▲▼ buttons to select Picture Setting, and then press the ENTER button. 3. Press the ◄► buttons to select the desired Picture Setting. • Dynamic : Choose this setting to increase Sharpness. • Normal : Choose this setting for most viewing applications. • Movie : This is the best setting for watching movies. • User : Lets you adjust the sharpness and noise reduction function respectively. ✎NOTE ▪▪ When you use BD wise function, this menu will not appear. The BONUSVIEW feature allows you to view additional content (such as commentaries) in a small screen window while the movie is playing. This function is only available if the disc has the Bonusview feature. 1. During playback, press the TOOLS button. 2. Press the ▲▼ buttons to select BONUSVIEW Video or BONUSVIEW Audio. 3. Press the ◄► buttons to select the desired Bonusview. ✎NOTE ▪▪ If you switch from BONUSVIEW Video, BONUSVIEW Audio will change automatically in accordance with BONUSVIEW Video. Listening to Music ow Playing an Audio CD (CD-DA)/MP3 1. Insert an Audio CD (CD-DA) or an MP3 Disc into the disc tray. • For an Audio CD (CD-DA), the first track plays automatically. • For an MP3 disc, press the ◄► buttons to select Music, then press the ENTER button. 2. Press the ▲▼ buttons to select the track you want to play, and then press the ENTER button. Audio CD (CD-DA)/MP3 Screen Elements 1 2 TRACK 001 7 6 + 00:08 / 05:57 1/6 TRACK 001 05:57 TRACK 002 04:27 TRACK 003 04:07 TRACK 004 03:41 TRACK 005 03:17 " Pause CD 5 03:35 Tools ' Return 4 1 Displays the music information. 2 Displays the playlist. 3 Display the current track/total tracks. 4 Displays buttons available. 5 Shows the current play time/total play time. 6 Displays the current playback status. 7 Displays the repeated playback status. Repeat an Audio CD (CD-DA)/ MP3 1. During the Playlist playback, press the TOOLS button. 2. Select Repeat Mode, and then press the ◄► buttons to select the desired repeat mode. 3. Press the ENTER button. Off Tracks on a disc are Audio CD played in the order (CD-DA)/MP3 in which they were recorded on the disc. ( ) Track Audio CD (CD-DA) Current track is repeated. ( ) One MP3 Current track is repeated. ( ) All Audio CD All tracks are (CD-DA)/MP3 repeated. ( )Shuffle The random option Audio CD plays a disc’s tracks (CD-DA)/MP3 in random order. 3 Playlist TRACK 006 Repeat Modes : Playlist 1. Insert an Audio CD (CD-DA) or an MP3 Disc into the disc tray. •For an Audio CD (CD-DA), the first track plays automatically. •For an MP3 disc, press the ◄► buttons to select Music, then press the ENTER button. 2. To move to the Music List, press the STOP ( ) or RETURN button. The Music List screen appears. 3. Press the ▲▼◄► buttons to move to a desired track, then press the YELLOW (C) button to check the desired track. Repeat this procedure to select additional tracks. 4. If you want to remove a track from the playlist, go to the track, and then press the YELLOW (C) button again. The track is removed. 5. Press the ENTER button to play the selected tracks. The selected tracks will play automatically. 21 6. To go to the Music List, press the STOP ( or RETURN button. 7. To go to the Playlist, press the ENTER button. ) ✎NOTE ▪▪ You can create a playlist with up to 99 tracks on Audio CDs (CD-DA). Playing back Pictures Playing JPEG files G 1. Insert a JPEG disc into the disc tray. 2. Press the ◄► buttons to select Photos, and then press the ENTER button. 3. Press the ▲▼◄► buttons to select the folder you want to play, and then press the ENTER button. 4. Press the ▲▼◄► buttons to select the photo you want to play, and then press the ENTER button. ✎NOTE ▪▪ You can’t enlarge the subtitle and PG graphic in the full screen mode. Using the TOOLS button You can use various functions by pressing the TOOLS button. • Start Slide Show : Select to start the slide show. • Stop Slide Show : Select if you want to stop the slide show. • Slide Show Speed : Select if you want to adjust the Slide Show speed. 22 • Background Music : Select to listen to music while viewing a slide show. • Zoom : Select to enlarge the current picture. (Enlarged up to 4 times) • Rotate : Select to rotate the picture. (This will rotate the picture either clockwise or counter clockwise.) • Information : Shows the picture information including the name and size, etc. ✎NOTE ▪▪ To enable the background music function, the photo file must be in the same storage media as the music file. However, the sound quality can be affected by the bit rate of the MP3 file, the size of the photo, and the encoding method. ▪▪ Start Slide Show and Stop Slide Show alternate, depending on whether you are running a slide show or not. Playing Selected Photos You can select spesific photos to play pressing the YELLOW (C) button on your remote. To select specific photos, follow these steps: 1. Select the folder that contains the photos you want to view, and then press the ENTER button. 2. Press the ▲▼◄►buttons to select a photo you want to play, and then press the YELLOW (C) button. A check mark appears on the photo. 3. Repeat Step 2 for each photo you want to play. ✎NOTE ▪▪ To deselect a photo, press the ▲▼◄►buttons to highlight the photo, and then press the YELLOW (C) button. 4. Press the ENTER button when done. The slide show starts. Playing back a USB Storage Device YouTube You can use the USB connection to play multimedia files (MP3, JPEG, DivX, etc) located on a USB storage device. 1. Move to the Home menu. 2. In Stop mode, connect the USB storage device to the USB port on the front panel of the player. The message “Do you want to access the device?” will be displayed. 3. Press the ◄► button to select Yes, then press the ENTER button. 4. Press the RED (A) button or BLUE (D) button. If you pressed the RED (A) button, go to Step 5. If you pressed the BLUE (D) button, go to Step 4-1. YouTube No Disc 123 DLNA 123 a Change Device c Safely Remove USB d View Devices " Enter 5. Press the ▲▼ buttons to select USB, then press the ENTER button. 6. Press the ◄► buttons to select the desired Videos, Music or Photos, then press the ENTER button. Go to Step 7 4-1. If you pressed the BLUE (D) button, the screen below appears. Go to 5-1. 123 123 d Home " Enter 5-1. Press the ◄► buttons to select USB, then press the ENTER button. 6-1. Press the ▲▼ buttons to select the desired Videos, Music or Photos, then press the ENTER button. 7. For playing back Video, Music or Photo files see pages 19~22. ✎NOTE ▪▪ You must remove the USB storage device safely (by performing the “Safely Remove USB” function) in order to prevent possible damage to the USB memory. Press the MENU button to move to the Home menu, select the YELLOW (C) button, and then press the ENTER button. ▪▪ When the Audio-CD (CD-DA), MP3 or JPEG files are in stop mode, pressing the FULL SCREEN button on the remote will not bring up a full screen picture. ▪▪ If you insert a disc when playing a USB storage device, the device mode changes to “DVD or CD” automatically. Network Services You can enjoy various network services such as BD-LIVE by connecting the player to your network. Read the following instructions before using any network service. 1. Connecting the player to the network (pages 10 and 11). 2. Configuring the network settings (page 16). BD-LIVE™ Once the player is connected to the network, you can enjoy various movie-related service contents using a BD-LIVE compliant disc. 1. Attach a USB memory stick to the USB jack on the side of the player, and then check its remaining memory. The memory device must have at least 1GB of free space to accommodate the BD-LIVE services. 2. Insert a Blu-ray Disc that supports BDLIVE. 3. Select an item from various BD-LIVE service contents provided by the disc manufacturer. ✎NOTE ▪▪ The way you use BD-LIVE and the provided contents may differ, depending on the disc manufacturer. Using the AllShare Function AllShare lets you play music, video, and photo files located in your PC or NAS on the player. To use AllShare with your player, you must connect the player to your network (See pages 10~11). To use AllShare with your PC, you must install AllShare software on your PC. If you have NAS, you can use AllShare without any additional software. To download AllShare software 1. Go to Samsung.com 2. Click Support, enter your player’s product number in the field that appears, and then click Product. 3. On the next screen, click Get downloads under Downloads. 4. Click Software on the next page. 5. Click the icon in the AllShare line under File to start the download. Playing content located in your PC on the Blu-ray Disc Player You can view shared files of your computer to your Blu-ray Disc Player. You can get detailed instructions for using AllShare from the Samsung.com web site. Blu-ray Disc Player AllShare Connection Play back PC’s files Appendix Troubleshooting Before requesting service, please try the following solutions. PROBLEM SOLUTION No operation can be performed with the remote control. • Check the batteries in the remote control. They may need replacing. • Operate the remote control at a distance of no more than 61m. • Remove batteries and hold down one or more buttons for several minutes to drain the microprocessor inside the remote control to reset it. Reinstall batteries and try to operate the remote control again. Disc does not play. • Ensure that the disc is installed with the label side facing up. • Check the region number of the Blu-ray Disc/DVD. Disc Menu does not appear. • Ensure that the disc has disc menus. The prohibition message appears on the screen. • This message appears when an invalid button is pressed. • The Blu-ray Disc/DVD’s software doesn’t support the feature (e.g., angles). • You’ve requested a title or chapter number or search time that is out of range. Play mode differs from the Setup Menu selection. • Some of the functions selected in the Setup Menu may not work properly if the disc is not encoded with the corresponding function. The screen ratio cannot be changed. • The Screen Ratio is fixed on your Blu-ray Disc/DVD. • This is not a problem with the player. No audio. • Make sure you have selected the correct Digital Output in the Audio Options Menu. The screen is blocked • If the HDMI output is set to a resolution your TV cannot support (for example, 1080p), you may not see a picture on your TV. • Press the PLAY/PAUSE ( ) button (on front panel) for more than 5 seconds with no disc inside. All settings will revert to the factory settings. • When the factory default settings are restored, all stored user BD data is deleted. 23 PROBLEM Forgot password SOLUTION • Press the PLAY/PAUSE ( ) button (on front panel) for more than 5 seconds with no disc inside. All settings including the password will revert to the factory settings. Don’t use this unless absolutely necessary. • When the factory default settings are restored, all stored user BD data is deleted. If you experience other problems. • Go to the contents and find the section of the user manual that contains the explanations regarding the current problem, and follow the procedure once again. • If the problem still cannot be solved, please contact your nearest Samsung authorized service center. The picture is noisy or distorted • Make sure that the disc is not dirty or scratched. • Clean the disc. No HDMI output. • Check the connection between the TV and the HDMI jack of the player. • Check if your TV supports 576p/480p, 720p, 1080i, 1080p HDMI input resolution. Abnormal HDMI output screen. • If random noise appears on the screen, it means that TV does not support HDCP (High-bandwidth Digital Content Protection). AllShare function I can see folders shared through AllShare, but I cannot see the files. • AllShares shows only files corresponding to the Image, Music, and Movie categories. Files that do not correspond to these categories may not be displayed. Video is played intermittently. • Check if the network is stable. • Check if the network cable is properly connected and if the network is not overloaded. AllShare connection between Player and PC is unstable. • The IP address under the same subnetwork should be unique. If they are not, IP interference can cause this phenomenon. • Check if you have a firewall enabled. If so, disable the firewall function. 24 PROBLEM BD-LIVE SOLUTION I cannot connect to the BDLIVE server. • Check whether the network connection is successful or not by using the Network Status menu. • Check whether the USB memory device is connected to the player. • The memory device must have at least 1GB of free space to accommodate the BDLIVE service. You can check the available size in BD Data Management. • Check whether the BD-LIVE Internet Connection menu is set to Allow(All). • If all above fails, contact the contents provider or update the player to the latest firmware. When using the BD-LIVE service, an error occurs. • The memory device must have at least 1GB of free space to accommodate the BDLIVE service. You can check the available size in BD Data Management. ✎NOTE ▪▪ When the factory default settings are restored, all stored user BD data is deleted. Repairs If you contact us to repair your player, an administration fee may be charged if either: 1. An engineer is called out to your home at your request and there is no defect in the product. 2. You bring the unit to a repair center and there is no defect in the product. We will provide you with the amount of the administration fee before we make a home visit or begin any work on your player. We recommend you read this manually thoroughly, search for a solution on line at www. samsung.com, or contact Samsung Customer Care before seeking to repair your player. Specifications General USB HDMI Audio Output Network Weight 1.3 Kg Dimensions 360 (W) X 193 (D) X 41 (H) mm Operating Temperature Range +5°C to +35°C Operating Humidity Range 10 % to 75 % Type A USB 2.0 DC Output 5V 500mA Max. Video 1080p, 1080i, 720p, 576p/480p Audio PCM, Bitstream Digital Audio Output Coaxial Ethernet 100BASE - TX Terminal -- It is not supported when the network speed is below or equal to 10 Mbps. -- Design and specifications are subject to change without prior notice. -- For the power supply and power consumption, refer to the label attached to the product. -- Weight and dimensions are approximate. 25 Compliance and Compatibility Notice NOT ALL discs are compatible • Subject to the restrictions described below and those noted throughout this Manual, including the Disc Type and Characteristics section of this user manual, disc types that can be played are: pre-recorded commercial BD-ROM, DVDVIDEO, and Audio CD (CD-DA) discs; BD-RE/-R, DVD-RW/-R discs; and CD-RW/-R discs. • Discs other than the above cannot and/or is not intended to be played by this player. And some of the above discs may not play due to one or more reasons provided below. • Samsung cannot assure that this player will play every disc bearing the BD-ROM, BD-RE/-R, DVD-VIDEO, DVD-RW/-R, DVD+RW/+R and CD-RW/-R logos, and this player may not respond to all operating commands or operate all features of every disc. These and other disc compatibility and player operation issues with new and existing format discs are possible because: -- Blu-ray is a new and evolving format and this player may not operate all features of Blu-ray Discs because some features may be optional, additional features may have been added to the Blu-ray Disc format after the production of this player, and certain available features may be subject to delayed availability; -- not all new and existing disc format versions are supported by this player; -- new and existing disc formats may be revised, changed, updated, improved and/or supplemented; -- some discs are produced in a manner that allows specific or limited operation and feature during playback; -- some features may be optional, additional features may have been added after the production of this player or certain available features may be subject to delayed availability; -- some discs bearing the BD-ROM, BD-RE/-R, DVD-VIDEO, DVD-RW/-R, DVD+RW/+R and CD-RW/-R logos may still be non-standardized discs; -- some discs may not be played depending on their physical state or recording conditions; -- problems and errors can occur during the creation of Blu-ray Disc, DVD software and/or the manufacture of discs; -- this player operates differently than a standard DVD player or other AV equipment; and/or -- for reasons noted throughout this user manual and for other reason(s) discovered and posted by SAMSUNG customer care center. • If you encounter disc compatibility or player operation problems, please contact SAMSUNG customer care center. You may also contact SAMSUNG customer care center for possible updates on this player. • For additional information on playback restrictions and disc compatibility, refer to the Precautions, Before Reading the user manual, Disc Types and Characteristics, and Before Playing sections of this user manual. • For Blu-ray Disc Player progressive scan output : CONSUMERS SHOULD NOTE THAT NOT ALL HIGH DEFINITION TELEVISION SETS ARE FULLY COMPATIBLE WITH THIS PRODUCT AND MAY CAUSE ARTIFACTS TO BE DISPLAYED IN THE PICTURE. IN CASE OF PROGRESSIVE SCAN PICTURE PROBLEMS, IT IS RECOMMENDED THAT THE USER SWITCH THE CONNECTION TO THE ‘STANDARD DEFINITION’ OUTPUT. IF THERE ARE QUESTIONS REGARDING OUR TV SET COMPATIBILITY WITH THIS PRODUCT, PLEASE CONTACT OUR CUSTOMER SERVICE CENTER. Copy Protection • Because AACS (Advanced Access Content System) is approved as content protection system for Blu-ray Disc format, similar to use of CSS (Content Scramble System) for DVD format, certain restrictions are imposed on playback, analog signal output, etc., of AACS protected contents. The operation of this product and restrictions on this product may vary depending on your time of purchase as those restrictions may be adopted and/or changed by AACS after the production of this product. Furthermore, BD-ROM Mark and BD+ are additionally used as content protection system for Blu-ray Disc format, which imposes certain restrictions including playback restrictions for BD-ROM Mark and/or BD+ protected contents. To obtain additional information on AACS, BD-ROM Mark, BD+, or this product, please contact SAMSUNG customer care center. 26 • Many Blu-ray Disc/DVDs are encoded with copy protection. Because of this, you should only connect your Player directly to your TV, not to a VCR. Connecting to a VCR results in a distorted picture from copyprotected Blu-ray Disc/DVDs. • Under the U.S. Copyright laws and Copyright laws of other countries, unauthorized recording, use, display, distribution, or revision of television programs, videotapes, Blu-ray Discs, DVDs, and other materials may subject you to civil and/or criminal liability. • Cinavia Notice : This product uses Cinavia technology to limit the use of unauthorized copies of some commercially-produced film and videos and their soundtracks. When a prohibitet use of an unauthorized copy is detected, a message will be displayed and playback or copying will be interrupted. More information about Cinavia technology is provided at the Cinavia Online Consumer Information Center at http://www. cinavia.com. To request additional information about Cinavia by email, send a postcard with your mailing address to: Cinavia Consumer Information Center, P.O. Box 86851, San Diego CA, 92138, USA. This product incorporates proprietary technology under licence from Verance Corporation and is protected by U.S. Patent 7,369,677 and other U.S. and worldwide patens issued and pending as well as copyright and trade secret protection for certain aspects of such technology. Cinavia is a trademark of Verance Corporation. Copyright 2004-2010 Verance Corporation. All right reserved by Verance. Reverse engineering or disassembly is prohibited. Network Service Disclaimer All content and services accessible through this device belong to third parties and are protected by copyright, patent, trademark and/or other intellectual property laws. Such content and services are provided solely for your personal noncommercial use. You may not use any content or services in a manner that has not been authorized by the content owner or service provider. Without limiting the foregoing, unless expressly authorized by the applicable content owner or service provider, you may not modify, copy, republish, upload, post, transmit, translate, sell, create derivative works, exploit, or distribute in any manner or medium any content or services displayed through this device. THIRD PARTY CONTENT AND SERVICES ARE PROVIDED “AS IS.” SAMSUNG DOES NOT WARRANT CONTENT OR SERVICES SO PROVIDED, EITHER EXPRESSLY OR IMPLIEDLY, FOR ANY PURPOSE. SAMSUNG EXPRESSLY DISCLAIMS ANY IMPLIED WARRANTIES, INCLUDING BUT NOT LIMITED TO, WARRANTIES OF MERCHANTABILITY OR FITNESS FOR A PARTICULAR PURPOSE. SAMSUNG DOES NOT GUARANTEE THE ACCURACY, VALIDITY, TIMELINESS, LEGALITY, OR COMPLETENESS OF ANY CONTENT OR SERVICE MADE AVAILABLE THROUGH THIS DEVICE AND UNDER NO CIRCUMSTANCES, INCLUDING NEGLIGENCE, SHALL SAMSUNG BE LIABLE, WHETHER IN CONTRACT OR TORT, FOR ANY DIRECT, INDIRECT, INCIDENTAL, SPECIAL OR CONSEQUENTIAL DAMAGES, ATTORNEY FEES, EXPENSES, OR ANY OTHER DAMAGES ARISING OUT OF, OR IN CONNECTION WITH, ANY INFORMATION CONTAINED IN, OR AS A RESULT OF THE USE OF ANY CONTENT OR SERVICE BY YOU OR ANY THIRD PARTY, EVEN IF ADVISED OF THE POSSIBILITY OF SUCH DAMAGES. Third party services may be terminated or interrupted at any time, and Samsung makes no representation or warranty that any content or service will remain available for any period of time. Content and services are transmitted by third parties by means of networks and transmission facilities over which Samsung has no control. Without limiting the generality of this disclaimer, Samsung expressly disclaims any responsibility or liability for any interruption or suspension of any content or service made available through this device. Samsung is neither responsible nor liable for customer service related to the content and services. Any question or request for service relating to the content or services should be made directly to the respective content and service providers. License • Manufactured under license from Dolby Laboratories. Dolby and the double-D symbol are trademarks of Dolby Laboratories. • Manufactured under license under U.S. Patent Nos : 5,956,674; 5,974,380; 6,487,535 & other U.S. and worldwide patents issued & pending. DTS, the Symbol, & DTS and the symbol together are registered trademarks & DTS 2.0+ Digital Out is a trademark of DTS, Inc. Product includes software. © DTS, Inc. All Rights Reserved. • DivX -- ABOUT DIVX VIDEO : DivX® is a digital video format created by DivX, LLC, a subsidiary of Rovi Corporation. This is an DivX Certified® device that plays DivX video. Visit www.divx.com for more information and software tools to convert your files into DivX video. -- ABOUT DIVX VIDEO-ON-DEMAND : This DivX Certified® device must be registered in order to play purchased DivX Video-on-Demand (VOD) movies. To obtain your registration code, locate the DivX VOD section in your device setup menu. Go to vod.divx.com for more information on how to complete your registration. -- DivX Certified® to play DivX® video up to HD 1080p, including premium content. -- DivX®, DivX Certified® and associated logos are trademarks of Rovi Corporation or its subsidiaries and are used under lisence. -- Covered by one or more of the following U.S. patents : 7,295,673; 7,460,668; 7,515,710; 7,519,274. • HDMI, the HDMI Logo, and High-Definition Multimedia Interface are trademarks or registered trademarks of HDMI Licensing LLC in the United States and other countries. • Oracle and Java are registered trademarks of Oracle and/or its affiliates. Other names may be trademarks of their respective owners • Open Source License Notice -- In the case of using open source software, Open Source Licenses are available on the product menu. • Blu-ray Disc™, Blu-ray™ and the logos are trademarks of the Blu-ray Disc Association. Contact SAMSUNG WORLD WIDE If you have any questions or comments relating to Samsung products, please contact the SAMSUNG customer care centre. Area ` Asia Pacific AUSTRALIA NEW ZEALAND CHINA HONG KONG INDIA INDONESIA MALAYSIA PHILIPPINES SINGAPORE THAILAND TAIWAN VIETNAM Contact Centre 1300 362 603 0800 SAMSUNG (0800 726 786) 400-810-5858 (852) 3698 4698 1800 1100 11 3030 8282 1800 3000 8282 1800 266 8282 0800-112-8888 021-5699-7777 1800-88-9999 1-800-10-SAMSUNG(726-7864) for PLDT 1-800-3-SAMSUNG(726-7864) for Digitel 1-800-8-SAMSUNG(726-7864) for Globe 02-5805777 1800-SAMSUNG(726-7864) 1800-29-3232 02-689-3232 0800-329-999 0266-026-066 1 800 588 889 Web Site www.samsung.com www.samsung.com www.samsung.com www.samsung.com/hk www.samsung.com/hk_en/ www.samsung.com www.samsung.com www.samsung.com www.samsung.com www.samsung.com www.samsung.com www.samsung.com www.samsung.com Area ` Middle East U.A.E OMAN KUWAIT BAHRAIN Egypt JORDAN IRAN Morocco Saudi Arabia ` Africa NIGERIA Ghana Cote D’ Ivoire Senegal Cameroon KENYA UGANDA TANZANIA SOUTH AFRICA Contact Centre Web Site 800-SAMSUNG (726-7864) 800-SAMSUNG (726-7864) 183-2255 8000-4726 08000-726786 800-22273 021-8255 080 100 2255 9200-21230 www.samsung.com www.samsung.com www.samsung.com www.samsung.com www.samsung.com www.samsung.com www.samsung.com www.samsung.com www.samsung.com 0800-726-7864 0800-10077 0302-200077 8000 0077 800-00-0077 7095- 0077 0800 724 000 0800 300 300 0685 88 99 00 0860-SAMSUNG(726-7864 ) www.samsung.com www.samsung.com www.samsung.com www.samsung.com www.samsung.com www.samsung.com www.samsung.com www.samsung.com www.samsung.com BD-E5200 BD-E5300 เครืองเล่ ่ นแผ่นดิสก์ Blu-ray™ ้ คูมือ ่ การใชงาน ิ ่ เป็่ นไปได ้ จินตนาการถึงสงที ้ ตภัณฑ์ซม ั ซุงชินนี้ ้ ขอขอบพระคุณทีเลื่ อกซือผลิ หากต ้องการได ้รับการบริการทีสมบู ่ รณ์ยงขึ ิ ่ น้ โปรดลงทะเบีย นผลิตภัณฑ์ของคุณทีเว็่บไซต์ ์ www.samsung.com/register ไทย คุณสมบัตส ิ ำ�คัญ คุณสมบ ัติของแผ่นดิสก์ Blu-ray แผ่นดิสก์ Blu-ray รองรับวิดโี อ HD คุณภาพสูงสุด ทีมีอ่ ยูในอุ ่ ตสาหกรรมขณะนี –้ ความจุขนาดใหญ่ หมายความถึงคุณภาพของวิดโี อทีสมบู ่ รณ์แบบทีสุด่ คุณสมบัตต ิ อ ่ ไปนีของแผ่ ้ นดิสก์ Blu-ray ขึนอยู ้ กับ ่ แผ่นดิสก์ และอาจแตกต่างกันไป รูปลักษณ์และการเรียกใช ้คุณสมบัตข ิ องแผ่นดิสก์ แต่ละแผ่นยังแตกต่างกันอีกด ้วย และไม่ใช่วา่ แผ่นดิสก์ทก ุ แผ่นจะมีคณ ุ สมบัตต ิ ามที ่ ระบุไว ้ด ้านล่าง ไฮไลต์วด ิ โี อ รูปแบบ BD-ROM รองรับ video codec ขันสู ้ ง 3 รูป แบบ ได ้แก่ AVC, VC-1 และ MPEG-2 นอกจากนัน้ ยังรองรับความละเอียดของภาพสูงใน ระดับ HD: • ความคมชัดสูง 1920 x 1080 • ความคมชัดสูง 1280 x 720ง ข ้อมูลด ้านความปลอดภัย คุณสมบ ัติของเครืองเล่ ่ นแผ่นดิสก์ Bluray คำ�เตือน ่ เพือลดความเสี ่ ยงจากไฟฟ้ าช็อค อย่าถอดฝาครอบ (หรือด ้านหลังเครือง) ่ ภายในเครืองไม่ ่ มส ี ว่ นใดทีผูใช ่ ้ ้สามารถแก ้ไขได ้เอง โปรดใช ้บริการซ่อมบำ�รุงจากช่างผูชำ�้ นาญการ AllShare ข้อควรระวัง คุณสามารถเล่นวิดโี อ เพลง และภาพถ่าย ทีจัด่ เก็บในอุปกรณ์ของคุณ (เช่น พีซ ี หรือ NAS[Network-Attached Storage]) ทางการ ่ อเครือข่าย เชือมต่ การเล่นไฟล์ม ัลติมเี ดีย ่ อ USB เพือเล่ คุณสามารถใช ้การเชือมต่ ่ นไฟล์ มัลติมเี ดียชนิดต่างๆ (MP3, JPEG, DivX ฯลฯ) ที ่ ื ่ อยูในอุ ่ ปกรณ์สอเก็บข ้อมูล USB เสี่ยงต่อไฟฟ้าช็อค อย่าเปิดออก รูปสายฟ้ าฟาดภายในสามเหลียมเป็ ่ น สัญญาณเตือนเพือแจ ่ ้งเตือนถึงระดับ แรงดันไฟฟ้ าทีเป็่ นอันตรายภายใน ผลิตภัณฑ์ ่ ข ้อควรระวัง : เพือลดความเสี ่ ยงจาก ไฟฟ้ าช็อค อย่าถอดฝาครอบ (หรือด ้านหลังเครือง) ่ ภายในเครืองไม่ ่ มสี ว่ นใดทีผูใช ่ ้ ้สามารถแก ้ไข ้บริ ได ้เอง โปรดใช การซ่อมบำ�รุงจากช่างผู ้ ชำ�นาญการ อย่าติดตังอุ้ ปกรณ์นในพื ี ้ นที ้ คับ่ แคบ เช่น ชัน ้ หนังสือหรือเครืองเรื ่ อนในลักษณะนี ้ ั ง สำ�หร ับการเล่นระบบความคมชดสู คำ�เตือน หากต ้องการดูเนือหาที ้ มีค่ วามคมชัดสูงในแผ่น ดิสก์ Blu-ray คุณจะต ้องใช ้ HDTV (โทรทัศน์ความ คมชัดสูง) แผ่นดิสก์ Blu-ray บางแผ่นอาจต ้องใช ้ HDMI OUT ของเครืองเล่ ่ นเพือดู่ เนือหาความคมชั ้ ดสูง ความสามารถในการดูเนือหาความคมชั ้ ดสูงบนแผ่น ดิสก์ Blu-ray อาจถูกจำ�กัด ทังนี้ ขึ้ นอยู ้ กับ ่ คุณภาพ ความละเอียดของโทรทัศน์ของคุณ เพือป้่ องกันอันตราย ทีอาจส่ ่ งผลให ้เกิดอันตราย ้ จากเพลิงไหม ้หรือไฟฟ้ าช็อค อย่าให ้เครืองใช ่ ไฟฟ้ าเครืองนี ่ ถูก ้ ฝนหรือความชืน ้ BD-LIVE คุณสามารถใช ้แผ่นดิสก์ Blu-ray ทีสนั่ บสนุน BDLIVE เพือดาวน์ ่ โหลดเนือหาต่ ้ างๆ ทีบริ่ ษัทผูผลิ้ ต ่ อเครือข่าย ดิสก์มใี ห ้ผ่านทางการเชือมต่ ข้อควรระว ัง เครืองเล่ ่ นแผ่นดิสก์ Blu-ray ใช ้ลำ�แสงเลเซอร์ท ี ่ ่ ความเสียงต่ ่ อการ มองด ้วยตาเปล่าไม่เห็น ซึงจะมี ได ้รับรังสีทเป็ ี ่ นอันตรายหากสัมผัสโดยตรง โปรดแน่ใจว่าใช ้งานเครืองเล่ ่ นแผ่นดิสก์ Blu-ray ตามคำ�แนะนำ �อย่างถูกต ้อง ผลิตภณั ฑเ์ลเซอรค์ ลาส 1 ั ้ นผลิตภัณฑ์ประ เครอื งเล่ ่ นคอมแพคดิสก์รนุนจี ่ ดเป็ เภทเ ลเซอร์คลาส 1 การใชก ้ ารควบคุม การปรับ เปลยี น่ หรือ การทำ�งานของขันตอนอนื ้ ใดนอก ่ เหนือจากทรี ะบุ ่ ในทนี ี ่ ้ อาจทำ�ใหเ้กด ิ การแผ่รังสีทเี ่ ป็ นอันตราย 2 เครืองหมายอั ่ ศเจรียภ ์ ายในรูป สามเหลียมเป็ ่ นสัญญาณเตือนว่า มีคำ�แนะนำ �สำ�คัญทีแจ่ ้งไว ้สำ�หรับ ผลิตภัณฑ์นี ้ ข้อควรระวง ั : • มรี ังสีเลเซอร์ทงทมี ั ้ องเห็ ่ นและมองไม่เห็นเมอื ่ เปิ ดออ ก หลีกเลยี งการสั ่ มผัสกับลำ�แสง (IEC 60825-1) • ผลิตภัณฑ์นใช ี ้ ้เลเซอร์ การใช ้ขันตอนเพื ้ อ่ ควบคุม หรือปรับแต่ง หรือการทำ�งาน นอก ่ อ เหนือจากทีระบุ ่ ไว ้ในทีนี ่ อาจมี ้ ผลให ้เสียงต่ การได ้รับรังสีทเป็ ี ่ นอันตราย ห ้ามเปิ ด ฝาเครืองและห ่ ้ามซ่อมแซมด ้วยตนเอง โปรด ส่งเข ้ารับบริการจากช่างผูชำ�้ นาญการ CLASS 1 KLASSE 1 LUOKAN 1 KLASS 1 PRODUCTO LASER PRODUCT LASER PRODUKT LASER LAITE LASER APPARAT LÁSER CLASE 1 ผลิตภัณฑ์นสอดคล ี ้ ้องตามระเบียบข ้อบังคับของ CE เมือใช ่ ้ขัวต่้ อและสายเคเบิลแบบมีฉนวนหุม ้ ่ อเครืองกั สำ�หรับเชือมต่ ่ บอุปกรณ์อน ื ่ เพือป้่ องกันการรบกวนทางแม่เหล็กไฟฟ้ าทีมีต่ อ ่ ้ไฟฟ้ า เช่น วิทยุและโทรทัศน์ ให ้ใช ้ เครืองใช ่ ขัวต่้ อและสายเคเบิลแบบมีฉนวนหุมสำ้ �หรับการ ่ อ เชือมต่ หมายเหตุส� ำ ค ัญ สายไฟหลักของอุปกรณ์นจั ี ด ้ ส่งให ้พร ้อมกับปลัก๊ แบบหล่อสำ�เร็จ ทีมีฟ่ ิ วส์อยูภายใน ่ ค่าของฟิ วส์จะ ระบุไว ้ทีขาของปลั ่ ก๊ หากต ้องเปลียน่ ต ้องใช ้ฟิ วส์ทได ี ่ ้รับการรับรอง ตาม BS1362 ทีมีพ่ ก ิ ด ั เท่ากัน อย่าใช ้ปลักที ๊ ไม่่ มฝี าครอบฟิ วส์ หากฝาครอบสามารถถอด ออกได ้ หากต ้องใช ้ฝาครอบฟิ วส์ใหม่ ต ้องใช ้สีเดียว กับขาของปลัก๊ ้ สามารถซือฝาครอบใหม่ ได ้จากตัวแทนจำ�หน่าย ของคุณ หากปลักถาวรไม่ ๊ เหมาะสมกับจุดจ่ายไฟในบ ้าน ของคุณ หรือสายเคเบิลยาวไม่พอสำ�หรับจุดจ่าย ไฟ คุณสามารถขอรับสายไฟต่อพ่วงทีได่ ้รับการ รรับรอง ซึงมี่ ความปลอดภัยและเหมาะสม หรือติดต่อ ตัวแทนจำ�หน่ายของคุณเพือขอความช่ ่ วยเหลือ อย่างไรก็ตาม หากไม่มท ี างเลือกสำ�หรับการตัด ปลักออก ๊ ให ้ถอดฟิ วส์ จากนันนำ ้ �ปลักไปทิ ๊ งอย่ ้ าง ปลอดภัย อย่าต่อปลักกั ๊ บช่องเสียบสายเมน ่ ออันตรายจากไฟฟ้ าช็อค เนืองจากมี ่ ความเสียงต่ จากสายเปลือยทียืด่ หยุนได ่ ้ หากต ้องการถอดสายไฟหลักของอุปกรณ์นี ต้ ้อง ดึงปลักออกจากเบ ๊ ้าเสียบสายไฟหลัก ปลักของ ๊ สายไฟหลักจึ งจะพร ้อมใช ้งาน ผลิตภัณฑ์พร ้อมกับคูมือ ่ ผูใช้ ้นี ได ้ ้รับอนุญาตภาย ิ ทางปั ญญาของบริษัท ใต ้สิทธิที์ เป็่ นทรัพย์สน หลายแห่ง ้ น ข้อควรระว ังเบืองต้ คำ�แนะนำ�สำ�ค ัญเพือความปลอดภ ่ ัย อ่านคำ�แนะนำ �ในการใช ้งานเหล่านีอย่ ้ างรอบคอบ ก่อนใช ้เครืองนี ่ ปฏิ ้ บต ั ต ิ ามคำ�แนะนำ �เพือความ ่ ปลอดภัยทังหมดที ้ แจ่ ้งไว ้ด ้านล่าง เก็บคูมือ ่ นีไว้ ้ให ้พร ้อมสำ�หรับการอ ้างอิงในอนาคต 1. อ่านคำ�แนะนำ �เหล่านี ้ 2. เก็บคำ�แนะนำ �เหล่านี ้ 3. โปรดสังเกตคำ�เตือนทังหมด ้ 4. ปฏิบต ั ต ิ ามคำ�แนะนำ �ทังหมด ้ 5. อย่าใช ้อุปกรณ์นใกล ี ้ ้กับน�้ ำ 6. ใช ้ผ ้าแห ้งทำ�ความสะอาดเท่านัน้ 7. อย่าปิ ดกันช่ ้ องระบายอากาศ ให ้ติดตังเครื ้ อง ่ ตามคำ�แนะนำ �ของผูผลิ้ ต 8. อย่าตังเครื ้ องใกล ่ ้อุปกรณ์ทเป็ ี ่ นแหล่งความ ร ้อน เช่น หม ้อน�้ เครื ำ องทำ ่ �ความร ้อน เตา หรืออุปกรณ์อนๆ ื ่ (รวมถึงเครืองรั ่ บสัญญาณ AV) ทีกระจายความร ่ ้อน 9. อย่าแก ้ไขปลักที ๊ ใช่ ้เป็ นกราวนด์หรือขัวเพื ้ อ่ ความปลอดภัย ปลักแบบมี ๊ ขวจะมี ั ้ ขาแบน 2 ขา ซึงข่ ้างหนึงจะกว ่ ้างกว่าอีกข ้าง ปลัก๊ ประเภทกราวด์จะมีขาแบนสองขา และมีขา สายดินขาทีสาม ่ ขาแบนทีกว่ ้างกว่า หรือขา สายดินนี มี้ ไว ้เพือความปลอดภั ่ ยของคุณ หากปลักที ๊ ให่ ้ไว ้ไม่สามารถใช ้ได ้กับเต ้ารับ ไฟฟ้ า ให ้ติดต่อช่างไฟเพือเปลี ่ ยนเต ่ ้ารับ ไฟฟ้ ารุนเก่ ่ านี ้ 10. ป้ องกันสายไฟจากการถูกเหยียบหรือบิดงอ โดยเฉพาะทีบริ่ เวณปลักต่ ๊ างๆ ทีเป็่ นจุดที ่ ออกจากเครือง ่ 11. ใช ้แต่อป ุ กรณ์เสริม/ยึดติด ทีผูผลิ ่ ้ ตระบุให ้ ใช ้ได ้เท่านัน้ 12. ใช ้แต่รถเข็น ฐานตัง ้ ขาตัง ้ แกนยึด หรือ โต๊ะ ทีผูผลิ ่ ้ ตระบุ หรือ ขายพร ้อมกับอุปกรณ์ นีเท่้ านัน้ เมือใช ่ ้รถ เข็น ให ้ระมัดระวังเมือ ่ เคลือนย ่ ้ายรถเข็น/ อุปกรณ์ เพือหลี ่ กเลียงการได ่ ้รับบาดเจ็บจาก การสะดุดล ้ม 13. ถอดปลักอุ ๊ ปกรณ์ระหว่างฝนฟ้ าคะนอง หรือ เมือไม่ ่ ได ้ใช ้งานเป็ นเวลานาน 14. ใช ้บริการซ่อมแซมจากช่างผูชำ�้ นาญทีได่ ้ รับการรับรองเท่านัน้ การซ่อมแซมเป็ นสิง ่ จำ�เป็ นเมืออุ ่ ปกรณ์ได ้รับความเสียหายไม่ ว่าประเภทใด เช่น สายไฟหรือปลักชำ ๊ �รุด ของเหลวหรือวัสดุเข ้าไปในเครือง ่ หรือ เครืองถู ่ กฝนหรือความชืน ้ ไม่ทำ�งานตาม ปกติ หรือตกหล่น การเก็บและจ ัดการแผ่นดิสก์ การจ ัดการแผ่นดิสก์ ล ักษณะของแผ่นดิสก์ • ใช ้แผ่นดิสก์รป ู ทรง ทัวไป ่ หากคุณใช ้ แผ่นดิสก์ทมี ี ร่ ป ู ทรง ผิดปกติ (แผ่นดิสก์ท ี ่ มีรป ู ทรงพิเศษ) คุณอาจทำ�ให ้เครืองเล่ ่ นชำ�รุด เสียหายได ้ การถือแผ่นดิสก์ • อย่าจับทีพืนผิ ่ ้ วของแผ่นดิสก์ ด ้านทีจะบั ่ นทึกข ้อมูล แผ่นดิสก์ Blu-ray • อย่าวางแผ่นดิสก์ Blu-ray ทิงไว ้ ้ในเครืองเล่ ่ น เป็ นเวลานาน ให ้นำ �แผ่นดิสก์ Blu-ray ออกจาก เครืองเล่ ่ นและจัดเก็บไว ้ในกล่อง • ระวังอย่าทิงลายนิ ้ วมื้ อหรือรอยขีดข่วนบนผิว หน ้าของแผ่นดิสก์ Blu-ray DVD-VIDEO, CD เพลง (CD-DA) ่ • ใช ้ผ ้านุมเช็ ่ ดคราบสกปรกหรือสิงเปรอะเปื อน ้ ออกจากแผ่นดิสก์ การเก็บแผ่นดิสก์ โปรดระวังอย่าให ้ดิสก์ได ้รับความเสียหาย เนืองจากข ่ ้อมูลในแผ่นดิสก์มค ี วามอ่อนไหวอย่าง มากต่อสภาพแวดล ้อม • อย่าวางแผ่นดิสก์ตากแดดโดยตรง • เก็บแผ่นไว ้ในบริเวณทีเย็่ นและอากาศถ่ายเท • เก็บแผ่นในแนวตัง ้ • เก็บแผ่นไว ้ในซองทีสะอาด ่ • หากคุณย ้ายเครืองเล่ ่ นจากทีเย็่ นไปทีอบอุ ่ นใน ่ ทันทีทน ั ใด อาจเกิดไอน�ในชิ ้ ำ นส่้ วนทำ�งานและ เลนส์ และทำ�ให ้การเล่นแผ่นผิดปกติได ้ หาก เกิดกรณีนี ให ้ ้ถอดปลักเครื ๊ องเล่ ่ น รอเป็ นเวลา ่ สองชัวโมง แล ้วเสียบปลักกั ๊ บเต ้ารับไฟฟ้ า จาก นันจึ ้ งใส่แผ่นดิสก์และลองเล่นอีกครัง้ ข้อควรระว ังในการจ ัดการแผ่นดิสก์ • อย่าใช ้ปากกาลูกลืนหรื ่ อดินสอเขียนทีด ้าน ่ ฉลากพิมพ์ • อย่าใช ้สเปรย์ทำ�ความสะอาดหัวบันทึกหรือ น�ยาป้ ้ ำ องกันไฟฟ้ าสถิตย์เพือทำ ่ �ความสะอาด ดิสก์ นอกจากนี อย่ ้ าใช ้สารระเหย เช่น เบนซิน หรือทินเนอร์ • อย่าติดฉลากหรือสติกเกอร์ ๊ ทแผ่ ี ่ นดิสก์ (อย่า ใช ้แผ่นดิสก์ทติ ี ด่ เทปกาวด ้านนอกหรือลอก สติกเกอร์ ๊ ออก) • อย่าใช ้แผ่นปิ ดหรือแผ่นป้ องกันรอยขีดข่วน • อย่าใช ้แผ่นดิสก์ทพิ ี ม่ พ์ด ้วยเครืองพิ ่ มพ์ฉลากที ่ มีอยูตามท ่ ้องตลาด • อย่าบรรจุแผ่นดิสก์ทงอหรื ี ่ อแตกหัก ่ ออุปกรณ์อนๆ • ก่อนทีจะเชื ่ อมต่ ื ่ เข ้ากับเครือง ่ เล่นนี ให ้ ้แน่ใจว่าปิ ดอุปกรณ์เหล่านันแล ้ ้ว • อย่าเคลือนย ่ ้ายเครืองเล่ ่ นขณะเล่นแผ่นดิสก์ แผ่นดิสก์อาจถูกขูดขีดหรือชำ�รุด และชินส่้ วน ภายในของเครืองเล่ ่ นอาจเสียหายได ้ 3 • อย่าวางแจกันดอกไม ้ทีบรรจุ ่ น�้ หรื ำ อวัตถุทเป็ ี ่น โลหะขนาดเล็ก ไว ้บนเครืองเล่ ่ น • ระวังอย่าวางมือของคุณไว ้ทีถาดวางแผ่ ่ นดิสก์ • อย่าวางสิงอื่ นที ่ ไม่่ ใช่แผ่นดิสก์ลงในถาดวาง แผ่นดิสก์ ่ • สิงรบกวนจากสภาพแวดล ้อมภายนอก เช่น ฟ้ าผ่า และประจุไฟฟ้ าสถิตย์ สามารถมีผลกระ ทบต่อการทำ�งานปกติของเครืองเล่ ่ นนีได้ ้ ถ ้า เกิดเหตุการณ์เช่นนีขึน ้ ้ ให ้ปิ ดเครืองเล่ ่ นและ เปิ ดขึนมาใหม่ ้ อก ี ครังโดยกดปุ ้ ม่ POWER หรือ ถอดปลักออก ๊ จากนันเสี ้ ยบสายไฟ AC เข ้ากับ เต ้าเสียบไฟ AC ใหม่ เครืองเล่ ่ นจะทำ�งานได ้ ตามปกติ • ดูให ้แน่ใจว่าได ้นำ �แผ่นดิสก์ออกและปิ ดเครือง ่ เล่นแล ้วหลังการใช ้งาน • ถอดสายไฟ AC ออกจากเต ้าเสียบไฟ AC เมือ ่ คุณไม่ได ้ใช ้งานเครืองเล่ ่ นเป็ นเวลานาน • ในการทำ�ความสะอาดแผ่นดิสก์ ให ้เช็ดเป็ น เส ้นตรงออกจากด ้านในของแผ่นดิสก์ไปยัง ด ้านนอก • อย่าให ้เครืองเล่ ่ นสัมผัสกับของ เหลวใดๆ • เมือเสี ่ ยบปลัก๊ AC กับเต ้ารับไฟฟ้ า ข ้างผนัง เครืองเล่ ่ นจะยังใช ้ไฟ (โหมดพร ้อมทำ�งาน) แม ้ปิ ดเครืองอยู ่ ่ ั ผัสกับน�้ หรื • อุปกรณ์ต ้องไม่สม ำ อทำ�น�กระเด็ ้ ำ น ใส่ไม่วา่ กรณีใดๆ และห ้ามนำ �ภาชนะทีบรรจุ ่ ของเหลว เช่น แจกัน วางไว ้บนอุปกรณ์ ่ อ • ปลักสายไฟหลั ๊ กใช ้สำ�หรับตัดการเชือมต่ อุปกรณ์และควรอยูในสถานะพร ่ ้อมทำ�งาน ทุกครัง้ • อย่าใช ้มือเปี ยกแตะปลักไฟ ๊ มิเช่นนันอาจถู ้ ก ไฟฟ้ าดู ดได ้ • อย่าใช ้เต ้ารับไฟฟ้ าเดียวกับอุปกรณ์ไฟฟ้ า หลายชิน ้ มิเช่นนัน้ อาจทำ�ให ้มีความร ้อนสูงเกิน ส่งผลให ้ เกิด เพลิงไหม ้ได ้ • หากคุณได ้ยินเสียงผิดปกติ กลินไหม ่ ้ หรือควัน ให ้ปิ ดสวิตช์ไฟของอุปกรณ์ทน ั ทีและถอดปลัก๊ ไฟออกจากเต ้ารับไฟฟ้ าทีผนั่ ง จากนันติ ้ ดต่อ ศูนย์บริการลูกค ้าในละแวกใกล ้เคียงเพือขอ ่ ความช่วยเหลือทางเทคนิค หากคุณยังคงใช ้ ผลิตภัณฑ์ในสภาพเช่นนันต่ ้ อไป อาจส่งผลให ้ ไฟฟ้ าดูดหรือเกิดเพลิงไหม ้ได ้ 4 การดูแลร ักษาต ัวเครือง่ ก่อนทีคุณ ่ จะทำ�ความสะอาดตัวเครืองเล่ ่ นแผ่น ดิสก์ Blu-ray ตรวจดูให ้แน่ใจว่าได ้ถอดสายไฟ AC ออกจากเต ้าเสียบไฟ AC แล ้ว • อย่าใช ้เบนซิน ทินเนอร์ หรือน�ยาอื ้ ำ นๆ่ ทำ�ความสะอาดเครือง ่ • ใช ้ผ ้านุมเช็ ่ ดทีตัว่ เครือง ่ สารบัญ คุณสมบัตส ิ ำ�คัญ คุณสมบัตข ิ องแผ่นดิสก์ Blu-ray.......................2 คุณสมบัติของเครื่องเล่นแผ่นดิสก์ Blu-ray........2 ข้อจำ�ก ัดในการเล่น ข้อมูลด้านความปลอดภัย ่ ้งาน • เครืองเล่ ่ นนีอาจไม่ ้ ตอบสนองคำ�สังใช ทังหมด ้ เนืองจากแผ่ ่ นดิสก์ Blu-ray, DVD หรือ CD บางรุน่ สามารถใช ้งานเฉพาะเจาะจง หรือจำ�กัด และมีคณ ุ สมบัตบ ิ างอย่างให ้เท่านัน้ ระหว่างการเล่น โปรดสังเกตว่านีไม่่ ใช่ข ้อบกพร่องของเครือง ่ เล่น • ซัมซุงไม่สามารถรับประกันได ้ว่าเครืองเล่ ่ นนีจะ้ เล่นแผ่นดิสก์ Blu-ray, DVD หรือ CD ของทุก โลโก ้ เนืองจากฟอร์ ่ แมตของแผ่นดิสก์อาจมี การเปลียนแปลง ่ และอาจเกิดปั ญหาและข ้อผิด พลาดระหว่างการผลิตซอฟต์แวร์สำ�หรับแผ่น ดิสก์ Blu-ray, DVD, CD และ/หรือระหว่างการ ผลิตแผ่นดิสก์ โปรดติดต่อศูนย์บริการลูกค ้าของซัมซุง หาก คุณมีข ้อสงสัยหรือพบปั ญหาในการเล่นแผ่น ดิสก์ Blu-ray, DVD หรือ CD ในเครืองเล่ ่ นนี ้ นอกจากนัน้ โปรดอ่านรายละเอียดส่วนทีเหลื ่ อ ของคูมือ ่ การใช ้งานนีหากต ้ ้องการข ้อมูลเพิม ่ เติมเกียวกั ่ บข ้อจำ�กัดในการเล่น คำ�เตือน2��������������������������������������������������������2 ข้อควรระวังเบื้องต้น........................................3 การเก็บและจัดการแผ่นดิสก์. ...........................3 การเริ่มต้นใช้งาน ก่อนการใช้คู่มือการใช้งาน...............................5 อุปกรณ์เสริม..................................................7 แผงด้านหน้า. ................................................8 แผงด้านหลัง. ................................................8 รีโมทคอนโทรล..............................................9 การเชื่อมต่อ เครือข่าย.................................................... 16 ระบบ.......................................................... 17 ภาษา......................................................... 17 ความปลอดภัย............................................ 17 ทั่วไป......................................................... 18 การสนับสนุน. ............................................. 18 ฟังก์ชั่นพื้นฐาน การเล่นวิดีโอ...................................................19 การใช้เมนูดิสก์/เมนูชื่อ/ เมนูป็อปอัป................................................ 19 การใช้ฟังก์ชั่นค้นหาและข้าม...........................19 เล่นภาพเคลื่อนไหวทีละภาพ...........................20 การใช้ปุ่ม TOOLS...........................................20 การฟังเพลง....................................................21 การเล่นภาพ....................................................22 A. การเชื่อมต่อกับโทรทัศน์ของคุณ..................9 การเล่นอุปกรณ์สื่อเก็บข้อมูล USB ................................................ 22 C. การเชื่อมต่อกับเครือข่าย.......................... 10 บริการเครือข่าย B. การเชื่อมต่อกับระบบออดิโอ..................... 10 ตั้งค่า การตั้งค่าเบื้องต้น........................................ 12 กรนำ�ทงของเมน1����������������������������������������� 12 การเข้าใช้งานเมนูการตั้งค่า.......................... 12 หน้าจอ....................................................... 13 เสียง.......................................................... 14 BD-LIVE™................................................. 23 การใช้ฟังก์ชั่น AllShare............................... 23 ภาคผนวก การแก้ไขปัญหา.......................................... 23 ข้อมูลจำ�เพะ2����������������������������������������������� 25 ้ การเริมต ่ ้นใชงาน ชนิดแผ่นดิสก์ทเครื ี ่ องเล่ ่ นของคุณไม่สามารถเล่นได้ ้ มื ก่อนการใชค ู อ ่ การใชง้ าน ชนิดแผ่นดิสก์และข้อมูลในแผ่นดิสก์ทเครื ี ่ องเล่ ่ นของคุณสามารถเล่นได้ เงือนไข ่ โลโก้ วีดโี อ - เพลง ภาพถ่าย - ไอคอน คำ�จำ�ก ัดความ h � ั ่ มีบ่ นแผ่นดิสก์ BD-ROM หรือ BD-RE/-R แสดงถึงฟั งก์ชนที ทีบัน่ ทึกในฟอร์แมต BD-RE Z � ั ่ มีบ่ นแผ่นดิสก์ DVD-VIDEO หรือ DVD+RW/ แสดงถึงฟั งก์ชนที DVD-RW(V)/DVD-R/+R ทีบัน่ ทึกซึงบั่ นทึกและปิ ดการเขียนแล ้ว � o � G ั ่ มีใ่ นแผ่นดิสก์ CD-RW/-R, DVD-RW/-R, BDแสดงถึงฟั งก์ชนที ่ บข ้อมูล USB ทีบรรจุ RE/-R หรือสือเก็ ่ ข ้อมูล DivX, MKV, MP4 ั ่ มีบ่ น CD-RW/-R เพลง (ฟอร์แมต CD-DA) แสดงถึงฟั งก์ชนที ั ่ มีใ่ นแผ่นดิสก์ CD-RW/-R, DVD-RW/-R, BDแสดงถึงฟั งก์ชนที ่ บข ้อมูล USB ทีบรรจุ RE/-R หรือสือเก็ ่ ข ้อมูล MP3 หรือ WMA ั ่ มีใ่ นแผ่นดิสก์ CD-RW/-R, DVD-RW/-R, BDแสดงถึงฟั งก์ชนที ่ บข ้อมูล USB ทีบรรจุ RE/-R หรือสือเก็ ่ ข ้อมูล JPEG ✎✎ หมายเหตุ ▪▪ เครืองเล่ ่ นนี ไม่ ้ สามารถเล่นแผ่น CD-RW/-R และ DVD-R บางแผ่นได ้ เนืองจากชนิ ่ ดของแผ่น ดิสก์ หรือสภาพในการบันทึก ▪▪ หากมีการบันทึกข ้อมูลในแผ่นดิสก์ DVD-RW/-R อย่างไม่เหมาะสมในฟอร์แมต DVD video แผ่นนันจะไม่ ้ สามารถเล่นได ้ ▪▪ เครืองเล่ ่ นของคุณจะไม่เล่นข ้อมูลทีบัน่ ทึกบนแผ่นดิสก์ DVD-R ทีมีอ่ ต ั ราบิตมากกว่า 10 Mbps ▪▪ เครืองเล่ ่ นของคุณจะไม่เล่นข ้อมูลทีบัน่ ทึกบนแผ่นดิสก์ BD-R หรืออุปกรณ์ USB ทีมีอ่ ต ั ราบิต มากกว่า 25 Mbps • HD DVD • DVD-RAM • DVD-RW(โหมด • แผ่น DVD-R สำ�หรับ VR) Authoring ความจุ 3.9 GB • แผ่นดิสก์ DVD• ซุปเปอร์ออดิโอ CD ROM/PD/MV ฯลฯ (ยกเว ้น CD เลเยอร์) • CVD/CD-ROM/CDV/ CD-G/CD-I/LD (CD-Gs เล่นแต่เสียง เท่านัน้ ไม่เล่นภาพ) ✎✎ หมายเหตุ ความสามารถในการใชง้ านร่วม ของแผ่นดิสก์ Blu-ray ▪▪ แผ่นดิสก์และแผ่น DVD ทีใช่ ้ในเชิง ้ พาณิชย์บางประเภทซึงซื่ อมาจากภู มภ ิ าค อืนที ่ ไม่่ ใช่ภม ู ภ ิ าคทีคุณ ่ อยู อาจไม่ ่ แผ่นดิสก์ Blu-ray เป็ นฟอร์แมตใหม่ทยั ี ง่ มี สามารถเล่นกับเครืองเล่ ่ นนีได้ ้ วิวฒ ั นาการต่อเนือง่ ดังนัน้ จึงอาจมีปัญหาในเรือง ่ ั ่ ความสามารถในการใช ้งานร่วม ไม่สามารถใช ้งาน ▪▪ เครืองจะไม่ ่ สามารถเล่น หรือใช ้ฟั งก์ชนพิ เศษอืน ่ ๆ เช่น การเปลียนแปลงมุ ่ มกล ้อง ร่วมหรือเล่นกับแผ่นดิสก์ได ้ทุกแผ่น หากต ้องการ และการปรับตังอั้ ตราส่วนภาพกับแผ่น ข ้อมูลเพิมเติ ่ ม โปรดดูสว่ นข ้อสังเกตเกียวกั ่ บความ ดิสก์บางชนิด ข ้อมูลเกียวกั ่ บแผ่นดิสก์จะ สอดคล ้องและความสามารถในการใช ้งานร่วมใน มีระบุในรายละเอียดบนกล่องดิสก์ โปรด คูมือ ่ ผูใช้ ้นี ้ อ่านรายละเอียดดังกล่าว ถ ้าจำ�เป็ น ▪▪ อย่าปล่อยให ้แผ่นดิสก์สกปรกหรือมีรอย ่ ขีดข่วน ลายนิวมื้ อ สิงสกปรก ฝุนละออง ่ รอยขีดข่วน หรือคราบควันบุหรีบนผิ ่ วหน ้า ชนิดแผ่นดิสก์ บันทึกจะทำ�ให ้ไม่สามารถใช ้แผ่นดิสก์นี ้ ทำ�การเล่นได ้ BD-ROM ▪▪ เมือคุ ่ ณเล่นระบบ BD-J อาจต ้องใช ้เวลา โหลดข ้อมูลนานกว่าปกติ หรือบางฟั งก์ชั ่ แผ่นดิสก์ Blu-ray ROM นีสามารถเล่ ้ นได ้อย่าง นอาจทำ�งานช ้าลง เดียว ่ ้ เครืองเล่ ่ นนีสามารถเล่ ้ นแผ่นดิสก์ BD-ROM ที ่ ▪▪ เครืองเล่ ่ นนีอาจไม่ ้ ตอบสนองคำ�สังใช งานทังหมด ้ เนืองจากแผ่ ่ นดิสก์ Blu-ray, บันทึกข ้อมูลดังเดิ ้ มและใช ้ในเชิงพาณิชย์ DVD หรือ CD บางรุน่ สามารถใช ้งาน เฉพาะเจาะจงหรือจำ�กัด และมีคณ ุ สมบัต ิ BD-RE/-R บางอย่างให ้เท่านันระหว่ ้ างการเล่น โปรดสังเกตว่านีไม่่ ใช่ข ้อบกพร่องของ เครืองเล่ ่ น แผ่นดิสก์ Blu-ray RE/-R สามารถบันทึกและ เล่นได ้ ▪▪ ซัมซุงไม่สามารถรับประกันได ้ว่าเครือง ่ ่ นนีสามารถเล่ ้ นแผ่นดิสก์ BD-RE/-R ที ่ เล่นนีจะเล่ ้ นแผ่นดิสก์ Blu-ray, DVD หรือ เครืองเล่ CD ของทุกโลโก ้ เนืองจากฟอร์ ่ แมตของ บันทึกโดยเครืองบั ่ นทึกแผ่นดิสก์ Blu-ray อืนที ่ ่ แผ่นดิสก์อาจมีการเปลียนแปลง ่ และอาจ ใช ้ร่วมกันได ้ เกิดปั ญหาและข ้อผิดพลาดระหว่างการ ผลิตซอฟต์แวร์สำ�หรับแผ่นดิสก์ Blu-ray, DVD, CD และ/หรือระหว่างการผลิต DVD-VIDEO แผ่นดิสก์ โปรดติดต่อศูนย์บริการลูกค ้าของซัมซุง • เครืองเล่ ่ นนีสามารถเล่ ้ นแผ่น DVD (แผ่น DVDหากคุณมีข ้อสงสัยหรือพบปั ญหาเมือเล่ ่ น VIDEO) เชิงพาณิชย์ทบั ี น่ ทึกข ้อมูลดังเดิ ้ มของ แผ่นดิสก์ Blu-ray, DVD หรือ CD ใน ภาพยนตร์ เครืองเล่ ่ นนี นอกจากนั ้ น้ โปรดอ่านราย • เมือสลั ่ บจากการอ่านแผ่นเลเยอร์ขนที ั ้ หนึ่ ง ่ ละเอียดส่วนทีเหลื ่ อของคูมือ ่ การใช ้งาน นีหากต ้ ้องการข ้อมูลเพิมเติ ่ มเกียวกั ่ บข ้อ ไปยังเลเยอร์ขนที ั ้ สองของแผ่ ่ น DVD-VIDEO จำ�กัดในการเล่น แบบเลเยอร์คู อาจมี ่ ภาพและเสียงทีบิด่ เบียว้ ่ ซึ ่ เช่นนีไม่้ ใช่การทำ�งานผิด เกิดขึนชั้ วครู ่ งกรณี ปกติของตัวเครืองเล่ ่ น 5 DVD-RW/-R/+R AVCHD (Video Codec ขนสู ั ้ง ความละเอียดสูง) เครืองเล่ ่ นนีสามารถเล่ ้ นแผ่น DVD-RW/-R/+R ที ่ ถูกบันทึกและปิ ดการเขียนด ้วยเครืองบั ่ นทึกวิดโี อ • เครืองเล่ ่ นนีสามารถเล่ ้ นแผ่นดิสก์ในฟอร์แมต DVD ความสามารถในการเล่น ขึนอยู ้ กับ ่ สภาพใน AVCHD ปกติแล ้วแผ่นดิสก์เหล่านีจะถู ้ กบันทึก ้ในกล การบันทึก และใช ้องถ่ายวิดโี อ • ฟอร์แมต AVCHD เป็ นฟอร์แมตของกล ้องวิดโี อ ดิจต ิ อลความละเอียดสูง DVD+RW • ฟอร์แมต MPEG-4 AVC/H.264 มีความสามารถ • เครืองเล่ ่ นนีสามารถเล่ ้ นแผ่นดิสก์ DVD+RW ในการบีบอัดรูปภาพทีมีป่ ระสิทธิภาพสูงกว่ารูป ทีถูก่ บันทึกด ้วยเครืองบั ่ นทึกวิดโี อ DVD ความ แบบการบีบอัดรูปภาพแบบดังเดิ ้ ม สามารถในการเล่น ขึนอยู ้ กับ ่ สภาพในการ • แผ่นดิสก์ AVCHD บางแผ่นใช ้รูปแบบ บันทึก “x.v.Color” เครืองเล่ ่ นนีสามารถเล่ ้ นแผ่นดิสก์ AVCHD ทีใช่ ้รูปแบบ “x.v.Color” ได ้ CD เพลง (CD-DA) • “x.v.Color” เป็ นเครืองหมายการค ่ ้าของ Sony Corporation • เครืองเล่ ่ นนีเล่้ นแผ่นดิสก์ CD-RW/-R เพลง ใน • “AVCHD” และโลโก ้ AVCHD เป็ น ฟอร์แมต CD-DA เครืองหมายการค ่ ้าของ Matsushita • เครืองเล่ ่ นนีอาจไม่ ้ สามารถเล่นแผ่น CDElectronic Industrial Co., Ltd. และ Sony RW/-R บางแผ่น เนืองจากสภาพในการบั ่ นทึก Corporation CD-RW/-R • ใช ้แผ่น CD-RW/-R ขนาด 700 MB (80 นาที) หากเป็ นไปได ้ อย่าใช ้แผ่นดิสก์ขนาด 800 MB (90 นาที) หรือดิสก์ทมี ี ค่ วามจุมากกว่า เนืองจากดิ ่ สก์อาจไม่สามารถเล่นได ้ • หากแผ่น CD-RW/-R ไม่ได ้บันทึกมาแบบ เซสชันปิ่ ด คุณอาจพบการหน่วงของสัญญาณ เมือเล่ ่ นแผ่นดิสก์ตงแต่ ั ้ แรก หรือไม่สามารถเล่น ไฟล์ทบั ี น่ ทึกไว ้ทังหมดได ้ ้ • แผ่นดิสก์ CD-RW/-R บางชนิดอาจไม่สามารถ เล่นกับเครืองเล่ ่ นนีได้ ้ ขึนอยู ้ กับ ่ อุปกรณ์ทใช ี ่ ้ เขียนข ้อมูลลงบนแผ่นเหล่านัน้ สำ�หรับข ้อมูล ่ จากแผ่น CD ทีบัน่ ทึกอยูบนสื ่ อ CD-RW/-R ้ส่วนตัวนัน้ ความสามารถในการเล่น เพือการใช ่ อาจขึนอยู ้ กับ ่ ข ้อมูลและแผ่นดิสก์ รูปแบบไฟล์ทสน ี ่ ับสนุน รหัสภู ชนิดแผ่นดิสก์ มิ ภาค แผ่นดิสก์ Blu-ray ✎✎ หมายเหตุ ▪▪ แผ่นดิสก์ AVCHD บางรูปแบบอาจไม่ สามารถเล่นได ้ ทังนี้ ขึ้ นอยู ้ กับ ่ สภาพใน การบันทึก แผ่นดิสก์รป ู แบบ AVCHD จำ�เป็ นต ้องถูก ปิ ดการเขียน ▪▪ “x.v.Color” นำ �เสนอช่วงสีทมี ี ค่ วามกว ้าง มากกว่าแผ่นดิสก์ทวไปสำ ั ่ �หรับกล ้อง ถ่ายดีวด ี ี ▪▪ รูปแบบดิสก์ DivX, MKV และ MP4 บางแผ่นอาจเล่นไม่ได ้ ขึนอยู ้ กับ ่ ความ ละเอียดของภาพและเงือนไขอั ่ ตราเฟรม DVDVIDEO รห ัสภูมภ ิ าค ทังเครื ้ องเล่ ่ นและแผ่นดิสก์ถก ู เข ้ารหัสไว ้ตาม ภูมภ ิ าค เพือที ่ จะสามารถเล่ ่ นแผ่นดิสก์ได ้ รหัส ภูมภ ิ าคเหล่านีต้ ้องตรงกัน ถ ้ารหัสไม่ตรงกัน แผ่น ดิสก์กจ ็ ะเล่นไม่ได ้ มีการแสดงหมายเลขภูมภ ิ าคสำ�หรับเครืองเล่ ่ นนีไว้ ้ ทีแผงด ่ ้านหลังของเครืองเล่ ่ น ้ ่ พืนที A อเมริกาเหนือ อเมริกากลาง อเมริกาใต ้ เกาหลี ญีปุน่ ่ ไต ้หวัน ฮ่องกง และเอเชียตะวันออกเ ฉียงใต ้ B ยุโรป กรีนแลนด์ ดินแดนในปกครองข องฝรังเศส ่ ตะวันออกกลาง แอฟริกา ออสเตรเลีย และนิวซีแลนด์ C อินเดีย จีน รัสเซีย เอเชียกลางและเอเชียใต ้ 1 สหรัฐฯ เขตปกครองของสหรัฐฯ และแคนาดา 2 ยุโรป ญีปุน่ ่ ตะวันออกกลาง อียป ิ ต์ แอฟริกาใต ้ กรีนแลนด์ 3 ไต ้หวัน เกาหลี ฟิ ลป ิ ปิ นส์ อินโดนีเซีย ฮ่องกง 4 เม็กซิโก อเมริกาใต ้ อเมริกากลาง ออสเตรเลีย นิวซีแลนด์ หมูเกาะแปซิ ่ ฟิก คาริบเบียน 5 รัสเซีย ยุโรปตะวันออก อินเดีย แอฟริกาส่วนใหญ่ เกาหลีเหนือ มองโกเลีย 6 จีน ลิขสิทธิ ์ ©2012 Samsung Electronics Co.,Ltd. ้ ำ อคัดลอกส่วน สงวนลิขสิทธิ; ์ห ้ามทำ�การผลิตซ�หรื หนึงส่่ วนใดหรือเนือหาทั ้ งหมดของคู ้ มือ ่ การใช ้งาน นีโดยไม่ ้ ได ้รับอนุญาตเป็ นลายลักษณ์อก ั ษรจาก Samsung Electronics Co., Ltd. 6 ่ อ หมายเหตุเกียวก ่ ับการเชือมต่ USB ่ บข ้อมูล USB • เครืองเล่ ่ นของคุณรองรับสือเก็ เครืองเล่ ่ น MP3 กล ้องถ่ายรูปดิจต ิ อล และตัว อ่านการ์ด USB ่ ่ • เครืองเล่ ่ นไม่สนับสนุนชือโฟลเดอร์ หรือชือไฟล์ ยาวเกิน 128 อักขระ • อุปกรณ์กล ้องถ่ายรูปดิจต ิ อล/USB บาง ประเภท/HDD ภายนอก/อาจไม่สามารถใช ้งาน ได ้กับเครืองเล่ ่ นนี ้ • เครืองเล่ ่ นของคุณสนับสนุนระบบไฟล์ FAT16, FAT32 และ NTFS ่ ออุปกรณ์ USB โดยตรงกับพอร์ต USB • เชือมต่ ่ อทางสายเคเบิล ของเครืองเล่ ่ น การเชือมต่ USB อาจทำ�ให ้เครืองไม่ ่ สามารถใช ้งานร่วม กันได ้ • การใส่อป ุ กรณ์หน่วยความจำ�มากกว่าหนึงตั่ วใน ตัวอ่านการ์ดหลายช่องอาจทำ�ให ้ตัวอ่านทำ�งาน ไม่ถก ู ต ้อง • เครืองเล่ ่ นไม่สนับสนุนโปรโตคอล PTP ่ ออุปกรณ์ USB ระหว่างขัน ้ • อย่าถอดการเชือมต่ ตอน "การโหลด" • ความละเอียดทีมากขึ ่ นของภาพ ้ จะทำ�ให ้การ แสดงผลภาพล่าช ้ายิงขึ่ น ้ • เครืองเล่ ่ นนีไม่้ สามารถเล่นไฟล์ MP3 ทีใช่ ้ DRM (Digital Rights Management) ซึง ่ ดาวน์โหลดจากเว็บไซต์เชิงพาณิชย์ • เครืองเล่ ่ นของคุณสนับสนุนวิดโี อทีมีอ่ ต ั ราเฟรม ต่�กว่ ำ า 30 fps เท่านัน้ การสน ับสนุนไฟล์วด ิ โี อ ส่วนขยายไฟล์ *.avi ข้อมูลบรรจุ AVI การสน ับสนุนไฟล์เพลง Video Codec Audio Codec ความละเอียด ส่วนขยายไฟล์ ข้อมูลบรรจุ Audio Codec ช่วงทีสน่ ับสนุน DivX 3.11/4.x/5.1/6.0 MP3 1920x1080 *.mp3 MP3 MP3 - DTS WMA PCM 1920x1080 *.wma WMA WMA MP4v3 H.264 BP/MP/HP VC-1 AP *.mkv MKV DivX 5.1/6.0 H.264 BP/MP/HP *.wmv *.mp4 WMV(wmv9) MP4 VC-1 AP VC-1 SM MP4 (mp4v) H.264 BP/MP/HP MPEG1 *.mpg *.mpeg PS MPEG2 H.264 BP/MP/HP Dolby Digital MP3 Dolby Digital DTS WMA AAC MP1, 2 Dolby Digital DTS 1920x1080 1920x1080 1920x1080 1920x1080 1920x1080 *อ ต ั ราการสุม ่ (หน่วย kHz) - 8, 11, 16, 22, 32, 44.1, 48 * อต ั ราบิต - อัตราบิตทังหมดในช่ ้ วง 5 kbps เป็ น 384 kbps โลโก้แผ่นดิสก์ทเครื ี ่ องเล่ ่ นสามารถเล่นได้ 1920x1080 1920x1080 1920x1080 1920x1080 1920x1080 แผ่นดิสก์ Blu-ray BD-LIVE 1920x1080 ข้อจำ�ก ัด -- แม ้ว่าไฟล์จะถูกเข ้ารหัสโดย codec ทีสนั่ บสนุนตามทีระบุ ่ ข ้างต ้น ก็อาจไม่สามารถเล่นไฟล์ได ้หาก เนือหามี ้ ปัญหา -- ไม่สามารถรับประกันการเล่นปกติได ้หากข ้อมูลบรรจุของไฟล์ไม่ถก ู ต ้องหรือไฟล์นันเสี ้ ยหาย -- ไฟล์ทมี ี บ่ ต ิ เรต/อัตราเฟรมสูงกว่ามาตรฐานอาจติดขัดเมือเล่ ่ นเสียง/ภาพ ั ค ้นหา (ข ้าม) ไม่สามารถใช ้ได ้หากตารางดัชนีของไฟล์เสียหาย. -- ฟั งก์ชน ระบบภาพแบบ PAL ในสหราชอาณาจักร, ฝรังเศส, ่ เยอรมันนี, ฯลฯ อุปกรณ์เสริม ตรวจดูอป ุ กรณ์เสริมทีจัด่ ให ้มาด ้านล่าง ต ัวถอดรห ัสวิดโี อ -- สนับสนุนสูงถึง H.264 ระดับ 4.1 และ AVCHD -- ไม่สนับสนุน H.264 FMO/ASO/RS, VC1 SP/MP/AP L4 -- MPEG4 SP, ASP : ต่�กว่ ำ า 1280 x 720: 60 เฟรม สูงสุด สูงกว่า 1280 x 720: 30 เฟรม สูงสุด -- ไม่สนับสนุน GMC 2 ขึนไป ้ แบตเตอรีสำ่ �หรับรีโมทคอนโทรล (ขนาด AAA) ต ัวถอดรห ัสเสียง -- สนับสนุน WMA 7, 8, 9 และ STD ่ วอย่าง WMA ที 22050Hz -- ไม่สนับสนุนอัตราสุมตั ่ โมโน คูมือ ่ การใช ้งาน รีโมทคอนโทรล 7 แผงด้านหน้า แผงด้านหล ัง a a b bc d 1 2 3 4 5 6 7 e g f ถาดวางแผ่นดิสก์ เปิ ดเพือวางแผ่ ่ นดิสก์ เซนเซอร์ของรี โมทคอนโทรล ตรวจจับสัญญาณจากรีโมทคอนโทรล จอแสดงผล แสดงสถานะการเล่น, เวลา ฯลฯ ปุมเปิ ่ ด/ปิ ด เปิ ดและปิ ดถาดวางแผ่นดิสก์ ปุมเปิ ่ ด/ปิ ดเครือง่ เปิ ดและปิ ดเครืองเล่ ่ น ยูเอสบีโฮสต์ ่ อแฟลชสติกหน่ คุณสามารถเชือมต่ ๊ วยความจำ� USB ้เป็ นทีเก็่ บข ้อมูลเมือเครื ่ อกับ BD-LIVE ทีนีและใช ่ ่ ่ องเล่ ่ นเชือมต่ นอกจากนียัง้ สามารถใช ้ยูเอสบีโฮสต์เพืออั่ พเกรดซอฟต์แ วร์และเล่น MP3/JPEG/DivX/MKV/MP4 ปุมเล่ ่ น/พ ัก ่ เล่นแผ่นหรือหยุดเล่นชัวคราว ✎✎ หมายเหตุ ▪▪ คุณสามารถอัพเกรดซอฟต์แวร์โดยใช ้ช่องเสียบยูเอสบีโฮสต์กบ ั แฟลชสติกหน่ ๊ วยความจำ� USB เท่านัน้ ▪▪ เมือเครื ่ องเล่ ่ นแสดงเมนูแผ่นดิสก์ Blu-ray คุณไม่สามารถเริมเล่ ่ นภาพยนตร์โดยการกดปุมเล่ ่ น บนเครืองเล่ ่ นหรือรีโมทได ้ หากต ้องการเล่นภาพยนตร์ คุณต ้องเลือกเล่นภาพยนตร์หรือเริมต ่ ้น ในเมนูดส ิ ก์ แล ้วกดปุมป ่ ้ อน 8 c 1 LAN 2 HDMI OUT 3 DIGITAL AUDIO OUT ใช ้กับบริการบนเครือข่าย , BD-LIVE ่ อเครือข่าย และการอัพเกรดซอฟต์แวร์โดยใช ้การเชือมต่ ่ อสายสัญญาณออก HDMI ในการใช ้สายสัญญาณ HDMI เชือมต่ กับช่องเสียบสัญญาณเข ้า HDMI ทีโทรทั ่ ศน์ของคุณเพือให ่ ้ได ้ภาพทีมีค่ ณ ุ ภาพทีสุด่ หรือทีเครื ่ องรั ่ บสัญญาณ AV ของคุณเพือให ่ ้ได ้เสียงทีมีค่ ณ ุ ภาพทีสุด่ ่ อกับเครืองรั เชือมต่ ่ บสัญญาณ AV ื ่ อ การเชอมต่ รีโมทคอนโทรล ส่วนต่างๆ ของรีโมทคอนโทรล ่ อก ับโทรท ัศน์ของคุณ A.การเชือมต่ เปิ ดและปิ ดเครืองเล่ ่ น เปิ ดและปิ ดโทรทัศน์ หลังจากตังค่้ า มารถตังแหล่ ้ งสัญญาณเข ้าบนโทรทัศน์ของคุณ การนำ �แผ่นดิสก์ออก ปรับเสียงโทรทัศน์ ้ ายเคเบิล HDMI ่ อก ับโทรท ัศน์โดยใชส การเชือมต่ - คุณภาพสูงสุด ่ อช่องเสียบ HDMI OUT ทีด ้านหลั 1. ใช ้สายเคเบิล HDMI เชือมต่ ่ งของเครืองเล่ ่ นไปยังช่องเสียบ HDMI IN ของโทรทัศน์ (ดูหน ้า 11) 2. เปิ ดเครืองเล่ ่ นและโทรทัศน์ กดปุมตั ่ วเลขเพือเรี ่ ยกใช ้งานตัวเลือก ่ ของแผ่นดิสก์ ใช ้ปุมนี ่ เพื้ อเข ่ ้าสูเมนู ่ แบบป็ อปอัป/เมนูเรือง ใช ้ปุมนี ่ เพื้ อเข ่ ้าสูเมนู ่ กดเพื่อค้นหาไปข้างหน้าหรือถอยหลังใน แผ่นดิสก์ กดเพือข่ ้ามไปข ้างหลังหรือข ้ามไปข ้างหน ้า ั ่ กดเพือหยุ ่ ดแผ่นดิสก์ชวคราว กดเพือไปยั ่ งเมนูหลัก กดเพือหยุ ่ ดแผ่นดิสก์ กดเพือเล่ ่ นแผ่นดิสก์ ั ่ ยงต่างๆ ใช ้ปุมนี ่ เพื้ อเข ่ ้าไปยังฟั งก์ชนเสี ทีมีบ่ นแผ่นดิสก์ (แผ่นดิสก์ Blu-ray/DVD) ใช้ปุ่มนี้เพื่อแสดงข้อมูลการเล่นในระหว่างการ เล่นแผ่นดิสก์ Blu-ray/DVD กดเพือใช ่ ้เมนูเครืองมื ่ อ ใช้ปุ่มนี้เพื่อแสดงข้อมูลการเล่นในระหว่างการ เล่นแผ่นดิสก์ Blu-ray/DVD ใช ้เลือกรายการเมนูและเปลียนค่ ่ าเมนู กดปุมนี ่ เพื้ อออกจากเมนู ่ กลับไปยังเมนูกอ ่ นหน ้า ปุ่มเหล่านี้ใช้กับทั้งเมนูบนเครื่องเล่นและกับฟัง ก์ชั่นหลายๆ ฟังก์ชั่นของแผ่นดิสก์ Blu-ray กดปุมนี ่ เพื้ อดู่ หน ้าจอเต็มบนโทรทัศน์. ั ่ bonusview กดเพือใช ่ ้ฟั งก์ชน ้ ำ อง ่ บท แทร็ก ใช ้ในการเล่นซ�เรื ้ ำ งแผ่ ้ น. หรือเล่นซ�ทั ำ ใช ้ในการเล่นซ�้ A-B 3. กดปุมเลื ่ อกสัญญาณเข ้าบนรีโมทคอนโทรลของโทรทัศน์ จนกระทังสั่ ญญาณ HDMI จากเครือง ่ เล่นปรากฏบนหน ้าจอโทรทัศน์ของคุณ หมายเหตุ ่ อสาย ▪▪ สายเคเบิล HDMI ส่งสัญญาณวิดโี อ/ออดิโอออกแบบดิจต ิ อล ดังนัน้ คุณไม่ต ้องเชือมต่ ออดิโอ ่ อกับทีวข ▪▪ หากเครืองเล่ ่ นเชือมต่ ี องคุณในโหมดสัญญาณออก HDMI 720p, 1080i หรือ 1080p คุณต ้องใช ้สายเคเบิล HDMI ความเร็วสูง (ประเภท 2) ▪▪ สัญญาณออกของ HDMI จะแสดงเฉพาะสัญญาณดิจต ิ อลบริสท ุ ธิไปยั ์ งโทรทัศน์เท่านัน้ ั ญาณรบกวน ถ ้าโทรทัศน์ไม่สนับสนุน HDCP (การป้ องกันเนือหาดิ ้ จต ิ อลแบนด์วธิ สูง) จะมีสญ ปรากฏบนหน ้าจอ ▪▪ ขึนอยู ้ กับ ่ โทรทัศน์ของคุณ ความละเอียดของสัญญาณออก HDMI บางระดับอาจไม่สามารถใช ้ งานได ้ โปรดอ่านคูมือ ่ การใช ้งานของโทรทัศน์ของคุณ ่ อเครืองเล่ ่ อกับ ▪▪ เมือคุ ่ ณเชือมต่ ่ นกับโทรทัศน์โดยใช ้สาย HDMI เป็ นครังแรก ้ หรือเชือมต่ โทรทัศน์เครืองใหม่ ่ ความละเอียดของสัญญาณออกของ HDMI จะถูกตังค่้ าเป็ นระดับสูงสุดเท่า ทีคุณ ่ สมบัตข ิ องโทรทัศน์รองรับได ้โดยอัตโนมัต ิ ▪▪ สายเคเบิล HDMI ทีมีค่ วามยาวอาจทำ�ให ้เกิดสัญญาณรบกวนจอภาพ ในกรณีนี ตั้ งค่้ าปิ ดความ ลึกของสีในเมนู ่ อกับอุปกรณ์แสดงผลของคุณ คุณต ้องเชือมต่ ่ อ ▪▪ หากคุณใช ้สาย HDMI-to-DVI เพือเชื ่ อมต่ สัญญาณเสียงดิจต ิ อลออกกับระบบเสียงของคุณด ้วย เพือรั่ บฟั งเสียง.์ ✎✎ การใส่แบตเตอรี ่ ✎✎ หมายเหตุ ▪▪ ถ ้ารีโมททำ�งานอย่างไม่เหมาะสม • ตรวจสอบขัว ้ (+/-) ของแบตเตอรี ่ • ตรวจสอบว่าพลังงานแบตเตอรีหมดหรื ่ อไม่ • ตรวจสอบว่าเซนเซอร์ของรีโมทมีอะไรมาบังหรือไม่ • ตรวจสอบว่ามีแสงไฟฟลูออเรสเซนต์อยูข่ ้างๆ หรือไม่ ! ข้อควรระว ัง ่ ▪▪ ทิงแบตเตอรี ้ ตามกฎด ่ ้านสิงแวดล ้อมของประเทศ อย่าทิงในถั ้ ง ขยะภายในบ ้าน 9 ่ อก ับระบบออดิโอ B.การเชือมต่ • โปรดลดระดับเสียงลงก่อนทีคุณ ่ จะเปิ ดเครืองรั ่ บสัญญาณ AV เสียงทีดัง่ ขึนมาทั ้ นที อาจทำ�ให ้เกิด ความเสียหายต่อลำ�โพงและหูของคุณ • ตังรู้ ปแบบออดิโอออกตามความสามารถของเครืองรั ่ บสัญญาณ AV ของคุณ • ตำ�แหน่งของช่องเสียบสัญญาณเข ้า HDMI อาจแตกต่างกันไป ขึนอยู ้ กับ ่ เครืองรั ่ บสัญญาณ AV ของคุณ โปรดอ่านคูมือ ่ การใช ้งานของเครืองรั ่ บสัญญาณ AV ของคุณ ั ่ อไปย ังระบบออดิโอ (เครืองร แบบที 1่ : การเชือมต่ ่ ับสญญาณ AV ที ่ รองร ับ HDMI) - คุณภาพสูงสุด (แนะนำ�) ่ อช่องเสียบ HDMI OUT ทีแผงด 1. ใช ้สายเคเบิล HDMI เชือมต่ ่ ้านหลังของเครืองเล่ ่ นกับช่องเสียบ HDMI IN ของเครืองรั ่ บสัญญาณ AV (ดูหน ้า 11) ่ อช่องเสียบ HDMI OUT ของเครืองรั 2. ใช ้สายเคเบิล HDMI เชือมต่ ่ บสัญญาณ AV กับช่องเสียบ HDMI IN ของโทรทัศน์ 3. เปิ ดเครืองเล่ ่ น โทรทัศน์ และเครืองรั ่ บสัญญาณ AV 4. ใช ้ปุมเลื ่ อกสัญญาณเข ้าของเครืองรั ่ บ AV และทีว ี เลือกสัญญาณเข ้า HDMI ทีถูก่ ต ้อง ทีคุณ ่ ต ้องการได ้ยินเสียงและดูภาพวิดโี อจากเครืองเล่ ่ นเครืองรั ่ บสัญญาณ AV ของคุณ เพือกำ่ �หนด สัญญาณเสียงเข ้าของเครืองรั ่ บสัญญาณ AV ั ่ อก ับระบบออดิโอ (เครืองร แบบที 2่ : การเชือมต่ ่ ับสญญาณ AV ทีมีด่ อลบี ้ ดิจต ิ อลหรือต ัวถอดรห ัส DTS) - คุณภาพดีกว่า ่ อช่องเสียบ DIGITAL AUDIO OUT (COAXIAL) ทีแผงด 1. ใช ้สายมีแกนรวมกันเชือมต่ ่ ้านหลัง ของเครืองเล่ ่ นกับช่องเสียบ DIGITAL AUDIO IN (COAXIAL) ของเครืองรั ่ บสัญญาณ AV (ดู หน ้า 11) ่ อช่องเสียบ HDMI ทีแผงด 2. ใช ้สายสัญญาณวิดโี อเชือมต่ ่ ้านหลังของเครืองเล่ ่ นกับช่องเสียบ HDMI ของโทรทัศน์ 3. เปิ ดเครืองเล่ ่ น โทรทัศน์ และเครืองรั ่ บสัญญาณ AV 4. กดปุมเลื ่ อกสัญญาณเข ้าบนเครืองรั ่ บสัญญาณ AV เพือเลื ่ อกสัญญาณเข ้าภายนอกทีจะฟั ่ งเสียงจาก เครืองเล่ ่ น โปรดดูคมื ู อ่ การใช ้งานเครืองรั ่ บสัญญาณ AV ของคุณ เพือกำ่ �หนดสัญญาณเสียงเข ้าของ เครืองรั ่ บสัญญาณ AV 5. กดตัวเลือกสัญญาณเข ้าบนรีโมทคอนโทรลของโทรทัศน์เพือเลื ่ อกHDMIแหล่งสัญญาณวิดโี อ 10 ่ อก ับเครือข่าย C.การเชือมต่ เครืองเล่ ่ นนีช่ว้ ยให ้คุณสามารถใช ้บริการบนเครือข่าย BD-LIVE และการอัพเกรดซอฟต์แวร์เมือเชื ่ อม่ ่ อ ต่อกับเครือข่าย เราแนะนำ �ให ้ใช ้เราเตอร์ โมเดมบรอดแบนด์ (ทีมีเ่ ราเตอร์รวม) หรือ IP สำ�หรับการเชือมต่ ่ อเราเตอร์ โปรดดูคมื สำ�หรับข ้อมูลเพิมเติ ่ มเกียวกั ่ บการเชือมต่ ู อ ่ ผูใช้ ้ของเราเตอร์หรือติดต่อผูผลิ้ ตเรา เตอร์เพือขอความช่ ่ วยเหลือด ้านเทคนิค ้ ายสญญาณ ั เครือข่ายทีใช่ ส ่ อช่องเสียบ LAN ของเครืองเล่ 1. ใช ้สาย Direct LAN ( UTP) สาย CAT 5 เชือมต่ ่ น ไปยังช่องเสียบ LAN ของโมเดมหรือเราเตอร์ ดูหน ้า 11 2. ในการตังค่้ าตัวเลือกเครือข่าย ดูหน ้า 16 ✎✎ หมายเหตุ ▪▪ อาจไม่อนุญาตการเข ้าถึงเซิรฟ ์ เวอร์อพ ั เดทซอฟต์แวร์ของซัมซุงทางอินเทอร์เน็ ต ทังนี้ ขึ้ น ้ อยูกับ ่ เราเตอร์ทคุ ี ณ ่ ใช ้หรือนโยบายของ ISP สำ�หรับข ้อมูลเพิมเติ ่ ม ติดต่อ ISP (ผูให้ ้บริการ อินเทอร์เน็ ต) ของคุณ ่ อเครือข่าย ▪▪ สำ�หรับผูใช้ ้ DSL โปรดใช ้เราเตอร์เพือทำ ่ �การเชือมต่ ั ่ AllShare คุณต ้องเชือมต่ ่ อพีซข ี องคุณกับเครือข่ายตามทีแสดงในภาพ ▪▪ ในการใช ้ฟั งก์ชน ่ ่ ออาจเป็ นแบบมีสา การเชือมต่ A B ่ อก ับโทรท ัศน์ของคุณ การเชือมต่ ่ อก ับระบบออดิโอ การเชือมต่ แบบท 1 : สายเคเบิล HDMI (ไม่ได้ให้มา) สายเคเบิล HDMI (ไม่ ได้ให้มา) แบบท 1 : สายเคเบิล HDMI (ไม่ได้ให้มา) C เครือข่าย แบบที 2่ : สายเคเบิล มีแกน รวมกัน(ไม่ได้ให้มา) เราเตอร์ โมเดมบรอดแบนด์ (ทีมีเ่ รา เตอร์รวม) หรือ โมเดมบรอดแบนด์ บริการบรอด แบนด์ บริการบรอด แบนด์ ั ่AllShare ี � เครือข่ายก ับพีซส ำ หร ับฟังก์ชน ่ อเครืองนี ่ อแบบใช ้สายเท่านัน้ ✎✎ หมายเหตุ :คุณสามารถเชือมต่ ่ กับ ้ เครือข่ายผ่านทางการเชือมต่ 11 ตังค่้ า การนำ�ทางของเมน ้ น การตงค่ ั ้ าเบืองต้ ่ อ 1. เปิ ดโทรทัศน์ของคุณหลังการเชือมต่ เครืองเล่ ่ น ่ อเครืองเล่ เมือคุ ่ ณเชือมต่ ่ นกับโทรทัศน์เป็ น ครังแรก ้ เครืองเล่ ่ นจะเปิ ดขึนอั้ ตโนมัตแ ิ ละ หน ้าจอการตังค่้ าเบืองต ้ ้นจะปรากฏขึน ้ Initial Settings I On-Screen Language Select a language for the on-screen displays. English Français Deutsch Español Italiano Nederlands > Move " Select 2. กดปุม่ ▲▼ เพือเลื ่ อกภาษาทีต ้องการ ่ จาก นันกดปุ ้ ม่ ENTER 3. กดปุม่ ENTER เพือเลื ่ อก Start 4. กดปุม่ ▲▼ เพือเลื ่ อกอัตราส่วนภาพของ โทรทัศน์ทต ี ้องการ ่ จากนันกดปุ ้ ม่ ป้อน 5. กดปุม่ AUTO จากนันกดปุ ้ ม่ ENTER หาก คุณไม่มเี ครือข่ายในบ ้าน กดปุมสี ่ ฟ้า (D) ่ �คุณไปยังเมนูหน ้า บนรีโมทของคุณ ซึงจะนำ หลักโดยตรง 6. เครืองเล่ ่ น Blu-ray ตรวจสอบเครือข่ายมี สายของคุณโดยอัตโนมัต ิ เมือการตรวจสอบ ่ เสร็จสิน ้ หน ้าจอจะแสดง ข ้อความ “เครือ ข่ายของคุณกำ�ลังทำ�งานอย่างเหมาะสม” จากนันกดปุ ้ ม่ ENTER 7. ข ้อความ “Initial settings completed ้ ปรากฏขึน ้ จาก (การตังค่้ าเริมต ่ ้นเสร็จสิน)” นันหน ้ ้าจอหน ้าหลักจะปรากฏ ขึน ้ - หากเครืองเล่ ่ น Blu-ray ของคุณไม่เชือม่ ่ อ ต่อกับเครือข่าย หรือคุณต ้องการเชือมต่ ด ้วยตนเอง ไปที การตั ่ งค่้ าเครือข่าย ที ่ หน ้า 16 12 ✎✎ หมายเหตุ เมื่อเครื่องเล่นเชื่อมต่อกับโทรทัศน์เป็นครั้ง แรก เครื่องเล่นจะเปิดขึ้นอัตโนมัติ ซึ่งไม่ใช่การท�ำงานผิดปกติแต่อย่างใด ▪▪ เมนูหน้าหลักจะไม่ปรากฏขึ้นหากคุณ ไม่ได้ก�ำหนดค่าเบื้องต้นยกเว้นต ามที่ระบุในหมายเหตุด้านล่าง ▪▪ หากคุณกดปุ่มสีฟ้า (D) ในระหว่างกา รตั้งค่าเครือข่าย คุณสามารถเข้ าถึงเมนูหน้าหลักได้แม้การตั้งค่าเครือ ข่ายจะยังไม่เสร็จสิ้น ▪▪ เมือ ่ คุณกลับสูเ่ มนูหลัก โหมดเต็มจอจะถูก ยกเลิกโดยอัตโนมัต ิ ▪▪ หากคุณต ้องการแสดงหน ้าจอ การตัง้ ค่าเบือ ้ ง ต ้น อีกครัง้ เพือ ่ ทีจ่ ะท�ำการเปลีย ่ นแปลง กปุ่ ม เล่น/พัก ( ) บนแผงด ้านหน ้าของผลิตภัณ ฑ์ค ้างไว ้นานกว่า5 วินาทีโดยไม่ใส่ดส ิ ก วิธ ี นีจ ้ ะรีเซ็ตเครือ ่ งเล่นไปเป็ นการตัง้ ค่าเริม ่ ต ้น ของเครือ ่ ง ▪▪ หากคุณใช้สาย HDMI เพื่อเชื่อมต่อเครื่อง เล่นกับโทรทัศน์ซัมซุงที่สามารถใช้งานร่วม กับ Anynet+(HDMI-CEC) และ 1.) คุณได้ตั้งคุณสมบัติ Anynet+(HDMI-CEC) เป็นเปิดทั้งในโทรทัศน์และเครื่องเล่น และ2.) คุณได้ตั้งค่าโทรทัศน์เป็นภาษาที่เครื่องเล่น สนับสนุน เครื่องเล่นจะเลือกภาษานั้น เป็นภาษาที่ต้องการโดยอัตโนมัติ ▪▪ ถ ้าเครืองเล่ ่ นถูกทิงไว ้ ้ในโหม ดหยุดเป็ นเวลานานกว่า5 นาทีโดยปราศจากการใช ้งาน ระบบป้ องกันจอภาพไหม ้จะปร ากฏบนโทรทัศน์ของคุณ ถ ้าเครืองเล่ ่ นถูกทิงไว ้ ้ในระบบป้ องกันจ อภาพไหม ้เป็ นเวลานานกว่า 25 นาที เครืองจะปิ ่ ดเองโดยอัตโนมัต. 1 ▪▪ เลือก Music. 5 เลือก Settings. 6 หน ้าจอแสดงปุมที ่ ใช่ ้ได การเข้าใชง้ านเมนูการตงค่ ั ้า 3 4 2 4 หากต ้องการเข ้าใช ้งานเมนูการตังค่้ าและเมนูยอ ่ ย ให ้ทำ�ตามขันตอนเหล่ ้ านี: ้ 1 HOME : กดเพือไปยั ่ งเมนูหน ้าหลัก 2 RETURN : กลับไปยังเมนูกอ ่ นหน ้า 3 ป้อน/ทิศทาง : เลือนเคอร์ ่ เซอร์หรือเลือกรายการ เปิ ดใช ้งานรายการทีเลื่ อกในขณะนี ้ ยืนยันการตังค่้ า 4 ปุม่ EXIT : กดปุมนี ่ เพื้ อออกจากเมนู ่ 1. กดปุม่ POWER เมนูหน ้าหลักจะปรากฏขึน ้ 2. กดปุม่ ◄► เพือเลื ่ อก Settings แล ้วกด ปุมป ่ ้ อน 3. กดปุม่ ▲▼ เพือเลื ่ อกเมนูยอ ่ ยทีต ้องการ ่ แล ้วกดปุม่ ENTER 4. กดปุม่ ▲▼ เพือเลื ่ อกรายการทีต ้องการ ่ แล ้ว กดปุม่ ENTER 5. กดปุม่ EXIT เพือออกจากเมนู ่ • เมนูหล ัก 2 ▪▪ ขันตอนเข ้ ้าใช ้งานอาจแตกต่างกันขึนกั้ บ เมนูทเลื ี ่ อก OSD (On Screen Display) อาจเปลียนแปลงในเครื ่ องเล่ ่ นนีหลั ้ งจาก ั ของซอฟต์แวร์ การอัพเกรดเวอร์ชน YouTube Videos 3 4 1 5 No Disc a Change Device 1 เลือก Videos. 2 เลือก YouTube. 3 เลือก Photos. ✎✎ หมายเหตุ d View Devices " Enter 6 หน้าจอ คุณสามารถกำ�หนดค่าตัวเลือกหน ้าจอต่างๆ กัน เช่น อัตราส่วนภาพทีว ี ความละเอียด ฯลฯ อ ัตราส่วน TV ขึนอยู ้ กับ ่ ชนิดของโทรทัศน์ทคุ ี ณ ่ มี คุณอาจ ต ้องการปรับการตังค่้ าขนาดหน ้าจอตามต ้องการ ่ อเครือง • 16:9 Original : เลือกเมือคุ ่ ณเชือมต่ ่ เล่นกับหน ้าจอโทรทัศน์ 16:9 เครืองเล่ ่ นจะ แสดงเนือหาทั ้ งหมดในอั ้ ตราส่วนภาพดังเดิ ้ ม เนือหาที ้ จัด่ รูปแบบในแบบ 4:3 จะปรากฏโดยมี ้ายและขวา แถบสีดำ�ทีด ้านซ ่ ่ อเครืองเล่ • 16:9 Full : เลือกเมือคุ ่ ณเชือมต่ ่ น กับหน ้าจอโทรทัศน์ 16:9 เนือหาทั ้ งหมดจะ ้ เต็มหน ้าจอพอดี เนือหาที ้ มีร่ ป ู แบบในแบบ 4:3 จะถูกขยายภาพ ่ อ • 4:3 Letter Box : เลือกเมือคุ ่ ณเชือมต่ เครืองเล่ ่ นกับหน ้าจอโทรทัศน์ 4:3 เครืองเล่ ่ น จะแสดงเนือหาทั ้ งหมดในอั ้ ตราส่วนภาพดังเดิ ้ ม เนือหาที ้ จัด่ รูปแบบในแบบ 16:9 จะปรากฏโดย มีแถบสีดำ�ทีด ้านบนสุ ่ ดและล่างสุด ่ อเครือง • 4:3 Pan-Scan : เลือกเมือคุ ่ ณเชือมต่ ่ เล่นกับหน ้าจอโทรทัศน์ 4:3 ส่วนขวาสุดและ ซ ้ายสุดของภาพเนือหา ้ 16:9 จะถูกตัดออก ✎✎ หมายเหตุ ▪▪ ขึนอยู ้ กับ ่ ชนิดของแผ่นดิสก์ บางอัตราส่วนภาพอาจไม่สามารถใช ้ได ้ ▪▪ หากคุณเลือกอัตราส่วนภาพและตัว เลือกทีต่า่ งจากอัตรา ส่วนภาพของหน ้าจอโทรทัศน์ของคุณ ภาพทีปรากฏอาจบิ ่ ดเบียว้ ▪▪ หากคุณเลือก 4:3 Pan-Scan หรือ 4:3 Letter Box . คุณไม่สามารถดูแบบเต็มจอ ได ้โดยการกดปุม่ FULL SCREEN บนรีโมทคอนโทรล ▪▪ หากคุณเลือก 16:9 Normal 4:3 Pillarbox อาจปรากฏขึน ้ ในกรณีนี คุ้ ณไม่สามารถมองเห็นภาพเต็มห น ้าจอได ้โดยการกดปุม่ FULL SCREEN บนรีโมทคอนโทรล. ั ง BD Wise (ผลิตภ ัณฑ์ซมซุ เท่านน) ั ้ ่ อระหว่างกันที ่ BD Wise คือคุณสมบัตก ิ ารเชือมต่ ซัมซุงคิดค ้นขึนใหม่ ้ ลา่ สุด ่ อเครืองเล่ ั เมือคุ ่ ณเชือมต่ ่ นซัมซุงและโทรทัศน์ซม ซุงทีมี ่ BD ผ่านทาง HDMI และ BD Wise เปิ ด อยูทั่ งในเครื ้ องเล่ ่ นและโทรทัศน์ เครืองเล่ ่ นจะส่ง สัญญาณวิดโี อออกทีความละเอี ่ ยดวิดโี อและอัตรา เฟรมของแผ่นดิสก์ Blu-ray/DVD • Off: ความละเอียดของสัญญาณออกจะถูก กำ�หนดไว ้ทีความละเอี ่ ยดทีตังไว ่ ้ ้ก่อนหน ้าใน เมนูความละเอียด โดยไม่คำ�นึงถึงความละเอียด ของแผ่นดิสก์ โปรดดูความละเอียดด ้านล่าง • On : เครืองเล่ ่ นจะส่งสัญญาณวิดโี อออกที ่ ความละเอียดดังเดิ ้ มและอัตราเฟรมดังเดิ ้ มของ แผ่นดิสก์ Blu-ray/DVD ่ อเครืองเล่ อัตโนมัต ิ หากคุณเชือมต่ ่ นกับโทรทัศน์ ทีมีค่ ณ ุ สมบัต ิ BD Wise ผ่านทาง HDMI (รายการ เมนูของ BD Wise จะปรากฏเมือตั่ งเปิ ้ ด BD Wise เท่านัน้ ดู BD Wise ข ้างต้น) • 1080p : สัญญาณวิดโี อออกแบบโปรเกรสซีฟ 1080 เส ้น ความละเอียด ช่วยให ้คุณสามารถตังค่้ าความละเอียดสัญญาณ ออกของสัญญาณวิดโี อ และวิดโี อ HDMI เป็ น Autoิ, 1080p, 1080i, 720p, 576p/480p ตัวเลข หมายถึงจำ�นวนเส ้นของวิดโี อต่อเฟรม i และ p หมายถึงอินเตอร์เลซและโปรเกรสซีฟสแกนตาม ลำ�ดับ ยิงมี่ เส ้นมาก คุณภาพยิงสู่ งมาก • Auto: ตังค่้ าความละเอียดสัญญาณออกเป็ น ่ อ ความละเอียดสูงสุดของโทรทัศน์ทเชื ี ่ อมต่ โดยอัตโนมัต ิ • BD Wise : ตังค่้ าความละเอียดเป็ นความ ละเอียดของแผ่นดิสก์ Blu-ray/DVD โดย • 720p : สัญญาณวิดโี อออกแบบโปรเกรสซีฟ 720 เส ้น • 576p/480p : สัญญาณวิดโี อออกแบบโปรเก รสซีฟ 576/480 เส ้น ั ความละเอียดทีสอดคล้ ่ องก ับโหมดสญญาณออก ้ • การเล่นแผ่นดิสก์ Blu-ray/E-contents/เนือหาดิ จต ิ อล ่ อ HDMI / เชือมต่ สัญญาณออก ตังค่้ า โหมด HDMI แผ่นดิสก์ Blu-ray E-contents/เนือหาดิ ้ จต ิ อล BD Wise ความละเอียดของแผ่นดิสก์ Blu-ray 1080p@60F อัตโนมัต ิ ความละเอียดสูงสุดของสัญญ าณเข ้าโทรทัศน์ ความละเอียดสูงสุดของสัญญ าณเข ้าโทรทัศน์ 1080p@60F (เปิ ดเฟรมภาพยนตร:Off) 1080p@60F 1080p@60F เฟรมภาพยนตร์ : อัตโนมัต ิ (24Fs) 1080i 720p 576p/480p 1080p@24F 1080i 720p 576p/480p 1080p@24F 1080i 720p 576p/480p ✎✎ หมายเหตุ ▪▪ เมือ ่ BD Wise เปิ ดอยู การตั ่ งค่้ าความ ละเอียดจะกำ�หนดค่าเริมต ่ ้นเป็ น BD Wise โดยอัตโนมัต ิ และ BD Wise ปรากฏขึนในเมนู ้ ความละเอียด ่ อเครืองเล่ ▪▪ หากเชือมต่ ่ นกับอุปกรณ์ทไม่ ี ่ สนับสนุน BD Wise คุณจะไม่สามารถใช ้ ั ่ BD wise ฟั งก์ชน ▪▪ เพือการทำ ่ �งานทีเหมาะสมของ ่ BD Wise ให ้ตังเมนู ้ แต่ละข ้อของ BD Wise ใน เครืองเล่ ่ นและทีว ี ไว ้ทีเปิ่ ด • 1080i : สัญญาณวิดโี อออกแบบอินเตอร์เลซ 1080 เส ้น • การเล่น DVD สัญญาณออก ตังค่้ า ่ อ HDMI / เชือมต่ โหมด HDMI BD Wise 576i/480i อัตโนมัต ิ ความละเอียดสูงสุดของสัญญ าณเข ้าโทรทัศน์ 1080p@60F 1080p@60F 1080i 1080i 720p 720p 576p/480p 576p/480p 13 ✎✎ หมายเหตุ ่ อกับเครือง ▪▪ หากโทรทัศน์ทคุ ี ณ ่ เชือมต่ ่ เล่นไม่สนับสนุนเฟรมภาพยนตร์หรือ ความละเอียดทีคุณ ่ เลือก ข ้อความ “If no pictures are shown after the selection, please wait for 15 seconds. And then, the resolution will be reverted to the previous value automatically. Would you like to make a selection?” จะปรากฏขึน ้ หากคุณเลือก Yes่ หน ้าจอของโทรทัศน์ จะเปลียนเป็ ่ นว่างเปล่า 15 วินาที จาก นันความละเอี ้ ยดจะเปลียนกลั ่ บเป็ นความ ละเอียดก่อนหน ้าโดยอัตโนมัต ิ ▪▪ ถ ้าหน ้าจอยังคงว่างเปล่าหลังจากคุณ เปลียนความละเอี ่ ยดแล ้ว ให ้นำ �แผ่น ดิสก์ออกทุกแผ่น แล ้วกดค ้างไ เล่น/ พัก ( ) รูปแบบสี HDMI ช่วยให ้คุณสามารถตังรู้ ปแบบสีสำ�หรับสัญญาณ ออก HDMI เพือให ่ ้ตรงกับความสามารถของ ่ อ (เช่น โทรทัศน์ จอภาพ) อุปกรณ์ทเชื ี ่ อมต่ • Autoิ : ตังค่้ าเครืองเล่ ่ นเป็ นรูปแบบทีดีท ่ สุ ี ด่ ที ่ อุปกรณ์ของคุณรองรับโดยอัตโนมัต ิ • YCbCr (4:4:4) : หากโทรทัศน์ของคุณ รองรับรูปแบบสี YCbCr ผ่านทาง HDMI ให ้ เลือกค่านีเป็้ นสัญญาณออกรูปแบบสี YCbCr ปกติ • RGB (Standard) : เลือกค่านีเพื้ อส่่ ง สัญญาณออกรูปแบบสี RGB ปกติ ่ อเครือง • RGB (Enhanced) : หากคุณเชือมต่ ่ เล่นกับอุปกรณ์แสดงผล DVI เช่น จอภาพ เลือกค่านีเพื้ อส่่ งสัญญาณออกเป็ นรูปแบบสี RGB ทีปรั่ บปรุง ทีด ้านหน ่ ้าของเครืองเล่ ่ นนานกว่า 5 ความเข้มสี HDMI วินาที การตังค่้ าทังหมดถู ้ กเรียกคืนเป็ น ช่วยให ้คุณสามารถส่งสัญญาณวิดโี อออกจากช่อง ค่าตังต้ ้นจากผูผลิ้ ต ปฏิบต ั ต ิ ามขันตอน ้ เสียบ HDMI OUT ทีมีค่ วามเข ้มสี ความเข ้มของสี ในหน ้าก่อน เพือเข ่ ้าใช ้งานแต่ละโหมด ั ได ้ถูกต ้องมากขึนโดยมี ช่วยให ้สร ้างสีสน ้ ความเข ้ม และเลือกตังค่้ าการแสดงผลทีทีว่ ข ี อง ของสีมากขึน ้ คุณรองรับ ่ นจะส่งสัญญาณวิดโี อออก ▪▪ เมือการตั ่ งค่้ าถูกเรียกคืนเป็ นค่าตังต้ ้นจากผู ้ • Auto ิ : เครืองเล่ ่ อซึง ่ โดยมีความเข ้มของสีไปยังทีวท ี เชื ี ่ อมต่ ผลิต ข ้อมูล BD ของผูใช้ ้ทีเก็่ บไว ้ทังหมด ้ สนับสนุนความเข ้มสี HDMI จะถูกลบออก • Off : ภาพจะส่งออกโดยไม่มค ี วามเข ้มของสี ▪▪ แผ่นดิสก์ Blu-ray ต ้องมีคณ ุ สมบัตแ ิ บบ 24 เฟรมสำ�หรับเครืองเล่ ่ น หากต ้องการ โหมดโปรเกรสซี ฟ ใช ้โหมดเฟรมภาพยนตร์ (24Fs) ช่วยให ้คุณสามารถปรับปรุงคุณภาพของภาพเมือ ่ ดู DVD เฟรมภาพยนตร์ (24Fs) • Autoิ : เลือกการตังค่้ านีเพื้ อให ่ ้เครืองเล่ ่ นเลือก การตังค่้ าคุณสมบัตเิ ฟรมภาพยนตร์ (24 Fs) เป็ น คุณภาพของภาพทีดีท ่ สุ ี ด่ สำ�หรับ DVD ทีคุณ ่ อ ัตโนม ัติ จะเปิ ดโอกาสให ้คุณปรับสัญญาณออก กำ�ลังรับชมอยูโดยอั ่ ตโนมัต ิ HDMI ของเครืองเล่ ่ นเป็ น 24 เฟรมต่อวินาทีเพือ ่ • Video : เลือกการตังค่้ านีเพื้ อให ่ ้ได ้คุณภาพ ให ้ได ้ภาพทีมีค่ ณ ุ ภาพยิงขึ่ น ้ ของภาพทีดีท ่ สุ ี ด่ สำ�หรับคอนเสิรต ์ หรือ DVD คุณสามารถเพลิดเพลินกับคุณสมบัตเิ ฟรม รายการโทรทัศน์ ภาพยนตร์ (24 Fs) เฉพาะกับโทรทัศน์ทรองรั ี ่ บ อัตราเฟรมระดับนีเท่้ านัน้ คุณสามารถเลือกเฟรม ภาพยนตร์ได ้ต่อเมือเครื ่ องเล่ ่ นอยูในโหมดความ ่ ละเอียดสัญญาณออก HDMI 1080i หรือ 1080p ั ่ • Autoิ : ฟั งก์ชนเฟรมภาพยนตร์ (24 Fs) จะ ทำ�งาน ั ่ • Off : ฟั งก์ชนเฟรมภาพยนตร์ (24 Fs) จะ ปิ ดลง เสียง เอาต์พต ุ ดิจท ิ ัล คุณตังค่้ าเอาต์พต ุ ดิจต ิ อลให ้ตรงกับความสามารถ ่ อกับ ของเครืองรั ่ บสัญญาณ AV ทีคุณ ่ เชือมต่ เครืองเล่ ่ น: ่ ้ได ้ • PCM : นีคือ ่ การตังค่้ าเริมต ่ ้น ซึงสามารถใช กับทีวแ ี ละเครืองรั ่ บสัญญาณส่วนใหญ่ ั การเลือกสญญาณดิ จต ิ อลออก การตงค่ ั ้า ่ อ การเชือมต่ สตรีมเสียงบนแผ ่นดิสก์ Blu-ray สตรีม เสียงบน DVD บิตสตรีม (ไบ่บก ี ารประมวลผล) PCM บิตสตรีม (DTS Re- บิตสตรีม (Dolby D encoded) Re-encoded) เครืองรั ่ บสัญญาณ AV ทีสนั่ บสนุน HDMI Coaxial เครืองร ่ ับส ัญญาณ AV ทีสน่ ับสนุน HDMI Coaxial เครืองร ่ ับส ัญญาณ AV ทีสน่ ับสนุน HDMI หร มีแกนรวมก ัน เครืองร ่ ับส ัญญาณ AV ทีสน่ ับสนุน HDMI หร มีแกนรวมก ัน PCM สูงสุด 7.1CH PCM 2 ช่อง PCM PCM 2 ช่อง DTS re-encoded Re-encoded Dolby Digital * Dolby Digital PCM 2 ช่อง PCM 2 ช่อง Dolby Digital Dolby Digital DTS re-encoded Re-encoded Dolby Digital * Dolby Digital Plus PCM 2 ช่อง PCM 2 ช่อง Dolby Digital Plus Dolby Digital DTS re-encoded Re-encoded Dolby Digital * Dolby TrueHD PCM 2 ช่อง PCM 2 ช่อง Dolby TrueHD Dolby Digital DTS re-encoded Re-encoded Dolby Digital * DTS PCM 2 ช่อง PCM 2 ช่อง DTS DTS DTS re-encoded Re-encoded Dolby Digital * DTS-HD HRA PCM 2 ช่อง PCM 2 ช่อง DTS-HD HRA DTS DTS re-encoded Re-encoded Dolby Digital * DTS-HD MA PCM 2 ช่อง PCM 2 ช่อง DTS-HD MA DTS DTS re-encoded Re-encoded Dolby Digital * PCM PCM 2 ช่อง PCM 2 ช่อง PCM 2 ช่อง PCM 2 ช่อง PCM 2 ช่อง PCM 2 ช่อง PCM 2 ช่อง PCM 2 ช่อง Dolby Digital Dolby Digital Dolby Digital Dolby Digital PCM 2 ช่อง PCM 2 ช่อง DTS DTS DTS DTS Dolby Digital DTS 14 • Bitstream (Unprocessed) : เลือกข ้อนี ้ หากคุณต ้องการให ้เครืองรั ่ บสัญญาณของ คุณถอดรหัสสัญญาณเสียง ทังหมด ้ เสียง Bonusview จะไม่สามารถใช ้ได • Bitstream (Re-encoded DTS) : ้ ำ น DTS เสียงดังเดิ ้ มจะได ้รับการเข ้ารหัสซ�เป็ • Bitstream (Re-encoded Dolby D): ้ ำ น Dolby เสียงดังเดิ ้ มจะได ้รับการเข ้ารหัสซ�เป็ Digital สำ�หรับรายละเอียดเพิมเติ ่ ม โปรดดูตารางการ เลือกสัญญาณดิจต ิ อลออก. ั ่ ญญาณ การลดอ ัดราสุมส PCM การตงค่ ั ้า ่ อ การเชือมต่ PCM เครืองรั ่ บสัญญาณ AV ทีสนั่ บสนุน HDMI Coaxial บิตสตรีม (ไบ่บก ี ารประมวลผล) เครืองร ่ ับส ัญญาณ AV ทีสน่ ับสนุน HDMI Coaxial บิตสตรีม (DTS Re- บิตสตรีม (Dolby D encoded) Re-encoded) เครืองร ่ ับส ัญญาณ AV ทีสน่ ับสนุน HDMI หร ืCoaxial เครืองร ่ ับส ัญญาณ AV ทีสน่ ับสนุน HDMI หร C ื oaxial การควบคุมช่วงไดนามิก ช่วยให ้คุณสามารถตังค่้ าเปิ ดหรือปิ ดการลดอัตรา คุณสามารถรับฟั งเสียงระดับเบาแต่ยงั คงได ้ยิน ่ ญญาณ PCM 48kHz และ 96kHz สุมสั เสียงพูดอย่างชัดเจน ตัวเลือกนีใช้ ้ได ้เฉพาะเมือตรวจพบสั ่ ญญาณ • Off : เลือกตัวเลือกนี เมื ้ อเครื ่ องรั ่ บสัญญาณ Dolby Digital เท่านัน้ AV ทีต่อ่ กับเครืองเล่ ่ นนีใช้ ้งาน 96kHz ได ้ • Autoิ : การควบคุมช่วงไดนามิคจะตังค่้ าโดย • On : เลือกตัวเลือกนี เมื ้ อเครื ่ องรั ่ บสัญญาณ อัตโนมัตข ิ นกั ึ ้ บข ้อมูลทีมีใ่ ห ้โดยแทร็กเสียง AV ทีต่อ่ กับเครืองเล่ ่ นนีไม่้ สามารถใช ้งาน Dolby TrueHD 96kHz สัญญาณ 96kHz จะถูกแปลงลดความถี ่ ลงอยูที่ 48kHz ่ • Off : คุณจะเพลิดเพลินไปกับภาพยนตร์ในช่วง ไดนามิคมาตรฐาน หมายเหตุ • On : เมือเล่ ่ นแทร็กเสียงของภาพยนตร์ท ี ่ ่ ▪▪ แม ้เมือการลดอั ่ ตราสุมสัญญาณ PCM ถูก ระดับเสียงเบาหรือจากลำ�โพงขนาดเล็ก ระบบ ตังเป็ ้ น Off ดิสก์บางแผ่นจะส่งสัญญาณ สามารถบีบอัดสัญญาณเสียงอย่างเหมาะสม เสียงทีถูก่ ลดสัญญาณผ่านสัญญาณออก เพือสร ่ ้างมวลเสียงเบาให ้สามารถเข ้าใจได ้ และ ดิจต ิ อล ป้ องกันท่อนเสียงเกินจริงไม่ให ้ดังเกินไป ✎✎ คำ�จำ�กัดความของแผ่นดิสก์ Blu-ray ไม่ระบุ ถอดรหัสสตรีมเสียงคุณ สมบัตหิ ลักและเสียง BONUSVIEW รวมกันเป็ นเสียง PCM และเติมเอฟเฟกต์เสียงการนำ�ทาง ส่งสัญญาณออกเฉพาะสตรีมเสียง ถอดรหัสสตรีมเสียงคุณสมบัตหิ ลักและเสียง ถอดรหัสสตรีมเสียงคุณสมบัตหิ ลักและเสียง คุณสมบัตห ิ ลักเท่านัน้ BONUSVIEW รวมกันเป็ นเสียง BONUSVIEW รวมกันเป็ นเสียง PCM ดังนัน้ เครืองรั ่ บสัญญาณ AV PCM และเติมเอฟเฟกต์เสียงการนำ�ทาง ของคุณสามารถถอดรหัสบ และเติมเอฟเฟกต์เสียงการนำ�ทาง แล้วถอดรหัสเสียง PCM แล้วถอดรหัสเสียง ิตสตรีมของเสียงได ้ อีกครังเป็้ นบิตสตรีม Dolby digital หรือ คุณจะไม่ได ้ยินเสียง BONUSVIEW PCM อีกครังเป็้ นบิตสตรีม DTS PCM และเอฟเฟกต์เสียงการนำ �ทาง * หากสตรีมแหล่งสัญญาณเป็ น 2 ช่อง จะไม่ใช ้การตังค่้ า “Dolby D Re-encoded” สัญญาณออกจะเป็ น LPCM 2 ช่อง แผ่นดิสก์ Blu-ray อาจประกอบด ้วยสตรีมเสียง สามแบบ : -- เสียงคุณสมบัตห ิ ลัก : แทร็กเสียงของ คุณสมบัตห ิ ลัก -- เสียง BONUSVIEW : แทร็กเสียงเพิมเติ ่ ม เช่น เสียงความเห็นของผูกำ�้ กับหรือนักแสดง -- เอฟเฟกต์เสียงการนำ �ทาง : เมือคุ ่ ณเลือก การนำ �ทางเมนูบางอย่าง เอฟเฟกต์เสียงการนำ � ทางจะดังขึน ้ เอฟเฟกต์เสียงการนำ �ทางแตก ต่างกันในแผ่นดิสก์ Blu-ray แต่ละแผ่น ✎✎ หมายเหตุ ▪▪ ตรวจสอบให ้แน่ใจว่าคุณเลือกสัญญาณ ดิจต ิ อลออกได ้ถูกต ้อง ไม่เช่นนันคุ ้ ณจะ ไม่ได ้ยินเสียงเลยหรือได ้ยินเสียงดังมาก ▪▪ ถ ้าอุปกรณ์ HDMI (เครืองรั ่ บสัญญาณ AV โทรทัศน์) ไม่สามารถใช ้งานร่วมกับ ฟอร์แมตทีบีบ่ ขนาดได ้ (Dolby digital, DTS) สัญญาณเสียงจะออกมาเป็ น PCM ▪▪ DVD ปกติจะไม่มเี สียง BONUSVIEW และเอฟเฟกต์เสียงการนำ �ทาง ▪▪ แผ่นดิสก์ Blu-ray บางแผ่นไม่มเี สียง BONUSVIEW และเอฟเฟกต์เสียงการนำ � ทาง ▪▪ การตังค่้ าสัญญาณดิจต ิ อลออกจะไม่ม ี HDMI ของโทรทัศน์ของคุณ แต่จะมีผลกับสัญญาณเสียงออกออ Coaxial และ HDMI เมือเครื ่ องเล่ ่ นเชือม่ ต่อกับเครืองรั ่ บสัญญาณ AV ▪▪ หากคุณเล่นแทร็กเสียง MPEG เครือง ่ เล่นจะส่งสัญญาณเสียง PCM ออกแม ้จะ เลือกสัญญาณดิจต ิ อลออก (PCM หรือ บิตสตรีม) ไว ้ก็ตาม HDMI • หากโทรทัศน์ของคุณไม่สามารถใช ้งานกับ รูปแบบมัลติแชนเนลทีบีบ่ ขนาดได ้ (Dolby Digital, DTS) เครืองเล่ ่ นอาจส่งสัญญาณเสียง ดาวน์มก ิ ซ์ PCM 2 แชนเนลออก แม ้คุณเลือก บิตสตรีม (เข ้ารหัสใหม่หรือไม่มก ี ารประมวล ผล) ในเมนูการตังค่้ าของคุณ • หากโทรทัศน์ของคุณไม่สามารถใช ้งานกับ ่ ญญาณ PCM ทีเกิ่ น 48kHz ได ้ อัตราสุมสั เครืองเล่ ่ นอาจส่งสัญญาณเสียง PCM ออกทีถูก่ ลดขนาดลงอยูที่ 48kHz ่ แม ้คุณตังค่้ าการลด ่ ญญาณ PCM เป็ น Off ก็ตาม อัตราสุมสั โหมดดาวน์มก ิ ซ์ เลือกโหมดดาวน์มก ิ ซ์สำ�หรับเอาท์พท ุ สเตอริโอ • Normal Stereo (สเตอริโอปกติ): ดาวน์ ัญญาณเสี มิกซ์ส ยงหลายช่องส ัญญาณ ้ เป็นเสียงสเตอริโอทวไป ั ่ เลือกข้อนีหาก คุณฟังเสียงจากทีวห ี รือเครืองขยายเสี ่ ยง สเตอริโอ • Surround Compatible (ทีใช้่ แบบเซ อราวด์ได้): ดาวน์มก ิ ซ์เสียงหลายช่อง ส ัญญาณออกเป็นสเตอริโอทีใช้่ งานแบบ เซอราวด์ได้ โหมดนีสน้ ับสนุนการถอดรห ัส เครืองร ่ ับ AV สเตอริโอของคุณไปเป็นเสียง เซอร์ราวด์ 15 6. เครือข่าย โปรดติดต่อ ISP ของคุณเพือค่ ้นหาว่าไอ พีแอดเดรสของคุณเป็ นแบบสแตติกหรือไดนามิก หากเป็ นแบบไดนามิกขอแนะนำ �ให ้ตังค่้ าเป็ น อัตโนมัต ิ วิธน ี ง่ี า้ ยทีสุด่ และจะทำ�งานได ้ในกรณี ส่วนใหญ่ หากเป็ นแบบสแตติก คุณต ้องใช ้กระบ วนการตังค่้ าด ้วยตนเองคำ�แนะนำ �สำ�หรับเครือข่าย ใช ้สายมีอยูด่ ้านล่าง. ✎ หมายเหตุ ่ อเครืองนี ▪▪ คุณสามารถเชือมต่ ่ กับ ้ เครือข่าย ่ อแบบใช ้สายเท่านัน้ ้ ผ่านทางการเชือมต่ ตงค่ ั ้ าเครือข่ายอ ัตโนม ัติ ่ อเครือข่ายสำ� ในการเริมต ่ ้นตังค่้ าการเชือมต่ หรับผลิตภัณฑ์ของคุณ ทำ�ตามขันตอนเหล่ ้ านีี้: 1. ในเมนูหลัก กดปุม ่ ◄►เพือ ่ เลือก Settings แล้วกดปุ่ม ENTER 2. กดปุ่ม ▲▼ เพื่อเลือก Network จากนั้นกดปุ่ม ENTER 3. กดปุ่ม ▲▼ เพื่อเลือก Wired Network Settings จากนั้นกดปุ่ม ENTER หน้าจอ การตั้งค่าเครือข่ายแบบมีสาย จะปรากฏขึ้น Settings \ 0 0 0 0 0 0 0 0 0 0 0 0 > Move " Select ' Return 4. ในช่อง Internet Protocol Setup (ตัง ้ ค่าโปรโตคอลอินเทอร์เน็ ต) เลือก Auto (อัตโนมัต)ิ หากไม่ได ้เลือกไว ้ (กดป้ อน เพือ ่ เลือก AUTO (อัตโนมัต)ิ จากนันกดป้ ้ อน) ั อัตโนมัตแ 5. รับฟั งก์ชน ิ ละกรอกค่าสำ�หรับ IP Address, Subnet Mask, ฯลฯ โดย อัตโนมัต 16 ✎หมายเหต ้เวลานานถึงห ้านาที. ▪▪ กระบวนการนีอาจใช ้ 7. เลือก Network Test (ทดสอบเครือข่าย) จากนันกด ้ ป้ อน เพือให ่ ้แน่ใจว่าเครืองเล่ ่ น ่ อกับเครือข่ายของคุณแล ้ว เชือมต่ 8. เมือ ่ Network Test (ทดสอบเครือข่าย) เสร็จสิน ้ กด ย้อนกล ับ สองครังเพื ้ อกลั ่ บไป ยังเมนูหลัก 9. หากฟังก์ชั่นเครือข่ายไม่ได้รับค่าเครือข่าย หรือคุณเลือก Manual ไปที่คำ�แนะนำ�สำ�หรับการตั้งค่าด้วยตนเอง. การตงค่ ั ้ าเครือข่ายด้วยตนเอง ก่อนทีคุณ ่ จะเริมต ่ ้นการตังค่้ าเครือข่ายด ้วย ตนเอง คุณต ้องมีคา่ สำ�หรับการตังค่้ าเครือ ข่ายิ ในการดูคา่ เครือข่ายจากคอมพิวเตอร์ Windows โดยส่วนใหญ่ ทำ�ตามขันตอนเหล่ ้ านี: ้ Windows XP 1. คลิกขวาทีไอคอน ่ เครือข่าย ทางด ้านขวา ล่างของเดสก์ทอป Windows 2. ในเมนูป็อปอัป คลิก สถานะ Wired Network Settings Display Internet Protocol Setup :Auto Audio : 0 Network IP Address System Subnet Mask : 0 Language Gateway : 0 Security DNS :Auto General : 0 Support DNS Server หลังจากฟังก์ชั่นเครือข่ายได้รับค่าเครือข่ายแล้ว กดปุ่ม RETURN จากนั้นทำ�การทดสอบเครือข่ายเพื่อให้แน่ใจว่า ผลิตภัณฑ์ได้เชื่อมต่อกับเครือข่ายแล้วิ 3. บนกล่องโต ้ตอบทีปรากฏ ่ คลิกแท็บ สนับสนุน 4. บนแท็บ สนับสนุน คลิกทีปุม่ ่ รายละเอียด การตังค่้ าเครือข่าย จะปรากฏขึน ้ Windows 7 1. คลิกไอคอน เครือข่ายทางด ้านขวาล่างของ เดสก์ทอป Windows 2. ในเมนูป็อปอัป คลิก เครือข่ายและศูนย์ การแชร์ ่ อ 3. บนกล่องโต ้ตอบทีปรากฏ ่ คลิก การเชือมต่ ่ อเครือข่ายแบบ พืนที ้ ภายใน ่ หรือ การเชือมต่ ่ อเครือข่ายของคุณ ไร ้สาย ขึนกั้ บการเชือมต่ 4. บนแท็บ สนับสนุน คลิกทีปุม่ ่ รายละเอียด การตังค่้ าเครือข่าย จะปรากฏขึน ้ ในการป้ อน การตังค่้ าเครือข่าย ลงในผลิตภัณฑ์ของคุณ ทำ�ตามขันตอนเหล่ ้ านี: ้ การทดสอบเครือข่าย 1. ในเมนูหลัก กดปุม ่ ◄►เพือ ่ เลือก Settings แล้วกดปุ่ม ENTER ่ อเครือข่ายใช ้สาย ใช ้เมนูนเพื ี ้ อเชื ่ อมต่ ่ อเค หรือตรวจสอบว่าการเชือมต่ รือข่ายได ้ผลหรือไม่ 3. กดปุ่ม ▲▼ เพื่อเลือก Wired Network Settings จากนั้นกดปุ่ม ENTER หน้าจอ การตั้งค่าเครือข่ายแบบมีสาย จะปรากฏขึ้น สถานะเครือข่าย 2. กดปุ่ม ▲▼ เพื่อเลือก Network จากนั้นกดปุ่ม ENTER 4. 5. 6. 7. 8. 9. บนหน้าจอ การตั้งค่าอินเทอร์เน็ตโปรโตคอล กดปุ่ม ENTER กดปุ่ม ▲▼ เพื่อเลือก Manual จากนั้นกดปุ่ม ENTER กดปุ่ม ▼ เพื่อไปยังฟิลด์รายการแรก (ไอพีแอดเดรส) ใช้ปุ่มตัวเลขบนรีโมทของคุณเพื่อป้อนตัวเลข เมื่อป้อนแต่ละฟิลด์เสร็จสิ้น ใช้ปุ่ม ►เพื่อเลื่อนไปยังฟิลด์ถัดไป คุณยังสามารถใช้ปุ่มลูกศรอื่นๆ เพื่อเลื่อนขึ้น ลง และกลับ ป้อนค่า IP Address, Subnet Mask และ Gateway 10. กดปุ่ม ▼ เพื่อไปยัง DNS 11. กดปุ่ม ▼ เพื่อไปยังฟิลด์รายการ DNS แรก ป้อนหมายเลขตามวิธีข้างต้น 12. ใสศวเลบชางตน 13. กดปุ่ม RETURN บนรีโมทของคุณ. 14. ทำ�การทดสอบเครือข่ายเพื่อให้แน่ใจว่า ผลิตภัณฑ์ได้เชื่อมต่อกับเครือข่ายแล้ว. ่ อกับเครือข่ายและ ตรวจสอบว่ามีการเชือมต่ อินเทอร์เน็ ตแล ้วหรือไม่ ่ ออินเทอร์เน็ ต BD-LIVE การเชือมต่ ่ ออินเทอร์เ ตังค่้ าเพืออนุ ่ ญาตให ้มีการเชือมต่ น็ ตเมือใช ่ ้บริการ BD-LIVE ่ ออิน • Allow (All) : อนุญาตให ้มีการเชือมต่ เทอร์เน็ ตสำ�หรับข ้อมูล BD-LIVE ทังหมด ้ • Allow (Valid Only) : ่ ออินเทอร์เ อนุญาตให ้มีการเชือมต่ น็ ตเฉพาะข ้อมูล BD-LIVE ทีมีใ่ บรับรองถูกต ้องเท่านัน้ • Prohibit : ไม่อนุญาตให ้มีการเชือ ่ มต่ออินเทอร์เน็ ตสำ� หรับข ้อมูล BD-LIVE. ✎หมายเหต ▪▪ ใบรับรองทีถูก่ ต ้องคืออะไร? ้ BD-LIVE เพือส่่ งข ้อมูลแผ่ เมือเครื ่ องใช ่ นดิสก์ และร ้องขอให ้เซิรฟ ์ เวอร์รับรองแผ่นดิสก์ ▪▪ เซิรฟ ์ เวอร์จะใช ้ข ้อมูลทีถ่า่ ยโอนม าเพือตรวจสอบว่ ่ าแผ่น ดิสก์นันถู ้ กต ้องหรือไม่และส่งก ารรับรองกลับไปยังเครือง ่ ่ ออินเทอร์เน็ ตอาจถูกจำ�ก ▪▪ การเชือมต่ ัดขณะคุณกำ�ลังใช ้ข ้อมูล BD-LIVE. ่ ออินเทอร์เน็ ตอาจถูกจำ�กัด ▪▪ การเชือมต่ ขณะคุณกำ�ลังใช ้ข ้อมูล BD-LIVE ระบบ การตงค่ ั ้ าเริมต้ ่ น ั ่ ด ้วยการใช ้ฟั งก์ชนการตั งค่้ าเบืองต ้ ้น คุณสามารถ ตังค่้ าภาษา การตังค่้ าเครือข่าย ฯลฯ ั ่ สำ�หรับข ้อมูลเพิมเติ ่ มเกียวกั ่ บฟั งก์ชนการตั งค่้ า เบืองต ้ ้น โปรดดูสว่ นการตังค่้ าเบืองต ้ ้นของคูมือ ่ การใช ้งานนี (ดู ้ หน ้า 12) Anynet+(HDMI-CEC) ั ่ ช่ว่ ยอำ�นวยความสะดวก Anynet+ คือฟั งก์ชนที ่ อกับเครืองเล่ ซึงนำ่ �เสนอการทำ�งานทีเชื่ อมต่ ่ น อืนๆ่ ของซัมซุงทีมีค่ ณ ุ สมบัต ิ Anynet+ ั ่ เชื ่ อเครืองเล่ ในการใช ้งานฟั งก์ชนนี ้ อมต่ ่ นนีกับ ้ ั ซุงโดยใช ้สาย HDMI โทรทัศน์ซม ด ้วยการเปิ ด Anynet+ คุณสามารถใช ้งานเครือง ่ ้รีโมทคอนโทรลของโทรทัศน์ซม ั ซุง เล่นนีโดยใช ้ และเริมต ่ ้นการเล่นดิสก์ได ้ง่าย เพียงกดปุมเล่ ่ น ( ) บนรีโมทคอนโทรลของโทรทัศน์ สำ�หรับข ้อมูลเพิมเติ ่ ม โปรดดูคมื ู อ ่ ผูใช้ ้ของ โทรทัศน์ ั ่ • Off : ฟั งก์ชน Anynet+ จะไม่ทำ�งาน ั ่ Anynet+ จะทำ�งาน • On : ฟั งก์ชน ✎✎ หมายเหตุ ั ่ ไม่้ สามารถใช ้งานได ้ถ ้าสาย ▪▪ ฟั งก์ชนนี HDMI ไม่รองรับ CEC ั ซุงของคุณมีโลโก ้ ▪▪ ถ ้าโทรทัศน์ซม Anynet+ หมายความว่าโทรทัศน์เครือง ่ ั ่ Anynet+ นันรองรั ้ บฟั งก์ชน ▪▪ ขึนอยู ้ กับ ่ โทรทัศน์ของคุณ ความละเอียด ของสัญญาณออก HDMI บางระดับอาจ ไม่สามารถใช ้งานได ้ โปรดอ่านคูมือ ่ ผูใช้ ้ของโทรทัศน์ของคุณ การจ ัดการข้อมูล BD ช่วยให ้คุณสามารถจัดการเนือหาที ้ คุณ ่ เข ้าใช ้งาน ่ ทางแผ่นดิสก์ Blu-ray ซึงรองรั บบริการ BD-LIVE และจัดเก็บในอุปกรณ์หน่วยความจำ�แฟลชทีต่อ่ พ่วง คุณสามารถตรวจสอบข ้อมูลอุปกรณ์รวมถึงขนาด ่ บข ้อมูล ลบข ้อมูล BD หรือเปลียนอุ สือเก็ ่ ปกรณ์ หน่วยความจำ�แฟลช ข้อมูลหน้าจอการจ ัดการข้อมูล BD : • ขนาดรวม : ขนาดหน่วยความจำ�รวมของ อุปกรณ์ • ขนาดทีมี ่ : หน่วยความจำ�ทีมีใ่ นอุปกรณ์ ✎✎ หมายเหตุ ▪▪ ในโหมดหน่วยความจำ�ภายนอก การ ่ อ เล่นดิสก์จะหยุดหากคุณตัดการเชือมต่ อุปกรณ์ USB ในระหว่างการเล่น ▪▪ สนับสนุนอุปกรณ์ USB ทีถูก่ ฟอร์แมต เป็ นระบบไฟล์ FAT (DOS 8.3 volume label) เท่านัน้ และแนะนำ �ให ้ใช ้อุปกรณ์ USB ทีสนั่ บสนุนโปรโตคอล USB 2.0 ทีมีค่ วามเร็วในการอ่าน/เขียน 4 MB/ วินาทีขนไป ึ ้ ั ่ นต่ออาจไม่ทำ�งานหลังการ ▪▪ ฟั งก์ชนเล่ ื ่ บข ้อมูล ฟอร์แมตอุปกรณ์สอเก็ ▪▪ หน่วยความจำ�ทีมีอ่ ยูรวมของการจั ่ ดการ ข ้อมูล BD อาจต่างกัน ขึนอยู ้ กับ ่ สภาวะ เงือนไข ่ DivX® Video On Demand ่ อและ ้ ดูรหัสลงทะเบียน DivX® VOD เพือสั่ งซื เล่นเนือหา ้ DivX® VOD ภาษา คุณสามารถเลือกภาษาทีต ้องการสำ ่ �หรับเมนูหน ้า หลัก เมนูดส ิ ก์ ฯลฯ • On-Screen Menu : เลือกภาษาสำ�หรับการ แสดงผลบนหน ้าจอ • Disc Menu : เลือกภาษาสำ�หรับการแสดง ผลเมนูดส ิ ก์ • Audio : เลือกภาษาสำ�หรับเสียงบนดิสก์ • Subtitle : เลือกภาษาสำ�หรับคำ�บรรยายใต ้ ภาพของดิสก์ ✎✎ หมายเหตุ ▪▪ ภาษาทีเลื่ อกจะปรากฏขึนถ้ ้าแผ่นดิสก์นัน้ สนับสนุนคุณสมบัตน ิ ี ้ ความปลอดภ ัย ํ หร ับ DVD จ ัดเรตสา ั ่ ทำ้ �งานร่วมกับแผ่นดิสก์ DVD ทีมีก่ าร ฟั งก์ชนนี ่ กำ�หนดระดับอายุหรือระดับตัวเลขเอาไว ้ ซึงระบุ ระดับอายุผชมเนื ู ้ อหาดั ้ งกล่าว ตัวเลขเหล่านีช่้วย ให ้คุณสามารถควบคุมชนิดของแผ่นดิสก์ DVD ที ่ ครอบครัวของคุณจะรับชมได ้ เลือกระดับอายุทคุ ี ณ ่ ต ้องการกำ�หนดให ้กับการจัด เรตสำ�หรับ BD และระดับเรตทีคุณ ่ ต ้องการกำ�หนด ให ้กับการจัดเรตสำ�หรับ DVD เครืองเล่ ่ นจะเล่น เฉพาะแผ่นดิสก์ Blu-ray ทีจัด่ เรตทีระดั ่ บหรือ ต่�กว่ ำ าระดับอายุและระดับเรต DVD ต่�กว่ ำ าเรต ตัวเลข เว ้นแต่จะมีการป้ อนรหัสผ่าน ตัวเลขทีมากขึ ่ นแสดงถึ ้ งข ้อมูลทีต ้องการวุ ่ ฒภ ิ า วะมากขึ YouTube Lock จำ�กัดการใชบ้ ริการ YouTube จนกว่าจะกรอก รหัสผ่าน • Off : ปิ ดระบบล็อค YouTube เมือคุ ่ ณใช ้งานเมนูนเป็ ี ้ นครังแรก ้ หน ้าจอตังค่้ ารหัสผ่านจะปรากฏขึน ้ • On : เปิ ดระบบล็อค Youtube. ป้ อนรหัสผ่าน 4 หลักทีต ้องการโดยใช ่ ้ปมตั ุ ่ วเลข ตามค่าดีฟอลต้น เปลียน ่ PIN ํ หร ับ BD จ ัดเรตสา ป้ องกันการเล่นแผ่นดิสก์ Blu-ray ด ้วยเรตอายุท ี ่ ระบุ เว ้นแต่จะมีการป้ อนรหัสผ่าน • Off (ปิ ด): BD Parental Rating (จัดเรตสำ�หรับ BD) ไม่ได ้ทำ�งาน และแผ่น Blu-ray ทังหมดจะเล่ ้ นได ้ครบถ ้วน. • On (เปิ ด): จะห ้ามการเล่นแผ่น Blu-ray ทีอยู่ ในเรตสู ่ งกว่าการจัดเรต ั ่ เปลียนรหั ่ สผ่าน 4 หลักทีใช่ ้เพือเข ่ ้าถึงฟั งก์ชน ความปลอดภัย ถ้าคุณลืมรห ัสผ่าน 1. นำ �แผ่นดิสก์ออก 2. กดเล่น/พัก ( ) ทีแผงด ่ ้านหน ้าค ้างไว ้ 5 วินาทีหรือนานกว่านัน้ การตังค่้ าทังหมดจะถู ้ กเรียกคืนเป็ นค่าตังต้ ้น จากผูผลิ้ ต หมายเหตุ ▪▪ เมือการตั ่ งค่้ าถูกเรียกคืนเป็ นค่าตังต้ ้น จากผูผลิ้ ต ข ้อมูล BD ของผูใช้ ้ทีเก็่ บไว ้ ทังหมดจะถู ้ กลบออก ✎✎ 17 ทวไป ั ่ เขตเวลา คุณสามารถระบุเขตเวลาทีใช่ ้งานกับพืนที ้ ของคุ ่ ณ การสน ับสนุน อพเกรดซอฟต์แวร์ เมนูอพ ั เกรดซอฟต์แวร์ชว่ ยให ้คุณสามารถอัพเกรด ซอฟต์แวร์ของเครืองเล่ ่ นสำ�หรับการปรับปรุง ประสิทธิภาพหรือบริการเสริม คุณสามารถอัพเกรด ได ้สีวิธ่ :ี ้ โดยอินเทอร์เน็ ต หากต ้องการอัพเกรดโดยอินเทอร์เน็ ต ทำ�ตามขัน ้ ตอนเหล่านี: ้ 1. เลือก By Online แล ้วกดปุม่ ENTER ่ อกับเซิรฟ ข ้อความกำ�ลังเชือมต่ ์ เวอร์จะ ปรากฏขึน ้ 2. ข ้อความป็ อปอัพจะปรากฏขึนหากมี ้ การ อัพเดตให ้เลือก 3. หากคุณเลือก Yes (ใช่) เครืองเล่ ่ นจะปิ ดโดย อัตโนมัตห ิ ลังจากรีสตาร์ท (ห ้ามเปิ ดเครือง ่ เล่นระหว่างการอัพเกรด) 4. ป็ อปอัพขันตอนการอั ้ พเดตจะปรากฏขึน ้ เมือ ่ การอัพเดตเสร็จสิน ้ เครืองเล่ ่ นจะปิ ดเองโดย อัตโนมัต ิ 5. กดปุมเปิ ่ ดปิ ด เพือเปิ ่ ดเครืองเล่ ่ น ✎ หมายเหต ้ อผลิ ▪▪ การอัปเดตจะเสร็จสินเมื ่ ตภัณฑ์ปิดเองห ลังจากการเริมต ่ ้นใหม่ กดปุม่ POWER เพือเปิ ่ ดเครืองที ่ อัป่ เดตแล ้วสำ�ห รับการใช ้งานของคุณ ▪▪ อย่าปิ ดหรือเปิ ดเครืองด ่ ้วยตนเอง ในระหว่างกระบวนการอัปเดต 18 ▪▪ Samsung Electronics ไม่รับผิดชอบตามกฎห มายต่อการทำ�งานผิดปก ่ ออินเทอร์เน็ ต ติของเครืองที ่ เกิ่ ดจากการเชือมต่ ไม่เสถียรหรือการไม่เอาใจใส่ของลูกค ้า ในระหว่างการอัปเกรดซอฟต์แวร์. ▪▪ ถ ้าคุณต ้องการยกเลิกการอัพเกรดขณะ ดาวน์โหลดซอฟต์แวร์อพ ั เกรด ให ้กด ปุมป ่ ้ อน โดย USB หากต ้องการอัพเกรดโดย USB ทำ�ตามขันตอน ้ เหล่านี: ้ 1. เยียมชม ่ www.samsung.com/ bluraysupport ิ ทีอยู่ ในคอมพิ 2. คลายไฟล์ซป ่ วเตอร์ของคุณ ื ่ ยว คุณควรมีไฟล์ RUF ไฟล์เดียวทีมีช่ อเดี ิ กับไฟล์ซป 3. คัดลอกไฟล์ RUF ลงในแฟลชไดรฟ์ USB 4. คัดลอกโฟลเดอร์ลงในแฟลชไดรฟ์ USB 5. ตรวจดูให ้แน่ใจว่าไม่มแ ี ผ่นดิสก์ในเครืองเล่ ่ น แล ้วเสียบแฟลชไดรฟ์ USB เข ้ากับช่องเสียบ USB ของเครืองเล่ ่ น 6. ในเมนูของเครืองเล่ ่ น ไปที การตั ่ งค่้ า > การ สนับสนุน > อัพเกรดซอฟต์แวร์ 7. เลือก โดย USB หมายเหตุ ▪▪ ถาดวางแผ่นดิสก์ต ้องว่างเปล่าเมือคุ ่ ณ อัพเกรดซอฟต์แวร์โดยใช ้แจ็ค USB Host ้ ▪▪ เมือเสร็ ่ จสินการอั พเกรดซอฟต์แวร์ ตรวจ สอบรายละเอียดของซอฟต์แวร์ในเมนู อัพเกรดซอฟต์แวร์ ▪▪ อย่าปิ ดเครืองเล่ ่ นในระหว่างการอัพเกรด ซอฟต์แวร์ เพราะอาจทำ�ให ้เครืองเล่ ่ น ทำ�งานผิดปกติได ้ ▪▪ การอัพเกรดซอฟต์แวร์โดยใช ้แจ็ค USB Host จะต ้องใช ้กับแฟลชสติกหน่ ๊ วยความ จำ� USB เท่านัน้ ✎✎ การแจ้งการอ ัพเกรดอ ัตโนม ัติ ์ ่ อเครืองเล่ หากคุณเชือมต่ ่ นกับเครือข่ายของ คุณแล ้ว จากนันตั ้ งค่้ าเปิ ดการแจ ้งการอัพเกรด อัตโนมัต ิ เครืองเล่ ่ น จะแจ ้งให ้คุณทราบโดยอัตโนมัตเิ มือมี ่ ซอฟต์แวร์ ั ใหม่สำ�หรับเครืองเล่ เวอร์ชน ่ น ในการตังเปิ ้ ดการแจ ้งการอัพเกรดอัตโนมัต ิ ให ้ทำ� ตามขันตอนด ้ ้านล่าง: 1. เลือก Auto Upgrade Notificationิ จาก นันกดปุ ้ มป้ ่ อน 2. ใช ้ปุม่ เพือเลื ่ อก เปิ ด แล ้วกดปุมป้ ่ อน ั ใหม่ เครืองเล่ หากมีซอฟต์แวร์เวอร์ชน ่ นจะแจ ้งให ้ คุณทราบด ้วยข ้อความป็ อปอัพ 1. ในการอัปเกรดเฟิร์มแวร์ เลือก Yes บนป็อปอัป เครื่องจะปิดลงโดยอัตโนมัติ แล้วเปิดเครือ ่ งใหม่ และเริม ่ ต้นการดาวน์โหลด (ไม่ต้องเปิดเครื่องด้วยตนเอง) 2. ป็อปอัปแสดงความคืบหน้าในการอัปเดตจะป 3. รากฏขึ้นเมื่อการอัปเดตเสร็จสิ้น เครื่องจะปิดลงโดยอัตโนมัติ 4. กดปุ่ม POWER เพื่อเปิดเครื่อง. ✎หมายเหต ้ อผลิ ▪▪ การอัปเดตจะเสร็จสินเมื ่ ตภัณ ฑ์ปิดเองหลังจากการเริมต ่ ้นใหม่ กดปุม่ POWER เพือเปิ ่ ดเครืองที ่ อัป่ เดตแล ้วสำ�หรั บการใช ้งานของคุณ อย่าปิ ดหรือเปิ ดเครืองด ่ ้วยตนเองในระหว่า งกระบวนการอัปเดต ▪▪ Samsung Electronics ไม่รับผิดชอบตา มกฎหมายต่อการทำ�งานผิดปกติของเครือ่ ่ ออินเทอร์เน็ ตไม่เสถี งทีเกิ่ ดจากการเชือมต่ ยรหรือการไม่เอาใจใส่ของลูกค ้า ในระหว่างการอัเกรดซอฟต์แวร์. ติดต่อ Samsung ให ้ข ้อมูลติดต่อเมือต ่ ้องการความช่วยเหลือเกียว่ กับเครืองเล่ ่ นของคุณ Terms of Service Agreement ดูขอ ้ สงวนสิทธเ,ิ บอ.ื งตน ้ เกย1ี วกับขอ ้ มูลและ บริการของบุคคลภายนอก. ์ รีเซต การตังค่้ าทังหมดจะเปลี ้ ยนกลั ่ บเป็ นค่าเริมต ่ ้น ยกเว ้นค่าเครือข่าย ั ่ นฐาน ฟั งก์ชนพื ้ การเล่นวิดโี อ ื ่ การใชเ้ มนูชอ 1. กดปุมเปิ ่ ด/ปิ ด ( แผ่นดิสก์์ ) เพือเปิ ่ ดถาดวาง 3. กดปุมเปิ ่ ด/ปิ ด ( แผ่นดิสก์ 4. กดปุมเล่ ่ น( เรือง ่ 1 บทที 1่ บทที 2่ ) เพือปิ่ ดถาดวาง ). ) เริมต ่ ้นการเล่น พัก ( ) ) หยุดการเล่น • หากคุณกดปุมหนึ ่ งครั ่ ง้ : ตำ�แหน่งหยุดจะถูกจดจำ�ไว ้ • หากคุณกดปุมสองครั ่ ง้ : ตำ�แหน่งหยุดจะไม่ถก ู จดจำ�ไว ้ บทที 1่ เรือง ่ 2 บทที 2่ บทที 3่ • CD เพลง (CD-DA) แทร็ก 1 ปุมที ่ เกี่ ยวข้ ่ องก ับการเล่น หยุด ( 1. ระหว่างการเล่น กดปุม่ TITLE MENU บนรีโมทคอนโทรล • แผ่นดิสก์ Blu-ray, DVD-VIDEO 2. วางแผ่นดิสก์ลงในถาดเบาๆ โดยวางด ้านทีมี ่ ข ้อความสกรีนหงายขึน ้ เล่น ( Z โครงสร้างแผ่นดิสก์ ปกติแล ้ว เนือหาของดิ ้ สก์ถก ู แบ่งดังนี ้ การเล่น แทร็ก 2 แทร็ก 3 ▪▪ สำ�หรับดิสก์บางแผ่น การกดปุมหยุ ่ ด ( ) หนึงครั ่ งอาจไม่ ้ จดจำ�ตำ�แหน่ง หยุดไว ้ ▪▪ ไฟล์วด ิ โี อทีมีอ่ ต ั ราบิตสูง 20 Mbps หรือ มากกว่า อาจทำ�ลายความสามารถของ เครืองเล่ ่ นและอาจหยุดในระหว่างการเล่น โฟลเดอร์ (กลุม)่ 2 ไฟล์ 1 ไฟล์ 2 ไฟล์ 3 ื ่ การใชเ้ มนูดส ิ ก์/เมนูชอ/ เมนูป็อปอ ัป การใชเ้ มนูดส ิ ก์ hZ 1. ระหว่างการเล่น กดปุม่ DISC MENU บนรีโมทคอนโทรล 2. ✎✎ POPUP กดปุม่ ▲▼◄► เพือทำ่ �การเลือกค่าที ่ ต ้องการ จากนันกดปุ ้ มป ่ ้ อน หมายเหตุ ▪▪ ขึนกั้ บแผ่นดิสก์ รายการเมนูอาจแตกต่าง กันและเมนูนอาจไม่ ี ้ สามารถใช ้งานได ้ แทร็ก 5 ่ หยุดเล่นชัวคราว ✎✎ หมายเหตุ 2. TITLE MENU ่ อง่ การเล่นตามรายชือเรื แทร็ก 4 • MP3, WMA, DivX, MKV และ MP4 โฟลเดอร์ (กลุม)่ 1 ไฟล์ 1 ไฟล์ 2 ้ ง ั ่ นหาและข้าม การใชฟ ั ก์ชนค้ DISC MENU กดปุม่ ▲▼◄► เพือเลื ่ อก แล ้วกด ปุมป ่ ้ อน ✎✎ หมายเหตุ z 1. ระหว่างการเล่น กดปุม่ DISC MENU หรือ TITLE MENU DISC MENU 2. กดปุม่ ▲▼ เพือเลื ่ อกรายการทีคุณ ่ TITLE MENU POPUP ่ อง ต ้องการเล่นจากรายชือเรื ่ แล ้ว กดปุมป ่ ้ อน หมายเหตุ ▪▪ หากดิสก์ของคุณมีรายการเพลง กดปุมสี ่ เขียว (B) เพือไปยั ่ งรายการเพลง ✎✎ การใชเ้ มนูป็อปอ ัป h 1. ระหว่างการเล่น กดปุม่ POPUP MENU บนรีโมทคอนโทรล TITLE MENU POPUP 2. กดปุม่ ▲▼◄► หรือปุมป ่ ้ อน เพือ ่ เลือกเมนูทต ี ้องการ ่ หมายเหตุ ▪▪ ขึนกั้ บแผ่นดิสก์ รายการเมนูอาจแตกต่าง กันและเมนูนอาจไม่ ี ้ สามารถใช ้งานได ้ ✎✎ ระหว่างการเล่น คุณสามารถค ้นหาผ่านแต่ละฉาก ั ่ ้าม หรือแทร็กได ้อย่างรวดเร็ว หรือใช ้ฟั งก์ชนข เพือข่ ้ามไปยังบทถัดไปได ้ การค้นหาฉากทีต้อ่ งการ hzZyx • ระหว่างการเล่น กดปุมค้ ่ นหา ( ) แต่ละครังที ้ คุณ ่ กดปุมค้ ่ นหา ( ) ความเร็วในการเล่นจะเปลียนแปลงดั ่ งนี: ้ BD-ROM, BD-RE/-R, DVD-RW/-R, DVD+RW/+R, DVD-VIDEO DivX, MKV, MP4 )1)2)3 )4)5)6 )7 (1(2(3 (4(5(6 (7 )1)2)3 (1(2(3 • ในการกลับไปเล่นทีความเร็ ่ วปกติ ให ้กดปุมเล่ ่ น ( ) ✎✎ หมายเหตุ ▪▪ เครืองเล่ ่ นไม่เล่นเสียงในโหมดค ้นหา การข้ามฉาก hzZyx • ระหว่างการเล่น กดปุมข้ ่ าม ( ) ถ ้าคุณกดปุมข้ ่ าม ( ) แผ่นดิสก์จะไปยัง ฉากถัดไป ถ ้าคุณกดปุมข้ ่ าม ( ) แผ่นดิสก์จะไปยังจุด เริมต ่ ้นของฉาก การกดเพิมอี่ กครัง้ จะเลือนไป ่ ยังจุดเริมต ่ ้นของฉากก่อนหน ้า เล่นภาพชา้ / ▪▪ ขึนกั้ บแผ่นดิสก์ รายการเมนูอาจแตกต่าง กันและเมนูนอาจไม่ ี ้ สามารถใช ้งานได ้้ 19 เล่นภาพเคลือนไหวที ่ ละภาพ เล่นภาพชา้ hzZyx • ในโหมดพัก กดปุมค้ ่ นหา ( ) แต่ละครังที ้ คุณ ่ กดปุมค้ ่ นหา ( ) ความเร็วในการเล่นจะเปลียนแปลงดั ่ งนี: ้ * 1/8 * 1/4 * 1/2 • ในการกลับไปเล่นทีความเร็ ่ วปกติ ให ้กดปุมเล่ ่ น ( ) ✎✎ หมายเหตุ ▪▪ เครืองเล่ ่ นไม่เล่นเสียงในโหมดเล่น ภาพช ้า เล่นภาพเคลือนไหวที ่ ละภาพ hzZyx ั ่ • ในโหมดพัก กดปุมหยุ ่ ดชวคราว ( ) ั ่ แต่ละครังที ้ คุณ ่ กดปุมหยุ ่ ดชวคราว ( ) เฟรมใหม่จะปรากฏขึน ้ • ในการกลับไปเล่นทีความเร็ ่ วปกติ ให ้กดปุมเล่ ่ น ( ) ✎✎ หมายเหตุ ▪▪ เครืองเล่ ่ นไม่เล่นเสียงในโหมดเล่นภาพ เคลือนไหวที ่ ละภาพ ้ ม การใชป ุ ่ TOOLS ระหว่างการเล่น คุณสามารถใช ้งานเมนู ดิสก์โดยการกดปุม่ TOOLS ✎✎ หมายเหตุ ▪▪ เมนูเครืองมื ่ ออาจแตกต่างกันขึน ้ กับแผ่นดิสก์ การไปย ังฉากทีต้อ่ งการโดยตรง hzZy 1. ระหว่างการเล่น กดปุม่ TOOLS 2. กดปุม่ ▲▼ เพือเลื ่ อก Title, Chapter หรือ Playing Time 3. กดปุม่ ◄► หรือ หรือปุมตั ่ วเลขเพือเลื ่ อกชือ ่ ฉาก หรือเวลาทีต ้องการ ่ แล ้วกดปุมป ่ ้ อน hzZy ้ ำ อหรื ่ อฉากในดิสก์ เล่นซ�ชื ั ่ นซ�อาจไม่ ้ ำ ทำ�งาน ขึนอยู ้ กับ ่ แผ่นดิสก์ ฟั งก์ชนเล่ 1. ระหว่างการเล่น กดปุม่ REPEAT บนรีโมทคอนโทรล REPEAT 2. กดปุม่ ▲▼ เพือเลื ่ อก ฉาก หรือ ชือ ่ แล ้วกดปุมป ่ ้ อน 3. ในการกลับไปเล่นตามปกติ ให ้กด ปุม่ REPEAT อีกครัง้ 4. กดปุม่ ▲▼ เพือเลื ่ อก ปิ ด แล ้วกดปุมป ่ ้ อน ้ ำ วน เล่นซ�ส่ hzZy 1. ระหว่างการเล่น กดปุม่ REPEAT A-B บนรีโมทคอนโทรล 2. กดปุม่ REPEAT A-B ทีจุด่ ซึงคุ่ ณ ำ ต ้องการให ้เริมต ่ ้นเล่นซ�้ (A) 3. กดปุม่ REPEAT A-B ทีจุด่ ซึงคุ่ ณ ้ ำ ด (B) ต ้องการให ้การเล่นซ�หยุ hzZx ั ่ โดย คุณยังสามารถใช ้งานฟั งก์ชนนี ้ กดปุม่ AUDIO ทีรีโ่ มทคอนโทรล AUDIO 1. ระหว่างการเล่น กดปุม่ TOOLS 2. กดปุม่ ▲▼ เพือเลื ่ อก Audio ้ ำ อหรื ่ อฉาก เล่นซ�ชื REPEAT 4. ในการกลับไปเล่น กดปุม่ REPEAT A-B หมายเหตุ ▪▪ ถ ้าคุณตังจุ้ ด (B) ก่อนจบห ้าวินาที ข ้อความห ้ามจะปรากฏขึน ้ ▪▪ ขึนกั้ บแผ่นดิสก์ รายการเมนูอาจแตกต่าง กันและเมนูนอาจไม่ ี ้ สามารถใช ้งานได ้ ✎✎ 20 การเลือกภาษาของเสียง 3. กดปุม่ ◄► เพือเลื ่ อกภาษาของเสียงที ่ ต ้องการ หมายเหตุ ✎✎ ▪▪ ไฟแสดงสถานะ ◄► จะไม่ปรากฏขึนบน ้ หน ้าจอหากส่วน BONUSVIEW ไม่มก ี าร ตังค่้ าเสียง BONUSVIEW ▪▪ ข ้อมูลเกียวกั ่ บโหมดคุณสมบัตห ิ ลัก / โหมด BONUSVIEW จะปรากฏขึนหาก ้ แผ่นดิสก์ Blu-ray มีสว่ น BONUSVIEW ใช ้ปุม่ ◄► เพือสลั ่ บระหว่างโหมด เสียงคุณสมบัตห ิ ลักและโหมดเสียง BONUSVIEW ั ่ ▪▪ ภาษาทีมีใ่ ห ้เลือกใช ้ทางฟั งก์ชนภาษา ของเสียงขึนกั้ บภาษาทีเข่ ้ารหัสบนแผ่น ั ่ หรื้ อภาษาบางภาษาอาจ ดิสก์ ฟั งก์ชนนี ไม่มใี ห ้เลือกใช ้งาน ารเลือกภาษาของคำ�บรรยายใต้ ภาพ hZx SUBTITLE ั ่AUDIO คุณยังสามารถใช ้งานฟั งก์ชน นีโดยกดปุ ้ ม่ SUBTITLE ที ่ รีโมทคอนโทรล SUBTITLE 1. ระหว่างการเล่น กดปุม่ TOOLS 2. กดปุม่ ▲▼ เพือเลื ่ อก Subtitle 3. กดปุม่ ◄► เพือเลื ่ อกภาษาของคำ�บรรยาย ใต ้ภาพทีต ้องการ ่ หมายเหตุ ✎✎ ▪▪ คุณอาจเปลียนคำ ่ �บรรยายใต ้ภาพทีต ้องการ ่ ในเมนูดสิ ก์ได ้ ทังนี้ ขึ้ นอยู ้ กับ ่ แผ่นดิสก์ Blu-ray /DVD โดยกดปุม่ DISC MENU ั ่ ขึนอยู ▪▪ ฟั งก์ชนนี ้ ้ กับ ่ การเลือกคำ�บรรยาย ใต ้ภาพทีมีก่ ารเข ้ารหัสไว ้บนแผ่นดิสก์ และอาจไม่ทำ�งานในแผ่นดิสก์ Blu-ray/ DVD ทุกแผ่น ▪▪ แผ่นดิสก์ Blu-ray สามารถบรรจุภาษา ของคำ�บรรยายใต ้ภาพได ้ถึง 255 ภาษา และแผ่น DVD บรรจุได ้ 32 ภาษา ▪▪ แผ่นดิสก์ Blu-ray สามารถบรรจุภาษา ของเสียงได ้ถึง 32 ภาษา และแผ่น DVD บรรจุได ้ 8 ภาษา ▪▪ ข ้อมูลเกียวกั ่ บโหมดคุณสมบัตห ิ ลัก / โหมด BONUSVIEW จะปรากฏขึนหาก ้ แผ่นดิสก์ Blu-ray มีสว่ น BONUSVIEW ▪▪ แผ่นดิสก์ Blu-ray บางแผ่นอาจยินยอม ให ้คุณเลือกแทร็กเสียงทัง ้PCM แบบ มัลติแชนเนล หรือ Dolby Digital ใน แทร็กเสียงภาษาอังกฤษ ั ่ จะเปลี ▪▪ ฟั งก์ชนนี ้ ยนทั ่ งคำ้ �บรรยายใต ้ภาพ หลักและคำ�บรรยายใต ้ภาพรองในเวลา เดียวกัน ▪▪ ถ ้าคุณกดปุม่ AUDIO ทีรีโ่ มทคอนโทรล แถบเสียงจะปรากฏขึน ้ กดปุม่ RETURN เพือให ่ ้แถบเสียง หายไป ▪▪ จำ�นวนรวมของคำ�บรรยายใต ้ภาพหลัก และรองจะปรากฏขึนตามลำ ้ �ดับ ▪▪ ถ ้าคุณกดปุม่ SUBTITLE ที ่ รีโมทคอนโทรล แถบคำ�บรรยายจะ ปรากฏขึน ้ กดปุม่ RETURN เพือให ่ ้แถบคำ�บรรยาย หายไป����������������������������� เพือนำ่ �แถบคำ�บรรยายใต ้ภาพออก การเปลียนมุ ่ มกล้อง การตงค่ ั ้ า BONUSVIEW hZ เมือแผ่ ่ นดิสก์ Blu-ray/DVD ประกอบด ้วยมุม กล ้องหลายมุมในฉากบางฉาก คุณสามารถใช ้ฟั ง ั ่ มกล ้องได ้ ก์ชนมุ 1. ระหว่างการเล่น กดปุม่ TOOLS 2. กดปุม่ ▲▼ เพือเลื ่ อก Angle 3. กดปุม่ ◄► เพือเลื ่ อกมุมทีต ้องการ ่ การเลือกการตงค่ ั ้ าภาพ hzZy ั ่ ช่ว้ ยให ้คุณสามารถปรับคุณภาพของ ฟั งก์ชนนี ่ อกับโทรทัศน์ วิดโี อเมือเครื ่ องเล่ ่ นเชือมต่ 1. ระหว่างการเล่น กดปุม่ TOOLS 2. 3. กดปุม่ ▲▼ เพือเลื ่ อก Picture Setting จาก นันกดปุ ้ ม่ ป้อน กดปุม่ ◄► เพือเลื ่ อก การตงค่ ั ้ าภาพ ที ่ ต ้องการ • Dynamic : เลือกการตังค่้ านีเพื้ อเพิ ่ ม่ ความคมชัด • Normal : ������������������������������ เลือกการตังค่้ านีสำ�้ หรับการดู ่ วนใหญ่ แอปพลิเคชันส่ • Movie : ������������������������������������ นีเป็่ นการตังค่้ าทีดีท ่ สุ ี ด่ สำ�หรับ การชมภาพยนตร์ • User้ : ช่วยให ้คุณสามารถปรับความคม ั ่ ชัดและฟั งก์ชนการลดสั ญญาณรบกวน ตามลำ�ดับ ✎✎ หมายเหตุ ั ่ BD wise เมนูนจะไม่ ▪▪ เมือคุ ่ ณใช ้ฟั งก์ชน ี ้ ปรากฏขึน ้ h ส่วนประกอบของหน้าจอ CD เพลง (CD-DA)/MP3 1 คุณสมบัต ิ Bonusview อนุญาตให ้คุณดูเนือหา ้ ใหม่ (เช่น บทวิจารณ์) ในหน ้าต่างขนาดเล็กบน หน ้าจอขณะทีเล่่ นภาพยนตร์ ั ่ มีใ้ ห ้ใช ้งานได ้ต่อเมือแผ่ ฟั งก์ชนนี ่ นดิสก์นันมี ้ คุณสมบัต ิ Bonusview 1. ระหว่างการเล่น กดปุม่ TOOLS 2. กดปุม่ ▲▼ เพือเลื ่ อก วิดโี อ BONUSVIEW Video หรือ BONUSVIEW Audio TRACK 001 7 6 + 00:08 / 05:57 CD 3. กดปุม่ ◄► เพือเลื ่ อก bonusview ที ่ ต ้องการ ✎✎ หมายเหตุ 2 3 Playlist 05:57 TRACK 002 04:27 TRACK 003 04:07 TRACK 004 03:41 TRACK 005 03:17 TRACK 006 03:35 5 ปิ ด CD เพลง (CD-DA)/ MP3 แทร็กบนแผ่นดิสก์จ ะถูกเล ่นในลำ�ดับทีบัน่ ทึกมาในแผ่นดิสก์ ( ) แทร็ก CD เพลง (CD-DA) แทร็กปั จจุบน ั จะถูกเล่นซ�้ ำ ( ) หนึง ่ MP3 แทร็กปั จจุบน ั จะถูกเล่นซ�้ ำ ( ) ทังหมด ้ CD เพลง (CD-DA)/ MP3 ้ ำ กแทร็ก เล่นซ�ทุ ( ) สุม ่ CD เพลง (CD-DA)/ MP3 ตัวเลือกเล่นแบบ ่ จะเล่ สุมนี ้ น แทร็กของแผ่น ดิสก์ในลำ�ดับแบบสุม ่ 1/6 TRACK 001 " Pause โหมดเล่นซ: Tools ' Return 4 1 แสดงข ้อมูลเพลง รายการเล่น 2 แสดงรายการเล่น 3 แสดงแทร็กปั จจุบน ั /แทร็กทังหมด ้ 1. ใส่แผ่น CD เพลง (CD-DA) หรือ MP3 ลงในถาดวางแผ่นดิสก์ 4 แสดงปุมที ่ ใช่ ้ได ้ 5 แสดงเวลาปั จจุบน ั / เวลาในการเล่นทังหมด ้ การเล่น CD เพลง (CD-DA)/MP3 6 แสดงสถานะการเล่นปั จจุบน ั 1. ใส่แผ่น CD เพลง (CD-DA) หรือ MP3 ลง ในถาดวางแผ่นดิสก์ • สำ�หรับแผ่น CD เพลง (CD-DA) แทร็ก แรกจะเล่นโดยอัตโนมัต ิ • ในการเริมเล่ ่ นแผ่น MP3 กดปุม่ ◄► เพือ ่ เลือก Music จากนันกดปุ ้ ม่ ป้อน 7 แสดงสถานะการเล่นซ�้ ำ ▪▪ หากคุณสลับจาก วิดโี อ BONUSVIEW เสียง BONUSVIEW จะเปลียนโดย ่ อัตโนมัตต ิ าม วิดโี อ BONUSVIEW การฟังเพลง ow 2. กดปุม่ ▲▼ เพือเลื ่ อกแทร็กทีคุณ ่ ต ้องการ เล่น จากนันกดปุ ้ มป ่ ้ อน ำ เพลง (CD-DA)/MP3 การเล่นซ�้ CD 1. ระหว่างการเล่นรายการเล่น กดปุ่มTOOLS. 2. โหมดเล่นซ้ำ� แล้วกดปุ่ม ◄► เพื่อเลือกโหมดเล่นซ้ำ�ที่ต้องการ. 3. กดปุ่มป้อน. • CD เพลง (CD-DA) จะเล่นอัตโนมัต ิ • ในการเริมเล่ ่ นแผ่น MP3 กดปุม่ ◄► เพือเลื ่ อก Music จากนันกดปุ ้ ม่ ป้ อน 2. ในการไปที่ รายการเพลง กดปุ่ม หยุด ( ) หรือ RETURN หน้าจอ รายการเพลง จะปรากฏขึ. 3. กดปุ่ม ▲▼◄► เพื่อเลื่อนแทร็กที่ต้องการ แล้วกดปุ่ม สีเหลือง(C) เพื่อเลือกแทร็กที่ต้องการ ทำ�ซ้ำ�กระบวนการนี้เพื่อเลือกแทร็กอื่นๆ. 4. หากมีแทร็กที่ไม่ต้องการในรายการเล่น กดปุ่ม สีเหลือง(C) อีกครั้ง แทร็กที่ไม่ต้องการจะถูกลบออกไป 5. กดปุ่ม ป้อน เพื่อเล่นแทร็กที่เลือก แทร็กที่เลือกจะเล่นโดยอัตโนมัต. 6. ในการไปที่ รายการเพลง กดปุ่ม หยุด ( หรือ RETURN ) 7. ในการไปยัง รายการเล่น กดปุ่ม ป้อน. 21 ✎✎ หมายเหตุ ▪▪ คุณสามารถสร ้างรายการเล่นได ้สูงสุด 99 แทร็กบน CD เพลง (CD-DA) ภาพแบบตามเข็มนาฬิกาหรือทวนเข็มนาฬิกา) ่ • Information : แสดงข ้อมูลภาพรวมถึงชือและขนาด ฯลฯ . ✎หมายเหต การเล่นไฟล์ JPEG ั ▪▪ ก่อนทีคุณ ่ จะสามารถเปิ ดใช ้งานฟั งก์ชน เพลงพืนหลั ้ ง ไฟล์ภาพถ่ายควรปรากฏ ่ บข ้อมูล อยูในสื ่ อเก็ เดียวกันกับไฟล์เพลง อย่างไรก็ตาม คุณภาพเสียงอาจได ้รับผลกระทบจากอัต ราบิตของไฟล์ MP3 ขนาดของภาพถ่าย และวิธก ี ารเข ้ารหัส. 1. ใส่แผ่นดิสก์ JPEG ลงบนถาดวางแผ่นดิสก์ ▪▪ เริมต ่ ้นสไลด์โชว์และหยุดสไลด์โชว์สลับกัน ขึนอยู ้ กับ ่ ว่าคุณกำ�ลังรันสไลด์โชว์หรือไม่ การเล่นภาพ G 2. กดปุม่ ▲▼ เพือเลื ่ อก ภาพ แล ้วกดปุมป ่ ้ อน 3. กดปุม่ ▲▼◄► เพือเลื ่ อกโฟลเดอร์ทคุ ี ณ ่ ต ้องการเล่น แล ้วกดปุมป ่ ้ อน 4. กดปุม่ ▲▼◄► เพือเลื ่ อกภาพทีคุณ ่ ต ้องการเล่น แล ้วกดปุมป ่ ้ อน ✎✎ หมายเหตุ ▪▪ คุณไม่สามารถขยายคำ�บรรยายใต ้ภาพ และภาพกราฟิ ก PG ในโหมดเต็มหน ้าจอ ้ ม การใชป ุ ่ TOOLS ั ่ างๆ โดยการกด คุณสามารถใช ้ฟั งก์ชนต่ ั ่ างๆ โดยการ ปุม่ คุณสามารถใช ้ฟั งก์ชนต่ กดปุม่ TOOLS. • Start Slide Show์ : เลือกเพือเริ ่ มต ่ ้นสไลด์ โชว์ • Stop Slide Show : เลือกตัวเลือกนีหากคุ ้ ณ ต ้องการหยุดสไลด์โชว์ • Slide Show Speed์ : เลือกตัวเลือกนีหากคุ ้ ณต ้อ งการปรับความเร็วของสไลด์โชว์ • Background Music : เลือกเพือฟั่ งเพลงขณะดูภาพ. • Zoom : เลือกเพื่อขยายภาพปัจจุบัน (ขยาย เพิ่ม 4 เท่า) • Rotate : เลือกเพื่อหมุนภาพ (ตัวเลือกจะหมุน 22 การเล่นรูปภาพทีเลื่ อก์ คุณสามารถเลือกรูปภาพเฉพาะทีจะเล่ ่ นโดยการ กดปุมสี ่ เหลือง (C) บนรีโมทของคุณ ในการเลือก รูปภาพเฉพาะ ทำ�ตาม ขันตอนด ้ ้านล่าง: 1. ื ่ บข้อมูล USB การเล่นอุปกรณ์สอเก็ ✎✎ หมายเหตุ ▪▪ คุณไม่สามารถขยายคำ�บรรยายใต ้ภาพ และภาพกราฟิ ก PG ในโหมดเต็มหน ้าจอ 4. เมือเสร็ ่ จสิน ้ กดปุมป้ ่ อน สไลด์โชว์จะเริม่ ต ้นขึน ้ 123 1. เลื่อนไปยังเมนูหลัก 2. ในโหมด หยุด เชือ ่ มต่ออุปกรณ์สอ ่ื เก็บข้อมูล USB กับพอร์ต USB บนแผงด้านหน้าของเครื่อง ข้อความ “Do you want to access the device?” จะปรากฏขึ้น 3. กดปุ่ม ◄► เพื่อเลือก Yes จากนั้นกดปุ่ม ป้อน 4. กดปุ่มสีแดง(A) หรือปุ่มสีฟ้า(D) ถ้าคุณกดปุม ่ สีแดง(A) โปรดไปทีข ่ น ้ั ตอนที่ 5 ถ้าคุณกดปุ่มสีฟ้า(D) โปรดไปที่ขั้นตอนที่ -1 4 . No Disc 123 DLNA 123 a Change Device c Safely Remove USB d View Devices 123 d Home " Enter 5-1. กดปุม่ ◄► เพือเลื ่ อก USB จากนันกดปุ ้ ม่ ป้ อน 6-1. กดปุม่ ▲▼ เพือเลื ่ อก วิดโี อ เพลง หรือ ภาพถ่าย ทีต ้องการ ่ จากนันกดปุ ้ ม่ ป้ อน 7. สำ�หรับการเล่นไฟล์ วิดีโอ, เพลง หรือ ภาพถ่าย โปรดดูหน้า 19-22. ✎หมายเหต ื ่ บข ้อมูล USB ▪▪ คุณต ้องถอดอุปกรณ์สอเก็ ั ่ “ถอด อย่างปลอดภัย (โดยการทำ�ฟั งก์ชน USB ออกอย่างปลอดภัย”) เพือป้่ องกันอันตรายทีอา่ จเป็ นได ้กับหน่วยความจำ� USB กดปุม่ MENU เพือเลื ่ อนไปยั ่ งเมนูหลัก และเลือกปุม่ สีเหลือง(C) แล ้วกดปุม่ ป้ อน YouTube เลือกโฟลเดอร์ทมี ี ร่ ป ู ภาพทีคุณ ่ ต ้องการดู จาก นันกดปุ ้ มป้ ่ อน 2. กดปุม่ ▲▼◄► เพือเลื ่ อกรูปภาพทีคุณ ่ ต ้องการเล่น จากนันกดปุ ้ มสี ่ เหลือง (C) เครืองหมายเลื ่ อกจะปรากฏทีรูป่ ภาพนัน้ ้ ำ นตอน ้ 2 ข ้างต ้นสำ�หรับรูปภาพ 3. ทำ�ซ�ตามขั แต่ละภาพทีคุณ ่ ต ้องการเล่น YouTube ่ อ USB คุณสามารถใช ้การเชือมต่ เพือเล่ ่ นไฟล์มล ั ติมเี ดีย (MP3, JPEG, DivX ฯลฯ) ื ่ บข ้อมูล USB ทีดาวน์ ่ โหลดมาจากอุปกรณ์สอเก็ " Enter 5. กดปุ่ม ▲▼ เพื่อเลือก USB จากนั้นกดปุ่ม ป้อน 6. กดปุ่ม ◄► เพื่อเลือก วิดีโอ เพลง หรือ ภาพถ่าย จากนั้นกดปุ่ม ป้อน ไปยังขั้นตอนที่ 7 4-1.กดปุมสี ่ ฟ้า(D) หน ้าจอด ้านล่างจะปรากฏขึน ้ ไปยังขันตอนที ้ 5่ -1. ▪▪ เมือไฟล์ ่ Audio-CD (CD-DA), MP3 และ JPEG อยูในโหมดหยุ ่ ด คุณจะไม่สามารถดูภาพเต็มจอโดยการกดปุม่ FULL SCREEN บนรีโมทคอนโทรล ▪▪ หากคุณใส่แผ่นดิสก์เมือเล่ ่ นอุปก ื ่ บข ้อมูล USB รณ์สอเก็ โหมดอุปกรณ์เปลียนเป็ ่ น “DVD หรือ CD” โดยอัตโนมัต.ิ บริการเครือข่าย คุณสามารถเพลิดเพลินกับบริการเครือข่ายเช่น ่ อเครืองเล่ BD-LIVE โดยการเชือมต่ ่ นกับระบบ เครือข่าย อ่านคำ�แนะนำ �ต่อไปนีก่อ ้ นใช ้บริการเครือข่าย ่ อเครืองเล่ 1. เชือมต่ ่ นกับเครือข่าย (ดูหน ้า 10~12) 2. ตังค่้ าเครือข่าย (ดูหน ้า 16~18) BD-LIVE™ ่ อกับเครือข่ายแล ้ว คุณ เมือเครื ่ องเล่ ่ นเชือมต่ สามารถเพลิดเพลินกับเนือหาบริ ้ การทีเกี่ ยวข ่ ้อง กับภาพยนตร์ตา่ งๆ โดยใช ้ดิสก์ทรองรั ี ่ บ BD-LIVE 1. เสียบสติกหน่ ๊ วยความจำ� USB กับแจ็ค USB ทีด ้านข ่ ้างของเครืองเล่ ่ นแล ้วตรวจ สอบหน่วยความจำ�ทีเหลื ่ อ อุปกรณ์หน่วย ความจำ�ต ้องมีพนที ื ้ ว่า่ งอย่างน ้อย 1GB เพือ ่ อำ�นวยความสะดวกต่อบริการ BD-LIVE 2. ใส่แผ่นดิสก์ Blu-ray ทีสนั่ บสนุน BD-LIVE 3. เลือกรายการจากเนือหาบริ ้ การ BD-LIVE ต่างๆ ทีผูผลิ ่ ้ ตดิสก์มใี ห ้ ✎✎ หมายเหตุ ▪▪ วิธก ี ารใช ้ BD-LIVE และเนือหาที ้ มีใ่ ห ้ อาจแตกต่างกัน ขึนอยู ้ กับ ่ ผูผลิ้ ตดิสก์ ภาคผนวก ้ ง ั ่AllShare การใชฟ ั ก์ชน AllShare ช่วยให ้คุณเล่นไฟล์เพลง วิดโี อ และ ภาพถ่ายทีอยู่ ในพี ่ ซ ี หรือ NAS ของเครืองเล่ ่ น หากต ้องการใช ้ AllShare กับเครืองเล่ ่ นของคุณ ่ อเครืองเล่ คุณต ้องเชือมต่ ่ นกับเครือข่ายของคุณ (ดูหน ้า 10~11) ี องคุณ คุณต ้อง หากต ้องการใช ้ AllShare กับพีซข ติดตังซอฟต์ ้ แวร์ AllShare บนพีซ ี ื ้งานร่ หากคุณมีโอทีสามารถใช ่ วมกับ NAS คุณ สามารถใช ้ AllShare โดยไม่ต ้องเพิมซอฟต์ ่ แวร์ ใดๆ ในการดาวน์โหลดซอฟต์แวร์ AllShare: 1. ไปที่ Samsung.com 2. คลิก Support (บริการ) ป้อนหมายเลขรุ่นของเครื่องเล่นของคุณ ในช่องที่ปรากฏ แล้วคลิก ผลิตภัณฑ์์ 3. ในหน้าจอถัดไป คลิก Get Downloads (รับการดาวน์โหลด) ภายใต้เมนู Downloads (ดาวน์โหลด) 4. คลิก Software (ซอฟต์แวร์) ที่หน้าถัดไป 5. คลิกไอคอนในบรรทัด AllShare ข้างใต้ File (ไฟล์) เพื่อเริ่มต้นการดาวน์โหลด การแก้ไขปัญหา ก่อนทีจะนำ ่ �เครืองไปรั ่ บบริการซ่อมแซม โปรดตรวจสอบสิงต่่ อไปนีก่อ ้ น ปัญหา วิธแ ี ก้ไข ไม่สามารถดำ�เนินการใดๆ ได ้ด ้วยรีโมทคอนโทรล • ตรวจสอบแบตเตอรีในรี ่ โมทคอนโทรล แบตเตอรีอาจจำ ่ �เป็ นต ้อง เปลียนใหม่ ่ • ใช ้รีโมทคอนโทรลในระยะทางทีไม่่ เกิน 6.1 เมตร • นำ �แบตเตอรีออก ่ และกดปุมหลายๆ ่ ปุมค ่ ้างไว ้ เพือทำ ่ �ให ้ไมโครโปรเซสเซอร์ภายในรีโมทคอนโ ทรลรีเซ็ตตัวเอง ใส่แบตเตอรีกลั ่ บเข ้าไป และลองใช ้งานรีโมทคอนโทรลอีกครัง้ แผ่นดิสก์ไม่เล่น • ให ้แน่ใจว่าใส่แผ่นดิสก์แล ้ว โดยวางด ้านทีมีข่ ้อความสกรีนห งายขึน ้ • ตรวจสอบหมายเลขภูมภ ิ าคของแผ่นดิสก์ Blu-ray/DVD เมนูดส ิ ก์ไม่ปรากฏ • ตรวจสอบให ้แน่ใจว่าดิสก์แผ่นนันมี ้ เมนูดส ิ ก์ ข ้อความห ้ามปรากฏ บนหน ้าจอ • ข ้อความนีจะปรากฏขึ ้ นเมื ้ อกดปุ ่ มผิ ่ ด • ซอฟต์แวร์ของแผ่นดิสก์ Blu-ray/DVD ไม่สนับสนุนคุณสมบัต ิ (เช่น มุมกล ้อง) • คุณขอดูเรือง ่ หรือหมายเลขฉาก หรือเวลาค ้นหาอยูนอกช่ ่ วงเวลาของภาพยนตร์ โหมดการเล่นแตกต่างจ ากสิงที่ เลื่ อก ในเมนูการตังค่้ า • คุณสมบัตบ ิ างอย่างทีเลื่ อกในเมนูการตังค่้ าอาจไม่ทำ�งานอย่าง ั ่ เหมาะสม เหมาะสม ถ ้าแผ่นดิสก์ไม่ได ้เข ้ารหัสด ้วยฟั งก์ชนที ่ การเลน่่ เนอื้ หาทอีี่ ยใู่ นพีซีทมี่มี่เครอื่ งเลน่่ แผน่่ Blu-ray อัตราส่วนหน ้าจอ ไม่สามารถ เปลียนแปลงได ่ ้ • อัตราส่วนหน ้าจอถูกตังไว ้ ้คงทีบนแผ่ ่ นดิสก์ Blu-ray/DVD ่ ใช่ความผิดพลาดของเครืองนี • ซึงไม่ ่ ้ คุณสามารถดูไฟล์ที่ใช้งานร่วมกันใน คอมพิวเตอร์ของคุณด้วยเครื่องเล่นแผ่น Bluray คุณสามารถได้รับคำ�แนะนำ�โดยละเอียดสำ�หรับ การใช้ AllShare ได้จากเว็บไซต์ Samsung. com. ไม่มเี สียง • ตรวจดูให ้แน่ใจว่าคุณเลือกสัญญาณดิจต ิ อลออกทีถูก่ ต ้องในเม นูตวั เลือกเสียง หน ้าจอถูกบล็อก • ถ ้าสัญญาณออก HDMI ถูกตังค่้ าความละเอียดในระดับทีโทรทั ่ ศน์ของคุณไม่รองรับ (เช่น 1080p) คุณอาจต ้องรับชมภาพจากโทรทัศน์ของคุณ • กดปุม่ เล่น/พัก ( ) (บนแผงด ้านหน ้า) นานกว่า 5 วินาทีเมือไม่ ่ มแ ี ผ่นดิสก์อยูในเครื ่ อง ่ การตังค่้ าทังหมดจะถู ้ กเรียกคืนเป็ นค่าตังต้ ้นจากผูผลิ้ ต • เมือการตั ่ งค่้ าถูกเรียกคืนเป็ นค่าตังต้ ้นจากผูผลิ้ ต ข ้อมูล BD ผูใช้ ้ทีเก็่ บไว ้ทังหมดจะถู ้ กลบออก เครืองเล่ ่ นแผ่นดิสก์ Blu-ray ่ อ AllShare การเชือมต่ เล่นไฟล์ในพีซ ี 23 ปัญหา วิธแ ี ก้ไข ลืมรหัสผ่าน ) • กดปุม่ เล่น/พัก ( • (บนแผงด ้านหน ้า) นานกว่า 5 วินาทีเมือไม่ ่ มแ ี ผ่นดิสก์อยู ่ ในเครือง ่ การตังค่้ าทังหมดรวมทั ้ งรหั ้ สผ่านจะถูกเรียกคืนกลับ เป็ นค่าจากผูผลิ้ ต อย่าดำ�เนินการเช่นนี ยกเว ้ ้นในกรณีทจำี �่ เป็ นจริงๆ เท่านัน้ • เมือการตั ่ งค่้ าถูกเรียกคืนเป็ นค่าตังต้ ้นจากผูผลิ้ ต ข ้อมูล BD ผูใช้ ้ทีเก็่ บไว ้ทังหมดจะถู ้ กลบออก ถ ้าคุณมีปัญหาอืนๆ่ • ไปยังเนือหา ้ และค ้นหาขันตอนการดำ ้ �เนินการในคูมือ ่ ผูใช้ ้ทีป ่ ระกอบด ้วยคำ�อธิบายทีเกี่ ยวข ่ ้องกับปั ญหาของคุณ และดำ�เนินก ารตามขันตอนอี ้ กครังหนึ ้ ง่ • ถ ้ายังไม่สามารถแก ้ปั ญหาได ้ โปรดติดต่อศูนย์บริการทีได่ ้รับกา รแต่งตังของซั ้ มซุงใกล ้บ ้านคุณ ภาพมีเส ้นรบกวน หรือบิดเบือน ิ ่ • ตรวจดูให ้แน่ใจว่าแผ่นดิสก์ไม่มส ี งสกปรกติ ดอยู หรื ่ อรอยขีดข่วน • ทำ�ความสะอาดแผ่นดิสก์ ั ญาณออก HDMI ไม่มส ี ญ ่ อระหว่างโทรทัศน์และแจ็ค HDMI • ตรวจสอบการเชือมต่ บนเครืองเล่ ่ น • ตรวจสอบว่าโทรทัศน์ของคุณรองรับสัญญาณเข ้า HDMI ความละเอียด 576p/480p, 720p, 1080i, 1080p หรือไม่ หน ้าจอสัญญาณออก HDMI ผิดปกติ • ถ ้าเกิดสัญญาณรบกวนบนหน ้าจอ หมายความว่าโทรทัศน์ไ ม่สนับสนุน HDCP (High-bandwidth Digital Content Protection) ั ่AllShare ฟังก์ชน ฉั นสามารถมองเห็นโ ฟลเดอร์ทใช ี ่ ้งาน ร่วมกันผ่านทาง AllShare แต่ฉันมอง ไม่เห็นไฟล์ • AllShare แสดงไฟล์ทเกี ี ่ ยวข ่ ้องกับหมวดหมูรูป่ ภาพ เพลง และภา พยนตร์เท่านัน้ ไฟล์ทไม่ ี ่ เกียวข ่ ้องกับหมวดหมูเหล่ ่ านีจะไม่ ้ สา มารถแสดงได ้ วิดโี อเล่นแบบไม่ตอ ่ เนือง่ • ตรวจสอบว่าเครือข่ายเสถียรหรือไม่ ่ ออย่างเหมาะสมหรือไม่ • ตรวจสอบว่าสายเคเบิลเครือข่ายเชือมต่ และเครือข่ายไม่ได ้ถูกใช ้งานหนักเกินไป ่ อ AllShare การเชือมต่ ระหว่างทีว ี กับพีซไี ม่ม ี ความเสถียร ้ ำ น ไม่เช่นนัน้ • ไอพีแอดเดรสภายใต ้ซับเน็ ตเวิรก ์ เดียวกันไม่ควรซ�กั การรบกวนไอพีอาจทำ�ให ้เกิดปรากฏการณ์นี ้ • ตรวจสอบว่าคุณเปิ ดใช ้งานไฟร์วอลล์หรือไม่ หากใช่ ให ้ปิ ดการทำ�งานของไฟร์วอลล์ 24 ปัญหา วิธแ ี ก้ไข BD-LIVE ่ อกับเ • ตรวจสอบว่าการเชือมต่ ่ อเครือข่ายสำ�เร็จหรือไม่ ฉั นไม่สามารถเชือมต่ โดยใช ้เมนูสถานะเครือข่าย ซิรฟ ์ เวอร์ • ตรวจสอบว่าอุปกรณ์หน่วยความจำ� USB BD-LIVE ่ อกับเครืองเล่ เชือมต่ ่ นหรือไม่ • อุปกรณ์หน่วยความจำ�ต ้องมีพนที ื ้ ว่า่ งอย่างน ้อย 1GB เพืออำ่ �นวยความสะดวกต่อบริการ BD-LIVE คุณสามารถตรวจดูขนาดทีมีอ่ ยูในการจั ่ ดการข ้อมูล BD ่ ออินเทอร์เน็ ต BD-LIVE ตังค่้ าเป็ น • ตรวจสอบว่าเมนูการเชือมต่ อนุญาต (ทังหมด) ้ หรือไม่ • หากไม่เป็ นไปตามทังหมดข ้ ้างต ้น ติดต่อผูให้ ้บริการเนือหา ้ หรืออัพเดทเครืองเล่ ่ นเป็ นเฟิ รม ์ แวร์ลา่ สุด เมือใช ่ ้บริการ BD-LIVE เกิดข ้อผิดพลาดขึน ้ • อุปกรณ์หน่วยความจำ�ต ้องมีพนที ื ้ ว่า่ งอย่างน ้อย 1GB เพืออำ่ �นวยความสะดวกต่อบริการ BD-LIVE คุณสามารถตรวจดูขนาดทีมีอ่ ยูในการจั ่ ดการข ้อมูล BD ✎✎ หมายเหตุ ▪▪ เมือการตั ่ งค่้ าถูกเรียกคืนเป็ นค่าตังต้ ้นจากผูผลิ้ ต ข ้อมูล BD ผูใช้ ้ทีเก็่ บไว ้ทังหมดจะถู ้ กลบออก การซ่อมแซม หากคุณติดต่อให ้เราซ่อมแซมเครืองเล่ ่ นของคุณ อาจมีการเรียกเก็บค่าธรรมเนียมการดำ�เนินการ หาก: 1. วิศวกรถูกเรียกตัวไปยังบ ้านของคุณตามคำ�ขอ และไม่พบข ้อบกพร่องในผลิตภัณฑ์ ่ มและไม่พบข ้อบกพร่องในผลิตภัณฑ์ 2. คุณนำ �เครืองไปยั ่ งศูนย์ซอ เราจะแสดงค่าธรรมเนียมการดำ�เนินการให ้คุณทราบก่อนทีจะไปพบคุ ่ ณทีบ ่้านหรือเริมดำ ่ �เนินการกับ เครืองเล่ ่ นของคุณ เราขอแนะนำ �ให ้คุณอ่านคูมือ ่ นีอย่ ้ างละเอียด ค ้นหาวิธแ ี ก ้ไขออนไลน์ท ี www.samsung.com ่ หรือ ติดต่อศูนย์บริการลูกค ้าของซัมซุงก่อนพยายามซ่อมเครืองเล่ ่ นของคุณ ข้อมูลจำ�เพาะ ทัว่ ไป USB HDMI สัญญาณเสียงออก เครือข่าย น้�ำ หนัก 1.3 กก. ขนาด 360 (W) X 193 (D) X 41 (H) มม. ช่วงอุณหภูมข ิ ณะทำ�งาน +5°C ถึง +35°C ช่วงความชืน ้ ขณะทำ�งาน 10 % ถึง 75 % ประเภท A USB 2.0 เอาท์พท ุ DC 5V 500mA สูงสุดี ภาพ 1080p, 1080i, 720p, 576p/480p เสียง PCM, Bitstream สัญญาณเสียงดิจต ิ อลออก มีแกนรวมกัน อีเทอร์เน็ ต 100BASE-TX Terminal -- ไม่สนับสนุนหากความเร็วเครือข่ายต่�กว่ ำ า 10Mbps -- การออกแบบและข ้อมูลจำ�เพาะอาจเปลียนแปลงได ่ ้โดยไม่ต ้องแจ ้งให ้ทราบล่วงหน ้า -- สำ�หรับการจ่ายไฟและการใช ้ไฟ ดูทฉลากติ ี ่ ดกับตัวเครือง ่ -- น�หนั ้ ำ กและขนาด เป็ นค่าโดยประมาณ 25 ประกาศเกียวก ่ ับความสอดคล้องและความสามารถในการใชง้ านร่วม การป้องก ันการค ัดลอก ดิสก์ทก ุ แผ่นไม่สามารถใช ้งานร่วมได ้ทังหมด ้ • เนืองจาก ่ AACS (Advanced Access Content System) ได ้รับอนุมต ั ใิ ห ้เป็ นระบบป้ องกันเนือหา ้ สำ�หรับฟอร์แมตดิสก์ Blu-ray เหมือนกับการใช ้ CSS (Content Scramble System) สำ�หรับฟอร์แมต DVD มีการกำ�หนดข ้อจำ�กัดบางประการในการเล่น สัญญาณออกแบบอนาล็อก ฯลฯ สำ�หรับเนือหาที ้ ่ ได ้รับการปกป้ องจาก AACS การทำ�งานของผลิตภัณฑ์นและข ี ้ ้อจำ�กัดต่อผลิตภัณฑ์นี อาจแตกต่ ้ างกันขึนอยู ้ กับ ่ จังหวะเวลาที ่ ้ ตภัณฑ์ เนืองจากข คุณซือผลิ ่ ้อจำ�กัดเหล่านันอาจได ้ ้รับการแก ้ไขหรือเปลียนแปลงโดย ่ AACS ภาย หลังการผลิตผลิตภัณฑ์นี ยิ้ งไปกว่ ่ านัน้ BD-ROM Mark และ BD+ ยังถูกใช ้เป็ นระบบป้ องกันเนือหา ้ สำ�หรับฟอร์แมตดิสก์ Blu-ray ซึงกำ่ �หนดข ้อจำ�กัดบางประการ อาทิ ข ้อจำ�กัดในการเล่นเนือหาที ้ ได่ ้ รับการปกป้ องจาก BD-ROM Mark และ/หรือ BD+ ในการขอรับข ้อมูลเพิมเติ ่ มเกียวกั ่ บ AACS, BDROM Mark, BD+ หรือเกียวกั ่ บผลิตภัณฑ์นี โปรดติ ้ ดต่อศูนย์บริการลูกค ้าของซัมซุง ่ • สืบเนืองจากข ่ ้อจำ�กัดทีอธิ่ บายไว ้ด ้านล่างและทีตังข ่ ้ ้อสังเกตไว ้ในคูมือ ่ นี ซึ้ งรวมถึ งส่วนชนิดและ คุณลักษณะเฉพาะของแผ่นดิสก์ในคูมือ ่ การใช ้งานนี แผ่ ้ นดิสก์ชนิดทีสามารถเล่ ่ นได ้คือ: แผ่น BDROM, DVD-VIDEO และ CD เพลง (CD-DA) ทีบัน่ ทึกข ้อมูลดังเดิ ้ ม แผ่น BD-RE/-R, DVD-RW/-R และแผ่น CD-RW/-R • แผ่นดิสก์นอกเหนือจากทีกล่่ าวถึงด ้านบนนีไม่้ สามารถและ/หรือไม่ได ้ออกแบบมาสำ�หรับเล่นกับ เครืองเล่ ่ นนี และแผ่ ้ นดิสก์บางประเภททีกล่่ าวถึงด ้านบนนีอาจไม่ ้ สามารถเล่นได ้เนืองจากเหตุ ่ ผล ต่างๆ ดังทีแสดงไว ่ ้ด ้านล่าง • ซัมซุงไม่สามารถรับรองได ้ว่าเครืองเล่ ่ นนีจะเล่ ้ นกับแผ่นดิสก์ทก ุ แผ่นทีมีโ่ ลโก ้ BD-ROM, BD-RE/-R, DVD-VIDEO, DVD-RW/-R, DVD+RW/+ R และ CD-RW/-R และเครืองเล่ ่ นนีอาจไม่ ้ ตอบสนองคำ� ่ ้งานทังหมดหรื สังใช ้ อทำ�งานตามคุณสมบัตท ิ งหมดของแผ่ ั ้ นดิสก์ ปั ญหาเหล่านี รวมถึ ้ งปั ญหาเกียว่ กับความสามารถในการใช ้งานร่วมของแผ่นดิสก์ และการใช ้งานเครืองเล่ ่ นกับแผ่นดิสก์ฟอร์แมตใหม่ และฟอร์แมตทีมีอ่ ยู อาจเกิ ่ ดขึนได ้ ้เนืองจาก: ่ -- Blu-ray เป็ นฟอร์แมตใหม่และฟอร์แมตทียัง่ มีววิ ฒ ั นาการต่อเนือง่ และเครืองเล่ ่ นนีอาจไม่ ้ สามารถ ทำ�งานตามคุณสมบัตท ิ งหมดของแผ่ ั ้ นดิสก์ Blu-ray เพราะบางคุณสมบัตอ ิ าจเป็ นคุณสมบัตเิ สริม และอาจมีการเพิมเติ ่ มคุณสมบัตใิ หม่ในฟอร์แมตแผ่นดิสก์ Blu-ray ภายหลังการผลิตเครืองเล่ ่ นนี ้ และคุณสมบัตบ ิ างอย่างอาจสามารถใช ้งานได ้ล่าช ้ากว่าทีกำ�่ หนดไว ้ ั ่ มีอ่ ยูและเวอร์ ั ่ -- เครืองเล่ ่ นนีไม่้ รองรับฟอร์แมตของแผ่นดิสก์ทงหมดทั ั ้ งเวอร์ ้ ชนที ่ ชนใหม่ -- ฟอร์แมตของแผ่นดิสก์ทมี ี อ่ ยูและฟอร์ ่ แมตใหม่อาจถูกแก ้ไข เปลียนแปลง ่ อัพเดท ปรับปรุง และ/ หรือเพิมเติ ่ ม -- แผ่นดิสก์บางแผ่นผลิตขึนมาในรู ้ ปแบบทีอนุ่ ญาตการใช ้งานและคุณสมบัตท ิ เฉพาะเจาะจงหรื ี ่ อ จำ�กัดระหว่างการเล่น -- บางคุณสมบัตอ ิ าจเป็ นคุณสมบัตเิ สริม คุณสมบัตใิ หม่อาจถูกเพิมเข ่ ้ามาภายหลังการผลิตเครืองเล่ ่ น นี หรื ้ อคุณสมบัตบ ิ างอย่างอาจสามารถใช ้งานได ้ล่าช ้ากว่าทีกำ�่ หนดไว ้ -- แผ่นดิสก์บางแผ่นทีมีโ่ ลโก ้ BD-ROM, BD-RE/-R, DVD-VIDEO, DVD-RW/-R, DVD+RW/+ R และ CD-RW/-R อาจเป็ นแผ่นทียัง่ ไม่ได ้มาตรฐาน -- แผ่นดิสก์บางแผ่นอาจไม่สามารถเล่นได ้ ขึนอยู ้ กับ ่ สถานะทางกายภาพหรือเงือนไขในการบั ่ นทึก -- ปั ญหาและข ้อผิดพลาดอาจเกิดขึนระหว่ ้ างการสร ้างซอฟต์แวร์แผ่นดิสก์ Blu-ray, DVD และ/หรือ การผลิตแผ่นดิสก์ -- เครืองเล่ ่ นนีทำ้ �งานต่างจากเครืองเล่ ่ น DVD มาตรฐานหรืออุปกรณ์ AV อืนๆ่ -- สำ�หรับเหตุผลทีระบุ ่ ไว ้ในคูมือ ่ การใช ้งานนี และสำ ้ �หรับเหตุผลอืนๆ่ ทีศูน่ ย์บริการลูกค ้าของซัมซุง ค ้นพบและแจ ้งมา • หากคุณพบปั ญหาเกียวกั ่ บความสามารถในการใช ้งานร่วมหรือปั ญหาการทำ�งานของเครืองเล่ ่ น โปรด ติดต่อศูนย์บริการลูกค ้าของซัมซุง คุณอาจติดต่อศูนย์บริการลูกค ้าของซัมซุงเพืออั่ พเดทเครืองเล่ ่ นนีในอนาคต ้ • สำ�หรับข ้อมูลเพิมเติ ่ มเกียวกั ่ บข ้อจำ�กัดในการเล่นและความสามารถในการใช ้งานร่วมของแผ่นดิสก์ โปรดดูสว่ นข ้อควรระวังเบืองต ้ ้นก่อนการอ่านคูมือ ่ การใช ้งาน ส่วนชนิดและคุณลักษณะเฉพาะของ แผ่นดิสก์และส่วนก่อนการเล่นในคูมือ ่ การใช ้งานนี ้ • สำ�หรับระบบสัญญาณโปรเกรสซีฟสแกนออกของเครืองเล่ ่ นแผ่นดิสก์ Blu-ray : ผูบริ้ โภคควรทราบ ว่า โทรทัศน์ความคมชัดสูงทุกเครือง ่ ไม่ได ้เข ้ากันได ้กับผลิตภัณฑ์นี และอาจเกิ ้ ดปั ญหาในการแสดง ภาพ ในกรณีทเกิ ี ่ ดปั ญหาเกียวกั ่ บภาพในระบบโปรเกรสซีฟสแกน เราแนะนำ �ให ้ผูใช้ ้สลับการเชือม่ ต่อไปเป็ นสัญญาณออกในระบบ ‘ความคมชัดมาตรฐาน’ หากมีคำ�ถามเกียวกั ่ บเครืองรั ่ บโทรทัศน์ท ี ่ สนับสนุนผลิตภัณฑ์นี โปรดติ ้ ดต่อศูนย์บริการลูกค ้าของเรา • แผ่นดิสก์ Blu-ray/DVD ส่วนใหญ่มก ี ารเข ้ารหัสเพือป้่ องกันการคัดลอกไว ้ ด ้วยเหตุนี คุ้ ณควรเชือม่ ่ อไปยัง ต่อเครืองเล่ ่ นของคุณเข ้ากับโทรทัศน์โดยตรง โดยไม่ผา่ น VCR (เครืองเล่ ่ นวิดโี อ) การเชือมต่ VCR เป็ นผลให ้ภาพผิดเพียนเนื ้ องจากแผ่ ่ นดิสก์ Blu-ray/DVD ทีมีก่ ารป้ องกันการคัดลอก • ภายใต ้กฎหมายป้ องกันการละเมิดลิขสิทธิของสหรั ์ ฐฯ และประเทศอืนๆ่ การบันทึก การใช ้ การแสดง ผล การจัดจำ�หน่าย หรือการดัดแปลงแก ้ไขรายการโทรทัศน์ วิดโี อเทป, แผ่นดิสก์ Blu-ray, DVD, CD และวัสดุอนๆ ื ่ อาจทำ�ให ้คุณมีความผิดทางแพ่งและ/หรือทางอาญา • ประกำ�ศเกียวก ่ ับ Cinavia : ผลิตภัณฑ์นใช ี ้ ้เทคโนโลยี Cinavia เพือจากั ่ ดการใช ้งานแผ่นทีไม่่ ้งาน ได ้รับอนุญาตของฟิ ลม ์ และวิดโี อและแทร็กเสียงทีผลิ่ ตมาเพือการค ่ ้าบางแผ่น เมือพบการใช ่ ต ้องห ้ามของแผ่นทีไม่่ ได ้รับอนุญาต ข ้อความจะปรากฏขึนและการเล่ ้ นหรือการคัดลอกจะหยุดทา งาน ข ้อมูลเพิมเติ ่ มเกียวกั ่ บเทคโนโลยี Cinavia มีให ้ทีศูน่ ย์ข ้อมูลลูกค ้าทางออนไลน์ของ Cinavia ที http://www.cinavia.com ่ หากต ้องการขอรับข ้อมูลเพิมเติ ่ มเกียวกั ่ บ Cinavia ทางไปรษณีย ์ ส่ง โปสการ์ดทีมีท ่ อยู ี ่ ของคุ ่ ณไปที: Cinavia ่ Consumer Information Centre, P.O. Box 86851, San Diego, CA, 92138, USA ผลิตภัณฑ์นรวมเอาเทคโนโลยี ี ้ เอกสิทธิเฉพาะภายใต ์ ้การอนุญาตจาก Verance Corporation และได ้รับความคุมครองโดยสิ ้ ทธิบต ั รสหรัฐฯ เลขที 7,369,677 ่ และสิทธิ บัตรสหรัฐฯ อืนๆ่ และทัวโลกที ่ ประกาศแล ่ ้วและรอการพิจารณา รวมทังลิ้ ขสิทธิและการป้ ์ องกันความ ลับทางการค ้าในบางด ้านของเทคโนโลยีดงั กล่าว Cinavia เป็ นเครืองหมายการค ่ ้าของ Verance Corporation ลิขสิทธิ 2004-2010 ์ Verance Corporation สงวนสิทธิทั์ งหมดโดย ้ Verance ห ้ามดา เนินการทางวิศวกรรมย ้อนกลับหรือถอดชินส่้ วนผลิตภัณฑ์ ข้อปฏิเสธความร ับผิดชอบของบริการเครือข่าย เนือหาและบริ ้ การทังหมดที ้ เข่ ้าถึงผ่านทางอุปกรณ์นเป็ ี ้ นของบุคคลทีสาม ่ และได ้รับการคุมครองโดย ้ ิ ทางปั ญญาอืนๆ่ เนือหาและ กฎหมายลิขสิทธิ สิ์ ทธิบต ั ร เครืองหมายการค ่ ้า และ/หรือกฎหมายทรัพย์สน ้ ้ส่วนตัวทีไม่่ เป็ นเชิงพาณิชย์เท่านัน้ คุณไม่สามารถใช ้เนือหาหรื บริการดังกล่าวแสดงเพือการใช ่ ้ อบริการ ในรูปแบบทีไม่่ ได ้รับอนุญาตโดยเจ ้าของเนือหาหรื ้ อผูให้ ้บริการ โดยไม่จำ�กัดสิงที่ กล่่ าวไปแล ้ว เว ้นแต่ ได ้รับอนุญาตอย่างชัดแจ ้งจากเจ ้าของเนือหาหรื ้ อผูให้ ้บริการทีเกี่ ยวข ่ ้อง คุณไม่สามารถแก ้ไข คัดลอก ้ ้ เผยแพร่ซ�้ อัำ พโหลด โพสต์ ส่ง แปล จำ�หน่าย สร ้างชินงานที เป็่ นส่วนต่อยอดจากชินงานดั งกล่าว ใช ้ ่ ประโยชน์ หรือเผยแพร่เนือหาหรื ้ อบริการทีแสดงผ่ ่ านทางอุปกรณ์นในรู ี ้ ปแบบหรือสือใดๆ เนือหาและบริ ้ การของบุคคลทีสามได ่ ้รับการจัดหาให ้ "ตามทีเป็่ น" ซัมซุงไม่รับประกันเนือหาหรื ้ อบริการ ่ ใดทีแสดงทั ่ งโดยชั ้ ดแจ ้งหรือโดยนัย เพือวั่ ตถุประสงค์ใดๆ ซัมซุงปฏิเสธความรับผิดชอบโดยนัย ซึงรวม ถึงแต่ไม่จำ�กัดเฉพาะการรับประกันความสามารถในทางพาณิชย์หรือความเหมาะสมสำ�หรับวัตถุประสงค์ เฉพาะ ซัมซุงไม่รับประกันความถูกต ้อง ความสมเหตุสมผล การตรงตามกำ�หนดเวลา ความถูกต ้อง ้ได ้ผ่านทางอุปกรณ์นี และไม่ ตามกฎหมาย หรือความสมบูรณ์ของเนือหาหรื ้ อบริการทีสามารถใช ่ ้ วา่ ่ ในสถานการณ์ใด ซึงรวมถึ งการละเลย ซัมซุงจะไม่รับผิดชอบ ไม่วา่ ในสัญญาหรือมีการละเมิดสัญญา สำ�หรับความเสียหายโดยตรง โดยอ ้อม ทีเกิ่ ดขึน ้ พิเศษ หรือทีสืบ่ เนืองมา ่ ค่าธรรมเนียมทนายความ ค่า ใช ้จ่าย หรือค่าเสียหายอืนใดที ่ เกิ่ ดจากหรือเกียวข ่ ้องกับข ้อมูลทีอยู่ ในเนื ่ อหาหรื ้ อบริการของคุณหรือ บุคคลภายนอก แม ้มีการแนะนำ �เกียวกั ่ บความเป็ นไปได ้ในเรืองความเสี ่ ยหายดังกล่าวก็ตาม บริการของบุคคลทีสามอาจถู ่ กยกเลิกหรือถูกขัดจังหวะได ้ทุกเมือ ่ และซัมซุงไม่รับรองหรือรับประกันว่า เนือหาหรื ้ อบริการจะยังคงใช ้ได ้ภายในระยะเวลาใดๆ เนือหาและบริ ้ การถูกส่งโดยบุคคลทีสามผ่ ่ านทาง เครือข่ายหรือระบบส่งข ้อมูล ซึงซั่ มซุงไม่มอ ี ำ�นาจควบคุม โดยปราศจากข ้อจำ�กัดของกฎเกณฑ์ทวไปใน ั ่ การปฏิเสธความรับผิดชอบนี ซั้ มซุงปฏิเสธความรับผิดชอบหรือภาระรับผิดโดยชัดแจ ้งต่อการติดขัดหรือ การระงับเนือหาหรื ้ อบริการทีได่ ้รับผ่านอุปกรณ์นี ้ ซัมซุงไม่รับผิดชอบและรับผิดสำ�หรับบริการลูกค ้าทีเกี่ ยวข ่ ้องกับเนือหาและบริ ้ การ คำ�ถามหรือข ้อเรียก ร ้องใดๆ สำ�หรับบริการทีเกี่ ยวข ่ ้องกับเนือหาหรื ้ อบริการควรดำ�เนินการโดยตรงกับผูให้ ้บริการเนือหาและ ้ บริการทีเกี่ ยวข ่ ้อง ใบอนุญาต • ผลิตภายใต ้การอนุญาตจาก Dolby Laboratories Dolby และสัญลักษณ์ D คู เป็่ น เครืองหมายการค ่ ้าของ Dolby Laboratories • ผลิตภายใต ้การอนุญาตตามสิทธิบต ั รในสหรัฐฯ : 5,956,674; 5,974,380; 6,487,535 และสิทธิบต ั รอืนๆ่ ทีได่ ้รับแล ้วและรอการอนุมต ั ใิ นสหรัฐฯ และทัว ่ โลก DTS และสัญลักษณ์เป็ นเครืองหมายการค ่ ้าจดทะเบียน และโลโก ้ DTS 2.0+ Digital Out และ DTS เป็ นเครืองหมายการค ่ ้าของ DTS, Inc. Product รวมถึง ซอฟต์แวร์ด ้วย © DTS, Inc. สงวนลิขสิทธิ ์ • DivX -- เกียวกั ่ บวิดโี อ DIVX: DivX® คือรูปแบบวิดโี อดิจต ิ อลทีสร่ ้างโดย DivX, LLC ซึงเป็่ น บริษัทในเครือของ Rovi Corporation อุปกรณ์นได ี ้ ้รับการรับรอง DivX Certified ® อย่างเป็ นทางการสำ�หรับการเล่นวิดโี อ DivX เยียมชม ่ www.divx.com สำ�หรับข ้อมูลเพิมเติ ่ มและเครืองมื ่ อซอฟต์แวร์เพือแปลงไฟล์ ่ ของคุณ เป็ นวิดโี อ DivX -- เกียวกั ่ บวิดโี อตามคำ�สัง ่ DIVX : อุปกรณ์ DivX Certified® นีจะต ้ ้องได ้รับการลงทะเบียนเพือเล่ ่ น ภาพยนตร์ตามคำ�สัง ่ (VOD) DivX ทีซือ่ ้ ในการรับรหัสลงทะเบียน ค ้นหาส่วน DivX VOD ในเมนู ตังค่้ าอุปกรณ์ของคุณ ไปที vod.divx.com ่ สำ�หรับข ้อมูลเพิมเติ ่ มเกียวกั ่ บวิธก ี ารลงทะเบียนของ คุณ -- DivX Certified® เพือเล่ ่ นวิดโี อ DivX® สูงสุดถึง HD 1080p รวมถึงเนือหาพิ ้ เศษ -- โลโก ้ DivX®, DivX Certified® และโลโก ้ทีเกี่ ยวข ่ ้องเป็ นเครืองหมายการค ่ ้าของ Rovi Corporation หรือบริษัทในเครือ และถูกใช ้ภายใต ้การอนุญาต -- ได ้รับความคุมครองโดยสิ ้ ทธิบต ั รของสหรัฐอเมริกาตังแต่ ้ หนึงรายการขึ ่ นไปดั ้ งนี: ้ 7,295,673; 7,460,668; 7,515,710; 7,519,274. • HDMI, โลโก ้ HDMI Logo และ High-Definition Multimedia Interface เป็ น เครืองหมายการค ่ ้าหรือเครืองหมายการค ่ ้าจดทะเบียนของ HDMI Licensing LLC ในสหรัฐอเมริกาและประเทศอืนๆ่ • Oracle และ Java เป็ นเครืองหมายการค ่ ้าจดทะเบียนของ Oracle และ/หรือบริษัทใน เครือ ชืออื่ นๆ่ อาจเป็ นเครืองหมายการค ่ ้าของเจ ้าของเหล่านัน้ • ประกาศใบอนุญาตโอเพนซอร์ส -- ในกรณีทใช ี ่ ้ซอฟต์แวร์โอเพนซอร์ส ใบอนุญาตโอเพนซอร์สมีอยูบนเมนู ่ ผลิตภัณฑ์ • Blu-ray Disc™, Blu-ray™ และโลโก ้ต่างๆ เป็ นเครืองหมายการค ่ ้าของ Blu-ray Disc Association ั งเว็บไซด์ ติดต่อซมซุ ั ซุง ติดต่อสอบถามได ้ที SAMSUNG ติดต่อซัมซุงเว็บไซด์ หากมีคำ�แนะนำ �หรือข ้อสงสัยเกียวกั ่ บผลิตภัณฑ์ซม ่ customer care center Area ` Asia Pacific AUSTRALIA NEW ZEALAND CHINA HONG KONG INDIA INDONESIA MALAYSIA PHILIPPINES SINGAPORE THAILAND TAIWAN VIETNAM Contact Centre 1300 362 603 0800 SAMSUNG (0800 726 786) 400-810-5858 (852) 3698 4698 1800 1100 11 3030 8282 1800 3000 8282 1800 266 8282 0800-112-8888 021-5699-7777 1800-88-9999 1-800-10-SAMSUNG(726-7864) for PLDT 1-800-3-SAMSUNG(726-7864) for Digitel 1-800-8-SAMSUNG(726-7864) for Globe 02-5805777 1800-SAMSUNG(726-7864) 1800-29-3232 02-689-3232 0800-329-999 0266-026-066 1 800 588 889 Web Site www.samsung.com www.samsung.com www.samsung.com www.samsung.com/hk www.samsung.com/hk_en/ www.samsung.com www.samsung.com www.samsung.com www.samsung.com www.samsung.com www.samsung.com www.samsung.com www.samsung.com Area ` Middle East U.A.E OMAN KUWAIT BAHRAIN Egypt JORDAN IRAN Morocco Saudi Arabia ` Africa NIGERIA Ghana Cote D’ Ivoire Senegal Cameroon KENYA UGANDA TANZANIA SOUTH AFRICA Contact Centre Web Site 800-SAMSUNG (726-7864) 800-SAMSUNG (726-7864) 183-2255 8000-4726 08000-726786 800-22273 021-8255 080 100 2255 9200-21230 www.samsung.com www.samsung.com www.samsung.com www.samsung.com www.samsung.com www.samsung.com www.samsung.com www.samsung.com www.samsung.com 0800-726-7864 0800-10077 0302-200077 8000 0077 800-00-0077 7095- 0077 0800 724 000 0800 300 300 0685 88 99 00 0860-SAMSUNG(726-7864 ) www.samsung.com www.samsung.com www.samsung.com www.samsung.com www.samsung.com www.samsung.com www.samsung.com www.samsung.com www.samsung.com AK68-02163A-00 AK68-02163A-00