Download User Manual for Biometric Safe
Transcript
User Manual for Biometric Safe
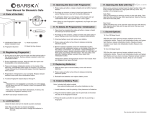
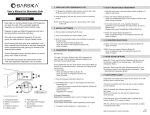
D. Opening the Door with Fingerprint
I. Sound Options
1. Press wake-up button, a beep is heard and red LED of sensor
flashes.
To Turn Off Beep Sound
2. Put finger on scanner, a beep is heard and green led of
sensor flashes once, now turn the handle clockwise
3. If verification failed, two short beeps will be heard and red
LED flashes twice, then operate step 1 and 2 again.
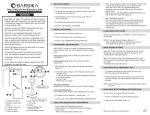
A. Parts of the Safe
B
C
Note: When no user fingerprint is registered, any finger can open
the door
E. To Delete All Fingerprints / Initialization
A
A. Initialization Button
with tamper resistant
cover
B. Fingerprint Scanner
C. Wake-Up Button
1. Open door by pressing the wake-up button, a beep is heard
and red LED of sensor flashes.
2. Put finger on the scanner, a beep is heard and green LED of
sensor flashes once, then the door is opened automatically.
3. Unscrew battery cover and remove one battery.
4. Press wake-up button a few times to release remaining
electronic power.
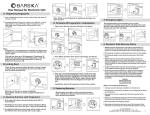
B. Registering Fingerprint
1. Remove special access keys from the inside of safe before
set up.
2. Remove tamper resistant cover from initialization button.
Press and release initialization button on the inside of the
safe door.
3. Immediately place finger on scanner, you will hear 1 beep
followed by 2 consecutive beeps. Remove fingerprint from
scanner. Replace tamper resistant cover back onto
initialization button.
5. Remove tamper resistant cover from initialization button.
Press and hold initialization button on the inside of the door as
the battery is reinserted, you will hear 1 beep followed by 2
consecutive beeps, release initializing button the LED light will
flash green accordingly with the beeps. This may take a few
seconds. Replace tamper resistant cover back onto
initialization button.
Initialization deletes all fingerprints stored in the module. Now
any fingerprint can open the safe.
With the door open remove tamper resistant cover from
initialization button. Press & hold initialization button until green
light flashes, release initialization button. Replace tamper
resistant cover back onto initialization button. Beep is now
disabled
To Turn On Beep Sound
With the door open remove tamper resistant cover from
initialization button. Press & hold initialization button until green
light flashes and you hear one beep. Replace tamper resistant
cover back onto initialization button. Beep is now enabled
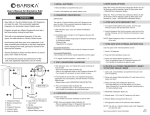
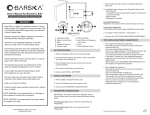
J. Mounting
The safe may be mounted to a wall or through the floor. When
mounting to a wall, be sure of the load bearing so as to hold the
weight of the safe and the contents. Failure to do so could result
in the safe falling and damaging property and or people.
Suggested 12mm socket wrench tool and drill bits
Mounting Through The Bottom Of The Safe
1. Check the floor for what type it is (wood, tile and or concrete)
2. Get the appropriate anchors for the type of floor you have
3. Check location on the floor for concealed wires or pipes
4. Mark the floor to drill your anchor
F. Replacing Batteries
1. With the door open unscrew battery cover and remove
batteries.
2. Press wake-up button a few times to release remaining
electronic power.
5. Drill the appropriate size hole for the anchors you have
6. Mount the safe and make sure it is securely mounted
DO NOT mount safe without anchoring to the wall behind
the safe!
Mounting Through The Back Of The Safe
4. Registration of fingerprint is now complete.
3. Reinstall new batteries and replace battery cover.
5. To add a fingerprint repeat steps 2 through 4.
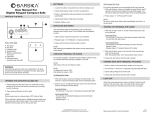
G. External Battery Pack
Note:
If fingerprint is not registered successfully, two short beeps
will be heard and red LED flashes, check the operation and
register again.
Note: Use external battery pack only when batteries are low
2. For safety, have someone help you to hold the safe during
mounting
1. Install batteries; note the polarity of the placement of batteries
3. Check location for concealed wires or pipes
2. Plug the external battery pack into the pink hole on the lower
left side of the fingerprint module
4. Mark the surface to drill holes for the anchors you will
be using
3. Press the wake-up button to open safe door by scanning a
fingerprint
5. Drill the appropriate size holes for the anchors you are using
If the green and red LED flash alternatively 10 times, this
indicates the fingerprint memory is full.
DO NOT lose tamper resistant cover.
C. Locking Door
Close the door and turn the handle counter clockwise
Note: Be sure the door is closed completely
Alarm: When 3 beeps are heard, change the batteries in
the safe.
H. Opening the Safe with Key
The mechanical key is for emergency use, use the screwdriver
to twist the screws on the safe plate, then open the door with
mechanical key. After opening door, take out the key and return
the safe plate.
1. Check the wall or cabinet for structural soundness
6. While having someone hold the unit, anchor the safe to
the wall
7. Test the strength of the mounted safe so it will not fall off the
wall or cabinet
DO NOT mount safe without anchoring to the wall behind
the safe!
See reverse side for more information
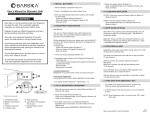
Care and Maintenance
- If necessary use a damp cloth to clean the safe. DO NOT use
chemicals or cleaning agents
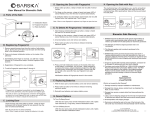
Biometric Safe Warranty
- Keep liquids away from the control panel. Spills on the control
panel will cause damage and possibly electric shock
1. BARSKA warrants the Biometric Safe against original defects
in material and/or workmanship under normal use for a period
of twelve (12) months from the date product is received
by purchaser.
- Properly secure the safe to prevent it from falling and causing
damage or injury
2. This Warranty is limited to original purchaser and is
not transferable.
- DO NOT lose tamper resistant cover
3. This Warranty applies only to products purchased in the
United States.
- DO NOT over stuff the contents of the safe or you can
damage the motor mechanism or the contents
- DO NOT disassemble the product. For all repairs and
maintenance, contact authorized service centers or distributor
4. BARSKA will examine and test returned product and repair or
replace defective part(s) or units with new part(s) or a new
unit if necessary within the warranty period. Purchaser is
required to remit $60.00 to BARSKA for return shipping and
handling at time product is returned.
- DO NOT place emergency keys inside of safe
5. If repair is required after warranty period expiration,
purchaser will be charged for replacement parts and return
shipping.
6. Purchaser must contact BARSKA at 1.909.445.8168 to
request a Returned Merchandise Authorization (RMA)
number. The RMA number must appear on the outside of the
shipping package. Product must be packed carefully and
sturdily in its original packaging to prevent damage in transit
and returned freight pre-paid to:
BARSKA
Repair Department
1721 Wright Avenue
La Verne, CA 91750
What is NOT covered by this Warranty?
1. Damage caused by improper installation or maintenance.
2. Damage from misuse, abuse, accident (such as dropping),
fire, flood, or acts of nature.
3. Damage from service or repairs other than those performed
by BARSKA.
4. Labor, cost and shipping charges for the removal and
replacement of defective parts beyond the initial
twelve-month warranty period.
5. All transportation and shipping charges.
6. Removing or altering the seal on the rear of the front part of
the safe under any circumstances will automatically void
the warranty.
© 2011 BARSKA®
1721 Wright Ave| La Verne, CA 91750 | USA
(t) 888.666.6769 | (f) 909.445.8169 | www.barska.com
8/11
BC195


