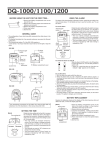
1
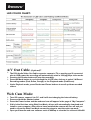
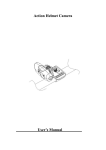
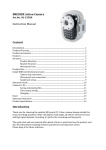
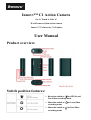
Innovv™ C1 Action Camera See it, Touch it, Like it ! World's most stylish action camera Innovv™, To Innovate, To Explore User Manual Product overview: Switch positionIHDWXUHV: Move the switch to IRULED On and 2QH9LGHRrecording PRGH Move the switch to IRULoop Video recording PRGH Move the switch to IRUOne Video recording PRGH Charging: Charge the battery before using your camera for the first time. Use the supplied USB cable to connect the camera to PC USB port or USB charger. The Yellow LED will remain On during charging. The Yellow LED will go Off after full charge. Operating Instructions: FUNCTION KEYS CHART: Power Button: Press the Power button for 3 seconds to turn camera ON / OFF. Turning camera ON automatically start recording FullHD 1080p@30fps video (default). The red LED will slow flashing when recording. Shutter Button: Press the Shutter button to stop or to start video recording. Mode Button: With camera in standby mode (stable LED color) press the Mode button to cycle through the 4 LED color choices (Red, Green, Orange, Red/Green) to select 4 different recording modes. See Functions chart and LED color chart below. To start recording in selected Mode, press the Shutter button. LED COLOR CHART: A/V Out Cable (Optional): The RCA Audio/Video Out Cable connects camera to TV or monitor and if connected also to USB power the recording will automatically start in 1080p@30fps video mode. Pressing the Shutter button will stop the recording. Press the Mode button to cycle through the 4 LED color choices to select 3 different Recording modes (Red, Green, Orange) or the Playback mode (Red/Green). Under Playback mode, press Shutter and Power buttons to scroll up/down recorded videos. Web Cam Mode: Turn Off camera, connect it to PC, and it will start charging the internal battery. Press and hold the Shutter button. Press the Power button and the webcam icon will appear in the page of “My Computer”. If this is the first time using Web Cam Mode, drivers will automatically download and install to your computer. After drivers have installed the camera will turn off and you need to repeat the Web Cam Mode connecting steps to start the web cam mode. Open your favorite web cam software such as AMCap to view the live video at 640x480. Car DVR and charging (optional car charger and charging cable): Use the car charger and charging cable to connect the camera to 12V power source (cigarette lighter). Camera will automatically start recording when power is detected. If no power detected the camera switches off. This option is for recordings only when car engine is running. Camera can be charged and record at same time. Camera can be used also in Parking Mode after engine stop and the internal battery will keep the camera in standby up to 8 hours and enabling the G-Sensor shocks recordings. Time and date: Create a new text file and rename it as TIMESET.txt Write date and time into the file in this form: 2014:08:29 23:43:53 Y Y is for yes, to show date/time on video and N is for no, no time stamp Put the TIMESET.txt file into the root of your MicroSD Card Insert the MicroSD Card into camera and start it 15 seconds before the time from txt file. TIMESET.txt Package Includes: 1 x Innovv C1 Camera 1 x Innovv C1 Holder 1 x USB cable 1 x Velcro strip 1 x User manual 1 x Neck Strap Lanyard (No MicroSD Card included) Optional Accessories: 1 x Car Charger (USB car charger adapter can also charge camera battery while recording) 1 x Charging cable (used with car charger above for charging while recording) 1 x AV Out Cable (used to connect camera to TV or Monitor) 1 x Bicycle holder 1 x Helmet holder 1 x Window rubber suction mount 3 x color shell Please Note: Car charger and cables are specific for this camera only. Use only original Innovv C1 accessories. Do not mix with other cables. Additional support: Visit http://www.innovv.com to get more support!