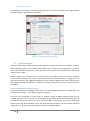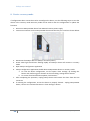
1
PoKeys57CNC User’s manual Version: 23/4/2015 PoKeys user manual Please read the following notes 1. All information included in this document is current as of the date this document is issued. Such information, however, is subject to change without any prior notice. 2. PoLabs does not assume any liability for infringement of patents, copyrights, or other intellectual property rights of third parties by or arising from the use of PoLabs products or technical information described in this document. No license, express, implied or otherwise, is granted hereby under any patents, copyrights or other intellectual property rights of PoLabs or others. PoLabs claims the copyright of, and retains the rights to, all material (software, documents, etc.) contained in this release. You may copy and distribute the entire release in its original state, but must not copy individual items within the release other than for backup purposes. 3. Descriptions of circuits, software and other related information in this document are provided only to illustrate the operation of the products and application examples. You are fully responsible for the incorporation of these circuits, software, and information in the design of your equipment. PoLabs assumes no responsibility for any losses incurred by you or third parties arising from the use of these circuits, software, or information. 4. PoLabs has used reasonable care in preparing the information included in this document, but PoLabs does not warrant that such information is error free. PoLabs assumes no liability whatsoever for any damages incurred by you resulting from errors in or omissions from the information included herein. 5. PoLabs devices may be used in equipment that does not impose a threat to human life in case of the malfunctioning, such as: computer interfaces, office equipment, communications equipment, test and measurement equipment, audio and visual equipment, home electronic appliances, machine tools, personal electronic equipment, and industrial robots. 6. Measures such as fail-safe function and redundant design should be taken to ensure reliability and safety when PoLabs devices are used for or in connection with equipment that requires higher reliability, for example: traffic control systems, anti-disaster systems, anticrime systems, safety equipment, medical equipment not specifically designed for life support, and other similar applications. 7. PoLabs devices shall not be used for or in connection with equipment that requires an extremely high level of reliability and safety, as for example: aircraft systems, aerospace equipment, nuclear reactor control systems, medical equipment or systems for life support (e.g. artificial life support devices or systems), and any other applications or purposes that pose a direct threat to human life. 8. You should use the PoLabs products described in this document within the range specified by PoLabs, especially with respect to the maximum rating, operating supply voltage range and other product characteristics. PoLabs shall have no liability for malfunctions or damages arising out of the use of PoLabs products beyond such specified ranges. 9. Although PoLabs endeavors to improve the quality and reliability of its products, semiconductor products have specific characteristics such as the occurrence of failure at a certain rate and malfunctions under certain use conditions. Further, PoLabs products are not subject to radiation resistance design. Please be sure to implement safety measures to guard them against the possibility of physical injury, and injury or damage caused by fire in the event of the failure of a PoLabs product, such as safety design for hardware and software including but not limited to redundancy, fire control and malfunction prevention, appropriate treatment for aging degradation or any other appropriate measures. 10. Usage: the software in this release is for use only with PoLabs products or with data collected using PoLabs products. 11. Fitness for purpose: no two applications are the same, so PoLabs cannot guarantee that its equipment or software is suitable for a given application. It is therefore the user's responsibility to ensure that the product is suitable for the user's application. 12. Viruses: this software was continuously monitored for viruses during production, however the user is responsible for virus checking the software once it is installed. 13. Upgrades: we provide upgrades, free of charge, from our web site at www.poscope.com. We reserve the right to charge for updates or replacements sent out on physical media. 14. Please contact a PoLabs support for details as to environmental matters such as the environmental compatibility of each PoLabs product. Please use PoLabs products in compliance with all applicable laws and regulations that regulate the inclusion or use of controlled substances, including without limitation, the EU RoHS Directive. PoLabs assumes no liability for damages or losses occurring as a result of your noncompliance with applicable laws and regulations. 15. Please contact a PoLabs support at [email protected] if you have any questions regarding the information contained in this document or PoLabs products, or if you have any other inquiries. 16. The licensee agrees to allow access to this software only to persons who have been informed of and agree to abide by these conditions. 17. Trademarks: Windows is a registered trademark of Microsoft Corporation. PoKeys, PoKeys55, PoKeys56U, PoKeys56E, PoScope, PoLabs and others are internationally registered trademarks. 2 www.poscope.com PoKeys user manual Contents 1. Introduction ..................................................................................................................................... 6 2. Features ........................................................................................................................................... 7 3. Device hardware description........................................................................................................... 8 3.1. PoKeys57CNC connector pinout.............................................................................................. 9 Pin types .......................................................................................................................................... 9 Power supply ................................................................................................................................... 9 SSR (Solid State Relay) connector.................................................................................................... 9 Relays connector ............................................................................................................................. 9 Galvanically isolated I/Os .............................................................................................................. 10 LCD connector ............................................................................................................................... 10 Pendant connector ........................................................................................................................ 10 Encoders connector ....................................................................................................................... 12 ADC connector............................................................................................................................... 12 Motor connectors 1-8 ................................................................................................................... 13 Axis switches connector ................................................................................................................ 13 Additional limit switches ............................................................................................................... 13 Test IO connector .......................................................................................................................... 14 3.2. Pin types and specifications .................................................................................................. 15 Type DI5P: Digital input with filtering ........................................................................................... 15 Type DO5: 5 V digital output ......................................................................................................... 15 Type DO5_D: 5 V digital output without resistor .......................................................................... 15 Type DIO33: 3,3 V digital input or output ..................................................................................... 16 Type OCOC: opto-coupled open-collector output ........................................................................ 16 Type OCSSR: open-collector output for SSR (Solid State Relay).................................................... 17 Type REL: relay output .................................................................................................................. 17 Type AN33: 3.3 V analog input ...................................................................................................... 17 Type AN33F: 3.3 V analog input with low-pass filter .................................................................... 18 3.3. Status LEDs ............................................................................................................................ 18 4. Requirements ................................................................................................................................ 19 5. Technical specifications ................................................................................................................. 20 6. 5.1. PoKeys57CNC dimensions ..................................................................................................... 20 5.2. Environment specifications ................................................................................................... 20 Installation ..................................................................................................................................... 21 3 www.poscope.com PoKeys user manual 7. 6.1. Using USB .............................................................................................................................. 21 6.2. Using Ethernet - direct connection between PoKeys57CNC and computer ......................... 21 6.3. Using Ethernet - PoKeys57CNC connected to a network with DHCP server ......................... 22 6.1. Using USB and Ethernet ........................................................................................................ 22 6.2. Motor drivers and peripherals installation ........................................................................... 22 PoKeys configuration options........................................................................................................ 23 7.1. Digital inputs and outputs ..................................................................................................... 23 PoKeys configuration software usage ........................................................................................... 23 7.2. Digital counters ..................................................................................................................... 25 PoKeys configuration software usage ........................................................................................... 25 7.3. Encoders ................................................................................................................................ 26 PoKeys configuration software usage ........................................................................................... 26 7.4. Pulse engine .......................................................................................................................... 29 Pulse engine status/control dialog parts ....................................................................................... 30 Axis configuration panel ................................................................................................................ 31 7.5. Matrix keyboard .................................................................................................................... 32 PoKeys configuration software usage ........................................................................................... 32 7.6. Analog inputs ......................................................................................................................... 34 PoKeys configuration software usage ........................................................................................... 34 7.7. Joystick mapping ................................................................................................................... 35 PoKeys configuration software usage ........................................................................................... 35 7.8. PWM outputs ........................................................................................................................ 36 PoKeys configuration software usage ........................................................................................... 37 7.9. LCD......................................................................................................................................... 38 PoKeys configuration software usage ........................................................................................... 38 7.10. PoExtBus ............................................................................................................................ 41 PoKeys configuration software usage ........................................................................................... 41 PoExtBus connector type .............................................................................................................. 41 7.11. PoNET ................................................................................................................................ 42 Adding new devices ....................................................................................................................... 43 PoNET kb48CNC keyboard............................................................................................................. 44 7.12. Failsafe settings ................................................................................................................. 45 7.13. Peripheral communication protocols ................................................................................ 46 I2C protocol .................................................................................................................................... 46 4 www.poscope.com PoKeys user manual 1-wire............................................................................................................................................. 47 7.14. EasySensors ....................................................................................................................... 48 EasySensors configuration dialog .................................................................................................. 48 Scan for I2C sensors ....................................................................................................................... 48 Scan for 1-wire sensors ................................................................................................................. 49 Add DHTxx 1-Wire sensor.............................................................................................................. 49 Add analog sensor ......................................................................................................................... 49 List of supported sensors .............................................................................................................. 51 7.15. Network device functionality ............................................................................................ 52 Device discovery ............................................................................................................................ 52 Default network settings ............................................................................................................... 53 Connecting to device in other network ......................................................................................... 53 Security .......................................................................................................................................... 54 Web interface (dashboard) ........................................................................................................... 55 Modbus.......................................................................................................................................... 58 Reporting data to network server with PoKeys57CNC device ...................................................... 61 7.16. Changing User ID number ................................................................................................. 67 7.17. Saving current configuration to file ................................................................................... 67 7.18. PoIL core functionality ....................................................................................................... 67 8. Device recovery mode ................................................................................................................... 68 9. Frequently asked questions .......................................................................................................... 69 10. Errata information ..................................................................................................................... 70 PoKeys device resets when external power supply is applied or removed .................................. 70 11. Grant of license ......................................................................................................................... 71 5 www.poscope.com PoKeys user manual 1. Introduction PoKeys products line consists of simple, easy-to-use USB and network devices with the extended list of features making them powerful input/output devices. PoKeys57CNC features both USB and Ethernet connectivity, giving user an option to select the preferred connection for the application. The device is highly adjustable and as such requires no complex knowledge on device programming. PoKeys57CNC is a blend between general purpose PoKeys device and motor controller. The device is targeted primarily for controlling up to 8 STEP/DIR signal driven motors (stepper motors, servo drives, etc.) in various applications with the addition of powerful PoKeys device features. Device contains dedicated connectors for connections with motor drivers, pendants, (HD44780-compatible) LCD module, etc. In addition, 5 analog inputs with 12-bit resolution are available. The device also features four galvanically-isolated open-collector outputs and 0 to 10 V analog output. The device runs the PoIL core and is fully compatible with PoBlocks graphical programming software, bringing Programmable Logic Controller to a motor controller board. PoBlocks can be used to simply automate different peripherals and interchange data with other software applications that are using PoKeys57CNC device. PoKeys USB products integrate support for virtual USB keyboard and USB joystick, which can be used to emulate a standard USB keyboard and joystick. Digital input pins can be mapped to virtual keyboard and joystick keys, while analog inputs can be mapped to virtual joystick axes. Configuration is simple by using our intuitive graphical PoKeys configuration application, where each function can also be tested. A dedicated PoExtBus/PoNET connector can be used to extend the number of digital outputs for additional 80 outputs in the form of either relay outputs or open-collector outputs. It can also be used to connect various additional peripherals (e.g. PoKeysKBD48CNC pendant) and I2C sensors. Third-party application developers that are adding the support for PoKeys devices, are encouraged to use the supplied communication DLL that can be simply used in the different .NET framework based applications and various other programming languages that provide support for ActiveX interface. There is even an open-source cross-platform C library available at https://bitbucket.org/mbosnak/pokeyslib. To aid developers that are communicating with PoKeys devices on the low-level, the extensive documentation on device communication protocol can be downloaded free of charge from the product webpage. 6 www.poscope.com PoKeys user manual 2. Features - Compatible with USB 1.1/2.0 HID standard, standard English USB keyboard simulation (with triggering support for up/down keys), standard USB joystick simulation (6 axes, 32 buttons with triggering support), Ethernet 10/100 with DHCP client or fixed IP support, TCP or UDP connection with the device, Modbus TCP support (access to digital IO, analog inputs, encoder values, digital counters values, PWM outputs, LCD display, PoExtBus devices, matrix keyboard status), web interface with newly designed dashboard and I/O status display with multiple user accounts, 28 digital inputs or outputs (software configurable) with pull-up resistors and available as virtual USB keyboard keys. There are additional 4 dedicated digital outputs, 5 analog inputs (12-bit) with digital low-pass filtering (4 analog inputs also include analog low-pass filter with 1.9 kHz cut-off frequency), multiple encoder pair inputs with three additional dedicated high-speed encoder and one ultra high-speed encoder inputs, digital counters on specific digital input pins, high performance 8-axis 125 kHz pulse engine with dedicated motor connectors, up to 16x8 matrix keyboard with triggered keys/alternate function support, up to 4 high-speed fully configurable PWM outputs (25MHz PWM timer) - two of them with open-collector transistor outputs, dedicated connector for HD44780-based character LCD (up to 4x20 characters), dedicated connector for PoPendant1, PoExtBus support for adding up to 10 external shift registers (e.g. PoExtBusOC16, PoExtBusRE, etc.), PoNET devices support (48-key CNC keyboard), fail-safe support in case of communication interruption, support for up to 100 sensors, that can be connected to I2C bus, 1-wire bus or on the general purpose analog inputs, intuitive and user-friendly software, third-party support via communication DLL library and extensive protocol specification document that allows porting to other systems. 7 www.poscope.com PoKeys user manual 3. Device hardware description 8 www.poscope.com PoKeys user manual 3.1. PoKeys57CNC connector pinout Pin types Type code DI5P DI33P DO5 DO5_D DIO33 OCOC OCSSR REL AN33 AN33F Description 5 V digital input with input filtering 3,3 V digital input with input filtering 5 V digital output 5 V digital output without series resistor 3,3 V digital input or output without filtering Opto-coupled open-collector output Open-collector outputs for SSR Relay output 3,3 V analog input without filtering 3,3 V analog input with 1,9 kHz low-pass filtering See chapter 3.2 Pin types for details on the listed pin types. Power supply Pin Type Function 1 Supply input Positive power supply 6-26V (marked with +) 2 Supply input Negative power supply (ground) PoKeys57CNC requires external 6-26V power supply to be connected to the board in order for the device to operate correctly (device may not operate according to the specifications if the external power supply is not present). The device uses switching power converter to scale down the input power supply to 5V. The power supply should be capable of providing at least 2.5W. SSR (Solid State Relay) connector Pin Type Function 1 OCSSR SSR2 output 2 +5V +5V output (power supply to SSR relay) 3 OCSSR SSR1 output The solid state relays should be connected between +5V output and corresponding SSR output pin. Note: all +5V output pins on the board share the same power supply and the current is distributed to all loads. Relays connector Pin Type 1 REL 2 REL 3 REL 4 REL 9 Function Relay 2 NO Relay 2 common Relay 1 NO Relay 1 common www.poscope.com PoKeys user manual Galvanically isolated I/Os This connector contains special I/O signals that are galvanically isolated from the rest of the board. Signals on pins 2 and 3 should only be referenced to GNDi points (available on pins 1 and 4). Pin 1 2 3 4 5 6 7 8 9 10 11 12 Type GNDi DI5P GNDi OCOC OCOC OCOC OCOC OCOC OCOC OCOC OCOC Label GNDi SpEr 10V GNDi OC4+ OC4OC3+ OC3OC2+ OC2OC1+ OC1- LCD connector Pin Type Label 1 GND GND 2 +5V +5V 3 DIO33 RST 4 5 6 7 8 9 10 11 12 13 14 15 16 DIO33 DIO33 DIO33 DIO33 DIO33 DIO33 DIO33 +5V OC RS R/W E D4 D5 D6 D7 LED+ LED- Pendant connector Pin Type Label 1 +5V +5V 2 GND GND 3 GND GND 4 DI33P E-stop 1 Function Isolated ground connection (for use only with signals on this connector) Spindle error input 0-10V analog output Isolated ground connection Open collector output 4 Open collector output 3 Open collector output 2 Open collector output 1 Function Ground +5V power supply for LCD LCD contrast voltage, also used as PoKeys pin 18 with PWM and reset pin (see Device recovery mode for more details) LCD RS signal, also used as PoKeys pin 291 LCD R/W signal, also used as PoKeys pin 28 LCD Enable signal, also used as PoKeys pin 301 not connected not connected not connected not connected LCD D4 signal, also used as PoKeys pin 26 LCD D5 signal, also used as PoKeys pin 25 LCD D6 signal, also used as PoKeys pin 24 LCD D7 signal, also used as PoKeys pin 23 +5 V power supply for LCD backlight with 4,7 Ω resistor in series Open-collector output (max. 100 mA), also used as PoKeys pin 22 with PWM Function +5 V power supply to pendant (used for encoder/MPG power) Ground Ground E-stop signal input, also used as PoKeys pin 52 (connect E-stop switch Digital counter functionality can be enabled for this pin 10 www.poscope.com PoKeys user manual 5 6 7 8 9 10 11 DIO33 GND-E DIO33 GND +5V DI33P OC FastEncA E-Stop FastEncB GND LED+ Ax-B LED- 12 13 14 15 16 17 18 19 20 21 22 23 24 25 26 DI33P DI33P DI33P DI33P GND DI33P GND DI33P GND DI33P GND DI33P GND Ax-C Ax-X Ax-Y Ax-Z GND Ax-A GND Step x1 GND Step x10 GND Step x100 GND between pins 4 and 6) - see notes below Encoder channel A, also used as PoKeys pin 12 E-stop switch GND - see notes below Encoder channel B, also used as PoKeys pin 22 Ground +5 V power supply for pendant LED Axis B selection signal, also used as PoKeys pin 32 Open-collector output (max. 100 mA), also used as PoKeys pin 21 with PWM Axis C selection signal, also used as PoKeys pin 42 Axis X selection signal, also used as PoKeys pin 92 not connected Axis Y selection signal, also used as PoKeys pin 102 not connected Axis Z selection signal, also used as PoKeys pin 112 Ground Axis A selection signal, also used as PoKeys pin 52 Ground Step x1 selection signal, also used as PoKeys pin 62 Ground Step x10 selection signal, also used as PoKeys pin 152 Ground Step x100 selection signal, also used as PoKeys pin 162 Ground Note: E-stop switch can be connected either to dedicated E-stop connector (red 4-pin connector) or to pendant connector (a combination of both is also allowed since both are wired in series). a) E-stop switch is connected to dedicated 4-pin E-stop connector between pins 2 and 3. Jumper 'NeST' must be removed and inserted into the pendant connector between pins 4 and 6 b) E-stop switch is connected to pendant connector (between pins 4 and 6). Jumper 'NeST' must be present c) Two E-stop switches are connected - one to dedicated 4-pin E-stop connector (betwen pins 2 and 3) and one to pendant connector (between pins 4 and 6). 2 Digital counter functionality can be enabled for this pin 11 www.poscope.com PoKeys user manual Encoders connector Pin Type Label 1 +5V +5V 2 GND GND 3 DIO33 uFEA 4 GND GND 5 DIO33 uFEB 6 GND GND 7 DIO33 uFEI 8 GND GND 9 DIO33 PK20 10 GND GND ADC connector Pin Type 1 GND 2 GND 3 AN33F 4 AN33F 5 +3,3V 6 +3,3V 7 AN33F 8 AN33F 9 AN33/DIO33 10 GND 3 Function Axis enable signal (inverted) Ground Ultra-fast encoder A-channel signal input, also used as PoKeys pin 8 Ground Ultra-fast encoder B-channel signal input, also used as PoKeys pin 12 Ground Ultra-fast encoder index signal input, also used as PoKeys pin 13 Ground PoKeys pin 20 with PWM3 Ground Label GND GND PK41 PK42 +3,3V +3,3V PK43 PK44 PK45 GND Function Ground Ground PoKeys pin 41 PoKeys pin 42 PoKeys pin 43 PoKeys pin 44 PoKeys pin 45 Ground Digital counter functionality can be enabled for this pin 12 www.poscope.com PoKeys user manual Motor connectors 1-8 Pin Type Label 1 DO5 /AXEn 2 GND GND 3 DO5 DIR 4 GND GND 5 DO5 STEP 6 GND GND 7 DI5P /ERRORin 8 GND GND 9 +5V 5V 10 GND GND Function Axis enable signal (inverted) Ground Direction signal Ground Step signal Ground Error input signal (from stepper driver to PoKeys) Ground +5V output to stepper driver Ground Axis switches connector Pin Type Label 1 GND GND 2 GND GND 3 DI5P AX84 DI5P AX8 H 5 DI5P AX76 DI5P AX7 H 7 DI5P AX68 DI5P AX6 H 9 DI5P AX510 DI5P AX5 H 11 DI5P AX412 DI5P AX4 H 13 DI5P AX314 DI5P AX3 H 15 DI5P AX216 DI5P AX2 H 17 DI5P AX118 DI5P AX1 H 19 GND GND 20 GND GND Function Ground Ground Axis 8 limit- switch Axis 8 home switch Axis 7 limit- switch Axis 7 home switch Axis 6 (C) limit- switch Axis 6 (C) home switch Axis 5 (B) limit- switch Axis 5 (B) home switch Axis 4 (A) limit- switch Axis 4 (A) home switch Axis 3 (Z) limit- switch Axis 3 (Z) home switch Axis 2 (Y) limit- switch Axis 2 (Y) home switch Axis 1 (X) limit- switch Axis 1 (X) home switch Ground Ground Additional limit switches Pin Type Label 1 GND GND 2 DI5P AX1+ 3 DI5P AX2+4 DI5P AX3+ 5 DI5P AX4+ 6 DI5P AX5+ 7 DI5P AX6+ 8 DI5P AX7+ Function Ground Axis 1 (X) limit+ switch Axis 2 (Y) limit+ switch Axis 3 (Z) limit+ switch Axis 4 (A) limit+ switch Axis 5 (B) limit+ switch Axis 6 (C) limit+ switch Axis 7 limit+ switch 13 www.poscope.com PoKeys user manual 9 10 11 12 DI5P GND GND DI5P AX8+ GND GND Probe Axis 8 limit+ switch Ground Ground Probe input Test IO connector Although the pinout is compatible with LPT-based stepper drivers, the physical pin numbering sequence in PoKeys57CNC v1.1 differs from that of a real DB-25 connector. Pin 1 2 3 4 5 6 7 8 9 10 11 12 13 14 15 16 17 18 19 20 21 22 23 24 25 26 Type DO5 DO5 DO5 DO5 DO5 DO5 DO5 DO5 DO5 DI5P DI5P DI5P DI5P DO5_D DI5P DO5_D DO5 GND GND GND GND GND GND GND GND GND 14 Label /AXEn1 STEP1 DIR1 STEP2 DIR2 STEP3 DIR3 STEP4 DIR4 AX3+ AX5+ AX2+ AX1+ PK20 AX4+ PK45 /AXEn2 GND GND GND GND GND GND GND GND GND Function Axis 1 (X) enable signal (inverted) Step signal for axis 1 (X) Direction signal for axis 1 (X) Step signal for axis 2 (Y) Direction signal for axis 2 (Y) Step signal for axis 3 (Z) Direction signal for axis 3 (Z) Step signal for axis 4 (A) Direction signal for axis 4 (A) Axis 3 (Z) limit+ switch Axis 5 (B) limit+ switch Axis 2 (Y) limit+ switch Axis 1 (X) limit+ switch PoKeys pin 20 (output only) Axis 4 (A) limit+ switch PoKeys pin 45 (output only) Axis 2 (Y) enable signal (inverted) Ground Ground Ground Ground Ground Ground Ground Ground Ground www.poscope.com PoKeys user manual 3.2. Pin types and specifications Type DI5P: Digital input with filtering Symbol Parameter Min Max Unit VDI5P,MAX VDI5P,LOW VDI5P,HIGH maximum voltage applied to DI5P pin applied voltage for LOW state applied voltage for HIGH state 1,6 5,5 0,2 - V V V Type DO5: 5 V digital output Symbol Parameter Min Max Unit IDO5,MAX VDO5,LOW VDO5,HIGH RDO5,HIGH maximum current supplied by DO5 pin voltage of LOW state (no current) voltage of HIGH state (no current) internal resistance of the digital output 4,9 100 8 0,1 TBD mA V V Ohm Type DO5_D: 5 V digital output without resistor Symbol Parameter Min Max Unit IDO5_D,MAX VDO5_D,LOW VDO5_D,HIGH 4,9 50 0,1 - mA V V 15 maximum current supplied by DO5 pin voltage of LOW state (no current) voltage of HIGH state (no current) www.poscope.com PoKeys user manual Type DIO33: 3,3 V digital input or output Digital pin directly connected to MCU. Symbol Parameter Ipu pull-up current Pin used as digital output IDO33,MAX maximum current supplied by DO33 pin VDO33,LOW voltage of LOW state (no current) VDO33,HIGH voltage of HIGH state (no current) Pin used as digital input VDI5,MAX maximum voltage applied to DI5 pin VDI5,LOW applied voltage for LOW state VDI5,HIGH applied voltage for HIGH state Min Max Unit 0 (V >= 3.3V) -100 µA 0 - 4 3,3 mA V V 2,0 5,0 0,8 - V V V I Type OCOC: opto-coupled open-collector output Symbol Parameter Min Max Unit IOCOC,MAX VOCOC,DIFF VOCOC,ISO maximum output current maximum voltage applied between OC+ and OCisolation voltage (AC for 1min, R.H. 40-60%) - 50 50 3000 mA V VRMS 16 www.poscope.com PoKeys user manual Type OCSSR: open-collector output for SSR (Solid State Relay) Symbol Parameter Min Max Unit IOCSSR,MAX UOCSSR,MAX maximum current sunk by OCSSR pin maximum voltage applied to OCSSR pin - 500 50 mA V Type REL: relay output Symbol Parameter Min Max Unit IREL,28VDC IREL,125VAC IREL,240VAC maximum current switching at 28 VDC maximum current switching at 125 VAC maximum current switching at 240 VAC - 10 10 7 A A A Type AN33: 3.3 V analog input Symbol Parameter Min Max Unit VIA -0.5 3.3 V analog input voltage on ADC related pins 17 www.poscope.com PoKeys user manual Type AN33F: 3.3 V analog input with low-pass filter Symbol Parameter Min Max Unit VIA fLP -0.5 1.6 3.3 2.2 V kHz analog input voltage on ADC related pins cut-off frequency of the analog low-pass filter 3.3. Status LEDs o 18 TBD www.poscope.com PoKeys user manual 4. Requirements - 6-26 V power supply with 2.5 W or more, one available USB 1.1 or USB 2.0 port, Ethernet connection between host computer and PoKeys57CNC device, USB HID device driver enabled operating system (Windows 98 SE/ME/2000/XP/Vista, Linux, Mac OS), included software requires Windows XP/Vista/7/8/8.1 with .NET framework 3.5 installed. 19 www.poscope.com PoKeys user manual 5. Technical specifications 5.1. PoKeys57CNC dimensions Measurements are in mm. 5.2. Environment specifications Parameter Min Typ Max Unit Power supply range Operating temperature Storage temperature Humidity 6 0 -40 5 - 26 60 85 95 (non-condensing) V °C °C % RH 20 www.poscope.com PoKeys user manual 6. Installation 6.1. Using USB PoKeys57CNC is a USB 1.1/2.0 compliant device. Step 1: Locate a free USB 2.0 port on your computer (1) and PoKeys57CNC board (2) and connect them with a standard USB cable. Step 2: Connect the PoKeys57CNC board to an appropriate power supply (3). Step 3: Install PoKeys software Step 4: Open PoKeys application, connect to your PoKeys57CNC device and enable Fast USB interface (go to Settings > Enable Fast USB interface). Step 5: Remove the USB cable from PoKeys57CNC device and insert it again. The computer will find a new device and search for drivers. See FAQ section of the manual if driver installation fails. 6.2. Using Ethernet - direct connection between PoKeys57CNC and computer Network firewalls must allow all traffic on TCP/UDP port 20055 between PoKeys57CNC device and PoKeys-related software running on a computer. Step 1: Locate ethernet ports on your computer (1) and PoKeys57CNC board (2) and connect them with RJ-45 cable (standard network cable). Step 2: Connect the PoKeys57CNC board to an appropriate power supply (3). Step 3: Configure your computer's network card with a static IP address in the 192.168.x.x range Step 4: Install PoKeys software Step 5: Start PoKeys software, select the PoKeys57CNC device in the list and click on 'Confiugre' button. Select the unique IP address for the PoKeys57CNC device in the same range as the computer's network card 21 www.poscope.com PoKeys user manual 6.3. Using Ethernet - PoKeys57CNC connected to a network with DHCP server Network firewalls must allow all traffic on TCP/UDP port 20055 between PoKeys57CNC device and PoKeys-related software running on a computer. Step 1: Locate ethernet ports on your router (1) and PoKeys57CNC board (2) and connect them with RJ-45 cable (standard network cable). Step 2: Connect the PoKeys57CNC board to an appropriate power supply (3). Step 3: Install PoKeys software 6.1. Using USB and Ethernet PoKeys57CNC device can also be connected to computer by using both the USB and Ethernet connection. In this case, applications will detect two instances of PoKeys57CNC devices and USB connection will be selected by default by third-party applications. Follow the above instructions on connecting the PoKeys57CNC device over Ethernet and USB. 6.2. Motor drivers and peripherals installation Connect motor drivers to dedicated 10-pin axis motor connectors, marked as MOTOR1, MOTOR2 … MOTOR8. Connect pendant to the dedicated pendant connector. 22 www.poscope.com PoKeys user manual 7. PoKeys configuration options 7.1. Digital inputs and outputs Unlike generic PoKeys devices, PoKeys57CNC doesn’t have generic pin headers with fully customizable pin functions. Certain pins of the dedicated connectors on PoKeys57CNC can be reused for other purposes if not used by the specific peripheral device. See the connector pinout diagram to discover which pins can be reused as digital inputs or digital outputs. Pin numbers were assigned according to the available functions of each pin in order to keep the device back-compatible with 3rd party software. Although primarily targetted for CNC applications, PoKeys57CNC shares the same virtual USB keyboard and joystick capability of PoKeys USB series of devices. Digital pins can be mapped to virtual keyboard keys or virtual joystick buttons. On activation, PoKeys device sends a USB message with the key code and modifier associated with this pin. Moreover, PoKeys57CNC device can also simulate a series of key presses, what is called a macro sequence. Up to 64 different macro sequences can be setup with the combined total length of 3584 characters with each macro sequence shorter than 128 keys. All macros can be labelled with a 7-character name. An extension to the USB keyboard mapping described above, PoKeys supports also triggered mapping of inputs to USB keyboard keys. In triggered mapping mode, only pin state transitions (lowto-high or high-to-low trigger a USB key press) with different key combinations for each transition. Type-matic like repeat and delay is an additional extension to the triggered key mapping. Instead of relying on the user’s system to trigger key repeat events, PoKeys can be configured to simulate repeated key presses at the predefined rate (period between two key presses is adjustable in 5 ms cycles – 0.78 to 200 repeats possible4) after a predefined delay (adjustable in steps of 5 ms – 0 to 1275 ms possible). PoKeys configuration software usage There is graphical representation for configuration of each PoKeys device’s pin on left and right side of main window. To change pin function, click on pin name and change its function in central ‘Pin settings’ frame. Figure 1: PoKeys configuration window 4 The maximum repeat rate depends on the user's system 23 www.poscope.com PoKeys user manual There are 6 main pin functions possible: inactive, digital input, triggered digital input, digital output, analog input, depending on the capabilities of each pin. Inactive Any pin (except those fixly mapped to an activated peripheral) can be set as inactive. Inactive pin is put in high-Z state with internal pull-up resistors enabled. Digital input Any free pin can be configured as digital input by selecting ‘Digital input’ option box. If the pin polarity is wished to be inverted, check the 'Invert pin' box. There are several additional possibilities for digital input pin functions. Direct key mapping – only if connected over USB Digital input set up for direct key mapping acts like a keyboard key. When there is a high state on pin (on low state when using inverted option), PoKeys device sends a key associated with this pin. Select a keyboard key from drop-down box and check appropriate key modifiers (Shift, Ctrl, …). Triggered digital input Triggered digital input function is activated by selecting ‘Triggered input’ option box. This pin mode enables user to select a key that is pressed only when a transition in a signal occurs. Different keys can be selected for ‘LOW-to-HIGH’ or ‘Key up’ event and for ‘HIGH-to-LOW’ or ‘Key down’ event. Selecting the keys is similar to Direct key mapping described above. Digital output Most of the available pins (check the pin capabilities in device pinout section of this manual) can be configured as digital output by selecting ‘Digital output’ option box. If the polarity of the pin is wished to be inverted, check the 'Invert pin' box. On startup, all pins (although optionally configured as digital output) are by default initialized in high-Z state (behaving like inputs). To use the outputs, SetPinData should be called before attempting to set the output state. However, there is an option to disable this behaviour - use the ‘Settings > Initialize outputs on startup’ option to either enable or disable output activation on PoKeys startup. View status of digital inputs and outputs Go to ‘Peripherals > Digital inputs and outputs…’ to display the status dialog as shown below. Figure 2: Input and output status dialog 24 www.poscope.com PoKeys user manual There are 55 pins represented as colored squares in the dialog, organized in the rows of 8 pins. Each square contains a pin index number in the lower left corner, while the lower right corner is used to indicate a digital output (small black triangle is displayed on pins, configured as digital outputs). The color of the square resembles the current state of the pin – green for the activated (HIGH state) and white for the unactivated (LOW state). To change the digital output state, first enable ‘Enable output control’ option, then either left or right click with mouse on the square representing the digital output to activate or deactivate this output. 7.2. Digital counters Selected pins of the PoKeys device can be setup to count the number of signal transitions on those pins. Pin digital counter can be setup to be incremented/decremented on rising, falling or rising and falling edges of the input signal. If needed, additional pin can be selected to toggle between incrementing and decrementing mode. Digital counters are implemented using interrupts and can therefore detect short signal pulses (even shorter than 1 microsecond). If switches are used in the combination with digital counters, external debouncing circuit must be installed to keep the digital counters from counting additional pulses due to switch contact bouncing on making or braking the contact. Check PoKeys device pinout section to discover which pins are compatible with digital counter option. PoKeys configuration software usage To setup digital counter inputs, first set the selected pin as ‘Digital input’ and if digital counter is available on the selected pin, the ‘Enable counter’ option will be enabled. Check this option and check ‘rising’ and/or ‘falling’ edge counting option. To enable selection between incrementing or decrementing counter modes, a direction pin can be selected in the ‘Direction pin’ drop-down menu. If no pin is selected, the counter mode defaults to incrementing mode. Digital counters values status page (menu ‘Peripherals > Digital counters values…’) can be used to check the proper working of the configured digital counters 25 www.poscope.com PoKeys user manual 7.3. Encoders PoKeys devices can handle decoding of up to 26 pairs of quadrature encoder signals. A and B signals of 25 'normal' encoders can be connected to any digital input and are intended for hand-driven rotational encoder switches with the quadrature signal frequencies up to 1 kHz. Three fast encoders input pairs are available only on selected input pins (pins 1-2 as encoder 1, pins 5-6 as encoder 2, pins 15-16 as encoder 3) and can handle quadrature signal frequencies to about 100 kHz. When activated, fast encoders logically replace the 'normal' encoders 1, 2 and 3. Ultra-fast encoder support is available on pins 8, 12 with the optional index signal input on pin 13. This feature uses hardware specialized hardware decoder and can handle even higher frequencies (up to 5 MHz with digital filtering disabled), but only x2 and x4 step multiplication factors are available. Samilarly as simple digital inputs, encoders can be assigned to direct key mapping or keyboard macro (only with USB devices). This is possible for both directions (CW and CCW) separately - the keyboard mapping of pin A is activated on positive change of the encoder value, while the keyboard mapping of pin B is activated on negative change of the encoder value. Except for ultra-fast encoders, the encoder value can be multiplied by 1x (one ‘tick’), 2x or 4x. The 4x mode increments encoder value on every signal edge and increases the resolution of the encoder for a factor of 4. Figure 3: Encoder settings in PoKeys application PoKeys configuration software usage To enable encoder input on the selected pin, define the pin as digital input, switch to ‘Encoders/Counters’ tab, select encoder index with numerical up-down selector and select appropriate encoder channel. The last step is to check the box ‘Encoder’. 26 www.poscope.com PoKeys user manual To assign a key combination associated with the encoder, use the same procedure as described in the ‘Digital inputs and ouputs’ section. Enabling fast encoders To enable fast encoders, go to menu 'Peripherals > Fast encoders settings’, then check ‘Enable fast encoders’ option. There are additional options for inverting the encoders’ directions, disabling 4x step multiplication and enabling the index signal on pins 9, 11 and 27. If index signal input is enabled, encoder value is automatically reset on low to high index signal transition. Fast encoders inputs are fixed to pins 1-2 for fast encoder 1, pins 5-6 for fast encoder 2 and pins 1516 for fast encoder 3. Enabling ultra-fast encoders To enable ultra-fast encoders, go to menu 'Peripherals > Fast encoders settings’, then check ‘Enable ultra-fast encoders’ option. There are additional options to enable 4x step multiplication and inverting the encoder direction. Digital filter sampling delay slider enables setting the digital filter delay parameter - leftmost position equates to no digital filtering, rightmost position equates to digital filtering with filter delay constant set to 1000 (sampling frequency reduced to less than 25 kHz). Displaying encoder raw values To open encoder raw values dialog, go to Peripherals menu and select ‘Encoder RAW values’. The following dialog below appears. It simply shows the list of all encoders and their current values. In additional column, current encoder speed is displayed. Status of the fast encoders is displayed in green, while the status of an ordinary encoder is displayed in light grey. Inactive encoders are displayed as dark grey boxes. At the bottom of the window, there is a command button that can be used to reset the encoders’ values. 27 www.poscope.com PoKeys user manual Figure 4: Encoders' RAW values 28 www.poscope.com PoKeys user manual 7.4. Pulse engine PoKeys57CNC is a hybrid device between a USB PoKeys, Ethernet PoKeys nad PoKeysCNCaddon. As such, it contains an external pulse generator on-board, which is capable of driving of up to 8 axes controlled by STEP/DIR signals with maximum pulse frequency of 125 kHz. The pulse engine is fully configurable in terms of: - - - Axis switches configuration: each switch (Limit-, Limit+ and Home/Ref) can be independently enabled, inverted and positioned either on dedicated pins (pin value of 0) or standard PoKeys pins that are listed in the device pinout Axis motion control configuration: each axis can be configured to optionally use an internal motion controller in either position or speed mode Homing/referencing procedure: motion of the reference position search can be inverted if home/ref switch is positioned in the positive end of the axis travel. The speed of the homing procedure can be configured in percents of the maximum axis speed. Internal motion controller parameters: such as maximum speed, acceleration and deceleration can be individually configured for each axis. Integrated MPG jog mode: where PoKeys can handle the MPG jogging directly - encoder index and step multiplier can be individually configured Other axis settings: axis enable signals, direction inversion, soft limits, etc. See the description of the Pulse engine status/control dialog on the next page. Figure 5: Pulse engine status/control dialog 29 www.poscope.com PoKeys user manual Pulse engine status/control dialog parts 1. Main Pulse engine settings: a. Enable pulse engine: main switch to enable or disable Pulse engine functionality b. Lock: when Lock is enabled, the main Pulse engine settings and Pulse generator settings are disabled c. Enable safety charge pump output: this option is not available on PoKeys57CNC d. Invert emergency input polarity: PoKeys expects NC (normally closed switch to be used as emergency switch) and HIGH signal state on emergency input indicates an emergency. If NO switch is used, the polarity of the signal must be inverted by selecting this option 2. Pulse generator options: PoKeys57CNC contains an external pulse generator on-board, thus external pulse generator option with ‘Extended IO’ must be selected. Up to 8 axes can be enabled 3. Axis configuration - see next page 4. Pulse engine state display and control: this panel displays current PoKeys Pulse engine state and allows the user to change between the states a. STOP: stopped mode - the Pulse engine is deactivated momentarily and produces no pulses. Transition to STOP mode is instantaneous - if there is any motion being executed, the pulse generation will cease immediately after switching to STOP mode. b. ERR: error mode - if PoKeys detects any event that results in error (emergency stop, limit stop, etc.), this mode will automatically be activated. As STOP mode, the transition is instantaneous c. Homing: in this mode, PoKeys is executing the homing procedure. The selected axes are referenced in regards to the position of Home/Ref switch. PoKeys executes homing procedure in two steps - in first step, course position of the switch is located using faster motion in the negative direction of the axes (unless Homing direction is inverted in the settings). When the switch is located, the fine position of the reference position is located using slower motion in the positive direction of the axis (again, if not inverted in the settings) until the Home/Ref switch is released. d. Running: normal operating mode e. Jogging: jogging mode - in this mode, PoKeys Pulse engine can use the values from the encoders to directly jog the configured axes 5. Enable axis power: these options select, when the axis enable signal is activated (besides in normal operating modes) 6. Save configuration button: after the settings are changes, this button must be clicked to send the settings to device and save them to the on-board non-volatile memory. Since this operation may produce interruptions in the motion, it is suggested to stop any motion before commencing configuration save. 7. Pulse engine testing panel: 8. Auxilary outputs: these can be used to test the on-board auxilary outputs a. Relays 0 and 1 control the SSR outputs b. Relays 2 and 3 control the on-board relays c. OC-outputs control the galvanically isolated open-collector outputs 30 www.poscope.com PoKeys user manual Axis configuration panel This panel contains settings for each axis. Figure 6: Axis configuration panel 1. Limit switch configuration: individual limit switch (on axis positive and negative ends) can be individually enabled and inverted (in NO switches are used). Since PoKeys57CNC uses external pulse generator with extended IO, 0 should be selected as pin number 2. Home/Ref switch configuration: this switch can be configured as a separate switch or shared with either Limit+ or Limit- switches 3. Axis enabled output: pin 0 should be selected in dedicated signal pin on motor connector is to be used. The state of the signal can be inverted if motor drivers require it. 4. Motion configuration: axis direction can be inverted here. Optionally, internal motion controller can be activated, allowing PoKeys device to produce the motion signals based on position or speed reference setup. The ‘Mask enable’ option is for testing purposes and enables third-party software to enable individual axes independently. 5. Homing configuration: use these settings to invert homing direction and set the speed of the motion during homing procedure 6. Motion parameters: use these fields in case that Internal motion controller is enabled to setup the maximum speed, acceleration and deceleration values. When the value is entered into the fields, confirm the value by pressing ‘Enter’ (‘Return’) key - the field will change color from red to white. 7. Soft limits configuration: optionally, soft limits can be configured for each axis. When internal motion controller detects the current position has gone out of these limits, the motion is softly stopped and only motion in the out-of-limit direction is allowed. 8. MPG jog setup: select encoder and multiplier factor to setup direct MPG jogging that is active in Jogging operating mode 9. Copy to all axes: all settings are copied to all other axes by clicking on this button 31 www.poscope.com PoKeys user manual 7.5. Matrix keyboard Matrix keyboard is a set of buttons, connected into a mesh. All buttons in a row share one contact, same goes for each of the buttons in the column. If a button is pressed, a key press is detected with a periodic scanning of each of the rows and columns. PoKeys devices use digital outputs for setting the voltage levels on rows and read column voltage levels using digital inputs that already have internal pull-up resistors, so no external circuitry is needed. PoKeys devices support matrix keyboards of up to 16x8 in size, simpler 3x3, 4x3, 4x4 and others are of course fully supported. Similarly to simple digital inputs, keys of the matrix keyboard connected to the PoKeys device can be configured as USB keyboard keys. Direct mapping, mapping to macro sequence and triggered mapping are all supported. Additional alternate function can be used to assign two different keyboard keys to each of the matrix keyboard buttons. If additional (and freely selectable from the list of digital inputs) Fn+ input pin is inactive, the default function key is used. If the Fn+ key input pin is activated, an alternate function key is used instead of the default. On all devices, the status of key presses of the matrix keyboard can be read using the PoKeys library commands without the need to setup the mapping described above. Figure 7: Standard 4x3 matrix keyboard Figure 8: 4x4 matrix keyboard internal structure PoKeys configuration software usage Before any matrix keyboard configuration can be done, go to ‘Peripherals > Matrix keyboard…’, check the ‘Enable matrix keyboard’ option and select the number of rows and columns. Close the dialog and continue by selecting column and row pins. 32 www.poscope.com PoKeys user manual Figure 9: Assigning row and column pins Matrix keyboard column selection Each free digital input pin can be assigned as matrix keyboard column input. Make sure the selected pin is configured as digital input, then check the ‘Matrix keyboard’ option for the pin and select the appropriate column letter from the list. Matrix keyboard row selection Each free digital output pin can be assigned as matrix keyboard row output. Make sure the selected pin is configured as digital output, then check the ‘Matrix keyboard’ option for the pin and select the appropriate row number from the list. Keyboard mapping configuration Open the ‘Peripherals > Matrix keyboard…’ menu for configuration of the keyboard mapping. Matrix keyboard is schematically drawn in the dialog below. On the right, key mapping settings can be selected. To setup mapping, click on one of the keys in the matrix keyboard drawing and select appropriate key mapping options on the right. To test the matrix keyboard, first make sure that the settings have been saved to device (close the Matrix keyboard dialog and click on ‘Send to device’ button). The matrix keyboard dialog can then be used to test the matrix keyboard – just press any key on your matrix keyboard and the appropriate button in the matrix keyboard drawing will be highlighted. To setup different key presses for ‘key press’ and ‘key release’ events, check ‘Triggered mapping’ option and select different settings for ‘Down key’ (‘key press’ event) and ‘Up key’ (‘key release’ event). 33 www.poscope.com PoKeys user manual Figure 10: Matrix keyboard configuration for a 4x3 matrix keyboard 7.6. Analog inputs Analog input function is only available on pins 41 to 45. These analog inputs can also be freely mapped to any of the 6 joystick axis; X, Y, Z, rotation X, rotation Y and throttle. Analog inputs have a resolution of 12 bits and are sampled at a fixed rate of 10 kHz, then fed through adjustable digital low-pass filter with the following equation 𝑦(𝑘) = 𝑦(𝑘 − 1) ∗ 𝑓𝑖𝑙𝑡𝑒𝑟 1 + 𝑢(𝑘) ∗ 𝑓𝑖𝑙𝑡𝑒𝑟 + 1 𝑓𝑖𝑙𝑡𝑒𝑟 + 1 where y(k) is the output analog value, u(k) is a new A/D sample and filter is a user-adjustable constant. For proper operation of the digital filter, an analog low-pass filter with a cut-off frequency of 5 kHz must be used on each analog input. The following equation gives the relation between value of filter and filter’s cut-off frequency: 𝑓𝑐 = 10 𝑘𝐻𝑧 2𝜋 ∗ 𝑓𝑖𝑙𝑡𝑒𝑟 Sample u(k) is produced according to the following equation 𝑢(𝑘) = 𝑈(𝑘)[𝑉] ∗ 4095 3.3 𝑉 where U(k) (in Volts) is a voltage present on the selected analog input pin. PoKeys configuration software usage To open analog inputs dialog, go to Peripherals menu and select ‘Analog inputs and outputs’. Dialog below appears. To enable display of analog input channel, check the appropriate check box. It is enabled only when the input is set up as analog input. The progress bar displays the current voltage at the pin with the maximum at 3.3V. Below the input selection boxes user can set low-pass filtering for analog inputs. When analog input signal appears to 34 www.poscope.com PoKeys user manual be flickering or jumping due to analog signal noise, move the value for the filter to the right towards label ‘slow signals’ and then press Set button. Figure 11: Analog inputs and outputs dialog 7.7. Joystick mapping Each axis of the PoKeys virtual joystick can be assigned an analog input source. In addition, analog to digital mapping option can be enabled, which allows user to connect an analog joystick to a PoKeys devices and simulate key presses for each direction of the joystick. User can freely select dead band and saturation ranges. Besides mapping the analog inputs to virtual joystick axes, digital inputs (or encoder switching events) can be mapped to any of the 32 virtual joystick buttons (either directly or ‘triggered’) or 4way POV hat selector. The triggered mapping to joystick buttons enables used to select different pins that triggers selected joystick button on off-to-on transition (Down Event) and on on-to-off transition (Up Event). PoKeys configuration software usage Joystick axis and buttons mapping can be setup via Joystick mapping dialog. Go to ‘Peripherals’ and select ‘Joystick settings…’. The dialog on Figure 12 appears. Each axis can be assigned an analog input. In addition, analog to digital mapping option can be enabled. This allows user to connect an analog joystick to a PoKeys devices and simulate key presses for each direction of the joystick. To do so, first check ‘Map to key’ option. Then set the dead band (when input value will be between lower and upper dead band margins, no keys will be activated) using sliders. In the lower part of the window, select the mapping options. 35 www.poscope.com PoKeys user manual For simple direct mapping (pin input status is directly reflected in joystick button status) use the ‘Direct mapping’ option and select pin number to be associated with selected joystick button. If more advanced behavior is needed (joystick button is pressed for a short time only on transitions of pin status), user should select ‘Triggered mapping’ option to select one pin that triggers selected joystick button on off-to-on transition (Down Event) and one pin that triggers this joystick button on on-tooff transition (Up Event). If joystick button mapping is to be used in connection with encoder inputs, use ‘Triggered mapping’ option (encoder’s values cannot be directly translated into direct mapping) and select a pin with the appropriate encoder channel. For example: pins 5 and 6 are set up as digital inputs with encoder (channel A on pin 5 and channel B on pin 6). When pin 5 is selected as Down event pin for joystick Button 2 and pin 6 is selected as Down event pin for joystick Button 3, rotating the encoder in positive direction will trigger joystick Button 2 on each detent. Similarly, rotating the encoder in negative direction, joystick Button 3 will be triggered on each detent. Up Event pin option cannot be used in connection with encoders. Figure 12: Joystick mapping settings 7.8. PWM outputs PoKeys57CNC device supports PWM output function on 4 pins (pins 18, 20, 21 and 22). Different duty cycles can be assigned to each PWM output however, all outputs share the same PWM period. PWM outputs can be easily amplified using an external transistor and used for control of loads with 36 www.poscope.com PoKeys user manual increased current demand - pins with such function embedded are marked as OC (open-collector) in the pinout diagram. PoKeys PWM outputs can also be used to drive various R/C servo motors that accept PWM signal with 50 Hz frequency (20 ms PWM period) and duty cycles between 5 and 10 % (1 to 2 ms). PoKeys devices have an in-built PWM module that operates at a fixed clock frequency (25 MHz). Both the PWM period and the PWM duty cycles must be expressed as number of module clock cycles (i.e. 20 ms PWM period equates to 0.020 x 25 000 000 = 500 000). Figure 13: PWM output PoKeys configuration software usage PoKeys device’s PWM (pulse width modulation) module can be setup via Peripherals > PWM outputs…. Figure 14: PWM outputs settings In this window, user can enter PWM period and set PWM duties for each channel. Channels can be independently enabled or disabled. After a change is made, user must click 'Set values' button or check 'Send to device on change' checkbox. Left position of a slider means 0% and right position 100% respectively. 37 www.poscope.com PoKeys user manual 7.9. LCD PoKeys devices support connecting one alphanumeric LCD module up to a size of 4x20 (4 rows, 20 columns). The selection of the module is limited by support for HD44780 or compatible chipset. Usually these displays come in various sizes - 1/2/4 line with 8/16/20 characters and colors (black letters on green background, white letters on blue background ...). PoKeys57CNC device has a dedicated connector for such LCD displays - see the pinout section of the manual for connector pinout description. Figure 15: Typical 2x16 character LCD LCD display can be used to display various data. A third-party application or a script can execute all supported operations, including LCD initializing, clearing, moving cursor, setting display shifting mode, custom character defining and displaying text. PoKeys57CNC devices by default function in buffered LCD mode. In this mode, any LCD-related command that is sent to PoKeys device is first buffered and when possible, PoKeys device executes the LCD refresh on its own. In this mode, some LCD operations are not operational – cursor movement is controlled by the PoKeys device and cursor move or display commands may not work as expected. If this low-level control is desirable, buffered mode must be deactivated first. In other cases, it is advisable to use buffered mode in order to allow better load balancing in PoKeys devices and in the end obtain greater communication speed. Before LCD initialization, the LCD module size (number of rows and columns) must be specified and appropriate pin assignment (primary or secondary, see the table above) must be selected. Secondary pins must be selected in case of matrix LED display 2 in use. PoKeys configuration software usage Functions of this interface can be tested through PoKeys settings application. Just open Peripherals > Test LCD… and dialog below will appear. 38 www.poscope.com PoKeys user manual Figure 16: Character LCD testing dialog LCD settings In this part, user can set number of rows and columns in the LCD used. Support for LCD can be enabled or disabled also. LCD operations Before user can start using the LCD, LCD module must be initialized. This is done via 'Initialize LCD' button. Button 'Clear LCD' clears LCD display and moves cursor to home position. LCD module is initialized automatically by PoKeys device on device startup if ‘Enable LCD support’ option is enabled. User can also set entry mode settings of LCD module. Cursor can be set-up to move either right (normally) or left after each character displayed. If 'Display' shift is enabled, whole display shifts with every new character displayed. Settings are processed after user clicks button 'Set Entry mode' and work only in ‘unbuffered’ mode described above. Display on/off settings User can set on/off switches for whole display, cursor and cursor blinking. Settings are processed after user clicks button 'Set LCD on/off' work only in ‘unbuffered’ mode described above. Custom characters Simple interface enables to draw up to 8 custom characters. These characters can then be used on display. Selecting 'Live edit' mode will transfer the character each time a change is made to any of the pixels. Character can be previewed via button 'Print', which puts current custom character on the LCD display. The ‘Copy code’ button can be used to export the character data in a form of C-style array, as shown in the table below. 39 www.poscope.com PoKeys user manual LCD custom character editor Produced code unsigned char uCustomChar[8] = { 0x10, 0x1C, 0x04, 0x04, 0x04, 0x04, 0x07, 0x01, }; Move cursor This section enabled user to move cursor to any position on the screen works only in ‘unbuffered’ mode described above. Print text Sends entered text to display module. If advanced characters are needed, enter character code in lower text box and press 'Print character'. 40 www.poscope.com PoKeys user manual 7.10. PoExtBus PoExtBus bus support enables user to add additional ten 8-bit shift registers to add up to 80 additional digital outputs to PoKeys device. Figure 17: PoExtBus outputs chaining PoKeys configuration software usage To set-up and test PoExtBus, open 'Peripherals' > PoExtBus...'. The dialog below (Figure 18) appears. By using mouse left and right clicks, user can turn on or off each of the outputs. Figure 18: PoExtBus setup dialog PoExtBus connector type - Female wire-side connector: Molex 22-01-2055 - Cable contacts: 08-50-0032 (5 pcs needed) - Prepared cables: 88941-0700 (5 pcs needed) 41 www.poscope.com PoKeys user manual 7.11. PoNET PoKeys57CNC device supports PoNET devices (such as kb48CNC CNC keyboard). Multiple PoNET and PoExtBus devices can be linked together. While the PoNET devices and PoExtBus devices share the same PoExtBus/PoNET connector, user should pay attention in connecting devices of both types together (see the schematics below). All PoNET devices must be connected in parallel to each other and directly to the PoExtBus/PoNET connector, while the PoExtBus devices should be connected in series after the PoNET devices, as described below - PoNET devices must be connected in parallel to each other PoExtBus devices must be connected in series There should be no PoExtBus device between PoKeys device and PoNET devices PoExtBus device PoKeys device PoNET device PoNET device PoNET device 42 PoNET device PoExtBus device PoKeys device PoNET device PoExtBus device PoExtBus device PoNET device www.poscope.com PoKeys user manual Adding new devices After connecting new PoNET device, go to ‘Peripherals > PoNET...’. The following dialog will appear Figure 19: PoNET settings dialog with an unconfigured device In order to register new device, double click on the 'Unconfigured device' icon. In the next 10 seconds press any key on the device that is about to be added. If the process is successful, status LED on the device will stop blinking and will be constantly lit. The device will also be listed as in the dialog below: Figure 20: PoNET settings dialog with a successfully configured device 43 www.poscope.com PoKeys user manual PoNET kb48CNC keyboard The device can be virually mapped to PoKeys matrix keyboard. Third party software can set the status of LEDs under the keys, read the light sensor that measure the amount of light in the environment and set the intensity of the LEDs. To map the PoNET keyboard to PoKeys matrix keyboard, initialize the PoNET bus as described above in 'Adding new devices', select the keyboard in the device list and check the checkbox 'Enable mapping to matrix keyboard'. 44 www.poscope.com PoKeys user manual 7.12. Failsafe settings PoKeys devices support the configuration of the failsafe state for the digital outputs, PWM outputs, PoExtBus devices and PoKeys Pulse engine. When the communication with the device is interrupted for longer than a period defined in the failsafe configuration, peripherals listed above enter the failsafe mode, which can be setup in ‘Failsafe settings’ dialog (Peripherals > Failsafe settings…) Peripheral Digital outputs PoExtBus outputs PWM outputs Pulse engine Failsafe setting Active Off / Active On Active Off / Active On Fixed duty cycle in % No setting – Pulse engine enters emergency mode on failsafe activation Figure 21: Failsafe settings dialog 45 www.poscope.com PoKeys user manual 7.13. Peripheral communication protocols I2C protocol The I2C bus was designed by Philips in the early '80s to allow easy communication between components which reside on the same circuit board. Philips Semiconductors migrated to NXP in 2006. The name I2C translates into "Inter IC". Sometimes the bus is called IIC or I²C bus. PoKeys devices support communication with I2C slave devices, connected to the PoExtBus/PoNET connector. As I2C, PoNET and PoExtBus use the same connector, PoExtBus, PoNET and I2C functions are automatically switched by the PoKeys device. Marking the pin closer to the edge of the PoKeys57CNC board as pin 1, the I2C devices should be connected as follows: Pin 1 Pin 2 Pin 3 Pin 4 Pin 5 Power supply 5V Ground Serial data Serial clock Protocol can be tested via PoKeys configuration software. Click on Peripherals > I2C bus test... The following dialog appears. 2 Figure 22: I C protocol test dialog 46 www.poscope.com PoKeys user manual 1-wire 1-Wire is a device communications bus system designed by Dallas Semiconductor Corp. that provides low-speed data, signaling, and power over a single signal wire. 1-Wire is similar in concept to I²C, but with lower data rates and longer range. It is typically used to communicate with small inexpensive devices such as digital thermometers and weather instruments. PoKeys devices support communication with 1-Wire slave devices (without parasitic power supply), connected to the pin 55 with external pull-up resistor (of approximately 5 kΩ). Protocol can be tested via PoKeys configuration software. Click on Peripherals > 1-Wire bus test... The following dialog appears. Figure 23: 1-Wire protocol test dialog 47 www.poscope.com PoKeys user manual 7.14. EasySensors PoKeys57 series devices implement a feature called EasySensors. It is an improvement of the original support for various sensors in PoKeys56 series devices. EasySensors feature allows the user to setup up to 100 sensors on various communication buses (including I2C, 1-wire, DHTxx 1-wire and analog inputs). The feature is accessible in Peripherals > EasySensors menu. EasySensors configuration dialog The main EasySensors configuration dialog contains a list of all configured sensors with corresponding sensor information. Here, the sensory type, reading and refresh rate can be changed. Figure 24: EasySensors configuration dialog The changed sensor entries are marked with red color - in order for the changes to take effect, click on ‘Send to device’ button, which transfers the EasySensors configuration to device (note that this action does not save the settings to device’s non-volatile memory and ‘Send to device’ on main PoKeys configuration window must be clicked to do that). There are 4 types of sensors supported and each type of sensor can be added by clicking a corresponding button at the bottom of the dialog. Scan for I2C sensors This command opens the ‘Add I2C sensor’ dialog, which is automatically populated with detected I2C devices and sensor type suggestions. Sensor type, reading and refresh rate can be changed using the selections on the right part of the diagram. In order to add the configuration of I2C sensor, check the corresponding item in the detected I2C devices list and click on ‘Finish. 2 Figure 25: Scanning for I C sensors 48 www.poscope.com PoKeys user manual Scan for 1-wire sensors The command opens the ‘Add 1-Wire sensor’ dialog that allows the user to select PoKeys pin, where the 1-Wire bus is connected to. By clicking ‘Scan’, PoKeys device scans the 1-Wire bus for devices. The EasySensors 1-wire bus implementation can detect multiple 1-Wire devices on the bus at once and thus simplifying the configuration process. The list of available devices is then shown in the ‘Detected devices’ list (if ‘Hide configured devices’ option is selected, already configured 1-Wire devices are not displayed in the list). On the right side, reading type and refresh rate of the selected sensor can be configured. To add the sensor to the EasySensors list, check the checkbox of the sensor in the list and click ‘Finish’. 2 Figure 26: Scanning for I C sensors Add DHTxx 1-Wire sensor Three types of DHTxx 1-Wire sensors are supported by PoKeys device (sensors differ in temperature and humidity resolution and accuracy). Any of the available PoKeys pins can be selected as DHTxx 1Wire bus, but only one sensor can be connected per pin. Figure 27: Adding the DHTxx 1-Wire sensor Add analog sensor EasySensors feature supports reading of simple analog sensors connected to PoKeys analog inputs. A linear transformation is applied to analog input reading to produce the sensor value. There are two possible ways to set up the sensor 49 www.poscope.com PoKeys user manual a) Using gain and offset: specify the gain and offset characteristics of the sensor. The gain specifies the number of sensor units per 1 V of analog voltage, while the offset specifies the sensor value of analog voltage input of zero. Figure 28: Analog sensor setup with gain / offset option b) Using two point mapping: in this mode, two sensor values with corresponding analog voltage must be entered into the fields provided. Gain and offset of the sensor are automatically calculated. Figure 29: Analog sensor setup with mapping Analog sensors use the following formula to convert the analog input voltage into sensor reading 𝑢 = 𝐴𝐷𝑣𝑎𝑙 ∗ 𝐴𝑔𝑎𝑖𝑛 + 𝐴𝑜𝑓𝑓𝑠𝑒𝑡 4096 where 𝐴𝐷_𝑣𝑎𝑙 is a measurement of the analog-to-digital converter (a value between 0 and 4095), 𝐴𝑔𝑎𝑖𝑛 is gain (32-bit integer number) and 𝐴𝑜𝑓𝑓𝑠𝑒𝑡 is result offset (32-bit integer number). The value of 𝑢 is a integer number that gets divised by 100 for the display (the temperature of 15.58 °C is represented by 𝑢 = 1558. A gain of 330 therefore gives the true voltage on the analog input pin. The analog sensor dialog shows the gain and offset settings in the bottom left corner of the dialog and should not be confused with Gain and Offset setup parameters. 50 www.poscope.com PoKeys user manual List of supported sensors - LM75 temperature sensor for the temperature range -55 °C to +125 °C with the resolution of 0.5 °C. The sensor has configurable address and up to 8 sensors can be connected. - SHT21 temperature and humidity sensor for the temperature range -40 °C to +125 °C with the resolution of 0.01 °C and air relative humidity in range 0 to 100 %. - MCP3425 A/D converter with selectable gain - MMA7660 3-axis accelerometer - BH1750 light sensor - ADS1115 16-bit 4-channel A/D converter with selectable gain (up to 16x) - DS18B20 temperature sensor for the temperature range of -55 °C to +125 °C with the resolution of 0.0625 °C. As each sensor has its own unique sequence ID, up to 10 sensors can be connected to PoKeys. - DS18S20 temperature sensor - DHT11, DHT21 and DHT22 (AM2302) temperature and humidity sensors Figure 30: Thermal image of a temperature sensor being connected directly to a circuit board. The thermal conductivity of the sensor's leads causes the sensor to register higher temperature than the ambient real temperature. Use properly longer connections between sensor and sensor host board for the accurate readings 51 www.poscope.com PoKeys user manual 7.15. Network device functionality PoKeys57CNC device can be connected to Ethernet 10/100 network with standard RJ-45 cable. By default, the device is set to use the DHCP functionality of the network router. User can later turn on or off the DHCP support. If DHCP is not required or available, fixed IP address must be defined for the device. To set the network settings of the device, go to Device menu and click Network device settings... Figure 31: Device network settings The device communicates using TCP and UDP port of 20055. Please ensure the firewall settings allow communication with this port. Also, please make sure that your network card (which you have connected the PoKeys device to) has an IP address assigned with the subnet mask 255.255.255.0 (check it in IPv4 settings in your system). By default, PoKeys device is configured to close the connection with the host after 3 seconds of inactivity. This connection timeout value can be set in the dialog, shown in Figure 31. Device discovery Unless PoKeys device is configured with a fixed IP address or static DHCP lease option is enabled on the router, user has no direct display of what IP the PoKeys device is configured or assigned with. Therefore, PoKeys device feature an automatic discovery mechanism that uses discovery packets sent from software looking for PoKeys device and discovery response packets that PoKeys device constructs as an answer to a discovery. The discovery response packet contains vital PoKeys device information that can be used to identify and find the PoKeys device in the network. In case the DHCP server is not available in the network or if discovery packet was received from different subnet than the one used by PoKeys device, the device will change to a temporary IP address from the same subnet (defaulting to 255.255.255.0 subnet mask) that the request was sent from. This temporary address can be recognized by ending in .250 and should only be used to find a misconfigured device and setup it with proper network configuration. The discovery process can be disabled under Device > Network device settings by clicking ‘Advanced’ button. More information on this mechanism can be found in the Protocol specification document. 52 www.poscope.com PoKeys user manual Default network settings DHCP: Port: Security: enabled 20055 Full access Connecting to device in other network When the device is not detected automatically (either there is a firewall blocking the UDP broadcast messages or the device is not in the same network as a computer), custom IP address of the device can be entered by clicking on the 'Network settings... ' button on the ‘Connect to device’ dialog. The following dialog appears. Figure 32: Additional network settings IP address of the device can be entered in the text box on the right and added to the list by clicking the button 'Add'. The list of additional devices is saved on application exit. 53 www.poscope.com PoKeys user manual Security Due to exposed nature of a network device, an authentication mechanism was implemented in network PoKeys that allows three levels of access rights: - Full access (default): the device is fully accessible from the network Read-only access: unauthorized users are allowed only to fetch a limited set of data from the device, while an authenticated users can acccess all functions of the device Full lock: unauthorised users can not neither read or write to the device. A user password is required to unlock access. The security is set up in PoKeys configuration software – on the Device menu, click Set device security... The password can contain any character and can be up to 32 characters long. Figure 33: Device security settings window 54 www.poscope.com PoKeys user manual Web interface (dashboard) Network PoKeys devices can be monitored through the simple web interface (that is already enabled by default). Figure 34: PoKeys device web interface The interface can be disabled or configured in dialog accessible via menu Device->Web interface configuration. The following dialog appears General settings Dashboard items list Web users configuration and selection Dashboard item configuration Figure 35: Web interface settings – Dashboard configuration The dialog presents the following three options in the upper left corner: - Disable web interface: check this field to disable web interface. Allow anonymous access to dashboard and I/O status: if this field is checked, users can access web interface directly without entering user name and password. 55 www.poscope.com PoKeys user manual - Allow toggling outputs via web interface: if this field is checked, users can toggle the pins that are setup as outputs. If this field is unchecked, users are only presented with the status of each pin. Dashboard items configuration Up to 100 dashboard items can be configured. In order to add a new item, click on ‘Add new’ and enter the item information in the fields below (‘Selected item’ settings). Figure 36: Dashboard item configuration The following settings are available for each item: - - - - Item caption: a string of up to 13 characters describing the item (note: some web services have limitations on what characters can be used - the software will provide you with a warning if incorrect characters are used) Data source: select the data source from available sources (digital inputs or outputs, PoExtBus outputs, Sensors, digital counters, PoIL shared slot data) with respective index of the item from the second list Display type: there are different display type options available based on the data source type. The digital signals can be represented by ON/OFF value with optional On/Off or On/Off/Toggle buttons. The (analog) value signals can be represented by numeric value display with optional bar graph. The numeric value can be mad editable - double-click on the displayed value shows an editor box, that allows the user to enter a new value, which is sent back to device (for use with PoIL shared data values). Data unit: the PoKeys device comes preconfigured with a variety of data units. If the desired unit is missing from the list, up to 20 custom units can be configured. Min/max value: use the minimum and maximum value boxes to set the values for the bar graph boundaries. Access rights: select users from the list that should have access to the selected item. Custom unit editing PoKeys device contains 20 custom units that allow the user to setup additional units if needed. Since the units are displayed on a dashboard in a web browser, HTML code for the unit can be entered, allowing different text formatting. 56 www.poscope.com PoKeys user manual Figure 37: Custom unit editor Managing the web user accounts The dashboard configuration dialog contains a list of available users. To edit the user, double-click on the entry in the list - a ‘User account’ dialog will pop up, allowing the changes to user name and password. By default, PoKeys contains a user named ‘Admin’ with password set to ‘root0’. Both the username and password of this user can also be changed. Usernames and passwords can be configured for up to 4 users with the length of each limited to 8 (ASCII) characters. Figure 38: Editing user account Accessing the dashboard items data The information on dashboard items data and their values can be accessed by fetching the following files from the device: - devStat.xml: contains values of all digital inputs and outputs, encoder values, analog inputs, sensors, PoIL shared data values and digital counters 57 www.poscope.com PoKeys user manual - devData.xml: information on the PoKeys device (network configuration and some other device data) sensorList.xml*: contains information on dashboard items configuration and value sensorList.json*: same as above, but in json format setS.html*: is used to change the sensor value setDO.html: is used to change digital output value The setS.html and setDO.html have the following syntax http://<IP address>/setDO.html?Pin=<Pin ID>&State=<0/1/T>&u=<Username>&p=<Password> http://<IP address> /setS.html?Sensor=<Item ID>&State=<Value>&u=<Username>&p=<Password> The <Pin ID> is 1-based PoKeys pin index (same as indicated on the device), while <Item ID> is 0based dashboard item index of the current user. Modbus PoKeys57CNC device supports slave (server) operation of Modbus TCP communication protocol. Modbus TCP compatible devices on the network can read the values from the device and set the outputs. To elevate the security, user can define which peripherals are accessible via Modbus TCP. Modbus TCP uses TCP protocol on port 502 (default), which can be changed in Modbus settings (accessible from the menu Device – Modbus configuration...). The Modbus TCP connection is disconnected after 3 seconds of inactivity (this default value can be changed in the Modbus settings). Discrete inputs/outputs Supported operations: 0x01: Read coils 0x02: Read discrete input 0x05: Write single coil 0x0F: Write multiple coils Address (0-based) 0-54 100-126 (100-149 on PoKeys57 series) 200-263 Access (R – Read, W – Write) R/W R Description 55 pin inputs/outputs Sensor OK statuses R/W 1000-1127 1400-1527 1600-1727 2000-2079 2000 2001 ... 2079 R W R/W R/W PoIL shared data (binary data) overlapped with 32-bit PoIL shared data at 1000-1127 (16-bit) Matrix keyboard inputs I2C Matrix keyboard LED LED matrix PoExtBus Device 10 – Output H Device 10 – Output G 58 Device 1 – Output A www.poscope.com PoKeys user manual Registers Supported operations: 0x03: Read holding register 0x04: Read input register 0x06: Write single register 0x10: Write multiple registers Address (0-based) 0-1 Access (R – Read, W – Write) R 10-16 20-45 R RW Description Serial number of the device (PoKeys57 only) Analog inputs Encoder counter values (lower 16bit) Digital counter values PWM PWM period (MSB first) PWM duty1 (MSB first) – pin 22 100-154 RW 200-213 RW 200,201 202,203 ... 212,213 300-304 RW 400-453 (400-499 on R PoKeys57 series) 500-579 RW 590 W 591 W 592 593 600 700-751 W W R R[W] 800-909 RW 1000-1127 RW PoExtBus channel mapping: Address (0-based) Register description 300 A B C D E F Device 10 301 A B C D E F Device 8 302 A B C D E F Device 6 59 PWM duty6 (MSB first) – pin 17 PoExtBus Sensors (32-bit values, LSB first) LCD buffer LCD configuration (0=disabled, 1=primary or 2=secondary) - writing to this register will re-init and clear the LCD Number of rows (lower byte) and number of columns (upper byte) of the LCD module Not used Clear LCD (both bytes = 0xAA) Tick counter (lower 16-bit) Digital encoder values (32-bit values, LSB first) - any write to these registers causes the reset of the encoder value to 0 Digital counter values (32-bit values, LSB first) PoIL shared data (32-bit, LSB first) G H A B G H A B G H A B C D E Device 9 C D E Device 7 C D E Device 5 F G H F G H F G H www.poscope.com PoKeys user manual 303 A B 304 A B 10 F 9 G C D E Device 4 C D E Device 2 F G H A B F G H A B 8 H 5 C C D E Device 3 C D E Device 1 F G H F G H where 15 A 14 B 13 C 12 D 11 E Device 10 7 A 6 B 4 D 3 E 2 F 1 G 0 H Modbus word bit PoExtBus device bit mapping Device 9 Figure 39: Modbus configuration 60 www.poscope.com PoKeys user manual Reporting data to network server with PoKeys57CNC device PoKeys57CNC devices can automatically report sensor values to various network servers using the HTTP POST, HTTP PUT or text-only protocols. To use this reporting feature, user must specify reports type (RAW, UDP, Xively, Standard HTTP POST/PUT or custom), server IP, server port number and update rate. Custom report type The request header is constructed of two parts – HTML header and data header, divided by double new line character (\n). Example header (Xively.com web service): PUT /v2/feeds/62592.csv HTTP/1.1 Host: api.xively.com X-ApiKey: CAb3XX634daSAKxZc3M0M3I1NWVZVT0g User-Agent: PoKeys56E Content-Type: text/csv Content-Length: 010 Connection: close Test1234,-15000.00 The HTTP header without 'Connection' and 'Content-length' tags must be provided by the user The 'Connection' and 'Content-length' tags are automatically inserted by the PoKeys device Data is inserted at the end of the packet The above example is specified as PUT /v2/feeds/62592.csv HTTP/1.1 Host: api.xively.com X-ApiKey: CAb3XX634daSAKxZc3M0M3I1NWVZVT0g User-Agent: PoKeys56E Content-Type: text/csv The extra new line at the end is essential. 61 www.poscope.com PoKeys user manual More customized header: POST /myScript.php HTTP/1.1 Host: api.xively.com User-Agent: MyCustomDeviceAgent Content-Type: text/csv Content-Length: 010 Connection: close MyData: Test1234,-15000.00 The HTTP header without 'Connection' and 'Content-length' tags must be provided by the user The 'Connection' and 'Content-length' tags are automatically inserted by PoKeys device The above example must be specified as POST /myScript.php HTTP/1.1 Host: api.xively.com User-Agent: MyCustomDeviceAgent Content-Type: text/csv MyData: Again, an extra new line character in fifth line is essential. Total length of final header and data is limited to 350 bytes. Setup for Xively web service Xively web service is an on-line database service allowing users to connect sensor-derived data (eg. energy and environment data from objects) to the Web and to build their own applications based on that data. PoKeys57CNC devices feature a direct support for the Xively web service. To configure PoKeys device for Xively, follow these steps: 1. Sign-up for a free account at http://xively.com/ 2. Navigate to Develop and create a new private device 3. Under the created device information, you can find ‘Feed ID’ and ‘API key’ for your newly created device, as shown in the figure below. 62 www.poscope.com PoKeys user manual 4. Open Device > Server reports configuration. Check ‘Xively web service’ option. 5. Enter your Xively API key and Feed ID, created in step 3, leave other fields with default values Your Xively API key Your Xively Feed ID Figure 40: Reports server settings for Xively service 6. Select the update rate on the right 7. Click Send to device button. If you wish to save the settings to non-volatile memory, click ‘Send to device’ on main PoKeys screen. 8. Go back to Device > Web interface settings to edit the dashboard items. Define entries as described in the ‘Web interface’ chapter of this manual. To enable uploading of the 63 www.poscope.com PoKeys user manual dashboard item to the Xively service, select ‘Server reports’ as the user. The ‘Item caption’ field is used to identify the datastream in the selected Xively feed. Make sure that item caption does not contain any invalid characters for Xively channel name (+, -, _, letters and numbers are allowed) Figure 41: Item configuration for the Xively service 9. Save the settings again by clicking 'Send to device' button. 10. Make sure the PoKeys device has properly configured network settings and that it is connected to the internet 11. After a update interval, check the status of the Xively updates in the Xively 'Develop' page 64 www.poscope.com PoKeys user manual 12. Open your Xively feed by clicking the Feed URL – you should see the recorded data Figure 42: Xively feed overview page Setup for standard HTTP POST or PUT data upload Let's assume that the user wants to send sensor data to his server script that accepts POST method for data upload. The user's server script is available at the address www.userdomain.com/PoKeysDataUpload.asp. The user also wants that the data in the POST stream to have the HTTP type of 'text/plain' and preceded with the string 'MyData: '. The data should be transferred every 10 minutes. The settings are displayed in Figure 43. To setup PoKeys to use these settings, the following steps must be taken (enter text without ' quotes): 1. 2. 3. 4. 5. 6. 7. 8. 9. Open Device > Server reports configuration. Select 'Standard HTTP request’ and check HTTP POST option Enter 'www.userdomain.com/PoKeysDataUpload.asp' in the Destination field Enter 'text/plain' in the 'Content-type' field. Enter 'MyData: ' in the 'Data header' field Enter the server's IP address and port number in the fields below. Enter 600 in the update time field Click Close and click Send to device button. Go to Device > Web interface settings and define entries as described in the ‘Web interface’ chapter of this manual. To enable uploading of the dashboard item to the web server, select ‘Server reports’ as the user. The ‘Item caption’ field is used to identify the datastream. 10. Save the settings again by clicking 'Send to device' button. 11. Make sure the PoKeys device has properly configured network settings and that it is connected to the internet 65 www.poscope.com PoKeys user manual Figure 43: Example of HTTP POST service setup 66 www.poscope.com PoKeys user manual 7.16. Changing User ID number Users can freely assign their own User ID number that represents a specific PoKeys device (enables distinguishing between different PoKeys devices in case there is more than one connected to a single host PC). To change the User ID number, go to ‘Device’ > ‘Change user ID’ menu. Simply enter any number between 0 and 255, and click the 'Change user ID' button. Figure 44: Device user ID dialog 7.17. Saving current configuration to file To save the current configuration to a file, go to ‘File’ > 'Save' menu and select a new filename. To reload a saved configuration from a file, go to ‘File’ > ‘Open’ menu and select the appropriate file. To transfer new settings to the device, click on the ‘Save to device’ button. 7.18. PoIL core functionality PoKeys57CNC contains PoIL core that is fully compatible with other PoKeys devices. Read the separate PoIL core documentation for more information. Due to the omission of the 3V lithium backup battery, PoKeys57CNC does not support value retention in case of power failure. 67 www.poscope.com PoKeys user manual 8. Device recovery mode If configuration editor cannot be used to reconfigure the device, use the following steps to start the device in the recovery mode. Recovery mode can be used to clear the configuration or update the firmware. 1. Disconnect PoKeys57CNC device from USB and remove power supply 2. Locate LCD connector on the PoKeys57CNC device and short the pins 1 and 3 as shown below 3. Reconnect the PoKeys device to USB (or reconnect power) 4. Green status light should start flashing rapidly and PoKeys device will connect in recovery mode 5. Open PoKeys configuration application 6. PoKeys configuration application should detect PoKeys57CNC device in recovery mode. a. To reset the device configuration, use the option ‘Clear settings’. By clicking this button and confirming your decision on the next dialog, settings will be erased. b. To recover from bad firmware update, click ‘Recover’. 7. After completing the operation, unplug PoKeys device and remove the short from the LCD connector 8. If resetting the configuration, ensure the device is properly cleared – replug PoKeys57CNC device, connect to it and execute Device > Clear settings in device. 68 www.poscope.com PoKeys user manual 9. Frequently asked questions What software must be installed to operate the device? On first use or when reconfiguring the device, the supplied software must be installed. If USB connection is to be used, device driver must be used that should be automatically installed by the setup package. Can I use both USB and Ethernet connections? Yes, both USB and Ethernet connections can be connected at the same time, but USB connection will have a priority over Ethernet. Windows can not find drivers for PoKeys57CNC device The drivers should automatically be installed by PoKeys setup package. If this is not the case and Windows reports unknown device, install the drivers manually by instructing the Windows device setup wizard to look for drivers in PoKeys installation folder (C:\Program Files\PoLabs\PoKeys\ by default). I misconfigured the device and device no longer responds. What can I do? If you misconfigured the device in such a way that configuration utility cannot be used to repair the configuration, see the section ‘Quick resetting the device configuration’ in this manual. There is spontaneous triggering of some of the pins. What is wrong? Although the device implements basic noise filtering on the digital inputs, long wires between PoKeys device and switches can cause spontaneous triggering if those wires are located near high-power electrical wiring. Use twisted pair wires, shielding and try to route the signal wires away from power supply wires. The connection with the PoKeys device cannot be established with 10BASE-T router Please check that you are using proper cable that is supported by 10BASE-T standard. The following diagram shows the correct wiring for different connection standards. (source: http://www.okidensen.co.jp/en/prod/cable/lan/img/cate6_n_fig05.gif) 69 www.poscope.com PoKeys user manual 10. Errata information This section describes special limitations of the device. PoKeys device resets when external power supply is applied or removed If PoKeys device is connected to USB, the device resets when external power supply is either applied or removed. 70 www.poscope.com PoKeys user manual 11. Grant of license The material contained in this release is licensed, not sold. PoLabs grants a license to the person who installs this software, subject to the conditions listed below. Access The licensee agrees to allow access to this software only to persons who have been informed of and agree to abide by these conditions. Usage The software in this release is for use only with PoLabs products or with data collected using PoLabs products. Copyright PoLabs claims the copyright of, and retains the rights to, all material (software, documents etc) contained in this release. You may copy and distribute the entire release in its original state, but must not copy individual items within the release other than for backup purposes. Liability PoLabs and its agents shall not be liable for any loss or damage, howsoever caused, related to the use of PoLabs equipment or software, unless excluded by statute. Fitness for purpose No two applications are the same, so PoLabs cannot guarantee that its equipment or software is suitable for a given application. It is therefore the user's responsibility to ensure that the product is suitable for the user's application. Mission Critical applications Because the software runs on a computer that may be running other software products, and may be subject to interference from these other products, this license specifically excludes usage in 'mission critical' applications, for example life support systems. Viruses This software was continuously monitored for viruses during production, however the user is responsible for virus checking the software once it is installed. Support No software is ever error-free, but if you are unsatisfied with the performance of this software, please contact our technical support staff, who will try to fix the problem within a reasonable time. Upgrades We provide upgrades, free of charge, from our web site at www.poscope.com. We reserve the right to charge for updates or replacements sent out on physical media. Trademarks Windows is a registered trademark of Microsoft Corporation. PoKeys, PoKeys55, PoKeys56U, PoKeys56E, PoScope, PoLabs and others are internationally registered trademarks. support: www.poscope.com 71 www.poscope.com