1
Microfile MF-PRO
DOCUMENT IMAGING AND MANAGEMENT SOFTWARE
PROFESSIONAL EDITION
User’s Manual
Copyright © MicroPal Systems. All rights reserved.
MicroPal Systems makes no warranty of any kind with regard to this material, including, but not
limited to, the implied warranties of merchantability and fitness for a particular purpose. MicroPal
Systems is not liable for any errors contained herein or incidental or consequential damages in
connection with furnishing, performance or use of this material.
All rights reserved. No part of this publication may be reproduced by any means without written
permission from MicroPal Systems. Making copies of any part of this book (or the accompanying
software) for any purpose other than for your own personal use is a violation of United States
copyright laws and International treaty. No part of this document may be photocopied, reproduced or
translated to another language without prior written consent of MicroPal Systems.
The information contained in this manual is subject to change. Revisions to this manual or new
editions may be issued as deemed necessary by MicroPal Systems. The information herein is
believed to be, and is presented as being, accurate in all respects. However, MicroPal Systems
cannot assume any responsibility or liability for any consequences resulting from the use or misuse
of the software or the manual.
Copyright Statement
This document contains proprietary information which is protected by copyright. All rights are
reserved. It is a criminal offence, under applicable copyright laws, to make unauthorized copies of
copyright protected material, including computer programs.
Trademarks
“MicroPal” and “MF-PRO” are trademarks of MicroPal Systems. All other companies and all other
product names identified in this book are trademarks or registered trademarks of their respective
companies. They are used in this book in editorial fashion only. No such use, or the use of any
trade name, is intended to convey endorsement or other affiliation with this book or MicroPal
products.
MICROPAL SYSTEMS
Address:
324 S. Diamond Bar Blvd. #618, Diamond Bar, CA 91765, USA
Tel: 909-860-8001
world wide web: http://www.micropalsystems.com
e-mail: [email protected]
[email protected]
________________________________________________________________________________
1
MF-PRO License Agreement
This software is licensed to you, the end user, under the following terms and conditions:
1.
The 'MF-PRO' programs (hereafter called The Software) are copyrighted by MicroPal Systems.
2.
You may:
(a) Install The Software for a one-time, 30-day trial period onto any computer.
(b) Use the installed files of The Software after 30-days only on licensed computers;
(c) Make one additional copy of The Software for archive and back-up purposes;
3.
You may not:
(1) Copy or reproduce any part of The Software by any means except as permitted by This
License;
(2) Rent or lease The Software to another party;
4.
In no event will MicroPal Systems be liable for any direct loss or other indirect, special,
incidental, or consequential damages resulting from the use of The Software.
5.
The only limited warranty offered by MicroPal Systems is that if you discover physical defects in
the media on which The Software is distributed, MicroPal Systems will replace the media,
provided you return the defective media postage prepaid and with proof of purchase, within
thirty days from date of purchase.
6.
In any event, the maximum liability of MicroPal Systems shall not exceed the total amount
originally paid for purchase of The Software.
7.
This License shall continue for as long as you use The Software. However, it will terminate if you
fail to comply with any of its terms or conditions. You agree, upon termination of This
License, to destroy all copies of the Software. The limitations of warranties and liability set
out above shall continue in force even after any termination.
If you do not agree with these terms and conditions, promptly return the unopened software to your
dealer for a refund.
2
THANK YOU FOR SELECTING MICROFILE MF-PRO!
The uses for MF-PRO are limited only to your imagination and will make the work of organizing all
your paper information an easy task. Compatible with most Twain scanners, MF-PRO allows you to
scan, store and retrieve digitized information easily, helping to eliminate the clutter normally
associated with typical paper filing and storage. MF-PRO can even work with your existing OCR
program and fax card to further enhance your document management efficiency.
Having adapted a familiar database approach, MF-PRO provides the greatest flexibility and ease-ofuse for organizing your information without the restrictions of conventional drawers and filing cabinets
which other software programs often try to imitate.
The five main screens, or work tabs, "BROWSE," "Detail," "Image," “Text” and “Attached,” make it
easy to enter information, search, find, view, print and fax saved documents. MF-PRO's powerful,
built-in search engine makes for quick retrieval of any data entered into its database.
Whether saving images directly from a disk, hard drive or acquiring them from your scanner, the
stored images are highly compressed to minimize disk usage while still maintaining the best possible
quality for future viewing and printing.
A few practical applications for business where MF-PRO could prove beneficial:
• Product literature & price lists
• Vehicle maintenance records
• Income tax records
• Personal work files
• Invoice & Purchase Order records
• Project documents
• Legal contracts
• Insurance policies
• Customer or Case files
• Attorney case files
• Sales reports
• Medical history files
• Expense receipts & reports
• Accounting files
• Payroll records
• Annual reports
• Tax records
• Specification sheets
• Property maintenance receipts
• Job resumes files
• Property improvement records
• Personnel files
• Newspaper and magazine articles
• Mortgage/loan applications
3
Description of Features for MF-PRO:
•
•
•
•
•
•
•
•
•
•
•
•
•
•
•
•
•
•
Introductory Quick Tour- Upon starting MF-PRO, you can choose to start the Quick Tour which
gives a brief overview of the program’s layout and tool bar functions.
Use preconfigured databases or customize with easily definable field names.
The powerful built-in search engine allows for selections of many different search criteria, making
the retrieval of any saved document quick and easy.
Supports Twain compliant scanners (v16. or higher) and OCR programs.
Supports interface between most fax cards and third party software.
Built-in image enhancement tools and filters, i.e., sharpen, rotate, contrast, invert, etc.
Supports direct importing of graphics images, i.e., .JPG, .PCX, .BMP, .TIF, etc., into a MF-PRO
database (.DBB) record.
Build custom keyword lists on-the-fly or create a predefined list.
Pre-defined database templates.
Ability to modify database structure after creation.
Unlimited number of database (.DDB) files.
Supports up to 500 pages per document record.
Supports multiple databases opened at one time.
Network & multi-user supported.
File security & log-on/off tracking.
Advanced search capabilities.
ATTACHED TAB for attaching non-image files, such as AutoCAD files and MS Office files.
Supports multiple page scans.
4
TABLE OF CONTENTS
1. About Microfile MF-PRO................................................................................................................... 1
1.1
System Requirements........................................................................................................... 1
1.2
MF-PRO Installation Procedure ............................................................................................ 1
2. Pull-Down Menu Description ........................................................................................................... 9
2.1
“FILE” pull-down menu.......................................................................................................... 9
2.2
“EDIT” pull-down menu ......................................................................................................... 9
2.3
“DOCUMENT” pull-down menu............................................................................................. 11
2.4
“IMAGE” pull-down menu...................................................................................................... 13
2.5
“ATTACHED” pull-down menu .............................................................................................. 21
2.6
“OPTIONS” pull-down menu ................................................................................................. 22
2.7
“SECURITY” pull-down menu ............................................................................................... 28
2.8
“WINDOWS” pull-down menu ............................................................................................... 32
2.9
“HELP” pull-down menu ........................................................................................................ 32
3. Using MF-PRO................................................................................................................................... 35
3.1
How to create a Document Database (.DDB) file.................................................................. 35
3.2
How to open an existing Document Database (.DDB) file..................................................... 36
3.3
Using the BROWSE TAB screen .......................................................................................... 37
3.4
Create a new document records ........................................................................................... 37
3.5
Using the DETAILS TAB screen ........................................................................................... 38
3.6
Using the IMAGE TAB screen............................................................................................... 39
3.7
About scanning ..................................................................................................................... 41
3.8
Viewing and enhancing a document image........................................................................... 41
3.9
Using the TEXT TAB screen ................................................................................................. 42
3.10 Using the ATTACHED TAB screen ....................................................................................... 43
3.11 Searching for a document within a database ........................................................................ 44
3.12 Printing a document .............................................................................................................. 45
3.13 Cropping an image................................................................................................................ 45
3.14 Sorting document records ..................................................................................................... 45
3.15 Saving document records ..................................................................................................... 46
3.16 Archiving a Document Database file ..................................................................................... 47
3.17 Changing the order of a multi-page document record........................................................... 48
3.18 Adjust brightness and contrast.............................................................................................. 48
3.19 Gamma correction................................................................................................................. 48
3.20 Color depth conversion ......................................................................................................... 48
3.21 Rotating images .................................................................................................................... 49
3.22 Resizing images.................................................................................................................... 49
3.23 Links to other software .......................................................................................................... 50
3.24 Modify Keyword Lookup Tables ............................................................................................ 50
3.25 TEXT TAB screen ................................................................................................................. 51
3.26 Faxing documents................................................................................................................. 51
3.27 Repairing databases ............................................................................................................. 51
4. MF-PRO Q&A ................................................................................................................................... 53
5
1. About Microfile MF-PRO
Microfile MF-PRO (MF-PRO Professional Edition) is the smart way to manage all your paper
documents easily and efficiently.
Like microfilm, MF-PRO software allows you to store vast amounts of documents efficiently, avoiding
the clutter of paper storage. But better than microfilm, MF-PRO allows you to retrieve your
documents quickly and easily for viewing, printing and faxing right from your computer, thus
improving the efficiency of your business.
Use your scanner to scan in your original documents, converting them into digital images.
Alternatively, you can also import supported image formats directly into MF-PRO from a hard drive or
floppy disk. With MF-PRO, you can even attach video, audio or most any digital file directly to a
document. With an optional viewer, you can also view attached AutoCAD engineering files.
All of your important information can be stored in either standard or customized MF-PRO databases,
on a hard disk, or other backup media. When necessary, you can add or remove pages from your
documents. Should you need to view, print or fax your stored information, MF-PRO's powerful search
engine will quickly locate the requested file from within your database with just a few keystrokes.
1.1 System Requirements
To use MF-PRO you will need the following hardware and operating system:
• An IBM PC or equivalent computer with a Pentium II or faster processor.
• Microsoft Windows XP or newer operating system.
• At least 128 MB of RAM.
• At least 10MB of free space on your hard drive disk for the program only.
• A mouse or other pointing device supported by Windows.
• A TWAIN compliant scanner (TWAIN version of 1.6 preferred. If needed, contact your scanner
manufacturer for an updated driver).
1.2 MF-PRO Installation Procedure
Microfile MF-PRO 3.0 is a 32-bit Windows application, so you must have Windows 98 or newer
Windows version installed on your client computer (workstation PC) as your current operating
system before proceeding.
There are two separate steps for using the MF-PRO software:
1.) Install for use as a 90-day trial.
2.) Install for use as a full-version.
All workstations must first have the MF-PRO software installed from this CD-ROM as a 90-day
trial before upgrading to a full version. (Normally no reinstallation is needed.)
1.2.1. Install for use as a 90-day trial
6
Insert the MF-PRO CD-ROM into your drive, run SETUP.EXE and follow the screen
prompts as they appear from the "Installation Wizard."
Select the Windows "START" button on the lower left-hand of the screen and click on the
"RUN" to start the installation procedure.
In the "Open" command line type: x:\SETUP.EXE
Replace the letter "x" with the letter that identifies your CD-ROM drive.
Follow the screen prompts that walk you through the various setup screen steps.
The setup screens are briefly described below:
1.2.1.1. Define a path, or use the default directory C:\Program Files\MFPRO to save the software's
PROGRAM FILES (client) to your computer, then press the NEXT button.
Figure 1. “Define path to MF-PRO Program Files.”
1.2.1.2. Define a path for the software's SYSTEM FILES to reside on your server which can be
accessed by all other network workstations using MF-PRO, (UNC formats are acceptable if
your network supports them).
2
Fig. 2 “Define path to MF-PRO System Files on server.”
Note: If you are a single user (non-network), use the default path C:\Program Files\MFPRO or use
the same path as previously defined in step 1.2.1.1. for the location of the PROGRAM FILES. If you
are using MF-PRO in a network, be sure to store your document database files on the server.
1.2.1.3.1.
Enter the full name of your company.
1.2.1.3.2.
The "Welcome to MF-PRO" screen should appear prompting you to enter a User Name
and Password for the Administrator account. Try to enter a user name that you will be
using for registering the software. This will avoid having to re-install MF-PRO after
evaluation.
3
Fig. 3 “New Administrator account setup.”
1.2.1.5. After the User Name and Password has been configured, you are now ready to use MFPRO in the 90-day trial mode. The initial password is set to DEMO that you can change later
from the MF-PRO Security menu. Note that passwords are case sensitive.
1.2.1.6. Start the program by selecting the MICROFILE MF-PRO from the program group and enter
the User Name and Password. Upon startup, the "Trial Screen" is displayed indicating
status of remaining days left for the trial period, as well as your unique 10 digit HOST ID and
12 digit LICENSE CODE, both are alphanumeric and required when applying for fullversion upgrades or additional user licenses. (It’s very important to keep these numbers in a
safe place for future reference)
1.2.1.7. The Quick Tour window is displayed upon MF-PRO startup. It goes through a brief
overview of the program features and can easily be disabled by unchecking the "Always run
Quick Tour on startup" box.
1.2.1.8. Upgrade to full-version
In order to upgrade to a full-version or purchase additional user licenses, you need to
submit the registration information to us via your dealer. You can fill out the registration form
by selecting “Register MF-Pro” from the Help menu of the main screen.
1.2.1.9. The HOST ID number* (10 alphanumeric digit)
1.2.2.0. LICENSE CODE number* (12 alphanumeric digit)
4
1.2.2.1. The serial number as shown on the “S/N Label” located on the CD-ROM sleeve or jewel
case.
Fig. 4 “Trial Version screen.”
*These numbers are displayed on the “Trial Screen” and should only be obtained from the
designated Administrator’s workstation, also referred to as the SETUP CONTROLLER, where all
future upgrades will be installed from.
1.2.2.2. Upon verification of your submitted HOST ID and LICENSE CODE numbers, MicroPal will
generate a new SYSTEM KEY and LICENSE CODE numbers to unlock the MF-PRO
software and allow the installation for the appropriate number of user licenses onto your
network system.
IMPORTANT: Keep the Administrators HOST ID and LICENSE CODE, as well as the
supplied SYSTEM KEY and LICENSE CODE numbers in a safe place for future reference.
1.2.2.3. From the Administrator workstation (SETUP CONTROLLER), which was previously defined
in step 1.2.1.4., select Microfile MF-PRO System Manager from the Microfile MF-PRO
Program Group.
5
1.2.2.4. Enter the Administrator User Name and Password, as defined in step 1.2.1.4.
Fig. 5 “User name and password screen.”
1.2.2.5. The MF-PRO System Manager will be displayed.
1.2.2.6. Click on the SYSTEM SETUP KEY button to install the SYSTEM KEY number, which was
previously obtained from MicroPal Systems. If a proper key number was entered and
accepted, a message of SYSTEM KEY ACCEPTED will be displayed. Your trial version for
the Administrator workstation has now been activated for full version use on this network
only.
1.2.3. Adding User Licenses to other workstations
1.2.3.1 From the Administrator's workstation (which is also known as the SETUP CONTROLLER),
as previously defined in step 1.2.1.9. ~ 1.2.2.2, select the Microfile MF-PRO System
Manager from the Microfile MF-PRO Program Group.
Fig. 6 “Select Microfile MF-PRO System Manager from Program group.”
1.2.3.2. Enter the Administrator User Name and Password, as defined in step 1.2.1.4.
6
1.2.3.2.1.
The MF-PRO System Manager will be displayed.
Fig. 7 “MF-PRO System Manager screen.”
1.2.3.4.
If you have purchased more than one user license, click on the LICENSE UPGRADE
button to install the License Code number which was obtained from MicroPal Systems.
After entering the code and clicking the OK button, your MF-PRO System Manager
screen should display the number of user licenses you have purchased for your network
system next to your License Code number near the top of this screen.
7
1.2.3.5. To activate the other workstations to use MF-PRO in full version on the network, first install
the MF-PRO software as a trial version, following all steps in section 1.2.1.1. through
section 1.2.1.5. for each network workstation that has purchased a license. Be sure that the
SYSTEM FILES in step 1.2.1.2 points to the same/equivalent location on the server for the
system files as originally installed on the Administrator workstation. For details about
mapping a folder on the server to a drive letter on the local computer, please refer to
Windows documentations.
1.2.3.6. Go back to the Administrator's workstation (the SETUP CONTROLLER) and open the
Microfile MF-PRO System Manager, and click on the RUN SETUP CONTROLLER UTILITY
button. Leave this screen running as you go to the other individual workstations to perform
the final steps, 1.2.3.7. & 1.2.3.8. to register their HOST ID to the SETUP CONTROLLER.
Fig. 8 “Setup Controller Utility.”
1.2.3.7. From the remote user workstation, select the Microfile MF-PRO System Manager from the
Microfile MF-PRO Program Group. Enter the appropriate administrator User Name and
Password.
1.2.3.8. Click on the REGISTER HOST ID TO SYSTEM button and enter a name assigned to this
workstation. Upon completion, this workstation should now be allowed access to the MFPRO database.
IMPORTANT: It is vital that the SYSTEM ADMINISTRATOR take proper care in the setup of users
and their access rights to each database in order to protect the integrity and security of the data.
8
2. Pull-Down Menu Descriptions
2.1. “FILE” pull-down menu
Open Document Database...
(CTRL+O)
Opens a saved MF-PRO Document Database (.DDB) file.
Create New Document Database...
Creates a new document database (use a standard or custom template).
Close Document Database...
Closes the currently open document database.
Delete Database...
Allows you to delete a MF-PRO database and all its associated images.
Print...
Goes to the Print dialog where you can select print options for printing your document.
Fax…
Opens a menu selection of currently installed print drivers. Select the appropriate fax driver to print
your document to the fax card.
NOTE: Between the Fax and Exit selections is where a list of the last five document databases
opened will be displayed. Click on anyone of them to reopen that particular document
database.
Exit...
Closes and exits the MF-PRO program.
2.2 “EDIT” pull-down menu
Undo… (Undo Image… displayed from within the Image tab screen)
9
Undoes your last action. This will vary depending on what Tab you are using. If you are in the
BROWSE or DETAILS TAB it will undo the last change made to the text. If you are in the Image
tab it will undo the last change made to the image.
Tip: You can also abandon all the changes you have made to a document by moving off the
record, and when asked whether you want to Save Changes, select “No.”
Disable Image Undo…
When selected, it will not allow any changes made to images to be undone. ( The menu
selection will then toggle to Enable Image Undo…)
Cut Text… (Cut Page... displayed from within the Image tab screen)
On the BROWSE or DETAILS TAB this will delete the currently selected text and place it on the
Windows clipboard ready for pasting. On the Image tab it will cut the current image (page) and
place it on the clipboard. In this way you can move pages from one document to another or one
program to another. First cut the page and then go to another document and paste. The
clipboard data may be pasted to any other Windows application which can accept either image
or text files.
Copy Text… (Copy Page... displayed from within the Image tab screen)
Copies the selected text or page to the clipboard. This menu item will be disabled if there is no
selected text or current image for that document record. The data can also be pasted to the
other Windows application which can accept either image or text files.
Paste Text… (Paste Page... displayed from within the Image tab screen)
Pastes the text or page from the Windows clipboard to the current database location. This menu
selection will be disabled if there is no valid data in the clipboard to paste.
Delete Text... (Delete Page... displayed from within the Image tab screen)
On the BROWSE or DETAILS TAB screens, this selection deletes text. On the Image tab it will
delete the current image page.
Crop Page... (Only available from within the Image tab screen)
Crops the image down to only the selected area, deleting everything outside of the box with the
dotted line.
Insert Today's Date...
Inserts the computers system date (current date) into the appropriate record field in the
database.
10
Empty Clipboard…
Empties the clipboard of any saved data, including data copied to the clipboard from other
applications. After you have finished with the data or the image you copied to the clipboard, you
can use this option to delete it to free up memory.
2.3. “DOCUMENT” pull-down menu
Refresh (F5)
Refreshes the Window so it displays the most up-to-date information from the database. It will
also re-sort the data and refresh the results of a search. You can also press F5 to refresh the
data. The data is refreshed automatically for you when you switch between the Document
Database and the Results window.
New Document... CTRL+N
Adds a new document record to the current database. You can also click on the New Document
button to add a new document. New documents are always added to the bottom of a database.
After you have saved the document you can Refresh the data to re-sort the documents so the
new document is displayed in the correct sort order.
Save Document... CTRL+S
This will save the current document. You can also click on the Save Document button to save a
document. If you have made any changes to a document, you will always be prompted to save
the document before you move on to a new document or close the database.
Delete Document... CTRL+D
This will delete the current document record. You can also click the Delete Document button on
the Document tool bar.
11
Sort...
Allows you to select the sort order of your documents.
Search...
Opens the powerful search engine for locating specific documents using selectable search
criteria.
Fig. 9 “Powerful search criteria selection screen.”
Archive...
12
Allows you to backup your documents into a archive database. This is a Read-Only database,
but can be converted back into a Read-Write database by the database Administrator(s).
Batch Copy...
Allows you to perform a document search and then copy all the documents in the search result
table to a new database of the same structure. You can also batch copy all the documents in the
current database to another database of the same structure.
Delete All...
Delete all the documents in the current database.
Export Database…
This option will export your database, excluding images, to a delimited text file. This can then be
imported into spreadsheet or database applications. You can select the delimiter and text
qualifier you would like to use and be prompted to select the location and filename for the
exported data.
2.4. “IMAGE” pull-down menu
NOTE: Selections from this pull-down menu are only available from within the Image tab screen.
Zoom
To zoom an image you can use the Zoom tool on the Image tool bar, or you can select Zoom
from the Image menu and then select from the options listed below. (Zooming an image will
display it larger or smaller on your monitor, but won't change the actual size of the image. To
change the actual size, select “Resize” from the Image menu.)
Zoom 100%...
Zooms the image to 100%.
Zoom to Fit...
Zooms the image so the entire image can be seen.
Zoom to Width...
Zooms the image to fit the width of the display area.
+ Left mouse button
Zoom In...
Zooms in on the image. You can also use the Zoom tool to zoom in and out on a document
page.
+ Right mouse button
Zoom Out...
13
Zooms out on the image. You can also use the Zoom tool to zoom in and out on a document
page.
ZOOM Range by percent (only displayed on Image tool bar)...
Allows you to set the ZOOM range with a percent value.
Go To Page... CTRL+G
Allows you to enter the document page number you want to jump to.
New Page...
Moves to a new page of the document where you can import, scan or paste a new image.
Page Order...
Allows you to change the current order of the pages in your document record (pagination).
14
Fig. 10 “Page order arrangement screen.”
Select Scanner...
Allows you to select the scanner driver you are going to use for scanning in images. Be sure
that the scanner is properly connected and you have the latest scanner driver from the
manufacturer installed.
Scan…
Starts the scanner interface software to capture the document from your scanner. You can also
scan by clicking on the Scan button within the tool bar icon.
Batch Scan…
Allows you to either scan several pages into a batch file directory or scan all pages directly into
the current document database. You can also use this menu selection to preview previously
scanned images for placement into document records.
15
Fig. 11 “Batch scanned files screen.”
TWAIN Configuration…
Allows you to select Buffered or Native transfer mode if your TWAIN compatible scanner support
both modes.
Import…
Allows you to import supported image files into a document. You can also click on the Import
tool bar icon.
Export…
Allows you to export images in supported formats so they can be used in other applications.
Tip: You can also copy and paste images to other applications provided the application accepts
that type of particular data.
Brightness and Contrast…
Allows you to adjust the brightness and contrast of the currently displayed image.
16
Fig. 12 “Brightness and Contrast settings”
Gamma Correction…
This can be used to correct the display of the image for various output devices such as monitors
and printers. Common values used are between 2.2 and 2.5.
Fig. 13 “Gamma setting.”
Invert Colors…
Inverts (or reverses) the colors of the current image.
Color Depth Conversion…
The color depth of an image determines the number of colors and shades the image is capable
of displaying. To change the color depth of an image select Color Depth Conversion from the
Image menu, then select the color depth you want to convert the image to. It is important to note
that gray scale images will automatically be converted to 256 gray scale when saved, and true
color images (65 thousand colors or more) will automatically be converted to 16 million colors.
This is done to optimize the compression.
The Color Depth Conversion menu item that corresponds to the current color depth will be
checked, and usually disabled.
The color depth choices are:
Monochrome
Converts the image to two colors - black and white.
16 Colors
Converts the image to 16 colors.
256 Gray Scale
17
Converts the image to 256 shades of gray.
256 Colors
Converts the image to 256 colors.
65 Thousand Colors
Converts the image to 65 thousand colors.
16 Million Colors
Converts the images to 16 million colors.
Decreasing color depth
When converting from a higher color depth to a lower color depth (e.g. 16 million colors to 256
colors) the colors in the image will be reduced. It will automatically pick the best colors to use for
the new color depth. In addition you have the option of selecting a dithering method. Dithering
is a means by which additional colors are simulated by intermingling spots of one or more colors
- so from a distance it appears to be a different color. For example having alternating red and
blue dots would simulate the color purple. From the Color Conversion window you will be given
options relating to dithering.
Increasing color depth
By increasing the color depth the image will be capable of displaying more colors - but more
colors won't be added to the image. Increasing the color depth before performing certain image
editing functions can in some cases improve the result. For example, if you are resizing an
image with the smoothing option, increasing the color depth from monochrome to gray scale, or
256 colors to 16 million, will improve the result.
Flip…
Allows you to flip the image horizontally or vertically.
Rotate…
Allows you to rotate the image using preset degrees or using arbitrary settings.
Resize…
Allows you to resize the image by selecting the width and height you want to resize the image to.
you can select the width and height units by clicking the button next to the Units box and then
selecting the unit from the drop down list.
18
Fig. 14 “Resize image screen.”
Maintain Proportions
To keep the same width and height proportions when resizing, select the Maintain Proportions
check box.
Resize with smoothing
Selecting the Resize with smoothing option will smooth the jagged edges you sometimes get
when resizing and produce a better result, but it may take more time to resize.
Tip: If you are increasing the size of an image, the extra detail is interpolated from the existing
data. This can give a poor result if going from a small to large image. It is better to re-scan the
document at a larger size rather than resizing it.
Resolution…
Allows you to change the resolution of an image. The resolution governs the detail the image
has and the size it will be when printed. A higher resolution image will have more detail than a
lower resolution with the same print size.
19
Fig. 15 “Image Resolution screen.”
To select a resolution from the drop down list or type in a resolution value in the box provided (in
dots per inch).
Maintain Print Dimensions
Selecting this option will add or remove pixels in order to maintain the dimension of the image
when printed. For example, if you decrease the number of dots per inch from 300 to 150, in
order to maintain the same width and height when printed you would need half the number of
dots (pixels). Pixels are removed or added to maintain the same width and height in inches. If
you increase the resolution with this option selected the actual quality of the image may not be
increased since the additional pixels have to be interpolated.
Maintain Screen Size
Selecting this option will maintain the width and height when displayed on the screen - which
means the width and height when printed will change. If the resolution is changed from 300 dots
per inch to 150 dots per inch - with the same number of dots (pixels) the image, when printed,
would be twice the number of inches.
Compression factors…
Allows you to select the compression factor for saving images. Black & White images
automatically use the best and fastest compression with no loss in quality. These settings will be
maintained as the default setting until they are changed.
20
Fig. 16 “Image compression settings.”
For 256 color images
Higher compression settings will take longer to save, but will not have any effect on the image
quality.
For True color and 256 Grayscale images
Two choices are available: Retain Image Quality- offers compression without loss of image
quality, or Lossy Compression- Where you get much better compression of the image in trade
for some image quality loss in relation to your chosen compression value setting.
Recompress All When Saving…
This selection will automatically recompress all currently saved images within the current
database including images previously saved using “Retain Image Quality” on True color and 256
Grayscale images.
Note: Recompressing unmodified images can result in loss of quality on True color and 256
Grayscale images.
Information…
Displays information about the current image, such as:
File Size:
Date acquired:
Height:
Color depth:
21
Compression ratio:
Uncompressed size:
Y resolution:
X resolution:
Last saved date/time:
Compression:
Width:
2.5. “ATTACHED” pull-down menu
View/Edit…
Launches the program that is associated with opening the attached file. The workstation viewing
the attached file must have the associated program already installed on to it or have a path on
the network to launch it.
Print…
Prints the attached file by opening the program associated with the attached file. The
workstation viewing the attached file must have the associated program already installed onto it,
or have a path on the network to launch it.
Import…
Allows you to import a file into the ATTACHED TAB screen.
Export…
Allows you to export a file from the ATTACHED TAB screen.
Remove…
Deletes the existing attached file from the current document record.
Keep Original Copy
Select this if you want to keep the original copy of a file you import. Deselect if you want the
original copy to be deleted.
2.6. “OPTIONS” pull-down menu
Confirm Document Deletion
Select this menu item if you want to be asked for confirmation before a document is deleted. A
check-mark next to the menu item indicates that has been selected. By default it is always
selected when you start MF-PRO.
22
Confirm Before Saving Document
Select this menu item if you want to be asked for confirmation before saving a document that is
modified or newly created. By default it is always selected when you start MF-PRO.
Run Quick Tour on Startup
Select this menu item if you want the MF-PRO Quick Tour to run every time you start MF-PRO. A
check-mark next to the menu item indicates it has been selected.
Fig. 16 “Quick Tour screen.”
Open Last Database on Startup
Select this menu item if you want the last document database you last worked on to be opened
automatically when you start MF-PRO again. A check-mark next to the menu item indicates it
has been selected.
Show Document Image on Details Tab
Select this menu item if you want to show the first page of the document image in a floating
window while you are on the Details Tab. You can press the F2 function key to toggle the
floating window on and off. To avoid blocking the screen underneath, the floating window is
automatically resized and repositioned when you click on any place on the main window of MFPro. You can resize and reposition the floating window appropriately when it is in focus. When
you click on it from the anchored position, it will remember the last size and position and
redisplay itself there.
Invert Image Color After Scanning
Some scanners invert the colors of the image when transferring it from the source. Select this
option to invert the colors of the image back to normal.
Temporary Files Location…
This option allows you to change the location where your temporary images are stored. From the
pop-up window you can select a new drive and directory for the temporary image files. The drive
selected should have enough disk space to store the images of documents you are working on.
Try to avoid using a removable disk.
23
Links To Other Software...
You can add customizable toolbar buttons to the top-most toolbar that will launch other
applications from within MF-PRO. If the application can load text or images, then the text or
image can be automatically loaded into the application for viewing or editing.
Fig. 18 “Link to other software setup screen.”
To add your own links to other software or modify the existing links, select Links to Other
Software from the Options menu. This will display the Links to Other Software window.
To add a new link, click on the Add... button. This will then display the Add Link window. From
here you can enter the filename of the application you want to add a link to, in the Filename box,
or click the Browse button to browse the files. You can enter a description of the application in
the description box. If you want the application to load the text on the TEXT TAB for viewing or
editing select the Text check box. The application must be able to load ASCII text files. If you
want the application to load an image for viewing or editing, select the check-boxes
corresponding to the image file formats which that application supports. For editing it must be
able to save in the selected format as well. Most image editors will support BMP images and
just selecting the BMP Images check box should be sufficient.
To modify a link button click the Modify... button. The Modify Link window will be displayed,
which is similar to the Add Link window - see above for details.
To remove a link, click the Remove button.
Once you have finished customizing the links click the OK button. If you want to cancel all
changes made then click the Cancel button.
Table Layout…
The table layout can be changed from the table itself:
To change the order of columns, position the mouse over the column heading and drag to a new
position.
24
To change the width of a column, position the mouse over the vertical line to the right of the
column heading. When the mouse pointer changes to a double arrow pointing left and right,
drag the mouse to resize the column.
To hide a column, resize the column width to nothing.
After hiding a column you can redisplay it by selecting Table Layout from the Options menu.
This will display the Table Layout window. From here you can check or uncheck the boxes next
to each field, to show or hide each column in the table. To show all of the columns, click the
Show All button. To hide all of the columns, click the Hide All button.
After you have made the changes you want click the OK button to accept the changes or Cancel
to cancel any changes you have made.
Fig. 19 “Table Layout screen.”
25
Modify Database Structure…
To view and modify the structure of your document database select Modify Database Structure
from the Options menu. This will then display the View/Modify Database Structure window.
Note: For already created databases, only the "Field Names" and "Descriptions" can be
changed. But you can add more fields to the table if needed.
Fig. 20 “Modify database structure table.”
26
Lookup Tables…
This menu item allows you to modify the keywords stored in your lookup tables and gives the
options to govern how new keywords are added to your lookup tables.
Lookup tables help speed up data entry by providing you with a list of keywords you can select
for each keyword field. By default new keywords are added to the lookup tables automatically.
Clicking the radio buttons at the bottom of the Lookup Tables window can change this. First
select the keyword field from the Lookup Table drop down list. Then click on one of the radio
button.
Fig. 21 “Keyword Lookup Table.”
The options you have are:
Automatically add new keywords to Lookup Table
Selecting this will mean any new keywords you entered will automatically be added to the
Lookup Table.
Prompt before new keywords are added to Lookup Table
With this option you will always be prompted before new keywords are added.
27
Don't automatically add new keywords to Lookup Table
No new keywords will be added to the Lookup Table. To add keywords you will have to first go
to the Lookup Table window and then click the Add button - see below for more details.
Only allow keywords that are in the Lookup Table
No new keywords will be added to the Lookup Table. To add keywords you will have to first go
to the Lookup Table window and then click the Add button - see below for more details. In
addition you will only be allowed to enter a keyword that is in the Lookup Table.
To add new keywords you can click the Add button of the Lookup Table window. The Add
Keywords window will then be displayed which will allow you to enter new keywords for the
selected Lookup table.
To delete keywords you can select the keyword or words and click the Delete button. To select
multiple keywords hold down the Control key as you select the keywords that you want. To
select a range of keywords select the first keyword, then hold down the Shift key and select the
last keyword. All the keywords in between the two will then be selected.
To edit a keyword double click the keyword you want to edit. Click on the ENTER button when
you have finished editing the keyword.
After you have finished making modifications to the Lookup tables click the Close button.
Compact Database…
This selection allows you to defragment the file and recover disk space. The database you want
to compact must first be closed and not in use by anyone else.
Repair Database…
If an error occurs when you try to open your database or your database behaves unpredictably,
this could be caused by a corrupted database. Databases can be corrupted if there is a power
failure or hardware problem while data is being written to the database.
Selecting Repair from the Database menu will attempt to repair a corrupted database. The
database you want to repair must first be closed. The Repair command will also attempt to
validate all system tables and all indexes. Any data that can't be repaired is discarded. If the
database cannot be repaired, you will be notified.
Tips:
Repairing a database, it is also a good idea to compact the database by selecting Compact from
the Database menu. This will defragment the file and recover disk space.
To avoid corruption NEVER switch off your computer without first shutting down Windows (or
exiting Windows if using Windows 3.1). This procedure should be followed no matter what
applications you are running.
Routinely archive your data to protect against data loss. Archive to a removable disk or tape
drive for best protection. When archiving your data you have the choice to archive both images
and the database or just the database only. It is a good idea to archive both, but if you don't
28
have the disk space or the time to archive all your images, selecting to archive just your
database will at least protect against the database becoming corrupted. Then, if your database
does become corrupted and Repair doesn't fix the problem (or too much data is lost) simply use
Windows Explorer or File Manager to replace the corrupted database with the archived
database. However, any new documents added after your last archive will of course be lost.
You may want to make a copy of your database before replacing it with the archived database.
2.7. “SECURITY” pull-down menu
Users…To add new users and modify user accounts select Users from the Security menu. This
option is only available to System Administrators.
Fig. 22 “Users Table.”
The table displays a list of all users and groups of users. User groups are displayed in curly
brackets { }. There are two-user groups{All System Administrators}
{All Users}
All users belong to the {All Users} group. Those users that have System Administrator privileges
also belong to the {All System Administrators} group.
29
To assign System Administrator privileges to a User select the System Administrator cell of the
user and click to toggle the check box. You can also press the Space Bar to toggle the check
box or click 'Y' to check it or 'N' to uncheck it.
Users with System Administrator privileges are allowed to add other users and modify user
accounts. By default System Administrators are also granted full access to document
databases.
To change a User's name, first select the User Name cell of the user you want to change, then
click again to edit it.
Selecting More Than One User
To select more than one user in the user table move the mouse to the left of the table, and when
the mouse pointer changes to a check mark, click to select that row. To deselect a user click
again. You can also click Select All or Select None on the Select menu. To delete all selected
users click Delete Selected on the Select menu. To remove or assign System Administrator
privileges to all selected users click Assign Administrator Privileges or Remove Administrator
Privileges on the Select menu. Note the buttons below the table act on individual users rather
than those selected.
Sort Menu
Select User Name to sort the users by User Name or User ID to sort the users by User ID. A
check mark is displayed next to the menu item you select.
Add User Button
Click this button to add new users. A “New User” window will appear to enter the New User’s
name and password. You may also check the “System Administrator” check-box to add as an
Administrator.
Refresh Button
Click to refresh the contents of the table. You can also click F5 on your keyboard to do this.
Change Password Button
Click this button to change the password of a user. You will be asked to enter the new password
twice, and both entries must be identical before you can proceed. To prevent the password from
being seen by others as you enter it, asterisks are displayed instead of the actual characters
entered. Passwords must be at least four characters in length and are case sensitive.
Delete User Button
Click this to remove a user. After the user has been removed they will no longer be able to login and use MF-PRO.
Close Button
Click this button to close the Users window.
Help button
Displays help menu page relating to Adding or Modifying User Accounts.
30
Permissions…
Displays access permissions for Users. Database Administrators can select what level of
security to assign each user for the current database.
Fig. 23 “User Permission Table.”
31
User Log…
Displays a detailed table of log-on and log-off dates/times for authorized MF-PRO Users.
Fig. 24 “User Log Table.”
Change Password…
You must then enter your existing password and the new password. You will be asked to enter
the new password twice, and both entries must be identical before you can proceed.
To prevent the password from being seen by others as you enter it, asterisks are displayed
instead of the actual characters entered. Passwords must be at least four characters in length
and are case sensitive.
Click the OK button once you have entered your new password, or click Cancel to cancel the
change.
System Administrators can also change the passwords of other users. If you forget your
password your system administrator will be able to provide you with a new one. For security
reasons your existing password cannot be retrieved by anyone, not even system administrators.
However, system administrators can issue new passwords without knowing your existing
password.
32
Archive Permissions Database…
Without the Permissions Database you will not be able to open any of your networked/secured
databases. It is vital that you archive all your Permission Databases.
Fig. 25 “Archive Permission Database path setting.”
In the text box displayed, enter the path and file name where you want the Permission Database
(.PDB) archived to.
2.8. “WINDOWS” pull-down menu
Cascade
Displays all currently open MF-PRO database in a cascaded (layered) format.
Tile
Displays all currently open MF-PRO databases in a tiled format.
Arrange Icons
Arranges currently open databases that have been minimized to icons, to the bottom of the
page.
2.9. “HELP” pull-down menu
Contents…
Displays the help menu screen.
33
Quick Tour…
Starts a quick overview of the MF-PRO features.
Contact Information...
Provides contact phone, web and e-mail address on how to get in touch with MicroPal Systems.
Sales
Email:
Web:
(USA) 909-860-8001
[email protected]
http://www.micropalsystems.com
Written inquiries:
MICROPAL SYSTEMS
19726 E. Colima Road #228
Rowland Heights, CA 91748, USA
A list of what information is required when submitting inquiries for technical support:
1. Make and model of your computer system (clone if not known).
2. CPU type and clock speed (e.g. Pentium 2.4 GHz).
3. Amount of memory (RAM) your computer has.
4. Operating system (e.g., Windows XP).
5. Version of MF-PRO (this can be obtained by selecting About from MF-PRO's Help menu).
6. Make and model of scanner (if it's a scanner problem).
7. Version of interface software used with scanner.
8. Detailed description of the problem or question you have, including the exact wording of error
messages encountered, and what you were doing or trying to do when they occurred.
Register MF-PRO...
Displays a form for you to enter information to register your copy of Microfile MF-Pro. After filling
out the form, a text file will be created and saved in the folder as displayed on the screen.
If you have purchased one or more MF-Pro licenses you will then have to email the registration
text file to your dealer to request for the system key to unlock the software. There is no need to
reinstall the software when you obtain the key.
About...
Displays MF-RPO version and copyright information.
34
35
3. Using MF-PRO
• Start MF-PRO if you haven't already done so, by clicking its icon (or double clicking if running
Windows 3.1).
• MF-PRO stores your documents in a document database (.DDB) file.
• When you start MF-PRO it will open the last document database you had opened, this feature
can be disabled from the “Options” pull-down menu. The first time you run MF-PRO it will
open a sample database that comes with the software as an example.
3.1 How to create a Document Database (.DDB) file
To create a document database for storing your documents, select Create Document Database
from the “File” pull-down menu. The Create Document Database window will be displayed, and
from here you make a selection whether to create a Standard database, or a Customized
database.
Fig. 26 “Create new database”
If you select “Create Standard Database,” these fields will be chosen for you. Simply enter your
document file name and a title for the database. If selecting “Create Customized Database,” you
will be allowed to choose from predefined database templates and modify the structure to fit your
own requirements. Once you have made your selection click the OK button to continue, or click
the Cancel button to cancel.
36
Fig. 27 “Modify database structure”
3.2 How to open an existing Document Database (.DDB) file
To open an existing document database, select the open file folder button from the Icon Bar or
use the “File” pull-down menu and select Open Document Database. From the file navigation
screen, locate the drive and directory where your Document Database is located and select it.
Click “OK” to open the database.
37
3.3 Using the BROWSE TAB screen
From the BROWSE TAB screen you can view all defined fields of the current database.
Fig. 28 “BROWSE TAB screen.”
3.4 Create a new document record
Click on the “Create a New Document” icon located on the Icon bar. You will always be
prompted to save any changes made to new documents, as well as changes made to existing
documents before leaving that document record.
Note: New document records are always added to the end of a database. If you want them to
be displayed in a correct order, after saving the document you need to refresh the database by
selecting Refresh from the “Document” pull-down menu or clicking the F5 button. For large
databases, refreshing the browse table may take quite long time and therefore not
recommended. Always try to use the Search button to find a document.
38
3.5 Using the DETAILS TAB screen
From the DETAILS TAB screen, enter information relating to the document such as date, title or
any other fields you may have defined. The information entered within the “Details” and “Text”
screens are used by the search engine to later retrieve your stored document.
Tip: You can use the “Insert Today’s Date” button to place the current date in to the date field.
Fig. 28 “DETAILS TAB screen.”
39
3.6 Using the IMAGE TAB screen
Adding new image page(s) to a document record requires that you first select the “Image” tab.
From within the “Image” tab screen, an image tool bar is now displayed. To import images, click
the Import Image tool bar button or select Import from the Image menu. If a page(s) has
previously been saved, you will be prompted to insert the new page (image) before, after, or to
replace the current image page altogether.
Fig. 29 “Image tab screen.”
Note: From within the Import window you can select between Importing Single Page or Importing
Multiple Pages.
3.6.1. To import a single page:
Click the Single Page tab if it isn't already selected. You can then select the drive and directory
where the image(s) is to be imported and is stored. To open a directory, double click the
directory in the directory list. Once you have selected the directory, you can select the image
you want to import from the list below the directory list. Use the “List Files of Type” drop down
list, in order to restrict which types of files are to be displayed. You can also select how the files
are sorted by clicking on the radio buttons at the bottom on the left.
If after the image has been imported you want to delete the original file, select the “Delete
Original Files” radio button.
40
You can preview images before importing by selecting the “Auto Preview” check box. You can
also drag files for previewing to the preview window. The zoom buttons at the bottom right of the
preview window can be used to zoom in and out of the image. The Refresh button refreshes the
directory and file lists, and is useful if you change disk and want to update the display to display
the files on the new disk.
Once you have selected the image you want to import, click the OK button.
3.6.2. To import multiple pages:
Click the “Multiple Pages” tab if it isn't already selected. The Multiple Pages tab is similar to the
Single Page tab except for the “Files To Import” box. To select files to be imported, first select
the file name in the file box on the left and then click the Add button to add that file to the list of
files to import. Alternately click on the ”Add All” button to add all the listed files. To remove files
from the files to import list, select the files to remove, then click on the Remove button. To
remove all files click the Clear All button. Images can also be dragged from one list to the other.
You can also change the order of the files to be imported by dragging and dropping the files
within the files to import list.
Fig. 29 “Multiple page import screen.”
41
3.7 About scanning
Before scanning documents you must first ensure that your scanner is connected correctly and
that the necessary (and in some cases, the latest) drivers have been installed. Your scanner
should have details on how to do this. Select the Image tab, then click the “Scan” button, or
select “Scan” from the “Image” pull-down menu. Your scanners interface window should appear
for selecting your scan options. The options available will vary from scanner to scanner, but
options like resolution, color depth, size, brightness and contrast, etc should be available for
setting selection.
The resolution you should scan will depend on the type of document you are scanning. The
higher the resolution, the more detail the image will have, but it will also take up more disk
space. A resolution between 150 dpi (dots per inch) and 300 dpi is usually best. If you are
going to use your OCR software to convert the image to text, use a setting of B&W 200 dpi.
Color Depth
If you are scanning documents that are mostly black and white without graphics, select
monochrome (or black & white). If the document has graphics that you want to come out clearly,
select gray scale. If the document is in color, select true color. Color documents take up more
storage than gray scale or black & white, so if you don't need the color, select one of the other
options. Similarly, gray scale takes up more storage than black & white.
If you already have scanned page(s) within the document, you will be prompted where to place
the next scanned page, either After Current Page, Before Current Page, Replace the Current
Image or Place the Image Into a New Document.
Note: To change the location where temporary images are stored, select Temporary Image
Location from the “Options” pull-down menu. From the pop-up window you can select a new
drive and directory where temporary image files will be stored. The drive selected should have
enough disk space to store the images for documents you are working on. Try to avoid using a
removable disk.
3.8 Viewing and enhancing a document image
Once an image is scanned or imported into your document, you may choose to enhance its
quality either for clarity” pull-down menu (The Image menu is available only if you are on the
Image tab screen). Selections, reducing file size or viewing orientation. The various tools to
perform these modifications are located in the “Image to adjust brightness, invert colors, color
depth conversion, etc., can be selected and applied to enhance the displayed image. A complete
description of each tool can be found under in section 2.4 “Image” pull-down menu.
42
3.9 Using the TEXT TAB screen
The TEXT TAB screen can be utilized in various ways depending on your application or
requirements. A couple of uses would be to type personal annotations regarding the current
document record for yourself or other licensed users on network. The TEXT TAB can also be
used to hold text that was pasted from the current document image after it had been converted
from your OCR software. All words in the TEXT TAB screen are searchable when using the
software’s built-in “Search” engine function.
Fig. 29 “TEXT TAB screen.”
43
3.10 Using the ATTACHED TAB screen
The Attached tab screen is where you can attach files of any kind to a related MF-PRO
document record. Non-image files such as a .AVI, .WAV, Microsoft Word, Excel, .AVI, are
common attachments. With an optional viewer, even files like AutoCAD drawings can be
retrieved and viewed. If attaching a file, you must be able to have the application program for
that file on workstation or launched from the workstation in order to open the attachment.
Additional features within this screen allow you to Export, Remove, Keep Original Copy of the
attachment, and Auto Close Attached File. (See section 2.5 for more details on Attached file
selections.) Note: On moving to a new document MF-PRO will attempt to close the attached file
if it is open. If MF-PRO can't close the attached file you will be prompted to close it in the usual
way.
Fig. 30 “ATTACHED TAB screen with AutoCad file attachment.”
44
3.11
Searching
for
a
document
within
a
database
Searching
To display the search criteria window, click on the “Search” button or use the “Image” pull-down
menu and click on the “Search” selection.
From the search window you must first select the criteria for the field(s) that will locate a saved
document. Clicking the drop-down button in each of the criteria field will produce list of choices
for that field. You can then enter the value or word(s) you want to locate. Leave the criteria box
set to (None) if you don't want to search that field.
Fig. 31 “Search criteria screen.”
At the bottom left of the window are two radio buttons you can use to select whether all
conditions you’ve selected should be met or at least one.
You can also optionally select to sort the search results by clicking on the “Sort Criteria” button.
When you have finished entering the search criteria, click the “Search” button to perform the
search. The search results will then be displayed.
The Search Results window has all the same functions as the BROWSE TAB screen, except
you will not be able to perform another search, unless the current search results screen is
closed.
45
After you have viewed the search results you can switch back to the document database by
clicking on the Back tool bar button (which is only displayed after you have performed a search).
After returning to the document database this button will change to Results which, if clicked, will
allow you to return to your search results. When you have finished with your Search Results,
you can close the Results Window by clicking on the Close Search Results menu option from the
File menu, while the Search Results are displayed.
3.12 Printing a document
To print any or all pages within a document record, select the small printer icon next to the TEXT
TAB screen, or from the “File” pull-down menu select “Print.” A print screen appears, offering
you the option to print a Document Description Cover Page, include and Print Images in the
printing or print the Document Description only. There are also buttons to configure printer
choice and print page selections, Page Setup and a button to configure what will print on the
Cover Page Layout.
Fig. 32 “Print selection screen.”
3.13 Cropping an image
In order to save disk space, you may choose to crop a scanned or imported image, which means
to save only a partial section from the entire image and delete the remaining areas.
Click on the “Selection” tool located on the Image Tool bar. Then drag the mouse over the
image while holding down the left-mouse button so that the box covers the area you want to
save. Next select “Crop Page” from the “Edit” pull-down menu. The image will now be cropped
and all surrounding areas not selected will be deleted.
3.14 Sorting document records
To display the “Sort Database” window, click the “Sort” button or use the “Sort” selection from
the “Database” pull-down menu.
46
From the Sort Database window you can select the fields you want your documents to be sorted
by and choose whether to sort in ascending or descending order. Select the first field you want
your documents to be sorted by from the field names displayed in the list on the left. Then click
the Add Ascending button to sort in ascending order or Add Descending button to sort in
descending order. Adding more field selections will be used to sort those records which have
the same values for the previous sort fields.
Fig. 33 “Sorting document records.”
3.15 Saving documents
To save changes to a document, click the “Save” button or “Save Document” from the
“Database” pull-down menu. If you’ve made any changes to a document, you will automatically
be prompted to save the document when you move to a new document or close the document
database.
Compression factors…
Compression is automatically set, however you may manually make selection as you see fit.
Settings will be maintained as the default setting until they are changed. Black & White images
automatically use the best and fastest compression with no loss in quality.
Zip: This is loss-less compression - meaning the image quality will not be impaired. A scroll bar
will be displayed when you select this option which allows you to select the compression factor.
47
Higher compression will take longer to compress - but use less disk space. Use this option if
you are compressing black & white images.
JPEG: This is lossy compression - meaning the image quality will be degraded slightly. A scroll
bar will be displayed when you select this option which allows you to select the compression
factor - higher compression lowers the quality of the image. Use this option if you are
compressing gray scale (many shades of gray) or true color (16 million colors) images. If the
image you are compressing is neither gray scale nor True color, then it will be automatically
converted to one of these formats. Black and white (monochrome) images will be converted to
gray scale, and color images will be converted to true color. The radio buttons determine what
images in the document will be compressed/decompressed.
3.16 Archiving a Document Database file
To archive data select Archive from the Database menu. Archiving data allows you to make a
copy of your documents to help protect against data loss. In the Archive window, select a path
and database name where you want to archived your current database to, or click browse to
search for a path and existing location. If the database you enter doesn't exist, it will be created
for you.
Fig. 34 “Archive database screen.”
48
The Options allow you to select which documents will be archived. The Limit Size option will
limit the archive size to the specified amount; this can be useful if archiving to CD-R so the CD-R
capacity isn't exceeded, especially if you are creating a virtual CD-ROM.
3.17 Changing the order of a multi-page document record
First select the Image tab if it has not already been selected. To change the order of multi-page
documents, click the Page Order tool bar button, or select Page Order from the Image menu.
This will display the Page Order window. From here you can change the order of the pages by
dragging and dropping the page icons into the order you want. The numbers shown on the page
icons are the page numbers before you clicked on the Page Order button.
3.18 Adjust brightness and contrast
To adjust the brightness or contrast of the current image, select Brightness and Contrast from
the Image menu. Use the scroll bars to select the amount you want to increase or decrease the
brightness and contrast. More than 0% will increase the brightness or contrast; less than 0% will
decrease the brightness or contrast.
3.19 Gamma correction
This can be used to correct the display of the image for various output devices such as monitors
and printers. Common values used are between 2.2 and 2.5.
3.20 Color depth conversion
The color depth of an image determines the number of colors and shades the image is capable
of displaying. To change the color depth of an image, select Color Depth Conversion from the
Image menu, then select the color depth you want to convert the image to. It is important to note
that the image may be converted to a different color depth when it is saved depending on the
compression method used. If you choose to save the image with JPEG compression, the image
will be automatically converted to gray scale if it’s monochrome, or 16 million colors if it is color.
For more information on compression methods, see:
Saving Documents:
The Color Depth Conversion menu item that corresponds to the current color depth will be
checked, and usually disabled.
The color depth choices are:
Monochrome
Converts the image to two colors - black and white.
16 Colors
Converts the image to 16 colors.
256 Gray Scale
Converts the image to 256 shades of gray.
256 Colors
Converts the image to 256 colors.
49
65 Thousand Colors
Converts the image to 65 thousand colors.
16 Million colors
Converts the image to 16 million colors.
Decreasing Color Depth
When converting from a higher color depth to a lower color depth (e.g. 16 million colors to 256
colors) the colors in the image will be reduced. It will automatically pick the best colors to use for
the new color depth. In addition you have the option of selecting a dithering method. Dithering
is a means by which additional colors are simulated by intermingling spots of one or more colors
- so from a distance it appears to be a different color. For example having alternating red and
blue dots would simulate the purple color. From the Color Conversion window you will be given
options relating to dithering.
Increasing Color Depth
If increasing the color depth, the image will then be capable of displaying more colors - but more
colors won't be added to the image. Increasing the color depth before performing certain image
editing functions can in some cases improve the result. For example, if you are resizing an
image with the smoothing option, increasing the color depth from monochrome to gray scale, or
256 colors to 16 million, will improve the result.
3.21 Rotating images
First select the Image tab if not already selected. Then to rotate an image, click the Rotate
button on the Image tool bar or select Rotate from the Image menu. This will pop up the Rotate
Image window. From here you can select the angle and direction of rotation. By clicking on one
of the radio buttons you can select to rotate the image by 90°, 180° or 270°. Alternatively you
can enter your own angle by selecting the Arbitrary radio button and then entering the angle in
the adjacent box. After selecting the angle click the Rotate button to rotate the image, or Cancel
to cancel the rotation.
3.22 Resizing images
To resize an image select Resize from the Image menu. This will display the Resize Image
window. From here you can select the width and height you want to resize the image to. You
can select the width and height units by clicking the button next to the Units box and then
selecting the unit from the drop down list.
Maintain Proportions
To keep the same width and height proportions when resizing, select the Maintain Proportions
check box.
Resize with Smoothing
Selecting the Resize with smoothing option will smooth the jagged edges you sometimes get
when resizing and produce a better result, but it may take more time to resize.
50
Tip: If you are increasing the size of an image, the extra detail is interpolated from the existing
data. This can give a poor result if going from a small to large image. It is better to re-scan the
document at a larger size rather than resizing it.
3.23 Links to other software
You can add customized tool bar buttons to the topmost tool bar that will launch other
applications from within MF-PRO. If the application can load text or images, then the text or
image can be automatically loaded into the application for viewing or editing. To add your own
links to other software or modify the existing links, select Links to Other Software from the
Options menu. This will display the Links to Other Software window.
To add a new link click the Add... button. This will then display the Add Link window. From here
you can enter the file name of the application you want to add a link to in the File name box or
click the Browse button to browse the files. You can enter a description of the application in the
description box. If you want the application to load the text on the TEXT TAB for viewing or
editing, select the Text check box. The application must be able to load ASCII text files. If you
want the application to load an image for viewing or editing, select the check boxes
corresponding to the image file formats that the application supports (either BMP, PCX or TIFF).
For editing it must be able to save in the selected format as well. Most image editors will support
BMP images, and just selecting the BMP Images check box should be sufficient.
To modify a link button click the Modify... button. The Modify Link window will be displayed,
which is similar to the Add Link window - see above for details.
To remove a link click the Remove button. Once you have finished customizing the links, click
the OK button. If you want to cancel all changes made then click the Cancel button.
3.24 Modify Keyword Lookup Tables
To modify the keywords stored in your Lookup Tables and the options governing how new
keywords are added to your Lookup Tables, select Lookup Tables from the Options menu.
Lookup Tables help speed up data entry by providing you with a list of keywords you can select
for each keyword field. By default new keywords are added to the Lookup Tables automatically.
This can be changed by clicking the radio buttons at the bottom of the Lookup Tables window.
First select the keyword field from the Lookup Table drop down list. Then click on one of the
radio buttons. The options you have are:
Automatically Add New Keywords to Lookup Table
Selecting this will mean any new keywords you entered will automatically be added to the
Lookup Table.
Prompt Before New Keywords are Added to Lookup Table
With this option you will always be prompted before new keywords are added.
Don't Automatically Add New Keywords to Lookup Table
No new keywords will be added to the Lookup Table. To add keywords you will have to first go
to the Lookup Table window and then click the Add button - see below for more details.
51
Only Allow Keywords That are in Lookup Table
No new keywords will be added to the Lookup Table. To add keywords you will have to first go
to the Lookup Table windows and then click the Add button - see
below for more details. In addition you will only be allowed to enter a keyword that is in the
Lookup Table.
To add new keywords you can click the Add button of the Lookup Table window. The Add
Keywords window will then be displayed which will allow you to enter new keywords for the
selected Lookup Table.
To delete keywords you can select the keyword or words and click the Delete button. To select
multiple keywords hold down the Control key as you click the keywords you want to select. To
select a range of keywords, select the first keyword, then hold down the Shift key and select the
last keyword. All the keywords in between the two will then be selected.
To edit a keyword double click the keyword you want to edit. Press the ENTER key when you
have finished editing the keyword. After you have finished making modifications to the Lookup
Tables, click the Close button.
3.25 TEXT TAB screen
This displays any optional text associated with each image page of the current document. You
can import an ASCII text file by selecting Import Text from the File menu (useful for documents
that have been converted using your current OCR software). This option is only available from
the TEXT TAB and you must have at least one image. The text imported can then be viewed
and modified from the TEXT TAB screen (also useful for adding notes or personal annotations
regarding the current document record). You can also paste text into the text box on the TEXT
TAB by first positioning the cursor where you want to insert the text, and then selecting paste
from the Edit menu. Text must have first been copied to the clipboard.
3.26 Faxing documents
Faxing documents from your current document database requires that you have a fax modem
installed on your computer and that is configured and working properly.
Open the desired document you wish to fax and select the Print icon button or the Print
command from the File pull-down menu. Then from the Print screen, select Printer Setup to
change from your current print driver to the fax driver installed on your system.
3.27 Repairing databases
If an error occurs when you try to open your database, or the database behaves unpredictably,
this could be caused by a corrupted database. Databases can be corrupted if there is a power
failure or hardware problem while data is being written to the database.
Selecting Repair from the Database menu will attempt to repair a corrupted database. The
database you want to repair must first be closed. The Repair command will also attempt to
validate all system tables and all indexes. Any data that can't be repaired is discarded. If the
database cannot be repaired, you will be notified.
52
Tips:
•
After repairing a database, it is also a good idea to compact the database by selecting
Compact from the Database menu. This will defragment the file to recover disk space.
•
To avoid corruption NEVER switch off your computer without first shutting down Windows
(or exiting Windows if using Windows 3.1). This procedure should be followed no matter
what applications you are running.
•
Routinely archive your data to protect against data loss. Archive to a removable disk or
tape drive for best protection. When archiving your data you have the choice to archive
either images and database or just the database. It is a good idea to archive both, but if you
don't have the disk space or the time to archive all your images, selecting to archive just
your database will at least protect against the database becoming corrupted. Then, if your
database does become corrupted and Repair doesn't fix the problem (or too much data is
lost) simply use Windows Explorer or File Manager to replace the corrupted database with
the archived database. However, any new documents added after your last archive will of
course be lost. You may want to make a copy of your database before replacing it with the
archived database. (For advice on archiving see section 4.12, Archiving documents.)
Additional features not offered in the MF-PRO Edition may be available on the Enterprise Edition
release. Please check our web-site for updated details or call our Sales Dept. for additional
information.
53
4. MF-PRO Q. & A.
Q1. What is MF-PRO?
A1. MF-PRO (the short form for MicroFile Professional Edition) is a document imaging and
management software that can save you time and money. Like microfilm, it allows you to store vast
amounts of documents efficiently, avoiding the clutter of paper storage, thus improving the efficiency
of your office.
Q2. What if my image didn't scan well?
A2. MF-PRO provides you with several tools and filters to correct and change the look of your
images. Options like rotate, crop, flip, invert, adjust brightness to name just a few, will help you
enhance the image quality.
Q3. Do I save my images in color or black & white?
A3. If your scanner supports color, these images will take up more storage space than using a black
& white mode. Therefore, when scanning images where color is not a critical issue, such as invoice
copies, you should always try to select a non-color mode such as grayscale or black & white modes.
Q4. What resolution should I set my scanner to keep my file size down?
A4. For most documents you seldom have to exceed 150 dpi. For images that will be used with an
OCR program, try to scan at 200 or 300 dpi for best character recognition. For line art such as
cartoons or simple drawings, settings of 72 dpi may prove to be acceptable. The higher the dpi, the
bigger the file.
(Note: cropping or deleting unwanted or unused areas around the actual image or information you
want to save will also reduce the file size, even if the space is blank.)
Q5. Can I add new pages or delete existing pages from my document records?
A5. Yes, whenever necessary, you can add pages or remove pages from your documents at anytime
with just a few keystrokes if you are set up as a User with permission to do so.
Q6. What kind of documents can be stored in MF-PRO?
A6. You name it. MF-PRO is so flexible you can store and manage just about any type of document
that can be scanned from a printed original, or directly imported from a graphics file.
54
Examples:
Contracts
Business Cards
Expense receipts
Newspaper and magazine clippings
Handwritten notes and memos (ideal for salespeople)
Product brochures
Business forms
Tax return forms and records
Sales invoices
Photos
Shipping documents
Web-page screen capture
Q7. How can I find a document that I've saved in MF-PRO?
A7. When you originally saved the document, you should have entered some key information about it
within the DETAILS TAB screen. This information is the criteria that is indexed in order to find a
specific document when using MF-PRO's powerful search engine. Many selection and combinations
for searchable fields are available from the Search screen. These search parameters can include,
"Exact Match," "Not Equal To," "Within Range," "Less Than," "Greater Than," "Contains," and
"Doesn't Contain".
Q8. Do you recommend any particular brand or model of scanner for your software?
A8. Any standard Twain compliant scanner using version 1.6 TWAIN or higher (released 4/96)
should work with MF-PRO without any problem. In fact some scanners using earlier version of
TWAIN may also work, but are not recommended. Also the faster the scanner, the more benefit you
will get from the document imaging system and depending on volume of paper documents to be
scanned, the following is provided as general guidelines for scanner speeds:
Personal and SOHO use: 4 to 10 PPM
Small volume: 15 to 20 PPM
Moderately large volumes (e.g. law firms): 45 to 50 PPM
High volumes: 100 to 200 PPM
Q9. Does your software store the images in a standard graphics format?
A9. MF-PRO stores images in JPG or ZIP compressed formats, however in order to maintain the
integrity of the program, each image is assigned a unique filename by the software and the only way
to really view the needed document image is from within MF-PRO or exporting from MF-PRO to a
supported format into a different directory.
55
Q10. How can I have an outside application receive an image from MF-PRO?
A10. You can export saved document images from within MF-PRO in .TIF, .BMP, .PCX formats to
any directory or launch other applications to accept the image using the "Link to Other Software"
feature.
Q11. Is your database in a standard format such as Microsoft Access?
A11. Yes, it is compatible with Access, however you are advised not to directly edit the MF-PRO
database with Access in order to keep the integrity of the data.
Q12. If the database is archived onto a CD-ROM disk and then distributed throughout the
company, do the recipients need to install any software on their computers to read the disk?
A12. You will need a separate license for any user who will view the archived database on a different
machine. For network users, the database (.DDB) files saved to a CD-ROM my be located any
where on the network node. An “Off-line” MF-PRO database browser may be developed sometime
in the future for unlicensed users to view files.
Q13. When I run Setup I see an error message "Setup has run into a conflict with a running
application. Please close all applications and select OK to try again."
A13. Not all programs have an icon on the taskbar to select to terminate the program. Some
programs run in the background and you must manually terminate them by simultaneously pressing
Ctrl+Alt+Del. Select each listed program one-by-one and click on the “End Task” button to close
them. (DO NOT close Explorer or the Systray programs.)
Q14. During installation, the setup program reports errors in copying certain files.
A14. You can usually avoid the errors by first closing all other programs in Windows before running
the MF-PRO setup program.
Q15. I received an error message: "Run time error 31037, error loading from file" while
running the program.
A15. MF-PRO utilizes Visual Basic and OCX component technology, which requires that an OCX file
exists in the system directory and are registered in the windows registry as well. This error indicates
that Visual Basic cannot find an OCX file due to a problem with the registry or some other cause. To
solve this problem:
56
A). Download and run the full set of updated Automation Library Files
The following knowledge base article provides more information and a download link for Updated
Automation System Files
URL: http://www.microsoft.com/kb/articles/Q164/5/29.htm
Download and run the Automatic System files, then reboot your computer.
Reinstall and run MF-PRO.
If this does not clear up the problem, follow step B.
B). Download and run regcln41.exe
The following Microsoft knowledge base article provides some more information and a download link
to
RegClean
URL: http://www.microsoft.com/kb/articles/q147/7/69.htm
An alternate download site for RegClean is:
http://www6.zdnet.com/cgi-bin/texis/swlib/hotfiles/info.html?fcode=000E3I
Download and run the RegClean, then reboot your computer.
Reinstall and run MF-PRO.
Q16. When I run the software, I see the error message "Out of memory".
A16. The software requires 8MB of memory to run. Make sure your system has this minimum
amount of memory installed. Also, if running Windows 3.1, you must run Windows in Enhanced
Mode. Please refer to your Windows manual for more information about Enhanced Mode. We
recommend 32MB of memory be installed on your system.
To force Windows 3.1 to run in enhanced mode, you may load Windows by typing:
Win /3
To see what Windows mode you are running, click the Help menu command in Program Manager
and click the About Program Manager menu item.
Q17. What kind of scanner will be compatible with MF-PRO?
A17. Any TWAIN 1.6 compliant (released in Apr.1996) or newer scanner will be compatible with MFPRO. If you are not sure whether your scanner is TWAIN 1.6 or if you require the latest driver for
your scanner, contact your scanner manufacturer, as it can usually be downloaded from their website at no charge to you.
Q18. Why do I have problems scanning documents or selecting the Twain source?
A18. Most of the problems related with scanning are caused by improper connection or an obsolete
TWAIN driver. Check that your scanner is properly connected and the necessary drivers are
57
installed. Your scanner’s user manual will have instructions on how to do this. Also make sure you
have the latest scanner driver from the manufacturer. Driver upgrades can often be downloaded free
of charge on the Internet. The following site contains many useful links about various scanners:
http://www.winfiles.com/drivers/scanners.html
Q19. After a number of scans, why do I get the error message "Twain source manager could
not be loaded..."?
A19. Try closing other applications. If this doesn't help, close MF-PRO and then restart Windows.
To avoid this problem you can use your scanner's software to scan your documents to files on your
hard disk, which can then be imported into MF-PRO. Adding more memory to your machine will help
avoid this problem (32 MB is recommended), and if you are running Windows 3.1, upgrading to
Windows 95 may also help. Also avoid running other applications at the same time as MF-PRO. For
additional help see question Q13.
Q20. The colors of the images sometimes look weird.
A20. This is probably caused by PALETTE SHIFT. Palette shift happens when you switch between
different Windows programs that display graphics or different images which use different color
palettes. After the palette shifts back, the colors will become normal again. Although no harm will be
caused by palette shift, you can avoid this by not switching between different applications or images.
Q21. The colors of the images look weird all the time.
A21. Check to make sure your system can display VGA graphics with at least 256 colors. Also check
that you have the correct display driver installed in Windows. Please refer to your Windows and
graphics card manuals for more information about drivers.
Q22. The application screens look different.
A22. You are probably running another incompatible Visual Basic program at the same time. Quit
the other Visual Basic program and the application, then re-run the application.
Q23. Black and white are inverted after scanning in a document with the black and white color
depth option.
A23. This can occur with some display drivers in True Color display mode. When printed the image
will not be inverted. A display driver upgrade from your graphics card manufacturer may fix this
problem. Such upgrades can often be obtained free of charge over the Internet. Alternatively
changing the display mode to 256 colors might also fix it (refer to your graphics card and Windows
manuals for details on how to change the display mode). You can also invert the colors of the image
58
by selecting Invert from the Image menu. If you invert the colors remember to invert them back
before printing, otherwise the printed image will be inverted.
Q24. The wrong date is inserted when I select Insert Today's Date from the Edit menu or click
the Today's Date button.
A24. Check that your system has the correct date, and change it if it hasn't. The Insert Today’s Date
button uses your system clock‘s data. From Control Panel select Date/Time and then adjust the
date and time accordingly. For help in doing this refer to your Windows manual and your computers
manual.
Q25. The wrong date is inserted for the Last Update/Last Archived fields when the document
is saved/archived.
A25. See question Q24.
Q26. I can't change the date format used for date fields.
A26. The date format is set from your systems short date style. To change the month, day and the
year order format, go to Control Panel and select Regional Settings. From there you can change the
date format. Refer to your Windows manual or Windows help for more details.
Q27. In Windows 95 the date format used by MF-PRO is not the same as my systems date
format.
A27. Your systems date format may need resetting. Go to Control Panel and select Regional
Settings. Then select the Date tab. Re-enter the "Short date style" and click the OK button. Your
systems date format will now be reset and MF-PRO will use this date style to format dates.
Q28. The dates in the table aren't correct.
A28. Make sure your system uses a short date style that includes date separators. For example the
date format MMDDYY should be changed to MM/DD/YY or MM-DD-YY to avoid this problem. Refer
to question Q24. on how to change your systems date style.
Q29. What is the Setup Controller?
A29. The workstation that has been selected to run the MF-PRO System Manager in order to
generate license codes for all other stations on the network. This computer is referred to as a Setup
Controller. After you obtained the Setup System Key and License Upgrade Code from MicroPal,
select the specific computer on your network (the same computer whose Host ID you used to obtain
59
the system key from MicroPal) to act as the Setup Controller and activate MF-PRO to become a fullversion software on it. After that, all other workstations can be activated by registering their
computers “Host ID” number to the Setup Controller, while it is running the Setup Controller Utility
option.
Q30. How do I upgrade new User Licenses?
A30. Licenses are installed by changing the License Upgrade number (supplied by MicroPal
Systems) on the Setup Controller for all other workstations. Then each licensed workstation will
need to have the 30-day trial version of MF-PRO installed before running the Setup Controller Utility
option from the Setup Controller.
Q31. What network model does MF-PRO use?
A31. The networking model of MF-Pro is client-computing with centralized file storage.
Q32. What image compression method is used in MF-PRO?
A32. MF-PRO supports both JPEG and ZIP image compression, with user-configurable compression
factors.
Q33. What about the storage cost of digitized documents?
A33. Each Giga byte of storage can hold about 2500 pages of letter- sized images, assuming it was
scanned in at 300 DPI with 8-bit grayscale settings and a JPEG compression ratio of 20. With today’s
HDD pricing, it’s very affordable and even cheaper than paper copies.
Q34. How many levels of security can I have?
A34. Four; ‘Read’, ‘Write’, ‘Database Administrator’ and ‘No Access’.
Q35. Can I import data from other database applications?
A35. Currently no.
Q36. What image formats are supported for importing?
A36. MF-Pro supports .DIB, .BMP, .JPG, .TGA, .TIF, .FXS, .PCX, .PNG files for importing.
60
Q37. If the Setup Controller ever failed, what should I do to get MF-PRO back to work?
A37. If the Setup Controller (workstation) crashed and the Operating System was reinstalled, you
may need to call MicroPal for assistance at that time.
###
61


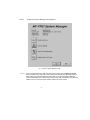
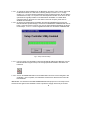


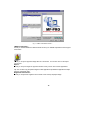
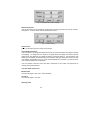

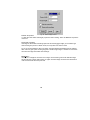


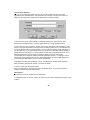

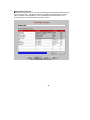
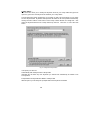
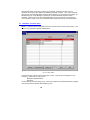

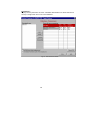

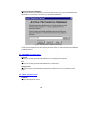


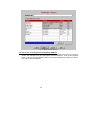

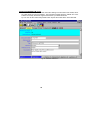
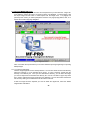
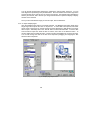


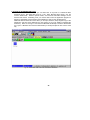
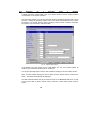
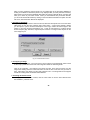


![[1 ] Oracle® Enterprise Manager](http://vs1.manualzilla.com/store/data/005669073_1-0396df232df5e560fdd03210f5126330-150x150.png)