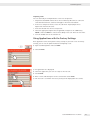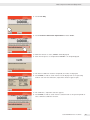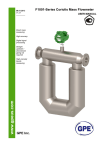
1
Quick Reference Guide
Sartorius Manual Cubis® Comparators
Electronic Mass Comparators
Model MCM
98648-020-14
Contents
Contents
Notes on Using This Quick Reference Guide . . . . . . . . . . . . . . . . . . . . . . . . . . . . . . . . . . . . . . . 3
Safety Instructions . . . . . . . . . . . . . . . . . . . . . . . . . . . . . . . . . . . . . . . . . . . . . . . . . . . . . . . . . . . . . . . 5
Intended Use . . . . . . . . . . . . . . . . . . . . . . . . . . . . . . . . . . . . . . . . . . . . . . . . . . . . . . . . . . . . . . . . . . 5
Operating the Mass Comparator . . . . . . . . . . . . . . . . . . . . . . . . . . . . . . . . . . . . . . . . . . . . . . . . . . 6
Turning the Mass Comparator On and Off . . . . . . . . . . . . . . . . . . . . . . . . . . . . . . . . . . . . . . . . 6
Operating Design: Q-Guide . . . . . . . . . . . . . . . . . . . . . . . . . . . . . . . . . . . . . . . . . . . . . . . . . . . . . 6
Using the Display and Control Unit . . . . . . . . . . . . . . . . . . . . . . . . . . . . . . . . . . . . . . . . . . . . . . 8
Quick Guide: First Weighing . . . . . . . . . . . . . . . . . . . . . . . . . . . . . . . . . . . . . . . . . . . . . . . . . . . . 9
User Interface (Touch Screen) . . . . . . . . . . . . . . . . . . . . . . . . . . . . . . . . . . . . . . . . . . . . . . . . . . . 9
Using the Touch Screen . . . . . . . . . . . . . . . . . . . . . . . . . . . . . . . . . . . . . . . . . . . . . . . . . . . . . . . . . 12
Activating/Switching Users . . . . . . . . . . . . . . . . . . . . . . . . . . . . . . . . . . . . . . . . . . . . . . . . . . . . . . 13
Task Management . . . . . . . . . . . . . . . . . . . . . . . . . . . . . . . . . . . . . . . . . . . . . . . . . . . . . . . . . . . . . . . .
Using Applications with the Factory Settings . . . . . . . . . . . . . . . . . . . . . . . . . . . . . . . . . . . . .
Creating (Configuring) New Tasks . . . . . . . . . . . . . . . . . . . . . . . . . . . . . . . . . . . . . . . . . . . . . . .
Executing Tasks . . . . . . . . . . . . . . . . . . . . . . . . . . . . . . . . . . . . . . . . . . . . . . . . . . . . . . . . . . . . . . . .
14
15
16
19
Weighing . . . . . . . . . . . . . . . . . . . . . . . . . . . . . . . . . . . . . . . . . . . . . . . . . . . . . . . . . . . . . . . . . . . . . . . . 20
Mass Calibration . . . . . . . . . . . . . . . . . . . . . . . . . . . . . . . . . . . . . . . . . . . . . . . . . . . . . . . . . . . . . . . . .
Performing and Configuring a Mass Calibration . . . . . . . . . . . . . . . . . . . . . . . . . . . . . . . . . .
Selecting the Weighing Cycle . . . . . . . . . . . . . . . . . . . . . . . . . . . . . . . . . . . . . . . . . . . . . . . . . . . .
Printout/Sample Log . . . . . . . . . . . . . . . . . . . . . . . . . . . . . . . . . . . . . . . . . . . . . . . . . . . . . . . . . . .
Formulas and Symbols for Mass Calibration . . . . . . . . . . . . . . . . . . . . . . . . . . . . . . . . . . . . . .
21
21
34
35
39
Mass Comparator Calibration/Adjustment . . . . . . . . . . . . . . . . . . . . . . . . . . . . . . . . . . . . . . . . . 44
Calibration/Adjustment Using Internal Calibration Weight . . . . . . . . . . . . . . . . . . . . . . . . . 44
Calibration/Adjustment Using External Calibration Weight . . . . . . . . . . . . . . . . . . . . . . . . 46
System Settings (Menu) . . . . . . . . . . . . . . . . . . . . . . . . . . . . . . . . . . . . . . . . . . . . . . . . . . . . . . . . . .
Leveling the Mass Comparator (Q-Level) . . . . . . . . . . . . . . . . . . . . . . . . . . . . . . . . . . . . . . . . .
Configuring Calibration/Adjustment . . . . . . . . . . . . . . . . . . . . . . . . . . . . . . . . . . . . . . . . . . . . .
Configure Timer Controlled Actions . . . . . . . . . . . . . . . . . . . . . . . . . . . . . . . . . . . . . . . . . . . . . .
Display Device Information . . . . . . . . . . . . . . . . . . . . . . . . . . . . . . . . . . . . . . . . . . . . . . . . . . . . .
Configuring Device Parameters . . . . . . . . . . . . . . . . . . . . . . . . . . . . . . . . . . . . . . . . . . . . . . . . . .
Importing/Exporting Data . . . . . . . . . . . . . . . . . . . . . . . . . . . . . . . . . . . . . . . . . . . . . . . . . . . . . .
Activating the Service Mode . . . . . . . . . . . . . . . . . . . . . . . . . . . . . . . . . . . . . . . . . . . . . . . . . . . . .
48
48
51
52
55
56
63
64
User Management . . . . . . . . . . . . . . . . . . . . . . . . . . . . . . . . . . . . . . . . . . . . . . . . . . . . . . . . . . . . . . . .
Creating User Profiles . . . . . . . . . . . . . . . . . . . . . . . . . . . . . . . . . . . . . . . . . . . . . . . . . . . . . . . . . . .
Activating Users . . . . . . . . . . . . . . . . . . . . . . . . . . . . . . . . . . . . . . . . . . . . . . . . . . . . . . . . . . . . . . . .
Editing User Profiles . . . . . . . . . . . . . . . . . . . . . . . . . . . . . . . . . . . . . . . . . . . . . . . . . . . . . . . . . . . .
65
65
68
69
This Quick Reference Guide will help familiarize you with the operation of the mass
comparator, introduce you to the Q-Guide operating design and offer you examples of
how to perform simple tasks.
The user manual additionally contains:
— A “safety instructions" chapter
— A description of all operating processes
— A description of all applications
— Cleaning and care instructions
— Maintenance and repair instructions
— Information on disposal
— Technical data
2
Cubis MCM Quick Reference Guide
Notes on Using This Quick Reference Guide
Notes on Using This Quick Reference
Guide
ttPlease read the instructions carefully and completely before using the device.
ttRead the safety precautions carefully.
ttThis Quick Reference Guide is part of the product. Keep them in a safe and easily
accessible location.
ttIf the instructions should be lost or misplaced, please contact Sartorius for a
replacement or download the latest version from our website:
www.sartorius.com
Symbols and Signs
The following symbols are used in this manual:
This instruction denotes a possible danger with medium risk that death or severe
injury may result if it is not avoided.
This symbol denotes a possible danger with risk that moderate or minor injury may
result if it is not avoided.
This symbol denotes a danger with low risk that could result in property damage if
the risk is not avoided.
This symbol
–– is an indication of a function or setting on the device.
–– is an indication that caution should be exercised while working.
–– identifies useful information.
The hand symbol indicates operating steps that involve touch screen controls.
H
This symbol means that the USER key should be pressed.
D
This symbol means that the TASK key should be pressed.
When individual buttons are displayed, they should be pressed.
ttIndicates a required action
yy Describes the result of an action
1. If a procedure has multiple steps,.
2. ...the steps are numbered consecutively.
–– Indicates an item in a list
Cubis MCM Quick Reference Guide
3
Notes on Using This Quick Reference Guide
Other Documents
In addition to this quick reference guide, there is also an installation manual which is
supplied along with the device. (Enclosed as a hard copy).
Hotline/technical advice on applications:
Phone:+49.551.308.4440
Fax:+49.551.308.4449
4
Cubis MCM Quick Reference Guide
Safety Instructions
Safety Instructions
The mass comparator complies with the regulations and standards for electrical
equipment, electromagnetic compatibility and the stipulated safety requirements.
Improper use or handling can, however, result in damage and | or injury.
The equipment may only be operated by trained personnel. Operators must read these
installation instructions, particularly the safety information, and must be familiar with
the operation of the equipment. These safety precautions must be supplemented by
the operator as required. The operating personnel must be instructed accordingly.
Before working with the mass comparator, it is imperative that you read the
chapter on “Safety Instructions” in the enclosed installation instructions!
Sharp or pointed instruments (such as ballpoint pens) can damage the device!
he touch screen should only be operated by lightly pressing it using the tips of your
T
fingers. You can also operate the touch screen when wearing lab gloves.
Intended Use
The Cubis®models MCM with the “Mass Calibration" application were developed as
mass comparators especially for use in testing institutes and calibration services.
Each model covers a certain weight range, see Chapter “Technical Data" in the user
manual.
The Cubis®models are designed to be used exclusively indoors. They can be operated
standalone, connected to a PC or in a network.
Cubis MCM Quick Reference Guide
5
Operating the Mass Comparator
Operating the Mass Comparator
Damage to the device due to being improperly secured during transportation!
Mass comparators with motorized substitution weight should be switched to the
standby mode each time before they are transported.
Turning the Mass Comparator On and Off
ttMake sure the mass comparator has been installed and put into operation in
accordance with the installation instructions.
A
ttPress the button A on the control unit.
yy The start screen appears briefly on the screen and then the user interface appears.
The user interface initially appears in German. It is however possible to change
the language setting (see “Configuring Display and Control Unit Properties” on
page 59).
On subsequent starts, the most recent active user profile and task are opened (if at
least one user profile and task have been set up).
ttLevel the mass comparator, if you are prompted to do so (see Chapter “Leveling the
Mass Comparator").
A
ttTo put the mass comparator in the standby mode or to switch it off, press the key
A.
ttClose the draft shield (if your model has one).
Operating Design: Q-Guide
The Cubis® mass comparators are equipped with an application software with
interactive operator guidance. Once you open a menu or select an application,
brief instructions appear on the display to guide you through the menu or application
step-by-step. At each step along the way, the display shows only those options that
are relevant to your process; this helps prevent unnecessary “detours” and enables you
to reach your goal more quickly.
This type of user guidance is mostly intuitive. Although operation of the mass
comparator is mostly intuitive, this quick reference guide includes a section with very
detailed, step-by-step instructions where you can learn about all of the available
options (see Section “Creating User Profiles" in Chapter “User Management").
Basic Operational Structure
The most basic functions, weighing and taring, can be carried out as soon as the
mass comparator is switched on. The application software is divided into three general
areas, in which individual settings can be configured:
6
Cubis MCM Quick Reference Guide
Operating the Mass Comparator
Task Management
In Task Management (from page 14) task profiles with specific applications, device
settings and printout settings can be configured:
Task Management TASK D
Configuration
See
Select application, start
configured at factory
page 19
Configuring tasks
configurable by user
page 16
User Management
In User Management (from page 65) user profiles with specific configuration
settings and user rights can be set up. You can also set up password protection to
meet your security requirements. The mass comparator can also be used without user
management.
User Management USER H
Configuration
See
Selecting user
configured at factory
page 13
Creating user profiles
configurable by user
page 65
System Settings (Menu)
System settings (Menu) contain all basic settings and parameters which are used to
operate the mass comparator, have an effect on its entire operation and can also be
used as a template for creating new tasks.
System settings
Configuration
See
System settings
user-configurable, in some cases only with
administrator rights
from page
48
Using the “Wizard"
You can choose between two display types in some menus:
The overview lists all parameters with their set options. You can select each individual
option to change its setting.
When you activate the Wizard in the same menu, the program guides you onwards
step by step: The individual parameters with their options are displayed in succession.
Cubis MCM Quick Reference Guide
7
Operating the Mass Comparator
Using the Display and Control Unit
Control Keys
D
TASK key: Opens Task Management, in which tasks can be selected and defined. While
working in this menu, you can also use the TASK key to cancel at any time and return
to task overview.
H
USER key: Opens User Management, in which user profiles can be selected and user
settings defined. While working in this menu, you can also use the USER key to cancel
at any time and return to user overview.
J
P
TARE keys - left and right: Zeroing and taring
A
O
Control key: to turn on and switch to standby
PRINT key: Used to print the currently displayed measurement results or a userspecific printout.
Operating elements for electronic draft shield (depending on the model)
Setting up the Display and Control Unit
The tilt angle of the display and control unit can be set as desired to enable optimal
readability for changing working conditions. The color and brightness of the display
can also be changed to match the illumination in the room (see “User Management"
and “System Settings").
Inserting Memory Cards into the Display and Control Unit
The slot for the SD card is located at the back of the display and control unit.
8
Cubis MCM Quick Reference Guide
Operating the Mass Comparator
2
1
1. Tilt the control unit until it is nearly vertical.
2. Swivel the cover of the card slot to the front. Align the SD card so that the contacts
are facing forwards and upwards.
For the sake of clarity, the illustration shows reversed view of the display and
control unit.
3. Insert the card into the slot as far as it will go.
ttTo remove the card, press it against the resistance in the direction of the slot so
that the card springs out.
4. Press the position retainer and swivel the display and operating unit back into the
desired position.
Quick Guide: First Weighing
A
ttTo turn the mass comparator on, press the button A.
ttClose the draft shield (if available).
ttBefore the first weighing, check the level indicator and level the mass comparator
if necessary (see Chapter "Leveling the Mass Comparator”).
J
ttTo tare the mass comparator, press the tare key J.
yy The mass comparator is tared and the value displayed is zero.
ttIf required, open the draft shield and carefully place the sample (test weight or
reference weight) on the weighing pan.
ttClose the draft shield (if available).
yy You can read the measured value as soon as the measurement value stops changing
and the unit is displayed. The font color of the numbers changes from gray to
black.
User Interface (Touch Screen)
Many operating steps are carried out via the display using the touch screen. The
display varies depending on whether the application software is in operating mode or
a menu is currently open (setup mode).
Cubis MCM Quick Reference Guide
9
Operating the Mass Comparator
Display in Operating Mode
8
1
7
6
2
5
4
3
10
1
User field displays the current user, date and time Touching this area displays the user description
2
Scaled measurement value display (percentage of weighing capacity utilization)
3
Toolbar with currently available buttons
4
Task area with instructions on how to proceed
5
Field for status and warning messages (see below)
6
Value range with current measurement value (the numeric value is displayed in
black numbers once the weighing system reaches stability; beforehand it is displayed
in gray)
7
Metrology line left of the weighing capacity (“Max”), to the right “d" readability
(resolution) of the mass comparator
8
Function display current task (here: Preparation mass calibration) Touching this area displays the description of the application
Cubis MCM Quick Reference Guide
Operating the Mass Comparator
Status and Warning Messages
Tabs with the following messages may be displayed here:
isoCAL is displayed: isoCAL is active
isoCAL flashes: Adjustment required
Touch the tab to activate the function.
Level me! flashes: The mass comparator is not straight, leveling required
Touch the tab to activate the function.
Service: The next scheduled maintenance date has been reached. Touch the tab to
view details of your contact person at Sartorius.
GLP: GLP print is active, the header will be printed. Touch the tab to print the footer.
Display in Setup Mode
6
1
5
4
2
3
1
Symbol indicating which menu (TASK, USER or MENU) is currently open
2
Scroll bar to view the entire selection area
3
Toolbar with currently available buttons
4
Selection area with selectable options
5
Orientation line shows the current menu level
6
Interaction area with instructions on how to proceed
Cubis MCM Quick Reference Guide
11
Operating the Mass Comparator
Using the Touch Screen
Sharp or pointed instruments (such as ballpoint pens) can damage the device!
he touch screen should only be operated by lightly pressing it using the tips of your
T
fingers. You can also operate the touch screen when wearing lab gloves.
All operating buttons on the touch screen are depicted in a light plastic surface.
They are activated with a light touch.
Alternative selection: When only one of several options is available, always touch the
desired option and the program will automatically switch to the next view.
Multiple selection: When several options are available for selection, each option will
have a checkbox. You can select or deselect the desired option by touching the
checkbox (adding or removing the checkmark).
Touch Next to go to the next query.
For some displays you will need to use the scroll bar to view all options. You can either
slide the bar (touch it and pull in the desired direction) or touch the up or down arrow
keys.
Entering Text and Numbers
A keypad will appear whenever you have to enter text and numbers. A cursor appears
in the entry line above the keypad.
ttSelect the desired characters with a light touch.
yy The text entered will appear in the entry line.
Press the ‘Shift' button to change the input mode between uppercase letters,
lowercase letters, numbers and the complete character set with special characters.
The ‘backspace' key is used to delete the character to the left of the cursor.
Touching the input line toggles the input mode.
Overwrite mode: The cursor now marks a character or the entire entry. The marked
text will be overwritten by the new entry.
Input mode: The cursor is positioned in the blank space between characters so that
you can enter more characters.
Use either of the arrow keys to move the cursor one space to the left or to the right.
12
Cubis MCM Quick Reference Guide
Operating the Mass Comparator
The Back key cancels the entry process and takes you back one step to the last view.
The OK key ends the process and saves character input.
Opening and Closing the Draft Shield
O
Operating elements for the electronic draft shield (depending on the model)
The operating elements are located to the left and right sides of the control and
display unit, see figure on page 7.
You can open and close the draft shield with the UP/DOWN keys on the control and
display unit.
Activating/Switching Users
H
In the operating mode, the active user is displayed in the user field in the upper
right-hand corner of the display. To activate another user profile, open the User
Management menu.
ttPress the key USER H.
yy The user selection is displayed. The current, active user can be recognized by the
small arrow and the dark background.
ttTouch the user you want to activate.
yy The program switches back to operating mode with the selected user is logged in
with his access rights.
ttWhen you touch Start the user who is currently selected will be activated.
Cubis MCM Quick Reference Guide
13
Task Management
Task Management
In the Task Management menu (TASK) you can
–– start a task,
–– configure a new task and
–– edit an existing task (modify, copy, delete).
Some applications like weighing, density determination, statistics etc. are available to
you for a task, see User Manual. Each task contains at least one of these applications.
However, it can also have a combination of several applications. Each application can
be used either with its factory settings or you can modify it as desired. The weighing
application is available as a basic function for every task. Each task also contains the
individual settings and the individually configured printout.
Which options are available to a given user in the task management depend on the
user’s rights: An administrator can use all options, while a user can only use limited
options (see “User Management" in Chapter User Management). If no users have been
defined, all options can be accessed; there are no limitations. A maximum of 15 tasks
can be created.
The administrator can create tasks with restricted use, i.e. tasks that can only be used
by certain users or only by the administrator himself.
Global tasks can be used by all users.
Some tasks are only accessible to the user who created them. Exception: A user can
copy global tasks to use them afterwards as a local task.
Option
Administrator
Configure, modify, delete own tasks
Configure, modify, delete global tasks
i
i
Execute, copy local tasks
Execute, copy global tasks
D
User
i
i
i
ttTo switch to task management, press the TASK key D.
yy The two pre-configured tasks (Mass Calibration, Climate module) are
displayed.
You can change the names of the tasks according to your own preferences and add
additional tasks.
ttWhen you touch Start, the task currently selected will be started (indicated by the
dark background).
yy The text entered will appear in the entry line.
14
Cubis MCM Quick Reference Guide
Task Management
Importing Tasks:
You can also load pre-configured tasks to the mass comparator:
1. Unpack the desired ZIP archive file to the root directory (Root Dir) of a SD card
after download from the Sartorius homepage or from the enclosed CD.
2. In the mass comparator menu, access the sub-menu “Import/Export Data:
Import Files from the SD Card."
3. Insert the SD card into the mass comparator.
4. Select the appropriate import data (if applicable, navigate to the subdirectory
QAPP ) and touch Next to activate the loading of this task. Then exit the menu.
5. Start the loaded task via the selection list.
Using Applications with the Factory Settings
D
Each application comes with specific factory settings. If you wish to use the factory
settings, you can use the quick method for configuring a task:
ttOpen Task Management and touch Edit.
ttSelect Create.
yy An application list is displayed.
ttSelect the application you want to assign to the new task.
ttTouch Done.
ttEnter a name and description for the task and then touch Save.
yy The new task is saved with the factory settings and is displayed in the task list.
Cubis MCM Quick Reference Guide
15
Task Management
Sorting the Task List
D
New tasks are always added to the end of the task list. After you have already
configured several tasks, it may be helpful to sort the selection list.
yy The task selection is displayed.
ttTouch Sort.
yy The list is sorted alphabetically (A - Z).
ttTo reverse the sorting order touch Sort. once again.
ttTo sort tasks by the date of last use, touch Sort. once again.
Creating (Configuring) New Tasks
The following applications are included in the Cubis® software. You can configure
them as tasks according to your requirements and preferences.
–– Weighing
–– Mass unit Conversion
–– Individual identifiers
–– Density determination
–– Draft shield (optional)
–– Individual sequence (Q-App)
The basic process for task configuration is as follows:
1. Create a new task.
2. Select application.
3. Complete all following prompts and if applicable make own entries for the required
parameters.
4. If applicable, perform steps 2 and 3 for additional applications if you would like to
combine multiple applications.
5. Check settings for the weighing and for the printouts, and modify as required.
6. If you are an administrator, define whether the new task can be used by all or only
by certain users.
7. Enter a name and description for the new task.
8. Save task.
16
Cubis MCM Quick Reference Guide
Task Management
Flow Chart “Configuring a Task”
If the Back button is visible on the display, you can navigate backwards.
Create new task
Select application
Make settings
Combine other
applications?
yes
no
Settings for Weighing
Settings for Printouts
Enter name
Save task
D
Example: Creating a Task
ttOpen Task Management and touch Edit.
ttTo define a new task, select Create.
Cubis MCM Quick Reference Guide
17
Task Management
yy An application list is displayed.
ttTo view all applications, use the scroll bar on the right.
ttSelect the application you want to assign to the new task.
ttConfigure this application as required. The program guides you through the
configuration menu.
ttIf you want to assign additional applications to the task, these applications should
also be configured (see “Combining applications into one task").
yy After all applications for the new task have been configured, the following two
parameters have to be set: Configure the settings for weighing and printouts.
All settings configured here will only affect the new task.
Settings for Weighing
ttCheck the settings and change them as required.
To find explanations for each of the options, first touch Wizard and then Info.
ttTouch Next.
Settings for Printouts
ttCheck the settings and change them as required.
To find explanations for each of the options, first touch Wizard and then Info.
ttTouch Next.
ttEnter a short name and a description for the new task.
ttTouch Save.
yy The task selection with the new task is displayed.
18
Cubis MCM Quick Reference Guide
Task Management
Executing Tasks
D
After all required settings have been configured, you can now start and execute a task.
ttIf you haven't already done so, go to Task Management.
yy The task selection list is displayed.
ttTouch the task of your choice
or:
ttIf the desired task has already been selected, (dark background and arrow on the
left), touch Start.
yy The program switches to the operating mode and the selected task is activated.
ttFollow the instructions on the display.
In this Quick Reference Guide, we only describe the applications “Weighing" and
“Mass Calibration". For complete description of all applications, please refer to the full
user manual on the enclosed CD-ROM.
Cubis MCM Quick Reference Guide
19
Weighing
Weighing
Purpose
Weight determination within the scope of the device-specific weighing capacity
(see “Technical Data")
Combination Options
“Mass Unit Conversion” and “Individual Identification”
Configuring a Task: My Weighing
ttIf you have not already done so, switch over to Task Management and touch Edit.
D
yy You can create, modify, copy and delete a task profile.
ttTouch Create and select the application for the task profile, in this case Basic
Weighing.
If you want to set up the weighing function without combining it with another
application:
yy The settings for Basic Weighing are displayed.
ttCheck all settings and change them as required.
ttTouch Next.
yy The settings for the Printouts are displayed.
ttCheck all settings and change as required.
ttTouch Next.
ttIf you are an administrator: Define whether all or only certain users may use this
task.
ttTouch Next.
ttEnter a short name and a description for the new task (e.g. “My Weighing”).
ttTo save the new task, touch Save.
Executing Tasks: My Weighing
D
ttIf you haven't already done so, go to Task management.
yy The task selection is displayed.
ttTouch the desired task, or, if the desired task has already been selected touch
Start.
yy The program switches to the operating mode and the selected task is activated.
20
Cubis MCM Quick Reference Guide
Mass Calibration
Mass Calibration
Purpose
The application “Mass Calibration" has been especially developed for use in metrology
institutes and laboratories involved in mass and calibration in order to provide users
with a simple, fast and comprehensive mass calibration process. The Cubis® models
MCM are used as mass comparators with this application.
In a precisely conducted process sequence, according to OIML R111 and/or
ASTM E614 the conventional mass value of the test weight and its uncertainty are
determined by means of the comparison of a test weight (“Test piece") and a reference
weight (“Normal"). It is by this means that the test weights can be traced back to
international standards.
Configuration Options
In the ex-factory state, the Cubis® MCM models have a pre-defined mass calibration
task which you can use immediately or customize to your requirements.
The “Mass Calibration" application offers vast scope for configuration. You can, for
example, select the standard applied (OIML or ASTM), modify the parameters for timer
control and define the uncertainty parameters required. The scope and additional
information such as order data and test weight data in the output log can be selected
individually. Besides this, the application has a database for saving your reference
weight data and a material database according to OIML R111, which can be expanded
to include your own materials.
Requirements
In order to perform a mass calibration operation, you require a test weight and a
calibrated reference weight of the relevant mass.
The requirements for mass calibration in accordance with the standards of OIML
and ASTM are taken into account in the processes by means of appropriate settings.
However, the parameters selected and entered by you in this regard are not checked
for plausibility.
Performing and Configuring a Mass Calibration
A task Mass Calibration is pre-configured at the factory itself. You can use this
task immediately and modify the configuration even while it is being performed.
If you want to create additional tasks for mass calibration, please read Chapter
“Creating a Task: Mass Calibration” on page 26.
Cubis MCM Quick Reference Guide
21
Mass Calibration
Executing Tasks: Mass Calibration
D
ttIf you haven't already done so, go to task management.
yy The task selection is displayed.
ttTouch the task of your choice or:
ttif the desired task is already selected, touch Start.
yy The main menu is displayed after a few seconds.
In the main menu, the reference weights, materials and settings must now be
configured via the menu items of the same names (see page 27). You will need
the appropriate user access rights for these tasks. If these menu items are inactive
(grayed out), you do not have user access rights for these tasks and must either
change the user (see page 13) or have the required user access rights set up for
you (see page 69).
If you have deselected the calculation of the uncertainties and the buoyancy
correction in the settings menu, the tasks do not have to be configured.
ttTo start the mass calibration, touch [Start] Mass Calibration or Start.
yy Depending upon the default settings, the order data, header or process data are
displayed:
yy This query about order data appears only if the Input order data option
has been activated in the settings menu of the mass calibration (see page 32).
ttTouch the buttons displayed.
yy An option for entering order data is displayed.
The order data which you enter here are used only for orders of this task and are
not available to other tasks. The order data in printed out in the logs.
–– Customer: Customer for the current task
–– Order number: Number of the order
–– Order Ident.: Name of the order
–– Remark: Comments about the order
ttTouch Continue.
yy The query about the header data of the test weight is displayed only if the Input
head data option has been activated in the settings menu of the mass
calibration (see page 32).
ttTouch the buttons displayed.
yy An option for entering header data is displayed.
–– Manufacturer: Manufacturer of the test weight
–– Identification: Description of the test weight
–– Serial number: Serial number of the test weight
–– Shape: Form or shape of the test weight (e.g. Knob Weight)
ttTouch Continue.
The process data which will be described in the next steps can only be modified if the
user has the appropriate user access rights.
22
Cubis MCM Quick Reference Guide
Mass Calibration
ttSelect the weighing cycle, enter the process data and modify it if required.
Touching the values will take you to a selection.
–– Used standard: OIML, ASTM or Free nominal values
–– OIML/ASTM: If these standards have been selected, the accuracy class will also
be displayed
–– Class: Class according to OIML or ASTM
–– Nominal value: Selection of the nominal value
–– Weighing cycle: Selection of the weighing cycle ABA, ABBA or AB...BA
(see Chapter “Selecting the Weighing Cycle” on page 34)
–– Number of cycles: Number of passes of the selected weighing cycle (only in
case of ABA or ABBA)
–– Num. of test weights: Select the number of test weights (only in case of
AB...BA)
ttTouch Continue.
If you have selected Free nominal values as the default:
ttTouch Nominal value input and on Unit of nom. value, to enter the values.
ttIf you have not already done so, select the Weighing cycle and the Number
of cycles.
ttTouch Continue.
ttCheck the material data of the test weight displayed, and modify if required.
–– Material: Display of the material of the test weight. You can access a preconfigured selection by touching it. If you want to create a new material,
open the main menu of the mass calibration and define a new material
(see page 30).
–– Material density: Display of the density of the selected material; by touching
it, you can access an input field and enter an individual value for the density.
–– Expanded uncertainty: Display of the expanded uncertainty of the selected
material; by touching it, you can access an input field and enter an individual
value.
–– Coverage factor k: Factor for uncertainty of the density; the default is 2,
you can enter an individual value.
ttTouch Continue.
yy An appropriate reference weight is proposed, if available.
ttCheck whether the reference weight displayed is correct. If multiple reference
weights are available, you can open a selection list by touching it.
if so:
ttTouch Save, to confirm the value of the reference weight entered, and to save the
previously entered order data and configuration data.
Cubis MCM Quick Reference Guide
23
Mass Calibration
If not:
If multiple reference weights have been defined for the nominal value of the test
weight, the reference weight is selectable. Suitable reference weights are all weights
with a higher accuracy class, at least, however, all E1- and / or. 000 weights of the
appropriate nominal value.
ttTouch the reference weight in order to be taken to a selection and to select a
different reference weight; then confirm your selection with Save.
ttTouch Print, if you would like to print out the configuration data at this stage,
and on Back, to return to the view of the material of the test weight.
yy If the test weight and the reference weight have been confirmed, the overview of
the climate data is displayed:
If a climate module YCM20MC or YCM20MC-DAKKS has been connected to the
device and if you have selected the use of the connected climate module in the
settings menu, you can only read this data, but cannot modify it. If you have opted
for the use of external climate date, the current data must be entered now.
ttCheck the climate data displayed.
ttTouch Save, if you now want to perform the mass calibration with the values
displayed.
Please note that the following process will leave you just enough time for each step,
as you have set in the settings menu. If the tolerance times are exceeded, the current
measurement cycle will be aborted. This can however, be repeated if necessary.
ttKeep the reference weight and the test weight ready before starting the mass
calibration and ensure that there is no dust either on the weighing pan or on the
weights. If required, carefully remove the dust with a soft brush. Use only
appropriate lifting tools or wear gloves when loading the mass comparator.
If the climate data has been confirmed, all required settings have been made. You can
prepare the mass calibration:
ttUnload the weighing pan, close the draft shield and tare the mass comparator.
ttWhen you have completed the preparations, touch Start.
yy You will now be prompted through the mass calibration process step by step.
–– “Weight A” is the reference weight, “Weight B” is the test weight.
–– For your information, the display will indicate to which phase of the mass
calibration the weighing cycle (e.g. A-B-A) currently taking place belongs,
and the number of the weighing cycle (e.g. 1/3) currently being run.
24
Cubis MCM Quick Reference Guide
Mass Calibration
ttFollow the instructions on the screen.
–– Place the weights carefully on the pan and remove them again, when prompted
to do so.
–– Close the draft shield, if present, after the weights have been placed.
–– Complete each step within the allotted time. The remaining time is displayed on
the bottom right corner of the screen.
If you exceed the tolerance time for the step of the mass calibration, the process
terminates, and the message Time overflow! is displayed.
ttIf you want to repeat only the last completed cycle, of the current mass calibration,
touch Again.
ttIf you want to start the entire mass calibration from scratch, touch Abort.
You will be taken back to the main menu.
yy At the end of the mass calibration, the overview of the current climate date is
displayed. If you have opted for the use of external climate date, the current data
must be entered now.
ttTouch Save.
yy The results of the mass calibration are displayed:
ttTouch the scroll bar and scroll downwards to view all the results.
ttTouch Print Fct. if you would like to print out the log of the results.
yy You will get a printout of the results; You can view a sample printout in chapter
“Printout/Sample Log” on page 35 .
ttTouch Trans. (“Transfer"), if you want to save the results on an SD card. You
must have inserted an SD beforehand card for this purpose. The results data are
filed in a txt file which is readable both by people and computers.
The name of the txt file is composed of a time stamp, the order number, the serial
number and the identification of the test weight.
Example: “2014-07-31-17-32-11_999888777_03-0014_AAA.txt“
Cubis MCM Quick Reference Guide
25
Mass Calibration
ttTouch End, if you would like to return to the main menu.
Creating a Task: Mass Calibration
D
ttOpen Task Management and touch Edit.
ttTo create a new task, touch Create.
ttSelect Individual Q-App Workflow.
ttSelect the application Mass Calibration.
ttCheck the settings for the weighing and change them as required.
ttTouch Wizard, if you would like explanations or help with the individual settings.
ttTouch Done, skip the next step and switch directly over to user authorization.
ttTouch Next, if you want to check or modify the settings for the printout.
ttCheck the settings for the printout and change them as required.
ttTouch Wizard, if you would like explanations or help with the individual settings.
ttTouch Done or Next.
26
Cubis MCM Quick Reference Guide
Mass Calibration
ttSelect which users may use the task.
ttTouch Next.
ttEnter a short name, and if desired, a description for the new task.
ttTouch Save, to save the new task.
Configuring a Task: Mass Calibration
D
ttIf you haven't already done so, go to Task management.
yy The task selection is displayed.
ttTouch the task of your choice, or:
ttIf the desired task is already selected, touch Start.
yy The main menu is displayed after a few seconds. If you are logged on as an
administrator, you can see:
–– [Start] Mass calibration: Start task.
–– Show last result: Get the results of the last mass calibration, if any.
–– Reference configuration: In the reference weights database you can edit
reference weights and create your own reference weights (see the next subsection “Create, modify or delete new reference weight”).
–– Density of material: Create and edit your own material in the material
database (see page 30). (Materials conforming to OIML R111 standards cannot
be deleted or modified.)
–– Settings menu: Define general settings for the task “Mass Calibration”
(see page 30).
yy If you are logged on as a user without privileges (e.g. a “trainee”), some of the
buttons are grayed out and inactive since the current user does not have any
privileges set up for the associated applications.
–– [Start] Mass calibration: it is possible to start the task
–– Show last result: it is possible to access the results of the last mass
calibration, if any.
–– Reference configuration: inactive, in the absence of user privileges
–– Density of material: inactive, in the absence of user privileges
–– Settings menu: inactive, in the absence of user privileges
Cubis MCM Quick Reference Guide
27
Mass Calibration
––Creating, modifying or deleting a new reference weight
ttIn the mass calibration main menu, touch Reference configuration.
yy In the reference weight database you can create new reference weights, or modify
or delete existing reference weights. There are no pre-defined reference weights.
ttIn order to define a new reference weight, touch Create new reference.
ttEnter the header data of the reference weight.
–– Manufacturer: Name of manufacturer
–– Identification: Description of the reference weight
–– Serial number: Serial number to differentiate between multiple reference
weights of the same class and mass (e.g. E2, 2 kg)
–– Shape: Knob weight, Cylindrical weight, Wire weight, Leaf
weight, Block weight, Ton weight or Other.
ttTouch Continue.
ttEnter the calibration data (1st part) of the reference weight.
–– Cal. laboratory: Name of the laboratory at which the weight was calibrated
–– Cal. certificate no.: Authority issuing the certificate
–– Calibration date: Date of the last calibration
–– Air temperature cal.: Air temperature during calibration
–– Amb. humidity during calib.: Ambient humidity during the calibration
–– Air pressure cal.: Air pressure during the calibration
–– Air densitycal.: Air density during the calibration (calculated automatically).
ttTouch Continue.
28
Cubis MCM Quick Reference Guide
Mass Calibration
ttEnter the calibration data (2nd part) for the reference weight.
If “OIML” or “ASTM” has been selected as a standard (can be configured in the
settings menu of the mass calibration, menu item “Test process”, see page 31):
–– Class: Class according to OIML or ASTM
–– Nominal value: Selection of the nominal value according to OIML or ASTM
–– Nom. value deviation: Difference compared to conventional mass
Please note, that weight combinations according to OIML or ASTM standards are
usually used as reference weights for the calibration of user-definable nominal
values. Combinations of weights are not usable directly, but can be handled by the
application “Mass Calibration” only as single-piece reference weights in accordance
with the user selectable nominal values. For this purpose, the user must put together
the combination of weights and calculate the input values independently.
If “User-definable nominal values” is selected as a standard (this can be configured
in the mass calibration settings menu, menu item ‘test process', see page 31):
–– Nominal value: Select the nominal value
–– Unit of nom. value: Select the weight unit of the nominal value
–– Conventional mass: Conventional mass
–– Expanded uncertainty: Expanded uncertainty
–– Coverage factor k: Factor, with which the expanded uncertainty was
calculated; standard: 2
ttTouch Continue.
ttSelect the material and if applicable enter the material density deviation, its
uncertainty and the expansion factor as well as the instability of the reference
weight.
ttTouch Save.
yy The reference weight is now available in the database for the mass calibration.
You can use it both in the current task and in other tasks.
Cubis MCM Quick Reference Guide
29
Mass Calibration
Creating New Materials
ttIn the main menu, touch Density of material.
yy You can create new materials, and modify or delete materials. The pre-defined
materials correspond to the values of the OIML standards and cannot be modified.
ttIn order to define a new material touch Create new material.
ttEnter the material description and the data of the material.
ttTouch Save.
yy The material is now available for reference weights and test weights.
ttTouch once Back, to return to the function selection.
ttTouch again Back, to return to the mass calibration main menu.
Defining General Settings for the Application „Mass Calibration“
ttIn the main menu, touch Settings menu.
yy The mass calibration settings menu is displayed.
–– Test procedure: You can define the standard (OIML, ASTM or user-definable
nominal value), the weighing cycle and the number of weighing cycles.
–– Basic settings: You can define the taring behavior and the time period of the
measurement, and also enable or disable the draft shield automatically.
–– Cal. data of climate sens.: If you do not use any integrated climate sensors,
you can enter the required calibration data. This information will appear on the
printed logs.
–– Balance uncertainty: You can enter the uncertainty data of the mass
comparator.
–– Import/export data: You can export the data of both databases (reference
weights and materials) of the application “Mass Calibration" on to an SD
memory card or import it from an SD-memory card (see page 33).
30
Cubis MCM Quick Reference Guide
Mass Calibration
ttIn the settings menu, touch Test procedure.
ttSelect Used standard.
–– OIML: Recommendations of the “Organization Internationale de Métrologie
Légale” (OIML R 111-1)
–– ASTM: US-Standards of the “American Society for Testing and Materials”
(ASTM E617)
–– Free nominal values: For calibration of user-definable nominal values
ttSelect the Class according to OIML or ASTM.
ttSelect the weighing cycle, and define the number of cycles.
–– Weighing cycle: Selection of the weighing cycle ABA, ABBA or AB...BA
(see page 34).
–– Number of cycles: Number of passes of the selected weighing cycle (1-10).
ttTouch Save.
ttIn the settings menu, touch Basic settings.
ttSelect the settings for the handling.
–– Automatic tare:
Off: No automatic taring is performed.
At first A1: Taring is performed automatically upon the takeover of the initial
measurement value (A1 = 0).
At A1 of every cycle: Taring is performed automatically upon the takeover
of each A1 measurement value.
–– Take measured value:
With time interval: The measurement value is taken over after a pre-defined,
fixed time window, and if the acceptance criterion has been fulfilled.
With delay time: The measurement value is taken over after the delay time
has lapsed. (The delay time begins upon the appearance of the stability symbol.)
–– Acceptance criterion (only if “With time interval” has been selected):
With stability: The measurement value is taken over only if the stability
symbol is displayed after the stabilization time has lapsed.
Without stability: The measurement value is taken over even without the
stability symbol.
–– Draftshield automatic:
Off: The draft shield must always be operated manually.
Open aftertaking measurment: The draft shield opens automatically as
soon as the measurement value has been taken over.
ttTouch Continue.
If buoyancy correction and uncertainty calculation are de-selected, no reference
from the reference database for mass calibration is required. The results are the mean
difference and the standard deviation.
Attention: If the buoyancy correction has been de-selected, but an uncertainty
calculation has been performed, the uncertainty of the air density will be assumed
and the air density at the installation site with
.
with
Cubis MCM Quick Reference Guide
31
Mass Calibration
ttSelect the settings for the time control of the procedure and the use of additional
calculations.
–– Handling time: Enter a fixed time period for placing and removing the
weights.
–– Stabilization time: Set the time period after which the measurement value
should be taken over (Time interval) or the latest time in which the mass
comparator ought to have attained stability, in order to start the delay time
(Delay time).
–– Delay time: Set the time delay after which the measurement value should be
taken over after the appearance of the stability symbol (0-99 s, only if delay time
has been selected).
–– Timing tolerance: Enter the duration of the maximum time over-shoot
which will be tolerated after the handling time and stabilization time have
lapsed. When this time has lapsed, the task will be canceled.
–– Air buoyancy corr.: Turn the air buoyancy correction Off or On, with int.
sensor or On, with ext. sensor.
–– Uncertainty calcul.: Enable or disable the uncertainty calculation.
–– Coverage factor k: Factor for adjustment of the confidence range of the
expanded uncertainty. The default value is 2. You can enter a different factor.
ttTouch Continue.
ttSelect the settings for the entry of header data and order data and for the printout.
–– Input head data: If you enable the header data by selecting On , you will be
prompted to enter the test weight header data before the performance of the
task. The header will appear on your printout.
–– Input order data: If you enable the order data by selecting On , you will be
prompted to enter the order data before the performance of a task and this data
will appear on your printout.
–– Printout: You can toggle between Minimum, Maximum and Standard,
in order to determine the length of the print order (see examples of the printouts
from page 35).
ttTouch Save.
When using an internal climate sensor YCM20MC or YCM20MC-DAKKS the
uncertainty values of the sensor will be applied automatically.
ttIn the settings menu, touch Cal. data of climate sens.
If in the settings for the air buoyancy correction the option On, with ext. sensor
has been selected:
ttEnter the calibration data for the external temperature sensor.
ttTouch Continue.
ttEnter the calibration data for the external humidity sensor.
ttTouch Continue.
ttEnter the calibration data for the external pressure sensor.
ttTouch Save.
32
Cubis MCM Quick Reference Guide
Mass Calibration
ttIn the settings menu, touch Balance uncertainty.
ttEnter the uncertainty data of the mass comparator.
–– Rel. u sensitivity: Factor for calculation of the uncertainty due to the
sensitivity of the mass comparator (see page 41)
–– u eccentricity: Uncertainty due to eccentric loading
–– u magnetism: Uncertainty due to magnetism
–– Pooled std. deviation: Pooled standard deviation of the mass comparator
(determined at the place where the mass comparator is installed)
–– Safety factor F: Critical value from the F-distribution for checking the
accuracy of the mass comparator. ( according to [1, Gl. D.2-2]).
ttTouch Save.
ttIn order to switch from the settings menu to the main mass calibration menu,
touch Exit.
Importing/Exporting Data
You can export and import data from mass calibrations performed via the application
“Mass Calibration”.
ttIn the main menu, touch Settings menu.
ttIn the settings menu, touch Import/export data.
yy Here you can export the entire data set (settings, materials database and reference
database) of the application “Mass Calibration” to an SD memory card, or import it
from an SD memory card.
ttPlease ensure that the correct SD memory card has been inserted into the mass
comparator (see page 8). If the SD memory card is defective or not properly
inserted, an error message is displayed.
ttIn order to export the data, touch Export all data to SD card.
ttIn order to import the data, touch Import all data from SD card.
You can save your data records by exporting them or easily copy your settings and
databases to other comparators. This eliminates you having to update your data
multiple times.
ttIn order to switch from the settings menu to the main menu, touch Exit.
Cubis MCM Quick Reference Guide
33
Mass Calibration
Selecting the Weighing Cycle
The application “Mass Calibration” alternates between weighing the reference weight
“Normal” (A) and the test weight – The “Test piece” – (B). The selected weighing cycle
ABA, ABBA or AB...BA determines the sequence in which the weights are placed on
the pan.
–– ABA: This method requires 15 weighing steps over 5 measuring cycles.
The measurements are strictly sequential.
Example:
ABAABAABAABAABA
1
2
3
4
5
–– ABBA: This method requires 12 weighing steps over 3 measuring cycles.
The measurements are strictly sequential.
Example:
ABBAABBAABBA
1
2
3
–– AB...BA: With this method up to 5 test pieces can be simultaneously compared in
a single weighing cycle. For 5 test pieces, this method requires 7 weighing steps.
The process can be severely impacted due to the drifting of the weighing display
and is therefore suitable only for weights of the accuracy class F2 or Class 4 or
lower.
Example:
AB1B2B3B4B5A
1
From the individual values, the display difference between the reference weight
“Normal" (A) and the test weight “Test piece" (B) is determined multiple times.
The mean value and the standard deviation are calculated from the differences.
The standard deviation determined serves as a measure for the accuracy of the mass
comparator or the weighing process.
34
Cubis MCM Quick Reference Guide
Mass Calibration
Printout/Sample Log
You can define the printout details in the general settings for tasks (see page 30).
You can choose from the following three settings: Minimum, Standard and
Maximum. The example shows sample logs for each of the settings.
If you have performed a weighing operation or a mass calibration and want to view
the results, you can touch Print (see page 25), to print the data out directly on the
connected printer, as shown in the following example (see page 35).
Alternatively, you can touch Trans and thus have the data transferred to an SD card.
The data are saved in TXT format and can be viewed or evaluated with a spreadsheet
program.
Minimum
--------------------01/08/2014 17.30.06
SARTORIUS
Mass Calibration
--------------------User:
--------------------Basic settings:
--------------------Air buoyancy corr.
On, with int. sensor
Uncertainty calcul.
On
Coverage factor k
2
Reference weight:
--------------------Identification
AAD
Serial number
03-0296
Class
E2
Nominal value
1 kg
Conv. mass deviation
+1.010 mg
Test weight:
--------------------Identification
AAA
Serial number
03-0014
Evaluation:
--------------------Standard dev. meas.
passed
--------------------Nom.val. dev. meas.
passed
---------------------
--------------------Expanded uncertainty
passed
--------------------Results:
--------------------Conventional mass
1 kg
+2.37 mg
Uncertainty budget
5 mg
--------------------01/08/2014 5.32.55 PM
---------------------
Mass Calibration
Standard
--------------------01/08/2014 5.24.20 PM
SARTORIUS
Mass Calibration
--------------------Model
MCM5004
SerNo.
48428
--------------------User:
Expanded uncertainty
0.250 mg
Coverage factor k
2
Instability
0.000 mg
Material description
Stainless steel
Material density
8010.800 kg/m3
--------------------Order data:
--------------------Customer
SARTORIUS
Order number
999888777
Order Ident.
666555444
Remark
Basic settings:
--------------------Take measured value
After stabilization
Acceptance criterion
With stability
Air buoyancy corr.
On, with int. sensor
Uncertainty calcul.
On
Coverage factor k
2
Reference weight:
--------------------Manufacturer
Sartorius
Identification
AAD
Serial number
03-0296
Shape
Knob weight
Class
E2
Nominal value
1 kg
Conv. mass deviation
+1.010 mg
36
Cubis MCM Quick Reference Guide
Test weight:
--------------------Manufacturer
Sartorius
Identification
AAA
Serial number
03-0014
Shape
Cylindrical weight
Material description
Stainless steel
Material density
7950.000 kg/m3
Measures values:
--------------------A11
+1000.0004 g
B11
+1000.0019 g
A12
+1000.0006 g
u buoyancy correct.
0.00 mg
u balance
0.04 mg
Evaluation:
--------------------Standard dev. meas.
0.07 mg
passed
--------------------Nom.val. dev. meas.
2.37 mg
passed
--------------------Expanded uncertainty
0.89 mg
passed
--------------------Results:
--------------------Conventional mass
1 kg
+2.37 mg
Uncertainty budget
5 mg
--------------------01/08/2014 5.27.10 PM
---------------------
Diff.conv. mass 1
0.00136 g
A21
+1000.0005 g
B21
+1000.0018 g
A22
+1000.0003 g
Diff.conv. mass 2
0.00136 g
Average diff.
0.00136 g
Uncertainty:
--------------------u sensitiv. Balance
0.00 mg
u weighing process
0.42 mg
u reference weight
0.13 mg
Maximum
--------------------01/08/2014 5.18.03 PM
SARTORIUS
Mass Calibration
--------------------Model
MCM5004
SerNo.
48428
BAC:
00-55-84
APC:
01-60-08
Q-App:
08-xx-00
--------------------User:
Timing tolerance
5 s
Air buoyancy corr.
On, with int. sensor
Uncertainty calcul.
On
Coverage factor k
2
Climate sensors:
--------------------u air density
0.001013 kg/m3
--------------------Order data:
--------------------Customer
SARTORIUS
Order number
999888777
Order Ident.
666555444
Remark
Process data:
--------------------Used standard
OIML
Class
F2
Nominal value
1 kg
Weighing cycle
ABA
Number of cycles
2
Basic settings:
--------------------Automatic tare
Off
Take measured value
With time interval
Acceptance criterion
With stability
Handling time
8 s
Stabilization time
10 s
Int. temp. sensor:
--------------------Cal. laboratory
Cal. certificate no.
Calibration date
Expanded uncertainty
0.30 ‘C
Coverage factor k
2
Int. humid. sensor:
--------------------Cal. laboratory
Cal. certificate no.
Calibration date
Expanded uncertainty
2 %
Coverage factor k
2
Int. press. sensor:
--------------------Cal. laboratory
Cal. certificate no.
Calibration date
Expanded uncertainty
2 hPa
Mass Calibration
Coverage factor k
2
Balance uncertainty:
--------------------Rel. u sensitivity
0.00050
u display resolution
0.04 mg
u eccentricity
0.00 mg
u magnetism
0.00 mg
Pooled std.deviation
0.50 mg
Safety factor Sw/Sp
3.00
Reference weight:
--------------------Manufacturer
Sartorius
Identification
AAD
Serial number
03-0296
Shape
Knob weight
Cal. laboratory
Sartorius
Cal. certificate no.
DAkkS
Calibration date
1.8.2014
Air temperature cal.
21.85 °C
Rel. air humid. cal.
48.0 %
Air pressure cal.
1008.20 hPa
Air density cal.
1.185422 kg/m3
Class
E2
Nominal value
1 kg
Conv. mass deviation
+1.010 mg
Expanded uncertainty
0.250 mg
Coverage factor k
2
Mass Calibration
Instability
0.000 mg
Material description
Stainless steel
Material density
8010.800 kg/m3
Expanded uncertainty
1.800 kg/m3
Coverage factor k
2
Test weight:
--------------------Manufacturer
Sartorius
Identification
AAA
Serial number
03-0014
Shape
Cylindrical weight
Material description
Stainless steel
Material density
7950.000 kg/m3
Expanded uncertainty
140.000 kg/m3
Coverage factor k
2
Measures values:
--------------------A11
+1000.0006 g
B11
+1000.0018 g
A12
+1000.0006 g
Air temperature 1
24.18 ‘C
Rel. humidity 1
42.7 %
Air pressure 1
992.19 hPa
Air density 1
1.157222 kg/m3
Correction factor 1
-0.00000004
Diff.conv. mass 1
0.00116 g
A21
B21
A22
38
+1000.0006 g
+1000.0019 g
+1000.0006 g
Cubis MCM Quick Reference Guide
Air temperature 2
24.19 ‘C
Rel. humidity 2
42.2 %
Air pressure 2
992.17 hPa
Air density 2
1.157250 kg/m3
Correction factor 2
-0.00000004
Diff.conv. mass 2
0.00126 g
Results:
--------------------Conventional mass
1 kg
+2.22 mg
Uncertainty budget
5 mg
--------------------01/08/2014 5.21.32 PM
Name:
---------------------
Average diff. mass
0.00121 g
Uncertainty:
--------------------u sensitiv. Balance
0.00 mg
u weighing process
0.42 mg
u reference weight
0.13 mg
u buoyancy correct.
0.00 mg
u balance
0.04 mg
Evaluation:
--------------------Standard dev. meas.
0.07 mg
passed
Pooled std.deviation
0.50 mg
Safety factor Sw/Sp
3.00
--------------------Nom.val. dev. meas.
2.22 mg
passed
Nom.val. dev. budget
11 mg
--------------------Expanded uncertainty
0.89 mg
passed
Uncertainty budget
5 mg
---------------------
Mass Calibration
Formulas and Symbols for Mass Calibration
Formula according to OIML R 111
Description
Unit
OIML R 111
Display difference from the
measurement series (ABA)
mg. g. kg.
[1, Formula
C.4.1-2]
Display difference from the
measurement series (ABBA)
mg. g. kg.
[1, Formula
C.4.1-1]
mg. g. kg.
cf.
[1, Gl. C.4.2-1]
kg m–3
[1, Formula E.31]
in which is as follows:
Symbol/Formula
, ..., : mit
Display difference from the
measurement series with multiple
test weights (AB1...BnA)
in which is as follows:
, ..., : mit
Approximation formula for the
air density
Correction factor for the air
buoyancy for the cycle
[1, Formula
C.5.1-3]
(If the air buoyancy correction
is done with external sensors then
only one is calculated for the
entire measurement.)
Difference of the conventional
mass corrected by the air buoyancy
for
with
AB1...BnA i = (j)
mg. g. kg.
[1, Formula
C.5.1-2]
Mean difference of the
conventional mass
mg. g. kg.
[1, Formula C.
5.1-4]
Variance deviation of the
conventional mass
mg
[1, Formula
C.6.1-3]
Conventional mass
of the test object
mg. g. kg.
[1, Formula
C.5.4-1]
Variance of the air density
kg m–3
[1, Formula
C.6.3-3]
with:
kg m–3
[1, Section E.3]
kg m–3
cf..
[4, Section 2.2]
kg m–3
cf..
[4, Section 2.2]
kg m–3
cf..
[4, Section 2.2]
Cubis MCM Quick Reference Guide
39
Mass Calibration
Description
Symbol/Formula
Standard uncertainty due to the
weighing process
with
Unit
OIML R 111
mg
cf.
[1, Gl. C.6.1-1]
as per [1, Gl. D.2-1]
To check the accuracy of the mass
comparator, the following applies:
(Safety factor < critical value from
the F distribution)
cf.
[1, Section D.2]
mg
[1, Formula
C.6.4-2]
mg
See
[3, sections
3.4.6.2 and
3.4.6.3]
mg
[1, Formula
C.6.4-5]
Uncertainty of the air buoyancy
correction with al
mg
cf.
[1, Gl. C.6.3-1]
[3, Gl. 34.67]
The following applies if no air
buoyancy correction has been
performed:
mg
[1, Section
C.6.3.2]
Standard uncertainty of the
conventional mass of the standard
mg
[1, Formula
C.6.2-1]
Combined standard uncertainty
of the conventional mass of the
test object
mg
[1, Formula
C.6.5-1]
Expanded uncertainty of the
conventional mass
mg
[1, Formula
C.6.5-3]
Uncertainty due to the division of
the digital display
Uncertainty due to the sensitivity
of the mass comparator, simplified
[1, Gl. C.6.4-1]
(5 +10-4 is the default value for the
relative uncertainty of the sensitivity,
cf. p.33)
∆
Combined standard uncertainty of
the mass comparator
(
)
∆
Symbols in accordance with OIML R 111
Symbol
Unit
Definition
(A),
mg. g. kg.
Subscript for reference weight
(B),
mg. g. kg.
Subscript for test weight
mg. g. kg.
Indication of the mass comparator (scale divisions)
mg. g. kg.
Indication difference of the mass comparator
with
, for this cycle
Subscript for the number of weighing cycles
Number of test weights
Subscript for the number of test weights
Subscript for number of measurement sequences
hPa
40
Air pressure
Cubis MCM Quick Reference Guide
Symbol
Unit
Definition
%
Relative humidity
°C
(Air) temperature in °C with
kg m–3
Air density of the moist air
Mass Calibration
𝑇𝑇 273.15 K
Correction factor for air buoyancy
kg m–3
Reference density of the air (1.2 kg m-3)
kg m–3
Density of the reference weight (Normal) with the mass mr
kg m–3
Density of the test weight (test piece)
mg. g. kg.
Conventional mass of the test weight
mg. g. kg.
Conventional mass of the reference weight
mg. g. kg.
Average difference of the conventional mass
mg. g. kg.
Standard deviation
mg. g. kg.
Standard deviation of the weighing process:
mg. g. kg.
Pooled standard deviation
mg. g. kg.
Combined standard uncertainty
mg. g. kg.
Uncertainty of the conventional mass of the test weight (test piece)
mg. g. kg.
Expanded uncertainty of the conventional mass of the test weight (test piece)
Coverage factor, typically 2
mg. g. kg.
Uncertainty due to the weighing process
mg. g. kg.
Uncertainty of the balance:
Uncertainty of the air buoyancy correction:
mg. g. kg.
Uncertainty of the conventional mass of the reference weight (Normal)
mg. g. kg.
Uncertainty of the Normal
mg. g. kg.
Uncertainty due to the sensitivity of the balance
mg. g. kg.
Uncertainty due to the display resolution of a digital balance
mg. g. kg.
Uncertainty due to eccentricity
mg. g. kg.
Uncertainty due to magnetism
Uncertainty of the air density:
Uncertainty of the density of the test weight (test piece)
Uncertainty of the density of the reference weight (Normal)
Expanded uncertainty :
Standard uncertainty
Safety factor, critical value from the F Distribution
Cubis MCM Quick Reference Guide
41
Mass Calibration
References
[1]
OIML R111-1, Weights of classes E1, E2, F1, F2, M1, M1-2, M2, M2-3 and M3, Part 1:
Metrological and technical requirements, Edition 2004 (E)
[2]
ASTM E617-13, Standard Specification for Laboratory Weights and Precision, Mass
Standards, 100 Barr Harbor drive, PO Box C700, West Conshohocken, PA 19428-2959,
United States, 2013
[3]
Kochsiek, M. Gläser, M., “Comprehensive Mass Metrology”, Wiley-VCH Verlag Berlin
(2000), Sec. 3.4, “Mass determination with balances” (Roman Schwartz)
[4]
Picard, A., Davis, R.S., Gläser, M., Fujii, K., “Revised formula for the density of moist air
(CIPM-2007)”, Metrologia 45 (2008) 149 - 155
[5]
GUM 1995, Guide to the expression of uncertainty in measurement, JCGM 100:2008,
2008
Flowchart for calculating conventional mass
A flow chart for calculation of conventional mass and its uncertainty is shown in
the following figure.
42
Cubis MCM Quick Reference Guide
Uncertainty
Uncertainty
Air pressure p
Humidity hr
Calculate the conventional
mass
of the
test weight
Calculate the conventional
mass difference
test weight reference weight
Type B uncertainty
due to instability
of reference weight
Type B reference
weight uncertainty
(from the calibration certificate)
Calculate the Type B
uncertainty of
air buoyancy correction
Calculate the expanded
overall uncertainty
Calculate the uncertainty
of the weighing process
Pooled standard
deviation
from older measurements
Conventional reference weight value ± Type B uncertainty
Uncertainty
Uncertainty
Reference weight
material density
Test weight material density
Uncertainty
Uncertainty of formula for
determining air density
Uncertainty
Environmental effects
Temperature t
Determine the
standard deviation
User influence
Air density
Calculate the
display difference
test weight reference weight
-weighing cycles
ABBA / ABA
Start
Expansion factor
Calculate the uncertainty
of the mass comparator
Uncertainty of the
mass comparator
due to magnetism
Uncertainty of the
mass comparator
due to excentric loads
Uncertainty due to the
display resolution of
the mass comparator
Uncertainty due
to the sensitivity
of the mass comparator
Mass Calibration
Cubis MCM Quick Reference Guide
43
Mass Comparator Calibration/Adjustment
Mass Comparator Calibration/Adjustment
Background
During calibration, a calibration weight is used to determine how much the displayed
value deviates from the actual measurement value. This deviation is compared with
an entered target value and is then eliminated by subsequent adjustment. During the
linearization, the deviation of the values from the ideal characteristic curve is cleared.
When and how often
Calibration/adjustment should be carried out on a regular basis, e.g., daily after the
mass comparator is switched on. In addition, it should be done after each leveling and
always when the ambient conditions have changed (temperature, humidity or air
pressure), and when the balance has been set up at a different location.
isoCal
All Cubis® mass comparators are equipped with the automatic calibration / adjustment
function ‘isoCal' (timer and temperature-controlled). You can adapt this function
according to your requirements. You also have the option of setting up a reminder
function that prompts for calibration/adjustment at user-definable intervals.
The process sequence may differ depending on the presets which have been defined
for the calibration/adjustment function. The factory settings have not been changed
for the procedure described here.
Calibration/Adjustment Using Internal Calibration
Weight
D
ttPress the key TASK D.
yy A list of available tasks is displayed.
ttTouch Weighing.
yy You are in the operating mode.
ttMake sure that the weighing plate is unloaded.
J
44
Cubis MCM Quick Reference Guide
ttPress TARE, in order to tare the mass comparator.
Mass Comparator Calibration/Adjustment
ttTouch Cal./Adj.
ttTouch Internal calibration/adjustment and then Start.
yy While the function is active, Cal.Int. will be displayed.
ttWait until the process is completed and Cal.Int. is no longer displayed.
yy The internal calibration has been completed, the results are displayed.
ttTouch Back, in order to switch from the results display back to the operating
mode or wait until the calibration / adjustment selection appears again.
yy The calibration / adjustment selection appears.
ttTouch Back, in order to switch from the selection back to the operating mode or
select a different calibration function.
Cubis MCM Quick Reference Guide
45
Mass Comparator Calibration/Adjustment
Calibration/Adjustment Using External Calibration
Weight
An external calibration weight is required for this function. Please note the tolerance
of the calibration weight being used.
D
ttPress the key TASK D.
yy A list of available tasks is displayed.
ttTouch Weighing.
yy You are in the operating mode.
ttMake sure that the weighing plate is unloaded.
J
ttPress TARE, to tare the mass comparator.
ttTouch Cal./Adj.
ttIn the calibration / adjustment selection, touch External cal./adj. with
factory-defined weight or a different, external test weight.
yy The calibration is started. The weighing plate is not yet loaded.
46
Cubis MCM Quick Reference Guide
Mass Comparator Calibration/Adjustment
yy The display changes.
yy You are prompted to place the test weight.
ttTouch Start.
yy After the calibration / adjustment the results will be displayed.
ttTouch the scroll bar and scroll downwards to view all the results.
ttTouch Back.
yy You are taken back to the operating mode.
Cubis MCM Quick Reference Guide
47
System Settings (Menu)
System Settings (Menu)
This menu contains all settings relevant to the device. Basic settings can be made here
that immediately affect the device. Changed settings do not affect previously defined
tasks and user profiles.
All system settings are user-independent; in other words, they are applied to all users
As long as a task is active and/or a user has been selected, several basic settings
cannot be changed. In order to enable all settings to be changed, “Weighing" has
to be selected in the operating mode and no user profile may be selected.
ttIn order to open the system settings, touch Menu in the operating mode.
yy The selection of the system settings is displayed.
ttTo view all menu items, use the right scroll bar.
ttTouch the menu item whose settings you want to change.
System settings are divided into the following menus:
–– Leveling the mass comparator (see next section, page 48)
–– Configuring calibration / adjustment (see page 51)
–– Setting up time-controlled actions(see page 52)
–– Displaying device information (see page 55)
–– Configuring the device (see page 56)
–– Importing / exporting data (see page 63)
–– Activating the service mode (see page 64)
You have already learned how to use the menus. In the following, only configuration
options are described and explained.
Leveling the Mass Comparator (Q-Level)
The mass comparator must be leveled, in order to enable it to provide accurate
weighing results. During the leveling process, the unevenness of a weighing plate is
eliminated by adjusting the leveling feed of the mass comparator. Leveling is always
required if the mass comparator is set up at a different location, or is moved at its
original location.
Depending on the model, the mass comparator is equipped with motorized or
manually activated leveling feet. An integrated sensor detects the alignment of the
mass comparator and triggers a warning message when leveling is required. You can
configure the leveling note and the leveling (see page 56).
The mass comparator needs to be re-leveled and adjusted each time its setup location
is changed.
48
Cubis MCM Quick Reference Guide
System Settings (Menu)
As soon the display shows the message Leveling me! , you must perform the
leveling process. The process is quick and easy.
ttTouch the tab Level me!,
or:
ttin the menu select the option Level the balance.
ttMake sure that Weighing plate is unloaded.
Mass Comparators with Motorized Leveling Feet (Automatic Leveling)
The models MCM2004, MCM5004, MCM5003 and MCM10K3 with the motorized
leveling feet can only be automatically leveled. All other models show you, by means
of arrows on the display, the direction in which the leveling feet need to be turned in
order to level the unit.
ttTouch Start, to start the automatic leveling process.
yy A message is displayed as soon as the automatic leveling is completed.
ttAcknowledge the message by touching OK.
yy This takes you back to the selection of the system settings.
Manually Leveling the Mass Comparator
Mass Comparator with Four Leveling Feet
ttTurn the two rear leveling feet fully according to the direction of rotation shown
on the display.
ttTouch Next.
Cubis MCM Quick Reference Guide
49
System Settings (Menu)
yy The display indicates by means of arrows, which of the front feet need to be turned
in which direction.
ttFollow the instructions on the display.
yy A message is displayed after the correct setting of the front leveling feet.
ttAcknowledge the message by touching Next.
ttTurn both the rear leveling feet in accordance with the direction of rotation shown
on the display until they touch the surface on which the mass comparator is being
set up.
ttEnd the leveling process by touching OK.
Mass Comparators with two leveling feet.
yy The display indicates by means of arrows, which of the rear feet need to be turned
in which direction.
ttFollow the instructions on the display.
yy After the correct setting of the leveling feet, a message is displayed.
ttEnd the leveling process by touching OK.
50
Cubis MCM Quick Reference Guide
System Settings (Menu)
Configuring Calibration/Adjustment
ttIn the operating mode, touch Menu.
yy The selection of the system settings is displayed.
ttTouch Calibration/adjustment data.
yy The selection of the settings options is displayed (the settings options will be
described in the following chapters).
–– Define calibration/adjustment functions
–– Define External Calibration Weights
–– Set fully automatic adjustment function isoCAL
ttSelect the section in which you want to make settings.
ttConfigure the desired settings for all sub-menus.
ttTo save the settings touch Save.
In the following text. factory settings are identified with “*”.
Defining Calibration and Adjustment Functions
ttIn the menu, touch Calibration/adjustment data, in order to access the
selection of the settings options.
ttIn the selection section of the settings options, touch Define calibration /
adjustment functions:
Cal./Adj.-key: Functions of the key: Block key / *Configure key selection menu /
Select fixed 1-key function
Cal./Adj. Selection menu: Select which calibration/adjustment functions are
listed when the Cal./Adj. key is touched.
Cal./Adj. Sequence: Options: *Calibrate, then adjust automatically / adjust /
calibrate or subsequently adjust manually
Cal./Adj. Unit: Options: *Gram / Kilogram / Defined via data record
Define External Calibration Weights
ttIn the menu, touch Calibration/adjustment data, in order to access the
selection of the settings options.
ttIn the selection of the settings options, touch Define external calibration
weights:
No. of external calibration weights: Enter the number
Ext. calibration weight n: Enter the data for each calibration weight:
weight value (in grams), ID, certificate, validation
Cubis MCM Quick Reference Guide
51
System Settings (Menu)
Set Fully Automatic Adjustment Function isoCAL
ttIn the menu, touch Calibration/adjustment data, in order to access the
selection of the settings options.
ttIn the selection of the settings options, touch Set fully autom. adjustment
function isoCAL.
isoCAL: Define the function setting: Off / only alert levels, manual start / On,
automatic execution
isoCAL alert levels: *isoCAL status field only (the “Tab”)/Alert message,
repeating/ Alarm message adjustment urgently required
isoCAL temperature: Enter temperature difference (in Kelvin).
isoCAL interval time: Enter interval time in hours.
Configure Timer Controlled Actions
You can program the following actions so that they run automatically at preset times:
–– Display message and execute a command (see example below)
–– Execute a command
–– Show a message (e.g. a prompt as a reminder)
ttIn the operating mode, touch Menu.
yy The selection of the system settings is displayed.
ttTouch Configure timer-controlled actions.
yy The available actions are displayed. When you open this menu for the first time,
the list will be empty.
ttTouch Edit.
52
Cubis MCM Quick Reference Guide
System Settings (Menu)
yy The editing options available are displayed.
ttIf you want to set up a new time-controlled action, touch Create. Later you can
also modify, copy, or delete each action here.
Example
You want the function “Internal calibration / adjustment” to run every morning at
7:00 a.m. In addition, you want a message to be displayed.
ttSelect the action which you want to set up, e.g, “Display Message and execute
command".
ttSelect the action which you want to set up, e.g. “Internal Calibration and
Adjustment"
ttEnter the text which should be displayed during the execution of the action,
e.g. “Time-controlled adjustment”.
Cubis MCM Quick Reference Guide
53
System Settings (Menu)
ttEnter the date and time at which the action should be executed for the first time.
ttDefine the time interval at which you want the action to be repeated (e.g., one day
for daily occurrence).
ttTouch Next.
ttSelect Enable action.
yy The action programed, will start at the specified time. You can at any time enable
or disable the window “Enable / Disable Action” , in order to disable the action or
to enable it once again with a new start time.
yy The overview of all settings for the action is displayed.
ttCheck and correct all settings as required.
ttTouch Next.
ttEnter a name and a description for the action.
ttTouch Save.
ttTouch Back.
yy In the operating mode, a tab “Timer” is displayed. If you touch the tab, you can
access a list of the actions.
yy The programmed action is displayed in the list. You can edit them again at any
time here.
54
Cubis MCM Quick Reference Guide
System Settings (Menu)
Display Device Information
ttIn the operating mode, touch Menu and then Device information.
yy You can view various information here.
ttSelect the information that you want to view.
Base Data
Here you can find all information about the manufacturer, model, serial number,
host name, and IP address used.
ttTouch Version if you want to have the version number of the mass comparator,
the display and control unit and the application software displayed.
ttTouch Ranges if you want to have the weighing ranges and digits (resolution)
displayed.
Service Information and Hotline
Service contact information is displayed here along with the hotline number and
maintenance contract and interval information,
Calibration / Adjustment Log File
The log file is displayed here with the results of all calibration and adjustment
routines.
Audit Trail
All changes to the menu, user profiles, and task profiles are logged in the audit trail.
This function logs: User, profile, parameter ID, parameter, old and new setting.
Log File
The messages recorded by the system (Log files) are displayed here, e.g. error
messages.
Cubis MCM Quick Reference Guide
55
System Settings (Menu)
Configuring Device Parameters
ttIn the operating mode touch Menu and then Device parameters.
Here you can update the software and change the following device settings.
Settings are applied to all user profiles.
–– Set properties of the mass comparator
–– Configure data output
–– Enter the device ID
–– Set date and time
–– Configure the properties of the display unit
–– Adjusting Touch Screen
–– Configure the interfaces
–– Alibi Memory Configuration
–– Update Software
–– Software activation codes
–– Restoring Factory Settings
Optional:
–– Motorized draft shield
–– Ionizer
Setting the Properties in the Operating Mode ‘Weighing'
In the following text. factory settings are identified with “*”.
General Weighing Settings
Here you can define the default settings for the general functions of the mass
comparator. These settings can be changed for a specific task whenever a new task
is created.
These settings can only be changed if the mass comparator is set to “Weighing" in
the operating mode. If Configure balance parameters cannot be selected, use
TASK D to switch over to Task Management and select Weighing.
In order to obtain detailed information about the individual setting options of the
sub-menu, touch Info.
56
Cubis MCM Quick Reference Guide
System Settings (Menu)
Filter adaptation: The effects of unfavorable weighing conditions such as drafts
or vibration can be filtered out by adapting the balance filter (and thus its measuring
time) to suit ambient conditions. Options: Very stable conditions / *Stable conditions /
Unstable conditions / Very unstable conditions
Application filter: Equalizes the load deviations on the display. Options: *Final
readout/Dosing/Low filtering/Without filtering
Stability range: The stability indicator lights up when the weighing results are
constant within a set range. Options: Maximum accuracy/Very high accuracy/
*Medium accuracy/Fast/Very Fast/Maximum speed
Stability delay: This setting lets you compensate for slowly abating disturbances,
such as turbulence in the weighing chamber. Options: *Very short delay/
Short delay/Medium delay/Long Delay
Zero/tare function: Conditions for performing the tare function. Without
stability/*After stability/During stability
Automatic zeroing: If this option is enabled, changes of a fixed, configured
fraction of scale intervals per second starting from the display zero point are
automatically tared. Options: On/*Off
Basic unit: Unit of weight which should be used for this task; Options: all available
units of weight/*Grams
Display accuracy: A low display accuracy gives a faster display. Options: *All dig.
on/Reduced by one decimal place in case of load change/Last decimal
place of the 1st Division/Last decimal place off
Zero/Tare at Power On: When switched on, the mass comparator is automatically
tared. Options: *On/Off
ttTouch Save, to save your settings.
Setting up Q-Level leveling function
You can configure the leveling function here.
Leveling notice
Switched off/Switching off, no indication: Leveling prompt is disabled.
Display/Status Display: As soon as leveling is required the Tab Level Me!
appears and flashes.
Alert / Alarm message, Leveling mandatory: As soon as leveling is required
the Tab Level Me! appears and flashes. If this notice is ignored, an alarm message
appears after five minutes. If this occurs, work can only be resumed after leveling has
been performed.
Automatic leveling (only for mass comparators with motorized leveling feet)
Off / Switch off, Start with key: To activate automatic leveling, touch Start.
Switched on / Switch on fully automatic: The mass comparator is leveled
automatically before every calibration/adjustment routine.
ttTouch Save, to save your settings.
Cubis MCM Quick Reference Guide
57
System Settings (Menu)
Defining the Startup Mode of the Mass Comparator
ttSelect the mode that is used when the mass comparator is turned on and when the
operating key A is pressed repeatedly (Startup behavior).
Optional: ON / Stand-by or Always ON
ttTouch Save, to save your settings.
Defining the Energy-Saving Mode of the Mass Comparator
ttSwitch the power saving mode of the device on or off,
Switched off / Switch off, No function: The power saving mode is not in
use.
Automatic shutoff after 2 minutes: The backlight on the display and
control unit switches off if the device is idle for 2 minutes.
ttTouch Save, to save your settings
Restoring Factory Settings
You can reset all settings of the mass comparator to factory condition (after the
prompt “Do you want to restore factory settings?”).
ttTouch Yes or No.
Configuring Data Output (Print Parameters)
Note: In the following text. factory settings are identified with “*”,
Here you can configure all settings for printing and data output.
Some of these settings depend on the interface configuration:
ttIn this regard, please read the chapter “Interfaces” in the user manual.
To obtain detailed information about the individual setting options, first touch
Wizard and then Info.
Printout interface: Options: COM port peripherals, Port A PC (USB), Port B,
Optional, Port C, Network, Port D, Print to file
Log: Options: Print/SBI/XBPI/Web Service/SICS/Secondary display
This setting cannot be changed here. It is defined when configuring the interface.
The display of the parameters and settings depends on the protocol selected.
GLP standard print: When should ISO/GLP printing be possible?
Options: *Off/Turned on for Cal./Adjust./Always on.
Tare after printout: Automatic tare after printing?
Options: *Off/On
58
Cubis MCM Quick Reference Guide
System Settings (Menu)
Print event: What event should trigger printing?
Options: *PRINT Key/Start of task/Initialization of application/Result of application/
Printing component/Evaluation of application/Exit task/Calibration - adjustment
Print key elements: Which elements should be printed?
For more information see the chapter “Interfaces” in the user manual.
Enter the device ID
With these two IDs you can expand the printer protocol.
ttSelect the input for both the IDs.
ttEnter the desired value (text) for each identifier.
ttTouch Save, to save your settings.
For associated input and output commands for data output please see the user
handbook, Chapter “Interfaces", Section “SBI Commands”.
Setting the date and time
ttEnter the current date and time in the prescribed format.
Configuring Display and Control Unit Properties
The following properties of the display and control unit can be changed as necessary:
Language, Background colors, User field colors, Brightness and
Acoustic signals
These general properties are applied to all user profiles, are also used when no user is
logged in, and serve as a template when a new user profile is created.
Cubis MCM Quick Reference Guide
59
System Settings (Menu)
Adjusting the Touch Screen
Here you can customize the marker button on the touch screen (finger pressure, angle
of touch, etc.),
ttFollow the instructions on the display.
Configuring Interfaces and Network Settings
Here you can configure serial interfaces and make settings for the network.
Besides this, you can make settings for:
–– Control inputs / outputs
–– Print to file
–– FTP server settings
A detailed description of the connection options and data interface ports can be found
in the user manual, in the chapter “Interfaces”.
A detailed description of all the sub-menus, can be found in the user manual in the
chapter “Configuring Interfaces and Network Settings".
ttTouch Save, to save your settings.
Update Software
ttFollow the instructions on the display.
yy After the software has been updated, the balance will restart.
The Cubis®-Software is regularly updated. A detailed description of how you can
perform a software update on your mass comparator can be found in the user
handbook in the chapter “Updating your Software”.
60
Cubis MCM Quick Reference Guide
System Settings (Menu)
Software Activation Codes
Here you will find the activation code administration.
ttTouch WebService or MassCal or ClimaMod, in order to have the codes
displayed.
Restoring Factory Settings
You can reset all settings individually to the factory settings at any time.
ttSlide the scroll bar in the Device parameters sub-menu downwards to the
right, to access the Restore factory settings menu item.
ttHighlight all settings which you want to reset, and touch Next.
ttConfirm the security query.
Setting Up the Motorized Draft Shield (Model Dependent)
O
Operating elements for electronic draft shield (depending on the model)
If your mass comparator is equipped with a motorized draft shield the control unit has
keys on the right and left sides of the display and control unit, which can be used for
the motor-driven opening and closing of the draft shield doors. You can configure the
functionality of these keys in the menu.
Models with analytical draft shields:
For example, you can configure the left key to open and close the right and upper
door (for users who are right-handed) and the right key to open and close the left
door (for users who are left-handed). The opening width (entirely or partially) of the
sliding panels can also be defined.
These settings must be made manually for the draft shield (see “Opening function of
the keys (Learn Function)” on the next page).
ttIn the Device parameters menu, touch Draft shield.
Cubis MCM Quick Reference Guide
61
System Settings (Menu)
ttCheck and correct all settings as required
ttTo save the settings touch Save.
ttDefine the functions for the left and right keys:
Off, no function: The keys have no function.
Same function: Both keys have identical functions.
Separate function: The left and right keys are configured with different
functions.
ttDefine the automatic mode for the draft shield,
Off, no function: The automatic function is switched off.
"Close -> function -> open": The draft shield doors are closed in automatic
mode while the function is executed, and then the doors re-open.
Close -> function: The draft shield doors are closed in automatic mode
while the function is executed.
Automatic mode can be executed using the following keys:
–– Key TARE
–– Key PRINT
–– Softkey Cal /Adj.
–– Component takeover in case of logging applications
(Statistics, formulations, totalizations)
If the automatic mode is switched on, the draft shield doors automatically close when
the mass comparator is switched to standby,
Assigning Opening Functions to Keys (Learning Function)
Example: The keys should be cross-configured (left key opens/closes right door and
vice versa). The mass comparator must be turned on.
ttClose all the draft shield doors.
ttManually operate the door you want to assign to the left key:
Push the right door open as far as you want it to be opened, entirely or partially.
ttPress the left key O.
yy The door will close again.
Now you have configured the left key so that, when pressed, it opens or closes the
right door.
62
Cubis MCM Quick Reference Guide
System Settings (Menu)
ttProceed accordingly to configure the left door and the right key.
Using the same method, you can assign operation of the upper door to one of the
keys. You can also configure one key to move both doors by manually opening both
doors during set up before you press the desired key.
Importing/Exporting Data
ttIn the operating mode, touch Menu and then Import/export data.
ttIf you have not already done so, iInsert the SD card into the slot provided
(see “Inserting an SD card into the control unit”) and touch Next.
ttIf the ‘Continue' button is not visible, check whether the SD card is properly
inserted and latched in place.
ttChoose whether you want to export data to the SD card or import it from the
SD card or whether you want to import a Q-App-Option from the SD card.
Export:
ttHighlight the data that you want to export and touch Next.
ttEdit the name of the export folder, if desired, and touch OK.
ttTouch Next.
yy The data is copied to the SD memory card,
yy An icon is shown on the display during the data transfer.
yy The device cannot be operated during this time.
Import:
ttTouch the folder from which you want to import data from the SD card.
ttHighlight the data that you want to export and touch Next.
yy The user profiles are copied from the SD card.
yy An icon is shown on the display during the data transfer.
yy The device cannot be operated during this time.
The data is available in XML-Format and can be viewed in a browser on a PC.
Cubis MCM Quick Reference Guide
63
System Settings (Menu)
Activating the Service Mode
The service mode gives you the option to make basic settings centrally from this
menu. Depending upon the configuration of the mass comparator when delivered,
and on user access rights, some menu items can be operated only to a limited extent.
You will find a detailed description of the settings in the user manual.
ttIn the operating mode touch Menu and then on Service.
ttSelect the sub-menu in which you want to view the status information or change
the settings.
ttConfirm queries with Yes or No and touch Exit, if you have completed the
configuration.
yy Changes become effective immediately,
ttTo quit the menu, touch Back.
You can access the following views or make settings:
–– View the log file
–– Disable the Audit Trail
–– Configure the service information
–– Disable the action “Next Maintenance”
–– Delete passwords
–– Start the boot menu
–– Delete all profiles (task, user and menu profiles)
–– Restore factory settings (Detailed selection)
–– Set the menu of the weighing settings (properties in the operating mode
‘Weighing') to standard or to calibration mode
64
Cubis MCM Quick Reference Guide
User Management
User Management
You can configure the following settings in this menu:
–– Creating new user profiles (only possible as administrator)
–– Editing user profiles (modify, copy, delete, change and delete passwords, depending
on user rights)
–– Activating users
User management includes users with different rights: the administrator and regular
users.
The administrator can use all functions (except those in Service) and he has all user
rights. Only he can create new user profiles and assign individual rights. There is only
one administrator.
A user, on the other hand, cannot use all functions. He/she has limited rights, which
are defined in the user profile.
When the mass comparator is first delivered, there are no user profiles, all settings can
be carried out. The first user profile that is created is automatically an administrator.
He can then create additional user profiles.
H
ttPress the key USER H.
yy
The User Management menu opens, and the selection of user profiles is displayed.
Creating User Profiles
This function can only be carried out by an administrator.
The following settings can be made in the user profile and are only valid for that user:
–– Language
–– Display settings (color, brightness)
–– Volume and acoustic signal on/off
–– User rights
–– Password Protection
–– User name and description.
Cubis MCM Quick Reference Guide
65
User Management
H
ttTo create a new user profile, touch Edit.
ttTouch Create.
The program now automatically guides you through the menu. Make your selections
by touching the desired option, the program then takes you to the next prompt.
Or:
If the desired option is already selected (dark background), touch Next to go to the
next prompt.
Even if more than one option can be selected, after making your selection touch Next
to go to the next prompt.
Step 1: Setting the Language
Touch the desired language.
Steps 2 to 4: Setting the color and brightness of the display
ttTo select the background color, touch the desired color.
The Sartorius default color for the background is a shade of gray (Sahara).
Together with the user box setting Sun down this is set at the factory.
yy The display changes to the color selection for the user field (see “Display in
Operating Mode").
ttTouch the desired color for the user field.
The Sartorius standard color for the user field is a shade of orange (Setting Sun
down), which is preset at the factory prior to delivery of the mass comparator.
yy The display changes according to the brightness setting.
ttTo change the brightness of the display, touch the desired setting.
Step 5: Setting acoustic signals
If the signal is on, a short beep-tone is emitted each time an operating element on the
display is used.
ttSelect the desired volume.
Or:
ttTouch Off, to disable the acoustic signal.
66
Cubis MCM Quick Reference Guide
User Management
Step 6: Assigning User Rights
ttDefine user rights.
There is one administrator with all rights, users with modification rights for tasks,
and users without modification rights for tasks. Besides this you can grant access
rights for:
–– Importing data
–– Modifying calibration and adjustment settings
–– Modifying the weighing settings of the mass comparator
–– Creating, modifying or deleting time-controlled actions
–– Exporting data
–– Display device information
ttTo move to the next menu item, touch Next.
Step 7: Configuring Password Protection
If you protect a user profile by assigning it a password, this profile can be used only
after the password has been activated.
ttSelect the corresponding option to define whether the user profile is passwordprotected or not.
yy The password will be defined in the step after next.
Only the administrator can open the user profile without the password (for example,
if the user forgets the password) and assign a different password. The administrator
can remove the password protection so that a new password can be set, if desired.
If the administrator forgets the password:
ttPlease contact your Sartorius Service Center
Step 8: Checking All Settings
ttUse the scroll bar or press the down arrow to view all settings.
ttTo modify a setting, press the corresponding button. This opens a screen showing the
options for that setting.
ttIf the settings are correct, touch Next.
Step 9: Defining the Password (if Password Protection Enabled)
yy If you selected the option for password protection, you are now prompted to enter
the desired password twice.
ttPress the upper button.
ttEnter the desired password (min. 4 characters, max. 8 characters, only capital letters
and numerals).
ttPress the lower button, and enter the password again.
ttTouch Next.
Cubis MCM Quick Reference Guide
67
User Management
Step 10: Entering User Names and Descriptions
ttTo enter a name for the user profile, touch the button User.
The user name is shown on the top right of the display during operation as long as
the respective user profile is active.
ttEnter the user name (max. 40 characters) and touch OK.
ttTo enter a description of the user profile, touch the button User description.
ttThe user description can be viewed at any time during operation by pressing the
user info area on the display (see “User Interface”).
ttEnter the description and touch OK.
ttTo complete the process. touch Save.
yy The program switches to user selection. The newly created user profile is placed at
the end of the list.
ttWhen you want to activate a new user, just touch the button with his name.
yy The program switches to the operating mode and the selected user is activated.
Or:
ttIf you want to set up additional user profiles, touch Edit and repeat the steps
described.
Or:
ttWhen you want to switch to the operating mode without switching the user,
touch Start.
Activating Users
In the operating mode, the active user is displayed at the top right of the user field.
To activate another user profile, you must open the ‘User Management' menu.
H
ttPress the USER key H.
yy The user selection list is displayed. The current, active user can be recognized by
the small arrow and the dark background.
ttTouch the user you want to activate.
If a password has been set for this user:
ttEnter the password and confirm the entry.
yy The program switches back to operating mode with the selected user activated and
displayed at the top right of the user field.
68
Cubis MCM Quick Reference Guide
User Management
Editing User Profiles
Which options for editing user profiles are available depends on whether or not you
have administrator rights, The following table shows who can carry out which changes
to user profiles.
Accordingly, the displays shown in this section may differ from your screen because in
this chapter, the administrator view is always shown here,
Option
H
Administrator
User
Change own profile
i
i
Change other profile
i
Copy profile
i
Delete profile
i
Changing or deleting your own password
i
Changing or deleting other user passwords
i
i
ttIf you have not already done so, open the User Management menu by touching the
USER H key.
yy The user selection list is displayed.
ttIn the user selection list touch Edit.
yy The function selection is displayed.
Changing User Profiles
ttTouch Modify.
ttIf you are an administrator, you must now select the profile that you want to
change and touch Next.
yy The overview of all settings for this profile is displayed You can now select and
change the parameters one by one.
Or:
ttIf you want to use the automatic user guide (step-by-step), touch Wizard.
Now all setting options will be displayed one by one to be changed.
ttTouch Next.
ttIf required, change the user name and description.
Cubis MCM Quick Reference Guide
69
User Management
ttTouch Save.
yy The user profile has been changed. The display changes to the user selection.
Copying User Profiles
This function can only be performed by the administrator.
When you copy a user profile with password protection, the password is not
transferred to the copy, but is deleted instead!
ttTouch Copy.
yy All available user profiles are displayed.
ttSelect the profile that you want to copy.
ttTouch Next.
ttEnter a new name and description for the copied user profile.
ttTouch Save.
yy The display switches over to the user selection list, which now includes the new
profile.
Deleting User Profiles
This function can only be performed by the administrator.
ttTouch Delete.
yy All available user profiles are displayed.
ttSelect the profiles that you want to delete and touch Next.
Or:
ttIf you want to delete all the user profiles touch All.
yy All profiles selected for deletion are displayed in a security prompt.
ttIf you even now, still want to change the selection, touch No or confirm the
deletion with Yes.
70
Cubis MCM Quick Reference Guide
User Management
Changing or Deleting Your Own Password
ttIf you haven't already done so, activate your own user profile.
ttIn the user selection list touch Edit.
ttSelect Change or delete own password.
ttIf you want to change the password, touch Yes.
ttSelect both buttons in order and enter the new password twice.
ttTouch Next.
yy This takes you back to the user selection.
Deleting Other User Passwords
This function can only be performed out by the administrator.
ttActivate your own profile.
ttIn the user selection list touch Edit
ttSelect Delete other passwords.
yy An overview of all users with passwords is displayed.
ttSelect all users whose passwords you want to delete and then touch Next.
Or:
ttIf you want to delete all the passwords, touch All.
yy All users whose passwords you selected for deletion are displayed in a security
prompt.
ttIf you still want to change the selection touch No.
Or:
ttConfirm the deletion with Yes.
yy You return to user selection.
Cubis MCM Quick Reference Guide
71
Sartorius Lab Instruments GmbH & Co. KG
Weender Landstrasse 94–108
37075 Goettingen, Germany
Phone +49.551.308.0
Fax +49.551.308.3289
www.sartorius.com
Copyright by Sartorius, Goettingen,
Germany.
No part of this publication may be reprinted
or translated in any form or by any means
without prior written permission from
Sartorius.
All rights reserved by Sartorius AG in
accordance with copyright law.
The information and figures contained in
these instructions correspond to the version
date specified below. Sartorius reserves the
right to make changes to the technology,
features, specifications and design of the
equipment without notice.
Status:
January 2015,
Sartorius Lab Instruments GmbH & Co. KG,
Goettingen
Printed in the EU
on paper bleached without chlorine
W_Cubis® Kurzanleitung MCM · KT
Publication No.: WMC6017-e150102