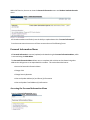
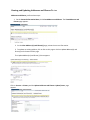
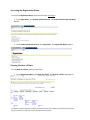
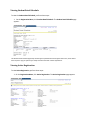
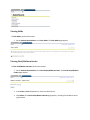
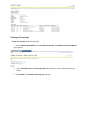
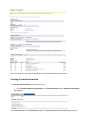
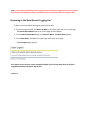
1
Banner Self-Service for Students
Manual
Canadore Self Service can be accessed via the Canadore website by clicking the Canadore Self
Service tab located at the bottom of the website.
LOGIN
Your User ID is your Student Number (case sensitive) and your PIN is your Date of Birth
(DDMMYY). You will be prompted to change your PIN on your first login. Your new PIN
must be six numbers (no letters).
If you encounter problems with this process please contact please contact Canadore’s
Service Desk at extension 5800 or Angela Catahan in the Admissions Office at extension
5906.
Once you have entered your new PIN, you will be prompted to enter a Security Question and
Answer. This can be used if you forget your PIN in the future.
Enter Secure Area
1. Select Enter Secure Area
Enter User ID and PIN and Click Login
2. Please enter your User Identification number (ID) and your Personal Identification
number (PIN)
Within Self-Service, the user can view the Personal Information menu and Student Academic Records
menu.
All Canadore students and faculty have the ability to update data within “Personal Information”.
From these two menu items a user will have access and use of the following forms:
Personal Information Menu
All Personal Information is entered, updated, and viewed using the Personal Information Menu, which
is accessed using the Main Menu.
The Personal Information Menu allows users to complete vital activities such as determining what
address the college uses to correspond with the student. This section describes how to:
• Access the Personal Information Menu
• Change a PIN
• Change Security Question
• View and Update Address (es) and Phone (s) Information
• View and Update E-mail Address (es) Information.
Accessing the Personal Information Menu
Open the Personal Information menu.
Changing a PIN
To Change a PIN, perform these steps:
1. On the Personal Information Menu, click Change your PIN. The Change PIN page appears.
2.
In the corresponding fields, enter the Old PIN and enter a New PIN.
3. Click Change PIN. The Personal Information Menu appears, notifying you that “Your changes
were saved successfully.”
Changing Security Question
To Change Security Question, perform these steps:
1. On the Personal Information Menu, click Change Security Question. The Security Question and
Answer page appears.
2. In the corresponding fields, enter the New Question and enter the New Answer.
3. Click Submit. The Personal Information Menu appears, notifying you that “Your changes were
saved successfully.”
Viewing and Updating Addresses and Phones To view
Addresses and Phones, perform these steps:
1. On the Personal Information Menu, click View Addresses and Phones. The View Addresses and
Phones page appears.
2. On the View Address (es) and Phone(s) page, review the current information.
3. To update an existing address, click on Exit on this page or click on Update Address(es) and
Phone(s) on the bottom of this page.
The Update Address(es) and Phone (s) Form appears.
Click on Current or Primary and the Update Addresses and Phones- Update/Insert page
appears.
On the Update Addresses and Phones-Update/Insert, in the corresponding fields, enter the
New Address and enter the New Telephone Number information
Click submit
The Update Addresses and Phones-Select Address page appears, displaying the current
information changes.
Viewing your E-mail Address Information
To View E-mail Addresses, perform these steps:
1. On the Personal Information Menu, click View E-mail Address. The View E- mail Addresses
page appears.
Student Academic Record Menu
The Student Academic Record allows users to complete vital activities from determining what classes a
student has added, dropped, or changed and each activity determines what appears in the Week at a
Glance and Student Detail Schedule.
The Week at a Glance and Student Detail Schedule displays a students’ weekly class schedule and
individual class details, including Associated Term, CRN (Course Reference Number), Status, and Credit
Hours.
This section describes how to:
• Access the Registration Menu
• View Week at a Glance
• View Student Detail Schedule.
• View Active Registration and Registration History
Accessing the Registration Menu
To access the Registration Menu, perform these steps: Instructions
1. On the Main Menu, click Student Academic Record. The Student Academic Records Menu
appears.
2. On the Student Academic Records, click Registration. The Registration Menu appears.
Viewing Week at a Glance
To view Week at a Glance, perform these steps:
1. On the Registration Menu, click Week at a Glance. The Week at a Glance page appears.
The Week at a Glance page helps students get acquainted with their schedule, and it allows them to print a
copy for reference for easy class location and class time descriptions.
Viewing Student Detail Schedule
To view the Student Detail Schedule, perform these steps:
1. On the Registration Menu, click Student Detail Schedule. The Student Detail Schedule page
appears.
The Student Detail Schedule page helps students get acquainted with their Assigned Instructors, and it allows
them to print a copy for reference for Campus location and other relevant information.
Viewing Active Registration
To view Active Registration, perform these steps:
1. On the Registration Menu, click Active Registration. The Active Registration page appears.
Viewing Registration History
To view Registration history, perform these steps:
1. On the Registration Menu, click Registration History. The Registration
History page appears.
Working with Student Records
All Student Records activities are conducted using the Student Records Menu, which is first accessed
from the Main Menu and then accessed from the Student & Financial Aid Menu.
The Student Records Menu allows users to complete vital activities from viewing account holds, to
viewing final semester grades, transcripts, and other relevant student information.
This section describes how to:
• Access the Student Records Menu
• View Holds
• View Midterm/Final Grades
• View Transcripts
Accessing the Student Records Menu
To access the Student Records Menu, perform these steps:
1. On the Main Menu, click Student Academic Record. The Student & Financial Aid Menu appears.
2. On the Student & Financial Aid Menu, click Student Records. The Student Records Menu
appears.
Viewing Holds
To View Holds, perform these steps:
1. On the Student Records Menu, click View Holds. The View Holds page appears.
Viewing Final/Midterm Grades
To View Final/Midterm Grades, perform these steps:
1. On the Student Records Menu, click Final Grades/Midterm Grades. The Final Grades/Midterm
Grades page appears.
2. In the Select a Term drop-down list, select the desired term.
3. Click Submit. The Final Grades/Midterm Grades page appears, including final/midterm course
grade details.
Viewing a Transcript
To View a Transcript, perform these steps:
1. On the Student Records Menu, click Academic Transcript. The Academic Transcript Options
page appears.
2. In the Transcripts Level and Transcript Type drop-down lists, select the desired transcript
details.
3. Click Submit. The Academic Transcript page appears.
Note: The transcript is only considered Official if it is signed and sealed by the Registrar.
Viewing Account Information
To View Account Information, perform these steps:
1. On the Student Academic Records Menu, click Student Account and the Student Account Menu
page appears.
Click Account Summary or Account Summary by Term. The Account Summary or Account by Term page appears.
Note: If you require clarification or have any questions with respect to transactions in your account
please contact the Admissions Office at extension 5123 or the Finance Office at extension 5507.
Returning to the Main Menu & Logging Out
To Return to the main Menu and Logout, perform these step:
1. On the last page accessed, click Return to Menu jn the upper right hand corner of the page.
The Student Record Menu appears or the last page accessed appears.
2. On the Student Record Menu page, click Return to Menu. The Main Menu appears.
3. On the Main Menu, click Exit in the upper right hand corner of the page
The Final Logout page appears.
As a matter of security users need to completely logout of their session when they are finished
using Banner Faculty and Advisor Self-Service.
Version 3