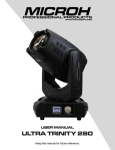
1
RIO IP PAR126
12PCS*12W RGBWA+UV (6-in-1)
www.microhpro.com
User Manual
Please read this manual carefully before using this product!
1. Safety information
Safety warning information
After receiving the device, please unpacking check whether any visible damage was caused during
transport. lf the power cord housing or the light are damaged, do not operate the device, contact your
specialized dealer or manufacturer immediately.
1),Please read the user manual before energizing or installation.
2),Follow operating safety precautions and pay attention to warning signs methods and
Equipment on the user manual.
Prevent fall to injury
1),When hanging lamps, must verify the lamp hook and facilities at least able to
withstand the weight of the lamp 10 times.
2),Before installation must be verify the install hardware strong enough no other
damage, and the use of safe insurance rope as auxiliary safe way, fixed on the other
facilities.
3),Installing or removing equipment, must be lower the boom to a safe place.
Prevent combustion or fire
1),Please do not install the device directly on the surface of ordinary combustible
material.
2),Don't short sub temperature control protection switch or fuse, must use the
regulation models of fuse.
3),Equipment must be installed away from flammable materials, equipment away from
flammable items or materials shortest distance is 0.5mm.
4),Fan or ventilation at least within the range of 0.3m cannot have obstacles.
5),Allow equipment to cool at least 15 minutes before handling.
2. Packing information
Item Name
QTY
Unit
The LED par light
1
pcs
Signal wire
1
pcs
Power wire
1
pcs
User manual:
1
pcs
3. Key Description:
MENU: Access the menu
DOWN: "reduction key" or "key under the selected"; decrease the
value function down menu.
UP: "add key" or "selection on the key"; increase the value
function, shift on the menu
ENTER: Is used to select and confirm/store the current selection
4. Menu Display:
No
Display
Show
Numerical
Value
1
d001
001- 512
DMX512 address setting -10-channel mode
2
A001
001- 512
DMX512 address setting -6-channel mode
3
r255
000 - 255
Red dimming ,from dark to bright
4
G255
000 - 255
Green dimming ,from dark to bright
5
b255
000 - 255
Blue dimming ,from dark to bright
6
u255
000 - 255
White dimming ,from dark to bright
7
Y255
000 - 255
Amber dimming ,from dark to bright
8
P255
000 - 255
UV dimming ,from dark to bright
9
FH99
01 - 99
Strobe,speed from slow to fast
10
CL01
01 - 08
8 kinds of color output.
11
CC01
01 - 99
Color jumping,speed from slow to fast
12
DE99
01 - 99
Color Gradual change,speed from slow to fast
13
CP99
01 - 99
Color Pulse change,speed from slow to fast
14
SU01
01 - 09
mode:1-8 color strobe,9 is color jumping
Function and Description
5. Setting DMX512 console channel address:
After starting DMX512 console, etc. LCD display console initialization has been completed, press Program key,
until the top of the light is flashing, then press the button below channel 1, channel 1 indicator light DMX512
console's address is 10000000, to promote channel faders can be DMX512 console control. Choose DMX512
address consistent with DIP, light to enter the DMX512 control console for the state. The products selected as
10000000 DMX512 console take effect.
6. DMX512 Controller Channel Function:
6 Channel Mode:
Channel
Function
Description
CH1
R dimming
CH2
G dimming
CH3
B dimming
CH4
W dimming
CH5
A dimming
Red dimming ,from dark to bright
Green dimming ,from dark to bright
Blue dimming ,from dark to bright
White dimming ,from dark to bright
Amber dimming ,from dark to bright
CH6
UV dimming
UV dimming ,from dark to bright
10 Channel Mode:
Channel
Function
Description
CH1
Master Dimmer
RGBWAUV master dimmer, from dark to bright
CH2
R dimming
Red dimming ,from dark to bright
CH3
G dimming
Green dimming ,from dark to bright
CH4
B dimming
Blue dimming ,from dark to bright
CH5
W dimming
White dimming ,from dark to bright
CH6
A dimming
Amber dimming ,from dark to bright
CH7
UV dimming
CH8
Master strobe
CH9
Function selection
UV dimming ,from dark to bright
RGBWAUV master strobe ,from slow to fast
0—50:controlled by CH1-CH8;
51-100:8 kinds of color output.;
101—150:Color jumping;
151—200:Color Gradual change;
201—250:Color Pulse change;
251-255:Sound control
Function speed from slow to fast (Color output when the
color selection)
CH10
Function speed
7. The Special Function
Long press the "MENU" button does not release until "0000" and the first flash, then release the button, press
the "MENU" switch function number, use UP or DOWN keys to select, press ENTER to save the settings and
exit
No
Display
Show
Numerical
Value
1
000
000
2
r255
000 - 255
3
G255
000 - 255
4
b255
000 - 255
5
u255
000 - 255
6
Y255
000 - 255
7
P255
000 - 255
8
9
rGbu
py32
-
10
nod1
1/2
11
P235
50-255
12
Ft50
45-70
Function and Description
Off all lights
Red channel current setting, from small to large, from dark
bright
Green channel current setting, from small to large, from dark
bright
Blue channel current setting, from small to large, from dark
bright
Red channel current setting, from small to large, from dark
bright
Amber channel current setting, from small to large, from dark
bright
UV channel current setting, from small to large, from dark
bright
Full bright
Program Version
to
to
to
to
to
to
When the channel mode display nod2 mode: the Channel
function is :
1 Total dimming, 2 strobe , 3 function, 4 function Speed, 5 red, 6
green, 7 blue, 8 white, 9 amber , 10 UV
After the lamp PCB plate temperature reaches 70 degrees, the
LED lamp 's reduced power rate is :
as set 200: current
(brightness) = 200/255 = 78%
Temperature setting when fan at full speed ,
when the
temperature is below 15 degrees, the fan will start.
If below the set value 5 degrees, the fan speed will be reduced
one rank
8. Cleaning and Maintenance
CAUTION!
Disconnect from main power before starting maintenance operation!
The cleaning of internal and external optical lenses and/or mirrors must be carried out periodically to
optimize light output. Cleaning frequency depends on the environment in which the fixture operates:
damp, smoky or particularly dirty surrounding can cause greater accumulation of dirt on the unit’s optics.
1) Clean with soft cloth using normal glass cleaning fluid.
2) Always dry the parts carefully.
3) Clean the external optics at least every 20 days. Clean the internal optics at least every
30/60 days.
9. Specification:
Rated voltage: 95V-240VAC, 50/60Hz
Power Consumption:144W
Lamp:12*12W RGBWA+UV(6 in 1) LEDs
Bean angel:150
DMX512 Channels: 6/10CH
Waterproof Grade: IP65
Dimming:0-100%
Cooling system: Convection
Function: Auto-run feature, DMX-512 control console, Voice-activated functions
Fixtures Size:215x215x120mm
Gross Weight:8KG
This unit is covered by a 2 Year Manufacturer’s warranty. Please contact the store you purchased this
unit to arrange any warranty repairs. Please keep your invoice to show proof of purchase date.