Download Geller Touch User Guide - ACCS Advanced Cash Control Systems
Transcript
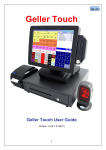
GellerTouch
FirstPlus
GellerTouch
First Plus User Guide
Version 2.1 (8.2.57)
1
Contents
About This Manual..................................................................................................... 3 Sales Mode................................................................................................................ 4 Basic User Operations ............................................................................................ 4 To access Sales Mode from the Back Office ....................................................... 4 To access Back Office from Sales Mode ............................................................. 4 To Exit from Touch in Sales Mode ....................................................................... 4 Signing on to the till.............................................................................................. 5 Signing Off ........................................................................................................... 6 Making a Sale ...................................................................................................... 6 Using the Quantity Button .................................................................................... 9 Selling with a Modifier ........................................................................................ 10 Storing to Tables/Tabs ....................................................................................... 11 Covers ................................................................................................................ 12 Splitting the Bill .................................................................................................. 13 Moving products to another table....................................................................... 14 Going Dutch ....................................................................................................... 15 Product Enquiry ................................................................................................. 16 Paying a transaction .......................................................................................... 17 To accept multiple Tender Types....................................................................... 18 Printing a Receipt............................................................................................... 19 User Help ........................................................................................................... 20 2
About This Manual
This Manual tells you how to use Geller Touch. Any information you cannot find in
this manual is covered in the Managers or Advanced User Manual, please speak to
your Manager/Supervisor if there is something you cannot find.
This guide has been written using our demo system as the basis; this may well
have changed slightly due to the nature of your business and how your system has
been installed by you dealer.
This manual assumes that the target audience is familiar with PC s and their
general use.
To make the manual user friendly; icons that you will see on your screen have been
used e.g.
*
Keep an eye out for boxes like this as they contain tips and helpful hints!
3
Sales Mode
Basic User Operations
Sales Mode is the function which allows you to run a point of sale (till) from the
machine, from Sale Mode you can carry out sales, process refunds manage tabs
and tables amongst other things
The illustrations used in the Sales mode section may not reflect the layout of your
tills exactly e.g. the colour, size and wording on the buttons may be slightly different
depending on how your system has been configured.
To access Sales Mode from the Back Office
• Select
• Select
To access Back Office from Sales Mode
• Select
To Exit from Touch in Sales Mode
• Select
You will be asked to confirm your action
4
An example layout:
Signing on to the till
There are 3 main ways of signing on to a till
1. Dallas Key – this is a fob that is attached the till
2. Manual Sign On – this is a box for the operator to enter their Sign On code
and confirm their password
3. Button Sign On – this is a displayed button on the Sign On screen, it will also
prompt for a Password if the user has been allocated one
5
Signing Off
• Select
Making a Sale
• Select the required product from the fast screen
OR
• Select the department from the left side
6
The centre of the screen will then display the first 44 products in the department
• Select the product to be sold
Once the department button has been pressed it will change to
If the product you want to sell is not shown on the main page you can select this
button and it will display a department screen
7
This will display every product in the department, if there is more than one page
you can use the arrows to navigate through
If the product is not recognised because it does not exist there is a setting that can
be switched on to allow you to create products ‘on the fly’ in sales mode
You will see the following
• Select Yes
8
Enter the description, price and select the correct department
• Select Accept
The product will be pulled onto the transaction screen
Using the Quantity Button
The Quantity button can be used to sell multiples of a product
• Select the number to be sold from the number pad e.g.6
• Select
• Select the product
• The selected product and it’s price will be displayed in the transaction screen
9
Selling with a Modifier
A Modifier is a button which allows a product to be sold at another size and or price
e.g. Half Pint, Double or Childs Portion
• Select the relevant modifier button
• Select the Product
• The selected product and it’s price will be displayed in the transaction screen
*
The Product must have a price against the unit in price levels; if not you will
receive the message below
10
Storing to Tables/Tabs
Tables are used predominantly in the Restaurant environment
If you are in a transaction and want to store the products to a table:
• Select
The table screen is displayed
• Select the table number
• Press
• The following message will appear
• Select Yes
11
• Select
Covers
Covers can be used either in a table or in a normal transaction
• Select the number from the number pad
• Select
You can see the number of covers displayed at the top of the POS
*
If you have the prompt setting switched on the system will automatically
prompt for the number of covers
12
Splitting the Bill
Splitting the bill enables a table/tab to be split up into a number of bills that can be
paid separately
• Recall the table
• Select
The Split Bill page is displayed
• Select the items to be taken off of the current bill by clicking on the line
• Select
The products appear on the transaction screen the bill can now be paid
13
Moving products to another table
• Recall the table
• Select
The Split Bill page is displayed
• Select the items to be taken off of the current bill by clicking on the line
• Select
The products appear on the transaction screen
• Select
• Select the table number you want to move the items to
• Store the table
14
Going Dutch
The ‘Going Dutch’ feature allows you to split the bill into a number of bills equally.
• Recall the table to be split
• Select
The following screen will be displayed
• Using the up and down arrows; select the number of bills required
• Select
The bills will be printed out and the subtotal screen displayed, complete the
transaction as normal
15
Product Enquiry
Product Enquiry can be used when you need to know certain details about a
product; the information you see is configured by your dealer so every system will
be different
• Select
Use the search fields or enter the PLU
The Product Enquiry – Stock Details Page will be shown
You can copy the product into sales mode from this screen
16
Paying a transaction
When all the items have been selected and you are ready to accept payment
• Select
This will display the payments screen
Using the numeric keypad enter the amount that is being tendered e.g. 2000
• Select the tender type from the right hand side e.g. cash
17
To accept multiple Tender Types
When all the items have been selected and you are ready to accept payment
• Select
This will display the payments screen
Using the numeric keypad enter the amount that is being tendered e.g. 500
• Select the tender type from the right hand side e.g. cash
• Enter the next amount to be tendered e.g. 1000
• Enter the next amount to be tendered e.g. 500
18
Printing a Receipt
• Select
*
When in a transaction or an open table and receipt is selected a bill
will be printed, if you have just signed in and receipt is selected the
last receipt (for the terminal) will be printed
User Guide
The ‘User Guide’ button can be used to view the user guide in a pdf.
• Select
• Select
The user manual will open on the sales screen you can use the controls in the top
right to minimise/close the manual or use the scroll bar to navigate through the
pages.
Use this to
minimise the
pages
Use this to close
the manual
Use this to maximise
the pages
19
User Help
The User Help button can be used to view or print a step by step guide on how to
carry out particular procedures on the till; depending on the security level given to
the operator you may or may not be able to carry these out.
• Select
• Select
The following screen will be displayed
Using the arrows
• Select the subject you need help with
• Select the category you need help with
The steps or an explanation is displayed in the main body of the screen
Select
to send to the local receipt printer or
to exit from the help screen.
20


