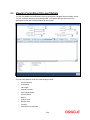
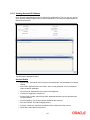
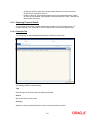
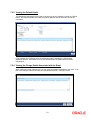
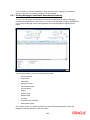
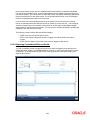
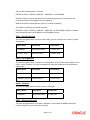
1
Mortgages
Version-11.1
9NT1368-ORACLE FCUBSV.UM 11.1.0.0.0.0.0
[August] [2010]
Oracle Part Number E51575-01
Document Control
Author: Documentation Team
Group: UBPG
Created on: December 15, 2009
Revision No: Final
Updated by: Documentation Team
Reviewed by:
Development/Testing teams
Approved by: Software Quality
Assurance Team
Updated on: August 13, 2010
Reviewed on: August 13,
2010
Approved on: August 13, 2010
Mortgages
Table of Contents
1.
ABOUT THIS MANUAL................................................................................................................................ 1-1
1.1
INTRODUCTION ........................................................................................................................................... 1-1
1.1.1
Audience ............................................................................................................................................ 1-1
1.1.2
Organization ...................................................................................................................................... 1-1
1.1.3
Related Documents ............................................................................................................................ 1-2
1.1.4
Glossary of Icons ............................................................................................................................... 1-2
2.
MORTGAGES – AN OVERVIEW................................................................................................................ 2-1
2.1
INTRODUCTION ........................................................................................................................................... 2-1
2.1.1
Account Processing ........................................................................................................................... 2-1
2.2
INTERFACE WITH OTHER MODULES ............................................................................................................ 2-2
3.
MAINTENANCES AND OPERATIONS...................................................................................................... 3-1
3.1
INTRODUCTION ........................................................................................................................................... 3-1
3.2
MAINTAINING BANK PARAMETERS ............................................................................................................ 3-2
3.3
MAINTAINING BRANCH PARAMETERS ........................................................................................................ 3-4
3.3.1
Viewing Mortgages Branch Parameters Summary.......................................................................... 3-10
3.4
DEFINING UDE RULES ............................................................................................................................. 3-11
3.5
PROVIDING UDE VALUES ........................................................................................................................ 3-13
3.5.1
Maintaining Fixed Amount UDEs in other Currency ...................................................................... 3-15
3.6
APPLYING THE UDE CASCADE FUNCTION ............................................................................................... 3-16
3.7
MAINTAINING ADHOC CHARGE TYPES ..................................................................................................... 3-17
3.8
MAINTAINING ADHOC CHARGES .............................................................................................................. 3-18
3.9
VIEWING MORTGAGE ADHOC CHARGES SUMMARY SCREEN ................................................................... 3-20
3.10 MAINTAINING HOLIDAY PERIODS ............................................................................................................ 3-21
3.11 MAINTAINING CHECK LISTS ..................................................................................................................... 3-23
3.12 MAINTAINING SYSTEM DATA ELEMENTS ................................................................................................. 3-24
3.13 MAINTAINING FLOATING INTEREST RATES .............................................................................................. 3-27
3.14 MAINTAINING USER DEFINED POLICIES ................................................................................................... 3-29
3.15 MAINTAINING STANDARD POLICIES ......................................................................................................... 3-31
3.16 MAINTAINING BULK PAYMENT PREFERENCES ......................................................................................... 3-31
3.16.1 Viewing Summary Records .............................................................................................................. 3-35
3.17 MAINTAINING LEGAL HEIR DETAILS OF A MORTGAGE ............................................................................ 3-36
4.
DEFINING PRODUCT CATEGORIES AND PRODUCTS....................................................................... 4-1
4.1
INTRODUCTION ........................................................................................................................................... 4-1
4.2
MAINTAINING PRODUCT CATEGORIES........................................................................................................ 4-2
4.2.1
Setting up a Mortgages product......................................................................................................... 4-2
4.2.2
Defining Other Attributes for a Product ............................................................................................ 4-4
4.2.3
Specifying User Data Elements ......................................................................................................... 4-6
4.2.4
Indicating Preferences for a Product ................................................................................................ 4-7
4.2.5
Specify Components Details ............................................................................................................ 4-12
4.2.6
Associating Notices and Statement .................................................................................................. 4-31
4.2.7
Mapping Accounting Roles to Product ............................................................................................ 4-35
4.2.8
Specifying Account Status................................................................................................................ 4-38
4.2.9
Maintaining Event Details ............................................................................................................... 4-44
4.2.10 Branch Currency Restrictions Tab .................................................................................................. 4-54
4.2.11 Maintaining Customer Category Restriction................................................................................... 4-57
4.2.12 Defining User Defined Fields .......................................................................................................... 4-58
4.3
VIEWING MORTGAGE PRODUCT SUMMARY ............................................................................................. 4-61
4.4
PROCESSING OF IRR APPLICATION ON MORTGAGES ................................................................................. 4-62
4.4.1
Recalculation of IRR with new effective date................................................................................... 4-63
4.5
DEFINING CUSTOMIZED PRODUCTS .......................................................................................................... 4-65
4.5.1
Preferences Tab ............................................................................................................................... 4-66
4.5.2
Components Tab .............................................................................................................................. 4-67
5.
ACCOUNT CREATION................................................................................................................................. 5-1
5.1
INTRODUCTION ........................................................................................................................................... 5-1
5.2
CREATING A MORTGAGE ACCOUNT ........................................................................................................... 5-2
5.2.1
Main Tab............................................................................................................................................ 5-4
5.2.2
Preferences Tab ................................................................................................................................. 5-9
5.2.3
Check List Tab ................................................................................................................................. 5-15
5.2.4
Fields Tab ........................................................................................................................................ 5-16
5.2.5
Components Tab .............................................................................................................................. 5-17
5.2.6
Charges Tab..................................................................................................................................... 5-29
5.2.7
Linkages Tab.................................................................................................................................... 5-32
5.2.8
Advices Tab...................................................................................................................................... 5-33
5.2.9
Credit Score Tab.............................................................................................................................. 5-35
5.2.10 Specifying Other Applicants Details ................................................................................................ 5-36
5.2.11 Capturing Asset Details ................................................................................................................... 5-38
5.2.12 Repayment Holiday for Amortized Mortgages................................................................................. 5-47
5.3
VIEWING MORTGAGE ACCOUNT SUMMARY ............................................................................................. 5-51
5.4
CREATING A COMMITMENT ACCOUNT ..................................................................................................... 5-52
5.4.1
Commitment Tab.............................................................................................................................. 5-54
5.4.2
Applying Different Repayment Styles for a Commitment................................................................. 5-55
5.4.3
Charging Fee on Commitments ....................................................................................................... 5-56
5.4.4
Processing Events for a Commitment .............................................................................................. 5-56
5.5
VIEWING COMMITMENT ACCOUNT DETAILS ............................................................................................ 5-59
5.6
SAVING AND AUTHORISING MORTGAGE/COMMITMENT ACCOUNT .......................................................... 5-60
5.7
MULTILEVEL AUTHORIZATION OF AN ACCOUNT ...................................................................................... 5-60
5.8
VIEWING DETAILS OF MORTGAGE ACCOUNTS LINKED TO L/C ................................................................ 5-61
5.9
MANUAL CONFIRMATION BY NOTARY ..................................................................................................... 5-62
5.10 VIEWING MORTGAGE MANUAL NOTARY CONFIRMATION SUMMARY ...................................................... 5-64
6.
CAPTURING ADDITIONAL DETAILS FOR A MORTGAGE................................................................ 6-1
6.1
INTRODUCTION ........................................................................................................................................... 6-1
6.1.1
Specifying Promotions ....................................................................................................................... 6-2
6.1.2
Viewing Internal Rate of return Details............................................................................................. 6-3
6.1.3
Viewing MIS Details of the Mortgage................................................................................................ 6-4
6.1.4
Viewing Account GL Balance ............................................................................................................ 6-5
6.1.5
Viewing Internal Rate of Return (IRR) Details .................................................................................. 6-6
6.1.6
Capturing Swift Message Details....................................................................................................... 6-7
6.1.7
Viewing Installment Details............................................................................................................... 6-8
6.1.8
Maintaining Payment Mode Details .................................................................................................. 6-9
6.1.9
Capturing Financial Details ............................................................................................................ 6-11
6.1.10 Viewing Account Status ................................................................................................................... 6-14
6.1.11 Viewing Security History Details..................................................................................................... 6-15
6.2
VIEWING EVENTS DIARY DETAILS ........................................................................................................... 6-16
6.2.1
Processed Tab.................................................................................................................................. 6-17
6.2.2
Unprocessed Tab ............................................................................................................................. 6-20
6.2.3
Querying Account Details................................................................................................................ 6-21
6.3
INACTIVE MORTGAGES............................................................................................................................. 6-22
6.3.1
Operations on Inactive Mortgages .................................................................................................. 6-23
6.4
VIEWING MORTGAGE INACTIVE ACCOUNTS SUMMARY ........................................................................... 6-24
6.5
MORTGAGE SIMULATION ......................................................................................................................... 6-25
6.5.1
Simulating a Mortgage .................................................................................................................... 6-25
6.5.2
7.
Simulating a Commitment................................................................................................................ 6-27
MAKING MANUAL DISBURSEMENTS .................................................................................................... 7-1
7.1
INTRODUCTION ........................................................................................................................................... 7-1
7.2
DISBURSING A MORTGAGE THROUGH THE ‘MANUAL’ MODE ..................................................................... 7-2
7.2.1
Verifying the Check List Items ........................................................................................................... 7-9
7.2.2
Capturing values for the event level UDFs...................................................................................... 7-10
7.2.3
Viewing the Default Details ............................................................................................................. 7-11
7.2.4
Viewing the Charge Details Associated with the Event ................................................................... 7-11
7.2.5
Capturing the Advice Related Details.............................................................................................. 7-12
7.2.6
Viewing the Swift Message Details .................................................................................................. 7-13
7.3
VIEWING MORTGAGE MANUAL DISBURSEMENT SUMMARY .................................................................... 7-14
7.4
SAVING AND AUTHORIZING A MANUAL DISBURSEMENT ......................................................................... 7-15
7.4.1
Accounting Entries........................................................................................................................... 7-16
8.
OPERATIONS................................................................................................................................................. 8-1
8.1
INTRODUCTION ........................................................................................................................................... 8-1
8.2
MORTGAGE PAYMENTS .............................................................................................................................. 8-1
8.2.2
Partial Payment ................................................................................................................................. 8-8
8.2.3
Payments Simulation.......................................................................................................................... 8-9
8.2.4
Back Dated Payments ...................................................................................................................... 8-10
8.2.5
Making Bulk Payments against Mortgage or Commitment ............................................................. 8-11
8.3
VIEWING MORTGAGE PAYMENTS SUMMARY ........................................................................................... 8-17
8.4
MORTGAGE AMENDMENTS ....................................................................................................................... 8-18
8.4.1
Amendments Tab.............................................................................................................................. 8-19
8.4.2
Account Details Tab......................................................................................................................... 8-19
8.4.3
Components Tab .............................................................................................................................. 8-21
8.4.4
Charges Tab..................................................................................................................................... 8-23
8.4.5
Saving and Authorising Mortgage/Commitment Account................................................................ 8-24
8.5
AMENDING COMMITMENTS ...................................................................................................................... 8-25
8.5.1
Viewing Mortgage Commitment Amendments Summary ................................................................. 8-26
8.6
VAMI SIMULATION.................................................................................................................................. 8-27
8.7
VIEWING MORTGAGE VAMI SUMMARY .................................................................................................. 8-28
8.8
MORTGAGE REASSIGNMENT..................................................................................................................... 8-29
8.8.1
Amendment ...................................................................................................................................... 8-30
8.9
VIEWING MORTGAGE REASSIGNMENT SUMMARY.................................................................................... 8-31
8.10 MORTGAGE RENEGOTIATION ................................................................................................................... 8-32
8.11 VIEWING ACCOUNT VERSION HISTORY AND REVERSAL .......................................................................... 8-33
8.12 MANUAL STATUS CHANGE ....................................................................................................................... 8-35
8.12.1 Changing Mortgage Installment Status ........................................................................................... 8-36
8.13 LINKING MORTGAGE TO SAVINGS ACCOUNT ........................................................................................... 8-37
8.14 CHECKING CUSTOMER EXISTENCE DETAILS OF MORTGAGES .................................................................. 8-39
8.15 VIEWING MORTGAGE ACCOUNT DETAILS ................................................................................................ 8-41
8.16 ROLLOVER OPERATIONS .......................................................................................................................... 8-42
8.16.1 Capturing Manual Rollover Details ................................................................................................ 8-42
8.16.2 Capturing Split Rollover Details ..................................................................................................... 8-49
8.16.3 Capturing Consolidated Rollover Details........................................................................................ 8-52
8.16.4 Capturing Inactive Rollover Details ................................................................................................ 8-55
8.17 CALCULATING EMI FOR PERSONAL AND AUTO LOANS............................................................................ 8-56
8.17.1 Main Tab.......................................................................................................................................... 8-58
8.17.2 Preferences Tab ............................................................................................................................... 8-60
8.17.3 Components Tab .............................................................................................................................. 8-63
8.17.4 Charges Tab..................................................................................................................................... 8-66
9.
BATCH PROCESSES..................................................................................................................................... 9-1
9.1
INTRODUCTION ........................................................................................................................................... 9-1
9.2
CONFIGURING THE MORTGAGE BATCH PROCESSES ................................................................................... 9-1
9.2.1
Defining Batch Processes .................................................................................................................. 9-2
9.2.2
Initiating the Batch Process............................................................................................................... 9-4
9.2.3
Multi-threading of Batch Processes................................................................................................... 9-5
9.2.4
Excess Amount Allocation Batch ....................................................................................................... 9-5
9.2.5
Interest Posting (INTP Event)............................................................................................................ 9-6
9.2.6
Excess Amount Allocation Batch ....................................................................................................... 9-7
9.2.7
Processing the Mortgage Batch......................................................................................................... 9-7
10.
10.1
10.2
10.3
10.4
11.
11.1
ANNEXURE A........................................................................................................................................... 10-1
ACCOUNTING ENTRIES ............................................................................................................................. 10-1
EVENTS .................................................................................................................................................... 10-1
ACCOUNTING ROLES ................................................................................................................................ 10-3
EVENT-WISE ADVICES .............................................................................................................................. 10-4
GLOSSARY ............................................................................................................................................... 11-1
IMPORTANT TERMS .................................................................................................................................. 11-1
1. About this Manual
1.1
Introduction
This manual is designed to help acquaint you with the Mortgages module of Oracle FLEXCUBE.
It provides an overview of the module and guides you, through the various steps involved in
granting mortgages to the customers of your bank.
1.1.1 Audience
This manual is intended for the following User/User Roles:
Role
Function
Back office data entry clerk
Input functions for contracts
Back office managers/officers
Authorization functions
Product Managers
Product definition and authorization
End of Day operators
Processing during End of Day/ Beginning of Day
Financial Controller / Product Managers
Generation of reports
1.1.2 Organization
This manual is organized into the following chapters:
Chapter 1
About this Manual gives information on the intended audience. It also lists
the various chapters covered in this User Manual.
Chapter 2
Mortgages - An Overview offers a snapshot of the features that the module
provides.
Chapter 3
Maintenances and Operations discusses the procedure to maintain details of
the account which are necessary for disbursing the mortgage.
Chapter 4
Defining Product Categories and Products talks about defining the attributes
specific to setting up a mortgage product.
Chapter 5
Account Creation talks about creating customer accounts.
Chapter 6
Capturing Additional Details for a Mortgage talks about the additional details
that you can capture for a Mortgage account.
Chapter 7
Making Manual Disbursements describes the procedure to make a mortgage
disbursement using the ‘Manual’ mode.
1-1
Chapter 8
Operations deals with the payments details and changes that you can effect
on a mortgage.
Chapter 9
Batch Processes deals with processing the batch operations.
Chapter 10
Annexure A explains the types of accounting entries and advices generated
at each stage in the lifecycle of a mortgage.
Chapter 11
Glossary lists the important terms and their definition.
1.1.3 Related Documents
You may need to refer to any or all of the User Manuals while working on the Mortgages module:
• Core
• Procedures
• Settlements
• Interest
• User Defined
1.1.4 Glossary of Icons
This User Manual may refer to all or some of the following icons.
Icons
Function
New
Copy
Save
Delete
Unlock
Print
Close
Re-open
Reverse
Template
Roll-over
1-2
Icons
Function
Hold
Authorize
Liquidate
Exit
Sign-off
Help
Add row
Delete
row
Option
List
Confirm
Enter
Query
Execute
Query
Refer the Procedures User Manual for further details about the icons.
1-3
2. Mortgages – An Overview
2.1
Introduction
The primary function of banks is to accept deposits and use it to dispense loans. Every time a
bank sanctions a loan it is creating an asset in its books. The interest a bank earns from lending
contributes substantially to its bottom line. Lending itself stimulates business activity in the
economy. Loan products offered by banks can be of various tenors, rates of interest, repayment
schedules and complexity. Thus, you can have short or long term loans; loans at fixed or floating
rates or a combination of the two; loans disbursed and repaid as a bullet or in installments and so
on.
A loan passes through various stages or events from the moment it is given till the time it is
repaid. The process begins with a loan application form in which the borrower is asked to furnish
their details and the kind of facility requested. The bank’s loans or credit department appraises
the application and takes a decision whether the applicant is eligible for the loan asked and
whether loan can be extended to that customer. The bank will apply its own parameters in
arriving at this decision. The factors which will go into this include the standing, character, track
record and the collaterals (securities) offered to secure the loan. Assuming that the loan is
sanctioned the bank gives a commitment and stipulates terms and conditions governing the
same. The bank may levy a processing charge at this stage. The loan amount is then disbursed
and credited to the settlement account of the borrower who draws the amount, uses it for the
purpose for which it was taken. Interest accrues on the account which has to be serviced by the
borrower besides repaying the principal amount as per the repayment schedule. If the loan is not
repaid or there is a delay the loan asset’s status is changed to reflect its deterioration. The bank
may also charge penal interest or interest on interest in such a scenario. A reverse mortgage loan
is available to seniors and it is used to release the home equity in the property as a lump sum or
multiple payments. Moreover then bank may have to make provisions from its profits for such
sub-standard loans. On the other hand if the loan account is conducted well it will close on the
date the last installment is due and paid. On closure, the bank will return or lift the collaterals
which it had taken. The loan cycle is now complete.
The Mortgages module in Oracle FLEXCUBE captures and maintains the parameters with
respect to the life cycle of the mortgage outlined above and this is detailed in the subsequent
sections.
This module is designed to cater to the lending needs of banks and other financial institutions. It
comprises of a two-step process namely,
• Account Processing
The Mortgages Module is also capacitated to interface with the Core Module of Oracle
FLEXCUBE for Accounting, Messaging and MIS related operations.
2.1.1 Account Processing
The application moves to an account processing stage when the applicant becomes a customer
of your bank. The customer’s record will now be available in the bank’s customer database. A
Loan account is created which will be used to service the customer. Loan account creation
involves capturing the details of the final loan application into the features of the Loan. Loan
Accounts in Oracle FLEXCUBE will be created under Account Templates called ‘Products’. The
system resolves the product category and product on the basis of the application details.
2-1
The Loan Account thus created, reports to the Asset GL of the bank. Disbursements will debit the
loan account and hence a loan with outstanding balances will be in debit. Payments are credited
to the loan account. At the end of complete re-payment, the account becomes zero balanced and
is closed.
Product Categories are a logical grouping of certain products such as Vehicle Loans, Home
Loans etc. The banks/ FIs can setup different products based on services they offer.
When a customer loan is sanctioned, a loan account will be created under a specific loan account
product.
Hence, its’ features would default from the account product. The Loan account so created will be
used for further Loan servicing such as disbursements. The loan account balance will represent
the outstanding Principal that was advanced to the Customer. Interests will be calculated on this
balance based on the schedule and pricing setup. The Account processing stage involves the
following:
• Loan Account Creation
• Loan Initiation & Schedule setup
• Payments of Schedules
• Collections and Delinquency Management
• Loan Status Change Processing
• Amendments to Loans
• Disbursements
2.2
Interface with other Modules
The Mortgages Module interfaces with the following sub-systems/Modules of Oracle FLEXCUBE
• Security Management System (SMS)
• Core Services like Currency, General Ledger, End of Day, Accounting
• Central Liability (Limits)
• Bills - Guarantees (through uploads)
2-2
3. Maintenances and Operations
3.1
Introduction
Before you begin using the Mortgages module, you must maintain the following information in the
system:
Bank Parameters
These are parameters that you need to specify at the bank level. These will include the following:
• Interest calculation parameters
• Amount blocks on inactive accounts
• Splitting of accounting entries for the offset leg
• Site specific maintenances
Branch Parameters
These are parameters that you need to specify at the branch level. These will determine the
following:
• Batch processing during holidays
• Netting of accounting entries for accrual, liquidation and status change
• Default Settlement Accounts
• Format/Mask for generation of Account numbers etc
• The structure of the schedule
• Schedule gap treatment
In addition, you also have to maintain the following:
UDE (User Data Elements) Rules
UDEs are used to build formulae to calculate the amount of interest applicable. These include
entities like Interest Rate, Amount Slab etc. that will hold values you provide. The UDEs
themselves are defined at the product level but you can use these UDEs to build rules with
different conditions based on which the UDE value should be arrived at.
You can maintain the UDE values at Product and Account level. You can also maintain Fixed
amount UDEs in other currencies.
Repayment holiday periods
For a calendar year, you can define holiday periods for customers during which they can avail a
repayment holidays.
Check Lists
For different events, you can maintain check lists. The check lists that you maintain here will be
validated during the execution of that event while processing the mortgage.
3-1
System Data Elements (SDEs)
Information that is constantly updated by the system, for instance, the balance in an account,
number of transactions processed etc. is referred to as SDEs. This information is readily available
for computation of penalties, Interest or charges. You need to identify the SDEs applicable for this
module.
Floating Rate maintenance
You can maintain floating rates for a Rate Code, Currency, Amount Slab and Effective Date
combination
User Defined Policies
These are validation and operations that are performed during the life cycle of a mortgage
Promotions
Promotions are special offers whereby you can offer special incentives/ concessions to
customers. You can link mortgages to one or more promotions
The above maintenances are discussed in detail in this chapter
3.2
Maintaining Bank Parameters
You can maintain the bank parameters in the ‘Retail Lending – Bank Parameters’ screen. You
can invoke this screen by typing ‘CLDBKPMT’ in the field at the top right corner of the Application
toolbar and clicking on the adjoining arrow button.
Here you can capture the following details:
Bank Details
Bank Code
Specify the code that represents your bank
3-2
Include To date for Interest Calc
If you check this option, then accrual entries will be passed from the value date + 1 till the
maturity date. However, if this box is not checked, then accrual entries will be passed from the
value date till the maturity date - 1.
Amount Blocking for inactive account
Indicate whether an amount block needs to be imposed on an inactive account or not
Split Offset Leg
Check this box if you wish to have split accounting entries for the offset leg of a transaction. For
example, if a certain transaction debits a particular GL and credits two different GLs (as in off
balance sheet entries), the system will pass two debit entries for the first GL to be in sync with the
credit entries to the other GLs. If this option is not checked the accounting entries will be as
under:
Dr/Cr
Account
Amount
Dr
00000001
50
Cr
00000011
20
Cr
00000022
30
If this option is checked the accounting entries will be as under:
Dr/Cr
Account
Amount
Dr
00000001
20
Cr
00000011
20
Dr
00000001
30
Cr
00000022
30
Archieve Processed Records From Events Diary
The parameter Reference Date, Frequency, Unit will be used to archive the processed records in
Event Diary
The archival will be done in EOD by batch function. If this parameter is not set then no archive will
be done.
Purge Inactive Loan
Specify the tenor in units of days, months and year, for which you want to keep the inactive
mortgages for purging.
3-3
Cutoff Transaction
Select the Cutoff GL from the option list. Transactions after 2:00 pm on a day will be considered
on the next working day. The accounting entries for such transactions will be passed into the
Cutoff GL and not the Settlement GL.
3.3
Maintaining Branch Parameters
You can maintain the branch parameters in the ‘Mortgage – Branch Parameters’ screen. You can
invoke this screen by typing ‘MODBRPMT’ in the field at the top right corner of the Application
tool bar and clicking on the adjoining arrow button. Branch parameters include the following:
Branch Code
You have to indicate the code of the branch for which the parameters have to be maintained. The
codes of the various branches of your bank are available in the option list provided.
When you select the code, the branch name is also displayed alongside.
Process Till Next Working Day – 1
This specification will determine the day on which automatic events such accrual, liquidation etc.
falling due on a holiday, should be processed. If you select this option, events scheduled for a
holiday will be processed on the last working day before the holiday.
3-4
Example
Assume that the current system date is 15th May ’05. Further, 16th and 17th are holidays. If you select
‘Process Till Next Working Day – 1’, when you execute the batch program during EOD of 15th May, the
th
th
events due on 16 and 17 will also be processed.
If you do not select this option, processing will be done upto the system date i.e. the current date.
The automatic events due on a holiday will be processed as part of the batch program run at
BOD on the next working day after the holiday.
Consider the example discussed above, if you do not check this option, the events due on 16th
and 17th will be processed as part of BOD operations on 18th May ’05, which the next working day
after the holidays.
Netting
Here, you need to indicate the netting preference for posting entries during accrual, liquidation
and status change.
If you opt to net, the system will post a single consolidated entry for a GL and Currency
combination. If you do not select this option, entries are posted individually for each account.
The GL netting status change option can also be used to indicate installment level status change.
The Netting of Notices across Accounts can be used to indicate that for or all accounts for which
the payments falls due on a particular date, the requests for invoice generation should be
consolidated.
The mortgage accounts for which the reminder or demand note should be sent is tracked based
on the status of the account. The SDE ‘Next Schedule Date’ is set up to arrive at how many no.
of days in advance the payment notice should be generated. Based on the status of the mortgage
account the corresponding payment invoice format is set up.
The Auto allocate part payment option can be used if you want to do a partial payment through
auto allocation. For accounts which are marked for manual allocation of partial amount the
payment can be done in bulk using the ‘Consumer Lending – Bulk Payments’ screen.
For more details on Bulk payments refer section ‘Bulk Payments’ in the ‘Operations’ chapter of
Retail lending module.
Settlement
The settlement accounts for processing lending transactions have to be specified here. You have
to specify the Bridge GL/Account to be used for the settlement of the debit and credit legs of
transactions that would be processed at your branch. You can select the accounts from the option
lists provided for the same.
Account Auto Generated
You can select this option for automatic generation of account numbers. The system generates
the account numbers automatically when you create customer accounts through the ‘Account
Details’ screen. If this option is not checked, you have to capture the account number yourself.
3-5
For details on creating an account, refer the ‘Account Creation’ chapter of this User Manual.
Accounting Mask Required and Account Mask
To maintain uniformity in the account numbers generated/captured across a branch, you can
specify a format/mask for account numbers. If you specify that account numbers should conform
to a specific format, you have to specify the mask in the ‘Account Mask’ field.
Example
You may want the account numbers of your branch to be a combination of:
•
Branch Code (3 Characters)
•
Product (4 Characters)
•
Currency (3 Character currency code)
•
5 digit running sequence number
The account mask in this case would be: @ (BRN)@(PROD)@(CCY)@(SEQ:5)
An example of an account number conforming to the above mask would be DOC3ROLUSD60021.
If you opt for auto generation of account numbers but do not specify a mask, the generated
number will, by default, conform to the following format:
• 3 character Branch Code
• 4 character Product Code
• Date in Julian format (YYDDD)
• 4 digit running sequence number
An example of an account conforming to the above format is ‘DOCVSIM040960021’ where:
• ‘DOC’ is the Branch Code
• ‘VSIM’ is the Product Code
• ‘04096’ is the date equivalent to 5th April 2004 (04 – Year and 096 is the number of days
that have elapsed in the year).
• ‘0021’ is the running sequence number.
Also, if you maintain an account mask but do not opt to auto generate the account numbers, then,
during account capture you have to conform to the account mask maintained for the branch. If the
account is not as per the mask, the following error message is displayed:
Account number entered is not conforming to the account mask.
User Reference Number
User Reference Number in Messages
Check this box to indicate that the User Reference Number provided in the account screen has to
be used in Tag 20 of MT103 and Tag 21 of MT202. If the box is unchecked, the mortgage
account number will be used instead of the User Ref no.
Auto Generate User Reference Number
Check this box to indicate that system should auto generate user ref no during account creation.
3-6
Others
IRR Processing
Check this option to trigger the YACR (Yield Accrual) event for the branch batch.
Schedule Structure
This option is used to indicate if the schedule definitions should honor the end dates or honor the
frequencies when the two contradict. The options are:
• Frequency Based
• Non-Frequency Based (the end dates contradict each other)
Example
For a product, you can define payment schedules based on the value date of the mortgage and/or based on
the calendar date. Assume that you have a housing mortgage product ‘HOME’ with the following payment
schedule details:
•
Unit – Monthly
•
Frequency – 1
•
Schedule Basis – Value Date
•
Tenor – 12 months
Case 1: Schedule structure is frequency based
th
A housing mortgage is initiated on 4 April 2004. As per the above details, the following schedule dates are
defaulted:
•
First Due Date: 4th May 2004 (one month after the disbursement date)
•
End Date:
months)
•
The last schedule is always a ‘Bullet’ schedule.
4th Mar 2005 (in between schedules being 4th June, 4th July and so on for 11
Note that the schedule dates are driven by the value date of the mortgage. At the account level, you can,
however, change the defaulted schedules. But the end dates should not contradict for the schedules.
For instance, you cannot define schedules with the following details:
First Due Date
No of Schedules
Frequency
End Date
04-MAY-2004
5
Monthly
04-SEPT-2004
01-OCT-2004
5
Monthly
01-FEB-2005
04-APR-2005
1
Bullet
04-APR-2005
Note that for the first and second schedules, the end dates are contradicting (4th Sep and 1st Feb
respectively). This is not allowed if the schedule structure is ‘Frequency Based’. The following error
message is displayed:
Input for component is not as per schedule frequency.
Case 2: Schedule structure is non-frequency based
If the schedule structure is non-frequency based, you can define schedules with contradicting end dates
(refer the schedule structure given in Case 1 above).
First Payment Schedule Gap Treatment
Here, you have to specify the manner in which you would like to treat the period/gap between the
mortgage disbursement date and the first payment. The options are:
3-7
• Treat as Payment
• Treat as Moratorium
Example
st
st
Assume that you make a disbursement on 1 January and the first payment is due on 1 March. This means
that there is a gap of two months between the disbursement and the first payment schedule. You can treat
this gap either as a ‘Payment’ schedule or a ‘Moratorium’ schedule. If you opt to treat it as a ‘Payment’
schedule, then, during product creation, you should define the payment schedule with the ‘Schedule Flag’
being ‘Normal’. You should also specify a separate formula for this schedule. This is also done at the
product level.
Similarly, if the gap is treated as a ‘Moratorium’, you should define a schedule with type ‘Moratorium’ and
also define a moratorium formula for the schedule.
Intermediate Schedule Gap Treatment
Here, you have to specify the manner in which the system should handle gaps between two
schedules. The available options are:
• Create New Schedule
• Advance current schedule
• Extend previous schedule
Example
Assume that the following are the two payment schedules for a mortgage:
•
1st May to 25th May
•
5th June to 25th June
Therefore, the gap between the two schedules is 10 i.e. from 26th May to 4th June. To handle this gap, you
can instruct the system to do any one of the following:
•
Create a new schedule in which case a new schedule is defined for the gap period i.e. 10 days.
•
Advance the current schedule, wherein the second schedule will start from 26th May instead of 5th
June and go upto 25th June.
•
Extend the previous schedule in which case the first schedule goes upto the 4th of June instead of
25th May.
Pre-Payment Penalty Year
Indicate the type of pre-payment penalty year. You can select one of the following options:
• Mortgage Year
• Financial Year
• Calendar Year
Computation of prepaid amount in a year depends upon the selection of the above option. Based
on the option selected, the date range is interpreted by the system for considering the ceiling of
prepaid amount in a year. You can not change this option after the first authorization of the
Mortgage Branch Parameters.
Mortgage Year ranges between value date of the mortgage and completion of that particular year.
Financial Year ranges between start date of the financial year and the end date of the financial
year. Calendar Year ranges between the start date of the calendar year and end date of the
calendar year.
Example
Let us assume the following:
Value Date: 05-JAN-2000
3-8
Maturity Date: 05-JAN-2020
Mortgage Year
Year wise penalty free computation is considered like 05-JAN-2000 to 04-JAN-2001, 05-JAN-2001 to 04JAN-2002, 05-JAN-2002 to 04-JAN-2003 and so on.
Financial Year
If financial year is maintained from April to March, in such a scenario, year wise Penalty free computation
will be considered like 01-APR-2000 to 31-MAR-2001, 01-APR-2001 to 31-MAR-2002, 01-APR-2002 to 31MAR-2003 and so on.
Calendar Year
Year-wise penalty free computation is considered like 05-JAN-2000 to 31-DEC-2000, 01-JAN-2001 to 31DEC-2001, 01-JAN-2002 to 31-DEC-2002 and so on.
The amount prepaid is stored in a data store year-wise. This data store is value date based. This
table is updated at the time of save of payment. Also during deletion and reversal operations this
table is updated correctly. The impact of prepaid amount is cancelled from the table during
deletion/reversal. The pre-payment penalty amount collected is also stored in the same data
store.
At the product level you have to maintain a UDE for handling maximum prepayment amount in a
financial year. Let us assume that the UDE is maintained as MAX_PREPAID_PCT. You can
maintain the default value of the above UDE from the product. System validates that the extent of
pre-paid amount doesn’t exceed the percentage maintained at product level at the time of prepayment.
Example
Assume the following:
Principal: 1000000 USD
Pre-payment penalty
Free percentage: 5% (This will be taken from UDE value: MAX_PREPAID_PCT.)
5 % of 100000 = 50000
Hence, every year up to 50000 USD can be paid as an early repayment without any penalty.
Value date: 01-JUN-2000
Maturity date: 01-JUN-2020
Schedules: 240 monthly
During liquidation, value date of the payment is compared with the start date of the year,
i.e. Value date of payment: 01-OCT-2008
If the borrower is doing pre-payment (prepaid amount = amount paid – (amount due + amount overdue) then
system will validate this against allowed prepaid amount.
EMI: 9744.85 USD
Amount paid: 40000 USD
Prepaid amount: 40000 – (9744.85 + 0) = 30255.15 USD
This 30255.15 USD is validated against 50000 USD and from the data store of prepaid amount between 01OCT-2008 and 01-JUN-2008. Since this is under allowed prepayment amount no penalty is applied against
this pre-payment.
If already some prepayment has happened for the contract in the same year of 20000 USD, system will
fetch the same from the data store of prepaid amount and add it to the current prepaid amount i.e. 20000 +
30255.15 = 50255.15 USD. It is more than the allowed pre paid amount. Hence penalty is applicable and
penalty is calculated for the amount 255.15 (50255.15 – 50000) USD.
3-9
After setting up the branch parameters, you have to save the details. Click Save icon to save the
details in the system. However, the parameters take effect only after your supervisor authorizes
the same.
3.3.1 Viewing Mortgages Branch Parameters Summary
You can view a summary of all Mortgages Branch Parameters, through the ‘Mortgages – Branch
Parameters Summary’ screen. You can invoke this screen by typing ‘MOSBRPMT’ in the field at
the top right corner of the Application tool bar and clicking the adjoining arrow button. You can query based on all or any of the following criteria:
•
Authorization Status
•
Branch Code
•
Record Status
•
Once Auth
Click ‘Search’ button. The system identifies all records satisfying the specified criteria and
displays the following details for each one of them:
•
Authorization Status
•
Record Status
•
Branch Code
•
Intraday Accrual
•
Debt Settlement BridgeGL
•
Credit Settlement BridgeGL
3-10
•
3.4
Accounting Mask Request
Defining UDE Rules
User Defined Elements (UDEs) refer to entities like Interest Rates, Amount/Tier Slabs whose
value you can specify and at the same time maintain different values with different effective
dates. For instance, you can indicate that interest should be calculated at five percent on a
certain date and specify a higher rate effective at a later date.
The UDEs, per say, are defined at the product level and the actual values are provided for a
combination of Product, Currency, UDE Rule, and Effective Date in the ‘UDE Values’ screen. This
will be defaulted at the account level and you can override the same with account specific values.
You can define UDE Rules based on which the UDE Values will be picked up at the account
level. UDE Rules are conditional expressions built using the SDEs like Mortgage Amount, Tenor,
Rate, Customer Category etc. These rules can be created independently and later attached at the
time of maintaining UDE Values. You can associate multiple rules and specify UDE values for
each rule. You can maintain the rules in the ‘UDE Rules’ screen. You can invoke this screen by
typing ‘CLDUDRMT’ in the field at the top right corner of the Application tool bar and clicking on
the adjoining arrow button.
The following information should be captured to create a UDE Rule:
User Defined Element Rule
You have to specify a unique code consisting of a maximum of four alphanumeric characters, to
identify the rule in Oracle FLEXCUBE. This is mandatory to save the record.
Condition
You can build multiple conditions for a rule. To do this, click on ‘Condition’ in the screen above.
The following screen is displayed:
3-11
You can create conditions using the following:
Field
• The SDEs that are factory shipped or maintained in the ‘System Data Elements’ screen
are available in this list.
Operators
• This list includes the mathematical operators:
¾
¾
¾
¾
¾
¾
¾
¾
Equal To
Greater Than
Greater Than or Equal To
Less Than
Less Than or Equal To
Like
Not Like
Not Equal To
• Logical Operators:
¾
¾
And: Use ’And’
Or: Use ’OR”
Value
•
The value of the SDE selected to define the condition should be entered here. The value
may be numeric or alphanumeric, as required for the condition.
After building the condition, click ‘Accept’ to accept the same. To remove a condition, click ‘Clear’
in the screen.
After you build the condition(s), click ‘Ok’ in the screen. You will return to the ‘UDE Rules’ screen.
The condition defined is displayed in this screen.
Example
Assume that you want to charge interest at 12% for home mortgages (Product Code - HOME) where the
mortgage amount is greater than or equal to 100, 000 and an interest rate of 10% on mortgages less than
100,000. You can build these conditions in the form of UDE Rules.
3-12
Rule ID
Condition
UDE1
AMOUNT_FINANCED >=100000
UDE2
AMOUNT_FINANCED<100000
At the time of assigning values for the UDE ‘INTEREST’ (assuming that this is the UDE defined for the
product in the ‘UDE Values’ screen(discussed below), you can associate the above rules and for a product,
currency, rule and effective date combination, you can specify the value as 12 and 10 respectively.
Depending on the condition that the mortgage satisfies (whether >= 100000 OR less than 100000), the
appropriate rate is picked up for interest calculation.
Refer the section titled ‘Specifying product Main details’ in the ‘Defining Product Categories and
Products’ chapter of this User Manual for details on defining UDEs.
3.5
Providing UDE Values
The actual values for the UDEs defined during product creation (in the ‘Main’ tab of the
‘Consumer Lending Product’ screen) is maintained in the ‘UDE Values’ screen. You can invoke
this screen by typing ‘CLDUDVMT’ in the field at the top right corner of the Application tool bar
and clicking on the adjoining arrow button.
In this screen, you can maintain values for a ‘Product Code + Description + Currency Code +
UDE Rules + UDE Dates+ UDE Values’ combination. The following details have to be captured
here.
3-13
Product Detail
Product Code
You have to select the product for which the UDE values have to be maintained. The products
offered at your bank are available for selection in the option list provided.
Description
After selecting the product the system will automatically generate a description for the product.
Currency Code
For the product selected, specify the relevant currency. This becomes the UDE currency and the
values you capture for the UDE is expressed in this currency. The option list will include the
currencies maintained in the ‘Currency Definition’ screen. You can select a relevant code from
this list.
For details on ‘Currency Definition’ screen, refer the ‘Currency Maintenance’ chapter of the Core
Services User Manual.
Product User Defined Element Rules
User Defined Element Rule Code
Here, you have to associate the relevant UDE Rule(s). The rules maintained in the ‘UDE Rules’
screen are available in the option list. For each associated rule, you can specify UDE values with
different effective dates and depending on the rule that the mortgage satisfies, the corresponding
UDE values become applicable to the mortgage and same are picked for Interest, Charge, Tax,
Commission and Fee computation.
The UDE Rule is mandatory to save the record. The system will automatically link the default
rule if you do not associate a rule.
Product User Defined Element Dates
User Defined Element Effective Date
You have to specify the effective dates for the UDE values. This is the date on which the UDE
value becomes applicable in the system. The date should be in MM-DD-YYYY format. For a rule,
you can maintain UDE values with different effective dates.
Product User Defined Element Values
UDE ID
The UDEs defined for the selected product is automatically displayed here.
UDE Value
For each UDE displayed for the selected product, enter the UDE value. As mentioned, you can
maintain values with different effective dates. Note that the UDE values should fall within the
minimum and maximum limit specified for the UDEs linked to the product.
3-14
Rate Code
If you want the UDE to have a floating interest rate, select the applicable rate code from the
option list. Depending on the rate code selected, the rates are picked up from the ‘Floating Rate
Code Definition’ screen. In this case, the value captured for the UDE becomes the spread against
the rate code.
For instance, assume that the rate code is ‘MIBOR’ and the UDE value is 2 (positive spread). If
the rate picked up as per the rate code (taking into consideration the effective date, amount slab
and tenor) is 5%, then the actual interest applicable would be 7% (5 + 2). Similarly, if it were a
negative spread, the interest would be 3% (5 – 2).
For details on maintaining floating rate codes, refer the section titled ‘Maintaining Floating Interest
Rates’ in this chapter.
UDE Currency
The Currency of the UDE for UDE of Amount type will be captured
Code Usage
This is applicable only if you associate a ‘Rate Code’ with the UDE. It indicates the frequency at
which you want to refresh the floating rates. The options are:
• Automatic: This implies that the rates will be automatically refreshed every time a rate
change occurs. Therefore, rates are reapplied to the mortgages as and when there is a
rate change.
• Periodic: This means that the rates will be refreshed based on the Rate Revision Schedule
maintained at the component level (in the ‘Components’ tab of the ‘Consumer Lending
Product’ screen).
It is mandatory to specify the Rate Code usage if the rate code is maintained.
Cascade
You can change the UDE values even after creating accounts under the product. The cascade
feature is used to determine the manner in which the change should be handled. If you choose to
cascade (select ‘YES’), the change becomes applicable to all the existing accounts under the
product. However, if you do not cascade the changes, the new UDE values become applicable
only to accounts created subsequent to the change.
3.5.1 Maintaining Fixed Amount UDEs in other Currency
To maintain UDEs in a currency different from the mortgage currency, you have to maintain the
values separately for each currency. At the time of mortgage creation, the values defined for the
UDE Currency is picked up and is displayed (in the ‘Ude Value’ field of the ‘Account Details’
screen) after conversion into the mortgage currency equivalent.
Example
Assume that at the product level (Product Code: HOME), you define three UDEs (of type ‘Amount’), each in
a different currency.
•
UDE1 in CLP (mortgage currency)
•
UDE2 in USD
•
UDE3 in GBP
At the time of capturing the values for these UDEs in the ‘UDE Values’ screen, you have to maintain UDE
values for the following three combinations:
3-15
•
HOME + CLP + Default UDE Rule + Effective Date + UDE1
•
HOME + USD + Default UDE Rule + Effective Date + UDE2
•
HOME + GBP + Default UDE Rule + Effective Date + UDE3
At the account level, the value corresponding to the UDE currency (as specified at the product level) is
picked up. For UDE1, the value corresponding to the first combination is picked up, likewise for UDE2 and
UDE3 the values corresponding to the 2nd and 3rd combinations resp. are picked up.
The values, however, are displayed after conversion into the mortgage currency equivalent.
3.6
Applying the UDE Cascade Function
You also have the feature to change the value of a UDE for all the existing accounts under a
product. However, the change will be applicable only to the existing accounts. UDE values for
new accounts created under the product will be picked as per your specifications in the ‘UDE
Values’ screen.
You can define new UDE values for existing accounts in the ‘UDE Cascade’ screen. To invoke
this screen type ‘CLDUDCMT’ in the field at the top right corner of the Application tool bar and
click the adjoining arrow button.
The code of the login branch is displayed here. The following information is captured in this
screen:
Product Details
Reference
After saving the UDE cascade function, Reference will be generated by system itself
Branch code
Input the branch code in which the relevant data is maintained
CCY Code
Select a currency maintained for the product from the option list provided. The UDE value is
applied in the currency selected here
3-16
Product Code
Select a product for which you have to change the UDE value. The change becomes applicable
to all the existing accounts under the product
UDE Effective Date
The date on which the new UDE value is brought into effect is captured here. The date format
should be ‘MM-DD-YYYY’
After you specify the effective date, the system automatically generates a unique ‘Reference’
Number
Change Cascaded
UDE Id
The option list will display the UDEs defined for the selected product. Select the UDE that
requires a change in value. When you select the UDE, the ‘Old Ude Value’ is also displayed in
the next field.
New UDE Value
Provide the new value for the selected UDE
3.7
Maintaining Adhoc Charge Types
In order to maintain the various ad hoc charge types invoke the ‘Adhoc Charges Type’ screen.
This screen allows you to capture and store ad hoc charge types such as legal fees, notary fees,
and administration fees etc. which are applicable at the collection stage of the mortgage. You can
invoke this screen by typing ‘CLDADCMT’ in the field at the top right corner of the Application tool
bar and clicking on the adjoining arrow button.
Charge Type
Specify the charge type that can be levied on a mortgage in case of any delayed repayments.
The valid values are of the type Admin Fee, Legal Fee, etc
3-17
Charge Desc
Specify a detailed description of the Charge Type
3.8
Maintaining Adhoc Charges
You can maintain adhoc charges in the system using the ‘Adhoc Charges’ screen. You can
invoke this screen by typing ‘MODADCHG’ in the field at the top right corner of the Application
tool bar and clicking on the adjoining arrow button.
You need to enter the following details in the screen above:
Branch
Select the branch code of the bank that is servicing the mortgage.
Account Number
Select the account number on which the charges are to be levied from the option list.
Internal Ref No
A unique identifier for the specific ad hoc charge is displayed here. This is system generated.
Component Name
Select the component that is to be used to track the ad hoc charge from the option list.
Credit Account
Specify the account (GL) to which the ad hoc charges collected are to be credited from the option
list. This in most cases is the account of the Collection Agency.
Charge Type
Select the charge type to be levied on a mortgage from the option list. The values in the option list
are the charge types maintained using the Adhoc Charge Type maintenance.
3-18
Charge Incurred date
Specify the date on which the charge is to be levied on the customer. This cannot be a future
date. Also, it should pass the accounting for ad hoc charges with a back date.
Reason
Specify the reason for which the charge is being levied on the account.
Currency
Select the currency for the adhoc charge.
Amount
Specify the amount of the ad hoc charge to be levied on the customer account.
Exch Rate
Specify the exchange rate of the currency.
You can reverse the adhoc charges entered in the system. The Reversal button is enabled for all
authorized adhoc charges entered in the system. The contract status for the adhoc charge will
have the value as ‘PAID’ or ‘REVERSED’. Post reversal of the adhoc charge, the contract status
is displayed as ‘REVERSED’.
At the time of Authorizing of reversal of Adhoc Charges, re-computation of IRR is done by the
system if IRR is applicable for the product. The unauthorized reversals can be deleted and
authorized. The delete and Authorize buttons will be enabled for unauthorized reversals.
The event code used for reversal of adhoc charge is RADC (Reversal of Adhoc Charge).
Adhoc charge reversal is not allowed if any event happens after the adhoc charge event. In such
case, the event needs to be reversed first and then only adhoc charge can be reversed. The
possible events are ALIQ/MLIQ, VAMI, DSBR, REVN.
3-19
3.9
Viewing Mortgage Adhoc Charges Summary Screen
You can view a summary of all Mortgage Adhoc Charges, through the ‘Mortgage Adhoc Charges
Summary’ screen. You can invoke this screen by typing ‘MOSADCHG’ in the field at the top right
corner of the Application tool bar and clicking the adjoining arrow button. You can query based on all or any of the following criteria:
•
Account Number
•
Internal Reference Number
•
Contract Status
•
Branch
•
Authorization Status
Click ‘Search’ button. The system identifies all records satisfying the specified criteria and
displays the following details for each one of them:
•
Account Number
•
Branch
•
Component Name
•
Charge Incurred Date
•
Reason
•
Event Sequence Number
•
Credit Account
3-20
•
Amount
•
Charge Type
3.10 Maintaining Holiday Periods
You can identify certain periods in the calendar as holiday periods when customers would have
other expenses and would like to avail a repayment holiday. This would typically be during
Christmas/New Year or for anniversary celebrations. Although, Interest computation continues for
this period, repayments are not scheduled.
You can define repayment holiday periods in the ‘Holiday Period’ screen.
You can invoke this screen by typing ‘CLDHOLMT’ in the field at the top right corner of the
Application tool bar and clicking on the adjoining arrow button.
The following information is captured to define a holiday period:
Period Code
You have to capture a unique code to identify the period in the system. The code can comprise of
30 alphanumeric characters.
Date From and Date To
For the period code specified, capture the holiday period i.e. the start date and end date for the
holidays. The date format should be ‘MM-DD-YYYY’. It is mandatory to specify the date range to
save the holiday period.
Anniversary Period
This option is used to define an anniversary period. If you check this option, the holidays will be
repeated every year for the given range of dates. By default, the system checks this option.
Principal Repayment Holiday
If you check this option, the system will apply the holiday period to the principal component alone.
The simple interest formula defined at the product level will not be affected. By default, this option
is unchecked. However, you may modify it.
3-21
While defining a mortgage contract, you may apply the holiday period codes maintained using
this screen.
Example
Suppose that a product has dual formula for the MAIN_INT component as shown:
Formula Name
Formula Type
FRM_MAIN_INT Amortized FRM_MAIN_INT_1 Non-amortized A holiday period ‘PRINHOL’ is maintained as shown below:
Field
Value
Period Code PRINHOL From Date 1-Oct-00 To Date 1-Nov-00 Anniversary Period Y Principal Repayment Holiday Y Contract details are shown in the following table:
Value Date 01-Jan-2000 Maturity Date 31-Dec-2000 Once ‘PRINHOL’ has been linked as holiday period linkage, the system will generate Comp SCH as shown
in the following table:
Formula
First Due Date
No. of Schedules
Frequency
Schedule Type
FRM_MAIN_INT 01-Feb-2000 8 1 Monthly FRM_MAIN_INT_1 01-Oct-2000 1 1 Monthly FRM_MAIN_INT 01-Nov-2000 8 1 Monthly FRM_MAIN_INT 01-Dec-2000 8 1 Bullet 3-22
3.11 Maintaining Check Lists
You can maintain check list for different events using the ‘Check List Maintenance’ screen. The
check lists that you maintain here will be validated during the execution of that event while
processing the mortgage. For E.g.- A checklist of documents required for mortgage processing
can be maintained like ID proof, Bank statements, Income etc.
You can invoke this screen by typing ‘CLDCHKMT’ in the field at the top right corner of the
Application tool bar and clicking on the adjoining arrow button.
The following details have to be captured here:
Event Code
Select the event code for which check list items have to be maintained from the drop down list.
Check List Item
Specify the check list item name that you want to maintain for the selected event. The check list
items that you maintain here will be validated by the system during that event, while processing
the mortgage.
3-23
3.12 Maintaining System Data Elements
The balance in the account for which the interest has to be calculated depends on the activities
that take place in the customer account over a period of time. This information is constantly
updated in the system and is readily available for computation of interest or charges. Data
elements of this sort are called ‘System Data Elements’ (SDEs) because the values for the SDEs
are necessarily picked up by the system while applying interest. You cannot input the values for
these elements.
You can capture the various SDEs in the ‘System Data Elements’ screen. You can invoke this
screen by typing ‘CLDSDEMT’ in the field at the top right corner of the Application tool bar and
clicking on the adjoining arrow button.
You have to maintain the following to define a SDE:
Element ID
Capture an id to uniquely identify the SDE in the system. You can devise an Id comprising a
maximum of 30 alphanumeric characters.
Function Name
Here, you have to associate the Oracle function which would calculate the SDE value internally.
The values available in the option list are factory shipped. The system picks up the value
computed by the function for use in interest calculation.
Data Type
This indicates the nature of the data the SDE represents. The options are:
• Character
• Number
• Date
3-24
Language Code and Language Text
Select a language for the SDE being defined. You can select a code from the option list provided.
The system automatically displays the corresponding text in the language selected for the SDE.
Language Description
Here, you have to provide the description of the SDE being defined, in the language selected.
The description should not exceed 30 alphanumeric characters.
System Data elements can be balances like PRINCIPAL_EXPECTED, PRINCIPAL_OVERDUE
etc. Some Oracle FLEXCUBE entities required for formula generation/rule set up will be factory
shipped.
The list of standard SDEs available for use are given below:
Name
Description
TENOR
Duration for which the mortgage is applied for in days
CUSTOMER_CATEGORY
Category of the customer of the mortgage which is
maintained at the customer information file level
BRANCH_CODE
Code of the branch where the mortgage account is
opened
ACCOUNT_CCY
Mortgage account's currency
LOAN_STATUS
Status of the mortgage account
CUSTOMER_ID
Primary customer's id for a mortgage account
NO_OF_RPMNT_SCHS
Number of repayment schedules excluding the
moratorium ones
INCREASED_PRINCIPAL
Increase in the principal
DAYS
Days in a month
YEAR
Days in a year
RISK_CLASSIFICATION
Risk classification at line level which can be used at
status change
PREPAID_AMOUNT
Amount that has been prepaid
MORA_OUTSTANDING
Total moratorium outstanding amount
TOTAL_MORA_AMOUNT
Total moratorium amount
INDEX_CCY
Index currency
NEXT_WORKDAY
Next working day of the branch
LAST_WORK_DAY
Last working day of the branch
3-25
Name
Description
TODAY
Today's branch date
TOTAL_PRINCIPAL
Amount for which the mortgage is applied for
AMOUNT_FINANCED
Amount for which the mortgage is applied for
PRINCIPAL
Amount disbursed
INT_SUSPENSION_DATE
Interest suspension date based on risk classification.
If classification is C, then the suspension date is one
year from today's date. If classification is D, then the
suspension is immediate.
COMPOUND_VALUE
Amount compounded within a schedule and is used
internally
RESIDUAL_DAYS
Tenor of the mortgage
WORST_SCH
Worst Instalment Status
APPLICATION_DATE
Application date in mortgage origination
APPLICATION_SCORE
Application score in mortgage origination
APPLICATION_TENOR
Application tenor in mortgage origination
APPLICATION_PRINCIPAL
Application principal amount in mortgage origination
_OVR_DAYS
<Component> overdue days
_EXPECTED
<Component> expected amount
_OUTSTAND
<Component> outstanding amount
_CCY
<Component> currency
_OVERDUE
<Component> overdue amount
_INS_OVR_DAYS
<Component> number of days between the schedule
due date and the maturity date
_FN_NO_REPAY_SCH
<Component> number of schedules for a component
if periodic
_NET_PRINCIPAL
<Component> amount financed
_SCHODUE
<Component> schedule amount due less amount
settled
EMI_AMOUNT
The EMI amount for amortized mortgage contracts, in
the current schedule for rental cash flow type of
Mortgages
3-26
Name
Description
TOTAL_SCHODUE
Amount overdue for the schedule.
3.13 Maintaining Floating Interest Rates
You can apply interest either as ‘Fixed’ rate or as ‘Floating’ rate. A Floating Rate corresponds to
the market rates for the day. These rates are maintained and updated daily (or whenever they
change,) in the 'LD MM Floating Rate Input' screen. You can invoke this screen by typing
‘CFDFLTRT’ in the field at the top right corner of the Application tool bar and clicking on the
adjoining arrow button.
The floating interest rates are defined through this screen. A Rate Code identifies a set of rates
defined for a combination of Currency, Amount Slab (optional) and Effective Date. Also, for each
such combination, you can maintain rates that can differ by each tenor.
The following details have to be captured here:
Rate Code and Description
You can maintain new rate codes and also provide values for existing ones (like MIBOR, LIBOR
etc). For a new code, you need to capture a unique id. The id can include a maximum 10
alphanumeric characters.
3-27
Currency
You have to associate each Rate Code with a currency. You can define rates for the same Rate
Code in different currencies. Select a currency from the option list provided.
Effective Date
Each rate that you define for a Rate Code and Currency combination should have an Effective
Date associated with it. This is the date on which the rate comes into effect. Once a rate comes
into effect, it will be applicable till a rate with another Effective Date is given for the same Rate
Code and Currency combination.
Example
Rate Code
-
TERMDEP45
Currency
-
U S Dollar
Effective Date
Interest Rate
01 January 2005
12.5%
14 January 2005
12.0%
31 January 2005
13.0%
These rates will be applicable as follows:
Period
Interest Rate
1st January to 13 January 2005
12.5%
14th January to 30 January 2005
12.0%
31st January to one day before the next date
13.0%
The rates will be applied to a contract depending on whether it has been defined with
‘Automatic’ Rate Code Usage or ‘Periodic’ Rate Code Usage. You can specify this in the ‘UDE
Values’ screen.
Amount Slab
For a specific Rate Code and Currency combination, you can define an amount slab. However,
this is not mandatory. A rate that has been defined for an Effective Date - Amount Slab
combination will be applicable to an amount less than or equal to the specified amount.
Example
Let us extend the example we discussed for Rates and Effective Dates to include amount limits.
Amount (USD)
Effective Date
Interest Rate
10,000
01 January ‘05
12.5%
50,000
01 January ‘05
13.0%
999.9 million
01 January ‘05
14.0%
3-28
If the rates have to be applied on 1st Jan ‘05, they will be picked up as follows:
•
For a mortgage with an amount less than or equal to USD10, 000 the rate will be 12.5%.
•
For a mortgage with an amount greater than USD 10,000 and less than or equal to 50,000 the rate
will be 13%.
•
For a mortgage with an amount greater than USD 50,000 and less than or equal to USD 999.9
million, the rate applied will be 14%.
A huge amount (999.9 million) has been given as the last amount limit. This denotes that
after 50,000 there is no upper limit in the slab
Borrow/Lend Indicator
For every Amount Slab - Effective Date combination, you should define the rate to be applied as
a borrow rate, a lend rate or a mid rate. Borrow rates are applied for mortgages taken by the bank
and lend rates applied on mortgages disbursed.
Tenor and Interest Rates
The rates that will be applied for a given combination of Amount Slab – Effective date –
Lend/Borrow Indicator can be tenor based. In this screen, you can also define interest rates for
different tenors.
For instance, for an amount slab you can maintain rates for the Rate Code LIBOR for tenors 1 30 Days, 30 – 90 Days and so on. If you do not maintain tenor wise interest rates, you have to
maintain the tenor as ‘0’ and then specify the rate. This is mandatory to save the details.
3.14 Maintaining User Defined Policies
User defined Policies are special validations and operations to be performed before or after a life
cycle event of a mortgage. You can maintain policies in the ‘User Policy’ screen.
You can invoke this screen by typing ‘CLDPOLMT’ in the field at the top right corner of the
Application tool bar and clicking on the adjoining arrow button.
3-29
Specify the following details to maintain a policy:
Policy Code and Policy Description
A policy code identifies a policy uniquely in the system. The code is used to link the policy to a
product/account. You can devise a code consisting of a maximum of 20-alphanumeic characters.
Also, for the code captured, provide a brief description in not more than 35 alphanumeric
characters. The description is used for information purposes only.
Policy Category
Select the category to which the policy should belong. This implies if the Policy is to be linked to
an Application (Origination and API or Product setup). The two options are:
• Origination
• Servicing
Policy Details
Expression Line
You can maintain multiple expressions for a policy and each expression is identified by a unique
serial number. The serial number can consist of a maximum 6 digits.
Policy Expression
Here, you have to specify the expression for the policy which when satisfied by the mortgage, will
trigger the corresponding action. You can maintain multiple expressions and action codes under a
policy. Depending on the expression that is evaluated successfully, appropriate ‘Action Id’ is
triggered. However, an expression is not mandatory to define a policy.
Action Id
You have to select the action that is to be triggered when the corresponding expression becomes
valid for the mortgage. This refers to the wrapper name that is mapped to the actual PL/SQL code
that executes the policy. Select the action id from the option list provided. The values available in
the list are factory shipped.
The policies defined through ‘User Policy’ screen become available for association at the ‘Product
Category’ level.
For more details, refer the section titled ‘Maintaining Product Categories’ in the ‘Defining Product
Categories and Products’ chapter of this User Manual.
3-30
3.15 Maintaining Standard Policies
You can also categorize the policies defined through the ‘User Policy’ screen as standard
policies’ in the ‘Standard Policies’ screen.
You can invoke this screen by typing ‘CLDSTDPL’ in the field at the top right corner of the
Application tool bar and clicking on the adjoining arrow button.
To maintain a standard policy, you have to specify the following in the screen:
Module
A standard policy is defined for a Module and Event combination. You have to select the module
for which the policy should be applied. The option list will display the list of valid Oracle
FLEXCUBE modules.
Event Code
The events defined for the selected Module are displayed in the option list provided. You may
select an event from this list.
Policy Code
The policies maintained in the ‘User Policy’ screen are available in the option list provided. Select
the appropriate policy for the selected Module and Event combination.
3.16 Maintaining Bulk Payment Preferences
If indicated at the Mortgages/Commitments level that bulk payments need to be maintained for an
account, then preferences for the bulk payments are maintained at the Bulk Payment Preferences
screen. Under a Mortgage/Commitment a customer can make multiple disbursements under that
Mortgage/Commitment account. These multiple payments are treated as separate transactions
with separate products and interest components. On payment of the Principal amount of any of
the mortgages the Mortgage/Commitment is restored to the customer. As these multiple
disbursals are treated as individual transactions, hence the Bulk Payment option provides the
customer to make a single payment across for multiple payments. This payment can be
configured to be split automatically among the different disbursals made based on a defined rule.
3-31
The Bulk Payment Preferences screen can be used for maintaining the priority for auto as well as
manual liquidation of bulk payments. Invoke this screen by typing ‘CLDBPPRF’ in the field at the
top right corner of the Application tool bar and clicking on the adjoining arrow button.
The following details need to be specified for maintaining the bulk payment preferences for
multiple disbursals made under a single line/commitment:
Branch
The branch where the bulk payments preferences are maintained for a CL account is displayed
here. The maintenance is done at this branch. The preferences maintained for each
mortgage/commitment are only for this branch.
Bulk Entity
Select the bulk entity applicable for these payments from the option list provided. You can select
the following values
•
Limit Line – This option displays all the valid limit lines in the current branch which have
been attached to any of the mortgage accounts.
•
Commitment – The valid commitment reference numbers attached to any of the
mortgage accounts in the current branch is displayed on selecting this option.
Bulk Entity Reference
Specify the bulk entity reference number associated with the relevant mortgage account. The bulk
entity reference lists values as ‘ALL’ indicating that the rule is common for all references attached
to a branch and not a specific reference maintained for that particular branch. On selecting a bulk
entity reference number the customer mortgage ID is populated in the liability ID section. In case
of limits the liability ID for the line linked is populated in the corresponding Liability ID section.
Liability ID
The Liability ID is populated with the customer mortgage ID on selecting a specific bulk reference
number.
3-32
Allow Partial Liquidation
Check this box to indicate that the partial payment is allowed for the individual mortgage
amounts. If the payment amount is sufficient to liquidate only partially as against the total due
amount then if the partial liquidation option is allowed then a partial amount is allocated against
the total due amount.
Partial allocation is allowed for dues for all priority options. For all prioritization options, if the total
payment amount provided for bulk payment only partially satisfies liquidation, then partial amount
is allocated against the amount due, only if the Partial allocation box is checked otherwise the
schedule is skipped from liquidation.
Prioritization Option
Select the appropriate prioritization option. You can select the following options:
• Earliest Due First
• Highest Due First
• Component Prioritization
On selecting Component Prioritization the ‘Component Prioritization’ details are enabled for entry.
However on selecting the same Account level and Schedule Level are disabled for entry.
The following Priority combinations can be selected:
• Earliest Due first /Account level/partial allocation allowed.
• Earliest Due first /Account level/partial allocation not allowed.
• Earliest Due first /Schedule level/partial allocation allowed.
• Earliest Due first /Schedule level/partial allocation not allowed.
• Highest Due first / Account level/partial allocation allowed.
• Highest Due first /Account level/partial allocation not allowed.
• Component Prioritization/ partial allocation allowed.
• Component Prioritization/ partial allocation not allowed.
Earliest due first date
When you make this selection you can only specify the account level option. When the available
amount is allocated while indicating account level or schedule level, amongst the due amounts
belonging to the eligible accounts, then the account priority is applied in case of multiple
accounts. The schedules with earliest due date are considered first and liquidation amount is
allocated based on the due date at schedules level. In case of conflict arisen, the earliest value
date and highest due is considered for resolution. If the value dates and highest due are the
same then the resolution is carried out on the basis of the account number, that is, the earlier
account number is considered first.
Highest Due First
When you make this selection you can also specify the account level. On allocating the bulk
amount while indicating account level, the highest due amount within the accounts is determined
and all components due in this account are marked for payment followed by the next highest due
available among the rest of the accounts. In a conflict the earliest valued date is considered. If the
value dates are same then the accounts are prioritized based on the account numbers.
3-33
Component Prioritization
Check this box to define the order for liquidation for components across products. When you
make this selection you must also select the option N/A. The liquidation order defined here
overrides the product liquidation order. If Component prioritization option is chosen then the fields
under component prioritization options frame will be enabled.
According to the priority defined allocation of the bulk amount is done for all accounts. Similar to
the cases described above the value date and highest due is considered for allocation, in cases
of conflict due to value date and highest due the resolution is brought about by account number.
Component Prioritization Options
The component details related to prioritization are enabled for entry once the ‘Component
Prioritization’ is enabled
Product Code
Specify the component product code for which liquidation prioritization details are maintained.
Products not listed in prioritization will not be considered for liquidation.
Component
Specify the component for which prioritization is maintained
Priority
Specify the priority for the component. The priority is a unique numeric character input by a user.
The lower the number value the higher is the priority applied to the component.
3-34
3.16.1 Viewing Summary Records
You can view and amend details of a particular record by using the ‘Summary’ screen. You can
invoke this screen by typing ‘CLSBPPRF’ the field at the top right corner of the Application tool
bar and clicking on the adjoining arrow button.
To view a particular record double click on the desired record displayed in the list of records. The
required record is enabled for action.
3-35
3.17 Maintaining Legal Heir Details of a Mortgage
You can maintain the details of a legal heir of a mortgage in ‘Legal Heir Maintenance’ screen. To
invoke this screen type ‘STDMOHEI’ in the field at the top right corner of the Application tool bar
and clicking the adjoining arrow button.
In ‘Legal Heir Maintenance’ screen, you can specify the details of the legal heir.
Branch Code
Specify the branch code of the legal heir. This adjoining option list displays all valid branches
maintained in the system. You can choose the appropriate one.
Account
Specify the account number of the reverse mortgage loan.
Legal Heir Detail
Serial No
Specify the serial number of the legal heir detail.
Legal Heir Name
Specify the name of the legal heir of the mortgage loan. The legal heir need not be the customer
of the bank.
Is Customer
You can choose the appropriate value from the drop-down list to indicate whether the heir is a
customer of the bank or not.
• Yes
• No
3-36
Customer No
Specify the customer number if the legal heir is the customer of the bank.
Relation
Specify the relationship that the legal heir shares with the customer.
Date of Birth
Specify the date of birth of the legal heir.
Gender
Specify the gender (male/female) of the heir.
Percentage
Specify the percentage in the property that the heir holds.
Address Line1, 2, 3, 4
Specify the address of domicile of the customer. Four lines have been provided for this. Each line
can have a maximum of 105 alphanumeric characters.
Country
Specify the country of domicile of the customer. This adjoining option list displays all valid
Country codes maintained in the system.
Nationality
Specify the nationality of the heir.
Telephone
Specify the telephone number of the heir.
Email
Specify the e-mail id of the heir.
Fax
Specify the fax number of the heir.
3-37
4. Defining Product Categories and Products
4.1
Introduction
You may offer your customers a variety of financial services such as Vehicle Mortgages, Home
Mortgages, Personal Mortgages, and so on. The different types of mortgages can be different
‘Product Categories’. A product category is used to distinguish between the various mortgage
services offered by the bank. Each of these mortgages are totally different and hence the need to
categorize them.
Under a product category, you may have mortgages that may vary in features such as pricing,
tenor, amount etc. Each variation of these services can, therefore, be considered as ‘Products’.
At the time of capturing a mortgage application, you would specify details such as Mortgage
Amount, Tenor, and Asset Class etc. The system automatically resolves the Product Category
and Product applicable based on the application details. Hence, the Mortgage Account is created
under the appropriate product.
The Mortgages Module will have an inheritance hierarchy as follows:
Product Category
Products
Account
This chapter explains the procedure for setting up product categories and products.
4-1
4.2
Maintaining Product Categories
You can define the attributes for a Product Category in the ‘Product Category’ screen.
You can invoke this screen by typing ‘CLDPRCMT’ in the field at the top right corner of the
Application tool bar and clicking on the adjoining arrow button.
The following details have to be captured in this screen:
Product Category
You have to specify the name of the mortgage service which will identify the category uniquely in
the system. For example: Home Mortgage, Vehicle Mortgage etc. The category name can consist
of a maximum of 20 alphanumeric characters. The categories maintained through this screen
become available for creating products under it (in the ‘Consumer Lending Product’ screen).
Product category is mandatory to save the record in the system.
Policy Code and Event Code
To the category being defined, you have to associate a policy code. The policies maintained in
the ‘User Policy’ screen are available in the option-list provided.
You have to associate an event code to each policy selected. Whenever the event is triggered,
the associated policy gets executed.
4.2.1 Setting up a Mortgages product
As mentioned at the beginning of this chapter, within a category you may have mortgages that
differ in amount, tenor or other preferences.
These may be categorized into products. The mortgage product is derived from the product
category based on the product rule that it satisfies.
4-2
Product Categories and Products are created at the Head Office (HOB) and you can create
accounts under the products at branch level.
The branches that can offer the products are further determined by the branch restrictions defined
for the products.
You can capture product details in the ‘Product Maintenance’ screen.
You can invoke this screen by typing ‘MODPRMNT’ in the field at the top right corner of the
Application tool bar and clicking on the adjoining arrow button.
In this screen, you can enter basic information about a product such as the Product Code, the
Description, etc.
Specify the following details:
Product Code and Description
The code you enter for a product identifies it throughout the module. You can follow your own
conventions for devising the code. However, it must have a minimum of four characters.
When defining a new product, you should enter a code. This code is unique across the CL
modules of Oracle FLEXCUBE. For instance, if you have used VA01 for a product in this module,
you cannot use it as a product code in any other module.
You should also enter a brief description of the product. This description will be associated with
the product for information retrieval.
Product Type
Select the type of consumer Lending product that you are creating. The options available are:
• Mortgage – Select this option if you want to create a mortgage product
• Commitment – Select this option if you want to create a commitment product
4-3
Product Category
Products can be categorized into groups, based on the common elements that they share. For
example Vehicle Mortgages, Personal Mortgages, Home Mortgages, and so on. You must
associate a product with a category to facilitate retrieval of information for a specific category.
The categories defined through the ‘Product Category Maintenance’ are available in the optionlist provided.
Product End Date
A product can be defined to be active for a specific period. When you create a product, you
specify an End Date for it. The product can only be used within the specified period i.e. within the
Start Date (the date on which the product is created) and End Date.
If you do not specify an end date for a product, it can be used for an indefinite period and the
product becomes open-ended in nature.
Remarks
When creating a product, you can enter information about the product intended for your bank’s
internal reference. This information will not be printed on any correspondence with the customer.
Slogan
You can enter a marketing punch line for every product you create. This slogan will be printed on
all advices that are sent to customers who avail of the product.
4.2.2 Defining Other Attributes for a Product
After specifying the basic details of a product, you can define the other finer attributes for a
product in the appropriate sub-screens provided. From the ‘Mortgage Product’ screen, you can
move to the sub-screen of your choice to define these details. Click on the buttons provided at the
bottom of the screen for this purpose.
Each buttons is explained briefly in the table below:
Button Name
Description
User Date Elements
To define the UDEs and Components relating to the
product
Preferences
To indicate your preferences specific to the product
Components
To specify the component details, schedule definition
and formulae for the product
Notices and
Statements
To specify details of account statements and notices
to be issued to customers. These have to be
generated for different events in the life cycle of a
loan
Role to Head
To specify accounting roles and account heads for
the product. (The concept of accounting roles and
heads is explained later)
4-4
Button Name
Description
Account Status
To indicate the status preferences for the product
Events
To specify events
Branch/Currency
Restriction
To define the branch and currency restrictions for the
product
Customer Category
Restriction
To Define the Customer Category Restrictions and
Customer Access Restrictions for the Product
Fields
To associate User Define Fields(UDFs) i.e. Character
Fields, Number Fields and Date Fields, with the
product
Minimum Amount
Due Method
To define the MAD formula for OLL product
Product Fields
To define Product fields
MIS
To define MIS details
There are some fields in the product definition screens, to which input is mandatory. If you try
to save a product without entering details in these fields, the product will not be saved.
When you save a product that you have created, your user-id will be displayed in the ‘Input By’
field and the date and time at which you saved the product in the ‘Date/Time’ field. The Status of
the product will be updated as ‘Unauthorized’. A product is available for use only after it has been
authorized by another user.
4-5
4.2.3 Specifying User Data Elements
You can capture the user data elements details of a product by clicking the ‘User Data Elements’
button. The screen is displayed below:
The main details include the definition of ‘Used Data Elements and Components
To define a User Data Element (UDE), you have to specify the following details:
User Data Elements ID and Description
Data elements like the rate at which interest has to be applied, the tier structure based on which
interest needs to be computed etc. are called User Data Elements (UDEs). These are, in effect,
elements for which you can capture the values. You have to specify a unique ID to identify the
UDE in the system. For instance, you can have a UDE ‘SUBSIDY_RATE’ to indicate the rate to
be used for calculating the subsidy interest amount. The UDE maintained here will be available
for defining product rules.
You can also provide a brief description of the UDE being defined.
User Data Elements Type
UDE Type will describe the nature of the UDE. An UDE can fall into one the following types:
• Amount
• Number
• Rate
• Rate Code
4-6
User Data Elements Ccy
If the UDE type is ‘Amount’, you should specify the currency of the UDE. The currencies
maintained in the ‘Currency Definition’ screen are available in the option-list provided. You can
select a currency from this list.
Minimum User Data Elements Value
You need to specify the floor limit for the UDE value. This means that the actual UDE value
cannot be less than the rate specified here. Note that this amount has to be less than the
maximum UDE value. The system will throw an error message if the minimum UDE value is
greater than the maximum UDE value.
Maximum User Data Elements Value
You need to specify the ceiling limit for the UDE value. This means that the actual UDE value
cannot be greater than the rate specified here. Note that this amount has to be greater than the
minimum UDE value. The system will throw an error message if this value is less than the
minimum UDE value.
The UDE names alone are captured here. To capture the values for the UDEs defined for a
product, you have to use the ‘UDE Values’ screen.
Refer the section titled ‘Providing UDE Values’ in the ‘Maintenances and Operations’ chapter of
this User Manual for more details.
Rate Change Restricted
On checking this option, the system validates if the changes done to the UDE is done during rate
plan change window. If this field is unchecked, then the system will not put any restriction on the
amendment of the UDE based on rate plan change window.
System will validate that either all the parameters for rate plan change is input or every
parameter is null at the time of product input/amendment.
4.2.4 Indicating Preferences for a Product
Preferences are the options that are available to you for defining the attributes of a mortgage
account product. These could be:
• The manner in which the system should handle schedules falling due on holidays
• Whether rollover should be automatic or with user intervention (manual)
• The tenor details for the mortgage
• Whether receivables should be tracked for the mortgage account etc.
The options you choose, ultimately, shape the product. These details are used for mortgage
account processing.
4-7
Click ‘Preferences’ button in the ‘Product Definition’ screen.
You should maintain the following preferences for the mortgage product:
4.2.4.1 Rate/Account Preferences Tab
The exchange rate preferences include the following:
Rate
You have to indicate the exchange rate applicable for the product you are maintaining. The
available options are:
• Mid Rate
• Buy/Sell Rate
By default, the Buy/Sell Rate is used.
Rate Type
You have to select the code that should be used for the product from the option list provided. The
‘Rate’ and ‘Rate Type’ are used in combination to determine the actual rate applicable for
currency conversion.
The default value for Rate Code is ‘STANDARD’. This means that, if you choose ‘Mid Rate’, the
mid rate maintained for the STANDARD code is used for the mortgages created under the
product.
Maximum Variance
When creating a product, you can capture the maximum limit for rate variance. This is expressed
in percentage. The variance between the exchange rate (specified for the product) and the rate
captured for a mortgage (at the account level) should not be greater than the value specified
here. If the exchange rate exceeds the maximum variance that you have defined for the product,
the system will not allow you to save the mortgage. The transaction is rejected.
This value should be greater the value for ‘Normal Variance’.
4-1
Normal Variance
You also need to specify the minimum/normal variance allowed for the rate. If the exchange rate
variance between the exchange rate (specified for the product) and the rate captured for a
mortgage exceeds the value specified here, the system will display an override message before
proceeding to apply the exchange rate. The normal variance should be less than the maximum
variance.
For back valued transactions, the system applies the rate on the basis of the exchange rate
history. The variance will be based on the rate prevailing at that time.
Account Preferences
As part of specifying the account preferences, you can indicate the following:
Amend Past Paid Schedule Allowed
This option, if checked, allows you to perform value dated amendments to interest rate,
installment amount etc with effective date beyond the last paid schedule. In such a case, the
increase/decrease in the interest amount, as a result of the amendment, will be adjusted against
the next available schedule after the current system date (date on which the amendment was
performed) even if unpaid (overdue) schedules are present for the mortgage.
Back Period Entry Allowed
This option facilitates back valued transactions. If you select this option, you will be allowed to
process transactions with a value date less than the current system date.
Interest Statement
You have to select this option to facilitate interest statement generation for the account.
Liquidate Back Valued Schedules
If you select this option, on initiation of a back value dated mortgage, all the schedules with a due
date less than the system date will be liquidated.
Special Interest Accrual
If you check this box, accrual of interest is done on the basis of the formula specified for a
component. Otherwise, interest accrual will be done based on the number of days in the
schedule.
CL Against Bill
Check this box if you want this Mortgages product to be used for mortgages against an export bill.
By default this is not checked.
You are allowed to link multiple mortgages against one bill.
Product for Limit
Check this box to indicate that the product is for limits. If you check this option, the product will be
available for limits linkage during line creation.
4-2
Packing Credit product
Check this box to indicate the possibility of linking CL Accounts to BC when you create them with
this product.
Schedule Basis
You should also specify the schedule basis for the rolled over mortgage. The new mortgage can
inherit the schedules from the mortgage product or you can apply the schedules maintained for
the original mortgage itself.
Rate Plan Change Frequency
You can change the rate plan frequency of a mortgage account in the ‘Preferences’ button of the
Product screen.
Tenor
Specify the amount of time to be given to the customer for rate change plan option..
Unit
Select the unit for the specified tenor from the drop-down list. The following options are available
for selection:
• Monthly
• Yearly
Rate Plan Window
Tenor
Specify the amount of time that the customer can take to decide on the ‘rate plan’ and intimate
the bank about the decision.
Unit
Select the unit for the rate plan tenor from the drop-down list. The following options are available
for selection:
• Monthly
• Yearly
Liquidation Preferences
Liquidation preferences include the following:
Liquidation Mode
You can specify the mode of liquidation to be either Auto Liquidation or Manual Liquidation.
Partial Liquidation
In case of insufficient funds in the account, you can instruct the system to perform partial auto
liquidation to the extent of funds available in the account. However, if this option is not selected,
the schedule amount due will not be liquidated if sufficient funds are not available in the account.
4-3
Reset Retry Count for Reversed Auto Liquidation
If you have maintained a limit on the number of retries for auto liquidation, this option will reset
the retries count to zero during reversal of auto liquidation. This will be applicable from the date of
reversal of payment. Hence, the system will once again attempt auto liquidation till the number of
retries allowed. The system will update the status of the reversed payment to ‘Unprocessed’ after
which it again attempts auto liquidation.
Retries Auto Liq Days
Capture the number of working days for which the system should attempt auto liquidation. The
number of retries per day will depend on the configuration maintained for the ‘Liquidation Batch
Process’ - during BOD, EOD or both. For instance, if the batch is configured for both EOD and
BOD, and the number of retry days is ‘1’, then, auto liquidation is attempted twice on the same
day i.e. once during BOD and another retry at EOD.
4.2.4.2 Holiday Preferences Tab
The value date, schedule date, revision date or the maturity date of a contract might fall on a local
holiday defined for your branch or on a holiday specified for the currency involved in the contract.
You need to specify the following holiday parameters, which has to be considered for holiday
handling:
Adhoc Treatment Required
Check this option to allow the movement of due dates of the schedules that fall on the newly
declared holidays. This option is enabled only if the options, Ignore Holidays parameter and the
Cascade Schedules parameter are not checked at the product level.
Ignore Holidays
If you check this option, the schedule dates will be fixed without taking the holidays into account.
In such a case, if a schedule date falls on a holiday, the automatic processing of such a schedule
is determined by your holiday handling specifications for automatic processes, as defined in the
‘Branch Parameters’ screen.
4-4
Cascade Schedules
If you check this option, when a particular schedule falls due on a holiday and hence is moved to
the next or previous working day (based on the ‘Branch Parameters’), the movement cascades to
other schedules too. If not selected, only the affected schedule will be moved to the previous or
next working day, as the case may be, and other schedules will remain unaffected.
Example
Assume that you have opted to move holiday schedules to the next working day and a schedule falling due
th
th
th
on 29 April is moved to 30 April, 29 being a holiday.
The schedule date for May depends on whether you have chosen to cascade schedules. If you have,
th
chosen to cascade schedules, the schedule date for May will be set as 30 May, since the frequency has
been specified as monthly. All subsequent schedules will be moved forward by a day.
If you have not specified that schedules have to be cascaded, the date originally specified will be the date
for drawing up the remaining schedules. Even if you move the April schedule from 29th to 30th, the next
schedule will remain on 29th May.
However, when you cascade schedules, the last schedule (at maturity) will be liquidated on the
original date itself and will not be changed like the interim schedules. Hence, for this particular
schedule, the interest days may vary from that of the previous schedules.
Move Across Month
If you have chosen to move the schedule date of a mortgage falling due on a holiday, either to the
next or previous working day and the movement crosses over into a different month, then this
option will determine whether the movement should be allowed or not.
Schedule Movement – Forward /Backward
If you opt to move the schedule date falling due on a holiday across months, you need to specify
whether the schedule date should move forward to the next working day in the following month or
move backward to the previous working day of the current schedule month itself.
However, if you opt to ignore the holidays and do not select the ‘Move Across Months’ option, the
system Ignores the holidays and the due will be scheduled on the holiday itself.
4.2.4.3 Account Preferences Tab
4-5
The rollover specifications for a mortgage account will apply to all mortgage accounts opened
under the product.
Auto/Manual Rollover
You have the option to rollover the mortgage manually or instruct the system to do an automatic
rollover. If you choose the do an auto rollover, then upon maturity of the mortgage, the system will
automatically rollover the account.
The rollover will happen as part of the Rollover Batch executed at BOD or EOD, depending on
your requirement.
Rollover Type
The following options are available:
• Custom: This determines if the Rolled over amount will include the unpaid components of
the product. The option list provided will display the components relevant to the product
from which you can choose the components that are to be rolled over.
• Special: Choose this option to indicate that a special amount is to be rolled over. The
amount is captured at the account level when the actual rollover is initiated.
Rollover By
This is applicable if you have opted for automatic rollover. You have to specify the unit based on
which Rollover will be triggered. The options are:
• Days
• Months
• Quarters
• Semi Annuals
• Years
UDE Type
Here, you need to specify whether UDE Values for the new (rolled over) mortgage should be
defaulted from the product or from the original mortgage account/contract that is being rolled
over.
Disbursement Mode
The following options are available to make a disbursement:
• Auto - Choose this option to instruct the system for automatic disbursal of mortgage. In
this case, disbursement happens based on the disbursement schedule maintained for the
product. This is defined in the ‘Components’ button. By default, the system does an auto
disbursal.
• Manual – Choose this option to manually disburse the mortgage. Here, disbursement
happens on demand. In this case, disbursement schedules need not be maintained for the
PRINCIPAL component.
The ‘Manual Disbursement’ screen is used for this purpose.
For details, refer the ‘Making Manual Disbursements’ chapter of this User Manual.
4-6
Prepayment preferences for amortized mortgages
The following are the preferences based on which prepayment of amortized mortgage should be
processed:
Recomputation Basis
Recomputation of amortized mortgages as a result of a prepayment can be based on one of the
following:
• Recalculate Installment Amount: In this case the tenor remains constant.
• Recalculate Tenor: Here, the tenor is recomputed while the installment remains constant.
Prepayment Installment Calculation Type
For Prepayment of amortized mortgages, if you have chosen to recompute the Installment
Amount keeping the tenor constant, then the Installment calculation can be one of the following
types based on future rates:
• Single Installment: A single installment is computed using the future rates.
• Multiple Installments: Multiple EMIs are defined if a future rate change is known upfront.
While giving the UDE values, effective dates can be given based on which the UDE
values will become applicable.
Let us say a mortgage is sanctioned on 1.1.2008. The rate of interest is as follows:
¾ UDE value Effective date is 01.11.2007 - 10%
¾ UDE Value effective date is 01.04.2008 - 11%
If the option chosen is ‘Multiple installment’ then based on the UDE values, EMI will be
calculated depicting a higher EMI from 1.4.2008 at the new rate of interest. So, when
ever a prepayment happens it will take into effect the two rates and calculate two different
EMIs for these periods.
Prepayment Effective From
You can choose the date on which the prepayment should become effective. The prepayment
can come into effect from the value date of the current installment (the day on which the payment
is made) or the Next Installment.
Minimum EMI Amount
You can enter the minimum amount that has to be paid as EMI after recomputing the EMI. The
recalculated EMI after prepayment should be greater than this amount.
Minimum EMI Ccy
You can enter the currency of the EMI amount to be paid.
Notary Confirmation Required
You can check this box to indicate that the product is a mortgage product that requires
confirmation from the notary for disbursing the mortgage.
Interest Only Period
Specify (in numbers) the duration for which the customer needs to repay only the interest
component. This period thereby indicates a holiday period for principal repayment.
4-7
Unit
Select the unit of period to be considered for the interest holiday, from the adjoining drop-down
list. This list displays the following values:
• Days
• Weeks
• Months
• Years
Note that in Oracle FLEXCUBE, one month is equal to 30 days.
Tenor Preferences
You can set the minimum and maximum tenor limits for a product. You can also specify a
standard or a default tenor.
Minimum Tenor
You can fix the minimum tenor of a product. The tenor of the mortgage account that involves the
product should be greater than or equal to the Minimum tenor that you specify.
Maximum Tenor
Likewise, you can also specify the maximum tenor for a product. The tenor of the mortgage
accounts that involve the product should be less than or equal to the Maximum tenor that you
specify.
Default Tenor
The ‘default tenor’ is the tenor that is associated with a mortgage account involving this product.
The value captured here should be greater than the minimum tenor and less than the maximum
tenor. You can change the default tenor applied on a mortgage account during mortgage
processing. However, the new tenor should be within the minimum and maximum tenors
maintained for the product.
Units
The tenor details that you specify for a product can be expressed in one of the following units:
• Days
• Months
• Year
Recomputation of Amortization Mortgage at Amendments
You have to indicate whether the tenor of the mortgage should be reduced or the installment
should be recalculated whenever a maturity date, principal change or a rate change is made
against an amortized mortgage.
Recomputation basis for amendments
The possible amendments and the recomputation basis are given below:
• For amendment of maturity date of an amortized mortgage: You can opt to change the
tenor, keeping the installment constant..
4-8
• For amendment of principal amount: You can affect it either as a Balloon additional
amount in the last schedule or apportion it across the installments
• For interest rate change: You can change the tenor keeping the installment constant or
vary the EMI and keep the tenor same.
VAMI Installment Calculation Type
For amendments, if the recomputation basis is ‘Change Installment’, then the Instalment
calculation can be:
• Single Installment
• Multiple Installment based on multiple future rates
Account Opening Installment Calculation Type
The Account Opening Installment Calculation Type based on future rates can be:
• Single Installment: A single installment is computed using the future rates.
• Multiple Installments: Multiple EMIs are defined as per the future rates.
Readjustment Entry Preferences
You have to specify the manner in which adjustment entries passed due to back dated
adjustments should be handled. The options are:
• Settlement: This means that the adjustment is settled directly
• Adjust: In this case, the entries are tracked as a receivable (Cr) or a payable (Dr), to be
settled later
4.2.4.4 Prepayment Penalty Component
An SDE, ‘CUR_PREPAID_AMOUNT’ defines the formula of the prepayment penalty component.
This indicates the prepaid amount for the current year. This SDE picks its value from
CLTB_LIQ_PREPAID table. ‘CUR_PNLTY_COLLECTED’ is an SDE that indicates the
prepayment penalty already collected for the financial year. ‘CUR_PRINCIPAL_OUTSTND’ is an
SDE that defines the formula of the prepayment penalty component. This indicates the principal
outstanding amount at the beginning of the current year.
You can use the following formula to base the ceiling percentage on original disbursement
amount:
CUR_PREPAID_AMOUNT>(MAX_PREPAID_PCT*AMOUNT_DISBURSED/100)
You can use the following formula to base the ceiling percentage on the opening principal
outstanding amount for the current year:
CUR_PREPAID_AMOUNT>(MAX_PREPAID_PCT*CUR_PRIN_OUTSTND/100)
The result of the above formulae is as follows:
(CUR_PREPAID_AMOUNT(MAX_PREPAID_PCT*AMOUNT_DISBURSED/100))*(PREPAY_RATE/100)(CUR_PNLTY_COLLECTED)
4-9
After the collection of pre-payment penalty, if there is any additional disbursement to the
customer which leads to the increase in limit of the prepaid amount, system will not pass on the
benefits back to the customer. However, for subsequent calculations the disbursed amount and
the pre-payment penalty paid till date for the financial year is considered based on the formula
defined. If SDE ‘CUR_PRINCIPAL_OUTSTND’ is the basis for calculation, the additional
disbursement will not be considered in calculation for current year. It is used for calculation only
from next year onwards.
4.2.4.5 Calculating NPV Difference
In case of early repayment of mortgages (partial or full), the following method is followed for
penalty calculation:
Let us assume that, X% of the total mortgage amount can be paid in one year. Penalty is
applicable on anything above X%. This penalty is the difference between the NPV of existing
cash flows of the mortgage being paid and the NPV of the cash flows post-prepayment
application. Both the NPVs are based on current yield curve i.e. yield rate supplied. This penalty
can also be based on percentage of amount being overpaid.
A UDE, ‘YIELD_RATE’ is used for the calculation of penalty based on NPV of current cash flows
of mortgage and NPV of new cash flows post-prepayment.
An SDE, XNPV computes the NPV value based on the current cash flows and future cash flows
(i.e. post-prepayment application) respectively.
The formula for calculating NPV is as follows:
CUR_PREPAID_AMOUNT > MAX_PREPAID_PCT * PRINCIPAL
The formula above can be used to base the ceiling percentage on original disbursement amount.
You can use the following formula to base the ceiling percentage on the opening principal
outstanding amount for the current year:
CUR_PREPAID_AMOUNT > MAX_PREPAID_PCT * CUR_PRINCIPAL_OUTSTND
The result of the formula is as follows:
@XNPVDIFF (XNPV, YIELD_RATE)
Result of the formula can be some percentage of the difference of the NPV as shown below:
@XNPVDIFF (XNPV, YIELD_RATE) * 0.05
The computation of pre-payment penalty is done by the system at the time of allocate. Internally
system applies the pre-payment and gets the future schedules. Subsequently, based on the
formula defined for XNPVDIFF, system finds the difference between the NPV based on the yield
rate and populates the same against the pre-payment penalty component.
Penalty based on NPV is supported by the system only when product is amortized.
4-10
4.2.4.6 Re-key Preferences
As a cross-checking mechanism to ensure that you are invoking the right mortgage for
authorization, you can specify that the values of certain fields should be entered, before the other
details are displayed. The complete details of the mortgage will be displayed only after the values
to these fields are entered. This is called the re-key option. The fields for which the values have to
be given are called the re-key fields.
You can specify the values of a mortgage that the authorizer is supposed to key-in before
authorizing the same.
If no re-key fields have been defined, the details of the mortgage will be displayed immediately
once the authorizer calls the mortgage for authorization.
The re-key option also serves as a means of ensuring the accuracy of the data captured.
4.2.4.7 IRR Accrual Preferences
If IRR computation is applicable for the product that you are defining, you need to specify the
accrual preference for the same. You can do this through the Accrual Preference part of the
preferences screen.
Accrual Frequency
Specify the frequency at which IRR accrual should be performed. This can be either Daily or
Monthly. Choose the appropriate option from the adjoining drop-down list.
Handling of foreclosure
Specify how foreclosures in respect of the mortgage contracts under the product, must be
handled. You can opt for complete accruals or refund. Choose the appropriate option from the
adjoining drop-down list.
In case of pre-closure of the mortgage (prepayment of the total outstanding amount), the
fund interest will also get liquidated and thus the accrual entries will get reversed.
Acquisition Type
Specify the acquisition type for the product. You can specify any of the following options:
• Par
• Par/Discount
• Par/Premium
• Par/Discount/Premium
Refer the section titled ‘Processing of IRR application on mortgages’ in this chapter to understand
the IRR processing for this module.
4-11
4.2.5 Specify Components Details
You can define the features of the components in the ‘Components’ screen. Invoke this screen by
clicking ‘Components’ button. The following screen displays:
Specify the following details:
Class Code
Select a class code from the adjoining option list. The option list displays all the valid classes
maintained in the system. One class can have multiple components defined. The system attaches
all the components to the product on clicking ‘Default from Class’ button
On authorizing a component class, system will create the required accounting roles and amount
tags.
Component Details
The basic information for a component is specified here. This includes the following:
Component
The Component which is selected in the list appears in Component field. For e.g. ‘PRINCIPAL’,
‘INTEREST’, ‘PENALTY’ ‘PROV’ etc. Subsequently, you have to define the parameters for these
components in the ’Component’ button of the screen.
For Commitment products, the MAIN_INT component is used for defining periodic fees on the
unutilized commitment amount.
4-12
Currency
Associate the component with a currency. The component is expressed in the currency selected
here. You can select the currency of your choice from the option list provided.
Calculation Type
Specify the manner in which the component should be calculated and liquidated. You can choose
one of the following options (the applicable ‘Component Type’ is also provided):
• Formula with schedule (Component Type - Interest)
• Formula without schedule (Charge)
• Penal Interest
• Prepayment Penalty
• Discount
• Schedule without formula (Principal)
• No schedule No formula (Ad Hoc Charges)
• Penalty Charges
• Savings
Note the following:
• ‘Penalty Charges’ are calculated only once for a ‘Penal Basis’ schedule. ‘Penal Basis’ is
explained later in this user manual.
• The component ‘Savings’ is used for interest calculation on the value dated balance of the
savings account. This component needs to be defined as simple interest component with
its basis element as ‘CUSTAC_BAL’, and rate to use as ‘INTEREST_RATE’. Formula for
this component is given below:
@SIMPLE (CUSTAC_BAL, (INTEREST_RATE), DAYS, YEAR, COMPOUND_VALUE)
• Select the option in ‘Calculation Type’ as ‘No Schedule No Formula’ for adhoc type
component.
Main Component
This option is used to designate a component as the ‘Main’ Interest component. If you enable the
‘Main Component’ option for a particular component, the system treats this component as the
main component. Also, you are allowed to define the amortization schedules only for this
component.
‘Principal’ is an implicit component that is automatically created for the product
Capitalization
You can indicate whether capitalization is required for all the schedules for various component of
the mortgage. At anytime, the outstanding interest will be capitalized on the schedule date at the
rate prevalent on that day. You can opt for capitalization at the component level or opt for
capitalization/non capitalization for a particular schedule at the ‘Schedule’ level.
You could have more than one type of schedules applicable on a product. In such a case, you
can designate one as the capitalized and the other as un-capitalized schedule.
4-13
Description
The Description of the component which is defined in Main button for the component will appear
in this field once you select the component in component list.
Component Type
Indicate the nature of the component. This is also known as the ‘Reporting Type’. It defines the
manner in which the component should be classified for reporting/accounting purposes. A
component can be of one of the following types:
• Reimbursement: these are components which have both Dr and Cr mapped to settlement
accounts
• Off-Balance Sheet (OBS): An OBS Component will have balances but these need not be
zero when an account is closed
• Fund Interest: This indicates the funding component
• Ad hoc Charges
• Charge
• Tax
• Insurance
• Interest
• Provisioning
• Deposit
The fund interest component gets liquidated on schedule even if the customer does not pay
the other components.
During EOD, provisioning event is triggered for all mortgage accounts linked to a customer
whenever you modify the credit rating of a customer at the customer level. Provisioning amount is
calculated based on the formula maintained for the Provisioning Component at the Product level.
During EOD batch, PROV event is picked and processed for all the mortgage accounts for which
PROV event is to be triggered. As a part of end of day batch accounting entries are passed for
the calculated provision amount.
Even though the credit rating changes at customer level, the Provision event will not be triggered
for accounts belonging to that CL product level, if the following maintenances are not done:
• Provisioning component maintenance at product level
• Provisioning event (PROV) maintenance at product level
• If Accrual frequency is daily at product level
Propagation is required
Check this option to indicate that the interest amount collected from the borrower should be
passed on to participants.
Component Attributes
The component attributes include the following:
Periodicity
The periodicity of the component can be either:
4-14
• Daily
• Periodic
If you choose the periodicity as ‘Daily’, any changes to UDE and SDE values will result in
recalculation of the component. The recalculation happens as and when a change in value
occurs. If maintained as ‘Periodic’, the values and calculations of the elements will be refreshed
on the last day of the period.
In case of a product having main and subsidy interest components, the schedule periodicity
needs to be identical for both components.
Special Component
You can define a component as a ‘Special Interest Component’. You can override such
components at the account level. You may need to apply a special interest component as a result
of customer negotiations. A special interest component is specified as an amount.
Formula Type
You can specify the type of formula to be used for calculating the component. This formula is
applied for the component across all its’ schedules. It can be one of the following:
• User Defined: This can also include a combination of standard formulae for different
schedules of the component or can have a completely user defined formula.
• Standard
¾
¾
¾
¾
¾
¾
Simple
Amortized Rule of 78
Discounted
Amortized Reducing
True Discounted
Rate Only
You can choose the option ‘Amortized Reducing’ for subsidy component.
Note the following:
• This is not applicable for the ‘PRINCIPAL’ component
• For a commitment product, the formula type cannot be ‘Amortized’, ‘Discounted’ or
‘Simple’
Penal Basis
You may want to allot the penalty to the recovery of certain components. Once a component is
overdue, an appropriate penalty is applied. Therefore, you need to identify the component, which
on becoming overdue will trigger the penalty computation. However, the system will calculate the
penalty on the component you select in the ‘Basis Element’ field.
For commitment products ‘PRINCIPAL’ is not used for penal basis and for basis amount. In
case of EMI products, instalment amount is used for calculating the penalty.
4-15
Balance Type
Identify the nature of the balance that the component would hold. This can be represented
through this field. For instance, for a mortgage product, the ‘Principal’ component is expected to
have a ‘Debit’ balance.
Basis Element
If you select the ‘Standard’ formula type, you have to specify the component upon which
calculation should be performed. The component is denoted by an SDE (e.g.
PRICIPAL_EXPECTED) and you can select it from the option list provided. For an
overdue/penalty component, this is the element on which penalty is applied.
This is not applicable if ‘Formula Type’ is ‘User Defined’
Rate to Use
Here, you need to select the UDE which will define the rate to be used for computing the
component. The value of the selected UDE is picked up as per the maintenance in the ‘UDE
Values’ screen. For instance, you need to choose the option ‘SUBSIDY_RATE’ for a subsidy
interest component.
This is applicable only for components defined with ‘Standard’ Formula Type
The ‘Basis Element’ for computing fund interest will always be ‘Principal Outstanding’ and the
‘Formula Type’ will be ‘Simple’, independent of the main interest component. The liquidation
mode for funding component will always be ‘Auto’, independent of the Product / Account
Liquidation mode.
Moratorium Preferences
The following parameters have to be specified:
Moratorium Period and Period Units
If you wish to provide a moratorium on a mortgage, you need to mention the moratorium period
and moratorium unit for each component. This refers to a repayment holiday at the beginning of
the mortgage. When you input a mortgage in Oracle FLEXCUBE, the repayment start date of
each component will be defaulted based on your specifications here. The moratorium unit should
be in terms of:
• Days
• Months
• Years
Computation Defaults
For computing interest, you have to specify the following:
Days in Year
You can specify the number of days to be considered for a year during computation of a particular
component. This could be:
• 360: This means that only 360 days will be considered irrespective of the actual number of
calendar days
4-16
• 365: In this case, leap and non leap year will be 365
• Actual: In this case, leap year will be 366 and non leap year will be 365
This value corresponds to the denominator part of the interest method
Days in Month
Here, you have to specify the number of days to be considered in a month for component
computation. The options available are:
• Actual: This implies that the actual number of days is considered for calculation. For
instance, 31 days in January, 28 days in February (for a non-leap year), 29 days in
February (for a leap year) and so on
• 30 (EURO): In this case, 30 days is considered for all months including February,
irrespective of leap or non-leap year
• 30 (US): This means that only 30 days is to be considered for interest calculation for all
months except February where the actual number of days is considered i.e. 28 or 29
depending on leap or non-leap year
The value selected here corresponds to the Numerator part of the Interest method
Interest Method Default from Currency Definition
You also have the option to use the interest method defined for the currency of the component. In
this case, the interest method defined in the ‘Currency Definition’ screen (for the component
currency) will become applicable to the mortgage. By default, this option is checked.
Grace Days
The grace days refer to the period after the repayment date, within which the penalty interest (if
one has been defined for the product) will not be applied, even if the repayment is made after the
due date. This period is defined as a specific number of days and will begin from the date the
repayment becomes due. However, if the customer fails to repay even within the grace period,
penalty will be applied and calculated from the repayment due date.
However, in case a penalty charge is defined for a penal basis component under a retail lending
product, the ‘Grace Days’ is defined as part of itself. The schedule due date for the penalty
charge is then computed by adding the ‘Grace Days’ to the corresponding schedule due date of
the penal basis component.
IRR Applicable
Check this option to indicate that the chosen component needs to be considered for Internal Rate
of Return (IRR) calculation. This option is applicable to interest, charge, adhoc charge,
prepayment penalty, penalty and upfront fee components.
This option should not be checked for Commitment products.
If a charge component is to be considered for IRR, the charge will be accrued using the FACR
(Upfront Fee Accrual) batch.
The following components cannot be considered for IRR calculation:
• Off-balance sheet component
• Provision component
4-17
If you check this option, then you have to check the ‘Accrual Required’ option.
For bearing type of component formula, you can check this option only if the ‘Accrual Required’
option is checked.
For discounted or true discounted types of component formula, this option will be enabled
irrespective of the whether the ‘Accrual Required’ option is checked or not. If this option is
checked and ‘Accrual Required’ is not, the discounted component will be considered as a part of
the total discount to be accrued for Net Present Value (NPV) computation. If both ‘Accrual
Required’ and ‘IRR Applicable’ are checked, then discounted interest will be considered for IRR
computation.
Verify Funds
You can indicate whether the system should verify the availability of sufficient funds in the
customer account before doing auto liquidation of the component.
Accruals/Provisioning
To perform accrual of the components, you have to capture the following details:
Accrual Required
You can use this option to indicate that the component has to be accrued and provisioning is
applicable. For the components that have been marked for accrual, you need to specify the
accrual frequency, start month and start date in the respective fields.
If the ‘Calculation Type’ is ‘Penalty Charges’ for a component, the ‘Accrual Required’ option
is disabled.
Accrual Frequency
If you have opted for accrual and provisioning for the components, you have to specify the
frequency for the same. The frequency can be one of the following:
• Daily
• Monthly
• Quarterly
• Half yearly
• Yearly
Accrual Start Month
If you set the accrual/provisioning frequency as quarterly, half yearly or yearly, you have to
specify the month in which the first accrual has to begin, besides the date.
Accrual Start Date
In the case of monthly, quarterly, half yearly or yearly frequencies, you should specify the date on
which the accrual/provisioning has to be done. For example, if you specify the date as ‘30’,
accruals will be carried out on the 30th of the month, according to the frequency that you have
defined.
4-18
Prepayment Threshold
This includes the threshold amount and currency, explained below:
Amount
Here, you can maintain the minimum limit for allowing prepayment of schedules. If the residual
amount after prepayment against a schedule is less than the threshold amount you specify here,
the system will disallow the prepayment.
Currency
If you specify the threshold amount, you also have to indicate the currency in which the amount
should be expressed. You can select the currency from the option-list provided.
4.2.5.1 Intermediate Formula
Intermediate Formulae are used as building blocks for more complex formulae. An intermediate
formula is used to create a Booked/Moratorium formula as an intermediate step. It will not be
associated directly to any schedule.
To define an intermediate formula, click ‘Intermediate’ in the ’Components’ button of the screen.
The ‘Intermediate Formula - Expression Builder’ screen is displayed.
Formula Name
Specify a suitable name to identify the formula that you are defining. After you specify the name
you can define the characteristics of the formula in the subsequent fields. You have to use the
name captured here to associate a formula with a schedule. The name can comprise of a
maximum of 27 alphanumeric characters.
Round Up To
If you want to round off the results of an intermediate formula, you can indicate the number of
digits upto which the results should be rounded-off to. Compound Days/Months/Years
4-19
If you want to compound the result obtained for the intermediate formula, you have to specify the
frequency for compounding the calculated interest.
The frequency can be in terms of:
• Days
• Months
• Years
If you do not specify the compound days, months or years, it means that compounding is not
applicable
Rounding Factor
Specify the precision value if the number is to be rounded
It is mandatory for you to specify the precision value if you have maintained the rounding
parameter.
Compound Days
If you want to compound the result obtained for the intermediate formula, you have to specify the
frequency for compounding the calculated interest. The frequency can be in terms of days.
Compound Months
If you want to compound the result obtained for an intermediate formula, you have to specify the
frequency for compounding the calculated interest. The frequency can be in terms of months.
Compound Years
If you want to compound the result obtained for an intermediate formula, you have to specify the
frequency for compounding the calculated interest. The frequency can be in terms of years.
Condition and Result
A formula or calcualtion logic is built in the form of expressions where each expression consists of
a ‘Condition’ (optional) and a ‘Result’. There is no limit to the number of expressions in a formula.
For each condition, assign a unique sequence number/formula number. The conditions are
evaluated based on this number. To define a condition, click on ‘Condition’ in the screen above.
The following screen is displayed:
4-20
In this screen, you can use the elements, operators, and logical operators to build a condition.
Although you can define multiple expressions for a component, if a given condition is satisfied,
subsequent conditions are not evaluated. Thus, depending on the condition of the expression that
is satisfied, the corresponding formula result is picked up for component value computation.
Therefore, you have the flexibility to define a computation logic for each component of the
product.
The result of the formula may be used as an intermediate step in other formulae.
4.2.5.2 Using Intermediate Formulae for Amortized Mortgages
You can use intermediate formula in the interest components of amortized mortgage mortgages.
To enable this, you need to select the UDE ‘Z_INTRMDT_RATE’ against the field ‘Rate to Use’.
Further, you can set an intermediate formula with a combination of multiple UDEs in the ‘Result’
field. For example, you may specify the following formula:
INTEREST_RATE + MARGIN_RATE
This implies that the result is the sum of two user defined elements viz. ‘INTEREST_RATE’ and
‘MARGIN_RATE’. You may also define different formulae based on the conditions set.
Intermediate formulae support the following mathematical functions:
• Plus (+)
• Minus (-)
• Multiplication (*)
• Division (/)
Based on requirements, you may define and set various formulae using the above mathematical
functions.
The system calculates the value of the UDE ‘Z_INTRMDT_RATE’ based on the intermediate
formula defined. This calculation is handled in the system generated package. Apart from
‘Z_INTRMDT_RATE’, the system will not allow you to define a UDE that starts with ‘Z_’.
Oracle FLEXCUBE uses the following formats to display the derived interest rate:
Formats
MO_AMD_ADV
MO_LOAN_DETAIL
MO_CONTR_STMT
MO_UDE_ADVC
MO_RTCH_ADV
4-21
4.2.5.3 Booked Formula
Booked Formula refers to the formula used to compute a component value for a particular
schedule. You can use intermediate formulae to create a ‘Booked’ formula. To create the formula,
click ‘Book’ in the ‘Component’ button of the screen. The following screen is displayed:
The SDEs available will be shown in the Condition Builder. You can use the relevant ones to build
the formula. For instance, you need to use the SDE ‘TOTAL_SCHODUE’ in the formula to
compute schedule amount for subsidy mortgage products. The Booked formula so created will be
linked to a schedule.
These are some of the examples of the formulae generated by the system on its own by choosing
the formula type and the basis elements.
• Simple @SIMPLE(PRINCIPAL_EXPECTED,(INTEREST_RATE),DAYS,YEAR,COMPOUND_VAL
UE)
•
Amortized Reducing @AMORT_RED(PRINCIPAL_EXPECTED,(INTEREST_RATE),DAYS,YEAR)
•
Discounting @DISCOUNTED(PRINCIPAL_EXPECTED,(INTEREST_RATE),DAYS,YEAR)
•
Amortised Rule 78 @AMORT_78(PRINCIPAL_EXPECTED,(INTEREST_RATE),DAYS,YEAR)
•
True Discounted @TRUE_DISC(PRINCIPAL_EXPECTED,(INTEREST_RATE),DAYS,YEAR)
The parameters required to create a ‘Booked’ formula are similar to the ones explained for an
Intermediate formula.
The formula for calculation of ‘Provision Amount’ is defined based on the following conditions:
Line
Condition
Result
1
CUSTOMER_CREDIT_RATING=”AAA”
PRINCIPAL_OUTSTAND*0.0015
4-22
2
CUSTOMER_CREDIT_RATING=”AA+”
PRINCIPAL_OUTSTAND*0.0025
3
CUSTOMER_CREDIT_RATING=”AA”
PRINCIPAL_OUTSTAND*0.0035
4
CUSTOMER_CREDIT_RATING=”A+”
PRINCIPAL_OUTSTAND*0.0045
5
CUSTOMER_CREDIT_RATING=”A”
PRINCIPAL_OUTSTAND*0.0055
6
CUSTOMER_CREDIT_RATING=”BBB”
PRINCIPAL_OUTSTAND*0.0065
7
CUSTOMER_CREDIT_RATING=”BB+”
PRINCIPAL_OUTSTAND*0.0075
8
CUSTOMER_CREDIT_RATING=”BB”
PRINCIPAL_OUTSTAND*0.0085
Amortized
Select this option to specify that the schedules of the component should be amortized
For Commitment products do not select this option
Amortization Basis
If you opt to Amortize the schedules of the component, you have to identify the element based on
which the component is amortized. For example, if it is deposit interest, the amortization basis
would be ‘Principal’. The components are available in the option list provided.
In case of a subsidy mortgage, amortization is done with both the main interest and the subsidy
component. For instance, if the interest rate is x% and the subsidy rate is y%, amortization will be
done using net interest rate as x+y%, in the aforesaid scenario. The interest component will be
calculated for the main interest and the subsidy component based on the principal expected and
the individual rates for the components.
4.2.5.4 Moratorium Formula
Moratorium refers to the repayment holiday given during the period between the value date of the
mortgage and the first repayment date. While no repayment will happen during this period,
computation will continue. However, you can also have a principal moratorium wherein no
principal repayment happens in a certain period; only interest component is repaid. This
moratorium may be applied at any stage of the repayment cycle of the mortgage. In case of a
principal moratorium, you need to ensure that the tenor given in the formula does not exceed the
principal moratorium period. The Moratorium formula is used for the computation of interest for
the moratorium period.
To define the formula, click ‘Moratorium’ in the ‘Component’ button of the screen. The
‘Moratorium Formula – Expression Builder’ screen is displayed:
4-23
The procedure for defining the Moratorium formula is as explained for Intermediate and Booked
formulae. The following additional fields are also applicable for a moratorium formula:
Formula Name
Here, you specify a suitable name to identify the formula that you are defining. After you specify
the name, you can define the characteristics of the formula in the subsequent fields. You have to
use the name captured here to associate a formula with a schedule. The name can comprise of a
maximum of 27 alphanumeric characters.
Moratorium Liquidation Formula
The formula used for computation of interest for the moratorium period is called ‘Moratorium
Formula’. The Interest calculated using the moratorium formula should be liquidated for the
lifetime of the mortgage by apportioning it across all the installments. Therefore, you need to
maintain a formula for liquidating the moratorium interest.
Check this option to indicate that the formula you have maintained is for Moratorium liquidation.
Liquidate Moratorium to Installment
This option is applicable only if you are defining a ‘Moratorium Liquidation Formula’
If you check this option, the moratorium interest amount is added to the first installment amount
and collected along with the schedule on the day the schedule falls due.
If you do not check this option, the moratorium amount is allocated from the Installment due. The
principal component of the EMI is liquidated towards the moratorium. Therefore, Principal
repayment does not begin until complete settlement of the moratorium amount.
Default Moratorium Formula
If you want to create a default moratorium formula, check this option. By default, the system will
attach this formula to a moratorium schedule. You can, however, change it to a different
moratorium formula.
4-24
4.2.5.5 Installment Level Status
For a component, you can maintain Schedule/Installment level status change parameters. You
can also specify the account Heads and Roles to be used whenever an installment changes from
one status to the other.
To define the installment level status change details, click ‘Installment Status’ in the ‘Components’
button of the screen - the ‘Installment Status’ screen is displayed:
The following details have to be captured here:
Sequence Number
The number you capture here is used to identify the adversity level of an installment. It should not
overlap with that of an account status, expect for the first factory shipped status ‘NORM’
(Normal).
Status Code
The status that an installment will go through is specified here. The sequence number determines
the order when the installment would attain this status. The status codes defined in the ‘Status
Codes Maintenance’ screen are available in the option-list provided.
Status Rule
The rule defined here will determine the movement of the installment to the selected status (in the
‘Status’ field). You can build multiple conditions for a rule.
To do this, click on ‘Condition’ in the screen above. The ‘Condition Builder’ is displayed.
4-25
You can build the conditions using the elements (SDEs), operators and logical operators
available in the screen above.
Examples of Status Movement Rules are given below:
•
NORM TO PDO1 PRINCIPAL_OVR_DAYS > 30 OR MAIN_INT_OVR_DAYS > 30
•
NORM TO DOUB PRINCIPAL_OVR_DAYS > 60 OR MAIN_INT_OVR_DAYS > 60
•
PDO1 TO NORM PRINCIPAL_OVR_DAYS < 31 AND MAIN_INT_OVR_DAYS < 31
•
PDO1 TO DOUB PRINCIPAL_OVR_DAYS > 60 OR MAIN_INT_OVR_DAYS > 60
•
DOUB TO PDO1
•
DOUB TO NORM PRINCIPAL_OVR_DAYS < 31 AND MAIN_INT_OVR_DAYS < 31
(PRINCIPAL_OVR_DAYS > 30 AND PRINCIPAL_OVR_DAYS < 61) AND
(MAIN_INT_OVR_DAYS > 30 AND MAIN_INT_OVR_DAYS < 61)
For details on building a condition using the options available in the screen, refer the section titled
‘Defining UDE Rules’ in the ‘Maintenances and Operations’ chapter of this User Manual.
The installment will move to the status selected if the associated status rule is satisfied.
Complete Pending Accruals
Check this box to indicate if the pending interest accruals need to be completed before the
Installment status changes. This is applicable only if Accrual Frequency is any one of the
following:
• Monthly
• Quarterly
• Half yearly
• Yearly
This check box will not be enabled if Accrual Frequency in the ‘Consumer Lending Product’
screen is ‘Daily’.
Accounting Entries
For each status of the installment, you can specify the accounting entry preferences. Whenever
an installment attains a status, the entries are passed as per the setup maintained for that status.
Therefore, the entries will be moved from the active GLs to the status specific GLs. However,
when the actual payment occurs, the system will automatically resolve the appropriate GLs.
4-26
For more details on setting up accounting entry preferences, refer the section titled ‘Maintaining
Event details’ in this chapter.
Processing at Account Level
At the account level, when there is a change in the status, Oracle FLEXCUBE will first check if
accrual is required for the components. When the accrual frequency for a component is not
‘Daily’, Oracle FLEXCUBE will validate if the installment status or the account status changes
before accrual execution date. If it changes, Oracle FLEXCUBE will trigger catchup accrual for
the component till the installment status and the account status change date. Subsequent to this,
Oracle FLEXCUBE will process the installment status change and account status change.
Note the following:
• An installment status change will not change the next execution date of unprocessed
ACCR events
• A status change is applicable for both manual and automatic account status
• If you delete an account level status change, it will delete the catch up accrual accounting
entries also
If you reverse an account level status change, it will reverse the catch up accrual accounting
entries as well
4.2.5.6 Specifying Policy preferences
You can associate policies at an installment level. Policies are user defined validations that are
fired when an event is triggered.
Policy Code
The Standard Policies (defined through the ‘Policy Maintenance’ screen) and the Policies
associated with the product category are available in the option list provided. Policies are used to
handle special validations and operations on a mortgage.
Execution Type
You can associate a policy at one of the following points in time in a mortgage -event lifecycle:
• Before Event
• After Event
• Both
The policy is executed appropriately.
For details on maintaining policy details, refer the section titled ‘Maintaining User Defined
Policies’ in the ‘Maintenances and Operations’ chapter of this User Manual.
Schedule Preferences
In the ‘Component’ section of the screen, you need to maintain the applicable schedule details for
each component:
4-27
Sequence Number
You can define more than one schedule for a component. The sequence number determines the
order in which the individual schedule should be applied on a component. For instance, you can
define a schedule structure consisting of a moratorium schedule and a normal schedule. The
moratorium schedule, if defined for a component, should necessarily be the first schedule. You
cannot have moratorium schedules in between normal schedules.
Type
This is the kind of schedule you want to define. The options are:
• Payment: This is used to define a repayment schedule. You can capitalize a payment
schedule. If the ‘Capitalized’ option (under Component Definition) is checked, the
‘Capitalized’ option at the schedule level will also be checked for payment schedules. You
can, however, uncheck/check this option for a schedule.
• Disbursement: You can maintain a disbursement schedule for mortgage disbursal if the
‘Disbursement Mode’ is automatic (this is maintained on the ‘Preferences’ button). For
auto disbursement, you have to maintain at least one disbursement schedule.
• Rate Revision schedules: This will capture the schedule at which the rates applicable to
the component should be revised.
Start Reference
This is used to capture the reference to arrive at the due date of the schedule. The options are:
• Calendar: If you select this option, you should also specify the ‘Start Date’ for the
schedule. For example, if an account is created on 15th Sept with a ‘Monthly’ schedule
frequency and the Start Date is 1st, then the schedule due dates would be 1st Oct, 1st Nov
and so on.
• Value Date: If you select value date, the schedule due dates will be based on the Value
Date of the account. For instance, if an account is created on 15th Sept and the schedule
frequency is ‘Monthly’, then the schedule due date would be 15th October, 15th Nov and so
on.
For a component, you can define schedules based on both value date and calendar date.
Frequency Unit
Here, you have to capture the unit to define the schedule. The unit can have the following values:
• Daily
• Weekly
• Monthly
• Quarterly
• Half Yearly
• Yearly
• Bullet
If the schedule unit is ‘Weekly’, you should also capture the ‘Start Day’. Similarly, for units
‘Quarterly’, ‘Half Yearly’ and ‘Yearly’, you should also specify the ‘Start Month’.
4-28
Frequency
This is used in combination with ‘Unit’ explained above, to define non-standard frequencies. For
instance, a ‘Monthly’ unit and frequency 2 implies that the schedule is bi-monthly (occurring every
two months).
Start Day
If the schedule unit is ‘Weekly’, you should specify the start day to initiate the schedule. The dropdown box lists the days of the week
Start Month
This is applicable if the schedule unit is one of the following:
• Quarterly
• Half Yearly
• Yearly
The drop-down box lists the months in a year
Start Date
Here, you can specify a value between 1 and 31. This is applicable if the schedule unit is
‘Monthly’
Due On
You can use this to define a schedule on a particular date of the month. A value between 1 and
31 can be used for this purpose. If you specify a value here, the system will build the schedules
based on this date even if you have indicated the ‘Start Date’ for the schedule.
Formula
You have to select the formula applicable for component value calculation. The Booked and
Intermediate formulae defined for the component are available in the option list. With a userdefined formula maintained through the rule builder, you can define a schedule with multiple
formulae.
Flag
You can define a non-repayment schedule or a repayment schedule. This field is used to identify
the schedule type:
• Normal: This refers to a repayment schedule. Repayment happens as and when the
schedule falls due
• Moratorium: This refers to a non-repayment schedule or a repayment holiday during the
repayment cycle of a mortgage
Number of schedules
The value captured here determines the number of times a schedule frequency should recur. For
example, a 12 monthly schedule would have a ‘Monthly’ unit and number of schedules as 12.
4-29
Capitalized
Check this option to specify capitalization of the component for a particular schedule. If the
‘Capitalized’ option (under Component Definition) is checked, the ‘Capitalized’ option at the
schedule level will also be checked for payment schedules. You can, however, uncheck this
option for a schedule.
4.2.5.7 Processing at Installment Level
At the installment level, if there is a change in the installment status, Oracle FLEXCUBE will first
check if accrual is required for the installment components. When the accrual frequency for a
component is not ‘Daily’, Oracle FLEXCUBE will validate if the installment status changes before
accrual execution date. If it changes, Oracle FLEXCUBE will trigger catchup accrual for the
component till the installment status change date. Subsequent to this, Oracle FLEXCUBE will
process the installment status change.
The following example will explain the Complete Pending Accrual functionality. This is applicable
for both Installment Level as well as Account Level Status change.
Example
Let us assume an accrual frequency for a component MAIN_INT. The schedules for this component are as
follows:
•
Value Date – 05-Jan-06
•
Schedule Dates:
¾
¾
¾
•
05-Jan-06,
05-Feb-06
05-Mar-06
Accrual Execution Dates:
¾
¾
31-Jan-06
28-Feb-06
If the installment status or account status changes on 15-Jan-06, Oracle FLEXCUBE will trigger catch up
accrual if ‘Complete Pending accrual’ is checked.
Note the following:
• An installment status change will not change the next execution date of unprocessed
ACCR events.
• A status change is applicable for both manual and automatic installment status.
• If you delete an Installment level status change, it will delete the catch up accrual
accounting entries also.
• You can reverse an installment level status change by inputting another installment level
status change. For example, if installment status changes from NORM to OVD1, reversal
of the same can be done by doing installment status change from OVD1 to NORM. In this
case no processing will be done.
4-30
4.2.6 Associating Notices and Statement
Just as you define components that should become a part of the product, so also you can
associate Notices and Statements with a product.
The actual communication/correspondence, however, is handled by the Messaging Module of
Oracle FLEXCUBE. Click ‘Notices & Statements’ button in the ‘Product Maintenance’ screen.
In this screen, you need to maintain the preferences for Billing Notices, Delinquency Notices,
Rate Revision Notice, Direct Debit Notice and Statements. Also, you can associate multiple
formats for the generation of notices and statements. The selection of a particular format is based
on the condition.
Rule No/Condition No
You can assign a unique number for each rule/condition that is being maintained for notice and
statement generation.
Condition
Define the conditions/rules for notice and statement generation. The system will evaluate the
conditions and based on the one that is satisfied, the corresponding advice format is selected for
notice/statement generation.
To maintain a condition, click ‘Condition’ button in the screen above. The ‘Condition Builder’ is
displayed.
4-31
For details on building a condition using the options available in the screen, refer the section titled
‘Defining UDE Rules’ in the ‘Maintenances and Operations’ chapter of this User Manual.
Number Days
The Number of days indicates the period before the due date, when the system starts sending the
Billing/Delinquency notices to customers.
This period is defined as a specific number of days and will begin before the date the repayment
becomes due.
Format
For the condition defined, select the format in which the advice should be generated. The system
will select the specific format of the message type when the condition maintained evaluates
favorably. Frequency Days
Specify the frequency (in days) for generation of Delinquency Notices. The first notice is sent on
the basis of the ‘Num Days’ maintained. For instance, if the ‘Num Days’ is four and the payment
due date is 4th April 2004, the first notice will be sent on 31st March ’04 (4 days before due date).
Subsequent generation of the same notice is based on the frequency days maintained. If the
‘Frequency Days’ is ‘2’, the second notice will be sent on 2nd April ’04 i.e. the notice is sent once
in two days only.
The following information is applicable to Statement generation:
Frequency
Indicate the frequency in which the Statements have to be generated. The available options:
• Daily
• Monthly
• Quarterly
• Half Yearly
• Yearly
Frequency Days
The frequency captured here is used to get the next date for statement generation subsequent to
the first statement. This will be used in combination with the ‘Frequency’ explained above.
Start Date
The date entered here is used as a reference to start generation of the statement
The following example illustrates the manner in which the ‘Frequency’, ‘Frequency Days’ and ‘Start
Date’ are used together:
Assume that you have maintained the following preferences for Statement generation:
Frequency: Monthly
Frequency Days: 2
Start Date: 1st Jan 2005
th
You open a mortgage account on 15 Jan 2005. The first statement for this mortgage will be generated on
st
1 February 2005 (Based on the Start Date and at a Monthly frequency). The second statement will be
generated on 1st April 2005 (once in two months – based on the frequency days).
4-32
Message Type
Specify the type of Statement that should be generated. Statements are of the following types:
• Interest Statements
• Mortgage Statements
Generic Notice
Notice ID
Specify the identification number of the notice.
Notice
Select the notice type of the rate plan from the list of options.
Rule Number
Specify the unique number for the rule maintained for notice. It is a running number starting from
1.
Condition
Specify the condition for notice generation. The system will evaluate the conditions and based on
the one that is satisfied, the corresponding advice format is selected for notice.
Click ‘Condition’ button to maintain a condition in ‘Product’ screen. The ‘Condition Builder’ is
displayed.
Format
Select the format of the advice to be generated from the list of options.
Number of Days
Specify the number of days required to intimate the customer in advance about the UDE rate
change period.
Frequency
Select the frequency at which the notice has to be generated from the adjoining drop-down list.
This list displays the following values:
• Daily
• Monthly
• Quarterly
• Half Yearly
• Yearly
Tenor
Specify the tenor at which the notice has to be generated.
4-33
Start Date
Specify the date on which the notice has to be generated.
Transaction Code
Specify the identifier code of the transaction.
Interest Rate Revision within the Rate Revision Period
The Rate Revision Notice section allows you to maintain the number of days for the generation of
the advice, prior to the scheduled date of rate revision. During End of Day if the notification date
is less than or equal to schedule date, a Rate Revision Advice is generated.
The four different conditions for the rate revision will be handled in Oracle FLEXCUBE as follows:
• Condition 1:
Once the interest revision date is reached, the system continues to use the same interest rate
code, till the next revision date.
• Condition 2
If the request for change in interest rate is received a few days before the scheduled revision
date, the interest rate code of the mortgage account is changed by value dated amendment, with
the effective date as the scheduled interest revision date. On the effective date, the system
changes the rate code and picks up the new interest rate
• Condition 3
If the request is for a future dated prepayment of the mortgage account there is no change in the
interest rate, the principal is changed depending on the prepaid amount and once the payment is
available in the settlement account, you can liquidate the mortgage manually with the requested
effective date.
An outstanding component breakup of prepayment penalty charges if applicable is sent to the
customer.
• Condition4
If the request for interest rate revision is made much before the scheduled revision date, you can
change the interest rate code of the mortgage account by value dated amendment with effective
date as requested.
The rate revision will be applicable on the total principal outstanding amount.
4-34
4.2.7 Mapping Accounting Roles to Product
You can define the accounting roles for a product in the ‘Role to Head’ button of the ‘Consumer
Lending Product’ screen. A list of accounting roles that are applicable to the product being
maintained is provided. This is a pre-defined list and you can add roles to it too.
The following details are captured in this screen:
Map Type
The mapping between an accounting role and account head can be of the following types:
• Static: If the map type is static, you can link an accounting role to only one accounting/GL
head (one to one mapping).
• User Defined: For a user defined map type, you can maintain multiple linkages under
different conditions using a case-result rule structure (one to many accounting).
Accounting Role and Description
Accounting role is used to denote the accounting function of a GL or Account. To map an
accounting role to an account head, select a valid accounting role from the option list provided.
This list will display the roles available for the product being maintained.
Once you choose the accounting role, the description maintained for the role is also displayed in
the adjacent field.
4-35
If you do not want to select a role from the option list, you can also create an accounting role for a
product and specify a brief description for the same.
The GLs (Account Heads) for the Dr/Cr Settlement Bridge Role will default as per your
selection in the ‘Branch Parameters’ screen.
Account Head and Description
The account head identifies the GL or Account to which the accounting entries would be posted.
Based on the type of accounting role you select (Asset, Liability etc.), the list of Account Heads
(General Ledger heads) that are of the same type as that of the accounting role, becomes
available in the option list provided. You can select an accounting head from this list and thus,
create a role to head mapping. On selection of the Account Head, the description is also
displayed in the adjacent field.
Click Add icon to create subsequent mappings for the product. If you would like to delete a role to
head mapping, click Delete icon.
Rule
If the ‘Map Type’ is ‘User Defined’, you can create a case-result rule structure based on which the
entries are posted to the appropriate account head. To create a rule, click ‘Rule’ in the ‘Role to
Head’ button of the product screen.
You can define multiple conditions and for each condition you can specify the resultant ‘Account
Head’. This way you can maintain one to many mappings between an accounting role and an
account head. Depending on the condition that is evaluated favorably, the corresponding account
head is used for posting the entries.
To build a condition, click on ‘Condition’ in the screen above. The ‘Condition Builder’ is displayed.
4-36
You can build the conditions using the elements (SDEs), operators and logical operators
available in the screen above.
For details on building a condition using the options available in the screen, refer the section titled
‘Defining UDE Rules’ in the ‘Maintenances and Operations’ chapter of this User Manual.
The system ensures that all accounting roles that are applicable for the Product and which
have been used in the definition of the accounting entries are necessarily linked to an account
head. If the mapping is not complete, an error message is displayed when you attempt to save
the product.
4.2.7.1 Dynamic creation of accounting roles for a component
For each component you define for a product, six accounting roles are dynamically created by the
system. For example, if you have defined a component ‘MAIN_INT’, the following accounting
roles are created:
• MAIN_INTINC
- Component Income
• MAIN_INTEXP
- Component Expense
• MAIN_INTRIA
- Component Received in Advance
• MAIN_INTPAY
- Component Payable
• MAIN_INTREC
- Component Receivable
• MAIN_INTPIA
- Component Paid in Advance
For a detailed list of Events, Advices, Accounting Roles and Amount Tags, refer ‘Annexure 1’ of
this User Manual.
4-37
4.2.8 Specifying Account Status
Ideally, when setting up a product, you should identify all possible status that mortgages involving
the product would move into.
A status can apply either to a mortgage installment or the entire mortgage account. Installment
level status change preferences are maintained in the ‘Component’ screen of the screen.
For more details, refer the section titled ‘Specifying Component Details’ in this chapter
You can maintain account level status movement preferences the ‘Account Status’ button of the
screen.
In this screen, you can specify the following:
• Define a status derivation rule to resolve a status
• Define accounting entries, advices etc. which need to be fired for a status
• Specify the liquidation order for a status
• Associate charges, if applicable, for a status
• Policies to be triggered for a status change
4-38
Status
When setting up a product, you should identify all possible statuses that mortgages involving the
product would move into. By default, the ‘NORM’ (Normal) status is defined for the product. You
can select the relevant status codes from the option list provided. The status codes defined
through the ‘Status Codes Maintenance’ screen with ‘Status Type’ as ‘Account’ is available in this
list.
When you select a status, the associated description is also displayed in the adjacent field.
Adversity Level
This signifies the adversity level of the status. The Status ‘NORM’ has an adversity level of ‘1’ and
is the most favorable. This is the default status for a mortgage.
Accrual Preference
For a status, you have to indicate the manner in which accounting entries should be posted when
the mortgage moves to the status. The options are:
• Stop Accrual – accruals are frozen
• Reverse Accrual – accruals till date are reversed by transferring them to an expense GL
• Continue Accrual – accruals continue as in the previous status as per the Role to Head
maintained for the status and as per the accounting entries defined
After you specify the status codes applicable for the product, you need to specify the manner in
which the status movement should occur.
From Status and To Status
When you highlight a status from the list of status codes maintained for the product, the selected
status becomes the ‘From Status’
In the option list provided for the ‘To Status’, the status codes applicable for the product is
displayed. Select the relevant status into which a mortgage should move from the ‘From Status’.
Movement Type
You have to indicate the type of movement of a mortgage from the current status (From Status) to
the next status (To Status). The movement can be:
• Automatic
• Manual
• Both
Movement Rule
You have to define the status derivation rule which will determine the movement of a mortgage
from one status to the other. This is the condition based on which the status movement occurs. If
a mortgage satisfies all the rules defined due to which it can move to several statuses at a time, it
will identify the most adverse status and move to that status.
To define a derivation rule, click ‘Condition’ button in the screen above. The ‘Condition Builder’ is
displayed.
4-39
You can build the conditions using the elements (SDEs), operators and logical operators provided
in the screen above.
For details on building a condition using the options available in the screen, refer the section titled
‘Defining UDE Rules’ in the ‘Maintenances and Operations’ chapter of this User Manual.
Example
Assume that the current status of a mortgage is ‘ACTIVE’ and you want the mortgage to move to the
‘OVERDUE’ status if the overdue months exceeds zero. To meet this requirement, you can define the
following parameters:
•
From Status: Active
•
To Status: Overdue
•
Movement Type: Automatic
•
Rule: If MORTGAGE_STATUS = 'ACTIVE' AND OVERDUE_MONTHS > 0
If the mortgage satisfies the rule, it automatically moves to the ‘Overdue’ Status.
Complete Pending Accruals
Check this box to indicate if the pending interest accruals need to be completed before the
Account status changes. This is applicable only if Accrual Frequency is any one of the following:
• Monthly
• Quarterly
• Half yearly
• Yearly
This check box will not be enabled if Accrual Frequency in the ‘Consumer Lending Product’
screen is ‘Daily’.
4-40
4.2.8.1 Specifying the liquidation order
You can prioritize the liquidation of the various mortgage components at a status level. To
maintain liquidation order of components, click ‘Liquidation Order’ in the ‘Account Status’ button
of the screen – the following screen is displayed.
When a mortgage attains an adverse status, you may want to allot priority to the recovery of
certain components. For example, you may want to recover the Principal first and then the
Interest type of components.
The components maintained for the product are available in the option list provided. Select a
component and then specify the order of liquidation for the component.
Click on Add icon to maintain the liquidation order for the next component
4.2.8.2 Specifying the accounting preferences
You can specify accounting preferences at a status level. You may have a GL structure under
which mortgages in ‘Normal’ status should report. You can maintain a different structure for
mortgages in other status. To do this, click ‘Accounting Entries’ in the ’Account Status’ button –
the following screen is displayed:
4-41
Also, for a status, you may not want to change accounting roles but change only the
accounts/GLs. The accounting roles will be the same. To achieve this, you can create a rule
based ‘Role to Head’ mapping. The SDEs like ’Account Status’ can be used to create the rule and
if a mortgage satisfies the rule i.e. moves to the status maintained in the rule, the Account Head
selected for the rule is used for posting the entries.
For a commitment product, the following amount tags are used for passing accounting entries:
Sl No
Amount Tag
Description
1
COMMUTIL_INCR
Commitment Amount Utilized
2
COMMUTIL_DECR
Commitment Amount Reinstated
3
COMM_UNUTIL
Commitment Amount unutilized
Refer the section titled ‘Maintaining Role to Head mapping preferences’ for details on creating a
‘Role to Head’ mapping.
4.2.8.3 Specifying Advices
You can also specify the advices that should be generated when a status change occurs. For
instance, when a mortgage moves from an ‘ACTIVE’ status to an ‘OVERDUE’ status, you can
choose to send an advice to inform the customer of the status change and request for payment.
The advices can be maintained in the ‘Product Event Advices Maintenance’ screen - click
‘Advices’ in the ‘Account Status’ button to invoke it.
4-42
You can associate advices at an event level also.
For more details on maintaining advice preferences, refer the ‘Maintaining Event details’ section
of this User Manual.
4.2.8.4 Specifying Policy Preferences
Just as you associate policies at an installment level, you can also associate policies for a
mortgage account status. To do this, click ‘Policies’ in the ‘Account Status’ button of the product
screen – the following screen is displayed:
Specify the following in this screen:
Policy Code
The policies defined in the ‘User Policy’ screen are available in the option list provided. Policies
are used to handle special validations and operations on a mortgage.
4-43
Execution Type
You can associate a policy at one of the following points in time in a mortgage-event lifecycle:
• Before Event
• After Event
• Both
The policy gets executed appropriately
4.2.8.5 Associating Charges
Whenever a mortgage undergoes a status change, you can apply charge on the mortgage. You
need to associate charge components at a status level. To do this, click ‘Charges’ in the ‘Account
Status’ button of the screen – the following screen is displayed:
The charge type of components defined for the product (in the ‘Components’ button of the
screen) are displayed in the option list. Select the component you wish to associate with the
mortgage. The charge is applied when the mortgage moves to the status and is debited to the
customer account.
4.2.9 Maintaining Event Details
A contract goes through different stages in its life cycle. In Oracle FLEXCUBE, the different
stages a contract passes through in its life cycle are referred to as ’Events‘.
At an event, typically, you would want to post the accounting entries to the appropriate account
heads and generate the required advices. When setting up a product, you can define the
accounting entries that have to be posted and the advices that have to be generated at the
various events in the life cycle of mortgages involving the product.
Therefore, for the required events you have to specify the Accounting entries, Charges, Policies
and Advices. To do this, click ’Events’ button in the ‘Product Maintenance’ screen – the following
screen is displayed.
4-44
Event Code and Event Description
These are the events for which the accounting entries, advices, policies and charges will be
maintained, individually. The event codes applicable for the module are available in the option list
provided. Select the relevant events for the product from this list.
The description for the event chosen is also displayed
For a commitment product the following events are used:
• LINK
• DLNK
• CLOC
The following events should not be maintained for a commitment product:
• BADJ
• CLOS
• REOP
• RNOG
• ROLL
• SROL
• YACR
• NOVA
• REVV
• REVL
4-45
4.2.9.1 Defining Accounting Entries
To define accounting entries for an event, click ‘Accounting Entries’ in the ‘Events’ button – the
’Product Event Rule Based Entries’ screen is displayed.
With the Rule definition builder, you can maintain different set of accounting entries for different
conditions.
Rule Number
Every rule/condition you define for a product should be assigned a unique number. The rule
number can consist of a maximum of 5 digits
Case
You can use the ‘Condition Builder’ to define a rule. Click on ‘Condition’ in the above screen to
invoke it
4-46
You can define a rule using the SDEs like Tenor, Customer Risk Category and other UDFs.
If you do no specify a rule/condition, the accounting entries become applicable to all conditions.
For details on building a condition using the options available in the screen, refer the section titled
‘Defining UDE Rules’ in the ‘Maintenances and Operations’ chapter of this User Manual.
Accounting Role
Select the accounting role that should be used at the event. The option list displays all the
accounting roles specified for the product in the ‘Role To Head’ button of the ‘Consumer Lending
Product’ screen. Select the role appropriate for the event.
Amount Tag
Specify the amount tag applicable for the Accounting Role. An amount tag identifies the
amount/value that is actually due for a component. Depending on the components defined for the
product, the system dynamically creates a set of amount tags. For instance, if the component is
‘MAIN_INT’, the following amount tags are automatically created:
• MAIN_INT _RESD
- Component Amount Residual
• MAIN_INT_ADJ
- Component Amount Adjustment
• MAIN_INT_LIQD
- Component Amount Liquidated
• MAIN_INT_ROLL
- Component Amount Rolled over
• MAIN_INT_CAP
- Component Amount Capitalized
• MAIN_INT_ACCR
- Component Amount Accrued
• MAIN_INT_DLIQ schedules
Component Amount Paid against Due Schedules/future not-due
• MAIN_INT_OLIQ -
Component Amount Paid against Overdue Schedules
The ‘_DLIQ’ and ‘_OLIQ’ tags will be generated only for the events LIQD and ROLL.
Select the appropriate amount tag from this list
Debit or Credit
Here, you have to specify the type of accounting entry to be posted – the entry can be a debit
entry or a credit entry.
Transaction Code
Every accounting entry in Oracle FLEXCUBE is associated with a Transaction Code that
describes the nature of the entry. Specify the transaction code that should be used to post the
accounting entry to the account head. You can group all similar transactions under a common
transaction code. The transaction codes maintained in the ‘Transaction Code Maintenance’
screen are available in the option list provided.
Netting
Specify whether accounting entries should be netted at an event. You can net the accounting
entries that are generated at an event by selecting ‘Yes’ from the drop down list. The system will
then net the entries and show the resultant value in account statements. If you do not net, the
entries will be shown separately in the statements.
4-47
MIS Head
An MIS Head indicates the manner in which the type of entry should be considered for profitability
reporting purposes. This classification indicates the method in which the accounting entry will be
reported in the profitability report. It could be one of the following:
• Balance
• Contingent Balance
• Income
• Expense
You can also link a product to an MIS Group if you do not want to define individual entities for the
product.
Refer the section titled ‘Associating an MIS Group with the product’ in this chapter for more
details.
Revaluation Required
Online Revaluation refers to revaluation done on transaction amounts during transaction posting,
and not as part of an end-of-day process. The Revaluation profit /loss are booked to the Online
‘Profit GL’ or Online ‘Loss GL’ that you maintain for the GL being revalued.
You can opt for online revaluation by selecting the ‘Reval Reqd’ option.
Profit GL and Loss GL
If you have opted for online revaluation and the result of revaluation is a profit, the profit amount
is credited to the Profit GL you select here. Similarly, if the result of revaluation is a loss, the loss
amount is credited to the Loss GL you specify here.
Reval Txn Code
If you opt for online revaluation, you need to associate the transaction code to be used for
booking revaluation entries. The system will use this transaction code to track the revaluation
entries.
Holiday Treatment
Specify whether holiday treatment is applicable for processing accounting entries falling due on
holidays. Select one of the following:
• Yes
• No
GAAP
Indicate the GAAP indicators for which the accounting entry is required for reporting under multi
GAAP accounting. The adjoining option list shows all the GAAP indicators maintained in the
system. Choose the appropriate one.
The system will then post entries into the specified books (GAAP indicators) during the different
events that occur in the lifecycle of the mortgage. You can retrieve the balance for a certain
component in an account in a specific status, for a given GAAP indicator, in a certain branch,
reporting to a certain GL. The system will show the real and contingent balances accordingly.
4-48
Split Balance
Specify whether you need the balances to be split or not. If you check this option, the system will
store the balance break-up for the specified GAAP indicators. You can then retrieve the balances
separately for the different GAAP indicators to which accounting entries are posted for the
mortgage.
If you need to move the balances from multiple/Single GLs, where the balances are currently
lying, check this box. In such case the credit leg will be governed by the GLs from where
component balances need to move, and not the GL maintained at the product level for the event.
For example:
For ALIQ event, the maintenance is as follows:
Dr/Cr
Role
Settlement
Reqd
Amount Tag
Spilt
Balance
Dr.
DR_SETTL_BRIDGE
Y
MAIN_INT_LIQD
N
Cr.
INTEREST RECEIVABLE (say
GL-000
N
MAIN_INT_LIQD
Y
However, the balance for interest is lying like this: 500 (GL-001) and 200 (GL-002) Lets say we are
liquidating 700 against MAIN_INT component.
In this scenario, finally system will pass the following entries:
•
Dr Customer A/c
700
•
Cr GL-001
500
•
Cr GL-002
200
In case Split balance is set to NO for Cr leg the entry would have been:
•
Dr Customer A/c
700
•
Cr GL-000
700
When you are building new balances into GLs, you need to uncheck this option for the credit leg also. In
such cases accounting will go by the maintenance of the GLs/account done for the event.
For Example:
If you want to move ACCRUED_AMOUNT from one GL into another GL, and also build one parallel entry for
the same in OFF BALANCE sheet, then in such case for the movement pair, you will maintain split balance
as Y for the credit leg. For the new balance into OFF BALANCE sheet, you will maintain the split balance as
N for both the legs.
When you need to reverse the contingents, for both the credit and debit leg, the GLs will be governed by the
GLs where the balances are currently lying then you need to set it to CONTRA.
This means that if the accounting entry setup is like this:
Dr/Cr
Role
Settlement Reqd
Amount Tag
Spilt Balance
Dr.
CONT-001
N
MAIN_INT_OVD1_REAL
N
Cr.
CONT-002
N
MAIN_INT_OVD1_REAL
Y
And if balances (say 50 for the component) for MAIN_INT_OVD1_REAL are lying in CONT-003 AND CONT004 GLs. (This kind of setup means while doing status movement, you are building one parallel set of entry
into contingents)
With this setup, system will pass the entry like this
4-49
•
Dr CONT-003
50
•
Cr CONT-004
50
If for both the legs, split is set to NO, then system will pass the following entries instead:
•
Dr CONT-001
50
•
Cr CONT-002
50
Balance Check in Batch
Indicate whether the balance check is required for the batch operations/online processing.
The options available are:
• Reject – The transaction is rejected if there is insufficient fund to process the transaction.
• Delinquency Tracking – The transaction is processed. If you have specified delinquency
tracking for the accounting entries, the tracking is done according to the parameters you
have defined for the Delinquency Product.
• Force Debit – The transaction is processed. However, no delinquency tracking is done
even if the account goes into overdraft.
• Partial Liquidation – The transaction is processed. If you have specified partial
delinquency, the system liquidates upto the available amount and the delinquency tracking
is done on the remaining amount only.
Delinquency Product
In case you have specified delinquency tracking for balance check type, you need to specify the
delinquency product under which the entry is tracked. The option list displays all the delinquency
product codes maintained in the Oracle FLEXCUBE. Select the appropriate from the option list.
Settlement
This field used to settle the amount. If it set as yes, while doing settlement system uses the
Account used during amount settlement. If it is no it will use default account, which is mapped in
role to head.
If you have selected the ‘Accounting Role’ as DR_SETTL_BRIDGE or CR_SETTL_BRIDGE in
and if ‘Settlement’ box is checked then system looks at the default settlement accounts
maintained in the Debit settlement Mode and Credit settlement mode. If ‘Settlement’ box is not
checked then the system tries to arrive at the GL through Role to Head Mapping.
4.2.9.2 Specifying Advices for an Event
You can select the advices that should be triggered for various events. These advices can be
simple Debit /Credit advices when any payment or disbursement is made, Rate Revision advices,
Mortgage advices etc.
To specify the advices for an event, click ‘Advices’ in the ‘Events’ button of the ‘Product
Maintenance’ screen – the following screen is displayed.
4-50
The following advice details have to be maintained in the screen:
Message Type
Select an advice from the option list provided. The advices applicable for the module are
available in this list. When you select an advice, the description is displayed in the adjacent field.
Generation Time
The ‘Trigger’ indicates the appropriate time at which the advice is to be generated. You can
indicate whether the advices specified for the product should be generated when the event takes
place (Input) or at authorization.
Suppress
This option may be used if you want to suppress the generation of some advices
Priority
You can indicate the importance of the advice generation. The priority may be:
• High
• Medium
• Low
Charges
You may check this option to collect charges for advice generation.
You can specify a definite format for advice generation. The formats maintained through the
‘Format File Maintenance’ are available in the option list. Select the appropriate format from this
list.
For a detailed list of Events, Advices, Accounting Roles and Amount Tags, refer ‘Annexure 1’ of
this User Manual.
4-51
4.2.9.3 Defining User Defined Policies
Policies are user defined validations that will be fired when any event is triggered. These can
even be policies which govern the firing of an event under certain conditions.
For example, if an operation called payment is being done and the customer is paying an amount
greater than his current overdue and one additional installment, you can associate a policy to
disallow the payment. Therefore, you have to associate policies to an event.
Click on ‘Policies’ in the ‘Events’ button of the screen to define the policies that should be
executed for an event.
You can select the appropriate policy from the option list provided. The policies defined in the
‘User Policy’ screen are available in this list. You should also specify the instance when the policy
should be triggered for the event. The options are:
• Before Event
• After Event
• Both
4-52
4.2.9.4 Associating Charges
You can associate charges to an event. Linking a charge to an event implies calculating the value
of the charge.
To associate charges, click ‘Charges’ in the ‘Event’ button of the screen
The charge type of components defined for the product (in the ‘Components’ button of the
screen) are displayed in the option list. Select the component you wish to associate with the
event.
4-53
4.2.10 Branch Currency Restrictions Tab
The mortgage products created in the Head Office Bank (HOB) are available across all the
branches subject to the branch restrictions maintained for the product. Likewise, you also restrict
the products to select currencies. To achieve this, you can maintain a list of allowed/disallowed
branches and currencies
Click on the ‘Branch CCY Restriction’ button in the product screen.
The following details are captured here:
Branch and Currency Restriction
Under Branch and Currency Restrictions respectively, two columns are displayed.
• Allowed List
• Disallowed List
The allowed or disallowed column that is displayed would depend on the list type that you choose
to maintain. For instance, if you choose to maintain an allowed list of branches, the column would
display the branches that you can opt to allow.
In the Branch Restriction and Currency Restriction Section, click on the adjoining option list to
invoke a list of bank codes and currencies codes respectively that you have maintained in your
bank. Select an appropriate code.
Using the Add or Delete icons, you can add/delete a branch or currency from the corresponding
allowed/disallowed column that you have maintained.
When you create a product, it is, by default, available to all the branches of your bank, in all
currencies, and for all customers unless restrictions are explicitly specified for the product.
4-54
Minimum Amount
Specify the minimum amount for all the allowed currency maintained at the product level.
Maximum Amount
Specify the maximum amount for all the allowed currency maintained at the product level.
System checks the following:
• At the product level, if the minimum amount is less than the maximum amount
• At the Mortgage Contract screen, if the amount financed falls in the range of minimum and
maximum amount derived from product for the currency same as the mortgage currency
Currency Balance Details
You can maintain the following currency balance details:
Currency
You can specify the transaction limit for a currency while defining currency restrictions for a
product. Choose the currency code from the option list.
Residual amount
Here, you have to capture the minimum amount by which, if a component of a schedule becomes
overdue, the system will consider it as paid.
Neg Residue Amount
If the difference between the amount paid (COMPONENT_EXPECTED) and the amount due is
less than the residue amount specified here, then the difference is treated as an income
otherwise the transaction is rejected.
4-55
In the case of an income, the installment schedule is marked as completely settled/paid and the
income is posted to the residual suspense GL. This triggers the event called ‘RESD’ (Residual)
and the following entries are passed:
Accounting Role
Amount Tag
Dr/Cr
Mortgage Account
RESIDUAL_AMOUNT
Cr
Residual Suspense
RESIDUAL_AMOUNT
Dr
ATM Cash limit
Here, you can enter the maximum non- Cash transaction amount for the currency that you have
defined. The ATM transaction amount cannot exceed the value given here.
Rounding Factor (EMI)
Specify the rounding factor if the EMI is to be rounded.
It is mandatory for you to specify the rounding factor if you have maintained the rounding
parameter.
Emi Round Up Down
Indicate whether the EMI should be rounded up or down.
• Choose ‘UP’ in case you want to round the number to the next decimal value.
• Choose ‘DOWN’ if you want to truncate the number to the previous decimal value
The principal component of the EMI is adjusted based on the rounded EMI amount.
Numerator Method
Specify the day count method for the numerator for each currency applicable to the product. The
following options are available in the drop-down list:
• Actual
• 30 Euro
• 30 US
Choose the appropriate one. This value will be used for calculation of the Net Present Value
(NPV).
Denominator Method
Specify the day count method for the denominator for each currency applicable to the product.
The following options are available in the drop-down list:
• 360
• 365
Choose the appropriate one. This value will be used for calculation of the Net Present Value
(NPV).
4-56
4.2.11 Maintaining Customer Category Restriction
Just as you can maintain a list of allowed/disallowed branches and currencies for a product, you
can maintain a list of allowed/disallowed customer categories.
You can maintain several restrictions for each customer category.
You can restrict customers from availing a product by maintaining an ‘allowed’ list or a
‘disallowed’ list of customer categories.
Only customer categories that are a part of an allowed list maintained for a product can avail the
product. Likewise, customer categories that are part of a disallowed list cannot avail the product
or service.
The allowed or disallowed column that you view depends on the list type that you choose to
maintain. For instance, if you choose to maintain an allowed list, the column would display those
customer categories that you choose to allow.
You can move a category to the allowed/disallowed column, using the Add or Delete icons.
4.2.11.1 Allowing Access to Special Customers
Depending on the customer restriction you specify – allowed or disallowed, you can further
maintain a list of customers who are allowed (for a ‘Disallowed’ list) or specific customers who are
not allowed to use the product (in the case of an ‘Allowed’ list). For example, you may disallow
the customer category ‘CORPORATES’ from availing a certain mortgage product. However, you
may want to allow ‘Cavillieri and Barrett’ (belonging to the category ‘CORPORATES’) to avail the
product.
Select the name of the customer from the option list provided. The ‘Customer Name’ is displayed
after you select the customer id.
4-57
If the selected customer belongs to a category which is ‘Disallowed’ for the product but you want
to allow the customer, check the ‘Allowed’ option. Similarly, if the customer belongs to a category
that is ‘Allowed’ but you want to disallow the customer, do not check the ‘Allowed’ option.
4.2.12 Defining User Defined Fields
UDFs are additional fields that are available for use depending on the bank’s requirement. You
can define UDFs in the ‘Fields’ screen.
In the ‘Field’ button of the screen, you can associate these custom fields with the product.
The UDFs are segregated based on the ‘Field Type’, into the following:
• Character Fields
• Number Fields
• Date Fields
When you select an UDF from the option list, the description is also displayed in the adjacent
field.
4-58
4.2.12.1 Associating an MIS Group with the Product
You can associate MIS details with a product in the ‘MIS’ screen. Click ‘MIS’ button in the
‘Mortgage Product’ screen to invoke it.
In this screen, you can associate an ‘MIS Group’ to which the product should be linked (if it is
applicable; if not, you can define the individual entities under which the product should be
reviewed).
To associate a group, check the ‘Link Group’ option. If a group is linked, the entities defined for
the group will be displayed. Only the Transaction MIS Code will be applicable to a product. The
specific MIS entity (in the form of an MIS Code) will be picked up by default only if you have
defined them for the group. If not, you have to indicate the appropriate MIS code for each
applicable MIS class.
4-59
4.2.12.2 Associating Product Field
You can associate product fields with a product in the ‘Product Fields’ screen. Click ‘Product
Fields’ button in the ‘Mortgage Product’ screen to invoke it.
4-60
4.3 Viewing Mortgage Product Summary
You can view a summary of all Mortgage Products, through the ‘Mortgage Product Summary’
screen. You can invoke this screen by typing ‘MOSPRMNT’ in the field at the top right corner of
the Application tool bar and clicking the adjoining arrow button. You can query based on all or any of the following criteria:
•
Authorization Status
•
Start Date
•
End Date
•
Record Status
•
Product Code
Click ‘Search’ button. The system identifies all records satisfying the specified criteria and
displays the following details for each one of them:
•
Authorization Status
•
Record Status
•
Module Code
•
Product Category
•
Product Code
•
Product Description
•
End Date
4-61
4.4
•
Product Type
•
Allow Rollover
•
Alternate Account
Processing of IRR application on Mortgages
The internal rate of return (IRR) is the interest rate received for an investment consisting of
payments (negative values) and income (positive values) that occur at regular periods. It is
computed for a series of cash flows represented by the numbers in values. These cash flows may
not be even, as they would be for an annuity. IRR is computed only when the cash flows occur at
regular intervals, such as monthly or annually.
IRR is closely related to NPV - Net Present Value. The rate of return calculated by IRR is the
interest rate corresponding to a 0 (zero) NPV. NPV measures the additional market value that the
management expects the project to create (or destroy) if it is undertaken. It is computed using a
discount rate and a series of future payments (negative values) and income (positive values).
IRR for mortgage accounts (where applicable) is calculated when the YACR event is triggered
and the corresponding batch is run. You need to set up certain specific accounting entries for this
event.
Refer the chapter titled ‘Annexure A: Accounting Entries and Advices’ in this User Manual for the
details of the accounting entries.
The system identifies the acquisition type of the product during account creation. For the account,
it derives the acquisition type based on the following parameters:
For asset accounts (mortgages), if:
• Inflow>Outflow, then Acquisition type will be ‘Discount’
• Inflow=Outflow, then Acquisition type will be ‘Par’
• Inflow<Outflow Acquisition type will be ‘Premium’
It calculates the constant yield or IRR during the initial disbursement of account using the
following formula:
⎡N
⎤
CF
i
⎢
⎥=0
di − d1
∑
(
) ⎥
⎢ i =1
D
⎢⎣ (1 + IRR)
⎥⎦
Where:
• N - Number of cashflows including the net cash flow on the contract value date (Initial
disbursement record)
• CFi - i th Cashflow
• IRR - Internal Rate of Return for the contract
• di
- Date of i th Cashflow
4-62
• d1
- Date of 1st Cashflow (the first disbursement date)
• di-d1 - Number of Days based on the Numerator Daycount Method
• D
- Denominator Daycount Method
The IRR is computed in an iterative method by taking the contract interest rate as the initial
guess. In case of mortgage amendment and prepayment, the cash flows are re-computed and
used for IRR calculation post amendment/prepayment. The formula used for recomputation is the
same as that used for the initial computation.
For subsidy mortgage, the IRR is computed based on the overall percentage of both the interest
and subsidy component, if and only if the ‘IRR is Applicable’ field is checked in the both
components. Else the component in which the “IRR is Applicable’ field is checked, will be
considered for IRR computation.
4.4.1 Recalculation of IRR with new effective date
In case of Bearing and Amortized accounts, IRR recalculation will be done using a new effective
date, during the following events:
• Manual disbursement
• Value Dated Amendment with schedule redefinition
• Prepayment
• Floating Rate Revision
• Value Dated Increase of Principal
• Value Dated Maturity Date Change
• Value Dated Rate Revision
• Rollover
• Version reversal
• Up-front fee Amendment
For such accounts, s new charge is levied on the following events:
• Value Dated Amendment Initiation (VAMI)
• Rollover (ROLL)
• Partial prepayment(MLIQ)
• Account status change (STCH)
• Installment status change (STSH)
In case of Discounted accounts, IRR will be re-calculated using a new effective date, during the
following events:
• Rollover
• Up-front fee Amendment
For such accounts, a new charge is levied on the following events:
• Value Dated Amendment Initiation (VAMI)
• Rollover (ROLL)
• Partial prepayment(MLIQ)
4-63
During the event ‘Value Dated Amendment with Schedule Re-definition’, IRR is recalculated with
the currently active IRR effective date.
IRR re-calculation has to be done during reversal of partial and full prepayment, if the prepayment
triggered recalculation of IRR.
In case of partial prepayment, if the payment value date is less than or equal to an existing IRR
effective date, then IRR will be recalculated as of the earliest IRR effective date and all future
dated IRR will be deleted.
IRR re-calculation does not happen in following cases:
• Regular Payment
• Overdue Payment
• Reversal of Regular Payment
• Reversal of Overdue Payment
Note the following:
• Catch-up of discount accrual during various events like amendment leads to recalculation
(i.e. principal change/maturity date change/rate change/schedule redefinition), rate
revision, liquidation, rollover, reversal of prepayment, etc. This is similar to the catch-up of
interest liquidation in this module.
• During full repayment, outstanding accruals are passed unconditionally with the YACR
event.
• During full prepayment, if there is a charge associated for the LIQD liquidation event, the
charge amount will be populated with %LIQD amount tags.
• During foreclosure of the account the same processing as that of discount is followed for
premium. This means that either complete pending accrual or refund happens based on
the preference specified at the product level in the ‘IRR Accrual Preference’ screen. This
implies that either the unaccrued discount for the entire tenor of the account will get
accrued (in case of ‘Complete Accrual’ preference) or the refund happens to the customer
for the unaccrued amount (in case of ‘Refund’ preference).
• In case of ‘Par’ acquisition type, there is no refund. Only the pending accruals are
completed.
4.4.1.1 Processing during the Account Status Change
During status change the system:
• Makes all discount accrual accounting roles available for transfer
• Identifies the balances to be transferred as ‘Premium TBA – Premium Accrued’ and
‘Discount TBA – Discount Accrued’
• Stops the discount accrual and ensures that the YACR event doesn’t pass any entries
when the option ‘Stop Accrual’ is checked for a contract
• Reverses the balances for ‘Premium Accrued’ and ‘Discount Accrued’ when the ‘Reverse
Accruals’ option is checked for a contract
• Cash flow for charge components being liquidated while booking of the mortgage (BOOK)
or initiation of the mortgage (INIT) are populated with due date equal to first disbursement
date
4-64
• For charge components wherein the charge currency is different from the contract
currency, the charges are calculated in the specified charge currency at the product
component level. These charges are liquidated during the BOOK or INIT events. The
charge amount in the account currency is then arrived at based on the exchange rate as
of account booking date.
• In case the charge currency not the same as the account currency, but the account
currency is the same as the settlement account currency, the exchange rate input in the
‘Settlements’ screen will be used to convert the amount to account currency.
• IRR calculation is done during booking of the account (the BOOK event) instead of value
date of the account (the INIT event) for future dated accounts.
4.5
Defining Customized Products
The Mortgages module gives you the flexibility to create customized products for promotional and
special offers whereby you can offer special incentives/ concessions to certain or all categories of
customers. Such products are referred to as ‘Promotions’. A promotion can have a different set of
preferences, schedules etc. You can associate a mortgage with one or more promotions.
You can create customized promotion products in the ‘Promotions’ screen available in the
Application Browser. You can invoke this screen by typing ‘CLDPROMT’ in the field at the top
right corner of the Application tool bar and clicking on the adjoining arrow button.
The screen has two tabs: Preferences and Components. By default, the ‘Preferences’ tab is
displayed when you invoke the screen.
Basic details
First, capture the following basic information about the promotion:
4-65
Promotion Code and Description
You have to specify a unique 4-character alphanumeric code to identify the promotion in the
system.
Provide a brief description of the promotion. This description will be associated with the promotion
product for information retrieval purposes.
Promotion Start Date and End Date
Specify the life span of the promotion. The promotion is valid for the period maintained here. By
default, the current date is the ‘Start Date’ of the promotion. You can change it to a date in the
past or future.
If you do not specify an end date for the promotion, it can be used for an indefinite period and the
product becomes open-ended in nature.
4.5.1 Preferences Tab
As part of promotion preferences, you have to:
• Specify tenor details
• Associate holiday periods
• Select the relevant UDEs and specify their values
Tenor Preferences
You can set the minimum and maximum tenor limits for the promotion. You can also specify a
standard or a default tenor.
Minimum Tenor
Specify the minimum tenor applicable for the promotion. If you associate the mortgage to the
promotion being maintained, the tenor of the mortgage account should be greater than or equal to
the minimum tenor specified here.
Maximum Tenor
Likewise, you can also specify the maximum tenor for the promotion. The tenor of the mortgage
accounts associated with the promotion should be less than or equal to the Maximum tenor that
you specify here.
Default Tenor
The ‘default tenor’ is the tenor that is applied to the mortgage account upon association with the
promotion. The value captured here should be greater than the minimum tenor and less than the
maximum tenor. You can change the default tenor applied on a mortgage account during
mortgage processing. However, the new tenor should be within the minimum and maximum
tenors maintained for the promotion.
Units
The tenor details that you specify for a promotion can be expressed in one of the following units:
• Days
• Months
4-66
• Years
It is mandatory to define the tenor details before specifying the holiday periods for the promotion.
Holiday Periods
You can maintain holiday periods for the promotion. Holiday periods or repayment holidays refer
to the time when customers can avail repayment holidays owing to other expenses during the
period. Holiday periods are defined in the ‘Holiday Period’ screen and the same are available for
association with the promotion being maintained.
For more details, refer the section titled ‘Maintaining Holiday Periods’ in the ‘Maintenance and
Operations’ chapter of this User Manual.
Select the appropriate holiday periods from the option list provided.
Promotion Rate Factor
You have to specify the special interest rates that are applicable for the promotion:
UDE Id
Select the UDEs (User Data Elements) for the promotion being maintained.
UDE Value
Specify the value of the UDEs selected. The value specified here is used in the formula defined
for interest calculation. The UDEs maintained for the Promotion takes precedence over the
product level UDEs. At the account level, the UDEs get defaulted from the promotion in the order
of priority, the highest priority promotion being applied last.
For more details on mortgage accounts, refer the ‘Account Creation’ chapter of this User Manual.
4.5.2 Components Tab
To specify the component details, go to the ‘Component’ tab of the screen.
4-67
The following components are automatically defined for the promotion:
• MAIN_INT: This component is designated as the ‘Main Component’ and the ‘Component
Type’ is ‘Interest’.
• PRINCIPAL
You cannot modify the components or define additional components for a promotion.
Schedules
Maintain the schedule details for the two components in this section of the screen. These include
the following:
• Sequence Number
• Schedule Type
• Start Reference
• Unit and Frequency
• Start Day
• Start Month
• Start Date
• Flag (Normal or Moratorium)
• Number of schedules
• Whether capitalization of the component is applicable or not
For more details on the schedule preferences, refer the section titled ‘Specifying policy
preferences’ in this chapter.
After the promotion is saved and authorized, it becomes available for association with mortgage
accounts.
You can associate one or more promotions to a mortgage account in the ‘Account Details’
screen. The tenor details, holiday periods, UDEs and component details maintained for the
promotion get defaulted to the account in the order of the priority level specified for the
promotions. The promotion that has the highest priority level will be applied last.
For more details on associating promotions to a mortgage account, refer the ‘Account Creation’
chapter of this User Manual
4-68
5. Account Creation
5.1
Introduction
Mortgage Accounts in the Mortgages module represent the receivable accounts that you create
while disbursing a mortgage. These accounts derive their feature from the Mortgage Product.
Mortgage Accounts are mapped to the Asset GL through the accounting Role
MORTGAGE_ACCOUNT. This role has to be mapped to the respective Asset GL of the Bank.
You can override some product features at the account level.
The system allows you to do the following actions on the Mortgage accounts:
• Account Main Details Maintenance/Light Mortgages
• Liability details and UDE Values Maintenance
• Account Preferences/Defaults
• Account Component schedules
• Charges Maintenance and Settlement details
• Linkages Information
• Events, Events Due and Events Overdue
5-1
5.2
Creating a Mortgage Account
The account screen accepts the Customer, Currency and Amount Financed and creates a Light
Mortgage. This is a default Mortgage that takes all other details from the defaults the product
provides. For creating simple accounts in the Mortgages module, you can follow this simple
process. These Mortgages are called Light Mortgages in the Mortgages module. You can create
a mortgage account using the ‘Account Details’ screen. You can invoke this screen by typing
‘MODACCNT’ in the field at the top right corner of the Application tool bar and clicking the
adjoining arrow button.
You can specify the following generic details in the Account Details screen:
Branch
The system displays the Branch Code of the branch into which the user has logged in, for which
the UDE values are maintained.
Account Number
Based on the parameters that setup at the branch level, the account number would be either auto
generated or would have to be captured in this field.
Product Code
Click the option list to select a Product Code from the list of values. Double click on a Product
Code to select a particular code. The product codes are maintained in the Product Definition
screen.
5-2
Product Category
The system displays the product category in this field
Application Number
The system displays the Application Number in this field
This is applicable only if the origination of the mortgage is in Oracle FLEXCUBE or is
interfaced
Version Number
The system displays the current Version Number of the account. A new version number is
created when changes like Roll over, Amendment are made to a mortgage. This is displayed in
the top right corner of the ‘Account Details’ screen.
Alt Acc No
Specify the alternate account number in this field. It can be an account number in the existing
system from which the account has migrated to Oracle FLEXCUBE.
User Defined Status
The system defaults the value of CIF status as available in the ‘Customer Maintenance’ screen.
This status is the worst status among all the mortgages, savings accounts and current accounts
for the customer in the current branch.
This is done if you have opted for status processing at the ‘Group/CIF’ level as part of your
branch preferences.
Derived Status
The system defaults the status of the individual mortgage account here.
User Reference Number
A 16-digit User Reference Number is autogenerated and displayed here if the ‘Auto Generate
User Ref No’ option is checked in the Branch Parameters. The format of the user reference
number is BranchCode + ProductCode + Sequence number. You are allowed to modify the autogenerated User Ref No.
If the ‘Auto Generate User Ref No’ in Branch Parameters is not checked then the User Ref No
will be blank by default and you have to specify it manually. Validations are done by the system
not to save the account if an unsuppressed payment message is present which has the User Ref
No as blank.
5-3
5.2.1 Main Tab
The following details regarding the mortgage account are captured here:
Account Details
The following details are captured here:
Amount Financed
Specify the total mortgage amount of the mortgage in this field. On saving the transaction after
entering all the required details in the system, the system validates the value of the transaction
amount against the following:
• Product transaction limit
• User Input limit
If the transaction currency and the limit currency are different, then the system converts the
amount financed to limit currency and checks if the same is in excess of the product transaction
limit and user input limit. If this holds true, the system indicates the same with below
override/error messages:
• Number of levels required for authorizing the transaction
• Transaction amount is in excess of the input limit of the user
If Calculate Gross Principle is checked, then the amount financed is the gross principal.
Currency
To select a currency, click the LOV button. A list of currencies is displayed. Double click to select
a currency.
Net Principal
The Net Principal is the actual principal amount financed. It is system calculated and excludes
any other funded components.
Customer Name
Specify the customer name here.
Value Date
Select the Value date of the mortgage in this field using the date button.
Customer ID
To select a customer ID, click the option list. A screen called ‘Find Customer Details’ is displayed.
You can enter search criteria in this screen. For example, you can enter the customer name or
number and click on the ‘Search’ button. The system then fetches you all the details
corresponding to the Customer name or account. Once you find all the details, double-click on
the record to return to the account details screen.
5-4
Subsidy Customer ID
Specify the unique identifier of the agency or the third party included in the subsidy mortgage
contract.
Loan to Value
Specify the accepted value of the mortgaged property. For example, if the mortgaged property’s
actual value is 100,000, then the mortgage value of the property will be 80,000.
The system calculates the amount to be financed based on ‘Loan to Value’, the rate of interest,
fees and charges are charged at the time of defaulting.
On schedule regeneration, system calculates the Annuity amount for each disbursement
schedule. Effectively disbursed amount will be credited to the customer’s account and it will be
called Equal Monthly Payment (Annuity).
System does not allow making any payment schedule other than bullet schedule for principal and
interest components.
On maturity of reverse mortgage mortgage, if the borrower is alive then the contract is rolled over
using special rollover with normal Retail Lending mortgage product. This special rollover is done
manually.
VAMI can be done on the RML contracts like normal mortgage contracts i.e. user can do
amendment of schedules/rate of interest from VAMI screen. On change of schedules/rate, system
recalculates the annuity amount, effective the date of the VAMI.
Maturity Date
Select the maturity date in this field using the date button.
If you are not sure of the maturity date, enter the tenor of the mortgage in either days or months
or years as say 3M for 3 Months etc. The system automatically calculates the date after you
press the ‘Enter’ button.
Alternatively, you can calculate the maturity date by entering certain details in the ‘Maturity’
screen. You need to click the ‘Q’ button to invoke the ‘Maturity’ screen.
For more details on how to calculate Maturity Date refer section ‘Calculating Maturity Date’
discussed later in this chapter.
Maturity Type
Select the Fixed or Call option to specify the type of mortgage maturity.
The system by default selects the option Fixed. For the Call option, the maturity date will not
be computed upfront.
If you choose the ‘Call’ option, IRR processing will not be applicable to the account
Index Exch Rate
Specify the exchange rate for index currency here
5-5
Calculate Gross Principle
Check this box if you want the system to calculate the gross principal for the mortgage. If you
have checked this box and have entered the amount financed then system takes the amount
financed as the gross principal.
Bill Ref No
Select the reference number of the export bill against which you want to link the mortgage, from
the option list. The option list displays all active and authorized export bill contracts with non zero
positive outstanding amount. You can link multiple mortgages to as bill. However, the sum total of
all mortgages linked with an export bill should not exceed the outstanding amount for the export
bill.
This is enabled only for those Mortgages products for which the ‘CL against Bill’ option is
selected at the product preference level.
Bill Outstanding
The outstanding amount of the bill selected is displayed here
Packing Credit
The system populates this check box by default for all contracts under the ‘Packing Credit
Product’. However you can uncheck it leaving such contracts to be unavailable for selection in BC
towards Packing Credit Mortgages .If you check this box without flagging the Packing Credit
product option under Mortgages Products, the system throws an error on attempting to save the
contract.
Repayment of Mortgages in the case of CL Accounts created with ‘Packing Credit Product’
flags is through Bullet Schedules only.
For more details on Pre-Shipment Financing refer section ‘Specifying Purchase Details’ in
chapter ‘Processing Bills’ of the ‘Bills and Collections’ manual.
Commitment Type
Select the type of commitment contract that you want to create. The options available are:
• Revolving - In case of revolving mortgages the amount available is reinstated whenever
there is a payment against a mortgage linked to it. So the paid amount is again available
for reutilization. The reinstatement happens only if the payment is done before the validity
period of the commitment contract.
• Non-Revolving - In case of non revolving mortgages the amount repaid against a
mortgage is not reinstated
Book Date
In this field, the current date when the mortgage details were entered is defaulted and cannot be
modified
Installment Start Date
Enter the original start date of the mortgage in this field. This will be defaulted to the Mortgage
Value date at the time of Mortgage creation
5-6
For rolled over contract, the system populates the new start date in the Value Date field and
this field remains unchanged and will hold the original start date
Promotions
The following details are captured here:
Promotion Type
The system displays the Promotion type to which the original mortgage is linked. It could be any
of the following:
• CONVENIOS
• PROMOTION
• CORFO
• FOGAPE
Promotion ID
The system displays the promotion ID in this field
Beneficiary
The system displays the beneficiary CIF in this field
Priority
The system displays the priority assigned to the promotion
Account Statistics
Once you select an Account Number, the system displays the following details pertaining to the
current status of the account:
• Component Name
• Expected
• Overdue Amount
• Outstanding Principle
• Advance Amount
• Currency
The Account creation and any other change to an account is updated the audit trail of the record.
In the audit trail, the Account status details are also displayed. An Account can be active or
uninitiated. Once it is active, it can be reversed, deleted or liquidated based on the operations on
it. This is displayed on the screen.
Effective Date
You can specify the following detail here:
Effective Date
The effective date is used to pick the UDE value. The system displays this date from the General
UDE maintenance screen.
5-7
For a product + currency combination, if the UDE values are not maintained for the effective date,
then the system defaults “0” which the user can then edit.
UDE Values
The UDE values for each Account are maintained here. The UDE values default from the UDE
values maintenance for the Product, Currency, effective dates combination. These can be
overridden by providing account level UDE values. However the UDE are only those defined at
the product level.
The system checks whether the UDE values fall within the minimum and maximum limits
specified for the UDEs linked to the product. If a UDE value falls outside the permissible limits,
the system will throw an error message,
If there are no product level UDE values maintained, the system will default the UDE value to
Zero. However, at the time of saving, if UDE values are zero or any invalid value, then an
override will be raised with an appropriate error message. If required this can be configured as an
error message. In case of an ERROR, you will have to give a valid value. While if it is an
OVERRIDE, you can overlook the message and continue and if it is for an ONLINE
AUTHORIZATION the parameter should be authorized appropriately.
The system displays the UDE values from that of the UDE values maintenance screen. These
values can be overridden by providing account level UDE values. However, the value can be
maintained only for those UDEs defined at the product level. No New UDEs can be introduced at
the account level.
You can specify the following details for the UDE values:
UDE ID
To select a UDE Id, click the option list. A list of UDE Ids is displayed. Double click to select a
UDE Id.
UDE Values
Specify the Actual Value for the UDE based on the effective Date in this field. The value specified
here should fall within the minimum and maximum limits maintained for the UDE linked to the
underlying product.
Mandatory if a UDE is maintained.
Rate Code
Select the code for the Floating Rates if any and the spread on it applicable in this field by clicking
the option list. A list of values is displayed. Double click on a value to select it.
Code Usage
Select the Code usage which can be periodic or automatic in this field
Resolved Value
This denotes the final value of a UDE. Resolved value = Rate code value taken from Floating
Rate Maintenance + the spread [UDE Value]
5-8
5.2.2
Preferences Tab
The defaults are maintained by the bank. Depending upon the combination of various
preferences, the bank can have various account preferences. The defaults primarily are based on
product definition and can be overridden.
You can specify the following details here:
Amend Past Paid Schedule Allowed
This preference determines if you can modify any feature such as interest rate, installment
amount which affects already paid schedules. If you select this option then the paid schedules are
recalculated and liquidations on them are recognized as pending as appropriate.
Liquidate Back Valued Schedules
If this flag is turned on, during initiation, when a mortgage is input back dated and if there are any
installment dues, then all those schedules with a due date less than the system date will be
liquidated on initiation
Stop Disbursement
Check this option to stop the disbursement of annuity for the mortgage loan in case of any legal
or compliance issues.
Last n annuities are not disbursed in a given reverse mortgage loan contract if the 'Stop
Disbursement' option is checked or 'Till Date' is not updated due to lack of information or proof.
And, if the ‘Stop Disbursement’ option is unchecked in Value dated amendment or 'Till Date' is
changed to some future date, then the system will disburse all n annuities in the EOD or BOD.
5-9
Notary Pre Confirmed
Check this box to indicate that you have already got confirmation from the notary, before creation
of the mortgage.
If the value date of the account is on or before the application date, then ‘NCON’ will trigger INIT
and DSBR event for auto disbursement product, else user will need to trigger manual
disbursement post the notary confirmation. .
If the value date of the loan is beyond the application date, the system will trigger the NCON
event online, once the value date is reached the INIT and DSBR events gets fired, if the loan is
under an auto disbursement product.
You can also save a mortgage account with this option unchecked. Once you receive the
confirmation, you can trigger the ‘NCON’ event manually using the ‘Manual Notary Confirmation’
screen.
Refer the section ‘Manual Confirmation by Notary’ in this chapter to see the steps required for
getting confirmation from Notary.
Recalc Annuity on Disbursement
Check this option to indicate that annuity amount should be recalculated on disbursement.
Loan Statement Required
The system defaults the status of this checkbox based on the preferences maintained for the MO
product. However, you can modify the default value. Check this box to indicate that the loan
statement should be generated.
If this field is checked and the loan statement maintenance is not done at product level, the
system will display an error at the time of saving the contract.
The system maintains ‘CLST_DETAILED’ message for DSBR event, to generate Loan
Advice on each disbursal in loan account authorized at product event level.
The system maintains the ‘Loan Statements’ message types in ‘Notices and Statements’ tab
at product level.
Liquidation
You can maintain the following liquidation preferences:
Auto Liquidation
If you select this option, system will support auto liquidation
By default, the system selects this option
Auto Liqd Reversed Pmt
If auto liquidation has been reversed in an account, it will be retried depending upon the status of
this field. If this option is selected, then the auto liquidation is retried.
5-10
Partial Liquidation
If you select this option, system will perform partial auto liquidation
Retries for Auto liquidation
When auto liquidation option is chosen and funds are not available, the number of times the
system can retry auto liquidation is determined by this field
If blank, the number of retries is infinite
Track Receivable
If Track receivable option is checked for an account, it tracks the amount to be liquidated as a
receivable if funds are not available. So upon any subsequent credit, the receivables are blocked
and allocated to the pending liquidation.
Auto Liquidation
Select this option to indicate that the Track receivable option is for Auto Liquidations. You can
modify this during VAMI/rollover/renegotiation.
This is defaulted from the product level
On schedule liquidation if there are insufficient funds in the settlement account to satisfy the
liquidation and if both the product and the account are marked for receivable tracking then system
initiates tracking of receivable.
If the account is marked for Partial liquidation, then liquidation happens to the extent of available
funds, and the remaining amount is tracked.
If the account is not marked for partial liquidation, and the amount available in the settlement
account is less than the due amount, then system won’t do any liquidation and starts tracking the
full due amount.
Whenever there is a credit to an account, the tracking process checks if the account has any
receivable against it and if it does then the relevant amount is blocked as a receivable and the
corresponding amount is marked to be used for settlement during subsequent ALIQ for the
account. This process happens till the amount needed for liquidation is fully available.
The decision of allocating this credit will be based on the preference order of products that has
been specified at an account class level. On the following EOD/BOD, batch liquidation tries to
liquidate the schedule. The amount receivable is made available for the liquidation, and
liquidation happens to the extent of receivable amount.
Manual Liquidation
Select this option to indicate that the Track receivable option is for Manual Liquidations.
By default, the system selects this option
5-11
UDE Rate Plan
Start Date
The start date from which the rate plan change can be done is displayed here. However, you can
modify this value at mortgage account level.
End Date
The end date till which the rate plan change can be done is displayed here. However, you can
modify this value at mortgage account level.
Based on the product maintenance, the ‘Rate Plan Change’ details are defaulted to the
mortgage account and this can be modified.
Intermediary Details
You can capture the Intermediary Details at the account level to keep track of the accounts
created through Intermediaries.
Intermediary Initiated
Check this box to indicate that the mortgage has been initiated by an intermediary.
Intermediary Code
If you have checked the box 'Intermediary Initiated', you need to specify the code of the
intermediary who has initiated the mortgage. The adjoining option list displays all valid
intermediary codes maintained in the system. You can select the appropriate one..
Both the fields are disabled after the first authorization of the mortgage. They field cannot be
modified during value-dated amendment and rollover operation.
Note that adjustment of commission and charge computed for the intermediary (in the past cycle)
should be done manually in case of a reversal of any transaction done by the intermediary post
the computation.
Loan Statements
You can specify the following details for generation of loan statements:
Start Date
Specify the start date of loan statement generation. Use the adjoining date button to choose a
date from the calendar.
Frequency
Specify the frequency of loan statement generation. The drop-down list displays the following
frequencies:
• Daily
• Monthly
• Quarterly
• Half Yearly
5-12
• Yearly
Choose the appropriate one.
Frequency Unit
Specify the frequency unit for loan statement generation.
If the above preferences are not maintained, the system generates loan statements based on the
loan advices maintained in ‘Notices and Statements’ screen at the product level. If Loan
Statement details are not maintained at the product level, the system will not allow you to set loan
statement preferences for the contract. The system checks the product level preferences during
EOD or BOD batches. You can also amend the loan statement preferences using ‘Value Date
Amendment’ screen.
Holiday Periods
You can specify the following detail here:
Period
Select the period for which repayment holiday is to be given to the customer. The holiday periods
maintained in the system are displayed in the adjoining option list. If the selected repayment
holiday period exceeds ‘Interest Only Period’ field in the ‘Product’ screen, the system will display
an appropriate error message.
For details on repayment holidays for amortized mortgages, please refer to the section
‘Repayment Holiday for Amortized Mortgages’ in this chapter.
5.2.2.1 Rollover Tab
Click Rollover Tab to specify rollover details.
5-13
You can maintain the following details here:
Allow Rollover
Select the required option to indicate if rollover should be allowed for the mortgage or not. The
options are:
• Yes
• No
Rollover
This option is used to determine if the Rollover is system driven or not .You can select either of
the following options:
• Auto - If you select the option Auto Rollover, then upon maturity, the Account will be rolled
over automatically by the system Rollover batch run in BOD.
• Manual - If you select the option Manual roll over, then the system does not perform the
auto rollover and you can perform a manual rollover.
By default, the system selects the ‘Auto’ option
Rollover Type
Select either of the following options:
• Special Amount: If your rollover is a special amount, select this option and capture the
amount that has to be rolled over
• Custom: If the rollover type is ‘Custom’, then select the ‘Component Names’ that have to
be rolled over
UDE Rollover
Select the required option to determine if at the time of rollover the UDE value would be defaulted
from the product or from the account /Contract
The system by default does not select the option Contract
Schedule Basis
This flag will determine if at the time of rollover the schedule would be defaulted from the product
or from the account/Contract
The system by default does not select the option Contract
Roll By
Specify the basis for rollover. It could be any of the following:
• Days
• Months
• Years
5-14
Rollover Components
You can maintain the following detail here:
Component
This option is applicable when Rollover Type is Custom. The option list provided will display the
components relevant to the account from which you can choose the components that are to be
rolled over.
5.2.3 Check List Tab
The Check lists are maintained in the ‘Check List Maintenance’ screen and are linked to different
events of the contract. The checklist maintained for the BOOK event is available in the Checklist
tab at the time of account creation.
The following details are captured here:
Description
The description of the check list maintained for the BOOK event is displayed here
Verified
Check this box to indicate that the check list item has been verified
Remarks
Specify any additional remarks about the check list or the account in this free format text field
5-15
5.2.4 Fields Tab
The User Defined Fields are defined at the Product level. These fields are available in the Fields
tab at the time of account creation.
The following details are displayed/captured here:
UDF Description
The UDF descriptions defaulted from the Product screen are displayed. The system displays all
the UDF descriptions defined at the Product level
UDF Value
Specify the UDF value in this field. This is applicable only if the user input or list of values is
defined at the time of creation of the UDF
5-16
5.2.5 Components Tab
Clicking against the ‘Components’ tab in the ‘Account Details’ screen invokes the following
screen:
You can specify the following details for the components:
Component Name
After you specify the component Name, the system displays the description of the component in
the adjacent field.
Component Ccy
The system displays the currency associated with the component in this field. The value is
defined at Product level.
Special Interest Amount
Specify the amount for the special interest in this field
Settlement Ccy
Select the settlement currency for the option list. Click the adjoining option list to choose a
settlement currency from the list of currencies. Double click on a value to select it.
In case of a subsidy mortgage, the system displays the settlement currency based on the subsidy
customer ID specified in the ‘Main’ tab. However you can change it. The settlement currency is
maintained as a default for both Credits and Debits.
5-17
Main component
The system selects the component of the mortgage designated as main component in the
product level in this field
Verify Fund
You can indicate whether the system should verify the availability of sufficient funds in the
customer account before doing auto liquidation of the component
Capitalized
Select this option if the scheduled amounts are to be capitalized
Waive
Select this option to waive the component for the account
The system does not select it by default
Special Interest option
Select this option to denote if the component is a special Interest type. This implies that the
computed value of the component can be overridden with the entered value
IRR Applicable
Check this option to indicate that the component is to be considered for IRR calculation for the
account. This field is applicable to interest, charge and fee components. For adhoc charge,
charge, penalty and prepayment penalty components, the value will be defaulted from the product
level and you will not be able to modify it.
This field will not be available for input if ‘Accrual Required’ and ‘IRR Applicable’ are left
unchecked at the product level.
Note the following:
• For bearing type of component formula this option will be enabled only if ‘Accrual
Required’ is checked for the component at the product level
• For discounted or true discounted type of component formula this option will be allowed
irrespective of whether the ‘Accrual Required’ option is checked or not at the product
component level
• If the option ‘Accrual Required’ is unchecked and ‘IRR Applicable’ is checked, then
discounted component will be considered as a part of total discount to be accrued for Net
Present Value (NPV) computation
• If both ‘Accrual Required’ and ‘IRR Applicable’ are checked, then discounted component
will be considered for IRR computation
• Upfront Fee component will be considered for IRR only when ‘Accrual Required’ and ‘IRR
Applicable’ both are checked
• For upfront fee component, if ‘IRR Applicable’ is checked, then ‘Accrual Required’ has to
be checked
Funded During INIT
This field indicates if the component can be funded during the INIT event.
5-18
Funded during Rollover
Select this option if the component can be funded during the rollover process.
Penal basis Comp options
The system displays the Penal basis for calculating penalty component in this field.
Service Branch
Click the option list to select the branch that services the customer account
Double click on a value to select it
Service Account
Click the option list to select the account in the service branch.
Double click on a value to select it.
All modes except CASA needs service account. Adjustments etc. will be settled through this
account.
Schedule Definition
Click ‘Explode’ button to view the following Schedule details:
Schedule Number
The system generates and displays a sequential schedule number for installments
Due Date
The system displays the due date of the payments and disbursements in this field
Amount Settled
The system displays the settlement amount for the schedule in this field
Amount Due
The system displays the amount due for the schedule in this field
EMI Amount
The EMI that should be repaid in this schedule is displayed in this field
Amort Prin Details
The system displays the principal that has to be amortized in this field. This field will be relevant
for the Interest component that is being amortized.
Accrued Amount
In this field, the system displays the amount accrued for the component for the schedule
5-19
Capitalize
The flag is used to display that the schedule installment is capitalized
Waive
Select this option to indicate if this particular amount which is due will be waived or not
Click ‘Edit’ to make any change to the scheduling and after you have made changes, click
‘Explode’ to see the changes made
If you select any component and click ‘Edit’ you can make changes to the schedules which are
defaulted from the product to the account.
If you select the ‘Explode’ button, other components will get adjusted according to change made
to any of the attribute.
5.2.5.1 Viewing Disbursals
Select the Principal Component. Click ‘Disbursals’ to see the Disbursal schedule. This gives the
list of Schedules for the disbursements and their corresponding Disbursement amounts.
You can check the details of the due date of the schedule and the Amount to be disbursed from
the Sch Due date field and the Amount To Dsbr field respectively.
If any disbursal results in a status change for the account, the system will update the current
status for the account in the ‘Derived Status’ field. During end-of-day batch processing, it will
update the ‘User Defined Status’ for the account with the worst status that is available for all
accounts and mortgages for this CIF and post the required accounting entries for the change.
5.2.5.2 Viewing Rate Revisions
Select a component which has rate revision defined. To view the details of the Rate revision
schedule, click the ’Revisions’ button. This lists the details of the revisions done on the
Components.
This lists the revision date against the component name. This also has an application option
which displays if the revision was applied or not
5-20
You can check the details of the name of the component that is revised and the date when it has
been revised from the field Component name and Revision date respectively.
5.2.5.3 Maintaining Payment Mode Details
You can specify the details of payment mode in the ‘Settlement Mode’ screen. To invoke the
screen, click ‘Payment Mode Details’ button under ‘Components’ tab in the ‘Account Details’
screen.
Select the payment mode from the option list. The options for debit mode are CASA, Credit Card,
Debit Card, Clearing, External Account, Electronic Pay Order, Internal Check, Instrument, GIRO
and Cash/Teller.
The options for credit mode are CASA, Clearing, External Account, Instrument, and Cash/Teller.
5-21
The values in these modes are:
• CASA:
¾
Branch: Click the option list to choose the branch in which the customer account
resides. . Double click on a branch to select it.
• Account: Click the option list to choose the account in the branch selected. Double click on
an account to select it. Credit Card / Debit Card
¾
Card Number: This field captures either the Credit No or the Debit No details based
on the selection.
The card must be a valid card whose number can be checked with a modulo logic or
maintenance file.
• Clearing Network
¾
¾
¾
¾
¾
¾
¾
Clearing Bank Code: Click the option list to select the bank code as per clearing
maintenance. Double click on a bank code to select it.
Clearing Branch Code: Click the option list to select the clearing bank branch. Double
click on a branch code to select it.
Instrument No: Enter the number on the instrument presented for clearing in this field.
Double click on a value to select it.
Routing No: Enter the routing number of the branch selected for clearing in this field.
Clearing Product Code: Click the option list to choose a product code if the clearing is
using an Oracle FLEXCUBE clearing product. Double click on a branch to select it.
End Point: This field picks up the end point maintained in the clearing system.
Sector Code: Click the option list to choose the clearing sector code. Double click on
a sector code to select it.
• External Account
¾
¾
¾
¾
Clearing Bank Code: Click the option list to choose the external bank code as per
clearing maintenance
Clearing Branch Code: Click the option list to choose the external bank branch used
for clearing
Ext Acc No: Enter the external account number in this field
Ext Acc Beneficiary Name: Enter the name of the beneficiary of the external account
in this field
• GIRO
¾
¾
¾
¾
¾
¾
¾
Auto/Manual GIRO – Select Auto GIRO for automatic direct debit or else select
Manual
Bank/Plus GIRO – Select the GIRO clearing system used, which can be either Bank
or Plus
GIRO Number – This is applicable only for corporate customers and not for individual
customers. You have to enter the GIRO number
Payer Bank Name – Specify the name of the bank from which the amount is paid.
Payer Branch - Specify the branch from which the amount is paid
Payer Account - Specify the account from which the amount is paid
Payer Bank Address - Specify the address of the bank from which the amount is paid
• Instrument / Cash / Teller
5-22
¾
¾
AC Branch: Click the option list to choose branch where the account is serviced.
Double click on a branch to select it
Product or Account: If the payment mode is Account, this field specifies the CASA /
GL account to be debited. If the payment is through Instrument / Cash, it denotes the
teller product to be used
Credit Settlement Mode Tab
You can specify the credit settlement details under the ‘Credit Settlement Mode’ in the
‘Settlement Mode’ screen.
Here you can specify the following details:
Credit Payment Mode
Select the credit payment mode from the adjoining drop-down list. The list displays the following
values:
• CASA
• Credit Card
• Clearing
• Debit Card
• External Account
• Electronic Pay Order
• GIRO
• Internal Cheque
• Instrument
• Cash/Teller
5-23
Credit Product Account
Specify the account number of the credit product.
Credit Account Branch
Specify the name of the branch in which the credit account should be maintained.
Instrument Number Credit
Specify the instrument number that should be used for credit payment.
Upload Source Credit
Specify the upload source that should be used for credit payment.
End Point
Specify the end point maintained in the clearing system. The adjoining option list displays all valid
end points maintained in the system. You can choose the appropriate one.
External Account Number
Specify the external account number.
External Account Name
Specify the name of the beneficiary who is holding the external account.
Clearing Bank Code
Specify the code of the external bank that should be used for clearing maintenance. The
adjoining option list maintains all valid banks maintained in the system. You can choose the
appropriate one.
Clearing Branch Code
Specify the branch code of the specified external bank that should be used for clearing. The
adjoining option list displays all valid codes maintained in the system. You can choose the
appropriate one.
Product Category
Specify the category of the product. The adjoining option list displays all valid products
maintained in the system. You can choose the appropriate one.
Routing Number
Specify the routing number of the specified branch for clearing.
Clearing Product Code
Specify the product code that should be used for clearing. The adjoining option list displays all
valid code maintained in the system. You can choose the appropriate one.
Sector Code
Specify the code of the sector that should be used for clearing. The adjoining option list displays
all valid codes maintained in the system. You can choose the appropriate one.
5-24
Giro Number
Specify the GIRO number of the corporate customer.
Payer Account
Specify the account from which the amount should be paid.
Payer Bank Code
Specify the code of the payer’s bank that should be used for the payment of amount.
Payer Branch
Specify the branch of the specified payer’s bank that should be used for the payment of amount.
Payer Bank Address 1-4
Specify the address of the bank that should be used for the payment of the amount.
Bank Giro
Indicate the type of bank giro that should be used for corporate customers. You can select one of
the following:
• Bank GIRO
• Plus
Auto Giro
Indicate the type of the Auto GIRO for automatic direct debit. You can select one of the following
values:
• Auto
• Manual
Exchange Rate
Specify the exchange rate that should be used for the currency conversion.
Negotiated Cost Rate
Specify the negotiated cost rate that should be used for foreign currency transactions between
the treasury and the branch. You need to specify the rate only when the currencies involved in
the transaction are different. Otherwise, it will be a normal transaction.
Negotiation Reference Number
Specify the reference number that should be used for negotiation of cost rate, in foreign currency
transaction. If you have specified the negotiated cost rate, then you need to specify the
negotiated reference number also.
Oracle FLEXCUBE books the online revaluation entries based on the difference in exchange
rate between the negotiated cost rate and transaction rate.
Original Exchange Rate
Specify the original exchange rate for the currency conversion.
5-25
Debit Settlement Mode Tab
You can specify the debit settlement details under the ‘Debit Settlement Mode’ in the ‘Settlement
Mode’ screen.
Here you can specify the following details:
Debit Payment Mode
Select the Debit payment mode from the adjoining drop-down list. The list displays the following
values:
• CASA
• Credit Card
• Clearing
• Debit Card
• External Account
• Electronic Pay Order
• GIRO
• Internal Cheque
• Instrument
• Cash/Teller
Debit Product Account
Specify the account number of the debit product.
5-26
Debit Account Branch
Specify the name of the branch in which the debit account should be maintained.
Instrument Number Debit
Specify the instrument number that should be used for debit payment.
Upload Source Debit
Specify the upload source that should be used for debit payment.
End Point
Specify the end point maintained in the clearing system. The adjoining option list displays all valid
end points maintained in the system. You can choose the appropriate one.
External Account Number
Specify the external account number.
External Account Name
Specify the name of the beneficiary who is holding the external account.
Clearing Bank Code
Specify the code of the external bank that should be used for clearing maintenance. The
adjoining option list maintains all valid banks maintained in the system. You can choose the
appropriate one.
Clearing Branch Code
Specify the branch code of the specified external bank that should be used for clearing. The
adjoining option list displays all valid codes maintained in the system. You can choose the
appropriate one.
Product Category
Specify the category of the product. The adjoining option list displays all valid products
maintained in the system. You can choose the appropriate one.
Routing Number
Specify the routing number of the specified branch for clearing.
Clearing Product Code
Specify the product code that should be used for clearing. The adjoining option list displays all
valid code maintained in the system. You can choose the appropriate one.
Sector Code
Specify the code of the sector that should be used for clearing. The adjoining option list displays
all valid codes maintained in the system. You can choose the appropriate one.
Payer Account
Specify the account from which the amount should be paid.
5-27
Payer Bank Code
Specify the code of the payer’s bank that should be used for the payment of amount.
Payer Branch
Specify the branch of the specified payer’s bank that should be used for the payment of amount.
Payer Bank Address 1-4
Specify the address of the bank that should be used for the payment of the amount.
Giro Number
Specify the GIRO number of the corporate customer.
Bank Giro
Indicate the type of bank giro that should be used for corporate customers. You can select one of
the following:
• Bank GIRO
• Plus
Auto Giro
Indicate the type of the Auto GIRO for automatic direct debit. You can select one of the following
values:
• Auto
• Manual
Exchange Rate
Specify the exchange rate that should be used for the currency conversion.
Negotiated Cost Rate
Specify the negotiated cost rate that should be used for foreign currency transactions between
the treasury and the branch. You need to specify the rate only when the currencies involved in
the transaction are different. Otherwise, it will be a normal transaction.
Negotiation Reference Number
Specify the reference number that should be used for negotiation of cost rate, in foreign currency
transaction. If you have specified the negotiated cost rate, then you need to specify the
negotiated reference number also.
Oracle FLEXCUBE books the online revaluation entries based on the difference in exchange
rate between the negotiated cost rate and transaction rate.
Original Exchange Rate
Specify the original exchange rate for the currency conversion.
5-28
5.2.6 Charges Tab
This module is used for calculating and applying charges on an account. To calculate the
charges that we would like to levy on an account, we have to specify the basis on which we would
like to apply charges. For example, we may want to apply charges on the basis of the debit
turnover in an account. When we define a Charge product, we have to specify the Charge basis.
When we apply the charge product on an account or an account class, charges for the account
will be calculated on this basis.
The following details are captured:
Component Name
Here, you can add a brief description for the component that you specify for a product
Calculation Type
To specify the manner in which the component should be calculated and liquidated. You can
choose one of the following options:
Formula with schedule (Component Type - Interest)
• Formula without schedule (Charge)
• Penal Interest
• Prepayment Penalty
• Discount
• Schedule without formula (Principal)
• No schedule No formula (Ad Hoc Charges)
5-29
• Penalty Charges
Component Currency
The system displays the currency associated with the component. The component currency is
defaulted from the Product level
Settlement Currency
Click the option list to choose the details of the currency in which the payments are to be made in
this field. A list of currencies is displayed. Double click on a value to select it.
5.2.6.1 Maintaining Payment Mode Details
The debit and credit settlement mode details for the account can be maintained in the ‘Settlement
Details’ screen. You can invoke this screen by clicking the ‘Payment Mode’ button in the ‘Main’
tab.
Specify the following details:
Dr Payment Mode
Click the option list to choose the details of the mode of payment (For debit payments) in this
field. A list of values includes CASA, Cash/Teller, Instrument, External Account, Electronic Pay
Order, Internal Check, Clearing, Debit Card and Credit Card.
Dr Prod Ac
Enter the Product / Account to be used for Debit payments in this field
5-30
Dr Acc Brn
Click the option list to choose the details of the branch where the Dr account resides. A list of
values is displayed. Double click on a value to select it
Cr Payment Mode
Click on list item to choose the mode of payment by which the account is credited. The list of
values includes a list of values which includes CASA, Cash/Teller, Instrument, External Account,
and Clearing.
Cr Prod Ac
Enter the details of the Product/Account to be used for Credit payments in this field
Cr Acc Brn
Click the option list to choose the details of the branch where the Cr account resides. A list of
values is displayed. Double click on a value to select it.
Charge Appl Date
Enter the details of the date from which the charge is applicable in this field
Service Branch
The branch that services the account - Any Valid, Open Branch
Service Account
Denotes the account in the service branch. A valid open account in the service branch . The
service account is needed for all modes apart from CASA. The adjustments etc will be settled
through this account.
Due Date
The date on which the charge was applied
Amount Due
Enter the details of the amount due for repayment in this field
Funded during INIT
Select this option if the component can be funded during mortgage initiation
Funded during Rollover
Select this option if the component can be funded during the rollover process
For each component, the following details are displayed:
• Event Code
• Component Name: A component will be of type ‘Charge’
• Amount Due: The amount due for repayment in this field
• Amount Settled: The settled amount in this field
• Schedule Due Date: The scheduled date for repayment in this field
5-31
• Waive: If this option is checked, the charge defined for event is waived off
Waiver Flag
Select this option to waive off the charges
Refer ‘Maintaining Payment Mode Details’ section in this User Manual for field explanations.
5.2.7 Linkages Tab
At the time of Mortgage account capture, the Linkages to securities backing the mortgage is
captured. They include:
• The reference number of the Collateral , Collateral Pool , Line , Account , Amount block,
Commitment, Guarantee Collection Bill is linked
• The amount which is attributed to the particular reference number is also captured
• The account input screen captures the Linkages as shown below
You can link Limit/Commitment to the Mortgage account during CL account creation.
You can specify the following Linkage details:
Linkage Sequence Number
Enter the sequence number for the linkage that you are specifying
Linkage Type
Click on the list item to choose the details of the linkage type. A list of values is displayed. Double
click on a value to select it
5-32
The valid values are Line, Deposit, Guarantee, Amount Block, CASA Account, Collateral Pool,
Commitment and Collateral
Linkage Branch
Select the branch of the linkage type
Customer ID
Click on ‘C’ button to choose the ID of the customer to be used for corresponding linkage type. A
list of values is displayed. Double click on a value to select it.
A customer can either be the primary applicant or any of the other applicants for which the
linkage type has been maintained.
Linkage Ref No
Click on ‘L’ button to choose linkage reference number be used for corresponding field.
Linkage Amount
Enter the linkage amount in this field
Secured Portion
Enter the part of the principal that is backed by some asset in this field
5.2.8 Advices Tab
Advices that may be generated whenever the account level status changes or whenever a
particular event is fired can be linked at the Product level. Priorities of the advice can be changed
and also a particular advice for an event can be suppressed. Generation of an advice across the
life of the account can also be suppressed.
5-33
You can specify the following Advice details:
Message Type
The system displays all the advices for all the events for the account. The list will include all the
advices that are defined at the product level
Suppress
This field allows the user to suppress the generation of the advice for a particular event. The
options are Yes or No
Priority
Click the option list to select the priority of generation. A list of values is displayed. Double click
on a value to select it.
The options are High, Medium or Low
Suppress Advices across the Account
The generation of an advice across the life of the account can be suppressed.
Message Type
Click the option list to select the type of advice, the generation of which can be suppressed
across the account. A list of values is displayed. Double click on a value to select it.
The list includes advices defined at the product level
5-34
You can suppress the Payment Message defaulted in case you do not need a credit through swift
message.
The message is automatically suppressed if the Principal Credit Settlement account is changed
to a GL or if the receiver in ‘Swift Msg Details’ screen is not valid to receive the message i.e, if the
Customer Type of the Receiver party is not a Bank.
Also, if the settlement mode for PRINCIPAL component is anything other than CASA, the swift
message is automatically suppressed.
If the Transfer Type is chosen as blank i.e, neither Customer Transfer nor Bank Transfer, then
PAYMENT_MESSAGE will become CREDIT_ADVICE by Swift(MT910) if the Receiver is a bank
and the credit settlement account is a current account.
5.2.9 Credit Score Tab
Click ‘Credit Score’ tab to specify the details for calculating the credit score.
You need to specify the following details here:
Rule Name
The rule associated with the mortgage product gets defaulted here. You can modify this, if
required.
Credit Score
Specify the credit score associated with the customer
5-35
Automated Score
The credit score calculated by the system based on the rules maintained at the product level gets
displayed here
Agency Code
Select the code of the external agency, to be approached for calculating the score
External Credit Score
The score as calculated by the external agency is displayed here
Click ‘Score’ to auto-generate the credit score for the customer. Click ‘External Score’ to autogenerate the credit score for the Bureau.
5.2.10 Specifying Other Applicants Details
You can maintain the primary and other applicants details in the ‘Other Applicants’ screen. Click
the ‘Other Applicants’ button to invoke the screen.
Primary Applicant
You can maintain the following details of the Primary applicants:
Customer ID
This detail is defaulted from the main screen. Enter the Customer ID of the primary applicant in
this field
Customer Name
After you enter the Customer ID, the system displays the Name of the primary applicant in this
field
5-36
Other Applicants
The details of the liability parties to the account are maintained in this field. Other Applicants of a
mortgage include Co-signers and Guarantors.
You can specify the following details of the Co-applicants:
Customer ID
To select the customer ID of the co-applicant, click the option list. A list of customer IDs is
displayed. Double click to select the customer ID of the co-applicant.
Customer Name
After you enter the name of the Customer, the system displays the name of the customer in this
field.
Responsibility
Select the details of the co-applicants and their responsibility as a Co-signer or as a guarantor
from the option list. You can enter the details like the guarantor, co-signer, main addressee,
advice notice receiver, and borrower etc., who is relevant to a joint account relationship. During
initiation of the account, the primary customer is defaulted to ‘Borrower’ with 100% Liability and
value date as the effective date. You are allowed to maintain multiple applicants (customer id) for
a mortgage with the same responsibility (Borrower).
While there is no processing impact, the difference will become important when the original
debtor is absconding and the mortgage is unpaid etc.
Liabilities%
Specify the contribution of the co-applicants to the Mortgage. You can specify the Liability of the
co-applicant if any, in case of a Mortgage default. You can also specify the percentage of interest
split among different co-applicants. It is not made mandatory to maintain ‘Liability %’ for the
responsibility ‘Borrower’. There could be borrowers with 0% liability.
The sum of ‘Liability %’ for all the customers of a mortgage to be equal to 100%
Liability Amount
The system calculates and displays the upper limit of the liability in terms of the amount in this
field. You may override the computed value.
Effective Date
This field is used to capture the date from which the % interest split among co-applicants of the
mortgage will be taken into consideration. During the initiation of the mortgage, the value date of
the mortgage will be defaulted as the effective date. During VAMI, the same effective date will be
retained, you can however edit it.
The effective date can not be a date prior to the mortgage initiation date. It is also necessary
that there is one record for the initiation date. The effective date for all the applicants is the same.
5-37
5.2.11 Capturing Asset Details
You can capture the details corresponding to the collateral being provided for the current
mortgage in the ‘Assets’ screen. To invoke this screen, click ‘Assets’ button in the ‘Account
Details’ screen.
5.2.11.1
Valuations Tab
You can capture valuation details of the asset in this tab:
Here, you can specify the following details related to your assets like vehicle, home, etc.
Assets
Select the type of asset from the drop-down list. The following values are provided for selection:
• Vehicle
• Home
• Others
Valuation Dt
Specify the valuation date for the selected asset, or select the date by clicking the ‘Calendar’
button.
Source
Specify the source associated with the asset selected
Supplement
Specify the supplement of the valuation source used for the valuation
Edition
Specify edition of the valuation source used for the valuation
Wholesale
Specify the wholesale rate associated with the asset selected
5-38
Retail
Specify the retail rate associated with the asset selected
Usage
Specify usage level at the time of the valuation
Usage Value +
Specify the initial usage value
Total
Specify the total usage of the asset
5.2.11.2
Vehicle Tab
You can capture details regarding the asset of type ‘vehicle’ in this tab
You can specify the following common details associated with asset of type vehicle:
Class
Select the class associated with the asset selected, from the option list. The following options are
provided:
• New
• Used
Status
Select the status of the asset selected, from the option list. The following options are provided:
• Active
• Inactive
• Inventory
• Undefined
5-39
Type
Specify the type of the selected asset here
Sub Type
Specify the subtype associated with the asset, if any
Year
Specify the year of association with the selected asset
Make
Specify the make of the selected asset. For vehicle, you can specify the manufacturing company
name and for home you can specify the name of the builder or developer.
Model
Specify the model of the selected asset
Address
Specify the address associated with the asset
You need to specify the following details additional related to vehicle type of asset:
Body
Specify the body number associated with the vehicle
Id Number
Specify the unique identification number associated with the vehicle
Reg. Number
Specify the registration number of the vehicle
5-40
5.2.11.3
Home Tab
You can capture details regarding the asset of type Home in this tab
You can specify the following additional details for home type of asset:
Occupancy
Specify the number of people occupying the house
Width
Specify the width associated with the selected asset
Length
Specify the length associated with the selected asset
PO #
Specify the post office number of the location of the property
GEO
Specify the property GEO code (Geospatial Entity Object Code) for the asset
BNA
Specify the census tract/BNA code (Block Numbering Area) for the asset
MSA
Specify the metropolitan statistical area (MSA) code for the asset
Click ‘Ok’ to save the details.
5-41
5.2.11.4
Others Tab
You can capture other asset details here.
Specify the following details:
• Asset Class
• Type
• Sub Type
• Asset Status
• Asset Year
• Asset Make
• Asset Model
• Asset Body
• Identity Number
• Register Number
• Address
5.2.11.5
Mortgage Tab
5-42
Property Name
Specify the name of the property of the mortgage loan.
Collateral Category
Specify the type of the collateral offered to the bank.
Property Age (In Years)
Specify the age details of the property of the mortgage loan.
Country
Specify the name of the country where the property is located.
Co-owner
Specify the name of co-owner of the property.
Offset Margin
Specify the offset margin of the mortgage property.
Lendable Margin
Specify the lendable margin of the mortgage property.
Valuation Currency
Specify the currency in which the property has to be valued. This adjoining option list displays all
valid currencies maintained in the system. You can choose the appropriate one.
Valuation
Specify the actual value of the property.
Property Address
Specify the address details of the property. You can use four address fields to capture the
complete address.
Project Details
You can specify the project details in the following fields:
Developer Code
Specify the code that identifies the developer of the property.
Project Name
Specify the name of the project under which the property was constructed.
Project Description
Specify a brief description of the specified project.
5-43
Evaluator
Specify the name of person who evaluates the property.
Evaluation Value
Specify the worth of the property that is evaluated by the evaluator.
Evaluation Date
Specify the date on which the evaluation is done by the specified evaluator.
Requested Amount
Specify the amount that is requested by the customer.
Property Usage
Specify the usage of the property.
Mortgage Degree
Specify the degree of the mortgage.
Lot Number
Specify the lot number of the property.
Property Type
Specify the type of the property. The following are the different types of properties:
• Land
• Apartment
• Villa
Property Status
Specify the status of the property.
Title Deed Number
Specify the deed number of legal document on the purchased property.
Title Deed Issue Date
Specify the date on which the legal document is issued.
Title Deed Issue From
Specify the name of the authority who issued the legal document on the property.
Building Name
Specify the name of the building.
Building Compound Name
Specify the name of the building compound.
5-44
Contact Person
Specify the name of the contact person.
Contact Number
Specify the contact number of the developer.
Wing Name
Specify the portion name of the property.
Asset Finance Amount
Specify the finance amount of the property asset.
Property Value
Specify the worth of the property.
Down Payment
Specify the amount that should be paid as down payment.
Market Value
Specify the current market value of the property.
Sale Value
Specify the sale value of the property that should be used for the secondary market purchase.
Registered Name
Specify the name of the person to whom the property should be registered.
Registration Number
Specify the registration serial number of the property.
Registration Date
Specify the date on which the property should be registered.
Completion Date
Specify the date on which the project should be completed.
For more details on collateral and collateral pool, refer sections ‘Collaterals Maintenance’ and
‘Collateral Pool Maintenance’ in Limits & Collaterals chapter of ELCM module.
5-45
5.2.11.6
Insurance Tab
You can capture details regarding the asset of type Insurance in this tab.
Here you can specify the following details:
Policy Number
Specify the insurance policy number.
Policy Type
Specify the type of the policy. The following are the different types of polices:
• Property Insurance
• Life Insurance
Insurer
Specify the name of the insurance company.
Insurer Address 1 to 4
Specify the address of the insurance company. You can use four address fields to capture the
complete address.
Insurance Expiry
Specify the date on which the insurance policy expires. Click the date button to choose a date
from the calendar.
Customer
Specify the name of the primary customer.
Policy Amount
Specify the amount insured on the policy.
5-46
Policy Start Date
Specify the start date of the insurance policy. Click the date button to choose a date from the
calendar.
Policy End Date
Specify the end date of the insurance policy. Click the date button to choose a date from the
calendar.
Premium Amount
Specify the yearly premium amount being paid for this insurance.
Insured Name
Specify the name of the person insured under this policy.
Managed by
Specify the name of the person who manages the insurance policy. If an insurance broker
manages the policy, enter the name of the broker.
Oracle FLEXCUBE changes the undisbursed DSBRs to moratorium using VAMI options.
The system also collects the processing fee in advance and runs along with the BOOK/DSBR
events.
5.2.12 Repayment Holiday for Amortized Mortgages
A mortgage has two formulae for the slots of simple and the amortized. Simple and amortized
formulae can occupy any position in schedules definition.
During principal repayment holiday period, interest is calculated on the simple interest formula
specified. The customer needs to repay only the interest component. Principal is amortized for
the remaining period or tenor of the mortgage. Principal schedule will not be present during
repayment holiday period.
The system treats instances of overdue and default as per the liquidation order maintained.
Example
Consider the following details:
Mortgage Amount
24000
Tenor of Mortgage
24 months
Rate of Interest
20%
Simple Calculation Period
06
Amortized Calculation Period
18
Mortgage start Date
01-Sep-2008
Mortgage End Date
01-Sep-2010
5-47
Interest Calculation Amortized
From 01-Sep-2008 to 01-Sep-2009
Interest Calculation Simple
From 01-Sep-2009 to 01-Mar-2010
Interest Calculation Amortized
From 01-Mar-2010 to 01-Sep-2010
Sl No
Instalment
Schedule Date
Mortgage
Outstanding
Amount
Instalment
Amount
Repayment
Principal
Interest
1 10/1/2008 9482.13 601.2 517.87 83.33 2 11/1/2008 8962.58 601.2 519.55 81.65 3 12/1/2008 8436.07 601.2 526.51 74.69 4 1/1/2009 7907.51 601.2 528.56 72.64 5 2/1/2009 7374.4 601.2 533.11 68.09 6 3/1/2009 6830.56 601.2 543.84 57.36 7 4/1/2009 6288.18 601.2 542.38 58.82 8 5/1/2009 5739.38 601.2 548.8 52.4 9 6/1/2009 5187.6 601.2 551.78 49.42 10 7/1/2009 4629.63 601.2 557.97 43.23 11 8/1/2009 4068.3 601.2 561.33 39.87 12 9/1/2009 3502.13 601.2 566.17 35.03 13 10/1/2009 3502.13 29.18 29.18 14 11/1/2009 3502.13 30.16 30.16 15 12/1/2009 3502.13 29.18 29.18 16 1/1/2010 3502.13 30.16 30.16 17 2/1/2010 3502.13 30.16 30.16 18 3/1/2010 3502.13 27.24 27.24 19 4/1/2010 2931.09 601.2 571.04 30.16 20 5/1/2010 2354.32 601.2 576.77 24.43 21 6/1/2010 1773.39 601.2 580.93 20.27 22 7/1/2010 1186.97 601.2 586.42 14.78 5-48
Sl No
Instalment
Schedule Date
Mortgage
Outstanding
Amount
Instalment
Amount
Repayment
Principal
Interest
23 8/1/2010 595.99 601.2 590.98 10.22 24 9/1/2010 0 601.12 595.99 5.13 Repayment amounts marked in ‘italics’ are derived using amortized formula. The remaining amounts are
derived using simple formula.
Simple interest formula cannot be used for the last payment row. The bullet schedule for interest
cannot be based on the simple interest formula. Hence the gap between the principal schedules –
01-Sep-2009 and 01-Apr-2010 – in the above example.
Now, in case of principal moratorium for a simple mortgage, there may be no principal schedules
present for a given period of Interest. The system calculates simple interest during principal
moratorium based on the principal outstanding amount at that time.
Example
Consider the following details:
Mortgage Amount
24000
Tenor of Mortgage
24 months
Rate of Interest
20%
Mortgage Start Date
01-Sep-2008
Mortgage End Date
01-Sep-2010
Principal Moratorium Period
From 01-Sep-2009 to 01-Apr-2010
Sl
Instalment
Mortgage
Instalment
Repayment
No.
Schedule Date
Outstanding Amount
Amount
Principal
Interest
1
10/1/2008
22666.67
1733.33
1333.33
400
2
11/1/2008
21333.34
1723.7
1333.33
390.37
3
12/1/2008
20000.01
1688.89
1333.33
355.56
4
1/1/2009
18666.68
1677.77
1333.33
344.44
5
2/1/2009
17333.35
1654.81
1333.33
321.48
6
3/1/2009
16000.02
1602.96
1333.33
269.63
7
4/1/2009
14666.69
1608.89
1333.33
275.56
8
5/1/2009
13333.36
1577.77
1333.33
244.44
5-49
Sl
Instalment
Mortgage
Instalment
Repayment
No.
Schedule Date
Outstanding Amount
Amount
Principal
Interest
9
6/1/2009
12000.03
1562.96
1333.33
229.63
10
7/1/2009
10666.7
1533.33
1333.33
200
11
8/1/2009
9333.37
1517.03
1333.33
183.7
12
9/1/2009
8000.04
1494.07
1333.33
160.74
13
10/1/2009
8000.04
133.33
0
133.33
14
11/1/2009
8000.04
137.78
0
137.78
15
12/1/2009
8000.04
133.33
0
133.33
16
1/1/2010
8000.04
137.78
0
137.78
17
2/1/2010
8000.04
137.78
0
137.78
18
3/1/2010
8000.04
124.45
0
124.45
19
4/1/2010
6666.7
1471.12
1333.34
137.78
20
5/1/2010
5333.36
1444.45
1333.34
111.11
21
6/1/2010
4000.02
1425.19
1333.34
91.85
22
7/1/2010
2666.68
1400.01
1333.34
66.67
23
8/1/2010
1333.34
1379.27
1333.34
45.93
24
9/1/2010
0
1356.3
1333.34
22.96
For further details on holiday period maintenance, please refer to the section ‘Maintaining Holiday
Periods’ in chapter ‘Maintenances and Operations’ of this user manual.
5-50
5.3
Viewing Mortgage Account Summary
You can view a summary of all Mortgage Accounts, through the ‘Mortgage Account Summary’
screen. You can invoke this screen by typing ‘MOSACCNT’ in the field at the top right corner of
the Application tool bar and clicking the adjoining arrow button. You can query based on all or any of the following criteria:
•
Account Number
•
Customer Id
•
Value Date
•
Amount Financed
•
User Defined Status
•
Account Status
•
Branch
•
Product Code
•
Maturity Date
•
Currency
•
Alternate Account Number
•
Authorization Status
5-51
Click ‘Search’ button. The system identifies all records satisfying the specified criteria and
displays the following details for each one of them:
5.4
•
Account Number
•
Branch
•
Customer Id
•
Product Code
•
Value Date
•
Maturity Date
•
Amount Financed
•
Currency
•
User Defined Status
•
Alternate Account
Creating a Commitment Account
A ‘commitment’ is an agreement by a bank to make available a specified amount of fund to the
borrower for a certain period of time. It is a ‘line of credit’ that is made available by the bank to a
borrower. The entire commitment amount may be disbursed in full at the time of authorization or
disbursed partially on predefined scheduled dates.
You can link a commitment to more than one mortgage, provided funds are available, and the
mortgage(s) given against the commitment amount may or may not be in the same currency.
When a mortgage is disbursed against a commitment, there is no movement of funds involved
but only a setting aside of funds. Hence there is no disbursement or credit to the borrower’s
account.
You can create a commitment contract using the ‘Commitment Account Details’ screen. You can
invoke this screen by typing ‘MODCOMIT’ in the field at the top right corner of the Application tool
bar and clicking on the adjoining arrow button.
5-52
You can enter details of the commitment account in the above screen. This screen is similar to
the ‘Account Details’ screen.
On query of a Commitment Contract attached to a Limit Facility, either manually or while
launching from ‘Facility Maintenance’ screen, the LINE ID will be displayed in the form of a
concatenated string.
Allow Bulk Payment
Check this box to indicate whether the accounts under a commitment should be considered for
bulk processing. Various disbursements are allowed for a corporate customer and these are
treated as mortgages with separate products and EMI schedules. Assigning individual payments
as Bulk payments provides the facility of viewing multiple mortgages under a single commitment.
For field explanations on all tabs except Commitment tab refer section ‘Creating a Mortgage
Account’ in this chapter.
5-53
5.4.1 Commitment Tab
To view the utilization details of the commitment contract click ‘Commitment’ tab.
You can capture the following details on this screen:
Disallow further Disbursement
If you check this option, the system will not allow further disbursements on this commitment
account. Whereas, if you check this option, the system allows further disbursements on this
commitment account. By default, the system displays the status as unchecked. However, you can
modify this.
Mortgage Group
A mortgage in Oracle FLEXCUBE may have different repayment styles, rate conditions and
maturity conditions. By checking this option, you can use this commitment for such mortgages
with multiple repayment formula.
5-54
Last Available Date
Enter the last available date. This is the final date as of which all disbursements under this
commitment should be completed. Beyond this date, the system will not allow disbursements on
this commitment.
Loan Maturity Date
Enter the loan maturity date. All disbursements under this commitment should be matured as of
this date. For this commitment, the system will not allow disbursements with a maturity date
beyond the loan maturity date.
The following utilization details of all commitments linked against a mortgage account are
displayed in the above screen:
• Commit Sequence Number
• Commitment Event
• Linkage Branch Code
• Linkage Reference Number
• Linkage Date
• Linkage Event
• Linkage Event Sequence Number
• Linkage Currency
• Linkage Currency Amount
• Commit Amount
• Increase Decrease Flag
• Commit Balance
5.4.2 Applying Different Repayment Styles for a Commitment
You can have different repayment styles, rate conditions and maturity conditions for the same
mortgage account maintained in Oracle FLEXCUBE. For this, repayment of principal amount
needs to be divided into multiple disbursement slabs. You can use the following fields on the
‘Commitments’ tab to enable this feature:
• Disallow further Disbursement
• Mortgage Group
• Last Available Date
• Mortgage Maturity Date
Please lookup the above section ‘Commitments Tab’ for details on inputs for these fields.
Example
Consider a mortgage of 500,000 against a specific property. Based on the terms agreed upon by the bank
and the customer, you can split the mortgage principal into multiple disbursements as shown below:
Disbursement
Conditions
Disbursement of first 200,000
Interest only, variable rate, 20 years with
balloon principal repayment
Disbursement of second 200,000
Annuity (EMI type), 10 year fixed rate
5-55
Disbursement
Conditions
Disbursement of final 100,000
Interest only, fixed rate, 5 year, balloon
repayment via insurance policy
In this case, interest repayment may be started at any point of time. However, repayment of the principal
amount can begin only after the disbursement of entire 500,000.
You can initiate closure of such mortgages only after closing all disbursements with various
conditions, i.e. after liquidation of all mortgage contracts. Further to closure of such mortgages,
you need to complete two housekeeping activities viz. notification to notary and release of
collateral.
5.4.3 Charging Fee on Commitments
A fee is charged by the bank at the time of entering into a commitment agreement. This fee is
repayable at predefined schedules. Also there can be another fee component charged on the
amount of commitment that is utilized and un-utilized. The following SDEs are used to define fees
on utilized/un-utilized commitment amount:
• COMMITMENT_UTILIZED
• COMMITMENT_UNUTILIZED
For more details on maintaining SDEs refer section ‘Maintaining System Data Elements’ in the
Chapter ‘Maintenances and Operations’ of this User Manual.
5.4.4 Processing Events for a Commitment
The following events are triggered by the system during the different stages of a commitment
contract:
• DSBR Event – DSBR event is triggered when a mortgage is disbursed against a
commitment. There is no movement of funds involved but only a setting aside of funds.
Only such disbursed amount is available for linking to a Mortgage account. Entire
commitment amount may be disbursed in full at the time of authorization or disbursed
partially on scheduled dates as defined. You can choose to have an automatic
disbursement or manual disbursement for the commitment contract. System validates any
physical transfer of funds when DSBR event is triggered. Reversal of DSBR Event in
Commitment Contract is not permitted if the commitment available amount falls below the
utilized amount.
• ACCR Event - ACCR event is triggered when you define an INTEREST component for
collecting fees on the un-utilized commitment on a periodic basis. The fees may be
collected automatically or manually as defined in the product.
• LINK Event – LINK event is triggered when a Mortgage Account is linked to a
Commitment contract. This results in increasing the utilization of the commitment amount
and availability of the same comes down. Contingent entries which are passed when the
commitment contract is initiated are reversed when this event is triggered up to the extent
of the linked amount.
• DLNK Event – DLINK event is triggered when payment is made for a mortgage account
which is linked to a Commitment contract of revolving type. This happens only if the
payment is done before the validity period of the commitment contract. Once the
commitment contract is liquidated, payment does not result in triggering of DLNK event.
This results in decreasing of utilization of the commitment amount and availability of the
same is increased. Contingent entries are passed when a DLNK event is fired, upto the
extent of the delinked amount.
5-56
• CLOC Event - CLOC event is triggered when the contingent entries are reversed upto the
extent of unutilized commitment amount and the contract is marked as liquidated, on the
maturity date of a commitment contract. The Commitment contract will not be liquidated if
there is any outstanding fee. This happens during end of day batch processing. All the
commitment contracts with maturity date as of today are marked as liquidated during End
of Day processing. Contingent entries for the un-utilized commitment funds are reversed.
• VAMI – VAMI event is triggered when an amendment is done on the mortgage account
• ROLL - ROLL event is triggered if a rollover is done. You can choose to liquidate the
principal component and then system triggers the DLNK event fire in the commitment
contract. You can also choose to increase the principal, in such case the LINK event is
triggered in the commitment contract. You can also choose to increase the linkage amount
or add a new commitment. LINK event is triggered for the newly linked commitment. DLNK
event is triggered for the Old De- linked commitment.
• NOVA – NOVA event is triggered when you change the customer during reassignment. In
such a case the linked commitment is delinked manually and you can choose to select a
new commitment. In this case DLNK event is triggered for the previous commitment
contract and LINK event is triggered for the new commitment contract.
• RNOG - RNOG event is triggered when principal liquidation and principal increase is
done. The LINK event is triggered when principal is increased and DLNK event is
triggered when Principal liquidation is done.
• SCHR - This event regenerates the schedules in linked mortgage contracts. The system
verifies the following details:
¾
¾
¾
Whether the option ‘Disallow further Disbursement’ is checked.
Whether EOD / BOD processing date is greater than or equal to Loan Maturity Date
Whether the amount available in mortgage group commitment is zero
Based on these verifications, the system triggers SCHR event for linked mortgage loans
and mortgage group commitment contracts during EOD / BOD.
During MO batch (EOD/BOD), the system triggers SCHR event. This event regenerates
the schedules as per the product setup principal repayment schedule. For linked loan
contract of amortized type, the system generates EMI schedule.
If an amortized loan contract is linked to a mortgage group commitment contract, dual
formula needs to be maintained at the product level, of which one will be of non-amortized
type.
After entering the mortgage/commitment account details click ‘Save’ icon to save the account
details. On saving the transaction after entering all the required details in the system, the system
validates the value of the transaction amount against the following:
• Product transaction limit
• User Input limit
If the transaction currency and the limit currency are different, then the system converts the
amount financed to limit currency and checks if the same is in excess of the product transaction
limit and user input limit. If this holds true, the system indicates the same with below
override/error messages:
• Number of levels required for authorizing the transaction
• Transaction amount is in excess of the input limit of the user
To authorize the account, click ‘Authorize’ icon on the Application toolbar. The ‘Account
Authorization’ screen is displayed.
5-57
The mortgage account number and the branch details are defaulted here.
The following detail needs to be selected, as required:
Generate Message
Check this box if you want swift messages to be generated either for a customer transfer or a
bank transfer along with a cover. The generated message can be viewed in the messages
browser. Even if the box is left unchecked you can go to messages browser at a later point of
time and generate the message.
If the message generation fails for some reason, the account is authorized and you have to go to
the browser to manually generate the swift message.
All other advices related to BOOK/INIT/DSBR events are not generated at this point and you
need to go to the message browser to do the same.
5-58
5.5
Viewing Commitment Account Details
You can view details of all commitment accounts, through the ‘Mortgage Account Details’ screen.
You can invoke this screen by typing ‘MOSCOMIT’ in the field at the top right corner of the
Application tool bar and clicking the adjoining arrow button. You can query based on all or any of the following criteria:
•
Account Number
•
Customer Id
•
Value Date
•
Amount Financed
•
User Defined Status
•
Account Status
•
Branch
•
Product Code
•
Maturity Date
•
Currency
•
Alternate Account Number
5-59
•
Authorization Status
Click ‘Search’ button. The system identifies all records satisfying the specified criteria and
displays the following details for each one of them:
5.6
•
Account Number
•
Branch
•
Customer Id
•
Product Code
•
Value Date
•
Maturity Date
•
Amount Financed
•
Currency
•
User Defined Status
•
Alternate Account
Saving and Authorising Mortgage/Commitment Account
You have to save a mortgage/commitment account after entering all the required details in the
system. Click Save icon on the Toolbar or choose ‘Save’ from the Actions menu to save an
account. The system updates this as an unauthorised account. To authorize an account, click
‘Authorize’ icon on the Application toolbar.
Note the following:
You cannot authorise an account from the ‘Mortagage Account Details’ screen or ‘Mortagage
Commitment Account Details’ screen in the following cases:
• the contract has multilevel of authorization pending, the same will be done using the
‘Multilevel Authorization Detailed’ screen
• the level of authorization is greater than or equal to ‘N’
•
the ‘Nth’ or the final level of the users authorisation limit is less than the difference
between amount financed and sum of the limits of all the users involved in authorizing a
transaction, this case holds good when the ‘Cumulative’ field is checked in the ‘Product
Transaction Limits Maintenance’ screen
• the transaction amount is greater than the authoriser’s authorisation limit if the
‘Cumulative’ field is unchecked in the ‘Product Transaction Limits Maintenance’ screen
5.7 Multilevel Authorization of an Account
High value accounts may require multilevel of authorization. The levels of authorizations are
defined in the ‘Product Transaction Limits’ screen. You can use the ‘Multilevel Authorization
Detailed’ screen for authoring an account n-1 times. However, final authorization can take place
only in the main account screen.
5-60
For more details, refer the ‘Multilevel Authorization of Contract/Loan Account’ section in the
‘Procedures’ User Manual.
5.8
Viewing Details of Mortgage Accounts Linked to L/C
You can query Mortgage accounts linked to the L/C in the ‘Commitment/Limits Summary’ screen.
You can invoke this screen by typing ‘CLSENTTY’ in the field at the top right corner of the
Application tool bar and clicking the adjoining arrow button.
You can query a record using the following options:
• Base Entity Type
• Commitment Limit Number
• Customer Identification
• User Defined Status
• Account Status
• Branch
• Product Code
• Maturity Date
• Currency
• Alternate Account Number
• Authorization Status
The following details get displayed:
5-61
• Account Number
• Branch
• Customer Identification
• Product Code
• Value Date
• Maturity Date
• Amount Financed
• Currency
• User Defined Status
• Account Status
• Alternate Account Number
• Authorization Status
In this screen, click a child record to invoke ‘Account Details’ screen.
5.9
Manual Confirmation by Notary
Usually a notary confirms the collaterals (linked to the mortgage) before mortgage account
creation. In case, the confirmation from notary is not received before mortgage account creation,
you can initiate confirmation manually using the ‘Manual Notary Confirmation’ screen. You can
invoke this screen by typing ‘MODNOCON’ in the field at the top right corner of the Application
tool bar and clicking the adjoining arrow button.
You need to specify the following details here:
Branch Code
Specify the unique identifier of the branch where the mortgage account (for which notary
confirmation needs to be updated) is created. The adjoining option list displays all branches
maintained in the system. You can select the appropriate one.
5-62
Account Number
Specify the mortgage / commitment account number for which notary confirmation needs to be
updated. The adjoining option list displays all mortgage accounts/commitment accounts (for
which the “Notary Confirmation Required” check box is checked at the product level,and “Notary
Pre Confirmed” check box is unchecked at the account level) maintained in the system. You can
select the appropriate one.
Notary Confirmation Date
The system displays the current system date as the date of confirmation.
Notary Status
Select the notary status from the adjoining drop-down list. This list displays the following values:
• Confirmed
• Reject
If the notary status is ‘Confirmed’, then the system will trigger NCON event during authorization. If
the notary status is ‘Reject’, the system will trigger NREJ event which in turn triggers the reversal
of the contract during authorization.
Remarks
Enter the remarks for confirming or rejecting the collateral details.
5-63
5.10 Viewing Mortgage Manual Notary Confirmation
Summary
You can view a summary of all Mortgage Manual Notary Confirmation, through the ‘Mortgage
Manual Notary Confirmation Summary’ screen. You can invoke this screen by typing
‘MOSNOCON’ in the field at the top right corner of the Application tool bar and clicking the
adjoining arrow button. You can query based on all or any of the following criteria:
•
Authorization Status
•
Account Number
•
Record Status
Click ‘Search’ button. The system identifies all records satisfying the specified criteria and
displays the following details for each one of them:
•
Authorization Status
•
Record Status
•
Branch Code
•
Account Number
•
Notary Confirmation Date
•
Notary Status
5-64
6. Capturing Additional Details for a Mortgage
6.1
Introduction
The buttons on the ‘Account Details’ screen enable you to invoke a number of functions vital to
the processing of a Mortgage account.
These buttons have been briefly described below.
Buttons
Description
Promotions
Click this button to capture promotion details
Other Applicants
Click this button to capture other applicants details
Payment Mode Details
Click this button to capture payment mode details
Assets
Click this button to capture asset details
Financials
Click this button to capture financial details
MIS
Click this button to define MIS details for the Mortgage.
General Ledger Query
Click this button to view the GL balances for the various components
that are defined for an account.
Internal Rate of Return
Click this button to view the IRR value for the chosen component for
6-1
Buttons
Description
Details
different effective dates.
Events
Click this button to view the details of the events and accounting
entries that a contract involves.
Inventory
Click this button to view installment details
Swift Msg Details
Click this button to view the swift message details pertaining to any
transaction on the account
Statistics
Click this button to view account status details
Security Details
Click this button to view security details
Enter valid inputs into all the mandatory fields or you will not be able to save the mortgage
contract. After making the mandatory entries for the Mortgage account, save the account details
by either clicking save icon in the toolbar or selecting Save from the Actions menu.
A contract that you have entered should be authorized by a user bearing a different Login ID,
before the EOD is run.
You have the option to amend all the unauthorized entries made for a Mortgage. However,
after authorization, certain fields cannot be amended.
Click ‘Exit’ or ‘Cancel’ to go back to the Application Browser.
6.1.1 Specifying Promotions
Invoke the ‘Promotions’ screen by clicking the ‘Promotions’ button in the ‘Account Details’ screen.
6-2
The following details are captured here:
Promotion Type
The system displays the Promotion type to which the original loan is linked. It could be any of the
following:
• CONVENIOS
• PROMOTION
• CORFO
• FOGAPE
Promotion ID
The system displays the promotion ID in this field
Beneficiary
The system displays the beneficiary CIF in this field
Priority
The system displays the priority assigned to the promotion.
6.1.2 Viewing Internal Rate of return Details
You can view the internal rate of return details in the ‘Internal Rate of Return Details’ screen. You
can invoke this screen by clicking the ‘Internal Rate of Return Details’ button in the ‘Account
Details’ screen.
6-3
6.1.3 Viewing MIS Details of the Mortgage
Click ‘MIS’ button to view the MIS details screen. This is a view only screen, which provides a
MIS details for an account.
For more details on this screen refer section ‘Defining MIS details for an account or contract’ in
the chapter ‘Defining MIS Details for a Customer, Account Class, Account, Product, and Contract’
in the ‘Management Information System’ User Manual.
6-4
6.1.4 Viewing Account GL Balance
Click ‘General Ledger Balance’ button to view the GL details screen. This is a view only screen,
which provides a single snapshot of the latest GL balances for the various components that are
defined for an account.
The information displayed includes:
Account Details
• Branch Code: The branch code of the account maintained in the valid tables of consumer
lending.
• Account No: Applicant’s account number, which is auto generated if it is so maintained
under the branch parameter.
• Alt Account No: Alternate account number of the applicant.
• Customer Id: Applicant’s customer Id
• Product Code: Product code of the product associated with the account, defaulted from
Product definition.
• Product Category: The product category availed by the customer.
• Amount Financed: The total mortgage amount
• Currency: Currency in which the transaction will be conducted for the account.
• Value Date: value date for the account.
6-5
• Maturity Date: Maturity date for the mortgage account.
Components
• Component Name: Name of the component defined for the product to which the account is
linked.
• Description: Component description as defined at the Product level.
GL Details
• GL Code: This is the account head to which the component will be dr / cr. This is defined
at the product level.
• Type: GL category as defined in the GL chart of accounts
• Status: GL type as defined in the GL chart of accounts
• Balance: GL balance in terms of the account currency
• Lcy Balance: GL balance in terms of the local currency
6.1.5 Viewing Internal Rate of Return (IRR) Details
Click the ‘Internal Rate of Return Details’ button and invoke the ‘Internal Rate of Return Details’
screen. This screen displays the IRR value for the chosen component for different effective dates.
The values are displayed in the descending order of the dates.
The following details are displayed here:
• Effective Date of the interest rate
• The interest rate
6-6
6.1.6 Capturing Swift Message Details
You can view the swift message details pertaining to any transaction on the account in the ‘Swift
Msg Details’ button.
The following swift message related details can be viewed in the above screen:
• Branch Code
• Account Number
• Benficiary Institution
• Sender to Receiver Info
• Message Details
• Payment Details
• Charge Details
• Ordering Institution
• Ordering customer
• Intermediary Reim Institution
• Ultimate Beneficiary
• Beneficiary Institution for Cover
• Receiver Correspondence
• Ace with Institution
• Intermediary
Swift messages are not generated in the following situations:
• Settlement Instructions are not maintained
• Settlement Instructions are maintained but ‘Payment By’ for ‘Pay leg’ is not ‘Message’.
6-7
• Settlement Instructions are maintained but the Receiver is not a Bank at the time of saving
the account/manual disbursement.
• Settlement Details are changed during manual disbursement to have settlement mode
other than CASA.
• The credit settlement account is a GL
• The message is manually suppressed
6.1.7 Viewing Installment Details
Click ‘Installment’ button to access the Installment query screen. The installment query screen
displays the details of the installments for the account. The information displayed includes the
account details, installment details and the installment summary.
You can invoke the ‘Installment Query’ screen by typing ‘CLDINSQY’ in the field at the top right
corner of the Application tool bar and clicking the adjoining arrow button.
The following installment details are displayed:
Account Details
The following account details are displayed:
• Branch Code: The branch code of the account maintained in the valid tables of consumer
lending.
• Customer Id: Applicant’s customer Id as maintained in the valid table.
• Account No: Applicant’s account number, which is auto generated if it is so maintained
under the branch parameter.
• Alt Account No: Alternate account number of the applicant.
• Application No: The application number of the customer.
6-8
• Amount Financed: The total mortgage amount as maintained in the valid table.
• Currency: Currency in which the transaction will be conducted for the account.
• Product Code: Product code of the product associated with the account, defaulted from
Product definition.
• Maturity Date: Maturity date for the mortgage account.
• Value Date: value date for the account.
• User Defined Status: the user defined status for the account.
Installment Summary
The following installment summary details are displayed:
• Schedule No: Schedule number of the installment.
• Due Date: Installment due date.
• Currency: currency for the installment.
• Total Amount Due: Total amount due for the installment.
Installment Detail
The following installment details are displayed:
• Component Name: Names of all the components that make up a particular installment.
• Amount Due: Amounts due for each of the components of a particular installment.
• Status: Installment status based on the status maintained at the installment level in the
product.
6.1.8 Maintaining Payment Mode Details
The debit and credit settlement mode details for the account can be maintained in the ‘Settlement
Details’ screen. You can invoke this screen by clicking the ‘Payment Mode’ button in the ‘Main’
tab.
6-9
The options for debit mode are CASA, Credit Card, Debit Card, Clearing, External Account,
Electronic Pay Order, Internal Check, Instrument, GIRO and Cash/Teller.
The options for credit mode are CASA, Clearing, External Account, Instrument, and Cash/Teller.
You can maintain the following details here:
• CASA:
¾
Branch: Click the option list to choose the branch in which the customer account
resides. Double click on a branch to select it
• Account: Click the option list to choose the account in the branch selected. Double click on
an account to select it. Credit Card / Debit Card
¾
Card Number: This field captures either the Credit No or the Debit No details based
on the selection
The card must be a valid card whose number can be checked with a modulo logic or
maintenance file
• Clearing Network
¾
¾
¾
¾
¾
¾
¾
Clearing Bank Code: Click the option list to select the bank code as per clearing
maintenance. Double click on a bank code to select it
Clearing Branch Code: Click the option list to select the clearing bank branch. Double
click on a branch code to select it
Instrument No: Enter the number on the instrument presented for clearing in this field.
Double click on a value to select it
Routing No: Enter the routing number of the branch selected for clearing in this field
Clearing Product Code: Click the option list to choose a product code if the clearing is
using an Oracle FLEXCUBE clearing product. Double click on a branch to select it
End Point: This field picks up the end point maintained in the clearing system
Sector Code: Click the option list to choose the clearing sector code. Double click on
a sector code to select it
• External Account
¾
¾
¾
¾
Clearing Bank Code: Click the option list to choose the external bank code as per
clearing maintenance
Clearing Branch Code: Click the option list to choose the external bank branch used
for clearing
Ext Acc No: Enter the external account number in this field
Ext Acc Beneficiary Name: Enter the name of the beneficiary of the external account
in this field
• GIRO
¾
¾
¾
¾
¾
¾
¾
Auto/Manual GIRO – Select Auto GIRO for automatic direct debit or else select
Manual
Bank/Plus GIRO – Select the GIRO clearing system used, which can be either Bank
or Plus
GIRO Number – This is applicable only for corporate customers and not for individual
customers. You have to enter the GIRO number
Payer Bank Name – Specify the name of the bank from which the amount is paid
Payer Branch - Specify the branch from which the amount is paid
Payer Account - Specify the account from which the amount is paid
Payer Bank Address - Specify the address of the bank from which the amount is paid
• Instrument / Cash / Teller
6-10
¾
¾
AC Branch: Click the option list to choose branch where the account is serviced.
Double click on a branch to select it
Product or Account: If the payment mode is Account, this field specifies the CASA /
GL account to be debited. If the payment is through Instrument / Cash, it denotes the
teller product to be used
6.1.9 Capturing Financial Details
You can capture the income or liability details of the customer in the ‘Financials’ screen. To
invoke this screen, click ‘Financials’ in ‘Account Details’ tab of the Account Details screen.
6.1.9.1 Financials Tab
You can specify the following details related to the customer’s income here:
The following details are captured here:
Type
Select the type of the income from the option list provided
Source
Specify the source of the income
Currency
Select the currency associated with the income, from the option list provided
6-11
Amount
Specify the amount associated with the income
Comment
Specify any remarks or comments for the income
6.1.9.2 Liability Tab
Here you can specify the following details related to the customer’s liability:
The following details are captured here:
Type
Select the type of the liability from the option list provided
Account Type
Specify the account type associated with the liability
Currency
Select the currency associated with the liability, from the option list provided
Amount
Specify the amount associated with the liability
6-12
Frequency
Select the frequency at which payments are made towards the liability. The following options are
possible:
• Daily
• Weekly
• Monthly
• Quarterly
• Half Yearly
• Yearly
Balance
Specify the current amount outstanding
Comment
Specify any remarks or comments to be associated with the liability
6.1.9.3 Other Income Tab
You can also capture the details related to other sources of income, if exists
6-13
The following details are captured here:
Seq No
Specify the sequence number here
Type
Specify the type of income here. You can also select the income type from the adjoining option
list
Currency
Specify the currency of the income here. You can also select the currency from the adjoining
option list
Amount
Specify the amount of income here
Frequency
Select the frequency of the income here from the drop-down list
Click Ok to save the details
6.1.10 Viewing Account Status
You can view the current status of an account in the ‘Account Details’ screen. You can invoke this
screen by clicking the ‘Statistics’ button in the ‘Account Details’ screen.
Once you select an Account Number, the system displays the following details pertaining to the
current status of the account:
• Component Name
• Expected
• Overdue Amount
• Outstanding Principle
6-14
• Advance Amount
• Currency
• Number of overdue installments
The Account creation and any other change to an account is updated the audit trail of the record.
In the audit trail, the Account status details are also displayed. An Account can be active or
uninitiated. Once it is active, it can be reversed, deleted or liquidated based on the operations on
it. This is displayed on the screen.
6.1.11 Viewing Security History Details
You can view the securitization details in the ‘Security History Details’ screen. You can invoke this
screen by clicking ‘Security Details’ button in the ‘Account Details’ screen.
Here the system displays the securitization details such as Securitization Event, Status, Date and
Security Reference Number on which the loan contract has been a part.
6-15
6.2
Viewing Events Diary Details
An ‘event’ may be defined as any action starting from application entry to collections. The ‘Events
Diary’ screen captures the details of events applicable to the account. The screen displays both
processed and unprocessed events. You can invoke this screen by typing ‘CLDEVTQR’ in the
field at the top right corner of the Application tool bar and clicking the adjoining arrow button.
The following details are displayed here:
• Branch Code: The branch code of the account maintained in the valid tables of consumer
lending.
• Account No: Applicant’s account number, which is auto generated if it is so maintained
under the branch parameter.
• Alt Account No: Alternate account number of the applicant.
• Application Number: The application number captured at the time of mortgage initiation.
• Customer Id: Applicant’s customer Id.
• Product Code: Product code of the product associated with the account, defaulted from
Product definition.
• Product Category: The product category availed by the customer.
• Amount Financed: The total mortgage amount.
• Currency: Currency in which the transaction will be conducted for the account.
• Down Payment Amount: The amount paid by the customer upfront. This is used for
information only.
• Maturity Date: Maturity date for the mortgage account.
• Value Date: value date for the account.
• User defined status: The user defined status for the account.
6-16
6.2.1 Processed Tab
The processed events are all the events which have already taken place. This displays the
details like the sequence number of the event. The date on which the event was processed, the
value date, the event code, the cutoff status, and a brief description of the event. The screen also
displays the details of the events according to the events selected.
The following details are displayed here:
Events
• Sequence No: The sequence number for the account.
• Processed Date: The date on which the event takes place. It is the same as system date.
• Value Date: The value date of the events as maintained in the valid table that is captured
during application entry.
• Code: Event code.
• Description: Description for the event occurred.
Advices
• DCN: System generated number for reference.
• Message Type: Type of advice generated for the event. This is applicable only if
maintained at the product level for the particular event.
Entries
• Dr/Cr: This field indicates if the event occurring is a Debit or Credit event.
• Branch: The branch in which the event occurred. This is defaulted from the Consumer
Lending module.
• Account: The number of the account affected by the event as maintained in the valid table.
• Ccy: The currency involved in the event
• Event Fcy Amt: Foreign currency amount involved with the event, if any
• Exch Rate: Exchange rate associated with the account
• Event Lcy Amt: Local currency amount involved with the event, if any. These events are
maintained in the Event entries table.
• Value Date: Value date for the event as maintained in the valid date captured during the
application entry.
• Trn Date: Event transaction date. It is same as the system date.
• Entry Fcy Amt: Netted entry log for the foreign currency amount. These values are stored
in the daily logs.
• Entry Lcy Amt: Netted entry log for the local currency amount. These values are stored in
the daily logs.
• Trn Code: Transaction code
• Amount Tag: Amount tag for the transacted amount
• Event Seq Number: Event sequence number
• Event: Event name and identifier
• GAAP indicator: Generally Accepted Accounting Principles (GAAP) applicable for the
accounting entry
6-17
6.2.1.1 Viewing Event Checklist
Event checklist is a list of items that pops up when an online function is triggered.
6-18
6.2.1.2 Archiving Processed Events
You can archive processed records from the events diary using the ‘Retail Lending - Bank
Parameters’ screen.
In this screen, you can specify the following parameters to archive processed events:
Reference Date
This is the first date on which the archival will be initiated. If this date is NULL, no archival will be
done.
Frequency
This is the frequency for archival. The options in the drop down list are:
• Daily
• Monthly
• Yearly
Unit
This is a numeric value. Let us suppose you select the frequency as Daily and Unit as 5. In this
case archival will be done every 5th day.
A batch process will execute the archival by end of day. However, if you do not specify the
parameters, archival will not be executed.
A batch process will execute the archival by end of day. However, if you do not specify the
above parameters, archival will not be executed.
6-19
6.2.2 Unprocessed Tab
The Unprocessed event screen has all the details of the overdue and the Due events for the
account.
The following details are displayed:
Overdue Events
An event which has crossed the due date becomes an overdue event. The number of days after
the due date is used by the bank to calculate penalty for the event.
The following Overdue event details are displayed:
Overdue Events
• Code: Unique event code
• Date: Date on which event occurred
• Description: Brief event description
Components
Component name: Name of the component affected by the event.
Due Events
The date on which the event is supposed to take place is the due date of the event. In case of
repayments, the customer is informed by the bank regarding the due date.
The following details are displayed:
6-20
Due Events
• Code: Unique event code.
• Date: Date on which event occurred.
• Description: Brief event description.
Components
Component name: Name of the component affected by the event.
6.2.3 Querying Account Details
Oracle FLEXCUBE allows you to query the following account related details:
• A particular or all accounts of a customer – This is done using the ‘Customer Summary
Query’ screen. The records are displayed product wise, module wise, accounting class
wise and also based on external account types. You can narrow down the query by double
clicking on a record and navigating to its account details.
• Accounting entries for a mortgage account – This is done using the ‘Customer Account
Transaction Query’ screen.
• The liability details of a customer or an account or the details of a transaction involving a
particular limit line – This is done using the ‘Liability Query’ screen.
6-21
6.3
Inactive Mortgages
During Mortgage processing, it is required to capture mortgage details and not initiate till
verification of documents, etc. This module creates a mortgage account in an inactive state.
Inactive mortgages are input by a separate screen similar to the Accounts screen or by Uploads.
After manual verification the account is entered as an inactive account. The account is activated
once the requisite documents are received.
To invoke this screen, type ‘MODINADT’ in the field at the top right corner of the Application tool
bar and click the adjoining arrow button.
The system captures the following details and generates an inactive account:
• Mortgage Reference Number
• Schedule Dates
• Charges
• Installment Amounts
Modifications are allowed on inactive mortgages even after authorisation and there are no
restrictions on inactive mortgages modifications. Mortgage details are handed off to other
systems. Messages such as Mortgage advice or Promissory Notes can also be generated.
6-22
6.3.1 Operations on Inactive Mortgages
It is possible to modify an inactive mortgage and save it even after authorisation. When the
account is activated it will be an unauthorized account and behaves like an account directly
created /uploaded into the system. It is possible to delete the same too. The user can change all
mortgage account properties.
Click ‘Active Account’ button to activate the mortgage. This changes the funded status of the
mortgage. Once activated, the account cannot be deleted after authorisation and cannot be
unlocked after one save.
Accounting entries and limit updates are not called when the mortgage is inactive. Accounts
queries do not display inactive accounts and Inactive accounts views do not show active
accounts.
If an account is created after its value date, it behaves as a Back valued mortgage entry. If it is
created after its maturity date, it behaves like an overdue account.
Inactive mortgages are created with a sequence that is different from the account mask
maintained. Upon activation, the account mask is used to create a new account. Hence the
account number of an activated account differs from its inactive version.
6.3.1.1 Activating Mortgages and Limit Earmarking
Inactive mortgages are activated by clicking on Activate Account button or through an upload.
Upon mortgage activation, Limits Utilizations are updated. Accounting entries are passed for
disbursement and for any upfront changes as defined in the product.
The earmarked amount field shows the total earmarking and an earmarking reference number is
captured. Upon the actual mortgage initiation, utilization is made on the line and real entries
passed.
6.3.1.2 Deleting Inactive Mortgage
Inactive mortgages can be deleted even after the authorisation of Inactive mortgage account. In
Bank Parameters, Site specific parameters are provided to control the automatic deletion of
Inactive mortgages. An Inactive Mortgage processing supports this deletion.
6-23
6.4
Viewing Mortgage Inactive Accounts Summary
You can view a summary of all Mortgage Inactive Accounts, through the ‘Mortgage Inactive
Accounts Summary’ screen. You can invoke this screen by typing ‘MOSINADT’ in the field at the
top right corner of the Application tool bar and clicking the adjoining arrow button. You
can query based on all or any of the following criteria:
•
Account Number
•
Customer Id
•
Value Date
•
Amount Financed
•
User Defined Status
•
Account Status
•
Branch
•
Product Code
•
Maturity Date
•
Currency
•
Alternate Account Number
•
Authorization Status
Click ‘Search’ button. The system identifies all records satisfying the specified criteria and
displays the following details for each one of them:
6-24
6.5
•
Account Number
•
Branch
•
Customer Id
•
Product Code
•
Value Date
•
Maturity Date
•
Amount Financed
•
Currency
•
User Defined Status
•
Alternate Account
Mortgage Simulation
You can simulate mortgages to answer customer queries especially for new mortgages and prepaid mortgages. The payment schedules of any type of Mortgage Products can be generated
while negotiating with clients during the Presale stage.
6.5.1 Simulating a Mortgage
You can use the ‘Account Simulation’ screen to simulate a mortgage. This screen is similar to the
Account Details screen. You can invoke this screen by typing ‘MODSIMDT’ in the field at the top
right corner of the Application tool bar and clicking on the adjoining arrow button.
6-25
Simulation will function in exactly the same way as a regular mortgage input. All warnings and
overrides associated with an actual contract save will come in a simulation. For example, if the
mortgage results in the overdrawing of the customer’s mortgage line, then an Override is thrown
up. However, no data will be stored in Oracle FLEXCUBE.
Click ‘Create Active Account’ button to create a mortgage directly from the simulator. Only users
with rights to invoke Oracle FLEXCUBE mortgage creation function will be allowed to create
mortgages from the simulation function. The sequence of the Mortgage account thus created is
based on the branch level account mask maintained.
Similarly, click ‘Create Active Account’ button to actually create an inactive account based on the
simulated data.
A separate Sequence number is provided to create reference numbers for Simulations. These are
one time reference numbers for simulation purposes only and are not used for final mortgage.
The User Defined Reference Number facility of Oracle FLEXCUBE is used to create Mortgage
Simulation Sequences.
If the simulator is launched from Oracle FLEXCUBE, simulations can be run several times to
examine the impact of different parameters on the mortgage. If the simulator is invoked from a
channel, all parameters should be specified afresh for each invocation.
Mortgage advices can be printed from the screen based on the mortgage account simulated. This
is allowed for mortgage accounts created in the system prior to their being initiated.
Subsequently, advices configured through the events screen will be triggered.
6-26
6.5.2 Simulating a Commitment
You can use the ‘Commitment Simulation’ screen to simulate a Commitment. You can invoke this
screen by typing ‘MODSCOMT’ in the field at the top right corner of the Application tool bar and
clicking on the adjoining arrow button.
Create Active account and Create Inactive account buttons are disabled for commitment
simulation.
For field explanations on all tabs except Commitment tab refer section ‘Creating a Mortgage
Account’ in this chapter.
For Commitment tab details refer section ‘Viewing Commitment Details’ in the ‘Account Creation’
chapter.
6-27
7. Making Manual Disbursements
7.1
Introduction
The Mortgages Module of Oracle FLEXCUBE supports the following modes for disbursements:
• Auto
• Manual
If you select the mode ‘Auto’, the system will automatically disburse the mortgages based on the
disbursement schedule defined for the product.
In the manual mode, disbursement happens on demand. In this case, disbursement schedules
need not be maintained for the ‘PRINCIPAL’ component. Also, you can collect any applicable
charges related to the disbursement at the time of making the disbursement. These charges are
defined at the product level.
You have to specify the disbursement mode as a preference at the time of setting up a Consumer
Lending product in the system.
If a manual disbursal results in a status change for the account, the system will update the
current status for the account in the ‘Derived Status’ field. During end-of-day batch processing, it
will update the ‘User Defined Status’ for the account with the worst status that is available for all
accounts and mortgages for this CIF and post the required accounting entries for the change.
Refer the section titled ‘Disbursement Mode preferences’ in the ‘Defining Product Categories and
Products’ chapter of this User Manual for details.
7-1
7.2
Disbursing a Mortgage through the ‘Manual’ Mode
You can initiate a manual disbursement through the ‘Manual disbursement’ screen You can
invoke this screen by typing ‘MODMDSBR’ in the field at the top right corner of the Application
tool bar and clicking on the adjoining arrow button.
To begin the disbursement, click on the New icon in the toolbar of the screen or select ‘New’ from
the Actions Menu. The following information gets defaulted to the screen:
Branch Code
The code of the login/sign-on branch is displayed here. However, you can select a different
branch from the option list provided. It is the branch where the mortgage account of the customer
resides.
Account Number
Select the Mortgage Account of the customer to which the disbursement is made. All valid
accounts are available in the option list. Select the appropriate one from this list.
Component Name
All disbursements are made towards the PRINCIPAL component. You cannot change the
component.
Value Date
This is the date when the credit entry (for the disbursement amount) is posted to the Cr
Settlement Bridge. The current system date is displayed here.
Execution Date
This is the date on which the disbursement is booked in the system. The current system date is
displayed here. You may change the date to a date in the future before the maturity date of the
mortgage.
7-2
Reference Number
This is auto generated and used as a reference to identify the transaction in the system.
Capture the following details in the screen:
Remarks
Capture any additional information about the disbursements, if required.
Total Amount
This displays the sum total of the amount disbursed across the various settlement modes. It gets
incremented by the amount settled.
On saving the transaction after entering all the required details in the system, the system
validates the value of the transaction amount against the following:
• Product transaction limit
• User Input limit
If the transaction currency and the limit currency are different, then the system converts the
amount financed to limit currency and checks if the same is in excess of the product transaction
limit and user input limit. If this holds true, the system indicates the same with below
override/error messages:
• Number of levels required for authorizing the transaction
• Transaction amount is in excess of the input limit of the user
Specifying Disbursement Details
The following disbursement details have to be captured in the ‘Disbursement Details’ section of
the screen:
Reversed
When you reverse a manual disbursement, the system automatically checks this option to denote
that the particular settlement mode has been reversed.
For reversing a disbursal, a different event, REVD (Reverse Disbursement) is triggered.
Settle Mode
You can make disbursements either through a single mode or by using multiple modes of
settlement, depending on the customer’s requirement.
The settlement details that need to be captured depend on the mode you select. The list of
modes and the applicable settlement details are given below:
• CASA
¾
¾
Settlement Branch
Settlement Account
• Clearing
7-3
¾
¾
¾
¾
¾
¾
¾
¾
Upload Source
Instrument Number
Clearing Product
End Point
Routing Number
Clearing Bank
Clearing Branch
Sector Code
• External Account
¾
¾
¾
¾
¾
¾
Upload Source
Product Category
Clearing Bank Code
Clearing Branch Code
External Account Name
External Account Number
• Instrument
¾
¾
¾
Instrument Number
Settlement Branch
Settlement Account
• Cash/Teller
¾
¾
Upload Source
Settlement Product
Atleast one mode is mandatory to make a disbursement.
Settle Ccy
After specifying the settlement mode for the disbursement, select the currency in which the
disbursement is to be made. The currencies allowed for the branch are available in the option list
provided.
Amount Settled
Here, you have to capture the disbursement amount that is to be settled through the selected
mode in the selected currency.
The ‘Total Amount’ gets incremented by the amount settled and displays the sum total of the
amount disbursed across the various settlement modes.
Exch Rate
This information is applicable if the Mode Currency is different from the Mortgage Currency. The
exchange rate that is defaulted from the Standard Exchange Rate Maintenance is used to convert
the disbursement amount to the Mortgage Currency equivalent.
You can change the defaulted rate provided the change is within the variance level maintained for
the underlying product.
7-4
Refer the section titled ‘Exchange Rate Preferences’ in the ‘Defining Product Categories and
Products’ chapter of this User Manual for details.
Mortgage Ccy Equiv
As mentioned above, if the Mode Currency and Mortgage Currency are different, the system
calculates the Mortgage Currency equivalent using the exchange rate applicable for the currency
pair.
Negotiated Cost Rate
Specify the negotiated cost rate that should be used for foreign currency transactions between
the treasury and the branch. You need to specify the rate only when the currencies involved in
the transaction are different. Otherwise, it will be a normal transaction.
Negotiation Reference Number
Specify the reference number that should be used for negotiation of cost rate in foreign currency
transaction. If you have specified the negotiated cost rate, then you need to specify the
negotiated reference number also.
Oracle FLEXCUBE books then online revaluation entries based on the difference in
exchange rate between the negotiated cost rate and transaction rate.
Branch Profit for Non Negotiated Transactions
There can be two situations in profit calculation of non negotiated transactions:
•
Transaction involves two foreign currencies
•
Transaction involves a foreign currency and a local currency
Methods of profit calculation are different based on the currencies involved as discussed in the
following examples.
Examples
1 - Profit Calculation of Non Negotiated Transactions Involving a Foreign Currency and a Local
Currency
Consider a mortgage transaction. The currency of the mortgage is USD and that of the settlement account is
AED. The mortgage amount is 10,000 USD and the transaction is booked at an exchange rate of 3.55.
The mid rate for the revaluation rate code for USD-AED pair is maintained as 3.60 in Currency Rates
Maintenance with a buy spread of 0.05 and a sell spread of 0.05. Hence, the cost rate for the branch for this
transaction will be 1 USD = 3.60 AED.
The system will pass the following accounting entries in this case.
Dr/Cr
Account
Ccy
FCY Amount
LCY Amount
Dr
Asset-1
USD
10,000
35500
Cr
Customer-1
AED
35500
As a result of this transaction, the branch has made a profit of 500 AED.
10000 x (3.60 – 3.55) = 500
The mortgage product used for the contract needs to be configured for online revaluation. This will enable
the profit of 500 AED to be booked at the time of creation of the contract itself.
The system will pass the following additional accounting entries.
7-5
Dr/Cr
Account
Ccy
FCY Amount
LCY Amount
Dr
Asset-1
USD
500
Cr
Income-1
AED
500
You need to maintain the Income/Expense accounts used for booking the branch profit/loss (Income-1, in
the above example). As part of the product setup, you need to maintain these general ledgers for online
revaluation.
2 - Profit Calculation of Non Negotiated Transactions Involving Two Foreign Currencies
Consider the case of liquidation of an import bill. The currency for the bill is GBP and that of the settlement
account is USD.
The system uses USD as the through currency to derive the exchange rate of GBP against AED. The rates
of exchange for GBP-USD and USD-AED pairs are maintained in the system as given below:
For GBP-USD pair Mid Rate - 1 GBP = 1.5651 USD
Buy Spread = 0.10
Sell Spread = 0.10.
Hence,
Buy Rate = 1.4651
Sell Rate = 1.6651
Similarly, for USD-AED pair Mid Rate - 1 USD = 3.60 AED
Buy Spread = 0.05
Sell Spread = 0.05
Hence,
Buy Rate = 3.55
Sell Rate = 3.65
Based on the above details, the system derives the GBP-AED rate as below:
Mid Rate - 1 GBP = 5.6344 AED
Buy Rate = 5.2011
Sell Rate = 6.0776
Consider that a bill for 1000 GBP has been liquidated. The currency of the settlement account is USD and if
the transaction rate is 1 GBP = 1.6651 USD. The system will pass the following accounting entries.
Dr/Cr
Account
Ccy
FCY Amount
Exchange Rate
LCY Amount
Dr
Customer-Ac-1
USD
1,665.10
3.6499
6077.60
Cr
Nostro-1
GBP
1,000.00
6.0776
6077.60
As part of online revaluation process, the system evaluates the profit/loss as follows.
Transaction Amount x (Transaction Rate – Cost Rate of CCY1) x Revaluation Mid Rate of CCY2
= 1000 x (1.6651 – 1.5651) x 3.6 = 360 AED
7-6
The system will pass the following accounting entries in this case.
Dr/Cr
Account
Ccy
FCY Amount
LCY Amount
Dr
Nostro-1
GBP
360
Cr
Income-1
AED
360
Branch Profit for Negotiated Transactions
There can be two situations in profit calculation of negotiated transactions:
•
Transaction involves two foreign currencies
•
Transaction involves a foreign currency and a local currency
Methods of profit calculation are different based on the currencies involved as discussed in the
following examples.
Examples
1 - Profit Calculation of Negotiated Transactions Involving a Foreign Currency and a Local Currency
Consider a mortgage transaction. The currency of the mortgage is USD and that of the settlement account is
AED. Following are the particulars:
Mortgage Amount = 1,000,000 USD
Mid Rate/Cost Rate - 1 USD = 3.60 AED
Deal Rate - 1 USD = 3.55 AED
Since the amount involved is huge, the customer negotiates with the branch to offer a better exchange rate
of 3.60. The profit becomes zero in this case. Hence, the bank negotiates with Treasury to provide a better
cost rate. The Treasury will evaluate the transaction and offer a better cost rate (negotiated cost rate) of
3.65. Based on this, the branch will book the transaction at a deal rate of 3.60 with the negotiated cost rate
of 3.65.
When you book the transaction, the system derives the profit from the deal based on the difference between
the negotiated cost rate and the transaction rate. The system will pass the following accounting entries in
this case.
Dr/Cr
Account
Ccy
FCY Amount
LCY Amount
Dr
Asset-1
USD
1,000,000
3,600,000
Cr
Customer-1
AED
3,600,000
During online revaluation, the system will pass the following entries.
Dr/Cr
Account
Ccy
FCY Amount
LCY Amount
Dr
Asset-1
USD
50,000
Cr
Income-1
AED
50,000
The local currency amount of 50,000 is derived as follows:
(Negotiated Cost Rate – Transaction Rate) x Transaction Amount
EOD Account Revaluation
The system picks up the accounting entries based on the revaluation setup for the branch. Assume that
EOD account revaluation happens for the GL used in the above example that involves negotiated cost rate.
7-7
During EOD, if the Mid Rate becomes 3.70, the system will pass the following entries.
Dr/Cr
Account
Ccy
FCY Amount
LCY Amount
Dr
Asset-1
USD
50,000
Cr
Income-2
AED
50,000
Here, Income-2 is the Income GL maintained in the Account Revaluation Setup.
The profit generated as part of Online Revaluation will remain in Income-1 GL and the Revaluation Profit
generated during EOD operations will remain in Income-2 GL.
2 - Profit Calculation of Negotiated Transactions Involving Two Foreign Currencies
Consider the liquidation of an import bill. The currency of the bill is GBP and that of the
Settlement Account is USD.
The system uses USD as the through currency to derive the exchange rate of GBP against AED. The rates
of exchange for GBP-USD and USD-AED pairs are maintained in the system as given below:
For GBP-USD pair Mid Rate - 1 GBP = 1.5651 USD
Buy Spread = 0.10
Sell Spread = 0.10
Hence,
Buy Rate = 1.4651
Sell Rate = 1.6651
Similarly, for USD-AED pair Mid Rate - 1 USD = 3.60 AED
Buy Spread = 0.05
Sell Spread = 0.05
Hence,
Buy Rate = 3.55
Sell Rate = 3.65
Based on the above details, the system derives the GBP-AED rate as below:
Mid Rate - 1 GBP = 5.6344 AED
Buy Rate = 5.2011
Sell Rate = 6.0776
Consider that a bill for 1000 GBP has been liquidated. The currency of the settlement account is USD and if
the transaction rate is 1 GBP = 1.532 USD. The system will pass the following accounting entries.
Dr/Cr
Account
Ccy
FCY Amount
Exchange Rate
LCY Amount
Dr
Customer-Ac-1
USD
1,532.00
3.9671
6077.60
Cr
Nostro-1
GBP
1,000.00
6.0776
6077.60
The Negotiated Cost Rate of the transaction is 1.525.
7-8
As part of online revaluation process, the system evaluates the profit/loss as follows.
Transaction Amount x (Transaction Rate – Negotiated Cost Rate) x Revaluation Mid Rate of CCY2
= 1000 x (1.532 – 1.525) x 3.60 = 25.20 AED
The system will pass the following accounting entries in this case.
Dr/Cr
Account
Ccy
FCY Amount
LCY Amount
Dr
Nostro-1
GBP
25.20
Cr
Income-1
AED
25.20
7.2.1 Verifying the Check List Items
To every online event, you can associate check list items through the ‘Event Checklist’ screen. To
view the check list items associated with the ‘Disbursement’ event (DSBR), click on the ‘Check
List & Remarks’ button.
This screen displays the check list items for DSBR. All check list items have to be verified for
successful disbursal of the mortgage. To do this, check the ‘Verified’ box against each check list
item.
You may also capture any additional information/remarks, if required.
Click ‘OK’ button to Save and return to the ‘Manual disbursement’ screen.
7-9
7.2.2 Capturing values for the event level UDFs
You can enter values for the UDFs that you have associated with the DSBR event in the ‘Account
Event UDF’ screen. To invoke this screen, click ‘Event Fields’ button in the ‘Manual
Disbursement’ screen.
The system allows you to enter different values for the same UDF for events that gets repeated
for the same mortgage account. For instance, if you have multiple disbursements for a Mortgage
Account, you can capture different values for UDFs for different disbursements.
Click Exit button to exit and return to the ‘Manual disbursement’ screen.
7-10
7.2.3 Viewing the Default Details
The defaults are maintained by the bank for the account can be viewed by clicking the ‘Default’
button. The defaults primarily are based on product definition and the account but it can be
overridden.
If the Payment By is ‘Message’ then the settlement mode is defaulted to CASA and the
settlement account , branch and currency are defaulted from the Settlement Instructions
maintenance.
7.2.4 Viewing the Charge Details Associated with the Event
When making a manual disbursement, you can apply the charges applicable for the event. To do
this, click ’Charges’ button and invoke the ‘Manual disbursement – Charges’ screen.
7-11
Specify the following details in this screen:
Component Name
Select the charge component from the option list provided. This list displays the components of
type ‘Charge’ that were associated with the event at the time of defining the product.
Settle Mode
You can use multiple modes of settlement for charge settlement also. The list of modes
applicable is same as the one allowed for mortgage disbursal.
Settle Ccy
After specifying the settlement mode, select the currency in which the charge is to be collected.
The currencies allowed for the branch are available in the option list provided.
Amount Settled
If a formula is maintained for charge calculation at the product level, the system calculates the
charge on the amount being disbursed using the formula. The same is then displayed in the here.
Exch Rate and Mortgage Ccy Equiv
This information is applicable if the Mode Currency is different from the Mortgage Currency. The
exchange rate that is defaulted from the Standard Exchange Rate Maintenance is used to convert
the charge amount to the Mortgage Currency equivalent.
7.2.5 Capturing the Advice Related Details
You can view the advices defaulted which also includes the Payment Message in the ‘Advices’
screen. To invoke this screen, click ‘Advices’ button on the ‘Manual Disbursement’ screen. You
can also choose to suppress the messages as required .
You can opt to suppress the Payment Message defaulted in case you do not need a credit
through swift message .
The deafulted details can be overriden at this stage and if the settlement mode is changed to
anything other than CASA, the swift message is automatically suppressed.
7-12
System automatically supresses the payment message under the following conditions:
• If the Principal Credit Settlement account is changed to a GL or if the receiver in Swift
Msg Details tab is not valid to receive the message i.e, if the Customer Type of the
Receiver party is not a Bank
• If the settlement mode for PRINCIPAL component is changed to anything other than
CASA
If the Transfer Type is chosen as blank i.e, neither Customer Transfer nor Bank Transfer and if
the Receiver is a bank and the credit settlement account is a current account then the
PAYMENT_MESSAGE becomes CREDIT_ADVICE by Swift(MT910).
7.2.6 Viewing the Swift Message Details
The swift message details are picked up from the Settlement Instructions maintenance and are
displayed in the ‘Swift’ screen. To invoke this screen, click ‘Swift’ button on the ‘Manual
Disbursement’ screen..
For more details on Swift message related details refer section ‘Capturing Swift Message Details’
in the chapter ‘Capturing Additional Details for a Mortgage’ in this User Manual.
7-13
7.3
Viewing Mortgage Manual Disbursement Summary
You can view a summary of all Mortgage Manual Disbursements, through the ‘Mortgage Manual
Disbursement Summary’ screen. You can invoke this screen by typing ‘MOSMDSBR’ in the field
at the top right corner of the Application tool bar and clicking the adjoining arrow button. You can query based on all or any of the following criteria:
•
Account Number
•
Event Sequence Number
•
Authorization Status
•
Branch
•
Reference Number
Click ‘Search’ button. The system identifies all records satisfying the specified criteria and
displays the following details for each one of them:
•
Account Number
•
Branch
•
Event Sequence Number
•
Reference Number
•
Authorization Status
•
Component Name
7-14
7.4
•
Total Amount
•
Remarks
•
Value Date
Saving and Authorizing a Manual Disbursement
After entering the details for manual disbursement in the ‘Manual Disbursement Input’ screen
click Save icon to save the details.
To authorize the manual disbursement, click Authorize icon on the Application toolbar. The
account authorization screen is displayed.
The Branch and Account number is defaulted and the Xref number is generated by the system.
The following detail needs to be selected as required:
Message Generation
Check this box if you want swift messages to be generatedt either for the customer transfer or the
bank transfer along with a cover. The generated message can be biewed in the messages
browser. Even if the box is left unchecked you can go to messages browser at a later point of
time and generate the message.
If the message generation fails for some reason, the account is authorized and you have to go to
the browser to manually generate the swift message.
All other advices related to DSBR event are not generated at this point and you need to go to the
message browser to do the same.
After the swift message has been generated, if the mortgage account or the manual
disbursement is reversed, no message is sent from CL.
Note the following:
You cannot authorise a transaction from the ‘Mortgage Manual Disbursement’ screen in the
following cases:
7-15
• the contract has multilevel of authorization pending, the same will be done using the
‘Multilevel Authorization Detailed’ screen
• the level of authorization is greater than or equal to ‘N’
•
the ‘Nth’ or the final level of the users authorisation limit is less than the difference
between amount financed and sum of the limits of all the users involved in authorizing a
transaction, this case holds good when the ‘Cumulative’ field is checked in the ‘Product
Transaction Limits Maintenance’ screen
• the transaction amount is greater than the authoriser’s authorisation limit if the
‘Cumulative’ field is unchecked in the ‘Product Transaction Limits Maintenance’ screen
7.4.1 Accounting Entries
During the disbursement event, the Mortgage Account is debited while the credit entry will
depend on the settlement mode(s) selected for disbursal.
The entries will appear as follows:
Accounting Role
Amount Tag
Cr/Dr
LOAN_ACCOUNT
PRINCIPAL
Dr
CR_SETTL_BRIDGE
PRINCIPAL
Cr
7-16
8. Operations
8.1
Introduction
This chapter explains the various operations that can be performed on a mortgage account; the
most prominent being payments and amendments, funding, status change, simulation of
payments, rollover etc.
8.2
Mortgage Payments
The ‘Mortgage Payment’ screen allows you to make payments towards a mortgage. CL module
supports Multi Mode settlements. The various payment modes allowed are Cash/Teller, CASA,
Clearing, Electronic Pay Order, Credit Card, Debit Card, External Account, Internal Check and
Instrument. Multi mode settlement mechanism facilitates payment of mortgage installment.
Payment can be against any or all or a combination of the components due. Prepayments will
attract a pre-payment penalty to be charged. The payment computed by the system can be
overridden by the amount negotiated by the customer and a subsidy is captured as amount
waived. The amount accepted is either waived or capitalized. Depending on the mode selected,
additional payment details such as clearing house details, settlement products to be used if the
settlement is through another product of Oracle FLEXCUBE, etc are captured.
Penalties on Payment
Prepayment as well as delayed payment of mortgage can attract penalties.
• Prepayment Penalty - The customer can choose to prepay the mortgage amount, either
partly or as a whole before the due date. This may attract a Prepayment Penalty.
• Penalty on delayed payment - In case a customer defaults in paying back the mortgage
amount in time, then the amount becomes an over due and a penalty may be applicable.
However, the customer is allowed to negotiate with the bank in order to subsidize the
amounts due. Once the bank and the customer decide upon a mutually agreeable amount,
the actual payable amount is replaced by this new amount and will be used in lieu of the
original amount due.
If a mortgage payment results in a status change for the account, the system will update the
current status for the account in the ‘Derived Status’ field. During end-of-day batch processing, it
will update the ‘User Defined Status’ for the account with the worst status that is available for all
accounts and mortgages for this CIF and post the required accounting entries for the change.
The ‘Mortgage Payment’ screen captures payment details such as Payment Mode, Amount
Settled, Settlement Currency and Exchange Rate. The payment is against any of the mortgage
components such as principal, interest, late fee etc.
You can invoke the ‘Mortgage Payment’ screen by typing ‘MODPMNT’ in the field at the top right
corner of the Application tool bar and clicking on the adjoining arrow button.
8-1
To make a payment, click New icon in the toolbar and then capture the ‘Branch Code’, ‘Account
Number’, ‘Value Date’ and ‘Execution Date’.
Click ‘Populate Due’ button to view the dues against the account. After this, you can enter the
payment details. Click ‘Allocate’ button to allocate the settlement amounts across the various
components based on the ‘Schedule Order’ and ‘Liquidation Order’.
Click ‘Penalty Rates’ to view the UDEs related to Prepayment penalties. The negotiated rates can
be overridden. In case of Penal components, you can select the relevant UDEs and modify them.
Click View icon to view a list of lending rate codes and their values in the ascending order of rate
value.
Account Details
The following details are captured here:
Branch Code
Select the branch code of the account towards which the payment is made, from the adjoining
option list. A list of branch codes is displayed. Click on a value to select it.
Account Number
Select the customer’s account number by clicking the adjoining option list. A list of values is
displayed. Click on a value to select it.
Event Sequence Number
The system displays the event sequence number of the payment in the account’s life history.
8-2
Value date
Enter the date on which the payment affects the account balance in this field.
The value date can be a Back Valued, Current or Future Date.
Execution Date
This is the application date on which the payment is entered into the system. If the Execution date
is in the future, the payment is tanked and released on the Future Value date of the payment;
else, it is applied immediately as of the value date of the payment.
By default it is the current system date, but can be modified.
Collection Agent Identification
The collection agent assigned to the mortgage gets defaulted here during liquidation. If the
collection agent eligible for the fees is different, you can change the agent name here.
The collection agent assigned through the Assignment screen is still valid and the collection
agent assigned here is effective only for this particular liquidation. After Authorization the details
of the liquidation is passed into Collections module routines for the calculation of Collection Agent
Fee.
Amount to be Paid Back
The system displays the difference amount between the auctioned amount and the mortgage
closure amount. On auction of the mortgage property at a higher price than the required amount
to close the mortgage, the bank needs to pay the excess amount to the customer/legal heir.
Customer No
The system displays the Customer No of the account in this field.
Main Int. Rate
The rate value for the rate code maintained against the main interest UDE chosen is displayed
here.
Limit Date
Select the limit date from the available schedules that can be included as amount due by clicking
the adjoining option list. A list of schedule due dates for the account is displayed. Click on a value
to select it.
This option is allowed only if the installment option is selected.
Installment(s)
If you select this option then the amount due includes schedules till limit date. If not then the
amount due is the same as on the value date.
8-3
Prepayment of Amortized Mortgage
The following details are captured here:
Recomputation Basis
You can choose the recomputation basis for prepayment of amortized mortgage. The options
available are Recalculated Tenor or Change EMI. Choose the relevant basis from the list for
recomputation basis.
Recomputation Effective From
You can choose the date on which the prepayment becomes effective. You can start the
prepayment on the Value Date or Next Installment.
Payment Details
The following details are captured here:
Reversed
This option indicates that the settlement is reversed.
This option is disabled in the new payment mode.
Payment Mode
Specify the mode of mortgage payment by clicking the adjoining option list. A list of payment
modes is displayed. Click on a value to select it.
The payment modes are CASA, Cash/Teller, Instrument, External Account, Electronic Pay Order,
Internal Cheque, Clearing, Debit Card, and Credit Card.
Settlement Currency
Select the currency used for the specific payment mode by clicking the adjoining option list. A list
of currencies is displayed. Click on a value to select it.
Amount Settled
Specify the amount paid through the specified mode of payment in terms of the settlement
currency in this field.
The amount should be a valid amount and should not exceed the total amounts due; else it is
treated as a prepayment.
Mortgage Currency Equivalent
The system displays the amount settled in terms of the local currency in this field.
Exchange Rate
Specify the exchange rate to be used between the mortgage currency and settlement currency in
this field.
The exchange rate is defaulted but can be overridden. The final value should be within the
exchange rate variances maintained in the account preference.
8-4
Settlement Order
Each settlement is apportioned against a component due based on the Liquidation order. The
order in which the settlements are picked is ordinal as entered in the screen. Click ‘Set Comp’
button to view/change the component settlement details in the ‘Component Details’ screen.
For more details on the ‘Component Details’ screen refer section titled ‘Viewing Component
Settlement Details’ in this chapter.
During payments, based on the Witholding tax percent specified in the ‘Withholding Tax Pct’ in
the ‘Customer Maintenance’ screen, system internally calculates the applicable tax portion based
on the Settlement Amount and passes the accounting entries for the tax.
For more details on setting up Witholding tax percentage refer ‘Maintaining Customer Basic
Record’ section of ‘Maintaining Customer Information Files’ chapter of Core Entity User Manual
During MLIQ event, you need to input the Settlement Amount after discounting the tax amount
and the system allocates the amount to Interest component after adding the tax amount. In
addition, system also tops up the Settlement Amount by the total tax amount applicable.
During ALIQ event, the amount available in the customer’s settlement account is taken up as the
basis for allocation. In case the settlement account does not have full funds, the amount present
is taken up as customer portion and the relevant tax portion is added up on top of that.
The amount tag which is used to pass accounting entries corresponding to the tax portion for
MLIQ and ALIQ events is <Component name>_WHLD. For eg. MAIN_INT_WHLD
Settlement Details
Depending upon the mode of payment the following settlement details are captured:
For ‘CASA’:
• Settlement Branch
• Settlement Account
For ‘Credit Card’ and ‘Debit Card’
• Card No.
For ‘Clearing’
• Upload Source
• Instrument Number
• Clearing Product
• End Point
• Routing Number
• Clearing Bank
• Clearing Branch
• Sector Code
For ‘External Account’
• Upload Source
• PC Category
• Clearing Bank
8-5
• Clearing Branch
• External Account Name
• External Account Number
For ‘Electronic Pay Order’
• Upload Source
• PC Category
• Clearing Bank
• Clearing Branch
• External Account Name
• External Account Number
For ‘Internal Check’
• Instrument Number
• Settlement Branch
• Settlement Account
For ‘Instrument’
• Instrument Number
• Settlement Branch
• Settlement Account
For ‘Cash/Teller’
• Upload Source
• Settlement Product
After entering the payment details, click ‘Save’ icon to save the details. On saving the transaction
after entering all the required details in the system, the system validates the value of the
transaction amount against the following:
• Product transaction limit
• User Input limit
If the transaction currency and the limit currency are different, then the system converts the
amount financed to limit currency and checks if the same is in excess of the product transaction
limit and user input limit. If this holds true, the system indicates the same with below
override/error messages:
• Number of levels required for authorizing the transaction
• Transaction amount is in excess of the input limit of the user
On saving a manual payment towards a mortgage component (s), the online liquidation against
each such component follows the order of liquidation as specified through the ‘Component
Liquidation Order’ screen.
The system updates this saved transaction as an unauthorised transaction. To authorize an
account, click ‘Authorize’ icon on the Application toolbar.
8-6
Note the following:
You cannot authorise a transaction from the ‘Mortagage Payment’ screen in the following cases:
• the contract has multilevel of authorization pending, the same will be done using the
‘Multilevel Authorization Detailed’ screen
• the level of authorization is greater than or equal to ‘N’
•
the ‘Nth’ or the final level of the users authorisation limit is less than the difference
between amount financed and sum of the limits of all the users involved in authorizing a
transaction, this case holds good when the ‘Cumulative’ field is checked in the ‘Product
Transaction Limits Maintenance’ screen
• the transaction amount is greater than the authoriser’s authorisation limit if the
‘Cumulative’ field is unchecked in the ‘Product Transaction Limits Maintenance’ screen
Component Details
The following details are captured here:
Component Name
The system displays the component name in this field.
Currency
The system displays the currency of the component based on Mortgage currency and the
account in this field. If the component is based on a flat amount UDE then the UDE currency is
displayed.
Amount due
The system displays the amount due for the component in this field. It is generated based on the
account and component.
Adjustment Due
Adjustment due happens when there is a revaluation or when there is rate revision, according to
increase or decrease of rates.
Amount overdue
Here, the system displays the amount overdue for the component. It is generated based on the
account and component.
Amount not due
For the principal amount, Amount not due is the rest of principal that is due after the value date.
Hence any payment towards this constitutes a prepayment. This value is system generated
based on account and component.
Amount Paid
The system displays the actual amount paid against the component dues in this field.
When payments are allocated across dues, payment details are defaulted from the liquidation
order. But these details can be modified as per your preferences.
8-7
Amount Waived
Enter the amount waived by the bank after negotiations with the customer in this field.
Amount Capitalized
Enter the amount capitalized in this field.
8.2.1.1 Viewing Component Settlement Details
Each settlement is apportioned against a component due based on the Liquidation order. The
order in which the settlements are picked is ordinal as entered in the screen. Click ‘Set
Component’ button to view/change the component settlement details in the ‘Component Details’
screen.
8.2.2 Partial Payment
Partial payment is required to parameterize partial liquidation during auto liquidation process.
In the ‘Mortgage Product Preferences’ screen you can indicate whether partial liquidation is
allowed during auto liquidation of the mortgage or not. This preference set at the product level
gets defaulted at the account creation level also. But this option is allowed only if ‘Verify Funds’
option is selected. Auto Liquidation will check this option before carrying out partial liquidation viz.
before liquidating to the extent of availability during Verify Funds check.
If selected, the function proceeds with liquidation, else it is marked as unpaid.
8-8
Refer the section titled ‘Specifying Product Preferences’ in the ‘Defining Product Categories and
Products’ chapter of this User Manual for more details.
8.2.3 Payments Simulation
Mortgage payment simulation calculation function is used to arrive at an agreement with the
client. The ‘Payment Simulation’ screen displays the effect of making payments across
components across schedules. You can invoke this screen by typing ‘MODSIMPT’ in the field at
the top right corner of the Application tool bar and clicking on the adjoining arrow button. The
results are used to arrive at a negotiated amount that can be used to settle outstanding loss.
8-9
For more details on the field explanation refer section ‘Mortgage Payment’ in this chapter.
You can change specific UDE values to simulate the effect of changing prepayment penalty rates.
Payments can be saved from the simulator. Once the payment simulation is saved, if you enter
simulation account number in the payments screen and click on the ‘Populate Due’ button then
the system displays all the details entered in the payment simulation screen.
Only users with rights to input payments are allowed to save payments from the simulator.
Click ‘Simulate’ button to view the account details after the current payment. An account screen is
launched to view the updated account after the payment. You can also print an advice from the
simulation screen.
8.2.4 Back Dated Payments
Oracle FLEXCUBE supports back value dating only upto the last payment date. Only those back
dated payments whose value date is before the last payment date are allowed.
If the product preference allows for Allow back valued entries, then the following functionalities
are relevant:
• Oracle FLEXCUBE supports back dated payments till the Mortgage Initiation / Value date.
• Whenever a back valued event such as Principal Increase, Rate Change or Payment
Reversal is made, the system recalculates Interest based on the new conditions and
passes the difference as back valued adjustments.
• Back valued Adjustments (accruals and Liquidations) are passed on the same day.
• Entries passed will be as follows:
¾
Accrual Adjustments (for a Component COMP)
Case 1: Favorable Adjustment (Income earned)
Dr Back valued Interest Adjustment GL
COMP_BVADJ_INC
Cr Accrual Adjustment Income
COMP_BVRADJ_INC
Case 2: Unfavorable Adjustment (Expense)
Dr Accrual Adjustment Expense
COMP_BVRADJ_EXP
Cr Back valued Interest Adjustment GL
COMP_BVRADJ_EXP
Liquidation Adjustments
Dr Settlement AC
COMP_BVADJ_INC
Cr Back valued Interest Adjustment GL
COMP_BVADJ_INC
Dr Back valued Interest Adjustment GL
COMP_BVADJ_EXP
Cr Settlement Account
COMP_BVRADJ_INC
Back valued Adjustments are passed to the mortgage servicing account maintained at the
mortgage level.
8-10
8.2.5 Making Bulk Payments against Mortgage or Commitment
The ‘BulkPayments’ screen is provided to create bulk payments against a limit or commitment for
a mortgage account. The mortgage/commitment linked to the mortgage account for which the
prioritization rules are maintained, is considered for bulk payment.
Bulk payment is done for the mortgage accounts linked to an L/C for which the buk payment
option is checked. The bulk payment is always done for the current branch. The Bulk payment is
done only for the CL accounts belonging to the current branch from where bulk payments are
made. Bulk payment amount is allocated to the accounts linked to a mortgage/commitment
account. This allocation is done based on the Prioritization rules maintained for the L/C selected.
If a specific rule is not available for L/C reference for the branch, the ALL option is considered.
The payment is triggered based on the amount allocated per the prioritization rules.
To make the bulk payments for the accounts associated under an L/C allocated, invoke the
‘BulkPayments’ screen by typing ‘CLDBLKPT’ in the field at the top right corner of the Application
tool bar and clicking the adjoining arrow button.
The following details are specified for making the bulk payments under a mortgage/commitment
account:
Branch Code
This displays a valid branch code for making bulk payments. All the accounts associated to a
mortgage/commitment are marked for bulk payments in this branch.
Bulk Payment Reference
Specify the bulk payment refernce number for the particular bulk payment made.
Total Payment Amount
Specify the total payment amount available to be allocated across the due components/accounts
under a mortgage/commitment.
8-11
Currency
Specify a valid currency to be maitained as part of the bulk payment made. The adjoining option
list displays all the valid currency maintained in the system. You can choose the appropriate one.
Limit Date
Specify the date the limit line is attached to the mortgage/commitment.
Bulk Entity Type
Select the Bulk Entity type from the adjoining drop-down list. This list displays the following
values:
• Limit Line
• Commitment
Specify the type of entity for which bulk payments are made. If the bulk entity type is chosen as
limit line, you can then choose the credit line against which the payment needs to be made in the
field Bulk Entity. The liability ID linked to this limit is defaulted. Only valid limit lines linked to the
mortgage accounts in the current branch are displayed in the option list.
For the bulk entity type ‘Commitment’ the Commitment reference number is chosen from the
option list for the “Bulk Entity”. The customer id of the commitment is populated as the liability ID,
and the commitment branch is populated as the branch code. The bulk entity option list displays
only the commitments defined under the current branch.
Liability ID
The liability ID is defaulted based on the limit type selected as bulk entity. The customer ID of a
commitment is populated when the bulk entity type is selected as commitment.
Bulk Entity
Specify the bulk entity. If you have chosen the ‘Bulk Entity Type‘ as ‘Commitment’ the customer id
of the commitment is populated as the liability ID.
After specifying the Bulk Entity details and limit date, click the ‘Populate Due’ button. Payment
Details and Component Details options are enabled to list all active mortgage accounts (linked to
the L/C selected) and the component wise amount due respectively.
After providing the bulk payment amount, click ‘Allocate’ button to display the payment details and
component wise details with all the applicable accounts including the total amount due and total
amount allocated against each as per the bulk payment preference maintenance.
Payment Details
Specify the following details:
Reversed
You can reverse a payment done for single account involved in bulk payment. Check this box to
indicate that this payment should be reversed.
An override message gets displayed.
8-12
Account Number
Specify the account number.
Payment Mode
Select the payment mode from the drop-down list. This list displays the following values:
• CASA
• Cash Teller
• Clearing
• Instrument
• External Pay Order
• Credit Card
• Debit Card
• External Account Details
• Internal Cheque
Settlement Currency
Specify a valid settlement currency in which payment is to be made. This adjoining options list
contains all the valid settlement currencies maintained in the system. You can choose the
appropriate one.
Amount Settled
Specify the amount settled.
Mortgage Currency Equivalent
Specify the mortgage currency equivalent.
Exchange Rate
Specify the exchange rate.
Check list
This contains a check list screen for the bulk payment made. You need to specify the description
or any remarks if any.
Checked
Check this box to indicate if the check list details are to be maintained for the bulk payment made
Description
Specify a description of the check list item, which the bulk payment is checked against.
Remark 1
Specify remarks for the check list, if any.
Remark 2
Specify remarks for the check list, if any.
8-13
Remark 3
Specify remarks for the check list, if any.
Remark 4
Specify remarks for the check list, if any.
Remark 5
Specify remarks for the check list, if any.
Remark 6
Specify remarks for the check list, if any.
Remark 7
Specify remarks for the check list, if any.
Remark 8
Specify remarks for the check list, if any.
Remark 9
Specify remarks for the check list, if any.
Remark 10
Specify remarks for the check list, if any.
Settlement Branch
Specify a valid settlement branch. The adjoining option list displays all the valid settlement branch
maintained in the system. You can choose the appropriate one.
Settlement Account
Specify a valid settlement account. The adjoining option list displays all the valid settlement
account maintained in the system. You can choose the appropriate one.
Settlement Product
Specify the settlement product.
Instrument Number
Specify the instrument number.
End Point
Specify a valid end point. This adjoining option list displays all the valid end point maintained in
the system. You can choose appropriate one.
Card Number
Specify the card number
8-14
External Account Number
Specify the external account number.
External Account Name
Specify the external account name.
Clearing Bank
Specify a valid clearing bank. This adjoining option list displays all the valid clearing bank
maintained in the system. You can choose the appropriate one.
Clearing Branch
Specify the clearing branch.
Upload Source
Specify a valid upload source. This adjoining option list displays all the upload source maintained
in the system. You can choose the appropriate one.
Sector Code
Specify a valid sector code. This adjoining option list displays all the valid sector code maintained
in the system. You can choose the appropriate one.
Routing Number
Specify the routing number.
Settlement Reference Number
Specify the settlement reference number.
Component Details
Specify the following details:
Account Number
Specify the account number.
Component Name
Specify the name of the component.
Component Currency
Specify the component currency.
Amount Due
Specify the amount to be paid.
Amount Paid (Component Currency)
Specify the amount that is paid.
8-15
Amount Overdue
Specify the overdue amount.
Amount Waived
Specify the amount that is waived.
You can perform the following operations in this screen:
• Save
• Delete
• Authorize
Against each account populated, settlement fields are enabled to capture the details required for
the particular settlement mode that has been chosen against the account. The different modes of
payment applicable in the manual mortgage payment screen are made available here as well.
Multiple modes of settlement for the same account are not supported.
You can change the allocated amount after the automatic allocation. System validates the data
on saving to compare the total payment amount and the sum of amount settled against each
component with respect to limit currency.
8.2.5.1 Viewing Summary Records
You can view and amend details of a particular record by using the ‘Summary’ screen. You can
invoke this screen by typing ‘CLSBLKPT’ the field at the top right corner of the Application tool
bar and clicking on the adjoining arrow button.
8-16
To view a particular record double click on the desired record displayed in the list of records. The
required record is enabled for action.
8.3
Viewing Mortgage Payments Summary
You can view a summary of all Mortgage Payments, through the ‘Mortgage Payments Summary’
screen. You can invoke this screen by typing ‘MOSPMNT’ in the field at the top right corner of the
Application tool bar and clicking the adjoining arrow button. You can query based on all or any of the following criteria:
•
Account Number
•
Authorize Status
•
Branch
Click ‘Search’ button. The system identifies all records satisfying the specified criteria and
displays the following details for each one of them:
•
Account Number
•
Branch
•
Event Sequence Number
•
Value Date
•
Execution Date
•
Recomputation Basis
•
Recomputation Effective From
8-17
•
8.4
Installment
Mortgage Amendments
Once a Mortgage is entered and authorized, financial changes to the Mortgages can be done
through the ‘Value Dated Amendments’ screen. These amendments are based on an effective
date and hence are called Value Dated Amendments (VAM). You can invoke this screen by
typing ‘MODVDAMD’ in the field at the top right corner of the Application tool bar and clicking on
the adjoining arrow button.
Booking an amendment is called VAMB and Initiating is called VAMI. These are considered as
events in the life cycle of the Mortgage.
Value Dated Amendments supports the following functions:
• Modification of currency between UF and CLP. The UF conversion on any date uses the
effective date UF rate.
• When the above change in interest rate is completed, the accrual is recomputed. The
difference in accruals is accounted for in the current period on the booking date of the
change.
If these changes are required to be effective on a particular date, not maintained previously, a
fresh set of rates for that day is required to be maintained.
You can pick any active account from the Value Dated Amendments screen and apply the
amendments for that account. You can also view or modify the amendments that are not yet
applied for that account.
If the amendments result in a status change for the account, the system will update the current
status for the account in the ‘Derived Status’ field. During end-of-day batch processing, it will
update the ‘User Defined Status’ for the account with the worst status available for all accounts
and mortgages for this CIF and post the required accounting entries for the change.
For more details on the field explanation refer section ‘Creating a Mortgage Account’ in ‘Account
Creation’ chapter of this User Manual.
8-18
8.4.1 Amendments Tab
The following detail is displayed here:
Effective Date
The effective date of the various amendments done to the Mortgage account is displayed here.
8.4.1.1 Viewing and Modifying Existing Amendments
In order to view or modify existing amendments, query for the required account number.
Select the corresponding effective dates of the amendment and click the ‘View/Modify’ button.
The Account Details tab is displayed where you can view/modify the existing amendments.
8.4.2 Account Details Tab
Specify the account number for which the amendment needs to be done and then ‘Unlock’ the
record. In the New Amendment frame specify the Effective Date. Click the ‘Create New
Amendment’ button in order to make new amendments to mortgages. The Account Details tab is
displayed where you can create the new amendment.
From this screen, you can modify the amount financed, which specifies the increase in amount,
Rate or Principal effective a value date, and also the maturity date. On saving the transaction
after entering all the required details in the system, the system validates the value of the
transaction amount against the following:
• Product transaction limit
• User Input limit
If the transaction currency and the limit currency are different, then the system converts the
amount financed to limit currency and checks if the same is in excess of the product transaction
limit and user input limit. If this holds true, the system indicates the same with below
override/error messages:
• Number of levels required for authorizing the transaction
• Transaction amount is in excess of the input limit of the user
8-19
Once you specify the amendments, the relative changes with regard to the same can be viewed
in the other tabs of the Screen.
You can also select the re-computation basis for amendments from this screen. For example, if
the re-computation basis is Change Installment, the amendments are applied by changing the
Equated Monthly Installments keeping the tenor constant. If re-computation basis is Change
Tenor, then the tenor is varied by keeping Installment constant.
Following are the amendments to the Value date effective mortgages accounts that you can
perform through this screen:
• Value Date based changes to the Principal
• Value Date based changes to the Rates
• Value Date based changes to the Tenor of the Mortgage
• Changes to other parameters
You can change the Mortgage Tenor, Rate or Principal effective a Value Date from these
screens. It also displays the schedules of the account.
The following information is captured:
Effective Date
This is the date as of which the changed values should be applicable.
Main Int Rate
The rate value for the rate code maintained against the main interest UDE chosen is displayed
here.
Amount Waived
Specify the amount which can be provided as the discount to the customer. This will be waived
from the charge computed. This amount can not be greater than the charge amount.
Click view icon to view a list of lending rate codes and their values in the ascending order of rate
value.
8-20
8.4.3 Components Tab
In this tab you can modify the schedule preferences of your account. Select the components that
you wish to modify from the list provided. You can amend the details of the selected component,
after you click the ‘Edit’ button. The schedules are defaulted from Product maintenances at the
time of account opening.
While making modification to schedule, follow the steps given below:
• Bullet schedule as well as end dates of schedules should be deleted before any
amendment.
• If you want to use irregular schedule amounts instead of normal linear flow you need to
maintain each schedule date separately.
• If you insert any schedule do not add end date.
• If number of schedules is ‘1’ for the particular schedule record, then the frequency should
be ‘daily’.
Click ‘Explode’ button once you finalize your changes on the schedule. System calculates the
missing parameters based on Product preferences.
You can modify future dated schedules only.
8-21
8.4.3.1 Amending Payment Mode Details
You can view and amend the payment mode details during value dated amendment of mortgage
accounts. Click ‘Payment Mode Details’ button from the Components tab.
You can modify the credit settlement mode details as given below:
You can modify the following credit settlement mode details:
Exchange Rate
You can modify the exchange rate. For a customer availing any Relationship Pricing scheme, the
customer specific exchange rate derived by adding the original exchange rate and the customer
spread maintained for the relationship pricing scheme gets displayed here.
If Relationship Pricing is not applicable, Exchange Rate will be the same as the Original
Exchange Rate.
Negotiated Cost Rate
You can modify the negotiated cost rate that should be used for foreign currency transactions
between the treasury and the branch. You need to specify the rate only when the currencies
involved in the transaction are different. Otherwise, it will be a normal transaction.
Negotiated Reference No
You can modify the reference number that should be used for negotiation of cost rate, in foreign
currency transaction. If you have specified the negotiated cost rate, then you need to specify the
negotiated reference number also.
You can view and modify the debit settlement mode details as given below:
8-22
You can modify the following debit settlement mode details:
• Exchange Rate
• Negotiated Cost Rate
• Negotiated Reference Number
For further details on these fields, refer to the details given above on credit settlement mode
amendment.
8.4.4 Charges Tab
In order to calculate the charges that we would like to levy on an account, we have to specify the
basis on which we would like to apply charges.
The Charges tab is displayed where you can view/modify the charges to be levied on the
account.
8-23
You can capture the following details in this screen:
Amt. Waived:
The amount displayed here is the amount that needs to be waived as the discount offered to the
customer.
For more details and the field explanation of each tab, refer to the section ‘Creating a Mortgage
Account’ in ‘Account Creation’ chapter of this User Manual.
8.4.5 Saving and Authorising Mortgage/Commitment Account
You have to save an amended mortgage account after entering all the required details in the
system. Click Save icon on the Toolbar or choose ‘Save’ from the Actions menu to save an
account. The system updates this as an unauthorised account. To authorize an account, click
‘Authorize’ icon on the Application toolbar.
Note the following:
You cannot authorise a transaction from the ‘Mortagage Amendments’ screen in the following
cases:
• the contract has multilevel of authorization pending, the same will be done using the
‘Multilevel Authorization Detailed’ screen
• the level of authorization is greater than or equal to ‘N’
•
the ‘Nth’ or the final level of the users authorisation limit is less than the difference
between amount financed and sum of the limits of all the users involved in authorizing a
transaction, this case holds good when the ‘Cumulative’ field is checked in the ‘Product
Transaction Limits Maintenance’ screen
• the transaction amount is greater than the authoriser’s authorisation limit if the
‘Cumulative’ field is unchecked in the ‘Product Transaction Limits Maintenance’ screen
8-24
8.5
Amending Commitments
Once a Commitment is entered and authorized, changes to the Commitment account can be
done through the ‘Commitment Amendments’ screen. These amendments are based on an
effective date and hence are called Value Dated Amendments (VAM). You can invoke this screen
by typing ‘MODCOMVD’ in the field at the top right corner of the Application tool bar and clicking
on the adjoining arrow button.
On saving the amended transaction, the amount financed is validated against the product
transaction limit and the user input limit maintained in the system. The system displays an
appropriate override/error message if the amount exceeds the allowed input limit. It also indicates
the level of authorisation required if the amount financed is in excess of the transaction limit
maintained.
The system converts the amount financed using the standard mid rate to the transaction limit
currency and check against the transaction limit amount maintained for the product if the
transaction currency is different from the transaction limit currency.
The system updates this amended commitment as an unauthorised transaction. To authorize an
account, click ‘Authorize’ icon on the Application toolbar.
Note the following:
You cannot authorise a transaction from the ‘Mortagage Commitment Amendments’ in the
following cases:
• If the account has multilevel of authorization pending
• if the level of authorization is greater than or equal to ‘N’ and if the authorisation limit of the
authoriser is less than the difference of account value and sum of authorisation limit of
authorisers (if multiple users are authorizing the account) involved in authorization.
• If the transaction amount is greater than the authoriser limit in case of single authoriser.
8-25
For more details on the field explanation of each tab refer section ‘Creating a Commitment
Account’ in the ‘Account Creation’ chapter of this User Manual.
8.5.1 Viewing Mortgage Commitment Amendments Summary
You can view a summary of all Mortgage Commitment Amendments, through the ‘Mortgage
Commitment Amendment Summary’ screen. You can invoke this screen by typing ‘MOSCOMVD’
in the field at the top right corner of the Application tool bar and clicking the adjoining arrow
button. You can query based on all or any of the following criteria:
•
Account Number
•
Customer Id
•
Value Date
•
Amount Financed
•
User Defined Status
•
Account Status
•
Branch
•
Product Code
•
Maturity Date
•
Currency
•
Alternate Account Number
•
Authorization Status
Click ‘Search’ button. The system identifies all records satisfying the specified criteria and
displays the following details for each one of them:
8-26
8.6
•
Account Number
•
Branch
•
Customer Id
•
Product Code
•
Value Date
•
Maturity Date
•
Amount Financed
•
Currency
•
User Defined Status
•
Alternate Account
VAMI Simulation
Value Dated Amendment simulation calculation function is used to get the details of the VAMI
charge before applying the same. You can invoke this screen by typing ‘MODSIMVD’ in the field
at the top right corner of the Application tool bar and clicking on the adjoining arrow button.
The Value Dated Amendment Simulation screen is similar to ‘Amendments’ screen.
For more details on the field explanation refer section ‘Creating a Mortgage Account’ in ‘Account
Creation’ chapter of this User Manual. Also refer ‘Mortgage Amendments’ section in this chapter.
8.6.1.1 Maturity Date Change
The Amendment of the Mortgage account maturity date, effective on a certain date can be
performed through this function. Future schedules are affected based on the effective date. This
assists in providing schedules as per the customer’s choice. Hence, even if an extension is
sought, the interest increase in the installment can be postponed till a certain period to facilitate
customer’s liquidity situation.
8.6.1.2 Version Creation
Version numbers are created for a mortgage account during any one of the following three
instances:
• When amendments made to the Account parameters – Principal, Rate and Tenor
8-27
• Status change of the product
• Rollover of the Mortgage product
8.7
Viewing Mortgage VAMI Summary
You can view a summary of all Mortgage VAMIs, through the ‘Mortgage VAMI Summary’ screen.
You can invoke this screen by typing ‘MOSVDAMD’ in the field at the top right corner of the
Application tool bar and clicking the adjoining arrow button. You can query based on all or any of the following criteria:
•
Account Number
•
Customer Id
•
Value Date
•
Amount Financed
•
User Defined Status
•
Account Status
•
Branch
•
Product Code
•
Maturity Date
•
Currency
•
Alternate Account Number
•
Authorization Status
8-28
Click ‘Search’ button. The system identifies all records satisfying the specified criteria and
displays the following details for each one of them:
8.8
•
Account Number
•
Branch
•
Customer Id
•
Product Code
•
Value Date
•
Maturity Date
•
Amount Financed
•
Currency
•
User Defined Status
•
Alternate Account
Mortgage Reassignment
Oracle FLEXCUBE allows you to change the main debtor of a mortgage through the process of
reassignment. You can achieve this through the ‘Reassignment’ screen. This screen is similar to
the ‘Account Details’ screen. To invoke the screen, type ‘MODNOVDT’ in the field at the top right
corner of the Application tool bar and click the adjoining arrow button.
8-29
In this screen, you need to clear all details by pressing F7. Then you can specify the account
number and click on F8. The system displays all the account details of the chosen account. You
can change the Customer Id of the primary applicant in the ‘Reassignment – Account Details’
screen.
Customer ID (Primary Applicant)
The CIF ID of the primary debtor of the mortgage account is displayed here. You can change it by
selecting another CIF ID from the option list. This in effect means the debtor will be changed.
Customer ID (Other Applicants)
The CIF IDs of the co-applicants for the original mortgage are displayed here. You can change
them by selecting other CIF IDs from the option list.
In the ‘Reassignment – Linkages’ screen, you can change the following details:
•
Linkage Type
•
Customer ID
•
Linked Reference Number
•
Linkage Amount
•
Secured Portion
All these details get displayed in the corresponding fields. You can modify the same.
8.8.1 Amendment
During Value Dated amendments, you can also change the following data:
•
Maturity Date
•
Interest Rate
•
Installment Dates
However, you cannot change the Mortgage Account Number.
As a result of reassignment, limit utilizations against the old customer will be reduced and those
towards the new customer will be increased by altering the utilizations.
8-30
8.9
Viewing Mortgage Reassignment Summary
You can view a summary of all Mortgage Reassignments, through the ‘Mortgage Reassignment
Summary’ screen. You can invoke this screen by typing ‘MOSNOVDT’ in the field at the top right
corner of the Application tool bar and clicking the adjoining arrow button. You can query based on all or any of the following criteria:
•
Account Number
•
Customer Id
•
Value Date
•
Amount Financed
•
User Defined Status
•
Account Status
•
Branch
•
Product Code
•
Maturity Date
•
Currency
•
Alternate Account Number
•
Authorization Status
8-31
Click ‘Search’ button. The system identifies all records satisfying the specified criteria and
displays the following details for each one of them:
•
Account Number
•
Branch
•
Customer Id
•
Product Code
•
Value Date
•
Maturity Date
•
Amount Financed
•
Currency
•
User Defined Status
•
Alternate Account
8.10 Mortgage Renegotiation
The customer can ask for re-negotiation of the written-off mortgage. Or when an account
becomes delinquent, the bank may negotiate with the customer. Negotiation may result in any of
the following:
•
The customer may repay the mortgage.
•
The mortgage is negotiated completely. In this case a new mortgage may be opened.
•
The customer may pay the partial mortgage amount and the bank may condone the rest.
•
The customer and bank may renegotiate part of the mortgage and the rest may be
condoned.
•
In the worst case scenario, if the customer is unable to pay back any portion the
mortgage amount, the bank may consider it as Condonation and close off the mortgage.
In Oracle FLEXCUBE, renegotiation is treated as a separate manual operation. Whenever a
mortgage is renegotiated, it results in the creation of a new version of the existing mortgage. The
system then recalculates the schedules. If the customer makes any payment towards the writtenoff mortgage, they are also considered.
Once the mortgage gets transformed into a new mortgage, it is affected by maintaining Bridge
GLs.
Renegotiation can result in just varying interest rates or maturity dates of the original mortgage
along with capitalization of the outstanding interest.
You can perform mortgage renegotiation through the ‘Re-Negotiation’ screen. To invoke the
screen, type ‘MODRENOG’ in the field at the top right corner of the Application tool bar and click
the adjoining arrow button.
8-32
This screen is similar to the one used for manual rollover.
8.11 Viewing Account Version History and Reversal
Multiple versions created for a mortgage account can be viewed through the ‘Account–View
History’ screen. Reversal of operations to previous version is supported for Rollovers and
Amendments that create a new version. You can invoke this screen by typing ‘CLDACHST’ in the
field at the top right corner of the Application tool bar and clicking on the adjoining arrow button.
8-33
The CL module has the following features:
• Oracle FLEXCUBE CL module Mortgage accounts have in-built versioning features.
• Contract parameters and hence the mortgage behaviour are modified based on operations
such as Value dated amendments, manual status changes, Contract amendments,
Rollovers etc, thus creating a new version.
• Any version of the mortgage can be backtracked sequentially to a previous configuration
by saving the versions in history and by changing the events diary appropriately.
• This can be viewed by scrolling to the appropriate version number.
• Oracle FLEXCUBE supports an incremental reversal of contract version. While reversing,
all the events will be reversed and the balances are appropriately affected. This is,
however, not applicable to versions created due to manual status changes.
• When you click Reversal icon in the toolbar, the options presented are Entire Contract and
Current Version.
• For a single step reversal, all authorized entries and maintenances are reversed through
this operation. A new version is created and a new event REVV – Reverse Version is
triggered.
• It is also possible to forward track the same changes after back tracking
• If the entire contract is to be reversed, REVC fires when the version to be reversed is the
First version.
8-34
Refer the ‘General Maintenance’ Chapter of this User Manual for further information on the
‘Account Details Screen’ and ‘Version Control’.
8.12 Manual Status Change
The status change can also be triggered manually. The status change can also be done with a
value date which can even be in the past.
You can invoke the ‘Manual Installment Status Change’ screen by typing ‘MODMSTCH’ in the
field at the top right corner of the Application tool bar and clicking on the adjoining arrow button.
The following details are captured here:
Branch Code
Enter the branch code of the account for which the status will be manually changed in this field.
Account Number
Select the account number of the account which needs a status change in this field by clicking the
adjoining option list. A list of values is displayed. Double click on a value to select it.
Current Status
The system displays the current status of the Account in this field.
New Status
Select the new status of the account by clicking the adjoining option list. A list of values appears.
Double click on a value to select it.
The valid values are active, dormant, closed and so on.
This is a mandatory input.
8-35
Effective Date
Enter the date of the new status for the account comes into effect in this field. This is a mandatory
input.
When a change in status is done manually for an account, the system will post the required
accounting entries for the change immediately.
8.12.1 Changing Mortgage Installment Status
You can manually change the status of mortgage installments using ‘Mortgage Manual
Installment Status Change’ screen. To invoke the screen, type ‘MODISTCH’ in the field at the top
right corner of the Application tool bar and click the adjoining arrow button.
You can capture the following details on this screen:
Branch Code
The system displays the branch code to which you have logged in. You cannot modify this.
Account Number
Specify the mortgage account number which requires installment status change. The option list
displays all valid account numbers applicable. Choose the appropriate one.
Component Name
Specify the name of the component.
Schedule Due Date
Specify the due date of the current schedule. Click the adjoining option list to choose one.
Effective Date
The system displays the effective date of the new status. However, you can modify this. Click the
adjoining date button to choose the effective date from the calendar.
Current Status
The system displays the current installment status.
8-36
New Status
Specify the new installment status. The option list displays all valid statuses applicable. Choose
the appropriate one.
Once you have captured the details, click ‘Change’ button. The system updates the status of the
installment for the selected account.
8.13 Linking Mortgage to Savings Account
Using Oracle FLEXCUBE, you can offset the balance in the savings account of a customer
against the amount owed on his / her mortgage mortgage account. In effect, interest is charged
on the difference amount only.
For example, a customer has a balance of £20,000 in savings account. He also has a mortgage
of £100,000. This customer may apply for an offset mortgage UK account. If granted, the
customer needs to pay interest only for an amount of £80,000, which is the difference of the
mortgage amount and the savings account balance.
In order to manage this feature, you need to link the mortgage account to a savings account of
the same customer. Initially, define a simple interest component ‘Savings’ with ‘CUSTAC_BAL’ as
its basis element. Choose ‘INTEREST_RATE’ as the Rate to Use. The formula for the component
needs to be set as given below:
@SIMPLE (CUSTAC_BAL, (INTEREST_RATE), DAYS, YEAR, COMPOUND_VALUE)
The system uses the calculation type ‘Savings’ at the retail lending product level for interest
calculation on the value dated balance of the savings account.
The system computes EMI for the mortgage account based on the actual amount financed,
applying regular interest rate. Apportionment of Principal and Interest is based on the savings
amount, i.e. the interest earned by the CASA account based on the value dated balance.
Precisely, the system computes interest for the difference between actual mortgage amount and
the savings account balance.
Example
Consider a mortgage with the following details:
Mortgage Amount
4500000 USD
Rate of Interest
10%
Tenor
240 months
EMI computed based on the above details = 43426 USD
Interest for 450000 USD for the first month = 37500 USD
Principal for the first month = 5926 USD
Now, assume that the balance in CASA account is 5000 USD in the first month of repayment.
Interest earned by the savings amount @ 10% = 42 USD
In case of manual liquidation, apportionment of principal and interest will happen as shown below:
The interest amount is offset with the interest earned by the savings component. That is INTEREST
= 37500 – 42
8-37
= 37458 USD
Principal is inflated by the interest earned by the savings component thereby retaining the EMI amount as
shown.
PRINCIPAL
= EMI – INTEREST
= 43426 – 37458
= 5968 USD (or 5926 +42 = 5968 USD)
In case of auto liquidation, system settles the dues of interest and principal components. The system will
further internally trigger an additional payment based on the CASA accrued amount and thereby pre-paying
the principal, which leads to the regeneration of future schedules. Observe the following illustration.
EMI computed based on the details = 43426 USD
Interest on 450000 for the first month = 37500 USD
Principal for the first month = 5926 USD
Assume that the CASA account balance for the first month is 5000 USD.
The interest earned by the savings amount @ 10% = 42 USD
Here, Interest amounts to 37500 USD and Principal amounts to 5926 USD.
Now, 42 USD will be paid as the Principal Pre-payment.
The principal component paid is inflated because of the balance in the CASA account. Hence, subsequent
schedules will also be impacted. On re-computation, the system reschedules the maturity of the mortgage to
an earlier date.
Accounting entry for the above transaction is as follows:
ACCR
•
•
MAIN_INT
Dr Receivable
Cr Income
: 37500
: 37500
Savings
Dr Income
Cr Receivable
: 42
: 42
During liquidation, the netted balance in the general ledgers will be as shown below:
Income Cr Balance
: 37458
Receivable Dr Balance
: 37458
Liquidation amount of 43426 USD will be taken as the EMI amount. Entries in case of manual liquidation will
be as shown:
Dr Customer Account
: 43426
Cr Receivable
: 37458 (37500 - 42)
Cr Asset
: 5968 (5926 + 42)
In case of auto liquidation, entries will be as shown:
Dr Customer account 43426
Cr Receivable 37500
Cr Asset 5968 (5926 + 42)
Excess principal paid (42 USD) will be treated as prepayment towards the principal. The system will recompute the schedule accordingly at the time of liquidation.
8-38
The system allows you to set only one savings component for a product, which is taken as the
offset of main interest component. Debit settlement details of the savings component are the
place holders for the linked CASA account.
You cannot link accounts with overdraft facility to the savings component. However, overdraft
facility can be specified at the account class level. The account folding under such account class
inherits the attribute.
The liquidation order at the product level does not list savings components. However, accrual is
required for the savings component also. It does not have any schedules as well. On the
liquidation date, the system frames schedules for the savings component, based on the accrual
till date.
For manual payments, entire prepayment impact including savings component contribution is
based on the prepayment re-computation basis specified at the time of payment. For automatic
liquidation, re-computation is set as ‘Change Tenor’ by default.
Retrospective benefits are passed to the customer in the current liquidation cycle. This will not
impact the liquidated schedules. The system accounts back-value dated entries to the savings
account in the current liquidation schedule itself. For instance, if there is a back dated credit to the
savings account which results in an increase in the interest earned by savings, the system
considers the additional interest during liquidation of the current schedule.
Similarly, for non amortized mortgages, the interest earned by the savings account is applied as a
payment towards the principal component.
During value dated amendments of an account, you cannot change the debit settlement details of
the savings component. Also, a CASA account linked to a loan account cannot be closed unless
the loan account is liquidated.
The system will not allow you to link the same CASA account to more than one loan accounts.
You can link a CASA account and a loan account only if they belong to the same customer.
However, these accounts can be in different currencies also.
System will calculate the savings interest only on the minimum of PRINCIPAL_EXPECTED and
value dated balance of the CASA account.
For details on maintaining system data elements, please refer to the chapter ‘Maintaining System
Data Elements’ in ‘Interest and Charges’ user manual.
8.14 Checking Customer Existence Details of Mortgages
On authorizing a ‘Reverse Mortgage Loan’ creation, the details of the authorized contract will be
displayed in the ‘Customer Existence Check’ screen. For an authorized contract, the Till Date will
be same as the value date of the reverse mortgage loan. You can check the customer existence
details of a mortgage in the ‘Mortgage Customer Existence Check’ screen. In this screen, you can
verify whether the customer is alive or not before the disbursement. You can invoke this screen
by typing ‘MODCUSCH’ in the field at the top right corner of the Application tool bar and clicking
the adjoining arrow button.
8-39
You can specify the following details:
Branch Code
Specify the branch code of the bank.
Account
Specify the account for which the customer existence check has to be done.
Till Date
Specify the date till the disbursement should be allowed. Till date should be greater than the
disbursement date.
Last n annuities are not disbursed in a given reverse mortgage loan contract if the 'Stop
Disbursement' option is checked or 'Till Date' is not updated due to lack of information or proof.
And, if the ‘Stop Disbursement’ option is unchecked in Value dated amendment or 'Till Date' is
changed to some future date, then the system will disburse all n annuities in the EOD or BOD.
Remarks
Specify the remarks about the customer verification.
8-40
8.15 Viewing Mortgage Account Details
You can view a summary of all Mortgage Customer Existence Check Summary, through the
‘Mortgage Customer Existence Check Summary’ screen. You can invoke this screen by typing
‘MOSCUSCH’ in the field at the top right corner of the Application tool bar and clicking the
adjoining arrow button. You can query based on all or any of the following criteria:
•
Authorization Status
•
Account
•
Record Status
•
Branch Code
Click ‘Search’ button. The system identifies all records satisfying the specified criteria and
displays the following details for each one of them:
•
Authorization Status
•
Record Status
•
Account
•
Branch Code
•
Till Date
8-41
8.16 Rollover Operations
The rollover preferences and rollover type for a mortgage account are specified at the time of
setting up a product. In the product screen, you have the option to rollover the account manually
or instruct the system to do an automatic rollover. You can also specify the type of rollover; the
options available are custom and special. When a mortgage is rolled over, a schedule is
defaulted depending upon the UDE type and the schedule basis specified in the product screen.
Refer to the Products Chapter for more details on rollover specifications for mortgage accounts.
The rollover preferences specified at the product level are defaulted in the accounts screen at the
time of mortgage account creation.
Refer to the Account Creation chapter for more details on rollover specifications for mortgage
accounts.
CL module has a special operations screen to support manual Rollover of accounts. This screen
provides facility to pay off dues on the mortgage and also options to rollover the unpaid amounts
for a new tenor with new mortgage terms.
If the Rollover is a simple maturity extension with or without components (Outstanding Principal,
Interest etc) capitalized, then the ROLL event is fired. However, if the Rollover is a result of
Renegotiation and Restructuring of the mortgage then the respective events are fired.
Special Rollovers involve a change in the Mortgage currency, reassignment of the Mortgage
customer, creation of a new mortgage with same reference number as the original mortgage and
waiver of outstanding mortgage. These are supported by events that fire the respective
accounting entries.
The special Rollover Event is SROL and Renegotiation of a mortgage is RNOG. The event
entries to be maintained are displayed in the product defaulting.
8.16.1 Capturing Manual Rollover Details
You can invoke the ‘Manual Rollover’ screen by typing ‘MODMROLL’ in the field at the top right
corner of the Application tool bar and clicking on the adjoining arrow button.
8-42
Query for the account number that needs to be rolled over and then click New icon in the toolbar.
Then, click on the ‘Populate Outstanding’ button. The system will display the outstanding against
each component for the account. You can then specify the rollover details such as ‘Liquidation
Amount’, ‘Settlement Details’ etc. Then, click ‘Allocate’ button to actually allocate the settlements
against the components involved.
8.16.1.1
Rollover Renegotiation Tab
You can specify the following details in the Manual Rollover screen:
Exec Date
Select the transaction date of the rollover in this field.
Value Date
Select the value date of the rollover in this field.
Product code
Select the new product of the account due to Special Rollover, from the adjoining option list.
Double click on a value to select it.
Currency
Select the new currency of the account due to Special Rollover from the adjoining option list.
Double click on a value to select it.
8-43
Customer ID
Select the customer Id from the list of values provided. Double click on a value to select it.
Component Details
The following details are captured here:
Component Name
The system displays the name of the component that is being rolled over / paid in this field.
Amount Outstanding
The system displays the outstanding portion of the component in this field.
Liquidation Amount
Enter the amount that is paid as part of the Rollover in this field.
Principal Increase Amount
Enter the amount that is rolled over for the component in this field.
Waive Amount
Enter the amount that is waived for the component as part of the rollover in this field.
Debit Details/Credit Details
The following details are captured here:
Mode
Select the mode in which the settlement should be done from the adjoining drop-down list. The
list displays the following values:
• CASA
• Credit Card
• Clearing
• Cash/Teller
Settlement Mode Ccy
Select the currency in which a particular settlement is to be made from the adjoining option list.
Double click on a value to select it.
The options include list of currencies allowed for the product, branch and category.
Amount Settled
Enter the amount to be disbursed in this mode as a part of the disbursement.
The amount should be less than the difference between Disbursement amount and the
amount settled through other modes. The amount should be in terms of the mode currency.
8-44
Mortgage Ccy Equiv
The system displays the amount in terms of the mortgage currency in this field.
Exch Rate
The Exchange rate is defaulted from the standard maintenance. But it can be overridden within
allowed variance levels.
For Dr Settlement, the following details can be captured depending on the settlement mode:
For ‘CASA’
• Settlement Branch
• Settlement Account
For ‘Credit Card’ and ‘Debit Card’
• Card No.
For ‘Clearing’
• Upload Source
• Instrument Number
• Clearing Product
• End Point
• Routing Number
• Clearing Bank
• Clearing Branch
• Sector Code
• Clearing House
For ‘External Account’
• Upload Source
• PC Category
• Clearing Bank
• Clearing Branch
• External Account Name
• External Account Number
• Clearing House
For ‘Electronic Pay Order’
• Instrument Number
For ‘Internal Check’
• Instrument Number
• Settlement Branch
• Settlement Account
For ‘Instrument’
• Instrument Number
• Routing Number
8-45
• End Point
For ‘Cash/Teller’
• Upload Source
For Cr Settlement, the following details can be captured depending on the settlement mode:
For ‘CASA’
• Settlement Branch
• Settlement Account
For ‘Clearing’
• Upload Source
• Instrument Number
• Clearing Product
• End Point
• Routing Number
• Clearing Bank
• Clearing Branch
• Sector Code
• Clearing House
For ‘External Account’
• Upload Source
• PC Category
• Clearing Bank
• Clearing Branch
• External Account Name
• External Account Number
• Clearing House
For ‘Instrument’
• Instrument Number
• Routing Number
• End Point
For ‘Cash/Teller’
• Upload Source
Negotiated Cost Rate
Specify the negotiated cost rate that should be used for foreign currency transactions between
the treasury and the branch. You need to specify the rate only when the currencies involved in
the transaction are different. Otherwise, it will be a normal transaction.
Negotiated Reference Number
Specify the reference number that should be used for negotiation of cost rate, in foreign currency
transaction. If you have specified the negotiated cost rate, then you need to specify the
negotiated reference number also.
8-46
Oracle FLEXCUBE books the online revaluation entries based on the difference in exchange
rate between the negotiated cost rate and transaction rate.
The CL Module supports the following rollover functions:
Special Rollover
Only manual product and/or currency modifications are allowed during rollover. This is termed as
Special rollover.
Following are the two events for special rollover:
SROL – Special Rollover Liquidation
This event has normal liquidation entries as well as the entries to liquidate the amount to be rolled
over into suspense.
Amount Tag
<component_name>_SROL
Accounting Role
SROL_SUSPENSE
The entries defined are:
Dr/Cr
Role
Amount Tag
Dr
DR_SETTLE_BRIDGE
PRINCIPAL_LIQD
Cr
LOAN_ACCOUNT
PRINCIPAL_LIQD
Dr
DR_SETTLE_BRIDGE
MAIN_INT_LIQD
Cr
MAIN_INTREC
MAIN_INT_LIQD
Dr
SROL_SUSPENSE
PRINCIPAL_SROL
Cr
LOAN_ACCOUNT
PRINCIPAL_SROL
Dr
SROL_SUSPENSE
MAIN_INT_SROL
Cr
MAIN_INTREC
MAIN_INT_SROL
REOP – Re-Opening of Mortgage Account with new product and/or currency
This event has entries to Dr Mortgage Account and Cr the Dr Settlement suspense. The
PRINCIPAL amount tag is used for these entries.
8-47
The entries defined are:
Dr/Cr
Role
Amount Tag
Dr
LOAN_ACCOUNT
PRINCIPAL
Cr
SROL_SUSPENSE
PRINCIPAL
Dr
LOAN_ACCOUNT
PRINCIPAL_INCR
Cr
CR_SETTLE_BRIDGE
PRINCIPAL_INCR
The above two events are triggered whenever Product and/or currency is changed during manual
rollover.
The manual rollover screen is used to carry out special rollover. The current product code and
currency are shown on the manual rollover tab. If any of this were modified then SROL event is
triggered, which in turn triggers REOP, else, a normal ROLL event is triggered.
In case of Product Change, SROL event of the previous product is triggered and REOP event
of the new product is fired. Hence the SROL_SUSPENSE maintained should be same across all
products.
Pre Mature Rollover
During manual rollover a Rollover Value Date is captured, which is a date prior to the maturity
date to pre maturely rollover the mortgage. The interest is calculated up to the rollover value date.
You can choose to liquidate or roll any component. Special Rollover is also allowed.
Back Value dated Rollover
The rollover value date may be used to input back valued rollovers.
Rollover Booking
The ROLB (Rollover Book) event facilitates processing of future dated rollover instructions. A
manual rollover, to be executed in the future can be created by giving a future execution date. For
such rollover instructions, the ROLB event is fired. The rollover instructions are applied on the
execution date. All the settlement entries are passed on the execution date with the rollover value
date.
Rollover Tenor
Select any of the following values:
• Days – The Tenor for the Rolled Contract would be taken in terms of days.
Example: Value Date: 01-Jan-2005; Maturity Date: 01-Apr-2005; Tenor: 90 days
New Rolled Maturity Date: 30-Jun-2005
• Months – In Terms of Months
Example: Value Date: 01-Jan-2005; Maturity Date: 01-Apr-2005; Tenor: 3 Months
New Rolled Maturity Date: 01-Jul-2005
8-48
• Quarters – In Terms of Quarters
Example: Value Date: 01-Jan-2005; Maturity Date: 01-Apr-2005; Tenor: 3 Months (1 Quarter)
New Rolled Maturity Date: 01-Jul-2005
• Semiannual – In Terms of Semi Annuals
Example: Value Date: 01-Jan-2005; Maturity Date: 01-Apr-2005; Tenor: 6 Months (Semi Annual)
New Rolled Maturity Date: 01-Oct-2005
• Year – In Terms of Years
Example: Value Date: 01-Jan-2005; Maturity Date: 01-Apr-2005; Tenor: 12 Months (Year)
New Rolled Maturity Date: 01-Apr-2006
The same field is available on the Account screen and the values are defaulted from product. The
defaulted values can be amended.
During rollover of an auto-disbursed mortgage, swift message is sent if the Principal increase
through credit settlement happens. If the credit settlement mode is chosen as CASA, the
settlement account, currency and branch along with the Swift message details are defaulted from
the account.
In case you change the customer, currency or the product during rollover, system picks up the
settlement details again from Settlement Instruction maintenance corresponding to the new
parameters. The swift message, if applicable, is generated during authorization similar to manual
disbursement.
8.16.2 Capturing Split Rollover Details
You can create multiple draw down contracts out of the original draw down contract using the
Split rollover method. For each rolled over contract, the system generates a split number. You
must indicate preferences for these rolled over contracts in the ‘Split Rollover’ screen.
You can invoke this screen by typing ‘CLDSROLL’ in the field at the top right corner of the
Application tool bar and clicking on the adjoining arrow button.
8-49
You need to specify the following details here:
Split Ref No
A unique Split Transaction Reference number is generated by the system to identify the
transaction uniquely whenever a new split preference is displayed here.
Account Number
Select a valid mortgage account for which the split rollover has to be done. All valid mortgage
accounts created using the ‘Account Details’ screen will be available for selection in the option
list.
Value Date
Select the value date for the split rollover operation.
Value Date cannot be less than the date of 'ALIQ','MLIQ','REVN', 'VAMI', 'DSBR' events.
Branch Code
The branch code of the mortgage account for which the split rollover preference is maintained is
displayed here.
UDE Basis
Select the UDE basis for the split mortgage accounts from the drop down list. The UDE for the
split mortgages can be defaulted from the product, parent account or user defined maintenance.
If you select user defined maintenance, then you need to specify the UDE details.
Effective Date
Select the effective date for UDE maintenance.
8-50
UDE Values
The following details are captured here:
UDE ID
Specify the UDE id here.
UDE Value
Specify the UDE rates here.
Rate Code
Select the rate code to be used for the UDE.
Rate Usage
Select whether the rate code should be periodic or automatic. If you select the rate code usage
as periodic, the rate revision schedules will be defaulted from parent mortgage account. In case
rate revision schedule is not maintained at the parent account, then rate revision schedules will
be same as the payment schedules.
Split Details
The following details are captured here:
Sequence No
Specify a unique sequence number for each split record.
Split Account No
The split account no which is generated when split rollover operation is done is displayed here.
This is generated by the system.
Max Roll Amount
Specify the maximum rollover amount applicable for a split mortgage account. Among all the
splits, the last split sequence no. will have the max roll amount as Null, which is later considered
as the remaining principal + interest of the parent mortgage.
Schedule Basis
Select whether the schedules of the new mortgage account should be defaulted from the product
or the mortgage account.
Maturity date
Select the maturity date of the split mortgage account. You can calculate the maturity date using
the ‘Q’ button.
On saving a split rollover the status of the rollover is marked as ‘U’- unprocessed. This split
operation is performed during authorization of split rollover or during CL batch.
8-51
In the parent account a new version is created and the account status is marked as Liquidated.
For each of the split detail record, a new CL Mortgage account is created with the amount as the
max rollover amount. The new account will have UDE values, Schedules and Maturity date as per
the given preferences for each detail record. For the last split detail record, a new CL Mortgage
account is created with the balance rollover amount.
In some cases due to some prepayment done in the parent account the total amount during
rollover is exhausted before the last split account is created. In such a case the new mortgage
account is created only for the available rollover amount. All the newly created Split mortgage
accounts will be made active by the system. The new account numbers generated is updated and
displayed in the ‘Split Account No’ field.
The following events are fired during the different stages:
• ROBK event is fired in all the split accounts
• ROLL event is fired in the parent account to trigger the LIQD and ROLL accounting
entries.
• ROSL (Rollover Split) event is fired in the parent mortgage at split rollover
8.16.3 Capturing Consolidated Rollover Details
You can consolidate several mortgage accounts into a single mortgage account as part of the
rollover operation using the ‘Consolidated Rollover’ screen. You can invoke this screen by typing
‘CLDCROLL’’ in the field at the top right corner of the Application tool bar and clicking on the
adjoining arrow button.
8-52
You need to specify the following details here:
Branch
The branch code of the mortgage account for which the consolidated rollover preference is
maintained is displayed here.
Value Date
Select the value date for the consolidation operation.
MIS Basis
Select the option from the drop-down list to indicate from where the MIS details of the
consolidated account should be defaulted. The MIS details can be defaulted from the account or
user defined maintenance.
If you select user defined maintenance, then you need to specify the MIS details by clicking
the ‘MIS’ button.
UDF basis
Select the option from the drop-down list to indicate from where the user defined fields of the
consolidated account should be defaulted. The UDF can be defaulted from the product, account
or user defined maintenance.
If you select user defined maintenance, then you need to specify the UDF details by clicking
the ‘UDF’ button.
Settlement Basis
Select the option from the drop-down list to indicate from where the settlement details of the
consolidated account should be defaulted. The Settlement details can be defaulted from the
account or user defined maintenance.
If you select user defined maintenance, then you need to specify the settlement details by
clicking the ‘Settlement Details’ button.
Consol Txn Ref No
A unique system-generated consolidated Txn Reference number to identify the transaction is
displayed here.
Consol Roll Acc
A system generated consolidated mortgage account number is displayed here after the rollover
operation is done.
UDE Basis
Select the option from the drop-down list to indicate from where the UDE details of the
consolidated account should be defaulted. The UDE details can be defaulted from the product,
account or user defined maintenance.
If you select user defined maintenance, then you need to specify the UDE details.
8-53
Schedule Basis
Select the option from the drop-down list to indicate from where the schedule details of the
consolidated account should be defaulted. The schedule details can be defaulted from the
product, account or user defined maintenance.
If you select user defined maintenance, then you need to specify the schedule details.
Customer
Select the customer name whose multiple CL or LS mortgage accounts have to be consolidated
from the option list.
Currency
Select a currency code for the consolidation operation from the option list. All participating
mortgages should belong to the same currency.
Product Code
Select a valid CL or LS module product code from the option list. All the mortgage accounts that
are chosen for rollover consolidation should belong to this product.
Rollover Amt
Specify the additional amount which would be added to the consolidated mortgage.
Maturity Date
Select the maturity date of the consolidated mortgage account. You can calculate the maturity
date using the ‘Q’ button.
Effective Date
Select the effective date for UDE maintenance.
UDE Id
Specify the UDE ID here.
UDE Value
Specify the UDE rates here.
Rate Code
Specify the rate code to be used for the UDE.
Rate Usage
Select the rate code usage from the drop-down list. The rate code usage can be either periodic or
automatic. If the rate code usage is periodic, the rate revision schedules will be defaulted from the
driver mortgage account. In case the rate revision schedule is not maintained at the driver
mortgage account, then rate revision schedules will be same as the payment schedules.
Account Number
Select the mortgage account no for consolidation from the option list.
8-54
Rollover Amount Type
Select the amount which has to be rolled over from the drop-down list. You can choose to rollover
the Principal or Principal + other components. If the rollover amount type is specified as the
Principal, then all other components would be liquidated during the consolidation in respective
mortgage accounts.
Driver Contract
Select ‘Yes’ from the drop-down to indicate that the selected account is a driver account. The
details for the consolidated mortgage are defaulted from this driver account. There can be only
one driver contract.
On saving a consolidated rollover the status of the rollover is marked as ‘U’- Unprocessed.
This consolidation operation is performed during authorization of split rollover or during CL batch.
In the participant accounts a new version would be created and the account status of each
mortgage would be marked as liquidated ‘L’.
A new consolidated mortgage account is created by consolidating all the amount preferences
specified for individual participant mortgages. The new account will have UDE values, settlement
details and MIS basis as per the given preferences.
The newly created consolidated mortgage account will be active. The status of consolidated
rollover record would then be marked as ‘P’ – Processed and the generated consolidated
mortgage account number is updated in the consolidated ‘Consol Roll Acc’ field.
The following events are fired at different stages:
• ROLL event is fired in all the participant mortgage accounts to fire LIQD and ROLL
accounting entries.
• ROCL event is fired in all the participant mortgage accounts which are selected for
consolidation.
• ROBK event is fired in the consolidated account
• DSBR event is fired in the consolidated account if any special rollover amount is specified.
8.16.4 Capturing Inactive Rollover Details
This function is provided to save Inactive rollover instructions. Click on the ‘Activate’ button on the
Inactive Rollover screen to activate the inactive rollover instructions.
When an Inactive instruction is saved, no events are processed. And when activated, all the
applicable events are fired.
This screen captures payment details such as Value date of the payment, Amount Settled,
Payment Mode, Related Payment Products and Settlement Account. The payment is against any
of the mortgage components such as principal, interest etc.
You can invoke this screen by typing ‘MODIMROL’ in the field at the top right corner of the
Application tool bar and clicking on the adjoining arrow button.
The procedure to create an Inactive Rollover is similar to the Manual Rollover process. However,
you have the additional facility to activate the rollover by clicking on the ‘Activate Rollover’ button.
8-55
The ‘Inactive Rollover’ screen is identical to the ‘Manual Rollover’ screen.
For more details on the field explanations refer section ‘Capturing Manual Rollover Details ‘in this
chapter.
8.17 Calculating EMI for Personal and Auto Loans
You can calculate the EMI for amortized products in the ‘Equated Monthly Installment’ screen.
Oracle FLEXCUBE stimulates the loan creation in this screen and calculates the EMI. Oracle
FLEXCUBE deletes the stimulated loan during the batch process.
You can invoke this screen by typing ‘MODEMINT’ in the field at the top right corner of the
Application tool bar and clicking the adjoining arrow button.
8-56
Here you can specify the following details:
Product
Specify the code of the product for which the EMI should be calculated. The adjoining option list
displays all valid codes maintained in the system. You can choose the appropriate one.
Product Category
The system displays the product category of the selected product.
Application Number
Specify the application number.
Branch Code
The system displays the branch code.
Account
Specify the number of the account that should be linked with the specified product.
Alternate Account Number
Specify the alternate account number that should be used as the secondary account.
User Reference Number
Specify the reference number of the user who is included in this contract.
User Defined Status
Based on the product selected, the system defaults the user defined status.
8-57
Derived Status
Specify the derived status.
8.17.1 Main Tab
You can specify the following details:
Customer ID
Specify the unique identification of the customer. The adjoining option list displays all valid
customers IDs maintained in the system. You can choose the appropriate one.
Customer Name
The system displays the name of the customer whose customer ID is specified above.
Currency
Specify the code of currency that should be maintained in the product. The adjoining option list
displays all valid currencies maintained in the system. You can choose the appropriate one.
Amount Financed
Specify the amount that should be financed.
Book Date
Based on the product code selected, the system defaults the book date.
Value Date
Specify the value date. You can select the date from the adjoining calendar.
Number of Installments
Specify the number of installments that should be allowed for the repayment of loan through EMI.
Unit
Select the unit from the adjoining drop-down list. The list displays the following values:
• Daily
• Weekly
• Monthly
• Quarterly
• Half Yearly
• Yearly
• Bullet
Frequency
Specify the frequency of the installment.
Installment Start Date
Specify the installment start date. You can select the appropriate date from the adjoining
calendar.
8-58
Due Date On
Specify the date on which the installment should be on due.
Maturity Type
Select the type of the maturity from the adjoining drop-down list. The list displays the following
values:
• Fixed
• Call
Maturity Date
Specify the date on which the installment should be matured. You can select the appropriate date
from the adjoining calendar.
Net Principal
Specify the net principal amount of the loan.
Loan To Value
Specify the loan to value.
Index Exchange Rate
Specify the exchange rate of the index.
Subsidy Customer ID
Specify the unique ID of the subsidy customer.
Calculate Gross Principal
Check this box to indicate that the gross principal should be calculated.
Effective Date
Specify the effective date from the adjoining calendar.
User Defined Element Values
You can specify the user defined element values details in the following fields:
User Defined Element ID
Specify the unique identification for the user defined element. The adjoining option list displays all
valid IDs maintained in the system. You can choose the appropriate one.
User Defined Element Value
Specify the value for the user defined element.
Rate Code
Specify the rate code. The adjoining option list displays all valid codes maintained in the system.
You can choose the appropriate one.
8-59
Code Usage
Select the type of code usage from the adjoining drop-down list. The list displays the following
values:
• Periodic
• Automatic
Resolved Value
When you click Enrich button, the system calculates the resolved value.
8.17.2 Preferences Tab
You can specify the preferences details in the ‘Preference’ tab in the ‘Equated Monthly
Installment’ screen.
Here you can specify the following details:
Cheque Book Facility
Check this box to indicate that the cheque book facility should be allowed to loan account.
Passbook Facility
Check this box to indicate that the pass book facility should be allowed to loan account.
ATM/Debit Card
Check this box to indicate that the ATM/Debit card should be provided to the account holder.
Liquidate Back Valued Schedules
Check this box to indicate that the back valued schedules should be liquidated.
8-60
Allow Bulk Payment
Check this box to indicate that the bulk payment should be allowed.
Amend Past Paid Schedules
Check this box to indicate that the past paid schedules should be amended.
Stop Disbursement
Check this box to indicate that the disbursement should be stopped.
Recalc Annuity On Disbursement
Check this box to indicate that the annuity on disbursement should be recalculated.
Use Guarantor for Repayment
Check this box to indicate that the repayment should be done by the guarantor.
Loan Statement Required
Check this box to indicate that the loan statement should be generated.
Liquidation
You can specify the liquidation details in the following fields:
Auto Liquidation
Check this box to indicate that the liquidation should be automated.
Reset Retry Count For Reversed Auto Liquidation
Check this box to indicate that the retry count for reversed auto liquidation should be reset.
Partial Liquidation
Check this box to indicate that the partial liquidation should be allowed.
Retries Auto Liquidation Days
Check this box to indicate that the auto liquidation days should be retried.
Intermediate
You can specify the intermediate details in the following fields:
Intermediary Initiated
Check this box to indicate that the intermediary should be initiated.
Intermediary Code
Specify the unique code of intermediary. The adjoining option list displays all valid codes
maintained in the system. You can choose the appropriate one.
8-61
Track Receivable
You can specify the track receivable details in the following fields:
Auto Liquidation
Check this box to indicate that the liquidation should be automated.
Manual Liquidation
Check this box to indicate that the liquidation should be done manually.
Bill Details
You can specify the bill details in the following fields:
Bill Reference Number
Specify the reference number of the bill. The adjoining option list displays all valid reference
numbers maintained in the system. You can choose the appropriate one.
Bill Due Amount
Specify the due amount of the bill.
Amount Available
Specify the available amount.
Holiday Periods
You can specify the holiday periods detail in the following field:
Period
Specify the period of the holiday. The adjoining option list displays all valid periods maintained in
the system. You can choose the appropriate one.
UDE Rate Plan
You can specify the UDE rate plan details in the following fields:
Start Date
Select the start date from the adjoining calendar.
End Date
Select the end date from the adjoining calendar.
8-62
8.17.3 Components Tab
You can specify the component details in the ‘Components’ tab in the Equated Monthly
Installment’ screen.
Here you can specify the following details:
Component Name
Specify the name of the component.
Calculation Type
The system displays the calculation type based on the component maintenance at the product
level.
Component Currency
Specify the currency in which the component should be maintained.
Special Interest Amt
Specify the special interest amount for the component.
Waive
Check this box to indicate that the interest amount should be waived.
Main Component
Check this box to indicate that the specified component should be main component.
Verify Fund
Check this box to indicate that the fund should be verified.
8-63
Capitalized
Check this box to indicate that the component should be capitalized.
Penal Basis Component
Specify the penal basis component.
Service Branch
Specify the service branch of the component. The adjoining option list displays all valid service
branches maintained in the system. You can choose the appropriate one.
Service Account
Specify the service account for the component. The adjoining option list displays all valid
accounts maintained in the system. You can choose the appropriate one.
Settlement Currency
Specify the code of the currency that should be used for settlements. The adjoining option list
displays all valid currencies maintained in the system. You can choose the appropriate one.
Internal Rate of Return Applicable
Check this box to indicate that the internal rate of return should be applicable for the component.
Special Component
Check this box to indicate that the component should be considered as special component.
Funded During Initiation
Check this box to indicate that the funding should be done during the initiation.
Funded During Rollover
Check this box to indicate that the funding should be done during the rollover.
Schedule Definition
You can specify the schedule definition details in the following fields:
Schedule Type
Select the type of the schedule from the adjoining drop-down list. The list displays the following
values:
• Payment
• Revision
• Disbursement
Schedule Flag
Select the schedule flag from the adjoining drop-down list. The list displays the following values:
• Normal
• Moratorium
8-64
Formula
Specify the formula. The adjoining option list displays all valid formulae maintained in the system.
You can choose the appropriate one.
First Due Date
Select the first due date from the adjoining calendar.
Number of Schedules
Specify the number of schedules.
Frequency
Specify the frequency of the schedule.
Units
Select the unit from the adjoining drop-down list. The list displays the following values:
• Daily
• Weekly
• Monthly
• Quarterly
• Half Yearly
• Yearly
• Bullet
Due Date On
Specify the due date of the schedule.
End Date
Specify the end date of the schedule.
Amount
Specify the schedule amount.
EMI Amount
Specify the EMI amount that should be paid during the schedule.
Compound Days
Specify the number of compound days.
Compound Months
Specify the number of compound months.
Compound Years
Specify the number of compound years.
8-65
Days in Month
Specify the number of days that would constitute a month for calculation. You can have 30 or 31
days in a month for this purpose.
Years
Specify the number of days that would constitute a year for calculation.
Capitalized
Check this box to indicate that the amount should be capitalized.
Waive
Check this option to indicate that the component needs to be waived off. This is applicable to
those components which do not have any schedule.
8.17.4 Charges Tab
You can specify the charge details in the ‘Charges’ tab in the Equated Monthly Installment’
screen.
Here you can specify the following details:
Component Name
Specify the name of the component.
Calculation Type
The system displays the calculation type based on the component maintenance at the product
level.
Component Currency
Specify the currency in which the component should be maintained.
8-66
Service Branch
Specify the service branch.
Service Account
Specify the service account.
Settlement Currency
Specify the currency in which the settlement should be done.
Effective Date
Specify the effective date.
Funded During Initiation
Check this box to indicate that the funding should be done during initiation.
Funded During Rollover
Check this box to indicate that the funding should be done during rollover.
Waive
Check this box to indicate that the charges should be waived.
Due Date
Specify the due date.
Amount Due
Specify the due amount.
Amount Waived
Specify the amount that should be waived.
Event Code
The system displays the event code.
Amount Settled
The system displays the settled amount.
Schedule Date
The system displays the schedule date.
8-67
9. Batch Processes
9.1
Introduction
The events that are to take place automatically are triggered off during what is called the Batch
Process. The batch process is an automatic function that is run as a mandatory Beginning of Day
(BOD) and/or End of Day (EOD) process. During EOD, the batch process should be run after
end-of-transaction-input (EOTI) has been marked for the day, and before end-of-financial-input
(EOFI) has been marked for the day.
9.2
Configuring the Mortgage Batch Processes
You have the facility to configure the batch processes to be executed either at EOD or BOD or
both, as per the bank’s requirement. This is achieved through the ‘Automatic Process Definition’
screen. You can invoke this screen by typing ‘CLDTPROC’ in the field at the top right corner of
the Application tool bar and clicking on the adjoining arrow button.
In this screen, you can amend the order of the various operations in the Mortgage batch and
choose to trigger them at EOD or BOD or both.
The default configuration is given below:
Batch Operation
BOD/EOD
Forward Init of Mortgage Accounts
BOD
Calculation
EOD/BOD
Accruals
EOD/BOD
Auto Liquidations
EOD/BOD
Auto Disbursements
BOD
9-1
Batch Operation
BOD/EOD
Rate Revisions
BOD
UDE Cascade
EOD
Maturity processing – Rollovers , Auto Closures
BOD/EOD
Automatic Status Change Processing
BOD
FEES
BOD
INTP (Interest Posting)
BOD
Billing & Payment Notices
BOD
Statements generation
EOD
Penalty Computation
BOD
Forward VAMIs
BOD
Revaluation
EOD
Readjustment
EOD
These batch processes are factory shipped for your bank.
9.2.1 Defining Batch Processes
The Mortgage batch processes are explained briefly:
Forward Init of Mortgage Accounts
Mortgage accounts maintained in the system are classified into two types:
• Active
• Inactive
When mortgage accounts become Active, the BOOK event is triggered for the Mortgage and you
can specify a Value Date for the mortgage during this event.
This batch identifies all the accounts that are due for initiation on that day, at BOD and the INIT
event is triggered for these accounts. The current system date will be taken as the value date for
these accounts.
Re-Calculation
Mortgage parameter alterations directly affect the computation of accruals. This batch identifies
such changes made to mortgage accounts, both at BOD and EOD. Further, it recalculates the
accruals based on the altered mortgage components.
Accruals
This batch passes all the recalculated accrual changes required for the components. It is
triggered, both at BOD and EOD.
9-2
Auto Liquidations
This batch processes the payments that are configured as auto payments and is triggered both at
BOD and EOD.
Auto Disbursements
Disbursement schedules are maintained for products. As part of BOD process, the DSBR events
for the accounts will be triggered.
This batch processes these schedules at BOD, which enables the DSBR events of the accounts
to be initiated.
Rate Revision
As part of BOD program, this batch processes the Floating Rate revision schedules for products.
UDE Cascade
This batch is triggered at EOD in case of UDE value changes. The changes in UDE values are
applied to all the affected accounts.
In case, a single account requires a UDE Change/Cascade, it can be performed online for that
account alone. Such accounts are then excluded from this batch.
Maturity Processing
Maturity processing of mortgages is performed if the maturity date falls at BOD of a particular
day. This results in either Auto Closure or Rollover of mortgages.
• Auto Closure: Mortgages that are liquidated on maturity are subject to Auto Closure,
during maturity processing.
• Rollover: Mortgages that have auto rollover maintained are rolled over during maturity
processing.
Status Change Processing
Certain accounts have automatic status changes, wherein the SDEs required for status change
are evaluated. In such cases, this batch detects status changes at BOD. Once this is done,
appropriate status change activities are triggered.
Notice Generation – Billing, Payments
For each mortgage, the number of days prior to which a Notice is to be generated is evaluated. In
case of mortgages that carry dues, the Notice is generated as specified in the notice days
maintained for the product. This batch is processed at BOD.
Statement Generation
At EOD, the statement is generated depending on the statement frequency and other statement
based maintenance actions specified.
Forward VAMI
At BOD, this batch processes all value dated amendments that are booked with the date as Value
Date.
9-3
Penalty
Penalty computations are evaluated at BOD by this batch. Any grace period maintained will have
to be considered during this calculation. On completion of the grace period, the penalty
components are computed from the due date till the current date.
Revaluation
At EOD, revaluation of assets and liabilities to the LCY are carried out.
Readjustment
This batch is processed at EOD. It is triggered in the presence of Index currencies that are not
treated as a part of revaluation. It handles readjustments based on new index rates.
9.2.2 Initiating the Batch Process
If you have opted to trigger the Mortgage batch programs at EOD, the same will be executed as
part of the ‘End of Cycle Operations’ after marking the ‘EOTI’ for the day. If the trigger is
maintained as ‘BOD’, the programs will be executed before the start of ‘Transaction Input’.
However, the programs will be triggered both at EOD and BOD if you opt to trigger it at both the
instances.
You also have the option to execute the batch programs through the ‘Mortgage Batch’ screen.
You can also invoke this screen by typing ‘MODBATCH’ in the field at the top right corner of the
Application tool bar and clicking on the adjoining arrow button.
Run Sequentially
Check this box to opt to execute the processes as per the sequence maintained in the ‘Automatic
Process Definition’ screen.
Click ‘Run’ button to run the batch process. Click ‘Cancel’ button to cancel the batch execution.
For the accounts wherein notary confirmation is required and yet to be received, the system will
check if NCON event has been triggered or not, before initiating the mortgage. For accounts
wherein confirmation has been received before mortgage creation, the system will trigger
initiation and disbursement without any check of the NCON event.
9-4
9.2.3 Multi-threading of Batch Processes
The Mortgage Batch process handles multi threading. The number of parallel processes and the
interval between processes is maintained as part of ‘MO Branch Parameters’.
Refer the section titled ‘Maintaining Branch Parameters’ in the ‘Maintenances and Operations’
chapter of this User Manual for details.
The accounts are split into multiple groups which can be processed in parallel for a particular sub
process. Hence, all non conflicting parallel groups will complete the sub process after which the
next sub process is taken up and so on. There is also an option to run it purely sequentially as
shown above.
9.2.4 Excess Amount Allocation Batch
The Excess Amount Allocation batch is run to allocate the transfer amount available for each
member against the outstanding balance in the corresponding mortgage accounts.
A member account is owned by a single member, but a mortgage account can be co-owned by
several members in a certain ratio. Each member could be a borrower in multiple mortgages. For
these reasons the amount allocations are necessitated.
The allocation process considers the following important parameters:
• % liability of each member in each mortgage where he is the borrower
• Transfer amount available per member
• Amount due (based on % liability) per member
To enable this fund allocation the rebate batch is run at the bank level. Common Settlement
Account maintained in ‘Rebate Account Preferences’ screen is used as the ‘Common Bridge
Account’. This will have the combined balance of all the member accounts, which can be utilized
for mortgage re-payment. The Rebate account processing batch will provide the details like the
member account number (CASA account), the member (CIF number) and the excess amount for
the member. This data will act as the input for this batch program.
The batch does the following operations:
• It will get the due details for the next schedule of each mortgage, along with the Liability
Split %. This will include the overdue amount, if any.
• Allocate the excess amount of each member to his mortgages, with the earliest unpaid
schedule first.
• The due date of the schedule will be considered by the allocation batch for allocating the
payments. The batch will ensure that the available amount is used to make advance
payment for the immediate next component due before considering the next.
• While allocating the amount for the next schedule, the available amount will be available
amount minus the amount already allocated against the previous schedule.
• With this info, CL payment will be triggered for each mortgage account. This will be an
advance payment (not Pre payment) for an aggregate amount and will be initiated
according to the liquidation order maintained for the components.
• On successful payment, process status will be changed to ‘P’ for all the records with this
Mortgage account number.
• Status will be changed to ‘E’, in case of any error during the payment. As per the current
functionality, the error details will be available in the exception table.
9-5
• After correcting the errors, you can re-initiate the process which will exclude the already
processed mortgage accounts.
• Further generation of Payment advice will derive the amount after considering the amount
paid through this batch process.
9.2.5 Interest Posting (INTP Event)
You need to make a provision to post an income into a separate GL. This income is the interest
which you pay to the customer who has a mortgage account. On the interest posting date, a
transaction occurs to move the receivable and the income from one GL to another. This
transaction distinguishes between receivables from the income which is due and not due. Also,
this interest posting is applicable for the main interest component only.
The INTP event runs at the BOD for a mortgage product against which it has been defined.
The following points are noteworthy:
• You can pick the INTP event during the mortgage product definition and maintain the
accounting entries against this event. To recall, you need to click on the ‘Events’ tab in the
‘Consumer Lending Product’ screen where you specify the various events which need to
be run.
• At the time of mortgage account creation, Oracle FLEXCUBE populates the events diary
with one record of the INTP event for each schedule due date. This has the status as
‘Unprocessed’. This is done for the main interest component schedule only.
• The system also creates a record for the end of each calendar quarter during the
moratorium period in the case of amortized mortgage products.
• Any rebuilding of repayment schedules results in the rebuilding of records in the events
diary.
• The batch process picks up all the unprocessed INTP records from the events diary
having the execution date on or before the current application date. The process is limited
to the active accounts belonging to the current branch.
• The amount and date of due for the main interest component is fetched from the
component schedule due details.
• The accounting entries get passed on the schedule due date or the calendar quarter end,
as defined for the event INTP through the ‘Consumer Lending Product’ screen under the
‘Events’ tab pertaining to a mortgage product maintenance.
• For term mortgages, the transaction posting date is the same as schedule due date of the
main interest component. The same is followed for amortized mortgages also.
• For an amortized mortgage with a moratorium period, the transaction posting date is the
end of the calendar quarter and the end of the moratorium period. If the moratorium period
is different from the end of the calendar quarter, the entries passed will not tally with the
actual amount due. This difference gets passed on the schedule due date of the
moratorium period.
• There are no changes in the INTP event execution behaviour in case of a partial prepayment.
• If a mortgage is getting pre-closed with a complete settlement, the system does not wait till
the schedule due date or calendar quarter end for passing the INTP entries. It posts the
interest accrued till the current date on the date of the pre-closure.
• In case of any failures during the INTP batch process, the system logs the error details for
the account and processes the subsequent accounts.
9-6
9.2.6 Excess Amount Allocation Batch
The Excess Amount Allocation batch is run to allocate the transfer amount available for each
member against the outstanding balance in the corresponding mortgage accounts.
A member account is owned by a single member, but a mortgage account can be co-owned by
several members in a certain ratio. Each member could be a borrower in multiple mortgages. For
these reasons the amount allocations are necessitated.
The allocation process considers the following important parameters:
•
% liability of each member in each mortgage where he is the borrower
•
Transfer amount available per member
•
Amount due (based on % liability) per member
To enable this fund allocation the rebate batch is run at the bank level. Common Settlement
Account maintained in ‘Rebate Account Preferences’ screen is used as the ‘Common Bridge
Account’. This will have the combined balance of all the member accounts, which can be utilized
for mortgage re-payment. The Rebate account processing batch will provide the details like the
member account number (CASA account), the member (CIF number) and the excess amount for
the member. This data will act as the input for this batch program.
The batch does the following operations:
•
It will get the due details for the next schedule of each mortgage, along with the Liability
Split %. This will include the overdue amount, if any
•
Allocate the excess amount of each member to his mortgages, with the earliest unpaid
schedule first
•
The due date of the schedule will be considered by the allocation batch for allocating the
payments. The batch will ensure that the available amount is used to make advance
payment for the immediate next component due before considering the next.
•
While allocating the amount for the next schedule, the available amount will be available
amount minus the amount already allocated against the previous schedule.
•
With this info, CL payment will be triggered for each mortgage account. This will be an
advance payment (not Pre payment) for an aggregate amount and will be initiated
according to the liquidation order maintained for the components.
•
On successful payment, process status will be changed to ‘P’ for all the records with this
Mortgage account number
•
Status will be changed to ‘E’, in case of any error during the payment. As per the current
functionality, the error details will be available in the exception table.
•
After correcting the errors, you can re-initiate the process which will exclude the already
processed mortgage accounts
Further generation of Payment advice will derive the amount after considering the amount paid
through this batch process.
9.2.7 Processing the Mortgage Batch
When prioritization rule is maintained for a L/C linked to the mortgage account, then bulk
liquidation takes a different route during Mortgage batch processing. Liquidation is triggered
based on the preference rule defined for L/C. This is treated as a normal payment once the
respective component, schedule of the mortgage is identified for the payment. During the batch
process prioritization for account liquidation takes place.
9-7
The batch process for liquidation takes place as follows
• Sub-process named as ‘BLIQ’ is used for Bulk Payment which runs before the ‘ALIQ’
Process. Event code used for this Prioritized liquidation is ALIQ.
• Accounts linked with L/C are grouped and liquidation process is done on the group.
• For the L/C linked to the mortgage account, if a prioritization rule is set, the same is
considered for Bulk Payment. If prioritization rule is not maintained, the liquidation
happens as part of ‘ALIQ’.
• When the bulk payment happens as part of batch, the prioritization rule determines which
account is to be liquidated first. The account is attempted like any other ALIQ except for
the component prioritization.
• Liquidation order is as per the prioritization rules defined for L/C.
9-8
10.
10.1
Annexure A
Accounting Entries
This section contains details of the suggested accounting entries that can be set up, for the
Mortgages module of Oracle FLEXCUBE. The details of the suggested accounting entries are
given event-wise.
10.2
Events
The following is an exhaustive list of events that can take place during the lifecycle of a contract.
In the subsequent paragraphs we shall examine the accounting entries and advices for each of
the events listed below.
Event Code
Event Description
ACCR
Accrual
ADCH
ADHOC charge application
ALIQ
Auto liquidation
ARVN
Automatic Rate Revision
BADJ
Back Dated Adjustment
BNTC
Billing Notice Event
BOOK
Booking Of Contract
CAMD
Contract Amendment
CLOS
Closure for off balance sheet comp
CLOC
Closure of Commitment
DLINK
Payment made against a mortgage linked to a revolving commitment contract
DNTC
Delinquency Notice Event
DSBR
Disbursement
INIT
Contract Initiation
ISTM
Interest Statement Event
LCYP
LCY update processing
LIQB
Liquidation Tanking
LSTM
Mortgage Statement Event
Page 10-1
Event Code
Event Description
LINK
Linking a Commitment to a mortgage account
MLIQ
Manual Liquidation
NOVA
Novation
PROV
Provisioning
READ
Readjustment Processing
REOP
Reopen of mortgage account
REVC
Reversal Of Contract
REVD
Reversal Of Disbursement
REVN
Rate Revision
REVP
Reversal Of Payment
RNOG
Re-Negotiation
ROLB
Roll Over Booking
ROLL
Roll Over Of Contract
REVL
Reversal of Linked Mortgage Account
SROL
Special Roll over
STSH
Installment Status Change
TAXC
Specific Tax Calculation
UDCN
UDE Cascade Change
USGR
Un-Secured GL Transfer Reversal
USGT
Unsecured GL Transfer
VAMB
Value Dated Amendment Booking
VAMI
Value Dated Amendment Initiation
YACR
Yield to Maturity based Discount Accrual
Page 10-2
10.3
Event Code
Event Description
NCON
Notary Confirmation
INLQ
Intermediary Liquidation
IMST
Intermediary Statement
NREJ
Notary Rejection
SCHR
Schedule Regeneration in Linked Mortgage Contracts
Accounting Roles
In this section we have provided a list of sample accounting roles.
Accounting Role
Description
ASSETGL
The Customer GL to which the Mortgage Account movements
are reported.
PRINCIPAL_LIQD
Principal Liquidated
PRINCIPAL_INCR
Principal Increased
COMPONENT _INC
Component Income
COMPONENT EXP
Component Expense
COMPONENT RIA
Component Received in Advance
COMPONENT PAY
Component Payable
COMPONENT REC
Component Receivable
COMPONENT PIA
Component Paid in Advance
BRIDGE GL
Intersystem Bridge GL
SETTLEMENT ACCOUNT
Customer Account Settled From / To
FEES_REC
Fees Receivable
CHARGES_REC
Adhoc Charges Receivable
IN_INTER_STMT
Intermediary Statement
Page 10-3
Accounting Roles for the YACR Event
10.4
Sl No
Accounting Role
Acquisition Type
Role Type
1.
EIMDISCRIA
Discount
Asset
2.
EIMDISCINC
Discount
Asset
3.
EIMPREMPIA
Premium
Asset
4.
EIMPREMEXP
Premium
Asset
5.
EIMINTADJREC
Par
Asset
6.
EIMINTADJINC
Par
Asset
Event-wise Advices
In this section we will discuss the suggested events and advices that should be generated for that
particular event in the life cycle of Consumer Lending.
BOOK
The system uses this event to enter details of a mortgage account. However, at this stage the
account is not initialized thus there will not be a change in the balance but you can perform other
activities (processing fee etc) for the mortgage account. The accounting entries passed will be
either Contingent Entries for disbursement or component liquidations entries.
Advice Name
Description
Format Name
CL_CONT_ADV
Contract Advice
CL_CONTR_STMT
On BOOK event of a commitment contract the following accounting entries are passed:
Accounting Role
Amount Tag
Dr./Cr. Indicator
CONTGL
PRINCIPAL_FWD
Debit
CONTOFF
PRINCIPAL_FWD
Credit
INIT
The system uses this event to initiate a mortgage with a value date as the date of initiation.
However, you can not disburse the mortgage under this event.
Advice Name
Description
Format Name
CL_INIT_ADV
Initiation Advice
CL_INIT_ADV
Page 10-4
Advice Name
Description
Format Name
CL_CAP
Capitalization Advice
CL_CAP_ADV
CL_CONT_ADV
Contract Advice
CL_CONTR_STMT
CLST_SUMMARY
Mortgage Summary
Statement Advice
CL_LOAN_SUMMARY
COUPON
Coupon Advice
ADV_COUPON
DSBR
This event is marked by the disbursement of the mortgage amount. The disbursement may be
done manually or can be triggered by a disbursement schedule. The mortgage account will have
debit balances after total disbursement.
Advice Name
Description
Format Name
CR_ADV
Credit Advice
CL_CR_ADV
CLST_DETAILS
Mortgage Detailed Statement Advice
CL_LOAN_DETAIL
CLST_SUMMARY
Mortgage Summary Statement Advice
CL_LOAN_SUMMARY
TAX_ADVICE
Tax Advice
CL_TAX_ADVICE
The entries passed are:
Accounting Role
Amount Tag
Dr /Cr
LOAN_AC
PRINCIPAL
Dr
CR_SETTLEMENT_BRG
PRINCIPAL
Cr
Note the following:
• The mortgage account of the customer reports to an internal GL of the bank, determined
by the Role to Head mapping done at the product level.
• A settlement bridge account is used since there is a probability of the customer account
being present in another system which is capable of interfacing with Oracle FLEXCUBE.
During the reconciliation process, the appropriate customer account in the relevant
system is credited with the mortgage amount.
ACCR
The accrual of the various components will be triggered based on the accrual parameters you
maintain at the product level.
The following accounting entries are passed for this event:
Page 10-5
For Interest Accrual
Accounting Role
Amount Tag
Dr /Cr
INT_REC
INT_ACCR
Dr
INT_INC
INT_ACCR
Cr
For Penalty Interest Accrual
Accounting Role
Amount Tag
Dr /Cr
PENAL_INT_REC
PENAL_INT_ACCR
Dr
PENAL_INT_INC
PENAL_INT_ACCR
Cr
NCON
This event is triggered when the ‘Notary Pre Confirmed’ check box is checked at the account
level or when the Notary Status is selected as ‘Confirmed’ in ‘Manual Notary Confirmation’
screen.
NREJ
This event is triggered when the ‘Notary Pre Confirmed’ check box is unchecked at the account
level and Notary status is selected as ‘Reject’ in ‘Manual Notary Confirmation’ screen. INLQ
This event is triggered as a batch process for the Intermediary Liquidation based on the product
event advice maintenance. It provides basic information about the Intermediary and the
corresponding commission settlement.
Advice Name
Description
Format Name
‘IN_INTER_CR
Intermediary Credit
INTER_CR_ADV
INCH
This event is triggered as a batch process for the Intermediary Liquidation based on the product
event class maintenance. It provides basic information about the Intermediary and charge
collected because of pre-payment and late payment by the customer.
Advice Name
Description
Format Name
IN_INTER_DR
Intermediary Debit
INTER_DR_ADV
Page 10-6
IMST
This event is triggered as per the statement frequency maintained at the Intermediary Level. It
provides basic information about the Intermediary and the corresponding commission/charge
settlements.
Advice Name
Description
Format Name
IN_INTER_STMT
Intermediary Statement
IN_INTER_STMT
ALIQ and MLIQ
Depending on the mode of liquidation opted for, whether automatic or manual, the appropriate
event is triggered. A batch process will be triggered at EOD for payments that are marked for
auto liquidation.
ALIQ
Advice Name
Description
Format Name
DR_ADV
Debit Advice
CL_DR_ADV
DELINQYADV
Delinquency Advice
CL_DELQ_ADV
Advice Name
Description
Format Name
BILNOTC
Billing Advice
CL_BILL_ADVC
DELINQYADV
Delinquency Advice
CL_DELQ_ADV
PAYMENT_ADVICE
Payment Advice
CL_PMT_ADV
MLIQ
The accounting entries for these events will be as follows:
Principal Repayment
Accounting Role
Amount Tag
Dr /Cr
DR_SETTLEMENT_BRG
PRINCIPAL_LIQD
Dr
LOAN_AC
PRINCIPAL_LIQD
Cr
Accounting Role
Amount Tag
Dr /Cr
DR_SETTLEMENT_BRG
INT_LIQD
Dr
Interest Repayment
Page 10-7
Accounting Role
Amount Tag
Dr /Cr
INT_REC
INT_LIQD
Cr
INTERNAL_GL
MAIN_INT_WHLD
Dr
MAIN_INTREC
MAIN_INT_WHLD
Cr
Accounting Role
Amount Tag
Dr /Cr
DR_SETTLEMENT_BRG
PENAL_INT_LIQD
Dr
PENAL_INT_REC
PENAL_INT_LIQD
Cr
Penalty Interest Repayment
Following are the accounting entries passed for the manual repayment of mortgage by cash:
Accounting Role
Amount Tag
Dr /Cr
DR_SETTL_BRIDGE
PRINCIPAL_LIQD
DR
LOAN_ACCOUNT
PRINCIPAL_LIQD
CR
DR_SETTL_BRIDGE
MAIN_INT_LIQD
DR
LOAN_ACCOUNT
MAIN_INT_LIQD
CR
LINK
This event is triggered when a commitment is linked to a consumer lending mortgage account.
LINK event increases the utilization of the commitment amount and the contingent entries passed
at the time of INIT is reversed upto the extent of linked amount.
Accounting Role
Amount Tag
Dr./Cr. Indicator
ASSETGL
COMMUTIL_INCR
Credit
ASSETOFF
COMMUTIL_INCR
Debit
DLNK (Delink)
This event is triggered when payment is made against a mortgage, which is linked to a revolving
commitment contract, Delink decreases the utilization of commitment amount.
Accounting Role
Amount Tag
Dr./Cr. Indicator
ASSETGL
COMMUTIL_DECR
Debit
ASSETOFF
COMMUTIL_DECR
Credit
Page 10-8
STCH
This event is triggered when a status change occurs. It could be a Forward Status Change
(FSTC) where the mortgage moves from one adverse status to another or a Backward Status
Change (BSTC) wherein, on repayment of overdue installments, a reversal of status takes place.
The status derivation rule is used to resolve the status. The change may occur due to a status
rule being activated. If the number of days by which a component becomes overdue, exceeds the
allowed number of days (may be referred to as the grace period), the component can undergo a
status change if a status rule is defined with such a criteria. A status change is triggered if any
condition defined for the rule is satisfied.
The accounting entries, if maintained for the events (FSTC and BSTC) will be triggered. The
accounting role provided will be the same for all the changes. However, the Role to Head
mapping rules will resolve the entries to the appropriate accounts for each status.
Interest accrual for status ‘ACTIVE’
Accounting Role
Amount Tag
Dr /Cr
INT_REC
(Mapped to a Real Asset)
INT_ACCR
Dr
INT_INC
(Mapped to a Real Income GL)
INT_ACCR
Cr
Interest accrual for status ‘PAST DUE’
Accounting Role
Amount Tag
Dr /Cr
INT_REC
(Mapped to a Contingent Asset)
INT_ACCR
Dr
INT_INC
(Mapped to a Contingent Liability)
INT_ACCR
Cr
CAMD, VAMB and VAMI
These statuses are triggered as a result of making amendments to a mortgage.
CAMD (Account Amendment)
Any amendment to the parameters of the account will create a new version of the mortgage.
These changes will not have any implications on the financial attributes of the mortgage.
Advice Name
Description
Format Name
CLAMDADV
Amendment Advice
CL_AMD_ADV
VAMB (Booking of a Value Dated Amendment)
This event is triggered when you book a value dated amendment.
Page 10-9
You can book for an amendment of the following:
• Maturity date
• Principal Increase
• Rate change
The batch program will identify the changes booked and the same is triggered appropriately on
the value date by the VAMI event.
Advice Name
Description
Format Name
CLAMDADV
Amendment Advice
CL_AMD_ADV
VAMI (Initiation of a Value Dated Amendment)
This event will pick up the future dated VAMBs and on the value date, initiate the same.
The accounting entries for an increase in principal will be as follows:
Accounting Role
Amount Tag
Dr /Cr
LOAN_AC
PRINCIPAL_INCREASED
Dr
CR_SETTLEMENT_BRG
PRINCIPAL_INCREASED
Cr
Any change to Rate and Tenor (Maturity Date) will alter the original mortgage schedules.
ROLL
This event is triggered when a mortgage is renewed with new terms. Rollover will have either a
combination of liquidation and rollover of Principal. It can also have liquidation of Interest and
penalty Interest.
Advice Name
Description
Format Name
CLAMDADV
Amendment Advice
CL_AMD_ADV
CL_ROLL_ADV
Rollover Advice
CL_ROLL_ADV
PAYMENT_ADVICE
Payment Advice
CL_PMT_ADV
The entries passed for rollover of the Principal are as follows:
Accounting Role
Amount Tag
Dr /Cr
CR_SETTLEMENT_BRG
PRINCIPAL_ROLL
Cr
LOAN_AC
PRINCIPAL_ROLL
Dr
For liquidation of Principal, the following entries are passed:
Page 10-10
Accounting Role
Amount Tag
Dr /Cr
DR_SETTLEMENT_BRG
PRINCIPAL_LIQD
Dr
LOAN_AC
PRINCIPAL_LIQD
Cr
For liquidation of Interest and Penalty Interest, the entries are:
Accounting Role
Amount Tag
Dr /Cr
DR_SETTLEMENT_BRG
LIQD_AMT
Dr
INT_REC
INT_LIQD
Cr
PENAL_INT_REC
PENAL_INT_LIQD
Cr
INTERNAL_GL
MAIN_INT_WHLD
Dr
MAIN_INTREC
MAIN_INT_WHLD
Cr
You may encounter the following cases:
Case 1: Rollover only Principal Outstanding; Pay Interest & Penalty Outstanding
In this case, both ‘PRINCIPAL_LIQD’ and ‘PRINCIPAL_ROLL’ will be zero and hence the ‘LOAN
ACCOUNT’ balance is not affected.
The Outstanding Interest and Principal will be liquidated. Referring to the accounting entries
above,
• INT_LIQD = Interest Outstanding
• PENAL_INT_LIQD = Penalty Interest Outstanding
• LIQD_AMT = INT_LIQD + PENAL_INT_LIQD (If Netting is ‘ON’ and both have the same
Settlement Account).
Case 2: Rollover Principal + Interest Outstanding; Pay Penalty Outstanding
In this case,
• PRINCIPAL_LIQD = 0,
• PRINCIPAL_ROLL = INT_ROLL (which is the Interest Rolled over as Principal);
• PENAL_INT_LIQD = Penalty Interest Outstanding
• LIQD_AMT = PENAL_INT_LIQD (If Netting is on and both have the same Settlement
Account).
Case 3: Rollover Principal + Interest + Penalty Outstanding
PRINCIPAL_ROLL = INT_ROLL + PENAL_INT_ROLL
LIQD_AMT = 0
Case 4 - a: Rollover Special Amount, Amount > Principal Outstanding
Page 10-11
This is in effect a disbursement. Therefore,
PRINCIPAL_ROLL = SPECIAL_AMOUNT – PRINCIPAL_OUTSTANDING
Since the rolled over amount is greater than the outstanding principal, it will be positive and
hence an increase in the mortgage amount is registered.
Case 4 – b: Rollover Special Amount, Amount < Principal Outstanding
This results in a decrease in Principal and hence
PRINCIPAL_ROLL = SPECIAL_AMOUNT – PRINCIPAL_OUTSTANDING will lead to a negative
amount which will reduce the Dr Balance on the Mortgage Account.
SROL – Special Roll-over
This event is triggered when a roll-over is done and it involves a change in the currency, product
and customer.
Advice Name
Description
Format Name
CLAMDADV
Amendment Advice
CL_AMD_ADV
CL_ROLL_ADV
Roll-over Advice
CL_ROLL_ADV
RNOG – Re-negotiation
This event is triggered when a customer is not being able to honor the terms and conditions of the
credit. In such a situation, the client re-negotiates the terms and conditions of the credit before
maturity date.
Advice Name
Description
Format Name
CLAMDADV
Amendment Advice
CL_AMD_ADV
PAYMENT_ADVICE
Payment Advice
CL_PMT_ADV
NOVA – Novation
This event is triggered when a primary customer is changed.
Advice Name
Description
Format Name
CLAMDADV
Amendment Advice
CL_AMD_ADV
REVC – Mortgage Reversal
This event is triggered when a mortgage is withdrawn. This will pass the DSBR entries with a
reversal of signs (-ve) for the amounts, as follows:
Page 10-12
Accounting Role
Amount Tag
Dr /Cr
LOAN_AC
- PRINCIPAL
Dr
CR_SETTLEMENT_BRG
- PRINCIPAL
Cr
REVP - Payment Reversal
The latest payment made, both auto and manual, will be reversed during this event. This will pass
the ALIQ or MLIQ event selected with a reversal of signs for the amounts.
Reversal of Principal Repayment
Accounting Role
Amount Tag
Dr /Cr
DR_SETTLEMENT_BRG
- PRINCIPAL_LIQD
Dr
LOAN_AC
- PRINCIPAL_LIQD
Cr
Reversal of Interest Repayment
Accounting Role
Amount Tag
Dr /Cr
DR_SETTLEMENT_BRG
- INT_LIQD
Dr
INT_REC
- INT_LIQD
Cr
Reversal of Penalty Interest Repayment
Accounting Role
Amount Tag
Dr /Cr
DR_SETTLEMENT_BRG
- PENAL_INT_LIQD
Dr
PENAL_INT_REC
- PENAL_INT_LIQD
Cr
REVN – Periodic Rate Revision
This will change the Floating Interest Rates based on the periodicity that you maintain.
Advice Name
Description
Format Name
CL_INT_STMT
Interest Statement Advice
CL_INT_STMT
RATECH_ADV
Rate Change Advice
CL_RTCH_ADV
Page 10-13
ARVN – Automatic Rate Revision
This will change the Floating Rate as and when the rate changes.
Advice Name
Description
Format Name
CL_INT_STMT
Interest Statement Advice
CL_INT_STMT
RATECH_ADV
Rate Change Advice
CL_RTCH_ADV
UDCH – User Defined Element Value Changes
This event will be triggered whenever there is a change in the UDE values. This will be required
to have Rate revision advices sent to the customers.
YACR – Yield to Maturity Discount Accrual
This event will be triggered for the computation of IRR. The following accounting entries will be
passed:
Accounting Role
Amount Tag
Dr /Cr
EIMDISCRIA
EIM_ACCR
Dr
EIMDISCINC
EIM_ACCR
Cr
EIMPREMEXP
EIM_ACCR
Dr
EIMPREMPIA
EIM_ACCR
Cr
If refunding needs to be done as part of with complete pre-payment, the following entries should
be passed in addition to the ones specified above:
Accounting Role
Amount Tag
Dr /Cr
<Charge Comp>_RIA
EIM_ADJ
Dr
CR_SETTL_BRIDGE
EIM_ADJ
Cr
DR_SETTL_BRIDGE
EIM_ADJ
Dr
<Charge Comp>_PIA
EIM_ADJ
Cr
CLIQ – Charge Liquidation
This event triggers the liquidation of charges applicable to the mortgage accounts. You need to
set up the following entries for this event:
Accounting Role
Amount Tag
Dr /Cr
DR_SETTL_BRIDGE
<Charge Comp>_LIQD
Dr
Page 10-14
Accounting Role
Amount Tag
Dr /Cr
<Charge Comp>_RIA
<Charge Comp>_LIQD
Cr
CR_SETTL_BRIDGE
<Charge Comp>_LIQD
Dr
<Charge Comp>_PIA
<Charge Comp>_LIQD
Cr
Accounting Role
Amount Tag
Dr./Cr. Indicator
CONTGL
COMM_UNUTIL
Credit
CONTOFF
COMM_UNUTIL
Debit
CLOC Event
Accounting Entries for RML – Reverse Mortgage Loan
DSBR Event
Accounting Role
Amount Tag
Dr/Cr
LOAN_ACCOUNT
PRINCIPAL
Dr
CR_SETTL_BRIDGE
PRINCIPAL
Cr
ACCR Event
Accounting Role
Amount Tag
Dr/Cr
MAIN_INTREC
MAIN_INT_ACCR
Dr
MAIN_INTINC
MAIN_INT_ACCR
Cr
MLIQ/ALIQ Event
Accounting Role
Amount Tag
Dr/Cr
DR_SETTL_BRIDGE
PRINCIPAL_LIQD
Dr
LOAN_ACCOUNT
PRINCIPAL_LIQD
Cr
DR_SETTL_BRIDGE
PRINCIPAL_EXCESS
Dr
PRINCIPALPAY
PRINCIPAL_EXCESS
Cr
PRINCIPALEXP
PRINCIPAL_WAVD
Dr
LOAN_ACCOUNT
PRINCIPAL_WAVD
Cr
Page 10-15
Accounting Role
Amount Tag
Dr/Cr
DR_SETTL_BRIDGE
MAIN_INT_LIQD
Dr
MAIN_INTREC
MAIN_INT_LIQD
Cr
MAIN_INTEXP
MAIN_INT_WAVD
DR
MAIN_INTREC
MAIN_INT_WAVD
CR
Page 10-16
11.
11.1
Glossary
Important Terms
Product
An identifier, in FLEXCUBE, for any type of service that a bank offers to its customers. A set of
attributes and preferences are maintained for the product, which will apply to the processing of
any contracts, transactions or deals involving the product (service).
Product Group
A group under which a product is logically classified, under which logically similar products are
placed together.
Product Remarks
Descriptive text about a product.
Product Slogan
Text or phrase that could be used as a declaration or an announcement of the product, to
customers.
Accounting Head
The specific GL created in any module of the FLEXCUBE system into which the accounting entry
would be posted.
Accounting Role
The general ledgers and sub-ledgers maintained as a chart of accounts in FLEXCUBE may be
classified logically under different categories, each of which is called an accounting role.
Amount Item
The amount entry that is passed into a general ledger / sub ledger in the chart of accounts for
each transaction.
Netting
Summing of two or more accounting entries passed to an account for the same event, so as to
arrive at a net figure for posting.
Trigger
The occurrence or process that initiates the generation of an advice during the processing of a
contract in FLEXCUBE.
Transaction Code
An identifier for each accounting entry that is used to track the transaction.
11-1
Rekey Options
The fields that are to be keyed in by an authorizer of a transaction, for the purpose of crosschecking, when the transaction is being authorized. Complete details of the transaction will only
be displayed when the authorizer ‘rekeys’ the values for these fields.
Payment Method
The manner in which the main interest payable on a loan contract is reckoned. The methods
could be Bearing, Discounted or True Discounted.
Schedule Type
The kind of repayment schedule defined for a loan contract. It could be amortized, normal or
capitalized.
Schedule Frequency
The frequency at which the repayment of the loan amount will be amortized in equated
installments over the tenor of the contract.
Accrual Frequency
The frequency at which components of a loan contract such as interest, charges or commissions
must be accrued over the tenor of the contract.
Tenor
The default period during which a contract is effective. The default Maturity Date of a contract is
calculated from tenor.
Rate Variance
The difference between the default value and the changed value of an exchange rate employed
for currency conversion. Permissible limit can be set for the variance.
Amortization Type
The method according to which amortization is applied on a loan contract for which the type of
schedule defined is amortization. It could be any of two types, Reducing Balance or Rule 78.
Cascading Schedules
A schedule falling due on a holiday can be moved backward or forward, based on the Mover
Forward or Move Backward preference. By cascading, the subsequent schedules are also moved
forward or backward accordingly. If schedules are not cascaded the frequency will be reckoned
from the schedule due date of the previous month before moving forward or backward.
Maturity Type
The manner in which the maturity of a loan contract is reckoned. There are three possible types
– Fixed, Call or Notice Days.
Commitment Type
An attribute of a commitment contract, which determines whether the amount of the contract is
reinstated when a loan linked to the contract, is paid. If the commitment is revolving, the contract
amount is reinstated, and if it is non-revolving, the contract amount is not reinstated.
11-2
Verify Funds
The check for availability of funds in a customer account before it is debited for the purpose of
liquidation of any of the components of a loan contract. If not specified for a contract, this check
is not performed in the system.
Cluster ID
A unique identifier for a cluster defined for a deposit product. A cluster deposit is a deposit
contract involving a deposit product for which a cluster has been defined.
Reducing Balance
A method of calculation of interest component for amortized type of repayment. The interest is
calculated on the outstanding principal for the current period.
Rule 78
A method of calculation of interest component for amortized type of repayment. The interest is
calculated on the outstanding principal based on remaining tenor divided by total tenor.
Holiday Currency
The currency of a loan contract, for which the holiday table of the currency must be checked,
before the payment schedule is drawn up. By default, the currency that is checked is the loan
currency. If any other currency is specified, then both are checked.
Liquidation Type
For a loan, the liquidation type indicates whether the loan is liquidated manually or automatically
on maturity.
Mode of Liquidation
The manner in which the payable components of a loan contract are to be settled in FLEXCUBE.
The modes available are automatic and manual.
Interest Rate Revision Schedule
The schedule defined for the refreshing of interest rates from the Floating Rates table, for floating
rates applicable on a loan contract.
Interest Rate Revision Frequency
The frequency specified for the rate revision schedule defined for floating rates applicable on a
loan contract.
Pre-Payment
Repayment of principal (whole or part) of a loan contract before the repayment schedule falls
due. Prepayment involves a re-computation of subsequent interest schedule amounts.
Main Interest
When more than one interest component is applicable on a contract involving a product, one of
the components may be designated as the main interest component for the contract. It helps
identify and differentiate the different interest components applicable for the component.
11-3
Interest Application Method
The basis upon which interest on a loan contract is applied. Interest on a contract could be
applied as an amount, or a fixed rate, or floating rate.
Interest Collection Method
The manner in which the main interest payable on a loan contract is collected or liquidated. The
methods could be Bearing, Discounted or True Discounted.
Repayment Type
The kind of repayment schedule defined for a loan contract. It could be amortized, normal or
capitalized.
Mode of Rollover
The manner in which a loan contract is renewed or rolled over. IT could be automatic or manual.
Residual Amount
A limit placed on the residual payables on any pending component that has not been liquidated,
of a loan for which the principal is to be liquidated. A check is made that the residual pending
payables for any component other than the principal, must be individually less than or equal to
the residual amount specified. The loan is liquidated only if this check is successful.
Billing Advice
The reminder sent to the customer of a loan contract a stipulated number of days before the
repayment date of a schedule, intimating that a payment is due.
Delinquency Notice
The intimation to the customer of a loan contract that a payment in the repayment schedule is
overdue.
Automatic Renewal
Rolling over a loan automatically, on maturity. The old loan is automatically liquidated and a new
one initiated.
Cluster Deposit
A cluster deposit involves the input of a deposit as a multiple of specific units of a certain
currency. All operations concerning the principal, like drawing up payment schedules for the
principal, change in principal, etc., must be in multiples of the cluster size specified for the
deposit.
11-4
Mortgages
[August] [2010]
Version 11.1
Oracle Corporation
World Headquarters
500 Oracle Parkway
Redwood Shores, CA 94065
U.S.A.
Worldwide Inquiries:
Phone: +1.650.506.7000
Fax: +1.650.506.7200
www.oracle.com/ financial_services/
Copyright © [2010] Oracle Financial Services Software Limited. All rights reserved.
No part of this work may be reproduced, stored in a retrieval system, adopted or transmitted in any form or by any means,
electronic, mechanical, photographic, graphic, optic recording or otherwise, translated in any language or computer
language, without the prior written permission of Oracle Financial Services Software Limited.
Due care has been taken to make this document and accompanying software package as accurate as possible. However,
Oracle Financial Services Software Limited makes no representation or warranties with respect to the contents hereof and
shall not be responsible for any loss or damage caused to the user by the direct or indirect use of this document and the
accompanying Software System. Furthermore, Oracle Financial Services Software Limited reserves the right to alter,
modify or otherwise change in any manner the content hereof, without obligation of Oracle Financial Services Software
Limited to notify any person of such revision or changes.
All company and product names are trademarks of the respective companies with which they are associated.