1
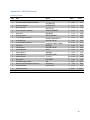
Paragon Pack-Rabbit Design Document: Group May13-22B Team Members: Adam Woody (Team Leader) Nick Marquardt (Webmaster) Kevin Flynn (Communications) Andy Goiffon (Team Representative) Chris Larson (Team Representative) Kart Team Table of Contents Executive Summary ............................................................................................ 1 System Design Requirements .............................................................................. 1 Functional Breakdown ................................................................................................................ 1 Motor Controller ................................................................................................................................... 1 Motor .................................................................................................................................................... 2 Battery................................................................................................................................................... 2 Non-functional Design................................................................................................................. 2 Lighting .................................................................................................................................................. 2 User Interface ....................................................................................................................................... 2 Additional Non-Functional Options ...................................................................................................... 3 Detailed System Description ............................................................................... 4 Motor Controller ......................................................................................................................... 4 Testing ................................................................................................................................................... 6 Lighting System ........................................................................................................................... 7 Testing ................................................................................................................................................... 9 Future Work .......................................................................................................................................... 9 Bluetooth Audio System............................................................................................................ 10 Testing ................................................................................................................................................. 12 Future Work ........................................................................................................................................ 13 Solar Charging ........................................................................................................................... 13 Testing ................................................................................................................................................. 14 Future Work ........................................................................................................................................ 14 User Interface ............................................................................................................................ 14 Testing ................................................................................................................................................. 17 Future Work ........................................................................................................................................ 18 Cost Breakdown................................................................................................ 19 Design Review .................................................................................................. 19 i Appendices ....................................................................................................... 20 Appendix A – User’s Guide ........................................................................................................ 20 Drivetrain ............................................................................................................................................ 20 Lighting System ................................................................................................................................... 20 Audio System ...................................................................................................................................... 21 Solar Panel .......................................................................................................................................... 22 User Interface ..................................................................................................................................... 22 Appendix B – Bill Of Materials................................................................................................... 23 Lighting System ................................................................................................................................... 23 Frame and Drivetrain .......................................................................................................................... 24 Audio System ...................................................................................................................................... 26 Solar Panel .......................................................................................................................................... 27 User Interface ..................................................................................................................................... 28 ii Executive Summary The purpose of this project is to design and build a small electric vehicle with a 25 mile per hour top speed and an operating endurance of about four hours for the Paragon company. This car will be built on a custom frame assembled by the mechanical engineering team, and will use component already purchased for the project. The car will be used as a multipurpose vehicle in a fair or carnival setting on relatively flat terrain. System Design Requirements The primary requirement of the design of the vehicle is that it must meet day-to-day needs in a carnival environment, including such activities as stocking concessions with supplies, carrying passengers and gear to various locations in an amusement park or fair, and to serve as a first-aid response vehicle. In most cases the car doesn’t need to travel faster than 5 to 10 miles per hour, but it is required to have a top speed of up to 25 miles per hour. It should be able to carry a driver as well as an additional adult passenger or as much as 250 pounds of gear or supplies. Functional Breakdown The functional requirements for the vehicle are met by the motor controller and motor provided to the team by the mechanical engineering team. This consists of a Curtis 1266 SepEx motor controller and a D&D Motor Systems class H separately-excited DC electric motor. The motor will provide enough torque and capacity to propel the vehicle at the desired speeds over relatively flat terrain. There is also a function select switch that will change the operation of the controller from a full-speed mode to a speed-limited mode for use in situations where the car is in a large crowd of people or it is otherwise not desired to drive at full speed. Motor Controller The Curtis 1266 SepEx motor controller is commonly used in golf carts and utility carts. It works with a separately-excited motor to provide a forward and reverse setting as well as a secondary forward setting. In the case of this project, the secondary setting is used for a reduced-speed mode. The controller is capable of providing up to 275 amps of current to the armature windings, and up to 20 amps of field current. The controller interfaces with the motor through a main contactor, a type of relay that connects and disconnects the armature of the motor to the output terminals of the controller. The main contactor is used for safety reasons, as the controller will detect particular faults and disengage this device to stop the motor. It is also the primary means used to engage and disengage the motor’s operation during normal use. Regenerative braking is handled by the controller through energizing the field windings with current in the opposite direction to normal use. This turns the motor into a generator and allows the forward momentum of the car to recharge the battery during deceleration and braking. As this is a standard 1 feature of this type of controller no additional system-level design needs to be done in order to implement this desired feature. Inputs to the controller are mostly through switches. There are switch inputs for the forward and reverse selectors, the mode selector, and the ignition key switch. There is also a switch input for a pedal interlock. When this switch is opened, the controller will ignore throttle input. This switch input will be wired to the brake handles so that in the event the user applies one or both of the brakes, the throttle signal to the controller will be interrupted. It will not directly cut power to the motor, but will rather engage the regenerative braking action to allow the motor to assist in slowing down the vehicle. Motor The D&D Motor Systems 7.5-horsepower motor is a class H separately-excited DC electric motor. Its intended purpose, the same as the motor controller, is to be installed on a golf cart or other utility vehicle. The field and armature windings are separate terminals on the motor body, so that each can be independently energized by the controller. This allows the motor to spin in both directions, by reversing the polarity of the field winding, which also enables regenerative braking. The motor, like many other electrical components, is capable of consuming more electrical power and delivering more mechanical power than it is designed. Care must be taken in the programming of the controller to ensure that the motor’s ratings are not exceeded. Since the controller is capable of producing way more current than our motor can handle, programming to ensure that it complies with specification is essential. Battery The charging station team is mostly responsible for the batteries, in terms of charging and monitoring their state of charge. However, the batteries used influence how our system operates. The batteries chosen are a set of three Trojan 215 AH flooded lead-acid batteries. These batteries are capable of sustaining about 150 amps of current output for around an hour and a half under absolute worst case driving. Real-world driving suggests around five hours of run time. Non-functional Design Lighting The vehicle’s lighting system, while not a functional component, is necessary in order for the car to meet regulations to be licensed as a moped, per the request of Paragon. Lighting will be LED headlights, taillights, and blinkers. The blinker system, based around a simple 555 timer circuit, will provide a pulsing output to lights which are meant to blink, as opposed to steady lights such as the headlamps, tail lamps, and brake lamps. User Interface The switches and other controls, along with the throttle handle, are located in the front handlebar area. This puts all of the controls within reach of the driver during normal use. Controls include a forward/reverse selector switch, a mode selector switch, and ignition switch, a lighting switch for automatic headlights and turn signals, a hand throttle, and a touchscreen LCD display. 2 The forward/reverse select switch is a 3-way toggle with a middle “neutral” position that ignores the throttle input. When reverse is selected, the motor controller sounds an external buzzer and energizes the field in the opposite direction to make the motor spin the opposite direction from normal. Speed of the car is limited to a much lower value when it is in reverse. The LCD screen will display speed in an electronic gauge, battery state of charge, battery and ambient temperature, time, and a reverse detection system. When the car is in forward, there are two possible modes in the controller. The mode select switch is used to switch between these two modes. ‘HI’ mode is the standard full-speed mode. For testing a maximum speed of 25 MPH. In ‘LO’ mode, the controller limits the speed of the car to 10 MPH and increases the throttle sensitivity to improve handling in a crowded setting. The hand throttle outputs a voltage range between roughly 0.7 and 4.3 volts, as measured on the signal wire, when given a voltage of 5 volts. The controller provides this voltage. It is a solid-state throttle using a Hall-effect sensor chip to vary the output voltage with respect to the position of the handle, which is more sophisticated than a simple potentiometer throttle but more reliable. This throttle was salvaged from a Chinese-built “bubble car” type vehicle that Paragon purchased for the team to disassemble and rebuild. Additional Non-Functional Options Two added features will be included for the prototype, which are planned to be options as chosen by the end user. The first is a Bluetooth Audio system with internal/external speakers. The internal speakers are 4” Boston Acoustics two-way hi-fidelity speakers. The external speaker is a 6” Jensen waterproof speaker, which is necessary to combat the elements. The system is designed to take inputs from a Bluetooth enabled device, such as a cell phone, an in-car mounted microphone, and a 3.5 mm audio jack. The Bluetooth audio will be routed to the internal speakers only so as to avoid broadcasting a private phone call while using the hands-free feature. The in-car mounted microphone will be activated by a momentary switch allowing the user to broadcast information to the surrounding area. A device connected to the 3.5 mm audio jack will be switchable between the internal and external speakers. The other is a large, flexible solar panel sourced by PowerFilm Solar. This is able to provide 30 watts under full sun to modestly charge the batteries. A system was built in order to extract the maximum power out of the solar panel under any condition by way of Maximum Power Point Tracking. The system also boosts the voltage to usable charging levels. 3 Detailed System Description Motor Controller The motor controller itself is also wired rather simply, with heavy 2-gauge wires providing the armature current and lighter wiring for the field winding, and also to provide signal input from the peripheral devices. A block diagram for the motor controller is below. Figure 1 – Motor controller block diagram 4 Figure 2 – Motor controller schematic The following are pictures of the actual components for reference. 5 Testing The following figure is testing under ‘LO’ Mode conditions. This is from the Fall 2012 vehicle design. Figure 3 – Charts of current and speed over time during a short test trip. After installing the motor, controller, and batteries into the frame produced by the mechanical engineering team, a test trip was made. This short trip involved no serious inclines, but was on a realworld test environment. The motor’s armature current jumps rapidly to the full 150-amp limit when the throttle is twisted to max, but when the full forward speed is reached, the current required to maintain speed drops to less than half of the acceleration current. On a downhill slope, since the controller will maintain the motor speed rather than its power output, current will instead flow into the battery as regenerative braking. The regenerative action can be seen in the graphs in Figure 1 as the points where the motor current dips negative. This current is flowing from the motor into the battery, partially charging the batteries. Due to the construction of the sealed lead-acid batteries in the testing configuration, the current to charge them is severely limited by the voltage limits of the cells. The controller limits regenerative current based on battery voltage levels. During testing, the motor controller’s features were very helpful, as it includes the ability to log data as seen above. This obviates the need to have a separate data logger attached to the operating system. Instead, the same controller connection used to program the parameters of the controller can be used to monitor its operation with a laptop or other portable computer device. The controller does not have any internal storage of its own, however, so it must be connected to the programmer in order to log data. 6 Lighting System The automatic lighting system uses a high amount of power, and as such, relays are used to route appropriate current to the various lights on the vehicle. The logic that controls the relays is controlled by some basic MOSFETs and a few depletion mode MOSFETs, which are on by default and turn off when a voltage is applied to the gate. The power demands to the system are very high. The headlights themselves require 15 amps each. A similar story exists for all of the other lights, most requiring 7.5 amps to run at a visible level. Due to this fact, and the fact that a unbalanced State of Charge (SOC) on the batteries can cause a decreased run time, each headlight is run off of a separate battery, while the brake lights and blinkers run off of the third battery in order to maintain a nearly balanced SOC. The automatic headlights work when certain conditions are met. First, the switch on the handlebars of the cart must be in automatic mode and the key switch must be on. Secondly, the solar panel input is connected to a depletion mode MOSFET which detects if the solar panel is providing voltage. The solar panel, at a certain level of low light, will not have enough solar energy to output any voltage or current, (around an estimated 20% of full sunlight). This allows the FET to turn on and pass current to the coil of the headlight relays under the low light condition. The halo lights around the headlights are on by default. When the user applies the turn signal, the halo will then flash using the blinker system. The blinker system is controlled by a simple 555 timer, set off of a ½ Hz frequency. The output of this goes through a MOSFET which is controlled by the blinker switch. This is then routed to the relays that control the blinkers. NOTE: The rear blinkers will oppose the front blinkers, which are the halo lights. The lighting system has an added 5V bus, which is used to charge the user’s cell phone and the Bluetooth dongle via USB. This is regulated by a buck converter capable of 3 amps. Figure 4 Lighting System Block Diagram 7 Figure 5 Lighting System Schematic V2.1 8 Figure 6 Lighting System PCB Layout V2.1 Headlights Tail lights Handlebar Mounted Switch Testing Due to the high power and complexity of this system, testing must be done on car. Version 1 of the board never made it to build level. It was revised to include an automatic headlight system. Version 2.0 of the board was ordered and then retrofitted to include the relay coil discharge diodes as shown in version 2.1. Future Work To reduce cost, a few lights can be eliminated. The rear blinkers can be eliminated and the brake lights can be repurposed as blinkers and brake lights. There may be a problem with using the 555 timer’s output to directly control the blinker relays. The coil should be controlled by a MOSFET that turns on from the 555 timer’s input. A blinker clicker should also be added and the frequency of the blinker should be increased to 1 Hz. 9 Bluetooth Audio System The Bluetooth audio system works under the premise of Boolean logic on a PCB (Audio Selection Center in the block diagram below). Two quad, 2-input NAND gate ICs (Fairchild Semiconductor MM74HC132 Quad 2-Input NAND Schmitt Trigger) take in the switch signals and then output signals to the audio switches. The audio switches (Fairchild Semiconductor FST2126 4-Bit Bus Switch) simply allow the audio signal to pass or not. Audio signals enter the system through three separate 3.5 mm audio jacks. The audio jacks connect to a permanent cart microphone, a Bluetooth adapter, and a generic 3.5 mm headphone jack. Two amplifiers are used to boost the audio signal to the speakers. The amplifier for the internal speakers is a 2x15 watt stereo class-T TA2024C amplifier board. The amplifier for the external speaker is a 2x50 watt stereo class-D TDA7492 amplifier board; we use only one of the two available outputs on this amplifier. Pre-designed amplifier boards are used to save on time and expense. By default, both the internal and external amplifiers are powered and the audio signal connected to the generic 3.5 mm headphone jack is passed to the internal speakers. If the microphone switch is pressed, the NAND logic sends a signal to the audio switches to pass only the microphone signal to the external speaker amplifier until the switch is released. If the Bluetooth switch is pressed, the NAND logic sends a signal to the audio switches to pass only the Bluetooth signal to the internal speaker’s amplifier until the switch is returned to the off position. Figure 7 Audio System Block Diagram 10 Figure 8 Audio System PCB Schematic Version 6 Figure 9 Audio System PCB Layout Version 6 11 Boston Acoustics Internal Speakers GOgroove SMARTmini AUX Bluetooth Adapter 2x15 Watt Stereo Class-T TA2024C Amplifier Board Jensen Waterproof External Speaker Permanent Cart Microphone 2x50 Watt Stereo Class-D TDA7492 Amplifier Board Testing Testing was done on version 4 of the PCB. This consisted of supplying 5 volts from a lab power supply, applying a 40 mVpp 300 Hz sine wave from a frequency generator to each 3.5 mm audio jack (one at a time), and connecting an oscilloscope to the signal outputs. Also, 5 volts was applied in succession and in combination to each input to verify the logic was working as intended. 12 Unfortunately, it was quickly found that the two power MOSFETs (not shown) that were intended to switch on and off the amplifiers would not operate under the given conditions. With VDS=12 V or 24 V and VGS=5 V (the intended ON state), the MOSFET could not turn on. Since these MOSFETs were included in the original Boolean expression to create the circuitry, this mistake has caused some functions not to operate as intended, e.g. passing the 3.5 mm generic input to both the internal and external speakers. Testing of the other parts was more successful. Powering the amplifiers with lab power supply’s, inputting a small signal from a frequency generator, and connecting an oscilloscope on the output we saw the amplifiers were operating correctly. We then proceeded to connect the speakers to the amplifier outputs. Then the PCB, amplifiers, and speakers were connected together. It should be noted that at this stage, the MOSFETs discussed earlier were bypassed and the amplifiers were powered directly from the power supplies. Readings on the oscilloscope were erratic and the sound was very unpleasant. Soon, a resistor on one of the amplifier boards was a block of carbon and we quickly turned off all power. After investigation of the mishap, it was found that two distinct grounds existed in the circuit, causing major transients. The burned resistor was replaced and testing recommenced, but with only one ground. Once this setup was successful, the microphone and Bluetooth adaptor were both tested by plugging them into a computer’s microphone port and recording the input. Each performed admirably. Future Work As noted in the captions for the audio system schematic and PCB layout, version 6 is shown. It was necessary to modify the tested version for reasons discussed earlier. These modifications included removing the power MOSFET switches and useless NAND gate circuitry. However, these modifications have given an underperforming design. For future work, a redesign of the NAND gate circuitry is necessary to accommodate the missing MOSFETs. Once a new Boolean expression is derived, an even simpler and smaller NAND gate circuitry will emerge. Also, power for the amplifier boards need not run through the PCB itself; they can be powered in a similar fashion to the PCB through relays. Finally, an upgraded amplifier for the internal speakers similar, if not identical, to the amplifier used for the external speaker would be recommended for greater entertainment. Solar Charging The Solar Charging system is comprised of two parts. The first part is a custom made solar panel, made for us by PowerFilm. It has an output of 30 watts at 15.4 volts and is 23 x 50”. It was designed to be an all-weather panel that is light, flexible, and very durable. Also, this solar panel performs very well in lowlight conditions. The second part is the PCB, which was designed around the SPV1020, a DC-DC boost converter with an operating voltage of 6.5-40 volts with a maximum power capability of 320 watts. It also has overvoltage, overcurrent, and thermal protection built in. The most important built-in feature of this chip is the MPPT algorithm that gives the DC-DC boost converter up to 98% efficiency. An adjustable switching frequency 13 of 50-200 kHz and a duty cycle of 5-90% with a 0.2% step are utilized to achieve this maximum-rated efficiency. Figure 10 Solar Charging Block diagram Figure 11 SPV1020 PCB Layout Figure 12 SPV1020 PCB Schematic Testing Testing has only been completed on the solar panel so far, the PCB testing is still in-process. This consisted of taking the solar panel outside on a sunny day, checking the output voltage, and the power output. The first round of testing on the PCB presented unexpected results. After further testing, it was discovered that the symbol and package had the pin numbers in the reverse orientation, causing the chip to be soldered to the board up-side down. Before testing can continue, a new chip (on order) must be installed. Future Work For future work, three or four more solar panels could be added such that when the cart is parked, the panels can be unrolled to charge the batteries faster and more effectively because of the increase in solar capture. This would utilize a key feature of the SPV1020; using it in a panel array. Also, a redesign of the current PCB may be in order if a larger solar panel is desired. User Interface The User Interface utilizes an EarthLCD ezLCD-313 touch screen and an Arduino Uno microcontroller board to relay information to the driver of the vehicle. The information that will be available to the user will include speed, battery life, and outside temperature. The Arduino also uses an additional 14 temperature sensor to monitor battery temperature and an infrared sensor to measure the distance of objects behind the vehicle. PCBs were designed to interface between the Arduino, the LCD screen, the various components, and supply power to the devices. To supply the power, buck converters are used to reduce the 36 V from the batteries to ~9V to power the Arduino and 3.3V to power the LCD. For connecting all of the components together plugs, connectors, and wires were selected to make component placement as versatile as possible. The EarthLCD ezLCD-313 was selected as the display primarily due to its features. It contains its own onboard microcontroller logic and widget library, making programming the graphical interface components much less time consuming and not as daunting of a task to a group with very little experience in this type of programming. All of the commands sent back and forth between the Arduino and the LCD are ASCII text, sent over a TTL serial link. The link is bidirectional so that touchscreen button taps can be relayed back to the Arduino for processing. The temperature sensors are Texas Instruments LM61CIM3 temperature sensor ICs. These sensors were selected due to their small, surface-mounted package size as well as their predictable linear voltage output. As opposed to other forms of temperature sensor, such as thermistors or resistance temperature detectors (RTDs), the LM61-type device provides a precision temperature output with no calibration required. The sensors take as a voltage supply +5VDC generated by the Arduino’s onboard regulators and are read by analog-to-digital convertors that are integral to the Arduino microcontroller package. The microcontroller’s analog-to-digital conversion has sufficient resolution to read the temperature accurate to within approximately 1 degree Fahrenheit or 0.5 degrees Celsius. The infrared distance sensor used to detect objects behind the vehicle is a Sharp GP2Y0A21YK0F infrared sensor. It is capable of sensing objects at distances from approximately ten centimeters to approximately 80 centimeters. The sensor itself is located inside the rear bumper of the car, protected from the outside elements by a piece of transparent plastic. The sensor outputs a voltage that varies inversely with distance. The approximate distance to an obstacle is reported to the user in either inches or centimeters when reversing, and the display will present a warning when an object passes inside a threshold distance. This system was included due to the lack of rear visibility in the vehicle with cargo loaded. To sense forward speed to report a speedometer value to the display unit, the Arduino module takes output from the Hall-effect speed sensor packaged onto the motor. Since all of the coupling between the motor and the wheels of the vehicle is directly through belts and shafts with no clutch or fluid coupling, motor RPM can be converted directly to vehicle forward speed through a formula. The Arduino’s code counts pulses and times the intervals between successive revolutions to determine the motor’s RPM. A proportionality constant is then used to convert the resulting speed into either miles per hour or kilometers per hour. Changing the system from US units to Metric units is done through the touch screen. This setting adjusts the proportionality constants for reporting speed, temperature, and distance data to the driver and also selects different display strings 15 Figure 11 – Arduino Uno rev. 3 microcontroller Figure 12 – ezLCD-313 display unit Figure 13 – User Interface Block Diagram 16 Figure 14 – PCB layout for sensor boards Figure 15 – Arduino interface board atop the Arduino Figure 16 – Schematic diagram for interface and sensor boards Testing During preliminary investigations, it was found that the signal on the hall-effect sensor is 5V pulse train, which will require no amplification in order to work with the Arduino’s system. However, this also means that the signal must be read as an interrupt and counted rather than monitored through ADC. Originally the signal from the speed sensor was run through the ADC for detection. The signal input for the speed sensor was rerouted through a jumper wire to data pin 2 on the Arduino, which is one of the two reserved pins for interrupts. In order to test the subsystems, some of the wiring was simulated on a breadboard. The component plugs on the small device sub-boards were of such size that they could be plugged directly into the board and powered / read. The individual components were not able to be tested on a breadboard due to their very small, surface-mount size and a lack of time to prototype the devices out. As a result of this, 17 many shortcomings and omissions were noted during the testing phase that were accommodated by soldering jumper wires onto the PCBs. The PCB designs themselves have been updated with the shortcomings found during testing addressed. During assembly, it was found that the datasheets listed incorrect sizes for several of the parts, such as the inductors for the voltage convertors. For some parts it was possible to make them work for the prototype, and the board designs were updated with the correct sizes for the components. The speed sensor amplifier custom board was abandoned completely as the chip was far too big for the laid out pads and would not work as configured, and a prototype buffer board was constructed using parts on hand (including a basic 741-type operational amplifier) and a prototyping board. Under testing of the temperature sensors it was found that the sensors predictably and accurately registered the air temperature, and responded appropriately with a rise in indicated temperature. Testing of the speed sensor buffer showed that it was properly transmitting pulses. Testing code in the Arduino successfully managed to both return a temperature for the sensors and calculate a speed based on the pulse rate coming from a function generator. The IR sensor was not yet able to be tested, as it had not yet arrived from the supplier. Also during testing it was found that the serial communication port was connected to pins on the LCD panel’s connection plug that cannot be used for serial communication (they are reserved for USB). To test the data link the connecting traces around the pins were scratched off, and jumper wires were soldered to the pins to enable a data path for testing. The Arduino was able to send data to and refresh the LCD panel’s meters. A bidirectional link was not tested. Future Work As previously noted, the PCBs are in an early prototype state and need to be further revised and refined to support additional sensors (if desired). The schematics and board layouts in this document show a revised version that may undergo further revision as more testing is done. Also, the Atmel ATMega328 microcontroller with the Arduino software could be integrated into the main board, for a more compact solution. Alternative sources for a touch-enabled LCD screen could be investigated, as well as more elegant means of interfacing with it. 18 Cost Breakdown The production cost goal was $2,000. The actual cost was a bit higher than that, but this was the prototype. The cost breakdown is below. Figure 17 – Cost Breakdown The total cost for all electrical systems was $3,578.61. The other teams spent an additional $2,237.05, bringing the total prototype cost to $5815.66. In production quantities, we expect to save around 40%, which comes out to an estimated total of nearly $3,500. This is well above the desired production cost, but $650 of that amount is optional, as well as future proposed savings on the user interface can bring down costs to a reasonable level. The individual cost breakdowns can be seen in the Bill of Materials in the index of this document. Design Review This design details the building of an electric vehicle that meets the given functional and non-functional requirements from the client, Paragon. It will, in its finished configuration, be able to reach a 25 mile per hour top speed and will have an operating duration of as long as four hours. It will be a fun little vehicle for Paragon that matches up well with their corporate philosophy of being a “manufacturer of fun.” 19 Appendices Datasheets for components used in the construction of the car, as well as some that were considered for use but were later decided to not be suitable, are located on the team website at http://seniord.ece.iastate.edu/may1322/ Appendix A – User’s Guide This section is intended for the next engineering segment of the design, as the system has not been fully completed. It will be subdivided into segments detailing what is the logical next step to take under the current design plans. Also, a detailed explanation of what is wrong with the current system and how to fix it is included. Drivetrain The motor controller needs reprogrammed for the new vehicle. The batteries are capable of safely extracting ~175 amps of current. The 2 modes need to be programmed. This is done with a dongle and a program for easy use. See Jim Heise (Professor in the Mechanical Engineering department) for these. Likewise, the entire system is wired and connected. It would be beneficial to add conduit and wire the vehicle more elegantly. A key switch with extra poles could be very beneficial as well to power to a relay in order to tap into switched power. Lighting System The current lighting system has not yet been tested. This is because the car was not finished in time, so it is unknown for sure whether the system works or not. Alternatively, a new PCB could be manufactured to add the MOSFETs to the blinker relay coils to put less strain on the 555 timer. If this option is taken, please note: The input/output terminals should be redesigned. A connector for each power input should be selected, as well as eliminating ones that are not needed. The Inductor has the wrong package size as well. This should be fixed before the next ordered. A case with connectors that are waterproof would be ideally integrated. Make note of the current capacity of these connectors. They need to be able to carry 15 amps apiece. Under the current circuit, the batteries will go out of balance eventually. This should be addressed somehow. The reason we did not use a buck circuit in the current configuration is because of loss, expense, and power capability. There is a definite compromise by tapping 3 separate batteries, but it seems to be the best. A battery balance system would be helpful. The brake lights are not included in the PCB properly and should be redesigned. The headlight “on” option (rather than “auto”) is currently planned on being implemented by off board relays. The coil is run by the “on” switch and the batteries go through the contactor to the lights. 20 Audio System The audio logic did not work. The error was that the gate voltage was not higher than the source to drain voltage, so the MOSFETs never turned on. The current strategy to eliminate this problem is to integrate relays with the MOSFETs to power the amplifiers. This, and other problems can be seen in the figure below. Everything that is circled is necessary changes to have a fully operating board, as intended. Figure 18 – Modified Version 1.3 with Changes Needed to have Fully Operational Board The current version of the PCB (V1.6) has the correct dimensions to mount the amplifier boards. This should NOT BE CHANGED. NOTE: The physical board that exists is V1.4. There are significant differences between 1.4 and 1.6. A new board should be designed as neither of these versions will work. The screw holes and board size are correct. The circuit needs redesigned but the dimensions shouldn’t be changed. The current plan is to use standoffs to mount each board atop the other. A case with connectors is 21 required (weatherproof). The 15 watt amplifier should be upgraded to make the internal speakers more audible. Under the current amplifier, the output cannot be bridged into one speaker. Only one channel can be used. Solar Panel When testing the PCB the SPV1020 is not boosting the input voltage. We tried trouble shooting this by testing the continuity of the diodes. According to the datasheet, if ILOAD=0A then Vout= Vin. To test this case, we applied a load and measured the voltage; and Vout=Vin. We also recalculated the values of R1, R2, R3 and R4 to verify they are correct. The next step you could take is to try and bread-board the circuit and trouble shoot it. If that doesn’t work redesign the board from scratch around the SPV1020 and see if you get a similar board. When ordering the PCB it might be in your interest to get a solder paste stencil for all the small components. Similarly, alternative diodes need to be chosen and added as the ones on the BOM are no longer available. A weather proof case and connectors for the PCB will need to be chosen. The solar panel itself definitely works and has been thoroughly tested. User Interface The original LCD interface board has the serial link going to pins that cannot be used for serial I/O. This has been addressed in the PCB layout designs in this document, but the original prototype boards are based on an old revision and are not correct. To use the prototype board, jumper wires have to be connected directly to the pins on the interface plug. More GPIO pins can be added for accessing, to allow room for expansion. On the Arduino board, GPIO pins are also broken out for access in the latest revision. Additional work for the microcontroller includes giving the Arduino the capability of collecting other signals, such as reverse status, whether or not the headlamps or blinkers are on, etc. Any of these types of signals would need to be buffered in order to not damage the Arduino’s input circuitry. A weatherproof case should be sought for enclosure of the Arduino. The LCD contains macros defining the home screen in US and Metric units, along with a pair of macros that set and clear a generic warning indicator. Full instructions for programming of the LCD user interface are located in the ezLCD-313 user’s manual, located at: http://store.earthlcd.com/app/site/media/sitemedia.nl/id.36447/.f 22 Appendix B – Bill Of Materials Lighting System Qty Part 6 470 kΩ Resistor 2 N-channel Mosfet Depletion Mode 2 1 2 N-channel Mosfet Buck Converter 47 uF Tantalum Capacitor 2 1 Relay SPST Schottky Diode 3 .1 uF Ceramic Capacitor 4 1 1 10 kΩ Resistor 47 uH Shielded Inductor 555 Timer 1 kΩ Resistor Standard Diode Power Mosfet 220 kΩ Resistor USB Connector Relay DBDT Handlebar Light Switch RELAY GEN PURPOSE SPDT 20A 12V Standard Diode PCB Manufacture 4 1 2 4 2 2 1 2 4 1 Part # ERJ-6GEYJ474V CPC5602CTR 2N7002LT3G AP1507-50 T491D476K020ZT PB134005 SS3P3-M3/84A C0805C104K4RACTU ERJ-6GEYJ103V CDRH127/LDNP-470MC NE555D ERJ-6GEYJ102V GF1B AOD484 ERJ-6GEYJ224V 292303-1 RT174005 N/A Amp Relays S1G-E3/5AT Price $ 0.10 $ 0.88 Price $ 0.60 $ 1.76 $ $ $ 0.15 2.36 1.08 $ $ $ 0.30 2.36 2.16 $ $ 1.49 0.60 $ $ 2.98 0.60 $ 0.11 $ 0.33 $ 0.10 $ 1.35 $ 0.44 $ 0.10 $ 0.49 $ 0.58 $ 0.10 $ 1.44 $ 2.50 $ 34.95 $ 4.32 $ 0.54 $ 33.00 Total: $ 0.40 $ 1.35 $ 0.44 $ 0.40 $ 0.49 $ 1.16 $ 0.40 $ 2.88 $ 5.00 $ 34.95 $ 8.64 $ 2.16 $ 33.00 $ 102.36 NOTE: This does not include the physical lights 23 Frame and Drivetrain HOME Electricals Mechanical s Item # J185HAC ES93B-48 1266 - Description Battery Motor Controller Front Wheel Assembly TWA 8 Rear Wheel P365M GT15 P1125 MGT15 Small Pulley Large pulley Front Brake Assembly Rear Brake Assembly Jack Shaft Assembly Rear Brake Rotor 13829 1369 5MR75 015 - Rear Hub Adapter Plate Rear Axle COST ESTIMATION $2,512.33 $1,637.05 Supplier Trojan Material Cost per Unit Initial Investment N u m be r of pa rts pe r un it Cost per part Co nve rsio n Direct to Expecte Cost Bul d Cost k Pri ce (%) 3 $336.20 1 $475.00 1 $409.89 90. 5 70 ScooterPa rts4Less 1 $145.00 Buggies Unlimited 2 Gates Initial Investment Tooling for NonStandard Parts Total Cost Per Part Cost $235.34 $706.02 $1,008.60 $429.88 $429.88 $475.00 $286.92 $286.92 $409.89 40 $58.00 $58.00 $145.00 $109.98 60 $65.99 $131.98 $219.96 2 $48.33 50 $24.17 $48.33 $96.66 Gates 2 $83.94 50 $41.97 $83.94 $167.88 ScooterPa rts4Less 1 $99.00 50 $49.50 $49.50 $99.00 1 $80.00 50 $40.00 $40.00 $80.00 1 $40.00 10 0 $40.00 $40.00 $40.00 2 $26.99 70 $18.89 $37.79 $53.98 2 $24.99 70 $17.49 $34.99 $49.98 1 $10.00 10 0 $10.00 $10.00 $10.00 1 $119.99 70 $83.99 $83.99 $119.99 D&D Motors Bohlingers ScooterPar ts4Less Custom Made Northern Tool Northern Tool Custom Made Northern Tool/Peerl ess Gear 70 $2,826.74 $4,149.38 Belt Gates 2 $16.61 50 $8.31 $16.61 $33.22 Taper Lock Gates 2 $11.38 50 $5.69 $11.38 $22.76 C o m m en t 24 ACCPS-3 5913K7 4 6244K5 4 2SWK1 31AL10 1 M2024 TJW0 1-GA1A C1510 AABB -B Bushing 7/8 Bushing 7/8 Gates 2 $12.48 50 $6.24 $12.48 $24.96 Charger Dual Pro 1 $350.95 70 $245.67 $245.67 $350.95 Ball Bearing 1" Ball Bearing 7/8" McMasterCarr McMasterCarr TE Connectivit y 3 $12.77 50 $6.39 $19.16 $38.31 2 $42.20 50 $21.10 $42.20 $84.40 1 $44.20 50 $37.90 $37.90 $44.20 Ignition Switch F/R/N Switch NKK Switches 1 $8.00 50 $6.92 $6.92 $8.00 HI-LO Switch Acrolectric 1 $4.64 50 $4.10 $4.10 $4.64 CloudElectric 1 $42.00 50 $21.00 $21.00 $42.00 McMasterCarr 1 $250.00 50 $125.00 $125.00 $250.00 1 $50.00 90 $45.00 $45.00 $50.00 1 $220.00 90 $198.00 $198.00 $220.00 Hall Effect Hand Throttle CablingEstimate Connectors -Estimate Lights Wheels Brakes Batteries Motor Transmissio n Charger Axle and Differential Speed Controller Estimate $414.94 $232.98 $1,008.60 $475.00 $518.19 $350.95 $119.99 $409.89 $3,530.54 25 Audio System Qty Part Name 1 Internal Speakers 1 Rocker Switch (On-Off-Mom) 1 JENSEN 6.5" Coaxial Waterproof Speaker 1 SWITCH ROCKER SPST 10A 125V 1 SWITCH ROCKER SPST 10A 125V 2 RELAY GEN PURPOSE SPDT 20A 12V 2 KNOB CLR GLOSS.925"DIA.250"SHAFT 1 CONN JACK MONO 3.5MM OPEN CIR (EXT) 1 eForCity VOIP / SKYPE Mini Flexible Microphone - Black 1 GOgroove SMARTmini AUX Bluetooth Car Kit with Handsfree Calling / Wireless Music Streaming 1 2x50W TDA7492 Class-D Amplifier Board 1 T-Amp Tripath TA2024 2x15W Audio Digital Amplifier Board 1 100K Audio Taper Stereo Potentiometer 1/4" Shaft 1 50K Audio Taper Stereo Potentiometer 1/4" Shaft 2 IC GATE NAND QUAD 2INPUT 14-SOIC 3 CONN AUDIO JACK 3.5MM STEREO SMD 2 Male to Female 3.5 mm cable 2 IC SWITCH BUS 4BIT TTL 14SOIC 1 TERMINAL BLOCK 5MM VERT 7POS PCB (Blue) 3 TERM BLOCK 2POS SIDE ENTRY 5MM (Green) 3 TERMINAL BLOCK 5MM VERT 2POS PCB (Blue) 10 STDOFF HEX M/F 4-40 2.00"L ALUM 6 MACHINE SCREW PAN PHILLIPS 4-40 6 HEX NUT 0.184" STEEL 4-40 1 Fabricated PCB 1 Cable, wire, connectors Mfg. Part No. SE45 7107J61ZQE22 MS6007S SRB22A2BBBNN SRB22A2DBBNN T9AP5D52-12 OEJL-90-1-5 35PM1 Price $39.99 $6.48 $29.99 $0.85 $0.85 $4.32 $4.66 $2.60 $2.30 $31.99 Ext $39.99 $6.48 $29.99 $0.85 $0.85 $8.64 $9.32 $2.60 $2.30 $31.99 AA-AB32174 TA2024 $24.90 $13.80 $24.90 $13.80 $2.40 $2.40 $0.49 $1.34 $2.75 $0.61 $1.16 $0.56 $0.41 $1.42 $0.61 $0.42 $33.00 $24.00 Total: $2.40 $2.40 $0.98 $4.02 $5.50 $1.22 $1.16 $1.68 $1.23 $14.20 $3.66 $2.52 $33.00 $24.00 $269.68 023-652 023-650 MM74HC132M SJ-3523-SMT-TR FST3126MX OSTTC070162 282836-2 OSTTC020162 8412 R4-40X3/8 2701 5205821-2 26 Solar Panel Qty Part Name 1 Voltage IC 4 C1,2,3,4 1 C12 1 C7 1 C8 1 C9 3 C6,11,13 4 L1,2,3,4 2 R1,3 1 R2 1 R4 1 R5 4 D1,2,3,4 1 Solar panel 1 PCB Fabrication Mfr. Part# SPV1020 GRM188R71C104KA01D C1210C475K5RACTU GRM188R71A474KA61D GRM188R71C223KA01J C1608C0G1H221J C0805C475K4RACTU B82477G4473M ERJ-6GEYJ305V ERA-6AED2553V CR0805-FX-7872ELF 292-1.0K-RC MBRS340 Value 100nF 4.7uF 470nF 22nF 220pF 4.7uF 47uH 3mOhm 255kOhm 78.7kOhm 1k Cost EA $ 11.57 $ 0.25 $ 0.77 $ 0.10 $ 0.10 $ 0.16 $ 0.37 $ 2.03 $ 0.07 $ 0.09 $ 0.10 $ 0.04 $ 0.61 $ 300.00 $ 33.00 Cost Cost $ 11.57 $ 1.00 $ 0.77 $ 0.10 $ 0.10 $ 0.16 $ 1.11 $ 8.12 $ 0.14 $ 0.09 $ 0.10 $ 0.04 $ 2.44 $ 300.00 $ 33.00 $ 358.74 27 User Interface Qty Part Name 3 100 uF, 50V Capacitor 2 100 uF, 25V Capacitor 2 470 uF, 16V Capacitor 3 60V Schottky Diode 2 2200 uH Inductor 2 1000 uH Inductor 3 2.0k Resistor 2 3.4k Resistor 2 12.7k Resistor 2 200k Resistor 2 2.0M Resistor 3 1-amp Buck Regulator 5 3-pin Connector (vertical) 4 3-pin Connector (horizontal) 3 Power Connector 3 2-pin Connector 3 6-pin Connector 3 8-pin Connector 2 16-pin female Connector 3 Power Plug 5 Contact for power plug 8 3-pin Plug 3 2-pin Plug 3 Temp Sensor IC 2 Op-Amp 1 Arduino 1 ezLCD-313 PCB Fabrication Mfg. Part No. EDK107M050A9MAA AVE107M25X16T-F AVE477M16G24T-F SS16-E3/5AT SDR1005-222KL SDR1005-102KL ERJ-3GEYJ202V ERJ-3EKF3401V ERJ-3EKF1272V ERJ-3GEYJ204V ERJ-3GEYJ205V TL2575-ADJIKTTR 640454-3 640457-3 1877285-2 640454-2 68001-406HLF 68000-408HLF DF11Z-16DS-2V(20) 1-1123722-2 1123721-2 3-640443-3 3-640623-2 LM61CIM3/NOPB MCP6001UT-I/OT A000066 ezLCD-313 Price Ext $0.70 $2.10 $0.21 $0.42 $0.51 $1.02 $0.52 $1.56 $0.64 $1.28 $0.64 $1.28 $0.10 $0.30 $0.10 $0.20 $0.10 $0.20 $0.10 $0.20 $0.10 $0.20 $1.91 $5.73 $0.17 $0.85 $0.17 $0.68 $0.30 $0.90 $0.13 $0.39 $0.34 $1.02 $0.27 $0.81 $1.66 $3.32 $0.16 $0.48 $0.21 $1.05 $0.20 $1.60 $0.16 $0.48 $0.93 $2.79 $0.29 $0.58 $27.83 $27.83 $219.00 $219.00 $33.00 $33.00 Total: $276.27 28