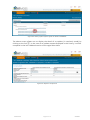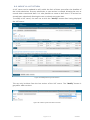
1
USER MANUAL The VATMOSS portal allows users of a taxable person having access to the VATMOSS system to fulfil their tax obligations including the management of the registration data (registration request to the special scheme, updates of the registration data, exclusion request from the special scheme), the management of mandates as well as the filing of VAT returns. DOCUMENT HISTORY Version 1.00 Date 29/09/2014 Author AED 1.01 24/09/2014 AED 1.02 03/07/2015 AED USER Manual Description Initial Version Description of VAT return designation of mandates. Update Page 1 on 76 submissions, VATMOSS Table of Contents 1. INTRODUCTION ...............................................................10 1.1. OBJECTIVE .......................................................................................... 10 1.2. STRUCTURE OF THE DOCUMENT ......................................................... 10 2. CONNECTION ...................................................................11 3. INITIAL REGISTRATION IN VATMOSS ................................12 3.1. REGISTRATION REQUEST ..................................................................... 12 3.1.1. Union scheme ............................................................................... 13 3.1.2. Non-Union scheme ....................................................................... 19 3.2. REQUEST SUBMISSION ........................................................................ 22 3.3. PROCESSING OF AN INITIAL REGISTRATION REQUEST ......................... 23 4. OTHER TYPES OF REQUESTS.............................................24 5. UPDATE OF THE REGISTRATION DATA .............................26 6. EXCLUSION REQUEST .......................................................27 6.1. EXCLUSION FORM ............................................................................... 27 6.1.1. Union scheme ............................................................................... 27 6.1.2. Non-Union Scheme ....................................................................... 29 6.2. UPDATE OF THE REGISTRATION DATA AFTER AN EXCLUSION .............. 30 7. RE-REGISTRATION IN VATMOSS .......................................31 8. REQUESTS HISTORY .........................................................32 9. VAT RETURNS ..................................................................34 9.1. FILE A VAT RETURN ............................................................................. 34 9.1.1. Select VAT return period ............................................................... 36 9.1.2. VAT return form ............................................................................ 36 9.1.3. Select VAT return start and end dates ........................................... 39 9.1.4. Fill NETP supplies .......................................................................... 40 9.1.5. Fill supplies from Fixed Establishments based in other Member States ..................................................................................................... 41 9.2. IMPORT DATA FROM AN XML FILE ...................................................... 42 9.3. IMPORT DATA FROM ANOTHER VAT RETURN ..................................... 42 9.4. SAVE VAT RETURN AS DRAFT .............................................................. 43 USER Manual Page 2 on 76 VATMOSS 9.5. MODIFY A DRAFT ................................................................................ 43 9.6. DELETE A DRAFT ................................................................................. 43 9.7. SUBMIT A VAT RETURN ....................................................................... 44 9.8. MODIFY A VAT RETURN ...................................................................... 45 9.9. TRANSMISSION TO MEMBER STATES OF CONSUMPTION .................... 46 9.10. TRANSMISSION TO MEMBER STATES OF ESTABLISHMENT ................ 47 9.11. STATEMENT OF TRANSACTIONS ........................................................ 48 9.11.1. Filter operations ......................................................................... 49 9.12. NOTIFICATIONS ................................................................................. 50 10. NOTIFICATIONS ..............................................................51 10.1. FILTER THE NOTIFICATIONS ............................................................... 52 10.2. DISPLAY A NOTIFICATION .................................................................. 53 11. MANDATES ....................................................................54 11.1. ESTABLISH A MANDATE .................................................................... 56 11.1.1. Agent established in Luxembourg ............................................... 56 11.1.2. Agent not established in Luxembourg ......................................... 57 11.2. REVOKE THE MANDATE..................................................................... 58 11.3. SHOW THE DETAILS OF A MANDATE ................................................. 58 12. AGENT............................................................................59 12.1. MENU ............................................................................................... 60 12.2. AGENT – LU NETP.............................................................................. 60 12.2.1. Details of an active mandate ....................................................... 62 12.2.2. Details of an inactive mandate .................................................... 64 12.3. AGENT – COMPANY ESTABLISHED IN LUXEMBOURG ......................... 64 12.3.1. Details of an active mandate ....................................................... 66 12.3.2. Details of an inactive mandate .................................................... 68 12.4. AGENT – COMPANY NOT ESTABLISHED IN LUXEMBOURG ................. 68 12.4.1. Details of an active mandate ....................................................... 70 12.4.2. Details of an inactive mandate .................................................... 72 12.5. VAT RETURN ..................................................................................... 73 13. USER’S PREFERENCES .....................................................74 USER Manual Page 3 on 76 VATMOSS LIST OF TABLES Table 1: Abbreviations and Acronyms ............................................................................................................... 6 LIST OF FIGURES Figure 1: Special scheme of M1SS ..................................................................................................................... 7 Figure 2 : M1SS organization at the Grand-Duchy of Luxembourg .................................................................... 8 Figure 3: Connection screen ........................................................................................................................... 11 Figure 4: Registration ...................................................................................................................................... 12 Figure 5: Registration not possible .................................................................................................................. 13 Figure 6: EU Registration request – part 1 ...................................................................................................... 14 Figure 7: EU Registration request – part 2 ...................................................................................................... 15 Figure 8: EU Registration request – part 3 ...................................................................................................... 15 Figure 9: EU Registration request – Add a fixed establishment ....................................................................... 16 Figure 10: EU Registration request – part 4 .................................................................................................... 17 Figure 11: Deletion of the draft and loading of the last submitted data ......................................................... 18 Figure 12: Non-EU Registration request – part 1 ............................................................................................. 19 Figure 13: Non-EU registration request - part 2 .............................................................................................. 20 Figure 14: Non-EU registration request – part 3 ............................................................................................. 21 Figure 15: Deletion of the draft and loading of the last submitted data ......................................................... 22 Figure 16: Registration request submitted ...................................................................................................... 22 Figure 17: E-mail address validated ................................................................................................................ 23 Figure 18: Welcome screen after the acceptance of the registration by the AED ........................................... 23 Figure 19: Registration request accepted ....................................................................................................... 24 Figure 20: Update the registration .................................................................................................................. 26 Figure 21: Voluntary exclusion from the Union scheme .................................................................................. 27 Figure 22: Confirmation of the exclusion request ........................................................................................... 28 Figure 23: Exclusion request ........................................................................................................................... 29 Figure 24: Voluntary exclusion from the non-Union scheme .......................................................................... 29 Figure 25: Button “Reregister” ........................................................................................................................ 31 Figure 26: Link to the requests history ............................................................................................................ 32 Figure 27: History of the status of the LU NETP in VATMOSS .......................................................................... 32 Figure 28: History of the requests of the LU NETP in VATMOSS ...................................................................... 33 Figure 29: Requests comparison ..................................................................................................................... 33 Figure 30: VAT return list ................................................................................................................................ 34 Figure 31: File a VAT return button from the home screen ............................................................................. 35 Figure 32: Create a VAT return button from the VAT return main screen ....................................................... 35 Figure 33: VAT return period selection screen ................................................................................................ 36 Figure 34: EU NETP VAT return creation form ................................................................................................. 38 Figure 35: Non EU NETP VAT return creation form ......................................................................................... 39 Figure 36: Wrong period ................................................................................................................................. 39 Figure 37: NETP supplies ................................................................................................................................. 40 Figure 38: Empty fields ................................................................................................................................... 40 Figure 39: (Alert) The user selected a Member State of consumption in which he has a fixed establishment 41 Figure 40: Fixed establishments supplies ........................................................................................................ 41 Figure 41: (Alert) Inactive fixed establishment................................................................................................ 41 Figure 42: Import data from an XML file ......................................................................................................... 42 Figure 43: Import data from another VAT return ............................................................................................ 42 Figure 44 : Confirmation of a VAT return submission ...................................................................................... 44 Figure 45: Modification of a VAT Return ......................................................................................................... 45 Figure 46: Choice of the VAT Return version ................................................................................................... 45 Figure 47 : VAT return modifications highlited ................................................................................................ 46 Figure 48 : Transmission to Member States of consumption .......................................................................... 47 Figure 49 : Transmission to Member States of establishment ......................................................................... 48 Figure 50 : Statement of transaction............................................................................................................... 49 Figure 51 : Filtrer les opérations ..................................................................................................................... 49 USER Manual Page 4 on 76 VATMOSS Figure 52 : Notifications of a VAT return ......................................................................................................... 50 Figure 53: List of notifications ......................................................................................................................... 51 Figure 54: Filter on the notifications ............................................................................................................... 52 Figure 55: Details of a notification .................................................................................................................. 53 Figure 56: Mandates homepage - no active mandate ..................................................................................... 55 Figure 57: Mandates homepage - active mandate .......................................................................................... 55 Figure 58: Agent established in Luxembourg .................................................................................................. 56 Figure 59: Agent not established in Luxembourg ............................................................................................ 57 Figure 60: Revoke the mandate ...................................................................................................................... 58 Figure 61: Details of a mandate ...................................................................................................................... 58 Figure 62: Registration data of the LU NETP (read-only) ................................................................................. 59 Figure 63: Menu bar of an agent ..................................................................................................................... 60 Figure 64: Homepage of an agent - LU NETP ................................................................................................... 61 Figure 65: Details of an active mandate .......................................................................................................... 62 Figure 66: Revocation of a mandate ............................................................................................................... 63 Figure 67: Modify my information linked to the mandate .............................................................................. 63 Figure 68: Details of an inactive mandate ....................................................................................................... 64 Figure 69: Homepage of an agent - established in Luxembourg ...................................................................... 65 Figure 70: Details of an active mandate .......................................................................................................... 66 Figure 71: Revoke a mandate.......................................................................................................................... 67 Figure 72: Modify my information linked to the mandate .............................................................................. 67 Figure 73: Details of an inactive mandate ....................................................................................................... 68 Figure 74: Homepage of an agent - not established in Luxembourg ............................................................... 69 Figure 75: Change my identification information ............................................................................................ 70 Figure 76: Details of an active mandate .......................................................................................................... 70 Figure 77: Revoke a mandate.......................................................................................................................... 71 Figure 78: Modify my information linked to the mandate .............................................................................. 71 Figure 79: Details of an inactive mandate ....................................................................................................... 72 Figure 80: User’s preferences ......................................................................................................................... 74 USER Manual Page 5 on 76 VATMOSS ABBREVIATIONS The following table shows the abbreviations used in this manual. For a detailed explanation of some concepts, the user can refer to the section “Definitions”. ABBREVIATIONS AND ACRONYMS Abbreviation Meaning CTIE Centre des Technologies de l’Information de l’Etat AED Administration de l’enregistrement et des domaines M1SS Mini One Stop Shop État Membre Member State of the European Union VATMOSS Luxembourgish M1SS MSID Member State of Identification in M1SS MSCON Member State of consumption NETP Non-Established Taxable Person NETP LU NETP being registered or registered in VATMOSS Régime particulier Collective term to designate the Union scheme and the non-Union scheme NETP LU UE LU NETP registered in the Union scheme of VATMOSS NETP LU non UE LU NETP registered in the non-Union scheme of VATMOSS Quarantaine Period after the exclusion of a NETP during which he cannot register to M1SS Notification Message addressed to the LU NETP by VATMOSS on the web portal Numéro d’identification TVA Number allocated during the registration of a person to the VAT. It consists of an identical and unique group of 8 digits preceded by the two letters LU. This number is used in intra Community exchanges. Numéro fiscal national Number that allows identifying the taxpayer in order to facilitate the tax administrations in their internal tax business. This number also allows the identification of taxpayers investing in other Member States. Table 1: Abbreviations and Acronyms DEFINITIONS A. The special scheme of Mini One Stop Shop M1SS The Mini One Stop Shop (M1SS) is an optional special scheme applicable to the telecommunications, broadcasting or electronic services supplied by taxable persons (NonEstablished Taxable Person) established or not in the European Union to non-taxable persons having their home or habitual residence within the territory of the European Union. The special scheme mainly aims to simplify administrative procedures of the NETP by allowing them to file and pay their VAT returns to only one Member State, called Member State of identification (MSID) [art. 358a, 369a DIR06/112], rather than having to complete procedures in each Member State in which they have provided services. On these returns, the NETP summarizes all the services provided to non-taxable persons in Member States, called Member States of consumption [art. 58 DIR06/112], where they are not located or where they do not have fixed establishments. USER Manual Page 6 on 76 VATMOSS Union scheme Non-Union scheme Figure 1: Special scheme of M1SS NETP There are two distinct sets of NETP that are likely to take advantage of this special scheme in a MSID: NETP tied to non-Union scheme: Any taxable person who has not established his business within the European Union, does not have a fixed establishment there, and is not obliged to register for VAT purposes may opt for the non-Union scheme as provided for in Section 2 of Chapter 6 of Title XII of DIR06/112. The taxable person can choose any Member Stare to be his Member State of identification. The MSID selected by the NETP identifies that NETP in M1SS through the allocation of an individual VAT identification number, called Voes number, that meets the alphanumeric syntax EUxxxyyyyyz [art. 362 DIR06/112], where xxx is a digital code identifying uniquely the MSID, while yyyyy are 5 digits identifying uniquely the NETP and z is a check digit. NETP tied to Union scheme: Any taxable person who has established his business within the European Union or has at least a fixed establishment there may opt for the Union scheme as provided for in Section 3 of Chapter 6 of Title XII of DIR06/112. When the taxable person has established his business within the European Union, the Member State in which he has established his business is considered as MSID. When the taxable person has established his business outside the European Union, but has several fixed establishments in the Member States within the European Union, he is entitled to choose one of those Member States to be the Member State of identification. Please note that the “Union scheme” does not apply to telecommunications, broadcasting or electronic services supplied in a Member State where the taxable person has established his business or in which he has a fixed establishment. These supplies must be reported to the competent tax authorities of that Member State in the VAT return designated by the article 250 of DIR06/112. The identification of a NETP tied to the Union scheme in the optional scheme of M1SS is done through the VAT identification number that has been allocated by the MSID for its internal operations [art. 369d DIR06/112]. Thus a taxable person can only opt for the Union scheme if he is already registered for VAT purposes in the MSID. USER Manual Page 7 on 76 VATMOSS Luxembourgish M1SS (VATMOSS) Union scheme Non-Union scheme EU LU NETP Non-EU LU NETP LU NETP Figure 2 : M1SS organization at the Grand-Duchy of Luxembourg B. The actors of the M1SS special scheme – The NETP The above chart shows that NETPs are divided in two groups: LU NETP registered in the Luxembourgish M1SS, called VATMOSS and amongst which there are 2 kinds of scheme (Union and non-Union) ; Non LU NETP registered in M1SS in another Member State. EU LU NETP An EU LU NETP is a NETP registered in VATMOSS under the Union scheme, i.e. a NETP with its place of business or a fixed establishment in Luxembourg. The identification is done by the VAT identification number in Luxembourg. Non-EU LU NETP A non-EU LU NETP is a NETP registered in VATMOSS under the non-Union scheme, i.e. a NETP who chose Luxembourg as MSID. C. Related concepts MSID – Member State of identification (Union scheme and non-Union scheme) The Member State of identification is the Member State in which the NETP is registered to M1SS and performs his tax obligations including the filing of VAT returns and the payment of the due tax [art. 358a, 369a DIR06/112]. MSCON – Member State of consumption (Union scheme and non-Union scheme) The Member State of consumption is the Member State in which, based on the article 58 of DIR06/112, the supply of the telecommunications, broadcasting or electronic services is deemed to take place. Fixed establishment (Union scheme) A fixed establishment is any establishment, other than the place of business, that has a sufficient degree of permanence and a suitable structure in terms of human and technical resources in order to supply the services he delivers. Simply having a VAT Identification number does not in itself mean that an establishment qualifies as a fixed establishment. USER Manual Page 8 on 76 VATMOSS MSEST – Member State holding a fixed establishment (Union scheme) It is the Member State of the European Union in which there is a fixed establishment having provided services applicable to M1SS. USER Manual Page 9 on 76 VATMOSS 1. INTRODUCTION 1.1. OBJECTIVE The VATMOSS portal allows users of a LU NETP having access to the VATMOSS system to fulfil their tax obligations including the management of the registration data (registration request to the special scheme, updates of the registration data, exclusion request from the special scheme) and the filing of the VAT return. This document is the user manual of the VATMOSS portal. As it stands, it sets out how to connect to the portal, how to view notifications generated by VATMOSS or by the Administration de l’enregistrement et des domaines (AED) and how to handle the preferences that the user can adapt to his needs. 1.2. STRUCTURE OF THE DOCUMENT The document is composed of the following elements: Chapter 1 – Introduction gives an overview of the objective and the scope of this document and the intended audience; Chapter 2 – Connection describes the procedure allowing a user to access to the portal; Chapter 3 – Initial registration in VATMOSS describes how to register in VATMOSS; Chapter 4 – Other types of Requests describes the requests that a NETP can submit in VATMOSS; Chapter 5 – Update of the registration data describes how to update the registration data; Chapter 6 – Exclusion Request describes how the NETP can proceed with its voluntary exclusion from VATMOSS; Chapter 7 – Re-registration in VATMOSS describes how a NETP who has been excluded from VATMOSS can request his re-registration; Chapter 8 – Requests history describes where the NETP can consult the history of the requests he submitted; Chapter 9 – VAT returns presents the way to submit VAT return and the different actions; Chapter 10 – Notifications presents the follow-up of the received notifications; Chapter 11 – Mandates presents the mandates management, with the establishment and the revocation of them; Chapter 12 – Agent presents the functionalities of the agents on VATMOSS; Chapter 13 – User’s preferences describes how the user can modify his preferences. USER Manual Page 10 on 76 VATMOSS 2. CONNECTION The user of the portal, that is to say the LU NETP, must pass through the connection screen of the CTIE before accessing any page of the portal. The connection requires an active Luxtrust card and the necessary software to read the LuxTrust card installed on the client computer. The URL of the application in the production environment is: https://enoss.b2g.etat.lu/enoss-netp/ Figure 3: Connection screen USER Manual Page 11 on 76 VATMOSS 3. INITIAL REGISTRATION IN VATMOSS At the first connection to VATMOSS, the following welcome screen is displayed: Figure 4: Registration Before using VATMOSS, it is mandatory to submit a registration request. This is why the welcome screen displays a link to a registration form at the first connection. The current section describes the different steps that a LU NETP must perform in order to submit its registration request in VATMOSS. He must refer to: section “3.1.1 - Union scheme” for the EU LU NETP tied to the Union scheme ; section “3.1.2 - Non-Union scheme” for the non EU LU NETP tied to the non-Union scheme. Once the registration request is accepted by the AED, the LU NETP can access all the features of the web portal. 3.1. REGISTRATION REQUEST The LU NETP reaches the registration form by clicking on the button “Register my company”. The information that the LU NETP must provide is different depending on the scheme, i.e. Union scheme or non-Union scheme. The scheme applicable to the NETP will automatically be determined by VATMOSS. Before finally submitting a registration request, the LU NETP can save it as “draft”. Saving a draft can only be performed if the entered data is complete and valid. All the fields of the figures presented in the current section marked by a red asterisk must be filled in in order to submit the registration request to AED. USER Manual Page 12 on 76 VATMOSS 3.1.1. Union scheme 3.1.1.1. Prior checks (EU LU NETP) Before a registration request for a EU LU NETP can be submitted, VATMOSS checks if the EU LU NETP is a taxable person who is active and known to the national register of VAT identification. If it is not the case, an error message (Figure 5: Registration not possible) displays and informs the EU LU NETP that it will not be possible to submit a registration request and that he should contact the eTVA helpdesk. Figure 5: Registration not possible If the EU LU NETP is a taxable person active and known by the database of AED, it is possible to fill in a registration request in VATMOSS. For the Union scheme, some fields of the registration request in the following figure are initialized via the data coming from the national register of VAT identification. It is the gray fields in the Figure 6: EU Registration request – part 1. If these pre-initialized fields are incorrect, the EU LU NETP must contact the eTVA helpdesk before being able to proceed. Here is the screen used to perform a registration request to VATMOSS for the Union scheme: USER Manual Page 13 on 76 VATMOSS 1 2 Figure 6: EU Registration request – part 1 ① Change of Member State of identification: This frame must be filled in if the EU LU NETP was registered for the Union scheme in another Member State in the European Union and that he requested to be excluded from this Member State with the intent to register for VATMOSS in Luxembourg. In the case of a change of MSID, the EU LU NETP must tick the box “Yes” and indicate his previous MSID as well as the VAT identification number in this Member State. ② Identification detail: The Individual VAT identification number, the company name, and the address are pre-initialized and not modifiable fields (greyed fields on the above figure). About the address, it is the address of the place of business in Luxembourg or, failing that, the address of the fixed establishment in Luxembourg coming from the national register of VAT identification; The box called “The country in which the taxable person has his place of business” informs the country in which the place of business of the EU LU NETP is. It is either the Grand Duchy of Luxembourg or, if there is no place of business within the European Union, the country outside the European Union where the place of business of the company is; A first button “Add” allows to add one or several trading name(s) if this or these ones differ from the company name; USER Manual Page 14 on 76 VATMOSS A valid e-mail address must be specified in order to continue the registration and finalize it. Indeed, this e-mail address will be checked by the sending of an e-mail from VATMOSS before the finalization of the registration process. By ticking the underneath box, the EU LU NETP can force the sending of an e-mail to this address whenever a notification is addressed to him on the portal; A second button “Add” allows to add several websites to the company; 3 4 5 Figure 7: EU Registration request – part 2 ③ Services: Gives the details about the types of services that the EU LU NETP provides. The relevant boxes should be ticked and a description of the provided services must be given. ④ Contact: This part of the registration request includes the information about the contact person at the EU LU NETP for the AED. If the national register of VAT identification holds a phone number, this phone number is pre-initialized, but may be modified. ⑤ Bank Account: Includes the bank details of the EU LU NETP that are pre-initialized with data coming from the national register of VAT identification. The pre-initialized data may still be modified. 6 7 8 Figure 8: EU Registration request – part 3 ⑥ Fixed establishments located in a Member State other than the MSID: A fixed establishment is any establishment, other than the place of business, that has a USER Manual Page 15 on 76 VATMOSS sufficient degree of permanence and a suitable structure in terms of human and technical resources in order to supply the services it delivers. Simply having a VAT Identification number does not in itself mean that an establishment qualifies as a fixed establishment. All fixed establishments that the EU LU NETP company has on the territory of the European Union must be specified. ⑦ It is possible to remove a fixed establishment that is already filled via the cross on the right. The removal is taken into account when the registration is saved as “draft” or submitted. ⑧ It is possible to add a fixed establishment by clicking on the button “add a fixed establishment”. The opening pop-up allows the user to enter the information related to the fixed establishment. 10 9 11 12 Figure 9: EU Registration request – Add a fixed establishment ⑨ Information related to the identification of the fixed establishment. ⑩ Address of the fixed establishment. ⑪ This button allows one to confirm the addition of a fixed establishment to the existing list. The addition of a fixed establishment does not save the changes done to the registration request. In order to save these changes, it is needed to save the registration request by clicking on the button ⑰ on the following figure. ⑫ This button allows one to cancel the modifications that have been done until now on the fixed establishment. USER Manual Page 16 on 76 VATMOSS 13 14 15 16 17 18 Figure 10: EU Registration request – part 4 ⑬ VAT identification number(s) allocated by Member State(s) as a non-established taxable person: This part lists the identification numbers that the taxable person has in others Member States. In this case, they are Member States in which the EU LU NETP has neither a place of business, nor a fixed establishment, but in which he is obliged to register for VAT purposes, particularly for distance sales. ⑭ Date of commencement of using the scheme: It is the beginning date of the activities covered by the Union scheme. By default, the first box is ticked: in this case, the beginning date of the activities covered by VATMOSS is the first day of the calendar quarter following the one during which the EU LU NETP submitted the registration request in VATMOSS, provided that the registration request has been accepted and validated by the AED during the quarter of application to join the Union scheme. The legislation allows one to force a beginning date based on the date of first supply of services services [art. 57d of Council regulation (EU) No 967/2012 of 9 October 2012]. In this case, the registration request must be done at the latest the tenth day of the month following the date of the first service supplied. By ticking the second box, the user can only enter a date between the date of the first supply of service and the tenth day of the month following the first supply of services. ⑮ Previous use of either of the special schemes: By ticking the box “Yes”, this section must list all the previous registrations of the LU NETP to M1SS, whether in the Union or the non-Union scheme, in Luxembourg or any other Member State. ⑯ Submit: Validates the request before submitting it (see the section “3.2 - Request submission”). The validation of the e-mail address provided by the EU LU NETP in the registration request is needed before definitive submission of the registration request for acceptance by the AED. ⑰ Save as draft: Validates the request before saving it as draft. The EU LU NETP can continue filling the form later. USER Manual Page 17 on 76 VATMOSS ⑱ Cancel: Cancels the unsaved changes. When the EU LU NETP saved a registration request as “draft” for the Union scheme or in case of rejection for any reason whatsoever of a first registration request by the AED, the EU LU NETP can access to the draft at the next connection to VATMOSS or load the last registration request submitted to AED by clicking on the tab “Registration data”. 19 20 Figure 11: Deletion of the draft and loading of the last submitted data ⑲ Delete the draft: Definitively deletes the current draft and loads the last data validated by the AED. If any registration request has been validated by the AED, the page goes back to its initial state at the page 12 on Figure 4: Registration. ⑳ Show the last transmitted registration: After the submission of a registration request, the AED can reject it and the EU LU NETP has the possibility to cancel it as long as an AED agent is not in charge of the request. This button allows one to reload the last data submitted to the AED (whatever the status: accepted, rejected or cancelled). If a draft exists, it is not overwritten. For that, it is needed to save the request. USER Manual Page 18 on 76 VATMOSS 3.1.2. Non-Union scheme In the case of the non-Union scheme, the input screen of a registration request stands as follows: 1 Figure 12: Non-EU Registration request – part 1 ① Identification detail: Company details: The individual VAT identification number cannot be entered. This grayed field will be empty in the case of a registration or a re-registration request for the non-Union scheme. In the case of an update of the registration data, the field will be pre-initialized (see the section “5 - Update of the registration data”) ; The first button “Add” allows one to add one or several trading name(s) if they differ from the company name ; The box called “The country in which the taxable person has his place of business” must be filled with the country of the place of business of the non-EU LU NETP. It is the country where the place of business is. The non-EU LU NETP also fills the national tax number in this country (“National tax number”) ; USER Manual Page 19 on 76 VATMOSS Address: The address must be filled carefully. It is the address of the place of business of the non-EU LU NETP located outside of the European Union ; A valid e-mail address must be specified in order to continue the registration and finalize it. Indeed, this e-mail address will be checked by the sending of an e-mail from VATMOSS before the finalization of the registration process. By ticking the underneath box, the non-EU LU NETP can force the sending of an e-mail to this address whenever a notification is addressed to him on the NETP portal A second button “Add” allows one to add several web sites to the company. 2 3 4 Figure 13: Non-EU registration request - part 2 ② Services: Gives the detail about the type of services provided by the non-EU LU NETP. The relevant boxes should be ticked and a description of the provided services must be given. ③ Contact: This part of the registration request includes the information about the contact person at the non-EU LU NETP for the AED. ④ Bank Account: Includes the bank details of the non-EU LU NETP to be filled as an IBAN or, if not available, an OBAN. USER Manual Page 20 on 76 VATMOSS 5 6 7 8 9 10 Figure 14: Non-EU registration request – part 3 ⑤ Date of commencement of using the scheme: It is the beginning date of the activities covered by the non-Union scheme. By default, the first box is ticked: in this case, the beginning date of the activities covered by VATMOSS is the first day of the calendar quarter following the one during which the non-EU LU NETP submitted the registration request in VATMOSS, provided that the registration request has been accepted and validated by the AED during the quarter of application to join the non-Union scheme. The legislation allows one to force a beginning date based on the date of first supply of services [art. 57d of Council regulation (EU) No 967/2012 of 9 October 2012]. In this case, the registration request must be done at the latest the tenth day of the month following the date of the first service supplied. By ticking the second box, the user can only enter a date between the date of the first supply of service and the tenth day of the month following the first supply of services. ⑥ Previous use of either of the special schemes: By ticking the box “Yes”, this section must list all the previous registrations of the LU NETP to M1SS, whether in the Union or the non-Union scheme, in Luxembourg or any other Member State. ⑦ Electronic declaration: before saving the request as draft or submitting it, the nonEU LU NETP must certify that he is not registered for VAT in a Member State. ⑧ Submit: Validates the request before submitting it (see the section “3.2 - Request submission”). The validation of the e-mail address provided by the non-EU LU NETP in the registration request is needed before the definitive submission of the registration request for acceptance by AED. ⑨ Save as draft: Validates the request before saving it as draft. The non-EU LU NETP can continue filling the form later. ⑩ Cancel: Cancels the unsaved changes. When the non-EU LU NETP saved a registration request as “draft” for the non-Union scheme or in case of rejection for any reason whatsoever of a first registration request by the AED, the non-EU LU NETP can access to the draft at the next connection to VATMOSS or load the last registration request submitted to AED by clicking on the tab “Registration data”: USER Manual Page 21 on 76 VATMOSS 11 12 Figure 15: Deletion of the draft and loading of the last submitted data ⑪ Delete the draft: Definitively deletes the current draft and loads the last data validated by the AED. If any registration request has been validated by AED, the page goes back to its initial stage at page 12 on the Figure 4: Registration. ⑫ Show the last transmitted registration: After the submission of a registration request, the AED can reject it and the non-EU LU NETP has the possibility to cancel it as long as an AED agent is not in charge of the request. This button allows one to reload the last data submitted to the AED (whatever the status: accepted, rejected or cancelled). If a draft exists, it is not overwritten. For that, it is needed to save the request. 3.2. REQUEST SUBMISSION After having completed the registration request form, the LU NETP can submit it by clicking on the button “Submit” shown in the Figure 10: EU Registration request – part 4 in the case of EU LU NETP tied to the Union scheme or in the Figure 14: Non-EU registration request – part 3 in the case of non-EU LU NETP tied to the non-Union scheme. The submission of the request is followed by a notification (see the section “10 - Notifications”). Figure 16: Registration request submitted In the case of the submission of an initial registration request dealt in the section “3.1 Registration request“, the LU NETP has to validate within 24 hours the e-mail address provided in the registration request form. If the LU NETP does not validate the e-mail address within 24 hours, the registration request is automatically rejected by VATMOSS and the LU NETP will have to submit a new registration request. The validation of the e-mail address of the LU NETP is done through a link sent to the LU NETP and on which it must click. The validation of his registration request is going on. It is still possible for the NETP to USER Manual Page 22 on 76 VATMOSS cancel his registration request at this step, as long as the registration request is not being processed by an AED agent. Figure 17: E-mail address validated 3.3. PROCESSING OF AN INITIAL REGISTRATION REQUEST A registration request submitted to the AED can be either accepted or rejected. In both scenarios, a notification will be addressed to the LU NETP on the portal (see the section “10 - Notifications”). If the registration request is rejected by the AED, the initial form is displayed during the access to the menu “Registration data”. In case of acceptance of the registration, the welcome screen of VATMOSS stands as follows during the subsequent connections to the portal: Figure 18: Welcome screen after the acceptance of the registration by the AED A summary of the registration data of the LU NETP company is shown in the left part of the screen, whereas the right part lists the last information of the VAT returns submitted by the NETP (as from 1st of January 2015). In the lower part of the screen are the unread notifications of the LU NETP. USER Manual Page 23 on 76 VATMOSS 4. OTHER TYPES OF REQUESTS Once registered in VATMOSS, the tab “Registration data” displays the registration form initially submitted by the LU NETP, but the form is read-only and now corresponds to the registration data of the LU NETP. During his registration to the special scheme, either the Union or the non-Union scheme, a LU NETP can be required to update his registration data or to request his exclusion from the special scheme. This LU NETP can also be excluded from the special scheme by the AED. The screen “Registration data” of the following figure allows one to display the different types and statuses of a request (draft, submitted data, and validated data) that the LU NETP can possibly submit: 1 2 19 19 Figure 19: Registration request accepted ① Update the registration data: A click on the button allows the LU NETP to fill in an update request for his registration data (see the section “5 - Update of the registration data”); USER Manual Page 24 on 76 VATMOSS ② Request an exclusion: This button will lead the LU NETP to a form that allows him to request his exclusion from a special scheme (see the section “6.1 - Exclusion form”). USER Manual Page 25 on 76 VATMOSS 5. UPDATE OF THE REGISTRATION DATA Once registered, the LU NETP can perform an update of his registration data by clicking on the button “Update the registration data” (Figure 19: Registration request accepted). The LU NETP is guided through the following screen that allows him to load the last registration data submitted to the AED. It displays the same form as the initial registration request (see the section “3.1 - Registration request”). However, the form is pre-initialized with the last registration data submitted in edition mode. Nevertheless, it is not possible to change the date of commencement of using the scheme. There is no restriction on the number of submissions of registration updates even without the validation of the previous request. Figure 20: Update the registration The same way as for an initial registration request, it is possible to save a new draft, to delete it or to load the last submitted data (whatever their status: accepted, rejected or cancelled). Please note that there is no limit on the number of registration request updates simultaneously submitted. If an update request is cancelled by the LU NETP, it is the previous update that is displayed or the last request accepted by the AED in case there is no other pending update. USER Manual Page 26 on 76 VATMOSS 6. EXCLUSION REQUEST A LU NETP registered in VATMOSS can ask his own exclusion from VATMOSS. A click on the button “Request an exclusion” from the screen “Registration Data” shown on the Figure 19: Registration request accepted leads to the exclusion request form. The procedure of an exclusion request for a: EU LU NETP tied to the Union scheme is described in the section “6.1.1. - Union scheme“; Non-EU LU NETP tied to the non-Union scheme is described in the section “6.1.2. Non-Union Scheme”. 6.1. EXCLUSION FORM 6.1.1. Union scheme The exclusion request form for the Union scheme is as follows: 2 1 Figure 21: Voluntary exclusion from the Union scheme The EU LU NETP can invoke several reasons to justify the submission of an exclusion request to the AED: “I no longer supply telecommunications, broadcasting or electronic services”. This choice involves a quarantine period of two calendar quarters from the date of cessation ; “My business no longer has a fixed establishment in the European Union and I want to make immediately use the special scheme for telecommunications, broadcasting services or electronic services supplied by taxable persons not established within the European Union”. This choice does not involve a quarantine period. The EU LU NETP must inform the date at which he has ceased to have a fixed establishment in the European Union ; USER Manual Page 27 on 76 VATMOSS “I request to be identified in another Member State”. This choice does not involve a quarantine period, but asks to point out the change reason: o “Because my business is not established in the European Union and I wish to make use of the special scheme covering telecommunications, broadcasting and electronically supplied services in another Member State in which I have a fixed establishment. Furthermore I am registered to the special scheme with the administration of Luxembourg for two years at least”. In this case, the EU LU NETP is invited to inform about the other Member State and the VAT identification number; o “Because my business is not establishment in the European Union and I have ceased to have a fixed establishment in Luxembourg. I still want to use hereafter the special scheme by registering in another Member State in which I have a fixed establishment”. The EU LU NETP must inform the date from which he has ceased to have a fixed establishment in Luxembourg, and is invited to provide the other Member State and the VAT identification number; o “Because my place of business is located in the European Union and I have moved my place of establishment from your country to another Member State”. The EU LU NETP must inform the date from which he has ceased to have a fixed establishment in Luxembourg, the other Member State and the VAT identification number; “Other reason”. This choice involves a quarantine period of two calendar quarters from the date of cessation. Clicking on “Request exclusion” ① opens a confirmation pop-up shown on the following figure to ensure that the exclusion is intended. It is also possible to “Cancel” ② the action if the EU LU NETP does not want to be excluded. Figure 22: Confirmation of the exclusion request After the confirmation of the exclusion request, this one is submitted to the AED and a notification on the following figure points out the sending of the request on the VATMOSS portal. After the submission of a registration request and before the acceptance by the AED, the EU LU NETP can update his registration data ③: USER Manual Page 28 on 76 VATMOSS 3 Figure 23: Exclusion request For the update of the registration data after an exclusion of VATMOSS, it is referred in the section “6.2. - Update of the registration data after an exclusion”. 6.1.2. Non-Union Scheme The exclusion request form from the non-Union scheme is as follows: Figure 24: Voluntary exclusion from the non-Union scheme The non-EU LU NETP can invoke several reasons to justify the submission of an exclusion request to the AED: “I no longer supply telecommunications, broadcasting or electronic services“. This choice involves a quarantine period of two calendar quarters from the date of cessation; “My business has opened a fixed establishment in the European Union and I want to make immediately use of the special scheme for telecommunications, broadcasting services or electronic services supplied by taxable persons established within the European Union but not established in the Member State of consumption”. This choice does not involve a quarantine period. The non-EU LU NETP must inform the date from which he has opened a fixed establishment in the European Union and the other Member State and the VAT identification number; USER Manual Page 29 on 76 VATMOSS “Other reason”. This choice involves a quarantine period of two calendar quarters from the date of cessation. For the finalization of the exclusion request process, it is referred in the procedure described in the previous section about the exclusion of the Union scheme. 6.2. UPDATE OF THE REGISTRATION DATA AFTER AN EXCLUSION After the LU NETP has been excluded from VATMOSS, the latter can always update part of his registration data. Clicking on the button “Update the registration data” on the screen “Registration data” (shown on the Figure 23: Exclusion request) displays the registration request form (see the section “3.1 - Registration request”) by limiting the edition of the following fields: E-mail address; Contact; Bank Account. USER Manual Page 30 on 76 VATMOSS 7. RE-REGISTRATION IN VATMOSS A LU NETP excluded from VATMOSS and whose period of quarantine has expired (in the case where such a period is expected by the laws in force) can ask its re-registration. If an excluded LU NETP wants to be re-registered, it must connect to VATMOSS and click on the button “Reregister” ① from the tab “Registration data“: a registration form similar to the one described on the section “3.1 - Registration request” will be displayed, section to which it is referred for the submission procedure of the form. 1 Figure 25: Button “Reregister” After the submission of an eventual registration request, it is checked if there is not any quarantine period imposed on LU NETP by another Member State (after 1st of January 2015). USER Manual Page 31 on 76 VATMOSS 8. REQUESTS HISTORY It is possible to access to the “View requests history” ① from the “Registration data” screen shown on the Figure 19: Registration request accepted in the case of an active LU NETP and on the following figure on the case of an excluded LU NETP. 1 Figure 26: Link to the requests history This link allows one to consult the history of the LU NETP status, meaning registered or excluded, in VATMOSS: 3 2 Figure 27: History of the status of the LU NETP in VATMOSS The LU NETP can: ② Display all the requests of the LU NETP by clicking on “Display requests”. The LU NETP is sent to the following screen including the set of requests submitted by the LU NETP. It may be registration, exclusion or re-registration requests. ③ Sort the requests in reverse chronological order. USER Manual Page 32 on 76 VATMOSS 4 Figure 28: History of the requests of the LU NETP in VATMOSS The above screen allows one to display the detail of an update (in read-only mode) by clicking on the link ④. In the case of an update request displayed in this history, it will be compared to the last validated version of the registration data: Figure 29: Requests comparison USER Manual Page 33 on 76 VATMOSS 9. VAT RETURNS The NETP can access the list of all its VAT returns, submitted and saved as draft, by clicking on the “VAT return” tab on the main menu. The following screen is then displayed: 1 2 3 4 5 Figure 30: VAT return list The VAT return list contains all the VAT returns the NETP has saved as draft or submitted. The VAT returns in a state of draft are indicated by an asterisk in parenthesis next to their period (*). From this screen, the following actions are available: ① Changing the table sorting order. By default, the VAT returns are sorted by period, starting with the more recent ones. The table can be sorted by another column by clicking on its header: one click sorts data by ascending order and a second click sorts it by descending order. Sorting by a column cancels any sorting previously applied. Data on this table is always grouped by year, regardless of the sorting applied, i.e. the sorting order concerns the VAT returns inside each year; ② Folding or unfolding a year to hide or show the VAT returns corresponding to that year. To do so, the user clicks on the row containing the year. The row is preceded by an arrow (►if the row is folded or ▼if it’s unfolded); ③ Display the details of a VAT return by clicking on the corresponding row in the table; ④ Setting the number of results (10, 50 or 100) displayed in the table. ⑤ Navigate through the result pages; 9.1. FILE A VAT RETURN The LU NETP has two ways to start creating a VAT return: either via the home screen by clicking the “File a VAT return” button: USER Manual Page 34 on 76 VATMOSS Figure 31: File a VAT return button from the home screen Or via the VAT return main screen by clicking on the “Create a VAT return” button: Figure 32: Create a VAT return button from the VAT return main screen USER Manual Page 35 on 76 VATMOSS 9.1.1. Select VAT return period After clicking one of these buttons, an intermediate screen lets the user choose which period will the VAT return concern: Figure 33: VAT return period selection screen Once the user has selected a period and clicked on the “Create a VAT return” button, the VAT return form appears. If the chosen period already has one or more version of a VAT return, submitted or saved as draft, the more recent one will be loaded instead of a blank form. A click on the “Cancel” button sends the user back to the VAT return main screen. 9.1.2. VAT return form The VAT return form is different whether the NETP is an EU NETP or a Non EU NETP. It is composed of the following parts: ① A header summing up various information about the VAT return: “Status” (“Draft” for a newly created VAT return); “Saved on”; “By”, the user who saved the VAT return; “Payment”, information on the last payments and reimbursement received on this VAT return. ② A tab bar used to access the various parts of the VAT return (during its creation, only the “VAT return” tab is accessible): “VAT Return” (see the sections “9.1 - File a VAT return” to “9.8 - Modify a VAT return”) “Transmission to Member States of consumption” (see the section “9.9 Transmission to Member States of consumption”) “Transmission to Member States of establishment” (see the section “9.10 Transmission to Member States of establishment”) “Statement of transactions” (see the section “9.11 - Statement of transactions”) USER Manual Page 36 on 76 VATMOSS “Notifications” (see the section “9.12 - Notifications”) ③ An upper toolbar containing the following buttons: “Modify” (inactive during VAT return creation); “Import XML data”, allowing the user to fill the VAT return using data contained in an .xml file; “Import data from another VAT return”, allowing the user to retrieve data from another VAT return and use it to start filling the current VAT return. ④ A drop down list containing the various version of the VAT return (during its creation, the list is empty); ⑤ Two date fields defining the start and end of the period covered by the VAT return; ⑥ A section dedicated to the NETP supplies; ⑦ (EU NETP only) A section dedicated to fixed establishment supplies; ⑧ (EU NETP only) A recap of the total VAT amount of the VAT return (sum of the total of sections ⑥ and ⑦); ⑨ A lower toolbar with the following buttons: “Submit VAT return” allowing the user to submit the VAT return; “Save as draft” allowing the user to save the current state of the VAT return as a draft, without submitting it; “Cancel” to go back to the VAT return main screen; “Delete draft” (inactive during VAT return creation). USER Manual Page 37 on 76 VATMOSS 1 2 3 4 5 6 7 8 9 Figure 34: EU NETP VAT return creation form USER Manual Page 38 on 76 VATMOSS 1 2 3 4 5 6 9 Figure 35: Non EU NETP VAT return creation form 9.1.3. Select VAT return start and end dates By default, when creating a new VAT return, the form and the fields are set up to cover the whole period, e.g. for Q1-2015, the default dates will be from 01/01/2015 to 31/03/2015. However, they can be modified to cover a shorter range, provided it is still contained in the VAT return period, e.g. for Q1-2015, the user could set a range going from 10/02/2015 to 20/03/2015 but not from 15/03/2015 to 15/04/2015 since the end date would be past the end of Q1-2015. If an erroneous period is entered, an error message will be displayed when the user tries to submit or save the VAT return as draft: Figure 36: Wrong period USER Manual Page 39 on 76 VATMOSS 9.1.4. Fill NETP supplies 1 4 2 3 Figure 37: NETP supplies The NETP supplies section is composed of the following parts: ① A checkbox allowing to declare that no electronic service has been supplied from Luxembourg; ② The lines of supply themselves, composed of the following information: The Member State of consumption in which the service has been consumed; The applied VAT rate, consisting in a VAT type (standard or reduced) and a value (between 0.01 and 99.99); The taxable amount; The computed VAT amount, which is not editable but rather the result of the application of the VAT rate to the taxable amount; The declared VAT amount, which can be different from the computed VAT amount. ③ An “Add line” button allowing the user to add a line of supply; ④ A delete (x) button allowing to remove an existing line; Every field has to be filled for a supply line to be correct, otherwise, the submission or saving of the VAT return will not be accepted and the fields with missing information will be highlighted in red: Figure 38: Empty fields As many lines as wanted can be added to the VAT return, provided the triplet Member State of consumption/VAT rate (type and value) is unique. Every time a supply is modified by the user, the computed amounts and totals are automatically updated. It is possible to select a Member State of consumption in which the NETP also has a Fixed Establishment. It means this Fixed Establishment has not been active for the whole period covered by the VAT return. In that case, the declared amount in the NETP supplies section USER Manual Page 40 on 76 VATMOSS is only applicable for the time the Fixed Establishment was closed. An alert informs the user when this situation arises: Figure 39: (Alert) The user selected a Member State of consumption in which he has a fixed establishment 9.1.5. Fill supplies from Fixed Establishments based in other Member States Figure 40: Fixed establishments supplies Filling Fixed Establishments supplies goes the same way as NETP supplies (see the section “9.1.4 - Fill NETP supplies”), except that the user has to mention which of the NETP’s Fixed Establishment is implied using the “Individual VAT identification number” drop-down list. This list contains the list of each Fixed Establishment of the NETP, whether it is currently active or not (because a Fixed Establishment could be open for only a part of the VAT return period). In the case where a currently inactive Fixed Establishment is selected, an alert is displayed at the left of the supply line: Figure 41: (Alert) Inactive fixed establishment As for the NETP supplies, as many lines as wanted can be added to the VAT return, provided the quadruplet Member State of establishment/Member State of consumption/ VAT rate (type and value) is unique. USER Manual Page 41 on 76 VATMOSS 9.2. IMPORT DATA FROM AN XML FILE 1 3 2 4 Figure 42: Import data from an XML file An XML file can be used to fill a VAT return. To do so, the user has to click on the “Import XML data” from the VAT return creation form. A popup is then displayed, composed of the following parts: ① A “Browse” button allows the user to select an .xml file from its computer; ② An “XML specifications” hyperlink, allowing the download of a .zip file which contains an explanatory leaflet “XML Schema Definition.pdf”, and an .xsd file “NETPVATReturnDefinition-v1.07.xsd” which details XML specifications precisely; ③ An “Import” button allows to confirm the file choice and to fill the VAT return with the information from this file; ④ A “Cancel” button allowing to close the popup and to go back on the VAT return form without importing any data. For the file to be processed correctly, it has to satisfy a number of specifications. To get a list of these specifications, the user can click on the hyperlink on the confirmation popup (②). In the case where a non-XML file, or one that doesn’t match the VAT return period is selected for import, an error message warns the user that the import is impossible. Otherwise, data is imported and the VAT return is filled and automatically saved as a draft. If a draft already existed at the time the user tried to import an XML file, a warning message asks for confirmation because the draft will be replaced if data is imported (only one draft can exist at a time for a VAT return). 9.3. IMPORT DATA FROM ANO THER VAT RETURN 1 2 3 Figure 43: Import data from another VAT return Data from an already existing VAT return can also be imported to fill another VAT return. To do so, the user has to click on the “Import data from another VAT return” button from the VAT return creation form. A popup is then displayed, composed of the following parts: ① A drop box allowing the user to select a VAT return to import; ② An “Import” button allowing to confirm the choice and fill the VAT return with data imported from the corresponding VAT return. The amounts are however not imported, USER Manual Page 42 on 76 VATMOSS only the Member States of consumption and establishment, the VAT types and VAT rates are; ③ A “Cancel” button allowing to close the popup and to go back on the VAT return form without importing any data. The data of the previous VAT return are imported but the amounts are forced to « 0 ». The user can then choose to save the VAT return as a draft or to submit it immediately, just as in the standard process. 9.4. SAVE VAT RETURN AS DRAFT Once the VAT return filled, it can be saved as a draft without submitting it, which allows the user to come back and complete it later. Moreover, it is possible to save the draft of a VAT return concerning the current period, whereas it cannot be submitted until the period is over. After clicking on the “Save as draft” button: An informative message confirms that the operation succeeded; The VAT return header is updated (Status: Draft, Saved on/by, Payment: Unpaid); In the version drop-down list, a “Draft” entry now appears; The tabs become accessible, however, for a VAT return newly created, the sections concerning Member States of consumption and establishment will be empty, as the splitting of the VAT return into MSCON/MSEST VAT returns only happens at its submission. The statement of transaction will also be empty; The VAT return appears in “display” mode: the fields are not accessible anymore. In the upper toolbox, only the “Modify” button is accessible, the import buttons are greyed, in the lower toolbox, only the “Submit VAT return” is displayed and accessible; The created VAT return appears in the table of the VAT return main screen with the “Draft” status. 9.5. MODIFY A DRAFT A draft can be updated as many times as the user wants it. However, only the last version of the draft is kept, there cannot be multiple version of a draft for a given VAT return. To edit a draft, the user has to click on the “Modify” button after having displayed the draft. He can then modify the data and confirms by clicking the button “Save as draft”. An informative message confirms that the operation succeeded. 9.6. DELETE A DRAFT A draft can be deleted at will by the user. Its data are then lost and cannot be retrieved again. To do so, the user has to click on the “Modify” button after having displayed the draft, then on the “Delete draft” button of the lower toolbar. There is no confirmation asked, the draft is deleted immediately and an informative message confirms it to the user. If there were other versions of the VAT return, the more recent of these is displayed right away. Otherwise, a blank form is shown. USER Manual Page 43 on 76 VATMOSS 9.7. SUBMIT A VAT RETURN It is possible to submit the VAT return either from the creation form or from an already saved draft via the “Submit VAT return” button. A confirmation popup then asks the user for confirmation. Figure 44 : Confirmation of a VAT return submission After confirmation, An informative message confirms that the operation succeeded; The VAT return header is updated (Status: Submitted, then Accepted, Saved on/By, Payment: Unpaid); The version is added to the drop-down list (with its status Submitted then Accepted); The tabs become accessible if they were not already; The amounts transferred to Member States of consumption and establishment are computed and the corresponding tabs are updated; The VAT return appears in “display” mode, the fields are not accessible anymore. In the upper toolbox, only the “Modify” button is accessible, the import buttons are greyed, in the lower toolbox, the “Submit VAT return” is also greyed; The VAT return appears in the main screen’s list with the status Submitted then Accepted; A notification is received immediately at the VAT return submission and another one after its acceptation. USER Manual Page 44 on 76 VATMOSS 9.8. MODIFY A VAT RETURN A VAT return can be updated at will, within the limit of three years after the deadline of the initial submission. At every submission, a new version is created, allowing the user to consult older transmitted data. It is also possible to create a draft even if a version has already been submitted, allowing the user to submit correction later. To modify a VAT return, the user has to click the “Modify” button after having displayed the VAT return: Figure 45: Modification of a VAT Return This can only be done from the last version of the VAT return. The “Modify” button is grayed for older versions: Figure 46: Choice of the VAT Return version USER Manual Page 45 on 76 VATMOSS The user can then either save its modification using the “Save as draft” button, or submit them immediately using the “Submit VAT return” button. In both cases, after confirmation, the VAT return is then displayed in “display” mode. In the case where a new version is submitted, differences with previous versions are highlighted: Figure 47 : VAT return modifications highlited Deleted lines of supply appear in red and strikethrough text Modified or added lines appear in blue and bold text 9.9. TRANSMISSION TO MEMB ER STATES OF CONSUMPTION This screen, accessible through the “Transmission to Member States of consumption” tab of the VAT return, sums up the information of the current version of the VAT return and the associated payments from the point of view of each Member State of consumption implied. Amounts are computed at every VAT return submission by the NETP. For each Member State of consumption, a “MSCON VAT return” is created and transmitted to the corresponding Member State. Lines that have been modified since the previous version are highlighted with bold text. Moreover, deleted lines also appear in bold with an amount of 0€, highlighting the fact that those lines are indeed transmitted to inform the Member State of their deletion. USER Manual Page 46 on 76 VATMOSS 1 2 3 4 5 6 Figure 48 : Transmission to Member States of consumption The screen is composed of the following parts: ① A drop-down list of every version of the VAT return; ② The list of every Member State of establishment implied in the VAT return. For each line, the user can fold and unfold the details of the VAT return (③) and of the payments (④) for this Member State of consumption; ③ Table representing the MSCON VAT return, including a drop-down list to select the number of element to display (10, 50 or 100), and a navigation system for this table; ④ T able representing the payments and reimbursements for this MSCON VAT return, including a drop-down list to select the number of element to display (10, 50 or 100), and a navigation system for this table; ⑤ Number of element to display (10, 50 or 100); ⑥ Navigation between the results. 9.10. TRANSMISSION TO MEMB ER STATES OF ESTABLISHMENT This screen, accessible through the “Transmission to Member States of establishment” tab of the VAT return, sums up the information of the current version of the VAT return and the associated payments from the point of view of each Member State of establishment implied. Amounts are computed at every VAT return submission by the NETP. For each Member State of establishment, a “MSEST VAT return” is created and transmitted to the corresponding Member State. Lines that have been modified since the previous version are highlighted with bold text. Moreover, deleted lines also appear in bold with an amount of 0€, highlighting the fact that those lines are indeed transmitted to inform the Member State of their deletion. USER Manual Page 47 on 76 VATMOSS 1 2 3 5 4 Figure 49 : Transmission to Member States of establishment The screen is composed of the following parts: ① A drop-down list of every version of the VAT return; ② The list of every Member State of establishment implied in the VAT return. For each line, the user can fold and unfold the details of the VAT return (③) for this Member State of consumption; ③ Table representing the MSEST VAT return, including a drop-down list to select the number of element to display (10, 50 or 100), and a navigation system for this table; ④ Number of element to display (10, 50 or 100); ⑤ Navigation between the results. 9.11. STATEMENT OF TRANSAC TIONS The list of every payment and reimbursement concerning the VAT return is available via the “Statement of transactions” tab. A table is also dedicated to the payments which accounting is pending, i.e. payments received and transmitted by eRecette but not yet transferred to the Member State of consumption. 1 2 3 USER Manual Page 48 on 76 VATMOSS Figure 50 : Statement of transaction The screen is composed of the following parts: ① A series of filters allowing to search payment (see the section “9.11.1 - Filter operations”); ② The list of every payment, reimbursement and retention for this VAT return, the following columns are displayed: Value date (sortable); Issuer (sortable); Recipient (sortable); Type of operation (reimbursement/payment/retention) (sortable); Version of the declaration (sortable); Amount; ③ The list of every payment which accounting is still pending, with the following columns: Value date (sortable); Issuer (sortable); Recipient (sortable); Amount (sortable); Reference (sortable). 9.11.1. Filter operations To filter the list of operations, the user can click on the button in order to display the filters currently applied. The following form is then displayed: 7 1 2 3 4 5 6 Figure 51 : Filtrer les opérations The information displayed in fields ① to ④ correspond to the filter currently applied. It’s possible to change the filtering by changing the values of fields ① to ④ depending on the expected results: ① The “Issuer” field allows the selection of the payment emitter, which can be either a Member State or a NETP; ② The “Recipient” field allows the selection of the NETP receiving the payment; USER Manual Page 49 on 76 VATMOSS ③ The “Operation” field allows the selection of a type of operation, including: Payment Reimbursement Retention ④ The “VAT return version” field restricts the result list to the operations concerning a precise VAT return version; ⑤ Click on the “Filter” button to apply the various filters previously entered. The various filters can be applied together, only the operation matching all the selected values will be displayed. It is also possible to: ⑥ Reset the filter to its default value by clicking on the “Reset filter” button. ⑦ Hide the filter details by clicking on the filter currently applied. button. Doing so does not cancel the 9.12. NOTIFICATIONS The list of notifications concerning a VAT return can be access by clicking the “Notifications” tab: Figure 52 : Notifications of a VAT return It is composed of a simple table containing the following columns: Date (sortable) Notification type (sortable) Issuer (sortable) By clicking on the link contained on the Date column, the details of the notification can be displayed (see the section “10.2 - Display a notification”). USER Manual Page 50 on 76 VATMOSS 10. NOTIFICATIONS A notification is the way used by VATMOSS or the AED in case of manual notification in order to communicate with the LU NETP the fact that an event happened or an action on his side is required. The notifications requiring an action from the user are called “persistent notifications”. They can be considered as “read” only when the required action has been performed by the LU NETP and validated by the AED. The list of the notifications received by the NETP is available by clicking on the tab “Notifications” in the main menu. The wording of the menu is followed by a red dot indicating the number of unread notifications. The following screen is then displayed: 1 2 3 5 4 Figure 53: List of notifications By default, no filter is applied: the list of notifications includes all notifications received by the LU NETP. The first column is displayed only for persistent notifications and can include the following value when a notification requires the execution of an action by the LU NETP and that action has not yet been performed. From this screen several actions are possible: ① Filter the list of the notifications (see the section “10.1 - Filter the notifications”); ② Change the sorting order of the table. By default, the notifications are sorted according to their issuing date, newest first. USER Manual Page 51 on 76 VATMOSS By clicking on the header of a column, it is possible to sort the table according to that column: a click sorts according to an ascending order, a second click sorts according to a descending order. The sort on a column deletes any other sort previously applied; ③ Display the details of a notification by clicking on the corresponding line in the table (see the section “10.2 - Display a notification”); ④ Display more or less elements in the table. The user can choose to display 10, 50 or 100 elements per page; ⑤ Browse between the pages of results. 10.1. FILTER THE NOTIFICAT IONS To filter the list of notifications, the user just has to click on the icon the filter currently applied. The following form is then displayed: 8 1 2 3 in order to display 4 5 7 6 Figure 54: Filter on the notifications The information displayed in the fields ① to ⑤ corresponds to the filter currently applied (none by default). It is possible to change the filtering by modifying the content of the fields ① to ⑤ according to the desired information: The fields “from” ① to “to” ② allow one to define a period during which the notifications to list must have been sent: If both fields are specified, the listed notifications must have been sent from the date “from”, and until the date “to” (included) ; If only the field “from” is specified, the notifications must have been sent from that date ; If only the field “to” is specified, the notification must have been sent until this date ; If no fields are specified, no restrictions will be applied to the date at which the listed notifications have been sent. ③ The field “Notification type” allows one to select the type of notification to display on the list. If no type is selected, no restriction will be applied on the types to display. It is not possible to select several types of notifications through this field. ④ The field “Free subject of the notification” allows one to limit the list of the notifications to those having a subject manually entered by the user that include the indicated text. ⑤ The field “Only unread notifications” allows, when the box is ticked, to display only the notifications that have not been read. USER Manual Page 52 on 76 VATMOSS ⑥ Click on the button “Filter” in order to apply the filter that has been defined. All these criteria can be cumulated: only the notifications in accordance with the all the criteria will be listed. The user can also: ⑦ Reset the filter to its default value by clicking on the button “Reset”. ⑧ Hide the detail of the filter by clicking on the button any impact on the filter being applied. . This action does not have 10.2. DISPLAY A NOTIFICATION After clicking on a notification, the following screen describes the information about the notification: 1 2 Figure 55: Details of a notification The user can do the following actions: ① Export the PDF associated to the notification by clicking on the icon corresponding to the selected language. ② Browse among the notifications displayed in the list of notifications: allows one to move to the previous notification in the list ; allows one to go back to list ; allows one to move to the next notification in the list. Note : The filter that has been applied is saved as long as the user does not disconnect or apply another filter. The browsing in the list is done with respect to this filter. USER Manual Page 53 on 76 VATMOSS 11. MANDATES Through VATMOSS, a user of a LU NETP can create a mandate with another company, established or not in Luxembourg. After that, this company will become the agent of the LU NETP. In order to have an active mandate, it must involve a LU NETP (principal) and another company, namely the agent, and must have been initiated by the LU NETP. When the mandate is established, both parties are notified of the creation of the mandate. Please be aware that a LU NETP, principal, can only have one mandate at a given time. Once activated, the mandate does not have any time limit. This could be revoked at any time by one of parties, the LU NETP or his agent. As during the establishment, both parties will be notified of the revocation, and from this moment, the agent will have no more access to the VATMOSS area of the NETP. In spite of an active mandate, the LU NETP remains in charge of the registration data (and their updates), because the agent has a read-only view on the registration data of the LU NETP. The agent can submit and modify VAT returns on behalf of the LU NETP. For the administration of Luxembourg, the LU NETP is the solely responsible of the information forwarded in spite of the mandate between both parties. The homepage of the mandates is presented on Figure 56: Mandates homepage - no active mandate and Figure 57: Mandates homepage - active mandate. The first part of the screen presents the active mandate (if there is) and the second part displays the mandates that have been revoked. If a mandate is active, the following information is displayed: Information linked to the agent: o VAT identification number o Company name o Contact o E-mail Information linked to the mandate: o Establishment date o Notification of the mandate’s establishment The table of mandates history shows the following information: The Establishment date of the mandate; The Revocation date of the mandate; The Company name of the agent; A link allowing to access to more information about the mandate. USER Manual Page 54 on 76 VATMOSS 1 3 5 4 Figure 56: Mandates homepage - no active mandate 2 4 5 Figure 57: Mandates homepage - active mandate From this homepage, the user can perform the following actions: ① Establish a mandate through the button “Establish a mandate” (see the section “11.1 - Establish a mandate”) ② Revoke the active mandate through the button “Revocate the mandate” (see the section “11.2 - Revoke the mandate”) USER Manual Page 55 on 76 VATMOSS ③ Consult the information linked to a revoked mandate through the link “Show details” (see the section “11.3 - Show the details of a mandate”) ④ Display more or less elements in the table. The user can choose to display 10, 50 or 100 elements per page. ⑤ Browse between the pages of results. 11.1. ESTABLISH A MANDATE After clicking on the button “Establish a mandate” of the Figure 56: Mandates homepage no active mandate, the user is on the page allowing him to establish a mandate. The establishment form is different if the mandate is established in Luxembourg (see the section “11.1.1 -Agent established in Luxembourg”) or outside the Luxembourg (see the section “11.1.2 -Agent not established in Luxembourg”). By default, the form is displayed for an agent established in Luxembourg. 11.1.1. Agent established in Luxembourg 4 2 1 5 3 6 7 8 9 Figure 58: Agent established in Luxembourg In the case where the mandate concerns an agent is established in Luxembourg, the user must give the following information: ① VAT identification number of the agent; ② National register number of the agent; ③ The button “Look for the company” is available when the previous fields, that is to say VAT identification number and national register number, are filled in. By clicking on this button, a control is done to ensure that the VAT identification number and the national register number correspond to the same company: If the control is positive, then the name of the agent appears in the field ④ Company name; USER Manual Page 56 on 76 VATMOSS If the control is negative, an error message appears specifying that either the VAT identification number or the national register number is wrong and the filed ④ remains empty. ⑤ Contact of the agent; ⑥ E-mail address of the contact; ⑦ After reading the terms of use, the user must validate them by ticking the box “I read and accept the terms of use”; ⑧ When all the data are filled in, the user can click on the button “Validate” that creates the mandate; ⑨ The user can cancel his action by clicking on the button “Cancel”. 11.1.2. Agent not established in Luxembourg 1 2 3 4 5 6 5 7 8 5 5 Figure 59: Agent not established in Luxembourg When the mandate concerns an agent not established in Luxembourg, the user must give the following information: ① VAT identification number of the agent. It is fictional LU VAT identification number beginning by LU99; ② Confirmation of the VAT identification number of the agent; ③ Company name of the agent; ④ Contact of the agent; ⑤ E-mail address of the contact; ⑥ After reading the terms of use, the user must validate them by ticking the box “I read and accept the terms of use”; ⑦ When all the data are filled in, the user can click on the button “Validate” that creates the mandate; ⑧ The user can cancel his action by clicking on the button “Cancel”. USER Manual Page 57 on 76 VATMOSS 11.2. REVOKE THE MANDATE 1 2 Figure 60: Revoke the mandate By clicking on the button “Revocate the mandate” from the Figure 57: Mandates homepage - active mandate, the user opens a pop-up that asks him to confirm the revocation of the mandate. The user can either confirm the revocation by clicking on the button “Validate” ① or cancel the revocation through the button “Cancel” ②. 11.3. SHOW THE DETAILS OF A MANDATE 1 Figure 61: Details of a mandate After clicking on the link “Show details” from Figure 56: Mandates homepage - no active mandate and Figure 57: Mandates homepage - active mandate, a pop-up with the information linked to the agent and the mandate displays. The first part Agent displays some information concerning the agent: The VAT identification number; The Company name; The Contact; The E-mail address of the contact. The second part Mandate displays some information about the mandate: The Establishment date of the mandate and a link through the establishment notification; The Revocation date of the mandate and a link through the revocation date; The Revocation initiator. USER Manual Page 58 on 76 VATMOSS 12. AGENT Once a mandate has been established between a LU NETP and an agent, this one has access to the VATMOSS workspace of the LU NETP during the activity period of the mandate. During this period, the agent can on the LU NETP VATMOSS: Consult the registration data of the LU NETP (without being able to change it – Figure 62: Registration data of the LU NETP (read-only)); Submit or modify the VAT returns on behalf of the LU NETP; Consult the notifications of the LU NETP. Figure 62: Registration data of the LU NETP (read-only) As soon as the mandate is revoked either by the LU NETP, either by the agent, the agent can no more have access to the VATMOSS workspace of the LU NETP. He keeps an access to the information about the mandate. An agent can be A LU NETP (see the section “12.2 - Agent – LU NETP”); A company established in Luxembourg (see “12.3 - Agent – company established in Luxembourg”) USER Manual Page 59 on 76 VATMOSS A company not established in Luxembourg (see the section “12.4 - Agent – company not established in Luxembourg”). Instead of the LU NETP, an agent can have several active mandates at a given time. 12.1. MENU 1 2 3 Figure 63: Menu bar of an agent The menu bar of an agent includes three parts: ① This button allows to come back to the homepage of the agent from everywhere ② This combo box allows to navigate between the homepage of the agent as LU NETP (My Company) and the homepages of the principals (My Mandates) ③ The different menu allowing to navigate through the different pages If the agent acts on behalf of his principal, he can navigate between the registration data, VAT returns and Notification of the LU NETP. However, if he acts on his behalf and if he is LU NETP, he navigates through these menus between the data registration, VAT returns, notifications and mandates about him. 12.2. AGENT – LU NETP In the case where a LU NETP is also an agent, when he connects to VATMOSS, he is directly on the homepage of the agents presented on Figure 64: Homepage of an agent - LU NETP and not on Figure 18: Welcome screen after the acceptance of the registration by the AED. USER Manual Page 60 on 76 VATMOSS 1 2 3 4 5 Figure 64: Homepage of an agent - LU NETP The homepage includes three parts: 1. The different menus leading to the different pages of VATMOSS of the LU NETP, and a combo box allowing to navigate between the principals and his company (see “12.1 - Menu”); 2. The registration data of the principal, namely the VAT identification number and the company name. These data being syncing with eRecette cannot be modified by the agent; 3. The active mandates allowing having access to VATMOSS workspaces of the principals and the inactive mandates. From this screen, several actions are possible: ① This combo box allows to navigate between the principals and the agent (see the section “12.1 - Menu”); ② “Access to my VATMOSS area” allows the user to access to the homepage of this VATMOSS workspace as LU NETP; ③ In the case where the agent has one or several active mandate(s), a table lists all the mandates by specifying the name of the principal, his VAT identification number, his establishment date and the number of unread notifications by the user for this mandate. By clicking on the name of the principal, the user is on the homepage of this one. USER Manual Page 61 on 76 VATMOSS ④ For an active mandate, by clicking on the button “View details” allows to display the information linked to the mandate (see the section “12.2.1 - Details of an active mandate”); ⑤ For an inactive mandate, it is possible to display the information linked to the mandate by clicking on the button “View details” (see the section "12.2.2 - Details of an inactive mandate”). 12.2.1. Details of an active mandate 1 2 Figure 65: Details of an active mandate The page of details of an active mandate lists the following information: About the principal: o VAT identification number o Company name o Scheme About the agent: o VAT identification number o Company name o Contact o E-mail address About the mandate: o Status o Establishment date and the establishment PDF From this screen, the user can ① Revoke the mandate by clicking on the button “Revocate the mandate” (see the section “12.2.1.1 - Revoke USER Manual a mandate”); Page 62 on 76 VATMOSS ② Modify some information through the button “Modify” (see the section “12.2.1.2 - Modify his information”). 12.2.1.1. Revoke a mandate 1 2 Figure 66: Revocation of a mandate By clicking on the button “Revocate the mandate” of Figure 65: Details of an active mandate, a pop-up opens asking the user to confirm the revocation of the mandate. Once the revocation has been validated, the agent will not have access to VATMOSS workspace of the LU NETP. The user can either validate ① the revocation, or cancel it ②. 12.2.1.2. Modify his information 1 2 Figure 67: Modify my information linked to the mandate When a mandate is active, an agent is able to modify some information concerning the mandate. If the agent is a LU NETP, this one can modify the following information: Contact; The E-mail address of the contact. The user can either validate the modifications by clicking on the button “Modify” ①, or cancel them ②. USER Manual Page 63 on 76 VATMOSS 12.2.2. Details of an inactive mandate Figure 68: Details of an inactive mandate The page of details of an inactive mandate displays the following information: About the principal: o VAT identification number o Company name o Scheme About the agent: o VAT identification number o Company name o Contact o E-mail address About the mandate: o Status o Establishment date and the establishment PDF o Revocation date and the revocation PDF o Revocation initiator 12.3. AGENT – COMPANY ESTABLISHED IN LUXEMBOURG In the case where the agent is a company established in Luxembourg, his homepage looks like: USER Manual Page 64 on 76 VATMOSS 1 2 3 4 5 Figure 69: Homepage of an agent - established in Luxembourg The homepage includes three parts: 1. The combo box allowing to navigate between the principals and his company (see the section “12.1 - Menu”); 2. The registration data of the principal, namely the VAT identification number and the company name. These data being syncing with eRecette cannot be modified by the agent; 3. The active mandates allowing having access to VATMOSS workspaces of the principals and the inactive mandates. From this screen, several actions are possible: ① This combo box allows to navigate between the principals and the agent (see the section “12.1 - Menu”); ② “Register my company” allows the user to access to the registration page in order to use VATMOSS (see Figure 6: EU Registration request – part 1 ); ③ In the case where the agent has one or several active mandate(s), a table lists all the mandates by specifying the name of the principal, his VAT identification number, his establishment date and the number of unread notifications by the user for this mandate. By clicking on the name of the principal, the user is on the homepage of this one. ④ For an active mandate, by clicking on the button “View details” allows to display the information linked to the mandate (see the section “12.3.1 - Details of an active mandate”); USER Manual Page 65 on 76 VATMOSS ⑤ For an inactive mandate, it is possible to display the information linked to the mandate by clicking on the button “View details” (see the section “12.3.2 - Details of an inactive mandate”). 12.3.1. Details of an active mandate 1 2 Figure 70: Details of an active mandate The page of details of an active mandate lists the following information: About the principal: o VAT identification number o Company name o Scheme About the agent: o VAT identification number o Company name o Contact o E-mail address About the mandate: o Status o Establishment date and the establishment PDF From this screen, the user can ① Revoke the mandate by clicking on the button “Revocate the mandate” (see the section “12.3.1.1 - Revoke a mandate”); ② Modify some information through the button “Modify” (see the section “12.3.1.2 - Modify his information”). USER Manual Page 66 on 76 VATMOSS 12.3.1.1. Revoke a mandate 1 2 Figure 71: Revoke a mandate By clicking on the button “Revocate the mandate” of Figure 70: Details of an active mandate, a pop-up opens asking the user to confirm the revocation of the mandate. Once the revocation has been validated, the agent will not have access to VATMOSS workspace of the LU NETP. The user can either validate ① the revocation, or cancel it ②. 12.3.1.2. Modify his information 1 2 Figure 72: Modify my information linked to the mandate When a mandate is active, an agent is able to modify some information concerning the mandate. If the agent is a company established in Luxembourg, this one can modify the following information: Contact; The E-mail address of the contact. The user can either validate the modifications by clicking on the button “Modify” ①, or cancel them ②. USER Manual Page 67 on 76 VATMOSS 12.3.2. Details of an inactive mandate Figure 73: Details of an inactive mandate The page of details of an inactive mandate displays the following information: About the principal: o VAT identification number o Company name o Scheme About the agent: o VAT identification number o Company name o Contact o E-mail address About the mandate: o Status o Establishment date and the establishment PDF o Revocation date and the revocation PDF o Revocation initiator 12.4. AGENT – COMPANY NOT ESTABLISHED IN LUXEMBOURG In the case where the agent is a company not established in Luxembourg, the homepage looks like: USER Manual Page 68 on 76 VATMOSS 1 2 3 4 5 6 Figure 74: Homepage of an agent - not established in Luxembourg The homepage includes three parts: 1. The different menus leading to the different pages of VATMOSS of the LU NETP, and a combo box allowing to navigate between the principals and his company (see the section “12.1 - Menu”); 2. The registration data of the principal, namely the VAT identification number and the company name ; 3. The active mandates allowing to have access to VATMOSS workspaces of the principals and the inactive mandates. From this screen, several actions are possible: ① This combo box allows to navigate between the principals and the agent (see the section “12.1 - Menu”); ② “Register my company” allows the user to access to the registration page in order to use VATMOSS (see Figure 12: Non-EU Registration request – part 1); ③ The user is able to modify the identification information by clicking on the button “Change my identification information”. The button opens a pop-up presented in Figure 75: Change my identification information; ④ In the case where the agent has one or several active mandate(s), a table lists all the mandates by specifying the name of the principal, his VAT identification number, his establishment date and the number of unread notifications by the user for this mandate. By clicking on the name of the principal, the user is on the homepage of this one; USER Manual Page 69 on 76 VATMOSS ⑤ For an active mandate, by clicking on the button “View details” allows to display the information linked to the mandate (see the section “12.4.1 - Details of an active mandate”); ⑥ For an inactive mandate, it is possible to display the information linked to the mandate by clicking on the button “View details” (see the section “12.4.2 - Details of an inactive mandate”). 1 2 3 4 Figure 75: Change my identification information From this screen, the user can modify his company name ①. After changing the company name, the user can ② Decide to modify his company name for all active mandates by checking the box “Apply the modification to all my active mandates”. If this box is not checked, the modification of the company name will only be visible on the homepage of the agent and not on the details page of active mandates. ③ Validate the name change; ④ Cancel the name change. 12.4.1. Details of an active mandate 2 1 Figure 76: Details of an active mandate The page of details of an active mandate lists the following information: About the principal: USER Manual Page 70 on 76 VATMOSS o VAT identification number o Company name o Scheme About the agent: o VAT identification number o Company name o Contact o E-mail address About the mandate: o Status o Establishment date and the establishment PDF From this screen, the user can ① Revoke the mandate by clicking on the button “Revocate the mandate” (see the section “12.4.1.1 - Revoke a mandate”); ② Modify some information through the button “Modify” (see the section “12.4.1.2 - Modify his information”). 12.4.1.1. Revoke a mandate 1 2 1 Figure 77: Revoke a mandate By clicking on the button “Revocate the mandate” of Figure 76: Details of an active mandate, a pop-up opens asking the user to confirm the revocation of the mandate. Once the revocation has been validated, the agent will not have access to VATMOSS workspace of the LU NETP. The user can either validate ① the revocation, or cancel it ②. USER Manual Page 71 on 76 VATMOSS 12.4.1.2. Modify his information 1 2 Figure 78: Modify my information linked to the mandate When a mandate is active, an agent is able to modify some information concerning the mandate. If the agent is a company not established in Luxembourg, this one can modify the following information: The Company name Contact; The E-mail address of the contact. The user can either validate the modifications by clicking on the button “Modify” ①, or cancel them ②. 12.4.2. Details of an inactive mandate Figure 79: Details of an inactive mandate The page of details of an inactive mandate displays the following information: About the principal: o USER Manual VAT identification number Page 72 on 76 VATMOSS o Company name o Scheme About the agent: o VAT identification number o Company name o Contact o E-mail address About the mandate: o Status o Establishment date and the establishment PDF o Revocation date and the revocation PDF o Revocation initiator 12.5. VAT RETURN Once a mandate is established, the agent can submit or modify VAT returns on behalf of the NETP. Please read the section “9 - VAT returns” about how to submit a VAT return. Since the information band about the VAT return includes the name of the user that submits it, the information band of a VAT return submitted by a user of an agent displays the name of this user and the name of the agent. Once the mandate between the agent and the LU NETP is revoked, the LU NETP keeps seeing who has submitted VAT returns. However, the future agents will not see that a VAT return has been submitted by an agent. The information band of the VAT return will display that the VAT return has been submitted by the NETP. USER Manual Page 73 on 76 VATMOSS 13. USER’S PREFERENCES Each user of a LU NETP can customize the behavior of the portal via the preferences of the user. To access to the screen of preferences modification, the user clicks in the main menu on the choice “Preferences”. The following screen is then presented: 1 2 3 4 5 Figure 80: User’s preferences From this screen, several actions are possible: ① Change the language of the portal by default. This language will be used after each connection and it will always be possible to change the language by using the corresponding link in the header of the portal. ② Change the e-mail address. The displayed e-mail address comes initially from the access request to the application (if no modification was requested afterwards). The user can modify the e-mail address. ③ Ask to receive an e-mail when a new notification is available on the portal. It is then mandatory to enter the e-mail address to use. ④ Save the modifications. The language by default will be used at the next connection and the warning by e-mail will be taken into account during the sending of the next notification. ⑤ Cancel the modifications. The previous value will then be restored. USER Manual Page 74 on 76 VATMOSS Administration de l’enregistrement et des domaines 1-3 avenue Guillaume L-1651 Luxembourg Adresse postale : BP 31 L-2010 Luxembourg [email protected]