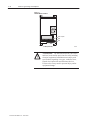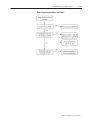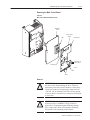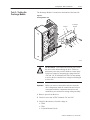
1
Allen-Bradley
1336 IMPACTt
Adjustable Frequency
AC Drive
Series A
A007 – A015
B015 – B030
C015 – C020
Troubleshooting
Guide
Important User
Information
Because of the variety of uses for the products described in this
publication, those responsible for the application and use of this
control equipment must satisfy themselves that all necessary steps
have been taken to assure that each application and use meets all
performance and safety requirements, including any applicable laws,
regulations, codes and standards.
The illustrations, charts, sample programs and layout examples
shown in this guide are intended solely for purposes of example.
Since there are many variables and requirements associated with any
particular installation, Rockwell Automation does not assume
responsibility or liability (to include intellectual property liability)
for actual use based upon the examples shown in this publication.
Rockwell Automation publication SGI-1.1, Safety Guidelines for the
Application, Installation, and Maintenance of Solid-State Control
(available from your local Rockwell Automation office), describes
some important differences between solid-state equipment and
electromechanical devices that should be taken into consideration
when applying products such as those described in this publication.
Reproduction of the contents of this copyrighted publication, in
whole or in part, without written permission of Rockwell
International Corporation, is prohibited.
Throughout this manual we use notes to make you aware of safety
considerations:
!
ATTENTION: Identifies information about practices
or circumstances that can lead to personal injury or
death, property damage or economic loss.
Attention statements help you to:
• identify a hazard
• avoid the hazard
• recognize the consequences
Important:
Identifies information that is critical for successful
application and understanding of the product.
We Want Our Manuals to be the Best!
You can help! Our manuals must meet the needs of you, the user. This is your opportunity to make sure they do just that.
By filling out this form you can help us provide the most useful, thorough, and accurate manuals available. Please take a
few minutes to tell us what you think. Then mail or FAX this form.
FAX: to your local Allen-Bradley Sales Office or 414/512-8579.
PUBLICATION NAME
PUBLICATION NUMBER, DATE AND PART NUMBER (IF PRESENT)
✓ CHECK THE FUNCTION THAT MOST CLEARLY DESCRIBES YOUR JOB.
- SUGGEST / RESPONSIBLE FOR THE PURCHASE OF EQUIPMENT
- MAINTAIN / OPERATE PROGRAMMABLE MACHINERY
- DESIGN / IMPLEMENT ELECTRICAL SYSTEMS
- TRAIN/EDUCATE MACHINE USERS
- SUPERVISE FLOOR OPERATIONS
✓ WHAT LEVEL OF EXPERIENCE DO YOU HAVE WITH EACH OF THE FOLLOWING PRODUCTS?
NONE
LITTLE
MODERATE
EXTENSIVE
PROGRAMMABLE CONTROL
-
-
-
-
AC / DC DRIVES
-
-
-
-
PERSONAL COMPUTERS
-
-
-
-
NC / CNC CONTROLS
-
-
-
-
DATA COMMUNICATIONS / LAN
-
-
-
-
✓ RATE THE OVERALL QUALITY OF THIS MANUAL BY CIRCLING YOUR RESPONSE BELOW. (1) = POOR (5) = EXCELLENT
HELPFULNESS OF INDEX / TABLE OF CONTENTS
1
2
3
4
5
CLARITY
1
2
3
4
5
EASE OF USE
1
2
3
4
5
ACCURACY AND COMPLETENESS
1
2
3
4
5
QUALITY COMPARED TO OTHER COMPANIES’ MANUALS
1
2
3
4
5
QUALITY COMPARED TO OTHER ALLEN-BRADLEY MANUALS
1
2
3
4
5
✓ WHAT DID YOU LIKE MOST ABOUT THIS MANUAL?
✓ WHAT DID YOU LIKE LEAST ABOUT THIS MANUAL?
✓ PLEASE LIST ANY ERRORS YOU FOUND IN THIS MANUAL (REFERENCE PAGE, TABLE, OR FIGURE NUMBERS).
CUT ALONG DOTTED LINE
✁
✓ DO YOU HAVE ANY ADDITIONAL COMMENTS?
✓ COMPLETE THE FOLLOWING.
NAME
COMPANY
TITLE
DEPARTMENT
STREET
TELEPHONE
CITY
STATE
DATE
ZIP
FOLD HERE
FOLD HERE
NO POSTAGE
NECESSARY
IF MAILED
IN THE
UNITED STATES
BUSINESS REPLY MAIL
FIRST CLASS
PERMIT NO. 413
MEQUON, WI
POSTAGE WILL BE PAID BY ADDRESSEE
ALLEN-BRADLEY
Attn: Marketing Communications
P.O. Box 760
Mequon, WI 53092-9907
Summary of Changes
Summary of Changes
The information below summarizes the changes to the
company-wide templates since the last release.
Updated Information
No changes have been made to this manual.
Publication 1336 IMPACT-6.1 – March 1998
Table of Contents
Preface
Manual Objective . . . . . . . . . . . . . . . . . . . . . . . . . . . . . . . . . . . . .
Who Should Use This Manual . . . . . . . . . . . . . . . . . . . . . . . . . . . .
Safety Precautions . . . . . . . . . . . . . . . . . . . . . . . . . . . . . . . . . . . .
Electrostatic Discharge Precautions . . . . . . . . . . . . . . . . . . . . . . .
1336 IMPACT Product Identification . . . . . . . . . . . . . . . . . . . . . . .
Drive Nameplate Location . . . . . . . . . . . . . . . . . . . . . . . . . . . .
Drive and Option Identification . . . . . . . . . . . . . . . . . . . . . . . . . . .
1336 IMPACT Drive Catalog Numbers . . . . . . . . . . . . . . . . . . . .
Drive Rating Qualifications . . . . . . . . . . . . . . . . . . . . . . . . . . . .
Enclosure Type . . . . . . . . . . . . . . . . . . . . . . . . . . . . . . . . . . . .
Conventions . . . . . . . . . . . . . . . . . . . . . . . . . . . . . . . . . . . . . . . .
Auxiliary Input . . . . . . . . . . . . . . . . . . . . . . . . . . . . . . . . . . . . .
Auxiliary Interlock . . . . . . . . . . . . . . . . . . . . . . . . . . . . . . . . . .
Bit . . . . . . . . . . . . . . . . . . . . . . . . . . . . . . . . . . . . . . . . . . . . .
Check . . . . . . . . . . . . . . . . . . . . . . . . . . . . . . . . . . . . . . . . . . .
Connector . . . . . . . . . . . . . . . . . . . . . . . . . . . . . . . . . . . . . . . .
Default . . . . . . . . . . . . . . . . . . . . . . . . . . . . . . . . . . . . . . . . . .
Enable Input . . . . . . . . . . . . . . . . . . . . . . . . . . . . . . . . . . . . . .
False . . . . . . . . . . . . . . . . . . . . . . . . . . . . . . . . . . . . . . . . . . .
Jumper . . . . . . . . . . . . . . . . . . . . . . . . . . . . . . . . . . . . . . . . . .
L Option Board . . . . . . . . . . . . . . . . . . . . . . . . . . . . . . . . . . . .
Parameter . . . . . . . . . . . . . . . . . . . . . . . . . . . . . . . . . . . . . . . .
Press . . . . . . . . . . . . . . . . . . . . . . . . . . . . . . . . . . . . . . . . . . .
True . . . . . . . . . . . . . . . . . . . . . . . . . . . . . . . . . . . . . . . . . . . .
Related Publications . . . . . . . . . . . . . . . . . . . . . . . . . . . . . . . . . .
Control Logic Wiring and
Adapters
P–1
P–1
P–1
P–2
P–3
P–3
P–4
P–4
P–7
P–8
P–8
P–8
P–8
P–8
P–9
P–9
P–9
P–9
P–9
P–9
P–10
P–10
P–10
P–10
P–10
Chapter 1
Chapter Objectives . . . . . . . . . . . . . . . . . . . . . . . . . . . . . . . . . . .
Chapter Overview . . . . . . . . . . . . . . . . . . . . . . . . . . . . . . . . . . . .
L Option Board . . . . . . . . . . . . . . . . . . . . . . . . . . . . . . . . . . . . . .
L Option Board Jumpers . . . . . . . . . . . . . . . . . . . . . . . . . . . . . .
Available Inputs . . . . . . . . . . . . . . . . . . . . . . . . . . . . . . . . . . . .
Local Programming . . . . . . . . . . . . . . . . . . . . . . . . . . . . . . . . . . .
Human Interface Module (HIM) . . . . . . . . . . . . . . . . . . . . . . . . . . .
Description . . . . . . . . . . . . . . . . . . . . . . . . . . . . . . . . . . . . . . .
Removing the HIM . . . . . . . . . . . . . . . . . . . . . . . . . . . . . . . . . .
HIM Operation . . . . . . . . . . . . . . . . . . . . . . . . . . . . . . . . . . . . .
Graphic Programming Terminal . . . . . . . . . . . . . . . . . . . . . . . . . . .
GPT Description . . . . . . . . . . . . . . . . . . . . . . . . . . . . . . . . . . .
DriveTools . . . . . . . . . . . . . . . . . . . . . . . . . . . . . . . . . . . . . . . . . .
Control Firmware Function . . . . . . . . . . . . . . . . . . . . . . . . . . . . . .
1–1
1–1
1–3
1–3
1–4
1–4
1–9
1–9
1–11
1–12
1–13
1–13
1–14
1–14
Publication 1336 IMPACT-6.1 – March 1998
ii
Table of Contents
Troubleshooting and Error
Codes
Chapter 2
Disassembly and Access
Procedures
Chapter 3
Component Test Procedures
Chapter 4
Chapter Objectives . . . . . . . . . . . . . . . . . . . . . . . . . . . . . . . . . . .
Fault/Warning Handling . . . . . . . . . . . . . . . . . . . . . . . . . . . . . . . .
Viewing the Fault and Warning Queues on the HIM . . . . . . . . . . . .
What Are the Fault Descriptions . . . . . . . . . . . . . . . . . . . . . . . . . .
Diagnostic Procedures by Symptom . . . . . . . . . . . . . . . . . . . . . . .
Drive Will Not Start or Jog . . . . . . . . . . . . . . . . . . . . . . . . . . . .
No HIM Display . . . . . . . . . . . . . . . . . . . . . . . . . . . . . . . . . . . .
HIM Displays “Running” . . . . . . . . . . . . . . . . . . . . . . . . . . . . . .
Motor Response Not Where You Want It . . . . . . . . . . . . . . . . . .
Start Up Troubleshooting Procedures . . . . . . . . . . . . . . . . . . . . . .
Miscellaneous Troubleshooting Procedures . . . . . . . . . . . . . . . . . .
Encoderless Troubleshooting Procedures . . . . . . . . . . . . . . . . . . .
Chapter Objectives . . . . . . . . . . . . . . . . . . . . . . . . . . . . . . . . . . .
Disassembly and Access Overview . . . . . . . . . . . . . . . . . . . . . . . .
Electrostatic Discharge Precautions . . . . . . . . . . . . . . . . . . . . . . .
Tools . . . . . . . . . . . . . . . . . . . . . . . . . . . . . . . . . . . . . . . . . . .
Fastener Torque Specifications . . . . . . . . . . . . . . . . . . . . . . . . . . .
Torque Sequence . . . . . . . . . . . . . . . . . . . . . . . . . . . . . . . . . .
Two-Point Mounting . . . . . . . . . . . . . . . . . . . . . . . . . . . . . . .
Four-Point Mounting . . . . . . . . . . . . . . . . . . . . . . . . . . . . . . .
Torque Specifications . . . . . . . . . . . . . . . . . . . . . . . . . . . . . . . .
Disassembly and Access Procedures . . . . . . . . . . . . . . . . . . . . . .
Opening the Drive Enclosure . . . . . . . . . . . . . . . . . . . . . . . . . .
Removal . . . . . . . . . . . . . . . . . . . . . . . . . . . . . . . . . . . . . . .
Installation . . . . . . . . . . . . . . . . . . . . . . . . . . . . . . . . . . . . . .
Removing the L Option Board . . . . . . . . . . . . . . . . . . . . . . . . . .
Removal . . . . . . . . . . . . . . . . . . . . . . . . . . . . . . . . . . . . . . .
Installation . . . . . . . . . . . . . . . . . . . . . . . . . . . . . . . . . . . . . .
Removing the Main Control Board Mounting Plate . . . . . . . . . . .
Removal . . . . . . . . . . . . . . . . . . . . . . . . . . . . . . . . . . . . . . .
Installation . . . . . . . . . . . . . . . . . . . . . . . . . . . . . . . . . . . . . .
Removing the Main Control Board . . . . . . . . . . . . . . . . . . . . . . .
Removal . . . . . . . . . . . . . . . . . . . . . . . . . . . . . . . . . . . . . . .
Installation . . . . . . . . . . . . . . . . . . . . . . . . . . . . . . . . . . . . . .
Removing the Gate Driver/Power Supply Board . . . . . . . . . . . . .
Removal . . . . . . . . . . . . . . . . . . . . . . . . . . . . . . . . . . . . . . .
Installation . . . . . . . . . . . . . . . . . . . . . . . . . . . . . . . . . . . . . .
Accessing Chassis Power Components . . . . . . . . . . . . . . . . . . .
Chapter Objectives . . . . . . . . . . . . . . . . . . . . . . . . . . . . . . . . . . .
Component Test Overview . . . . . . . . . . . . . . . . . . . . . . . . . . . . . .
Publication 1336 IMPACT-6.1 – March 1998
2–1
2–1
2–3
2–4
2–17
2–17
2–18
2–19
2–20
2–21
2–21
2–24
3–1
3–1
3–1
3–2
3–2
3–2
3–2
3–3
3–4
3–5
3–5
3–5
3–6
3–7
3–7
3–8
3–9
3–9
3–10
3–11
3–11
3–12
3–13
3–14
3–16
3–16
4–1
4–1
Table of Contents
Electrostatic Discharge Precautions . . . . . . . . . . . . . . . . . . . . . . .
Tools . . . . . . . . . . . . . . . . . . . . . . . . . . . . . . . . . . . . . . . . . . .
Test 1 – Testing Bridge Rectifier BR1 . . . . . . . . . . . . . . . . . . . . . . .
Test 2 – Testing the Bus Capacitors . . . . . . . . . . . . . . . . . . . . . . . .
Test 3 – Testing Transistor Modules Q1, Q2, and Q3 . . . . . . . . . . . .
Test 4 – Testing the Precharge Module . . . . . . . . . . . . . . . . . . . . .
Test 5 – Testing the Gate Driver/Power Supply Board . . . . . . . . . . .
Part Replacement
Procedures
Chapter 5
Replacement Parts List
Chapter 6
Chapter Objective . . . . . . . . . . . . . . . . . . . . . . . . . . . . . . . . . . . .
Part Replacement Overview . . . . . . . . . . . . . . . . . . . . . . . . . . . . .
Safety Precautions . . . . . . . . . . . . . . . . . . . . . . . . . . . . . . . . . . . .
Electrostatic Discharge Precautions . . . . . . . . . . . . . . . . . . . . . . .
Tools . . . . . . . . . . . . . . . . . . . . . . . . . . . . . . . . . . . . . . . . . . .
Major Component Replacement . . . . . . . . . . . . . . . . . . . . . . . . . .
Detailed Product Identification . . . . . . . . . . . . . . . . . . . . . . . . . . . .
Precharge Module . . . . . . . . . . . . . . . . . . . . . . . . . . . . . . . . . .
Removal . . . . . . . . . . . . . . . . . . . . . . . . . . . . . . . . . . . . . . .
Installation . . . . . . . . . . . . . . . . . . . . . . . . . . . . . . . . . . . . . .
Thermistor . . . . . . . . . . . . . . . . . . . . . . . . . . . . . . . . . . . . . . .
Removal . . . . . . . . . . . . . . . . . . . . . . . . . . . . . . . . . . . . . . .
Installation . . . . . . . . . . . . . . . . . . . . . . . . . . . . . . . . . . . . . .
Transistor Modules . . . . . . . . . . . . . . . . . . . . . . . . . . . . . . . . .
Removal . . . . . . . . . . . . . . . . . . . . . . . . . . . . . . . . . . . . . . .
Installation . . . . . . . . . . . . . . . . . . . . . . . . . . . . . . . . . . . . . .
Bridge Rectifier BR1 . . . . . . . . . . . . . . . . . . . . . . . . . . . . . . . .
Removal . . . . . . . . . . . . . . . . . . . . . . . . . . . . . . . . . . . . . . .
Installation . . . . . . . . . . . . . . . . . . . . . . . . . . . . . . . . . . . . . .
Fan . . . . . . . . . . . . . . . . . . . . . . . . . . . . . . . . . . . . . . . . . . . .
Removal . . . . . . . . . . . . . . . . . . . . . . . . . . . . . . . . . . . . . . .
Installation . . . . . . . . . . . . . . . . . . . . . . . . . . . . . . . . . . . . . .
DC Bus Inductor . . . . . . . . . . . . . . . . . . . . . . . . . . . . . . . . . . .
Removal . . . . . . . . . . . . . . . . . . . . . . . . . . . . . . . . . . . . . . .
Installation . . . . . . . . . . . . . . . . . . . . . . . . . . . . . . . . . . . . . .
Bus Capacitors . . . . . . . . . . . . . . . . . . . . . . . . . . . . . . . . . . . .
Removal . . . . . . . . . . . . . . . . . . . . . . . . . . . . . . . . . . . . . . .
Installation . . . . . . . . . . . . . . . . . . . . . . . . . . . . . . . . . . . . . .
Chapter Objectives . . . . . . . . . . . . . . . . . . . . . . . . . . . . . . . . . . .
Ordering Replacement Parts . . . . . . . . . . . . . . . . . . . . . . . . . . . . .
Replacement Parts Listing . . . . . . . . . . . . . . . . . . . . . . . . . . . . . .
iii
4–2
4–2
4–3
4–5
4–8
4–11
4–14
5–1
5–1
5–1
5–1
5–2
5–2
5–2
5–4
5–4
5–5
5–6
5–6
5–7
5–8
5–8
5–9
5–10
5–10
5–11
5–12
5–12
5–13
5–14
5–15
5–16
5–17
5–17
5–18
6–1
6–1
6–2
Publication 1336 IMPACT-6.1 – March 1998
iv
Table of Contents
Schematics — 15 – 30 HP
1336 IMPACT Drives
Index
Publication 1336 IMPACT-6.1 – March 1998
Chapter 7
Preface
P–1
Preface
Manual Objective
The information in this manual is designed to help troubleshoot or
repair an Allen-Bradley 1336 IMPACT Adjustable Frequency AC
Drive with ratings A007 – A015, B015 – B030, and C015 – C020.
Who Should Use This
Manual
This manual is intended for qualified service personnel responsible
for repairing the 1336 IMPACT Adjustable Frequency AC Drive.
You should:
• Read this entire manual before performing maintenance or repairs
to drives.
• Have previous experience with, and basic understanding of,
electrical terminology, procedures, required troubleshooting
equipment, equipment protection procedures and methods, and
safety precautions.
This manual describes equipment, troubleshooting, and disassembly
procedures. You begin with general illustrations and end with greater
detail concerning replacement parts and part locations on the drives.
Later chapters may refer you back to earlier chapters for information
on basic equipment and steps necessary to perform detailed
diagnostics and part replacement.
Safety Precautions
!
ATTENTION: Some printed circuit boards and drive
components may contain hazardous voltage levels.
Remove and lock out power before you disconnect or
reconnect wires and before you remove or replace
fuses and circuit boards. Verify bus voltage by
measuring the voltage between +DC and –DC on
terminal block TB1. Do not attempt to service the drive
until the bus voltage has discharged to zero volts.
Publication 1336 IMPACT-6.1 – March 1998
P–2
Preface
!
!
ATTENTION: Potentially fatal voltages may result
from improper usage of oscilloscope and other test
equipment. The oscilloscope chassis may be at a
potentially fatal voltage if not properly grounded. If an
oscilloscope is used to measure high voltage
waveforms, use only a dual channel oscilloscope in the
differential mode with X 100 probes. It is
recommended that the oscilloscope be used in the A
minus B Quasi-differential mode with the oscilloscope
chassis correctly grounded to an earth ground.
ATTENTION: Only personnel familiar with the
1336 IMPACT Adjustable Frequency AC Drive and
associated machinery should plan or implement the
installation, start-up and subsequent maintenance of the
system. Failure to comply may result in personal injury
and/or equipment damage.
Electrostatic Discharge
Precautions
!
ATTENTION: This assembly contains parts and
sub-assemblies that are sensitive to electrostatic
discharge. Static control precautions are required when
servicing this assembly. Component damage may result
if you ignore electrostatic discharge control procedures.
If you are not familiar with static control procedures,
reference Rockwell Automation Publication
8000-4.5.2, Guarding Against Electrostatic Damage, or
any other applicable ESD protection handbook.
Electrostatic discharge generated by static electricity can damage the
complementary metallic oxide semiconductor devices on various
drive boards. It is recommended that you perform these procedures
to guard against this type of damage when circuit boards are
removed or installed:
• Wear a wrist-type grounding strap that is grounded to the drive
chassis.
• Attach the wrist strap before removing the new circuit board from
the conductive packet.
• Remove boards from the drive and immediately insert them into
their conductive packets.
Publication 1336 IMPACT-6.1 – March 1998
Preface
P–3
1336 IMPACT Product
Identification
Drive Nameplate Location
The drive nameplate is located on the face of the Main Control
Board Mounting Plate. The drive nameplate contains the drive’s
catalog number and other important drive information. Reference the
catalog number when ordering replacement parts.
Figure P.1
Drive Nameplate Location
ESC SEL
JOG
Nameplate Located on
Tab of Main Control
Board Mounting Plate
11 – 22kW (15 – 30 HP)
380 to 460V
AB0279B
Publication 1336 IMPACT-6.1 – March 1998
P–4
Preface
Drive and Option
Identification
The following is an explanation of the catalog numbering system for
1336 IMPACT Adjustable Frequency AC Drives and options. The
catalog number is coded to identify the drive power rating and can be
found on the drive shipping carton and nameplate.
1336 IMPACT Drive Catalog Numbers
Table P.A
1336E
– A007-AN
– EN
– L6
– HA1
– GM1
Bulletin No.
Rating-Enclosure
(Must Be Specified)
Language Module
(Must Be Specified)
L Option
(Optional)
Human Interface
(Optional)
Communication Card
(Optional)
200 – 240V AC Input
Enclosures
Drive Rating
Frame
Designation
B
Output
Amps
27.2
33.77
48.2
Nominal
HP
7.5
100
15
Open IP00
No Enclosure
NEMA Type 1 IP20
General Purpose
NEMA Type 4
IP65
Resist Water, Dust
NEMA Type 12
IP54
Industrial Use
Code
Code
Code
Code
A007-AN
A010-AN
A0 0 AN
A015-AN
A007-AA, -AE
A010-AA,
A0 0 AA -AE
AE
A015-AA, -AE
A007-AF
A010-AF
A0 0 AF
A015-AF
A007-AJ
A010-AJ
A0 0 AJ
A015-AJ
Refer to the Language Module and Options tables following these Catalog Number tables.
Drive rating is based on a carrier frequency of 4kHz maximum, an altitude of 1,000 meters or less,
and a maximum ambient temperature of 40°. Refer to Drive Rating Qualifications on page P–7.
Refer to Table P.I for explanation of “AE” rating.
Publication 1336 IMPACT-6.1 – March 1998
Preface
P–5
Table P.B
1336E
– B007-AA
– EN
– L6
– HA1
– GM1
Bulletin No.
Rating-Enclosure
(Must Be Specified)
Language Module
(Must Be Specified)
L Option
(Optional)
Human Interface
(Optional)
Communication Card
(Optional)
380 – 480V AC Input
Enclosures
Drive Rating
Frame
Designation
B
Output
Amps
27 2
27.2
33.77
4
41.8
48.2
Nominal
HP
155
20
25
30
Open
IP00
No Enclosure
NEMA Type 1 IP20
General Purpose
NEMA Type 4 IP56
Resist Water, Dust
NEMA Type 12 IP54
Industrial Use
Code
Code
Code
Code
B0 5 AN
B015-AN
B020 AN
B020-AN
B025 AN
B025-AN
B030-AN
B0 5 AA -AE
B015-AA,
AE
B020 AA -AE
B020-AA,
AE
B025 AA -AE
B025-AA,
AE
B030-AA, -AE
B0 5 AF
B015-AF
B020 AF
B020-AF
B025 AF
B025-AF
B030-AF
B0 5 AJ
B015-AJ
B020 AJ
B020-AJ
B025 AJ
B025-AJ
B030-AJ
Refer to the Language Module and Options tables following these Catalog Number tables.
Drive rating is based on a carrier frequency of 4kHz maximum, an altitude of 1,000 meters or less,
and a maximum ambient temperature of 40°. Refer to Drive Rating Qualifications on page P–7.
Refer to Table P.I for explanation of “E” rating.
Table P.C
1336E
– C007-AA
– EN
– L6
– HA1
– GM1
Bulletin No.
Rating-Enclosure
(Must Be Specified)
Language Module
(Must Be Specified)
L Option
(Optional)
Human Interface
(Optional)
Communication Card
(Optional)
500 – 600V AC Input
Enclosures
Drive Rating
Frame
Designation
B
Output
Amps
19
24
Nominal HP
15
20
Open
IP00
No Enclosure
NEMA Type 1
IP20
General Purpose
NEMA Type 4
IP65
Resist Water, Dust
NEMA Type 12
IP54
Industrial Use
Code
Code
Code
Code
C015-AN
C020-AN
C015-AA, -AE
C020-AA, -AE
C015-AF
C020-AF
C015-AJ
C020-AJ
Refer to the Language Module and Options tables following these Catalog Number tables.
Drive rating is based on a carrier frequency of 4kHz maximum, an altitude of 1,000 meters or less,
and a maximum ambient temperature of 40°. Refer to Drive Rating Qualifications on page P–7.
Refer to Table P.I for explanation of “E” rating.
Publication 1336 IMPACT-6.1 – March 1998
P–6
Preface
Table P.D
Language Modules
Description
Option Code
English/English
EN
English/French
FR
English/German
DE
English/Italian
IT
English/Japanese JP
English/Spanish
ES
Currently not available.
Table P.E
Options
Code
Description
Code
Description
Human Interface Modules, NEMA Type 1 (IP20)
HAB
Blank – No Functionality
HAP
A
g mme Only
Programmer
Programmer/Controller with Analog Pot
HA1
HA2
Programmer/Controller with Digital Pot
Communication Options
GM1
Single Point Remote I/O
R 2 2/422/4 5 DF1
RS-232/422/485,
F
GM22
GM3
RS-232/422/485, DH485
Human Interface Modules, NEMA Type 4/12 (IP65/54)
L Option Boards
HJP
HJ2
L4
L7E
Contact Closure
Contact Closure & Encoder Feedback
L5
L8E
+24V AC/DC
+24V AC/DC & Encoder Feedback
L6
L9E
115V AC
115V AC & Encoder Feedback
Programmer Only
Programmer/Controller with Digital Pot
For a more functionally complete description of each option, refer to Publication 1336 IMPACT-1.0.
Publication 1336 IMPACT-6.1 – March 1998
Preface
P–7
Table P.F
200 – 240 Drives
Catalog
Number
A007
A010
A015
Maximum
Amp
Rating
27
34
48
Heat
Dissipation
Drive
Watts
Derate
Curve
156
200
205
Heat Sink
Watts
486
721
819
Total Watts
642
921
1024
Table P.G
380 – 480 Drives
Catalog
Number
B015
B020
B025
B030
Maximum
Amp
Rating
27
34
42
48
Heat
Dissipation
Drive
Watts
Derate
Curve
Heat Sink
Watts
Total Watts
117
140
141
141
486
628
720
820
603
768
861
961
Heat
Dissipation
Drive
Watts
Heat Sink
Watts
Total Watts
Table P.H
500 – 600 Drives
Catalog
Number
C015
C020
Maximum
Amp
Rating
19
24
Derate
Curve
117
140
360
467
477
607
Amp Rating is at 4kHz. If carrier frequencies above 4kHz are selected, drive Amp Rating must be
derated. Refer to the User Manual for carrier frequency vs. Amp deratings.
Drive Ambient Temperature Rating is 40_C. If ambient exceeds 40_C, the drive must be derated.
Drive Rating is based on altitudes of 1,000m (3,000 ft) or less. If installed at higher altitude, drive
must be derated.
Not available.
Refer to the 1336 IMPACT Drive User Manual.
Drive Rating Qualifications
Several factors can affect drive rating. If more than one factor exists,
derating percentages must be multiplied. For example, if a 14-amp
drive is installed at a 2km (6,600 ft.) altitude and has a 2%
high-input line voltage, the actual amp rating is:
14 x 94% altitude derating x 96% high-input line derating = 12.6
amps.
Publication 1336 IMPACT-6.1 – March 1998
P–8
Preface
Enclosure Type
The first character, A, indicates the Enclosure Code.
The second character indicates the type of enclosure shipped from
the factory:
Table P.I
Enclosure Type Code Descriptions
Enclosure
Type Code
N
A
E
F
J
Conventions
Description
Open style (IP 00)
NEMA Type 1 (IP 20)
NEMA Type 1 (IP 20) “CE” Metal Cover
NEMA Type 4 (IP 56)
NEMA Type 12 (IP 54)
To help differentiate parameter names and display text from other
text in this manual, the following conventions will be used:
• Parameter Names will appear in italics.
• Display Text will appear in “quotes”.
The following is a list of conventions used throughout this manual,
and definitions of the conventions. For a list of terminology and
definitions, refer to the Glossary in the back of this manual.
Auxiliary Interlock
The Auxiliary Interlock is a user supplied circuit consisting of reset,
overload, or other interlocking circuitry. The Interlock is wired to the
drive Not External Fault input.
Bit
A bit is a single character or status point used in programmable
logic. Eight bits form a BYTE, 16 bits form a word. Drive
parameters are actually eight bits or 16 bit words.
Check
To check means to examine either the physical condition of
something or the setting of some control, such as a Parameter.
Checking a drive board or component may also require
measurements and tests.
Publication 1336 IMPACT-6.1 – March 1998
Preface
P–9
Connector
A connector joins one drive board to another. Connectors come in
two designs, male and female. Male connectors are stationary and
contain pins, which are sometimes joined by jumpers. Female
connectors are at the ends of wires or ribbon cables and plug into
male connectors.
Default
When a drive function defaults, it automatically changes to a
pre-programmed setting.
Enable Input
The Enable Input is a terminal connection on the L Option Board.
This connection provides an external input to enable or disable the
Drive Output section. It must be true to permit the drive to operate.
False
False refers to a logical false state. For instance, an L Option signal
on TB3 is false when the input contact is open or the appropriate
voltage is not applied to the L Option Board.
Jumper
A jumper completes a circuit between two pins within a male
connector on a drive board. In the absence of certain optional
equipment using female connectors, jumpers are applied to certain
pins within a male connector to complete specific and necessary
circuits.
L Option Board
An L Option Board plugs into connectors J2 and J3, located on the
lower portion of the Main Control Board. This board is identified as
L4, L5, L6, L7E, L8E, or L9E and provides optional control wiring
configurations for a drive.
Publication 1336 IMPACT-6.1 – March 1998
P–10
Preface
Not External Fault Input
The Not External Fault Input is a terminal connection on the L
Option Board. This connection provides an external input for use as
an Auxiliary Interlock. Unless this interlock is closed, the drive will
be faulted with an External Fault.
Parameter
Parameters are programmable drive functions that define various
operating functions or status displays of a drive. Refer to the 1336
IMPACT Adjustable Frequency AC Drive User Manual for
parameter details.
Press
Press a button on the Human Interface Module to change parameter
settings and drive functions.
True
True refers to a logical true state. For instance, an L Option signal on
TB3 is true when: L4/L7E contact input is closed, L5/L8E input
terminal registers 24V, or L6/L9E input terminal registers
115V AC.
Related Publications
The following lists other Allen-Bradley publications that apply to the
1336 IMPACT Adjustable Frequency AC Drives:
• Product Data DriveTools Software (9303-2.0)
• Bulletin 1201 Graphic Programming Terminal User Manual
(1201-5.0)
• Product Pricing Bulletin (1336 IMPACT-3.0)
• 1336 IMPACT User Manual (1336 IMPACT-5.0)
• Renewal Parts List
• Options Manuals/Instructions
Current 1336 IMPACT spare parts information, including recommended parts, catalog numbers,
and pricing, can be obtained from the following sources.
• Allen-Bradley home page on the World Wide Web at:
http://www.ab.com
Select Drives, and the select Information for Drives, Including Part Lists . . . Select documents
1060.pdf (230V drives) and/or 1070.pdf (460 & 575V drives).
• Standard Drives “AutoFax” service–an automated system that you can call to request a “faxed”
copy of the spare parts information (or other technical documentation).
Simply call 444–646–6701 and follow the phone prompts to request document(s) 1060 (230V
drives) and/or 1070 (460 &575V drives).
Publication 1336 IMPACT-6.1 – March 1998
Chapter 1
1–1
Control Logic Wiring and Adapters
Chapter Objectives
This chapter introduces you to terminal block locations and wiring
and adapter locations and functions.
Chapter Overview
This chapter also illustrates and describes:
• L Options L4, L5, L6, L7E, L8E, and L9E including terminal
block TB3
• TB3 L Option Mode selections and functions
• TB3 terminal designations
Important:
!
!
All printed circuit boards, except the Main Control
Board assembly, are referenced to negative ground
(–bus).
ATTENTION: Some printed circuit boards and drive
components may contain hazardous voltage levels.
Remove power before you disconnect or reconnect
wires and before you remove or replace fuses and
circuit boards. Verify bus voltage by measuring the
voltage between +DC and –DC on terminal block TB1.
Do not attempt to service the drive until the bus voltage
has discharged to zero volts.
ATTENTION: This assembly contains parts and
sub-assemblies that are sensitive to electrostatic
discharge. Static control precautions are required when
servicing this assembly. Component damage may result
if you ignore electrostatic discharge control procedures.
If you are not familiar with static control procedures,
reference Rockwell Automation Publication
8000-4.5.2, Guarding Against Electrostatic Discharge,
or any other applicable ESD protection handbook.
Publication 1336 IMPACT-6.1 – March 1998
1–2
Control Logic Wiring and Adapters
Figure 1.1
Terminal Block Locations
ESC
SEL
JOG
TB3 L Option
TB2
TB1
11–22k (15–30 HP)
!
Publication 1336 IMPACT-6.1 – March 1998
AB0318A
ATTENTION: The National Electrical Code (NEC)
and local codes outline provisions for safely installing
electrical equipment. Installation must comply with
specifications regarding wire types, conductor sizes,
branch circuit protection and disconnect devices.
Failure to do so may result in personal injury and/or
equipment damage.
Control Logic Wiring and Adapters
L Option Board
1–3
The L Option Board provides a means of interfacing various signals
and commands to the 1336 IMPACT drive by using contact closures.
Six different versions of the option are available:
L4
Contact Closure Interface1
L7E
Contact Closure Interface with Encoder Feedback1
L5
+24V AC/DC Interface
L8E
+24V AC/DC Interface with Encoder Feedback
L6
115V AC Interface
L9E
115V AC Interface with Encoder Feedback
1 Uses internal +5V DC supply.
The user inputs are connected to the L Option Board through TB3.
The L4, L5, and L6 options each have nine inputs: seven
user-configurable inputs and two factory-defined control inputs. The
function of each input must be selected through programming as
explained later in this section. The L7E, L8E, and L9E options are
similar to L4, L5, and L6 with the addition of encoder feedback
inputs.
L Option Board Jumpers
Important:
If the L Option Board is being installed, Main Control
Board jumpers at pins 3 & 4 and 17 & 18 of J2 must be
removed. If these jumpers are removed, they can be
stored on the “Spares” location on the Main Control
Board. If this board is removed, these jumpers must be
reinstalled and the L Option Mode parameter (parameter
116) must be programmed to “1”.
Figure 1.2
Jumper Locations
Jumper
Spares
ESC
SEL
JOG
Jumper J7
(located on Main
Control Board)
11–22kW (15–30 HP)
AB0276C
Publication 1336 IMPACT-6.1 – March 1998
1–4
Control Logic Wiring and Adapters
Available Inputs
The L Option allows the combination of the following functions:
Accel/Decel Rates
Process Trim
Digital Potentiometer (MOP)
Ramp
Enable
Reset
Flux Enable
Run Forward
Forward/Reverse
Run Reverse
Jog
Speed Selects
Local Control
Speed Torque Selections
Not Ext Flt
Start
Not Stop, Clear Fault
Stop Mode Selects
The available combinations are shown in Figure 1.4. Programming
the L Option Mode parameter to one of the L Option Mode numbers
listed selects that combination of input functions.
Important:
The L Option Mode parameter can be changed at any
time; however, programming changes will not take
effect until power has been cycled to the drive. When
changing an L Option Mode, it is important to note that
the corresponding inputs to TB3 may also change.
The programming options of the L Option Board allow the user to
select an input combination to meet the needs of a specific
installation. Appropriate selection of a combination may be done by
using Table 1.A. First determine the type of start/stop/direction
control desired. Then select the remaining control functions
available. After selecting a group of L Option modes, use Table 1.A
for specific mode selection. Record the selected mode number below.
Selected Mode Number:
Local Programming
Publication 1336 IMPACT-6.1 – March 1998
For local programming and control information, refer to the 1336
IMPACT Drive User Manual.
Control Logic Wiring and Adapters
1–5
Table 1.A
L Option Mode Selection
Start/Stop Type
Direction Control
Communication Compatibility
Mode(s)
to Use
Stop & Enable
Only
None
Control must be provided by HIM or Communication Option.
1
Momentary
Pushbutton
(3 Wire)
Maintained Switch
(Open-Forward,
Closed-Reverse)
Single-Source
Start/Stop – works like the HIM and Communication Options. Direction
Control will not work with HIM or Communication Options. User must
select direction control from either HIM and Communication Options or
TB3 input.
2 – 6, 17,
and 18,
and 27
Momentary
Pushbutton
(3 Wire)
Momentary Pushbuttons
(Forward and Reverse)
Multi-Source
Start/Stop – works in parallel with HIM and Communication Options.
Direction – works in parallel with HIM or Communication Options.
7 – 11
and
19 – 22
and 28,
29
Start – works differently than three-wire control.
Direction – works differently than three-wire control.
Stop – always works.
12 – 16
and
23 – 26
and 30
Maintained switches for combined run and
direction control (2 wire, Run Forward, Run
Reverse)
Refer to two-, three-wire notes in the User Manual.
Diodes 27–30 are available with versions 2.02 and later.
Figure 1.3 provides the terminal designations for TB3. The
maximum and minimum wire sizes accepted by TB3 are 2.1 and
0.30 mm2 (14 and 22 AWG). Maximum torque for all terminals is
1.36 N-m (12 lb-in.). Use copper wire only.
Figure 1.3
TB3 Terminal Designations
19
20
21
22
23
24
25
26
27
28
29
30
31
32
33
34
35
36
Input 1
Input 2 (Stop)
Common
Input 3
Input 4
Input 5
Common
Input 6
Input 7
Input 8
Common
Enable
Encoder B
Encoder NOT A
Encoder NOT B
Encoder A
+12V (200mA max.)
Encoder Common
Included on L7E, L8E, & L9E Only
AB0293B
Publication 1336 IMPACT-6.1 – March 1998
1–6
Control Logic Wiring and Adapters
Figure 1.4
L Option Mode Selection and Typical TB3 Connections
L Option Mode (parameter 116) = 1
Factory Default
Momentary
User Connections
User Connections
Maintained
19
Status
20
Not Stop7, Clear Fault3,6
21
Common
22
Status
23
Status
24
Status
25
Common
26
Status
27
Status
28
Status
29
Common
30
Enable3
L Option Mode (parameter 116) = 2 – 6, 17, 18, and 27
Single-Source, Three-Wire Control
19
Start9
20
Not Stop7, Clear Fault3,6
21
Common
22
Rev/Fwd5
23
24
Not Ext Fault4,8,10
25
Common
2
3
Jog
Stop
Type7
27
Speed Select 21 1 See Table 1.B.
28
Speed Select 11
29
Common
30
Enable3
Publication 1336 IMPACT-6.1 – March 1998
Mode
6
2nd/1st Digital
Accel Pot Up
Jog
17
Proc
Trim
18
2711,12
Flux En Digital
Pot Up
Speed Speed 2nd/1st Digital
Local Ramp Reset
Select 31 Select 31 Decel Pot Dn Control2
26
AB0290B
4
511
Digital
Pot Dn
2 Drive must be stopped to take Local Control.
Control by all other adapters is disabled (except Stop).
3 These inputs must be present before drive will start.
4 For Common Bus, this becomes Precharge Enable.
5 Bit 11 of Logic Options (parameter 17) must be 0 for reverse direction
control.
6 For soft faults only. You need to recycle power to the drive or reset to clear.
For hard faults, refer to the troubleshooting chapter.
7 To configure the stop type, refer to Logic Options (parameter 17).
8 This input must be present before the fault can be cleared and the drive will
start. This can be disabled through Fault Select 2 (parameter 22) and
Warning Select 2 (parameter 23).
9 Latched starts require a stop to stop the drive.
10 This input must be present or masked out before drive will start.
11 In mode 5, the MOP value is not reset to 0 when you stop. In mode
27, the MOP Value is reset when you stop.
12 Available in versions 2.02 and later.
Control Logic Wiring and Adapters
1–7
Momentary
Maintained
L Option Mode (parameter 116) = 7 – 11 and 19 – 22, 28, 29
Multi-Source, Three-Wire Control
19
Start9
20
Not Stop7, Clear Fault3,6
21
7
Common
User Connections
24
25
Digital
Pot Up
Reverse5
Forward5 Forward5
Digital
Pot Dn
Forward5
Speed/ Forward5 Speed/
Speed/
2nd
Accel Torque 210 Torque 210
Torque 210
Digital
Pot Dn
Forward5
Speed/
Speed/
1st
Decel Torque 110 Torque 110
Ramp
Speed
Digital
Select 31 Pot Up
2nd
Decel
Reset
User Connections
Speed Speed
Digital
Select 31 Select 31 Pot Up
Speed
Speed Speed
Select 21 Select 21 Select 21
Common
30
Enable3
Digital
Pot Dn
Run
20
Not Stop7, Clear Fault3,6
Forward5,11
23
Flux
Enable
Speed
Select 21
Speed
Select 21
Digital
Pot Dn
Mode
Common
Run Reverse5,11
Process
Trim
Speed/
Torque 110
L Option Mode (parameter 116) = 12 – 16 and 23 – 26, 30
Single-Source, Two-Wire Control
19
12
13
14
1512
16
Local
Control2
Stop
Type7
2nd/1st
Accel
Digital
Pot Up
Local
Control2
Process
Trim
Flux Process
Enable Trim
Speed
Speed 2nd/1st
Select 31 Select 31 Decel
Digital
Pot Dn
Stop
Type
Reset
Reset
23
24
25
26
3012,13
Jog
Digital
Pot Up
Not Ext Fault4,8
Common
26
27
Speed Select 21
28
Speed Select 11
30
2812,13 2912,13
22
Speed/ Reverse5 Speed/
Speed/
1st
Torque 310
Accel Torque 310 Torque 310
Jog
29
29
21
Common
Speed Select 11
25
20
Not Ext Fault4,8
28
24
19
Reverse5
27
22
11
Digital
Pot Up
26
21
8
1012
Reverse5 Reverse5
22
23
Mode
912
Common
Enable3
Ramp
1 See Table 1.B.
2 Drive must be stopped to take Local Control.
Control by all other adapters is disabled (except Stop).
3 These inputs must be present before drive will start.
4 For Common Bus, this becomes Precharge Enable.
5 Bit 11 of Logic Options (parameter 17) must be 0 for reverse direction control.
6 For soft faults only. You need to recycle power to the drive to clear. For hard
faults, refer to the troubleshooting chapter.
7 To configure the stop type, refer to Logic Options (parameter 17).
8 This input must be present before the fault can be cleared and the drive will
start. This can be disabled through Fault Select 2 (parameter 22) and
Warning Select 2 (parameter 23).
9 Latched starts require a stop to stop the drive.
10 See Speed/Torque Select table.
11 Unlatched start.
12 In modes 9, 10, and 15, the MOP value is not reset to 0 when you stop.
In modes 28, 29, and 30, the MOP Value is reset when you stop.
13 Available in versions 2.02 and later.
Speed Digital
Select 31 Pot Dn
AB0291B
Publication 1336 IMPACT-6.1 – March 1998
1–8
Control Logic Wiring and Adapters
Table 1.B defines the input state of the Speed Select inputs for a
desired speed reference source.
Table 1.B
Speed Select/Speed Reference
Speed Reference
Source
Speed Select 3
Speed Select 2
Speed Select 1
O
O
O
Speed Ref 1
O
O
X
Speed Ref 2
O
X
O
Speed Ref 3
O
X
X
Speed Ref 4
X
O
O
Speed Ref 5
X
O
X
Speed Ref 6
X
X
O
Speed Ref 7
X
X
X
Last State
O = Open = Removed = 0
X = Closed = Applied = 1
Table 1.C defines the input state of the Speed/Torque Mode Select
inputs for a desired speed/torque mode.
Table 1.C
Speed/Torque Select
Speed/Torque
Mode
Select 3
Speed/Torque
Mode
Select 2
Speed/Torque
Mode
Select 1
O
O
O
Zero Torque
O
O
X
Speed Regulate
O
X
O
Torque Regulate
O
X
X
Minimum Torque/Speed
X
O
O
Maximum Torque/Speed
X
O
X
Sum of the Torque and Speed
X
X
O
Zero Torque
X
X
X
Zero Torque
O = Open = Removed = 0
X = Closed = Applied = 1
Publication 1336 IMPACT-6.1 – March 1998
Speed/Torque Mode
Control Logic Wiring and Adapters
1–9
Human Interface Module
(HIM)
Description
When the drive-mounted HIM is supplied, it will be connected as
SCANport Adapter 1 (refer to Figure 1.6) and visible from the front
of the drive. The HIM can be divided into two sections; Display
Panel and Control Panel. The Display Panel provides a means of
programming the drive and viewing the various operating
parameters. The Control Panel allows different drive functions to be
controlled. For HIM operation, refer to the 1336 IMPACT Drive
User Manual.
Important:
The operation of HIM functions depends upon drive
parameter settings. Default parameter values allow full
HIM functionality.
Publication 1336 IMPACT-6.1 – March 1998
1–10
Control Logic Wiring and Adapters
Figure 1.5
Human Interface Module
Display Panel
ESC
SEL
Control Panel
ESC
SEL
JOG
JOG
Human Interface Module
(HIM)
AB0268B
Figure 1.6
Adapter Locations
5.5–22 kW (15–30 HP)
Internal Communication
(Adapter 6)
ESC
Drive Mounted HIM
(Adapter 1)
SEL
JOG
L Option
(TB3 Adapter 0)
Communications Port for Remote HIM/
Communication Options (Adapter 2)
or
Expansion Options (Adapters 2, 3, 4, 5)
2
2
3
3
4
5
Expansion Options
Publication 1336 IMPACT-6.1 – March 1998
AB0319B
Control Logic Wiring and Adapters
1–11
Removing the HIM
For handheld operation, you can remove the module and place it up
to 10 meters (33 feet) from the 1336 IMPACT drive. (You do need a
cable for this.)
!
Important:
!
ATTENTION: Some voltages present behind the
drive front cover are at incoming line potential. To
avoid an electric shock hazard, use extreme caution
when removing/replacing the HIM.
Removing a HIM (or other SCANport device) from a
drive while power is applied causes a Serial Fault,
unless SP Enable Mask (parameter 124) or Fault Select
1 (parameter 20) have been set to disable this fault or
Control Logic (from the Control Status menu) has been
disabled (only available on a Series A, version 3.0 or
Series B HIM). Setting bit 1 of SP Enable Mask to 0
disables Serial Fault from a HIM on port 1. It also
disables all HIM control functions except Stop. Setting
bit 9 of Fault Select 1 to 0 disables the serial fault from
the HIM on port 1 but still allows HIM control.
ATTENTION: Hazard of personal injury of
equipment damage exist. If you initiate a command to
start motor rotation (command a start or jog) and then
disconnect the programming device, the drive will not
fault if you have the SCANport communications fault
set to be ignored for that port.
To remove the HIM, you need to:
1. Either remove the power or clear the port but, which corresponds
to the port the HIM is attached to, in SP Enable Mask (parameter
124) or Fault Select 1 (parameter 20) to prevent the drive from
faulting.
2. Remove the front cover of the drive.
3. Push release at the bottom of the HIM cradle and slide the
module down out of its cradle.
Publication 1336 IMPACT-6.1 – March 1998
1–12
Control Logic Wiring and Adapters
To use the module from anywhere up to 10 meters (33 feet) from the
drive, you need to:
1. Connect the appropriate cable between the HIM and the
communications port (adapter 2, 3, 4, or 5) or adapter 1 (the HIM
cradle).
2. Set SP Enable Mask to enable the port that you plugged the HIM
into and/or Fault Select 1 (parameter 20).
To replace the module, follow these steps:
1. Slide the module up into its cradle.
2. Replace the front cover of the drive.
3. Apply power, set SP Enable Mask or set Fault Select 1.
HIM Operation
When power is first applied to the drive, the HIM will cycle through
a series of displays. These displays will show the drive name, ID,
and communication status. Upon completion, the Status Display
(refer to Figure 1.7) will be shown. This display shows the current
status of the drive (i.e. Stopped, Running, etc.) or any faults that may
be present (Not Enabled, etc.).
For HIM operation, refer to the 1336 IMPACT Drive User Manual.
Figure 1.7
Status Display
Stopped
+0.00 RPM
Publication 1336 IMPACT-6.1 – March 1998
Control Logic Wiring and Adapters
1–13
Graphic Programming
Terminal
GPT Description
The optional GPT (Figure 1.8) is a remote device with a 1.8 meter
(6 foot) long cable. The GPT offers a 40 by 8 character display that
can also be used as a graphics display. For GPT operation, refer to
the 1201 GPT User Manual.
Important:
Main Menu screens are dynamic and will change based
on functionality provided by adapter and drive status.
Figure 1.8
Graphic Programming Terminal
F1
F2
D
7
4
ALT
8
F
9
5
6
PRESET 4
PRESET 5
XREF 1
PRESET 1
PRESET 2
PRESET 3
0
+/–
1
ESC
E
F3
.
2
F4
+
–
3
JOG
AB0554A
Publication 1336 IMPACT-6.1 – March 1998
1–14
Control Logic Wiring and Adapters
DriveTools
DriveTools software is a Windows 3.1 compatible family of
application programs allowing the user to perform programming,
monitoring, and diagnostic operations on Allen-Bradley AC and DC
digital drive products. The software consists of five Windows
applications. For operation, refer to the Product Data DriveTools
Software manual.
Control Firmware Function
All control functions in the 1336 IMPACT drive are performed
through the use of parameters that can be changed with a
programming terminal or DriveTools. Refer to the overview Block
Diagram of the Control Firmware Function in the 1336 IMPACT
Drive User Manual.
Feedback information is derived from hardware devices as part of
the process equipment used. Analog signals are converted to digital
signals for use by the drive. Control signals may be provided to the
drive by the Main Control Board.
All setup and operation information used by the drive is stored in a
system parameter table. Every parameter, including Setup and
Configuration parameters (Sources and Destinations), has an entry in
the parameter table. For example, parameter 29 is named the [Speed
Ref 1] parameter and contains a number value representing the speed
reference. The speed reference can originate from an external control
device such as a potentiometer connected to the analog input of the
Main Control Board. Refer to the 1336 IMPACT Drive User Manual,
Publication 1336 IMPACT-5.0.
Publication 1336 IMPACT-6.1 – March 1998
Chapter 2
2–1
Troubleshooting and Error Codes
Chapter Objectives
This chapter provides information to help troubleshoot your 1336
IMPACT drive.
!
ATTENTION: Do not troubleshoot or maintain the
1336 IMPACT drive unless you are familiar with your
drive system and the associated machinery. You may
be injured and/or the equipment may be damaged if
you do not comply.
During the start-up procedure, you should have recorded board
jumper settings for each board, board software version numbers, and
the drive and motor nameplate data in Table 6.A of the 1336
IMPACTt Adjustable Frequency AC Drive User Manual. If this
information was not recorded, record it before beginning any
troubleshooting sequences.
Fault/Warning Handling
When a problem occurs with your drive, check the VP and CP lights
on your drive on the main control board. Figure 2.1 shows the
location of the VP and CP lights.
Figure 2.2
VP and CP LED Locations
Frames B – H
Publication 1336 IMPACT-6.1 – March 1998
2–2
Troubleshooting and Error Codes
The lights on the motor control board indicate the status of the
velocity processor (VP) and current processor (CP):
If the VP or CP LED is:
Then, for that processor:
Solid green
No fault occurred.
Flashing green
A drive warning occurred.
Flashing red
A drive soft fault occurred.
Solid red
A drive hard fault occurred.
Faults fall into three basic categories:
This type of
fault:
Has the following definition:
To remove this fault,
you need to:
Trips the drive causing it to stop.
You cannot regain control until you
reset the drive.
Perform a Drive Reset command
or cycle drive power.
Soft
Trips the drive causing it to stop.
1 Address the condition that
caused the fault.
2 Perform a Clear Faults
command.
Warning
Indicates an undesirable condition.
The drive will not stop, but the
condition may lead to a fault that
will stop the drive.
Address the condition that caused
the warning.
Hard
Faults are annunciated on the Human Interface Module (HIM) at the
time they occur. Warnings are not annunciated on the HIM.
To help troubleshoot your 1336 IMPACT drive, the drive logs any
faults or warnings in either the fault or warning queue. The faults
and warnings that are contained in the queues are either configurable
or non-configurable.
This fault type:
"
Viewing the Fault and
Warning Queues on the
HIM
Refers to faults that you:
Configurable
Can set up to either trip the drive or provide only a visual
warning while the drive continues to operate.
Non-configurable
Cannot disable. These faults are the result of a condition
that could damage the drive if allowed to persist.
You can reset the soft faults by pressing the stop button on the HIM.
You can use the HIM to view the fault and warning queues. To view
the fault queue, you need to:
1. Press the Escape key until you reach the Choose Mode level.
2. Use the Increment or Decrement key to scroll through the Choose
Mode options until Control Status is displayed.
3. Press the Enter key.
Publication 1336 IMPACT-6.1 – March 1998
Troubleshooting and Error Codes
2–3
4. Use the Increment or Decrement key to scroll through the Control
Status options until Fault Queue is displayed.
5. Press the Enter key.
6. Press the Enter key when View Queue is displayed.
The fault queue can contain up to 32 faults. The 1336 IMPACT
drive reports the faults using the following format:
Fault name
I n v
O v e r T e m p
F
2 0 2 8
Fault queue
indicator
Fault code
number
T r i p
Trip indicator
T r p
1
Position in
fault queue
The trip indicator is only present if this fault caused the drive to trip.
The last number (1) indicates the position of this fault within the
fault queue.
A marker is placed in the queue when the first fault occurs after a
power up sequence. This power up marker is as shown.
P w r
F
U p
M a r k e r
0
1 1
The 1336 IMPACT drive tracks the time that has elapsed since
power up. The drive uses this information as a time stamp so that
you can tell when a fault occurred in relation to when the drive was
powered up.
To clear the fault queue, select Clear Queue from the Fault Queue
options.
To view the warning queue, select Warning Queue from the Control
Status options. The remaining steps are the same as for the fault
queue.
What Are the Fault
Descriptions
When a fault occurs, the fault is displayed until you initiate a Drive
Reset or a Clear Faults command. A Drive Reset clears all faults,
while a Clear Faults command only clears soft and warning faults.
You can perform a Drive Reset and Clear Faults either through bits
in Logic Input Sts (parameter 14) or with a terminal.
Publication 1336 IMPACT-6.1 – March 1998
2–4
Troubleshooting and Error Codes
The fault codes are defined as shown in Table 1.A.
Table 2.ATable 2.B
Fault Descriptions
Fault Code and
Text
LED Information
Fault
Type
Description
The drive encountered a problem while
running the autotune tests.
01027
Autotune Diag
VP, Flashing red
Soft
When this condition occurs, the drive
coasts to a stop regardless of the selected
stop type.
Suggested Action
Check Autotune Errors (parameter 176).
For additional information about Autotune
Errors, refer to Chapter 13, Understanding
the Autotuning Procedure, in the user
manual.
Check for possible motor overheating.
01051
MtrOvrld Pnd
VP, Flashing red
Soft
A motor overload is pending. The drive
has reached 95% of the level required for
a motor overload trip (see fault 01052).
•If the motor temperature is excessive,
reduce the accel/decel times
(parameters 42–45) or reduce the load.
•If the motor temperature is acceptable,
increase the value of Motor Overload %
(parameter 26).
If you do not want this condition to be
reported as a fault, change bit 3 in Fault
Select 2 (parameter 22) to 0.
Check for possible motor overheating.
01052
MtrOvrld Trp
01053
Mtr Stall
01083
MtrOvrld Pend
VP, Flashing red
VP, Flashing red
VP, Flashing green
Soft
Soft
Warning
Motor overload tripped. The drive has
reached the level of accumulated motor
current over time as set by Motor Overload
% (parameter 26).
The drive is in a limit condition for a period
of time in excess of the value specified in
Motor Stall Time (parameter 25) with the
motor at zero speed.
Motor overload pending. The drive has
reached 95% of the level required for a
motor overload trip (see fault 01084).
•If the motor temperature is excessive,
reduce the accel/decel times
(parameters 42–45) or reduce the load.
•If the motor temperature is acceptable,
increase the value of Motor Overload %
(parameter 26).
If you do not want this condition to be
reported as a fault, change bit 4 in Fault
Select 2 (parameter 22) to 0.
Check Torque Limit Sts (parameter 87) to
see which limit has occurred. Increase the
appropriate limit parameter or reduce the
load.
If you do not want this condition to be
reported as a fault, change bit 5 in Fault
Select 2 (parameter 22) to 0.
Check for possible motor overheating.
•If the motor temperature is excessive,
reduce the accel/decel times
(parameters 42–45) or reduce the load.
•If the motor temperature is acceptable,
increase the value of Motor Overload %
(parameter 26).
If you do not want this condition to be
reported as a warning, change bit 3 in
Warning Select 2 (parameter 23) to 0.
Publication 1336 IMPACT-6.1 – March 1998
Troubleshooting and Error Codes
Fault Code and
Text
LED Information
Fault
Type
Description
2–5
Suggested Action
Check for possible motor overheating.
01084
MtrOvrld Trp
01085
Mtr Stall
VP, Flashing green
VP, Flashing green
Warning
Warning
Motor overload tripped. The drive has
reached the level of accumulated motor
current over time as set by Motor Overload
% (parameter 26).
The drive is in a limit condition for a period
of time in excess of the value specified in
Motor Stall Time (parameter 25) with the
motor at zero speed.
Inverter overtemperature trip. There is
excessive temperature at the heatsink.
02028
Inv Overtemp Trp
VP, Flashing red
Soft
When this condition occurs, the drive
coasts to a stop regardless of the selected
stop type.
•If the motor temperature is excessive,
reduce the accel/decel times
(parameters 42–45) or reduce the load.
•If the motor temperature is acceptable,
increase the value of Motor Overload %
(parameter 26).
If you do not want this condition to be
reported as a warning, change bit 4 in
Warning Select 2 (parameter 23) to 0.
Check Torque Limit Sts (parameter 87) to
see which limit has occurred. Increase the
appropriate limit parameter or reduce the
load.
If you do not want this condition to be
reported as a warning, change bit 5 in
Warning Select 2 (parameter 23) to 0.
Check the cabinet filters, drive fans, and
heatsinks.
Check the thermal sensor and sensor
wiring (connector).
Reduce the load or duty cycle if possible.
Lower the value of PWM Frequency
(parameter 10).
Check the cabinet filters, drive fans, and
heatsinks.
Check the thermal sensor and sensor
wiring (connector).
02049
Inv Overtemp Pnd
VP, Flashing red
Soft
An inverter overtemperature is pending.
The inverter heatsink temperature is
approaching the trip level.
Reduce the load or duty cycle if possible.
Lower the value of PWM Frequency
(parameter 10).
If you do not want this condition to be
reported as a fault, change bit 1 in Fault
Select 2 (parameter 22) to 0.
02061
InvOvld Pend
VP, Flashing red
Soft
An inverter (IT) overload is pending. The
inverter current has been in excess of
105% of Inverter Amps (parameter 11) too
long. Continued operation at this load
level will cause an overload.
Soft
Inverter (IT) overload. The inverter current
has been in excess of 105% of Inverter
Amps (parameter 11) too long.
Reduce the load or duty cycle if possible.
If you do not want this condition to be
reported as a fault, change bit 13 in Fault
Select 2 (parameter 22) to 0.
Reduce the load or duty cycle if possible.
02063
Inv Overload
VP, Flashing red
If you do not want this condition to be
reported as a fault, change bit 15 in Fault
Select 2 (parameter 22) to 0.
Publication 1336 IMPACT-6.1 – March 1998
2–6
Fault Code and
Text
Troubleshooting and Error Codes
LED Information
Fault
Type
Description
Suggested Action
Check the cabinet filters, drive fans, and
heatsinks.
Check the thermal sensor and sensor
wiring (connector).
02081
Inv Overtemp Pnd
VP, Flashing green
Warning
An inverter overtemperature is pending.
The inverter heatsink temperature is
approaching the trip level.
Reduce the load or duty cycle if possible.
Lower the value of PWM Frequency
(parameter 10).
If you do not want this condition to be
reported as a warning, change bit 1 in
Warning Select 2 (parameter 23) to 0.
02093
InvOvld Pend
VP, Flashing green
Warning
An inverter (IT) overload is pending. The
inverter current has been in excess of
105% of Inverter Amps (parameter 11) too
long. Continued operation at this load
level will cause an overload.
Warning
Inverter (IT) overload. The inverter
current has been in excess of 105% of
Inverter Amps (parameter 11) too long.
Reduce the load or duty cycle if possible.
If you do not want this condition to be
reported as a warning, change bit 13 in
Warning Select 2 (parameter 23) to 0.
Reduce the load or duty cycle if possible.
02095
Inv Overload
VP, Flashing green
If you do not want this condition to be
reported as a warning, change bit 15 in
Warning Select 2 (parameter 23) to 0.
A hardware malfunction was detected on
power up or reset.
03008
HW Malfunction
VP, Red 1 blink
Hard
When this condition occurs, the drive
coasts to a stop regardless of the selected
stop type.
A hardware malfunction was detected on
power up or reset.
03009
HW Malfunction
VP, Red 2 blink
Hard
When this condition occurs, the drive
coasts to a stop regardless of the selected
stop type.
A hardware malfunction was detected on
power up or reset.
03010
HW Malfunction
VP, Red 3 blink
Hard
When this condition occurs, the drive
coasts to a stop regardless of the selected
stop type.
A hardware malfunction was detected on
power up or reset.
03011
HW Malfunction
VP, Red 4 blink
Hard
When this condition occurs, the drive
coasts to a stop regardless of the selected
stop type.
A hardware malfunction was detected on
power up or reset.
03012
HW Malfunction
VP, Red 5 blink
Hard
When this condition occurs, the drive
coasts to a stop regardless of the selected
stop type.
Publication 1336 IMPACT-6.1 – March 1998
Recycle the power. If the fault does not
clear, replace the main control board.
Recycle the power. If the fault does not
clear, replace the main control board.
Recycle the power. If the fault does not
clear, replace the main control board.
Recycle the power. If the fault does not
clear, replace the main control board.
Recycle the power. If the fault does not
clear, replace the main control board.
Troubleshooting and Error Codes
Fault Code and
Text
LED Information
Fault
Type
Description
2–7
Suggested Action
Initialize parameters or:
03014
EE Checksum
VP, Flashing red
Soft
The parameter database is corrupt.
•Perform a Recall Values operation.
•Perform a Save Values operation.
•Verify the parameters.
•Reset the drive.
If the fault still occurs, replace the main
control board.
Recycle the power. If the fault does not
clear, replace the main control board.
03015
HW Malfunction
VP, Flashing red
Soft
A hardware malfunction has occurred.
03022
Diff Drv Type
VP, Flashing red
Soft
The main control board has been
initialized on a different size drive.
Issue a Reset Defaults command to set
the drive parameters back to the default
values.
A software malfunction has occurred.
Recycle the power. If the fault does not
clear, replace the main control board. If
the fault still occurs, replace the gate driver
board.
03023
SW Malfunction
VP, Solid red
Hard
A software malfunction has occurred.
03024
SW Malfunction
VP, Solid red
Hard
When this condition occurs, the drive
coasts to a stop regardless of the selected
stop type.
The motor speed has exceeded the speed
limit plus Absolute Overspd (parameter 24)
settings.
03025
Absolute Overspd
VP, Flashing red
03026
Analog Spply Tol
VP, Flashing red
Soft
When this condition occurs, the drive
coasts to a stop regardless of the selected
stop type.
03029
SW Malfunction
VP, Solid red
Hard
A software malfunction has occurred.
Soft
When this condition occurs, the drive
coasts to a stop regardless of the selected
stop type.
The analog supply tolerance voltage is
outside of the 13V to 18V range.
Recycle the power. If the fault does not
clear, replace the main control board.
If operating in torque mode, check if the
load is allowing excessive motor speed.
Check if the setting of Absolute Overspd
(parameter 24) or the speed limits
(parameters 40 and 41) are too low.
Possible faulty analog 15V power supply.
The gate driver board or the main control
board may require replacement.
Recycle the power. If the fault does not
clear, replace the main control board.
A software malfunction has occurred.
03030
SW Malfunction
VP, Solid red
Hard
When this condition occurs, the drive
coasts to a stop regardless of the selected
stop type.
03031
SW Malfunction
VP, Solid red
Hard
A software malfunction has occurred.
Recycle the power. If the fault does not
clear, replace the main control board.
Recycle the power. If the fault does not
clear, replace the main control board.
Check your wiring and connections.
03040
mA Input
VP, Flashing red
Soft
A loss of 4–20mA input has occurred.
If the fault does not clear, replace the main
control board.
If you do not want this condition to be
reported as a fault, change bit 8 in Fault
Select 1 (parameter 20) to 0.
Publication 1336 IMPACT-6.1 – March 1998
2–8
Fault Code and
Text
03057
Param Limit
03058
Math Limit
Troubleshooting and Error Codes
LED Information
VP, Flashing red
VP, Flashing red
Fault
Type
Soft
Soft
Description
Suggested Action
A parameter limit has occurred.
Examine the parameter limit testpoints to
determine the exact cause. Refer to the
Understanding Parameter Limit Faults
section in the troubleshooting chapter of
the user manual.
A math limit has occurred.
If you do not want this condition to be
reported as a fault, change bit 9 in Fault
Select 2 (parameter 22) to 0.
Examine the math limit testpoints to
determine the exact cause. Refer to the
Understanding Math Limit Faults section in
the troubleshooting chapter of the user
manual.
If you do not want this condition to be
reported as a fault, change bit 10 in Fault
Select 2 (parameter 22) to 0.
Check your wiring and connections.
03072
mA Input
VP, Flashing green
Warning
A loss of 4–20mA input has occurred.
03089
Param Limit
VP, Flashing green
Warning
A parameter limit has occurred.
If you do not want this condition to be
reported as a warning, change bit 8 in
Warning Select 1 (parameter 21) to 0.
Examine the parameter limit testpoints to
determine the exact cause. Refer to the
Understanding Parameter Limit Faults
section in the troubleshooting chapter of
the user manual.
A math limit has occurred.
If you do not want this condition to be
reported as a warning, change bit 9 in
Warning Select 2 (parameter 23) to 0.
Examine the math limit testpoints to
determine the exact cause. Refer to the
Understanding Math Limit Faults section in
the troubleshooting chapter of the user
manual.
03090
Math Limit
VP, Flashing green
Warning
If you do not want this condition to be
reported as a warning, change bit 10 in
Warning Select 2 (parameter 23) to 0.
Check the encoder wiring.
05048
Spd Fdbk Loss
VP, Flashing red
Soft
A loss of feedback occurred.
Verify that the encoder signals are free of
noise.
If you do not want this condition to be
reported as a fault, change bit 0 in Fault
Select 2 (parameter 22) to 0.
Check the external circuit for cause of an
open input signal.
05054
External Flt In
VP, Flashing red
Publication 1336 IMPACT-6.1 – March 1998
Soft
The external fault input from the L Option
board is open.
If you do not want this condition to be
reported as a fault, change bit 6 in Fault
Select 2 (parameter 22) to 0.
Troubleshooting and Error Codes
Fault Code and
Text
LED Information
Fault
Type
Description
2–9
Suggested Action
Check the encoder wiring.
05080
Spd Fdbk Loss
VP, Flashing green
Warning
A loss of feedback occurred.
Verify that the encoder signals are free of
noise.
If you do not want this condition to be
reported as a warning, change bit 0 in
Warning Select 2 (parameter 23) to 0.
Check the external circuit for cause of an
open input signal.
05086
External Flt In
06041
SP 1 Timeout
VP, Flashing green
VP, Flashing red
Warning
Soft
The external fault input from the L Option
board is open.
The SCANport adapter at port 1 has been
disconnected and the logic mask bit for
port 1 is set (1).
If you do not want this condition to be
reported as a warning, change bit 6 in
Warning Select 2 (parameter 23) to 0.
If the adapter was not intentionally
disconnected:
•Check the wiring to the SCANport
adapters.
•Replace wiring, SCANport expander,
SCANport adapters, and main control
board.
•Replace drive, if required.
If you do not want this condition to be
reported as a fault, change bit 9 in Fault
Select 1 (parameter 20) to 0.
If the adapter was not intentionally
disconnected:
06042
SP 2 Timeout
VP, Flashing red
Soft
The SCANport adapter at port 2 has been
disconnected and the logic mask bit for
port 2 is set (1).
•Check the wiring to the SCANport
adapters.
•Replace wiring, SCANport expander,
SCANport adapters, and main control
board.
•Replace drive, if required.
If you do not want this condition to be
reported as a fault, change bit 10 in Fault
Select 1 (parameter 20) to 0.
If the adapter was not intentionally
disconnected:
06043
SP 3 Timeout
VP, Flashing red
Soft
The SCANport adapter at port 3 has been
disconnected and the logic mask bit for
port 3 is set (1).
•Check the wiring to the SCANport
adapters.
•Replace wiring, SCANport expander,
SCANport adapters, and main control
board.
•Replace drive, if required.
If you do not want this condition to be
reported as a fault, change bit 11 in Fault
Select 1 (parameter 20) to 0.
Publication 1336 IMPACT-6.1 – March 1998
2–10
Fault Code and
Text
Troubleshooting and Error Codes
LED Information
Fault
Type
Description
Suggested Action
If the adapter was not intentionally
disconnected:
06044
SP 4 Timeout
VP, Flashing red
Soft
The SCANport adapter at port 4 has been
disconnected and the logic mask bit for
port 4 is set (1).
•Check the wiring to the SCANport
adapters.
•Replace wiring, SCANport expander,
SCANport adapters, and main control
board.
•Replace drive, if required.
If you do not want this condition to be
reported as a fault, change bit 12 in Fault
Select 1 (parameter 20) to 0.
If the adapter was not intentionally
disconnected:
06045
SP 5 Timeout
VP, Flashing red
Soft
The SCANport adapter at port 5 has been
disconnected and the logic mask bit for
port 5 is set (1).
•Check the wiring to the SCANport
adapters.
•Replace wiring, SCANport expander,
SCANport adapters, and main control
board.
•Replace drive, if required.
If you do not want this condition to be
reported as a fault, change bit 13 in Fault
Select 1 (parameter 20) to 0.
If the adapter was not intentionally
disconnected:
06046
SP 6 Timeout
VP, Flashing red
Soft
The SCANport adapter at port 6 has been
disconnected and the logic mask bit for
port 6 is set (1).
•Check the wiring to the SCANport
adapters.
•Replace wiring, SCANport expander,
SCANport adapters, and main control
board.
•Replace drive, if required.
If you do not want this condition to be
reported as a fault, change bit 14 in Fault
Select 1 (parameter 20) to 0.
If the adapter was not intentionally
disconnected:
06047
SP Error
VP, Flashing red
Soft
SCANport communications have been
interrupted.
•Check the amount of noise on the
system.
•Check the wiring to the SCANport
adapters.
•Replace wiring, SCANport expander,
SCANport adapters, and main control
board.
•Replace drive, if required.
If you do not want this condition to be
reported as a fault, change bit 15 in Fault
Select 1 (parameter 20) to 0.
Publication 1336 IMPACT-6.1 – March 1998
Troubleshooting and Error Codes
Fault Code and
Text
LED Information
Fault
Type
Description
2–11
Suggested Action
If the adapter was not intentionally
disconnected:
06073
SP 1 Timeout
VP, Flashing green
Warning
The SCANport adapter at port 1 has been
disconnected and the logic mask bit for
port 1 is set (1).
•Check the wiring to the SCANport
adapters.
•Replace wiring, SCANport expander,
SCANport adapters, and main control
board.
•Replace drive, if required.
If you do not want this condition to be
reported as a warning, change bit 9 in
Warning Select 1 (parameter 21) to 0.
If the adapter was not intentionally
disconnected:
06074
SP 2 Timeout
VP, Flashing green
Warning
The SCANport adapter at port 2 has been
disconnected and the logic mask bit for
port 2 is set (1).
•Check the wiring to the SCANport
adapters.
•Replace wiring, SCANport expander,
SCANport adapters, and main control
board.
•Replace drive, if required.
If you do not want this condition to be
reported as a warning, change bit 10 in
Warning Select 1 (parameter 21) to 0.
If the adapter was not intentionally
disconnected:
06075
SP 3 Timeout
VP, Flashing green
Warning
The SCANport adapter at port 3 has been
disconnected and the logic mask bit for
port 3 is set (1).
•Check the wiring to the SCANport
adapters.
•Replace wiring, SCANport expander,
SCANport adapters, and main control
board.
•Replace drive, if required.
If you do not want this condition to be
reported as a warning, change bit 11 in
Warning Select 1 (parameter 21) to 0.
If the adapter was not intentionally
disconnected:
06076
SP 4 Timeout
VP, Flashing green
Warning
The SCANport adapter at port 4 has been
disconnected and the logic mask bit for
port 4 is set (1).
•Check the wiring to the SCANport
adapters.
•Replace wiring, SCANport expander,
SCANport adapters, and main control
board.
•Replace drive, if required.
If you do not want this condition to be
reported as a warning, change bit 12 in
Warning Select 1 (parameter 21) to 0.
Publication 1336 IMPACT-6.1 – March 1998
2–12
Fault Code and
Text
Troubleshooting and Error Codes
LED Information
Fault
Type
Description
Suggested Action
If the adapter was not intentionally
disconnected:
06077
SP 5 Timeout
VP, Flashing green
Warning
The SCANport adapter at port 5 has been
disconnected and the logic mask bit for
port 5 is set (1).
•Check the wiring to the SCANport
adapters.
•Replace wiring, SCANport expander,
SCANport adapters, and main control
board.
•Replace drive, if required.
If you do not want this condition to be
reported as a warning, change bit 13 in
Warning Select 1 (parameter 21) to 0.
If the adapter was not intentionally
disconnected:
06078
SP 6 Timeout
VP, Flashing green
Warning
The SCANport adapter at port 6 has been
disconnected and the logic mask bit for
port 6 is set (1).
•Check the wiring to the SCANport
adapters.
•Replace wiring, SCANport expander,
SCANport adapters, and main control
board.
•Replace drive, if required.
If you do not want this condition to be
reported as a warning, change bit 14 in
Warning Select 1 (parameter 21) to 0.
If the adapter was not intentionally
disconnected:
06079
SP Error
VP, Flashing green
Warning
SCANport communications have been
interrupted.
•Check the amount of noise on the
system.
•Check the wiring to the SCANport
adapters.
•Replace wiring, SCANport expander,
SCANport adapters, and main control
board.
•Replace drive, if required.
If you do not want this condition to be
reported as a warning, change bit 15 in
Warning Select 1 (parameter 21) to 0.
Monitor the AC line for high line voltage or
transient conditions.
The DC bus voltage has exceeded the
maximum value.
12016
Overvoltage
CP, Solid red
Soft
When this condition occurs, the drive
coasts to a stop regardless of the selected
stop type.
Increase the deceleration time or install
the dynamic brake option because motor
regeneration can also cause bus
overvoltages. Refer to the user manual for
a description of Bus Options (parameter
13) for additional information about bus
overvoltages.
If you are using flux braking, refer to
Chapter 9, Applications, in the user
manual for information about flux braking.
12017
Desaturation
CP, Solid red
Publication 1336 IMPACT-6.1 – March 1998
Soft
There was too much current in the system.
Run the power structure diagnostics.
When this condition occurs, the drive
coasts to a stop regardless of the selected
stop type.
Check for a shorted motor or motor wiring.
Replace the drive.
Troubleshooting and Error Codes
Fault Code and
Text
12018
Ground Fault
12019
Overcurrent
LED Information
Fault
Type
Description
A current path to earth ground in excess of
drive rated current has been detected at
one or more of the drive output terminals.
CP, Solid red
Soft
When this condition occurs, the drive
coasts to a stop regardless of the selected
stop type.
There was too much current in the system.
CP, Solid red
Soft
When this condition occurs, the drive
coasts to a stop regardless of the selected
stop type.
2–13
Suggested Action
Run the power structure diagnostics.
Check the motor and external wiring to the
drive output terminals for a grounded
condition.
Replace the drive.
Run the power structure diagnostics.
Check for shorted motor or motor wiring.
Replace drive.
Check the incoming power and fuses.
12032
RidethruTime
CP, Flashing red
Soft
There was a bus voltage drop of 150V and
power did not return within 2 seconds.
Refer to the Understanding Precharge and
Ridethrough Faults section in the
troubleshooting chapter of the user
manual for more information.
If you do not want this condition to be
reported as a fault, change bit 0 in Fault
Select 1 (parameter 20) to 0.
12033
Prechrg Time
CP, Flashing red
Soft
The precharge function could not complete
within 30 seconds.
Refer to the Understanding Precharge and
Ridethrough Faults section in the
troubleshooting chapter of the user
manual for more information.
If you do not want this condition to be
reported as a fault, change bit 1 in Fault
Select 1 (parameter 20) to 0.
Monitor the incoming AC line for low
voltage or line power interruption.
12034
Bus Drop
CP, Flashing red
Soft
The bus voltage dropped 150V below the
bus tracker voltage.
Refer to the Understanding Precharge and
Ridethrough Faults section in the
troubleshooting chapter of the user
manual for more information.
If you do not want this condition to be
reported as a fault, change bit 2 in Fault
Select 1 (parameter 20) to 0.
Monitor the incoming AC line for low
voltage or line power interruption.
12035
Bus Undervlt
CP, Flashing red
Soft
The DC bus voltage fell below the trip
value (388V DC at 460V AC input).
Refer to the Understanding Precharge and
Ridethrough Faults section in the
troubleshooting chapter of the user
manual for more information.
If you do not want this condition to be
reported as a fault, change bit 3 in Fault
Select 1 (parameter 20) to 0 or decrease
the bus undervoltage setpoint.
Publication 1336 IMPACT-6.1 – March 1998
2–14
Fault Code and
Text
Troubleshooting and Error Codes
LED Information
Fault
Type
Description
Suggested Action
Monitor the incoming AC line for low
voltage or line power interruption.
12036
Bus Cycle>5
CP, Flashing red
Soft
At least 5 ridethrough cycles have
occurred within a 20 second period. This
indicates a converter problem or a problem
with the incoming power.
Refer to the Understanding Precharge and
Ridethrough Faults section in the
troubleshooting chapter of the user
manual for more information.
If you do not want this condition to be
reported as a fault, change bit 4 in Fault
Select 1 (parameter 20) to 0.
Make sure the motor is properly
connected.
12037
Open Circuit
CP, Flashing red
Soft
The fast flux up current is less than 50% of
commanded.
Refer to the Understanding Precharge and
Ridethrough Faults section in the
troubleshooting chapter of the user
manual for more information.
If you do not want this condition to be
reported as a fault, change bit 5 in Fault
Select 1 (parameter 20) to 0.
Check the incoming power and fuses.
12064
RidethruTime
CP, Solid green
Warning
There was a drop of 150V and power did
not return within 2 seconds.
Refer to the Understanding Precharge and
Ridethrough Faults section in the
troubleshooting chapter of the user
manual for more information.
If you do not want this condition to be
reported as a warning, change bit 0 in
Warning Select 1 (parameter 21) to 0.
12065
Prechrg Time
CP, Solid green
Warning
The precharge function could not complete
within 30 seconds.
Refer to the Understanding Precharge and
Ridethrough Faults section in the
troubleshooting chapter of the user
manual for more information.
If you do not want this condition to be
reported as a warning, change bit 1 in
Warning Select 1 (parameter 21) to 0.
Monitor the incoming AC line for low
voltage or line power interruption.
12066
Bus Drop
CP, Solid green
Warning
The bus voltage dropped 150V below the
bus tracker voltage.
Refer to the Understanding Precharge and
Ridethrough Faults section in the
troubleshooting chapter of the user
manual for more information.
If you do not want this condition to be
reported as a warning, change bit 2 in
Warning Select 1 (parameter 21) to 0.
Publication 1336 IMPACT-6.1 – March 1998
Troubleshooting and Error Codes
Fault Code and
Text
LED Information
Fault
Type
Description
2–15
Suggested Action
Monitor the incoming AC line for low
voltage or line power interruption.
12067
Bus Undervlt
CP, Solid green
Warning
The DC bus voltage fell below the
minimum value (388V DC at 460V AC
input).
Refer to the Understanding Precharge and
Ridethrough Faults section in the
troubleshooting chapter of the user
manual for more information.
If you do not want this condition to be
reported as a warning, change bit 3 in
Warning Select 1 (parameter 21) to 0.
Monitor the incoming AC line for low
voltage or line power interruption.
12068
Bus Cycle>5
CP, Solid green
Warning
At least 5 ridethrough cycles have
occurred within a 20 second period. This
indicates a converter problem or a problem
with the incoming power.
Refer to the Understanding Precharge and
Ridethrough Faults section in the
troubleshooting chapter of the user
manual for more information.
If you do not want this condition to be
reported as a warning, change bit 4 in
Warning Select 1 (parameter 21) to 0.
Make sure the motor is properly
connected.
12069
Open Circuit
CP, Solid green
Warning
The fast flux up current is less than 50% of
commanded.
Refer to the Understanding Precharge and
Ridethrough Faults section in the
troubleshooting chapter of the user
manual for more information.
If you do not want this condition to be
reported as a warning, change bit 5 in
Warning Select 1 (parameter 21) to 0.
13000
HW Malfunction
CP, Solid red
Hard
A hardware malfunction occurred.
Recycle the power. If the fault does not
clear, replace the main control board.
13001
HW Malfunction
CP, Solid red
Hard
A hardware malfunction occurred.
Recycle the power. If the fault does not
clear, replace the main control board.
13002
HW Malfunction
CP, Solid red
Hard
A hardware malfunction occurred.
Recycle the power. If the fault does not
clear, replace the main control board.
13003
HW Malfunction
CP, Solid red
Hard
A hardware malfunction occurred.
Recycle the power. If the fault does not
clear, replace the main control board.
13004
HW Malfunction
CP, Solid red
Hard
A hardware malfunction occurred.
Recycle the power. If the fault does not
clear, replace the main control board.
Publication 1336 IMPACT-6.1 – March 1998
2–16
Troubleshooting and Error Codes
Diagnostic Procedures by
Symptom
The following charts list drive symptoms, symptom descriptions, and
recommended actions.
Drive Will Not Start or Jog
Publication 1336 IMPACT-6.1 – March 1998
Troubleshooting and Error Codes
2–17
No HIM Display
Publication 1336 IMPACT-6.1 – March 1998
2–18
Troubleshooting and Error Codes
HIM Displays “Running”
Publication 1336 IMPACT-6.1 – March 1998
Troubleshooting and Error Codes
2–19
Motor Response Not Where You Want It
Publication 1336 IMPACT-6.1 – March 1998
2–20
Troubleshooting and Error Codes
Start Up Troubleshooting
Procedures
If you are having problems with the start up procedure, refer to this
table for possible solutions before calling for help.
If:
Then:
You powered up your drive and
cannot access the start up routine.
The start up procedure is not supported on a Series A Human Interface
Module (HIM). To verify that you have a Series A HIM, check the series
letter located on the back side of the HIM or check the HIM version when
you first power up your drive.
You got a Feedback Loss Fault.
You have specified that an encoder is on the system but it has been
disconnected.
The motor does not turn during the
phase rotation test.
Remove the load from the motor and try running the autotune tests again.
Afterwards, you will need to attach the load again and run the inertia test
manually.
The drive is not getting any speed feedback information. You need to:
During the phase rotation test you
were asked to swap the encoder
leads. You changed the leads and
ran start up again. You were asked
to swap the leads again.
• Check the connection between the encoder and the motor.
• Run the phase rotation test again and escape out to the status display
at the first question. Check the motor speed. It should ramp to 3 Hz
(90 rpm) for a 60 Hz 4 pole motor. If the motor speed is 0 rpm, you
should:
•
•
Miscellaneous
Troubleshooting
Procedures
Check the encoder wiring.
Check the encoder itself.
If you are having problems with how your 1336 IMPACT drive is
operating, refer to this table for possible solutions before calling for
help.
If:
Then you should:
• Check if the mode specified in L Option Mode (parameter 116) is 2 or 3
wire.
• Check SP 2 Wire Enable (parameter 181).
The drive starts and then stops.
• Check to see if the HIM displays a fault message.
• Check the L Option Board wiring.
• Check the settings on your gateway (communications module).
There is a delay before the stop
command takes effect.
• Check the value of Stop Dwell Time (parameter 18).
• Check Start Dwell Time (parameter 194).
• Check Pos Torque Lim (parameter 74) and Neg Torque Lim (parameter
75).
The motor waits before starting.
• Check Fast Flux Level (parameter 78) and bit 8 of Bus/Brake Opts
(parameter 13).
• Check S–Curve Percent (parameter 47).
The drive coasts on stop.
Publication 1336 IMPACT-6.1 – March 1998
• Check the stop type bits in Logic Options (parameter 17).
• Check Zero Speed Tol (parameter 19).
Troubleshooting and Error Codes
If:
2–21
Then you should:
• Check if the port is enabled in SP Enable Mask (parameter 124).
• Check if clear faults is enabled in Clr Flt/Res Mask (parameter 127).
You cannot clear faults.
• Check if clear fault owners in Ramp/ClFlt Owner (parameter 131) is set. If
set, check stop owners in Start/Stop Owner (parameter 129) and remove
stop conditions.
• The fault is a hard fault which requires a power cycle or drive reset.
• Check which speed reference the drive is following in Drive/Inv Status
(parameter 15) bits 13–15.
The motor does not turn or run
at the correct speed.
• Check if Spd/Trq Mode Sel (parameter 68) is set correctly.
• Check if Spd Desired BW (parameter 161) is non–zero.
• Set the drive defaults and run start up again to tune the drive.
• Check if SP An In1 Select (parameter 133) or SP An In2 Select (parameter
136) is set to the HIM port number.
• Check if SP An In1 Scale (parameter 135) or SP An In2 Scale (parameter
138) is 0.125.
The HIM pot does not control
motor speed.
• Check if a Speed Ref 1–7 (parameters 29 through 36) is linked to SP An
In1 Value (parameter 134) or SP An In2 Value (parameter 137).
• Check which speed reference the drive is following in Drive/Inv Status
(parameter 15) bits 13–15. The speed reference should be set to the
speed reference that SP An In1 Value (parameter 134) or SP An In2 Value
(parameter 137) is linked to.
• Check if the port is enabled in SP Enable Mask (parameter 124).
The drive will not change
direction.
• Check if Direction is enabled in Dir/Ref Mask (parameter 125).
• Check if Direction owner in Dir/Ref Owner (parameter 128) has any bit set.
If so, remove the command direction.
• Check to make sure that bit 11 in Logic Options (parameter 17) is clear (0).
• Check if the port is enabled in SP Enable Mask (parameter 124).
• Check if Reference is enabled in Dir/Ref Mask (parameter 125).
You cannot change the speed
reference.
• Check if Reference owner in Dir/Ref Owner (parameter 128) has any bit
set. If so, remove the command reference. If bit 0 (for the L Option
control) is set, you need to do one of the following to remove ownership:
• Clear bit 0 in Dir/Ref Mask (parameter 125).
• If L Option Mode (parameter 116) is 2, 3, 8, 9, 23, 24, or 26, close the L
Option inputs for speed references 1, 2, and 3.
The drive does not run correct
torque.
The drive cannot control current
and trips on an overcurrent
fault.
The MOP does not work.
• Set the drive defaults and run start up again to tune the drive.
• Check Spd/Trq Mode Sel (parameter 68) and Slave Torque % (parameter
70).
• If you are using an encoder, check that you have entered the correct PPR
into Encoder PPR (parameter 8).
• Check L Option Mode (parameter 116).
• Make sure that Mop Value (parameter 119) is linked to a speed reference.
Publication 1336 IMPACT-6.1 – March 1998
2–22
Troubleshooting and Error Codes
If:
Then you should:
• Make sure that the pulse input jumper is set correctly.
• Make sure that the input is differential and not single ended.
The pulse input does not work.
• Check the values of Pulse In PPR (parameter 120), Pulse In Scale
(parameter 121), and Pulse In Offset (parameter 122).
• Check the link on Pulse In Value (parameter 123).
The external fault does not
work.
• Check the mode in L Option Mode (parameter 116).
• Check bit 6 in Fault Select 2 (parameter 22) and Warning Select 2
(parameter 23).
• Reduce the load.
You keep getting motor
overload trips.
• Check bits 3 and 4 in Fault Select 2 (parameter 22) and Warning Select 2
(parameter 23).
• Check Motor Overload % (parameter 26).
• Check SP An In1 Scale (parameter 135) or SP An In2Scale (parameter
138) if your speed input is coming from the HIM pot.
The motor reduced the speed
range.
• Check An In 1 Offset (parameter 97), An In 1 Scale (parameter 98), An In
2 Offset (parameter 100), An In 2 Scale (parameter 101), mA Input Offset
(parameter 103), and mA Input Scale (parameter 104) if your speed input
is coming from the analog inputs.
• Check Speed Scale 1 (parameter 30) or Speed Scale 7 (parameter 37).
• Check Absolute Overspd (parameter 24).
• Check Min Speed Limit (parameter 215).
Publication 1336 IMPACT-6.1 – March 1998
Troubleshooting and Error Codes
Encoderless
Troubleshooting
Procedures
2–23
If you are having problems with encoderless mode, refer to this table
for possible solutions before calling for help.
If:
Then you should:
• Increase the bandwidth in Spd Desired BW (parameter 161). If the
bandwidth is too low, the motor may not accelerate, although the current
increases to current limit.
The motor will not accelerate or
does not start smoothly
• If the regen power limit is 0, increase it to at least –5%.
• Increase the torque and current limits to the maximum.
The motor oscillates after it is
up to speed
• Increase the value of Kp Freq Reg (parameter 178).
• Decrease the bandwidth in Spd Desired BW (parameter 161) if the process
will allow. If this does not help, depending on your application, you need to
either increase or decrease the value of Error Filter BW (parameter 162).
• Increase the acceleration time.
The inverter trips on absolute
overspeed during starting
• If the overspeed occurs during a fast acceleration, increase the value of Kp
Freq Reg (parameter 178) until the trip stops occurring.
• Increase the bandwidth in Spd Desired BW (parameter 161).
• If the overspeed occurs during a reversal, increase the deceleration time
(slower deceleration).
Publication 1336 IMPACT-6.1 – March 1998
Chapter 3
3–1
Disassembly and Access
Procedures
Chapter Objectives
This chapter describes general disassembly procedures required to
access internal drive components.
Disassembly and Access
Overview
!
!
ATTENTION: Some printed circuit boards and drive
components may contain hazardous voltage levels.
Remove and lock out power before you disconnect or
reconnect wires and before you remove or replace
fuses and circuit boards. Verify bus voltage by
measuring the voltage between +DC and –DC on
terminal block TB1. Do not attempt to service the drive
until the bus voltage has discharged to zero volts.
ATTENTION: Servicing energized industrial control
equipment can be hazardous. Electrical shock, burns,
or unintentional actuation of controlled industrial
equipment may cause death or serious injury. Follow
the safety-related practices of NFPA 70E, Electrical
Safety for Employee Workplaces, when working on or
near energized equipment. Do not work alone on
energized equipment.
Electrostatic Discharge
Precautions
!
ATTENTION: This assembly contains parts and
sub-assemblies that are sensitive to electrostatic
discharge. Static control precautions are required when
servicing this assembly. Component damage may result
if you ignore electrostatic discharge control procedures.
If you are not familiar with static control procedures,
reference Rockwell Automation Publication
8000-4.5.2, Guarding Against Electrostatic Discharge,
or any other applicable ESD protection handbook.
Publication 1336 IMPACT-6.1 – March 1998
3–2
Disassembly and Access Procedures
Electrostatic discharge generated by static electricity can damage the
complementary metallic oxide semiconductor devices on various
drive boards. It is recommended that you perform these procedures
to guard against this type of damage when circuit boards are
removed or installed:
• Wear a wrist-type grounding strap that is grounded to the chassis.
• Attach the wrist strap before removing the new circuit board from
the conductive packet.
• Remove boards from the drive and immediately insert them into
their conductive packets.
Tools
You need the following tools to disassemble and assemble the drive:
• Pliers
• #2 Phillips screwdriver
• 5/16-inch or 8mm socket
• Torque wrench, metered in lb-in. or N-m
Fastener Torque
Specifications
Torque Sequence
When mounting components to a drive’s heat sink,
component-fastener torque sequences and tolerances are crucial to
component-to-heat sink heat dissipation.
!
ATTENTION: Component can be damaged if
temporary tightening procedure is not performed to
specification.
Two-Point Mounting
The following illustrates temporary and final tightening sequences
for components fastened to a heat sink using two screws. Temporary
torque is 1/3 (33%) of final torque. The numeric illustration labels
are for your assistance. Drive components do not carry these labels.
Publication 1336 IMPACT-6.1 – March 1998
Disassembly and Access Procedures
3–3
Figure 3.1
Two-Point Mounting
1
2
Two-Point Mounting
1
2
Temporary Tighten
2
1
Final Tighten
AB0016A
Four-Point Mounting
The following illustrates temporary and final tightening sequences
for components fastened to a heat sink using four screws. Temporary
torque is 1/3 (33%) of final torque. The numeric illustration labels
are for your assistance. Drive components do not carry these labels.
Figure 3.2
Four-Point Mounting
1
3
4
2
Four-Point Mounting
1
2
3
4
2
1
Temporary Tighten
4
3
Final Tighten
AB0017A
Publication 1336 IMPACT-6.1 – March 1998
3–4
Disassembly and Access Procedures
Torque Specifications
The following table lists fastener locations by component, how the
fasteners are used, and torque specifications. Refer to Torque
Sequence in this chapter for fastening two-point and four-point
components to the heat sink.
Table 3.A
Fastener Torque Specifications
Component
Bus Capacitor Ass’y
Gate Driver Board
Gate Driver Board
Gate Driver Board
Gate Driver Board
Bridge Rectifier BR1
Bridge Rectifier BR1
Precharge Module
Precharge Module
Transistor Modules Q1 – Q3
Inductor
TB1
TB3
Publication 1336 IMPACT-6.1 – March 1998
Fastener
Application
Ass’y to chassis
Driver board to capacitors
Driver board to inductor
Module (M5 screw)
Module (M6 screw)
BR1 to Driver board
BR1 to heat sink
M1 to heat sink
M1 to Driver board
Module to heat sink
Inductor to chassis
Wires to TB1
Wires to TB3
Torque,
lb-in.
Torque,
N-m
22 – 30
22 – 30
22 – 30
22 – 30
30 – 39
22 – 30
25 – 31
22 – 30
22 – 30
25 – 31
22 – 30
16
8 – 10
2.5 – 3.4
2.5 – 3.4
2.5 – 3.4
2.5 – 3.4
3.4 – 4.4
2.5 – 3.4
2.8 – 3.5
2.5 – 3.4
2.5 – 3.4
2.8 – 3.5
2.5 – 3.4
1.8
0.9 – 1.1
Disassembly and Access Procedures
3–5
Disassembly and Access
Procedures
Opening the Drive Enclosure
Figure 3.3
Opening the Drive Enclosure
Enclosure
Cover
AB0846B
Removal
!
ATTENTION: Disconnect and lock out power from
the drive before disassembling the drive. Failure to
disconnect power may result in death or serious injury.
Verify bus voltage by measuring the voltage between
+DC and –DC on terminal block TB1. Do not attempt
to service the drive until the bus voltage has discharged
to zero volts.
Publication 1336 IMPACT-6.1 – March 1998
3–6
Disassembly and Access Procedures
!
ATTENTION: Wear a wrist-type grounding strap
when servicing 1336 IMPACT drives. Failure to
protect drive components against ESD may damage
drive components. Refer to Electrostatic Discharge
Precautions at the beginning of this chapter.
1. Remove power from the drive.
2. Remove the screws fastening the enclosure cover to the bottom of
the Enclosure frame.
3. Pull the bottom of the cover outward to clear the enclosure frame,
and then lift the cover upward to remove the cover.
4. Check for zero volts at TB1 terminals +DC and –DC.
5. Check for the absence of control voltage at:
• TB10
• TB11
• L Option Board (if used)
6. Remove the customer-supplied wiring from the drive.
7. Remove the screws from the enclosure frame top and bottom
panels to remove the panels.
Installation
Install the Enclosure in reverse order of removal.
!
Publication 1336 IMPACT-6.1 – March 1998
ATTENTION: Replace all guards and insulators
before applying power to the drive. Failure to replace
guards may result in death or serious injury.
Disassembly and Access Procedures
3–7
Removing the L Option Board
Figure 3.4
L Option Board
L Option Board
AB0847A
Terminal Strip
TB3
Removal
!
ATTENTION: Disconnect and lock out power from
the drive before disassembling the drive. Failure to
disconnect power may result in death or serious injury.
Verify bus voltage by measuring the voltage between
+DC and –DC on terminal block TB1. Do not attempt
to service the drive until the bus voltage has discharged
to zero volts.
Publication 1336 IMPACT-6.1 – March 1998
3–8
Disassembly and Access Procedures
!
Important:
ATTENTION: Wear a wrist-type grounding strap
when servicing 1336 IMPACT drives. Failure to
protect drive components against ESD may damage
drive components. Refer to Electrostatic Discharge
Precautions at the beginning of this chapter.
Before you remove connections and wires from the
drive components, mark the connections and wires to
correspond with their component connections and
terminals to prevent incorrect wiring during assembly.
1. Remove power from the drive.
2. Open the enclosure cover. Refer to Opening the Drive Enclosure
in this chapter.
3. Check for zero volts at TB1 terminals +DC and –DC.
4. Check for the absence of control voltage at:
• TB10
• TB11
• L Option Board (if used)
5. Remove all wires from the terminals on TB3.
6. Loosen the two captive screws fastening the L Option Board to
the Main Control Board.
7. Grip the right and left sides of the L Option Board and pull the
board straight outward from the Main Control Board.
Installation
Install the L Option Board in reverse order of removal.
!
Publication 1336 IMPACT-6.1 – March 1998
ATTENTION: Replace all guards and insulators
before applying power to the drive. Failure to replace
guards may result in death or serious injury.
Disassembly and Access Procedures
3–9
Removing the Main Control Board Mounting Plate
Figure 3.5
Control Board Mounting Plate
Main Control
Board
Connector J1
HIM
Connector
J5
Connector J6
Connector J7
TB11
TB10
AB0848A
Removal
!
ATTENTION: Disconnect and lock out power from
the drive before disassembling the drive. Failure to
disconnect power may result in death or serious injury.
Verify bus voltage by measuring the voltage between
+DC and –DC on terminal block TB1. Do not attempt
to service the drive until the bus voltage has discharged
to zero volts.
Publication 1336 IMPACT-6.1 – March 1998
3–10
Disassembly and Access Procedures
!
Important:
ATTENTION: Wear a wrist-type grounding strap
when servicing 1336 IMPACT drives. Failure to
protect drive components against ESD may damage
drive components. Refer to Electrostatic Discharge
Precautions at the beginning of this chapter.
Before you remove connections and wires from the
drive components, mark the connections and wires to
correspond with their component connections and
terminals to prevent incorrect wiring during assembly.
1. Remove power from the drive.
2. Open the enclosure cover. Refer to Opening the Drive Enclosure
in this chapter.
3. Check for zero volts at TB1 terminals +DC and –DC.
4. Check for the absence of control voltage at:
• TB10
• TB11
• L Option Board (if used)
5. Disconnect the following from the Main Control Board:
•
•
•
•
•
J1 connector
J5 ribbon cable connector
J7 connector
Ground wires from terminal strip TE
Chassis ground wire at the top-right corner of the Main
Control Board Mounting Plate
6. Loosen the two captive screws near the bottom of the Main
Control Board Mounting Plate.
7. Pull the Main Control Board Mounting Plate out about two
inches, then slide it downward.
Installation
Install the Main Control Board Mounting Plate in reverse order of
removal.
!
Publication 1336 IMPACT-6.1 – March 1998
ATTENTION: Replace all guards and insulators
before applying power to the drive. Failure to replace
guards may result in death or serious injury.
Disassembly and Access Procedures
3–11
Removing the Main Control Board
Figure 3.6
Main Control Board and Mounting Plate
Mounting
Plate
HIM
Main Control
Board
Connector J1
Connector J6
Connector J7
Connector J5
AB0868A
TB11
TB10
Removal
!
!
ATTENTION: Disconnect and lock out power from
the drive before disassembling the drive. Failure to
disconnect power may result in death or serious injury.
Verify bus voltage by measuring the voltage between
+DC and –DC on terminal block TB1. Do not attempt
to service the drive until the bus voltage has discharged
to zero volts.
ATTENTION: Wear a wrist-type grounding strap
when servicing 1336 IMPACT drives. Failure to
protect drive components against ESD may damage
drive components. Refer to Electrostatic Discharge
Precautions at the beginning of this chapter.
Publication 1336 IMPACT-6.1 – March 1998
3–12
Disassembly and Access Procedures
Important:
Before you remove connections and wires from the
drive components, mark the connections and wires to
correspond with their component connections and
terminals to prevent incorrect wiring during assembly.
1. Remove power from the drive.
2. Open the enclosure cover. Refer to Opening the Drive Enclosure
in this chapter.
3. Check for zero volts at TB1 Terminals +DC and –DC.
4. Check for the absence of control voltage at:
• TB10
• TB11
• L Option Board (if used)
5. Remove all wires from Terminal Strip TB3 if an L Option Board
is used.
6. Disconnect the following from the Main Control Board:
• J1 connector
• J5 ribbon cable connector
• J6 connector
• J7 connector
• Ground wire at Stake-on connector
• All wires from the terminals on TB10 and TB11
7. Remove the screws fastening the Main Control Board to the Main
Control Board Mounting Plate.
8. Lift the Main Control Board upward to release it from the
slide-mount stand-offs.
9. Pull the Main Control Board away from the Mounting Plate.
Installation
Install the Main Control Board in reverse order of removal.
!
Publication 1336 IMPACT-6.1 – March 1998
ATTENTION: Replace all guards and insulators
before applying power to the drive. Failure to replace
guards may result in death or serious injury.
Disassembly and Access Procedures
3–13
Removing the Gate Driver/Power Supply Board
Figure 3.7
Gate Driver/Power Supply Board
Gate Driver/Power
Supply Board
J3
18
Screws
E22 (+)
E29 (–)
P14
P13
TB1
E25
Precharge Insulator,
Stand Alone Drives
(Shown Correctly Folded)
AB0671B
Publication 1336 IMPACT-6.1 – March 1998
3–14
Disassembly and Access Procedures
Figure 3.8
Gate Driver/Power Supply Board A007, B015, and C015
Drives
Gate Driver/Power
Supply Board
J3
18
Screws
E22 (+)
E29 (–)
TB7–1
TB7–2
TB1
P14
P13
E25
Precharge Insulator,
Stand Alone Drives
(Shown Correctly Folded)
AB0672B
Removal
!
Publication 1336 IMPACT-6.1 – March 1998
ATTENTION: Disconnect and lock out power from
the drive before disassembling the drive. Failure to
disconnect power may result in death or serious injury.
Verify bus voltage by measuring the voltage between
+DC and –DC on terminal block TB1. Do not attempt
to service the drive until the bus voltage has discharged
to zero volts.
Disassembly and Access Procedures
!
Important:
3–15
ATTENTION: Wear a wrist-type grounding strap
when servicing 1336 IMPACT drives. Failure to
protect drive components against ESD may damage
drive components. Refer to Electrostatic Discharge
Precautions at the beginning of this chapter.
Before you remove connections and wires from the
drive components, mark the connections and wires to
correspond with their component connections and
terminals to prevent incorrect wiring during assembly.
1. Remove power from the drive.
2. Open the enclosure cover. Refer to Opening the Drive Enclosure
in this chapter.
3. Check for zero volts at TB1 terminals +DC and –DC.
4. Check for the absence of control voltage at:
• TB10
• TB11
• L Option Board (if used)
5. Remove the Main Control Board Mounting Plate. Refer to
Removing the Main Control Board Mounting Plate in this
chapter.
6. Disconnect the following from the Gate Driver/Power Supply
Board:
• P13 stake-on connector
• P14 stake-on connector
• E29 – DC Bus Inductor wire
• E22 + DC Bus Inductor wire
• DC Bus Inductor wires from TB7
• E25 ground wire
• J3 connector fan wires
• All incoming power wires at terminal block TB1
7. Remove all screws connecting the Gate Driver/Power Supply
Board to the power components.
Publication 1336 IMPACT-6.1 – March 1998
3–16
Disassembly and Access Procedures
Installation
Install the Gate Driver/Power Supply Board in reverse order of
removal. Refer to Table 3.A – Fastener Torque Specifications.
Important:
!
Before positioning the Gate Driver/Power Supply Board
in the drive, fold and install the Precharge Insulator
through the back of the Gate Driver/Power Supply
Board. Refer to and 3.8.
ATTENTION: Replace all guards and insulators
before applying power to the drive. Failure to replace
guards may result in death or serious injury.
Accessing Chassis Power Components
To access the power components located on the chassis, refer to the
appropriate Removing the Gate Driver/Power Supply Board section
in this chapter.
Publication 1336 IMPACT-6.1 – March 1998
Chapter 4
4–1
Component Test Procedures
Chapter Objectives
The following tests help you troubleshoot A007 – A015,
B015 – B030, and C015 – C020 drives.
Component Test Overview
In some cases, different tests troubleshoot components of the same
name. These similar tests vary according to the rating of the drive
being tested. Verify that the rating on the drive matches the rating for
the test you are performing.
The procedures in this chapter assume that the drive you are
servicing either has no enclosure or that the enclosure is opened. For
more information on opening the drive enclosure, refer to
Chapter 3 – Disassembly and Access Procedures, Opening the Drive
Enclosure.
!
!
ATTENTION: Some printed circuit boards and drive
components may contain hazardous voltage levels.
Remove and lock out power before you disconnect or
reconnect wires and before you remove or replace
fuses and circuit boards. Verify bus voltage by
measuring the voltage between +DC and – DC on
terminal block TB1. Do not attempt to service the drive
until the bus voltage has discharged to zero volts.
ATTENTION: Servicing energized industrial control
equipment can be hazardous. Electrical shock, burns,
or unintentional actuation of controlled industrial
equipment may cause death or serious injury. Follow
the safety-related practices of NFPA 70E, Electrical
Safety for Employee Workplaces, when working on or
near energized equipment. Do not work alone on
energized equipment.
Publication 1336 IMPACT-6.1 – March 1998
4–2
Component Test Procedures
Electrostatic Discharge
Precautions
!
ATTENTION: This assembly contains parts and
sub-assemblies that are sensitive to electrostatic
discharge. Static control precautions are required when
servicing this assembly. Component damage may result
if you ignore electrostatic discharge control procedures.
If you are not familiar with static control procedures,
reference Rockwell Automation Publication
8000-4.5.2, Guarding Against Electrostatic Discharge,
or any other applicable ESD protection handbook.
Electrostatic discharge generated by static electricity can damage the
complementary metallic oxide semiconductor devices on various
drive boards. It is recommended that you perform these procedures
to guard against this type of damage when circuit boards are
removed or installed:
• Wear a wrist-type grounding strap that is grounded to the chassis.
• Attach the wrist strap before removing the new circuit board from
the conductive packet.
• Remove boards from the drive and immediately insert them into
their conductive packets.
Tools
You need the following tools to disassemble and assemble the drive:
• Pliers
• #2 Phillips screwdriver
• 5/16-inch or 8mm socket
• Torque wrench, metered in lb-in. or N-m
Publication 1336 IMPACT-6.1 – March 1998
Component Test Procedures
Test 1 – Testing Bridge
Rectifier BR1
4–3
Bridge Rectifier BR1 is located on the bottom right of the heat sink.
Figure 4.1
Bridge Rectifier Test
Positive (+)
Bridge
Rectifier
Negative (–)
3
2
1
AB0297A
!
Important:
ATTENTION: Disconnect and lock out power from
the drive before disassembling the drive. Failure to
disconnect power may result in death or serious injury.
Verify bus voltage by measuring the voltage between
+DC and –DC on terminal block TB1. Do not attempt
to service the drive until the bus voltage has discharged
to zero volts.
Before you remove connections and wires from the
drive components, mark the connections and wires to
correspond with their component connections and
terminals to prevent incorrect wiring during assembly.
1. Remove power from the drive.
2. Check for zero volts at TB1 terminals +DC and –DC.
Publication 1336 IMPACT-6.1 – March 1998
4–4
Component Test Procedures
3. Check for the absence of control voltage at:
• TB10
• TB11
• L Option Board (if used)
4. Remove the Gate Driver/Power Supply Board. Refer to Chapter
3 – Disassembly and Access Procedures, Removing the Gate
Driver/Power Supply Board.
5. Set your meter to test diodes.
6. The following table shows meter connections and ideal meter
readings for those connections. Refer to the previous illustration
for meter connection locations.
Table 4.A
Bridge Rectifier BR1 Test
Meter (+) Lead
Meter (–) Lead
Nominal Meter Reading
1
+
0.43
2
+
0.43
3
+
0.43
+
1
Infinite
+
2
Infinite
+
3
Infinite
–
1
0.43
–
2
0.43
–
3
0.43
1
–
Infinite
2
–
Infinite
3
–
Infinite
7. Replace BR1 if any readings are not as shown above.
• Clean all surfaces between the rectifier and the heat sink using
a soft, clean cloth.
• Replace the Preform between the rectifier and the chassis.
• Fasten the mounting screws. Refer to Chapter 3 – Disassembly
and Access Procedures, Table 3.A – Fastener Torque
Specifications.
8. If the rectifier shorted, check:
• Transistor Modules for possible damage.
• MOV1 for an open/shorted condition.
9. Replace and secure the Gate Driver/Power Supply Board and
Main Control Board Mounting Plate.
Publication 1336 IMPACT-6.1 – March 1998
Component Test Procedures
Test 2 – Testing the Bus
Capacitors
4–5
The Bus Capacitors are located on the left side of the Main Chassis.
Figure 4.2
Bus Capacitor Test
Terminal Block
TB1
Positive
(+) DC
Negative
(–) DC
AB0849A
!
Important:
ATTENTION: Disconnect and lock out power from
the drive before disassembling the drive. Failure to
disconnect power may result in death or serious injury.
Verify bus voltage by measuring the voltage between
+DC and –DC on terminal block TB1. Do not attempt
to service the drive until the bus voltage has discharged
to zero volts.
Before you remove connections and wires from the
drive components, mark the connections and wires to
correspond with their component connections and
terminals to prevent incorrect wiring during assembly.
1. Remove power from the drive.
2. Check for zero volts at TB1 terminals +DC and –DC.
Publication 1336 IMPACT-6.1 – March 1998
4–6
Component Test Procedures
3. Check for the absence of control voltage at:
• TB10
• TB11
• L Option Board (if used)
4. Inspect the capacitors for deformation, discoloration, or other
indications of high temperature. Replace if damaged. Otherwise,
go to Step 5.
5. Set your meter to test voltage.
6. Connect the negative lead of your meter to the (–) DC Bus
terminal on TB1 and the positive lead to the (+) DC Bus terminal.
Refer to the previous illustration for TB1 terminal locations.
ATTENTION: Servicing energized industrial
control equipment can be hazardous. Electrical
shock, burns, or unintentional actuation of
controlled industrial equipment may cause death or
serious injury. Follow the safety-related practices of
NFPA 70E, Electrical Safety for Employee
Workplaces, when working on or near energized
equipment. Do not work alone on energized
equipment.
!
7. Apply power AFTER the meter is connected; otherwise, your
meter will read zero volts. Expand readings for all input voltage
ratings.
Table 4.B
Bus Capacitor Group Test
Drive Rating
Input Volts
Meter Reading
200
282V DC +/–5%
A
230
325V DC +/–5%
240
339V DC +/–5%
380
537V DC +/–5%
415
586V DC +/–5%
480
478V DC +/–5%
500
707V DC +/–5%
575
813V DC +/–5%
600
850V DC+/–5%
B
C
8. If the voltage is out of tolerance, check the following:
• An open condition at Bridge Rectifier BR1.
• A voltage drop due to Inductor L1 resistance.
• A voltage drop between Bridge Rectifier BR1 and the bus
capacitors due to loose or resistive wires or connections.
• Precharge Circuit problems.
Publication 1336 IMPACT-6.1 – March 1998
Component Test Procedures
4–7
9. If the above check did not reveal a problem, replace the
capacitors and balancing resistors. The balancing resistors are
located on the top-right of the heat sink.
10.Install the nuts fastening the capacitor assembly. Refer to
Chapter 3 – Disassembly and Access Procedures,
Table 3.A – Fastener Torque Specifications.
!
ATTENTION: Replace all guards and insulators
before applying power to the drive. Failure to
replace guards may result in death or serious injury.
Publication 1336 IMPACT-6.1 – March 1998
4–8
Component Test Procedures
Test 3 – Testing Transistor
Modules Q1, Q2, and Q3
Transistor Modules Q1, Q2, and Q3 are located near the center of the
heat sink.
Figure 4.3
Transistor Module Test
Transistor
Module
C2E1
E2
C1
B1
E1
E2
B2
AB0298A
!
Important:
ATTENTION: Disconnect and lock out power from
the drive before disassembling the drive. Failure to
disconnect power may result in death or serious injury.
Verify bus voltage by measuring the voltage between
+DC and –DC on terminal block TB1. Do not attempt
to service the drive until the bus voltage has discharged
to zero volts.
Before you remove connections and wires from the
drive components, mark the connections and wires to
correspond with their component connections and
terminals to prevent incorrect wiring during assembly.
1. Remove power from the drive.
2. Check for zero volts at TB1 terminals +DC and –DC.
Publication 1336 IMPACT-6.1 – March 1998
Component Test Procedures
4–9
3. Check for the absence of control voltage at:
• TB10
• TB11
• L Option Board (if used)
4. Remove the Gate Driver/Power Supply Board. Refer to Chapter
3 – Disassembly and Access Procedures, Removing the Gate
Driver/Power Supply Board.
5. Set your meter to test diodes.
6. The following tables show meter connections and ideal meter
readings for those connections. Refer to the previous illustration
for meter connection locations.
Table 4.C
A007 – A005, B007 – B015, and C007 – C015 Q1, Q2, and Q3 Test
Meter (+) Lead
Meter (–) Lead
Nominal Meter Reading
C2E1
E2
Infinite
E2
C2E1
0.36
C1
C2E1
Infinite
C2E1
C1
0.36
B1
E1
Infinite
B2
E2
Infinite
Table 4.D
B020 – B030 and C020 Q1, Q2, and Q3 Test
Meter (+)
Lead
Meter (–)
Lead
Nominal Meter
Reading
Maximum Meter
Reading
C2E1
E2
Infinite/O.L.
–
E2
C2E1
0.34
0.6
C1
C2E1
Infinite/O.L.
–
C2E1
C1
0.34
0.6
B1
E1
Infinite
Infinite
B2
E2
Infinite
Infinite
Important: Check the Transistor Module casings and replace if deformed.
Publication 1336 IMPACT-6.1 – March 1998
4–10
Component Test Procedures
7. If your readings do not match the table readings, replace
Transistor Module Q1, Q2, or Q3.
• Clean all surfaces between the transistor and the heat sink
using a soft, clean cloth.
• Replace the Preform between the transistor and the heat sink.
• Install the screws fastening the Transistor Module to the heat
sink. Refer to Chapter 3 – Disassembly and Access
Procedures, Table 3.A – Fastener Torque Specifications.
8. If a Transistor Module is replaced, replace the Precharge Module.
Refer to Test 4 – Testing the Precharge Module. You must also
test the Gate Driver/Power Supply Board. Refer to
Test 5 – Testing the Gate Driver/Power Supply Board.
9. Replace and secure the Gate Driver/Power Supply Board and
Main Control Board Mounting Plate.
Publication 1336 IMPACT-6.1 – March 1998
Component Test Procedures
Test 4 – Testing the
Precharge Module
4–11
The Precharge Module is located near the bottom of the heat sink.
Figure 4.4
Precharge Module Test
Preform
Precharge
Module
4
1
2
3
5
AB0305B
!
Important:
ATTENTION: Disconnect and lock out power from
the drive before disassembling the drive. Failure to
disconnect power may result in death or serious injury.
Verify bus voltage by measuring the voltage between
+DC and –DC on terminal block TB1. Do not attempt
to service the drive until the bus voltage has discharged
to zero volts.
Before you remove connections and wires from the
drive components, mark the connections and wires to
correspond with their component connections and
terminals to prevent incorrect wiring during assembly.
1. Remove power from the drive.
2. Check for zero volts at TB1 Terminals +DC and –DC.
3. Check for the absence of control voltage at:
• TB10
• TB11
• L Option Board (if used)
Publication 1336 IMPACT-6.1 – March 1998
4–12
Component Test Procedures
4. Remove the Gate Driver/Power Supply Board. Refer to
Chapter 3 – Disassembly and Access Procedures, Removing the
Gate Driver/Power Supply Board.
5. Set your meter to test diodes.
6. Test the module. The following table shows meter connections at
the module and ideal meter readings for those connections. Refer
to the previous illustration for meter connection locations.
Table 4.E
Precharge Module Diode Test
Meter (+) Lead
Meter (–) Lead
Nominal Meter Reading
1
3
Infinite
3
1
0.42
1
2
Infinite
2
1
Infinite
2
3
Infinite
3
2
Infinite
7. Set your meter to test resistance.
8. Test the module. The following table shows meter connections at
the module and ideal meter readings for those connections. Refer
to the previous illustration for meter connection locations.
Table 4.F
Precharge Module Resistance Test
Publication 1336 IMPACT-6.1 – March 1998
Meter (+) Lead
Meter (–) Lead
Nominal Meter Reading
5
4
15
4
5
15
5
3
≈ 23M
5
2
0.00
2
5
0.00
4
2
15
5
1
≈ 10M
4
3
≈ 23M
4
1
≈ 10M
Component Test Procedures
4–13
9. If your readings do not match the table readings, replace the
Precharge Module.
• Clean the surfaces between the Precharge Module and the heat
sink using a soft, clean cloth.
• Replace the Preform between the Precharge Module and the
heat sink.
• Fasten the Precharge Module to the heat sink using two
screws. Refer to Chapter 3 – Disassembly and Access
Procedures, Table 3.A – Fastener Torque Specifications.
10.Replace and secure the Gate Driver/Power Supply Board and
Main Control Board Mounting Plate.
Publication 1336 IMPACT-6.1 – March 1998
4–14
Component Test Procedures
Test 5 – Testing the Gate
Driver/Power Supply
Board
The Gate Driver/Power Supply Board is located between the Main
Control Board and the Main Chassis. If one or more Transistor
Modules Q1, Q2, or Q3 has been replaced, you must test the Gate
Driver/Power Supply Board.
Figure 4.5
Gate Driver/Power Supply Board Test
VR7
VR2
VR6
VR3
VR4
VR5
F1
Gate Driver
Board
!
Important:
ATTENTION: Disconnect and lock out power from
the drive before disassembling the drive. Failure to
disconnect power may result in death or serious injury.
Verify bus voltage by measuring the voltage between
+DC and –DC on terminal block TB1. Do not attempt
to service the drive until the bus voltage has discharged
to zero volts.
Before you remove connections and wires from the
drive components, mark the connections and wires to
correspond with their component connections and
terminals to prevent incorrect wiring during assembly.
1. Remove power from the drive.
2. Check for zero volts at TB1 terminals +DC and –DC.
Publication 1336 IMPACT-6.1 – March 1998
AB0312B
Component Test Procedures
4–15
3. Check for the absence of control voltage at:
• TB10
• TB11
• L Option Board (if used)
4. Remove the Main Control Board Mounting Plate. Refer to
Chapter 3 – Disassembly and Access Procedures, Removing the
Main Control Board Mounting Plate.
5. Unplug the connectors from the Gate Driver/Power Supply
Board.
6. Set your meter to test resistance.
7. Check Fuse F1, located on the lower left side of the Gate
Driver/Power Supply Board, for continuity. Replace the fuse if it
shows an open condition.
8. Set your meter to test diodes.
9. Test VR2 through VR7. The following table shows meter
connections at the components and ideal meter readings for those
connections. Refer to the previous illustration for meter
connection locations.
Table 4.G
Gate Driver Board Test
Component
Meter (+) Lead
Meter (–) Lead
Nominal Meter Reading
VR2 – VR7
+
–
–
+
1.2
2.5
Important: Typical malfunction is shorted in both directions.
10.If your readings do not match the table readings, replace the Gate
Driver/Power Supply Board.
Publication 1336 IMPACT-6.1 – March 1998
Chapter 5
5–1
Part Replacement Procedures
Chapter Objective
This chapter describes procedures required to replace drive
components. This chapter references Chapter 3 – Disassembly and
Access Procedures for basic drive component access.
Part Replacement
Overview
The part replacement procedures in this chapter assume that the drive
you are servicing either has no enclosure or that the enclosure is
open. For more information on opening the drive enclosure, refer to
Chapter 3 – Disassembly and Access Procedures, Opening the Drive
Enclosure.
Safety Precautions
!
ATTENTION: Some printed circuit boards and drive
components may contain hazardous voltage levels.
Remove power before you disconnect or reconnect
wires and before you remove or replace fuses and
circuit boards. Verify bus voltage by measuring the
voltage between +DC and –DC on terminal block TB1.
Do not attempt to service the drive until the bus voltage
has discharged to zero volts.
Electrostatic Discharge
Precautions
!
ATTENTION: This assembly contains parts and
sub-assemblies that are sensitive to electrostatic
discharge. Static control precautions are required when
servicing this assembly. Component damage may result
if you ignore electrostatic discharge control procedures.
If you are not familiar with static control procedures,
reference Rockwell Automation Publication
8000-4.5.2, Guarding Against Electrostatic Discharge,
or any other applicable ESD protection handbook.
Publication 1336 IMPACT-6.1 – March 1998
5–2
Part Replacement Procedures
Electrostatic discharge generated by static electricity can damage the
complementary metallic oxide semiconductor devices on various
drive boards. It is recommended that you perform these procedures
to guard against this type of damage when circuit boards are
removed or installed:
• Wear a wrist type grounding strap that is grounded to the chassis.
• Attach the wrist strap before removing the new circuit board from
the conductive packet.
• Remove boards from the drive and immediately insert them into
their conductive packets.
Tools
You need the following tools to disassemble and assemble the drive:
• Pliers
• #2 Phillips screwdriver
• 5/16-inch or 8mm socket
• Torque wrench, metered in lb-in. or N-m
Major Component
Replacement
This section explains in detail how to replace the following drive
components:
• Precharge Module
• Thermistor
• Transistor Modules
• Bridge Rectifier BR1
• Fan
• DC Bus Inductor L1
• Bus Capacitors
For Gate Driver/Power Supply Board, Main Control Board, and
L Option Board installation and removal procedures, refer to
Chapter 3 – Disassembly and Access Procedures.
Detailed Product
Identification
Allen-Bradley Adjustable Frequency AC Drives are modular by
design to enhance troubleshooting and spare parts replacement,
thereby helping reduce production down-time.
The following illustration calls out the main components of a typical
drive. Component designs vary slightly among the different drive
ratings, but component locations are identical.
Publication 1336 IMPACT-6.1 – March 1998
Part Replacement Procedures
5–3
Figure 5.1
Main Drive Components
Heat Sink and Fan
Assembly
Thermistor
Load-Sharing Resistor
Transistor Module
Precharge Module
Gate Driver/Power
Supply Board
Bus MOV
Mounting Plate for
Main Control Board
LEM
Human Interface
Module (HIM)
Connector
J1
Connector
J5
Bridge
Rectifier
Inductor L1
Main Control
Board
Bus Capacitor
Bank
Connector J8
Fuse F1
Input MOV
Terminal Strip
TB1
Connector J6
Connector J7
Connector J16
Connector J3
Connector J2
TB11
Connector J4
TB10
L Option
Board
AB0850B
Publication 1336 IMPACT-6.1 – March 1998
5–4
Part Replacement Procedures
Precharge Module
The Precharge Module is located near the bottom of the heat sink. If
one or more Transistor Modules has been replaced, you must replace
the Precharge Module.
Figure 5.2
Precharge Module
Preform
Precharge
Module
4
1
2
3
5
AB0305B
Removal
!
!
Publication 1336 IMPACT-6.1 – March 1998
ATTENTION: Disconnect and lock out power from
the drive before disassembling the drive. Failure to
disconnect power may result in death or serious injury.
Verify bus voltage by measuring the voltage between
+DC and –DC on terminal block TB1. Do not attempt
to service the drive until the bus voltage had discharged
to zero volts.
ATTENTION: Wear a wrist-type grounding strap
when servicing 1336 IMPACT drives. Failure to
protect drive components against ESD may damage
drive components. Refer to Electrostatic Discharge
Precautions at the beginning of this chapter.
Part Replacement Procedures
Important:
5–5
Before you remove connections and wires from the
drive components, mark the connections and wires to
correspond with their component connections and
terminals to prevent incorrect wiring during assembly.
1. Remove power from the drive.
2. Check for zero volts at TB1 Terminals +DC and –DC.
3. Check for the absence of control voltage at:
• TB10
• TB11
• L Option Board (if used)
4. Remove the Gate Driver/Power Supply Board. Refer to
Chapter 3 – Disassembly and Access Procedures, Removing the
Gate Driver/Power Supply Board.
5. Remove the two round-head screws fastening the Precharge
Module to the heat sink.
6. Remove the Precharge Module from the drive.
Installation
1. Clean surfaces between the Precharge Module and the heat sink.
2. Replace the Preform between the Precharge Module and the heat
sink.
3. Install the Precharge Module in reverse order of removal. Refer to
Chapter 3 – Disassembly and Access Procedures,
Table 3.A – Fastener Torque Specifications.
!
ATTENTION: Replace all guards and insulators
before applying power to the drive. Failure to replace
guards may result in death or serious injury.
Publication 1336 IMPACT-6.1 – March 1998
5–6
Part Replacement Procedures
Thermistor
The Thermistor is fastened to the upper right corner of the heat sink.
Figure 5.3
Thermistor
Thermistor
Connector to Main
Control Board J1
AB0306B
Removal
!
!
Publication 1336 IMPACT-6.1 – March 1998
ATTENTION: Disconnect and lock out power from
the drive before disassembling the drive. Failure to
disconnect power may result in death or serious injury.
Verify bus voltage by measuring the voltage between
+DC and –DC on terminal block TB1. Do not attempt
to service the drive until the bus voltage has discharged
to zero volts.
ATTENTION: Wear a wrist-type grounding strap
when servicing 1336 IMPACT drives. Failure to
protect drive components against ESD may damage
drive components. Refer to Electrostatic Discharge
Precautions at the beginning of this chapter.
Part Replacement Procedures
5–7
1. Remove power from the drive.
2. Check for zero volts at TB1 Terminals +DC and –DC.
3. Check for the absence of control voltage at:
• TB10
• TB11
• L Option Board (if used)
4. Remove the Gate Driver/Power Supply Board. Refer to
Chapter 3 – Disassembly and Access Procedures, Removing the
Gate Driver/Power Supply Board.
5. Unscrew the Thermistor from the heat sink.
Installation
Install the Thermistor in reverse order of removal.
Important:
!
When fastening the Thermistor to the heat sink,
hand-tighten the Thermistor to avoid damaging the
porcelain Thermistor body.
ATTENTION: Replace all guards and insulators
before applying power to the drive. Failure to replace
guards may result in death or serious injury.
Publication 1336 IMPACT-6.1 – March 1998
5–8
Part Replacement Procedures
Transistor Modules
Transistor Modules Q1, Q2, and Q3 are located on the center of the
heat sink.
Figure 5.4
Transistor Modules
Transistor
Module
C2E1
E2
C1
B1
E2
E1
B2
AB0307A
Removal
!
!
Publication 1336 IMPACT-6.1 – March 1998
ATTENTION: Disconnect and lock out power from
the drive before disassembling the drive. Failure to
disconnect power may result in death or serious injury.
Verify bus voltage by measuring the voltage between
+DC and –DC on terminal block TB1. Do not attempt
to service the drive until the bus voltage has discharged
to zero volts.
ATTENTION: Wear a wrist-type grounding strap
when servicing 1336 IMPACT drives. Failure to
protect drive components against ESD may damage
drive components. Refer to Electrostatic Discharge
Precautions at the beginning of this chapter.
Part Replacement Procedures
Important:
5–9
Before you remove connections and wires from the
drive components, mark the connections and wires to
correspond with their component connections and
terminals to prevent incorrect wiring during assembly.
1. Remove power from the drive.
2. Check for zero volts at TB1 Terminals +DC and –DC.
3. Check for the absence of control voltage at:
• TB10
• TB11
• L Option Board (if used)
4. Remove the Gate Driver/Power Supply Board from the drive.
Refer to Chapter 3 – Disassembly and Access Procedures,
Removing the Gate Driver/Power Supply Board.
5. Remove all wires connected to the transistor module terminals.
6. Remove the screws fastening the transistor to the heat sink.
Installation
1. Clean all surfaces between the transistor and the heat sink using a
soft, clean cloth.
2. Replace the Preform between the transistor and the heat sink.
3. Install the transistor modules in reverse order of removal.
4. Fasten the mounting screws. Refer to Chapter 3 – Disassembly
and Access Procedures, Table 3.A – Fastener Torque
Specifications.
5. Fasten the terminal screws. Refer to Chapter 3 – Disassembly and
Access Procedures, Table 3.A – Fastener Torque Specifications.
!
ATTENTION: Replace all guards and insulators
before applying power to the drive. Failure to replace
guards may result in death or serious injury.
Publication 1336 IMPACT-6.1 – March 1998
5–10
Part Replacement Procedures
Bridge Rectifier BR1
Bridge Rectifier BR1 is located at the bottom of the heat sink.
Figure 5.5
Bridge Rectifier BR1
Positive (+)
Negative (–)
Bridge
Rectifier
Preform
3
2
1
AB0304A
Removal
!
!
Publication 1336 IMPACT-6.1 – March 1998
ATTENTION: Disconnect and lock out power from
the drive before disassembling the drive. Failure to
disconnect power may result in death or serious injury.
Verify bus voltage by measuring the voltage between
+DC and –DC on terminal block TB1. Do not attempt
to service the drive until the bus voltage has discharged
to zero volts.
ATTENTION: Wear a wrist-type grounding strap
when servicing 1336 IMPACT drives. Failure to
protect drive components against ESD may damage
drive components. Refer to Electrostatic Discharge
Precautions at the beginning of this chapter.
Part Replacement Procedures
Important:
5–11
Before you remove connections and wires from the
drive components, mark the connections and wires to
correspond with their component connections and
terminals to prevent incorrect wiring during assembly.
1. Remove power from the drive.
2. Check for zero volts at TB1 Terminals +DC and –DC.
3. Check for the absence of control voltage at:
• TB10
• TB11
• L Option Board (if used)
4. Remove the Gate Driver/Power Supply Board from the drive.
Refer to Chapter 3 – Disassembly and Access Procedures,
Removing the Gate Driver/Power Supply Board.
5. Remove the two screws fastening the bridge rectifier to the heat
sink.
6. Remove the rectifier from the heat sink.
Installation
1. Clean all surfaces between Bridge Rectifier BR1 and the heat sink
using a soft, clean cloth.
2. Replace the Preform between the rectifier and the heat sink.
3. Install the rectifier in reverse order of removal.
4. Fasten the mounting screws. Refer to Chapter 3 – Disassembly
and Access Procedures, Table 3.A – Fastener Torque
Specifications.
5. Fasten the terminal screws. Refer to Chapter 3 – Disassembly and
Access Procedures, Table 3.A – Fastener Torque Specifications.
!
ATTENTION: Replace all guards and insulators
before applying power to the drive. Failure to replace
guards may result in death or serious injury.
Publication 1336 IMPACT-6.1 – March 1998
5–12
Part Replacement Procedures
Fan
The Fan is located behind and to the bottom of the heat sink.
Figure 5.6
Fan
Fan
Fan Wire
Stake-On
Connectors
Air
Flow
Fan Guard
AB0301A
Removal
!
Publication 1336 IMPACT-6.1 – March 1998
ATTENTION: Disconnect and lock out power from
the drive before disassembling the drive. Failure to
disconnect power may result in death or serious injury.
Verify bus voltage by measuring the voltage between
+DC and –DC on terminal block TB1. Do not attempt
to service the drive until the bus voltage has discharged
to zero volts.
Part Replacement Procedures
!
Important:
5–13
ATTENTION: Wear a wrist-type grounding strap
when servicing 1336 IMPACT drives. Failure to
protect drive components against ESD may damage
drive components. Refer to Electrostatic Discharge
Precautions at the beginning of this chapter.
Before you remove connections and wires from the
drive components, mark the connections and wires to
correspond with their component connections and
terminals to prevent incorrect wiring during assembly.
1. Remove power from the drive.
2. Check for zero volts at TB1 terminals +DC and –DC.
3. Check for the absence of control voltage at:
• TB10
• TB11
• L Option Board (if used)
4. Remove the wire connectors from the terminals on the fan.
5. Remove the four round-head screws fastening the top and bottom
of the fan guard to the heat sink.
6. Pull the fan guard and fan away from the heat sink.
Installation
Install the fan in reverse order of removal.
Important:
!
When fastening the fan to the cover plate, position the
air flow arrow, located on the top of the fan near the
connectors, so it points to the top of the drive. Position
the fan connectors to the front, away from DC Bus
Inductor L1. Connect the red wire to the positive fan
terminal and the black wire to the negative terminal.
ATTENTION: Replace all guards and insulators
before applying power to the drive. Failure to replace
guards may result in death or serious injury.
Publication 1336 IMPACT-6.1 – March 1998
5–14
Part Replacement Procedures
DC Bus Inductor
DC Bus Inductor is located on the lower left-hand corner of the Main
Chassis.
Figure 5.7
DC Bus Inductor and Gate Driver/Power Supply Board
E22 (+)
E29 (–)
TB1
Inductor Bracket
Inductor To TB1 –DC
To TB1 +DC
+DC to Gate
Driver Board E22
–DC to Gate
Driver Board E29
Publication 1336 IMPACT-6.1 – March 1998
AB0645A
Part Replacement Procedures
5–15
Figure 5.8
DC Bus Inductor and Gate Driver/Power Supply Board,
A007 – A015, B015 – B030, and C015 – C020 Drives.
E22(+)
E29(–)
TB7-1
TB7-2
TB1
Inductor
To TB7-1
To TB7-2
+DC to Gate
Driver Board E22
Inductor
Bracket
–DC to Gate
Driver Board E29
AB0646B
Removal
!
!
ATTENTION: Disconnect and lock out power from
the drive before disassembling the drive. Failure to
disconnect power may result in death or serious injury.
Verify bus voltage by measuring the voltage between
+DC and –DC on terminal block TB1. Do not attempt
to service the drive until the bus voltage has discharged
to zero volts.
ATTENTION: Wear a wrist-type grounding strap
when servicing 1336 IMPACT drives. Failure to
protect drive components against ESD may damage
drive components. Refer to Electrostatic Discharge
Precautions at the beginning of this chapter.
Publication 1336 IMPACT-6.1 – March 1998
5–16
Part Replacement Procedures
1. Remove power from the drive.
2. Check for zero volts at TB1 Terminals +DC and –DC.
3. Check for the absence of control voltage at:
• TB10
• TB11
• L Option Board (if used)
4. Remove the Main Control Board Mounting Plate. Refer to
Chapter 3 – Disassembly and Access Procedures, Removing the
Main Control Board Mounting Plate.
5. Remove the DC Bus Inductor wires from TB1 –DC and TB1
+DC.
6. Remove the nut fastening the inductor bracket to the chassis.
7. Remove the bracket from the DC Bus Inductor to remove the
inductor.
Installation
1. Lower the DC Bus Inductor into the Main Chassis. Align the hole
in the bottom inductor bracket with the peg on the chassis.
Important:
The DC Bus Inductor insulator may shift when
the inductor is removed. Before installing the
inductor, check the insulator position.
2. Install the DC Bus Inductor in reverse order of removal.
!
Publication 1336 IMPACT-6.1 – March 1998
ATTENTION: Replace all guards and insulators
before applying power to the drive. Failure to
replace guards may result in death or serious injury.
Part Replacement Procedures
5–17
Bus Capacitors
The Bus Capacitors are located on the left side of the Main Chassis.
Bus Capacitor sizes and quantities vary according to drive ratings.
Figure 5.9
Bus Capacitors
Load-Sharing Resistors A
(upper) and B (lower).
Smaller drives use only one
resistor.
Bus Capacitor
Bank
Tab on Main Chassis
fastens through this
hole.
AB0302B
Removal
!
ATTENTION: Disconnect and lock out power from
the drive before disassembling the drive. Failure to
disconnect power may result in death or serious injury.
Verify bus voltage by measuring the voltage between
+DC and –DC on terminal block TB1. Do not attempt
to service the drive until the bus voltage has discharged
to zero volts.
Publication 1336 IMPACT-6.1 – March 1998
5–18
Part Replacement Procedures
!
Important:
ATTENTION: Wear a wrist-type grounding strap
when servicing 1336 IMPACT drives. Failure to
protect drive components against ESD may damage
drive components. Refer to Electrostatic Discharge
Precautions at the beginning of this chapter.
Before you remove connections and wires from the
drive components, mark the connections and wires to
correspond with their component connections and
terminals to prevent incorrect wiring during assembly.
1. Remove power from the drive.
2. Check for zero volts at TB1 Terminals +DC and –DC.
3. Check for the absence of control voltage at:
• TB10
• TB11
• L Option Board (if used)
4. Remove the Gate Driver/Power Supply Board. Refer to
Chapter 3 – Disassembly and Access Procedures, Removing the
Gate Driver/Power Supply Board.
5. Remove the Load-Sharing Resistor wires from the connectors on
the Bus Capacitor Bank.
6. Remove the two nuts fastening the Bus Capacitor assembly to the
chassis.
7. Remove the Bus Capacitor assembly from the Main Chassis.
Installation
1. Fasten the capacitor assembly to the Main Chassis using the two
nuts on the left side. Refer to Chapter 3 – Disassembly and
Access Procedures, Table 3.A – Fastener Torque Specifications.
2. Connect the Load-Sharing Resistors to the Bus Capacitors
according to the following diagrams.
Publication 1336 IMPACT-6.1 – March 1998
Part Replacement Procedures
5–19
Figure 5.10
Load-Sharing Resistor Connections to Bus Capacitors
7.5 – 10 HP @ 200 – 240V
15 – 20 HP @ 380 – 480V
15 – 20 HP @ 500 – 600V
E3
E3
E3
+
+
C1
+
C1
B
E4
+
C2
+
+
C1
13.6K
Ohms
E5
E6
15 HP @ 200 – 240V
25 – 30 HP @ 380 – 480V
13.6K
Ohms
C3
A
4.3K
Ohms
C4
B
4.3K
Ohms
E4
E5
C2
+
+
C2
E5
E6
E6
+
C3
A
E7
E8
13.6K
Ohms
AB0313A
!
ATTENTION: The Capacitor Bus PCB must connect
a positive (+) capacitor terminal to a negative (–)
capacitor terminal. Capacitors not connected correctly
will explode and cause death or serious injury.
Publication 1336 IMPACT-6.1 – March 1998
Chapter 6
6–1
Replacement Parts List
Chapter Objectives
This chapter illustrates and lists replacement parts for the 1336
IMPACT Drives rated A007 – A015, B015 – B030, and
C015 – C020 and describes replacement parts ordering procedures.
The following illustration and table show you parts, part names,
locations, and chapters for replacement procedures.
Ordering Replacement
Parts
For your convenience, the Rockwell Automation Drives Division
and the Rockwell Automation Support Division provide efficient and
convenient repair and exchange for eligible equipment.
A product service report number is required to return any equipment
for repair. Your local Rockwell Automation distributor or area sales
and support office can provide you with a product service report
number.
You should return equipment to be repaired to the area sales and
support center nearest you. Reference the product service report
number on the carton and packing slip. Include:
• Your company name
• Your company address
• The repair purchase order number
• A brief description of the problem
Contact your local Rockwell Automation distributor or sales office
for a complete listing of area sales and support centers near you.
For parts catalog numbers, refer to the 1336 IMPACT Spare Parts Pricing publication included
with your drive documentation set. See next page for more information.
Publication 1336 IMPACT-6.1 – March 1998
Spare Parts Information
Current 1336 IMPACT drive spare parts information including
recommended parts, catalog numbers and pricing can be obtained
from the following sources:
Allen-Bradley home page on the World Wide Web at
http://www.ab.com
then select . . .
“Drives and Motors” followed by . . .
“1336 IMPACT from the Product Directory” and . . .
“Terchnical Support . . .”
Select "Parts List"
6–2
Replacement Parts List
Replacement Parts Listing
Figure 6.1
Parts for A007 – A015, B015 – B030, and C015 – C020 Drives
1
2
3
5
4
6
7
8
10
9
AB0851B
Publication 1336 IMPACT-6.1 – March 1998
Replacement Parts List
6–3
Table 6.A
Replacement Parts for A007 – A015, B015 – B030, and
C015 – C020 Drives
Symbol
Description
Location
Replacement Procedures
1
ST
Thermistor
Main Chassis
Chapter 5, Thermistor
2
Q1 – 3
Transistor
Main Chassis
Chapter 5, Transistor Modules
3
M1
Precharge Module
Main Chassis
Chapter 5, Precharge Module
4
BR1
Bridge Rectifier
Main Chassis
Chapter 5, Bridge Rectifier BR1
5
BASEDR/
PWRSPLY
Gate Driver/Power
Supply PCB
–
Chapter 3, Removing the Gate
Driver/Power Supply Board
6
LOCAL DIS
Human Interface
Module
Main Control Board
Mounting Plate
Chapter 3, Removing the HIM
7
MAIN
CTL
Main Control PCB
Main Control Board
Mounting Plate
Chapter 3, Removing the Main
Control Board
8
FAN
Fan
Main Chassis
Chapter 5, Fan
9
L1
DC Bus
Inductor
Main Chassis
Chapter 5, DC Bus Inductor L1
10
C1 – C4
Bus Capacitors
Main Chassis
Chapter 5, Bus Capacitors
Callout
Publication 1336 IMPACT-6.1 – March 1998
Chapter 7
7–1
Schematics — 15 – 30 HP 1336 IMPACT
Drives
Publication 1336 IMPACT-6.1 – March 1998
7–2
Schematics — 15 – 30 HP 1336 IMPACT Drives
CAP BANK DETAILS
230V
7.5–10HP
230V
15HP
460V
15–20HP
460V
25–30HP
E5
E3 J1
+
C1
E5
J1
+
C1
E5 J2
+
C2
+
C2
C3
J2
J3
+
C4
E6 J3
J4
E6
E3
+
E4
E5
575V
15–20HP
E5
E3 J1
+
C1
E4 J2
+
C2
BR1
E5 J3
E6 J4
STANDALONE CONFIGURATION
E22
RECT+
SEE TABLE 1
+
E6
TB1–5R
C3
FR
E6
E7 J5
J6
E8
FS
E6
E19
TB1–6S
E20
E21
TB1–7T
FT
ALL CAPS ARE CONNECTED TOGETHER BY PCB ARTWORK
CUSTOMER FUSING
E29
*MOV2
*MOV1
*MOV3
*MOV4
STAND ALONE UNIT
BULLETIN 1336 IMPACT
200–240 Volt: 5.5–11 kW (7.5–15 HP)
380–480 Volt: 11–22kW (15–30 HP)
500–600 Volt: 11–15KW (15–20 HP)
Publication 1336 IMPACT-6.1 – March 1998
HP
VOLTAGE
7.5
10
15
15CT 20VT
20CT 25VT
25CT 30VT
30CT 30IEC
15
20
230
230
230
380/460
380/460
380/460
380/460
575
575
FUSE (AC)
FR,FS,FT TYPE JJ
35
45
70
35
45
60
70
25
35
AB0753A
Schematics — 15 – 30 HP 1336 IMPACT Drives
10,15 H.P. 230V
20 H.P. 575V
20,25,30 H.P. 380/460V
7–3
DISCRETE WIRES
PCB MOUNTED COMPONENT (GDB)
POWER PCB ARTWORK (GDB)
PCB ARTWORK (GDB)
*
DISCRETE WIRING
PCB SCREW TERMINAL
TB1–8
U
TB1–9
TB1–10
V
W
E8
L1
CT1
E7
TB7–2
CT2
2000:1
2000:1
E1
E12
E15
E5
TB1–1
U
*CT1
V
C1
E9
W
C1
C1
80 OHM
B
A
1000:1
TB1–4
DC–
B1
CAP
BANK
See Cap
Bank Detail
B1
E1 E11
E1
E1
B2
C.T.
C2
E2
B1
E1 E14
B2
E2
E2
E1 E17
E1
C2
C2
*C40
DC+
B2
*C41
*R1
D
*C42
TB1–3
C
E2
E2
E2
E16
E13
E10
L1
E6
TB1–2
TB7–1
1
–24VDC AUX INPUT
2
TB4
F1
WP_GATE
WP_EMIT
P5
P6
VP_GATE
VP_EMIT
P3
P4
UP_GATE
UP_EMIT
P1
P2
WN_GATE
WN_EMIT
VN_GATE
VN_EMIT
UN_GATE
UN_EMIT
P12
P11
P9
P10
P7
P8
+15
U_AMPS
–15V
E5
E2
E6
1 2
W16
W15
+24VDC AUX INPUT
+15
W_AMPS
–15
+BUS
–BUS
NEG_CAP
SCR_CATHODE
SCR_GATE
NTC to
Main Control Board
J2
24VDC Fan
CONTACTOR
INTERFACE
1 2 3
1 2 3
TB5
4
5
6
J6
25172–260–08
J3
1
2
Fan1
Fan2
1A 600V
GATE DRIVER BOARD
1
TB6
3
TB1
2
1
2
3
4
5
6
7
8
9
10
11
12
13
14
15
16
17
18
19
20
21
22
23
24
25
26
27
28
29
30
31
32
33
34
35
36
37
38
39
40
41
42
43
44
45
46
47
48
49
50
1
J1
HIGH VOLT +DC AUX. IN
2
HIGH VOLT –DC AUX. IN
J9
1
10
DGND
DGND
DGND
DGND
U_POS+
U_NEG+
V_POS+
V_NEG+
W_POS+
W_NEG+
U_POS–
U_NEG–
V_POS–
V_NEG–
W_POS–
W_NEG–
U_AMPS+
U_AMPS–
W_AMPS+
W_AMPS–
U_VOLTS
V_VOLTS
W_VOLTS
DGND
NEG_BUS
NEG_CAP
POS_BUS
GND_SHRT
NOT USED
AC_LINE
/CHARGE
EE_IO
EE_SK
EE_CS
PILOT
CVERIFY
+5V
+5V
+5V
+14.5
+14.5
–14.5
–14.5
+24V
IOS12
ISORTN
DGND
DGND
+5V
+5V
PE PE
To Main Control Board
AB0754A
Publication 1336 IMPACT-6.1 – March 1998
7–4
Schematics — 15 – 30 HP 1336 IMPACT Drives
Main Control Board
Publication 1336 IMPACT-6.1 – March 1998
Index
A
E
Adapter Locations, 1–10
Electrostatic Discharge, P–2
Audience for this Manual, P–1
Enable Input, Definition, P–9
Auxiliary Interlock, Definition, P–8
Enclosure Type, P–8
Encoderless, 2–23
B
ESD, P–2
Bit, Definition, P–8
Bridge Rectifier
Illustration, 5–10
Installation, 5–11
Removal, 5–10
Test, 4–3
Bus Capacitor
Illustration, 5–17
Installation, 5–18
Removal, 5–17
Test, 4–5
C
Check, Definition, P–8
Component Test Procedures, 4–1
Connector, Definition, P–9
Control Firmware Function, 1–14
Control Interface L Option Board. See L
Option Board
Control Logic Wiring, 1–1
Conventions in this Manual, P–8
D
DC Bus Inductor (Series C and D)
Illustration, 5–14
Installation, 5–16
Removal, 5–15
Default, Definition, P–9
Drive
Enclosure Type, P–8
Identification, P–4
Illustration, 5–3
Nameplate Location, P–3
Rating, P–7
Drive Enclosure
Illustration, 3–5
Installation, 3–6
Removal, 3–5
DriveTools, 1–14
F
False, Definition, P–9
Fan
Illustration, 5–12
Installation, 5–13
Removal, 5–12
Faults, 2–1
Absolute Overspd, 2–7
Analog Spply Tol, 2–7
Autotune Diag, 2–4
Bus Cycle >5, 2–14
Bus Drop, 2–13
Bus Undervlt, 2–13
Clear Queue, 2–3
Desaturation, 2–12
Diff Drv Type, 2–7
EE Checksum, 2–7
External Flt In, 2–8
Feedback Loss, 2–20
Ground Fault, 2–13
HW Malfunction, 2–6, 2–15
Inv Overload, 2–5
Inv Overtemp Pnd, 2–5
Inv Overtemp Trp, 2–5
InvOvld Pend, 2–5
mA Input, 2–7
Math Limit, 2–8
Mtr Stall, 2–4
MtrOvrld Pnd, 2–4
MtrOvrld Trp, 2–4
Open Circuit, 2–14
Overcurrent, 2–13
Overvoltage, 2–12
Param Limit, 2–8
Prechrg Time, 2–13
Ridethru Time, 2–13
SP 1 Timeout, 2–9
SP 2 Timeout, 2–9
SP 3 Timeout, 2–9
SP 4 Timeout, 2–10
SP 5 Timeout, 2–10
SP 6 Timeout, 2–10
Publication 1336 IMPACT-6.1 – March 1998
I–2
Index
SP Error, 2–10
Spd Fdbk Loss, 2–8
SW Malfunction, 2–7
Viewing Queue with HIM, 2–2
Feedback Loss Fault, 2–20
Four-Point Mounting, 3–3
G
Gate Driver/Power Supply Board, Test,
4–14
Gate Driver/Power Supply Board (Series C
and D)
Illustration, 3–13, 3–14
Installation, 3–16
Removal, 3–14
GPT. See Graphic Programming Terminal
Graphic Programming Terminal
Description, 1–13
Illustration, 1–13
H
Human Interface Module (HIM)
Adapter Locations, 1–10
Description, 1–9
Illustration, 1–10
Operation, 1–12
Removal, 1–11
Viewing Fault/Warning Queues, 2–2
I
Identification, Product, P–3
Input Mode. See L Option Mode
Inputs, Available, 1–4
J
Jumper, Definition, P–9
L
L Option Board, 1–3
Definition, P–9
Illustration, 3–7
Inputs, 1–4
Installation, 3–8
Jumper Locations, 1–3
Options, 1–3
Removal, 3–7
L Option Mode
Factory Default, 1–6
Publication 1336 IMPACT-6.1 – March 1998
Programming, 1–4
Selection, 1–5
Three-Wire Control, Multi-Source
Reversing, 1–7
Three-Wire Control, Single-Source
Reversing, 1–6
Two-Wire Control, Single-Source Control,
1–7
Load-Sharing Resistor Connections, 5–19
Local Programming, 1–4
M
Main Control Board
Illustration, 3–11
Installation, 3–12
Removal, 3–11
Main Control Board Mounting Plate
Illustration, 3–9
Installation, 3–10
Removal, 3–9
Manual
Audience, P–1
Conventions, P–8
Objective, P–1
Related Publications, P–10
Motor Control Board
Illustration, 3–11
Installation, 3–12
Removal, 3–11
Motor Control Board Mounting Plate
Illustration, 3–9
Installation, 3–10
Removal, 3–9
Mounting
Four-Point, 3–3
Two-Point, 3–2
N
Nameplate Location, P–3
Not External Falt Input, Definition, P–10
O
Objective of this Manual, P–1
Operation, Human Interface Module, 1–12
Option
Control Interface, 1–3
Identification, P–4
Index
P
Parameter, Definition, P–10
Precautions
Electrostatic Discharge, P–2
Safety, P–1
Precharge Module (Series C and D)
Illustration, 5–4
Installation, 5–5
Removal, 5–4
Test, 4–11
Press, Definition, P–10
Procedures
Accessing Internal Drive Components,
3–1
Bridge Rectifier Installation, 5–11
Bridge Rectifier Removal, 5–10
Bridge Rectifier Test, 4–3
Bus Capacitor Installation, 5–18
Bus Capacitor Removal, 5–17
Bus Capacitor Test, 4–5
Component Test, 4–1
Control Board Installation, 3–12
Control Board Mounting Plate
Installation, 3–10
Control Board Mounting Plate Removal,
3–9
Control Board Removal, 3–11
DC Bus Inductor (Series C and D)
Installation, 5–16
DC Bus Inductor (Series C and D)
Removal, 5–15
Drive Enclosure Installation, 3–6
Drive Enclosure Removal, 3–5
Fan Installation, 5–13
Fan Removal, 5–12
Gate Driver/Power Supply Board (Series
C and D) Installation, 3–16
Gate Driver/Power Supply Board (Series
C and D) Removal, 3–13
Gate Driver/Power Supply Board Test,
4–14
L Option Board Installation, 3–8
L Option Board Removal, 3–7
Main Control Board Installation, 3–12
Main Control Board Mounting Plate
Installation, 3–10
Main Control Board Mounting Plate
Removal, 3–9
Main Control Board Removal, 3–11
Precharge Module (Series C and D)
Installation, 5–5
Precharge Module (Series C and D)
Removal, 5–4
Precharge Module (Series C and D) Test,
4–11
Replacement Part, 5–1
I–3
Thermistor Installation, 5–7
Thermistor Removal, 5–6
Transistor Module Installation, 5–9
Transistor Module Removal, 5–8
Transistor Module Test, 4–8
Product Identification, P–3
Programming
L Option Mode, 1–4
Local, 1–4
R
Rating, Drive, P–7
Related Publications, P–10
Removal Procedures. See Procedures
Removal, Human Interface Module, 1–11
Replacement Part Procedures, 5–1
Replacement Parts, 6–1
S
Safety Precautions, P–1
Schematics, 7–1
Speed Select/Speed Reference, 1–8
T
TB3 Terminal Designations, 1–5
Terminal Block Locations, 1–2
Terminal Designations, TB3, 1–5
Thermistor
Illustration, 5–6
Installation, 5–7
Removal, 5–6
Tools, Required for Service, 3–2, 4–2, 5–2
Torque
Four-Point Mounting Sequence, 3–3
Maximum for TB Terminals, 1–5
Specifications, 3–4
Two-Point Mounting Sequence, 3–2
Transistor Module
Illustration, 5–8
Installation, 5–9
Removal, 5–8
Test, 4–8
Troubleshooting
Component Test Procedures, 4–1
Encoderless, 2–23
Start Up, 2–16, 2–20
True, Definition, P–10
Two-Point Mounting, 3–2
Publication 1336 IMPACT-6.1 – March 1998
I–4
Index
W
Warnings, 2–1
Bus Cycle>5, 2–15
Bus Drop, 2–14
Bus Undervlt, 2–15
External Flt In, 2–9
Inv Overload, 2–6
Inv Overtemp Pnd, 2–6
InvOvld Pend, 2–6
mA Input, 2–8
Math Limit, 2–8
Mtr Stall, 2–5
MtrOvrld Pend, 2–4
MtrOvrld Trp, 2–5
Publication 1336 IMPACT-6.1 – March 1998
Open Circuit, 2–15
Param Limit, 2–8
Prechrg Time, 2–14
Ridethru Time, 2–14
SP 1 Timeout, 2–11
SP 2 Timeout, 2–11
SP 3 Timeout, 2–11
SP 4 Timeout, 2–11
SP 5 Timeout, 2–12
SP 6 Timeout, 2–12
SP Error, 2–12
Spd Fdbk Loss, 2–9
Viewing Queue with HIM, 2–2
Wire Sizes, 1–5
1336 IMPACT, ControlNet, and SCANport are trademarks of Rockwell International Corporation.
PLC is a registered trademark of Rockwell International Corporation.
Allen-Bradley, a Rockwell Automation Business, has been helping its customers improve
productivity and quality for more than 90 years. We design, manufacture and support a broad
range of automation products worldwide. They include logic processors, power and motion
control devices, operator interfaces, sensors and a variety of software. Rockwell is one of the
world’s leading technology companies.
Worldwide representation.
Argentina • Australia • Austria • Bahrain • Belgium • Brazil • Bulgaria • Canada • Chile • China, PRC • Colombia • Costa Rica • Croatia • Cyprus • Czech Republic •
Denmark • Ecuador • Egypt • El Salvador • Finland • France • Germany • Greece • Guatemala • Honduras • Hong Kong • Hungary • Iceland • India • Indonesia •
Ireland • Israel • Italy • Jamaica • Japan • Jordan • Korea • Kuwait • Lebanon • Malaysia • Mexico • Netherlands • New Zealand • Norway • Pakistan • Peru •
Philippines • Poland • Portugal • Puerto Rico • Qatar • Romania • Russia–CIS • Saudi Arabia • Singapore • Slovakia • Slovenia • South Africa, Republic • Spain •
Sweden • Switzerland • Taiwan • Thailand • Turkey • United Arab Emirates • United Kingdom • United States • Uruguay • Venezuela • Yugoslavia
Allen-Bradley Headquarters, 1201 South Second Street, Milwaukee, WI 53204 USA, Tel: (1) 414 382-2000 Fax: (1) 414 382-4444
Publication 1336 IMPACT-6.1 – March 1998
PN 74103-718-01
Copyright 1998 Allen-Bradley Company, Inc., a Rockwell International Company. Printed in USA