1
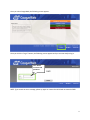
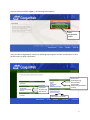
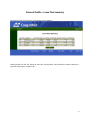
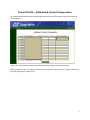
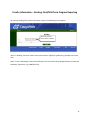
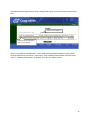
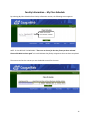
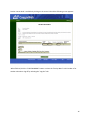
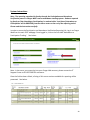
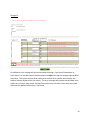
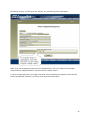
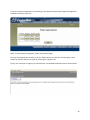
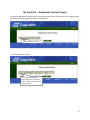
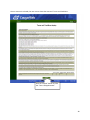
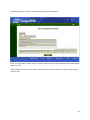
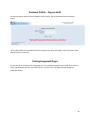
Columbus State Community College CougarWeb Faculty User Guide Updated December 2013 1 Table of Contents Topic Page Access the CougarWeb Website/Log In......................................................... 3 Leave Plan Summary .................................................................................... 6 Additional & Contract Compensation........................................................... 7 Class Roster .................................................................................................. 8 Grading –Final/Mid‐Term Reporting............................................................ 11 My Class Schedule ....................................................................................... 15 Financial Aid Non‐Attendance Reporting………………………………..……………….. 17 System Instructions …………………………………………………………… The three reporting options……………………………………………… Confirmation of Reporting………………………………………………… Possible Error Messages…………………………………………………… 20 23 26 28 Assignment Contract Approval.................................................................... 33 Assignment Contract Inquiry ...................................................................... 37 Degree Audit................................................................................................ Printing Cougarweb Pages.......................................................................... 40 40 2 Access the CougarWeb Website/Log In Go to Columbus State Community College homepage, www.cscc.edu and click on the CougarWeb link: NOTE: You can also access CougarWeb from the Columbus State Community College’s home page, www.cscc.edu, select “Faculty & Staff” from the listing on the left; select “CougarWeb” from the “User Guides” section. 3 Once you select CougarWeb, the following screen appears: Once you click the “Log In” button, the following screen appears and you are now ready to log in: Enter Novell username and password. NOTE: If you receive an error message, please try again or contact the HELP Desk at extension 5050. 4 Once you have successfully logged in, the following screen appears: Select Cougarweb for faculty. Once you select CougarWeb for Faculty, the following screen appears and you can now select a link to perform action or obtain information: Class rosters Grade Reporting Class Schedule Degree Audit Participation/Attendance Tracking Leave plan Overload pay Pay advices Sign and print contracts 5 Personal Profile – Leave Plan Summary By selecting Leave Plan Summary, the following screen appears: When finished, click the “OK” button or select the “Faculty Menu” tab in header for another selection or log off by selecting the “Log Out” tab. 6 Personal Profile – Additional & Contract Compensation By selecting Additional & Contract Compensation from the Faculty Information section, the following screen appears: NOTE: This screen provides compensation above the annual salary or three term contract. When finished, click the “OK” button or select the “Faculty Menu” tab in header for another selection or log off by selecting the “Log Out” tab. 7 Faculty Information ‐‐ Class Roster By selecting Class Roster from the Faculty Information section, the following screen appears: Select class NOTE: Terms for credit classes are identified as YYQQCR (Last two¬digits of the Year, Term identifier and ‘CR’ for credit) and non¬credit sections are YYQQNC (Year, Term, and ‘NC’ for non¬credit). Term designators are: WI – Winter, SP – Spring, SU – Summer, and AU – Autumn. NOTE: “Enter a Date Range” (start and end dates) to list all sections being taught between the start and end dates, respectively. NOTE: IF YOU RECEIVE THIS MESSAGE: “There are no classes for the time frame you have selected. Please click BACK to select again;” this could indicate that faculty assignments have not been completed. 8 You should see your Class Roster which provides you the Course Name and Title, all instructors assigned to this section, the roster of students enrolled and information regarding the students: NOTE: You can print this screen. Follow printing instructions located Printing section of the manual. 9 An example of a student profile screen is shown below: NOTE: Advisor and Counselor information is not used. When finished, click the “OK” button or select the “Faculty Menu” tab in header for another selection or log off by selecting the “Log Out” tab. 10 Faculty Information – Grading: Final/Mid Term Progress Reporting By selecting Grading from Faculty Information section, the following screen appears: Select the correct term and hit “submit” NOTE: In Grading, the terms listed are only those that are eligible for grade entry, generally the current term. NOTE: “Enter a Date Range” (start and end dates) to lists all sections being taught between the start and end dates, respectively. [e.g. MM/DD/YYYY] 11 The following screen appears which shows a listing of the courses you are teaching for that particular term: Select Final or Midterm Select section for which you want to enter grades. NOTE: IF YOU RECEIVE THIS MESSAGE: “Final or Midterm/Intermediate Grading is a required field. Please provide data or press Menu”, please select “Final or Midterm/Intermediate” and select either “Final” or “Midterm/Intermediate” for grading. Then click the “Submit” button. 12 Once you have selected the course section and clicked the “Submit” button, the following screen appears where you will enter the grades: NOTE: Appropriate grades for Mid Term Progress Reporting and Final Grading are: Mid‐term S‐ Satisfactory U‐ Unsatisfactory Final Grading A High Achievement B Good Achievement C Satisfactory Achievement D Below Satisfactory E Failing I Incomplete R Audit S Satisfactory U Unsatisfactory 13 Once you click the “Submit” you will receive a confirmation screen including a list noting which students’ grades that have been updated. Once you have submitted grades, students will be able to see the grades. When finished, click the “Submit” button select the “Faculty Menu” tab in header for another selection or log off by selecting the “Log Out” tab. NOTE: If you find that you made a mistake you may NOT go back in to the grade roster and update the grade. If you attempt to change a grade that was previously entered you will receive an error message. NOTE: Until the grade entry deadline, any required grade changes can be completed by the academic chair. Once the grade deadline has passed, you must submit a Grade Change Form through your department chairperson. 14 Faculty Information ‐‐ My Class Schedule By selecting My Class Schedule from Faculty Information section, the following screen appears: Select the correct term and hit “submit” NOTE: IF YOU RECEIVE THIS MESSAGE: “There are no classes for the time frame you have selected. Please click BACK to select again” this could indicate that faculty assignments have not been completed. The next screen lists the courses you are scheduled to teach for the term: 15 Further course detail is available by clicking on the course link and the following screen appears: When finished, click the “CLOSE WINDOW” button or select the “Faculty Menu” tab in header or for another selection or log off by selecting the “Log Out” tab. 16 Participation and Attendance Verification Reporting Introduction Columbus State Community College is required by federal law to verify and monitor the enrollment of students who participate in Federal Title IV student aid programs. These programs include the Federal Pell Grant, Federal Supplemental Educational Opportunity Grant, and the Federal Subsidized and Unsubsidized Direct Loans. It is our responsibility to verify students are in attendance and are actively engaged in the course as demonstrated by meaningful efforts toward completion of the course. The Participation and Attendance Verification Reporting procedure, required to be completed by all faculty utilizing their Cougar Web account, allows the college to effectively track students who never begin attendance, who fail to be actively engaged in their courses, or stop attendance during the term. Active engagement may be further defined as: completion of graded course assignments (homework, quiz, essay, project, or lab); active participation in studio or practicum sessions; making content‐related contributions to an online discussion forum (including responses both to prompts and to student/instructor posts). This section will provide instructions on the reporting process to be completed each term through their faculty Cougar Web account. Process Overview During each semester there will be a total of three reporting windows faculty may be asked to complete. Faculty will be required to review their class rosters and report the student’s participation and attendance up until that point in the semester. All faculty members teaching courses during the particular reporting window will receive an email notification through their CSCC email account from the Records and Registration department indicating when the reporting windows will open. This email will be sent approximately 2 to 4 days prior to each reporting window opening. For each semester the timing of reporting will be at the same point – with some variation for summer term as it is shorter in length than the other two semesters. For semesters that are 16 weeks in length (Autumn and Spring) the following reporting timeframes will be utilized: The first reporting window will open approximately 20 days after the semester begins – approximately week 3 ‐ and be open for 7 days. The second reporting window will open approximately during week 8 of the semester and be open for 14 days (ending date of this reporting window will occur on the last day to drop full term courses – see Academic Calendar). 17 The third reporting window will open during the 15th week and be open for 7 days. Summer semester is 11 weeks in length and the following reporting time frame will be used for this term: The first reporting window will open approximately 20 days after the semester begins – approximately week 3 ‐ and be open for 7 days. The second reporting window will open approximately during week 5 of the semester and be open for 14 days (ending date of this reporting window will occur on the last day to drop full term courses – see Academic Calendar). The third reporting window will open during the 10th week and be open for 7 days. Upon the opening of the reporting window, the faculty member can log into their Cougar Web account and complete the reporting for all their courses. Once the correct link on their Cougar Web menu has been accessed the faculty member will see all the courses they are teaching for that term. Upon choosing the course, a listing of financial aid students will be presented. The listing is NOT a full roster of ALL students in the course – only students receiving Federal financial aid. Once the faculty member has entered the course roster there will be three options available to choose from in reporting the students. The system automatically defaults to ‘Attending or Participating.’ The other options the faculty member may choose are: ‘Not Attending or Participating’ OR ‘Last Date of Attendance or Participation’. The faculty member updates each student accordingly, clicks the Certification Statement at the bottom and hits the ‘Submit’ button. This completes the required reporting for that particular course. During the reporting window the faculty member can update the information as many times as necessary. It is important to make sure the most accurate and up‐to‐date information is submitted by the close of the reporting window as that information will be used to withdraw students from the course sections if they are marked as not participating or attending. Once the reporting window is closed, the Records and Registration department representative will run the process to administratively withdraw students who were reported as ‘Not Attending or Participating ‘ or were reported with a ‘Last Date of Attendance or Participation.’ Students will be notified via their CSCC email account they were dropped from the course sections. 18 Reminder to Faculty: Do NOT use the grading screen in Cougar Web to report students for the Participation/Attendance Verification Reporting process. Information placed in error on the grading screen may cause data integrity issues for those students. Process to Readmit Student Erroneously Dropped from Course In the event an error occurred and the faculty member dropped a student by mistake, only the faculty member can authorize the student to be readmitted back into their course. There are currently two methods to complete this process. The most efficient method to request the student be readmitted to the course they were dropped from is to send an email to the following email address: [email protected]. The faculty member must use their CSCC email account to make this request. It will be necessary to include the following information in the email. If any of the following information is missing, the request will not be processed. Student Name Student Cougar ID Course Number – Full course information is REQUIRED o Example: Math 1020‐001‐12345 Faculty Name and Department A bounce back notification will be sent to the faculty member indicating the request has been received. The second method to readmit the student dropped in error from the course would be to have the student and faculty member complete a ‘Registration Add/Drop Form’ which is available online at: http://www.cscc.edu/_resources/media/services/pdf/Regrevision‐semesters.pdf The completed (student and faculty sections) paper Registration Add/Drop form would need to be brought by the student to the Records and Registration Department located in Madison Hall, Room 201 for processing. 19 System Instructions Note: The reporting completed by faculty through the Participation and Attendance Verification process in Cougar Web is not an attendance tracking system. Students reported by faculty as ‘Not Attending or Participating’ or marked with a ‘Last Date of Attendance or Participation’ will be DROPPED from the course rosters at the end of the reporting period. Please read the instructions carefully. In order to access the Participation and Attendance Verification Reporting link, Log In to Cougar Web from the main CSCC webpage. Once logged in, click on the link titled ‘Attendance or Participation Tracking.’ See below: Note: In the event, you cannot log into your Cougar Web account, please contact the IT Support Center at 614‐287‐5050 for assistance. Once the link has been clicked, a listing of ALL course sections available for reporting will be presented. See below: 20 In the event you click on the ‘Attendance or Participation Reporting’ link when the reporting window is NOT open, the following screen and error message will appear. See below: To complete the necessary reporting for each of the course sections shown on the screen, click on the radio button in the column titled ‘Choose One’ on the left side of the screen beside the column titled ‘Class Name and Title.’ See below: Once a course section is selected, the course roster of financial aid students that require you to update their participation/attendance will be presented. See below: 21 In the event there are no students receiving financial aid in the course selected, the following screen and error message will appear. See below: 22 Three options for reporting students As indicated above, you will be required to report one of the following statuses for each student presented on the roster. Only one status per student is allowed. Attending or Participating The first reporting option is to report all financial aid students presented on the course roster as ‘Attending or Participating.’ The course roster automatically defaults to show all students as ‘Attending or Participating.’ If this is correct, then check the Certification Statement on the bottom of the page as well as clicking on the ‘Submit’ button. This will indicate all students listed on the roster are attending and participating in the course. (See the enhanced definition of “Participation and Attendance” at beginning of this section for a detailed explanation.) See below: 23 Not Attending or Participating The second reporting option is to report students who have never attended or never participated in the course. If there are students in the course who have never attended or never participated, place a check in the box under the column ‘Not Attending or Participating’ for the particular student. You will be required to uncheck the box in the ‘Attending or Participating’ column. Only one entry per student will be permitted. To complete this reporting, check the certification statement on the bottom of the page and hit ‘Submit.’ See below: 24 Last Date of Attendance or Participation The third reporting option is to report students who have stopped attending/participating. If there are students in the course who have stopped attending/participating, you will be required to provide a last date of attendance/participation. To complete this reporting, a date MUST be entered in the column titled ‘Last Date of Attendance or Participation’ for the particular student. You will be required to uncheck the box in the ‘Attending or Participating’ column also. Only one entry per student is permitted. To finish this reporting, check the certification statement on the bottom of the page and hit ‘Submit.’ (See the enhanced definition of “Participation and Attendance” at the beginning of this section for a detailed explanation in determining the date needed.) See below: 25 Special Information regarding the first reporting window each semester: During the first reporting window (20 days into the semester) faculty teaching 16 week and first 8 week sections will be asked ONLY to report students who are ‘Not Attending or Participating’ in their courses. Faculty teaching first 5 week sections will be asked to report students who are ‘Not Attending or Participating’ AND any students who have stopped attending or participating by providing a ‘Last Date of Attendance or Participation.’ Error messages will be presented in the event a faculty member attempts to provide a ‘Last Date of Attendance or Participation’ for the 16 week and first 8 week sections. See ‘Possible error messages on reporting screen’ section for example. Confirmation of reporting Each time the course roster is entered and the certification statement at the bottom of the page is checked AND the ‘Submit’ button hit, a confirmation page will be presented. This page will give a recap of the reporting that has occurred and may be kept as a record of the 26 completion of the reporting process. You may enter the course roster as many times as necessary during the reporting open window. The last reported data (held by hitting the ‘Submit’ button) during the reporting window will be used in adjusting the course roster, if necessary. It is recommended that a copy of this confirmation be kept for your records. See below: Along with the confirmation page, a date will be populated on the main screen where all the course sections are listed. The column titled ‘Last Reported’ will be populated with the date the last time the ‘Submit’ button was hit for each of the sections reported on. See below: 27 NOTE: In the event a section does not contain any students receiving Federal financial aid, simply click the ‘Submit’ button and the reporting will be updated to show the roster was reviewed. Possible error messages on reporting screen As indicated in the section explaining the options for reporting, the system automatically defaults a reporting status of ‘Attending or Participating’ for all financial aid students upon entering the roster each time. To complete the reporting correctly, if a status other than ‘Attending or Participating’ needs to be reported for a student, then the box checked in that column MUST be removed before the system will allow the new status to be accepted. The error messages for these incorrect entries will be shown in the column titled ‘Error Messages’ or across the top of the screen. See below for examples: Example 1: Only one status can be checked 28 Example 2: An additional error message will be received when entering a ‘Last Date of Attendance or Participation’ for a student when the date entered is before the date the student registered for the course. The system will not allow a date to be entered that is earlier than the date the student actually registered for that course. The error message will provide the valid date to be used in this instance. Once a date has been entered that fits this time frame, then the system will allow the updated information. See below: 29 One additional error message will be presented in the event that NO status has been selected for a student. This error message will be presented at the TOP of the roster page. A selection for the particular student must be made to continue with the reporting on the roster presented. See below: 30 Reminder: During the first reporting window (occurring approximately 20 days into the semester) faculty members teaching 16 week and first 8 week sections will be asked ONLY to report students who are ‘Not Attending or Participating’ in their courses. Faculty teaching first 5 week sections will be asked to report students who are ‘Not Attending or Participating’ AND any students who have stopped attending or participating by providing a ‘Last Date of Attendance or Participation.’ Error messages will be presented in the event a faculty member attempts to provide a ‘Last Date of Attendance or Participation’ for the 16 week and first 8 week sections. To correct this error, remove the date from the ‘Last Date of Attendance or Participation’ column for that student. See below: 31 If you have multiple sections listed you will need to access each course section, review the roster, check the certification box as well as hit “Submit” in order for all reporting to be completed and sent for processing. 32 My Contracts ‐‐ Assignment Contract Approval By selecting Assignment Contract Approval from the My Contracts section ¬the following screen appears: 33 Once an assignment is selected, the next screen shows the Terms and Conditions of the contract: NOTE: If you are not going to accept the Terms and Conditions, click in the “Reject” box and type a reason under the “Rejection Reason” and then click the “Submit” button. 34 By selecting “Accept” and clicking on the “Submit” key, the following screen will appear: NOTE: If you are not going to accept the Terms of Appointment, click in the “Reject” box and type a reason under the “Rejection Reason” and then click the “Submit” button. If you have single assignment, you might see another Terms of Appointment approval screen that will need to be approved; otherwise, you will be returned to the Faculty Menu. 35 If you have multiple assignments, the following screen appears (the previously approved assignment should be missing from the list): NOTE: To select another assignment, follow the procedure again. Once you have signed your contracts, click the “Submit: button or select the “Faculty Menu” tab in header for another selection or log off by selecting the “Log Out” tab. Finally, once contracts are signed, you should receive a completed notification email as shown below: 36 My Contracts ‐‐ Assignment Contract Inquiry By selecting Assignment Contract Inquiry from My Contracts section, the following screen appears which allows the user to view previously approved assignments: Select the contract to view The following screen appears: To inquire about a specific contract type, click on the box under “choose one.” Click on the “submit” button. 37 Once a contract is selected, the next screen shows the contract’s Terms and Conditions: Click the “submit” button to view the “Terms of Appointment” 38 By selecting “Submit” the Terms of Appointment Inquiry screen appears: NOTE: To view another contract, click the “Submit” button and you will be returned to the Position Asgmt Selection screen. When finished, select the “Faculty Menu” tab in header for another selection or log off by selecting the “Log Out” tab. 39 Academic Profile ‐‐ Degree Audit By selecting Degree Audit from the Academic Profile section, you will be directed to the following screen: NOTE: Please follow the DarsWeb User Guide located in the “faulty and staff” section of the CSCC home page for further instructions. Printing Cougarweb Pages To print any of the screens within CougarWeb, use the standard printing function of File, Print and then select your designated printer. You could also do a “Screen Print.” You might want to change to a Landscape format. 40