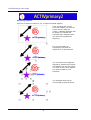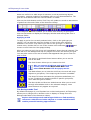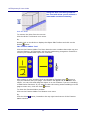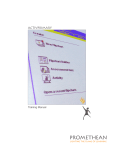
1
ACTIVprimary2
User Guide
PC version
US Edition
TP-1543-US
Issue 1
All rights reserved
All information contained in this document is subject to change without notice.
Any use of the contents of this User Manual other than for the purpose intended requires
express written permission of Promethean Technologies Group Ltd.
All trademarks noted with the ™ mark are the properties of their respective companies.
NOTE: All utility and driver software provided to operate ACTIV products is the property of
Promethean. Use of this software is granted for the purpose of installation, set up and
operation of ACTIV products and the standard feature set outlined in this guide. Promethean
does not encourage or authorise any other use.
Additional application software is provided from time to time as a service to our customers.
This software is licensed to the end user by the supplier. Use, possession and upgrades are the
responsibility of that supplier. Registered owners of Promethean product should contact those
suppliers directly for support.
© Copyright Promethean Technologies Group Ltd 2004
ACTIVprimary2 User Guide
Table of Contents
Concept ............................................................................................1
The ACTIVprimary Interface ....................................................................... 1
Design and Present Mode........................................................................... 1
Desktop Annotation................................................................................... 1
Integration with Windows Applications ......................................................... 1
User Profiles ............................................................................................ 1
Resources................................................................................................ 2
Customize ACTIVprimary ........................................................................... 2
Support & Contact Information .............................................................2
Technical Support ..................................................................................... 2
Contact Information .................................................................................. 2
What's New in ACTIVprimary 2.0 ..........................................................3
New Features ........................................................................................... 3
Enhancements.......................................................................................... 4
Presentation Mode ..............................................................................5
Interface ................................................................................................. 5
Flipchart .......................................................................................... 5
Teacher Interface.............................................................................. 5
Pupil Interface .................................................................................. 5
Trashcan ......................................................................................... 5
Tool Tray ......................................................................................... 5
Pupil Interface ...................................................................................6
The Page Number button ........................................................................... 6
Page Selector ................................................................................... 6
Previous Page and Next Page buttons .......................................................... 7
Page Turn Effects .............................................................................. 7
Auto................................................................................................ 7
DirectX (3D card)............................................................................. 7
Software.......................................................................................... 7
The Select Tool button............................................................................... 7
Selecting Objects .............................................................................. 8
Free mover ...................................................................................... 9
Aspect independent sizers .................................................................. 9
Rotator box...................................................................................... 9
Aspect sizer ................................................................................... 10
Moving Objects ............................................................................... 10
iii
ACTIVprimary2 User Guide
Copy and Paste............................................................................... 10
The Pen, Highlighter and Eraser Tool ......................................................... 10
Pen Tool ........................................................................................ 10
Highlighter Tool .............................................................................. 10
Eraser Tool .................................................................................... 11
Remove Annotations........................................................................ 11
Move Annotations ........................................................................... 11
Point to Point mode ......................................................................... 11
Automatic Annotation Grouping......................................................... 12
The Lines Tool ........................................................................................ 12
Draw a line .................................................................................... 12
Delete a line................................................................................... 13
Manipulate the line.......................................................................... 13
The Shapes Tool ..................................................................................... 13
Draw a shape ................................................................................. 14
Delete a shape ............................................................................... 14
Manipulate the shape ...................................................................... 14
The Text Tool ......................................................................................... 15
Floating Keyboard ........................................................................... 15
Text Tray ....................................................................................... 16
Editing Text Objects ........................................................................ 17
Manipulating Text ........................................................................... 17
Deconstruct text ............................................................................. 18
The Fill/Color Picker Tool.......................................................................... 18
Annotation Objects.......................................................................... 19
Lines and Shapes ............................................................................ 19
Text Objects................................................................................... 19
Images or Clipart ............................................................................ 19
Page Backgrounds........................................................................... 19
The Grid Tool ......................................................................................... 20
Applying a Grid ............................................................................... 20
The Backgrounds Tool ............................................................................. 20
Background images ......................................................................... 21
Choose Color .................................................................................. 21
Merge an object into the Background ................................................. 22
The Resource Library............................................................................... 22
Rubber Stamp Mode ........................................................................ 24
Sound Files .................................................................................... 24
iv
ACTIVprimary2 User Guide
Adding Resources to the Resource Library .......................................... 24
Flipchart Objects............................................................................. 24
Backgrounds and Grids .................................................................... 26
Adding Resources to Another Location................................................ 27
Creating Resource Folders or Categories............................................. 27
Deleting Resources.......................................................................... 29
The Undo and Redo buttons ..................................................................... 30
Teacher Interface ............................................................................. 30
The Exit button....................................................................................... 31
Recovery ....................................................................................... 31
The Teacher Tools Menu .......................................................................... 31
New Flipchart ................................................................................. 31
Open Flipchart ................................................................................ 32
Save Flipchart ................................................................................ 32
Print Flipchart................................................................................. 33
Name ............................................................................................ 34
Quality .......................................................................................... 34
Color or Gray Scale ......................................................................... 34
Portrait / Landscape ........................................................................ 34
Column count / Row count ............................................................... 34
Frame pages .................................................................................. 35
Page numbers ................................................................................ 35
Page margin (mm) .......................................................................... 35
Paper size ...................................................................................... 35
All / Current Page / Pages ................................................................ 35
Copies ........................................................................................... 35
Preview ......................................................................................... 35
Print.............................................................................................. 35
OK ................................................................................................ 35
Cancel ........................................................................................... 35
Page Reset..................................................................................... 36
Page Notes .................................................................................... 36
Design Mode .................................................................................. 37
Menu............................................................................................. 38
The Settings dialog ......................................................................... 38
ACTIVote Settings ........................................................................... 38
Clock Settings ................................................................................ 40
Flipchart Settings ............................................................................ 40
v
ACTIVprimary2 User Guide
Flipchart Objects Settings................................................................. 41
General Settings ............................................................................. 43
Linked File Hosting Settings.............................................................. 43
Profiles and Resources Settings......................................................... 44
Toolboxes Settings .......................................................................... 45
Tools Settings................................................................................. 46
User Input Settings ......................................................................... 47
View the contents of a library ........................................................... 47
Organizing the library folders............................................................ 47
Organizing the library contents ......................................................... 48
Local output ................................................................................... 49
FTP output ..................................................................................... 49
ACTIVprimary Forum ....................................................................... 50
ACTIVote Tool ................................................................................ 51
ACTIVote Session............................................................................ 51
ACTIVote Question Settings.............................................................. 52
The ACTIVote Question Settings window ............................................ 52
ACTIVote Results ............................................................................ 52
The Sound Controller / Recorder button ..................................................... 53
Sound Controller ............................................................................. 53
Sound Recorder .............................................................................. 55
The ACTIVities Explorer button ................................................................. 55
The Clear Tool ........................................................................................ 57
Clear Screen .................................................................................. 57
Clear Objects ................................................................................. 57
Clear Annotations............................................................................ 57
The Special Tools button .......................................................................... 57
The Spotlight Tool ........................................................................... 58
The Reveal Tool .............................................................................. 59
The Dice Tool ................................................................................. 59
The Protractor Tool.......................................................................... 60
The Ruler Tool ................................................................................ 62
The Fraction Maker Tool ................................................................... 64
Handwriting Recognition .................................................................. 65
The Calculator Tool ......................................................................... 67
The Camera Tool............................................................................. 68
The XY Origin Tool .......................................................................... 70
The Clock Tool ................................................................................ 71
vi
ACTIVprimary2 User Guide
Counter window.............................................................................. 72
ACTIVote Tool ........................................................................................ 72
Desktop Mode ........................................................................................ 73
Minimize the Desktop Toolbox........................................................... 73
Exit Desktop Mode .......................................................................... 73
Annotate over the Desktop ............................................................... 73
Capture photographs of your Desktop ................................................ 74
Use the Revealer or Spotlight over your Desktop ................................. 75
Use the Handwriting Recognition function in other applications .............. 76
Design Mode.................................................................................... 77
Menu Button .................................................................................. 78
Switching between Design and Present Mode ...................................... 78
Object Properties .................................................................................... 78
About the Properties window ............................................................ 78
Identification Properties ................................................................... 78
Position Properties .......................................................................... 79
Appearance Properties ..................................................................... 80
Container Properties ........................................................................ 83
Nothing ......................................................................................... 83
Anything........................................................................................ 83
Actions .......................................................................................... 85
About ACTIVstudio version 1.x hyperlinks........................................... 86
Layers................................................................................................... 87
Top layer ....................................................................................... 87
Middle layer ................................................................................... 87
Bottom layer .................................................................................. 88
Changing the layer .......................................................................... 88
Object Stacking Order ..................................................................... 88
Can I prevent an object from being selected and moved? ..................... 89
Page Organization................................................................................... 89
Page Organizer ............................................................................... 90
Selecting a single page .................................................................... 90
Selecting multiple pages .................................................................. 90
Drag and Drop Objects Between Pages............................................... 92
Additional Functionality ..................................................................... 93
Where can I use Right Click? .................................................................... 93
In Present Mode: ............................................................................ 93
vii
ACTIVprimary2 User Guide
In Design Mode: ............................................................................. 93
Create a Link Object................................................................................ 94
Enter a path/filename or URL to link to............................................... 95
Command line parameters ............................................................... 95
Video Placeholder............................................................................ 95
Moving and Rotating a Link Object..................................................... 95
Editing a Link Object ....................................................................... 95
Deleting a Link Object ..................................................................... 95
Video Placeholder ................................................................................... 96
About Video Placeholder Objects ....................................................... 96
Using the Placeholder Definer ........................................................... 96
Playing the Video ............................................................................ 96
Playback Controls............................................................................ 96
Play .............................................................................................. 96
Pause ............................................................................................ 96
Stop.............................................................................................. 96
Seek ............................................................................................. 96
Close............................................................................................. 96
Moving a Video Placeholder Object .................................................... 97
Editing a Video Placeholder Object..................................................... 97
Deleting a Video Placeholder Object ................................................... 97
Object Edit Toolbox ................................................................................. 97
Documentation Feedback................................................................... 98
For Help Files: ........................................................................................ 98
For Printed/PDF Documents: .................................................................... 98
Index ............................................................................................. 99
viii
ACTIVprimary2 User Guide
Concept
ACTIVprimary has been specifically designed to enhance the teaching and
learning experience for early years and Primary education level. The
uncomplicated child-friendly interface allows access to ACTIVprimary's many
tools and features, encouraging greater involvement in lessons by stimulating
your students enthusiasm.
The ACTIVprimary Interface
ACTIVprimary is split into two main areas, the Teacher Interface and the Pupil
Interface. The Teacher Interface contains tools for teacher use only, so is
located towards the top of the board. The tools contained in the Pupil Interface
are intended for use by student and teacher alike, so it is located at the bottom
of the board.
A Tool Tray provides access to a set of Tool functions or resources. The items
displayed depend on what Tool is selected. Initially, the Tray is located across
the bottom of the board so that your students can reach it. However, to make
the Flipchart area more accessible, you can switch the location of the Tool Tray
to the top of the board.
The Flipchart is your main workspace area and consists of as many pages as
you wish to create. Here you can annotate, create objects using the
ACTIVprimary tools, retrieve content from the Resource Library and third party
applications, focus attention on parts of the screen, use a range of virtual tools
to enhance learning, link to other files, etc. The Flipchart can then be output to
a printer, or exported to HTML format.
Design and Present Mode
Design Mode is an editing mode that allows you to prepare your Flipchart. Here
you can manipulate and set properties on objects so that they appear or
behave in a certain way when you switch to Present Mode. Extra features are
available in Design Mode because you can access the right click menus. The
properties are applied in Present Mode so an object will behave as intended.
Desktop Annotation
From the Desktop Toolbox, you can use the ACTIVpen to draw or highlight in
different colors and pen widths over the live Desktop or an image of the
Desktop. When finished, you can save the annotations for future use by
capturing an image of the screen (or part of the screen) using the Camera
Tool.
The Recognition Engine converts your handwriting into text in external
applications, such as Microsoft Word.
Integration with Windows Applications
ACTIVprimary has simplified the process to create links to your external files
and programs. If you prefer, it will even host the file for you, so you don't even
need to step outside the program.
User Profiles
Makes use of Windows profiling. This allows you to save your personal layouts,
resources and settings so you can access them again the next time you log on
to the computer. ACTIVprimary makes it easy to share resources with your
colleagues by saving your resources to a shared library located on your
computer network.
1
ACTIVprimary2 User Guide
Resources
The Resource Library allows you to access files and objects to use with your
Flipcharts. Open the Shared Library, supplied on a CD, for a wealth of
resources which you can use, manipulate and save. This library is intended to
be shared with multiple users.
Your Personal Library allows you to save your own resources, or you can
browse folders on your computer for resources to use with your Flipcharts.
Customize ACTIVprimary
Customize the form and function of selected tools and features to change how
you interact with ACTIVprimary. For more information about customizing
ACTIVprimary to suit your personal working environment, see the section
about The Settings Dialog.
Support & Contact Information
Technical Support
Registered users of Promethean software can contact user support on:
Telephone: 678-762-1500
Email: [email protected]
Technical Support website:
www.prometheanworld.com/namerica/en/html/customer_care/contact.shtml
Contact Information
Promethean Technologies Group Limited
8601 Dunwoody Place
Suite 108
Atlanta
GA 30350
Telephone: 888-652-2848
Fax: 678-762-7700
Email: [email protected]
Website: www.prometheanworld.com
User Forum:
http://www.prometheanworld.com/common/html/vb_forum/index.php
2
ACTIVprimary2 User Guide
What's New in ACTIVprimary 2.0
Here is an overview of the new features and enhancements in this release of
ACTIVprimary, click on an icon to learn more about the feature:
New Features
ACTIVote software is integrated with ACTIVprimary for instant
feedback during teaching.
The integrated ACTIVslate Controller allows you to control your
board remotely, with use of an ACTIVslateXR (available
separately).
Now you can annotate over your Desktop in two modes; Overlay
Mode and Photo Mode.
Record speech to accompany your flipchart using the Sound
Recorder Tool.
The new Clock Tool allows you to display an analog or digital
clock, or use a counter for timing activities.
Lock objects on the background to prevent them from being
manipulated.
Click on the XY Origin Tool to add a new center of rotation point
anywhere on the page. When activated, this allows you to rotate,
mirror or flip objects according to the position of the new origin
point.
You can now choose between three different ruler types; cm,
inches or mm.
Use the Color Picker Tool to copy colors from your Flipchart
objects and add them to your custom color selector.
ACTIVprimary is now more network friendly by utilizing your
Windows user profile.
A new button in the Text Tray allows you to select fonts which
are installed on your computer.
Use the Link Object feature to create flipchart objects that link to
websites and program files.
3
ACTIVprimary2 User Guide
Enhancements
The Desktop Mode button has been moved to the Teacher
Interface section to make access your Desktop easier.
The Desktop Toolbox now contains more features for extra
usability in Desktop Mode.
Pickup boxes are now displayed in Present Mode, as well as
Design Mode.
Color in objects intelligently with the Fill Tool.
You can now format the text in your Page Notes by clicking
on a button to display the Text Tray.
Right click on the Protractor in Design Mode to show or hide
the degrees of rotation and choose to draw filled or unfilled
segments.
Right click on the Ruler in Design Mode to show or hide the
degrees of rotation.
A color selector, which represents the default page color
specified in the Flipchart Settings, is located on many of the
Tool Trays.
Choose to copy or move objects when you drag and drop
them between pages.
Improved Resource Library that allows you to save personal
resources or share resources with your colleagues.
Change the appearance and performance of ACTIVprimary
by altering the settings.
Amend words in your personal dictionary to aid handwriting
recognition.
4
ACTIVprimary2 User Guide
Presentation Mode
Interface
ACTIVprimary has been developed with the delivery of primary education in
mind. ACTIVprimary provides a user interface that the pupils will find friendly
and easy to use. The tool buttons have been designed to be easily recognizable
visually and, moreover, accessible.
The interface is split into two distinct sections, a pupil interactive area and a
teacher administrative area.
Flipchart
The Flipchart is your main workspace area, in
which you open, prepare and deliver your
presentation.
Teacher
Interface
The teacher administrative section has a selection
of Tool buttons that carry out functions you will
want to control. Also allows you to access a range
of menu functions.
Pupil
Interface
The Pupil interface section has a selection of Tool
buttons that gives you and your pupils a wide
range of functions to interact with.
Trashcan
Drag objects directly into the Trashcan to remove
them from your Flipchart page.
Tool
Tray
Provides easy access to a useful set of Tool
functions or resources to use with your Flipchart.
The items displayed depend on what Tool button
is selected in the Pupil or Teacher Interface.
5
ACTIVprimary2 User Guide
Pupil Interface
Displays the current Page Number. Also, you can click on the
Page Number Button to display the Page Tray.
Navigate through your Flipchart pages with the Previous
Page and Next Page Tools.
Click and drag objects around the screen with the Select Tool.
The Pens, Highlighters and Erasers button displays a
selection of drawing Tools with a range of sizes and colors
available.
The Lines button displays a set of pre-drawn lines from the
Resource Library.
The Shapes button displays a set of pre-drawn shapes from
the Resource Library.
The Text button allows you to place text objects on the
screen. These are fully editable and can be displayed in a
variety of fonts, colors and sizes.
The Fill/Color Picker button allows you to select colors and
fill objects with a range of colors.
The Grids button allows you to select from a range of grids in
the Resource Library. They can be set so that objects snap to
the grid.
The Backgrounds button allows you to select from a variety
of backgrounds, which will display full screen, in the Resource
Library.
The Resource Library button allows you to access to a huge
range of multimedia resources. These are categorized for easy
selection.
The Undo and Redo buttons.
The Page Number button
At its simplest this button will update to reflect the current page number. Click
on the Page Number button to update the Tool Tray with thumbnails of your
Flipchart pages. This is called the Page Selector.
Page Selector
Click on any one of the thumbnail images to view that page of the Flipchart. If
your current document contains more pages than can be displayed, the Next
and Previous Page
buttons appear. Use these to scroll through all
Page
available pages.
6
ACTIVprimary2 User Guide
When you are working in Design Mode, the Page
Organizer button will
appear in the Page Selector Tray. See the Page Organization section for
more information.
Previous Page and Next Page buttons
Use the Previous Page and Next Page Tools to navigate through the pages in
your Flipchart.
When you open a new Flipchart it contains only one page. To add a page to
your Flipchart click on the Next Page
the second page.
button and the Flipchart will display
The page number in the title bar will update to display the page number as you
create more pages or move through the Flipchart.
Page Turn Effects
Right click on the Page Forward and Page Backward Tools to access the Page
Turn Effect window, which allows you to choose how the page turns in your
presentation.
Effect
Choose one of the following options from the drop down menu.
Speed
Allows you to adjust the speed of the page turn effect. Select a low number to
make the effect happen quickly, or a high number for the effect to happen
more slowly. The speed is measured in seconds.
Graphics Engine
Choose one of the following options for the transition engine to render your
graphics:
Auto
Finds 3D hardware installed on your
computer.
DirectX
(3D
card)
ACTIVprimary uses DirectX, if installed.
Even if DirectX is installed on your
computer, it does not indicate that 3D
hardware is available. The transition
engine will switch to software mode if a
3D hardware card is not present.
Software
If you do not have a 3D card, or if you are
running Windows NT, select the Software
option. This mode is slower and shows
more visual artifacts than hardware.
Software mode can also be used for users
who may be experiencing problems with
DirectX or 3D Hardware.
The Select Tool button
Allows you to manipulate objects on screen. The Select Tool is enabled by
certain other Tools. For example, when you use the shapes Tool to add a
shape, the select Tool is automatically enabled so that you can move your
shape around the screen. The Tool Tray has no user definable options for the
Select Tool, so the ACTIVprimary logo is displayed whilst this Tool is enabled:
7
ACTIVprimary2 User Guide
Selecting Objects
Click on an object to select it. Or, to select multiple objects:
Click and drag the cursor
over the objects you want to
select. As you drag the
cursor, a dotted rectangle will
be drawn to indicate the
selected area. Release when
you have surrounded the
object(s).
It is not necessary to
completely surround an
object for it to be selected.
You can select non-adjacent
objects by selecting an object
and holding the ctrl key when
you click on the other objects
you want to add to your
selection.
The selected area will be
surrounded by pickup boxes.
8
ACTIVprimary2 User Guide
Pickup Boxes
Free mover
When you hover the ACTIVpen over the Free
Mover pickup box, the cursor changes to
indicate that you can move the object in any
direction.
Aspect
independent
sizers
The white pickup boxes are aspect
independent sizers. The corner pickups allow
you to resize the object in width and height,
whereas the edge pickups will allow sizing in
one direction only. You can also resize
multiple selected objects using the pickup
boxes to enlarge or decrease the collective
shapes.
Rotator box
When you hover the ACTIVpen over the
Rotator box, the cursor changes to indicate
that you can rotate the object. Click the
ACTIVpen onto the rotator pickup box and
move the ACTIVpen to rotate your object
around its center. The object rotates in real
time, so you can see the visual effect of the
rotate as it happens.
Also you will notice a numerical display
as you rotate the Pen Object indicating
the angle of rotation. You can use this as a
guide if you plan to independently rotate
numerous objects and you wish to rotate by
the same amount. The rotation is set to snap
to the nearest degree and increments in
whole degrees only.
When you release the pen your object will
stay at the rotated angle.
If multiple objects are selected, you may
also rotate them in real time as though they
were one object. Use the Rotator pickup in
that same way as for a single object.
9
ACTIVprimary2 User Guide
You can change the center of rotation for all
objects on the page by using the XY Origin
Tool.
Aspect sizer
Click on this pickup box and drag it to
enlarge or reduce the object whilst
maintaining its aspect ratio. By this we mean
that you will resize the object without any
distortion.
Double click within the pickup area to reveal the Object Edit Toolbox, which
contains useful Tools for manipulating the selected object.
Moving Objects
To move an object simply click on any part that belongs to the object and drag
to a new location. Whilst a group of objects is selected you can move them as
one object. Click and drag any of the objects within the pickup box area to
move the selection.
Copy and Paste
In Design Mode, right click on selected object(s) to reveal a popup menu that
allows you to use the copy function. Then, right click on a Flipchart page to
paste it, or paste text or images from the Clipboard.
See Where can I use Right Click? for more information about the right click
menus.
The Pen, Highlighter and Eraser Tool
When you select this Tool button, the Tray will update to reveal a set of
Highlighter, Pen and Eraser Tools.
Pen Tool
The second narrowest Pen Tool is selected by default. Use the Tray to select
the Tool you require and use the color selectors on the bottom edge to draw in
that color. The nib of the pen will be updated to reflect the color choice.
In addition to the preset color selectors you also have four user definable
. To define a color, right click on one of the four boxes and
selectors
choose a color from the popup Color Palette.
Now annotate on the board with the pen.
Highlighter Tool
Use the Highlighter Tool to draw over annotations, text, images and other
objects with a translucent pen. This allows you to emphasize text, or another
object, with a translucent color to draw attention to certain parts of your
presentation. Like the Pen Tool, you can select any color from the color palette
and the nib will be updated to reflect the chosen color. However, lighter colors
work best because it's easier to see through them.
10
ACTIVprimary2 User Guide
Eraser Tool
The Eraser Tool allows you to remove any mistakes that you may have made
when annotating with the Pen or Highlighter Tools. You can erase the whole or
part of an annotation object. The Eraser Tool does not actually physically
remove the annotation. Instead, it adds a transparent layer on top of the
annotation that allows the background to show through.
Note that the color selectors automatically disappear if one of the Eraser pens
is selected.
You can select the eraser object and move it like any other object. As you
move it over some annotations it will rub them out and others it will not,
depending on whether the annotation was added before or after using the
Eraser Tool. This is because annotations are placed in an order according to
when they were performed, so you will have to move the Eraser object
forward, for example bring it to the front of the order, if you want it to apply to
all the annotations. Read more information about this in the Layers topic.
Remove Annotations
button, if applying the pen/highlighter stroke was
•
Click on the Undo
the last action.
•
Click and drag the annotation across to the Trashcan, if displayed.
•
Double click on the annotation and select the Delete
the Object Edit Toolbox.
•
To remove all annotations on the page, select the Wipe Clean Menu
Tool and choose the Clear annotations
button from
button.
Move Annotations
To move your pen/highlighter annotations click on the Select Tool
button then click and drag the annotation to the new location.
Point to Point mode
When you click the Draw Point to Point
to indicate that it is selected.
button, it will change color to red
In point to point mode, the Pen and the
Highlighter will draw in straight lines. Click
at the start point and the Tool will draw a
continuous line from point to point each
time you click the pen or highlighter.
11
ACTIVprimary2 User Guide
To finish drawing in Point to Point mode:
1. Click once more on the point to point
Tool to exit this mode.
2. Select another Tool button in the
Toolbox.
3. Or, click on the Flipchart page close
to the very first point where you
started to draw the current line.
In the case of number 3, the lines will close
to form an enclosed shape but it will remain
as an annotation object. The enclosed shape
can be colored in with the Fill Tool, see the
section about the Fill Tool for more
information.
Automatic Annotation Grouping
Select this option in the Flipchart Object settings to automatically group
annotations together if they are within a certain proximity.
If your annotations are grouped incorrectly, ungroup them and select the
correct annotations for grouping together. To ungroup a set of annotations,
first ensure that you are in Design Mode. Then double click on the group,
button from the Object Edit Toolbox, and click on the
select the Properties
Grouped checkbox on the Identification tab to clear the checkmark. To group
the correct annotations together, select the annotations you want to be
grouped, then double click on an object in the group, select the Properties
button and select the Grouped checkbox on the Identification tab.
The Lines Tool
Click on the Lines button and the Tool Tray will update to reveal an assortment
of lines from the Lines folder of the Resource Library:
Refer to The Resource Library for more information about using the Resource
Tray.
button enables you to select from a library of Line types.
The Categories
Click on this button to display the Category Window and select lines from a
different folder.
If the Lines category displayed contains more thumbnails than can be displayed
and Previous Lines
buttons appear.
you will notice that the More Lines
Use these to scroll through all available lines in that category. Note these
buttons only appear as required.
Draw a line
To draw a line in the currently selected line width and color, click on the line
type you require. A line will be drawn on the page. You can alter the line width
by clicking on one of the four preset widths available in the lower Tray before
you click on the line type.
12
ACTIVprimary2 User Guide
You can also select a preset color from the lower Tray before you add the line.
In addition to the preset color selectors you also have four custom color
selectors
. To define a custom color, right click on one of the four
boxes and choose a color from the popup Color Palette.
button. For
To draw multiple copies of a line, click on the Rubber Stamp
more information about using the Rubber Stamp mode, refer to the section
about the Resource Library.
Delete a line
, if drawing the line was the last action you
•
Click the Undo button
carried out.
•
Click and drag the annotation across to the Trashcan, if displayed.
•
Double click the line and select the Delete button
Toolbox.
•
To remove all images, lines, shapes and text objects from the page,
select the Wipe Clean Menu
from the Object Edit
Tool and choose the Clear objects
button.
Manipulate the line
Tool was
You will notice that when you selected the Line Tool, the Select
automatically enabled. This allows you to manipulate your Lines straight away.
•
Quickly adjust the length and angle of the line, move the ACTIVpen so
that it is near one of the line ends. The cursor will change to the line
stretcher. Click on the line end and drag it until the line is the desired
length and angle.
•
Easily adjust the length of a horizontal or vertical line using the Pickup
Boxes at each end of the line.
•
To move a line, position your ACTIVpen over the line then click and drag
the line to a new location.
•
You can also rotate a line using the Rotator Pickup Box.
•
To see the edit options for a line object, double click on it to view the
Object Edit Toolbox.
The Shapes Tool
Click on the Shapes button and the Tool Tray will update to reveal an
assortment of shapes from the Shapes folder of the Resource Library:
Refer to The Resource Library for more information about using the Resource
Tray.
13
ACTIVprimary2 User Guide
The Categories
button enables you to select from a library of shape types.
Click on this button to display the Category Window and select shapes from a
different folder.
If the Shapes category displayed contains more thumbnails than can be
and Previous Shapes
displayed you will notice that the More Shapes
buttons appear. Use these to scroll through all available shapes in that
category. Note these buttons only appear as required.
Draw a shape
To draw a shape in the currently selected color, click on the shape type you
require. The shape will be drawn on the page. You can alter the color by
clicking on one of the color selectors available in the lower Tray before you
click on the shape type. To define a custom color, double click on one of the
and choose a color from the Color popup
custom color selectors
dialog.
button, it
Your shape can also have a different outline color. Click the Outline
will turn red to indicate that it is enabled. The Shape Tray will display three
width settings for your outline; narrow, medium and thick:
Whilst the Outline button is selected, the color selected on the Tray determines
the color of the outline, not the shape. To switch the outline off, click on the
Outline button once more.
button. For
To draw multiple copies of a shape, click on the Rubber Stamp
more information about using the Rubber Stamp mode, refer to the section
about the Resource Library.
Delete a shape
, if drawing the shape was the last action
•
Click the Undo button
you carried out.
•
Click and drag the annotation across to the Trashcan, if displayed.
•
Double click the shape and select the Delete button
Edit Toolbox.
•
To remove all images, lines, shapes and text objects from the page,
select the Wipe Clean Menu
from the Object
Tool and choose the Clear objects
button.
Manipulate the shape
Tool was
You will notice that when you selected the Shape Tool, the Select
automatically enabled. This allows you to manipulate your shapes straight
away.
•
Adjust the size of the shape using the Pickup Boxes.
14
ACTIVprimary2 User Guide
•
To move a shape, position your ACTIVpen over the shape then click and
drag it to a new location.
•
To rotate a shape, position your ACTIVpen over the Rotator Pickup Box
then click and drag the shape around.
•
To see the edit options for a shape object, double click on it to view the
Object Edit Toolbox.
The Text Tool
Click on the button and the lower Tool Tray will update to reveal the text
options.
To add text, click on the screen at the location you wish to type and you will
see a flashing cursor. If you have use of a physical keyboard you may now
type your text. Alternatively you may use the floating keyboard on the ACTIV
board.
Floating Keyboard
button located on the far right of
To access the Keyboard click the Keyboard
the lower Tray. The floating keyboard will be displayed.
Child version
A small Child version,
which is a simplified
keyboard that contains the
alphabet, numbers and
standard punctuation
characters, is displayed by
default.
You can display a larger
version if you right click on
the keyboard and select
Child Large from the
popup menu.
Adult version
Right click on the keyboard
and choose Adult Small or
Adult Large from the
popup menu.
A standard qwerty version
of the keyboard is
displayed.
15
ACTIVprimary2 User Guide
Operating System
version
To use the Operating
System keyboard, go to
Teacher Tools Menu
button > Menu >
Settings... > User Input
and select the Use
keyboard supplied with
Operating System
checkbox. The virtual
keyboard supplied with
your Operating System is
displayed.
For more information about
this version, refer to the
separate help file supplied
with the keyboard.
About the adult keyboard
The function keys can be toggled on or off using the F key located at the top of
the keyboard. You can toggle the numeric keypad on or off by clicking the
Expand
button.
You can toggle through different character sets by clicking the S key located at
the top of the keyboard. Use the shift and caps lock keys as you would on a
conventional keyboard.
Text Tray
Font Options
button shows the style of the currently
The Current Font
selected font.
To change the font style for a new text object, click on the Current Font
button and select a font from the popup list. Six recently used fonts will be
displayed in the list, the most recently used being at the top of the list. Click on
the font style to select it. Each time you choose one from the list, it will be
placed at the top and all other styles will move down one place. The Current
Font button will be updated to show the style of the font chosen.
If the Current Font list does not contain the style you want to use, click on the
button and choose a font style from the Windows Font
Select new font...
Selector. The new style will be placed at the top of the Current Font list and the
style at the bottom of the list will be lost.
16
ACTIVprimary2 User Guide
For existing text objects, double click on the text object and select the Edit
Text
button. Highlight the text then select the Current Font button, or
click on the Select new font... button to choose a font from the Windows Font
Selector.
Text objects will retain their font properties, even if the font is
not available in the Current Font list.
Other options that can be changed are outlined below:
Toggle Bold on or off with this button
Toggle Italics on or off with this button
Toggle Underline on or off with this button
Select Left, Right, Centered or Justified with these
buttons
Click on the down arrow and select a preset font size.
Increase or Decrease font size with these buttons
Toggle the Floating Keyboard on or off with this button
Select font color with these buttons
Custom font colors
Once added, the text object is fully editable and you can move it around the
page by enabling the Select Tool
.
Editing Text Objects
If you wish to edit the text, double click on the text and from the Edit Toolbox
you can perform the following actions:
Increases the size of the text object.
Decreases the size of the text object.
Deletes the selected text.
Duplicates the selected text.
Allows you to edit the text object.
Manipulating Text
All text that you enter is enclosed in a Text Area. You may want to manipulate
this area to determine text flow, take the following example:
The text area is too narrow to take the
whole line of text. By clicking and dragging
the Text Area control
it is possible to
widen the Text Area to fit the text onto one
line.
17
ACTIVprimary2 User Guide
This image shows the effect of dragging the
Text Area control to increase the width so
that the text can fit.
Text will automatically flow and extend the depth of the Text Area to the
minimum that it needs to fit in; you have full control over the width of a Text
Object.
Using the various options it is possible to format your text in a variety of ways,
the following example shows some of the formatting that you can achieve with
this Tool:
Deconstruct text
The deconstruct feature is a convenient way of duplicating text, or parts of text
to create a new text object. Deconstruct text in the following ways:
During text edit
Highlight the portion of text you want to duplicate and drag it away
from the original text object. A new text object is created which
contains only the text that you highlighted.
Text objects
Select and right click on the text object you want to duplicate,
select Deconstruct word from the popup menu. A new text object
is created which is a duplicated copy of the original text object.
The Fill/Color Picker Tool
Click on the button and the lower Tool Tray will update and display a range of
colors.
The red outline around a color selector indicates the currently selected preset
fill color.
In addition to the preset color selectors you also have four user
definable selectors. To define a color, double click on one of the
four boxes and choose a color from the Color popup dialog.
Use the Fill Tool to add color to your Flipchart pages. You can change the color
of annotations and text, or color in anything on screen including:
•
Freehand annotations
•
Text objects
•
Images or clipart
•
Shape outline and fill
•
Flipchart background color
18
ACTIVprimary2 User Guide
To use the Fill Tool, select a fill color and click on the part of the object you
want to color.
Annotation Objects
You can change the color of the annotation itself or fill in any area, which is
enclosed by annotations, to create a fill shape.
Change the color of annotations
To select a new color for your annotations, click on an annotation and it will
change to the new color. Click on as many annotations as you need to in order
to change the color.
Fill in areas which are enclosed by annotations
The area does not have to be enclosed by one continuous annotation, but the
annotations must form a complete shape. When filled, the area will be
converted to a shape object, which you can edit and manipulate as normal. If
you want the fill shape and annotation objects to stay together as one object,
you can group them together. The section about the Identification
properties explains how to group and ungroup objects.
Lines and Shapes
Click on a line or shape (fill or outline) to change the color of it to the selected
color.
Text Objects
Click on the text that you want to change the color of. The complete word will
change to the new color. If you want to change the color of the complete text
object and it contains multiple lines of text, you will need to click the Fill Tool
on every word. However, there is a more efficient way to change the color of
lots of words. Ensure you are in Design Mode, then double-click on the text
button from the Object Edit Toolbox. Use
object and select the Edit Text
the cursor to highlight all the words you want to change, then select a color
from the Text Tray.
Images or Clipart
When used with images or clipart, the Fill Tool acts like a color replacer, which
replaces all instances of a color on the image with a new color from the color
palette. Click on a color in the image that you want to replace with the selected
color. You may not get the result you expected since minor changes in color,
which are not visible to the eye, will not be filled. This means that you may
need to click on the image several times before all of the color is replaced.
There are many images ready to be colored in the Resource Library:
Page Backgrounds
The Fill Tool makes it easy for you to change the color of the page background.
Click on the Flipchart page background. The color of the background has now
been changed.
19
ACTIVprimary2 User Guide
The Grid Tool
Grids are useful for a wide range of activities, such as positioning objects
accurately, creating guidelines and adding scale to your demonstrations. The
grid can be scaled to make an exercise easier or harder.
Click on the Grids button and the Tool Tray will update to reveal an assortment
of grids from the Grids folder of the Resource Library:
button enables you to select from a library of grid types.
The Categories
Click on this button to display the Category Window and select grids from a
different folder.
Applying a Grid
To apply a grid in the currently selected color, click on the grid type you
require. You can alter the color by clicking on one of the color selectors
available in the lower Tray before you click on the grid type. To define a
custom color, double click on one of the custom color selectors
choose a color from the Color popup dialog.
and
When you select a grid, the screen will immediately show the grid selected. The
Grid will be in the background and any objects on screen will overlay the grid.
You may also notice a new set of buttons has appeared that govern how the
grid is used:
The Scale Up and Scale Down buttons allow you to set the
size of the Grid.
The Clear button allows you to remove the Grid.
Also, to remove all objects and grids from the
screen, click on the Wipe Clean Menu and
select Clear Screen from the popup menu.
The Mask allows you to hide the Grid from view and still snap
objects to grid points, if the snap to grid function is enabled.
The Snap To button activates the grid points and allows you
to line up objects by attaching them to specific grid points,
even when the grid is hidden.
The More Grids and Previous Grids buttons allow you to scroll
through all available Grids in the selected category. Note
these buttons only appear as required.
The Backgrounds Tool
By default each page of your Flipchart has a white background. ACTIVprimary
allows you to change this to another color or display an image from the
Backgrounds folder of the Resource Library.
Explore the backgrounds and images folders to find matching
resources. Add text and other objects to create activities that
enable powerful learning opportunities.
20
ACTIVprimary2 User Guide
Background images
Click on the Backgrounds button and the Tool Tray will update to reveal an
assortment of background images from the Backgrounds folder of the Resource
Library:
button enables you to select from a library of background
The Categories
types. Click on this button to display the Category Window and select
backgrounds from a different folder.
If the Backgrounds category displayed contains more thumbnails than can be
and Previous
displayed you will notice that the More Backgrounds
Backgrounds
buttons appear. Use these to scroll through all available
backgrounds in that category. Note these buttons only appear as required.
Apply a background
To apply a background, click on the thumbnail of the background you require.
To change a background, click on another thumbnail and the current
background will be replaced with the new one.
Delete a background
When a Background is applied, the Tray displays an additional button, which is
called the Clear
button. Click on this button to remove the background.
Also, to remove all objects and backgrounds from the screen, click on the
Wipe Clean Menu and select Clear Screen from the popup menu.
Choose Color
The quickest way to change the color of your Flipchart background is to use the
Fill/Color Picker Tool. Click on a color to select it and move the ACTIVpen over
changes, click on the page to
to your Flipchart page. When the cursor
apply the new color. See the section about the Fill/Color Picker Tool for
more information.
Upon choosing a color, you will find that the background color of the current
Flipchart page is changed to your chosen color.
Default page background color
An additional color selector is available on the following Trays:
•
Pens, Highlighters and Erasers
•
Lines
•
Shapes
•
Text
•
Fill/Color Picker
•
Grid
This color represents the default page color specified in the Flipchart
Settings. You can select this color to use with your Tools, like the other color
selectors. If you have changed the color of the page background and you
change it back to the default color, these objects will be hidden against the
background of your page.
21
ACTIVprimary2 User Guide
Merge an object into the Background
Lock an object on the background layer so that it forms part of the
background. Ensure you are in Design Mode, then right click on the object and
select Lock on Background. Once locked, you will not be able to select, edit
or view the properties for the object. The object will sit on top of the
background color or background image which has been applied to the page.
Locked background objects are independent to the page
background. If you cut, copy, clear a background, or add it to
the Resource Library, the locked objects will not appear.
To unlock the objects, right click on the page and select Unlock Background
Objects from the popup menu. All locked objects will be moved from the
background layer to the back layer, where they can be selected and edited
again
While locked, you can change the color of the object, or part of it, using the
Fill Tool. You can also pick a color from your object using the Color Picker
Tool.
The Resource Library
Click on the Resource Library button and the Tool Tray will update to display
thumbnail images of your Shared Collections folder. Until you select a folder,
no resources will be displayed in the Tray.
Resource Category Window
The Categories
button displays the Resource Library Category Window:
Opens the Shared Resource Library, where you can share
resources with multiple users. These files are typically located
on a computer network.
When you open the Resource Library for the first time, your
shared library will automatically open. This enables you to
start using the resources which were supplied with
ACTIVprimary and installed into the shared resource library.
Place your shared Resources in an agreed place
on the network to make the resources publicly
available. Refer to the section about setting up
your resource location for more information.
22
ACTIVprimary2 User Guide
Opens your Personal Resource Library, where you can keep
your own resources. These files are typically located on your
computer.
When you select the Other Location button, an extra button
will appear. Click on this button to open another window
where you can navigate and browse for resources located in
folders on your computer. Select a folder then click OK to
view the resources in that folder, or Cancel to abort the
selection and close the window.
Available in Design Mode only, this option allows you to
create a new folder for your resources. See the topic about
Adding Resource Categories for more information.
List of resource categories.
Click on a folder to update the thumbnails in the Tray with resources from that
folder.
The resources contained in each folder can be of any object type; images,
sounds, backgrounds, grids, lines, shapes, annotations or text objects.
If the Resource Library Tray contains more thumbnails than can be displayed
you will notice that the More Resources and Previous Resources
buttons
appear. Use these to scroll through all available Resources in the selected
category. These buttons only appear as required.
When you browse through the Resource Library, you may notice an icon
located at the bottom right hand corner of some thumbnails. This icon
identifies what type of resource it is and exists for the following objects:
Annotations
Lines
Shapes
Text
Grids
Backgrounds
Flipchart pages
Flipcharts
23
ACTIVprimary2 User Guide
Add resources to the page
When the Resource Library
button is selected, the Select Tool
is
automatically enabled so that you can select and add resources to your
Flipchart page. Click on a resource thumbnail to add the object to the page. To
move an object, position your ACTIVpen over the image until you see the
cursor displays with mover arrows
location.
, then click and drag the object to a new
To see the edit options for an object, double click on it to view the Object Edit
Toolbox.
Rubber Stamp Mode
Rubber Stamp mode can be used with; annotation, image, line, shape and text
button to paste multiple copies of an
objects. Select the Rubber Stamp
object onto a page. The button will turn red to show that it is selected. Click on
a thumbnail then position and click the ACTIVpen around the page to paste
multiple copies of the object. To stop adding objects, click on the Rubber
Stamp button to disable it.
You can manipulate and edit the objects as normal once they are pasted onto
the page.
Sound Files
Many sound file formats are supported by ACTIVprimary, see the section about
the Sound Controller/Recorder for more information. It is possible to control
up to 2 different sound files simultaneously. To insert a sound file simply locate
the sound file you require in the Resource Library, which are easily identified
by the sound icon
.
Click on the thumbnail of the sound icon and it will be inserted on the screen,
where you can click and drag it to a new location. Click on the sound icon to
activate the sound. Ensure that your computer is set up to play sound files and
that you have the volume set to a suitable level.
Adding Resources to the Resource Library
In Design Mode, save your backgrounds, flipcharts, grids and objects to the
Resource Library, or to a folder on your computer to store them for future use.
This topic describes saving resources to the Resource Library. When you save
resources into the Resource Library they will always maintain the original
property for that type of object.
To the Collections Folder
The Collections folder allows you to build a theme folder with all resources in
one location that you may need for an activity.
Flipchart Objects
You can save single objects or you can combine multiple object types and save
this into the Resource Library as a single entry. Add objects to your Resource
Library by dragging them from the Flipchart page into the appropriate Resource
Tray. For example, you may have taken a brown hat image out of the Library,
used the Fill tool to change it into a red hat, and now you want to save it to a
different folder. When you drag an object to the Resource library it saves all
properties of that object, including which layer it is on.
24
ACTIVprimary2 User Guide
You can save any type of object(s) to the Collections folder. Click on the
Resource Library button and select the Categories button to display the folders
in the currently selected library.
Select the Shared or Personal Library button to open the Collections folder in
that Library. Click on the folder name in which you want to save your resource.
The Resource Tray will display a thumbnail image for each resource located in
that folder. Click on the Close button to close the Category Window.
Ensure you are in Design Mode, then click and drag the Resource from the
Flipchart page to the Resource Tray. When the cursor changes to the add
cursor, release the click. The screen will update with a dialog
resource
box asking you to name your new resource:
Click on a button to select the input type:
Pen input
Click on the Pen input button, which will turn
to indicate that it is enabled. Using
red
your ACTIVpen write the new resource name in
the yellow text box, then click on the
Recognize button. ACTIVprimary will now
recognize your handwriting and will enter the
recognized text in the lower textbox.
Sometimes the recognition engine will get it
wrong. You can have as many attempts as you
wish.
Use cursive writing, not separate
letters to improve the result.
To attempt the process again, click on the
button. The entry will be wiped clear
Redo
and you can try again. Or, if the recognition
was almost correct, you can click into the
recognized text and manually edit it.
Keyboard
input
Enter the resource name using a physical
keyboard. This is selected by default, so this
button will be displayed in red to show that this
input method is selected.
Floating
Keyboard
Invoke the Floating Keyboard to input the
resource name using the virtual keyboard
supplied with ACTIVprimary.
Once you are happy with the new resource name, click on the OK
25
button.
ACTIVprimary2 User Guide
Backgrounds and Grids
Add backgrounds and grids to a Collections folder so that you have all the
resources for a specific topic or activity in one place. Click on the Resource
Library button and select the Categories button to display the folders in the
currently selected library.
Select the Shared or Personal Library button to open the Collections folder in
that Library. Click on the folder name in which you want to save your resource.
The Resource Tray will display a thumbnail image for each resource located in
that folder. Click on the Close button to close the Category Window.
When the background or grid is displayed, ensure you are in Design Mode then
right click on the page and select Add Background to Library... or Add Grid
to Library.... Enter a name for the resource as described above.
To the Lines and Shapes Folders
These folders allow you to save line and shape types of resources to their
specific folder. The lines and shapes can be added to their resource folders with
a text object, but not with any other type of object.
Click on the Lines or Shapes Tool button and the Tool Tray will update to reveal
an assortment of resources from the Lines or Shapes folder of the Resource
Library. Click on the Categories button and select the folder in which you want
to save you line or shape. Click on the Close button to close the Category
Window.
Ensure you are in Design Mode, then click and drag the Resource from the
Flipchart page to the Resource Tray. When the cursor changes to the add
cursor, release the click. Enter a name for the resource as
resource
described above.
Certain properties are not preserved such as; line color, line
width, shape fill color and shape outline color. This is because
these are user selectable features of an object.
If the Locked property has been applied to a line or shape
object, it will be removed before adding it to the Resource
Library.
To the Backgrounds and Grid Folders
or Grids
Tool button and the Tool Tray will
Click on the Backgrounds
update to reveal an assortment of resources from the Lines or Shapes folder of
the Resource Library. Click on the Categories button and select the folder in
which you want to save you line or shape. Click on the Close button to close
the Category Window.
Apply a background or grid to your page and manipulate it so that it is
displayed correctly.
Ensure you are in Design Mode, then right click on the page and select Add
Background to Library... or Add Grid to Library.... Enter a name for the
resource as described above.
When saving a grid into the Grid folder, its current color will
not be preserved, since this is a user definable property.
However Grids added to the Resource library will retain all set
properties.
26
ACTIVprimary2 User Guide
To quickly create a background, drag an image into the
backgrounds Tray and enter a name. The image will tile
depending upon its size, but you can alter how the
backgrounds fits to the page in the Appearance properties.
Adding Resources to Another Location
ACTIVprimary allows you to save resources to other locations on your PC. Click
button and select the Categories
on the Resource Library
display the folders in the currently selected library.
Select the Other Location
button to
button, then click on the Browse to Another
button and navigate to a folder located on your computer or on a
Location
computer network. Click on the Close button to close the Category Window.
Enter a name for the resource as described in Adding Resources to the
Resource Library.
Creating Resource Folders or Categories
It is a good idea to categories your resources to make it easier for you, your
pupils and other members of staff to find suitable resources for a particular
topic. ACTIVprimary allows you to create multiple tiered folder structures
within the Resource Library in order to manage your resources. When you first
open the Resource Library and view your Shared Collection, you will see that
the resources are categorized and presented in a meaningful hierarchical folder
structure.
In order for you to maintain this, we provide you with the means of adding
your own resource categories to the structure. You can add new folders and
sub-folders in the Backgrounds, Grids, Lines and Shapes categories.
Adding a new Category
In Design Mode, open the Category window and select the folder in which you
button and enter a
want to add the new folder, click on the New Folder
button. Your folder will be displayed in
name for the folder. Click on the OK
the Category window and you can now drag your resources into the folder.
. The Tray will update to show
Click on the Resource Library button
button to open the
the current resource category. Click on the Categories
Resource Library Categories window:
27
ACTIVprimary2 User Guide
To add a new folder you must first look at the current folder structure. Notice
that there is a hierarchical tree menu.
The topmost folder is called the root folder. This folder contains many subfolders, or categories, of resources. If you want to add a new folder you need
to determine its position in the structure first.
New Category
To add a new category, click on the root folder to select it. The folder will be
highlighted in blue.
button. The screen will update with a dialog box
Click on the New Folder
asking you to name your new category:
Click on a button to select the input type:
Write the folder name in the yellow text box
using the ACTIVpen. ACTIVprimary will use the
handwriting recognition function to convert the
handwriting into text.
Click on the Pen input button, which will turn
to indicate that it is enabled. The dialog
red
will also update as below:
Pen input
Using your ACTIVpen write the new category
name into the large yellow text box, then click
on the Recognize button. ACTIVprimary will
now recognize your handwriting and will enter
the recognized text in the lower textbox.
28
ACTIVprimary2 User Guide
Sometimes the recognition engine will get it
wrong. You can have as many attempts as you
wish.
Use cursive writing, not separate
letters to improve the result.
To attempt the process again, click on the
button. The entry will be wiped clear
Redo
and you can try again. Or, if the recognition
was almost correct, you can click into the
recognized text and manually edit it.
Keyboard
input
Enter the folder name using a physical
keyboard. This is selected by default, so this
button will be displayed in red to show that
this input method is selected.
Floating
Keyboard
Invoke the Floating Keyboard to input the
folder name using the virtual keyboard
supplied with ACTIVprimary.
Once you are happy with the new category name, click on the OK
button to
create the new category. The dialog will disappear and the Resource Library
Categories window, containing your new category, will be displayed.
The new category will be selected since it is assumed you will want to use this
new category straight away. Because this category is brand new there will not
be any resources in the lower Tray and it will appear blank. This new category
is now ready for you to add resources.
Adding Sub-Categories
To add a sub category, highlight the main category name and click the New
button. Enter a name for your new sub-category, as before, and
Folder
click on the OK button. Your new sub-category will be listed alphabetically.
Repeat this for each set of categories and sub-categories you require.
There is no limit to the number of categories or levels of subcategories you can create.
Use the ACTIVresource Manager to organize your resources
more effectively.
Deleting Resources
You can delete resources that are located in the Resource Library, or in any
location on your PC network (assuming you have the relevant access rights).
To delete a resource, right click over the thumbnail image of the resource you
wish to delete. A popup will appear. Click on Delete object from tray to
remove the item.
You will be prompted to confirm your action.
Click the Yes
button to permanently remove the object.
Click the No
button to cancel the deletion of the object.
29
ACTIVprimary2 User Guide
This action is permanent and cannot be reversed by the Undo
.
Tool
The Undo and Redo buttons
The Undo
function has an unlimited capacity; it will undo all actions that
have occurred right back to the start of the current session.
The Tooltip tells you what the undo action is when you hover the cursor over
the Undo Tool. Undo is available for as long as there are actions to reverse on
the active Flipchart page. Each click on the Undo Tool reverses one more
action. If you want to reverse many actions, click on the Undo Tool as many
times as necessary to remove the changes and go back to a certain point on
the Flipchart page.
The Undo Tool is only limited by the number of actions performed on a
Flipchart. When there are no further actions to reverse, the Undo function is
unavailable and the Tooltip will display as empty.
function will also redo all actions right back up to the most recent
The Redo
action. It follows the same rules as the Undo Tool in that it is only limited by
the number of actions that need to be reapplied. Each click on the Redo Tool
reapplies one more action. If you want to reapply many actions, click on the
Redo Tool as many times as necessary to perform the actions.
If you edit the Flipchart after using the undo Tool you will lose
the redo history beyond that point.
Teacher Interface
The Exit button allows you to quickly exit the application.
Clicking on the Teacher Tools Menu button will display a flyout Tool
strip. This Tool strip contains a range of administrative functions. The
Teacher Tools Menu button also indicates which mode you are working
in; Design or Present Mode.
The Sound Controller/Recorder button allows you to select one of
the following options:
Sound
Controller
For the playback of up to 2 simultaneous sound
files.
Sound
Recorder
For recording voice and other sounds.
The ACTIVities Explorer button allows you to locate a range of
supplied interactive activities.
The Clear Tool displays a choice of clearing the screen; you can clear
the whole screen or just remove the annotations.
The Special Tools button will display a new Toolstrip along the base
of the screen containing a variety of Tools.
The ACTIVote button starts a new voting session.
30
ACTIVprimary2 User Guide
The Desktop Mode button minimizes ACTIVprimary to a small
Toolbox allowing you to access your Windows Desktop.
The Exit button
Click on the Exit button to close the ACTIVprimary program. If you have not
saved your changes to a Flipchart you will be prompted to do so.
button to save your current Flipchart and exit.
Click the Yes
Click the No
button to exit immediately without saving your Flipchart.
Click the Cancel
button to continue working with ACTIVprimary application.
Recovery
If ACTIVprimary shuts down unexpectedly, it will attempt to recover the
Flipchart you were working on the next time you start the application.
ACTIVprimary will normally preserve all actions carried out up to the event that
caused the application to exit.
button to open the recovered Flipchart. Or,
When prompted, click on the Yes
button to open ACTIVprimary with a new Flipchart.
click on the No
To save the recovered document click on the Save Flipchart button located in
the teachers Tools menu. To abandon the recovered Flipchart click on the New
Flipchart button located in the teachers Tools menu.
The Teacher Tools Menu
This button allows you to access a range of administrative functions:
Click on the New Flipchart button to create a new Flipchart.
The Open a Flipchart button allows you to choose to open a Flipchart
from the Resource Library or from a another location on your computer.
The Save a Flipchart button allows you to save your current Flipchart
to the Resource Library or another location on your computer.
Click on the Print button to open the printer dialog and display the
printing options.
Click on the Page Reset button to reset the current page of your
Flipchart to its saved state. This function only works on previously saved
Flipcharts.
Click to display the Page Notes for the current Flipchart page. This can
be used to store information gathered during a presentation or to store
prompts for each page of a Flipchart.
Click on the Design Mode button to switch between Design and Present
Mode. Design Mode allows you to set properties on objects so that their
behavior is controlled when you switch to Present Mode.
Click on the Menu button to access a menu of further options, such as
ACTIVprimary Settings or to access the Promethean website.
New Flipchart
Clicking on the New Flipchart button will create a new Flipchart. You will be
prompted to save your current Flipchart if you have made any changes to it.
31
ACTIVprimary2 User Guide
Click the Yes
Flipchart.
button to save your current Flipchart, and create a new
button to abandon your current Flipchart without saving the
Click the No
changes, and create a new Flipchart.
Click the Cancel
button to continue working with your current Flipchart.
Open Flipchart
This button allows you to access the Flipcharts located in your Personal or
Shared Resource Library and in other folders on your computer. Click on the
button and choose from the menu:
Open from My
Flipcharts...
Takes you to the Flipcharts folder in your
Personal Resource Library. Select the
Flipchart file you want to open, then click
Open to open the selected Flipchart file.
Or, click Cancel to abandon the open
function.
Open from Shared
Flipcharts...
Takes you to the Flipcharts folder in your
shared Resource Library. Select the
Flipchart file you want to open, then select
Open or Cancel.
Open from another
location...
(defaults to My
Flipcharts folder)
Allows you to locate and open Flipcharts
from a different location. Navigate to the
correct location and select the file, then
select Open or Cancel.
You may open a Flipchart to find that it doesn't display as you
would expect. Check the fit and scale of the Flipchart because it
may have been authored in a different screen size. See Page
Scale and Position Properties for more information.
Opening version 1.x Flipcharts
If you attempt to open an older version 1.x Flipchart, you will see a series of
dialogs informing you that the Flipchart is being updated to ACTIVprimary2
format before it is displayed.
Save Flipchart
When you exit the program, ACTIVprimary will detect if there are any changes
since you opened or last saved the Flipchart. If you haven't already done so,
you will be asked if you want to save your changes before exiting the program.
If in doubt you should always save your work.
Saving a Flipchart for the first time
When saving your Flipchart for the first time you will need to specify the
location where you want to save it. Click on the button and choose from the
menu:
32
ACTIVprimary2 User Guide
Save to My Flipcharts...
Saves the Flipchart to your Personal
Flipcharts folder.
Save to Shared
Flipcharts...
Saves the Flipchart to your Shared
Flipcharts folder.
Save to another
location...
(defaults to My
Flipcharts folder)
Browse your computer for a location to
save your Flipchart.
Enter a filename then click on Save to save the Flipchart to that location, or
Cancel to abandon the Save function.
Save changes to an existing Flipchart
If you want to save using an existing filename, ACTIVprimary will ask you if
you want to replace the file. Select Yes to overwrite the file, or No to enter a
different filename.
Print Flipchart
It is possible to print your Flipchart in a number of ways, you can print each
Flipchart page individually or choose from a variety of settings which allow
different layout options. Click on the Print button to display the Print Dialog.
33
ACTIVprimary2 User Guide
Printer
Name
Allows you to choose which printer to use. Your
default printer will be listed in the Name option, but
you can change this if you have multiple printers
attached to your computer. Click on the down arrow
to display the list of available printers. This list will be
unique to your system and will entirely depend upon
the printers you have attached.
Quality
You can alter the print quality by clicking the down
arrow next to the Quality setting.
For best and most economic results it is
recommended that you start off at the lowest setting
and print out a one page Flipchart to test the quality
from your printer. You may find that a low setting
produces acceptable results and saves expensive ink.
Try adjusting the quality gradually until you achieve
an acceptable output. You choice of printer greatly
affects the quality of printing.
Color or
Gray Scale
Allows you to print in color or force a black and white
print from a color printer. The option has no effect if
a color printer is not available.
Layout
Portrait /
Landscape
Allows you to select the orientation of the paper.
Column
count /
Row count
Allows you to select how many Flipchart pages to print
on each sheet of paper. Increasing the column number
will increase the number of Flipchart pages across the
sheet of paper. Increasing the row number will increase
the number of Flipchart pages down the paper.
Example
This example demonstrates a four-page Flipchart printed
with the settings adjusted as follows:
Landscape orientated paper
Pages fitted in two columns and two rows
Pages are framed.
34
ACTIVprimary2 User Guide
Frame
pages
Adds a frame border around your Flipchart page.
Page
numbers
Adds a page number in the bottom left corner of your
Flipchart page.
Page
margin
(mm)
Adds a blank space around the edge of the page.
Paper size
Click on the drop down arrow and select a paper size
from the list.
Range
All /
Current
Page /
Pages
Use these options to specify which Flipchart pages are
printed, you may choose to print all of your Flipchart,
the current page i.e. the one displayed in the
Flipchart or you may specify a range of pages for
example pages 2 to 6.
Copies
Allows you to send multiple copies of your page
selection to the printer.
Printing and Print Previewing
Preview
Allows you to review your Flipchart pages before
printing. The Print Preview window is displayed with a
preview copy of your Flipchart page.
More information about Print Preview
The preview displays the Print Preview Control dialog,
which you can use to navigate through all print pages:
Click on the arrow buttons to browse through the
preview pages. ACTIVprimary will detect how many
pages your flipchart contains so it won't allow you to
create a new page when you reach the end of your
pages, like the Next Page Tool does. The page number
of the current page being previewed is displayed in
between the two arrow buttons.
You cannot edit your flipchart whilst you are reviewing it
in Print Preview mode.
When you have finished reviewing your pages, click on
the Return button to go back to normal flipchart view.
Print
Prints the page(s) according to the options selected.
OK
Accepts the selected options and takes you back to your
Flipchart without printing.
Cancel
Rejects the selected options and goes back to the
default settings. Takes you back to your Flipchart
without printing.
35
ACTIVprimary2 User Guide
Page Reset
Reverts the current page of a previously saved Flipchart back to its saved
state.
This feature is extremely useful if you have a Flipchart containing a prepared
activity on the page. Your audience can play the activity, and then you can
reset the activity for someone else to have a go.
If you attempt this action on a Flipchart that has not been previously saved
and subsequently opened, you will receive a warning.
Page Notes
Clicking this button will open up the Page Notes
.
Each page can have its own copy of Page Notes. The type of information can
include:
•
Set of instructions for an activity
•
List of useful keywords or prompts
•
Presentation outline, summary, or lesson plan
•
Supporting notes for the Flipchart page with instructions on what to do
with the page. This is particularly useful if you share work with other
colleagues
•
Information gathered from audience feedback
Move and Resize the Page Notes Window
To change the size of the window, hover the cursor over the edge of the
window until it changes to the resize arrows. Click and drag the edge of the
window until it is the correct size. Perhaps you have a set of instructions that
you would like the class to work through; you could set the window size so that
you can scroll through one instruction at a time.
To move the window, click on the title bar and drag the window to a new
position on the screen. The next time you open Page Notes, the window will
appear in the same place you left it previously.
Edit Text
It is also possible to paste selected text from the Page Notes window onto the
Flipchart page. To do this simply highlight the text you wish to paste to the
Flipchart then click the Add to Page... button. This button appears
automatically when any text is selected.
36
ACTIVprimary2 User Guide
Click on the Menu button to display the Text Tray, which allows you to edit
any text you have entered into the Page Notes window.
Whilst you are editing text in the Page Notes window and if you are in Design
Mode, you can select the text and right click with the ACTIVpen to reveal a
popup menu. This menu allows you to perform common text editing functions
such as cut, copy, paste, delete, select all and undo. This can be used to copy
or paste text to and from the Clipboard, external application programs or text
objects.
Also, you can paste text from the Page Notes onto the Flipchart page.
Cut, Copy and Delete options will be unavailable if there is no
text selected.
Design Mode
Design Mode allows you to work with objects on your Flipchart page, so that
they appear or behave in a certain way when you switch to Present Mode. This
makes it easier to prepare your Flipchart because in Design Mode you have the
control to edit freely; you can set various object properties and right click on
the page to use useful editing functions. In Present Mode, these object
properties are applied, so an object will behave as intended. For example, if
you apply an action to a Flipchart object, you can interact with it when you
switch to Present Mode.
Menu Button
The appearance of the Teacher Tools Menu button indicates which mode is
currently selected:
Design Mode
Present Mode
When you open ACTIVprimary for the first time, Present Mode is selected.
Switching between Design and Present Mode
Switch to Design Mode to author your Flipchart, then go back to Present Mode
to view and interact with your Flipchart. You can switch between each mode at
any time by toggling the Design Mode option from the Teacher Tools Menu.
To select Design Mode; Click on Teacher Tools Menu button > Design
Mode. Notice that the Teacher Tools Menu button now displays the red border.
To select Present Mode once more you need to switch off Design Mode. Click on
Teacher Tools Menu button > Design Mode. The Teacher Tools Menu
button should now display a yellow border once more.
37
ACTIVprimary2 User Guide
Menu
Clicking on this button displays the menu system, which allows you to access
more ACTIVprimary features and information.
Page Scale
When you click on the Page Scale, a floating window appears that allows you to
scale the current page up or down from its original size. Choose one of the
following scaling options:
Best Fit
Automatically scale the Flipchart page so that the entire
page is visible.
Width Fit
(default)
Automatically scales the page so that it displays the
page according to the best fit using the width of the
current page. Scroll bars will appear if necessary.
Height
Fit
Automatically scales the page so that it displays the
page according to the best fit using the height of the
current page. Scroll bars will appear if necessary.
Original
Size
Automatically scales the page to its original size.
Other
Allows you to choose a percentage page scale from a
selection.
When you select a page scale it is immediately applied to your page. If you
scale down the Flipchart, the World Color (the colored area behind the
Flipchart page) will be visible. Click on the Close button to close the dialog.
It is possible for ACTIVprimary Flipcharts to support different
page sizes within a single Flipchart. However ACTIVprimary
does not allow you to create different page sizes, it only
supports these if imported from ACTIVstudio 1.x or 2.x.
At any page scale, when you drag an object completely out of
view, ACTIVprimary will automatically snap it back to the edge
of the view window. Note: The edge of the view window is not
necessarily the edge of the page.
The Settings dialog
The Settings allow you to change the form and function of selected Tools and
ACTIVprimary features. To display the settings, click on the Teacher Tools
Menu button > Menu > Settings.... Select one of the tab names in the left
hand pane to view the associated preferences.
A settings.ini file is automatically saved to the My Documents\ACTIVprimary2
directory, which contains all the information about your ACTIVprimary
preferences. If you work from different computers and your shared profile is
located on a computer network, save your ACTIVprimary settings to your
Shared ACTIVprimary2 directory so you can view ACTIVprimary in the same
format from wherever you open it.
ACTIVote Settings
The ACTIVote settings allow you to define options for setting up and voting
with the ACTIVote system.
38
ACTIVprimary2 User Guide
Display results
You may elect to have the graph automatically display after all responses are
received. If you choose not to display the graph, but then decide you would
like to see it, right click on the Flipchart page and select ACTIVote results to
view them.
Automatic page advance
Check this option if you wish ACTIVprimary to automatically turn the page after
receiving answers when using a Question Flipchart. This would be a useful
option if you require to give your audience a timed question paper - use this in
association with the timeout setting of each question.
ACTIVote User Database
Displays the location of the User Database used by the ACTIVote program.
Click on the Browse button to select another database.
Adhoc/demo mode
Question
timeout
You can set a default timeout that will be used when
you ask an ADHOC question and also when you are
using Demo Mode. To change the default timeout,
type in a new value.
Apply
timeout to
prepared
questions
Apply the question timeout for prepared questions.
Results to
new
Flipchart
page
Select this option if you would like to save the results
of the current question on a new Flipchart Page. Each
subsequent question, will create a new Flipchart Page
for the purposes of storing the question results. Clear
this option to paste the results in the current
Flipchart Page, in which case subsequent responses
will overwrite any existing results.
Answers
Take users
first
answer
only
If selected, your users will only be allowed to submit
one response and further responses will be ignored.
When all devices have voted, the timeout will stop
immediately and if set the graph will be displayed.
Allow
users to
alter their
answer
If selected, your users can answer, change their mind
and submit further answers during the timeout period.
They can continue to submit answers for the duration
of the timeout period. When the timeout period has
ended, further answers will be ignored and the results
will be displayed, if Display Results has been
selected.
39
ACTIVprimary2 User Guide
Display
names
This option will display user names during Named
Mode or device names during an anonymous or demo
mode. The names will be displayed beneath the
timeout bar and will light up when a response is
received from the user. The display allows you and
the group to see who has answered and who has not
by using color indicators:
Grey:
No response from user
Fill in
Yellow:
Valid Answer from user
Black:
Out of range answer from user (e.g. the
user pressed 3 to a question with 2
answers)
This option gives you the ability to allow your users
further chances to answer the question set. For
example if you have a large audience say 50 people it
is possible that not all users will answer in the allotted
timeout period.
Clock Settings
The Clock settings allow you to define options for displaying and using the
Clock Tool.
Analog
Clock
numbers
Select the Clock numbers checkbox to view numbers
around the Clock face. When the checkbox is cleared,
colored blocks will be displayed around the Clock face
instead.
Second
hand
Select the Second hand checkbox to display the seconds
hand. Clear the checkbox to display the hour and minute
hands only.
Digital
24 Hour
Select the 24 Hour checkbox to view a 24 hour Clock.
Clear the checkbox to view a 12 hour Clock.
Show
AM/PM
Select the Show AM/PM checkbox to view a 12 hour
Clock with AM or PM displayed. Clear the checkbox to
remove the AM/PM from display.
Seconds
Select the Seconds checkbox to display the seconds
counting. Clear the checkbox to view the hours and
minutes only.
Show
date
Select the Show date checkbox to display todays date
underneath the time. Clear the checkbox to view the
time only.
Flipchart Settings
The Flipchart settings allow you to change the default options for setting up,
displaying and working with Flipcharts.
40
ACTIVprimary2 User Guide
World color
World color is the background color of the Flipchart window, behind the
Flipchart page. The default color is grey. To change the world color, click on the
color button and select a color from the standard Windows color palette.
Default page color
The default color for new Flipchart pages is white. This setting allows you to set
an alternative default color for new Flipchart pages. To change the color, click
on the color button and select a color from the standard Windows color palette.
Remember that you can also use the Fill Tool to individually
color in the page.
Trashcan
Select the checkbox to display the Trashcan on your Flipchart. This allows you
to drag objects directly into the bin to remove them from your Flipchart page.
You can drag the Ruler and Protractor Tools to the Flipchart bin
to remove them from a page.
The Trashcan window will remember its position when you close ACTIVprimary,
so it will open in the same position the next time you open ACTIVprimary.
Clear the checkbox to hide the Trashcan.
Flipchart Objects Settings
The Flipchart Objects settings allow you to define the options for high quality
images and displaying objects and the Edit Toolbox.
High Quality
Images
The Images setting increases the visual quality of any
image when it is resized. This works particularly well
when the size of an image is reduced. Select the
checkbox to enable the Images setting.
Clear the checkbox to disable the setting
if your PC suffers from a significant slow
down when this setting is enabled.
Lines and
shapes
The Lines and Shapes setting increases the visual
quality of all line and shape edges, including freehand
annotations. Select the checkbox to enable the Lines
and Shapes setting. Clear the checkbox to disable the
setting.
High Quality OFF
41
High Quality ON
ACTIVprimary2 User Guide
This setting does not alter the quality of
annotations drawn when the Recognition
Tool is switched on.
You will not experience a decrease in PC
performance when this setting is enabled.
Image
Manipulation
The Image Manipulation setting will redraw an image in
high quality mode on the Flipchart page whilst the
image is being manipulated. This setting only applies to
manipulated images and not images that are displayed
in their original size.
Clear the checkbox to disable the setting
if your PC suffers from a significant slow
down when this setting is enabled.
Video
Increases the visual quality of video playback.
Clear the checkbox to disable the setting
if your PC suffers from a significant slow
down when this setting is enabled.
When annotating over video in Overlay
Mode, you may notice your annotations
have a flicker effect. This is a machine
specific issue and is related to the quality
of your graphics hardware.
It may be possible to prevent annotation
flickering by reducing the hardware
acceleration of your graphics hardware.
To do this, right click on your Desktop and
choose Properties.... In the Advanced
section, look for the Hardware
Acceleration setting, which may be in the
Performance or Troubleshooting sections.
Adjust the Hardware Acceleration slider
down from 'Full'. You will need to alter
this slider setting to the point where the
flickering is prevented.
42
ACTIVprimary2 User Guide
General Settings
The General settings allow you to determine how ACTIVprimary is displayed
and change options that define how ACTIVprimary uses various features.
Display Tooltips
Tooltips are small floating text boxes that appear when you hover the
ACTIVpen over designated areas. Select the checkbox to display Tooltips when
you hover the cursor over Tool buttons or resource thumbnails in the Resource
Library. This allows you to identify ACTIVprimary functions if you are not
familiar with it.
Did You Know?
When the checkbox is selected, you will be presented with the Did You Know
window each time you open ACTIVprimary. Clear the checkbox to stop the
window from displaying each time you open ACTIVprimary. This window
contains many tips for using ACTIVprimary. It is recommended that you leave
this setting enabled until you are familiar with the program. You can spend
some time looking at further facts by clicking on the Another button. Once you
have finished reading, click the OK button and ACTIVprimary will continue to
open.
Desktop Annotate
Overlay
Mode
This annotation mode is only available for users of
Windows 2000 and XP. When selected, ACTIVprimary
allows you to annotate over live applications and moving
images. In this mode you can interact with the Desktop.
For more information, refer to the section about
annotating in Overlay mode.
Photo
Mode
When selected, ACTIVprimary will allow you to annotate
over a static image of the Desktop. For more information,
refer to the section about annotating in Photo mode.
Linked File Hosting Settings
The Linked File Hosting settings allow you to define how links to external
documents are displayed when they are added to a Flipchart page, and change
the default URL for your Home and Search web pages.
Linked File Hosting
The Linked File Hosting setting allows you to select which media types are
supported by ACTIVprimary. You can choose from the following media types:
Images
Text
Sound
Video
Microsoft Word, PowerPoint, Excel
Shockwave Flash Movies
Select a checkbox to enable the hosting for that media type. Clear a checkbox
to disable the hosting for that media type.
43
ACTIVprimary2 User Guide
Select the Show Sound Controller checkbox to host sounds using the Sound
Controller. The sound controller can playback up to 2 sound files
simultaneously.
You can control and display web pages in a dedicated media window provided
by ACTIVprimary, just select the Use ACTIVweb browser checkbox. If you
prefer not to use the dedicated window, clear the checkbox. The web page will
then be hosted through your local web browser.
Web Links
Allows you to enter a URL for your default Home and Search webpages when
using the internal web Browser.
The default settings are:
Home URL - http://www.prometheanworld.com
Search URL - http://www.google.com
Profiles and Resources Settings
The Profiles and Resources settings allow you to determine the location of your
personal and shared ACTIVprimary files and settings.
Your files can be located on a specific computer or on a computer network.
Saving your files on a network is useful because it allows you to access your
Flipchart files, layouts, resources and settings from any computer within the
same network. Your profile contains information about your personal settings
and preferences, which is updated when you exit from an ACTIVprimary
session.
For each new user, ACTIVprimary will automatically create the folder structure
"\My Documents\ACTIVprimary2" as the default location for storing your
personal ACTIVprimary files, such as Flipcharts, resources and settings. Each
new user will also be pointed to a default location for shared resources.
However, you can override these default locations by choosing another
location. To change the default location, select Another Location for the
relevant path and click on the corresponding More button. Then browse to a
different location and select OK.
There are three paths to consider:
1. Profile stored in:
My
documents
Saves all your personal ACTIVprimary settings and
Toolbox layout to the folder "\My
Documents\ACTIVprimary2".
Another
location
Click on the browse button and navigate to a different
location, to override the default location.
2. My ACTIVprimary files in:
My
documents
Allows you to load and save all your personal
ACTIVprimary Flipcharts and Resources within the
folder: "\My Documents\ACTIVprimary2".
Another
location
Click on the browse button and navigate to a different
location, to override the default location.
44
ACTIVprimary2 User Guide
3. Shared ACTIVprimary files in:
All Users
Allows you to access the shared ACTIVprimary
Flipcharts and Resources. The shared Resources are
available for installation separately (on the supplied
ACTIVprimary CD). By default, the shared Resources
are installed into a local shared folder structure such
as "C:\Documents and Settings\All
Users\Documents\ACTIV Software\ACTIVprimary2".
Another
location
button and navigate to a
Click on the browse
different location, to override the default location for
the shared Resources.
When you change any of the default locations, you are simply
pointing ACTIVprimary to look for your files or resources at the
new location. Your files do not automatically move. Use
Windows Explorer to copy your files to the new location before
you change the location in ACTIVprimary. Refer to your
relevant Operating System documentation for information
about copying or moving files with Windows Explorer.
Toolboxes Settings
The Toolbox settings allow you to define the display and behavior parameters
for the Toolbox and Tray.
Main Toolbox and Trays
Toolbox
Position
Use this setting to specify the location of the vertical
Toolbox on startup. The Right radio button is selected
by default, so the Toolbox is on the right-hand side of
the screen. However, you can change this to the lefthand side of the screen by selecting the Left radio
button.
You can change the position of the Toolbox at any time
whilst using the ACTIVprimary application. To switch
the position of the Toolbox, right click (barrel button)
the ACTIVpen close to the outside left or right edge of
the screen. The Toolbox will switch instantly to that
edge. This position will be remembered in the
Toolboxes Settings.
If you are using a screen resolution larger than 800 x
600 pixels graphics mode, you can also reposition the
Toolbox vertically. Click and drag the Toolbox up or
down the screen; release when it is in the correct
position.
45
ACTIVprimary2 User Guide
Tray
Position
Use this setting to specify the location of the Tray on
startup. Select the Top or Bottom radio button to
ensure the Tray appears in that position.
You can change the position of the Tray at any time
whilst using ACTIVprimary. To switch the position of
the Tray, right click (barrel button) the ACTIVpen close
to the outside bottom or top edge of the screen. The
Tray will switch instantly to that edge. This position will
be remembered in the Toolboxes Settings.
Tray Effects
This option toggles the Tray effects on or off. When the checkbox is selected,
the Tray slides up and down when it changes to update for a particular Tool.
Clear the checkbox to de-select this option, so the Tray will simply appear
rather than slide into place.
Start Effects
This option toggles the start effects on or off. When the checkbox is selected,
on startup the Toolbox slides on the screen. On exit, the Toolbox slides out and
the Flipchart fades out. Clear the checkbox to de-select this option, so the
Flipchart and Toolbox will simply appear.
Object Edit Toolbox
Show
toolbox
with double
click
Select the checkbox if you want the Object Edit
Toolbox to display when you double click on an
object. Clear the checkbox to stop the Object Edit
Toolbox from displaying when you double click on an
object.
Toolbox
follows
selection
Select the checkbox if you want the Object Edit
Toolbox to appear close to where you select an
object.
Tools Settings
The Tool settings allow you to define options for the Toolbox Tools.
Dice Speed
The dice speed setting allows you to control the speed at which the dice are
rolled. Move the slider, making small adjustments to find a speed you prefer.
Protractor and Ruler
Tool color
To change the color of the Ruler and Protractor, click
on the color button and select a color from the
standard Windows color palette.
Tool text
color
To change the color of the Tool text, click on the
color button and select a color from the standard
Windows color palette.
Translucency
The Translucency setting allows you to adjust the
translucency of the Ruler or Protractor. You can fade
out the Ruler and Protractor so you can see through
them and they don't cover up the content on the
Flipchart. Move the slider between See through
and Solid.
46
ACTIVprimary2 User Guide
User Input Settings
Use keyboard supplied with Operating System
Instead of using the keyboard that has been supplied with your Operating
System, you may prefer to use the keyboard supplied with ACTIVprimary.
Select the checkbox if you would like to use the keyboard supplied with your
Operating System. Clear the checkbox to use the ACTIVprimary Floating
Keyboard.
Handwriting recognition language
Choose the language in which the Handwriting Recognition Tool will recognize
your annotations and convert them to text. Select one of the following options
from the drop down list:
•
English (UK)
•
English (US)
•
French
•
German
•
Spanish
•
Italian
•
Dutch
•
Portuguese
•
Portuguese (Brazil)
Manage Resources
Use the ACTIVresource Manager to organize your Resource Library folders and
resource content within the folders.
View the contents of a library
Select the relevant library icon in order to view the folders contained within
that library:
Open folders in Personal Resource Library
Open folders in Shared Resource Library
Click on a folder to view a thumbnail for each file contained within that folder.
The thumbnails will be displayed in alphabetical order.
Organizing the library folders
New
Right click on the folder that will be on the next level above your new folder.
Select New from the popup menu. Type a name into the textbox and click
somewhere else, or press Enter. The new folder will be created.
Rename
Right click on the folder you want to rename and select Rename from the
popup menu. Type the new name for the folder and click somewhere else or
press Enter. The folder will be renamed.
You can only rename subfolders which reside below the top-most folder.
47
ACTIVprimary2 User Guide
Organizing the library contents
Selecting
Whenever you click, or right click on a thumbnail, the thumbnail image and the
label will be highlighted in red. This is so you know exactly which thumbnail
you have selected.
To select multiple thumbnails:
Adjacent
Click the ACTIVpen to the left of a thumbnail, then drag
over the adjacent thumbnail.
Or
Select the first thumbnail in the selection then select the
Shift key on the keyboard before selecting the last
thumbnail. All thumbnails in between those you have
selected will also be selected.
Nonadjacent
Select the CTRL key on the keyboard whilst you click
the ACTIVpen on a selection of thumbnails.
Manipulating
Right click on any thumbnail to display a popup menu which allows you to cut,
copy, delete, rename or duplicate the thumbnail. Once you have cut or copied
a thumbnail, the next time you right click in the thumbnail area for any folder,
a paste option will appear. Click on this to paste the cut or copied thumbnail
into the currently open folder.
You can also click and drag a thumbnail from the thumbnail window over to a
folder name in order to move the file to a different folder.
Publish to Browser
Ensure you have saved your Flipchart, then click on Teacher Tools Menu >
Menu > Publish to browser....
Enter appropriate keywords that best describe your Flipchart.
Select the output location by choosing the radio button for Local or FTP output:
48
ACTIVprimary2 User Guide
Local
output
Exports your Flipchart pages to HTML format so that you can
distribute your Flipchart pages on the web and view them in
Internet Explorer.
Click on the browse button to choose the location for your file
and click OK. Click Next> to proceed with the export, or
Cancel to abort the export process.
The output location of the file will be displayed. Click on <Back
to change the location, Start> to proceed with the export, or
Cancel to abandon the export process.
The file will be created and you will be asked if you wish to view
button to view the file in Internet Explorer
it. Click on the Yes
button if you don't want to
immediately. Or, click on the No
view the file. A Flash based web page, which includes navigation
icons to view each page, will be displayed. You must have
installed Macromedia Shockwave Player on your PC to view
Flipcharts in this way. This software is included on your product
CD.
FTP
output
You may not be able to follow the FTP output
instructions because you will require access to an
FTP site.
You may require certain access rights in order to
use an FTP site. Contact the provider for more
information.
The browse button and output location will be grayed out
because they are not required. Select Next>. Enter the
relevant details that pertain to the ftp site you wish to connect
to, then click Connect.
Click on the Advanced button to enter the details that allow
you to access the firewall, if the site you are connecting to has
one.
A message should be displayed that says you are successfully
connected to the server, click Next>. If not, go back and check
the details you entered and try connecting again. You may need
to check the details with the site provider.
A new window appears that allows you to browse through the
folders on the FTP site. Navigate to the location that the file will
be exported to. You may need to add a new folder for your file if
a suitable folder does not already exist. Select Next>.
The Completing the Wizard window shows you where the file
will be exported to. Click on <Back to change the location,
Start> to proceed with the export, or Cancel to abandon the
export process.
A message will appear to tell you that the HTML file has been
successfully exported to the FTP site. You will have to use
Windows Explorer to go to the URL and view the FTP site if you
want to check the file or location. If the message does not
appear, you may have lost the connection to the FTP site. Try
exporting the file again.
49
ACTIVprimary2 User Guide
Promethean Website
This menu item will open your default web browser and connect to the
Promethean Website, www.prometheanworld.com. Visit the website often
for:
•
Notification of related products or software releases
•
Free upgrades or revisions to keep you informed of the latest features
•
Access to the User Forum
•
Helpful resources and education material for you to download
•
Links to useful websites
ACTIVprimary Forum
Why not also visit the ACTIVprimary User Forum to discuss the use of
ACTIVprimary in education with other users around the world. The Forum is
moderated by product experts who welcome any comments and ideas so that
we can improve future product developments.
We invite all new users to register and become members of our growing online
community. You are encouraged to join and visit the forum regularly for news
about updates to the ACTIV range of products, software and resources.
http://www.prometheanworld.com/common/html/vb_forum/index.php
About ACTIVprimary
The License details open in a separate window and allow you to check the
following information:
•
Version number of ACTIVprimary installed
•
User and company that ACTIVprimary is licensed to
•
Name of the current user
•
Details of the license agreement, which you can scroll through using the
scroll bar.
Click the OK
button to remove the License window from the screen.
ACTIVslate Controller
The ACTIVslate provides remote control of your PC cursor from anywhere in
the room. By simply moving the ACTIVpen over the ACTIVslate surface, you
can move the cursor around the Windows screen. Pressing the pen nib on the
ACTIVslate surface produces a left click on the PC. Clicking the button on the
pen barrel produces a right click. Pressing the pen nib on the ACTIVslate
surface twice in quick succession produces a double click (left button). Use the
ACTIVslate to annotate on your Flipcharts and perform tasks in ACTIVprimary
as though you were standing at the ACTIV board.
Communication to and from the ACTIVslate takes place via infrared or radio
signals, depending on which version of the ACTIVslate you are using. When you
use the ACTIVpen on an ACTIVslate, the information is transmitted from the
ACTIVslate via transceivers. The data is then sent, via cables, to the PC and
converted into mouse data.
Click on the ACTIVslate Tool to open up the ACTIVslate Controller Program.
This is a separate application that allows you to configure your Infrared (IR)
and Radio Frequency (RF) ACTIVslates.
Refer to the ACTIVcontroller help and ACTIVslate documentation for more
information about using the Controller Program and the ACTIVslate.
50
ACTIVprimary2 User Guide
Only one ACTIVslate can be enabled at any one time. The
decision as to which ACTIVslate is enabled is at your discretion
and is selected via the ACTIVslate Controller.
ACTIVote Tool
The ACTIVote Tool button opens the ACTIVote software as a separate
application, which is designed to work seamlessly with the ACTIV board and
ACTIVprimary software.
The purpose of ACTIVote is to generate user response via the ACTIV board
when called upon to do so by the presenter. It gives instant feedback on user
performance. Feedback can be displayed in various formats immediately on
screen or may be exported to a spreadsheet for further analysis.
To start a session, click on the ACTIVote Tool button. Choose a session type
from the ACTIVote Session window. Then click on the ACTIVote button once
more to start the session. When all responses are received you can display the
results window:
•
Click on the ACTIVote button once more.
•
Or, in Design Mode right click on the page and select ACTIVote
Results....
Refer to the ACTIVote help system for more detailed information about using
the ACTIVote system. This can be accessed separately from the ACTIVprimary
menu system.
ACTIVote Session
Named Mode
Named Mode requires you to register physical devices to the ACTIV board and
then allocate each device to a specific user. This allows you to receive more
feedback on user response.
Click on the Users... button to register devices.
Anonymous Mode
Anonymous Mode requires you to register physical devices to the ACTIV board
and then any registered device can be used by any user.
Click Devices... button to register your ACTIVote devices. Then, use the drop
down arrow to select the number of devices you want to use in the current
session.
Demo Mode
Demo Mode where you use simulated devices to practice using the program.
Enter the number of devices you would like to see in the demonstration.
Click OK to proceed with the session, or Cancel to abort and remove the
session window from display.
If you have already run an ACTIVote session, you may already
have results attached to your current Flipchart. If this is the
case, click on the Remove Results button to delete the results
before running a new session.
51
ACTIVprimary2 User Guide
ACTIVote Question Settings
The ACTIVote Question Settings allow you to quickly define a question page in
a Flipchart. To create a question page, add a text object for the each of the
following:
•
The question
•
The correct answer
•
Wrong answers
•
Answer labels, for example; A, B, etc.
Ensure you are in Design Mode, then right click on the page and choose
ACTIVote Question Settings....
The ACTIVote Question Settings window
Question
Page Type
Click on the drop down arrow and select Adhoc or
Pre-prepared. In order to use Pre-prepared Mode,
you must have the question, answers and answer
labels as text objects on the page.
Question
Type
Click on the drop down arrow and select the type
of question you are asking so that the results
display appropriately.
Correct
Click on the drop down arrow and select the correct
answer so that the results display the correct or
wrong answer response from users.
Timeout
Enter the number of seconds to set the amount of
time allowed for the users to answer the question.
Question,
Label and
Answers
Click inside the textbox areas and then click on the
drop down arrow to select the relevant text object
for the question, labels and answers.
Click OK to accept the question page edits, or Cancel to remove any changes
you have made.
When you open a question Flipchart, the ACTIVote Session window will
automatically open with the Flipchart. If the Flipchart already contains results
from a previous ACTIVote session, you will see a message. Click on the
Remove Results button to delete the results for the current question
Flipchart.
ACTIVote Results
Once ACTIVprimary has accepted all responses it will automatically display the
results in the form of a graph. The graph is displayed the same no matter
which ACTIVote mode you are using.
Click on a radio button to display the results in different forms. Indicate the
correct answer to a question by clicking on the appropriate answer button
along the top of the graph:
52
ACTIVprimary2 User Guide
Answers A
-F
Displays how many responses were received for each
possible answer.
Who
answered
what
Displays the response from each ACTIVote device.
When used in a Named Mode session, the device label
will display the name of the user.
Right
wrong
Displays a pie chart showing the percentage of right
and wrong answers.
Overall
scores
Displays the number of correct answers from each
ACTIVote device or named user.
Summary
Displays the response from each device or named
user. This graph allows you to see which answer they
chose for each question, or if they did not respond at
all.
Select the Response Times checkbox to display how long it took each user to
answer each question.
The response time is only displayed on certain graph types.
Click on the Paste button to paste a copy of the displayed graph as an image
object onto your current Flipchart page.
You can also export your ACTIVote results to a spreadsheet or
text file. Click on the Teacher Tools Menu button > Menu >
ACTIVote>> and select Export results to Excel, or Export
results to Notepad.
When you have finished viewing the results but you don't want to delete them,
click on the close button in the top right corner of the window. To display the
results window again, ensure you are in Design Mode and right click on the
Flipchart page, then select ACTIVote > Results....
When you have finished looking at the results, click on the Clear button to
delete the results from the current page. The page will then be ready for a new
voting session.
The Sound Controller / Recorder button
Click on this button and select one of the options from the popup menu;
Sound controller or Sound recorder.
Sound Controller
The Sound Controller allows you to playback audio files during a presentation.
It can control up to 2 different sounds simultaneously.
Add a sound object to your Flipchart
The audio file must first be added to the Flipchart. Use either of the following
methods to add the audio file to your Flipchart:
•
Drag a sound object from the Resource Library. The sound object will be
displayed on the Flipchart as a sound icon. When you hover the cursor
over the sound object, the cursor will change to indicate that you can
click on the object and link to a file. Click on the object to open the
Sound Playback Controls and play the audio file.
53
ACTIVprimary2 User Guide
•
Create a link object, which references the audio file from your Flipchart.
See the section about Creating Link Objects for more information.
ACTIVprimary supports the following popular audio file formats
.aif .aifc .aiff .au .cda .mid .rmi .midi .mp3 .snd .wma .wav.
Click on the Sound Controller Tool button and select Sound controller to
display the playback controls, which are used to control your audio file.
Playback controls
The track number is used to control the playback of
different types of audio file. ACTIVprimary will play a
sound file on Track 1 or Track 2 according to the type of
audio file it is playing.
Track
Number
Audio filename extension
1
Plays speech or sound audio files, such
as:
.wma.wav.snd.au.aif.aifc.aiff
2
Plays complex or music audio files,
such as:
.mp3.cda.mid.rmi.midi
The title of the track will be displayed below each control.
The Play button starts the playback of an audio file.
Select the Repeat checkbox to automatically replay the
sound when it has finished playing.
The Pause button suspends the current playback and
holds the position of the progress indicator on the
timebar. Click Play to continue playback from the position
where the playback was paused.
The Stop button discontinues the current playback and
moves the progress indicator to the beginning of the
timebar. Click Play to restart the playback.
The Playback Indicator moves along the timebar to
indicate the current position in the audio file. You can
click on the progress indicator and drag it to a different
position on the timebar to quickly move forwards or
backwards to a specific point in the playback.
If you move the indicator whilst Play is active, the audio
file will play from the new position.
If you move the indicator whilst the Pause or Stop is
active, the audio file will remain paused or stopped until
Play is selected, where the audio file will playback from
the new position.
Use the Volume Control to adjust the volume level and
make your playback louder or quieter.
Select the Mute button to switch the sound on and off.
Exit Sound Controller.
54
ACTIVprimary2 User Guide
Sound Recorder
The Sound Recorder allows you to record speech to accompany your Flipchart.
The speech recording will be added to your Flipchart page as an embedded
sound object, consisting of an icon that links to the sound file. The object
resides on your Flipchart page so you can replay the sound as many times as
you wish.
Click on the Sound Controller Tool button and select Sound recorder to
display the record controls.
Recorder controls
The recording is automatically given a
filename when you start to record your
speech. Every time you click on the Record
button, the filename will be
incremented by one.
Displays the length of recording. The time
will continue incrementing until you click
on the Stop
recording.
button to stop the
The position of the moving bars will
change according to the volume level of
the recording. As sounds get louder, the
color will change to red the further along it
is to the right-hand side.
The Record button starts the recording.
The Stop button stops the recording and
adds a sound icon on your Flipchart page
that links to the sound file (.wav). In
Present Mode, click on this link to play the
sound file.
The Cancel button abandons the current
recording. This button is redundant if
nothing is being recorded.
Add the sound file to the Resource Library
In Design Mode, open your Personal or Shared Resource Library and click on
the Categories button to navigate to the folder in which you want to add your
sound file. Click on the icon and drag it to the Tray. Enter a name for your
sound object and click on the OK button.
The ACTIVities Explorer button
Click on the ACTIVities Explorer button to view the ACTIVities Explorer window:
55
ACTIVprimary2 User Guide
The ACTIVities Explorer displays the contents of the ACTIVity folder and sub
folders. Promethean provide sample ACTIVities suitable for different primary
levels. Click on a folder in the left hand view pane and its contents will be
displayed in the right hand view pane. To launch an ACTIVity, click on an
ACTIVity listed in the right hand view pane.
Depending upon the type of ACTIVity launched you will see the host application
displaying the ACTIVity. It is possible to have a wide range of types of
ACTIVities. They could be Flash animations, Word documents, PowerPoint
presentations etc.
If the ACTIVity is created as a Flipchart, the ACTIVity will be displayed as
normal in the ACTIVprimary Flipchart workspace area. If the ACTIVity is
created as another file, it will be launched in the relevant program, thereby
hiding the ACTIVprimary main program, and the Desktop Toolbox will appear:
This floating Toolbox is displayed when ACTIVprimary is in
Desktop Mode. For more information about using this
Toolbox, refer to the topic about Desktop Mode in the
Teachers Tools section.
To switch back to the ACTIVities Explorer window, click on the Close or Quit
button. The appearance of this button will vary according to who authored the
ACTIVity and what program is hosting the ACTIVity.
To close the ACTIVities Explorer window, click on the Close
56
button.
ACTIVprimary2 User Guide
The Clear Tool
Use the Clear Tool to remove objects from the page. Click on the Clear Tool
button and a popup menu is displayed. Choose from the following options:
Clear Screen
Removes everything from a Flipchart page back to a clean page. This
includes all annotations, objects, grids and backgrounds.
Clear Objects
Removes all lines, shapes, images, sounds and text.
Any Pen, Highlighter and Eraser objects that have been placed on the
Middle or Back layer will also be removed. See the section about
Layers for more information.
Clear Annotations
Removes all freehand Pen, Highlighter and Eraser objects only
Any Pen, Highlighter or Eraser objects that have been placed on the
Middle or Back Layer will not be removed. See the section about
Layers for more information.
Tool to
Having used any of the Clear functions, you can then use the Undo
immediately to re-instate what was removed if you removed something by
mistake.
To remove specific objects from the page, use the Select
object(s), then double click and select the Delete
Edit Toolbox.
Tool to select the
button from the Object
The Special Tools button
Click on the Special Tools button to display a range of useful Tools in the Tray.
The Spotlight Tool allows you to focus attention on an aspect of the
screen or allows you to hide an aspect of the screen, depending upon
which mode you choose.
The Reveal Tool allows you to hide the displayed page and use a
window blind to reveal the underlying Flipchart from either the top,
bottom, left or right of the screen.
The Dice Tool allows you to roll up to 5 dice using an animated
sequence. The sum of the dice can be pasted on the page.
The Protractor Tool displays a virtual Protractor on screen.
The Ruler Tool displays a virtual Ruler on screen.
The Fraction Maker Tool allows you to convert handwritten fractions
into editable text objects.
57
ACTIVprimary2 User Guide
The Handwriting Recognition Tool allows you to recognize and
convert your handwritten words into editable text objects.
The Calculator Tool allows you to perform mathematical calculations
on a standard Calculator or a simplified child’s Calculator, which is
displayed in a floating window.
The Camera Tool allows you to capture an image of your desktop,
ACTIVprimary interface or the contents of your Flipchart page. You
can take a photograph of the complete screen, or you can define a
specific area on the screen to capture only part of it.
The XY Origin Tool adds a new origin point on the page, around
which you can rotate, mirror or flip objects.
The Clock Tool allows you to display a Clock or counter on screen.
The Spotlight Tool
When you click on the Spotlight Tool on the Special Tools Tray, you are
presented with four choices.
Circular Spotlight
Rectangular Spotlight
Inverse Circular Spotlight
Inverse Rectangular Spotlight
You would use either Circular or
Rectangular shape for masking the
screen to focus attention on a
particular part of the screen:
Use the Inverse Spotlight to hide
aspects of the screen whilst showing
some instructions or clues as to the
hidden part:
The Spotlight continues to be displayed as you move forwards and backwards
through the pages of your Flipchart.
58
ACTIVprimary2 User Guide
To resize the Spotlight, press the ACTIVpen down and drag the cursor towards
the center of the Spotlight area to make it smaller, or away from the Spotlight
center to make it larger.
To hide the Spotlight, click on the Spotlight Tool button once more.
The Reveal Tool
This Tool allows you to completely cover up and hide the contents of your
page. You can reveal in one of four directions from the top, bottom, left or
from the right.
When you select the Reveal Tool from the Special Tools Tray, the screen will go
black. At this point, imagine that ACTIVprimary has placed a piece of black
paper over the screen. Use the ACTIVpen to move the cursor to one of the
quadrants, then click on and drag the black area to the opposite quadrant,
gradually revealing the screen. When you have finished, slide the black area
back to where you started so that it again covers the whole of the windows
screen, or click on the Reveal Tool button to remove the Revealer.
You can navigate through the pages in your Flipchart and the Revealer will
reset itself to completely cover the next Flipchart page. This feature allows you
to navigate through your Flipchart pages and ensure they are hidden behind
the Revealer, even if your previous pages were partially revealed.
It is possible to use other Tools whilst using the Reveal Tool, for instance if you
wanted to draw or add an image it is possible to do this while part of the
screen is revealed. You would need to switch the lower Tool Tray back to
Special Tools in order to carry on working with the reveal Tool or to cancel it.
To cancel the Revealer, click on the Reveal Tool button in the Toolbox, and
your screen will be fully exposed.
The Dice Tool
Use the Dice Tool to roll up to 5 dice for generating random numbers and
incorporating games in numeric activities. Click on the Dice Tool to display the
dice Toolbar:
Click on the drop down arrow to select the number of dice you want to
use for the activity. You can choose up to 5 dice.
Click on this button to roll the dice. You will see an animated sequence
showing the die or dice rolling towards you. Click on the roll dice
button to roll the dice as many times as you wish. Go to the Tools
settings to change the speed at which the dice roll, select Teacher
Tools Menu button > Menu > Settings... and select Tools from
the left hand pane.
59
ACTIVprimary2 User Guide
Click on the equals button to paste the total sum of the die or dice as
a text object in the center of the page of the active Flipchart.
The sum behaves like any other text object. To move it, first ensure the Select
Tool is selected, then click on the text object and move it to another location
on the page. Move the text object of your sum before rolling the dice and
clicking on equals again, otherwise the new sum will be pasted on top of your
previous sum.
To close the dice Toolbar, click on the Close
to disable it and switch it off.
button or click on the Dice Tool
The Protractor Tool
Click on the Protractor Tool and you can then choose either a 180o
or 360o
Protractor, by clicking on the appropriate icon. A virtual Protractor will be
displayed, which you can resize, reposition, rotate and interact with using the
pen and highlighter Tools.
Change the appearance of the Protractor
To change the scale of the Protractor, double click on the Protractor and click
or Minus
button in the Object Edit Toolbox. This scales the
on the Plus
size of the Protractor to make it appear larger or smaller.
You can change the color and translucency values of the Protractor by clicking
on Teacher Tools Menu button > Menu > Settings... > Tools.
Reposition the Protractor
Position the ACTIVpen around the center sections of the Protractor. When the
cursor changes to display the mover arrows, you can click and drag the
Protractor to a different position on the page. Release the click when the
Protractor is in the correct position.
Measure angles very accurately by using the Grid Tool to snap
the Protractor and the object, which you are measuring, to a
fixed point:
60
ACTIVprimary2 User Guide
Rotate the Protractor
Position the ACTIVpen anywhere around the measurement scale towards the
edge of the Protractor. When the cursor changes to display the rotator arrows,
you can click and rotate the Protractor to a particular angle. This is required for
when the angle you want to measure or mark out is from a line that is not
horizontal. The center of rotation is at the center zero mark. Release the click
when the Protractor is at the desired angle.
In Design Mode, you can choose to display the angle of rotation at the center
point of the Protractor. By default this is displayed. Right click on the
Protractor, and click on Show degrees to clear this option if you don't want
the angle of rotation to be displayed.
Draw a Segment
When the pen or highlighter Tool is selected, move the cursor so that it is near
the outside edge of the Protractor. The cursor will display an arc and pen. This
indicates that you can draw a segment. Click the ACTIVpen on the edge of the
Protractor, at the angle you want to start from. Notice that ACTIVprimary will
automatically draw a line from the starting point to the center point. Drag the
cursor along the outside edge of the Protractor and release the click when the
segment is at the desired angle. ACTIVprimary will automatically draw a line
from the finish point and will fill in the segment with the currently selected pen
or highlighter color.
61
ACTIVprimary2 User Guide
To draw an unfilled segment, in Design Mode right click on the Protractor and
click on Fill Segments to clear this option. For any existing segments, in
Design Mode double click on the filled segment and select the Properties
button from the Object Edit Toolbox. Select Appearance and click on the
Fill Pattern checkbox to clear the fill pattern.
Hide the Protractor
To remove the Protractor from the screen:
Click the Protractor Tool button once more.
Or,
Double click on the Protractor to display the Edit Toolbox and click on the
button.
Delete
The Ruler Tool
The Ruler is a useful Tool that can be used for various activities; such as
arranging objects, drawing lines of a particular size and angle and measuring
objects as you resize them.
Click on the Ruler button and choose one of the options from the popup menu:
Ruler graduated in centimeters
Ruler graduated in inches
Ruler graduated in millimeters
A virtual Ruler will be displayed, which you can resize, reposition, rotate and
interact with using the pen and highlighter Tools.
Change the appearance of the Ruler
To increase or decrease the length of the Ruler, double click on the Ruler and
click on the Plus
or Minus
button in the Object Edit Toolbox.
62
ACTIVprimary2 User Guide
When increasing or decreasing the size of the Ruler you are
simply altering the length of the Ruler not its scale.
Double click on the Ruler to display the Edit Toolbox regardless
of what Tool is currently active in the Main Toolbox.
You can change the color and translucency values of the Ruler by clicking on
Teacher Tools Menu button > Menu > Settings... > Tools.
Reposition the Ruler
Position the ACTIVpen anywhere along the bottom edge of the Ruler. When the
cursor changes to display the mover arrows , you can click and drag the Ruler
to a different position on the page. Release the click when the Ruler is in the
correct position.
Position the Ruler accurately by snapping the zero point to a
grid point in a grid, which may or may not be visible on the
page.
Rotate the Ruler
Position the ACTIVpen anywhere along the top edge of the Ruler. When the
cursor changes to display the rotator arrows, you can click and rotate the Ruler
to a particular angle. The center of rotation is at the top of the zero mark on
the measurement scale. The current angle of rotation is displayed in the
center of the Ruler. Release the click when the Ruler is at the correct angle.
In Design Mode, you can choose to display the angle of rotation at the center
point of the Ruler. By default this is displayed. Right click on the Ruler, and
click on Show degrees to clear this option if you don't want the angle of
rotation to be displayed.
Draw a straight line
You can use the Ruler for measuring existing objects on screen or you can use
the Ruler to draw out lines of a set size and at a set angle if required.
To draw using the Ruler select the
Tool then position the Ruler at
Pen
the spot you wish to draw a straight
line. As with the Protractor, you may
rotate the Ruler around the 0 (zero)
axis of the measurement scale.
Tool position
To draw along the Ruler having previously selected the Pen
your ACTIVpen just above the top edge of the Ruler until you notice the cursor
change so that a line appears above the pen symbol. Now draw along the pen
from your start point to the desired length.
63
ACTIVprimary2 User Guide
Using the Grid Tool along with the
Pen Tool will allow you to achieve a
reasonable technical drawing.
Hide the Ruler
To remove the Ruler from the screen:
Click the Ruler Tool button once more.
Or,
Double click on the Ruler to display the Object Edit Toolbox and click on the
button.
Delete
The Fraction Maker Tool
Click on the Fraction Maker Tool then draw the two numbers that make up your
required fraction. ACTIVprimary will use its handwriting recognition function to
convert your handwritten input into a fraction.
button to
After writing in your numbers click on the Add to Flipchart page
copy the fraction onto your page. The fraction will appear as an editable text
object. You can click and drag this object to a new location if you are intending
to add further fractions. If you want to clear the writing without adding it to the
button.
page to start over, click the Clear
To close the Fraction Maker window:
Click on the Fraction Maker Tool button once more.
Or,
Click the Close
Maker window.
button, located on the top right hand corner of the Fraction
64
ACTIVprimary2 User Guide
The recognition function takes the order of annotations into
account when converting your writing.
A fraction is actually made up of two separate text objects and
a horizontal line, which are grouped together. It is possible to
edit this group of objects in Design Mode. However, editing a
grouped object is quite labor intensive and it may be quicker to
delete an incorrect fraction and create a new one.
Handwriting Recognition
This Tool allows you to convert your handwritten annotations into editable text
objects. Clicking on this button will display the Handwriting window:
Note that you have full access to the text Tray to set the font, size, color, etc.
which will be applied to the recognized text.
Use your ACTIVpen to write your words in the input area. Click the Preview
button and ACTIVprimary will convert your handwriting. The output will be
displayed in the text box below the input area.
button.
If you are happy with the result of the recognition click on the Apply
ACTIVprimary will paste the resultant text object onto the current Flipchart
page. The window will remain open for further input.
Closing the Handwriting Recognition window
When you are finished, click on the close button in the top right-hand corner of
the window. You will see your text object/s on the Flipchart page.
Editing Result
button to
If you are not happy with the recognized text, click on the Redo
clear the result and then try again. Remember that the recognizer creates
editable text objects, so it may be quicker to edit the resultant text object
rather than attempting recognition numerous times if the recognizer fails on
certain words or characters.
An alternative to using the Redo button is to edit the recognized text before
applying it to the page:
button in addition to the recognized text
When you have clicked the Preview
being displayed you may have noticed a new Tool appear. This is the Keyboard
Tool, which can be used to edit the recognized text.
65
ACTIVprimary2 User Guide
Click on the Apply
button directly without previewing the result.
Adjustable Guide Lines
To aid handwriting we provide adjustable guide lines.
button to widen the lines. Repeated
Use the increase guide line distance
clicks will increment the distance gradually.
Use the decrease guide line distance
button to narrow the lines. Use
repeated clicks to adjust the distance incrementally.
Use cursive writing, not separate letters to improve the
result. If you find that certain letters are not recognized then
attempt to modify your stroke slightly to see if this helps.
The Recognition function takes the order of annotations into
account when converting your annotations.
If you are confident that your handwriting will be correctly
recognized, you can bypass the Recognize button and click on
button to add a text object to the page.
the Apply
Language Support
The Handwriting Recognition engine now has support for the following
languages:
•
English (UK)
•
English (US)
•
French
•
German
•
Spanish
•
Italian
•
Dutch
•
Portuguese
•
Portuguese (Brazil)
In order to use this feature you must switch the Recognition engine into the
appropriate language mode. Click on the Teacher Tools Menu button >
Menu > Settings... > User Input. The User Input settings will be displayed.
In the Handwriting recognition language section, click on the drop down arrow
and select a different language from the list. Click OK to accept your change,
or Cancel to reject your change and close the Settings window.
66
ACTIVprimary2 User Guide
Upon changing the language setting, the software will load in a language
specific dictionary to aid in recognition. You may switch between languages at
any time.
You can also use the Handwriting Recognition Tool to convert
your freehand writing to text in other Windows applications, if
it is more convenient to recognize your annotations than
typing with the keyboard. See the information about the
Desktop Mode for more information.
The Calculator Tool
Selecting the Calculator Tool will display a Calculator in a floating window. This
version works just like a hand-held device.
When you select the Calculator, the child version will automatically appear as
default. However, you can change the Calculator to an adult version. Right click
anywhere on the Calculator apart from the display screen and select Adult
Calculator from the popup menu.
Reposition the Calculator
If you want to move the Calculator to a different position on the page, click
anywhere on the Calculator except on the screen or buttons and drag it across
the page. Release the click when you are happy with the position of the
Calculator.
Paste calculation to page
To insert the calculation as a text object onto the current Flipchart page:
button.
•
Child version- Click on the Output to Document
•
Adult version- Right click and select Output to Flipchart page from
the popup menu.
67
ACTIVprimary2 User Guide
Close the Calculator
To close the Calculator:
Click on the Calculator Tool button in the Special Tools Tray.
Or,
Click on the Close
or
button on the Calculator.
The Camera Tool
The Camera Tool allows you to take a photograph of the content of your
Flipchart pages. The photograph will capture all types of objects that are
displayed on screen including backgrounds, annotations, grids, lines, shapes,
text and other images. The resultant photograph is an image of all of these
objects, which can be added to your Flipchart page, resource library or copied
to the Clipboard as an object that you can manipulate. The photograph is
simply an image of the screen, so any objects within your photograph will not
be editable. You can resize or rotate the photograph like any other image
object.
Make sure that the screen is displaying the image you wish to capture, then
click on the Camera Tool button. Choose from one of the following Camera
:
types from the Camera Toolbox
If using the Camera from the Desktop Toolbox, first click on
the Camera Selector button to select the Camera type.
68
ACTIVprimary2 User Guide
Rectangular Area Capture
A dotted line in a rectangle shape
will appear on your screen. The
rectangle can be positioned
anywhere on your screen by a
click inside the rectangle shape
and drag it to another part of the
screen. It can also be resized
using the pickup handles that
surround the border. Move these
around until the shape contains
the image you want to
photograph, then choose from one
of the paste options available
from the Photograph Toolbox.
Point to Point Area Capture
Allows you to capture an irregular
shape made up from straight lines.
The first click starts the shape.
Every time you click, you add
another node to the shape so you
can move the line in another
direction. To end the shape, click
close to the first point and
ACTIVprimary will automatically
close the shape for you. A preview
of your photograph will appear on
screen surrounded by a pink
background. Choose from one of
the paste options available from
the Photograph Toolbox.
Freehand Capture
Allows you to capture an irregular
shape using freehand lines. Click
and drag the cursor to start the
capture. As you move the cursor,
a dotted line follows it to define
the capture area. To end the
shape, just release the click and
ACTIVprimary will close the shape
by placing a straight line between
the first and last point. A preview
of your photograph will appear on
screen surrounded by a pink
background. Choose from one of
the paste options available from
the Photograph Toolbox.
Camera Selector button
Use this button to toggle between the different camera types.
69
ACTIVprimary2 User Guide
Paste Options
When you have selected a camera type the Photograph Toolbox is displayed.
This Toolbox allows you to choose where to locate a copy of your photograph:
Pastes the image on the Flipchart page you currently have open.
Pastes the image on a new page in the Flipchart you currently have
open.
Allows you to save the image in your Personal Resource Library.
You will be prompted for a filename. The Images folder in your
Personal Resource Library will be selected by default, but you can
choose to save the image in another folder.
Allows you to save the image in your Shared Resource Library. You
will be prompted for a filename. The Images folder in your Shared
Resource Library will be selected by default, but you can choose to
save the image in another folder.
Pastes the image in the Windows Clipboard. From here, if you
switch to Design Mode, you can paste it onto a Flipchart page by
performing a right click and selecting Paste Image from
Clipboard from the popup menu. Or, you can paste the captured
image into one of your PC applications by navigating to paste whilst
the application is active.
Click on the Close
button to abandon the operation.
The XY Origin Tool
Rotate objects
You can rotate any object just by selecting it and using the Rotator pickup box
to spin the object around to a preferred angle. However, you may not want to
rotate an object around its center point. Instead, use the XY Origin Tool to add
a rotate point anywhere on a page. The object will spin around the page origin
point when you click and move the rotator pickup box.
Ensure the object you want to rotate is located on your page, then click on the
. Move the origin point to a new
XY Origin Tool to display the origin point
position, this will be the position that you want to be the center of rotation.
Select the object with the Marquee Select Tool, notice the XY Origin Tool
button remains selected. Then, use the rotator pickup box to spin the object
around the new origin point. When you have finished, click on the Rotate Tool
once more to remove the rotate point.
The rotate point will remember its last position on a page. When you switch it
on again, it will automatically appear in the same position when it was last
displayed.
Groups of objects will rotate about the center point of the selected group,
unless the XY Origin Tool is switched on. In this case the group will rotate
around the XY origin point.
Mirror or flip objects
Behaves like the XY origin of a graph or a grid (ie the zero-zero point).
Use the XY Origin Tool to offset the object from a specified origin point.
Example:
70
ACTIVprimary2 User Guide
Mirrored in X axis about the
origin point
Mirrored in Y axis about the origin
point
The Clock Tool
When you select the Clock Tool from the Toolbox, you are presented with a
popup menu. Click on one of the following options from the menu:
Displays a traditional analog Clock with a circular face and hands.
Displays a digital Clock.
Displays a traditional analog Clock with the digital Clock underneath.
Displays a digital counter. The counter will count down from the time
entered in the Clock counter window.
Displays a digital counter. The counter will count up to the time
entered in the Clock counter window.
Analog and Digital Clocks
The Clock opens in a separate window, which will always be on top of other
applications. To change the size of the window, hover the cursor over one of
the window edges until a resize arrow appears . Use the resize arrow to click
and drag the window to the size you prefer. To change the position of the
window, click on any blue part of the window and drag it to the position you
prefer. ACTIVprimary will remember the size and position of the Clock for the
next time you open the Clock.
The clocks have settings related to them that allow you to change the way they
display or how they behave. To view the settings, click on Teacher Tools
Menu button > Menu > Settings... > Clock.
To close the Clock window, click on the close button.
Counters
When you select one of the counters from the menu a window which allows you
to define your counter and change the way it behaves appears on screen.
71
ACTIVprimary2 User Guide
Counter window
Count down
from /
Count up to
Use the up and down arrows to increase or decrease
the amount of counting time. This is measured in
hours, minutes and seconds. The image below shows
the counter set as 1 minute 30 seconds.
The Count Down Clock will first display 1 minute 30
seconds and will count down to zero. The Count Up
Clock will first display zero and will count up to 1
minute 30 seconds.
Reset
Click on the reset button to set the counter to zero.
Repeat
Select the checkbox to repeat the count when the
counter has reached its target. This will be zero for
the Count Down Clock, or the time you specified for
the Count Up Clock.
After
timeout play
following
sound
Click on the down arrow to show any sound files
located in the sounds folder in your ACTIVprimary
application directory. You can add other sound files
to this directory so they appear in the list, using
Windows Explorer.
After
timeout,
perform
following
action
Click on the down arrow to show a list of some
useful actions you may want to occur when the
counter has reached timeout.
When you are happy with your definition click OK to display the counter, or
click Cancel to remove your changes and close the window. The counter will
start counting automatically when it appears on screen. The pause button is a
toggle switch, which allows you to temporarily stop and restart the counter. To
display the Clock Counter dialog and change the definition of your counter,
click on the menu button and select one of the counters from the menu. If you
no longer need to use the counter and would prefer to view a Clock instead,
choose one of the clocks from the menu instead.
Pause/Go button
button to temporarily stop the Clock or counter. To
Click on the Pause
restart the Clock or counter, click on the button once more, which has now
become a Go
button.
ACTIVote Tool
The ACTIVote Tool button opens the ACTIVote software as a separate
application, which is designed to work seamlessly with the ACTIV board and
ACTIVprimary software.
The purpose of ACTIVote is to generate user response via the ACTIV board
when called upon to do so by the presenter. It gives instant feedback on user
performance. Feedback can be displayed in various formats immediately on
screen or may be exported to a spreadsheet for further analysis.
72
ACTIVprimary2 User Guide
To start a session, click on the ACTIVote Tool button. Choose a session type
from the ACTIVote Session window. Then click on the ACTIVote button once
more to start the session. When all responses are received you can display the
results window:
•
Click on the ACTIVote button once more.
•
Or, in Design Mode right click on the page and select ACTIVote
Results....
Refer to the ACTIVote help system for more detailed information about using
the ACTIVote system. This can be accessed separately from the ACTIVprimary
menu system.
Desktop Mode
Desktop Mode allows you to hide the Flipchart and Tools in
order to display the live Windows Desktop. When you click the
Desktop Mode button, in addition to displaying the Windows
Desktop you will also see a small floating Toolbar. This is the
Desktop Toolbox.
The Select Tool is active by default so that you can interact with your Windows
Desktop.
Minimize the Desktop Toolbox
If the Desktop Toolbox takes up too much space on screen, use the roll-up
button to minimize it and hide the tools from view. The roll-up button will then
become a roll-down button. The only other button displayed on the minimized
Toolbox is the button that allows you to enter the ACTIVprimary User Interface.
Click on the roll-down button and the Toolbox will display the hidden Tools.
Exit Desktop Mode
Once you are finished you can return to the main ACTIVprimary interface by
button, which is the program icon
clicking on the Return to ACTIVprimary
located at the top right hand corner of the Desktop Toolbox.
Annotate over the Desktop
Use the ACTIVpen to draw or highlight over any open Windows application
using the Pen and Highlighter Tools.
Select the Pen or Highlighter from the Desktop Toolbox to activate the
annotation mode specified in your General Settings.
Click on a color and line thickness from the selectors. They will be highlighted
in red to indicate which selectors you have chosen. Example
This example shows the blue color and the 3rd thickest line selected
for the Pen Tool.
73
ACTIVprimary2 User Guide
You are now ready to start drawing or writing with your ACTIVpen.
You can move your Pen and Highlighter annotations around the screen using
. Click on the Select Tool and move your cursor over to the
the Select Tool
annotation. When the cursor displays the mover arrows, click and drag the
annotation to a different position.
If you are annotating in Overlay Mode and you choose the
Select Tool, you will be able to interact with the underlying
application with your annotations still visible.
. If
To delete all annotations on the screen, click on the Clear Screen Tool
you are annotating in Photo Mode when you click on the Clear Screen Tool, the
Select Tool will automatically be activated and you will be able to use the
underlying application.
If you make a mistake and need to undo your last action, click on the Undo
. You can redo the action by clicking on the Redo Tool
button.
Tool
These Tools function in the same way as though you are working on a
Flipchart.
Capture your annotations by using the Camera Tool to take a
photo of them.
Capture photographs of your Desktop
Make sure that the screen is displaying the image you wish to capture, then
and select a camera type. Choose from
click on the Camera Selector button
one of the following Camera types from the Camera Toolbox
:
For more information about how to use each camera type,
refer to the section about The Camera Tool.
Rectangular Area Capture
Resizable rectangle shape that can
be re-positioned on the desktop.
74
ACTIVprimary2 User Guide
Point to Point Area Capture
Click and drag straight lines in
order to capture an irregular area of
the screen.
Freehand Capture
Draw freehand in order to capture
an irregular area of the screen.
Paste Options
Once you have decided on the position and size of the photograph, you need to
decide where to locate the image. Choose one of the following options from the
Photograph Toolbox:
Pastes the image on the Flipchart page you currently have open.
Pastes the image on a new page in the Flipchart you currently have
open.
Save the image to your Personal Resource Library.
Save the image to your Shared Resource Library.
Copies the image to the Windows Clipboard.
For more information about each of these options, refer to The Camera Tool.
Use the Revealer or Spotlight over your Desktop
If you are annotating in Overlay Mode, your annotations will be
temporarily hidden when the Spotlight or Revealer are active.
Spotlight
Use the Spotlight to focus attention on a particular part of the screen.
To resize the Spotlight, press the ACTIVpen down and drag the cursor towards
the center of the Spotlight area to make it smaller, or away from the Spotlight
center to make it larger.
To hide the Spotlight, click on the Spotlight Tool button once more.
Revealer
Use the Revealer to hide the contents of your screen. You can reveal in one of
four directions from the top, bottom, left or from the right.
75
ACTIVprimary2 User Guide
Use the ACTIVpen to move the cursor to one of the quadrants, then click on
and drag the black area to the opposite quadrant, gradually revealing the
screen. When you have finished, slide the black area back to where you started
so that it again covers the whole of the windows screen, or click on the Reveal
Tool button to remove the Revealer.
To hide the Revealer and fully expose your screen, click on the Reveal Tool
button once more.
Use the Handwriting Recognition function in other applications
Use the handwriting recognition function to convert your freehand writing to
text in other Windows applications, if it is more convenient to recognize your
annotations than typing with the keyboard.
Click on the Handwriting Recognition button to view the Recognition Toolbox:
On/Off
button
Switches the Recognition function on
and off. If recognition is switched on and
the pen is selected, your annotations are
converted to text.
When using the recognition
function in external
applications, you will need to
switch off the Recognition
function in order to select
existing text or to move from
one field to another.
ACTIVprimary will continue
annotating if the recognition
function is switched on and
the program editing cursor is
displayed.
You can save a file by
annotating and using the
recognition tool to enter the
filename. However, ensure
the recognition function is
switched off if you need to
use the cursor to select part
of a filename to delete it, add
to or make any corrections to
the name entered..
Timer
Allows you to adjust the time between
annotating and recognizing.
Undo
Reverses the last action.
Recognition
Mode:
Convert your writing to text, numbers or
a mixture of text and numbers.
76
ACTIVprimary2 User Guide
Alpha
Numeric
Alphanumeric
Upper Case
Convert your writing to upper case text.
Add space
Adds a space after the recognized text.
Add
carriage
return
Adds a carriage return after the
recognized text.
Alternatives
Displays a list of alternative words taken
from the dictionary, which you can
select if your writing is not recognized
correctly.
You can customize the user dictionary
with specific terms that you use
regularly. See the separate help about
the Custom Dictionary for more
information.
Choose the Recognition Mode by clicking on the toggle button until it displays
the correct mode.
Click on the Titlebar of your application to make it the active application.
Notice that the application will display it's own cursor instead
of the ACTIVprimary pen cursor when you move the cursor
over the active area. However, use the ACTIVpen to move the
cursor and you will be annotating in your open application.
When you have finished annotating, wait for ACTIVprimary to perform the
recognition.
The Recognition function takes the order of annotations into
account when converting your annotations.
Click on the Close
button to close the Recognition Toolbox.
For information about using the Recognition function with other languages,
refer to the Handwriting Recognition section.
Design Mode
Design Mode allows you to work with objects on your Flipchart page, so that
they appear or behave in a certain way when you switch to Present Mode. This
makes it easier to prepare your Flipchart because in Design Mode you have the
control to edit freely; you can set various object properties and right click on
the page to use useful editing functions. In Present Mode, these object
properties are applied, so an object will behave as intended. For example, if
you apply an action to a Flipchart object, you can interact with it when you
switch to Present Mode.
77
ACTIVprimary2 User Guide
Menu Button
The appearance of the Teacher Tools Menu button indicates which mode is
currently selected:
Design Mode
Present Mode
When you open ACTIVprimary for the first time, Present Mode is selected.
Switching between Design and Present Mode
Switch to Design Mode to author your Flipchart, then go back to Present Mode
to view and interact with your Flipchart. You can switch between each mode at
any time by toggling the Design Mode option from the Teacher Tools Menu.
To select Design Mode; Click on Teacher Tools Menu button > Design
Mode. Notice that the Teacher Tools Menu button now displays the red border.
To select Present Mode once more you need to switch off Design Mode. Click on
Teacher Tools Menu button > Design Mode. The Teacher Tools Menu
button should now display a yellow border once more.
Object Properties
About the Properties window
The Properties button allows you to change and apply a range of powerful
properties to your Flipchart page or object(s). The windows are intuitive so the
options available will depend upon whether you have selected the properties
for a page, single object or multiple objects. Also, the type of object(s) selected
will determine which properties are displayed.
Page properties
Apply properties to a particular page in your Flipchart so that it displays in a
particular way when you turn to that page.
Select the F4 key on your keyboard to reveal a window
displaying the page properties.
Object properties and actions
Apply the object properties to change how an object is displayed, identified,
arranged and how it behaves. You can also apply an action to an object. When
you click on an object, something will happen to it or to an object that you
specify. This helps you to promote an active learning environment.
Identification Properties
The Identification tab allows you to define a single object with a name, or a
group of objects with a group number.
78
ACTIVprimary2 User Guide
Name
The Name textbox will only be displayed when you have
selected a single object. Every object added to the
Flipchart page is automatically given a default name to
differentiate one object from another. This allows you to
identify it, for example, in a search or so you can select
the object to apply an action to it. ACTIVprimary allows
you to change the default name given to an object. Click
inside the textbox and delete the default name before
entering a suitable name for the object.
A name can only be applied to single
objects.
Grouped
The Grouped checkbox will only be displayed when you
have selected multiple objects. If you select the Grouped
checkbox, ACTIVprimary will automatically assign a
group number to all objects selected and the group will
be treated as one object. You can then apply specific
properties to the group.
When the objects are grouped, they will remain on the
default layer for that object type. To change the layer
which the group resides on, in Design Mode right click on
the group with the Marquee Select Tool and select
Bottom Layer, Middle Layer or Top Layer from the
popup menu. Or, go to the Appearance properties,
click on the drop down arrow and select a layer from the
list.
Groups that contain a mixture of different object types
can only be added to the Collections folder in the
Resource Library.
Ungroup the objects by clearing the checkbox. If you
ungroup the objects, they will revert to their original
properties.
Try this example:
Add two or three objects to your page. Click
on one of the objects and use the Rotator
Pickup to rotate it. Only the object that you
have selected will be rotated. Now select all
of your objects, double click and select the
Properties button from the Edit Toolbox,
then select the Identification tab. Select the
Grouped checkbox. When you click on one
of the objects, the Marquee Pickup area will
now include all the objects you selected.
Move the Rotator Pickup to rotate the
objects. This time, the objects are rotated
around the center point of the object
selection.
Position Properties
The Position tab allows you to define the arrangement of objects on the
Flipchart page accurately, or change the size of a page in your Flipchart.
79
ACTIVprimary2 User Guide
Left, Top,
Width,
Height
Enter a number (measured in pixels) in the relevant
textbox and click <Enter> to move the object to that
position:
Left
Repositions the left edge of an object from the left edge
of the Flipchart page.
Top
Repositions the top edge of an object from the top edge
of the Flipchart page.
Width
Stretches the object horizontally from its 'Left' position.
Height
Stretches the object vertically from its 'Top' position.
The position and size properties cannot be
applied to change the position or size of a
group of objects. If you alter the position
and size properties for a group of objects,
each object within the group will move or
resize itself individually. As such, the
properties will not display the position and
size of the group.
Angle
Rotates an object from its center point. Enter a number
(measured in degrees) in the textbox and click <Enter>
to rotate the object to that position.
If you set an angle for a group of objects,
each object will rotate around its own
center point, instead of the center point of
the group.
Appearance Properties
Page Color
Click on the color selector and select a new background
color for your page from the color palette.
Tile fit
Allows you to select how a background image is displayed
on the page. Click on the drop down arrow and choose a
tile option from the list. The default setting is to tile the
image if it does not fill the page.
Layer
Each object will automatically be placed on a default layer;
top, middle or bottom. To move an object to a different
layer, click on the down arrow and select a layer from the
drop down list. To learn more about working with layers.
See the section about Layers for more information.
Transparent
Select the checkbox to make the selected object
transparent. The default transparency color is grey. To
change the transparency color, click on the color button
and use the Object Transparency Selection Tool to choose
a color from the image.
Select the Pick through checkbox and click on the Color
block to select a color to make it transparent.
80
ACTIVprimary2 User Guide
Translucency
Move the slider to change the translucent property of an
object and make it appear opaque or faded.
Visible
Select the checkbox to make an object visible (default).
Clear the checkbox to make the object invisible.
Invisible objects on your page will be
displayed when in Design Mode, but not
when you change to Present Mode.
Reflected
Select the checkbox to mirror the selected object
horizontally.
Inverted
Select the checkbox to mirror the selected object
vertically.
Pen Type
Click on the down arrow and select a different pen type
from the drop down list; pen, highlight or Eraser.
Pen width
and Color
Enter a number to change the pen width (in pixels). The
maximum value you can set is 999.
Setting the pen width to 0 is a special setting
that keeps the width of an annotation at 1
pixel regardless of the zoom level on the
page.
To change the color of the pen, click on the color block and
select a color from the color palette.
Line style
Click on the drop down arrow to choose between a flat
line, which contains sharp corners, or rounded line, which
contains rounded corners.
Begin style /
End style
Click on the drop down arrow and choose from the
following options:
Select Plain to view your line without any
Plain
end shapes.
Outline
Arrow
Select Arrow if you want your line to
contain a pointed arrowhead at one of
both ends.
Bullet
Select Bullet if you want your line to
contain a rounded shape at one of both
ends.
Select the checkbox to apply an outline and change the
outline characteristics.
Enter a number in the Outline width textbox to change the
width (thickness) of the outline (in pixels). The default
outline width is 1 pixel.
Click on the Color button and select a color for the outline
from the color palette. The default color is black.
81
ACTIVprimary2 User Guide
Fill Pattern
Select the Fill Pattern checkbox to apply a pattern style
that will fill a shape or text area. When applied, the fill
pattern will sit on top of the background property, see
below. If applied to a text object, the fill pattern will sit
underneath the text. Click on the drop down arrow and
choose one of the pattern styles.
To select a color, click on the Color button and select a
color from the color palette.
To change the fill pattern, select the Style down arrow and
choose a pattern from the list.
Background
Select the Background checkbox to apply a background
color to shapes and text objects. This property is
automatically applied to text objects which have a colored
background. To change the color, click on the color block
and select a different color from the palette.
Example
To illustrate the use of outlines, fill patterns and
backgrounds:
This shape object consists
This text object consists
of:
of:
Red Outline
Green Outline
Blue vertical fill pattern
Blue grid fill pattern
Yellow background
Yellow background
82
ACTIVprimary2 User Guide
Reset Colors
Reverts any color changes to an image object or
background image to their original colors.
Try this:
Use the Fill Tool to change the colors of an
image and save it to the Resource Library.
Select another page in your Flipchart and
drag the changed image out from the
Resource Library.
Use the Fill Tool to change the color of the
image again.
Now click on the Reset Colors button.
Notice that the colors of the image will revert
back to the original colors, i.e. the same
colors as before it was added to the Resource
Library.
Remove
Background
Deletes any background images from the page.
Container Properties
The Container tab allows you to create activities where objects can be enclosed
within other objects.
Can contain
Click on the down arrow and select one of the following options from the menu:
Nothing
The selected object will not 'hold' any other objects
placed inside it. When the selected object is moved,
any objects placed within it will remain in the location
in which you placed them.
Anything
The selected object will 'hold' any objects that are
placed inside it. When the selected object is moved,
any objects placed inside it will move with it.
Example
83
ACTIVprimary2 User Guide
In this example, the red square is not set to contain other objects. When the
yellow square is placed inside the red square, the yellow square stays in the
same position when the red square is moved.
The blue square is set to contain other objects. So, when the orange square is
placed inside the blue square, and the blue square is moved, the orange
square moves with it.
Contain Rules:
•
Any type of object, except annotations, can be a container.
•
The object being contained must have a higher stacking order than the
container. That is, it must be in front of the container.
•
The object being contained must fit within the container pickup area.
•
An object can be contained even when it is containing another object.
These rules are demonstrated by this more complex example
Here is a more advanced way of using the Container feature:
There are four individual images here:
Number 3000 image
Number 600 image
Number 80 image
Number 4 image
All of the images except the Number 4 image have had the container property
applied to them, so that they will contain any object placed on top of them. In
addition the stacking order of the images is such that they sit on top of one
another correctly. There is also a hidden snap to grid, which forces the objects
to line up correctly. You may notice a sudden snap action after each of the
moves in the animation as the object is snapped to the underlying grid.
In the example, all four objects appear as one. You can see that when the
number 3000 is moved, the other numbers move with it. When the number
600 is moved from the number 3000, the lower numbers move with it because
they are contained by it. The number 80 is then moved away from the number
600, notice the lower number goes with it. Finally the number 4 is moved away
from the number 80.
84
ACTIVprimary2 User Guide
The animation continues, showing various combinations of placing the number
objects onto various other number objects, showing how these are contained
by moving the container object. The sequence finishes by all objects being
dragged away from each other.
The number example above shows a valuable way of using this property in the
classroom. Careful consideration and preparation is required so that the objects
you are going to use are placed on the page in a logical order or that you later
define the stacking order by using the To Front or To Back actions, which are
available from the right click menu in Design Mode.
Actions
The Actions tab allows you to perform an action when you click on a selected
object/s, enabling you to create some very special effects in your presentation.
Actions can be applied to image, line, shape or text objects.
Actions are set up in Design mode and only work in Present
Mode.
Click on the drop down arrow and select an action from the list:
Do nothing
This is the default option. Clicking on an
object will not trigger an action to occur
because an action has not been selected.
First Page, Last Page,
Next Page, Previous
Page
These are primarily for navigation
purposes. Clicking on the object will
make the Flipchart jump to the relevant
page.
Another Page
Choosing this option will allow you to
jump to any page in your Flipchart when
you click on the object.
A Set button will automatically appear
when you choose the Another Page
option. Click on the Set button and a
popup window will appear which lists all
the pages in your Flipchart.
Hover the cursor over a page number in
the list. A thumbnail preview of the page
will be displayed in the blue area above
the list.
Click on a page number to select it as
the page your Flipchart will jump to. The
window will close automatically. Click on
the close button to close the window
without choosing a page.
85
ACTIVprimary2 User Guide
Play sound
A sound will play when you click on the
object. Choosing this option will allow
you to select a sound file from the
Shared Sounds folder in the Resource
Library. However, you can change this
location and browse other folders on
your computer. When you have selected
a sound file, click Open and the filename
will be displayed.
Any links to sound files will
be embedded with the
Flipchart.
Open embedded
document or file
Allows you to open a file when you click
on the object.
When you choose this option, a Set
button will automatically appear. Click
on the Set button and a popup window
will appear which allows you to create a
link to a file.
Show page notes
Selecting this option will display the
Page Notes for the current Flipchart
page when you click on the object.
Remove an action
To remove an action, double click on the object, select the Properties button
from the Object Edit Toolbox, select the Actions tab, click on the down arrow
and click on Do nothing.
Show Action Objects
The Show Action Objects setting allows you to easily identify which objects
on the flipchart page cause an action to occur when you click on them. This is
especially useful if:
•
You are unfamiliar with the contents of a flipchart, for example if
someone else has authored the flipchart.
•
If the action objects are invisible.
•
If you are opening a flipchart that was authored in a previous version of
ACTIVstudio or ACTIVprimary, which contains actions that are
supported in ACTIVprimary2.
By default the setting is switched off. To switch this setting on, go into Design
Mode and right click on a flipchart page, select Show Action Objects from
the popup menu.
All action objects in your flipchart will be surrounded by a red rectangle,
helping you to identify them.
About ACTIVstudio version 1.x hyperlinks
Hyperlinks will function according to their original setting in the ACTIVstudio
1.x Flipchart. Types supported are page hyperlink, file hyperlink, embedded file
hyperlink. Hyperlinks to the ACTIVstudio 1.x link library are not supported and
will be ignored.
86
ACTIVprimary2 User Guide
Layers
ACTIVprimary uses layers to hold the various objects that make up the
Flipchart page. These are like transparent sheets which only contain certain
object types unless you move objects from one layer to another. All objects
placed on the page, are ordered according to the layer and stacking order.
Take the image to the left,
This shows each of the
three layers separated in a
pictorial view to
demonstrate how layers
work. The bottom layer
holds the Farm
background image and is
also displaying a grid. The
Middle layer contains some
images, arrows and some
text objects. The top layer
has a simple pen object
which is circling the
Tractor. Here is the view
you would see normally:
Top layer
Contains all annotations (Pen,
Highlighter and Eraser) objects.
These objects will display on top of
any other object placed on the two
layers below.
Middle layer
Contains Image, Line, Shape and
Text objects.
These objects will be displayed
below (or underneath) any object
placed on the Front layer but will
be displayed above (or over) the
top of any object placed on the
Back layer.
Selecting Clear Objects from the
Clear Tool menu will remove any
objects placed on the middle layer,
see Changing the layer below.
87
ACTIVprimary2 User Guide
Bottom layer
The bottom layer contains any
object that is physically placed on
it. A background image, grid or any
object that has been locked to the
background will reside on this
layer.
Selecting Clear Objects from the
Clear Tool menu will remove any
objects placed on the back layer,
see Changing the layer below.
The layers are completely separate from each other. In other words, you can
replace the background without affecting your images or annotations. Or you
can annotate over your photographs and background without affecting other
layers.
Changing the layer
To change the layer an object is located on, in Design Mode, right click on the
object and select Bottom Layer, Middle Layer or Top Layer. This allows you
to cover, for example, an annotation object with an image object.
The Eraser Tool will act on any object placed on the front layer,
as well as annotation objects. Example
An example of how this may be used is provided in the resource
library, where you have two images of a house, one a cutaway view
inside the house the other a full external view, These objects have
already been placed into the Resource Library with the property set so
that the external view is placed on the Top layer. Drag and position
both images so that they sit one on top of the other on the page then
when ready use the Eraser Tool to selectively erase the front house
image away to reveal the inner layout.
Object Stacking Order
All objects when added to a page are allocated a position in the stacking order
according to the order they are added to the page. Each successive object is
placed on top of the preceding one within its own layer. Think of it as a pack of
playing cards where you must take a card out of the pack and place it on top in
order to fully view it.
88
ACTIVprimary2 User Guide
The images on this
example page have been
added in the following
order:
Red Square
Blue Circle
Green Triangle
So, the following rules will apply:
The red square will display beneath the blue circle and green triangle.
The blue circle will display on top of the red square but will be below the green
triangle.
The green triangle will display on top of the red square and blue circle..
These rules apply in each layer, so not only is there a stacking order in terms
of the layers, you also need to consider the stacking order within each layer.
Changing the stacking order
You can alter the stacking order by sending an object to the front or back of
the stack. In Design Mode, right click on the object and select To Front or To
Back. You can also select multiple objects to send the selection to the front or
back. Each object will retain its stacking position in relation to the other
objects.
A setting within ACTIVprimary allows you to alter the stacking order of objects
within their respective layers just by clicking on an object. Click on Teacher
Tools Menu button > Menu > Settings... > Flipchart Objects and select
the Objects to Front checkbox.
Now whenever you click on any object it will automatically be brought to the
front of all other objects within its layer. You can also use this function with
multiple objects; once again the objects will retain their relative stacking order
to each other. If you have selected a range of objects that span across
different layers then the objects will each have their stacking order altered in
relation to the layer they reside in.
Can I prevent an object from being selected and moved?
It is possible to lock an object to prevent it being repositioned, resized or
rotated when you are in Present Mode. You can, however, still apply other
properties or actions to the object. When the object is locked the Pickup boxes
will not be displayed when you click on the object. This is really useful if you
have a lot of objects on your page and some of which you may want your
pupils to move and others you may want to stay put even if they are clicked
on.
In Design Mode, right click on any object and select Lock from the popup
menu. Once an object has been locked, you may remove this property by right
clicking on the object that has been locked and choosing Unlock from the
popup menu.
Page Organization
In Design Mode, you can manipulate pages within the Page Organizer and you
can drag objects from the current page to other pages.
89
ACTIVprimary2 User Guide
Page Organizer
Use the Page Organizer to manipulate the pages for your Flipcharts. You can
move, duplicate, add or delete pages using the Page Organizer and its Toolbox.
To access the Page Organizer you need to be in Design Mode. Click on the page
number button to view the Page Selector Tray, then on the Page
button located in the Tray.
Organizer
The Flipchart window will update to show a thumbnail of all your Flipchart
pages and the Page Organizer Toolbox.
Organize your pages
Use your ACTIVpen to click and drag thumbnails to reorder the pages in the
Flipchart.
Selecting a single page
Click on a page to select it, a red rectangle around the page shows which page
you have selected. Drag the page to another location, as indicated by the red
cursor, and release the click to drop the page.
Selecting multiple pages
Adjacent
pages
Click the ACTIVpen to the left of a page, then drag
over the adjacent pages to select them, and drag to a
different location.
Or
Select the first page in the selection you want to
move then select the Shift key on the keyboard
before selecting the last page. All pages in between
the pages will be selected.
Example
Drag the pages to another location.
90
ACTIVprimary2 User Guide
Nonadjacent
pages
Select the CTRL key on the keyboard whilst you click
the ACTIVpen on a selection of pages.
Example
Drag the pages to another location.
Page Organizer Toolbox
Use the Page Organizer Toolbox, to manipulate your pages with the cut, copy,
paste, delete and duplicate functions.
When you have finished manipulating your pages, click on the Return to Page
View button located in the page number position. Your Flipchart will be
updated with the changes you made in the Page Organizer.
Copy
Copies the selected page(s) to the ACTIVprimary Clipboard. The
page(s) will then be available to paste in another location in the
same or another Flipchart. Only the most recent copied page(s)
can be pasted.
First select the thumbnail/s before you select Copy.
Cut
Removes the selected page(s) from the Flipchart and places the
page(s) on the ACTIVprimary Clipboard. The page(s) will then be
available to paste in another location in the same or another
Flipchart. Only the most recent cut page(s) can be pasted.
First select the thumbnail/s before you select Cut.
Delete
Click on the Trashcan to remove the selected page from the
Flipchart.
First select the thumbnail/s before you select Delete.
Duplicate
Copies and pastes a copy of the selected page(s) after the last
page in the current Flipchart.
First select the thumbnail/s before you select Duplicate.
Paste
Inserts the most recent cut or copied page(s), into the Flipchart.
To the same Flipchart, select Paste to add the selected page(s)
either:
•
immediately before any currently selected (highlighted in
red) page(s)
•
appended at the end of the Flipchart, if no page is currently
selected
91
ACTIVprimary2 User Guide
You may then select and move the page(s) to another location if
you prefer.
To a different Flipchart, save your current Flipchart then open a
new or existing Flipchart. Open the Page Organizer and select
Paste. Do not exit the application, otherwise the clipboard will be
cleared and you will not be able to paste the page(s) anywhere.
Select all
Selects all pages in the Flipchart.
Undo
Allows you to reverse the last action. Each click on the Undo Tool
reverses one more action.
Close
Click on the close button to exit the Page Organizer. You will be
returned to the page number you were on before you opened the
Page Organizer. Your Flipchart will be updated with the changes
you made in the Page Organizer. The changes you make are not
committed to the Flipchart until you save the Flipchart.
If you cut or delete all pages in your Flipchart, ACTIVprimary
will automatically add a blank page to the Flipchart because it
will not allow you to have a Flipchart that contains no pages.
Drag and Drop Objects Between Pages
In Design Mode only, you can copy or move object/s from the currently
displayed page to another page in the Flipchart.
1. Click on the Page Number Button
Tray.
to show the Page Selector
2. Click on the thumbnail of the page which contains the object you want
to add to another page.
3. Click and drag an object from the page so that it is over a thumbnail of
another page in the Tray. Notice the cursor
will change.
4. Choose one of the following options from the popup menu:
Copy
here
Pastes a copy of the object onto the page whose
thumbnail you dragged the object to. The object will
also still reside on the original page.
Move
here
Removes the object from the original page and
pastes it onto the page whose thumbnail you
dragged the object to.
When you drop object/s onto a page the following actions occur:
•
ACTIVprimary automatically displays the page you dragged and dropped
the object/s to
•
The object/s is automatically selected, ready to manoeuvre to a new
position on that page if required.
92
ACTIVprimary2 User Guide
•
The page thumbnail images will also update to reflect the additional
object on the page.
You can drag and drop objects onto other pages and it will
retain any properties that have been applied to it. Example
In this example we created a navigation aid by adding a shape to page
1 and applying the Next Page action to it. In the Page Selector, we
dragged and dropped the shape onto pages 2, 3 and 4. Notice that the
shape is copied to the pages in the same position as it is on page 1.
In Present Mode, when we click on the shape it opens the next page.
In Design Mode, you can drag this navigation button into your
collections folder of the Resource Library, where its
appearance and actions will be saved along with other
properties. It will then be ready for you to drag it from the
Resource Library and use.
Additional Functionality
Where can I use Right Click?
In Present Mode:
1. You can right click at the outer edge of the Toolbox or Flipchart page to
switch the Toolbox to the other side.
2. You can right click on the Calculator to toggle between a child's
Calculator or a standard Calculator.
3. You can right click on the on-screen keyboard to toggle between a
child's keyboard or a full function keyboard. You can also choose
between having small or large keyboards.
In Design Mode:
1. Switch Toolbox as in Present Mode.
2. You can right click on the page background to reveal a popup menu
offering you the following actions:
3. Add background to library
93
ACTIVprimary2 User Guide
4. Add grid to library
5. Unlock background objects
6. Insert new page
7. Insert link object
8. Paste Object
9. Paste Text from Clipboard
10. Paste Image from Clipboard
11. ACTIVote Question Settings
12. ACTIVote Results
13. Show Action Objects
14. You can right click on a single object or a selection of objects to reveal a
popup menu offering the following actions:
o
Copy
o
Lock
o
Unlock
o
To front
o
To back
o
Bottom layer
o
Middle layer
o
Top layer
o
Deconstruct word
o
Lock on background
15. You can right click on an object in any library to display a popup dialog
offering the action to delete the object.
16. You can right click on the Calculator to toggle between a child's
Calculator or a standard Calculator.
17. You can right click on the on-screen keyboard to toggle between a
child's keyboard or a full function keyboard. You can also choose
between having small or large keyboards.
18. You can right click when editing text on a Flipchart page, or in Page
Notes, to reveal a popup menu offering the following actions Undo - Cut
- Copy - Paste - Delete - Select All.
19. You can right click on a Flipchart page, or in page notes, to Paste Text
from Clipboard. You can use this to copy text from a Flipchart page,
page notes, or even a word processing application and paste it onto
your Flipchart page or in your page notes.
20. You can right click on the Protractor and Ruler to display the degrees of
rotation, or fill segments drawn with the Protractor.
Create a Link Object
A Link Object is a Flipchart object that links to a file, program or website
directly from an icon or text on your page.
To open the Create Link Object window:
Right click on the Flipchart page and select Insert link object....
94
ACTIVprimary2 User Guide
Or,
Double click on an object (except annotations), select the Properties
button, click on the down arrow and select Open Embedded Document
or File
Enter a path/filename or
URL to link to
Click on the More
button and
browse for a program exe file or
filename. The program path is
displayed in the textbox.
Command line parameters
This textbox is relevant only when
you have selected an exe or bat file
in your program/file definition.
Command Line Parameters allow
you to specify words, sequence of
characters or a control that
initiates an action when the exe or
bat file specified in the
Program/File textbox is opened.
Video Placeholder
If you have created a link to an
animation or video file, you will be
able to insert the link as a Video
Placeholder object by selecting this
radio button. See the section about
the Video Placeholder for more
information.
Click OK when you are happy with your definition, or Cancel to close the
window and remove your link object definition.
will change to
When you hover the cursor over the link object, the cursor
indicate that it is a link object. Click on the link and the program, file or
website will open in a new window in the associated program.
Moving and Rotating a Link Object
To move the link object, first ensure that you are in Design Mode and that the
Marquee Select Tool is active. Click on the Link Object and drag it to another
position on the page, holding the click as you drag. Release the click when the
Link Object is in the correct position.
To rotate the Link Object, use the Rotator pickup box to rotate it.
Editing a Link Object
You cannot edit a Link object to change the file it points to. Instead, you must
delete the Link object and create a new one that links to the correct file.
Deleting a Link Object
To delete a Link Object you must be in Design Mode. Use the Marquee Select
button from
Tool to double click on the link object and select the Delete
the Object Edit Toolbox. Or drag the link object over to the Trashcan, located
in the bottom left corner of your Flipchart.
95
ACTIVprimary2 User Guide
Video Placeholder
To create a Video Placeholder object, insert a video file as a
Link Object and select the Video Placeholder radio button. Click
OK to view the Placeholder Definer window.
About Video Placeholder Objects
Video Placeholder objects reside as image objects on your page and display an
image from a video file, which you specify in the Link Object Definer. The
position and size of the video image indicates the area in which the video
playback is displayed.
Using the Placeholder Definer
When you have finished defining your link object, click OK to view the
Placeholder Definer window.
Use the Play and Pause buttons, or use the seek bar, to find a frame you want
to use as the video image. Adjust the size of the window to alter the size of the
video playback area. Click OK when you have finished and the frame you chose
will be added to the page. Or, click Cancel to specify a different video file in
the Link Object Definer.
Playing the Video
When you hover the cursor over the video frame image, the cursor will change
to indicate that it is a link object. Click on the video frame image to start the
video and view the playback controls.
Playback Controls
Play
Starts the video playback.
Pause
Suspends the current playback and holds the position of the
progress indicator on the timebar. Click Play to continue playback
from the position where the playback was paused.
Stop
Discontinues the current playback and moves the progress
indicator to the beginning of the timebar. Click Play to restart the
playback.
Seek
The progress indicator moves along the timebar to indicate the
current position in the video file.
You can click on the progress indicator and drag it to a different
position on the timebar to quickly move forwards or backwards to
a specific point in the playback.
If you move the indicator whilst Play is active, the video file will
play from the new position.
If you move the indicator whilst the Pause or Stop is active, the
video file will remain paused or stopped until Play is selected,
where it will playback from the new position.
Close
Stops the video playback and displays the video image once more.
96
ACTIVprimary2 User Guide
Moving a Video Placeholder Object
To move the Video Placeholder object, first ensure that you are in Design
Mode and that the Marquee Select Tool is active. Click on the Video
Placeholder object and drag it to another position on the page, holding the click
as you drag. Release the click when it is in the correct position.
When the video is playing in Present Mode, you can just click
and drag the playback area to another position.
Editing a Video Placeholder Object
You cannot edit a Video Placeholder object to change the video file it's linked
to. Instead, you must delete the Video Placeholder object and create a new one
that links to the correct video file, using the Link Object Definer.
Deleting a Video Placeholder Object
To delete a Video Placeholder Object you must be in Design Mode. Use the
Marquee Select Tool to double click on the Video Placeholder Object and select
button from the Object Edit Toolbox. Or drag the Video
the Delete
Placeholder Object over to the Trashcan, located in the bottom left corner of
your Flipchart.
When annotating over video in Overlay Mode, you may notice
your annotations have a flicker effect. This is a machine
specific issue and is related to the quality of your graphics
hardware.
It may be possible to prevent annotation flickering by reducing
the hardware acceleration of your graphics hardware. To do
this, right click on your Desktop and choose Properties.... In
the Advanced section, look for the Hardware Acceleration
setting, which may be in the Performance or Troubleshooting
sections. Adjust the Hardware Acceleration slider down from
'Full'. You will need to alter this slider setting to the point
where the flickering is prevented.
Object Edit Toolbox
When you double click on an annotation, image, line or shape object, a Toolbox
will appear that allows you to perform the following functions:
Increases the size of the selected object.
Decreases the size of the selected object.
Allows you to delete the selected object.
Duplicates the selected object.
If you double click on a text object you will notice that an extended Toolbox
appears:
97
ACTIVprimary2 User Guide
The additional button is the Text Edit button, which allows you to
edit the selected text object.
When you are working in Design Mode, the following button will appear:
All objects have properties associated with them that define how
they display or interact with other objects. You may not be aware
of these properties because initially each object will be set with
default values. Use the Properties button to amend the properties
and actions for a single or group of objects. See the section about
Object Properties for more information.
Documentation Feedback
Promethean continually strives to improve our products and services and
appreciate any comments and suggestions that you have. We value your
feedback and have created this section to let you easily send us comments,
requests and issues relating to the help and documentation we supply to you.
Our aim is to produce high quality information, which allows you to find the
information you need quickly and helps you learn more about the features of
our ACTIV products.
It is useful to include the following information with your feedback:
For Help Files:
ACTIVprimary2 version and build number (click on Teacher Tools Menu >
Menu > Help > About ACTIVprimary2...)
Help File version number (click on the link at the bottom of the Welcome page)
Internet Explorer version number (within your browser, click on Help > About
Internet Explorer)
Help topic title
For Printed/PDF Documents:
ACTIVprimary2 version and build number (click on Teacher Tools Menu >
Menu > Help > About ACTIVprimary2...)
Document title and TP number
Issue number
Page number
Forward your comments in an email to [email protected]
This feedback is for your comments about documentation
and help only. Your personal details will be kept confidential.
The information you provide will only be used to improve the
quality of our help and documentation.
To contact Technical Support, fill out the online form on the
Promethean website:
http://www.prometheanworld.com/uk/html/customer_care/contact.shtml
98
ACTIVprimary2 User Guide
Index
... button, 38
analog clock, 71
about ACTIVprimary, 50
analog clock settings, 40
about ACTIVprimary2, 1
annotate over the desktop, 73
about properties, 78
annotation tools, 10
access to more features, 38
anonymous mode, 51
ACTIVities Explorer, 55
apply a background, 20
ACTIVote question settings, 52
apply a grid, 20
ACTIVote results, 52
apply grid mask, 20
ACTIVote session, 51
apply timeout, 38
ACTIVote settings, 38
arrow button, 7
ACTIVote tool, 51, 72
Backgrounds, 20
ACTIVote user database, 38
Bottom Layer, 87
ACTIVprimary forum, 50
button ..., 38
ACTIVprimary options, 38
Calculator, 67
ACTIVprimary preferences, 38
camera selector, 68
ACTIVprimary settings, 38
camera tool, 68
ACTIVprimary version number, 50
camera types, 68
ACTIVprimary2 interface, 5
center of mirror and flip point, 70
ACTIVresource manager, 47
center of rotation point, 70
ACTIVslate controller, 50
change background, 20
ACTIVstudio version 1.x hyperlinks,
85
change colors, 18
add a new resource category, 27
Change Layer, 87
change object appearance, 80
add multiple copies of a resource,
22
add resources to a location on your
PC network, 27
change protractor size, 60
change size of page, 38
change size of page on screen, 38
add resources to library, 24
change size of ruler, 62
add results to new flipchart page,
38
change the functions and features,
38
add sound object, 53
child calculator, 67
add to flipchart page button, 64
child keyboard, 15
address, 2
Clear Tool, 57
adult calculator, 67
Click Actions, 85
adult keyboard, 15
clock settings, 40
alter page scale, 38
clock tool, 71
alternative origin, 70
close, 31
99
ACTIVprimary2 User Guide
cm ruler, 62
desktop camera, 74
color of menu button, 37, 77
desktop mode, 73
color of page background, 20
desktop toolbox, 73
color picker tool, 18
Dice, 59
concept, 1
dice roller, 59
Contact, 2
dice speed, 46
Container, 83
Did You Know?, 43
container objects, 83
digital clock, 71
control sound playback, 53
digital clock settings, 40
control speed of dice roll, 46
display 24 hour clock, 40
convert handwriting to editable
text, 65
display ACTIVote results, 38
display clock, 71
count down, 71
display date, 40
count up, 71
display hints, 43
create a question page, 52
display tooltips, 43
create fractions, 64
display user names, 38
create links to files, 94
create new flipchart, 31
display version number of
ACTIVprimary, 50
create resource folders, 27
documentation feedback, 98
dancing man button, 31
double click to open objet edit
toolbox, 45
deconstruct text, 15
Drag Objects, 92
default background image, 20
draw a line, 12
default file locations, 44
default page background color, 20
default page color, 40
draw a segment, 60
draw a shape, 13
draw a straight line, 62
default URL, 43
edit objects, 73
define a question page, 52
define how links are displayed, 43
define how objects are displayed,
41
define how the clock is displayed,
40
define page color, 40
editing flipchart, 37, 77
editing functions, 97
editing recognized text, 65
editing text objects, 15
email, 2
enhancements, 3
define world color, 40
Eraser Tool, 10
delete objects, 40, 57
Exit, 31
Delete Resource, 29
export flipchart, 48
demo mode, 51
file host, 43
Design Mode, 37, 77
fill in answers, 38
100
ACTIVprimary2 User Guide
Fill Tool, 18
layout of printed pages, 33
fit page to..., 38
license agreement, 50
Flipchart Bin, 5, 40
line and shape quality, 41
flipchart objects settings, 41
line width, 12
flipchart settings, 40
Lines Tool, 12
floating keyboard, 15
link object, 94
font options, 15
linked file hosting settings, 43
Fraction Maker Tool, 64
locate personal and shared files, 44
freehand area capture, 68
Lock, 87
general settings, 43
lock object on background, 20
generate random numbers, 59
make fractions, 64
go to page, 85
make grid larger or smaller, 20
graph displaying ACTIVote results,
52
manage resource, 47
grid mask, 20
manipulate flipchart pages, 90
manipulate lines, 12
Grid Tool, 20
manipulate shape, 13
group objects, 78
hammer and spanner button, 57
handwriting guide lines, 65
Manipulating Objects, 7
Manipulating Text, 15
measure objects, 62
Handwriting Recognition, 65
Menu, 38
handwriting recognition function, 76
handwriting recognition language,
47
hide grid, 20
merge object on background, 20
Middle Layer, 87
minimize desktop toolbox, 73
mirror and flip objects, 70
Highlighter Tool, 10
mm ruler, 62
hyperlinks, 94
move calculator, 67
identify parts of the screen, 5
move objects, 79
identify types of resources, 22
move protractor, 60
image quality, 41
move ruler, 62
inches ruler, 62
include instructions for activity, 36
increase visual quality of objects,
41
name objects, 78
named mode, 51
navigate flipchart pages, 7
insert sound object, 53
new features, 3
introduction to ACTIVprimary2, 1
New Flipchart, 31
language for handwriting
recognition, 65
Next Page button, 7
notes window for page, 36
launch ACTIVities, 55
object edit toolbox, 97
Layers, 87
101
ACTIVprimary2 User Guide
object edit toolbox position, 45
point to point mode, 10
Object Properties, 78
position objects accurately, 20
Objects to Front, 41
preferences, 38
open ACTIVities folder, 55
prepare flipchart, 37, 77
open file in source program or
ACTIVprimary2?, 43
Prevent objects from being moved,
87
Open Flipchart, 32
Previous Page button, 7
open object edit toolbox, 45
print page numbers, 33
open resource library, 22
print pages, 33
opening version 1.x flipcharts, 32
print preview, 33
operating system keyboard, 15, 47
Printing, 33
options, 38
product features, 3
organize flipchart pages, 90
profile location, 44
organize resources, 47
profiles and resources settings, 44
orientation of revealer blind, 59
promethean address, 2
overlay mode, 43
promethean website, 2, 50
Page Color, 40
protractor color, 46
page fit, 38
Protractor Tool, 60
Page Notes, 36
protractor translucency, 46
Page Number button, 6, 89
Publish to browser, 48
Page Organizer, 90
pupil interface, 5, 6
page organizer toolbox, 90
question settings, 52
page properties, 78
question timeout, 38
Page Reset, 36
recognition language, 65
Page Scale, 38
recognition mode, 76
page selector, 6
record sounds, 53
page turn effects, 7
recorder controls, 53
paper size in printer, 33
rectangular area capture, 68
paste calculation to page, 67
Redo Tool, 30
paste multiple copies of a resource,
22
remote control of PC cursor, 50
Pen Tool, 10
remove objects, 40, 57
remove resource, 29
photo mode, 43
reset page button, 36
photograph, 68
resize objects, 79
photograph paste options, 68
resource category window, 22
photograph your desktop, 74
Resource Library Tool, 22, 24
playback controls, 53
resource type icon, 22
point to point area capture, 68
Reveal Tool, 59
102
ACTIVprimary2 User Guide
revealer over the desktop, 75
Sound Controller, 53
revert page to saved state, 36
sound playback controls, 53
right click functions, 93
sound recorder, 53
rotate objects, 70, 79
sound recorder controls, 53
rotate protractor, 60
Special Tools, 57
rotate ruler, 62
spotlight over the desktop, 75
rubber stamp, 22
Spotlight Tool, 58
ruler color, 46
Stacking Order, 87
Ruler Tool, 62
Start Effects, 45
ruler translucency, 46
start voting, 51, 72
Save Flipchart, 32
Support, 2
scale down page, 38
switch between design and present
modes, 37, 77
scale flipchart page, 38
take a photograph of your screen,
68
scale grid, 20
select annotation mode, 43
take first answer, 38
select camera, 68
Teacher Interface, 5, 30
select colors, 18
Teacher Tools, 30
select print range, 33
teacher tools menu button, 31
Select Tool button, 7
technical support, 2
select voting session, 51, 72
telephone number, 2
send comments about help to
technical publications at
promethean, 98
text deconstruct, 15
text options, 15
set page color, 40
Text Tool, 15
set printer, 33
text tray, 15, 65
set world color, 40
timer, 71
setting up the ACTIVote software,
38
tool tray, 5
Settings, 38
toolbox position, 45
Tooltips, 43
shape outline, 13
Top Layer, 87
Shapes Tool, 13
Tray Effects, 45
show action objects, 85
tray position, 45
show object edit toolbox, 45
types of ACTIVote session, 51
size of page on screen, 38
types of camera, 68
snap objects to grid points, 20
types of spotlight, 58
snap to grid, 20
Undo Tool, 30
snapshot tool, 68
Unlock, 87
Sound Control Tool, 53
use guidelines, 20
103
ACTIVprimary2 User Guide
use handwriting input in other
applications, 76
voting response, 52
web links, 43
use host program to open files?, 43
user forum, 50
website, 2
what's new in ACTIVprimary 2.0, 3
user input settings, 47
using resources, 22
where are my personal and shared
files?, 44
video placeholder objects, 96
where can I right click?, 93
video playback quality, 41
where is my ACTIVprimary2 profile
file?, 44
view ACTIVities folder, 55
Wipe Clean Tool, 57
view flipchart in HTML, 48
workspace area, 5
view results, 52
world color, 40
virtual keyboard, 47
xy origin tool, 70
visual quality of objects, 41
voting feedback, 52
104
ACTIVprimary2 User Guide
2
Promethean Technologies Group Limited
8601 Dunwoody Place, Suite 108, Atlanta,
GA 30350
Tel: (888) 652-2848
Fax: (678) 762-7700
www.prometheanworld.com