1
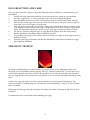
IM
DIGITAL INCUBATOR
INSTRUCTION
MANUAL
TABLE OF CONTENTS
2
INCUBATOR OPERATING INSTRUCTIONS
PREPARING THE INCUBATOR
STARTING YOUR INCUBATOR
3
AUTOMATIC TURNING UNITS
OPERATING ENVIRONMENT
4
EGG SELECTION AND CARE
FERTILITY TESTING
5
REGULATING THE HUMIDITY
CARE AND MAINTENANCE OF YOUR INCUBATOR
INCUBATION AND HYGINE
6
WARRANTY
NOTICE
1
INCUBATOR OPERATING INSTRUCTIONS
Thank you for purchasing an IM incubator.
Welcome to the exciting world of incubation, hatching and rearing of all types of poultry and bird
eggs. The following instructions will guide you through the set-up and preparation of your
incubator.
PREPARING THE INCUBATOR
1.
2.
3.
4.
5.
Remove the unit from the carton.
Remove all styrene from inside unit.
Fill the water tray in the bottom of the unit with lukewarm water.
In an automatic turning incubator make sure that the turning tray or trays are correctly
hooked over the turner arm on the motor shaft.
If using a wet bulb thermometer fill bulb with warm water and place inside unit on hatching
tray.
STARTING YOUR INCUBATOR
1.
2.
3.
4.
5.
6.
7.
8.
9.
Turn incubator on at the front of the control box using the power switch.
The digital display will flash, then show the current incubator temperature on the digital
display. The high temp / low temp light and the heater light will both come on.
To view the current set point temperature, press and hold down the ‘Set Temp’ button for 1
second. The current set point temperature will be displayed. After a few seconds this display
will revert to the current internal temperature.
The current temperature will slowly increase until it is on or over the set point as which time
the heater light will go out. The temperature inside the incubator will fluctuate for a little
while until it stabilizes on the current set point temperature.
The fan will operate continually to enable a more stable temperature control.
Run the incubator for an hour or so at least before putting eggs in to make sure everything is
running correctly.
The incubator should be run at 37.5 C or 99.5 F for general poultry. For all other species,
please refer to an expert reference.
If you need to change the set point of the incubator, hold the ‘Set Temp’ button down for 5
seconds. The display will change to show the current set point and will be flashing. Push the
‘Set Temp’ button to increase the current set point in increments of 0.1 C or press the ‘Set
Time’ button to decrease the set point in units of 0.1 C.
Once you have changed the set point to the desired temperature, leave the controller alone
for a few second and it will revert to the current internal temperature.
2
AUTOMATIC TURNING UNITS
1.
2.
3.
4.
5.
6.
7.
8.
If you have an automatic turning incubator, it will either be a tilt turn machine with egg trays
that rock from side to side or a roll turn machine with little rollers that the eggs sit on with a
tray that moves side to side rolling the rollers and the eggs with them.
Both types of machines have a motor driving each egg rack that is controlled from the
electronic circuit board on top of the machine.
A digital count down timer built on to the circuit board will count down from its set time to
zero and then turn all the motors at the same time.
To view the set time, hold down the ‘Set Time’ button for 1 second.
To change the set time hold down the ‘Set Time’ button for 5 seconds and when the number
is flashing use the ‘Set Temp’ to increase and the ‘Set Time’ to decrease the turning timer.
Do not set the timer to count down from less than 60 minutes unless you are doing so for
testing purposes only. If so, remember to set the timer back to every 60 minutes or greater.
Eggs should be turned at least every 8 hours for good results.
Eggs should be turned up to the last 2 to 3 days before hatching. After this, the eggs should
be moved to a hatching tray, separate hatcher incubator or the auto turner should be switched
off. It is not a good idea for eggs to be turning while hatching.
OPERATING ENVIRONMENT
Ideally your incubator should be located in a room where the temperature ranges between
14°C (57 F) and 25°C (77 F). The room should be free from drafts and not subject to excessive
fluctuations in temperature. Do not place the incubator alongside windows as direct sunlight can
cause problems with temperature control.
Avoid heating appliances (gas heaters) as excessive levels of CO2 can cause problems. Do not place
the incubator in areas where the temperature may drop below 10°C as the incubator may struggle to
maintain the correct temperature.
Do not use the incubator in a room with refrigerated air conditioning as the air conditioner will suck
moisture from the air and the incubator and you may have problems keeping enough humidity in the
incubator.
If you have the incubator on a cold surface such as a stone bench top, please be aware that cold air
will be sucked into the incubator and may cause fluctuations in temperature.
3
EGG SELECTION AND CARE
Once you have obtained a supply of eggs the following points will help you in maximizing your
hatchability.
1.
Freshly laid eggs should be stored for at least one day before setting in your incubator.
2.
Storage of eggs from 1 to 7 days generally will result in maximum hatchability.
3.
Eggs should be turned at least once a day during storage to maintain maximum viability.
4.
Do not allow stored eggs to become too cold or too hot. A dry cool spot is the best place to
store them. Never store eggs in a refrigerator.
5.
Only put clean eggs inside your incubator. Dirty eggs can introduce disease or bacteria into
your incubator. If you need to clean eggs, a damp wipe is best. Do not immerse eggs under
water. A disinfectant solution can also be used to wipe eggs to make sure they are clean.
6.
Do not use cracked or chipped eggs, or eggs that do not appear to be the correct shape.
Round, squashed or misshapen eggs are unlikely to hatch.
7.
Use medium sized eggs for the species. Do not incubate over large or small eggs as they are
unlikely to hatch.
8.
Selecting good eggs to incubate will increase hatchability and reduce the chances of eggs
blowing in the incubator.
FERTILITY TESTING
By using a candling lamp you can determine if an egg is fertile or not. Although testing is not
necessary you can eliminate infertile eggs by doing so. Usually by about day 7 you are able to see
red blood cell growth around the inside of the egg and/or the air sack developing in the fat end of
the egg. Eggs that show no growth or air sack and are clear are infertile and maybe discarded at this
time.
Candle your eggs again when it's time to put them down in to the separate hatching tray. The
removal of eggs for candling purposes will not harm your hatchability so long as it's for no longer
than 15 minutes.
Removing infertile eggs from the incubator will reduce the chance of having an egg blow in your
incubator.
It's important to have clean hands when handling your eggs.
4
REGULATING THE HUMIDITY
Getting the correct humidity for your incubator is very important. Some species are more vulnerable
to humidity being incorrect than others, however, all eggs require some level of humidity during
incubation and usually a different and higher humidity during hatching.
Humidity is controlled in the incubator by varying the surface area of water and / or air flow
through the machine. However, because the incubator is getting fresh air from the room it is in
external conditions will dramatically affect the humidity inside the incubator. Increasing the surface
area of water or decreasing air flow will increase humidity in the machine. Decreasing surface area
or increasing air flow will decrease humidity.
For general poultry it is usually recommended to run the IM incubator with its tray full of water and
kept topped up over time and all vents fully opened during incubation. This is the period up to the
last three days.
During the hatching period (last three days), the vents should be closed to only 1/3rd open. Never
close all the vents completely as eggs require fresh air to hatch.
If you find that your eggs are developing to nearly full growth and then not hatching, it is quite
likely to be the humidity not being high enough or too high.
Some species have different humidity requirements. Please use an expert reference for the humidity
requirements for the species you are incubating.
CARE AND MAINTENANCE OF YOUR INCUBATOR
After every hatching thoroughly clean and disinfect your incubator. For a suitable disinfectant,
contact your distributor. Ensuring the incubator is clean and thoroughly disinfected will avoid cross
contamination of hatches and prevent the growth of disease or bacteria in the incubator.
1.
2.
3.
4.
5.
6.
After every second hatching disconnect the incubator from the power supply.
Remove the incubator ceiling plate by unscrewing the screw/s at the front of the ceiling.
(near the perspex front door).
Slide the complete ceiling out of the incubator.
Using a vacuum cleaner and possibly a light brush, remove all the dust and fluff around the
fan and heating element.
Replace the ceiling and secure with its screw/s.
Failure to keep this area clean may void the warranty for the fan and heater elements.
INCUBATION AND HYGINE
Always start with a clean incubator. Bacteria can enter the shell of the egg through its pores
potentially damaging or killing the embryo and affecting your hatchability. After you've completed
your hatch its essential that you clean and sanitize your incubator. By maintaining a high level of
hygiene you will ensure you breed healthy birds.
When cleaning your incubator do not spray any liquid directly on the temperature probe that runs
down the wall of your incubator or across the roof. Only use a disinfectant recommended by your
distributor.
5
WARRANTY
All IM incubators are covered by a twelve months parts only warranty.
As of the 1st of January 2012 new Australian regulations come into place regarding warranties
against product defects. A warranty against defects is a warranty that extends the consumers normal
rights under law.
This product, which you have purchased, contains such a warranty. This document contains the new
requirements under Australian law that protects your rights under this warranty.
Any claim under this warranty must be made within twelve months from the date of purchase of
this product. To make a claim under this warranty, please contact (with proof of purchase):
JHSM Pty Ltd
P.O. Box 2146,
Rockingham DC. 6967
Ph: 1300 88 1170
Email: [email protected]
This warranty specifically relates to a failure of the product due to manufacture and does not cover
damage caused by misuse of the product. This includes damage caused to electrical equipment
caused by a power surge as the consumer is expected to provide surge protection to all electrical
equipment.
The consumer must provide JHSM Pty Ltd or its representatives an opportunity to inspect the faulty
product so that a decision can be made as to whether to repair or replace the product. This may be in
person of JHSM Pty Ltd or its agent, or with sufficient photographic documentation. In the event
that the product needs to be replaced, the consumer will be required to return the product to JHSM
Pty Ltd or its declared agent where costs to return said product are deemed reasonable. Where the
product has been determined to be repairable, JHSM Pty Ltd will send parts to the customer (within
a reasonable time frame) for the customer to make repairs to the product or the customer may return
the product to JHSM Pty Ltd for a technician to repair at the customers cost.
This warranty is provided in addition to other rights and remedies you have under law: Our goods
come with guarantees, which cannot be excluded under the Australian Consumer Law. You are
entitled to replacement or refund for a major failure and to compensation for other reasonably
foreseeable loss or damage. You are also entitled to have the goods repaired or replaced if the goods
fail to be of acceptable quality and the failure does not amount to a major failure.
A major failure, under the legislation, is defined as:
• A reasonable consumer would not have bought the product if they had known about the
problem. (Relating to a known problem or fault with the product).
• The goods are significantly different from the description, sample or demonstration model
shown to the consumer.
• The goods are substantially unfit for their normal purpose and cannot easily be made fit,
within a reasonable time.
• The goods are substantially unfit for a purpose that the consumer told the supplier about, and
cannot easily be made fit, within a reasonable time.
• The goods are unsafe.
For more information regarding this legislation please see the ACL website :http://www.consumerlaw.gov.au
6
IMPORTANT NOTICE
Our company recommends that electric appliances, such as
incubators, brooders, grain mills and dehydrators, be protected by a
surge filter or surge guard at all times.
WARRANTY'S DO NOT COVER DAMAGE CAUSED BY POWER
FLUCTUATION OR SURGES
When a large surge or power fluctuation occurs the surge guard or
surge filter will absorb the power and avoid damage to your
equipment.
A surge filter will absorb the surge and continue to allow power to the
appliance attached. This means that incubators and brooders will
continue to operate after the surge. A surge guard will usually turn off
the power and are fine for grain mills and other non essential
appliances.
We recommend nothing less than a Clipsal 463SF surge filter
These surge filters will absorb the power surge and continue to
operate. In the event of a surge larger than the unit can absorb, the
little red light will go off and it will no longer protect from surges. You
will need to replace the filter as soon as possible, but the equipment
will continue to operate.
7