1
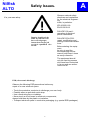
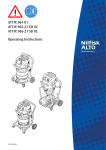
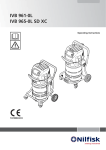
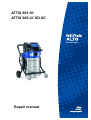
ATTIX 961-01
ATTIX 965-21 SD XC
Repair manual.
2
Nilfisk
ALTO
Index
A. Saftey Issues
3-4
B. Technical data
5-7
C. Construction
8-11
D.
12-14
Function
E. Trouble shooting
15-20
F.
Spare parts
21-23
G.
Tooles
24
H. Diagram
25-26
2
3
Nilfisk
ALTO
In this manual you will find
the essentials you need
to know when repairing
wet and dry cleaners of
the Attix 9 series.
When carrying out repairs,
make sure you have a suitable
workbench or the like with the
necessary power supply
available.
If you determine an error
in operation, be sure to
refer the customer to the
user manual.
A
Preface
A fault in the equipment
can have a number of causes.
Chapter E Troubleshooting
will help you here.
Use the illustrated spare
parts lists for your repairs.
These show you the location
of the individual parts and the
sequence in which they are
assembled.
Read the technical information sheets. These will tell you
about any technical modifications made after publication of
this repair manual.
Technical information
sheets are a supplement
to the spare parts list until
a follow-on publication.
Repair manuals and technical
information sheets
should be available at the
site where repairs are carried
out. Further repair
manuals of the Attix series
may be necessary for
repairs to the equipment.
It is not permitted to give
them to third parties.
Use original Nilfisk
ALTO spare parts only!
Safety instructions marked
with this symbol in
this manual must be observed
to prevent danger to persons.
Symbols used to mark
instructions
This symbol is used to
mark safety instructions
that must be observed to
prevent damage to the
equipment and degradation
of performance.
This symbol indicates tips
and instructions to simplify
work and to ensure safe
operation
3
4
Nilfisk
ALTO
A
Safety Issues.
Observe national safety
directives and regulations
for the electrical engineering
trade, in particular:
For your own safety.
IEC 60335-2-69
EN 60335-2-69
DIN VDE 105 part 1:
operation of electrical
power installations.
Repairs should only be
made by someone who
has received proper
instructions for the job
or who is a qualified electrician.
DIN VDE 0701/0702:
repair, modification and
testing of electrical installations.
Before starting the equipment,
be sure to read the
accompanying service
manual, and keep it close
as ready reference.
The equipment should
only be used by persons
who have been instructed
in its use and are authorized to do so.
ESD (electrostatic discharge)
Observe the following ESD precautions before any
repair of or near electronic parts:
• Touch the protective conductor to discharge your own body.
• Possibly wear an anti-static wrist strap.
• Use a conducting floor or tabletop.
• Never touch a circuit board or electronic components,
always hold them by the plastic or insulation.
• Transport electronic parts in conductive packaging (e.g. special ESD packages).
4
5
Nilfisk
ALTO
B
Technical Data.
Attix
National Variants
Voltage
Frequency
Fusing
Power consumption PIEC
Connected load for appliance
socket
Total connected load
Power cord lenght
Power cord type
Protection class
Protection category
RFI suppression
Width
Depth
Hight
Weight
Tank volume
Air volume flow (max)
Static wate lift (max)
V
Hz
A
W
W
W
m
mm
mm
mm
kg
l
l/min
Pa
Sound pressure level at 1m,
EN 60704-1
Noise level in working distance
Attix 961-01
SD
EU
EU
230
230
50/60
16
2x1200
1280
3680
2400
10
H07RN-F3G1,5
I
IPX4
EN 55014-1
580
615
600
690
970
990
30
45
70
50
2x3600
???
67
dB(A)
5
??
6
Nilfisk
ALTO
B
Technical Data.
Attix
National Variants
Voltage
Frequency
Fusing
Power consumption PIEC
Connected load for appliance
socket
Total connected load
Power cord lenght
Power cord type
Protection class
Protection category
RFI suppression
Width
Depth
Hight
Weight
Tank volume
Air volume flow (max)
Static wate lift (max)
V
Hz
A
W
W
W
m
mm
mm
mm
kg
l
l/min
mbar
ATTIX 965-21 SD XC
DK
230
50/60
13
2x1000
990
2990
10
H07RN-F3G1,0
I
IPX4
EN 55014-1
615
690
990
45
50
2x2900
230
Sound pressure level at 1m,
EN 60704-1
Noise level in working distance dB(A)
6
67
7
Nilfisk
ALTO
B
Technical Data.
Attix
National Variants
Voltage
Frequency
Fusing
Power consumption PIEC
Connected load socket
Total connected load
Power cord lenght
Power cord type
Protection class
Protection category
RFI suppression
Width
Depth
Hight
Weight
Tank volume
Air volume flow (max)
Static wate lift (max)
V
Hz
A
W
W
W
m
mm
mm
mm
kg
l
l/min
mBar 230
ATTIX 965-21 SD XC
EU
230
50/60
16
2x1200
2400
10
H07RN-F3G1,5
I
IPX4
EN 55014-1
615
690
990
45
50
2x3600
Sound pressure level at 1m,
EN 60704-1
Noise level in working distance
dB(A)
7
67
8
Nilfisk
ALTO
Construction.
ATTIX 961-01
8
C
9
Nilfisk
ALTO
Construction.
ATTIX 965-21 SD XC
9
C
10
Nilfisk
ALTO
C
Construction.
Suction turbines.
Attix 961-01
Attix 965-21 SD
10
11
Nilfisk
ALTO
Construction.
Electrical components.
Attix 961-01
Attix 965-21 SD
11
C
12
Nilfisk
ALTO
D
Function.
Attix 965-21 SD
Motor connection
Magnetic
Yellow led
Magnetic valve
Yellow led
flashes
Red led
Green led
Servo plug
Motor connection
Servo motor
Magnetic valve
12
13
Nilfisk
ALTO
D
Function.
Aut. Cleaning function.
Even with extremely fine dust the automatic filter cleaning function allows you to work constantly
with the same suction performance without having to manually clean the filter.
To make it possible to clean the filter during cleaning work, the filter has been divided into two
halves by means of two side seals on the filter holder. The cleaner sucks in dirt through
one side while the other side is being cleaned by a blast of air from the inside to the outside.
One solenoid valve (pos 1.) and the the servo motor (pos.2 ) control ( every 30 sec.) the suction
air stream and the blast of air to clean the filter.
Pos.1
Pos.2
13
14
Nilfisk
ALTO
Function.
Automatic filter cleaning.
5
4
3. Sucking on both sides of the filterspliting.
4. Electromagnet valve piston is closed.
5. Servo motor is in neutral.
3
3
5
4
2
1.
3.
2.
4.
5.
Right side will be closed.
Sucking on the left side of the filter.
Air push is claning the right side of the filter.
Electromagnet is opening to push hole.
Servo motor is closing the right side.
1.
3.
2.
4.
5.
Left side will be closed.
Sucking on the right side of the filter.
Air push is claning the leftside of the filter.
Electromagnet is opening to push hole.
Servo motor is closing the left side.
1
3
5
4
2
1
3
14
D
15
Nilfisk
ALTO
Trouble shooting
Removing/fitting grip with tensioning band
4
1
1
1. Take the cleaner head
with the adapter ring off
the container, and lift the
container out of the base
frame.
2. Mark (1) the position of
the grip (4) and the facing
stop (5) on the container.
5
2
3
1
1
3. Undo the screw (2) on
the tensioning band (3)
with a screwdriver, and remove
the grip (4) and tensioning
band (3).
4. Fit in the reverse order,
placing the grip (4) and
stop (5) between the markings
and lightly tightening
the screw (2) on the tensioning
band (3).
7
7
7
6
5. Set the container in the
base frame, and lock it in
place.
6. Align the grip (4) and
stop (5) on the container in
the base frame (7), and
firmly tighten the screw (2)
on the tensioning band (3)
7
Note:
The contact faces of the
contact spring (6) must be
clean and free of corrosion.
15
E
16
Nilfisk
ALTO
Trouble shooting
E
Removing/fitting belt (all models)
1. Take the cleaner head
with the adapter ring off
the container, and lift the
container out of the base
frame.
8
2. Mark the position of the
belt on the container (1).
3. Remove the ring (8) on the coupling
Take out the coupling.
6
4
6
4
6
4. Thread a normal length
of cord (3) or the like (6080 cm) through one of the
Loops (4) of the tensioning
device, and pull the loop
(4) back over the catch
(6). Detach the second
loop (4) in the same way,
and take off the belt (7).
7
4
5. Fit in the reverse order,
making sure the belt (7) is
correctly positioned.
3
1
16
17
Nilfisk
ALTO
Trouble shooting
Removing/fitting grip
Attix 961-01
Attix 965-21 SD XC
Fig.
Fig.
Remove 4 screws. in top.
Remove 2 screws in the handle.
Fig. 3
Fig. 4
Remove the filter.
Release by pulling.
Fig. 5
Punch out the wire
nail with a mandrel.
17
E
18
Nilfisk
ALTO
E
Trouble shooting
ESD (electrostatic discharge)
Observe the following
ESD precautions before
any repairs to electronic
circuitry:
- Touch the protective
coductor to discharge static
from your own body.
- Possibly wear an antistatic
wrist strap.
- Use a conductive floor tabletop.
- Never touch a circuit
board or electronic components, always hold
them by the plastic or insulation.
- Transport electronic
parts in conductive packaging (e.g. Special
ESD packages).
Troubleshooting on unit
Unit will not work
(all units with brush motor)
Start:
line voltage must be present
and plug must be plugged in.
Voltage applied to switch ?
No
Check plug and power
cord,replaceif
necessary.
Yes
Replace electronics.
Yes
Repair or replace motor.
No
No
Does motor work?
Conduct
saefty
check
Yes
Does cleaner work?
18
Yes
No
Do electronics work?
19
Nilfisk
ALTO
Trouble shooting
Aut. Filter cleaning
No.4
Magnetic
Valve plug.
No.1.
Yellow led
Magnetic valve.
No.2
Green led
Servo.
No.3
Servo plug.
Machine does not clean the Filter.
Is LED no.1 (operating )illuminates
Magnetic valve.
No
Replace electronic PC board.
Yes
Is LED no.2 (operating) illuminates
Servo.
No
Replace electronic PC board.
Yes
Check plugs for Servo (3) and
Magnetic valve (4) on PC board
Are they OK !
No
Replace Servo or Magnetic valve.
Yes
Replace Servo or Magnetic valve.
19
E
20
Nilfisk
ALTO
Spare parts
Attix 961-01
20
F
21
Nilfisk
ALTO
Spare parts
Attix 961-01
21
F
22
Nilfisk
ALTO
Spare parts
Attix 965-21 SD XC
22
F
23
Nilfisk
ALTO
Spare parts
Attix 965-21 SD XC
23
F
24
Nilfisk
ALTO
G
Tools
1
2
5
4
3
1. Calibration sensor (Alto no. 302000766)
2. Electronic device to check EC turbine
(Alto no. 62859)
3. Digital multimeter
4. Lamp holder E-27/60 W (Alto no. 302000764)
5. Lamp holder E-27/60 W (Alto no. 302000765)
6. Test device (Alto no. 40434)
7. Adjustment mask (Alto no. 62480)
6
7
24
25
Nilfisk
ALTO
Wiring Diagram
ATTIX 961-01
25
H
26
Nilfisk
ALTO
Wiring Diagram
ATTIX 965-21 SD XC
26
H