1
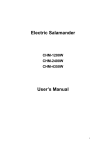
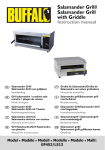
OE7303 Electric Salamander Grill
USER INSTRUCTIONS
Please read the following carefully before using this appliance.
Warnings and Precautions:
Please ensure that all commissioning checks and initial start-up procedures have taken place.
This manual should be kept in a safe and accessible place for future reference.
This appliance is designed for professional use and must only be operated by qualified
personnel.
It is mandatory that all appliances are installed, commissioned and serviced by a qualified and
competent person as defined by the regulations in force in the country of installation.
Failure to comply will invalidate the warranty.
Please ensure that the appliance is serviced regularly by a competent and registered catering
equipment engineer.
During long periods of operation certain parts of the appliance will become hot. Care should be
taken to avoid accidental burns. Ensure that the flue outlet is not be blocked and is kept clear at all
times.
IS296 ECN3055
Page 1 of 4
Fig. 1
LE FT S ID E IN D IC AT O R
O N /O FF IN D IC A T O R
(A BO V E E AC H K N O B )
C O N T R O L KN O B (L E FT S ID E)
P O W E R O N N EO N
C O NT R O L K N O B (R IG H T S IDE )
R IG H T S ID E IN D IC AT O R
Switching on the Appliance (Fig. 1, page 1)
1. Switch on the salamander by rotating both control knobs clockwise.
2. The top control knob operates the left hand side element and the bottom control knob operates
the right hand side element.
3. The control knobs are to be rotated clockwise to the number Six marking for full power and to
numbers One to Five for gradual heat settings.
Shutting down the Appliance (Fig. 1, page 1)
To turn off the appliance, turn both control knobs fully ant-clockwise to the OFF position.
COOKING ON THE SALAMANDER GRILL
• Toasting on the Grill Shelf
The grill shelf may be used in the horizontal position for toasting or browning/cheese melting.
• Grilling on the Branding Plate (Fig. 2)
The branding plate is ideal for the cooking of steaks, fillets, chops, cutlets, etc. and should be preheated for 8-10 minutes before such food products are introduced to achieve the best results.
To mount the branding plate on the grill shelf, locate the holes to the rear of the branding plate over
the pegs on the rear of the grill shelf. The lever mechanism (see “Grill Pan”, page 3) allows the grill
shelf and / or branding plate to be held at a variety of height levels and angles to optimise the
cooking process. In the horizontal positions the grill shelf or branding plate are slightly angled
downwards to allow natural drainage of the branding plate.
The drip tray should be checked regularly for build up of residue and emptied, as necessary.
NB Suitable gloves should be worn and a receptacle suitable for moving hot residue should be
available for the disposal of waste from the drip tray. The drain valve has a 15mm compression
fitting, so that a drain tube can be fitted (provided the location of the grill and safety considerations
allow). The drain tube which can be easily removed to allow the lever system to be withdrawn from
the grill.
IS296 ECN3055
Page 2 of 4
GRILL PAN
The grill pan has an integral drip tray with
drain valve and a lever system for the easy
adjustment of cooking positions of the
branding plate / grill shelf.
Minimal
familiarisation is required before using the
lever system.
• The right hand lever controls the
movement of the rear of the branding plate
/ grill shelf and has a light-to-touch
movement. To lift the rear, pull the lever
gently down.
• The left hand lever controls the front part
and the movement is more positive due to
the weight distribution of the branding
plate. To lift the front, push the lever up.
REMOVAL OF THE LEVER SYSTEM
First of all, ensure the drip tray has been drained and sufficient time has been allowed for the grill
pan to cool down. (This can take up to 90 minutes if the grill was used for a long period).
The lever system is extremely heavy! Two people are required to remove and replace it. Lift at the
front and pull forward. To replace, slide the grill pan into the grill pan and lift the front of the grill
pan to locate the restraining hooks into the slots on the front face of the enamelled liner.
CLEANING
Ensure electricity supply is switched off before commencing cleaning. The unit can be washed down
with a warm detergent solution.
Removable items such as the grill shelf and branding plate can be cleaned in the designated washing
area. We recommend the use of a cleaner, such as “Carbon-off”, on a daily basis if the branding
plate is used regularly. An abrasive may be used on the branding plate at the user’s discretion.
Do not use abrasives on stainless steel or enamelled parts.
Do not use any products containing chlorine to clean stainless steel surfaces.
Under any circumstances, do not clean the appliance using a water jet or a steam cleaner!.
MAINTENANCE OF THE SALAMANDER GRILL
This appliance should be serviced and maintained regularly.
IS296 ECN3055
Page 3 of 4
SERVICE INFORMATION
For help regarding the installation, maintenance and use of your LINCAT equipment, please call:-
LINCAT GROUP SERVICE HELP DESK
+44 (0) 1522 875520
AUTHORISED SERVICE AGENTS
We recommend that all servicing, other than routine cleaning, be carried out by our authorised
service agents. We cannot accept responsibility for work carried out by other persons.
Please quote both the model and serial numbers from the data plate attached to the unit. Give brief
details of the service requirement.
If possible please quote the product code of the part number you require.
Work carried out under warranty will normally be undertaken only during normal working hours, i.e.
Monday to Friday, 8.30 a.m. - 5.30 p.m.
CONDITIONS OF GUARANTEE
The guarantee does not cover:1)
Accidental breakage or damage
2)
Operational misuse, wear and tear from normal usage, incorrect adjustment, or neglect.
3)
Incorrect installation, maintenance, modification or unauthorised service work.
SPARE PARTS LIST
Part
number
BR05
EL203
EN10
CO09
HA05
HA06
HA17
KN218
SH14
IS296 ECN3055
Description
Branding Plate
Element 3.4 kW
Energy Regulator
Relay
Handle (for lever system)
Handle Disc (Plastic)
Handle Disc (Metal)
Control Knob
Grill Shelf
Page 4 of 4