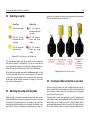
1
2.
0
wi
t
h
Us
ermanual
v
2.
0
© 2015 Mimosa Acoustics, Inc.
OtoStation Indications
OtoStat and OtoStation software and documentation are copyrighted by
Mimosa Acoustics, Inc.
OtoStation provides support software for the OtoStat device. It provides
patient databases, calibration, test history, test review, export, and printing
facilities.
All product names used are trademarks of their respective companies. All
patient names in examples are fictitious.
FDA 510(k) legally marketed device.
0086
For Software Version: 2.0
Manual Version: 2.0
Date: April 1, 2015
Printed in the U.S.A.
DPOAE Indications
The Distortion Product Otoacoustic Emission Analyzer (DPOAE)
module is designed to provide stimuli for rapid clinical measurement and
evaluation of odd order distortion product tones generated by the cochlea,
and measured in the external ear canal. These tones are known as
distortion-product otoacoustic emissions (DPOAEs). The system measures audiometric octave frequencies (or other frequencies, as desired)
between 500 through 8000 Hz with no known artifacts, a low system-noise
floor, and a high signal-to-noise ratio.
The presence in the ear of a cubic (2f1 − f2 ) distortion tone that is detectable above the system noise level indicates the presence of healthy
outer-hair-cell activity in the cochlea. Clinical research suggests that this
occurs in individuals with normal hearing or at most a mild hearing loss
(less than 30 to 40 dB HL). DPOAEs have been infrequently observed in
ears having severe–profound hearing loss. This presumably supports neural involvement (a retro-cochlear loss) rather than a loss of cochlear (hair
cell) function.
Before testing patients
MEPA Indications
Before testing patients, please install the OtoStation software and read
this User Manual. You should perform all of the self-training exercises, and
optionally those relating to probe calibration. For training purposes the Default probe or other provided calibrations can be used without performing
a new calibration.
The Middle-Ear Power Analyzer (MEPA) module provides rapid clinical
measurement and evaluation of middle-ear function and aids in the diagnosis of middle-ear disorders.
3
Usage Warnings
• The OtoStat, the ear probe and the 5V power supply are the only parts
of the system that can be used within the patient environment. The
support computer can not be used within the patient environment and
can not be connected to the OtoStat while the OtoStat is connected
to the patient unless the approved isolation transformer is used as
follows:
• If the support computer is connected to the OtoStat while the OtoStat
is connected to the patient, the support computer must be plugged
into the wall only through a Torroid Corporation of Maryland Part Number ISB-030W medical grade IEC 60601 approved isolation transformer. Additionally, in this configuration, the OtoStat 5V power supply, if it is used, must be plugged into the this isolation transformer as
well as the support computer. The OtoStat 5V power supply and the
ISB-030W isolation transformer can not be plugged separately into
mains power. In this configuration all system elements can be used
within the patient environment. Do not run the support computer on
battery power.
• The ISB-030W isolation transformer can not be placed on the floor.
• The maximum permissible load on the output of the ISB-030W isolation transformer is 300VA (300 Watts) maximum and the user is not
allowed to exceed this maximum load.
• Only the OtoStat and the support computer can be plugged into the
ISB-030W isolation transformer.
• Connecting any equipment supplied as part of the OtoStat where that
equipment is plugged directly into the wall can circumvent the medical
grade isolation provided by the isolation transformer and the 5V power
supply. This can cause a risk of electric shock to the patient.
• Connecting any equipment not supplied as part of the system where
that equipment is plugged directly into our provided isolation transformer can cause a risk of electric shock to the patient.
• Do not touch the USB connection between the OtoStat and the support computer and the patient at the same time.
• Do not connect the support computer to the OtoStat while the OtoStat
is being used on a patient, unless using the isolation transformer described above. Doing this can cause a safety hazard due to electric
shock through the support computer to the wall mains.
• Do not use an additional Multiple Portable Socket Outlet (aka power
strip or power board) or extension cord with the OtoStat aside from
the single system isolation transformer ISB-030W.
• Do not connect items that are not specified as part of the OtoStat
system (see Section 1.1).
• EQUIPMENT not suitable for use in the presence of a FLAMMABLE
ANAESTHETIC MIXTURE WITH AIR or WITH OXYGEN OR NITROUS OXIDE.
• The OtoStat is safe for use under CONTINUOUS OPERATION in
which it may be connected to the mains power for an indefinite period of time.
• The OtoStat may only be used with the supplied medical-grade power
supply: SL Power, Model MENB1010, Part Number
MENB1010A0503B01.
• Do not connect the ear probe to any other equipment except the OtoStat.
• Do not use the OtoStat in or near water or other fluid.
4
Marking and Labeling Symbols
The following symbols may be found in this manual, in the OtoStat program, and on the OtoStat hardware. Product serial numbers and symbols
are found on the sticker on the back of the OtoStat, on the back of the
ER10C ear-probe head, and below the prongs on the power supply.
Symbol
Found On
Meaning
Power supply
CE mark
OtoStat
Type B applied part
OtoStat
Manufacturing date
Power supply
Class II, double-insulated
Power supply
For indoor use only
OtoStat
Serial number
OtoStat, Power supply
See instructions
Eartips
Single-use only
OtoStat, Power supply
DO NOT discard this product in a
trash receptacle; use an appropriate
recovery and recycling facility. Contact your local sales representative
for additional information on the collection and recovery programs available for this product.
Contents
1 Setting up your OtoStat system
1.1 Components . . . . . . . . . . . . . . . . . . . . .
1.1.1 The OtoStat device . . . . . . . . . . . . . .
1.1.2 Etymōtic ER10C probe . . . . . . . . . . .
1.1.3 Eartips . . . . . . . . . . . . . . . . . . . .
1.1.4 Medical-grade power adapter . . . . . . . .
1.1.5 USB cable . . . . . . . . . . . . . . . . . .
1.2 Connecting the OtoStat components . . . . . . . .
1.3 Turning on the OtoStat . . . . . . . . . . . . . . . .
1.4 Turning off the OtoStat . . . . . . . . . . . . . . . .
1.5 Main Menu on the OtoStat . . . . . . . . . . . . . .
1.6 Setting the date and time . . . . . . . . . . . . . .
1.7 Battery status . . . . . . . . . . . . . . . . . . . . .
1.8 LED color status . . . . . . . . . . . . . . . . . . .
1.9 Environmental conditions for use . . . . . . . . . .
1.10 Environmental conditions for transport and storage
.
.
.
.
.
.
.
.
.
.
.
.
.
.
.
.
.
.
.
.
.
.
.
.
.
.
.
.
.
.
.
.
.
.
.
.
.
.
.
.
.
.
.
.
.
.
.
.
.
.
.
.
.
.
.
.
.
.
.
.
.
.
.
.
.
.
.
.
.
.
.
.
.
.
.
.
.
.
.
.
.
.
.
.
.
.
.
.
.
.
.
.
.
.
.
.
.
.
.
.
.
.
.
.
.
.
.
.
.
.
.
.
.
.
.
.
.
.
.
.
.
.
.
.
.
.
.
.
.
.
.
.
.
.
.
.
.
.
.
.
.
.
.
.
.
.
.
.
.
.
.
.
.
.
.
.
.
.
.
.
.
.
.
.
.
.
.
.
.
.
.
.
.
.
.
.
.
.
.
.
.
.
.
.
.
.
.
.
.
.
.
.
.
.
.
.
.
.
.
.
.
.
.
.
.
.
.
.
.
.
.
.
.
.
.
.
.
.
.
.
.
.
.
.
.
.
.
.
.
.
.
.
.
.
.
.
.
.
.
.
.
.
.
.
.
.
.
.
.
.
.
.
.
.
.
.
.
.
.
.
.
.
.
.
.
.
.
.
.
.
.
.
.
.
.
.
.
.
.
.
.
.
.
.
.
.
.
.
.
.
.
.
.
.
.
.
.
.
.
.
.
.
.
.
.
.
.
.
.
.
.
.
.
.
.
.
.
.
.
.
.
.
.
.
.
.
.
.
.
.
.
.
.
.
.
.
.
.
.
.
.
.
.
.
.
.
.
.
.
.
.
.
.
.
.
.
.
.
.
.
.
.
.
.
.
.
.
.
.
.
.
.
.
.
.
.
.
.
.
.
.
.
.
.
.
.
.
.
.
.
.
.
.
.
.
.
.
.
.
.
.
.
.
.
.
.
.
.
.
.
.
.
.
.
.
.
.
.
.
.
.
.
.
.
.
.
.
.
.
.
.
.
.
.
.
.
.
.
.
.
.
.
.
.
.
.
.
.
.
.
.
.
.
.
.
.
.
.
.
.
.
.
.
.
.
.
.
.
.
.
.
.
.
.
.
.
.
.
.
.
.
.
.
.
.
.
.
.
.
.
.
.
.
.
.
.
.
.
.
.
.
.
.
.
.
.
.
.
.
.
.
.
.
.
.
.
.
.
.
.
.
.
.
.
.
.
.
.
.
.
.
.
.
.
.
.
.
.
.
.
.
.
.
.
.
.
.
.
.
.
.
.
.
.
.
.
.
.
.
.
.
.
.
.
.
.
.
.
.
.
.
.
.
.
.
.
.
.
.
.
.
.
.
.
.
.
.
.
.
.
.
.
.
.
.
.
.
.
.
.
.
.
.
.
.
.
.
.
.
.
.
.
.
.
.
.
.
.
.
.
.
.
.
.
.
.
.
.
.
.
.
.
.
.
.
.
.
.
.
.
.
.
.
.
.
.
.
.
.
.
.
.
.
.
.
.
.
.
.
.
.
.
.
.
.
.
.
.
.
.
.
.
.
.
.
.
.
.
.
.
.
.
.
.
.
.
.
.
.
.
.
.
.
.
.
.
.
.
.
.
.
.
.
.
.
.
.
.
.
.
.
.
.
.
.
.
.
.
.
.
.
.
.
.
.
.
.
.
.
.
.
.
.
.
.
9
9
9
9
10
10
10
11
11
12
12
13
13
14
14
14
2 Getting started with OtoStation
2.1 OtoStation software support package . . . . . . . . . . .
2.1.1 System requirements for OtoStation . . . . . . . .
2.1.2 Installing OtoStation software to a computer . . . .
2.1.3 Firewall and Virus checker settings for OtoStation
2.2 Running OtoStation . . . . . . . . . . . . . . . . . . . . .
2.2.1 Items in the Main Window . . . . . . . . . . . . . .
2.3 Connecting the OtoStat to OtoStation . . . . . . . . . . .
.
.
.
.
.
.
.
.
.
.
.
.
.
.
.
.
.
.
.
.
.
.
.
.
.
.
.
.
.
.
.
.
.
.
.
.
.
.
.
.
.
.
.
.
.
.
.
.
.
.
.
.
.
.
.
.
.
.
.
.
.
.
.
.
.
.
.
.
.
.
.
.
.
.
.
.
.
.
.
.
.
.
.
.
.
.
.
.
.
.
.
.
.
.
.
.
.
.
.
.
.
.
.
.
.
.
.
.
.
.
.
.
.
.
.
.
.
.
.
.
.
.
.
.
.
.
.
.
.
.
.
.
.
.
.
.
.
.
.
.
.
.
.
.
.
.
.
.
.
.
.
.
.
.
.
.
.
.
.
.
.
.
.
.
.
.
.
.
.
.
.
.
.
.
.
.
.
.
.
.
.
.
.
.
.
.
.
.
.
.
.
.
.
.
.
.
.
.
.
.
.
.
.
.
.
.
.
.
.
.
.
.
.
.
.
.
.
.
.
.
.
.
.
.
.
.
.
.
.
.
.
.
.
.
.
.
.
.
.
.
.
.
.
.
.
.
.
.
.
.
.
.
.
.
.
.
.
.
.
.
.
.
.
.
.
.
.
.
.
.
.
.
.
.
.
.
.
.
.
.
.
.
.
.
.
.
.
.
.
.
.
.
.
.
.
.
.
.
.
.
.
.
.
.
.
.
.
.
.
.
.
.
.
.
.
.
.
.
.
.
.
.
.
.
.
.
.
.
.
.
.
.
.
.
.
.
15
15
15
15
16
17
19
20
.
.
.
.
.
.
.
.
.
.
.
.
.
.
.
.
.
.
.
.
.
.
.
.
.
.
.
.
.
.
.
.
.
.
.
.
.
.
.
.
.
.
.
.
.
3 Learning how to use the OtoStat and OtoStation
21
5
CONTENTS
3.1 Multimedia tutorials . . . . .
3.2 Take a self-training lesson .
3.3 MEPA principles . . . . . .
3.3.1 Newborns . . . . . .
3.3.2 Infants . . . . . . . .
3.3.3 Children . . . . . . .
3.3.4 Adults . . . . . . . .
3.3.5 Measurement theory
3.4 DPOAE principles . . . . .
6
.
.
.
.
.
.
.
.
.
.
.
.
.
.
.
.
.
.
.
.
.
.
.
.
.
.
.
.
.
.
.
.
.
.
.
.
.
.
.
.
.
.
.
.
.
.
.
.
.
.
.
.
.
.
.
.
.
.
.
.
.
.
.
.
.
.
.
.
.
.
.
.
.
.
.
.
.
.
.
.
.
.
.
.
.
.
.
.
.
.
.
.
.
.
.
.
.
.
.
.
.
.
.
.
.
.
.
.
.
.
.
.
.
.
.
.
.
.
.
.
.
.
.
.
.
.
.
.
.
.
.
.
.
.
.
.
.
.
.
.
.
.
.
.
.
.
.
.
.
.
.
.
.
.
.
.
.
.
.
.
.
.
.
.
.
.
.
.
.
.
.
.
.
.
.
.
.
.
.
.
.
.
.
.
.
.
.
.
.
.
.
.
.
.
.
.
.
.
.
.
.
.
.
.
.
.
.
.
.
.
.
.
.
.
.
.
.
.
.
.
.
.
.
.
.
.
.
.
.
.
.
.
.
.
.
.
.
.
.
.
.
.
.
.
.
.
.
.
.
.
.
.
.
.
.
.
.
.
.
.
.
.
.
.
.
.
.
.
.
.
.
.
.
.
.
.
.
.
.
.
.
.
.
.
.
.
.
.
.
.
.
.
.
.
.
.
.
.
.
.
.
.
.
.
.
.
.
.
.
.
.
.
.
.
.
.
.
.
.
.
.
.
.
.
.
.
.
.
.
.
.
.
.
.
.
.
.
.
.
.
.
.
.
.
.
.
.
.
.
.
.
.
.
.
.
.
.
.
.
.
.
.
.
.
.
.
.
.
.
.
.
.
.
.
.
.
.
.
.
.
.
.
.
.
.
.
.
.
.
.
.
.
.
.
.
.
.
.
.
.
.
.
.
.
.
.
.
.
.
.
.
.
.
.
.
.
.
.
.
.
.
.
.
.
.
.
.
.
.
.
.
.
.
.
.
.
.
.
.
.
.
.
.
.
.
.
.
.
.
.
.
.
.
.
.
.
.
.
.
.
.
.
.
.
.
.
.
.
.
.
.
.
.
.
.
.
.
.
.
.
.
.
.
.
.
.
.
.
.
.
.
.
.
.
.
.
.
.
.
.
.
.
.
.
.
.
.
.
.
.
.
.
.
.
.
.
.
.
.
.
.
.
.
.
.
.
.
.
.
.
.
.
.
.
.
.
.
.
.
.
.
.
.
.
.
.
.
.
.
.
.
.
.
.
.
.
.
.
.
.
.
.
.
.
.
.
.
.
.
.
.
.
.
.
.
.
.
.
.
.
.
.
.
.
.
21
21
22
22
23
23
23
23
23
4 Verifying and calibrating the probe
25
4.1 Verifying the probe calibration . . . . . . . . . . . . . . . . . . . . . . . . . . . . . . . . . . . . . . . . . . . . . . . . . . . . . . . . . . . . . . . . 26
4.2 Adding and calibrating a probe . . . . . . . . . . . . . . . . . . . . . . . . . . . . . . . . . . . . . . . . . . . . . . . . . . . . . . . . . . . . . . . 27
4.3 Transferring a new calibration to the OtoStat . . . . . . . . . . . . . . . . . . . . . . . . . . . . . . . . . . . . . . . . . . . . . . . . . . . . . . . . 30
5 Testing patients with the OtoStat
5.1 Entering the patient’s name or ID . . . . .
5.2 Otoscopic examination . . . . . . . . . . .
5.3 Selecting an eartip . . . . . . . . . . . . .
5.4 Mounting the eartip onto the probe . . . .
5.5 Inserting a rubber eartip into an ear canal
5.6 Inserting a foam eartip into an ear canal .
5.7 Instructing the patient . . . . . . . . . . .
5.8 Making measurements . . . . . . . . . . .
5.9 What happens in the MEPA test . . . . . .
5.10 What happens in the DPOAE test . . . . .
5.11 MEPA norms . . . . . . . . . . . . . . . .
5.12 DPOAE norms . . . . . . . . . . . . . . .
5.13 MEPA protocols and settings . . . . . . .
5.14 DPOAE protocols and settings . . . . . .
.
.
.
.
.
.
.
.
.
.
.
.
.
.
.
.
.
.
.
.
.
.
.
.
.
.
.
.
.
.
.
.
.
.
.
.
.
.
.
.
.
.
.
.
.
.
.
.
.
.
.
.
.
.
.
.
.
.
.
.
.
.
.
.
.
.
.
.
.
.
.
.
.
.
.
.
.
.
.
.
.
.
.
.
.
.
.
.
.
.
.
.
.
.
.
.
.
.
.
.
.
.
.
.
.
.
.
.
.
.
.
.
.
.
.
.
.
.
.
.
.
.
.
.
.
.
.
.
.
.
.
.
.
.
.
.
.
.
.
.
.
.
.
.
.
.
.
.
.
.
.
.
.
.
.
.
.
.
.
.
.
.
.
.
.
.
.
.
.
.
.
.
.
.
.
.
.
.
.
.
.
.
.
.
.
.
.
.
.
.
.
.
.
.
.
.
.
.
.
.
.
.
.
.
.
.
.
.
.
.
.
.
.
.
.
.
.
.
.
.
.
.
.
.
.
.
.
.
.
.
.
.
.
.
.
.
.
.
.
.
.
.
.
.
.
.
.
.
.
.
.
.
.
.
.
.
.
.
.
.
.
.
.
.
.
.
.
.
.
.
.
.
.
.
.
.
.
.
.
.
.
.
.
.
.
.
.
.
.
.
.
.
.
.
.
.
.
.
.
.
.
.
.
.
.
.
.
.
.
.
.
.
.
.
.
.
.
.
.
.
.
.
.
.
.
.
.
.
.
.
.
.
.
.
.
.
.
.
.
.
.
.
.
.
.
.
.
.
.
.
.
.
.
.
.
.
.
.
.
.
.
.
.
.
.
.
.
.
.
.
.
.
.
.
.
.
.
.
.
.
.
.
.
.
.
.
.
.
.
.
.
.
.
.
.
.
.
.
.
.
.
.
.
.
.
.
.
.
.
.
.
.
.
.
.
.
.
.
.
.
.
.
.
.
.
.
.
.
.
.
.
.
.
.
.
.
.
.
.
.
.
.
.
.
.
.
.
.
.
.
.
.
.
.
.
.
.
.
.
.
.
.
.
.
.
.
.
.
.
.
.
.
.
.
.
.
.
.
.
.
.
.
.
.
.
.
.
.
.
.
.
.
.
.
.
.
.
.
.
.
.
.
.
.
.
.
.
.
.
.
.
.
.
.
.
.
.
.
.
.
.
.
.
.
.
.
.
.
.
.
.
.
.
.
.
.
.
.
.
.
.
.
.
.
.
.
.
.
.
.
.
.
.
.
.
.
.
.
.
.
.
.
.
.
.
.
.
.
.
.
.
.
.
.
.
.
.
.
.
.
.
.
.
.
.
.
.
.
.
.
.
.
.
.
.
.
.
.
.
.
.
.
.
.
.
.
.
.
.
.
.
.
.
.
.
.
.
.
.
.
.
.
.
.
.
.
.
.
.
.
.
.
.
.
.
.
.
.
.
.
.
.
.
.
.
.
.
.
.
.
.
.
.
.
.
.
.
.
.
.
.
.
.
.
.
.
.
.
.
.
.
.
.
.
.
.
.
.
.
.
.
.
.
.
.
.
.
.
.
.
.
.
.
.
.
.
.
.
.
.
.
.
.
.
.
.
.
.
.
.
.
.
.
.
.
.
.
.
.
.
.
.
.
.
.
.
.
.
.
.
.
.
.
.
.
.
.
.
.
.
.
.
.
.
.
.
.
.
.
.
.
.
.
.
.
.
.
.
.
.
.
.
.
.
.
.
.
.
.
.
.
.
.
.
.
.
.
.
.
.
.
.
.
.
.
.
.
.
.
.
.
.
.
.
.
.
.
.
31
31
32
33
33
33
34
34
34
36
36
37
37
37
38
6 Reviewing test results
6.1 Reviewing tests on the OtoStat . .
6.2 Navigating the OtoStat displays . .
6.3 Interpreting the MEPA displays . .
6.4 Interpreting the DPOAE displays .
6.5 Reviewing tests on the OtoStation
6.5.1 Print summaries . . . . . .
.
.
.
.
.
.
.
.
.
.
.
.
.
.
.
.
.
.
.
.
.
.
.
.
.
.
.
.
.
.
.
.
.
.
.
.
.
.
.
.
.
.
.
.
.
.
.
.
.
.
.
.
.
.
.
.
.
.
.
.
.
.
.
.
.
.
.
.
.
.
.
.
.
.
.
.
.
.
.
.
.
.
.
.
.
.
.
.
.
.
.
.
.
.
.
.
.
.
.
.
.
.
.
.
.
.
.
.
.
.
.
.
.
.
.
.
.
.
.
.
.
.
.
.
.
.
.
.
.
.
.
.
.
.
.
.
.
.
.
.
.
.
.
.
.
.
.
.
.
.
.
.
.
.
.
.
.
.
.
.
.
.
.
.
.
.
.
.
.
.
.
.
.
.
.
.
.
.
.
.
.
.
.
.
.
.
.
.
.
.
.
.
.
.
.
.
.
.
.
.
.
.
.
.
.
.
.
.
.
.
.
.
.
.
.
.
.
.
.
.
.
.
.
.
.
.
.
.
.
.
.
.
.
.
.
.
.
.
.
.
.
.
.
.
.
.
.
.
.
.
.
.
.
.
.
.
.
.
.
.
.
.
.
.
.
.
.
.
.
.
.
.
.
.
.
.
.
.
.
.
.
.
.
.
.
.
.
.
.
.
.
.
.
.
.
.
.
.
.
.
.
.
.
.
.
.
.
.
.
.
.
.
.
.
.
.
.
.
.
.
.
.
.
.
.
.
.
.
.
.
.
.
.
.
.
.
.
.
.
.
.
.
39
39
39
40
40
42
44
.
.
.
.
.
.
.
.
.
.
.
.
.
.
.
.
.
.
7 Managing patients, users, and test results
.
.
.
.
.
.
46
CONTENTS
7.1 Administrating users . . . . . . . . . . . . . . . . . . . . . . . . . . . . . . . . . . . . . .
7.1.1 Changing the password . . . . . . . . . . . . . . . . . . . . . . . . . . . . . . . .
7.1.2 Resetting the admin password if forgotten . . . . . . . . . . . . . . . . . . . . . .
7.1.3 Administrator and user privileges . . . . . . . . . . . . . . . . . . . . . . . . . . .
7.1.4 Creating and adding users . . . . . . . . . . . . . . . . . . . . . . . . . . . . . .
7.1.5 Changing users . . . . . . . . . . . . . . . . . . . . . . . . . . . . . . . . . . . . .
7.1.6 Changing e-signature . . . . . . . . . . . . . . . . . . . . . . . . . . . . . . . . .
7.2 Administrating databases . . . . . . . . . . . . . . . . . . . . . . . . . . . . . . . . . . .
7.2.1 Creating a new database . . . . . . . . . . . . . . . . . . . . . . . . . . . . . . .
7.2.2 Opening a database . . . . . . . . . . . . . . . . . . . . . . . . . . . . . . . . . .
7.2.3 Detaching a database . . . . . . . . . . . . . . . . . . . . . . . . . . . . . . . . .
7.2.4 Restoring a database from backup . . . . . . . . . . . . . . . . . . . . . . . . . .
7.2.5 Restoring a database from an earlier version of OtoStation or different computer
7.2.6 Default, Sample, and Install Databases . . . . . . . . . . . . . . . . . . . . . . .
7.2.7 Backing up a database . . . . . . . . . . . . . . . . . . . . . . . . . . . . . . . .
7.2.8 Database details . . . . . . . . . . . . . . . . . . . . . . . . . . . . . . . . . . . .
7.2.9 Directory . . . . . . . . . . . . . . . . . . . . . . . . . . . . . . . . . . . . . . . .
7.3 Administrating patients . . . . . . . . . . . . . . . . . . . . . . . . . . . . . . . . . . . . .
7.3.1 Patient administration options . . . . . . . . . . . . . . . . . . . . . . . . . . . . .
7.3.2 Creating a new patient record . . . . . . . . . . . . . . . . . . . . . . . . . . . . .
7.3.3 Editing a patient record . . . . . . . . . . . . . . . . . . . . . . . . . . . . . . . .
7.3.4 Deleting a patient record . . . . . . . . . . . . . . . . . . . . . . . . . . . . . . .
7.3.5 Sorting patient records . . . . . . . . . . . . . . . . . . . . . . . . . . . . . . . . .
7.3.6 Finding a patient record . . . . . . . . . . . . . . . . . . . . . . . . . . . . . . . .
7.3.7 Uploading patient records to the OtoStat . . . . . . . . . . . . . . . . . . . . . . .
7.3.8 Merging patients . . . . . . . . . . . . . . . . . . . . . . . . . . . . . . . . . . . .
7.4 Managing test histories . . . . . . . . . . . . . . . . . . . . . . . . . . . . . . . . . . . .
7.4.1 Download tests from OtoStat . . . . . . . . . . . . . . . . . . . . . . . . . . . . .
7.4.2 Viewing a saved test . . . . . . . . . . . . . . . . . . . . . . . . . . . . . . . . . .
7.4.3 Editing a test history . . . . . . . . . . . . . . . . . . . . . . . . . . . . . . . . . .
7.4.4 Deleting a test history . . . . . . . . . . . . . . . . . . . . . . . . . . . . . . . . .
7.4.5 Moving a test history . . . . . . . . . . . . . . . . . . . . . . . . . . . . . . . . . .
7.4.6 Exporting patient data . . . . . . . . . . . . . . . . . . . . . . . . . . . . . . . . .
7.4.7 Test history category maintenance . . . . . . . . . . . . . . . . . . . . . . . . . .
7.5 Tools . . . . . . . . . . . . . . . . . . . . . . . . . . . . . . . . . . . . . . . . . . . . . . .
7.5.1 Defaults . . . . . . . . . . . . . . . . . . . . . . . . . . . . . . . . . . . . . . . . .
7.5.2 General defaults . . . . . . . . . . . . . . . . . . . . . . . . . . . . . . . . . . . .
7.5.3 Activate OtoStation . . . . . . . . . . . . . . . . . . . . . . . . . . . . . . . . . . .
7.5.4 Application logging . . . . . . . . . . . . . . . . . . . . . . . . . . . . . . . . . . .
7
.
.
.
.
.
.
.
.
.
.
.
.
.
.
.
.
.
.
.
.
.
.
.
.
.
.
.
.
.
.
.
.
.
.
.
.
.
.
.
.
.
.
.
.
.
.
.
.
.
.
.
.
.
.
.
.
.
.
.
.
.
.
.
.
.
.
.
.
.
.
.
.
.
.
.
.
.
.
.
.
.
.
.
.
.
.
.
.
.
.
.
.
.
.
.
.
.
.
.
.
.
.
.
.
.
.
.
.
.
.
.
.
.
.
.
.
.
.
.
.
.
.
.
.
.
.
.
.
.
.
.
.
.
.
.
.
.
.
.
.
.
.
.
.
.
.
.
.
.
.
.
.
.
.
.
.
.
.
.
.
.
.
.
.
.
.
.
.
.
.
.
.
.
.
.
.
.
.
.
.
.
.
.
.
.
.
.
.
.
.
.
.
.
.
.
.
.
.
.
.
.
.
.
.
.
.
.
.
.
.
.
.
.
.
.
.
.
.
.
.
.
.
.
.
.
.
.
.
.
.
.
.
.
.
.
.
.
.
.
.
.
.
.
.
.
.
.
.
.
.
.
.
.
.
.
.
.
.
.
.
.
.
.
.
.
.
.
.
.
.
.
.
.
.
.
.
.
.
.
.
.
.
.
.
.
.
.
.
.
.
.
.
.
.
.
.
.
.
.
.
.
.
.
.
.
.
.
.
.
.
.
.
.
.
.
.
.
.
.
.
.
.
.
.
.
.
.
.
.
.
.
.
.
.
.
.
.
.
.
.
.
.
.
.
.
.
.
.
.
.
.
.
.
.
.
.
.
.
.
.
.
.
.
.
.
.
.
.
.
.
.
.
.
.
.
.
.
.
.
.
.
.
.
.
.
.
.
.
.
.
.
.
.
.
.
.
.
.
.
.
.
.
.
.
.
.
.
.
.
.
.
.
.
.
.
.
.
.
.
.
.
.
.
.
.
.
.
.
.
.
.
.
.
.
.
.
.
.
.
.
.
.
.
.
.
.
.
.
.
.
.
.
.
.
.
.
.
.
.
.
.
.
.
.
.
.
.
.
.
.
.
.
.
.
.
.
.
.
.
.
.
.
.
.
.
.
.
.
.
.
.
.
.
.
.
.
.
.
.
.
.
.
.
.
.
.
.
.
.
.
.
.
.
.
.
.
.
.
.
.
.
.
.
.
.
.
.
.
.
.
.
.
.
.
.
.
.
.
.
.
.
.
.
.
.
.
.
.
.
.
.
.
.
.
.
.
.
.
.
.
.
.
.
.
.
.
.
.
.
.
.
.
.
.
.
.
.
.
.
.
.
.
.
.
.
.
.
.
.
.
.
.
.
.
.
.
.
.
.
.
.
.
.
.
.
.
.
.
.
.
.
.
.
.
.
.
.
.
.
.
.
.
.
.
.
.
.
.
.
.
.
.
.
.
.
.
.
.
.
.
.
.
.
.
.
.
.
.
.
.
.
.
.
.
.
.
.
.
.
.
.
.
.
.
.
.
.
.
.
.
.
.
.
.
.
.
.
.
.
.
.
.
.
.
.
.
.
.
.
.
.
.
.
.
.
.
.
.
.
.
.
.
.
.
.
.
.
.
.
.
.
.
.
.
.
.
.
.
.
.
.
.
.
.
.
.
.
.
.
.
.
.
.
.
.
.
.
.
.
.
.
.
.
.
.
.
.
.
.
.
.
.
.
.
.
.
.
.
.
.
.
.
.
.
.
.
.
.
.
.
.
.
.
.
.
.
.
.
.
.
.
.
.
.
.
.
.
.
.
.
.
.
.
.
.
.
.
.
.
.
.
.
.
.
.
.
.
.
.
.
.
.
.
.
.
.
.
.
.
.
.
.
.
.
.
.
.
.
.
.
.
.
.
.
.
.
.
.
.
.
.
.
.
.
.
.
.
.
.
.
.
.
.
.
.
.
.
.
.
.
.
.
.
.
.
.
.
.
.
.
.
.
.
.
.
.
.
.
.
.
.
.
.
.
.
.
.
.
.
.
.
.
.
.
.
.
.
.
.
.
.
.
.
.
.
.
.
.
.
.
.
.
.
.
.
.
.
.
.
.
.
.
.
.
.
.
.
.
.
.
.
.
.
.
.
.
.
.
.
.
.
.
.
.
.
.
.
.
.
.
.
.
.
.
.
.
.
.
.
.
.
.
.
.
.
.
.
.
.
.
.
.
.
.
.
.
.
.
.
.
.
.
.
.
.
.
.
.
.
.
.
.
.
.
.
.
.
.
.
.
.
.
.
.
.
.
.
.
.
.
.
.
.
.
.
.
.
.
.
.
.
.
.
.
.
.
.
.
.
.
.
.
.
.
.
.
.
.
.
.
.
.
.
.
.
.
.
.
.
.
.
.
.
.
.
.
.
.
.
.
.
.
.
.
.
.
.
.
.
.
.
.
.
.
.
.
.
.
.
.
.
.
.
.
.
.
.
.
.
.
.
.
.
.
.
.
.
.
.
.
.
.
.
.
.
.
.
.
.
.
.
.
.
.
.
.
.
.
.
.
.
.
.
.
.
.
.
.
.
.
.
.
.
.
.
.
.
.
.
.
.
.
.
.
.
.
.
.
.
.
.
.
.
.
.
.
.
.
.
.
.
.
.
.
.
.
.
.
.
.
.
.
.
.
.
.
.
.
.
.
.
.
.
.
.
.
.
.
.
.
.
.
.
.
.
.
.
.
.
.
.
.
.
.
.
.
.
.
.
46
46
46
46
47
48
48
48
48
49
50
50
50
50
51
51
51
51
51
51
52
53
53
53
54
54
54
55
56
56
56
57
57
58
58
58
59
59
59
CONTENTS
8
7.5.5 Probe calibration . . . . . . . . . . . . . . . . . . . . . . . . . . . . . . . . . . . . . . . . . . . . . . . . . . . . . . . . . . . . . . . . . . . 60
7.5.6 Transfer calibration . . . . . . . . . . . . . . . . . . . . . . . . . . . . . . . . . . . . . . . . . . . . . . . . . . . . . . . . . . . . . . . . . . 60
7.6 Help . . . . . . . . . . . . . . . . . . . . . . . . . . . . . . . . . . . . . . . . . . . . . . . . . . . . . . . . . . . . . . . . . . . . . . . . . . . . . . 60
8 Maintenance
8.1 DPOAE linearity check . . . . . . . . . . . . . .
8.2 Cleaning . . . . . . . . . . . . . . . . . . . . . .
8.3 Electrical safety for the patient and user . . . .
8.4 Preventative inspection and maintenance . . .
8.5 Proper disposal of OtoStat components . . . .
8.5.1 Proper disposal of the main OtoStat unit
8.5.2 Proper disposal of the battery . . . . . .
8.5.3 Proper disposal of the power supply . .
.
.
.
.
.
.
.
.
.
.
.
.
.
.
.
.
.
.
.
.
.
.
.
.
.
.
.
.
.
.
.
.
.
.
.
.
.
.
.
.
.
.
.
.
.
.
.
.
.
.
.
.
.
.
.
.
.
.
.
.
.
.
.
.
.
.
.
.
.
.
.
.
.
.
.
.
.
.
.
.
.
.
.
.
.
.
.
.
.
.
.
.
.
.
.
.
.
.
.
.
.
.
.
.
.
.
.
.
.
.
.
.
.
.
.
.
.
.
.
.
.
.
.
.
.
.
.
.
.
.
.
.
.
.
.
.
.
.
.
.
.
.
.
.
.
.
.
.
.
.
.
.
.
.
.
.
.
.
.
.
.
.
.
.
.
.
.
.
.
.
.
.
.
.
.
.
.
.
.
.
.
.
.
.
.
.
.
.
.
.
.
.
.
.
.
.
.
.
.
.
.
.
.
.
.
.
.
.
.
.
.
.
.
.
.
.
.
.
.
.
.
.
.
.
.
.
.
.
.
.
.
.
.
.
.
.
.
.
.
.
.
.
.
.
.
.
.
.
.
.
.
.
.
.
.
.
.
.
.
.
.
.
.
.
.
.
.
.
.
.
.
.
.
.
.
.
.
.
.
.
.
.
.
.
.
.
.
.
.
.
.
.
.
.
.
.
.
.
.
.
.
.
.
.
.
.
.
.
.
.
.
.
.
.
.
.
.
.
.
.
.
.
.
.
.
.
.
.
.
.
.
.
.
.
.
.
.
.
.
.
.
.
.
.
.
.
.
.
.
.
.
.
.
.
.
.
.
.
.
.
.
.
.
.
.
.
.
.
.
.
.
.
.
.
.
.
.
.
.
.
.
.
.
.
.
.
.
.
.
.
.
.
.
.
.
.
.
.
.
.
.
.
.
.
.
.
.
.
.
.
.
.
.
.
.
.
.
.
.
.
.
.
.
.
.
.
.
.
.
.
.
.
61
61
61
62
62
62
62
63
63
References
64
A Troubleshooting and help
65
B Accuracy
B.1 MEPA accuracy . . . . . . . . . . . .
B.2 Equipment and measurement Setup
B.3 Accuracy validation . . . . . . . . . .
B.4 DPOAE accuracy . . . . . . . . . . .
.
.
.
.
.
.
.
.
.
.
.
.
.
.
.
.
.
.
.
.
.
.
.
.
.
.
.
.
.
.
.
.
.
.
.
.
.
.
.
.
.
.
.
.
.
.
.
.
.
.
.
.
.
.
.
.
.
.
.
.
.
.
.
.
.
.
.
.
.
.
.
.
.
.
.
.
.
.
.
.
.
.
.
.
.
.
.
.
.
.
.
.
.
.
.
.
.
.
.
.
.
.
.
.
.
.
.
.
.
.
.
.
.
.
.
.
.
.
.
.
.
.
.
.
.
.
.
.
.
.
.
.
.
.
.
.
.
.
.
.
.
.
.
.
.
.
.
.
.
.
.
.
.
.
.
.
.
.
.
.
.
.
.
.
.
.
.
.
.
.
.
.
.
.
.
.
.
.
.
.
.
.
.
.
.
.
.
.
.
.
.
.
.
.
.
.
.
.
.
.
.
.
.
.
.
.
.
.
66
66
66
66
67
C Exported data
C.1 Excel export . . . . . . . . . . . . . . . . . . . . . . .
C.1.1 Fields in the “Info” sheet (MEPA and DPOAE)
C.1.2 Fields in the MEPA “FreqData” sheet . . . . .
C.1.3 Fields in the DPOAE “FreqData” sheet . . . .
.
.
.
.
.
.
.
.
.
.
.
.
.
.
.
.
.
.
.
.
.
.
.
.
.
.
.
.
.
.
.
.
.
.
.
.
.
.
.
.
.
.
.
.
.
.
.
.
.
.
.
.
.
.
.
.
.
.
.
.
.
.
.
.
.
.
.
.
.
.
.
.
.
.
.
.
.
.
.
.
.
.
.
.
.
.
.
.
.
.
.
.
.
.
.
.
.
.
.
.
.
.
.
.
.
.
.
.
.
.
.
.
.
.
.
.
.
.
.
.
.
.
.
.
.
.
.
.
.
.
.
.
.
.
.
.
.
.
.
.
.
.
.
.
.
.
.
.
.
.
.
.
.
.
.
.
.
.
.
.
.
.
.
.
.
.
.
.
.
.
.
.
.
.
.
.
.
.
.
.
.
.
.
.
.
.
.
.
.
.
.
.
.
.
.
.
.
.
.
.
.
.
.
.
68
68
68
69
69
D Contacts and support
.
.
.
.
.
.
.
.
.
.
.
.
.
.
.
.
.
.
.
.
.
.
.
.
.
.
.
.
.
.
.
.
70
Chapter 1
Setting up your OtoStat system
For safety and regulatory purposes, you must read this entire user manual before using the OtoStat on a patient. Training is required to use the
OtoStat effectively (see Section 3).
1.1
Components
Your OtoStat system includes a handheld unit, probe, eartips, calibration
cavity set (calibrator), power adaptor, USB cable, and OtoStation support
software (Figure 1.1–1.4).
1.1.1
The OtoStat device
Figure 1.1: The OtoStat System.
The OtoStat is handheld and battery-powered. It is designed to allow you
to quickly and easily screen ears using middle-ear reflectance and otoacoustic emission tests. The OtoStat outputs acoustic stimuli and measures
the response from the ear. Results are displayed onscreen for your interpretation. Control the unit through the graphical user interface (GUI) on
the touch-sensitive screen by tapping the screen with your finger.
1.1.2
Etymōtic ER10C probe
The probe contains two speakers and a microphone to deliver and record
sounds in the ear canal.
The enclosure is made of a laser sintered polyamide, and has dimensions
of 156 x 93 x 44 mm (6.14 x 3.66 x 1.73 in). The material is bio-compatible
according to EN ISO 10993-1 and USP/level VI/121 ◦ C. Slight spalling may
occur over the lifespan of the unit.
• Always keep a clean eartip on the probe to help keep the tubes clean
and to help protect the probe if dropped. The disposable eartip is
easily replaced, but it takes time and is costly to replace the probe.
9
1.1 Components
10
• The probe head is fragile. Avoid dropping or hitting the probe head
against hard surfaces.
1.1.4
• Use the clip on the probe cable to secure the cable to the patient’s
clothing.
The power adapter charges the OtoStat battery. The OtoStat has an internal rechargeable battery that lasts for about 5 hours of use. You should
charge the OtoStat when not being used. Use the medical-grade power
adapter supplied with the OtoStat or an equivalent medical-grade adapter
for your region. For more information on the battery, see Section 1.7.
• Keep the probe away from fluids, moisture, fumes, solvents, heat, and
dust. Do not subject the probe to shock or vibration.
• WARNING: Should any water, dirt, or cerumen get into the probe
head or the steel tubes on front of the probe, contact your vendor
for servicing.
• Do not attempt to open the probe as there are no user serviceable
parts inside. All service must be performed by an authorized dealer.
1.1.3
Eartips
Disposable eartips are used to securely and comfortably fit the probe into
the ear canal. Six eartip sizes are supplied to fit babies, children, and
adults (Figures 1.2 and 5.3).
• For hygiene, eartips are for single-patient use only. The same tip can
be used in both ears of the same person.
• Do not reuse an eartip once it is removed from the probe. Removal
stretches and tears the tubes inside the eartip.
• Keep eartips and plastic bags away from children, as they can present
a choking hazard.
• There are no specific requirements for disposing eartips.
Figure 1.2: The three foam eartip types (14B, 14A, 14C) and the three rubber
eartip types (05, 04, 03) that can be used with the OtoStat.
Medical-grade power adapter
For the electrical safety of you and your patient, and for ensuring quality measurements, we strongly recommend using the OtoStat on battery
power during tests. If you must use the OtoStat while the power adapter
is plugged into a power outlet, use only the medical-grade power adapter
supplied with the OtoStat or an equivalent medical grade adapter for your
region.
1.1.5
USB cable
The USB cable connects the OtoStat to a computer, which is necessary
for probe calibration and test result management.
1.3 Turning on the OtoStat
1.2
11
Connecting the OtoStat components
Figure 1.3 shows the different ports and buttons on the OtoStat, and Figure 1.4 shows an OtoStat system connected up.
• The probe cable plugs into the probe connection port on top of the
OtoStat. Take note of the orientation of the pins and do not force the
plug into the port.
• The square end of the USB cable plugs into the USB port on top of
the OtoStat and the flat end connects to a USB port in your support
computer. You only need to connect the USB when reviewing data
and making calibrations.
(a) Top
• To charge the battery, put the round end of the power adaptor plugs
into the power adapter port on top of the OtoStat and plug the other
end into a power outlet. We recommend you test when powered by
the battery.
• Attach the eartip to the probe by lining up the red stripe on the tip with
the red dot on the probe and sliding the plastic tube onto the steel
tubes. Then push to fully mount the eartip. See Section 5.4 for a
detailed description.
• The reset button may be used to turn off the OtoStat if it fails to respond. Insert a wire into the hole indicated in Figure 1.3 and push
gently to activate the button. The OtoStat will turn off immediately.
Press the power button to reboot.
(b) Bottom
Figure 1.3: The OtoStat Ports and Buttons.
• The LED light changes color to show system power and boot status
(Section 1.8).
1.3
Turning on the OtoStat
1. Push and hold the power button at the bottom face of the OtoStat
(Figure 1.3), for 2 seconds. The adjacent LED indicator turns cyan,
indicating that the system is booting up.
2. The cyan LED changes to green once booted, and a welcome screen
appears.
3. When the measurement program is loaded, the Main Menu screen is
displayed (Figure 1.5).
4. After 10 minutes of idle time, the screen dims; however the OtoStat
buttons remain active. As soon as you start using it again, the screen
will brighten automatically.
1.5 Main Menu on the OtoStat
12
Figure 1.5: The Main Menu Screen.
Figure 1.4: The OtoStat System connected to the support computer. The probe is
mounted into the calibration cavity set. (The power adapter cable is not shown).
1.4
Turning off the OtoStat
1. Push and hold the power button at the bottom face of the OtoStat
(Figure 1.3), for 2 seconds. The OtoStat will turn off.
2. If the OtoStat is plugged into a power outlet, the LED will blink, indicating it is charging.
3. Any unsaved data will be lost.
1.5
Main Menu on the OtoStat
At the top of the Main Menu, the date, time, current test number, and
remaining battery level are shown. At the bottom of the Main Menu, the
current probe’s verification status is shown.
From the Main Menu, you can:
• Start a test by tapping on the patient’s age group and then the eartip
you are using. (Section 5.8).
• Create a patient profile by tapping on the Patient ID button. (Section 5.1)
• Change the current test protocols by tapping on the Protocols button.
(Section 5.13 and 5.14).
1.7 Battery status
13
• Verify or change the probe by tapping on Probes. (Section 4.1)
• Change the date or time by tapping on the current date and time.
(Section 1.6)
1.6
Setting the date and time
The date and time are shown on the upper left corner of the OtoStat screen
(Figure 1.5). The correct date and time are needed to ensure tests and
probe verifications are accurately recorded. Set the time when receiving
the OtoStat, when changing time zones, to adjust for daylight savings, or if
the battery discharges completely. To set the date and time:
1. From the main screen (Figure 1.5), tap on the date and time to access
the Date-Time settings screen (Figure 1.6).
2. The current date and time is shown in an editable field in the order
year, month, day, hour, minutes, seconds. All components are represented with 2 digits, except year, which uses 4 digits.
3. Tap on the numbers in the editable field to edit, and erase digits with
the backspace key: <.
4. Ensure you enter a valid date and time by separating the day, month
and year using a hyphen -, the hour and the minute with a colon :, and
the date and time with a blank space.
5. An example with the correct format is shown onscreen above the keypad: “setting: 2013-05-18 17:02:54”.
1.7
Battery status
The OtoStat has an internal battery. The battery lasts about 5 hours, and
it takes about 4 hours to recharge. The battery level is shown on the upper
right corner of the main menu screen (Figure 1.5). If the battery level
gets too low, the OtoStat will automatically turn off before the battery is
completely drained. Connect the OtoStat to a power outlet to charge.
Figure 1.6: From the main menu, tap on the top of the screen on the current date
and time to access the Date-Time settings screen.
Plug the power adapter into the power adapter port to charge the battery.
Connect the power adapter to a standard AC power outlet. The LED indicator light on the OtoStat blinks while it is charging. The adapter supplied
with the system is rated for international use of 100-240 V˜ and 50-60 Hz
range. The OtoStat comes with a North American plug. Outside North
America, you will need to use your own plug adapter, or replace the power
adapter with a medical grade adapter for your region.
The battery is not user-replaceable. Please contact Mimosa Acoustics
for information about replacing batteries. You can use the OtoStat while
charging the battery if the power adapter is the one supplied with the system or is a medical-grade equivalent substitution.
If the OtoStat has not been used in the last six months, charge the battery
before turning it on.
1.10 Environmental conditions for transport and storage
1.8
LED color status
14
1.10
The LED light on the base of the OtoStat indicates the following power
conditions:
Environmental conditions for transport
and storage
• Temperature: 32° F (0° C) to 95° F (35° C)
• Relative Humidity: 25% to 80% non-condensing
OtoStat
Off
Off
Off
Off
Off
Off
Booting
Booting
Booting
Booting
Booting
On
On
On
On
1.9
Battery charge
Full
Partial
Full
Full
Partial
Partial
Full
Full
Partial
Partial
Partial
Full
Partial
Partial
Partial
Power & USB cable
No Power or USB
No Power or USB
Powered
USB
Powered
USB
Powered
USB
Powered
USB
No Power or USB
Powered
Powered
USB
No Power or USB
LED color
off
off
Blue
Blue
Blinking Blue
Blinking Blue
Cyan
Cyan
Blinking Cyan
Cyan
Cyan
Green
Blinking Green
Green
Green
Environmental conditions for use
The following ambient conditions must be met for valid measurements:
• The air temperature must be within 59° F to 95° F (15° C to 35° C).
• The relative air humidity must be within 30% to 90%.
• Ambient noise should be minimal; however, a sound-treated booth or
room is not necessary.
Chapter 2
Getting started with OtoStation
2.1.2
A support computer is necessary to run the OtoStation software that calibrates the probe; manages the patient database; reviews, prints, and exports test results; and displays the user manual and tutorials. After installing OtoStation, refer to Section 2.2 to get started.
Installing OtoStation software to a computer
WARNING: INSTALL THE SOFTWARE BEFORE CONNECTING THE
OtoStat TO THE COMPUTER
To install the support software:
2.1
2.1.1
1. Insert the USB flash drive provided with your system into a USB slot.
An AutoPlay window should appear.
OtoStation software support package
2. Choose “Open folder to view files using Windows Explorer”. A Windows Explorer window should appear showing the flash drive contents.
System requirements for OtoStation
3. Locate and run setup.exe and follow the installer instructions shown
onscreen.
The minimum computer hardware and system requirements are:
4. You will get the following choices:
• Windows™ 7 (32 or 64 bit), or Windows™ 8 (32 or 64 bit).
• Install a new instance, or upgrade an existing OtoStation install
(if you have previously installed one).
• 2 GB RAM and 80 GB hard drive.
• Install Application only or Application and Drivers (recommended).
• 5 GB available hard drive space.
• Accept the default installation folder, or choose a new one.
• Minimum i3 class processor (preferably i5 dual-core), at least 1.80
GHz.
5. Follow the onscreen prompts.
6. As part of the installation process, the installer installs the third-party
Mathworks Matlab Component Runtime Library. On some systems,
• An available USB 2 slot.
15
2.1 OtoStation software support package
there may be a warning about a newer version of Microsoft C++ 2010
Redistributable being detected (see Figure 2.1). You can safely ignore
this warning.
16
2.1.3
Firewall and Virus checker settings for OtoStation
7. Connect the OtoStat to the computer using the USB cable only after
the OtoStation is installed (Figure 1.4).
8. Switch on the OtoStat and wait for the OtoStat to completely boot
before connecting the USB cable.
9. When you connect the OtoStat you should get a notification that Mimosa Acoustics RNDIS drivers were installed successfully.
Figure 2.2: Allow your firewall Public and Private access to OtoStation. This example shows Windows Firewall. Your firewall may look different but still should offer
similar settings.
OtoStation communicates with OtoStat over a private network. You need
to allow your firewall to pass the network traffic. When you first run OtoStation you may be prompted by your firewall to allow access (see Figure 2.2). Allow both Public and Private access. If you inadvertently closed
this prompt without allowing suitable access, open your firewall settings
and edit every OtoStation entry to allow Public and Private access. You
may need Administrator access to your computer to do this.
Figure 2.1: If you see this warning, you can safely ignore it.
You may also need to modify your
low the following programs to run:
OtostatProbeCalibration.exe.
virus checker to alOtoStation.exe and
2.2 Running OtoStation
2.2
Running OtoStation
17
The About OtoStation window pops up while OtoStation is loading (see
Figure 2.4). It shows the program and module versions, and contact details. Load this window at any time by choosing About OtoStation from
the Help menu.
Run OtoStation by double-clicking the OtoStation icon
on your
desktop or by choosing it from the Windows Start menu. Once OtoStation has loaded, the Login Window appears (see Figure 2.3). The first
time you start the program, select the Sample database, which includes
some fictitious patients and test results for you to review. Log in using the
default administrator username: “Admin” and password: “password” (see
Figure 2.3). The user name and password are case sensitive. WARNING:
Change the “Admin” password as soon as possible (see section 7.1.1).
OtoStation hardware must be connected to transfer patient records from
the OtoStat. Once transferred, the OtoStat hardware does not need to
remain connected.
Once the user accounts are set up (see section 7.1), log into OtoStation
using your own user name and password. If you mistype the user name or
password, you are prompted to Retry or Cancel. Three retries are allowed
before OtoStation exits.
Figure 2.3: Enter the default user name and password in the Login window.
Figure 2.4: The About OtoStation window appears while OtoStation is loading.
2.2 Running OtoStation
18
Figure 2.5: Main window with key areas labeled.
2.2 Running OtoStation
2.2.1
Items in the Main Window
Once you successfully log into OtoStation you are presented with the main
window. Figure 2.5 shows the main window with key items indicated with
arrows. Take a few minutes to familiarize yourself with the main window.
19
• The Patient Upload icon allows you to transfer patient information to
the OtoStat, rather than adding and editing patient information on the
OtoStat itself (see section 7.3.7).
OtoStat Toolbar
Main Menu
The main menu allows you to manage databases (menu option
Database), manage patients (menu option Patient), manage test histories (menu option Test History), set options (menu option Tools), and get
help (menu option Help). Chapter 7 covers these options in more detail.
Main Toolbar
• Use OtoStat Search to establish a connection to the OtoStat (see section 2.3).
• The OtoStat icon shows if the OtoStat icon is connected (green light)
or not (crossed) (see section 2.3).
The main icon toolbar activates commonly used operations (see Figure 2.5). They are a subset of those options available from the Main Menu.
Test History
Patient Toolbar
• The New icon opens the window to create a new patient record (see
section 7.3.2).
• The Edit icon opens the window to edit existing patient information
(see section 7.3.3).
• Test Download allows you to move or copy test results from the OtoStat to the OtoStation (see section 7.4.1).
• Test Review allows you to review and print test results (see section 7.4.2).
• The Find icon allows you to search for patient records (see section 7.3.6).
• Test Delete, deletes the selected test results from the test history (see
section 7.4.4).
• The Delete icon allows you to delete a patient record (see section 7.3.4).
• Export Test allows you to export to OZ, Hi*Track, or Excel (see section 7.4.6).
2.3 Connecting the OtoStat to OtoStation
2.3
Connecting the OtoStat to OtoStation
To make a connection between OtoStat and OtoStation to transfer data,
plug the OtoStat into a USB port on the computer running OtoStation.
Turn on the OtoStat if it isn’t already on, and run OtoStation. If the
OtoStation indicates there is no OtoStat connected (icon on the right)
, click OtoStat Search (icon on the left). If it still does
not show a connected OtoStat, carefully follow these instructions:
1. Unplug the USB cable between the OtoStat and OtoStation computer
if it is currently plugged in.
2. Turn OtoStat on and wait for its main menu (age group and eartip
buttons) to show.
3. Start the OtoStation program, log in, and wait for its main menu to
show. At this point the OtoStat icon will show as Not Connected.
4. Connect the USB cable from OtoStat to the OtoStation computer. Wait
a moment. The computer might show a wait cursor and/or make a
beep sound as the USB driver for OtoStat is launched by Windows.
This is dependent on Windows settings.
5. Press the OtoStat Search button.
6. Once OtoStation finds the OtoStat on the network, the OtoStat icon
should now show as Connected.
If this did not work:
1. Try again after re-booting both the OtoStat and OtoStation computer.
2. Try a different USB cable.
3. Try a different USB port on the OtoStation computer.
4. Check your firewall settings (Section 2.1.3).
20
Chapter 3
Learning how to use the OtoStat and OtoStation
3.2
Learn how to use the OtoStat and OtoStation system by reading this manual, watching the multimedia tutorials, and following the self-training lesson in Section 3.2. Then expand your understanding by reading up on the
theory underpinning MEPA and DPOAE measurements in Sections 3.3
and 3.4, which includes a suggested reading list.
Take a self-training lesson
After reading the manual and watching the tutorials, familiarize yourself
with the OtoStat by doing this self-guided lesson.
1. Attach different eartips onto the probe. (Section 1.2)
3.1
2. Practice rolling, compressing, and inserting foam eartips into the calibration cavity (set to position 0) and into your own ear. Only insert
clean, unused eartips into the calibrator. Use a clean, unused eartip
for each person. (Section 1.2)
Multimedia tutorials
Find the tutorials under the OtoStation Help menu. The tutorials cover:
3. Create a patient profile on the OtoStat for yourself. (Section 5.1)
• Preparing a foam eartip for calibration or measurements.
4. Verify the probe calibration. (Section 4.1)
• Common errors in preparing foam eartips.
5. Perform a measurement on your ear. (Section 5.8)
• How to make a MEPA calibration.
6. Save the test results. (Section 5.8)
• How to calibrate using a rubber eartip.
7. Repeat the test and see what happens if the probe comes out of your
ear during testing. (Section 5.8)
• Common problems when making a MEPA calibration.
• Testing an adult using a foam eartip.
8. Repeat the test and see what happens if you make noise during testing. (Section 5.8)
The tutorials were made with the Mimosa Acoustics HearID system, but
the principles are identical. New tutorials may be found on our website at
9. Repeat the test and stop it early. (Section 5.8)
http://www.mimosaacoustics.com/support/tutorials.html
10. Review your saved tests on the OtoStat. (Section 6.1)
and the Mimosa Acoustics’ YouTube channel at
http://www.youtube.com/user/MimosaAcoustics.
11. Compare one of your MEPA tests to the norm. (Section 5.11)
21
3.3 MEPA principles
12. Find the numerical values for one of your DPOAE tests. (Section 6.4)
13. Attach the OtoStat to your computer, download your tests, and use
the OtoStation to add comments and print test results. (Section 7.4)
14. Create a new, fictitious, patient on the OtoStation. (Section 7.3)
15. Upload the new patient to the OtoStat. (Section 7.3.7).
16. Calibrate the probe. (Section 4.2)
17. Calibrate in both noisy and quiet environments, and notice the difference between the two results. (Section 4.2)
18. Do a linearity check. (Section 8.1)
3.3
MEPA principles
The middle ear is a complex mechanism with many components. There
are many possible disorders of the middle ear, including fluid in the ear, ossification of the bony structures, discontinuities of the ossicular chain, and
perforation of the eardrum, as well as abnormalities of the membranes,
ligaments, and supporting structures. Since the middle ear is involved in
virtually every test of hearing, it is critical to ascertain the middle-ear status
at the outset of any audiological evaluation, and, in the case of abnormal
middle-ear function, pinpoint the cause to enable an appropriate intervention.
The OtoStat middle-ear power analyzer (MEPA) is designed for middle-ear
analysis. The probe delivers a sound into the external ear canal. Some
of the sound is absorbed by the middle ear and the remainder is reflected
back into the ear canal. The percentage of reflected power to incident
power is defined as power reflectance (|R|2 ). Different middle-ear conditions affect the amount of power that is reflected or absorbed in each
frequency band. MEPA measures and plots reflectance and absorbance
over a wide frequency range, and displays the ear-canal equivalent volume, aiding the diagnosis of middle-ear disorders.
The OtoStat MEPA instrumentation employs computer-generated stimuli,
automated data monitoring, and advanced signal processing for noise and
artifact rejection. Measurements are made rapidly and conveniently. Once
22
the probe is verified (less than a minute, once a week), and placed in the
patient’s ear (a few seconds to a couple of minutes), the time for measuring
an ear’s power reflectance is less than 10 seconds. Otoacoustic emission
measurements may then be made immediately with the same probe, probe
fit, and equipment.
For more information about using MEPA clinically, we recommend the
following articles, along with our Clinician’s Guide on our website at
www.mimosaacoustics.com. Results from some of these papers are calculated and displayed on the OtoStat and OtoStation. Their interpretation
and use are at the clinician’s discretion. OtoStat and OtoStation do not
provide diagnoses.
3.3.1
Newborns
Hunter, Feeney, Lapsley Miller, Jeng, and Bohning (2010) show how
MEPA accurately discriminates infants who obtain a pass result for DPOAE
screening from infants who obtain a refer result, primarily due to transient middle-ear issues. They also provide normative regions for power
reflectance. Similar results are shown by Shahnaz (2008) and Sanford et
al. (2009).
The reflectance area index (RAI) at 2 kHz, as described in Hunter et al.
(2010), is displayed on the OtoStat and OtoStation:
• A “pass” result indicates the RAI is low, which is associated with a normal middle ear and a DPOAE pass result. If the baby has a RAI pass
result and a DPOAE refer result, they should be flagged for follow-up.
• A “retest” result indicates the RAI is high, which is associated with
an abnormal middle ear and a DPOAE refer result. If the baby gets
a DPOAE refer result, we recommend retesting the ear 12-24 hours
later as most middle-ear problems are transient and resolve within
hours of birth.
• An “ambiguous” result indicates the RAI result is inconclusive. If the
baby gets a DPOAE refer result, we recommend retesting the ear 1224 hours later as most middle-ear problems are transient and resolve
within hours of birth.
3.4 DPOAE principles
3.3.2
Infants
Hunter, Tubaugh, Jackson, and Propes (2008) show norms for infants and
young children. Prieve, Werff, Preston, and Georgantas (2013) show how
MEPA can be used to diagnose conductive hearing loss in infants.
23
reflectance and other MEPA measurements for various middle ear conditions, compared to an artificial ear.
The one-third octave reflectance area index (RAI) at 1.6 kHz, as described
in Prieve et al. (2013), is displayed on the OtoStat and OtoStation:
The absorbance level difference (ALD) between 0.6 and 1 kHz, as described in Nakajima et al. (2012), is displayed on the OtoStat and OtoStation. You can use the ALD in conjunction with the air-bone gap (ABG)
to aid in diagnosing conductive hearing loss in ears with intact tympanic
membranes and aerated middle ears. Nakajima et al. (2012) found:
• An RAI ≥ 69 is associated with conductive hearing loss in infants aged
3 to 26 weeks.
• Ears with ALD (0.6-1kHz) < 1 dB and ABG (1-4kHz) > 10 dB were
associated with stapes fixation.
• An RAI < 69 is associated with a normal middle ear in infants aged 3
to 26 weeks (but doesn’t preclude SNHL).
• Ears with ABG (1-4kHz) ≤ 10 dB were associated with semicircular
canal dehiscence.
3.3.3
Children
• Ears with ALD (0.6-1kHz) ≥ 1 dB and ABG (1-4kHz) > 20 dB were
associated with ossicular discontinuity.
Beers, Shahnaz, Westerberg, and Kozak (2010) show norms for children
aged 5-7 years, and show how children with otitis media with effusion have
higher reflectance.
3.3.5
The one-third octave reflectance area index (RAI) at 1.25 kHz, as described in Beers et al. (2010), is displayed on the OtoStat and OtoStation:
For more information about the MEPA calibration, we recommend reading
Voss and Allen (1994).
Measurement theory
• An RAI ≥ 62 is associated with middle ear effusion in children aged
5-7 years.
• An RAI < 62 is associated with a normal middle ear in children aged
5-7 years.
3.3.4
Adults
Feeney, Grant, and Marryott (2003) describe nine cases of middle-ear disorders and one case of sensorineural hearing loss, compared to 40 normal ears. Rosowski et al. (2012) shows norms for highly-screened adults
with normal ears. Nakajima et al. (2012) show how the combination of
reflectance and pure-tone audiometry can accurately distinguish among
stapes fixation, ossicular discontinuity, and semicircular canal dehiscence
for ears with conductive hearing loss and an intact, healthy tympanic membrane and an aerated middle ear. Allen, Jeng, and Levitt (2005) present
3.4
DPOAE principles
Distortion product otoacoustic emissions (DPOAEs) are generated in the
cochlea in response to two primary tones, (f1 , f2 , where f2 > f1 ), presented in the ear canal. The presence of DPOAEs is an objective indicator
of normally functioning outer hair cells (OHCs). The processing that is
done by the OHCs to compress the dynamic range of the basilar membrane motion necessarily generates small levels of distortion. This distortion propagates along the basilar membrane, back into the ear canal,
where the distortion may be measured with a microphone. The OtoStat is
designed to measure these distortion products (Allen, 1996; Allen, 1999).
By changing the frequencies of the primary tones, cochlear frequency
specificity may be investigated. The cubic distortion-product level at
3.4 DPOAE principles
2f1 − f2 is the distortion-product most commonly used in clinical applications. It typically ranges between -10 to 10 dB SPL in adults for primary
tone levels, L1 and L2 , of 65 and 55 dB SPL, respectively, when the frequency ratio, (f2 /f1 ), is 1.22. In general, the higher the input stimuli, the
higher the measured DPOAE level. However, the DPOAE level also depends on several other factors, such as the frequencies of the primary
tones, the frequency ratio, and the stimulus level difference, L1 − L2 . A
DPOAE measurement is sensitive to the status of OHCs at or around the
f2 frequency region, when measured using the optimal parameters described above.
Another important factor affecting the quality of the measurement is the
relation of the DPOAE to the noise floor. Since the DPOAE is very small,
ranging from 30 dB SPL in infants down to -10 dB SPL in adults (or 15 dB SPL in adults with mild hearing loss), it is necessary to ensure that
the measured level is for a DPOAE and not a high point of random noise in
the noise floor. One way to ensure this is to specify a separation between
the DPOAE and the noise floor. The larger the separation, the more confidence there can be that a measured DPOAE is a true DPOAE. A study
by Boys Town National Research Center over a large population used
6 dB separation to obtain 90% and 95% confidence intervals for DPOAEs
(Gorga, Stover, Neely, & Montoya, 1996; Gorga et al., 1997).
For screening purposes, the DP-gram is the most usual way to measure
and display DPOAE data. The DP-gram is a display of DPOAE levels
that have been measured across a range of frequencies with a constant
frequency ratio, stimulus levels, and stimulus level difference.
24
Chapter 4
Verifying and calibrating the probe
Calibration: The OtoStat usually comes with pre-installed calibrations for
each probe and eartip type. You only need to calibrate a probe if the weekly
verification fails, but you can choose to calibrate more frequently. Calibrating involves a quick test for each position in the 4-cavity calibrator while
the OtoStat is connected to the OtoStation computer. Once calibrated,
the probe needs only a quick, regular verification run from the OtoStat.
A high-quality calibration is essential for high-quality measurements. We
recommend you practice calibrating and that you watch the multimedia tutorials (Section 3.1) before making and saving a high-quality calibration
(Section 4.2).
Verification: is done weekly to ensure the calibration is still stable. If
a probe fails to verify, any tests done since the last successful verification might need repeating. Verify more frequently if your clinic has a high
throughput. The time until the next weekly verification for the currently selected probe is shown on the main OtoStat screen. When that time runs
out, the message changes to “Please Verify”. The probe should be verified
before doing any further testing; however you will not be precluded from
testing. Run the verification from the OtoStat (it does not need to be connected to the computer), and make one measurement using position 3 in
the 4-cavity calibration set (Section 4.1).
Figure 4.1: Probe with foam eartip mounted into the calibration cavity set (calibrator), which is set to Position 0.
25
4.1 Verifying the probe calibration
26
3. Check that the barrel on the calibrator is at position 0. This is the
closed (no cavity) position designed to set the probe tip to the correct
depth in the calibrator. Never insert, re-insert, or adjust the probe or
tip at positions 1, 2, 3, or 4; doing so can cause the tip to protrude into
the cavity and be damaged when the barrel is turned.
4. Mount a foam 14A eartip onto the probe (Section 1.2), and compress
it into a smooth domed shape.
5. Insert the probe tip into the cavity hole labeled “foam,” and support
the probe head and cable on the metal posts so that the probe head
is parallel to the cavity (Figure 4.1).
6. Use one hand to hold the calibrator steady and the other hand to
slightly pull out and rotate the barrel to position 3.
7. Start verification by tapping on the 14A eartip icon at the bottom of the
screen (Figure 4.2).
8. The OtoStat will test the probe and display the results. If the verification is successful, tap Done (Figure 4.3).
9. The probe serial number and verification status is updated and displayed at the bottom of the screen.
Figure 4.2: The Probe Selection screen.
4.1
Verifying the probe calibration
The probe serial number and time remaining on the current verification is
shown on the bottom left of the main screen. Time remaining is displayed
as days and hours (for more than one day remaining), or hours and minutes (for less than one day remaining). If it is time for the probe to be
reverified, the status shows “Please Verify”. To verify the probe status:
1. Tap Probes on the bottom right of the Main Menu to load the probe
verification screen on the OtoStat (Figure 4.2).
2. Check the serial number displayed on the screen matches the serial
number on the probe. If the numbers do not match, tap the arrow
button to cycle through the available probes. If the probe is not listed,
go to Section 4.2 to add a new calibrated probe to the list.
10. If the verification fails, troubleshoot for noise, vibration, and probe
cable connections. Check that the probe serial number onscreen
matches the serial number of the probe. The OtoStat may offer suggestions too. Tap on the eartip icon to repeat the test (Figure 4.3).
11. If the probe continues to fail the verification, you may have to perform
a new calibration for this probe (see Section 4.2).
You can continue to test with an unverified probe, but it is not recommended.
4.2 Adding and calibrating a probe
27
3. Place the calibrator on a foam pad to isolate it from vibrations. The
OtoStat case contains a foam pad.
4. Check that the barrel on the calibrator is at position 0. This is the
closed (no cavity) position designed to set the probe tip to the correct
depth in the calibrator. Never insert, re-insert, or adjust the probe
or tip when at positions 1, 2, 3, or 4; doing so can cause the tip to
protrude into the cavity and be damaged when the barrel is turned.
5. Connect the probe to the OtoStat (Section 1.2 and Figure 1.4). Ensure
the cables are not touching one another.
6. Mount the eartip onto the probe (Section 1.2), and ensure foam
eartips are compressed into a smooth domed shape before inserting
into the cavity.
7. Insert the probe tip into the cavity hole corresponding to the foam or
rubber eartip, and support the probe head and cable on the metal
posts so that the probe head is parallel to the cavity (Figure 4.1).
8. Connect the OtoStat to the computer (Section 1.2 and Figure 1.4) and
turn both the OtoStat and the computer on (see Section 1.3).
9. Run OtoStation, log in, then choose Probe Calibration from the
Tools menu to run the Calibration program (Figure 4.4).
Figure 4.3: (Left) A failed probe verification. (Right) a successful probe verification.
4.2
Adding and calibrating a probe
10. On the calibration screen (Figure 4.4), type in the probe serial number
(found on the back of the probe head) and select the eartip type (foam
or rubber).
11. Run a calibration for each four cavity positions:
You need to calibrate your probe if (a) you were not supplied with a factory
calibration, (b) your probe failed to verify, indicating the calibration parameters have drifted, (c) your probe has been serviced, (d) you markedly
change operating environment such as altitude, temperature, or humidity, or (e) you are a researcher and your research protocol requires more
frequent calibrations.
1. Calibrate in a quiet, vibration-free environment.
2. Calibrate each probe, for each eartip type (foam and rubber). If your
clinic uses one tip-type exclusively, you only need to calibrate that tip.
Use the 14A foam eartip and the 04 rubber eartip when calibrating.
(Note that probe verification always uses the foam eartip.)
(a) Use one hand to hold the calibrator steady and the other hand to
slightly pull out and rotate the barrel to position 1.
(b) Click Start (Figure 4.4).
(c) The calibration graph (Figure 4.5) displays the frequency responses in the cavity for the 2 speakers (blue lines), which
should fall within the light-blue tolerance patch, and the noise
level (brown lines).
(d) Repeat the calibration if the noise level is elevated.
4.2 Adding and calibrating a probe
Figure 4.4: The calibration window on the computer before beginning the calibration sequence.
28
Figure 4.5: Measurement recorded in cavity 1.
4.2 Adding and calibrating a probe
29
(e) If the blue cavity response lines are separated or outside the
light-blue patch, turn the cavity to position 0 and remove the
probe. Try refitting or replacing the probe tip. Re-insert the probe
into cavity 0 and make sure that the probe is not inserted at an
angle. Repeat the calibration. See the trouble-shooting section
if calibration is not successful (Appendix A).
(f) When you are satisfied with the calibration for cavity 1, rotate the
barrel to position 2 and calibrate as above. Repeat until all 4
cavities are calibrated. The light blue response region for each
cavity is different.
Figure 4.7: The calibration window after choosing Solve. This calibration shows a
Pass result.
14. If the calibration fails, repeat the calibrations for the cavities that gave
poor results and then tap on Solve to obtain a new calibration result.
See Figure 4.8 for a fail result. Tips for improving calibrations are
shown at the bottom of the window.
15. Choose Cancel to return to the Main Menu. From there you can start
a calibration for a different probe or different tip type.
16. After a successful calibration, tap the Probe button on the OtoStat
Main Menu to see and select the calibrated probes available.
Figure 4.6: Calibration window after all four positions are tested. Press Solve to
complete the calibration.
12. When all 4 cavities are calibrated, click Solve (Figure 4.6).
13. Calibration control curves and the result (Pass or Fail) are shown. If
the result is Pass, the calibration data is transferred and stored on the
OtoStat. Figure 4.7 shows a pass result.
4.3 Transferring a new calibration to the OtoStat
30
Figure 4.8: The calibration window after choosing Solve. This calibration shows a
Fail result.
4.3
Transferring a new calibration to the OtoStat
If you acquire a new probe or your probe has been serviced, you will either
need to calibrate it yourself or you may be supplied a new calibration. If
you are supplied with a new calibration, you need to transfer it onto the
OtoStat. From the OtoStation, go to the Tools menu and choose Transfer
Calibration. From the Transfer Calibration window, click on the Browse
button and navigate to the location of the new calibration(s). The table will
show you the available calibrations for transfer in that folder (Figure 4.9).
The first column is probe number, the second is tip type, and the third is
the calibration date and time. ‘R’ and ‘F’ represent rubber-tip and foam-tip
calibrations. Ensure your OtoStat is connected, highlight the file(s) and
choose Transfer.
Figure 4.9: The Probe Calibration Transfer window.
Chapter 5
Testing patients with the OtoStat
Section 7.3). Or you can enter patients directly on the OtoStat. OtoStat
and OtoStation synchronize patient data by matching the Patient ID, which
must be unique.
Before testing a patient:
• Ensure the OtoStat is ready for testing by turning it on, checking the
date, time, and battery levels. See Section 1.6 if you need to change
the date or time, and Section 1.7 for information about the battery.
Tap on the PatientID (ID,Last,First,M) button to load the Patient List
screen. From here you can highlight a patient by tapping on their name
in the list (Figure 5.2), scrolling if necessary. The following options are
available:
• Check the probe is calibrated and verified. See Section 4.
• We recommend doing daily listening tests in your own ear. Listen
for the MEPA and DPOAE stimuli (do they sound like they normally
do?), and listen for extraneous noise, crackling, or other interference.
Review your test results to see if they are similar to previous tests. If
anything seems untoward, work though the trouble-shooting help.
• New allows you to enter a new patient name or any preferred alphanumeric ID code. The patient entry screen will load (Figure 5.1). Tap on
the onscreen keyboard to enter the name or ID. Save any changes by
tapping on Done. When you return to the main screen, the PatientID
button will now show the currently selected patient. Any tests run will
now be saved to that patient’s folder.
These tasks can usually be done prior to meeting with the patient.
Once you are with the patient, perform an otoscopic exam, choose an
eartip that matches the ear-canal diameter, and insert the probe for testing
as described in this section.
5.1
– If you want to enter a complete Patient ID and name, use commas to delimit each part of the name and enter it in the order: ID,
Last Name, First Name, Middle Name or Initial.
– If you want to just use the Patient ID, enter the ID without any
commas.
Entering the patient’s name or ID
– WARNING: OtoStation matches records solely by the Patient ID.
If the Patient ID already exists on the OtoStation the name on the
OtoStat is ignored.
When you turn on OtoStat, the PatientID button defaults to the patient
identifier “ID,Last,First,M”. If you don’t enter any patient information, all
tests will be saved to this patient. You can choose to enter patient information on the OtoStation and upload the names to the OtoStat (see
– HINT: Once you download new tests from the OtoStat you can
edit the details for any new patient found.
31
5.2 Otoscopic examination
32
• Select to return to the main screen with that currently selected patient.
The currently selected patient will show on the button. Any new tests
will be saved under that name.
• Review tests for a previously-tested patient. The list of available tests
is shown (Figure 5.2).
– Tap on a test and then Review to display previous test results.
– Tap on a test and then the trashcan icon to delete the test.
– Done to return to the Patient List screen.
• Edit to modify selected patient details.
• Delete the selected patient by tapping the trashcan icon.
• Done returns to the main screen.
Figure 5.2: (Left) The Patient List. (Right) The Test History list.
5.2
Otoscopic examination
Before making any measurements using the OtoStat system:
• Perform an otoscopic examination to visualize the eardrum and to ensure the ear canals are free of debris.
• Excess cerumen (earwax) can affect the test results. It is recommended that excess cerumen be removed by someone trained in
cerumen management prior to inserting the probe in the ear canal.
Figure 5.1: The Patient ID data-entry screen.
• Failure to remove excess cerumen may cause the probe eartip openings to block, damage the probe, invalidate test results, and exacerbate cerumen impaction.
5.5 Inserting a rubber eartip into an ear canal
5.3
33
Selecting an eartip
shows the correct and incorrect way to squeeze and mount the foam eartip.
Also view the multimedia tutorials (Section 3.1).
Foam Tips
Rubber Tips
14A: Fits most adults
03: Fits newborns
and infants with small
ear canals
14B: Fits children,
and adults with small
ear canals
04: Fits newborns,
infants and young
children
14C: Fits adults with
wide ear canals
05: Fits newborns,
infants and young
children
Figure 5.3: The eartip options for the OtoStat probe.
The rubber tips and smallest foam tip are typically used for pediatric patients and the foam tips for adult patients. If you are not sure which size
to pick, start with the medium red 04 rubber tip for pediatric patients, the
brown 14B foam tip for children, and the yellow 14A for adult patients.
All the eartips are disposable and made for one time use only. It is safe
to use the same eartip for both ears of the same patient in the same test
session. Do not reuse an eartip once it is removed from the probe because
the inner tubes stretch and tear on removal. For hygiene, do not use the
same eartip on different people.
5.4
Mounting the eartip onto the probe
Attach the eartip to the probe by inserting the metal probe tubes into the
eartip stalk. Align the red stripe on the eartip to the red dot on the probe.
Push until you feel resistance decrease. For foam tips, compress the foam
evenly and smoothly immediately before inserting into the calibrator or ear
canal. Wait for the foam to expand before beginning the test. Figure 5.4
Figure 5.4: How to fit a foam tip to a probe.
5.5
Inserting a rubber eartip into an ear canal
Perform otoscopy to verify the ear canal is healthy and that you can visualize the eardrum. Before inserting the probe, work out any torque/twist in
the probe cable, so that the torque force of the cable does not work against
the probe direction and insertion.
If testing a baby or young infant, prepare the probe by laying the probe
cable along the baby’s body longitudinally with the probe head lined up
with the baby’s test ear. A baby’s ear canal is soft and collapsible. Pull the
pinna upward and backward to allow the insertion of the small red tip into
the ear canal. When the auricle is released, the tip will sit firmly in the ear
5.8 Making measurements
canal and the weight of the probe will be just enough to keep the probe in
place. The shirt-clip on the probe cable may come in handy to support the
probe head in place.
Ensure that you have completely inserted the eartip into the ear canal.
The end of the eartip should be flush with the opening of the ear canal.
A good insertion allows good seal of the ear canal and reduces external
noise. Eartips are designed for single-patient use, and should be disposed
after each patient use or removal.
5.6
34
might feel a little scratchy. You should say if you are experiencing any
discomfort from the eartip.
• During the test you will hear sounds. For example, tones, clicks, warbles. The sounds are not loud. They will be no louder than a doorbell.
• All you need to do is to sit quietly. You do not have to respond in any
way. Try to keep still so that the probe and cable do not move.
• Test results will be more accurate if you relax, breath quietly, and swallow only between the presentation of sounds. Try not to touch your
ear, the probe, or the probe cable.
Inserting a foam eartip into an ear canal
5.8
Perform otoscopy to verify the ear canal is healthy and that you can visualize the eardrum. Before inserting the probe, work out any torque/twist in
the probe cable, so that the torque force of the cable does not work against
the probe direction and insertion. Shape the foam between the thumb and
the index finger to compress the foam smoothly.
Pull up and back on the pinna to straighten out the ear canal and then
quickly insert the foam tip into the ear canal along the direction of the canal
as deeply as possible with at least half of the foam tip portion in the canal.
Hold it in the canal until the foam has expanded to secure the insertion.
Use the shirt-clip on the probe cable to attach the cable on the collar or
clothes around the shoulder. This will support the probe to prevent it from
dislodging from the ear canal under its own weight. Wait a few seconds for
the foam to expand before starting the test. Eartips are designed for singlepatient use, and should be disposed after each patient use or removal.
5.7
Instructing the patient
We suggest you include the following information in your instructions to the
patient.
• A probe covered by a rubber or foam eartip (like an earplug) will be
inserted into your ear canal. This should not hurt at all—at most it
Making measurements
Once you complete the test preparations described in this Chapter, you
are ready to make a measurement. Check that the eartip is securely in the
patient’s ear canal, that the probe cable is secured to the patient’s clothes
or blanket, and that the patient is still and quiet. There are two parts to the
measurement: a MEPA test followed by DPOAE test.
HINT: We recommend testing with the OtoStat running on battery.
To begin a test, from the Main Menu (Figure 1.5):
• (Optionally) Select the measurement protocol you wish to use by tapping the Protocols button and choosing from the available options
(Figure 5.5).
• Tap the patient’s Age Group from the choices in the left column of the
Main Menu.
• Start the measurement by selecting the Eartip type and size from the
choices in the right column of the Main Menu. The available eartip
options depend on the patient’s age group and whether there is a
foam and/or rubber eartip calibration for the selected probe. Refer to
Figure 5.3 for help in matching eartip shape to name.
During testing you can:
• Stop the test at any time by pressing the Stop button (Figure 5.6). Do
this if you spot a problem and the test needs to be restarted. You can
5.8 Making measurements
35
Immediately after testing you can:
• Tap on Save L ear or Save R ear to save test results for the left and
right ears, respectively (Figure 5.6). You can save about 1500 tests
before you need to free up room for more by deleting old tests.
• Tap and swipe the plots or tables to cycle among different displays.
Tap to change which data are displayed, and swipe to switch among
the tests (MEPA and DPOAE).
• HINT: If you have not already entered or selected a patient or you
have selected the wrong patient, tap on the Patient ID button to create
a new patient entry, or tap on the Review button to select an existing
patient. You must do this before saving the result. Once the record
is saved, you cannot switch it to a different patient or ear.
• Tap the Trash bin icon to discard a test without saving (Figure 5.6).
• After saving or discarding the test, you can choose to Repeat an identical test (on either ear) or tap Done to return to the Main Menu. Each
repeated test creates a new test record if saved.
Figure 5.5: (Left) The protocol selection screen shown after tapping the Protocols
button on the main menu. (Right) Choose a different protocol by tapping on the
available options.
also stop the test early if the test results provide enough information
and no further tests are needed. The partial test results can be saved.
• If you need to change to a different eartip size, select Stop, save or
discard the partial results, and select Done to return back to the Main
Menu to select the correct tip.
• Tap and swipe the plots or tables to cycle among different displays.
Tap to change which data are displayed, and swipe to switch among
the tests (MEPA and DPOAE).
5.10 What happens in the DPOAE test
36
to reduce noise. Tap the plot to see Absorbance instead, which is the
acoustic power absorbed into the middle ear, relative to the incident power,
in dB. Tap again to see the microphone pressure plotted in dB SPL.
Various caution indicators may show on the screen it the system detects:
too much noise, if the probe is not connected to the device, if the probe
is not inserted in an ear or cavity, or if the stimulus level drifts (i.e., the
probe has slipped in the ear). The current status of the measurement is
displayed in the plot title.
At the end of the measurement the MEPA extended analysis screen updates with test results, including the ear canal equivalent volume (EqV) in
cubic centimeters (cc), and age-related quantities that can be used to aid
diagnoses as described in Section 3.3. For detailed results, review the test
on the OtoStation (Chapter 6).
5.10
Figure 5.6: (Left) During a test you can Stop the measurement early if desired.
(Right) Immediately after a test you can tap on the Save L ear or Save R ear
buttons to save the test, or on the trash bin to discard.
5.9
What happens in the MEPA test
The MEPA test plays a series of chirps into the ear canal. Some of this
sound is absorbed into the middle-ear and some of it is reflected. The microphone measures the sound pressure in the ear canal. This measurement, along with the probe calibration parameters, is used to determine
Reflectance, which is the percentage of reflected acoustic power relative
to the incident acoustic power.
The MEPA Reflectance plot is updated as data are collected and averaged
What happens in the DPOAE test
If the MEPA test completes, the DPOAE test automatically starts. At each
test frequency, the two primary tones, f1 and f2 , are delivered into the
ear canal through the two probe speakers. The preceding MEPA microphone pressure responses are used to calibrate the stimulus levels. The
probe microphone records the stimulus and the resulting DPOAE in the ear
canal. This recording is split into a series of data frames that are averaged
together to improve the DPOAE signal-to-noise ratio. A frame is included
in this average if it has sufficiently low noise, otherwise it is rejected. As
each frequency is tested, the results are plotted on the screen. Stopping
rules are used to decrease test time.
“High noise” warnings are displayed on screen, with the instruction to “Reduce Noise” if the noise is sustained. The stimulus levels should remain
within ±1 dB of target. If the probe moves, the stimulus levels may deviate
from the target. The OtoStat compensates up to 10 dB with a “Re-Setting
Level” warning, but if the deviation is large, the test will stop and “Level Set
Error” displayed. The test can be saved or discarded.
During the test the DPOAE plot indicates the current frequency. At the end
of the test, the title shows the overall pass/refer status: DP pass, DP refer,
or DP noisy, and how many frequencies passed.
5.13 MEPA protocols and settings
5.11
MEPA norms
The OtoStat comes with age-appropriate MEPA norms based on measurements from various populations. These norms are plotted as a gray patch
under the current measurements.
Newborn (<1 week): Reflectance from infants aged up to 4 days old with
normal DPOAE, from Fig 3 (chirp stimulus) in Hunter et al. (2010).
The pass region is defined as the minimum reflectance for the group
with normal DPOAE and the tenth percentile for the group with abnormal DPOAE. Reflectance values above the normative region are
more likely to be associated with a DPOAE refer result due to transient
middle-ear issues. Although newborns 4-6 days old are slightly older
than the newborns used for the norms, we recommend using them if
the newborn is being tested as part of a newborn hearing screening
program, otherwise they could be tested as an infant instead.
Infant (1 week - 3 years): Reflectance from normal-hearing young children between 1 week and 3 years of age. Displayed is the tenth to
ninetieth percentile, based on data from Hunter et al. (2008) but reanalyzed for this age-group.
Child (3-16 years): Reflectance from 144 normal-hearing 5-7 year olds
from Fig 5. in Beers et al. (2010). Displayed is the 10th and 90th percentiles. Tests for children outside this age group should be compared
to this norm cautiously.
Adult (> 16 years): Reflectance from 58 normal-hearing adult ears from
Rosowski et al. (2012). Displayed is the 95% confidence interval.
In comparison, the DPOAE norm indicates where DPOAEs for normal and
abnormal ears overlap (i.e., it shows the ambiguous result region).
5.12
DPOAE norms
The DPOAE normative data range enables you to compare the current
DPOAE test results to the Boys Town National Research Hospital 90th
percentile confidence levels norms (Gorga et al., 1997). The gray band
37
indicates the ambiguous region where ears with normal hearing overlapped with hearing-impaired ears. DPOAEs above the ambiguous region
are associated with normal hearing. DPOAEs below the ambiguous region
are associated with abnormal hearing. DPOAEs within the ambiguous region may be associated with normal or abnormal hearing. These norms
are appropriate for all age groups.
In comparison, the MEPA normative region indicates the range where reflectance for normal middle ears fall.
5.13
MEPA protocols and settings
Check the currently loaded protocol and switch among protocols by tapping the Protocols button to get the Protocols screen and choosing
the desired protocol from the list. Two MEPA protocols are provided:
MEPA chirp 60 and MEPA chirp 60 2ch. They are identical except the
latter plots both output channels.
Stimulus type: wideband chirp (swept frequency).
Stimulus level: the level measured at the microphone is not controlled
by an in-the-ear calibration. Instead, the speaker output voltage is
based on the eartip used for the test. Smaller eartips are associated with smaller ear canal volumes, so lower speaker voltages are
used. The target rms pressure at the microphone is 60 dB SPL, as
measured in an artificial ear, but the true level varies with ear-canal
volume.
Measurements: two are made, one for each speaker in the probe. The
first measurement is displayed as the MEPA result, and is also used
as the in-the-ear calibration for the first DPOAE stimulus. The second measurement is not displayed and is used only for calibrating the
second DPOAE stimulus.
Artifact Rejection: is done in the time domain. For each data block, the
instantaneous noise is compared to a threshold. If greater than the
threshold, the block is rejected. Otherwise, the block is added to an
average. The artifact rejection threshold adjusts automatically based
on noise history.
5.14 DPOAE protocols and settings
Overflow detection: is also done in the time domain. If a single sample
in a block is close to overflow (95%), the entire block is rejected.
Reset Conditions: if the signal no longer matches the average signal
or is out of tolerance, this indicates something physical has changed
(e.g., the probe has moved or has fallen out). The average is cleared
and the test is restarted automatically.
Stopping Rules: for the first measurement, the test stops once 4 seconds of good data is collected. For the second measurement, the test
stops when 1.5 seconds of good data is collected. The test will only
stop early under two error conditions: if the probe is not connected to
the OtoStat or if more than 20 blocks are rejected for overflow.
38
8, 6.75, 4.8, 3.4, 2.8, 2.4, 1.6, 1.3 kHz. Pass/Refer criteria at individual frequencies are based on the bottom of the gray ambiguous region
for the BoysTown90 norm (see Section 5.12), which corresponds to the
10th percentile for normal-hearing ears. An overall pass/refer result is not
presented because this protocol, for some billing systems, requires a diagnostic evaluation to be provided by the clinician.
None: Choose None if you wish only to test MEPA and not DPOAEs.
Some parameters are common across all protocols:
Averaging time: testing at an individual frequency runs for a minimum of
2 seconds and a maximum of 6 seconds. Tests will stop early if:
Stop for pass: the SNR is at least 10 dB, the DPOAE level is at least
-5 dB SPL, and the noise level is no more than 0 dB SPL.
5.14
DPOAE protocols and settings
The current protocol is shown near the bottom of the main screen next to
the Protocols button. Switch among protocols by tapping the Protocols
button to get the Protocols screen and choosing the desired protocol from
the dropdown menu. The OtoStat comes with three DPOAE protocols:
BTSCREEN6: Boys Town National Research Hospital protocol for DPOAE
screening at f2 frequencies of 4, 3, 2, and 6 kHz (in that order). L1 /L2 is
65/55 dB SPL, and the f2 /f1 ratio is 1.2 (Gorga et al., 1997). A pass result
at a single frequency requires a minimum DPOAE response of -10 dB SPL,
with at least 6 dB SNR. A Pass result signifies DPOAE presence, but not
necessarily a DPOAE within normal limits. Three out of four frequencies
must pass to get an overall Pass result. The BoysTown90 norm (see Section 5.12) provides a normative region for comparison.
DP 6Freq: A DPOAE test that is similar to BTSCREEN6, with the addition
of two frequencies, tested in the order: 4, 3, 2, 6, 1, 5 kHz. Pass/Refer
criteria at individual frequencies are based on the bottom of the gray ambiguous region for the BoysTown90 norm (see Section 5.12), which corresponds to the 10th percentile for normal-hearing ears. Four out of 6
frequencies must achieve a pass result to gain an overall Pass.
DP 12Freq: A DPOAE test that is similar to BTSCREEN6, but uses logspaced frequencies between 1-8 kHz, tested in the order: 4, 2, 1, 5.7,
Stop for refer: the SNR is no more than 3 dB, the DPOAE level is no
more than -10 dB SPL, and the noise level is no more than -10
dB SPL.
Artifact Rejection: in the frequency domain, the noise floor is calculated
as the average of several frequency bins surrounding the 2f1 -f2 frequency bin. If a data block has a noise floor greater than 25 dB SPL it
is rejected. Additionally, the average noise floor of all accepted blocks
is calculated. If a single data block has a noise floor more than 10 dB
above the average of all accepted blocks so far then the block will be
rejected.
Setting Stimulus Level: the DPOAE test relies on the preceding MEPA
test for an in-the-ear calibration to set the stimulus levels correctly. If
the measured stimulus level is not within 3 dB of target, the OtoStat
adjusts the stimulus level. After 3 tries to set the level within 3 dB of
the target it will stop the test and issue a warning. If at any time the
level is more than 10 dB from the target level, the test will stop and
issue an error message “Stim Level Fail” without attempting to adjust
the stimulus level. Because this typically happens when the probe has
fallen out, the test does not continue, but frequencies already tested
can be saved.
Retesting noisy frequencies: If more than two-thirds of the data frames
at a test frequency were rejected for noise, the OtoStat automatically
retests noisy frequencies once.
Chapter 6
Reviewing test results
You can review test results on the OtoStat (Section 6.1), or in more detail
on the OtoStation (Section 6.5).
6.1
Reviewing tests on the OtoStat
• Tap on the Patient ID button on the Main Menu to display the patient
list. Choose a Patient then tap on Review to list their tests (Figure 5.2).
• The tests are listed chronologically.
• Select the test you would like to review by tapping on it then tapping
review.
• Once the test is displayed, scroll through the tests for that patient by
tapping on either the < s < or >> button.
• Tap Done to return to the Test List.
6.2
Navigating the OtoStat displays
Figure 6.1: Test results when recalled in review mode. Tap on the arrows to scroll
through other test results for the currently selected patient. Tap on the DPOAE or
MEPA buttons to review just those results.
Figure 6.1 shows the default two-panel test results displayed with the
MEPA reflectance plot at the top and the DPOAE DPgram plot at the bottom. To access alternative displays:
39
6.3 Interpreting the MEPA displays
• Tap on the MEPA plot to toggle among Reflectance, Absorbance, and
Extended Analysis (Figure 6.2).
• Swipe across the plot to switch between MEPA and DPOAE results
(Figure 6.1).
• In patient review mode, scroll to other test results for that patient by
tapping on either the << or >> button (Figure 6.1).
40
6.3
Interpreting the MEPA displays
By default, the top plot shows the MEPA reflectance curve in teal (Figure 6.1) and the normative range for the selected age group in gray (see
Section 5.11). The OtoStat does not interpret MEPA results and the clinician is entirely responsible for interpreting the MEPA reflectance curves
for diagnostic purposes.
Reflectance is represented as a percentage (%) of power reflected relative
to the incident power, and is plotted as a function of frequency between 0.2
and 8 kHz.
In the extended analysis table, the equivalent volume and various test results are displayed, depending on the normative age group (as chosen
from the main screen). To find out more about the extended analyses, see
Chapter 3.
HINT: Tap on the MEPA plot to toggle between displaying the results as
Reflectance or Absorbance (Figure 6.2). Absorbance shows how much
power was absorbed into the middle ear, and is measured in dB relative
to 100% power absorbed. 0 dB therefore indicates that all power was
absorbed. Absorbance is also known as Transmittance.
6.4
Interpreting the DPOAE displays
By default, the bottom plot shows the DPOAE DPgram (Figure 6.1). The
DPOAE Pass/Refer indicator is shown in the plot title, and shows how
many DP points were present, out of the total number measured.
The number of frequencies that must have DPOAEs present for an overall pass, and the criteria for that determination, depends on the protocol
(Section 5.14). The Pass/Refer indicator is given as a guideline only, and
a qualified clinician must make the final determination of the diagnostic result. Note that the DP 12Freq protocol does not provide pass/refer status.
Figure 6.2: (Left) Tap on the MEPA plot to toggle Absorbance, Reflectance, and
Extended Analysis. (Right) Tap on the DPOAE plot to toggle the DPgram and the
numerical table.
For each test frequency, the DPOAE and noise level are extracted and
displayed as bars in dB SPL at the f2 primary tone frequency. Onscreen,
dB SPL is shorted to dB. The DPgram is plotted from 0.2 to 8 kHz so that
it lines up with the MEPA plot.
6.4 Interpreting the DPOAE displays
41
HINT: Tap on the DPOAE plot to toggle between displaying the results
graphically and numerically.
The DPgram plot is color coded (as illustrated in Figure 6.3, which was
made in noisy conditions):
• Noise level - Black: the black bars indicate the noise level and are
plotted for every frequency tested, overlaying the DPOAE level. If the
DPOAE level is lower than noise level (signal-to-noise ratio≤0), it is
completely occluded by the black bar.
• Good DPOAE - Green: If the DPOAE signal-to-noise ratio and amplitude reaches the criterion for DPOAE presence (set in the protocol),
the DPOAE bar is colored green.
• Absent DPOAE - Orange: If the DPOAE signal-to-noise ratio is greater
than 0 but doesn’t reach the criterion for DPOAE presence (set in
the protocol), it is considered absent and the DPOAE bar is colored
orange.
• Noisy DPOAE - Brown: If more than two-thirds of the data frames
were rejected due to noise, but the signal-to-noise ratio is greater than
0, the DPOAE bar is colored brown, indicating that the level is not
reliable.
The DPOAE numerical table (Figure 6.3) shows for each test frequency:
F2: the f2 frequency in kHz (frequency is sorted in ascending order, not
in the order of testing, which varies by protocol),
DP: the DPOAE amplitude in dB SPL,
NF: the noise floor surrounding the DPOAE in dB SPL,
SNR: the signal-to-noise ratio in dB, and
P/R: the Pass/Refer status at each point, where P=Pass, R=Refer,
N=Noisy, and x=untested (test stopped early).
Figure 6.3: (Left) A test with elevated noise at 1, 2, 4, and 8 kHz. 1.3 kHz has
a low-level DPOAE, considered absent. The other frequencies met the criteria for
DPOAE presence. (Right) A numerical display of the same data (scroll with your
finger to see all frequencies).
6.5 Reviewing tests on the OtoStation
6.5
42
Reviewing tests on the OtoStation
This section assumes you have installed the OtoStation and have reviewed
how to navigate and use Test Histories (Section 7.4) after they have been
transferred from the OtoStat to the OtoStation database. The benefit to
using the OtoStation for review is that you are able to use all the features
of the patient database, print reports, and more easily compare results.
The review window contains six frames with plots, tables, and other information about the test results (see Figure 6.5). The top of the window
shows the patient name, ID, Birth Date, Ear Tested, Test Date and Category. The top right has Print Preview and Print buttons.
(a) MEPA legend
The default frames are as shown in Figure 6.5. You can configure what
is displayed in each frame. Note that each frame has a top section with 4
items:
• The dropdown box on the left allows you to choose which test type is
shown on the plot space.
• The second field displays the protocol name used when the test was
performed.
• The third field is not used in this version of OtoStation; it will always
display “OtoStat”.
• Click on the “?” field to open a legend for the selected test type and to
toggle whether the legends are shown on the plots (not recommended
because the legend can occlude data; once you have learned what
the symbols mean, turn the legend off). See Figure 6.4.
Click on the plot space to toggle through the available plot types for the
selected test. This is done in the same way as it is done on the OtoStat
itself.
Use the Print Preview and Print buttons to generate a report. You can
choose to Print to File (e.g., to PDF) for electronic reports.
The MEPA plots are essentially the same as shown on the OtoStat. The
DPOAE plot is recolored. The noise level is green if it meets the criterion
for a good noise level, otherwise it’s colored brown. The DPOAE level is
coded light green if it has good SNR and amplitude, otherwise it is coded
orange. If a bar is just green or brown it means the DPOAE is lower than
(b) DPOAE legend
Figure 6.4: The legend displayed depends on which test type is active in the plot
frame.
the noise level. See Figure 6.4 for the legends shown when you press the
’?’ symbol on the plots.
WARNING: In this version of the OtoStation, some additional test information and guidance is provided, depending on the patient’s age.
It is up
to you to determine if it is relevant and appropriate for your patient. This
information in itself is not a diagnosis, but may be used to support your diagnostic decision making. For more information, see Chapter 3 and go to
our website at www.mimosaacoustics.com. As more diagnostic information is published in peer-reviewed journals, we will expand the information
available on our website.
6.5 Reviewing tests on the OtoStation
43
Figure 6.5: The Measurement Review window.
6.5 Reviewing tests on the OtoStation
6.5.1
Print summaries
From the OtoStation measurement review window, you can print summary
reports. The reports are configured to print on two pages, one for MEPA
and one for DPOAE, but may span over more if there are extensive comments. See Figures 6.6 and 6.7.
Both pages have the same header with the following information:
• Institution details
• Patient Name and ID
• Birth date and test data/time
• Gender
• Comments
The MEPA test summary shows:
• Probe serial number and verification status
• Test Ear
• Ear tip type
• Test protocol
• Age Group
• Normative data and corresponding age group
• Equivalent Volume
• Extended analysis depending on age group
• Three plots: reflectance microphone pressure response, and absorbance
The DPOAE test summary shows:
• Probe serial number and verification status
• Test Ear
• Ear tip type
• Overall Pass/Refer result
44
• Test protocol
• Normative data
• DPgram plot
• DPOAE results table: F1 (Hz), F2 (Hz), L1 (dB SPL), L2 (dB SPL),
DPOAE (dB SPL), Noise level (dB SPL), SNR (dB), and pass/refer
status for each frequency.
WARNING: In this version of the OtoStation, some additional test information and guidance is provided, depending on the patient’s age.
It is up
to you to determine if it is relevant and appropriate for your patient. This
information in itself is not a diagnosis, but may be used to support your diagnostic decision making. For more information, see Chapter 3 and go to
our website at www.mimosaacoustics.com. As more diagnostic information is published in peer-reviewed journals, we will expand the information
available on our website.
6.5 Reviewing tests on the OtoStation
Figure 6.6: An example print summary for MEPA.
45
Figure 6.7: An example print summary for DPOAEs.
Chapter 7
Managing patients, users, and test results
7.1.2
This chapter covers setting up and maintaining User Accounts, Patient
Databases, and Patient Administration, including managing test histories. A User is a person who makes or reviews tests made on Patients.
7.1
Resetting the admin password if forgotten
If the username for the Admin user has been forgotten, it may be reset as
follows. The process involves obtaining a code from both OtoStation and
from your vendor. Read through the following instructions, obtain the reset
code, then call your vendor. The reset code works only once and is case
sensitive.
Administrating users
• From the OtoStation Login screen, choose Help and choose the Reset Password button.
In this section, the user administration options under the Database menu
(see Figure 7.1) are reviewed. Activate the Database menu by selecting it or by pressing [A LT–B], and then select User Administration. The
User Administration window will appear, allowing you to add a new user,
change user details including password, or delete an existing user.
• A window will appear providing a code.
• Copy the code down and contact your vendor.
• Your vendor will provide another code.
• You will be prompted to input the code from your vendor and then the
code generated from OtoStation.
7.1.1
Changing the password
• The Admin user’s password has been reset to “password.” We recommend changing this password as described in Section 7.1.1
To change your password, choose Edit User from the User Administration window (see Figure 7.1). WARNING: We strongly recommend changing the default password for the Admin user name. The Edit User window appears (see Figure 7.2). Enter your new password, and then confirm
your new password by typing it in again. Asterisks will appear instead of
the characters you type as a security measure.
7.1.3
Administrator and user privileges
Users can either have administrator privileges or user privileges. Only an
Administrator can create other administrators. Admin users have exclusive
46
7.1 Administrating users
47
(a) Database menu
Figure 7.2: The Edit User window.
7.1.4
(b) User Administration window
Creating and adding users
To add a new user, activate the Database menu by selecting it or by pressing [A LT–B] and select User Administration (see Figure 7.1). Choose
New User from the User Administration window. The Create User window appears (which is identical to the Edit User window in Figure 7.2).
Enter a user name, e-signature (user identifier displayed on measurement
printouts), password and password confirmation, and set the privilege.
Only an Administrator can create other administrators.
Figure 7.1: Database menu and User Administration options.
privileges to create, detach, and restore databases; create administrator
level users; and edit comments.
Users are specific to each database. If the same user requires access
to multiple databases, their profile must be entered separately for each
database. HINT: To avoid confusion, we recommend that the same user
chooses the same user name and password for each OtoStation database.
7.2 Administrating databases
7.1.5
48
7.2.1
Changing users
Creating a new database
To change the current user while OtoStation is running, choose Change
User from the Database menu (see Figure 7.1). The Login window appears (see Figure 2.3). Enter your user name and password.
The database currently in use is indicated (Choose Database Open
to log into a different database). Ensure that you are logged in as
the correct user and into the correct database so that your name
and e-signature are attached to the measurements that you make,
and so that the measurements are stored in the correct database.
The current database and current user are shown in the status bar (e.g.,
).
Figure 7.3: The Create New Database window with example details filled in.
7.1.6
Changing e-signature
An e-Signature is a user identifier that is displayed on measurement printouts. To change your e-signature, choose User Administration from the
Database menu and then Edit User (see Figure 7.1). Enter a new esignature in the ESignature field (see Figure 7.2). Measurements made
using the old e-signature are not modified.
7.2
Administrating databases
In this section, the database options under the Database menu (see Figure 7.1) are reviewed. Activate the Database menu by clicking on it or by
pressing [A LT–B].
You can choose to use the Default database (an empty database), the
Sample database (contains measurement examples), or to set up a new
database (or multiple databases). By setting up a new database, a more
meaningful name and description can be given. Multiple databases can be
useful when managing multiple research studies or patient groups (e.g.,
various clinics or work sites). All users must be entered manually for each
database.
Only administrators are allowed to create a new database. To create a
new database, choose New from the Database menu. The Create New
Database window appears (see Figure 7.3). See Section 7.2.5 on how to
open an existing database from a previous version of OtoStation or from a
different computer.
Navigate to the folder in which the database and associated data files are
to be stored by choosing the browse button (indicated with a red arrow in
Figure 7.3). Type the new database name in the File field. Check that
the Save as type: field indicates Database (*.accdb). Choose Save to
create the database. Alternatively, you can type the database path and
filename directly into the File field in the Create New Database window
(see Figure 7.3). The path you specify must exist. If you attempt to make
a new database with the name of an already existing database, you will be
warned.
To avoid inadvertently overwriting data, OtoStation requires that each new
database is created in a folder containing no other database (*.accdb)
files. Figure 7.4 displays the warning that pops up if an attempt is made to
create a new database in a folder that already holds a database.
The Identifier and Description fields in the Create New Database window will change to be the same name as the new database. You can
change both further as necessary. The Identifier is a short unique name
for the database. Use a name which readily identifies the database to
7.2 Administrating databases
49
Figure 7.4: Each database must reside in a folder with no other databases. The
warning appears if you try to save to a folder that already contains a database.
users (e.g., “AcmeAudiology”). The Description is used to provide additional descriptive information about the database. See Figure 7.3 for a
filled-in example and Figure 7.5 for an example of where this information is
used. Choosing OK initiates database creation. The window in Figure 7.6
confirms that the database was created.
Figure 7.5: The Login window showing multiple database choices. When you log
in, open a database, or change user, the Description is displayed on the system
Login screen after a database Identifier is selected from the list.
Once the database is initialized, the Create User window appears. Follow
the instructions in Section 7.1.4 to create one user. This user must be an
administrator. If you add more users or do any other database operations
at this stage, you will change only the current database and not the new
database. To add more users and to use a new database once it is created,
switch to the new database by opening it (see Section 7.2.2).
7.2.2
Opening a database
To open an existing database, choose Open from the Database menu or
press [C TRL –O]. The Login window appears. Fill in your user name, password, and choose the desired database (see Figure 7.5). Section 7.2.5
describes how to restore an existing database if it’s not shown on the list.
Figure 7.6: Confirmation of successful database creation.
database, choose Open on the Database menu.
To switch to this
7.2 Administrating databases
7.2.3
Detaching a database
Administrators may detach databases from OtoStation so that the
database no longer appear as an option on the login screen. The currently active database cannot be detached. To detach the currently active
database, open a different database first. To detach the database, choose
Detach from the Database menu. The Detach Database window appears
showing a list of available databases. Select the database you wish to detach and choose OK. Choose Close to return to OtoStation when you are
finished detaching database(s). Detaching does not delete the database,
it merely disassociates the database from OtoStation. The database remains in the same location. Databases may be reattached by following the
instructions in Section 7.2.5.
7.2.4
Restoring a database from backup
Administrators may restore databases and the corresponding data files
from the backup archive (backups are stored in the Backups folder in
*.zip format). This may be necessary if the database becomes corrupted. To restore a database, choose Restore from the Database menu.
The Restore Database window appears with further instructions. Zip
archives are named according to their Identifier and have a date/time
stamp attached. Select the zip archive you wish to restore and choose
Open. The Identifier and Description fields in the Restore Database
window are filled in automatically but may be modified if desired. Choose
OK to restore the database. The restored database can be found in the
Data/Restore subfolder in the OtoStation program folder.
50
arrow in Figure 7.3) opens up a window where you can navigate to the
folder in which the database and associated data files are stored. Change
the file type field to Database Files (*.accdb). Navigate to the database
location, select the database file you wish to restore and choose Open.
If the database and associated data files are on a different computer, you
will need to first transfer the files to an appropriate folder on the current
computer. Alternatively, you may be able to connect to the database over
a computer network. The Identifier and Description fields in the Restore
Database window are filled in automatically, but may be modified accordingly. Choose OK to restore the database.
If the database was created in an older version of OtoStation, an upgrade
to the database structure may be necessary. The Update Database dialog will appear if a database upgrade is required. New and upgraded
databases are not compatible with old versions of OtoStation. WARNING:
Create a backup of the database using Backup Database before upgrading in case of an error during the upgrade process. Select Upgrade to
permanently alter the database structure.
7.2.6
Default, Sample, and Install Databases
OtoStation comes with three databases: Default, Sample, and Install. Both
the Default and the Sample database have the administrator Username
“Admin” and Password “password.” It is recommended that the default
password for both is changed (see Section 7.1.1). The Default database
is empty and may be used as the primary database. See Section 7.2.1 on
setting up new databases.
Restoring a database from an earlier version of
OtoStation or different computer
The Sample database provides measurement examples. Included are
data sets for a normal-hearing adult male ear (DPOAE and MEPA measurements using the factory-supplied measurement protocols). Although
data may be added to the Sample database, it is not recommended.
Administrators may restore a database that was accidentally detached or
an existing database from a previous version of OtoStation or one created
on a different computer. To restore a database, choose Restore from the
Database menu. The Restore Database window appears with further instructions. Selecting the navigation browse button (indicated with a red
The Install database is a special database that is not listed on the Login
screen, but you may come across it if you are looking in the Data folder.
OtoStation uses the Install database for creating new databases. WARNING: Do not delete or use the Install database. It is for internal system use
only.
7.2.5
7.3 Administrating patients
7.2.7
Backing up a database
To backup the currently active database, select Backup from the
Database menu. The database is zipped along with associated data files
and saved to the Data/Backups folder under the main OtoStation program
folder with the name Database name and date/time stamp as a filename,
e.g., AcmeAudiology_1504231147.zip, where AcmeAudiology is the
*.accdb database filename and 1504231147 is the year-month-day-time
timestamp. Data can be backed up automatically after every session. See
Section 7.5.2 for automatic backup settings.
7.2.8
51
7.3
7.3.1
Administrating patients
Patient administration options
Figure 7.8 illustrates the patient administration options available for the
main window. Either use the buttons on the Patient toolbar or use the
drop-down menu (choose Patient or press [A LT–P],) to create New, Edit,
Delete, Find, Print, Upload to OtoStat, or Merge patient records in the
database. Some menu options may be unavailable until there is at least
one patient record in the database.
Database details
(a) Patient toolbar
(b) Main menu
Figure 7.8: Patient administration options in main window.
Figure 7.7: The Database Details window.
Database details can be accessed by selecting Database Details from the
Database menu (see Figure 7.7).
7.2.9
Directory
To open a new explorer window to the current database location, select
Directory from the Database menu.
7.3.2
Creating a new patient record
To create a new patient record, press [C TRL –N], or choose New from
the Patient menu, or choose the New button on the Patient toolbar (see
Figure 7.8). The Patient Info window will appear (see Figure 7.9). Fill in
each field as follows.
• Patient ID is required, and must be unique. Tick “Automatically assign
Patient ID” to have OtoStation assign a unique ID.
• Age is automatically calculated from the Date of Birth. If a Date of
Birth is not entered, it defaults to the current date. We recommend
7.3 Administrating patients
52
Figure 7.10: An example patient list.
HINT: It can be useful to create “patient” records for each measurement
probe.
Use the probe serial number as the Patient ID and First Name,
and the type of probe (ER10C) as the Last Name. Use these profiles when
you test the probe in a coupler, such as a syringe cavity, MEPA cavity, or
artificial ear.
7.3.3
Editing a patient record
To edit a patient’s details, first highlight the patient in the list, if it is not
already highlighted, (see Figure 7.10). Then either:
Figure 7.9: The Patient Info window with an example patient entered.
• double-click on the patient’s details,
entering the correct age because OtoStat and OtoStation display ageappropriate norms depending on this setting.
• Gender
can
be
listed
U=unspecified/unknown.
as
F=female,
M=male,
or
• Pathology Comment is an optional, but recommended field.
When you have entered the patient’s information, choose Save to write the
results to the database.
The Patient List summarizes each patient record (see Figure 7.10 for an
example). Highlighting a record enables editing.
• choose Edit from the Patient menu,
• choose the Edit button on the toolbar (see Figure 7.8), or
• right click in the Patient List and choose Edit Patient from the context
menu.
The Patient Info window appears (see Figure 7.9). All details may be
edited as necessary.
Note that Patient ID shown in Figure 7.10 is a user-assigned number that is
set using the Patient Info window (see Figure 7.9), whereas the ID# number shown in Figure 7.10 is an automatically-assigned database number
that cannot be edited.
7.3 Administrating patients
7.3.4
Deleting a patient record
To delete a patient’s details — along with the patient’s test history — first
highlight the patient’s details in the patient list record. Multiple patients
may be selected at one time by holding down the [C TRL ] key and using
the mouse to click the box on the left-hand-side of the row. The cursor
changes into an arrow when you move over the box to indicate that the
record may be selected. To delete, either:
53
You may also use wildcards “*” or “?” in your search, except in the date
of birth fields. Wildcard “?” represents a single character while “*” represents multiple characters (including zero characters). Wildcards work in
the beginning, middle and at the end of phrases.
• choose Delete Patient from the Patient menu,
• choose the Delete button on the toolbar (see Figure 7.8),
• press [D ELETE ], or
• right click in the Patient List and choose Delete Patient(s) from the
context menu.
A window will pop up asking you to confirm the deletion. Deleting a patient
removes the patient and test history from the database.
7.3.5
Sorting patient records
The patient records displayed in the patient record list (Figure 7.10) can
be sorted by clicking on a column header. Repeated clicking of a column
header will toggle between sorting by ascending and descending order.
Figure 7.11: The Find patient window with search parameters entered. This
search will find all patients born in 2000 with a last name beginning with “K”.
Using the patient list in Figure 7.10 as an example and searching on Last
Name:
a* will find patient Aardvark.
7.3.6
Finding a patient record
*a* will find patients Aardvark, Ora, Kaka, Takahe.
?a* will find patients Aardvark, Kaka, Takahe.
To find a patient record, press [C TRL –F], or choose Find Patient from the
Patient menu, or choose the Find button on the toolbar (see Figure 7.8).
The Find patient window will appear (see Figure 7.11) where you can enter
search criteria. First check the boxes on the left to indicate which fields you
would like entered into the search, then enter in the search information.
Search phrases are not case sensitive. Search options include Patient ID,
First Name, Last Name, and Month, Day, and/or Year of birth. The fields
are combined by using AND so a patient record must match all search
conditions.
*a will find patient Ora and Kaka.
Choose Find Next to find the next record in the patient list that matches
the search criteria. If that is not the record you are searching for, continue
to choose Find Next until you locate the desired record. If no patient is
found that matches the search criteria, a notification window appears.
Choose Clear All to remove all the current search parameters. You may
then enter new parameters. Choose Cancel when you are finished.
7.4 Managing test histories
7.3.7
Uploading patient records to the OtoStat
It is much easier to enter and edit Patient information on the OtoStation and
transfer it to the OtoStat, compared to entering the information directly on
the OtoStat. Ensure your OtoStat is plugged into the computer and turned
on (see Section 1.2), optionally select the patients you wish to transfer,
and choose Upload to OtoStat from the menu or select the Upload to
OtoStat button. The dialog box in Figure 7.12 provides an option to upload
the selected patients or all patients.
54
• Select a Source patient from the second list.
• Press the Merge button.
HINT: To selectively move test data to a different patient from the Test
History menu (if the wrong patient was selected), see Section 7.4.5.
7.4
Managing test histories
Figure 7.13: An example Test History list. Each record shows the date and
time of the test, the tester, the ear(s) tested (L=Left, R=Right), the test category,
the first line of the comments, and the number of each type of test (MP=MEPA,
DP=DPOAE). ID# is automatically assigned and cannot be edited. Records can
be sorted by clicking on a gray column header.
Figure 7.12: Upload patient names to OtoStat dialog box.
The OtoStat patient information display has only one field. The OtoStation patient information has four fields: ID, Last Name, First Name, and
Middle Name. When the information is copied to the OtoStat the four
fields will be copied to the one field with comma separators, like this:
ID,LastName,FirstName,MiddleName
7.3.8
Merging patients
If you find that the same patient has multiple entries in the database, you
can merge their patient entry and test records. The source patient can
optionally be deleted at the end of the Move operation.
• Choose Merge Patient from the Patient menu. The Patient Merge
window will open.
• Select a Target Patient from the first list. This patient will receive the
tests from the Source patient.
(a) Test History toolbar options: Download, View, Delete, and Export
(b) Test History menu options
Figure 7.14: Test History menu options.
Below the patient record list in the main window is the test history for the
currently highlighted patient (see Figure 7.13 for an example). To access
the Test History options, choose Test History from the menu or press
7.4 Managing test histories
55
[A LT–E]. Figure 7.14 shows the Test History options on the menu and
toolbar.
To work with tests histories, first you must transfer (download) the tests
from the OtoStat to the OtoStation. You may then view, categorize, comment, delete, move, and export, tests. See Section 6.5 on viewing and
printing tests.
7.4.1
Download tests from OtoStat
Use the Download tests feature to Copy or Move all test data from OtoStat
to OtoStation (Figure 7.15). Choose the download test icon on the Test
History toolbar or Download from OtoStat on the Test History menu.
Patients are matched by their ID only. Any other patient information like
name or age is not used.
• ID on the OtoStat is the patient information field if it contains no commas.
• ID on the OtoStat is the string before the first comma if there are
commas.
Figure 7.15: The Data Download window. Choose Download to copy patient and
test information from the OtoStat to the OtoStation. The Status region shows what
is currently happening, including the number of new patients and tests transferred.
• Once downloaded, if there is no match then a new patient entry will be
added to the OtoStation database (and can subsequently be edited).
• Once downloaded, if the OtoStat ID matches an OtoStation ID then
the test data will be added to that patient.
1. Download data from OtoStat but do not select the “Delete measurements from OtoStat” option.
• Duplicate measurements will not be copied.
• WARNING: Be very careful to ensure the Patient ID is correct so that
tests are not assigned to the wrong patient.
After the download is complete, the number of new patients added and
new tests added will be shown on the OtoStation.
OtoStation first copies all the data from OtoStat to an OtoStation temporary
location, and then it parses that data to find new data. The OtoStat has
only limited storage, so it is necessary to delete data from it on a regular
basis. For optimal data backup security that minimizes the chances of data
loss, follow these steps:
2. Review data on OtoStat and OtoStation and verify the data download
has occurred correctly.
3. Backup the OtoStation database and copy the backup file(s) to a
safe location external to the OtoStation computer (e.g., external drive,
cloud storage).
4. Download from OtoStat again and this time do select the Delete measurements from OtoStat option.
7.4 Managing test histories
7.4.2
56
Viewing a saved test
To view a saved test, double-click on the entry in the test history record
list that you wish to view (click on the Date, User Name, or Ear fields),
or select the test in the history list and choose the Review Test History
button, or select View from the Test History menu (see Figure 7.14, or
right-click and choose View Test Results. The test opens in the Review
Measurements window. From this window, the test may be printed and the
data redisplayed with different options. Close the measurement window to
return to the main window. HINT: Multiple test records can be opened at
the same time. See Section 6.5 for details on the measurement review
window.
7.4.3
Editing a test history
You may add comments or edit properties of a previously saved test by
three methods:
Figure 7.16: The Edit Test History window. The comments history lists the previous comments made about the test, who made the comments, and the date/time.
Type in the Comments box to add another comment.
• double-click on the entry in the test history record list that you wish to
view (click on the Ear, Category, Comments or Test Number fields),
• select the entry then select Edit from the Test History menu, or
• right click on the entry then select Edit Test History from the context
menu.
The Edit Test History window appears (see Figure 7.16). Only the Ear,
Category, and Comments can be edited. Comments is an open field —
you can add, change, or delete anything in this field. The first comment
shown in the test history window is the most recent comment.
7.4.4
Deleting a test history
You may delete a test history by three methods:
• Select the entry in the test history list and press [D ELETE ],
• Choose Delete from the Test History menu, or
Figure 7.17: Selecting multiple test histories for deletion. Hold down the [C TRL ]
key and use the mouse to click the records to select multiple histories. Then press
[D ELETE ].
• Right click on the entry, then choose Delete Selected Tests from the
context menu.
You will be prompted to confirm the deletion. Multiple test histories may
be deleted at a time by holding down the [C TRL ] key and using the mouse
to click the test history (see Figure 7.17). Deleting a test history record
removes it from the database, and also removes any associated data files.
7.4 Managing test histories
7.4.5
57
Moving a test history
If a test was saved to the wrong Patient. Highlight the test in the test history and choose Move from the Test History menu (or from the right-click
context menu). A dialog box will prompt you to choose which patient to
transfer the test to. Highlight the patient and choose Move. The database
is updated and the test files are also moved to the correct Patient. A comment is automatically added, auditing the move.
7.4.6
Exporting patient data
Patient data can be exported to Microsoft Excel file (*.xlsx) files and to
Hi*Track and OZ format. Note that this process can take a lot of time.
Figure 7.19: The Data Export window.
Public health, early childhood education, hospitals and other healthcare
providers use OZ (www.oz-systems.com) applications to complete their
required activities and assure thorough and accurate care for each child.
The Hi*Track (www.hitrack.org) family of products is designed specifically
to meet the data needs of state Early Hearing Detection & Intervention (EHDI) and hospital-based hearing screening Program Coordinators.
Hi*Track imports demographic data and screening results from OtoStation,
track children who need services, and report information on child progress.
Figure 7.18: The Data Export window.
Choose Export Data on the Patient menu. The Data Export window will
appear (see Figure 7.18). Either accept the default export file locations,
or navigate to choose a new destination folder. Tick the export types (you
may choose more than one): OZ, Hi*Track, and/or Excel. In the Export
Now section, choose to export either the test histories of selected patients
in the Patient Window, selected test histories in the Test History Window,
or all test histories.
The Data Export progress window appears (see Figure 7.19). Exporting
may take several minutes.
Export to Hi*Track and OZ saves only the DPOAE data, the patient demographic information, test date, and pass/refer result to a file for subsequent import into Hi*Track or OZ. For OZ, the filename is OZ.txt and
for Hi*Track, the filename is Mimosa.txt. For multiple databases, either
the same export path or different export paths may be specified. Newly
exported data are appended to these files.
Export to Excel provides detailed test information for research
use, including both DPOAE and MEPA results.
Each test is
saved to a uniquely-named *.xlsx file.
The file prefix is of
the format: PatientID Ear TestDateTime TestType TestNumber, e.g.,
7.5 Tools
AA003_R_20150131125615_DPOAE_1.xlsx. If the file already exists,
it is over-written. See Appendix C for details about what is saved in these
files.
7.4.7
Test history category maintenance
User-defined categories can be associated with patient test records (e.g.,
Baseline, Follow-up, Retest, etc., as in Figure 7.13), allowing the Test History list to be sorted by category. By default, there is one category “BASELINE”. If a category is not allocated, <none> is listed in the Category column.
58
• To create a new category, choose New, assign a name to the new
category and type a description into the text fields, then choose Save.
• To edit an existing category, select the category from the list, choose
Edit, change the name and/or description in the text fields, then
choose Save.
• To remove a category, select the category from the list, choose Remove. The category will no longer be available for new measurements, but existing measurements will still display the removed category.
———————————————————–
7.5
Tools
Access defaults, OtoStation activation, probe parameters, application logging, and calibration features on the Tools menu (see Figure 7.21).
Figure 7.20: The Test History Category Maintenance window.
Figure 7.21: Menu options on the Tools Menu.
To edit, add, delete or reorder categories, choose Category Maintenance
from the Test History menu (see Figure 7.14). The Category Maintenance window appears (see Figure 7.20). Categories are displayed as a
list on the left. Each category may have an associated description, which
displays when the category is selected from the list.
• To reorder the categories, select a category and then choose the
Move Down or Move Up button.
7.5.1
Defaults
Choosing Defaults from the Tools menu brings up the Define Defaults
window. There are two tabs: General and Language (only English is
available in this version of OtoStation).
7.5 Tools
59
7.5.3
Activate OtoStation
To activate OtoStation, choose Activation from the Tools menu. The Activation Screen appears (see Figure 7.23). Input the activation details
provided by your vendor exactly, in each of the appropriate text fields (the
details are case sensitive). Clicking on each text field updates the Activation Help notes shown on the right. For the Activation Key text field,
delete the existing characters (in particular the underscores and hyphens)
and type in (or copy and paste) your Activation Key. It should consist of
25 alphanumeric case-sensitive characters, grouped into five groups of
five characters, each group separated by a single hyphen, with no spaces.
Click Activate Now to activate the program.
The activation screen is shown during installation to activate your copy
of OtoStation. Thereafter it is used to add features to OtoStation. When
features are added, the program will automatically re-start.
Figure 7.22: The Defaults window showing the General tab settings.
7.5.2
General defaults
Backup Mode: Select Automatic to make backups of the data automatically after every session, Prompt on Exit to be prompted to make
backups after every session, or Never to never make backups (not
recommended). The database and associated data files are backed
up to a compressed *.zip file. The folder where backup *.zip files
are stored can be chosen by either typing a folder name in the given
text field or by choosing the folder selection button (with three dots) to
the right (see Figure 7.22).
Institution Name & Address: The institution name cannot be modified
as it is linked to your product activation key. Contact your vendor for a
new activation key if you need to modify the institution name. You may
modify the institution address and phone number (see Figure 7.22).
Figure 7.23: The Activation Screen.
7.5.4
Application logging
If you are having problems with your system, and if instructed to do so by
your customer service representative, you may be asked to enable Application Logging features for the program by selecting Application Logging
from the Tools menu. This feature will create log files of internal program
activity. The log files can then be sent to the factory for analysis. Logging
is disabled by default.
7.6 Help
7.5.5
60
Probe calibration
Selecting Probe Calibration launches a separate application for performing
the calibration. It can take several seconds for the application to launch.
When the calibration program finishes, it copies calibration files to the OtoStat and also saves a copy for OtoStation. See Section 4.2 for instructions
on how to run the calibration.
After adding and calibrating a new probe, go to the OtoStat and select the
new probe from the touch screen. If a duplicate probe number is used,
the old calibration will be removed and the new calibration put in its place.
HINT: Find the 4-digit probe serial number on the backplate of the probe
head.
7.5.6
Transfer calibration
See Section 4.3 for instructions on transferring a calibration. You may need
to do this if you are shipped a new probe with a new factory calibration
(saved as a file on a disk or thumbdrive, or sent electronically).
7.6
Help
Figure 7.24: The Help menu options.
The Help menu (see Figure 7.24) provides access to digital manuals,
Quick Start notes, videos, and other information. This user manual, the
OtoStat manual, and Install manual are available from the User Manuals
sub-menu. Quick Start notes are available from the Quick Start Notes
sub-menu. Tutorial videos are available by selecting the Tutorial Videos
option and choosing a video from the drop-down menu. Some of these
videos are for the HearID system, but the fundamentals remain the same.
The Mimosa Acoustics on the Web option is a hyperlink to the Mimosa
Acoustics website at www.MimosaAcoustics.com; an active Internet connection is required for this option to work. The About OtoStation option
provides information about the OtoStation software version, and the technical support contact details. It also provides information for any connected
OtoStat. The System Info option creates a snapshot of relevant information about your computer in text document form. This information is useful
in the event that troubleshooting is necessary.
Chapter 8
Maintenance
8.1
DPOAE linearity check
may cause permanent damage to the unit, including the loss of data. Never
submerge the OtoStat or probe in liquid.
You should perform a linearity check on the system once every 3 months.
This check will detect non-linear elements in the OtoStat and probe that
could result in artifactual responses that could give false negative results.
This check can be performed more often, if the system is in heavy use or
some problem with the system is suspected (see Appendix A for troubleshooting hints). To perform a linearity check:
General: Turn the OtoStat off before cleaning.
Main unit: Use only standard medical alcohol to clean the plastic unit.
Use a pre-moistened towelette or alcohol applied to a soft lint-free
cloth. Gently wipe all plastic surfaces of the enclosure, and be careful
not to wipe the touch screen with the alcohol. Do not apply excessive
alcohol.
1. Run a complete test (MEPA and DPOAE in an artificial ear, a MEPA
calibration cavity set to position 3, or 2 cc syringe tube).
Touchscreen Wet a soft, lint-free or microfiber cloth with distilled water.
Wring out as much water as you can. Make sure the cloth is damp but
not wet. Wipe the screen in a gentle circular motion to remove dust,
oil, or fingerprints.
2. Review the DPOAE results (ignore the MEPA results, which are
needed only for calibration purposes). There should be no significant responses above the noise level. Any frequency point that consistently returns a Pass result indicates a non-linear artifact. If this
occurs, contact your vendor. You may need to return the probe or
OtoStat for servicing.
• Avoid using anything abrasive when cleaning the touch screen.
• Never use any cleaner containing ammonia.
• Do not spray water or any liquid directly on the screen.
8.2
• Never use paper towels or tissue. They contain wood fibers that
can scratch any plastic surface.
Cleaning
• Do not press too hard on the touch screen while cleaning it or
the display could be damaged.
You do not need to clean the enclosure after each test. Clean dirt, grime
or other contamination, from the OtoStat only as necessary. Turn off the
unit, and disconnect all the cords before cleaning. Use only the following
materials and methods. The use of alternative materials and/or methods
Probe: Use only standard medical alcohol to clean the plastic probe enclosure. Use a pre-moistened towelette or apply alcohol to a soft lint
61
8.4 Preventative inspection and maintenance
free cloth. Gently wipe all plastic and rubber surfaces. We recommend cleaning the probe while a tip is attached to protect the tubes
from damage and alcohol contamination. Do not apply excessive alcohol.
Calibration Cavity Set Debris in the cavities can lead to faulty or failed
calibrations. Always set the dial to 0 when not in use. Regularly check
that the calibration cavity set is clean and clear of debris. Rotate the
barrel through each position and look carefully in each cavity. Use a
soft brush or cotton bud to remove any loose debris and a soft cloth
to wipe the outside. If any debris is caught in the mechanism, return
the cavity set to your vendor for servicing.
8.3
Electrical safety for the patient and user
Protection against electric shock for the patient and user is provided primarily by operating the OtoStat on battery power without being plugged
in to a power outlet or the support computer. If the battery power gets
low and tests must be completed, the OtoStat can be safely used while
plugged into a power outlet if the medical-grade power supply provided
with the unit is used. We recommend leaving the OtoStat plugged in for
battery re-charging when not in use, and to unplug it while in use.
62
recommended mode of operation, will eliminate any possible susceptibility
issues from the line power.
8.4
Preventative inspection and maintenance
There are no user serviceable parts. Disassembling the OtoStat is not
permitted, and will void all warranty. All connections should be visually
inspected for bent and damaged pins regularly.
Eartips are single-use only and must be replaced between patients. Depending on usage, the metal tubes extending from the probe head should
be inspected for obstructions approximately weekly (e.g., with an otoscope), or anytime a blockage is suspected (e.g., if calibrations are failing).
Do not touch the metal tubes. In the event of tube obstruction, the probe
must be returned to the manufacturer for cleaning and repair.
8.5
8.5.1
Proper disposal of OtoStat components
Proper disposal of the main OtoStat unit
The OtoStat can be used on a patient while it is plugged into the support computer ONLY if the ISB-030W IEC 60601 compliant isolation transformer is used. See Usage Warnings for specific details.
1. Before disposal, if the OtoStat is functional, disconnect it from the
power outlet and the support computer, turn it on, and leave it on until
it turns itself off. This discharges the battery.
The foam or rubber eartip forms an additional layer of electrical safety.
Since this layer can be removed and may be circumvented by humidity, it
cannot be depended upon in the absence of an approved power supply.
Do not use the probe without an eartip in place, and avoid touching the
metal tubes of the probe when replacing the eartip.
2. Dispose of the OtoStat by delivering it to an electronic device recycler.
The OtoStat has been tested for electromagnetic compliance (EMC) and
there are no known susceptibility or interference issues. No special procedures are required to avoid EMC problems. However, it is recommended
that to ensure quality measurements, avoid plugging the power supply into
a circuit that has other high-draw devices active (e.g. laser printers and
photocopiers). Running the Otostat on battery power alone, which is the
3. Contact your OtoStat distributor for additional information. Depending
on the region, your distributor might accept OtoStat units for recycling.
4. Do not dispose of the OtoStat in the trash. The OtoStat contains a
Lithium Ion Polymer battery that should be recycled.
5. Do not dispose of the OtoStat by incineration.
6. For the recycler: once the battery has been removed, the OtoStat
may be further recycled as an electronic device, or disposed of in the
trash. Do not incinerate.
8.5 Proper disposal of OtoStat components
8.5.2
Proper disposal of the battery
1. If possible, discharge the battery in the OtoStat before removal. Do
not short the leads together to discharge it.
2. Unscrew the OtoStat unit and slide the top face to gain access to the
battery.
3. Place the battery in a plastic bag, one battery per bag, to avoid any
battery leads contacting each other.
4. Deliver the battery to a local lithium battery recycler. Due to the large
number of lithium batteries in cell phones and other devices, most
electronics device retail stores will accept lithium batteries for recycling.
5. Do not dispose of the battery in the trash. It is a Lithium Ion Polymer
battery that should be recycled.
6. Do not incinerate the battery.
7. Do not cut, rip, tear, or puncture the battery.
8. Do not attempt to charge or re-use the battery outside of the OtoStat.
8.5.3
Proper disposal of the power supply
1. The power supply should be recycled if possible.
2. The power supply may be disposed of in the trash. Do not incinerate.
63
References
Allen, J. B. (1996). Derecruitment by multiband compression in hearing
aids. In W. Jesteadt (Ed.), Modeling sensorineural hearing loss (p.
99-112). NJ: Lawrence Erlbaum.
Allen, J. B. (1999). Derecruitment by multiband compression in hearing
aids. In C. Berlin (Ed.), The efferent auditory system (p. 73-386). CA:
Singular.
Allen, J. B., Jeng, P. S., Levitt, H. (2005). Evaluation of human middle ear
function via an acoustic power assessment. Journal of Rehabilitation
Research and Development, 42(4 Suppl 2), 63-78.
Beers, A. N., Shahnaz, N., Westerberg, B. D., Kozak, F. K. (2010). Wideband reflectance in normal caucasian and chinese school-aged children and in children with otitis media with effusion. Ear & Hearing,
31(2), 221-33.
Feeney, M. P., Grant, I. L., Marryott, L. P. (2003). Wideband energy reflectance measurements in adults with middle-ear disorders. Journal
of Speech, Language, and Hearing Research, 46(4), 901-11.
Gorga, M. P., Neely, S. T., Ohlrich, B., Hoover, B., Redner, J., Peters, J.
(1997). From laboratory to clinic: a large scale study of distortion
product otoacoustic emissions in ears with normal hearing and ears
with hearing loss. Ear and Hearing, 18(6), 440-55.
Gorga, M. P., Stover, L., Neely, S. T., Montoya, D. (1996). The use
of cumulative distributions to determine critical values and levels of
confidence for clinical distortion product otoacoustic emission measurements. Journal of the Acoustical Society of America, 100(2 Pt
1), 968-77.
Hunter, L. L., Feeney, M. P., Lapsley Miller, J. A., Jeng, P. S., Bohning,
S. (2010). Wideband reflectance in newborns: Normative regions
and relationship to hearing-screening results. Ear & Hearing, 31(5),
599-610.
Hunter, L. L., Tubaugh, L., Jackson, A., Propes, S. (2008). Wideband
middle ear power measurement in infants and children. J Am Acad
Audiol, 19(4), 309-24.
Nakajima, H. H., Pisano, D. V., Roosli, C., Hamade, M. A., Merchant, G. R.,
Mahfoud, L., et al. (2012). Comparison of ear-canal reflectance and
umbo velocity in patients with conductive hearing loss: a preliminary
study. Ear and Hearing, 33(1), 35-43.
Prieve, B. A., Werff, K. R., Preston, J. L., Georgantas, L. (2013). Identification of conductive hearing loss in young infants using tympanometry
and wideband reflectance. Ear & Hearing, 34(2), 168-78.
Rosowski, J. J., Nakajima, H. H., Hamade, M. A., Mahfoud, L., Merchant,
G. R., Halpin, C. F., et al. (2012). Ear-canal reflectance, umbo velocity, and tympanometry in normal-hearing adults. Ear and Hearing,
33(1), 19-34.
Sanford, C. A., Keefe, D. H., Liu, Y. W., Fitzpatrick, D., McCreery, R. W.,
Lewis, D. E., et al. (2009). Sound-conduction effects on distortionproduct otoacoustic emission screening outcomes in newborn infants: test performance of wideband acoustic transfer functions and
1-khz tympanometry. Ear and Hearing, 30(6), 635-52.
Shahnaz, N. (2008). Wideband reflectance in neonatal intensive care
units. J Am Acad Audiol, 19(5), 419-29.
Voss, S. E., Allen, J. B. (1994). Measurement of acoustic impedance and
reflectance in the human ear canal. Journal of the Acoustical Society
of America, 95(1), 372-84.
64
Appendix A
Troubleshooting and help
(a) Test the probe in an artificial ear, a MEPA cavity set, or 2cc syringe tube. There should be no significant artifact when running
any of the factory-supplied protocols.
Before seeking assistance, please review the following problems and solutions. The majority of difficulties experienced while making measurements
are due to a noisy patient or environment, or a poorly fitted probe in the
ear canal. The acoustical equipment is very sensitive.
3. If the stimulus levels or responses are too low (“level set error”):
1. If the measurements are noisy and/or no data is collected:
(a) Check that there is no cerumen blocking the eartip holes.
(b) Not all ear canals are straight, so sometimes the eartip holes can
end up facing the wall of the ear canal giving a “probe blocked”
warning. Try using a larger or smaller eartip and inserting the
eartip deeper or shallower. Changing the angle of the eartip by
draping the probe differently might help too.
(a) Ensure the testing environment is as quiet as possible. Sometimes data are not collected because of high noise levels.
(b) Ensure the probe cable is not moving against the patient. Use
the shirt clip or Velcro pad to stabilize the cable. Drape the probe
cable over the back of the chair, or suspend it so it doesn’t touch
the patient. A cable-holder such as those used to hold up the cable of a domestic iron can be clipped onto a table to help keep the
cable clear of the patient. The cable should not rest on the patient as small movements can cause noisy measurements. The
cable should not be moved during the measurement.
(c) Re-fit the eartip to the probe and reconnect the probe to the OtoStat.
4. If the OtoStat display locks up and becomes unresponsive to fingertaps or power-cycling:
(a) Insert a wire into the hole indicated in Figure 1.3 and push gently to activate the button. The OtoStat will turn off immediately.
Press the power button to reboot.
(c) If the patient breathes noisily, instruct the patient to breath
through their mouth to reduce the noise.
(b) If the reset button doesn’t work, unplug the OtoStat from the
power outlet (if connected) and leave until the battery runs out
and the screen turns off. Plug the OtoStat back into the power
outlet to recharge. Press the power button to turn the unit back
on.
(d) Check the eartip to ensure that it is fully inserted and that the
foam has expanded to fill the ear canal. Gaps can cause lowfrequency noise leakage.
2. If there appear to be artifactual responses:
65
Appendix B
Accuracy
B.1
MEPA accuracy
4. Use an artificial ear coupler (such as a DB100 or Brüel & Kjær 4157)
connected to a sound level meter, or equivalent. Mimosa Acoustics
uses a DB100 artificial ear, connected to a Brüel & Kjær 2130 Precision Sound Level Meter (SLM) via microphone Brüel & Kjær 4134.
MEPA accuracy is stated using MEPA Absorbance (also known as Transmittance). All MEPA measurements are derived from the complex pressure measurement in the ear canal or in a cavity, and are all related via
established formulae. Absorbance is specified in decibels, so it is comparable to audiometric measurements, such as hearing thresholds and the
middle ear transfer function.
5. Mount the ER10C probe with an ER10C-14A or ER10C-14B foam
eartip at an insertion depth of ≈0.5 cm.
6. Ensure the probe is calibrated or verified with valid Thevenin parameters for that specific probe.
The accuracy of measured Absorbance from an ear canal using the MEPA
measurement is specified using the measured Absorbance in an artificial
ear coupler in a setup as described below. The Thévenin Equivalent parameters of the probe used for testing are of critical importance for obtaining accurate MEPA measurements. Ensure the test probe is calibrated or
verified.
B.2
7. Perform a MEPA measurement using the default chirp stimulus protocol.
8. Transfer the measurement to the computer by connecting the OtoStat
and running the OtoStation support software. Choose the measurement and either view, print, or export it to an Excel file. Load the
measurement in a spreadsheet. Find the columns headed “Out 1 Abs
dB” and “Out 2 Abs dB” and plot them by the “Frequencies” column.
Equipment and measurement Setup
1. Test in a quiet area. A sound-attenuating booth is preferred, but a
quiet office is also acceptable.
B.3
2. The area should be free of loud noise, vibration, and electromagnetic
fields, such as from old CRT computer monitors and laser printers.
Accuracy validation
The measured absorbance is to be validated in three frequency segments
over 0.2 to 6 kHz. They are a low, a mid, and a high frequency segment
and the joints between the two adjacent segments are called knees.
3. Test with a OtoStat+MEPA system (hardware and software).
66
B.4 DPOAE accuracy
1. The low frequency segment ranges from 0.2 to about 1 kHz. This
segment of the absorbance has a rising slope of about 6 dB per octave
from about -15 dB to -2 dB with a tolerance of ±10 dB at 200 Hz due
to low level noise with decreasing tolerance of ±2 dB with increasing
frequency. The slope has a tolerance of ±1 dB.
2. The mid-frequency segment ranges from about 1 to about 4 kHz. This
segment of the absorbance is relatively flat at about 2 dB with a tolerance of ±2 dB.
3. The high frequency segment ranges above about 4 kHz and the plot
is cut-off at 6 kHz. The absorbance in this region has variation that
increases with frequency in both human ears and artificial ear coupler.
In the DB100 artificial ear coupler, the measured absorbance has an
average of -2.5 dB with a tolerance of ±2 dB.
4. The frequency of the knee between the low and mid frequency segments has a tolerance of 300 Hz on the low side and +500 Hz on the
high side of 1 kHz.
5. The frequency of the knee between the mid and high frequency segments has a tolerance of ±1 kHz at 4 kHz.
B.4
DPOAE accuracy
Quality control testing at the factory ensures the DPOAE stimulus level,
as measured with a sound level meter in an artificial ear, has a nominal
accuracy of ± 3 dB SPL from the target level for 500-6000 Hz frequencies,
and a nominal accuracy of ± 5 dB SPL from the target level for 6000-8000
Hz frequencies.
67
Appendix C
Exported data
Protocol: named protocol from the OtoStat
Contents of Excel file data export.
C.1
Tip Size Selected: 03, 04, 05, 14A, 14B, 14C; as selected on the OtoStat
when running the test
Excel export
Probe: serial number of the probe used in the test
C.1.1
Fields in the “Info” sheet (MEPA and DPOAE)
Probe Status: verification status of the probe: Verified or Not Verified
Probe Verified date: DD-MMM-YYYY hh:mm:ss string date/time format
or Not Verified
Patient Name: First, Middle, Last Names, if used
Patient ID: unique alphanumeric ID
Measurement File: filename and full path to OtoStat data file.
Gender: M=male, F=female, U=unknown
Normative Data Name: string with descriptive name of norms displayed
during test.
Test File Ear: L=left, R=right; the ear the data was originally saved under
Database Ear: L=left, R=right; the ear listed in the database, which may
differ from the Test File Ear if the user changed ear in the database to
correct an error
Final Header Message: header message displayed on OtoStat
Final Status Message: status message displayed on OtoStat
Date of Birth: DD-MMM-YYYY string date format
Test Date: DD-MMM-YYYY hh:mm:ss string date/time format
Equivalent Volume: EqV in cc (MEPA export only)
Age Group Selected: Adult, Child, Infant, Newborn; as selected on the
OtoStat when running the test
RAI: reflectance area index in % for the age group specified (may be
blank; MEPA export only)
Patient Comments: from the patient list (string)
ALD: absorbance level difference in dB for the age group specified (may
be blank; MEPA export only)
Test Comments: from the test history (string)
68
C.1 Excel export
C.1.2
Fields in the MEPA “FreqData” sheet
Frequencies: FFT frequency bins (Hz)
Out 1 Ref Pct: Power Reflectance in % for channel 1
Out 2 Ref Pct: Power Reflectance in % for channel 2
Out 1 Abs dB: Power Absorbance in dB re 100% absorbance for channel
1
Out 2 Abs dB: Power Absorbance in dB re 100% absorbance for channel
1
Response Frequencies: FFT frequency bins (Hz)
Out 1 Mic dBSPL: microphone pressure response to chirp stimulus for
channel 1 (dB SPL)
Out 2 Mic dBSPL: microphone pressure response to chirp stimulus for
channel 2 (dB SPL)
C.1.3
Fields in the DPOAE “FreqData” sheet
F1 Hz: frequency bin for F1 (Hz); may differ from target frequency due to
FFT bin size resolution
F2 Hz: frequency bin for F2 (Hz); may differ from target frequency due to
FFT bin size resolution
F1 Mic Level dBSPL: L1 level measured at the probe microphone (dB
SPL)
F2 Mic Level dBSPL: L2 level measured at the probe microphone (dB
SPL)
DP Level dBSPL: DPOAE magnitude (dB SPL)
NF Level dBSPL: noise level around F2 (dB SPL)
SNR dB: DPOAE to noise level in dB
P/R: pass/refer status of DPOAE at that frequency
69
Appendix D
Contacts and support
Mimosa Acoustics, Inc.
335 Fremont St.,
Champaign, IL 61820
USA
Phone: +1-217-359-9740
Fax: +1-217-359-9741
Email: [email protected]
Web: www.mimosaacoustics.com
Facebook: www.facebook.com/MimosaAcoustics
Twitter: @MimosaAcoustics
EU Representative
Emergo Europe
Molenstraat 15
2513 BH, The Hague
The Netherlands
Phone: +31 (0)70 345 8570
Fax: +31 (0)70 346 7299
70