1
U S E R M A N UA L
JA N UA RY 2 0 1 0
USER MANUAL
JANUARY 2011
© 2011 ZOHO Corp.
All rights reserved
No part of the contents of this book may be reproduced or transmitted in any form or by any
means without the written permission of the publisher.
TABLE OF CONTENTS
PART I .................................................................................................................................................................... 7
SALES FORCE AUTOMATION .................................................................................................................................. 7
CHAPTER 1 ............................................................................................................................................................ 2
INTRODUCTION ..................................................................................................................................................... 2
SALES FORCE AUTOMATION .............................................................................................................................................2
SALESFORCE AUTOMATION IN ZOHO CRM..........................................................................................................................3
Lead Management ................................................................................................................................................4
Account Management ..........................................................................................................................................4
Contact Management ...........................................................................................................................................5
Opportunity Management ....................................................................................................................................5
Sales Forecast .......................................................................................................................................................6
CHAPTER 2 ............................................................................................................................................................ 8
LEAD MANAGEMENT ............................................................................................................................................. 8
LEAD MANAGEMENT PROCESS..........................................................................................................................................8
CREATE LEADS ...............................................................................................................................................................9
Create Leads Individually ....................................................................................................................................10
APPROVE LEADS CAPTURED THROUGH WEBSITE.................................................................................................................11
ASSOCIATE LEADS WITH OTHER RECORDS .........................................................................................................................12
CONVERT LEADS TO OTHER SALES RECORDS ......................................................................................................................13
LEAD CONVERSION RULE ...............................................................................................................................................14
SET UP LEAD ASSIGNMENT RULES....................................................................................................................................16
Workflow of Lead Assignment Rule ....................................................................................................................16
Limitations ..........................................................................................................................................................16
MAP CUSTOM FIELDS ...................................................................................................................................................19
CHAPTER 3 .......................................................................................................................................................... 21
ACCOUNT MANAGEMENT ................................................................................................................................... 21
CREATE ACCOUNTS.......................................................................................................................................................21
Create Accounts Individually ...............................................................................................................................21
ASSOCIATE ACCOUNT WITH OTHER RECORDS ....................................................................................................................22
Add Member Accounts ........................................................................................................................................26
CHAPTER 4 .......................................................................................................................................................... 28
CONTACT MANAGEMENT .................................................................................................................................... 28
CREATE CONTACTS .......................................................................................................................................................28
Create Contact Individually .................................................................................................................................28
ASSOCIATE CONTACT WITH OTHER RECORDS .....................................................................................................................30
APPROVE CONTACTS CAPTURED THROUGH WEBSITE...........................................................................................................33
SET UP CONTACT ASSIGNMENT RULES ..............................................................................................................................34
Contact Assignment Workflow ...........................................................................................................................34
ii
Limitations ..........................................................................................................................................................34
CHAPTER 5 .......................................................................................................................................................... 38
POTENTIAL MANAGEMENT .................................................................................................................................. 38
CREATE POTENTIALS .....................................................................................................................................................38
Create Potentials Individually .............................................................................................................................38
ASSOCIATE POTENTIALS WITH OTHER RECORDS .................................................................................................................40
ASSOCIATE COMPETITORS WITH POTENTIAL ......................................................................................................................42
MAP CONTACT ROLES ...................................................................................................................................................43
CUSTOMIZE CONTACT ROLES ..........................................................................................................................................43
SET UP BIG DEAL ALERT.................................................................................................................................................44
CONFIGURE SALES STAGE PICK LIST ..................................................................................................................................45
MAP STAGE AND PROBABILITY VALUES.............................................................................................................................45
CHAPTER 6 .......................................................................................................................................................... 48
FORECAST MANAGEMENT ................................................................................................................................... 48
CREATE FORECASTS ......................................................................................................................................................48
SET UP FISCAL YEAR ......................................................................................................................................................49
ASSOCIATE FORECASTS WITH OTHER RECORDS...................................................................................................................50
PART II ................................................................................................................................................................. 51
MARKETING AUTOMATION ................................................................................................................................. 51
CHAPTER 7 .......................................................................................................................................................... 53
INTRODUCTION ................................................................................................................................................... 53
CAMPAIGN MANAGEMENT ................................................................................................................................. 54
CHAPTER 8 .......................................................................................................................................................... 55
CAMPAIGN MANAGEMENT ................................................................................................................................. 55
CREATE CAMPAIGNS .....................................................................................................................................................55
ASSOCIATE CAMPAIGN WITH OTHER RECORDS ...................................................................................................................56
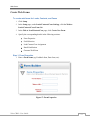
WEB FORMS ........................................................................................................................................................ 59
CHAPTER 9 .......................................................................................................................................................... 60
WEB FORMS ........................................................................................................................................................ 60
Benefits ...............................................................................................................................................................60
CREATE WEB FORMS ....................................................................................................................................................61
INSERTING CAPTCHA .....................................................................................................................................................65
AUTO RESPONSE RULES.................................................................................................................................................68
CREATE AUTO RESPONSE RULE .......................................................................................................................................68
CREATE AUTO RESPONSE RULE ENTRY..............................................................................................................................69
EMAIL MARKETING .............................................................................................................................................. 70
CHAPTER 10 ........................................................................................................................................................ 71
iii
EMAIL MARKETING .............................................................................................................................................. 71
BENEFITS ....................................................................................................................................................................71
SEND MASS EMAILS......................................................................................................................................................71
SCHEDULE MASS EMAIL ................................................................................................................................................73
AUTORESPONDERS .......................................................................................................................................................75
STEPS TO SCHEDULE AUTORESPONDERS ............................................................................................................................75
SET UP AUTORESPONDER ...............................................................................................................................................78
CREATE FOLDERS..........................................................................................................................................................83
EXCLUDING CONTACTS FROM FOLLOW-UP ........................................................................................................................84
INCLUDING ALL CONTACTS IN THE FOLLOW-UP ...................................................................................................................86
AUTORESPONDER SCENARIO...........................................................................................................................................86
PART III ................................................................................................................................................................ 89
INVENTORY MANAGEMENT................................................................................................................................. 89
INTRODUCTION ................................................................................................................................................... 90
CHAPTER 11 ........................................................................................................................................................ 91
INTRODUCTION ................................................................................................................................................... 91
PRODUCT MANAGEMENT .................................................................................................................................... 93
CHAPTER 12 ........................................................................................................................................................ 94
PRODUCT MANAGEMENT .................................................................................................................................... 94
CREATE PRODUCTS INDIVIDUALLY ....................................................................................................................................94
ASSOCIATE PRODUCT WITH OTHER RECORDS.....................................................................................................................96
CUSTOMIZE TAX RATES .................................................................................................................................................99
PRICE BOOK MANAGEMENT .............................................................................................................................. 100
CHAPTER 13 ...................................................................................................................................................... 101
PRICE BOOK MANAGEMENT .............................................................................................................................. 101
CREATE PRICE BOOKS..................................................................................................................................................101
CREATE PRICE BOOKS INDIVIDUALLY ..............................................................................................................................102
SET UP VOLUME DISCOUNTS ........................................................................................................................................103
ASSOCIATE PRICE BOOK WITH OTHER RECORDS ...............................................................................................................105
VENDOR MANAGEMENT.................................................................................................................................... 107
CHAPTER 14 ...................................................................................................................................................... 108
VENDOR MANAGEMENT.................................................................................................................................... 108
CREATE VENDORS ......................................................................................................................................................108
CREATE VENDORS INDIVIDUALLY ...................................................................................................................................109
ASSOCIATE VENDOR WITH OTHER RECORDS ....................................................................................................................110
CHAPTER 15 ...................................................................................................................................................... 114
QUOTE MANAGEMENT ...................................................................................................................................... 114
iv
CREATE QUOTES ........................................................................................................................................................114
ASSOCIATE QUOTES WITH OTHER RECORDS ....................................................................................................................116
CONVERT QUOTE TO SALES ORDER/INVOICE ...................................................................................................................117
CHAPTER 16 ...................................................................................................................................................... 119
SALES ORDER MANAGEMENT ............................................................................................................................ 119
CREATE SALES ORDERS ................................................................................................................................................119
ASSOCIATE SALES ORDER WITH OTHER RECORDS .............................................................................................................122
CHAPTER 17 ...................................................................................................................................................... 125
PURCHASE ORDER MANAGEMENT .................................................................................................................... 125
CREATE PURCHASE ORDERS .........................................................................................................................................125
ASSOCIATE PURCHASE ORDER WITH OTHER RECORDS .......................................................................................................127
CHAPTER 18 ...................................................................................................................................................... 129
INVOICE MANAGEMENT .................................................................................................................................... 129
CREATE INVOICES .......................................................................................................................................................129
Create Invoice Individually ................................................................................................................................131
ASSOCIATE INVOICES WITH OTHER RECORDS ...................................................................................................................131
PART IV .............................................................................................................................................................. 133
CUSTOMER SUPPORT......................................................................................................................................... 133
CHAPTER 19 ...................................................................................................................................................... 135
INTRODUCTION ................................................................................................................................................. 135
CHAPTER 20 ...................................................................................................................................................... 137
CASE MANAGEMENT ......................................................................................................................................... 137
CREATE CASES ...........................................................................................................................................................137
CREATE CASES INDIVIDUALLY ........................................................................................................................................139
ASSOCIATE CASE WITH OTHER RECORDS .........................................................................................................................140
APPROVE CASES CAPTURED THROUGH WEBSITE...............................................................................................................141
SET UP CASE ASSIGNMENT RULES ..................................................................................................................................141
Case Assignment Workflow ..............................................................................................................................142
Limitations ........................................................................................................................................................142
SET UP CASE ESCALATION RULES ...................................................................................................................................143
CHAPTER 21 ...................................................................................................................................................... 147
SOLUTION MANAGEMENT ................................................................................................................................. 147
CREATE SOLUTIONS ....................................................................................................................................................147
CREATE SOLUTIONS INDIVIDUALLY .................................................................................................................................148
ATTACH DOCUMENTS TO THE SOLUTION .........................................................................................................................149
PART V ............................................................................................................................................................... 150
CHAPTER 22 ...................................................................................................................................................... 152
v
REPORTS & DASHBOARDS ................................................................................................................................. 152
CHAPTER 23 ...................................................................................................................................................... 154
REPORTS ............................................................................................................................................................ 154
VIEW REPORTS ..........................................................................................................................................................154
CREATE REPORTS .......................................................................................................................................................159
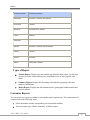
Types of Report .................................................................................................................................................160
CUSTOMIZE REPORTS ..................................................................................................................................................160
CREATE REPORT FOLDERS ............................................................................................................................................167
SCHEDULE REPORTS ....................................................................................................................................................169
EXPORT REPORTS .......................................................................................................................................................171
DELETE REPORTS ........................................................................................................................................................171
CHAPTER 24 ...................................................................................................................................................... 173
DASHBOARDS .................................................................................................................................................... 173
LIMITATIONS .............................................................................................................................................................173
CREATE DASHBOARD FOLDERS ......................................................................................................................................173
CREATE DASHBOARDS .................................................................................................................................................174
CREATE CHARTS .........................................................................................................................................................177
DRILL DOWN DASHBOARDS..........................................................................................................................................179
ZOOM IN CHARTS .......................................................................................................................................................181
PART VI .............................................................................................................................................................. 182
CHAPTER 25 ...................................................................................................................................................... 184
TASKS AND EVENTS ........................................................................................................................................... 184
CREATE TASKS ...........................................................................................................................................................184
CREATE EVENTS .........................................................................................................................................................185
CREATE RECURRING ACTIVITIES .....................................................................................................................................187
SET REMINDERS .........................................................................................................................................................188
ADD INVITEES ............................................................................................................................................................190
CHAPTER 26 ...................................................................................................................................................... 193
LOG CALLS.......................................................................................................................................................... 193
BENEFIT ...................................................................................................................................................................193
LOG A CALL ...............................................................................................................................................................193
ASSOCIATE CALLS WITH CRM RECORDS ..........................................................................................................................195
vi
PART I
SALES FORCE
AUTOMATION
In This Section:
Sales Force Automation in ZCRM
Lead Management
Account Management
Contact Management
Opportunity Management
Sales Forecast
CHAPTER 1
INTRODUCTION
In This Section:
Introduction to Sales Force Automation
Introduction
CHAPTER 1
INTRODUCTION
Sales Force Automation
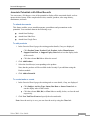
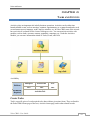
The following workflow briefly explains the sales procedure in Zoho CRM.
Zoho CRM – User Guide
2
Introduction
Zoho CRM provides the sales force, executives, and management with sophisticated sales
management functions such as: lead generation & qualification, sales pipeline analysis, sales
stage & probability analysis; competitor analysis; real-time sales forecasting and other useful
metrics. These functions give business an opportunity to completely focus on customer life-cycle
(lead generation - acquisition - conversion - retention - loyalty), thus increasing sales revenue.
Zoho CRM has sales force automation modules such as: Leads, Accounts, Contacts, Potentials,
and Sales Forecasting. You can accurately track all business opportunities and close more deals
in less amount of time. In addition, you can identify bottlenecks in the sales process in advance
and thereby effectively utilize existing customer data for future cross-selling and up-selling
opportunities.
Salesforce Automation in Zoho CRM
Lead Management
Leads are raw details about individuals or representatives of organizations
collected from trade shows, seminars, advertisements and other marketing
campaigns.
Create Leads | Associate Leads | Convert Leads | Approve Leads | Lead
Assignment Rules
Account Management
Accounts are companies or departments within the companies with which you
plan or have business dealings.
Create Accounts | Associate Accounts | Member Accounts
Contact Management
Contacts are people in an organization with whom you communicate in pursuit of
a business opportunity.
Create Contacts | Associate Contacts | Approve Contacts | Contact
Assignment Rules
Potential Management
Potentials are the business deals with organizations or people that generate real
revenue for your organization.
Create Potentials | Associate Potentials | Big Deal Alert | Map Stage &
Probability Values
Zoho CRM – User Guide
3
Introduction
Forecast Management
Forecasts are factual insight for tracking and fine-tuning the sales process in
your organization.
Create Forecasts | Associate Forecasts | Set Fiscal Year
Lead Management
Leads are raw details about individuals or representatives of organizations collected from
trade shows, seminars, advertisements and other marketing campaigns. With the Leads
module, you can:
Manage leads end-to-end (from creating leads to converting them into opportunities)
Capture leads directly from your Web site using Web-to-lead form
Import leads collected from trade shows, seminars, direct mail, and other types of
campaigns
Set up lead assignment rules to automatically assign leads to the sales force
executives in your organization
Qualify leads to the next stage based on the information captured in lead details. Once
leads are qualified for prospecting stage, convert them into sales opportunities,
accounts, and contacts with a single click
Customize lead management process (B2B and B2C business scenarios) as per the
organization's sales process
Standard reports and dashboards bundled for a fast learning curve. You can create
fully customizable lead reports and dashboards.
Export leads data for further analysis
Account Management
Accounts are companies or departments within the companies with which you plan or have
business dealings. With the Accounts module, you can:
Track all accounts and related contacts, opportunities, cases, and other details from a
common repository
Specify parent-child relationships between accounts and their subsidiaries or other
divisions
Generate quotes, sales orders, and invoices for the accounts
Zoho CRM – User Guide
4
Introduction
Track purchase history of the customers and analyze opportunities for up-selling and
cross-selling opportunities in future
Identify referrals from accounts and contacts for promoting new products and
services
Store account and contact-related notes and documents in the account history
Export accounts to analyze the buying patterns of a customers and set up loyalty
programs
Contact Management
Contacts are people in an organization with whom you communicate in pursuit of a business
opportunity. With the Contacts module, you can:
Track all contacts and related opportunities, cases, activities, and other details from a
common repository
Create the hierarchy of contacts within a company to have a better coordination while
dealing with customers
Import contacts from external sources, CRM and other business applications
Export contacts for further analysis
Synchronize contacts in the Zoho CRM using the Zoho CRM Plug-in for Microsoft
Outlook
Opportunity Management
Potentials are the business deals with organizations or people that generate real revenue for
your organization. With the Potentials module, you can:
Track all sales opportunities end-to-end in a sales cycle
Import Potentials from other Business/CRM solutions and services
Associate opportunities with accounts, contacts, activities, and other modules to have
a better visibility on the opportunities (360 degree view)
Track competition on each business opportunity
Analyze the sales stage and probability of winning deals
Intuitive Sales Funnel chart to analyze the pipeline and eliminate any bottlenecks in
the sales cycle
Alert the intended audience in your organization when a big deal closes (big deal
alert) or is nearing completion
Set up sales escalation process through Workflow rules
Zoho CRM – User Guide
5
Introduction
Generate quotes, sales orders, and invoices from the potentials
Export opportunities to analyze the sales pipeline
Sales Forecast
Forecasts are factual insight for tracking and fine-tuning the sales process in your
organization. With the Forecasts module, you can:
Estimate how much revenue you can generate in each fiscal quarter/year
Identify the sales persons who met their targets for fiscal quarter/year
Predict the revenue generation for the forthcoming quarters
Create fully customizable forecast reports and dashboards
Zoho CRM – User Guide
6
CHAPTER 2
LEAD
MANAGEMENT
In This Section:
Create Leads
Approve Leads
Associate to Other Records
Assignment Rule
Lead Management
CHAPTER 2
LEAD MANAGEMENT
Leads are the details gathered about an individual or representatives of an organization. They
play a very important role in an organization's Sales & Marketing department and are useful in
identifying potential customers. Collecting leads and managing them are the initial stages in the
sales process. Leads can be obtained through trade shows, seminars, advertisements, marketing
campaigns etc. Once the leads are collected, it is essential to manage them and follow them up
till the leads qualify to prospective customers. The sales department's approach in managing
leads can significantly impact the success of an organization.
The terminology related to lead management may differ across industries, but the basic process
remains the same. The Leads module in Zoho CRM helps you manage your leads. In Zoho
CRM, lead details contain a combination of company (account), person (contact), and business
opportunity (potential), depending on your CRM requirement - for managing Business to
Business (B2B) industry or Business to Consumer (B2C) industry.
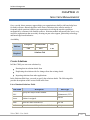
Availability
Enterprise
Professional
Free
YES
YES
YES
Editions
Permission
Required
Leads Tab
Lead Management Process
Customize Leads module in lead page according to your organization's Sales &
Marketing processes. (You may use the existing fields, disable some of the standard
fields, or add new custom fields.)
Setup lead generation process by filling the lead form, importing lead data from external
sources, or capturing leads directly from your Web site using web-to-lead forms.
Assign leads to the correct sales persons using the Lead Assignment rules.
Follow-up with the lead till it reaches a certain stage then convert the lead to potential.
While converting leads to potentials, accounts and contacts are created automatically.
Follow up the leads further in the Potentials module, till the deal is either won or lost.
Zoho CRM – User Guide
8
Lead Management
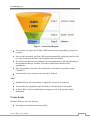
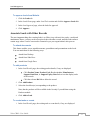
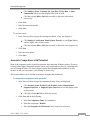
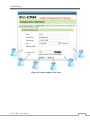
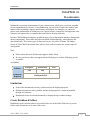
Figure 1: Sales Funnel Diagram
Every person who signs up with Zoho CRM becomes a lead and probably a prospective
customer.
Once a lead is generated, the Zoho CRM system automatically assigns the particular lead
to a sales person, provided the Lead Assignment Rules are defined.
The sales person performs the validation (or background check) of the lead and analyzes
the opportunities that are available. The leads are then filtered based on these
opportunities.
If the opportunities are positive, the lead becomes a potential or a possible customer
("Prospect").
A Potential becomes a Customer once the deal is finalized.
Note:
Standard fields in the Leads module are applicable to most of the industries.
You can add your organization-specific fields by customizing the leads module.
In Zoho CRM, a lead is a combination of company as well as the person's contact
information.
Create Leads
In Zoho CRM, you can create leads by:
Entering data in lead details form (manually)
Zoho CRM – User Guide
9
Lead Management
Importing leads from external sources
Capturing leads from Web site through Web-to-Lead form
Create Leads Individually
You can create leads manually by entering the details in the lead page. For instance: While
traveling you met a person who showed some interest in your product/service. You
exchanged business card and assured that you would contact him again with more details
about the product/service. The next day, you create a lead manually with the available details
and contact the person. In such cases, it is easy to manually feed in the available details and
create new lead records instantly.
You can create leads individually by:
Filling details in the lead creation form.
Using Quick Create option; a quick create component present in the left pane of the
Leads Home page.
Duplicating the lead with few changes in the existing lead details.
Notes:
By default, the person who creates the lead owns it.
To change owner, click the Change link in the Lead Owner field from the
Lead Details page and select another user.
To create leads individually
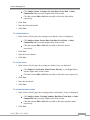
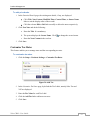
1. In the Leads module, click New Lead.
2. In the Create Lead page, enter the lead details.
3. Click Save.
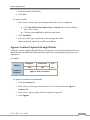
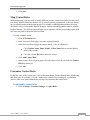
To create leads instantly
1. Click the Leads tab.
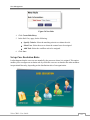
2. On the left pane of the Home page, select Leads from the Quick Create list.
Zoho CRM – User Guide
10
Lead Management
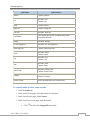
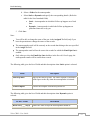
Figure 2: Quick Create
3. In the pop up window, enter the relevant details.
4. Click Save.
To create duplicate leads
1. In the Leads tab, click a particular lead that is to be duplicated.
2. In the Lead Details page, click Clone.
3. In the Clone Lead page, modify the required details.
4. Click Save.
Note: You can also Import Leads and also capture Leads from website using Web-to-Lead form.
Approve Leads Captured through Website
By default, leads captured through Website are assigned to one of the Lead Administrator who
can update the leads with additional information and assign it to the corresponding sales person
in your organization. It will allow your sales persons to focus mainly on high priority leads (lead
that contain correct contact information, and interest on your offering).
Availability
Enterprise
Professional
Free
YES
YES
YES
Editions
Permission
Required
Zoho CRM – User Guide
Approve Web-to-Leads
11
Lead Management
To approve leads from Website
1. Click the Leads tab.
2. In the Leads Home page, under Lead Tools section and click the Approve Leads link.
3. In the Lead Approval page, select the leads for approval.
4. Click Approve.
Associate Leads with Other Records
The next important thing after creating leads is to follow it up with activities, tasks, e-mails and
attachments. Hence, you may need to associate leads with other records, until the lead reaches a
certain stage where it can be converted to Potential as per your organization's sales process.
To attach documents
This feature enables you to attach documents, spreadsheets and presentations to the leads.
You can attach them in the following ways:
Attach from Desktop
Attach from Zoho Docs
Attach from Google Docs
To add products
1. In the Lead Details page, the existing product details, if any, are displayed.
Click Product Name, Product Code, Product Active, Manufacturer,
Support Start Date, or Support Expiry Date links to sort the display order
of the records.
Click the relevant Del link to delete the record.
2. Click Add Product.
3. Select the check box(es) corresponding to the product.
Note, that the products will be available in the list only if you add them using the
Products module.
4. Click Add to Lead.
To create tasks or events
1. In the Lead Details page, the existing task or event details, if any, are displayed.
Zoho CRM – User Guide
12
Lead Management
Click Subject, Activity Type, Status, Due Date or Owner Name links to
sort the display order of the records.
Click the relevant Edit, Del, or Close link to modify, delete, or close the task
respectively.
2. Click New Task/New Event and specify the relevant details.
Note: Once the activity is over, you can close the activity using the Close link.
To send e-mails
1. In the Lead Details page, the existing e-mail details, if any, are displayed.
Click Sent Or Received, Subject, Date or Sent By links to sort the display
order of the records.
Click the relevant Del link to delete the mail details.
2. Click Send Mail.
3. In the Send Mail page, compose the e-mail message and send it.
Make sure that the lead has a valid email address.
To add notes
1. In the Lead Details page, the existing note details, if any, are displayed.
Click Title, Note Content, Modified Time, Created Time, or Owner Name
links to sort the display order of the records.
Click the relevant Edit or Del link to modify or delete the notes respectively.
2. Click New Note and do the following:
a. Enter the Title. It is mandatory.
b. The system displays the name of the lead's Owner. Click
to change the
owner's name.
c. Enter the Note Content in the text box.
3. Click Save.
Convert Leads to Other Sales Records
When the lead status reaches a certain stage, where it can be qualified as a potential(i.e. when
there is a chance of further negotiations with the lead), it can be converted into an account,
contact, and potential.
Zoho CRM – User Guide
13
Lead Management
Note:
Once a lead is converted into potential, lead status will be changed to Converted in Leads
Home page.
You can view the list of converted leads by selecting the Converted view mode.
Once the lead is converted to account, contact and potential, you cannot revert to the
original state.
Availability
Enterprise
Professional
Free
YES
YES
YES
Editions
Permission
Required
Convert Leads
Lead Conversion Rule
While converting a lead to a potential first a new account and contact are created with the
relevant lead data, and then a new potential is created. The following table provides descriptions
of the various fields converted to account, contact, and potential (optional) during lead
conversion:
Lead Field
Converted To
Salutation
Contact: Salutation
First Name
Contact Name
Last Name
Contact Name
Company
Account: Name
Designation
Contact: Title
Lead Source
Potential: Lead Source
Contact: Lead Source
Industry
Account: Industry
Annual Revenue
Account: Annual Revenue
Assigned To
Account, Contact, Potential: Assigned To
Phone
Account: Phone
Contact: Phone
Zoho CRM – User Guide
14
Lead Management
Lead Field
Converted To
Mobile
Contact: Mobile
Fax
Account: Fax
Contact: Fax
Email
Contact: Email
Skype ID
Contact: Skype ID
Web site
Account: Web site
Lead Status
User should specify the Potential Stage while
converting the lead.
Rating
Potential: Rating
No of Employees
Account: No. of Employees
Email Opt Out
Contact: Email Opt Out
Street
Account: Street
Contact: Street
City
Account: City
Contact: City
State
Account: State
Contact: State
Postal Code
Account: Postal Code
Contact: Postal Code
Country
Account: Country
Contact: Country
Custom Fields
Users can map their own custom field.
To convert leads to other sales records
1. Click the Leads tab.
2. In the Leads Home page, select the lead to be converted.
3. In the Lead Details page, click Convert.
4. In the Lead Conversion page, enter the details:
a. Click
Zoho CRM – User Guide
to select the Assigned To user name.
15
Lead Management
b. The system displays the Account Name.
If the Account Name already exists, you will have an option to select the
existing company name or create a new account using the same company
name.
c. Enter the Potential Name.
d. Enter the Potential Close Date or select the date from the calendar displayed.
e. Select the Potential Stage from the list.
f. Select the Contact Role from the list.
g. Enter the Amount.
5. Click Save.
Set up Lead Assignment Rules
You can setup lead assignment rules based on your organization-wide lead distribution process
so that leads created by importing are automatically assigned to the respective sales team
members.
Availability
Enterprise
Professional
Free
YES
YES
NO
Editions
Permission
Required
Manage Leads Assignment Rules
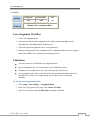
Workflow of Lead Assignment Rule
Create lead assignment rule.
Associate rule entries to the assignment rule
Select the required assignment rule in lead import tool
Limitations
You can create up to 20 different lead assignment rules.
In each assignment rule, you can associate up to 20 different criteria.
Though you set multiple rules, users can select only one rule at a time.
Zoho CRM – User Guide
16
Lead Management
Lead assignment rule can be used only for the leads generated through import tool
and Web-to-form.
You cannot assign leads to users if you are creating them manually.
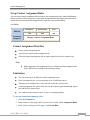
To set up lead assignment rules
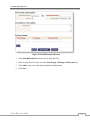
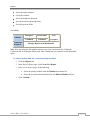
1. Click the Leads tab.
2. In the Leads Home page, under Lead Tools, click Assignment Rules.
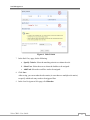
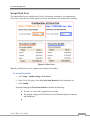
3. In the Lead Assignment Rule page, click Create Rule.
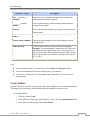
4. In the New Rule page, enter the Rule Name.
5. Click Save.
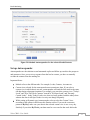
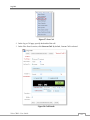
Figure 3: New Rule
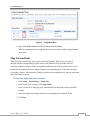
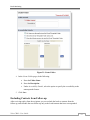
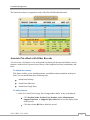
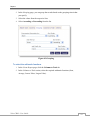
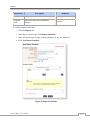
6. In the Lead Assignment Rule page, click Create Rule Entry.
Zoho CRM – User Guide
17
Lead Management
Figure 4: Rule Criteria
7. In the Rule Entry page, do the following:
a. Specify Criteria: Select the matching criteria to evaluate the rule.
b. Select User: Select the user to whom the lead has to be assigned.
c. Add Task: Select the work flow task to be assigned.
8. Click Save.
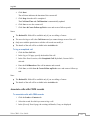
After saving, you can reorder the rule entries (in case there are multiple rule entries)
to specify which rule entry needs to be triggered first.
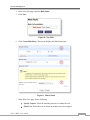
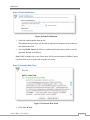
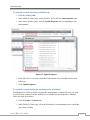
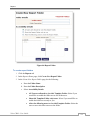
9. In the Lead Assignment Rule page, click Reorder.
Zoho CRM – User Guide
18
Lead Management
Figure 5: Assignment Rule
10. Specify the Order numbers of the rule entries and click Save.
When the assignment rule is triggered, the rule entries will in turn be triggered based
on its order.
Map Custom Fields
When a lead is converted into an account, contact and potential, field values of a lead are
mapped with the corresponding account, contact, and potential. Only when the fields are
accurately mapped with those of the corresponding modules, data will get transferred correctly.
By default, the standard fields are mapped with the corresponding fields of the other modules
(Accounts, Contacts, and Potentials). With the lead conversion mapping tool, you can easily map
other fields that you create.
To map lead fields with other modules
1. Click Setup > Lead Settings > Fields List.
2. In the Lead Fields List page, click Map Fields.
3. In the Custom Field Mapping page, custom fields are displayed under Lead Fields
column.
4. Select the appropriate options from the corresponding lists to map the fields.
5. Click Save.
Zoho CRM – User Guide
19
CHAPTER 3
ACCOUNT
MANAGEMENT
In This Section:
Create Accounts
Associate to Other Records
Account Management
CHAPTER 3
ACCOUNT MANAGEMENT
In a typical Business to Business (B2B) scenario, Account represents a Company or a
Department within the company, with which your organization is planning to do business in
future. An account stores the company address, number of employees, annual revenue, and other
details.
You can associate an account with contacts (persons) within the company and the potentials
(business opportunities) during pre-sales. After successful completion of the sales, you can also
provide Customer Support & Service through Zoho CRM - Case Management.
Availability
Enterprise
Professional
Free
YES
YES
YES
Editions
Permission
Required
Accounts Tab
Create Accounts
In Zoho CRM, you can create accounts by:
Entering data in the account details form
Duplicating the account with a few changes from the existing account details
Using Quick Create option, a quick create component present in the left pane of the
Accounts Home page
Importing accounts from other Contact Management and CRM applications
Synchronizing Microsoft Outlook contacts with Zoho CRM (Special case: An account
will be created in Zoho CRM while Company Name field is specified in the Microsoft
Outlook)
Converting leads to accounts
Create Accounts Individually
You can create accounts individually by:
Filling details in the account creation form.
Zoho CRM – User Guide
21
Account Management
Using Quick Create option; a quick create component present in the left pane of the
Accounts Home page.
Duplicating the accounts with few changes in the existing account details.
To create accounts individually
1. In the Accounts module, click New Account.
2. In the Create Account page, enter the account details.
3. Click Save.
To create accounts instantly
1. Click the Accounts tab.
2. On the left pane of the Home page, select Accounts from the Quick Create list.
Figure 6: Quick Create
3. In the pop up window, enter the relevant details.
4. Click Save.
To create duplicate accounts
1. In the Accounts tab, click a particular account that is to be duplicated.
2. In the Account Details page, click Clone.
3. In the Clone Account page, modify the required detail.
4. Click Save.
Associate Account with Other Records
You can create a 360 degrees view of the account to display all the associated details, such as
contacts, potentials, trouble tickets, activities, attachments, and notes in a single view.
Zoho CRM – User Guide
22
Account Management
To attach documents
This feature enables you to attach documents, spreadsheets and presentations to the account.
You can attach them in the following ways:
Attach from Desktop
Attach from Zoho Docs
Attach from Google Docs
To create potentials
1. In the Account Details page, the existing potential details, if any, are displayed.
Click Potential Name, Amount, Stage, Probability (%), Closing Date, or
Type links to sort the display order of the records.
Click the relevant Edit or Del link to modify or delete the potentials
respectively.
2. Click New.
3. Enter the potential details.
4. Click Save.
To add products
1. In the Account Details page, the existing product details, if any, are displayed.
Click Product Name, Product Code, Product Active, Manufacturer,
Support Start Date, or Support Expiry Date links to sort the display order
of the records.
Click the relevant Del link to delete the record.
2. Click New.
3. Select the check box(es) corresponding to the product.
The products will be available in the list only if you add them using the Products
module.
4. Click Add to Account.
To create contacts
1. In the Account Details page, the existing contact details, if any, are displayed.
Click Contact Name, Email, Phone, Mobile, or Fax links to sort the display
order of the records.
Zoho CRM – User Guide
23
Account Management
Click the relevant Edit or Del link to modify or delete the contacts
respectively.
2. Click New.
3. Enter the contact details.
4. Click Save.
To add notes
1. In the Account Details page, the existing note details, if any, are displayed.
Click Title, Note Content, Modified Time, Created Time, or Owner Name
links to sort the display order of the records.
Click the relevant Edit or Del link to modify or delete the notes respectively.
2. Click New Note and do the following:
a. Enter the Title.
b. The system displays the name of the account's Owner. Click
to change the
owner's name.
c. Enter the Note Content in the text box.
3. Click Save.
To create tasks or events
1. In the Account Details page, the existing task or event details, if any, are displayed.
Click Subject, Activity Type, Status, Due Date or Owner Name links to
sort the display order of the records.
Click the relevant Edit, Del, or Close link to modify, delete, or close the task
respectively.
2. Click New Task/New Event and specify the relevant details.
Note: Once the activity is over, you can close the activity using the Close link.
To create quotes
1. In the Account Details page, the existing quote details, if any, are displayed.
Click Subject, Quote Stage, Valid Till date, or Carrier links to sort the
display order of the records.
Click the relevant Edit or Del link to modify or delete the quotes respectively.
Zoho CRM – User Guide
24
Account Management
2. Click New.
3. Enter the relevant details.
4. Click Save.
To create sales orders
1. In the Account Details page, the existing sales order details, if any, are displayed.
Click Subject, Status, Customer No., Due Date, Excise Date, or Sales
Commission links to sort the display order of the records.
Click the relevant Edit or Del link to modify or delete the sales orders
respectively.
2. Click New.
3. Enter the sales order details.
4. Click Save.
To create invoices
1. In the Account Details page, the existing invoice details, if any, are displayed.
Click Subject, Status, Invoice Date, Due Date, Excise Date, or Sales
Commission links to sort the display order of the records.
Click the relevant Edit or Del link to modify or delete the invoice
respectively.
2. Click New.
3. Enter the invoice details.
4. Click Save.
To create cases
1. In the Account Details page, the existing case details, if any, are displayed.
Click Subject, Case Reason, Email, Status, Priority, or case Type links to
sort the display order of the records.
Click the relevant Edit or Del link to modify or delete the cases respectively.
2. Click New.
3. Enter the case details.
4. Click Save.
Zoho CRM – User Guide
25
Account Management
Add Member Accounts
Member Accounts are secondary accounts added to an existing parent account. In other
words, this allows having separate accounts with different divisions within a parent company,
thus providing the scope to view individual accounts as well as the consolidated accounts
within the parent account.
To add member accounts
1. In the Account Details page, the existing member account details, if any, are
displayed.
Click Account Name, Phone, Website, Account Type, Industry, or Annual
Revenue links to sort the display order of the records.
Click the relevant Edit or Del link to modify or delete the member account
respectively.
2. Click New.
3. Enter the member account details.
4. Click Save.
Zoho CRM – User Guide
26
CHAPTER 4
CONTACT
MANAGEMENT
In This Section:
Create Contacts
Associate to Other Records
Approve Contacts
Assignment Rule
Contact Management
CHAPTER 4
CONTACT MANAGEMENT
Contacts are people with whom you communicate, either in pursuit of a business opportunity or
for personal reasons. In Business-to-Consumer (B2C) scenario, contact is the most important
information for acquiring customers, whereas in Business-to-Business (B2B) it is a part of the
organization details with which you are doing business.
The most important function of contacts module in Zoho CRM is that they can be used for both
customers' acquisition as well as procurement of products from the vendors, i.e., contacts can be
related to accounts as well as vendors according to your business process.
Availability
Enterprise
Professional
Free
YES
YES
YES
Editions
Permission
Required
Contacts Tab
Create Contacts
In Zoho CRM, you can create contacts by:
Entering data in contact details form
Using Quick Create option, a quick create component present in the left pane of the
Contacts Home page
Duplicating the contact with few changes from the existing contact details
Importing contacts from other Contact Management applications
Converting leads to contacts
Synchronizing Microsoft Outlook contacts with Zoho CRM
Create Contact Individually
You can create contacts individually by:
Filling details in the contact creation form.
Zoho CRM – User Guide
28
Contact Management
Using Quick Create option; a quick create component present in the left pane of the
Contacts Home page.
Duplicating the contacts with few changes in the existing contact details.
To create contacts individually
1. In the Contacts module, click New Contact.
2. In the Create Contact page, enter the contact details.
3. Click Save.
Notes:
By default, the person who creates the contact owns it.
To change owner, click the Change link in the Contact Owner field from the
Contact Details page and select another user.
To create contacts instantly
1. Click the Contacts tab.
2. On the left pane of the Home page, select Contacts from the Quick Create list.
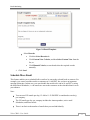
Figure 7: Quick Create
3. In the pop up window, enter the relevant details.
4. Click Save.
To create duplicate contacts
1. In the Contacts tab, click a particular contact that you want to be duplicated
2. In the Contact Details page, click Clone.
3. In the Clone Contact page, modify the required details.
Zoho CRM – User Guide
29
Contact Management
4. Click Save.
Associate Contact with other Records
You can create a 360-degrees view of the contact to display all the associated details, such as
potentials, trouble tickets, open activities, history of the completed activities, attachments, and
notes.
To attach documents
This feature enables you to attach documents, spreadsheets and presentations to the contact.
You can attach them in the following ways:
Attach from Desktop
Attach from Zoho Docs
Attach from Google Docs
To create potentials
1. In the Contact Details page, the existing potential details, if any, are displayed.
Click Potential Name, Amount, Stage, Probability (%), Closing Date, or
Type links to sort the display order of the records.
Click the relevant Edit or Del link to modify or delete the potentials
respectively.
2. Click New.
3. Enter the potential details.
4. Click Save.
To add products
1. In the Contact Details page, the existing product details, if any, are displayed
Click Product Name, Product Code, Product Active, Manufacturer,
Support Start Date, or Support Expiry Date links to sort the display order
of the records.
Click the relevant Del link to delete the record.
2. Click New.
3. Select the check box(es) corresponding to the product.
4. Click Add to Contact.
Zoho CRM – User Guide
30
Contact Management
To add notes
1. In the Contact Details page, the existing note details, if any, are displayed.
Click Title, Note Content, Modified Time, Created Time, or Owner Name
links to sort the display order of the records.
Click the relevant Edit or Del link to modify or delete the notes respectively.
2. Click New Note and do the following:
a. Enter the Title.
b. The system displays the name of the contact's Owner. Click
to change the
owner's name.
c. Enter the Note Content in the text box.
3. Click Save.
To create tasks or events
1. In the Contact Details page, the existing task or event details, if any, are displayed.
Click Subject, Activity Type, Status, Due Date or Owner Name links to
sort the display order of the records.
Click the relevant Edit, Del, or Close link to modify, delete, or close the task
respectively.
2. Click New Task/New Event and specify the relevant details.
Note: Once the activity is over, you can close the activity using the Close link.
To create quotes
1. In the Contact Details page, the existing quote details, if any, are displayed.
Click Subject, Quote Stage, Valid Till date, or Carrier links to sort the
display order of the records.
Click the relevant Edit or Del link to modify or delete the quotes respectively.
2. Click New.
3. Enter the relevant details.
4. Click Save.
To create sales orders
1. In the Contact Details page, the existing sales order details, if any, are displayed.
Zoho CRM – User Guide
31
Contact Management
Click Subject, Status, Customer No., Due Date, Excise Date, or Sales
Commission links to sort the display order of the records.
Click the relevant Edit or Del link to modify or delete the sales orders
respectively.
2. Click New.
3. Enter the sales order details.
4. Click Save.
To create invoices
1. In the Contact Details page, the existing invoice details, if any, are displayed.
Click Subject, Status, Invoice Date, Due Date, Excise Date, or Sales
Commission links to sort the display order of the records.
Click the relevant Edit or Del link to modify or delete the invoice
respectively.
2. Click New.
3. Enter the invoice details.
4. Click Save.
To create cases
1. In the Contact Details page, the existing case details, if any, are displayed.
Click Subject, Case Reason, Email, Status, Priority, or case Type links to
sort the display order of the records.
Click the relevant Edit or Del link to modify or delete the cases respectively.
2. Click New.
3. Enter the case details.
4. Click Save.
To create purchase orders
1. In the Contact Details page, the existing purchase order details, if any, are displayed.
Click Subject, Status, Tracking Number, Due Date, Excise Date, or Sales
Commission links to sort the display order of the records.
Click the relevant Edit or Del link to modify or delete the purchase orders
respectively.
2. Click New.
Zoho CRM – User Guide
32
Contact Management
3. Enter the purchase order details.
4. Click Save.
To send e-mails
1. In the Contact Details page, the existing e-mail details, if any, are displayed.
Click Sent Or Received, Subject, Date or Sent By links to sort the display
order of the records.
Click the relevant Del link to delete the mail details.
2. Click Send Mail.
3. In the Send Mail page, compose the e-mail message and send it.
Make sure that the contact has a valid e-mail address.
Approve Contacts Captured through Website
By default, contacts captured through Website are assigned to one of the Administrators who can
update the data with additional information and assign to the corresponding sales person in your
organization.
Availability
Enterprise
Professional
Free
YES
YES
YES
Editions
Permission
Required
Approve Web-to-Contacts
To approve contacts from Website
1. Click the Contacts tab.
2. In the Contacts Home page, under Contact Tools section, and click the Approve
Contacts link.
3. In the Contact Approval page, select the contacts for approval.
4. Click Approve.
Zoho CRM – User Guide
33
Contact Management
Set up Contact Assignment Rules
You can setup contact assignment rules based on your organization-wide contact distribution
(based on sales territories) process so that contacts generated through import tool and web-tocontact form are automatically assigned to the respective sales team members.
Availability
Enterprise
Professional
Free
YES
YES
NO
Editions
Permission
Required
Manage Contacts Assignment Rules
Contact Assignment Workflow
Create contact assignment rule.
Associate rule entries to the assignment rule
Select the required assignment rule in contact import tool/web-to-contact form
Note:
While importing, first assignment rule is evaluated and then assigned to the
Zoho CRM users according to the matching criteria.
Limitations
You can create up to 20 different contact assignment rules.
In each assignment rule, you can associate up to 20 different criteria.
Though you set multiple rules, users can select only one rule at a time.
Contact assignment rule can be used only for the contacts generated through import
tool and Web-to-contact form.
You cannot assign contacts to users if you are creating manually.
To set up contact assignment rules
1. Click the Contacts tab.
2. In the Contacts Home page, under Contact Tools section, select Assignment Rules.
3. In the Contact Assignment Rule page, click Create Rule.
Zoho CRM – User Guide
34
Contact Management
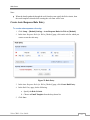
4. In the New Rule page, enter the Rule Name.
5. Click Save.
Figure 8: New Rule
6. Click Create Rule Entry. The system displays the Rule Entry page.
Figure 9: Rule Criteria
7. In the Rule Entry page, do the following:
Specify Criteria: Select the matching criteria to evaluate the rule.
Select User: Select the user to whom the contact has to be assigned.
Zoho CRM – User Guide
35
Contact Management
Add Task: Select the workflow task to be assigned.
8. Click Save.
After saving, you can reorder the rule entries (in case there are multiple rule entries)
to specify which rule entry needs to be triggered first.
9. In the Contact Assignment Rule page, click Reorder.
Figure 10: Assignment Rule
10. Specify the Order numbers of the rule entries and click Save.
When the assignment rule is triggered, the rule entries will in turn be triggered based
on its order.
Zoho CRM – User Guide
36
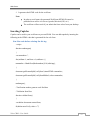
CHAPTER 5
POTENTIAL
MANAGEMENT
In This Section:
Create Potentials
Associate to Other Records
Set up Big Deal Alert
Map Stage & Probability Values
Potential Management
CHAPTER 5
POTENTIAL MANAGEMENT
In any sales organization, potentials are the most important records to generate the real revenue
for the organization. In a typical B2B organization all potentials have to undergo a complete
sales cycle, which starts with identifying the hot prospect and ends with prospects being won or
lost. The activities within this sales cycle that has to be completed are; sending product
information to potentials, product demonstrations, sending sales quotations and business
negotiations. Precisely, potential provides the following information for the sales management:
Sales cycle
The potential sales volume (Product units and price)
The sales status and the estimated sales probability in each sales stage
Reasons for the sales status (Won/Lost)
Competitors of the potential
Forecast for the next quarter/year sales
Availability
Enterprise
Professional
Free
YES
YES
YES
Editions
Permission
Required
Potentials Tab
Create Potentials
In Zoho CRM, you can create potentials by:
Entering data in potential details form
Importing potentials from other sales force automation applications
Converting Leads into potentials
Create Potentials Individually
You can create potentials individually by:
Zoho CRM – User Guide
38
Potential Management
Filling details in the potential creation form.
Using Quick Create option; a quick create component present in the left pane of the
Potentials Home page
Duplicating the potential with a few changes from the existing potential details
To create potentials individually
1. In the Potentials module, click New Potential.
2. In the Create Potential page, enter the potential details.
3. Click Save.
To create potentials instantly
1. Click the Potentials tab.
2. On the left pane of the Home page, select Potentials from the Quick Create list.
Figure 11: Quick Create
3. In the pop up window, enter the relevant details.
4. Click Save.
To create duplicate potentials
1. In the Potentials tab, click a particular potential that is to be duplicated.
2. In the Potential Details page, click Clone.
3. In the Clone Potential page, modify the required details.
4. Click Save.
Zoho CRM – User Guide
39
Potential Management
Associate Potentials with Other Records
You can create a 360-degrees view of the potential to display all the associated details, such as
open activities, history of the completed activities, contacts, products, sales stage history,
attachments, and notes.
To attach documents
This feature enables you to attach documents, spreadsheets and presentations to the
potentials. You can attach them in the following ways:
Attach from Desktop
Attach from Zoho Docs
Attach from Google Docs
To add products
1. In the Potential Details page, the existing product details, if any, are displayed.
Click Product Name, Product Code, Product Active, Manufacturer,
Support Start Date, or Support Expiry Date links to sort the display order
of the records.
Click the relevant Del link to delete the record.
2. Click Add Product.
3. Select the check box(es) corresponding to the product.
Note, that the products will be available in the list only if you add them using the
Products module.
4. Click Add to Potential.
To create tasks or events
1. In the Potential Details page, the existing task or event details, if any, are displayed.
Click Subject, Activity Type, Status, Due Date or Owner Name links to
sort the display order of the records.
Click the relevant Edit, Del, or Close links to modify, delete, or close the task
respectively.
2. Click New Task/New Event and specify the relevant details.
Note: Once the activity is over, you can close the activity using the Close link.
Zoho CRM – User Guide
40
Potential Management
To send e-mails
1. In the Potential Details page, the existing e-mail details, if any, are displayed.
Click Sent Or Received, Subject, Date or Sent By links to sort the display
order of the records.
Click the relevant Del link to delete the mail details.
2. Click Send Mail.
3. In the Send Mail page, compose the email message and send it.
Make sure that potential has a valid email address.
To add notes
1. In the Potential Details page, the existing note details, if any, are displayed.
Click Title, Note Content, Modified Time, Created Time, or Owner Name
links to sort the display order of the records.
Click the relevant Edit or Del link to modify or delete the notes respectively.
2. Click New Note and do the following:
a. Enter the Title.
b. The system displays the name of the potential's Owner. Click
to change
the owner's name.
c. Enter the Note Content in the text box.
3. Click Save.
To create quotes
1. In the Potential Details page, the existing quote details, if any, are displayed.
Click Subject, Quote Stage, Valid Till date, or Carrier links to sort the
display order of the records.
Click the relevant Edit or Del link to modify or delete the quotes respectively.
2. Click New.
3. Enter the quote details.
4. Click Save.
To create sales orders
1. In the Potential Details page, the existing sales order details, if any, are displayed.
Zoho CRM – User Guide
41
Potential Management
Click Subject, Status, Customer No., Due Date, Excise Date, or Sales
Commission links to sort the display order of the records.
Click the relevant Edit or Del link to modify or delete the sales orders
respectively.
2. Click New.
3. Enter the sales order details.
4. Click Save.
To create cases
1. In the Potential Details page, the existing case details, if any, are displayed.
Click Subject, Case Reason, Email, Status, Priority, or case Type links to
sort the display order of the records.
Click the relevant Edit or Del link to modify or delete the cases respectively.
2. Click New.
3. Enter the cases details.
4. Click Save.
Associate Competitors with Potential
Most of the companies prefer to purchase products after analyzing different vendors. If you are
working with a highly competitive market, where your competitors are directly competing with
you in winning the deals, it is always better to know their strengths and weaknesses well in
advance so that you can propose your offering in a better way.
This feature enables you to add the competitor's strengths and weaknesses.
To associate competitors with potential
1. In the Potential Details page, the competitor details, if any, are displayed.
Click Product Name, Product Code, Product Active, Manufacturer,
Support Start Date, or Support Expiry Date links to sort the display order
of the records.
Click the relevant Del link to delete the record.
2. Click New and do the following:
a. Enter the Competitor Name. It is mandatory.
b. Enter the competitor's Website.
c. Enter the Strengths and Weaknesses in the respective text boxes.
Zoho CRM – User Guide
42
Potential Management
3. Click Save.
Map Contact Roles
While prospecting, you may need to contact different persons (contacts) to finalize the sales deal.
It is always better to know the contact's role in your prospecting organization, so that you always
have a right discussion with the right person. For example, explaining about product price and
discounts is always better with Financial Manager, whereas explaining product features with the
Product Manager. This kind of approach helps you to negotiate with the prospecting organization
in a better way and cut short the sales lead-time.
To map contact roles
1. Click the Potentials tab.
2. In the Potentials Home page, select the required potential.
3. In the Potential Details page, the contact details, if any, are displayed.
Click Contact Name, Phone, Email, or Role Name links to sort the display
order of the records.
Click the relevant Del link to delete the record.
4. Click Add Contact Role.
5. In the Contact Roles Mapping page, for each contact select the role from the Contact
Role drop-down list.
6. Click Save.
Customize Contact Roles
By default, some of the contact roles, such as Decision Maker, Product Management, Purchasing
and other roles are available. You can customize the contact roles according to your business
process. Only users with Administrator privilege can customize the contact roles.
To add/modify contact roles
1. Click the Setup > Potential Settings > Contact Roles.
Zoho CRM – User Guide
43
Potential Management
Figure 12: Contact Roles
2. In the Edit Contact Roles page, do the following:
a. Click the Add Role link and enter the new contact role.
b. Select the required check box(es) that you want to delete, and then click the
Delete Role link.
c. Modify the existing roles.
3. Click Save.
Set up Big Deal Alert
You can use the Big-deal Alert function to notify your management/Colleagues about a chance
of winning a big deal that you would like to share with them. Sometimes, executive board
members may be interested to know all the Big-deal information well in advance. You can send
the Big-deal alert as an e-mail notification to all the Zoho CRM users or to the selected users and
colleagues not registered as Zoho CRM users.
To configure big deal alert
1. Click Setup > Potentials Settings > Big Deal Alert.
2. In the Workflow Rule page, the Big Alert rule details are displayed. The default
criteria is "Amount >= 1000 and the probability = 100".
3. Click Edit to modify the Rule Details.
Zoho CRM – User Guide
44
Potential Management
4. In the Related Alerts section, the alert details are displayed.
The default alert and e-mail template is "Big Deal Alert". You can change the Alert
details by editing the existing alert.
5. In the Related Tasks section, you can add tasks for the alert rule.
Configure Sales Stage Pick list
To add or modify pick list value
1. Click Setup > Potentials Settings > Field List.
2. In the List of Fields page, click the Edit link corresponding to the fields.
Figure 13: Field Information
3. The system displays the existing pick list values.
4. Modify the existing details, and then click Save.
Note: You can modify the default stage for new and converted leads.
Map Stage and Probability Values
Sales Stage is a very important criteria to identify the performance of organization-wide Sales
pipeline. In the Stage-Probability mapping page you can perform the following operations:
Create different types of Sales stages according to your organization-wide Sales process
Associate Probability values to the Sales stages
Zoho CRM – User Guide
45
Potential Management
Associate Forecast types (Open, Closed-won, or Closed-lost) to Sales stages
Associate Forecast categories (Pipeline, Closed, Omitted, Best Case, Committed
Tips:
For a better sales pipeline analysis assign different probabilities to sales stage values.
For each stage assign probability in the range of 0 to 100.
You may consider using probability value as 100 when the deal is closed-won and 0 for
deal closed-lost.
To map sales stage to probability values, forecast types and forecast
categories
1. Click Setup > Potentials Settings > Stage-Probability Mapping.
2. In the Stage-Probability Mapping page, the existing sales stages are displayed.
Click the Add Stage link and add new stages.
Click the Delete Stage link and delete new stages.
3. In the Stage-Probability Mapping page, do the following:
a. Enter the Stage Name, its Probability (%), and the Sort Order in the
respective boxes.
b. Select the Forecast Type and the Forecast Category from the respective lists.
4. Click Save.
Zoho CRM – User Guide
46
CHAPTER 6
FORECAST
MANAGEMENT
In This Section:
Create Forecasts
Associate to Other Records
Set up Fiscal Year
Forecast Management
CHAPTER 6
FORECAST MANAGEMENT
Forecasting provides real-time insight for tracking the sales against quotas, probabilities, plans,
etc., which helps the organization to fine-tune the sales process. For sales managers, forecast
feature provides an overall picture of the company's sales pipeline, as well as those of individual
staff performance. Sales representatives can use forecasting to meet/exceed quotas assigned to
them and in turn increase company profits.
Note: In Zoho CRM, you cannot consolidate the individual sales persons' forecasts and provide
the organization-wide forecast.
Availability
Enterprise
Professional
Free
YES
YES
NO
Editions
Permission
Required
Forecasts Tab
Create Forecasts
In Zoho CRM, you can create forecasts for a financial year and for each quarter by entering data
manually.
You can create forecast for a specific quarter only once. For example, if you create a forecast for
Quarter 1 in Year 2006, then you cannot create another forecast in the same quarter. You can
only modify the existing quarter details.
Note: You cannot customize the fields in forecast module.
To create forecasts
1. In the Forecast module, click New Forecast.
2. In the Create Forecast page, enter the forecast details.
3. Click Save.
Zoho CRM – User Guide
48
Forecast Management
Set up Fiscal Year
This option allows you to configure the Fiscal Year Settings according to you organization's
Fiscal cycle. Once the Fiscal start month is selected, fiscal quarters are automatically rolled up.
Figure 14: Fiscal Year
Note: By default, fiscal year is configured as January to December.
To set up Fiscal Year
1. Click Setup > Admin Settings > Fiscal Year.
2. In the Fiscal Year page, select the Fiscal Start Month from the drop down list
3. Click Submit.
Note that changing the Fiscal Start Month will affect the following:
The new, as well as the existing forecast records
The settings configured for Financial year and Financial Quarter in Reports
and Dashboards
Zoho CRM – User Guide
49
Forecast Management
Associate Forecasts with Other Records
After creating forecasts, you can add potentials in each month. Once the potential is closed it is
automatically displayed under forecast history. All the potentials created followed-up are
displayed under sales person's monthly forecast list.
To associate forecast with other records
1. In the Forecast Details page, the following details are displayed:
Potentials' list for specific months: Displays the list of potentials and the
corresponding forecast details for a month. You can also add new potential to
the month.
Figure 15: Potentials' List
Forecast History: Displays the overall details of the forecast with aggregate
Quota, Closed Amount, Committed Amount, Best Case Amount details.
Zoho CRM – User Guide
50
PART II
MARKETING
AUTOMATION
In This Section:
Marketing Automation in ZCRM
Campaign Management
Web Forms
Auto-Response Rules
Email Marketing
Autoresponders
CHAPTER 7
INTRODUCTION
In This Section:
Introduction to Marketing Automation
Introduction
CHAPTER 7
INTRODUCTION
As part of the marketing automation, Zoho CRM provides Campaign management, E-mail
marketing, and Web Forms (to generate leads, contacts, and cases) useful for integrating your
organization's sales and marketing activities.
With the Zoho CRM campaign management features, you can effectively plan marketing
expenditure and thereby improve the quality of lead generation process. In addition, campaign
management integrated with leads and opportunities modules helps your organization in
measuring the campaign performance and effectiveness.
Campaign Management
Campaigns refer to the marketing process which is planned, executed, distributed and
analyzed..
Create Campaigns | Associate Campaigns
Web Forms
Web forms will help you to capture leads contacts and cases online.
Create Web Forms | Insert Captcha | Auto Response Rules
Email Marketing
Use emails to reach numerous customers by sending mass emails and use
autoresponders to follow up with the customers.
Mass Emails | Schedule Mass Emails | Autoresponders | Autoresponder Scenario
Zoho CRM – User Guide
53
CHAPTER 8
CAMPAIGN
MANAGEMENT
In This Section:
Create Campaigns
Associate to Other Records
Campaign Management
CHAPTER 8
CAMPAIGN MANAGEMENT
Campaign management allows you to manage your entire marketing process by which marketing
campaigns are planned, produced, distributed and analyzed. This includes planning the
campaign, preparing your mailing list, executing the campaign and then analyzing the results.
Availability
Enterprise
Professional
Free
YES
YES
YES
Editions
Permission
Required
Campaigns Tab
You can use the Campaigns module for the following:
Planning marketing activities and developing campaign hierarchies.
Outlining marketing campaign objectives.
Defining campaign success metrics.
Building and testing sample campaigns on a subset of customer data.
Storing and reusing content from previous marketing campaigns.
Measuring campaign effectiveness by linking directly to the leads and potentials.
Tracking customer inquiries related directly to campaigns.
Tracking sales force closures related directly to campaigns.
Create Campaigns
In Zoho CRM, you can create campaigns by:
Entering data in the campaign details form (manually)
Using Quick Create option; a quick create component present in the left pane of the
Campaigns Home page.
Duplicating the campaigns with few changes in the existing details.
Zoho CRM – User Guide
55
Campaign Management
To create campaigns individually
1. In the Campaigns module, click New Campaign.
2. In the Create Campaign page, enter the campaign details.
3. Click Save.
To create campaigns instantly
1. Click the Campaigns tab.
2. On the left pane of the Home page, select Campaigns from the Quick Create list.
Figure 16: Quick Create
3. In the pop up window, enter the relevant details.
4. Click Save.
To create duplicate campaigns
1. In the Campaigns tab, click a particular campaign that is to be duplicated.
2. In the Campaign Details page, click Clone.
3. In the Clone Campaign page, modify the required details.
4. Click Save.
Associate Campaign with Other Records
After creating campaigns, you may need to associate campaigns with other records, such as
tasks, events, attachments, leads, contacts, and potentials.
Zoho CRM – User Guide
56
Campaign Management
To attach documents
This feature enables you to attach documents, spreadsheets and presentations to the leads.
You can attach them in the following ways:
Attach from Desktop
Attach from Zoho Docs
Attach from Google Docs
To create tasks or events
1. In the Campaign Details page, the existing task or event details, if any, are displayed.
Click Subject, Activity Type, Status, Due Date or Owner Name links to
sort the display order of the records.
Click the relevant Edit, Del, or Close link to modify, delete, or close the task
respectively.
2. Click New Task/New Event/Log a Call and specify the relevant details.
Note: Once the activity is over, you can close the activity using the Close link.
To create leads
1. In the Campaign Details page, the existing lead details, if any, are displayed.
Click Name, Company, Email, Lead Source, or Status links to sort the
display order of the records.
Click the relevant Edit or Del link to modify or delete the leads respectively.
2. Click New.
3. Enter the lead details.
4. Click Save.
To create contacts
1. In the Campaign Details page, the existing contact details, if any, are displayed.
Click Contact Name, Email, Phone, Mobile, or Fax links to sort the display
order of the records.
Click the relevant Edit or Del link to modify or delete the contacts
respectively.
2. Click New.
3. Enter the contact details.
Zoho CRM – User Guide
57
Campaign Management
4. Click Save.
To create potentials
1. In the Campaign Details page, the existing potential details, if any, are displayed.
Click Potential Name, Amount, Stage, Probability (%), Closing Date, or
Type links to sort the display order of the records.
Click the relevant Edit or Del link to modify or delete the potentials
respectively.
2. Click New.
3. Enter the potential details.
4. Click Save.
Zoho CRM – User Guide
58
CHAPTER 9
WEB FORMS
In This Section:
Web Forms
Auto-Response Rules
Web Forms
CHAPTER 9
WEB FORMS
Web forms simplify the process of capturing visitors' or users' information from the website into
your CRM system. They are designed to automate importing of data from website into Zoho
CRM and to enable non-technical users to design and publish their own web forms.
Before setting the web form, ensure the following check-list:
Create a default Email template to send automated replies to website visitors upon
submission of their details.
Create an Assignment rule if you wish to assign the incoming records to specific users.
By default, all incoming records are assigned to the Administrator.
Configure the Web form further, to suit your requirements. By default, the web form
contains only web related tags.
Customize the fields to be added in the web form.
Test the entire workflow of Web form, before publishing in the Website.
Availability
Enterprise
Professional
Free
20/module
10/module
1/module
Editions
Permission
Required
Web-to-Leads/Contacts/Cases
Benefits
Web forms can be used to:
Capture data (visitors' information)
Communicate with website visitors
Conduct surveys
Respond to user queries
Generate online sales
Receive online feedback
Zoho CRM – User Guide
60
Web Forms
Create Web Forms
To create web forms for Leads, Contacts, and Cases
1. Click Setup.
2. In the Setup page, under Leads/Contacts/Cases Settings, click the Web-toLeads/Contacts/Cases Form link.
3. In the Web to Lead/Contact/Case page, click Create New Form.
4. Specify the corresponding details in the following sections:
Form Properties
Field Selection
Lead/Contact/Case Assignment
Email Notification
Generate Web Form
Step 1: Form Properties
1. Enter a Form Name (eg. Feedback form, Data form, etc.).
Figure 17: Form Properties
Zoho CRM – User Guide
61
Web Forms
2. Enter the URL of the web page to which the visitor needs to be redirected once the
web form is submitted. Specify a valid Return URL starting with "http:// or https://".
Note: The length of Return URL should not exceed 50 characters.
3. Enter the URL of the website where the web form is to be hosted. It should start with
"http:// or https://".
This prevents spam and allows only forms submitted through the particular domain to
be captured as valid information
Note:
If the domain name does not match with the URL where the web form is
hosted, then the information will not be captured.
Alternatively, you can enter [*] in the domain name field to capture from
other / multiple domains.
Step 2: Fields Selection
1. Select the fields' check boxes that are to be displayed in the web form.
Figure 18: Field Selection
Note:
The fields displayed here are those available in the particular module's
(Leads/Contacts/Cases) Field list.
Zoho CRM – User Guide
62
Web Forms
To have custom field, you need to first create them in the particular module.
For Web to Contact form:- Account Name is available while creating Web to Contact forms.
When this field is used in the web form, and contact details are submitted, an Account will
automatically be created in CRM. There can be cases when the Account already exists in your
CRM account. Only in such cases, a new Account will not be created.
Note: An Account will be created, even if certain mandatory fields details are not provided.
Later, when the account is edited, you need to provide the other mandatory details before saving
the record.
Step 3: Lead/Contact/Case Assignment
Note: The option to select Assignment Rules to assign owners to the records, is available
only in Paid Editions.
Figure 19: Lead Assignment
1. Select the check box to enable manual approval of records generated through the web
form.
2. Click
to select a user as owner to the records.
3. Select the Lead Assignment Rule from the list.
4. Click Manage Rules link to edit the corresponding assignment rule.
Note:
Enabling Manual record approval will help you to validate the generated
records manually and then add them to the corresponding module in Zoho
CRM. If not enabled, all the records generated through website are assigned
directly to the corresponding modules.
You can setup Zoho CRM to automatically assign users for the records
generated from website by selecting the Select User option or by creating
Assignment rules.
Zoho CRM – User Guide
63
Web Forms
Step 4: Email Notification
Figure 20: Email Notification
1. Select the email template from the list.
The template that you select will be used to send an auto-response email to the user
who submits the form.
2. Select the Notify Owner checkbox to send an email to the owner, when a record is
generated through your Website.
Note: While creating web to case forms, there will be an extra option to Enable Contact
Creation when cases are generated using the web forms.
Step 5: Generate Web Form
Figure 21: Generate Web Form
1. Click Save & Next.
Zoho CRM – User Guide
64
Web Forms
2. It generates the HTML code for the web form.
Note:
In order to avoid spam, the generated Web Form (HTML file) must be
published in an active web server (Apache, Microsoft, IIS, etc.).
The web form will not work if you submit the form values from your desktop.
Inserting Captcha
Captcha can be used in your web forms to prevent SPAM. You can add captcha by inserting the
following in the HTML code that is generated for the web form.
Use this code before closing the div tag
<script>
function randomgen()
{
var rannumber='';
for(ranNum=1; ranNum<=6; ranNum++){
rannumber+=Math.floor(Math.random()*10).toString();
}
document.getElementById('varifyNum').innerHTML=rannumber;
document.getElementById('varifyNumHidden').value=rannumber;
}
randomgen();
//Varification number genarate code End here
//Validation Start Here
function validateForm()
{
var thefrm=document.contactForm;
if(thefrm.enterVerify.value=="")
Zoho CRM – User Guide
65
Web Forms
{
alert("Enter your Verification Code");
thefrm.enterVerify.focus();
eturn false;
}
else if(thefrm.enterVerify.value!="")
if(thefrm.enterVerify.value!=thefrm.varifyNumHidden.value)
{
alert("please Enter Currect Verification Number");
randomgen();
thefrm.enterVerify.select();
thefrm.enterVerify.focus();
return false;
}
else
{
return true;
}
}
else
{
return true;
}
}
</script>
Zoho CRM – User Guide
66
Web Forms
Use this code
<tr>
<td style="font-family: sans-serif; font-size: 12px;" class="feature-border"
align="right" nowrap="nowrap" width="29%">Verification Code:</td>
<td class="feature-border" align="left" valign="middle" width="66%"><input
name="varifyNumHidden" id="varifyNumHidden" value="701469" type="hidden">
<input name="enterVerify" id="enterVerify" type="text"> <div id="varifyNum"
style="font-size: 14px; font-family: Arial,Helvetica,sans-serif; font-weight:
bold;"></div></td>
</tr>
Before the Save and Reset button code:<tr><td colspan=2 align=center style='background-color:#eaeaea'> <input type='submit'
name='save' value=Save /> <input type='reset' name='reset' value=Reset
/> </td></tr>
3. Replace the code,
<form action='https://crm.zoho.com/crm/WebToContact' method='POST'
onSubmit='javascript:document.charset="UTF-8";' accept-charset='UTF-8'>
With
<form action='http://crm.zoho.com/crm/WebToContact' name="contactForm"
method='POST' onSubmit='return validateForm()'>
Zoho CRM – User Guide
67
Web Forms
Auto Response Rules
The Auto Response rule feature enables you to send automated emails when leads, contacts, or
cases are generated through web forms. When a lead is generated through web forms, you may
want to send appropriate emails to the leads with different types of requests. In such cases, you
can create an auto response rule with specific rule criteria. When a condition is satisfied, the
corresponding email is sent. You can create many auto response rules but only one auto response
rule can be active at a time.
Availability
Enterprise
Professional
Free
YES
YES
NO
Editions
Create Auto Response Rule
To create autoresponse rules for web forms
1. Click Setup > [Module] Settings > Auto Response Rules for Web to [Module]
2. In the Auto Response Rules for Web to [Module] page, click Create Rule.
Figure 22: Create Auto Response Rules
3. In the Create Auto Response Rules for Web to [Module] page, do the following:
a. Enter the Rule Name.
b. Select the checkbox to activate the rule.
4. Click Save.
Zoho CRM – User Guide
68
Web Forms
Note:
When the details gathered through the web form does not satisfy the Rule criteria, then
the email template selected while creating the web form will be sent.
Create Auto Response Rule Entry
To create autoresponse rule entry
1. Click Setup > [Module] Settings > Auto Response Rules for Web to [Module]
2. In the Auto Response Rules for Web to [Module] page, click on the rule for which you
want to create the rule entry.
Figure 23: Rule Entry
3. In the Auto Response Rules for Web to [Module] page, click Create Rule Entry.
4. In the Rule Entry page, do the following:
a. Specify the Rule Criteria.
b. Choose an Email Template from the drop down list.
5. Click Save.
Zoho CRM – User Guide
69
CHAPTER 10
EMAIL MARKETING
In This Section:
Send Mass Emails
Schedule Mass Emails
Autoresponders
Email Marketing
CHAPTER 10
EMAIL MARKETING
Communication with customers is an important activity in any business scenario. One of the best
ways of communicating is through emails. Zoho CRM provides the option of using emails to
reach a large number of customers and send mass emails. You can also create auto responders,
schedule mass emails, and create email templates that are ready to use.
Note: The Mass Email feature is available only for the Leads and Contacts Module.
In Zoho CRM, you can send bulk emails to customers with respect to your business
requirements. For example, you can send newsletters, special offers, updates, or personalized
follow-up email to the customers in bulk. While sending bulk emails to customers, you can
choose a predefined template for the message from various Email templates. Bulk emails ca be
sent in the following ways:
Sending Mass emails manually
Scheduling Mass Emails
Note:
Before sending emails, ensure that the record contains a valid email address.
Emails will not be delivered to the records with invalid email address.
Benefits
Save time in sending emails to the entire list of customers.
Create new mailing list based on business requirements.
Schedule emails to send later according to your convenience.
Allow customers to subscribe/unsubscribe from the mailing list using Email opt-out.
Send Mass Emails
In Zoho CRM, you can send mass emails to customers manually, by creating a new mailing list
or by using the existing list. You can select the recipients list in two ways:
Instant Filter (creating New Custom View)
Existing Custom View
Note:
The Mass Email feature is available only in the Leads and Contacts modules.
Zoho CRM – User Guide
71
Email Marketing
You need to create e-mail templates before sending mass e-mails.
You can send a maximum of 250 mass emails per day, per company.
The 250 emails per day, per company includes the Autoresponders, active email
Schedulers, and Mass emails.
There is no limit to the number of emails that you send individually.
Availability
Enterprise
Professional
Free
YES
YES
NO
Editions
Permission
Required
Mass Email Leads/Contacts
To send mass emails
1. Click the Leads or Contacts tab.
2. In Home page, under Leads/Contacts Tools, click Mass E-mail Leads/Contacts.
3. In the Mass E-mail page, by default, the system displays the E-mail Template tab.
Select Email Templates
Click the Email Template tab
Under Email Templates section, select the Template from the list.
Note, that you cannot edit the e-mail content here.
Click the New Template link to create a template.
Zoho CRM – User Guide
72
Email Marketing
Figure 24: Email Template
Select Records.
Click the Select Records tab
Click Custom View Criteria, and then Select Custom View from the
list, or
Click Manual Criteria, to search and select the required records
manually.
4. Click Send.
Schedule Mass Email
This feature enables you to schedule bulk e-mails to be sent to the selected leads or contacts. For
example, you want to send the emails to customers at 10 AM PST, but you have an important
meeting at that time. In that case, you can schedule the emails to be sent at 10 am PST by using
the Mass Email Scheduler, i.e. the emails are sent to the customers at the scheduled time even in
your absence.
Note:
You can send 250 emails per day (12 AM to 11.59 PM PDT is considered as one day),
per company.
The 250 emails per day, per company includes the Autoresponders, active email
Schedulers, and Mass emails.
There is no limit to the number of emails that you send individually.
Zoho CRM – User Guide
73
Email Marketing
For a given scheduled time only three bulk e-mail processes are possible.
To schedule mass emails
1. Click the Leads or Contacts tab.
2. In the Home page, under Leads/Contacts Tools, click Schedule Mass Email.
3. Click New Mass Mail Schedule.
Figure 25: Mail Scheduler
4. In the New Mass Mail Scheduler page, do the following:
a. Enter the Mass Mail Scheduler Name.
b. Select the Custom View from the list.
c. Select the Email Template from the list.
d. Select the Active check box.
Only when you select the Active check box, the scheduled mails will be
delivered.
e. Enter the Start Date and Time to schedule the mails.
Enter the date in MM/DD/YYYY format, or select the date from the calendar
displayed. Select the hours and minutes from the respective lists.
5. Click Save.
The system displays the View Mass Mail Schedule page.
6. Click Edit or Delete, as required.
Zoho CRM – User Guide
74
Email Marketing
7. Click Go Back. The created Scheduler is displayed under Mass Mail Schedulers.
Note: The e-mail templates will be available in the list only if you had already created them.
Autoresponders
Building business relationships is a marketing priority, and when it comes to lead nurture
programs, proper follow-up with prospects is essential to win deals. Autoresponder is a
marketing automation functionality that can streamline the process of sending series of
personalized email messages at predefined intervals to the leads and contacts. Additionally, you
can exclude the responded leads or contacts from the next follow-up Emails.
You can use autoresponders in many ways. Some of the real-time business scenarios are listed
below:
Nurture leads
Provide email tutorial courses regarding your product
Send introduction Emails to the customers
Automate reminder emails to receive payments from customers
Schedule Newsletters
Availability
Enterprise
Professional
Free
YES
NO
NO
Editions
Steps to Schedule Autoresponders
Set up Web forms (Optional)
Set up Custom Views with your contacts
Set up Email Templates
Set up Autoresponders
Zoho CRM – User Guide
75
Email Marketing
Figure 26: Visitor submits a Web Form
Zoho CRM – User Guide
76
Email Marketing
Figure 27: Visitors' information is stored in Zoho CRM - Manage Custom View for
filtering Leads/Contacts
Figure 28: Set up Email Templates for sending emails to Leads/Contacts
Zoho CRM – User Guide
77
Email Marketing
Figure 29: Schedule Autoresponders for the selected Leads/Contacts
Set up Autoresponder
Autoresponders are the solution to send automated replies and follow-up emails to the prospects
and customers. Once you receive a response from the lead or contact, you have to manually
exclude the contacts form the mailing list.
Important Notes:
Module refers to the different tabs. For example, Leads, Contacts, Accounts etc.
Custom view selected for the autoresponder must contain new data. If you select a
custom view in which data is not new, autoresponder will send the first email to the same
old data during subsequent iterations. For example, you can select custom views "Today's
Leads" and "New This Week Contacts" instead of "All Open Leads" and "Recently
Created Leads". In the Today's Leads view, data is always updated with the today's data
whereas the data in All Open Leads view may not change frequently.
While setting up Dynamic type Autoresponders, always select the Custom Views
according to the options in the Recurrence Pattern section. If you set the recurrence
pattern as By Day, make sure your data in the selected custom view is new every day.
Similarly if you select By Week, your data must be a new one for that week before the
Zoho CRM – User Guide
78
Email Marketing
autoresponder is initiated. If the data used is old, autoresponder will send the first email
to the same data during subsequent iterations.
While executing the autoresponder, system cannot identify the duplicate records. Hence,
you are recommended to check for the duplicate contacts and merge with the primary
record, before setting up the autoresponde
At present, you cannot track the response when customer responds to your email. Hence,
you have to manually select the contacts from the mailing list to exclude them from the
next follow-up.
Use the unsubscription form in the autoresponder email templates. By using
unsubscription form, you can allow the recipients to opt out from your next follow-up
and avoid Anti-SPAM complaints.
After setting up autoresponders, better not to change the Custom View, duration of the
next follow-up and the follow-up template options.
To set up autoresponders
1. Click the [Module] tab.
2. In the [Module] Home page, under [Module] Tools, click the Autoresponders link.
3. In the Autoresponders page, click Create Autoresponder.
Zoho CRM – User Guide
79
Email Marketing
Figure 30: Autoresponders
4. In the New Autoresponder page, under the Autoresponder Details section, do the
following:
a. Enter the Name of the autoresponder.
b. Select the owner of the records from the Assigned To pick list.
By default, the field displays the name of the user who creates the
autoreponder.
c. Select the Custom View to set up the recipient list for the autoresponder.
Zoho CRM – User Guide
80
Email Marketing
d. Select a Folder for the autoresponder.
e. Select Static or Dynamic and specify the corresponding details. (Refer the
table for the list of standard fields)
Static - Autoresponder in which the Follow-up happens on a fixed
date.
Dynamic - Autoresponder in which the Follow-up happens on
predefined intervals set by you.
5. Click Save
Note:
You will be able to change the name of the user in the Assigned To field, only if you
have the permission to change the owner of the records.
The autoresponder email will be sent only to the records that belong to the user specified
in the Assign To field.
The autoreponder email will not be sent to the records for which the Email Opt Out is
enabled.
Only when you clear the Email Opt Out checkbox in the Record's Details page, the
autoresponder emails will be sent to those records.
The following table gives the list of fields and their description when Static option is selected.
Fields
Description
Follow-up Date
Specify the follow-up date. The follow-up date is calculated
with respect to the day when the autoresponder is initiated.
Email template
Choose the template from the drop-down list.
The following table gives the list of fields and their description when Dynamic option is
selected.
By Day - Fields
Recur every ___ day(s)
Zoho CRM – User Guide
Description
Enter how often in days the autoresponder should be
81
Email Marketing
repeated.
Recur everyday
Select this if the autoresponder should be repeated everyday.
Select the Start date (MM/dd/yyyy format) and time for the
autoresponder.
End by
Select the End date for the autoresponder in MM/dd/yyyy
format.
No end date
Select this if the autoresponder should continue repeating till
you specify an end date.
Choose Email Template
Choose the template from the drop-down list.
Add Follow-up
Click the link to add follow-ups for the autoresponder.
Example: The autoresponder is initiated on 01-01-2010 and
the follow-up dates specified are After 3 days and After 10
days. In such a case, the first follow-up email will be sent on
04-01-2010 and the second follow-up email will be sent on
11-01-2010.
By Week - Fields
Recur every
____week(s) on
T-W-T-F-S
S-M-
Description
Enter how often in weeks the autoresponder should be
repeated. Then, select the checkbox(es) that correspond to
the day(s) of the week on which the recurrence should occur.
Start by
Select the Start date (MM/dd/yyyy format) and time for the
autoresponder.
End by
Select the End date for the autoresponder in MM/dd/yyyy
format.
No end date
Select this if the autoresponder should continue repeating till
you specify an end date.
Choose Email Template
Choose an email template for the autoresponder from the
drop-down list.
Add Follow-up
Click the link to add follow-ups for the autoresponder.
Example: The autoresponder is initiated on 01-01-2010 and
the follow-up dates specified are After 3 days and After 10
days. In such a case, the first follow-up email will be sent on
04-01-2010 and the second follow-up email will be sent on
11-01-2010.
Zoho CRM – User Guide
82
Email Marketing
By Month - Fields
Description
Day __ of every ___
month(s)
Enter how often in months and on the specified date the
autoresponder should be repeated.
____ ____ of every
month
Select a particular day when the autoresponder should be
repeated every month.
Start by
Select the Start date (MM/dd/yyyy format) and time for the
autoresponder.
End by
Select the End date for the autoresponder in MM/dd/yyyy format.
Choose Email Template
Choose an email template for the autoresponder from the
drop-down list.
Add Follow-up
Click the link to add follow-ups for the autoresponder.
Example: The autoresponder is initiated on 01-01-2010 and
the follow-up dates specified are After 3 days and After 10
days. In such a case, the first follow-up email will be sent on
04-01-2010 and the second follow-up email will be sent on
11-01-2010.
Note:
Auto-responders feature is available only in the Leads and Contacts modules
You can send maximum 250 mass emails per day, per company.
You can set a maximum of 3 autoresponders and a maximum of 5 follow-ups per
autoresponder.
Create Folders
In Zoho CRM, you can create various folders for a better organization of your autoresponders.
This helps you to keep them classified under different categories for quick access
To create folders
1. Click the [Module] tab.
2. In the [Module] Home page, under [Module] Tools, click the Autoresponders link.
3. In the Autoresponders page, click Create Folder.
Zoho CRM – User Guide
83
Email Marketing
Figure 31: Create Folder
4. In the Create Folder page, do the following:
a. Enter the Folder Name.
b. Enter the Description.
c. Under Accessibility Details, select the option to specify the accessibility to the
autoresponder feature.
5. Click Save.
Excluding Contacts from Follow-up
After receiving replies from the recipients, you can exclude the leads or contacts from the
follow-up, and schedule the next follow-up only to the leads/contacts that have not responded.
Zoho CRM – User Guide
84
Email Marketing
To exclude records from the next follow-up
1. Click the [Module] tab.
2. In the [Module] Home page, under [Module] Tools, click the Autoresponders link.
3. In the Autoresponders page, click the Update Response link corresponding to the
autoresponder.
Figure 32: Update Response
4. In the Mail Sent List overlay, select the leads/contacts to be excluded from the next
follow-up.
5. Click Update Response.
To exclude records before the autoresponder is initiated
The Mailing List will be available only after the autoresponder is initiated. In case you want
to exclude some contacts from the mailing list, even before the autoresponder is initiated,
follow the steps given below:
1. Click the Leads or Contacts tab.
2. In the [Module] Home page, select the checkbox(es) corresponding to the records that
you want to exclude.
Zoho CRM – User Guide
85
Email Marketing
3. Click More Options, and then click the Update Response link.
Figure 33: Update Response
4. In the Select Autoresponder popup window, select the autoresponder from the dropdown list.
5. Click Save.
Including all Contacts in the Follow-up
This option enables you to include all the contacts for the follow-up that you had excluded from
the mailing list.
To include all the record for the next follow-up
1. Click the [Module] tab.
2. In the [Module] Home page, under [Module] Tools, click the Autoresponders link.
3. In the Autoresponders page, click the Reset link corresponding to the autoresponder.
Autoresponder Scenario
Here is a real-time scenario, just one of the many ways in which you can use autoresponders.
The Challenge
A user has shown interest in your product and has subscribed for a 30 day free trial of your
product. Your challenge here is to engage the prospect in your product and follow-up with
right email messages to win the deal. This is a real-time Drip Marketing situation where
autoresponders can be used.
Zoho CRM – User Guide
86
Email Marketing
The Scenario
A visitor to your web site fills the web form and signs up for a 30 day trial period of your
product.
An auto-generated Thank you / Welcome email is sent to the user.
User's (lead) details are listed in Zoho CRM under a custom view (eg: Today's Leads).
Autoresponder is initiated.
Day 1 - 'Getting Started' email is sent to the user.
Day 2 - 'Support and Feedback Information' email is sent.
Day 5 - 'Product Updates' email is sent.
Day 15 - 'Purchase Offer' email is sent.
Day 25 - 'Reminder' email is sent.
Note: If the user subscribes to the product and is excluded from the mailing list, then the followup emails that come after will not be sent.
The procedure to set up autoresponder
1. Click the Leads tab.
2. In the Leads Home page, under Lead Tools, click the Autoresponders link.
3. In the Autoresponders page, click Create Autoresponder.
4. In the New Autoresponder page, under the Autoresponder Details section, do the
following:
a. Enter the Name of the autoresponder.
b. Select the Custom View to set up the recipient list for the autoresponder.
c. Select a Folder for the auto-responder.
d. Select Dynamic and specify the corresponding details (Refer the table.)
5. Click Save.
Note: If the user subscribes to the product, during the follow-up process, the user's email address
should be excluded from the mailing list. On excluding the email address, the successive followup emails will not be sent to the user
Zoho CRM – User Guide
87
Email Marketing
The following table provides information on the options that you need to specify for the
autoresponder.
Zoho CRM – User Guide
88
PART III
INVENTORY
MANAGEMENT
In This Section:
Inventory Management in ZCRM
Product Management
Price Book Management
Vendors Management
Quotes Management
Sales Order Management
Purchase Order Management
Invoice Management
CHAPTER 11
INTRODUCTION
In This Section:
Introduction to Inventory Management
Introduction
CHAPTER 11
INTRODUCTION
Zoho CRM extends beyond the traditional CRM functions and enables complete sales cycle
management features by integrating Inventory Management features, such as Products, Price
Books, Vendors, Sales Quotes, Orders, and Invoices with the Sales related modules, such as
Leads, Accounts & Contacts, and Opportunities.
With the Zoho CRM - Inventory Management features you can achieve the seamless integration
between pre-sales and post-sales accounting activities in a single application. In addition, you
can also procure goods/services from the selected list of vendor.
Product Management
Products refer to the goods or services sold or procured by any organization.
Create Products | Associate Products | Customize Tax Rates
Price Book Management
Price Books refer to the agreed price for selling a product to a customer. Based on the
agreed terms, the prices can even vary for different customers.
Create Price Books | Associate Price Books | Set Discount
Vendor Management
Vendors are the companies, individuals or contractors from whom your organization
procures products and/or services.
Create Vendors | Associate Vendors
Quotes Management
Quotes are legal agreement between a customer and a vendor to deliver the
requested product within the specified time at the agreed price.
Create Quotes | Associate Quotes | Convert Quote
Zoho CRM – User Guide
91
Introduction
Sales Order Management
Sales Orders are confirmation of sales, generated after the customer sends a
purchase order based on your quotes.
Create Sales Orders | Associate Sales Orders
Purchase Order Management
Purchase Orders are legally bound order-placing document for procuring products or
services from vendors.
Create Purchase Orders | Associate Purchase Orders
Invoice Management
Invoices are bills issued by the vendor to the customers along with the
goods/services with the purpose of procuring payments.
Create Invoices | Associate Invoices
Zoho CRM – User Guide
92
CHAPTER 12
PRODUCT
MANAGEMENT
In This Section:
Create Products
Associate to Other Records
Product Management
CHAPTER 12
PRODUCT MANAGEMENT
Products can be either goods or services, which are sold or procured by your organization. In
Zoho CRM, you can manage your company- wide products that are sold to the customers as well
as procured from the vendors. Hence, both sales and purchasing departments can use the
Products module effectively according to their department process. In case your organization
procures products from vendors and sell to customers with a markup, both sales and purchase
departments can coordinate in a better way.
Sales department can use the products module along with other modules, such as leads, accounts,
potentials, quotes, Sales Orders, and Invoices where as purchasing department can use along
with Vendors and Purchase Orders. In general Product details page contains the product name,
manufacturer/reseller name, part numbers, sales start/end dates, support start/end dates, price,
stock position and others.
Availability
Enterprise
Professional
Free
YES
YES
NO
Editions
Permission
Required
Products Tab
In Zoho CRM, you can store product details by entering data in product detail form.
Create Products Individually
You can create individual products by:
Filling details in the product creation form.
Using Quick Create option; a quick create component present in the left pane of the
Products Home page.
Duplicating the products with few changes in the existing product details.
Zoho CRM – User Guide
94
Product Management
List of Standard Product-related Fields
Field Name
Description
Data Type
Product Name*
Specify the name of the product. This field
is mandatory.
Text box,
alphanumeric (50)
Product Code
Specify the product identification.
Text box,
alphanumeric (40)
Product Active
Specify the status of the product.
Check box
Commission Rate
Specify the commission rate for selling the
product.
Text box, decimal ()
Qty/Unit
Specify the quantity rate for selling the
product.
Decimal
Unit Price
Specify the unit price of the product.
Decimal
Manufacturer
Select the name of the product
manufacturer.
Pick list
Product Category
Select the category of the product.
Pick list
Purchase Date
Select the date of purchase from the
calendar.
Date
Support Start Date
Select the date on which the product
support starts.
Date
Support Expiry
Date
Select the date on which the product
support ends.
Date
Description
Specify any other details about product.
Text area
Zoho CRM – User Guide
95
Product Management
To create products individually
1. In the Products module, click New Product.
2. In the Create Product page, enter the product information.
3. Under Product Information, select the Product Active check box if you want the
newly created product to be active.
4. By default, the check box is selected.
5. Click Save.
Note: Only the active products are displayed in the list of products
To create products instantly
1. Click the Products tab.
2. On the left pane of the Home page, select Products from the Quick Create list.
3. Enter the relevant details.
4. Click Save.
To create duplicate products
1. In the Products tab, click a particular product that you want to be duplicated.
2. In the Product Details page, click Clone.
3. In the Clone Product page, modify the required details.
4. Click Save.
Associate Product with Other Records
You can create a 360-degrees view of the product to display all the associated details, such as
products, trouble tickets, open activities, history of the completed activities, attachments, and
notes.
To attach documents
This feature enables you to attach documents, spreadsheets and presentations to the products.
You can attach them in the following ways:
Attach from Desktop
Attach from Zoho Docs
Attach from Google Docs
Zoho CRM – User Guide
96
Product Management
To create leads
1. In the Product Details page, the existing lead details, if any, are displayed.
Click Name, Company, Email, Lead Source, or Status links to sort the
display order of the records.
Click the relevant Edit or Del link to modify or delete the leads respectively.
2. Click New.
3. Enter the lead details.
4. Click Save.
To create contacts
1. In the Product Details page, the existing contact details, if any, are displayed.
Click Contact Name, Email, Phone, Mobile, or Fax links to sort the display
order of the records.
Click the relevant Edit or Del link to modify or delete the contacts
respectively.
2. Click New.
3. Enter the contact details.
4. Click Save.
To create potentials
1. In the Product Details page, the existing potential details, if any, are displayed.
Click Potential Name, Amount, Stage, Probability (%), Closing Date, or
Type links to sort the display order of the records.
Click the relevant Edit or Del link to modify or delete the potentials
respectively.
2. Click New.
3. Enter the potential details.
4. Click Save.
To create accounts
1. In the Product Details page, the existing account details, if any, are displayed.
Click Account Name, Phone, Website, Account Type, Industry, or Annual
Revenue links to sort the display order of the records.
Zoho CRM – User Guide
97
Product Management
Click the relevant Edit or Del link to modify or delete the accounts
respectively.
2. Click New.
3. Enter the account details.
4. Click Save.
To create tasks or events
1. In the Product Details page, the existing task or event details, if any, are displayed.
Click Subject, Activity Type, Status, Due Date or Owner Name links to
sort the display order of the records.
Click the relevant Edit, Del, or Close link to modify, delete, or close the task
respectively.
2. Click New Task/New Event/Log a Call and specify the relevant details.
To create cases
1. In the Product Details page, the existing case details, if any, are displayed.
2. Click Subject, Case Reason, Email, Status, Priority, or case Type links to sort the
display order of the records.
3. Click the relevant Edit or Del link to modify or delete the cases respectively.
4. Click New.
5. Enter the case details.
6. Click Save.
To create solutions
1. In the Product Details page, the existing solution details, if any, are displayed.
Click Solution Title, Solution Number, Published, Status, or Number of
comments links to sort the display order of the records.
Click the relevant Edit or Del link to modify or delete the solutions
respectively.
2. Click New.
3. Enter the solution details.
4. Click Save.
Zoho CRM – User Guide
98
Product Management
To add price books
1. In the Potential Details page, the existing note details, if any, are displayed.
Click Title, Note Content, Modified Time, Created Time, or Owner Name
links to sort the display order of the records.
Click the relevant Edit or Del link to modify or delete the notes respectively.
2. Click New Note and do the following:
a. Enter the Title. It is mandatory.
b. The system displays the Owner Name. Click
to change the owner's name.
c. Enter the Note Content in the text box.
3. Click Save.
Customize Tax Rates
This feature enables you to manage taxes and the corresponding tax rates.
To customize tax rates
1. Click the Setup > Products Settings > Customize Tax Rates.
Figure 34: Add Tax
2. In the Customize Tax Rates page, by default the Tax Labels, namely Sales Tax and
VAT are displayed.
3. Enter the Tax Value for each Tax Label.
4. Click the Add Tax link to add more tax rates.
5. Click Save.
Zoho CRM – User Guide
99
CHAPTER 13
PRICE BOOK
MANAGEMENT
In This Section:
Create Price Books
Associate to Other Records
Price Book Management
CHAPTER 13
PRICE BOOK MANAGEMENT
Price Books are used for selling products at different prices, based on the agreement terms with a
particular type of customer. For each customer you can sell the same product at different prices.
There are two key prices in price books. One is Unit Price and the other is List Price.
Unit Price - It is a price fixed by the manufacturer for the product and which cannot be changed.
List Price - It is the sellers' price. The manufacturer/resellers may sell the product with different
prices to their resellers/customers. These variable prices for the same product are called as List
Prices.
Availability
Enterprise
Professional
Free
YES
YES
NO
Editions
Permission
Required
Price Books Tab
Note: While creating a potential you can select products only from a single price book.
Create Price Books
In Zoho CRM, you can store price book details by entering data in the Price Book form or
importing the data from external sources.
List of Standard Fields
In the Price Book Edit form, you need to specify the Price Book-related information. The
following table provides descriptions of the various fields in the form.
Field Name
Description
Data Type
Price book Owner
Select the price book owner from the
available users list
Lookup
Zoho CRM – User Guide
101
Price Book Management
Field Name
Description
Data Type
Price book Owner
Select the price book owner from the
available users list
Lookup
Price book Name*
Specify the name of the price book. This
field is mandatory.
Text box, alphanumeric
(50)
Pricing Model
Select type of pricing model as per your
requirement. You can select None, Flat
or Differential type discounts.
Pick list
Active
Select the check box to set the status of
the price book as active.
Check box
Description
Specify any other details about Price
Book.
Text box
Create Price Books Individually
You can create price books individually by:
Filling details in the price book creation form.
Using Quick Create option; a quick create component present in the left pane of the Price
Books Home page.
Duplicating the price book with few changes in the existing price book details.
To create price books individually
1. In the Price Books module, click New Price Book.
2. In the Create Price Book page, enter the price information.
3. Click Save.
Note:
By default, the person who creates the price book owns it.
To change owner, click the Change link in the Price Book Owner field and select another
user.
Zoho CRM – User Guide
102
Price Book Management
To create price books instantly
1. Click the Price Books tab.
2. On the left pane of the Home page, select Price Books from the Quick Create list.
3. Enter the relevant details.
4. Click Save.
To create duplicate price books
1. In the Price Books module, click a particular record that you want to be duplicate.
2. In the Price Books Details page, click Clone.
3. In the Clone Price Books page, modify the required details.
4. Click Save.
Set up Volume Discounts
While creating price book information, you have an option to choose your Pricing Model based
on your business requirement. You can choose from the following options:
No discount
Flat Discount
Differential Discount
To define the pricing model with no discount
1. In the Price Books module, click New Price Book.
2. In the Create Price Book page, enter a Price Book Name.
3. Select Pricing Model from the drop down list.
By default, the Pricing Model displayed is None.
4. Click Save.
To define the pricing model with Flat/Differential discount
1. In the Price Books module, click New Price Book.
2. In the Create Price Book page, enter a Price Book Name.
Zoho CRM – User Guide
103
Price Book Management
Figure 35: Flat/Differential Discount
3. Select Flat/Differential discount from the drop down list
4. In the Pricing Details section, enter the From Range, To Range and Discount (%).
5. Click Add to enter more slots of pricing details and discounts.
6. Click Save.
Zoho CRM – User Guide
104
Price Book Management
The chart below shows a comparative study of the Flat & Differential discounts:
Associate Price Book with Other Records
You can create a 360-degrees view of the product to display all the associated details, such as
products, trouble tickets, open activities, history of the completed activities, attachments, and
notes.
To attach documents
This feature enables you to attach documents, spreadsheets and presentations to the price
book. You can attach them in the following ways:
Attach from Desktop
Attach from Zoho Docs
Attach from Google Docs
To add products
1. In the Price Book Details page, the existing product details, if any, are displayed.
Click Product Name, Product Code, Product Active, Manufacturer,
Support Start Date, or Support Expiry Date links to sort the display order
of the records.
Click the relevant Del link to delete the record.
Zoho CRM – User Guide
105
Price Book Management
2. Click Add Product.
3. Select the check box(es) corresponding to the product.
Note, that the products will be available in the list only if you add them using the
Products module.
4. Click Add to Price Book.
Zoho CRM – User Guide
106
CHAPTER 14
VENDOR
MANAGEMENT
In This Section:
Create Vendors
Associate to Other Records
Vendor Management
CHAPTER 14
VENDOR MANAGEMENT
Vendors include companies, people, and contractors from which your company gets products
and services. They can be either direct manufacturers or resellers. In the Zoho CRM system
typical vendor selection process involves the following steps:
Evaluate your business needs and create requirements document (RFI/RFP).
Collect information about vendors from Trade Magazines, Yellow Pages,
Advertisements, referrals, and other channels.
Send RFI (request for information) to vendors and scrutinize the primary list of vendors
based on their response to your RFI.
Send RFP (request for proposals) to selected list of vendors.
Evaluate vendors based on the response to your RFP, conduct vendor interviews and
short-list the vendors.
Gather required information, such as product details, communication channel, product
delivery process and others from the short listed vendors.
In Zoho CRM - Vendors module, create vendor information, such as business address of
the vendor, contact information of the persons you are dealing with, products supplied /to
be supplied, purchase orders for the shipments, activities related to vendors and others. In
addition, you can also attach the important documents related to each vendor.
Periodically update the vendors' details and products purchased so that you can have a
better visibility on your vendors/suppliers for the future procurement.
Availability
Enterprise
Professional
Free
YES
YES
NO
Editions
Permission
Required
Vendors Tab
Create Vendors
In Zoho CRM, you can store vendor details by entering data in vendor details form.
In the Vendor Edit form, you need to specify the vendor details. The following table provides
descriptions of the various fields in the form.
Zoho CRM – User Guide
108
Vendor Management
List of Standard Vendor-related Fields
Field Name
Description
Data Type
Vendor Name*
Specify the name of the vendor. This field Text box, alphanumeric
is mandatory
(50)
Phone
Specify the phone number of the vendor
Text box, alphanumeric
(40)
E-mail
Specify the E-mail ID of the vendor
Check box
Website
Specify the Web site URL of the vendor
Text box, decimal ()
GL Account
Select the general ledger account
Pick List
Category
Specify the category of the vendor
Text box, alphanumeric
(40)
Vendor Address
Street
City
Specify the address of the vendor
State
Postal Code
Country
Description
Specify any other details about vendor
Text area (long text)
Create Vendors Individually
You can create vendors individually by:
Filling details in the vendor creation form.
Using Quick Create option; a quick create component present in the left pane of the
Vendors Home page.
Duplicating the vendor with few changes in the existing vendor details
To create vendors individually
1. In the Vendors module, click New Vendor.
Zoho CRM – User Guide
109
Vendor Management
2. In the Create Vendor page, enter the vendor details.
3. Click Save.
To create vendors instantly
1. Click the Vendors tab.
2. On the left pane of the Home page, select Vendors from the Quick Create list.
3. Enter the relevant details.
4. Click Save.
To create duplicate records of vendors
1. In the Vendors tab, click a particular vendor that you want to be duplicated.
2. In the Vendor Details page, click Clone.
3. In the Clone Vendor page, modify the required details.
4. Click Save.
Associate Vendor with Other Records
You can create a 360-degrees view of the vendor to display all the associated details, such as
products, activities, contacts, and purchase orders.
Products: To add products that are purchased from vendor
Purchase Orders: To create purchase orders for getting products from the vendors
Open Activities: To add new tasks and events.
Closed Activities: To track closed tasks and events.
Attachments: To add files to the vendor record.
Contacts: To add contacts related to vendors.
To attach documents
This feature enables you to attach documents, spreadsheets and presentations to the vendor.
You can attach them in the following ways:
Attach from Desktop
Attach from Zoho Docs
Attach from Google Docs
Zoho CRM – User Guide
110
Vendor Management
To add products
1. In the Vendor Details page, the existing product details, if any, are displayed.
Click Product Name, Product Code, Product Active, Manufacturer,
Support Start Date, or Support Expiry Date links to sort the display order
of the records.
Click the relevant Del link to delete the record.
2. Click New.
3. In the Create Products page, specify the product details.
4. Click Save.
To create tasks or events
1. In the Vendor Details page, the existing task or event details, if any, are displayed.
Click Subject, Activity Type, Status, Due Date or Owner Name links to
sort the display order of the records.
Click the relevant Edit, Del, or Close link to modify, delete, or close the task
respectively.
2. Click New Task/New Event/Log a Call and specify the relevant details.
Note: Once the activity is over, you can close the activity using the Close link.
To create purchase orders
1. In the Vendor Details page, the existing purchase order details, if any, are displayed.
Click Subject, Status, Tracking Number, Due Date, Excise Date, or Sales
Commission links to sort the display order of the records.
Click the relevant Edit or Del link to modify or delete the purchase orders
respectively.
2. Click New.
3. In the Create Purchase Orders page, specify the purchase order details.
4. Click Save.
To create contacts
1. In the Vendor Details page, the existing contact details, if any, are displayed.
Click Contact Name, Email, Phone, Mobile, or Fax links to sort the display
order of the records.
Zoho CRM – User Guide
111
Vendor Management
Click the relevant Edit or Del link to modify or delete the contacts
respectively.
2. Click New.
3. In the Create Contacts page, specify the contact details.
4. Click Save.
Zoho CRM – User Guide
112
CHAPTER 15
QUOTE
MANAGEMENT
In This Section:
Create Quotes
Associate to Other Records
Quote Management
CHAPTER 15
QUOTE MANAGEMENT
Sales Quotes are legally binding agreement between customer and vendor to deliver customer
requested products in a specified time-frame at a predefined price. Your customers can place
orders within the stipulated period (validity date) that has been specified in the quote otherwise
you may cancel the quote or send a new quote extending the time-frame. In general, Sales Quote
contains the Quote number, date, line items (products) including the quantities and prices based
on your Price Books, Terms & Conditions and others. In Zoho CRM you can create a quote
directly from the potential or from the account page.
Availability
Enterprise
Professional
Free
YES
YES
NO
Editions
Permission
Required
Quotes Tab
Create Quotes
In Zoho CRM, you can store quote details by entering data in quote details form.
In the Quote Edit form, you need to specify the quote details. The following table provides
descriptions of the various fields in the form.
List of Standard Quote-related Fields
Field Name
Description
Data Type
Quote Owner
Select the name of the user to whom the quote is
assigned.
Lookup
Subject*
Specify the name of the quote. This field is
mandatory.
Text box,
alphanumeric (50)
Potential Name
Specify the potential name for which the quote has Text box,
to be created.
alphanumeric (40)
Quote Stage
Specify the status of the quote.
Valid Till
Specify the date till the quote is valid after sending
Date
to the prospective customer.
Zoho CRM – User Guide
Check box
114
Quote Management
Field Name
Description
Data Type
Quote Owner
Select the name of the user to whom the quote is
assigned.
Lookup
Contact Name
Specify the contact to which the quote has to be
created.
Lookup
Team
Specify the team name
Text box
Carrier
Select the name of the carrier manufacturer.
Pick list
Account Name*
Specify the account name to which the quote has to
Lookup
be created.
Specify the billing address of the account or
contact to which the quote has to be sent. If you
Billing Address* have selected the account or contact, the
corresponding billing address is automatically
filled up.
Shipping
Address*
Text box,
alphanumeric (256)
Specify the shipping address of the account or
contact to which the shipment has to be sent. If you
Text box,
have already selected the account or contact, the
alphanumeric (256)
corresponding shipping address is automatically
filled up.
Product Details Specify the line items of the quote.
Product
Select the product name.
Lookup
Product
Description
Enter a description for the product
Text
Note for existing Users: This enhancement will
come into effect, only if you initially save the Edit
Page Layout for Quotes.
Click Setup > Quote Settings > Edit Page
Layout, and then click Save.
Quantity
Specify the number of units.
Numeric (Integer)
Unit Price
Displays the unit price of the product.
Alphanumeric
List Price
Select the product list price from Price Book or
specify the product price.
Numeric
Total
Displays the amount of the selected products.
Alphanumeric
Terms &
Conditions
Specify the terms and conditions that are
associated with quote.
Text area (32,000)
Description
Specify any other details about quote.
Text area (32,000)
Zoho CRM – User Guide
115
Quote Management
To create quotes
1. In the Quotes module, click New Quote.
2. In the Create Quotes page, enter the quotes details.
3. Click Save.
To create duplicate quotes
1. In the Quotes tab, click a particular quote that you want to be duplicated.
2. In the Quote Details page, click Clone.
3. In the Clone Quotes page, modify the required details.
4. Click Save.
Associate Quotes with Other Records
You can create a 360-degrees view of the quote to display all the associated details, such as sales
orders, open activities, and history of the completed activities.
Sales Orders: To display sales orders associated with quotes.
Open Activities: To add tasks and events related to quotes.
Closed Activities: To display the completed activities.
Attachments: To attach documents.
Emails: To view e-mail messages.
To attach documents
This feature enables you to attach documents, spreadsheets and presentations to the quotes.
You can attach them in the following ways:
Attach from Desktop
Attach from Zoho Docs
Attach from Google Docs
To create tasks or events
1. In the Quote Details page, the existing task or event details, if any, are displayed.
Click Subject, Activity Type, Status, Due Date or Owner Name links to
sort the display order of the records.
Click the relevant Edit, Del, or Close link to modify, delete, or close the task
respectively.
Zoho CRM – User Guide
116
Quote Management
2. Click New Task/New Event/Log a Call and specify the relevant details.
Note: Once the activity is over, you can close the activity using the Close link.
To create sales orders
1. In the Quote Details page, the existing sales order details, if any, are displayed.
2. Click Subject, Status, Customer No., Due Date, Excise Date, or Sales
Commission links to sort the display order of the records.
3. Click the relevant Edit or Del link to modify or delete the sales orders respectively.
4. Click New.
5. Enter the sales order details.
6. Click Save.
Convert Quote to Sales Order/Invoice
To convert quotes to sales order/Invoice
1. Click the Quotes tab.
2. In the Quotes Home page, select the required quote.
3. In the Quote Details page, click Convert, and then select Sales Order/Invoice.
The Sales Order/Invoice Details page will be displayed.
Zoho CRM – User Guide
117
CHAPTER 16
SALES ORDER
MANAGEMENT
In This Section:
Create Sales Orders
Associate to Other Records
Sales Order Management
CHAPTER 16
SALES ORDER MANAGEMENT
Sales Order is a confirmation document sent to the customers before delivering the
goods/services. Sales Order (SO) can be created once the quote is accepted by your prospective
customer (potential) and the Purchase Order (PO) is sent by the customer for further processing.
After receiving the PO, some of the customers may request SOs to know the exact date of
delivery of the goods/services. Also the inventory/production department looks at the list of
Sales Orders to see what needs to be shipped out and when. After the order is shipped and
delivered to the customer an invoice is generated from the sales order for billing purposes. In
general SO contains the SO number, date, line items (products) including the quantities and
prices based on PO, Billing address, Shipping address, Terms & Conditions and others.
Availability
Enterprise
Professional
Free
YES
YES
NO
Editions
Permission
Required
Sales Order Tab
Create Sales Orders
In Zoho CRM, you can store sales order details by entering data in sales order details form.
In the Sales Order Edit form, you need to specify the sales order-related information. The
following table provides description of the various fields in the form.
List of Standard Sales Order-related Fields
Field Name
Subject*
Potential Name
Customer No
Purchase Order
Quote Name
Description
Specify the name of the sales order. This
field is mandatory.
Select the potential for which the sales
order has to be generated.
Specify the customer identification
number (if any)
Select the reference purchase order.
Select the reference quote.
Zoho CRM – User Guide
Data Type
Text box, alphanumeric
(50)
Select option
Text box, alphanumeric
(50)
Text box
Select option
119
Sales Order Management
Field Name
Description
Data Type
Contact Name
Select the contact for which the sales
order has to be generated.
Select option
Due Date
Select the date
Date
Carrier
Select the carrier’s name that ships the
products from your warehouse to
customer site.
Pick list
Text box, alphanumeric
(50)
Pending
Status
Specify the status of the sales order.
Check box
Sales Commission
Specify the commission to the sales
person upon closing the deal.
Numeric (float)
Excise Duty
Specify the excise duty for the shipment Text box, numeric
Account Name*
Specify the account name to which the
sales order has to be created.
Select option
Assigned To
Select the Zoho CRM user name to
whom the sales order handling duty is
assigned.
Select option
Specify the billing address of the account
or contact to which the sales order has to
Text box, alphanumeric
Billing Address * be sent. If you have selected the account
(256)
or contact the billing address is
automatically filled up.
Specify the shipping address of the
account or contact to which the shipment
Text box, alphanumeric
Shipping Address has to be sent. If you have already
selected the account or contact the
(256)
*
shipping address is automatically filled
up.
Product Details
Specify the line items of the sales order.
Product *
Select the product name.
Zoho CRM – User Guide
Select option
120
Sales Order Management
Field Name
Description
Data Type
Product Description Enter a description for the product
Text
Note For Existing Users: This
enhancement will come into effect, only
if you initially save the Edit Page Layout
for Sales Orders.
Click Setup > Sales Order
Settings > Edit Page Layout, and
then click Save.
Quantity in Stock
Displays the stock quantity..
Numeric (Integer)
Quantity*
Specify the quantity for which the sales
order has to be generated
Numeric (Integer)
Unit Price
Displays the unit price of the product.
Currency
List Price*
Select the product list price from Price
Book or specify the product price.
Lookup and Numeric
(Integer)
Tax
Specify the tax component of the
products
Currency
Adjustments
Specify if there are any adjustments, such
Currency
as discounts, or extra charges etc.
Total
Displays the amount of the selected line
Currency
item.
Terms &
Conditions
Specify the terms and conditions that are
Text area (long text)
associated with sales order.
Description
Specify any other details about sales
order.
Text area (long text
To create sales orders
1. In the Sales Orders module, click New Sales Order.
2. In the Create Sale Orders page, enter the details.
3. Click Save.
Zoho CRM – User Guide
121
Sales Order Management
To create duplicate sales order
1. In the Sales Orders tab, click a particular sales order that you want to be duplicated.
2. In the Sale Order Details page, click Clone.
3. In the Clone Sale Orders page, modify the required details.
4. Click Save.
Associate Sales Order with Other Records
You can associate the sales order with other records such as, activities, attachments and notes.
To attach documents
This feature enables you to attach documents, spreadsheets and presentations to the sales
orders. You can attach them in the following ways:
Attach from Desktop
Attach from Zoho Docs
Attach from Google Docs
To create tasks or events
1. In the Sales Order Details page, the existing task or event details, if any, are
displayed.
Click Subject, Activity Type, Status, Due Date or Owner Name links to
sort the display order of the records.
Click the relevant Edit, Del, or Close links to modify, delete, or close the task
respectively.
2. Click New Task/New Event/Log a Call and specify the relevant details
Note: Once the activity is over, you can close the activity using the Close link.
To create invoices
1. In the Sales Order Details page, the existing invoice details, if any, are displayed.
Click Subject, Status, Invoice Date, Due Date, Excise Duty, or Sales
Commission links to sort the display order of the records.
Click the relevant Edit or Del link to modify or delete the invoices
respectively.
2. Click New.
Zoho CRM – User Guide
122
Sales Order Management
3. Enter the invoice details.
4. Click Save.
Zoho CRM – User Guide
123
CHAPTER 17
PURCHASE ORDER
MANAGEMENT
In This Section:
Create Purchase Orders
Associate to Other Records
Purchase Order Management
CHAPTER 17
PURCHASE ORDER MANAGEMENT
Purchase Order is an order placed for procuring products or services from your short listed
vendors. It is a legal binding document that protects interests of both vendor and buyers, which
can be used as legal binding document for both parties. In general, PO contains the PO number,
date, line items (products) including the quantities and prices based on Sales Quote, Billing
address, Shipping address, Terms & Conditions and others.
You can use the PO for communicating your product and pricing requirements to vendors so that
there will not be any obligations in future. Also, you can use the PO to cross-check the products
shipped to your shipping address and invoices sent to your billing address. In addition, your
vendor can use PO as legal document in the event of nonpayment in a court of law for claiming
damages from your side.
Availability
Enterprise
Professional
Free
YES
YES
NO
Editions
Permission
Required
Purchase Order Tab
Create Purchase Orders
In the Zoho CRM system, you can store purchase order details by entering data into the Purchase
Order form.
In the Purchase Order Edit form, you need to specify the purchase order-related information. The
following table provides descriptions of the various fields in the form.
List of Standard Purchase Order-related Fields
Field Name
Description
Data Type
Subject*
Specify the name of the purchase order.
This field is mandatory.
Text box,
alphanumeric (50)
Sales Order
Select the reference Sales order.
Select option
Customer No
Specify the customer identification number Text box,
(if any)
alphanumeric (50)
Zoho CRM – User Guide
125
Purchase Order Management
Field Name
Description
Data Type
Purchase Order Date
Specify the date on which purchase order is
Date
created.
Due Date
Select the due date.
Sales Commission
Specify the commission to the sales person
Numeric (float)
upon closing the deal.
Account Name *
Specify the account name to which the
purchase order has to be created.
Select option
Status
Specify the status of the purchase order.
Check box
Account Name *
Specify the account name to which the
purchase order has to be created.
Select option
Assigned To*
Select the Zoho CRM user name to whom
the purchase order handling duty is
assigned.
Select option
Billing Address *
Specify the billing address of the account or
contact to which the purchase order has to
Text box,
be sent. If you have selected the account or
alphanumeric (256)
contact the billing address is automatically
filled up.
Date
Specify the shipping address of the account
or contact to which the shipment has to be
Text box,
Shipping Address * sent. If you have already selected the
alphanumeric (256)
account or contact the shipping address is
automatically filled up.
Product Details
Product
Specify the line items of the purchase order.
Select the product name.
Select option
Product Description Enter a description for the product
Text
Note for Existing Users: This enhancement
will come into effect, only if you initially
save the Edit Page Layout for Purchase
Orders.
Click Setup > Purchase Order
Settings > Edit Page Layout, and
then click Save.
Quantity
Specify the number of units.
Unit Price
Displays the unit price of the product.
List Price
Select the product list price from Price
Book or specify the product price
Zoho CRM – User Guide
Numeric (Integer)
Lookup and Numeric
(Integer)
126
Purchase Order Management
Field Name
Description
Data Type
Total
Displays the amount of the selected
products.
Terms & Conditions
Specify the terms and conditions that are
associated with purchase order.
Text area
Description
Specify any other details about purchase
order.
Text area
To create purchase orders
1. In the Purchase Orders module, click New Purchase Order.
2. In the Create Purchase Order page, enter the related information.
3. Click Save.
Associate Purchase Order with Other Records
By default, you can associate the purchase order with other records such as, activities,
attachments, and notes.
To attach documents
This feature enables you to attach documents, spreadsheets and presentations to the purchase
order. You can attach them in the following ways:
Attach from Desktop
Attach from Zoho Docs
Attach from Google Docs
To create tasks or events
1. In the Purchase Order Details page, the existing task or event details, if any, are
displayed.
Click Subject, Activity Type, Status, Due Date or Owner Name links to
sort the display order of the records.
Click the relevant Edit, Del, or Close link to modify, delete, or close the task
respectively.
2. Click New Task/New Event/Log a Call and specify the relevant details
Note: Once the activity is over, you can close the activity using the Close link.
Zoho CRM – User Guide
127
CHAPTER 18
INVOICE
MANAGEMENT
In This Section:
Create Invoices
Associate to Other Records
Invoice Management
CHAPTER 18
INVOICE MANAGEMENT
Once the sales stage reaches to final stage you may start working on payment procedure. In this
regard Invoice plays a vital role, which is very important for both Sales and Accounting
purposes. Invoice is a bill issued by the vendor to the customers along with the goods/services
shipment. It usually contains reference number of Purchase Order, Date, Billing Address,
Shipping Address, Terms of Payment, Line Items (products/services) with quantities and prices,
and others. In a typical organization, invoicing completes the sales process and begins the
accounting process where account receivable is managed by Accounts/Finance teams.
In Zoho CRM, you can create invoices directly from the Potentials, Accounts, Quotes, or Sales
Order.
Availability
Enterprise
Professional
Free
YES
YES
NO
Editions
Permission
Required
Invoice Tab
Create Invoices
In Zoho CRM, you can create invoices by entering data in the Invoice details form.
In the Invoice Edit form, you need to specify the invoice-related information. The following
table provides descriptions of the various fields in the form.
List of Standard Invoice-related Fields
Field Name
Description
Data Type
Subject*
Specify the name of the invoice. This field is
mandatory.
Text box, alphanumeric
(50)
Sales Order
Select the reference Sales order (if any).
Lookup
Customer No
Specify the customer identification number (if Text box, alphanumeric
any).
(50)
Zoho CRM – User Guide
129
Invoice Management
Field Name
Description
Data Type
Invoice Date
Specify the date on which the invoice is
created.
Date
Due Date
Specify the invoice due date as per your
payment terms.
Date
Sales
Commission
Specify the commission to the sales person
upon closing the deal.
Numeric (float)
Account Name *
Specify the account name to which the invoice
Lookup
has to be created.
Status
Specify the status of the invoice.
Account Name *
Specify the account name to which the invoice
Lookup
has to be created.
Assigned To*
Select the Zoho CRM user name to whom the
Lookup
invoice handling duty is assigned.
Specify the billing address of the account or
Billing Address contact to which the invoice has to be sent. If
*
you have selected the account or contact the
billing address is automatically filled up.
Shipping
Address *
Check box
Text box, alphanumeric
(256)
Specify the shipping address of the account or
contact to which the shipment has to be sent. If
Text box, alphanumeric
you have already selected the account or
(256)
contact the shipping address is automatically
filled up.
Product Details Specify the line items of the invoice.
Product*
Select the product name.
Lookup
Product
Description
Enter a description for the product
Text
Note For Existing Users: This enhancement
will come into effect, only if you initially save
the Edit Page Layout for Invoices.
Click Setup > Invoice Settings > Edit Page
Layout, and then click Save.
Zoho CRM – User Guide
130
Invoice Management
Field Name
Description
Data Type
Quantity
Specify the number of units.
Numeric (Integer)
Unit Price
Displays the unit price of the product.
Currency
List Price*
Select the product list price from Price Book or Lookup and Numeric
specify the product price
(Integer)
Total
Displays the amount of the selected products. Currency
Terms &
Conditions
Specify the terms and conditions that are
associated with invoice.
Text area (32 KB)
Description
Specify any other details about invoice.
Text area (32 KB)
Create Invoice Individually
You can create invoices individually by:
Filling details in the invoice creation form.
Duplicating the invoices with few changes in the existing invoice details.
To create invoices individually
1. In the Invoices module, click New Invoice.
2. In the Create Invoice page, enter the invoice details.
3. Click Save.
To create duplicate invoices
1. In the Invoices tab, click a particular invoice that you want to be duplicated
2. In the Invoice Details page, click Clone.
3. In the Clone Invoice page, modify the required details.
4. Click Save.
Associate Invoices with Other Records
You can associate invoice with the other records such as, activities, attachments and notes.
Zoho CRM – User Guide
131
Invoice Management
To attach documents
This feature enables you to attach documents, spreadsheets and presentations to the invoices.
You can attach them in the following ways:
Attach from Desktop
Attach from Zoho Docs
Attach from Google Docs
To create tasks or events
1. In the Invoice Details page, the existing task or event details, if any, are displayed.
Click Subject, Activity Type, Status, Due Date or Owner Name links to
sort the display order of the records.
Click the relevant Edit, Del, or Close link to modify, delete, or close the task
respectively.
2. Click New Task/New Event/Log a Call and specify the relevant details
Note: Once the activity is over, you can close the activity using the Close link.
Zoho CRM – User Guide
132
PART IV
CUSTOMER SUPPORT
In This Section:
Customer Support in ZCRM
CHAPTER 19
INTRODUCTION
In This Section:
Introduction to Customer Support
Introduction
CHAPTER 19
INTRODUCTION
Zoho CRM provides the Customer Support & Service management (Help Desk) features, such as
Cases (Trouble tickets), Solutions (Knowledge base), Case Routing & escalation through
Workflow rules, and easy to deploy Web-to-Case forms for capturing customer-specific cases
through Websites. In addition, you can also synchronize customer-specific e-mail messages as
Cases from Microsoft Outlook mail client to Cases module in Zoho CRM.
Cases and Solutions functionality can be used to streamline organization-wide Customer Support
process and enable a better integration between Sales & Customer Support processes in a single
system. Integration between Sales and Post-sales support management helps organizations in
resolving the customer reported cases in a least possible time, thereby enhance the customer
satisfaction and more cross-selling and up-selling opportunities in future.
Case Management
Cases refer to the feedback received from the customers on various issues
pertaining to the use of products or services.
Create Cases | Associate Cases | Approve Cases | Case Assignment Rules |
Case Escalation Rules
Solution Management
Solutions refer to the resources within the organization that enables solving
repetitive problems encountered by customers.
Create Solutions | Associate Solutions
.
Zoho CRM – User Guide
135
CHAPTER 20
CASE
MANAGEMENT
In This Section:
Create Cases
Associate to Other Records
Approve Cases
Assignment Rules
Escalation Rules
Case Management
CHAPTER 20
CASE MANAGEMENT
In the world of Internet, online Customer Support has became an integral part of the
organizations' business process. Customer Support is becoming an important activity in retaining
all types of products and service industries. In general, case trouble tickets are used to capture the
customer feedback on various types of problems that arise after purchasing product/service from
your company. Sometimes customers may provide some good feature requests that may be
useful during future product/service enhancements.
Availability
Enterprise
Professional
Free
YES
YES
YES
Editions
Permission
Required
Cases Tab
Typical Case Management Process
1. Customize the fields in Case page according to your organization's Customer Support
process (You may use the existing fields, disable some of the fields, or add new
custom fields).
2. Setup case generation process by filling the Case form, importing case data from
external sources, or capturing cases directly from Website using Web-to-Case form.
3. Assign cases to the correct users using the workflow rules.
4. Follow-up cases till resolutions are sent to the customers.
5. Once the resolution is working fine, add the solution to the publicly accessible
Solutions module for future reference.
In Zoho CRM, cases can be generated through telephone, E-mail, or Website. In addition, you
can also generate cases from customer specific e-mails in Microsoft Outlook using the Zoho
CRM Outlook Edition.
Create Cases
In the Zoho CRM system, you can create cases by:
Zoho CRM – User Guide
137
Case Management
Entering data manually into case details form
Importing cases from external sources
Capture cases from Website through Web-to-Case form
Adding customer-specific e-mail message as case from Microsoft Outlook to Cases
module
In the Case Edit form, you need to specify the case details. The following table provides
descriptions of the various fields in the form.
List of Standard Case-related Fields
Field Name Description
Data Type
Case
Number
Displays the case ID after creating a case.
Numeric
Case Owner
Select the name of the Zoho CRM user to whom
Lookup
the Case is assigned.
Subject*
Specify the title of the Case. This field is
mandatory.
Text box, Alphanumeric
(255)
Priority
Select the priority of the Case from the dropdown list.
Pick list
Status
Select the status of the Case from the drop-down
Pick list
list.
Reported
By
Displays the name of the contact.
Related To
Select the name of the contact who submitted the
Lookup
Case.
Type
Select the type of problem. It can be a general
question, feature request, or a real issue in your
product/service.
Pick list
Select the source from which the case has been
generated. You can select Email, Phone, or
Case Origin
Website. If you select Email, you must specify
the Email ID of the customer.
Pick list
Zoho CRM – User Guide
-
138
Case Management
Field Name Description
Data Type
Email
Specify the Email ID of the contact.
Email
Phone
Specify the phone number of the customer
Textbox
Case
Reason
Specify the reason for the case
Pick list
No of
comments
Displays the number of comments submitted
during case resolution.
-
Potential
Name
Displays the potential name
Description Specify complete details about the case.
Text Area (32 KB)
Comments
Text Area (32 KB)
Specify follow-up notes about case.
Create Cases Individually
To create cases
1. In the Cases module, click New Case.
2. In the Create Case page, enter the case details.
3. Click Save.
To create cases instantly
1. Click the Cases tab.
2. On the left pane of the Home page, select Cases from the Quick Create list.
3. In the pop up window, enter the relevant details.
4. Click Save.
To create duplicate cases
1. Click the Cases tab, click a particular case that you want to be duplicated.
2. In the Case Details page, click Clone.
3. In the Clone Case page, modify the required case details.
Zoho CRM – User Guide
139
Case Management
4. Click Save.
Note:
Before importing cases into Zoho CRM, you must have the case details in a CSV/XLS
file.
You must have privilege to import the cases in Zoho CRM.
Before importing the cases into Zoho CRM close the CSV/XLS file and the Spreadsheet
program.
Remove apostrophe from any place in the CSV file (For example, ABC's).
You can import a maximum of 1000 cases in one import cycle.
Associate Case with Other Records
You can create a 360-degrees view of the Case to display all the associated details, such as
potentials, cases, open activities, history of the completed activities, attachments, and notes.
To attach documents
This feature enables you to attach documents, spreadsheets and presentations to the cases.
You can attach them in the following ways:
Attach from Desktop
Attach from Zoho Docs
Attach from Google Docs
To add notes
1. In the Case Details page, the existing note details, if any, are displayed.
Click Title, Note Content, Modified Time, Created Time, or Owner Name
links to sort the display order of the records.
Click the relevant Edit or Del link to modify or delete the notes respectively.
2. Click New Note and do the following:
a. Enter the Note Title. It is mandatory.
b. The system displays the name of the lead's Owner. Click
to change the
owner's name.
c. Enter the Note Content in the text box.
3. Click Save.
Zoho CRM – User Guide
140
Case Management
To create tasks or events
1. In the Case Details page, the existing task or event details, if any, are displayed.
Click Subject, Activity Type, Status, Due Date or Owner Name links to
sort the display order of the records.
Click the relevant Edit, Del, or Close link to modify, delete, or close the task
respectively.
2. Click New Task/New Event/Log a Call and specify the relevant details.
Note: Once the activity is over, you can close the activity using the Close link.
Approve Cases Captured through Website
By default, cases captured through Website are assigned to one of the Customer Support
Administrator who can update the cases with additional information and assign to the
corresponding Support Agent in your organization. It will allow your Support Agents focus
mainly on the cases assigned to them.
Availability
Enterprise
Professional
Free
YES
YES
YES
Editions
Permission
Required
Approve Web-to-Cases
To approve cases from Website
1. Click the Cases tab.
2. In the Cases Home page, under Case Tools section, and click the Approve Cases
link.
3. In the Case Approval page, select the cases for approval.
4. Click Approve.
Set up Case Assignment Rules
You can setup case assignment rules based on your organization-wide case distribution (based on
product support) process so that cases generated through import tool are automatically assigned
to the respective support agents.
Zoho CRM – User Guide
141
Case Management
Availability
Enterprise
Professional
Free
YES
YES
NO
Editions
Permission
Required
Manage Cases Assignment Rules
Case Assignment Workflow
1. Create case assignment rule.
2. Associate rule entries to the assignment rule, which contains matching criteria,
selecting user, and adding default workflow task.
3. Select the required assignment rule in "case import tool"
4. During case importation, first assignment rule is evaluated and the cases are assigned
to the Zoho CRM users according to the matching criteria.
Limitations
You can create up to 20 different case assignment rules.
In each assignment rule, you can associate up to 20 different criteria.
Though you set multiple rules, users can select only one rule at a time.
Case assignment rule can be used only for the cases generated through import tool
and Web-to-Case form. You cannot assign cases to users if you are creating
manually.
To set up case assignment rules
1. Click Setup > Case Settings > Assignment Rules.
2. In the Case Assignment Rules page, click Create New Rule.
3. In the New Rule page, enter the Rule Name, and then click Save.
Zoho CRM – User Guide
142
Case Management
Figure 36: New Rule
4. Click Create Rule Entry.
5. In the Rule Entry page, do the following:
Specify Criteria: Select the matching criteria to evaluate the rule.
Select User: Select the user to whom the contact has to be assigned.
Add Task: Select the workflow task to be assigned.
6. Click Save.
Set up Case Escalation Rules
It often happens that the cases are not attended by the person to whom it is assigned. This option
enables you to configure an escalation rule by which the cases are escalated to the other members
in operational hierarchy, depending on the distribution rules of an organization.
Zoho CRM – User Guide
143
Case Management
Notes:
At a time, you can activate only ONE Escalation Rule.
If a newly created rule is set as active then the existing active rule will get deactivated.
Availability
Enterprise
Professional
Free
YES
NO
NO
Editions
Permission
Required
Configure Cases Escalation
To set the Case Escalation Rule
Enable the Escalation Scheduler
Set up Case Escalation Rule
Create Rule Entry
Define Escalation Action for the Rule Entry
Part 1 - Enable the Escalation Scheduler
The Escalation Scheduler should be enabled prior to creating the Case Escalation Rule.
1. Click Setup > Case Settings > Case Escalation Rules.
2. In the Case Escalation Rules page, click Enable Escalation Scheduler.
Note: To disable Case Escalation Scheduler, click the Close link in the Case Escalation Rules
page.
Part 2 - Create Case Escalation Rule
1. Click Setup > Case Settings > Case Escalation Rules.
2. In the Case Escalation Rule Name page, click New Case Escalation Rule.
3. In the Create Case Escalation Rule Name page, enter the Case Escalation Rule
Name.
4. Select the Active check box.
5. Click Save.
Note:
Activating any Rule, automatically deactivates the existing active Rule
Zoho CRM – User Guide
144
Case Management
After creating case escalation rule, you need to create the rule entry.
Part 3 - Create Rule Entry
1. Click Setup > Case Settings > Case Escalation Rules
2. In the Case Escalation Rule Name page, select the case escalation rule name from the
list.
Click Rename or Del link to rename or delete the corresponding rule
respectively.
3. Click Create Rule Entry.
4. In the Rule Entry page, specify the criteria for the rule.
5. In the Rule Entry details, do the following:
6. Select your organization's Business Hours.
Note, that you should have already defined the business hours.
7. Select the option from the list based on which the Escalation Time is set.
8. Click Save.
Note: Once the Rule Entries are created, you can click Reorder and specify the escalation order
of the rules.
Part 4 - Define Escalation Action for the Rule Entry
1. In the Case Escalation Rule page, click the Rule Entries' criteria from the list.
2. In the Rule Entry page, the rule entry details are displayed.
3. Click New Escalation Action.
4. In the New Escalation Action page, do the following:
a. Select the Age of Escalation Actions from the list.
b. Select the person to whom the case needs to be escalated from the Escalate To
pick list.
c. Select the Escalate Template from the list.
d. Select the owner for the escalation case from the pick list.
e. Select the e-mail template from the list used to Notify Assignee.
f. Enter the Additional Emails, if any.
5. Click Save.
Zoho CRM – User Guide
145
CHAPTER 21
SOLUTION
MANAGEMENT
In This Section:
Create Solutions
Associate to Other Records
Solution Management
CHAPTER 21
SOLUTION MANAGEMENT
Over a period, direct customer support helps your organization to build a rich knowledge base
for future reference. Knowledge Base in the form of solutions (also called as articles or
frequently asked questions) enables your organization in solving the repetitive problems
encountered by customers with limited resources. Solutions module integrated with Cases is very
useful for organizations that are mainly focusing on post-sales support, particularly technology
and knowledge-based industries.
Availability
Enterprise
Professional
Free
YES
YES
YES
Editions
Permission
Required
Solutions Tab
Create Solutions
In Zoho CRM, you can create solutions by:
Entering data in solution details form
Duplicating the solution with few changes from the existing details
Importing solutions from other applications
In the Solutions Edit form, you need to specify the solutions details. The following table
provides descriptions of the various fields in the form.
List of Standard Solutions Fields
Field Name
Description
Data Type
Solution
Title*
Specify the subject of the solution.
Solution
Owner
Select the Zoho CRM user's name to which the
Pick list
solution is assigned.
Status
Select the status from the list
Pick list
Product
Select the name of the product to which the
Lookup
Zoho CRM – User Guide
Text box,
Alphanumeric (255)
147
Solution Management
Field Name
Description
Name
solution has to be associated.
Data Type
Question*
Specify the Question.
Text box
Answer*
Specify solution details.
Text box
Note:
You can add comments only in the edit mode.
The Add Comment field will not be available while creating the solution.
Create Solutions Individually
To create solutions individually
1. Click the Solutions tab, click New Solution.
2. In the Solutions Home page, enter the solution details.
3. Click Save.
To create solutions instantly
1. Click the Solutions tab.
2. On the left pane of the Home page, select Solutions from the Quick Create list.
3. Enter the relevant details.
4. Click Save.
To create duplicate solutions
1. Click the Solutions tab, click a particular solution that you want to be duplicated.
2. In the Solution Details page, click Clone.
3. In the Clone Solution page, modify the required solution details.
4. Click Save.
Note:
Use the CSV/XLS file format.
The import file should contain the header column to map the data with Zoho CRM.
Zoho CRM – User Guide
148
Solution Management
Disable the Sort filter in import file (In import file, disable the filter option by Data à
Filter à AutoFilter).
Before importing the solutions into Zoho CRM close the import file and the
corresponding Spreadsheet program.
Remove apostrophe if present anywhere in the import file.
You can import a maximum of 1000 solutions in one import cycle.
Attach Documents to the Solution
You can attach additional documents to the solution.
To attach documents
This feature enables you to attach documents, spreadsheets and presentations to the solution.
You can attach them in the following ways:
Attach from Desktop
Attach from Zoho Docs
Attach from Google Docs
Zoho CRM – User Guide
149
PART V
DATA ANALYTICS
In This Section:
Data Analytics in ZCRM
CHAPTER 22
INTRODUCTION
In This Section:
Introduction to Data Analytics
Reports & Dashboards
CHAPTER 22
REPORTS & DASHBOARDS
Zoho CRM enables fully customizable reports in all the modules with more flexible options,
such as cross-linking modules, arithmetic operations, different types of layouts, 3-level column
grouping, public/private folders, scheduling reports generation and delivering to the intended
users including non-Zoho CRM users through e-mail. In addition, 40 plus standard reports are
packed in various modules, which can be used as a ready reference and enhance the learning
experience.
Dashboards give a real-time snapshot of your organization's key metrics. Using dashboards you
can easily visualize comparisons, patterns, and trends in sales, marketing, support, and inventory
related data. The Zoho CRM solution dashboard comprises of different types of twodimensional/three-dimensional (2D/3D) charts, which are generated dynamically built over the
Macromedia Flash technology. The unique chart is the Funnel chart, which can be used to
visualize the sales pipeline at various stages intuitively.
Reports
Presentation of data or records for various modules as per requirement.
Create Reports | Create Report Folders | Schedule Reports | Export Reports
Dashboards
A pictorial representation of your custom report data, which gives a real-time
snapshot of your organization's key metrics.
Create Dashboards | Create Dashboard Folders | Create Charts
Zoho CRM – User Guide
152
CHAPTER 23
REPORTS
In This Section:
Create Reports
Schedule Reports
Delete Reports
Export Reports
Reports
CHAPTER 23
REPORTS
Zoho CRM reports are the detailed and informative list of records. Each report provides access to
important data required for various purposes. In Zoho CRM, standard reports are provided in
various modules, which can be either used as it is or customized further as per your business
requirements.
Availability
Enterprise
Professional
Free
YES
YES
YES
Editions
Permission
Required
Reports Tab
View Reports
Zoho CRM provides more than 40 different standard reports for the users' benefit. These reports
are distributed across different modules in Zoho CRM. You can use the standard reports or
customize them as per your business requirements.
List of standard Reports
Report Name
Description
Account and
Contact Reports
Contact Mailing
List
Display the list of contact address details.
Key Accounts
Displays the accounts that give you more sales revenue.
Accounts by
Industry
Displays the accounts from various industries.
Potential Reports
Pipeline by Stage
Displays the potentials by their stage.
Potentials Closing
by this Month
Displays the potentials that are closing during the current month.
Zoho CRM – User Guide
154
Reports
Report Name
Description
Sales Person's
Displays the potentials gained by each sales person.
Performance Report
Lost Potentials
Displays the potentials that are lost.
Potentials by Type
Displays the potentials by their type.
Open Potentials
Displays the potentials that are pending.
Pipeline by
Probability
Displays the pipeline of the potentials by their probability.
Sales By Lead
Source
Displays the sales from various lead sources.
This Month Sales
Displays the sales that has happen during current month.
Today's Sales
Displays the sales that has happen today.
Stage Vs Potential
Type Report
Displays the sales vs potentials report
Lead Reports
Leads By Source
Displays the leads from various sources.
Leads By Status
Displays the leads and their status.
Today's Leads
Displays the leads that are created today.
Leads by
Ownership
Displays the leads and the corresponding owners.
Converted Leads
Displays the leads that are converted into Account / Potential /
Contact.
Leads by Industry
Displays the leads from various vertical industries.
Activity Reports
Tasks and Events
Report
Displays the list of all the tasks and events.
Today's Calls
Displays the list of current day's inbound and outbound calls.
Campaign Reports
Campaigns
Revenue Report
Display the revenue generated from the campaign.
Campaign Leads
Displays the leads that are generated through the campaign.
Zoho CRM – User Guide
155
Reports
Report Name
Description
Case & Solution
Reports
Popular Solutions
Displays the number of comments for solutions.
Cases By Origin
Displays the cases based upon their origin.
Cases By Status
Displays the cases based upon their status.
Cases By Priority
Displays the cases based upon their priorities.
Cases By
Comments
Displays the cases with the number of comments count.
Sales Forecast
Reports
Quarterly Forecast
Summary
Displays the quarterly forecasts that includes committed amounts,
best-case amounts, and pipeline by quarter.
Forecast History
Report
Displays the life cycle of the forecast.
Product Reports
Products by
Category
Displays the products based upon their category.
Products by
Support
Termination date
Displays the products list whose support discontinued during the
current month.
Products by Cases
Display the products and with the list of cases associated with the
products.
Vendor Reports
Amount by
Vendors
Displays the vendors based on the amount
Vendors Vs
Purchases
Displays the vendors based on the purchases made from the
vendors.
Quote Reports
Quotes by Accounts Displays the quotes based on accounts.
Quotes by Stage
Displays the quotes based on their stages.
Sales Order
Zoho CRM – User Guide
156
Reports
Report Name
Description
Reports
Sales Orders by
Accounts
Displays the sales orders based on accounts.
Sales Orders by
Status
Displays the sales orders based on their status.
Sales Orders by
Owner
Displays the sales orders based on their owners.
Purchase Order
Reports
Contacts Vs
Purchases
Displays the contacts based on purchases.
Purchase Orders by
Status
Displays the purchase orders based on their status.
Invoice Reports
Invoices by
Accounts
Displays the invoices based on their accounts.
Invoices by Status
Displays the invoices based on their status.
Note: You cannot delete the above standard reports.
To access standard reports in Reports tab click the specific report (For example, Contact Mailing
List from the Accounts & Contacts Reports) from the Reports folder (for example, Accounts &
Contacts Reports, Potentials reports, and others).
To view the report
1. Click the Reports tab.
2. In the Reports Home page, click the required reports' group.
Zoho CRM – User Guide
157
Reports
Figure 37: New Report
3. From the list of reports that are displayed, click the required report's link.
4. Click the Customize link next to the report to customize the report.
Figure 38: Customize Report
5. In the Reports page, you can do the following:
Export: Use this option to export and save the report in Excel, PDF, or CSV
format in your local disk.
Save As: Use this option to save the report with a new name. This option is
useful when you filter a specific set of data and save it for future reference.
Customize: This feature is used to customize the report with regards to the
report types, columns, grouping, filter criteria in the report, etc.
Reload: Use this option to update or refresh the contents of the page.
Zoho CRM – User Guide
158
Reports
Hide Details/Show Details: Click Hide Details to hide the details of the
report and click Show Details to see the hidden details of the report.
Create Chart: This feature enables you to create charts, (such as Bar
diagrams, Pie charts, Line charts, Funnel charts) based on the selected report
details.
6. Do one of the following, and then click Apply Filter to view reports based on the
filter options specified:
Select Last Created Time or Last Modified Time from the Column list.
Select the option from the adjacent list. (Next FQ, for example).
On selecting this option, the system will automatically display the Start and
End date in the respective boxes.
Enter the Start Date and the End Date in mm/dd/yyyy format, or select the
date from the calendar displayed.
Note:
FQ refers to Financial Quarter and FY refers to the Financial Year.
You can view a maximum of 2000 records in a report.
Create Reports
You can create new module-specific reports linking some of the other cross-functional modules.
For example, you can create a report in accounts module linking other modules such as Contacts,
Potentials, Quotes, and others.
List of Primary modules and the related Secondary modules
In the Create Report form, you need to specify the primary module and the related secondary
modules (optional). The following table provides various primary modules and the related
secondary modules.
Primary Module
Secondary Modules
Leads
None
Contacts
Accounts, Potentials, Quotes, and Orders
Accounts
Potentials, Contacts, Products, Quotes, and Invoices
Zoho CRM – User Guide
159
Reports
Primary Module
Secondary Modules
Potentials
Accounts, Contacts, and Quotes
Activities
Contacts
Products
Accounts and Contacts
Cases
Products
Solutions
-
Quotes
Accounts, Contacts, and Potentials
Orders
Contacts
Invoice
Accounts
Email
Leads, and Contacts
Types of Report
Tabular Report: Displays the data without any subtotals in the report. Use this type
of report to create contact mailing lists, consolidated view of sales pipeline, and
others.
Summary Report: Displays the data along with subtotals, groupings, and other
summary information.
Matrix Report: Displays the data summarized in a grid against both horizontal and
vertical columns.
Customize Reports
You can create new reports according to your organization's requirements. The customization of
a report involves the following steps:
Select the module and the corresponding cross-functional modules
Select the report type (Tabular, Summary, or Matrix report)
Zoho CRM – User Guide
160
Reports
Select the report columns
Group the columns
Select the arithmetic functions
Specify the advanced sorting filters
Save the report in folder
Availability
Enterprise
Professional
Free
Unlimited
Unlimited
5 Reports
Editions
Permission
Required
Manage Reports And Dashboards
Note: You can customize the standard reports as per your requirements by clicking the
Customize link in the Reports Home page. Once customized, you cannot revert to the default
report.
To select module and the cross-functional modules
1. Click the Reports tab.
2. In the Reports Home page, click Create New Report.
3. In the Create Report page, do the following:
a. Select the primary module from the Modules drop-down list.
b. Select the cross-functional modules from the Related Modules list box.
4. Click Continue.
Zoho CRM – User Guide
161
Reports
Figure 39: Create Report
Note: The system will display the column names (in the Columns tab) only for those modules
that you select here.
To select the report type
1. In the Create Report page, under the Report Type tab, select one of the following
report options:
Tabular Report
Summary Report
Matrix Report
Figure 40: Types of Reports
Zoho CRM – User Guide
162
Reports
Note:
When you select the Summary Report, the Grouping tab will also be available.
You can Run or Save the report at any point while creating it.
When you click the Run button, the system will prompt you to save the report. The report
is saved temporarily and then a preview of the report is generated.
When you click the Save button, the report is saved in the folder that you specify.
To select the report columns
1. In the Create Report page, click Columns tab.
2. Do the following to select the columns to be displayed in your report:
a. Select the columns from the Available Columns list box.
b. Click Add.
c. The columns will be added to the Selected Columns list box.
d. Use the
(Up) and
(Down) arrow keys to sort the display order of the
columns.
e. Select the column name and click
Zoho CRM – User Guide
to delete the selected column.
163
Reports
Figure 41: Columns
3. Click Save.
In the pop up window, specify the Report Name, Description, and Report Folder
details.
4. Click Run to save the report first, and then run it.
5. Once you have selected the report columns, click the Grouping tab if you are using
Summary Report otherwise click the Columns to Total tab (refer Step 5).
To group report columns
1. In the Create Report page, click the Grouping tab.
This tab will be available only when you select Summary Reports under the Report
Type tab.
Zoho CRM – User Guide
164
Reports
2. In the Grouping page, you can group the records based on the grouping criteria that
you specify.
3. Select the values from the respective lists.
4. Select Ascending or Descending from the list.
Figure 42: Grouping
To select the arithmetic functions
1. In the Create Report page, click the Columns to Total tab.
2. In the Columns to Total section, select the required arithmetic functions (Sum,
Average, Lowest Value, Largest Value).
Zoho CRM – User Guide
165
Reports
Figure 43: Columns to Total
To specify advanced sorting filters
1. In the Create Report page, click the Criteria tab.
2. In the Criteria section, select the additional criteria for the report.
Figure 44: Criteria
3. Once you have completed the report customization, do one of the following:
Zoho CRM – User Guide
166
Reports
a. Click Run to preview the report.
b. Click Save.
c. Click Cancel.
Note: You can also use a Record's Created By and Modified By fields to define a criteria.
To save report in folder
1. In the Create Report page, click Run or Save.
Note, that you can run the report only after you save it.
2. In the Save Report dialog box, do the following:
a. Enter the Report Name.
b. Enter the Description of the report.
c. Select the Report Folder in which the report has to be stored.
Figure 45: Save Report
3. Click Save.
Create Report Folders
By default, reports are stored in different categories. You can create personal/public folders to
store the frequently used reports in a common folder for easy access.
Zoho CRM – User Guide
167
Reports
Figure 46: Report Folder
To create report folders
1. Click the Reports tab.
2. In the Reports Home page, click Create New Report Folder.
3. In the Create New Report Folder page, do the following:
a. Enter the Folder Name.
b. Enter the Folder Description.
c. Select Accessibility Details:
All Users are allowed to view this Template Folder: Select if you
would like to enable the folder access for all the users.
Show this Template Folder only to me: Select if you would like to
enable the folder access only to you.
Allow the following users to view this Template Folder: Select the
users or user roles that can access the folder.
Zoho CRM – User Guide
168
Reports
4. Click Save.
Schedule Reports
You can automatically send the reports to your colleagues, executives management and other
non-Zoho CRM users by scheduling the reports daily, weekly, monthly or yearly. Once the
Report scheduler is configured, report will be delivered to recipients as an email attachment
(XLS format).
Note: You can create any number of report schedulers but only a maximum of 40 schedulers can
be active in the Enterprise Edition and 25 schedulers in the Professional Edition.
Availability
Enterprise
Professional
Free
YES
YES
NO
Editions
Permission
Required
Schedule Reports
The following table provides various field names in scheduling reports.
Field Name
Schedule
Name
Description
Specify the schedule name
Remarks
Mandatory field
Select Report Select the report from the drop-down list
Mandatory field
Active
Specify the scheduler status
Check box
Start Date
Specify the start date of scheduling the
report
Mandatory field. The
standard date format is
mm/dd/yy
Start Time
Specify the time when the report has to be
generated and sent to the recipients
Mandatory field. The
standard time format is
hh:mm
Repeat
Specify the frequency of the report
scheduler from the drop-down list. You
can select one of the options: daily,
weekly, monthly, or yearly.
Drop-down list
Recipient
Specify the recipients from the list.
List
Zoho CRM – User Guide
169
Reports
Field Name
Description
Remarks
Details
Recipient
Email
Specify the email IDs separated by
comma
Text box
To setup report scheduler
1. Click the Reports tab.
2. In the Reports Home page, click Reports Scheduler.
3. In the Scheduled Reports page, existing schedulers, if any, are displayed.
4. Click New Report Schedule.
Figure 47: Reports Scheduler
Zoho CRM – User Guide
170
Reports
5. In the New Report Schedule page specify the values (Refer the Report Scheduler
fields table).
6. Click Save.
Export Reports
You can export the reports data in to XLS, CSV, PDF and HTML formats, which can be used for
further data analysis purpose.
To export reports
1. Click the Reports tab.
2. In the Reports Home page, select the report from the required module.
For example, Lead by Source from the Leads module.
3. In the report page, select one of the following options:
Export to Excel: To save the report in *.XLS format
Export to CSV: To save the report in CSV format
Export to PDF: To export the report in PDF
Note: Using the Export function maximum of 5000 records can be exported. To get more than
5000 records, a complete backup must be requested for which there will be a charge of 10$ per
request.
Delete Reports
Periodically you may delete some of the unnecessary custom reports.
To delete reports
1. Click the Reports tab.
2. In the Reports Home page, click the Del link.
Note:
You can delete only the reports created by you.
The standard reports cannot be deleted, but can only be customized as per your
requirements.
Zoho CRM – User Guide
171
CHAPTER 24
DASHBOARDS
In This Section:
Create Dashboards
Create Charts
Drill Down Dashboards
Dashboards
CHAPTER 24
DASHBOARDS
Dashboard is a pictorial representation of your custom reports, which gives a real-time snapshot
of your organization's key metrics. Using dashboards, you can easily visualize the patterns, and
trends in sales, marketing, support, and inventory related data. For example, you can have a
glance at the products that are selling fast over a period of time, compare the current quarter sales
with previous quarter sales, or compare the actual sales to the projected sales.
In Zoho CRM, dashboard comprises of different types of two-dimensional and three-dimensional
charts (components). These charts are built with Adobe Flash technology, which displays the
data dynamically. The various types of charts are bar, pie, line, table, or funnel. The unique
feature in Zoho CRM is the Funnel chart, which can be used to visualize the various stages in
sales pipeline.
Note:
Please ensure that your Web browser supports Adobe Flash
In case your browser does not support Adobe Flash plug-in, click the Flash plug-in icon
to install it.
Availability
Enterprise
Professional
Free
YES
YES
YES
Editions
Permission
Required
Dashboards Tab
Limitations
Some of the international currency symbols will not be displayed properly.
Dashboard properties (color, gradient, borders, background etc.) cannot be modified
through user interface.
Dashboards need to be refreshed manually to display the up-to-minute changes.
Create Dashboard Folders
Dashboards can be stored in publicly accessible folders for all the Zoho CRM users or private
folders with a limited access to some of the users.
Zoho CRM – User Guide
173
Dashboards
To create dashboard folders
1. Click the Dashboards tab.
2. In the Dashboards Home page, click the Go to Dashboard List link.
3. In the Dashboard List page, click Create New Dashboard Folder.
Figure 48: Dashboard Folder
4. In the New Dashboard Folder page, do the following:
a. Enter the Folder Name.
b. In Accessibility Details section, define the user's accessibility to view the
dashboard folder.
5. Click Save.
Create Dashboards
Dashboard is a summarized view of the custom report data in Zoho CRM. It provides a platform
for a real-time analysis on the sales stages and business operations.
Zoho CRM – User Guide
174
Dashboards
Availability
Enterprise
Professional
Free
Unlimited
Unlimited
3 Dashboards
Editions
Permission
Required
Manage Reports And Dashboards
List of Standard Dashboard Components
In the Dashboard home page the following types of dashboards are available.
Module
Leads
Accounts and Contacts
Potentials
Campaigns
Cases and Solutions
Products
Zoho CRM – User Guide
Standard Dashboard Components
Leads by Source
Leads by Status
Sales by Lead Source
Leads by Industry
Sales by Account
Accounts by Industry
Pipeline by Stage
Pipeline by Probability
Potentials by Type
Campaign Leads
Campaign Vs Revenue
Cases by Origin
Cases by Priority
Cases by Status
Products by Category
175
Dashboards
Inventory Management
Vendors Vs Purchases
Sales Orders by Accounts
Contacts Vs Purchases
Purchase Orders by Status
Quotes by Accounts
Quotes by Stage
Invoices by Accounts
Invoices by Status
Sales Orders by Status
Note: You cannot modify or delete the standard dashboards.
To create dashboards
1. Click the Dashboards tab.
2. In the Dashboards Home page, click the Go to Dashboard List link.
3. In the Dashboard List page, click Create New Dashboard.
Figure 49: New Dashboard
4. In the New Dashboard page, do the following:
a. Enter the Dashboard Name.
b. Select Dashboard Folder from the list in which the dashboard has to be
stored.
c. Enter the Description of the dashboard.
Zoho CRM – User Guide
176
Dashboards
5. Click Save.
Create Charts
After creating a dashboard you must add components (charts, representing the exact data in
pictorial form), which includes Bar, Pie, Line, Funnel, or Table charts.
You can select the charts to display the data in pictorial form and table to display the data in
tabular format.
List of Standard Charts
Chart Type
Description
Bar chart
To display two or more kinds of data, that
can be used to compare values across
categories.
Pie Chart
To display data that is divided into
triangular areas proportional to the
percentages of the whole and used to
illustrate the relationship of parts to the
whole.
Line Chart
To display a trend over a period with the
variations in the multiple values in a single
chart.
Zoho CRM – User Guide
Example
177
Dashboards
Funnel Chart
To show the convergence of data from the
entry level to exit level. It is typically used
show the sales pipeline at any point of
time.
Table Chart
To show sum of the values in each
category of the data.
To create report charts
1. Click the Dashboards tab.
2. In the Dashboards Home page, click Add Component.
3. In the Add Component page, do the following:
a. Select the Component Type, either Chart or Table.
b. Enter the Component Name
c. Select the source of data for the report from the Source Report list.
4. Click Next.
5. In the Add Component page, select the type of chart from the Select Chart Type list
box.
6.
Under Provide Chart Details, the X-Axis and Y-Axis details are displayed.
7. Click Finish.
After adding a chart to the dashboard, you can perform the following operations:
Delete the chart
Edit the chart
Drill-down the chart
Zoho CRM – User Guide
178
Dashboards
Change to 2-dimensional or 3-dimensional view
Zoom out the chart
Figure 50: Zoom Out Chart
Note: You can delete only the custom charts created by you.
Drill Down Dashboards
This feature enables you to view a detailed report on the selected data in any dashboard report.
To drill-down dashboards
1. Click the Dashboards tab.
2. In the Dashboards Home page, select the dashboard from the Switch to Dashboard
drop-down list.
3. In the selected dashboard, click on the data for which you need a detailed report.
Zoho CRM – User Guide
179
Dashboards
Figure 51: Drill Down Dashboard
4. The data is displayed in the form of a report.
5. In the Report page, you can export the data to PDF/XLS/CSV, save the report,
customize it, or create a chart based on the details.
Figure 52: Export
Zoho CRM – User Guide
180
Dashboards
Zoom in Charts
This feature enables you to zoom in and zoom out the chart for a better visualization of data,
which is very useful while working with huge data.
To zoom in the charts
1. Click the Dashboards tab.
2. In the Dashboards Home page, select the dashboard from the Switch to Dashboard
drop-down list.
3. In the Dashboards Home page, in the required chart click the
(Zoom icon).
The enlarged chart is displayed in a separate window.
Zoho CRM – User Guide
181
PART VI
ACTIVITIES
In This Section:
Activity Management in ZCRM
Task Management
Event Management
Log Calls
CHAPTER 25
TASK AND EVENT
MANAGEMENT
In This Section:
Create Tasks and Events
Create Recurring Activity
Set Reminders
Tasks and Events
CHAPTER 25
TASKS AND EVENTS
Activities plays an important role in daily business operations. Activities can be either time
bound calendar events, such as meetings, seminars, appointments, etc or status bound tasks, such
as send status report to manager, send e-mail to customer, etc. In Zoho CRM, most of the records
have activities as a related list for a better 360 degrees view. You can associate activities with
modules, such as leads, accounts, contacts, potentials, campaigns, etc. Under the Activities
Module, you can store information related to Tasks, Events, and Calls.
Availability
Enterprise
Professional
Free
YES
YES
YES
Editions
Permission
Required
Activities Tab
Create Tasks
Task is a specific piece of work required to be done within a given time frame. They are listed in
the Zoho CRM's Home page of the user, Activities home page, and in other related records.
Zoho CRM – User Guide
184
Tasks and Events
To create tasks
1. Click the New Task link.
Alternatively, click the New Task button from records, such as leads, accounts,
contacts, potentials, cases, and others
2. In the Create Task page, specify the following details:
Task Owner - Select the owner of the task. By default, the user who creates
the task is the owner.
Subject - Specify the subject of the task.
Due Date - Specify the due date for the task.
Select Contact/Lead - Choose the contact or lead name with which the task
needs to be associated.
Select Module - Choose the module with which the task is associated. This
field is available only if Contact is selected in the previous field.
Status - Choose the status of the task.
Priority - Choose the priority of the task.
Send Notification E-mail - Select the checkbox to send an email notification
(about the task) to the task owner.
Remind At - Select the checkbox to set email or pop-up reminders.
Description - Specify additional details about the task.
3. Click Save.
Note: Tasks will be closed, only when the Status of the task is updated as Completed.
Create Events
Event is an activity that happens at a given place and time. They are listed in the Zoho CRM's
Home page of the user, Activities home page, Calendar, and in other related records.
To create events
1. Click the New Event link.
Alternatively, click New Event from records such as leads, accounts, contacts,
potentials.
2. In the Create Event page, specify the following details:
Event Owner - Select the owner of the event. By default, the user who creates
the event is the owner.
Zoho CRM – User Guide
185
Tasks and Events
Subject - Specify the subject of the event.
Start Date & Time - Choose the starting date and time of the event from the
calendar.
End Date & Time - Choose the ending date and time of the event from the
calendar.
Venue - Specify the location of the event.
Select Contact/Lead - Choose the contact or lead name with which the event
needs to be associated.
Select Module - Choose the module with which the event is associated. This
field is available only if Contact is selected in the previous field.
Send Notification E-mail - Select the checkbox to send an email notification
(about the event) to the event owner.
Recurring Activity - Select the checkbox to repeat the same event in future.
Remind At - Select the checkbox to set email or pop-up reminders.
Description - Specify additional details about the event.
3. Click Save.
To create events from Calendar
1. Click the Calendar.
2. In the Calendar page, by default, Day View is displayed. Click the time (for example
08:00 hrs), at which you have to set up a event.
3. In the pop-up dialog, select the event option, type the subject in Subject field.
4. Click Save.
5. In the Activity page, click Edit to update the event details.
6. In the Activity page, enter the other event related details.
7. Click Save.
Note: Events are automatically closed at the specified end date and time. There is no status
update for the events.
Zoho CRM – User Guide
186
Tasks and Events
Create Recurring Activities
An activity can be repeated by using the recurring option while creating the the tasks and events.
To create recurring activities
1. Click the New Task/Event link.
Alternatively, click New Task/Event from records such as leads, accounts, contacts,
potentials.
2. In the Create Task/Event page, specify the activity-related details.
Figure 53: Recurring Activity
3. Select the Recurring Activity checkbox and do the following:
a. Specify the Start Date and End Date for the activity to be repeated.
b. Specify the Repeat Type for the activity and select the options accordingly.
c. Click Save.
Daily - Fields
Description
Everyday
Select this if the activity should be repeated everyday.
Recur every ___
day(s)
Select this to specify how often in days the activity should be
repeated.
Weekly - Fields
Description
Recur every
Enter how often in weeks the activity should be repeated.
Zoho CRM – User Guide
187
Tasks and Events
____week(s)
Days of the week
Select the checkbox(es) that correspond to the day(s) of the
week on which the recurrence should occur.
Monthly - Fields
Description
On day __ of every
___ month(s)
Enter how often in months and on the specified date the
activity should be repeated.
On ____ ____ of
every ___ month
Select a particular day when the activity should be repeated
every month.
Yearly - Fields
Description
On every ___ ____
Enter how often in a year the activity should be repeated.
On ____ ____ of
____
Enter how often in a year and on the specified date the activity
should be repeated.
Set Reminders
While creating a task or event in Zoho CRM, you can set a reminder for it. There are two options
for reminders:
Alert through Email - On selecting this option, you can receive reminders for your tasks
or events through emails.
Alert through Pop up - On selecting this option, you can receive pop up reminders for
your tasks or events.
Note: The Reminder option is available only in the Paid Editions. It is not available in the Free
Edition or Trial versions.
To set reminders for tasks
1. In the Activities tab, click on the task for which you want to set reminders.
2. In the Task Details page, click Edit.
Zoho CRM – User Guide
188
Tasks and Events
Figure 54: Reminders
3. Select the Remind At checkbox and do the following:
a. Specify the time when you want the reminder.
b. Specify the recurrence pattern. (Daily, Weekly, Monthly, etc.)
c. Choose Alert Through Email or Alert Through Pop up as required.
4. Click Save.
To set reminders for events
1. In the Activities tab, click on the event for which you want to set reminders.
2. In the Event Details page, click Edit.
Figure 55: Reminders
3. Select the Remind At checkbox and do the following:
a. Specify the interval of time to receive an alert before the event starts.
b. Specify the recurrence pattern. (Daily, Weekly, Monthly, etc.)
c. Choose Alert Through Email or Alert Through Pop up as required.
4. Click Save.
After creating an event, you can invite users, leads, or contacts for the event by
clicking Add Invitees.
Zoho CRM – User Guide
189
Tasks and Events
Note:
If an email reminder is set for the event, then the event owner and also the invitees will
get email reminders.
If a pop-up reminder is set for the event, then the event owner and also the users (in
your CRM account) added as invitees will get pop-up reminders.
Add Invitees
To invite multiple users, leads, or contacts to the event
1. In the Activities tab, click on the event for which you want to add invitees.
2. In the Event Details page, click Add Invitees.
Figure 56: Add Invitees
Zoho CRM – User Guide
190
Tasks and Events
3. In Invitees Lookup popup window, search for Users, Leads, or Contacts.
4. In the list of Users, Leads, or Contacts, select the corresponding checkbox(es).
5. Click Add or Add and Send Email.
Note:
If an email reminder is set for the event, then the event owner and also the invitees will
get email reminders.
If a pop-up reminder is set for the event, then the event owner and also the users (in
your CRM account) added as invitees will get pop-up reminders.
Zoho CRM – User Guide
191
CHAPTER 26
LOG CALLS
In This Section:
Log Inbound & Outbound Calls
Associate to Other Records
Log Calls
CHAPTER 26
LOG CALLS
The Log a Call functionality helps you to register the inbound (received from leads and
customers) and outbound (dialed to leads and customers) call details such as, call duration, date
and time of calls, notes, etc. Users who frequently make calls or receive calls in an organization
can make use of this functionality in Zoho CRM.
For instance, this is of great help to the Customer Support Executives who often receive calls
from their customers. By recording call logs, they can identify the time spent on each call and
keep track of the average time spent in calls on a monthly basis. On the other hand, the Sales and
Marketing Executives can keep track of all the calls they make to their prospects. The call details
can be further used to generate reports on billing details, average time spent on calls, number of
calls per day, etc.
Availability
Enterprise
Professional
Free
YES
YES
YES
Editions
Permission
Required
Activities Tab
Benefit
Helps identify typical queries asked by users
Keep track of all the customer calls for future reference.
Log a Call
Using the Log a Call feature in Zoho CRM you can capture the completed and current call
details.
To log a current call
1. Click the New Call link.
Zoho CRM – User Guide
193
Log Calls
Figure 57: New Call
2. In the Log a Call page, specify the details of the call.
3. In the Time Details section, click Current Call. By default, Current Call is selected
Figure 58: Call Details
Zoho CRM – User Guide
194
Log Calls
4. Click Start.
The call timer indicates the duration of the current call.
5. Click Stop when the call is completed.
The Call Start Time and Call Duration is automatically updated
6. Click Save to save the current call
7. Click Save & Create Follow-up Task to save and create a follow-up task.
Notes:
The Related To field will be available only if you are calling a Contact.
The user who logs a call is the Call Owner and you cannot change owner of the call.
Only users with the permission to edit the call record can modify it.
The details of the call will be available in the Activities tab.
To log a completed call
1. Click the New Call link.
2. In the Log a Call page, specify the details of the call.
3. In the Time Details section, click Completed Call. By default, Current Call is
selected.
4. Enter the Call Duration of the call in minutes and seconds.
5. Click Save, or click Save & Create Follow-up Task to save and create a follow-up
task.
Note:
The Related To field will be available only if you are calling a Contact.
The details of the call will be available in the Activities tab.
Associate calls with CRM records
To associate calls with CRM records
1. Click the Leads or Contacts tab.
2. Select the record for which you want to log a call.
3. In the [Record] Details page, the existing call details, if any, are displayed.
Zoho CRM – User Guide
195
Log Calls
Click Subject, Activity Type, Status, Due Date or Owner Name links to
sort the display order of the records.
Click the Edit or Del link to modify or delete the call details respectively.
4. Click Log a Call.
Figure 59: Log a Call
5. In the Log a Call page, enter the call related details.
6. Click Save, or click Save & Create Follow-up Task to save and create a follow-up
task.
List of Standard call related fields
In the Log a Call page, you need to specify the call-related information. The following table
provides description of the various fields in the page.
Field Name
Subject
Description
Enter the subject of the call.
Choose Inbound for the incoming
calls in your organization.
Choose Outbound for the
outgoing calls in your organization.
Call Type
Data Type
Text Box
Select option
Related To
Choose the type of record to which the call
is related and then choose the record.
Drop-down list
Call From/To
Specify to whom the call is made or from
whom the call is received.
Select option
Call Purpose
Choose the purpose of the call from the
drop-down list.
Pick list
Call Result
Specify the call result
Text Box
Zoho CRM – User Guide
196
Log Calls
Click Current Call if the call is in
progress.
Click Completed Call if the call is
completed.
Time Details
Call Start Time
Automatically displays the current date
and time.
Displays the call duration for the
Current Calls.
For Completed Calls, specify the
call duration.
Call Duration
Select option
Date and Time
Numeric
Description
Specify the description of the call.
Text Box
Billable
Select the check box if the call is billable.
Check Box
Note: You cannot add custom fields in the Log a Call page. However you can customize the
existing fields using page layout customization.
Zoho CRM – User Guide
197
© 2011 ZOHO Corp.
All rights reserved
No part of the contents of this book may be reproduced or transmitted in any form or by any
means without the written permission of the publisher.