1
Content ONE
User Manual
© 2014 WorldWeb Management Services Pty Ltd
Content ONE general user manual
© 2014 WorldWeb Management Services Pty Ltd
All rights reserved. No parts of this work may be reproduced in any form or by any means - graphic, electronic, or
mechanical, including photocopying, recording, taping, or information storage and retrieval systems - without the
written permission of the publisher.
Products that are referred to in this document may be either trademarks and/or registered trademarks of the
respective owners. The publisher and the author make no claim to these trademarks.
While every precaution has been taken in the preparation of this document, the publisher and the author assume no
responsibility for errors or omissions, or for damages resulting from the use of information contained in this
document or from the use of programs and source code that may accompany it. In no event shall the publisher and
the author be liable for any loss of profit or any other commercial damage caused or alleged to have been caused
directly or indirectly by this document.
Printed: July 2014 in Adelaide, South Australia
Contents
I
Table of Contents
Foreword
0
Part I Introduction
2
1 Introducing
...................................................................................................................................
Content ONE
2
2 Site Template
................................................................................................................................... 9
3 Administration
...................................................................................................................................
Interface - Overview
12
HTML Editor (WYSIWYG)
.......................................................................................................................................................... 13
Part II Add
17
1 Add Page
................................................................................................................................... 17
2 Add Contact
................................................................................................................................... 24
3 Add Group
................................................................................................................................... 27
4 Import...................................................................................................................................
Contacts
30
5 Email ...................................................................................................................................
Campaign
33
Part III Preview
49
Part IV Pages
51
1 View Pages
................................................................................................................................... 51
Add Page
.......................................................................................................................................................... 53
Edit Page
.......................................................................................................................................................... 59
Delete Page .......................................................................................................................................................... 65
2 View Navigation
................................................................................................................................... 66
Add Child
.......................................................................................................................................................... 67
Edit Menu Item
.......................................................................................................................................................... 69
Re-order Menu
..........................................................................................................................................................
Item
71
Delete Menu Item
.......................................................................................................................................................... 73
3 Shared
...................................................................................................................................
Content
74
Add Shared Content
.......................................................................................................................................................... 75
Edit Shared Content
.......................................................................................................................................................... 77
Delete Shared..........................................................................................................................................................
Content
79
Part V Forms
82
1 View Forms
................................................................................................................................... 82
Add Form s .......................................................................................................................................................... 83
Edit Form s .......................................................................................................................................................... 90
Delete Form .......................................................................................................................................................... 96
Exam ples of Field
..........................................................................................................................................................
Types
97
Exam ple of Field
..........................................................................................................................................................
Types
102
2 View...................................................................................................................................
Submissions
102
Part VI Media
106
1 Media
...................................................................................................................................
Manager
106
© 2014 WorldWeb Management Services Pty Ltd
I
II
Content ONE general user manual
Add Im age .......................................................................................................................................................... 107
Edit Im age .......................................................................................................................................................... 111
Delete Im age.......................................................................................................................................................... 112
Manage Folders
.......................................................................................................................................................... 114
Add New .........................................................................................................................................................
Folders
115
Delete Folders/Images
......................................................................................................................................................... 116
2 Gallery
...................................................................................................................................
Manager
117
Add Gallery Category
.......................................................................................................................................................... 118
Edit Gallery Category
.......................................................................................................................................................... 120
Delete Gallery
..........................................................................................................................................................
Category
122
Add Album to
..........................................................................................................................................................
Category
123
Edit Album .......................................................................................................................................................... 125
Delete Album.......................................................................................................................................................... 127
Add Im ages ..........................................................................................................................................................
to Album
128
Delete Im ages
..........................................................................................................................................................
from Album
132
3 Image
...................................................................................................................................
Rotator Manager
134
Add Im age Rotator
..........................................................................................................................................................
Album
135
Add Im age to..........................................................................................................................................................
Im age Rotator Album
137
Edit Im age Rotator
..........................................................................................................................................................
Album
141
Edit Im age in..........................................................................................................................................................
Im age Rotator Album
143
Delete Im age..........................................................................................................................................................
Rotator Album
146
Delete Im age..........................................................................................................................................................
in Im age Rotator Album
148
Part VII News
152
1 View...................................................................................................................................
Articles
152
Add an Article
.......................................................................................................................................................... 153
Edit an Article
.......................................................................................................................................................... 156
Delete an Article
.......................................................................................................................................................... 159
2 View...................................................................................................................................
Categories
159
Add Category
.......................................................................................................................................................... 160
Edit Category.......................................................................................................................................................... 161
Delete Category
.......................................................................................................................................................... 162
Part VIII Events
164
1 Event...................................................................................................................................
Manager
164
Add Event .......................................................................................................................................................... 165
Edit Event .......................................................................................................................................................... 168
Delete Event .......................................................................................................................................................... 170
2 Category
...................................................................................................................................
Manager
171
Add Category
.......................................................................................................................................................... 172
Edit Category.......................................................................................................................................................... 173
Delete Category
.......................................................................................................................................................... 174
Part IX Contacts
176
1 View...................................................................................................................................
Contacts
176
Add Contact .......................................................................................................................................................... 177
Edit Contact Details
.......................................................................................................................................................... 179
Delete Contact
..........................................................................................................................................................
Details
182
2 Export
...................................................................................................................................
Contacts
183
How to Export
..........................................................................................................................................................
Contacts
184
© 2014 WorldWeb Management Services Pty Ltd
Contents
III
3 View...................................................................................................................................
Groups
186
Add Groups .......................................................................................................................................................... 186
Edit Groups .......................................................................................................................................................... 189
Delete Groups
.......................................................................................................................................................... 190
View Mem bers
.......................................................................................................................................................... 191
Part X Marketing
194
1 Email...................................................................................................................................
Campaigns: Manage Campaigns
195
Add Cam paign
.......................................................................................................................................................... 195
Edit Cam paign
.......................................................................................................................................................... 209
Delete Cam paign
.......................................................................................................................................................... 222
Re-activate Cam
..........................................................................................................................................................
paign
223
2 Social
...................................................................................................................................
Campaigns: Manage Campaigns
224
Add Cam paign
.......................................................................................................................................................... 225
Edit Cam paign
.......................................................................................................................................................... 229
Delete Cam paign
.......................................................................................................................................................... 234
Re-activate Cam
..........................................................................................................................................................
paign
235
3 SMS ...................................................................................................................................
Campaigns: Manage Campaigns
235
Add Cam paign
.......................................................................................................................................................... 236
Edit Cam paign
.......................................................................................................................................................... 242
Delete Cam paign
.......................................................................................................................................................... 247
Re-activate Cam
..........................................................................................................................................................
paign
248
Part XI Catalogue
251
1 View...................................................................................................................................
Products
251
Add Products
.......................................................................................................................................................... 252
Edit Products.......................................................................................................................................................... 259
Delete Products
.......................................................................................................................................................... 266
Search Products
.......................................................................................................................................................... 267
Manage Prices
.......................................................................................................................................................... 268
2 View...................................................................................................................................
Categories
268
Add Category
.......................................................................................................................................................... 269
Edit Category.......................................................................................................................................................... 273
Delete Category
.......................................................................................................................................................... 276
3 Export
...................................................................................................................................
Tools
277
Part XII Orders & Payments
281
1 Manage
...................................................................................................................................
Orders
281
2 Manage
...................................................................................................................................
Payments
282
3 Export
...................................................................................................................................
Orders
283
How to export
..........................................................................................................................................................
orders
283
Part XIII Glossary
Index
286
287
© 2014 WorldWeb Management Services Pty Ltd
III
Top Level Intro
This page is printed before a new
top-level chapter starts
Part
I
Introduction
1
Introduction
1.1
Introducing Content ONE
2
Content ONE
Powerful Content Management
Content ONE is a content management system installed by WorldWeb as part of your website
package. ContentONE enables you to update and manage most parts of your website. We have
constructed this manual to assist you with understanding how ContentONE
works and how you can use it to keep your website up to date!
Content Management Systems (CMS) have now developed to a point where a website designer or
computer programmer is no longer needed to add or edit website content.
However, the use of a content management system could not be described as non-technical, as some
knowledge and appreciation of how the web works and the CMS works is still needed.
We know that creating a webpage is not as straight-forward as pasting in text and images from a word
document. With this in mind, this manual has been created to provide MMON students and graduates
with the knowledge to add and edit their website content
themselves.
We suggest you read this document in full as it will give you a good introduction and many important
tips you will need to know to effectively manage your website without too much help from WorldWeb or
Media Makeup.
As always though, WorldWeb and Media Makeup are ready to help and assist you when and if you
need it. The content management system used by MMON to drive your website so you can build your
business is called ContentONE. It has been developed by
WorldWeb as a software package to drive all the online capabilities for the Media Makeup Online
Network.
Content ONE:
has a simple, easy to use Administration interface
makes it easy to add content and images
is designed with simplicity and flexibility for all users
Site owners do not need to learn any programming languages, such as HTML – Content ONE provides
an online 'What you see is what you get' (WYSIWYG) editor that makes editing page content as simple
as using a word processor.
It empowers you with the ability to publish dynamically formatted pages in your website by clicking a
few buttons.
© 2014 WorldWeb Management Services Pty Ltd
3
Content ONE general user manual
Content ONE Glossary
Admin Bar
The admin bar is an area of the screen just above your site that lists useful administration screen links
such as add a new post or edit your profile.
Avatar
An avatar is a graphic image or picture that represents a user.
Blog
A blog, or weblog, is an online journal, diary, or serial published by a person or group of people.
Category
Each page or post in ContentONE is filed under a category. Thoughtful categorisation allows posts to
be grouped with others of similar content and aids in the navigation of a site. The post category should
not be confused with the Link Categories used to classify and manage Links.
Comments
Comments are a feature of blogs which allow readers to respond to posts. Typically readers simply
provide their own thoughts regarding the content of the post, but users may also provide links to other
resources, generate discussion, or simply compliment the author for a well-written post.
Content
Content consists of text, images, or other information shared in posts. A Content Management System
changes and updates content, rather than the structural or graphic design of a web site.
Content Management System
ContentONE is Content Management System, or CMS, it is software used for facilitating the
maintenance of content, but not design, on a web site.
CSS
CSS, or Cascading Style Sheets, is a W3C open standards programming language for specifying how
a web page is presented. It allows web site designers to create formatting and layout for a web site
independently of its content.
Dashboard
In ContentONE a Dashboard is the main administration screen for a site or for a network of pages. It
summarizes information about the site or pages, and also external information, in one or more widgets
that the Dashboard user can enable, disable, and move around.
Database
A database in computing terms is software used to manage information in an organized fashion.
ContentONE uses the MySQL relational database management system for storing and retrieving the
content of your blog, such as posts, comments, and so on.
Default theme
Every installation of ContentONE has a default theme. The default theme is sometimes called the
fallback theme, because if the active theme is for some reason lost or deleted, ContentONE will fall
back to using the default theme. Page | 3
© 2014 WorldWeb Management Services Pty Ltd
Introduction
4
Domain name
A domain name is a name used for identification purposes on the Internet. In ContentONE a domain
name usually identifies a server where ContentONE is installed.
Feed
A feed is a function of special software that allows "Feed readers" to access a site automatically
looking for new content and then posting the information about new content and updates to another
site.
Footer area
A footer area is a horizontal area provided by a theme for displaying information other than the main
content of the web page. Themes may provide one or more footer areas below the content. Footer
areas usually contain widgets that an administrator of the site can customize.
FTP
FTP, or File Transfer Protocol, is rather predictably, a client-server protocol for transferring files. It is
one way to download files, and the most common way to upload files to a server. An FTP client is a
program which can download files from, or upload files to, an FTP server.
Gallery
A Gallery is specifically an exposition of images attached to a post. In that same vein, an upload is
"attached to a post" when you upload it while editing a post.
GMT
GMT ("Greenwich Mean Time", the time at the Royal Observatory in Greenwich, England) is the old
name of the time zone from which all other time zones were measured. It has been replaced by UTC
("Universal Time, Coordinated"), but for most practical purposes UTC and GMT are the same, so the
term GMT is still commonly used.
Hacking
Hacking is the process of writing code for, or contributing code to, a piece of software. There is some
controversy surrounding the meaning of this term. It began as a benign term meaning "to exercise
proficiency" or "to alter or improve," but the popular media have since construed it to mean "to break
into a computer system, usually with malicious intent."
HTML
HTML, or Hypertext Markup Language, is the W3C standard language with which all web pages are
built. It is the predecessor to XHTML, but HTML is often still used to describe either one. It is often
used in conjunction with CSS and/or JavaScript.
Meta
Meta has several meanings, but generally means information about. In ContentONE, meta usually
refers to administrative type information. As described in Meta Tags in ContentONE, meta is the HTML
tag used to describe and define a web page to the outside world (search engines). In the article Post
Meta Data, meta refers to information associated with each post, such as the author's name and the
date posted. Also, many ContentONE based sites offer a Meta section, usually found in the sidebar,
with links to login or register at that site.
MySQL
MySQL is a popular open source SQL (Structured Query Language) database implementation.
ContentONE requires a MySQL database to store all blog information, including posts, comments,
metadata, and other information.
© 2014 WorldWeb Management Services Pty Ltd
5
Content ONE general user manual
Navigation
Navigation is the term used to describe text on a page that, when selected, redirects you to a
corresponding page elsewhere on the website. Navigation may sometimes be referred to as the menu,
links and hyperlinks.
Page
A Page is often used to present "static" information about yourself or your site. A good example of a
Page is information you would place on an About Page. A Page should not be confused with the timeoriented objects called posts that you would use the ContentONE blog module to post. Pages are
typically "timeless" in nature and live "outside" your blog.
Permalink
A permalink is a URL at which a resource or article will be permanently stored. Many pages driven by
Content Management Systems contain excerpts of content which is frequently rotated, making linking
to bits of information within them a game of chance. Permalinks allow users to bookmark full articles at
a URL they know will never change, and will always present the same content.
PHP
PHP is a recursive acronym for PHP: Hypertext Preprocessor. It is a popular server-side scripting
language designed specifically for integration with HTML, and is used (often in conjunction with
MySQL) in Content Management Systems and other web applications.
RSS
"Really Simple Syndication": a format for syndicating many types of content, including blog entries,
torrent files, video clips on news-like sites; specifically frequently updated content on a Web site, and
is also known as a type of "feed" or "aggregator". An RSS feed can contain a summary of content or
the full text, and makes it easier for people to keep up to date with sites they like in an automated
manner (much like e-mail). The content of the feed can be read by using software called an RSS or
Feed reader. Page | 7
Robots.txt
Web Robots are programs which traverse the Web automatically. They are also called Web
Wanderers, Web Crawlers, and Spiders. Search Engines are the main Web Robots. Some Web
Robots look for a file named robots.txt on your web server to see what and where they should look for
content and files on your web server.
Shortcode
A Shortcode is a technique for embedding a snippet of PHP code into the body of a page or other
content item.
Sidebar
A sidebar is a vertical column provided by a theme for displaying information other than the main
content of the web page. Themes usually provide at least one sidebar at the left or right of the content.
Sidebars usually contain widgets that an administrator of the site can customize.
Spam
Spam has become synonymous with what is wrong with the internet. Spam, in general terms, is an
email or other forms of unsolicited advertising. Common spam these days comes from online gambling
sites and those trying to sell drugs for "male enhancement."
© 2014 WorldWeb Management Services Pty Ltd
Introduction
6
Tag
A tag is a keyword which describes all or part of a page. Think of it like a Category, but smaller in
scope. Many people confuse Tags and Categories, but the difference is easy: Categories generally
don't change often, while your Tags usually change with every Page addition.
Tagline
A tagline is a catchy phrase that describes the character or the attributes of the page in a brief,
concise manner. Think of it as the slogan, or catch line for a web page.
Template
In ContentONE a template is a file that defines an area of the web pages generated by a theme. For
example, there is typically a template for the header area at the top of the web pages, a template for
the content, a template for the sidebars, and so on. The templates are like building blocks that make
up the complete web page.
Text editor
A text editor is a program which edits files in plain text format, as compared to binary format. Using a
non-text based word processing program (e.g. using Microsoft Word to edit PHP scripts) can cause
major problems in your code. This is because non-text based word processing programs insert extra
formatting into text files, and can corrupt the files when they need to be interpreted by the interpreter.
An editor like Notepad does not insert any extra formatting.
Theme
A theme is a collection of files that work together to produce a graphical interface with an underlying
unifying design for a web page. A theme modifies the way the page is displayed, without modifying the
underlying software. Essentially, the ContentONE theme system is a way to skin your web pages.
Toolbar
The Toolbar is an area of the screen that lists useful administration screen links such as add or edit
your profile. It combines the former Admin Bar and admin header. The level of access to the toolbars
will be dependent on the user level permissions.
UTC
UTC ("Universal Time, Coordinated") is the basis of international time standards from which time zones
around the world are calculated. For most purposes it is the same as the older GMT standard.
Web server
A web server is a computer containing software for, and connected to infrastructure for, hosting, or
serving, web sites written in HTML.
Widget
In ContentONE a widget is a self-contained area of a web page that performs a specific function, or the
code that generates such a self-contained area. For example, ContentONE has a built-in widget that
displays a list of pages that you can browse in the Dashboard. Plugins and themes can provide
additional widgets.
© 2014 WorldWeb Management Services Pty Ltd
7
Content ONE general user manual
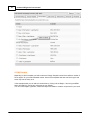
System Requirements
Content ONE only requires a web browser and an Internet connection. No special software needs to be
installed.
Web Browser
Content ONE is compatible with the following web browsers:
Mozilla Firefox
Internet Explorer
Chrome
Operating System Platform
Macintosh OSX+, or Windows XP+
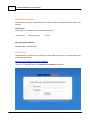
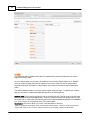
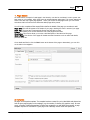
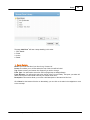
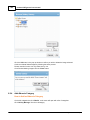
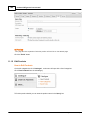
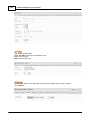
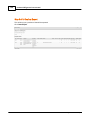
How to log In
The administration system allows you access to Content ONE control panel. In your web browser enter
the following URL to login:
http://www.yoursiteaddress.com/administration/
To sign in to ContentONE enter your username and password as provided.
© 2014 WorldWeb Management Services Pty Ltd
Introduction
8
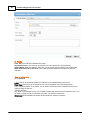
Enter your ContentONE username in the format provided e.g. 'worldweb' and your password.
If you are unsure of your username and password please contact WorldWeb.
Click 'Submit'.
You will enter to the home screen and you are signed in.
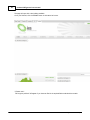
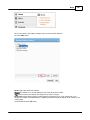
The first time you log in to ContentONE
The first time you log in to ContentONE a welcome to Website Station lightbox will appear to provide
you access to a quick introduction tour. Please go through this tour to familiarise yourself with the
toolbar menu and icons.
Temporary URL while site is under development:
Note that while your website is being developed, it may be located at a special temporary URL for
development and testing. The staging URL will have the following format e.g: http://
staging.yoursite.worldwebms.com/administration/
During the development phase of your site special login details will be provided to you by WorldWeb.
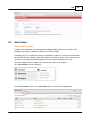
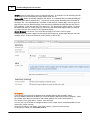
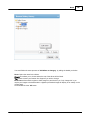
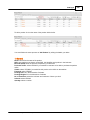
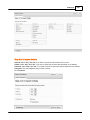
Management Systems Levels Access
The management systems levels access is designed to support the needs of multiple users for your
site. It supports the full set of administration, editor and user functions.
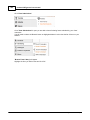
Depending on your granted access privileges, you will be provided with some of the following access
options:
User - can edit/create content, but not publish any content to the live site
Editor - can publish any content to the live site
Administrator - access to all functions, publish content
If you have a User status, then you can create new pages, add content, manage media and submit
pages for publishing.
If you are an Editor then you can create new pages, publish them, access pages created by a User,
manage media and create system users.
If you are an Administrator then you can manage menus, media, system users and customers, create
new pages and publish them.
© 2014 WorldWeb Management Services Pty Ltd
9
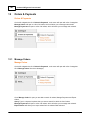
1.2
Content ONE general user manual
Site Template
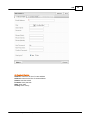
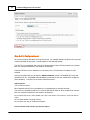
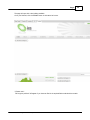
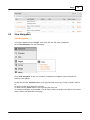
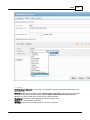
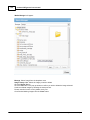
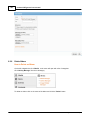
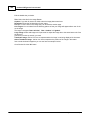
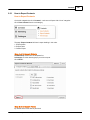
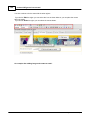
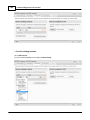
Using ContentONE Admin Area
There is a Title Bar, known as a bread crumb, located just under the top menubar as circled above in
red. It helps you identify the area you are currently in 'Welcome screen' which is also known as the
home screen.
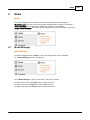
When you have logged in the home screen acts as the general administration area and contains 3
following areas:
Menubar
Workspace
Help Wizard
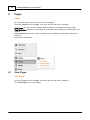
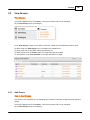
Menubar
The menubar contains various controls, depending on your permission level it will allow you to navigate
within the administration section to perform content changes, updates and publishing.
Each Menu section has a drop down menu.
© 2014 WorldWeb Management Services Pty Ltd
Introduction
10
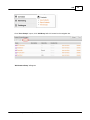
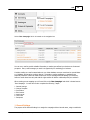
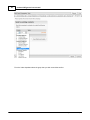
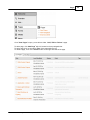
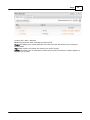
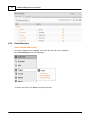
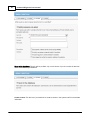
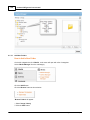
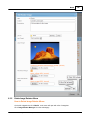
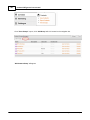
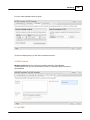
Workspace
The Workspace is represented in 2 different forms depending on which menu items are selected:
the area located immediately to the right of the Menubar
a lightbox
When the following menu items are selected:
Add
Pages
Contacts
Marketing
More
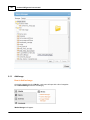
The workspace area will be located immediately to the right of the menubar as per image below when
'Pages' was selected.
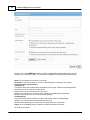
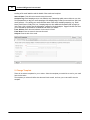
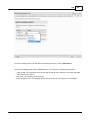
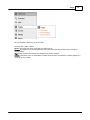
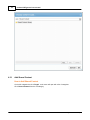
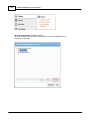
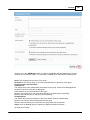
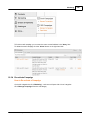
When the following menu items are selected:
© 2014 WorldWeb Management Services Pty Ltd
11
Content ONE general user manual
Forms
Media
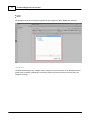
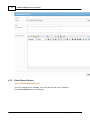
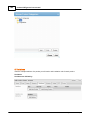
The workspace area will be located in a lightbox as per image below when 'Forms' was selected.
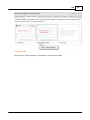
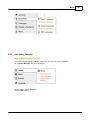
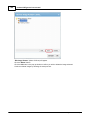
Help Wizard
The Help Wizard displays any changes made in orange in the second column of the workspace area to
provide a quick overview. Depending on what has just been actioned the content of the summary will
change accordingly.
© 2014 WorldWeb Management Services Pty Ltd
Introduction
1.3
12
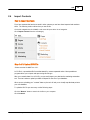
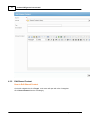
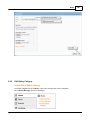
Administration Interface - Overview
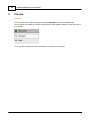
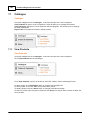
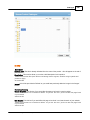
Site Management Menu Overview
The Menubar area mainly consists of 8 menu items for this Content ONE installation.
Each menu section has a drop down menu.
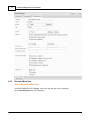
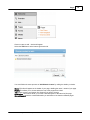
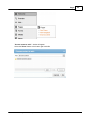
System Users
The System User displays all the users of the administrative system. However, depending on your user
status you might not be able to see the whole list of users.
For example, if you logged on as an 'editor' and would like to view the list of users and edit / add a new
one, you won't be able to see the users with an 'administrator' status.
You will only be able to add a new user with an 'editor' status or lower - 'user' status, and see userswith
an 'editor' or 'user' status only.
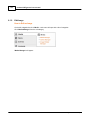
Depending on your granted access privileges, you will be provided with some of the following access
options:
User
Editor
Administrator
If you have a User status, then you can create new pages, add content, manage media and submit
pages for publishing.
If your status is an Editor - you can create new pages and publish them, upload media items and edit
existing content, access pages created by a User.
© 2014 WorldWeb Management Services Pty Ltd
13
Content ONE general user manual
If you are an Administrator - you can manage menus, media, system users and customers, create
new pages and publish them.
1.3.1
HTML Editor (WYSIWYG)
HTML Editor
The HTML editor will appear in multiple areas when you are in edit mode of formatted content.
In the example on the MMON staging site these areas include:
Home
About
Beauty Services
Contact
Makeup & Hair Pricelist
Password Recovery
Register
Once you are in edit mode and you have clicked inside the editable region the WYSIWYG editor
(What You See Is What You Get) will launch its toolbar. The WYSIWYG toolbar allows you to add
images, draw tables, make Hyperlinks, make pop up images etc and use various formatting options for
the text.
To find out which each icon or button does just move your mouse over the toolbar icon and it will
automatically highlight what it can be used for. For easy reference please see what each icon refers to
below.
- Cut the highlighted text to the clipboard. The first time you cut or copy in an article you may be
asked to allow access. Click 'Ok'.
- Copy the highlighted text to the clipboard. The first time you copy or cut in an article you may be
asked to allow access. Click 'Ok'.
- Paste the text you copied. Any formatting will be included.
- Paste the text you copied as plain text. No formatting will be included. For example, if the text
you copied was bold this paste will remove the bold.
- This allows you to select all text on the page.
- Undo and Redo.
- Find text in the article.
- Insert a link and this creates a path to an external, internal or within the current page. The icon
saves writing code.
- Selecting this will remove the HTML link from the selected text.
- A HTML anchor identifies text within a page which can be referenced by a link. To use the Anchor,
highlight the word, then click on the Anchor icon. Give the anchor a name. Anywhere on the page,
© 2014 WorldWeb Management Services Pty Ltd
Introduction
14
highlight the word you would like to link to the Anchor. Use the link icon and the pull down menu to find
the correct anchor.
- Insert a picture/image.
- Insert media audio/video.
- Insert a table. Clicking on this icon will bring up a pop-up box that allows you to set the table
properties.
- Table row properties - clicking on this icon will bring up a pop-up box that allows you to set up the
table row properties.
- Table cell properties - clicking on this icon will bring up a pop-up box that allows you to set up the
table cell properties.
- Insert row before the selected row.
- Insert row after the selected row.
- Delete selected row.
- Insert column before the selected column.
- Insert column after the selected column.
- Split the selected merged table cells.
- Merge tables cells.
- Select one of the standard pre-defined styles.
- Formats the selected text to Bold.
- Formats the selected text to Italic .
- Formats the selected text to have an Underline.
- Formats the selected text to have a Strike through.
- Add bullet points to the highlighted text.
- Add numbering to the highlighted text.
- Decreases the highlighted text indentation.
- Increases the highlighted text indentation.
- Right alignment of the highlighted text.
- Centre alignment of the highlighted text.
- Left alignment of the highlighted text.
- Full justified alignment of the highlighted text.
- This will make the selected text into a subscript, commonly used in chemical formulations. For
example H2O.
- This will make the selected text into a superscript, commonly used in dates. For example May
20th, 2014.
© 2014 WorldWeb Management Services Pty Ltd
15
Content ONE general user manual
- Special characters have been given pronunciations similar to letters and numbers in a radio
alphabet.
- Edit CSS Style.
- Access ONLY if you understand HTML code
© 2014 WorldWeb Management Services Pty Ltd
Top Level Intro
This page is printed before a new
top-level chapter starts
Part
II
17
2
Content ONE general user manual
Add
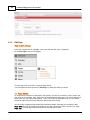
Add
The CMS allows you to add content. The 'Add' function will provide you access to do this. Depending
on your level of access you will be able to use the "Add" function in the following manner:
By clicking the 'Add' button this gives you the option to add a page, a contact, add a group, import
contacts and set up an email campaign.
On the left navigation bar click 'Add', a sub menu will open with a list of categories
Add Page: will allow you to add pages
Add Contact: will allow you to add contacts
Add Group: will allow you to add groups
Import Contacts: will allow you to import contacts
Email Campaign: will allow you to set up an email campaign
2.1
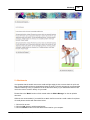
Add Page
How to Add a Page
Your Website will need to change based on the feedback you receive from your users, industry or peers.
From time to time you will need to add pages.
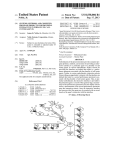
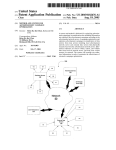
A website consists of webpages connected by hyperlinks. In ContentONE webpages are assigned a
parent page, in that they become a child page of the parent, as shown in the diagram below.
Add diagram
The top level in the menu are the parent pages. Each parent page can have children pages, which in turn
can be parents to other children. This section provides you with the instructions to create a page and
add it to the website.
On the left navigation bar click 'Pages', a sub menu will open with a list of categories.
Click 'View Pages' from the subcategory.
© 2014 WorldWeb Management Services Pty Ltd
Add
18
Select 'Add Page'
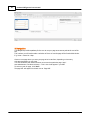
When creating a new page you will need to complete the following 5 steps:
1. Page Details - provides information about the page. The information includes, page title, page tag,
parent of that page, description, security information for the page and whether the page is a system
page or embedded.
2. Template - when adding a page there are a variety of templates that will be available within the
system for you to select from.
3. Navigation - the navigation is an important step for you to create the pathway for users to access the
page to be created.
4. SEO - search engines will find this page based on the descriptions made on the page to define the
content that you put in.
5. Content - this is all the images, videos and text that you put into the selected template that will
become a page on the website.
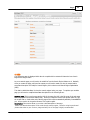
1 . Page Details
As shown above, the depth of a web-page in the hierarchy can also be considered. A menu system has
been setup on your website, which helps users to navigate between web-pages. This system determines
where in the site map a given page appears. When you access the add page screen you can browse
© 2014 WorldWeb Management Services Pty Ltd
19
Content ONE general user manual
and select within the site structure where the added page will be placed.
You will need to complete all the empty fields to define the details of the page you are about to add.
Page Title: This title will appear as the header of your page, detailing the name / natural of your page.
Page Tag: The page tag is automatically filled as the page title is typed.
Parent: This allows you to choose where the root of this page will be linked.
Description: This section allows you to write a brief description of the natural of this page.
Secure Page: Tick this box if this page will handle sensitive information such as credit card details,
personal details etc.
Once details are filled in click the 'Next' button at the bottom of the page or alternatively you can click
on the tabs in the navigation.
2. Template
All pages are assigned a template. The template has been created for you by WorldWeb and determines
how the given page displays on the webpage (e.g: the number of columns, the graphics used). In some
cases, a number of different templates will have been created for you with different properties. A page
template may then be selected for a given page in the 'Add Page' section under the options tab
(described later in this document).
Once the desired template has been selected you will then need to click 'Next'.
© 2014 WorldWeb Management Services Pty Ltd
Add
20
3. Navigation
The Navigation provides a pathway for the user to use your page as an access point to the rest of the
site.
This is where you will need to make a selection of where or how the page will be found within the site.
E.g. Home > About Us > Map
Choose a core page where you want your page to be located from, depending on how many
subcategories/pages you may have.
You then decide the path where someone can access that particular page. http://
www.websitename.com/about-us/map <-- This is how it will appear in your URL.
To select no path for page, click ‘None’.
The page URL will appear to be blank next to ‘Page URL’
© 2014 WorldWeb Management Services Pty Ltd
21
Content ONE general user manual
4. SEO
The way that a page is displayed within the site coupled with its content will determine how Search
Engines like Google read it.
As you create the page you will need to be mindful of how the Search Engine Robots see it. Basically
when you create the page, add it and its content you will need to make sure how its named and its
associated description is friendly for Search Engines, this is what we call Search Engine Optimisation
(SEO).
This data is called Meta Data, it is how the search engines index your page. To optimise your website
page you will need to complete Meta Data descriptions for the following areas:
Brow ser Title: This is used to generate the URL for the page (the URL is the file name of the web page
that is displayed in the browser address bar). When you create the browser title please make sure you
do not add .htm ro .html at the end of the the page as this will be automatically added by ContentONE for
you. All you need to do is type the Browser Title in plain english.
Description: This section allows you to write a brief description of the page
*Please note that the description w ill be used through search engines , therefore using keyw ords and
phrases that relate to your services, im age and story line of the page is highly recom m ended
© 2014 WorldWeb Management Services Pty Ltd
Add
22
Image: Upload an image that you want to represent the page - for example in social networking this will
be the image icon that represents the page viewers would click on
Custom URL: Please do not make changes to this section. It is important that you contact WorldWeb to
understand more about Canonical URL's. This tells the search engines about the preferred location of
this page's URL. The important thing to remember is that when you create a page, users will go to the
page however once you delete that page a user may have bookmarked the page and they may click on
their bookmark. In this case they will arrive at an error. This is bad for the search engines. So please
be mindful that when you create a page you will need to think about what happens when you delete it,
e.g. where will your users be taken to as a replacement page.
Search Engines: Tick this box if you would like this page to be found in search engines
Sometimes you don't want a page to be found by Search Engines e.g. private pages that you only want
members to see. If this is the case then you will need to un-tick the box.
5. Content
The format of the content will be displayed in the template that you have selected in Step 2.
Where formatted content can be added you will see the buttons "Add block to Region (number#). Select
the relevant region that you would like to add content and then click on the "block number #"
This will open a box giving options ‘content’, 'lists' and ‘forms’.
From this tool you will be able to manage formatted content, image rotators, embedded galleries, forms,
asset listing, events summary,
events list for category, past events, news article category, and recent news summary.
To add general content click ‘formatted content’.
© 2014 WorldWeb Management Services Pty Ltd
23
Content ONE general user manual
The page will open with a html editing available.
Once your finished, click the 'Finish' button in the bottom left corner.
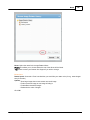
**Please note**
"We've got a problem" will appear if you have not filled in the required fields marked with an asterix.
© 2014 WorldWeb Management Services Pty Ltd
Add
2.2
24
Add Contact
How to Add a Contact
Contacts are the lifeblood of any email marketing campaign. Without them, there is no point to any
campaign. It is, therefore, vital that you build your own list of contacts.
In building your list, you should ensure that you are building a “quality” list. In terms of email marketing,
the old cliché holds true, “Quality is better than Quantity.” It is better to send to a few contacts who are
interested in your product/service/message than to send to random individuals who are not.
On the left navigation bar click 'Add', a sub menu will open with a list of categories.
Click 'Add Contact' from the subcategory.
Once ‘View Contacts’ is open, click ‘Add Contact’ which is located on the navigation bar.
© 2014 WorldWeb Management Services Pty Ltd
25
Content ONE general user manual
Once you have selected 'Add Contact' three steps will appear for you to select. The steps will appear
in the following order:
1. Basic Details
2. Contact Details
3. Membership groups
1. Basic Details
Contacts are the lifeblood of any email marketing campaign. Without them, there is no point to any
campaign. It is, therefore, vital that you build your own list of contacts.
In building your list, you should ensure that you are building a “quality” list. In terms of email marketing,
the old cliché holds true, “Quality is better than Quantity.” It is important that you build a contact list
based on contacts who are interested in your product/service/message than random individuals who are
not.
When you add a new contact, they will become a member of your website. If you would like them to be
able to log in to the member area then you will need to set them up with a password as well.
Once you have the contact you will need to populate the basic information or details for that contact.
Email Address: enter the contact email address
Title: select a title from the dropdown menu
Given Name: enter the first name of contact
Surname: enter the surname of contact
Phone (Work): enter work phone number
Phone (Home): enter home phone number
Phone (Mobile): enter mobile number
Has Password:
New Password: enter new password
Confirm Password: confirm new password
Can log in? this is pre-ticked to yes, only tick no if you do not wish for the contact to be able to log in
© 2014 WorldWeb Management Services Pty Ltd
Add
2. Contact Details
Address 1: enter the 1st line of contact address
Address 2: enter the 2nd line of contact address
Suburb: enter the suburb
Postcode: enter postcode
State: enter state
Country: enter country
© 2014 WorldWeb Management Services Pty Ltd
26
27
Content ONE general user manual
3. Membership Groups
It is important that you tick the relevant box so that the contact is included in the correct groups for
email/sms campaigns.
Once you have selected the relevant box for the member you will need to click 'Finish'.
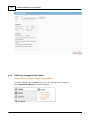
2.3
Add Group
How to Add Groups
This section is very important for your marketing as it provides you with way to add and assign emails to
groups.
On the left navigation bar click 'Contacts', a sub menu will open with a list of categories.
Click 'View Groups' from the subcategory.
© 2014 WorldWeb Management Services Pty Ltd
Add
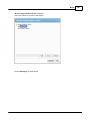
Once ‘View Groups’ is open, click ‘Add Group’ which is located on the navigation bar.
'Add Contact Group' will appear.
© 2014 WorldWeb Management Services Pty Ltd
28
29
Content ONE general user manual
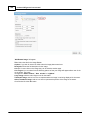
Once you are in the 'Add Group' section, you will be prompted to add information for the group of
members you are about to create. You will need to complete all the requested information areas.
Name: This will appear as the name of your group
Description: This section allows you to write a brief description of the nature of this group
Analytics Custom Variable Name:
Subscriptions:
This section refers to the 'Subscription' permissions for this group. Please select the appropriate
permission level to be set for this contact group.
Administrators can only add members to this group
Members can choose to join this group when registering or updating their membership
Members will automatically join this group when registering
Unsubscriptions
This section refers to the permissions for this group when it comes to 'Unsubscribing'
Members can manually remove themselves from this group
Members will automatically be removed from this group when they unsubscribe
Image: Click the 'browse' button to upload any additional relevant information
Click 'Ok' once finished.
© 2014 WorldWeb Management Services Pty Ltd
Add
2.4
30
Import Contacts
How to Import Contacts
If you have contacts that have been saved in other systems you can have them imported and market to
them. The following section outlines how you can do this.
On the left navigation bar click 'Add', a sub menu will open with a list of categories.
Click 'Import Contacts' from the subcategory.
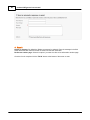
Step 1 of 3: Upload CSV File
*Please note the file MUST be CSV*
A CSV file is a spreadsheet file format that stands for comma-separated values. Most spreadsheet
programs allow you to import and export using this file type.
After your contact's data is in a CSV file, you can easily import your data into the marketing automation
tool. The time it takes to upload your data will depend on the size of your database.
When you are uploading your "contacts" data set, the tool will ask you to visually map the data points to
your new database.
To upload a CSV file you must carry out the following steps:
Click the 'Browse' button to search for the file on your computer.
Click 'Continue'.
© 2014 WorldWeb Management Services Pty Ltd
31
Content ONE general user manual
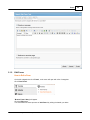
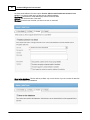
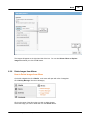
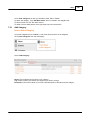
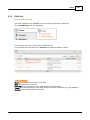
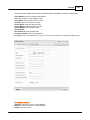
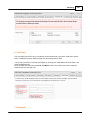
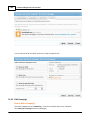
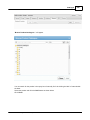
Step 2 of 3: Configure Import
We need to provide a description of the csv file format. For example what are the titles on the rows and
columns and what do they mean. I would explain it in the following manner:
The CSV file is a spreadsheet with a row at the top that has the name of all the content in the columns.
Each row will have the details for the contact to be imported.
Check the CSV file to ensure that there are not empty rows or columns with no headings or titles
assigned.
Once you have done that you can start the 'Import Contacts' section in ContentONE to browse and
upload the CSV file. ContentONE will automatically convert the file into your address book contacts for
email marketing. To do this you will need to follow these steps:
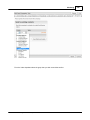
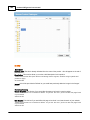
Import Options:
Tick all relevant options
When importing the CSV file or spreadsheet, it is important that you note the following:
The csv file is a spreadsheet with a row at the top that has the name of all the content in the columns.
Each row will have the details for the contact to be imported.
Do not import first row in in CSV (header row) - this is the name of your columns, you do not need to
import
Do not update details of existing contacts
Do not import rows with an invalid email address
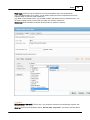
Please indicate what columns you want to import:
© 2014 WorldWeb Management Services Pty Ltd
Add
32
You will need to assign each column to the relevant dropdown option.
Click 'Continue'.
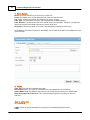
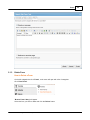
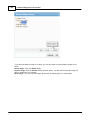
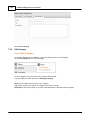
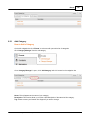
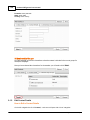
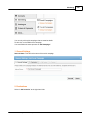
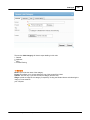
Step 3 of 3: Confirm Import
Once you click continue, you will arrive at the 'Confirm Import' screen, where you will be asked to
review the details and click 'Start Import' once you are happy with the details.
If there are skipped rows, it means the CSV has errors. When this occurs you should click the 'upload a
revised file' or 'Back to Step 2' if you want to repeat the whole process.
To check the contacts that are pending import you can click on 'show'. If all the new contacts are
correct and there are no skipped rows then you can click on 'Start Import'.
© 2014 WorldWeb Management Services Pty Ltd
33
2.5
Content ONE general user manual
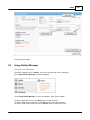
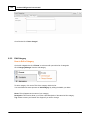
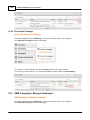
Email Campaign
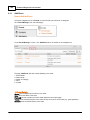
How to Add a New Campaign
This section details how you can use email marketing to reinforce your marketing strategy.
Communicating regularly with clients and prospective clients is crucial to a successful hair and beauty
business. E-mail, when used advantageously, helps ensure a steady return of repeat and referral
business. Because most of your clients will need your services an average of only once every 3 to 6
months, you need a way to maintain consistent contact during a long period of time. E-mail is your
answer.
Once you have all the contacts imported, categorised into groups and saved you can create a marketing
campaign. The following section details how you can create a new campaign by adding the campaign to
the system. Once the campaign has been added in the system, it will remain there for you to reuse in
the future.
The following section details how you can create a new campaign by adding the campaign to the system.
Once the campaign has been added in the system, it will remain there for you to reuse in the future.
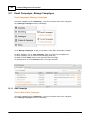
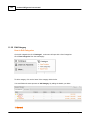
On the left navigation bar click 'Marketing', a sub menu will open with a list of categories.
Click 'Manage Campaigns' from the subcategory.
© 2014 WorldWeb Management Services Pty Ltd
Add
34
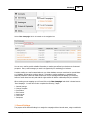
Select 'New Campaign' which is located on the navigation bar.
You can use e-mail to provide valuable information, to market yourself and your business to clients and
prospects. Every e-mail message you send is an opportunity for marketing your business.
Consider sending an e-mail communication to your client database once per month and on special dates
e.g. birthdays, anniversaries, mothers day etc. Remember, sending messages or newsletters too
frequently without a reason can make clients tune out your message and can damage your business,
however emails timed correctly and with the right content will build a relationship with your audience.
When creating a new campaign you will need click on the 'New Campaign' bab which is located next to
'View Campaign'. You will then need to complete the following 7 steps:
1.
2.
3.
4.
5.
6.
7.
General Settings
Change Template
Personalise
Edit Content
Attachments
Test Email
Recipients
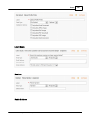
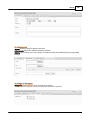
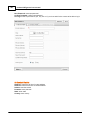
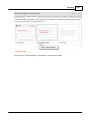
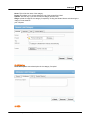
1. General Settings
The purpose of the General Settings is to assign the campaign with an internal name, a tag to enable the
© 2014 WorldWeb Management Services Pty Ltd
35
Content ONE general user manual
tracking of the email statistics and the details of the sender and recipient.
Internal Name: This will be the internal name of the email.
Analytics Tag: Email campaigns are a cost-effective way of attracting quality return visitors to your site.
It's important that you tag your email campaigns with campaign tags so that you can track how well each
email performs. You can tag your emails with the name of the email marketing campaign, e.g. Email
News, Email Promo 15 May 2014, etc. Campaign tags are also additional information that you apply to
links. Once a link is clicked, the tag information is passed to Google Analytics. Tagged links will also allow
you to evaluate the performance of individual links within your emails.
From Address: Enter the email address of who sent this email.
From Name: Enter the name of who sent this email
Subject: Enter the title of the email.
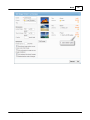
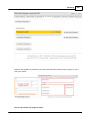
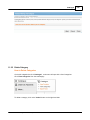
2. Change Template
There will be various templates for you to select. Select the template you would like to use for your email
from the list below.
The template you select will define how the email looks overall, and how your content will fit into the
template.
© 2014 WorldWeb Management Services Pty Ltd
Add
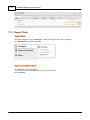
3. Personalise
Select the type of personalisation you would like to use from the list below:
© 2014 WorldWeb Management Services Pty Ltd
36
37
Content ONE general user manual
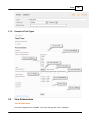
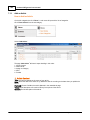
4. Edit Content
Depending on which template you select under the 'Change Template' section there will be a number of
'block regions' for you to add formatted content. Some of the templates will have one block region and
some may have as many as 6.
In the example below you can edit the content area by clicking into the Region 1 and using the HTML
editor (WYSIWYG), just like any other page of your website.
You can insert images, hyperlinks, various text styles and tables to create a unique look for your email.
© 2014 WorldWeb Management Services Pty Ltd
Add
38
Based on the template you selected in point 2 this will reflect the numbers of block regions for you to
enter your content.
How to add content and images to email:
© 2014 WorldWeb Management Services Pty Ltd
39
Content ONE general user manual
Click the button ' +Add block to Region #'. In the example below there are 6 block regions which have
the following content requirements:
+ Add block to Region 1 = whatever formatted content you would like this to be from images to text
+ Add block to Region 2 = whatever formatted content you would like this to be from images to text
+ Add block to Region 3 = whatever formatted content you would like this to be from images to text
+ Add block to Region 4 = whatever formatted content you would like this to be from images to text
+ Add block to Region 5 = the footer is normally a link back to the website with the contact details of the
business
+ Add block to Region 6 = add header, this is the header of the email so it is important that you keep
this short
Once you click the '+Add block to Region #' button a pop up window will appear.
Click 'Formatted Content'.
You can add, edit, delete content or images etc by using the HTML editor (WYSIWYG).
© 2014 WorldWeb Management Services Pty Ltd
Add
40
You then continue to do the same with the other regions.
If you wish to 'Edit' the region you can select the icon as shown below or you can place the mouse
within the region.
If you wish to 'Delete' a region you can select the remove button.
An example after adding image and content to email:
© 2014 WorldWeb Management Services Pty Ltd
41
Content ONE general user manual
5. Attachments
It is important that the emails sent out are small and light weight in size to ensure that it is quick and
easy for the intended recipient to download and open the email. To do this we strongly recommend that
instead of attaching a file you upload the file to the Document library of your website and add the URL
link for the user to access it directly via your email.
Please refer to the 'Media' section of this manual under the 'Media Manager' on how to upload a
document.
Whilst its not recommended, if you would like to attach the file to send to a small number of recipients
via email please continue with instructions below:
1. Click the link to start
2. Click the 'Add' button to add the attachments
3. Click the 'Browse' button to find the attachments saved on your computer
© 2014 WorldWeb Management Services Pty Ltd
Add
4. Click the 'Ok' button to finish
You can attach numerous files to your email.
To add attachments click the 'Add' button.
To edit attachments click the 'Edit' button.
To delete attachments click the file name and select the 'Delete' button.
To sort the attachments click the file name and select either 'Up' or 'Down' buttons.
© 2014 WorldWeb Management Services Pty Ltd
42
43
Content ONE general user manual
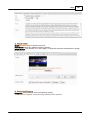
6. Test Email
Prior to sending the email to all your recipients we recommend that you test the email first to ensure
that it is displayed correctly and that all the links and calls to actions work.
You can test your email to see how it will appear by entering your email address and first name in the
areas highlighted below.
Once you have done that press the 'Send Test Email' button. Then check your email to verify the
format of what you have just sent.
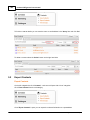
7. Recipients
© 2014 WorldWeb Management Services Pty Ltd
Add
44
The following area provides you with instructions of how you can select the recipients that will receive
your email. There are two options for you to choose from:
1. Send to existing contacts
2. Send to recipients in CSV
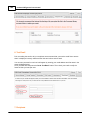
1. Send to existing contacts:
This section provides instructions of how you can send emails to your existing contacts. In the
recipients section there is an 'Add Criteria' button.
Click 'Add Criteria'.
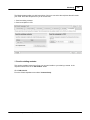
From the Criteria dropdown menu select 'Contact Group'.
© 2014 WorldWeb Management Services Pty Ltd
45
Content ONE general user manual
From the Value dropdown select the group that you wish to send the email to.
© 2014 WorldWeb Management Services Pty Ltd
Add
46
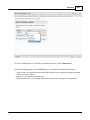
To send to multiple groups, you will need to repeat this process by clicking 'Add Criteria'.
Once finished adding groups click the 'Finish' button, you will then be presented with 3 options:
save as draft - the campaign will not be sent and will require you to manually come back and select
either of the next 2 options
send now - the campaign will be sent now
send at specific time - the campaign will be send at a time that you program it to be activated
© 2014 WorldWeb Management Services Pty Ltd
47
Content ONE general user manual
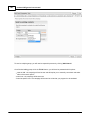
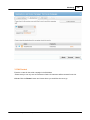
2. Send to recipients in CSV:
This section provides instructions of how you can send emails to your new contacts by importing a
CSV.
Click the 'Browse' button and select the CSV file that you have saved on your computer.
Click 'Upload'.
© 2014 WorldWeb Management Services Pty Ltd
Top Level Intro
This page is printed before a new
top-level chapter starts
Part
III
49
3
Content ONE general user manual
Preview
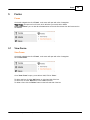
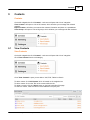
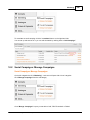
Preview
You can preview your website or changes by using the 'Preview' button in the Navigation Bar.
Preview will be used regularly from time to time when you make updates, changes or check the layout of
your website.
Once you click on preview the system will display your website on new window
© 2014 WorldWeb Management Services Pty Ltd
Top Level Intro
This page is printed before a new
top-level chapter starts
Part
IV
51
4
Content ONE general user manual
Pages
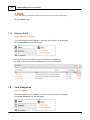
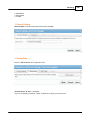
Pages
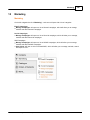
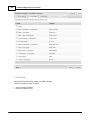
By clicking the Pages button, this will allow you to view pages
On the left navigation bar click 'Pages', a sub menu will open with a list of categories.
View Pages: will open to a list of all pages, which will allow you to manage and maintain pages.
View Navigation: will open to a list of pages and sub-pages. This will allow you to rearrange the order
of pages.
Shared Content: allows you to create content that can be assigned to several places rather then rewriting the
same content several times.
4.1
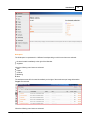
View Pages
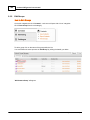
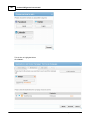
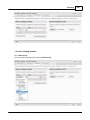
View Pages
On the left navigation bar click 'Pages', a sub menu will open with a list of categories.
Click 'View Pages' from the subcategory.
© 2014 WorldWeb Management Services Pty Ltd
Pages
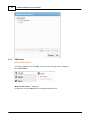
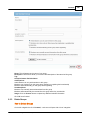
Once 'View Pages' is open you are able to either 'Add', 'Edit' or 'Delete' a page.
To add a page, click ‘Add Page’ which is located on the top navigation bar.
To edit a page click on the orange 'Title' of the page within the list.
To delete a page, click on the 'delete' button on the right hand side of the page.
© 2014 WorldWeb Management Services Pty Ltd
52
53
4.1.1
Content ONE general user manual
Add Page
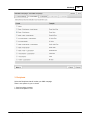
How to Add a Page
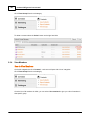
On the left navigation bar click 'Pages', a sub menu will open with a list of categories.
Click 'View Pages' from the subcategory.
Select 'Add Page'
When creating a new page you will need to complete the following 5 steps:
1. Page Details - provides information about the page. The information includes, page title, page tag,
parent of that page, description, security information for the page and whether the page is a system
page or embedded.
2. Template - when adding a page there are a variety of templates that will be available within the
system for you to select from.
3. Navigation - the navigation is an important step for you to create the pathway for users to access the
page to be created.
4. SEO - search engines will find this page based on the descriptions made on the page to define the
content that you put in.
5. Content - this is all the images, videos and text that you put into the selected template that will
become a page on the website.
© 2014 WorldWeb Management Services Pty Ltd
Pages
54
1 . Page Details
As shown above, the depth of a web-page in the hierarchy can also be considered. A menu system has
been setup on your website, which helps users to navigate between web-pages. This system determines
where in the site map a given page appears. When you access the add page screen you can browse
and select within the site structure where the added page will be placed.
You will need to complete all the empty fields to define the details of the page you are about to add.
Page Title: This title will appear as the header of your page, detailing the name / natural of your page.
Page Tag: The page tag is automatically filled as the page title is typed.
Parent: This allows you to choose where the root of this page will be linked.
Description: This section allows you to write a brief description of the natural of this page.
Secure Page: Tick this box if this page will handle sensitive information such as credit card details,
personal details etc.
Once details are filled in click the 'Next' button at the bottom of the page or alternatively you can click
on the tabs in the navigation.
2. Template
All pages are assigned a template. The template has been created for you by WorldWeb and determines
how the given page displays on the webpage (e.g: the number of columns, the graphics used). In some
cases, a number of different templates will have been created for you with different properties. A page
template may then be selected for a given page in the 'Add Page' section under the options tab
© 2014 WorldWeb Management Services Pty Ltd
55
Content ONE general user manual
(described later in this document).
Once the desired template has been selected you will then need to click 'Next'.
3. Navigation
The Navigation provides a pathway for the user to use your page as an access point to the rest of the
site.
This is where you will need to make a selection of where or how the page will be found within the site.
E.g. Home > About Us > Map
Choose a core page where you want your page to be located from, depending on how many
subcategories/pages you may have.
You then decide the path where someone can access that particular page. http://
www.websitename.com/about-us/map <-- This is how it will appear in your URL.
To select no path for page, click ‘None’.
The page URL will appear to be blank next to ‘Page URL’
© 2014 WorldWeb Management Services Pty Ltd
Pages
56
4. SEO
The way that a page is displayed within the site coupled with its content will determine how Search
Engines like Google read it.
As you create the page you will need to be mindful of how the Search Engine Robots see it. Basically
when you create the page, add it and its content you will need to make sure how its named and its
associated description is friendly for Search Engines, this is what we call Search Engine Optimisation
(SEO).
This data is called Meta Data, it is how the search engines index your page. To optimise your website
page you will need to complete Meta Data descriptions for the following areas:
Brow ser Title: This is used to generate the URL for the page (the URL is the file name of the web page
that is displayed in the browser address bar). When you create the browser title please make sure you
do not add .htm ro .html at the end of the the page as this will be automatically added by ContentONE for
you. All you need to do is type the Browser Title in plain english.
Description: This section allows you to write a brief description of the page
*Please note that the description w ill be used through search engines , therefore using keyw ords and
phrases that relate to your services, im age and story line of the page is highly recom m ended
© 2014 WorldWeb Management Services Pty Ltd
57
Content ONE general user manual
Image: Upload an image that you want to represent the page - for example in social networking this will
be the image icon that represents the page viewers would click on
Custom URL: Please do not make changes to this section. It is important that you contact WorldWeb to
understand more about Canonical URL's. This tells the search engines about the preferred location of
this page's URL. The important thing to remember is that when you create a page, users will go to the
page however once you delete that page a user may have bookmarked the page and they may click on
their bookmark. In this case they will arrive at an error. This is bad for the search engines. So please
be mindful that when you create a page you will need to think about what happens when you delete it,
e.g. where will your users be taken to as a replacement page.
Search Engines: Tick this box if you would like this page to be found in search engines
Sometimes you don't want a page to be found by Search Engines e.g. private pages that you only want
members to see. If this is the case then you will need to un-tick the box.
5. Content
The format of the content will be displayed in the template that you have selected in Step 2.
Where formatted content can be added you will see the buttons "Add block to Region (number#). Select
the relevant region that you would like to add content and then click on the "block number #"
This will open a box giving options ‘content’, 'lists' and ‘forms’.
From this tool you will be able to manage formatted content, image rotators, embedded galleries, forms,
asset listing, events summary,
events list for category, past events, news article category, and recent news summary.
To add general content click ‘formatted content’.
© 2014 WorldWeb Management Services Pty Ltd
Pages
58
The page will open with a html editing available.
Once your finished, click the 'Finish' button in the bottom left corner.
**Please note**
"We've got a problem" will appear if you have not filled in the required fields marked with an asterix.
© 2014 WorldWeb Management Services Pty Ltd
59
4.1.2
Content ONE general user manual
Edit Page
How to Edit a Page
On the left navigation bar click 'Pages', a sub menu will open with a list of categories.
Click 'View Pages' from the subcategory.
To edit a page click on the 'Title' of the page within the list.
You would follow the same process as 'Add Page' by editing the details you desire.
11 . Page Details
As shown above, the depth of a web-page in the hierarchy can also be considered. A menu system has
been setup on your website, which helps users to navigate between web-pages. This system determines
where in the site map a given page appears. When you access the add page screen you can browse
and select within the site structure where the added page will be placed.
You will need to complete all the empty fields to define the details of the page you are about to add.
Page Title: This title will appear as the header of your page, detailing the name / natural of your page.
Page Tag: The page tag is automatically filled as the page title is typed.
© 2014 WorldWeb Management Services Pty Ltd
Pages
60
Parent: This allows you to choose where the root of this page will be linked.
Description: This section allows you to write a brief description of the natural of this page.
Secure Page: Tick this box if this page will handle sensitive information such as credit card details,
personal details etc.
Once details are filled in click the 'Next' button at the bottom of the page or alternatively you can click
on the tabs in the navigation.
2. Template
All pages are assigned a template. The template has been created for you by WorldWeb and determines
how the given page displays on the webpage (e.g: the number of columns, the graphics used). In some
cases, a number of different templates will have been created for you with different properties. A page
template may then be selected for a given page in the 'Add Page' section under the options tab
(described later in this document).
Once the desired template has been selected you will then need to click 'Next'.
© 2014 WorldWeb Management Services Pty Ltd
61
Content ONE general user manual
3. Navigation
The Navigation provides a pathway for the user to use your page as an access point to the rest of the
site.
This is where you will need to make a selection of where or how the page will be found within the site.
E.g. Home > About Us > Map
Choose a core page where you want your page to be located from, depending on how many
subcategories/pages you may have.
You then decide the path where someone can access that particular page. http://
www.websitename.com/about-us/map <-- This is how it will appear in your URL.
To select no path for page, click ‘None’.
The page URL will appear to be blank next to ‘Page URL’
© 2014 WorldWeb Management Services Pty Ltd
Pages
62
4. SEO
The way that a page is displayed within the site coupled with its content will determine how Search
Engines like Google read it.
As you create the page you will need to be mindful of how the Search Engine Robots see it. Basically
when you create the page, add it and its content you will need to make sure how its named and its
associated description is friendly for Search Engines, this is what we call Search Engine Optimisation
(SEO).
This data is called Meta Data, it is how the search engines index your page. To optimise your website
page you will need to complete Meta Data descriptions for the following areas:
Brow ser Title: This is used to generate the URL for the page (the URL is the file name of the web page
that is displayed in the browser address bar). When you create the browser title please make sure you
do not add .htm ro .html at the end of the the page as this will be automatically added by ContentONE for
you. All you need to do is type the Browser Title in plain english.
Description: This section allows you to write a brief description of the page
*Please note that the description w ill be used through search engines , therefore using keyw ords and
phrases that relate to your services, im age and story line of the page is highly recom m ended
© 2014 WorldWeb Management Services Pty Ltd
63
Content ONE general user manual
Image: Upload an image that you want to represent the page - for example in social networking this will
be the image icon that represents the page viewers would click on
Custom URL: Please do not make changes to this section. It is important that you contact WorldWeb to
understand more about Canonical URL's. This tells the search engines about the preferred location of
this page's URL. The important thing to remember is that when you create a page, users will go to the
page however once you delete that page a user may have bookmarked the page and they may click on
their bookmark. In this case they will arrive at an error. This is bad for the search engines. So please
be mindful that when you create a page you will need to think about what happens when you delete it,
e.g. where will your users be taken to as a replacement page.
Search Engines: Tick this box if you would like this page to be found in search engines
Sometimes you don't want a page to be found by Search Engines e.g. private pages that you only want
members to see. If this is the case then you will need to un-tick the box.
5. Content
The format of the content will be displayed in the template that you have selected in Step 2.
Where formatted content can be added you will see the buttons "Add block to Region (number#). Select
the relevant region that you would like to add content and then click on the "block number #"
This will open a box giving options ‘content’, 'lists' and ‘forms’.
From this tool you will be able to manage formatted content, image rotators, embedded galleries, forms,
asset listing, events summary,
events list for category, past events, news article category, and recent news summary.
To add general content click ‘formatted content’.
© 2014 WorldWeb Management Services Pty Ltd
Pages
64
The page will open with a html editing available.
Once your finished, click the 'Finish' button in the bottom left corner.
**Please note**
"We've got a problem" will appear if you have not filled in the required fields marked with an asterix.
© 2014 WorldWeb Management Services Pty Ltd
65
4.1.3
Content ONE general user manual
Delete Page
How to Delete a Page
On the left navigation bar click 'Pages', a sub menu will open with a list of categories.
Click 'View Pages' from the subcategory.
To delete a page click on the 'Title' of the page within the list and select the 'delete' button on the right
hand side.
© 2014 WorldWeb Management Services Pty Ltd
Pages
4.2
66
View Navigation
View Navigation
On the left navigation bar click 'Pages', a sub menu will open with a list of categories.
Click 'View Navigation' from the subcategory.
Once 'View Navigation' is open you are able to reconfigure the navigation of each link within the
structure of the website.
To add child click the 'add child' button on the right hand side of the link you wish to create a sub-link
to.
To edit a link click on the title/name of the link.
To delete click the 'delete' button on the right hand side of the link.
To re-order the navigation click 're-order'. You will need to select the image on the right to move up and
down to set the new destination of the page.
© 2014 WorldWeb Management Services Pty Ltd
67
4.2.1
Content ONE general user manual
Add Child
How to Add a Child
On the left navigation bar click 'Pages', a sub menu will open with a list of categories.
Click 'View Navigation' from the subcategory.
Click 'add child' at the right hand side to where you wish to add a sub menu.
© 2014 WorldWeb Management Services Pty Ltd
Pages
68
Location: Site > Main > New Item
Name: This will be the name of the page you intend to add
Parent: This allows you to choose where the root of this menu item will be linked to by clicking the
'Browse' button
Tag: Please contact your Content One Support if you wish to change
Link to: This allows you to choose where you want this menu item to be linked to. Options appear in a
pop up for you to select:
© 2014 WorldWeb Management Services Pty Ltd
69
4.2.2
Content ONE general user manual
Edit Menu Item
How to Edit a Menu Item
On the left navigation bar click 'Pages', a sub menu will open with a list of categories.
Click 'View Navigation' from the subcategory.
© 2014 WorldWeb Management Services Pty Ltd
Pages
70
Click on the title of the menu you wish to edit.
Location: Site > Main > Home
Name: This will be the name of the page you intend to edit
Parent: This allows you to choose where the root of this menu item will be linked to by clicking the
'Browse' button
Tag: Please contact your Content One Support if you wish to change
Link to: This allows you to choose where you want this menu item to be linked to. Options appear on in
a pop up for you to select:
© 2014 WorldWeb Management Services Pty Ltd
71
4.2.3
Content ONE general user manual
Re-order Menu Item
How to Re-order a Menu Item
On the left navigation bar click 'Pages', a sub menu will open with a list of categories.
Click 'View Navigation' from the subcategory.
© 2014 WorldWeb Management Services Pty Ltd
Pages
72
Click 're-order' at the right hand side to re-order menu items.
Select the image on the right as shown below to move up and down to set the new destination of the
page.
© 2014 WorldWeb Management Services Pty Ltd
73
4.2.4
Content ONE general user manual
Delete Menu Item
How to Delete a Menu Item
On the left navigation bar click 'Pages', a sub menu will open with a list of categories.
Click 'View Navigation' from the subcategory.
To delete a menu item click 'delete' at the right hand side.
© 2014 WorldWeb Management Services Pty Ltd
Pages
4.3
74
Shared Content
Shared Content
On the left navigation bar click 'Pages', a sub menu will open with a list of categories.
Click 'Shared Content' from the subcategory.
Once 'Shared Content' is open you are able to 'Add', 'Edit' or 'Delete'.
Shared Content is creating content that can be assigned to several places rather then re-writing the
same content several times.
To add a new shared content click 'Add' on the bottom right of the box.
To edit a shared content click on the name of the shared content and on the bottom right of the box
click 'Edit'.
To delete a shared content click on the name of the shared content you wish to delete and on the
bottom right of the box click 'Delete'
© 2014 WorldWeb Management Services Pty Ltd
75
4.3.1
Content ONE general user manual
Add Shared Content
How to Add Shared Content
On the left navigation bar click 'Pages', a sub menu will open with a list of categories.
Click 'Shared Content' from the subcategory.
© 2014 WorldWeb Management Services Pty Ltd
Pages
Choose content to add... window will appear.
Select the 'Add' button at the bottom right hand side.
Name: This title will appear as the header of your page, detailing the name / natural of your page.
Parent: This allows you to choose where the root of this page will be linked.
Tag: Please contact your Content One Support if you wish to change.
Description: This section allows you to write a brief description of the natural of this page.
Shared Content: Add the content/information you would like to be shared on different pages.
© 2014 WorldWeb Management Services Pty Ltd
76
77
4.3.2
Content ONE general user manual
Edit Shared Content
How to Edit Shared Content
On the left navigation bar click 'Pages', a sub menu will open with a list of categories.
Click 'Shared Content' from the subcategory.
© 2014 WorldWeb Management Services Pty Ltd
Pages
Choose content to add... window will appear.
Select the 'Edit' button at the bottom right hand side.
You would follow the same process as 'Add Shared Content' by editing the details you desire.
Name: This title will appear as the header of your page, detailing the name / natural of your page.
Parent: This allows you to choose where the root of this page will be linked.
Tag: Please contact your Content One Support if you wish to change.
Description: This section allows you to write a brief description of the natural of this page.
Shared Content: Add the content/information you would like to be shared on different pages.
© 2014 WorldWeb Management Services Pty Ltd
78
79
4.3.3
Content ONE general user manual
Delete Shared Content
How to Delete Shared Content
On the left navigation bar click 'Pages', a sub menu will open with a list of categories.
Click 'Shared Content' from the subcategory.
© 2014 WorldWeb Management Services Pty Ltd
Pages
'Choose content to add...' window will appear.
Select the 'Delete' button at the bottom right hand side.
© 2014 WorldWeb Management Services Pty Ltd
80
Top Level Intro
This page is printed before a new
top-level chapter starts
Part
V
Forms
5
82
Forms
Forms
On the left navigation bar click 'Forms', a sub menu will open with a list of categories.
View Forms: will open to a list of forms, which will allow you to add, edit or delete.
View Submissions: you can view all submitted entries to the site from clients from the forms used on
the website.
5.1
View Forms
View Forms
On the left navigation bar click 'Forms', a sub menu will open with a list of categories.
Click 'View Forms'.
Once 'View Forms' is open you are able to 'Add', 'Edit' or 'Delete'.
To add a new form click the 'Add' bottom on right hand side of the box.
To edit a form click the 'Edit' button in the middle of the box.
To delete a form click the 'Delete' button on the left hand side of the box.
© 2014 WorldWeb Management Services Pty Ltd
83
5.1.1
Content ONE general user manual
Add Forms
How to Add a Form
On the left navigation bar click 'Forms', a sub menu will open with a list of categories.
Click 'View Forms'.
'Browse Form Library...' will appear.
To add a form click the 'Add' button at the left hand side of the box.
© 2014 WorldWeb Management Services Pty Ltd
Forms
84
The page ‘Add Form’ will have 4 steps detailing in this order.
1. Form Details
2. Fields
3. Action
4. Result
1 . Form Details
Name: This will be the title of your form for e.g 'Contact Us'.
Parent: This allows you to choose where the root of this form will be linked.
Tag: Please contact your Content One Support if you wish to change.
Form Type: You will need to select from the list (Single Step or Multiple Steps).
Form Structure: You will need to select from the list (Inline, List and Table). The layout you select will
define how the form looks overall and how your content will fit into it.
Description: This section allows you to write a brief description of the natural of this form
Click 'Next>' at the bottom of the box or alternatively you can click on the tabs in the navigation to move
to the next step.
© 2014 WorldWeb Management Services Pty Ltd
85
Content ONE general user manual
2 . Fields
Form Title: This title will be defaulted from step 1.
Introduction Text: If you require an introduction to the form please fill in here (Optional).
Submit Button Text: The default is 'Send' but you can change here by entering your preferred text.
What fields should be in the form": This is the information required to be present on the form.
Add field
H o w to ad d a field
Click 'Add field'
Label: This will be the question/detail you require from the individual filling out this form.
Field Type: Select the type of question this is from the dropdown menu (see image below)
(e.g. if you placed 'Name' in the 'Label', you will need to select text from the dropdown menu as the
customer filling out the form
needs to add text)
(e.g. What is your favourite colour, you will need to select radio buttons from the dropdown menu. You
will need to supply the list of colours that you intent your client to choose from.
Relevance: Choose whether the answer to this question is optional or required
© 2014 WorldWeb Management Services Pty Ltd
Forms
86
3. Action
Notify someone via email: Tick this box if you would like someone to be notified when a person has
filled in the form.
Send to: Select from the dropdown options 'Send to same recipients' if you want to send the data to
the same email address OR select option 'Send to different email addresses based on form
values' if you want a certain piece of data sent to a different address.
Recipients: Nominate the email address(es) that will receive the data.
Subject: This will be the title of the email.
Message: Enter the text here that you wish to be seen on the email.
© 2014 WorldWeb Management Services Pty Ltd
87
Content ONE general user manual
Save to the database: This box will be pre-filled, only un-tick this box if you do not wish all data from
forms to be saved to your database.
Create Contact: Tick this box if you would like to create a contact in the system and fill in the relevant
information.
© 2014 WorldWeb Management Services Pty Ltd
Forms
88
Send an automatic response via email: Tick this box if you would like a automatic email to be sent
to the person who filled out the form.
From Name: Enter the name of who sent this email.
From Email: Enter the email address of who sent this email.
Subject: Enter the title of the email.
Message: Enter the text here that you wish to be seen on the email.
Options: Tick this box if you would like to send the form with the email.
© 2014 WorldWeb Management Services Pty Ltd
89
Content ONE general user manual
4 . Result
Display a message: By default the 'Display a message' is selected. Enter the message in the field
shown below that the client will receive once the form has been submitted.
Redirect to another page: Select this option if you want the client to be redirected to another page.
Once the form is complete click the 'Finish' button at the bottom of the screen to save.
© 2014 WorldWeb Management Services Pty Ltd
Forms
5.1.2
Edit Forms
How to Edit a Form
On the left navigation bar click 'Forms', a sub menu will open with a list of categories.
Click 'View Forms'.
'Browse Form Library' will appear.
Click the 'Edit' button.
You would follow the same process as 'Add Forms' by editing the details you desire.
© 2014 WorldWeb Management Services Pty Ltd
90
91
Content ONE general user manual
1 . Form Details
Name: This will be the title of your form for e.g 'Contact Us'.
Parent: This allows you to choose where the root of this form will be linked.
Tag: Please contact your Content One Support if you wish to change.
Form Type: You will need to select from the list (Single Step or Multiple Steps).
Form Structure: You will need to select from the list (Inline, List and Table). The layout you select will
define how the form looks overall and how your content will fit into it.
Description: This section allows you to write a brief description of the natural of this form
Click 'Next>' at the bottom of the box or alternatively you can click on the tabs in the navigation to move
to the next step.
2 . Fields
Form Title: This title will be defaulted from step 1.
Introduction Text: If you require an introduction to the form please fill in here (Optional).
Submit Button Text: The default is 'Send' but you can change here by entering your preferred text.
What fields should be in the form": This is the information required to be present on the form.
Add field
H o w to ad d a field
Click 'Add field'
Label: This will be the question/detail you require from the individual filling out this form.
© 2014 WorldWeb Management Services Pty Ltd
Forms
92
Field Type: Select the type of question this is from the dropdown menu (see image below)
(e.g. if you placed 'Name' in the 'Label', you will need to select text from the dropdown menu as the
customer filling out the form needs to add text)
(e.g. What is your favourite colour, you will need to select radio buttons from the dropdown menu. You
will need to supply the list of colours that you intent your client to choose from.
Relevance: Choose whether the answer to this question is optional or required
3. Action
Notify someone via email: Tick this box if you would like someone to be notified when a person has
filled in the form.
Send to: Select from the dropdown options 'Send to same recipients' if you want to send the data to
© 2014 WorldWeb Management Services Pty Ltd
93
Content ONE general user manual
the same email address OR select option 'Send to different email addresses based on form
values' if you want a certain piece of data sent to a different address.
Recipients: Nominate the email address(es) that will receive the data.
Subject: This will be the title of the email.
Message: Enter the text here that you wish to be seen on the email.
Save to the database: This box will be pre-filled, only un-tick this box if you do not wish all data from
forms to be saved to your database.
© 2014 WorldWeb Management Services Pty Ltd
Forms
94
Create Contact: Tick this box if you would like to create a contact in the system and fill in the relevant
information.
Send an automatic response via email: Tick this box if you would like a automatic email to be sent
to the person who filled out the form.
From Name: Enter the name of who sent this email.
From Email: Enter the email address of who sent this email.
Subject: Enter the title of the email.
Message: Enter the text here that you wish to be seen on the email.
Options: Tick this box if you would like to send the form with the email.
© 2014 WorldWeb Management Services Pty Ltd
95
Content ONE general user manual
4 . Result
Display a message: By default the 'Display a message' is selected. Enter the message in the field
shown below that the client will receive once the form has been submitted.
Redirect to another page: Select this option if you want the client to be redirected to another page.
Once the form is complete click the 'Finish' button at the bottom of the screen to save.
© 2014 WorldWeb Management Services Pty Ltd
Forms
5.1.3
Delete Form
How to Delete a Form
On the left navigation bar click 'Forms', a sub menu will open with a list of categories.
Click 'View Forms'.
'Browse Form Library' will appear.
Select the form you wish to delete and click the 'Delete' button.
© 2014 WorldWeb Management Services Pty Ltd
96
97
5.1.4
Content ONE general user manual
Examples of Field Types
Examples of Field Types
Here are some examples of field types to consider when you are creating a form.
*Heading
This option is the heading on each section of the form.
Date
© 2014 WorldWeb Management Services Pty Ltd
Forms
Email Address
Check boxes
© 2014 WorldWeb Management Services Pty Ltd
98
99
Content ONE general user manual
Exam ple: Check boxes
Drop Down
Exam ple: Dr op dow n
File Upload
© 2014 WorldWeb Management Services Pty Ltd
Forms
Likert Scale
Number
Radio Buttons
© 2014 WorldWeb Management Services Pty Ltd
100
101
Content ONE general user manual
Exam ple: Radio Buttons
Reply-To Email Address
Text
Textbox
© 2014 WorldWeb Management Services Pty Ltd
Forms
5.1.5
Example of Field Types
5.2
View Submissions
View Submissions
On the left navigation bar click 'Forms', a sub menu will open with a list of categories.
© 2014 WorldWeb Management Services Pty Ltd
102
103
Content ONE general user manual
Click 'View Submissions'.
Once 'View Submissions' is open you are able to view all existing forms submitted by your client/
customers.
You will need to select the 'Browse' button as highlighted below in red to view the list of forms on your
website.
'Browse Form Library' will appear.
Highlight the form you wish to view and click 'Ok'.
© 2014 WorldWeb Management Services Pty Ltd
Forms
© 2014 WorldWeb Management Services Pty Ltd
104
Top Level Intro
This page is printed before a new
top-level chapter starts
Part
VI
Media
6
Media
Media
On the left navigation bar click 'Media', a sub menu will open with a list of categories.
Media Manager: This stores all your documents and videos that are used for your website.
Gallery Manager: This stores all your images that you have on your website.
Image Rotator Manager: This stores all your images that you use for the rotator on your site.
6.1
Media Manager
Media Manager
On the left navigation bar click 'Media', a sub menu will open with a list of categories.
Click 'Media Manager' from the subcategory.
Once 'Media Manager' is open you are able to 'Add', 'Edit' or 'Delete'.
To add a new file click on the 'Add' bottom on right of the box.
To edit a file click on the 'Edit' button in the middle of the box.
To delete a file click on the 'Delete' button on the left of the box.
© 2014 WorldWeb Management Services Pty Ltd
106
107
6.1.1
Content ONE general user manual
Add Image
How to Add an Image
On the left navigation bar click 'Media', a sub menu will open with a list of categories.
Click 'Media Manager' from the subcategory.
'Media Manager' will appear
© 2014 WorldWeb Management Services Pty Ltd
Media
108
The following is a list of items you can add to your site by selecting the dropdown highlighted below:
Audio File
Document
External Page
Image
Movie
© 2014 WorldWeb Management Services Pty Ltd
109
Content ONE general user manual
Manage: Select 'Image' from the dropdown menu.
Click the 'Add' button.
'Add Image' will appear.
Name: You do not need to type anything here. The system will automatically fill in the details for you
after you select the file you wish to upload.
Parent: This allows you to choose where the root of this image will be linked.
File: Click the 'Browse' button to find the image you wish to upload.
Description: This section allows you to write a brief description of the natural of this form
Click the 'OK' button
To finish click the 'Close' button
© 2014 WorldWeb Management Services Pty Ltd
Media
© 2014 WorldWeb Management Services Pty Ltd
110
111
6.1.2
Content ONE general user manual
Edit Image
How to Edit an Image
On the left navigation bar click 'Media', a sub menu will open with a list of categories.
Click 'Media Manager' from the subcategory.
'Media Manager' will appear.
© 2014 WorldWeb Management Services Pty Ltd
Media
To edit an image click on the 'Title' of the image within the list.
You would follow the same process as 'Add Image' by editing the details you desire.
6.1.3
Delete Image
How to Delete an Image
On the left navigation bar click 'Media', a sub menu will open with a list of categories.
Click 'Media Manager' from the subcategory.
© 2014 WorldWeb Management Services Pty Ltd
112
113
Content ONE general user manual
'Media Manager' will appear.
Manage: Select 'Image' from the dropdown menu
Image Library folder: Select the image you wish to delete
Click the 'Delete' Button
Click the 'Ok' button in the pop up window to confirm you wish to delete the image selected
Continue to delete images by following the same process.
Please note this function cal only delete one by one
Once finished deleting images click the 'Close' button
© 2014 WorldWeb Management Services Pty Ltd
Media
6.1.4
Manage Folders
How to Manage Folders
The best way to manage your images, documents, videos etc. is to create a directory.
Image Library
1. Event images (category)
Event 1 (Album)
- image 1
- image 2
- image 3
Event 2 (Album)
- image 1
- image 2
- image 2
2. News images (category)
All folders can have a directory and a sub directory that can help you manage all of media files.
© 2014 WorldWeb Management Services Pty Ltd
114
115
6.1.4.1
Content ONE general user manual
Add New Folders
How to Add a New Folder
On the left navigation bar click 'Media', a sub menu will open with a list of categories.
Select 'Media Manager' from the subcategory.
Click the 'Add' Button.
Click the 'Browse' button as shown below.
'Browse Folders' will appear.
Select 'Image Library'
Click the 'Add' button
© 2014 WorldWeb Management Services Pty Ltd
Media
'Add Folder' will appear.
Name: Enter folder name
Click the 'Ok' button.
6.1.4.2
Delete Folders/Images
How to Delete Folders / Images
On the left navigation bar click 'Media', a sub menu will open with a list of categories.
Select 'Media Manager' from the subcategory.
Manage: Select from the dropdown menu for e.g select 'Image'.
Image Library folder: Select the folder/image you wish to delete.
Click the 'Delete' Button.
Click the 'Ok' button in the pop up window to confirm you wish to delete the image selected.
Continue to delete folders/images by following the same process.
Please note this function can only delete one by one.
© 2014 WorldWeb Management Services Pty Ltd
116
117
Content ONE general user manual
Once finished deleting images click the 'Close' button.
6.2
Gallery Manager
Gallery Manager
On the left navigation bar click 'Media', a sub menu will open with a list of categories.
Click 'Gallery Manager' from the subcategory.
Once 'Gallery Manager' is open you are able to 'Add', 'Edit' or 'Delete'.
To add a category/image click on the 'Add' bottom on right of the box.
To edit a category/image click on the 'Edit' button in the middle of the box.
To delete a category/image click on the 'Delete' button on the left of the box.
© 2014 WorldWeb Management Services Pty Ltd
Media
6.2.1
Add Gallery Category
How to Add a Gallery Category
On the left navigation bar click 'Media', a sub menu will open with a list of categories.
Click 'Gallery Manager' from the subcategory.
'Browse Gallery Library' will appear.
Click the 'Ok' button.
© 2014 WorldWeb Management Services Pty Ltd
118
119
Content ONE general user manual
Name: Select the name for the Gallery Category.
Parent: This allows you to choose where the root of the image will be linked.
Tag: Please contact your Content One Support if you wish to change.
Behaviours: Allow search engines to index images is pre-ticked for you. Only change this is you
require your images to be downloaded in a lightbox (the desired image will display as an overlay on the
current page).
Once finished click the 'Ok' button.
© 2014 WorldWeb Management Services Pty Ltd
Media
6.2.2
Edit Gallery Category
How to Edit a Gallery Category
On the left navigation bar click 'Media', a sub menu will open with a list of categories.
Click 'Gallery Manager' from the subcategory.
© 2014 WorldWeb Management Services Pty Ltd
120
121
Content ONE general user manual
To edit a category click on the name of the category you wish to edit and select the 'Edit' button.
You would follow the same process as 'Add Gallery Category' by editing the details you desire.
Name: Select the name for the Gallery Category.
Parent: This allows you to choose where the root of the image will be linked.
Tag: Please contact your Content One Support if you wish to change.
Behaviours: Allow search engines to index images is pre-ticked for you. Only change this is you
require your images to be downloaded in a lightbox (the desired image will display as an overlay on the
current page).
Once finished click the 'Ok' button.
© 2014 WorldWeb Management Services Pty Ltd
Media
6.2.3
Delete Gallery Category
How to Delete a Gallery Category
On the left navigation bar click 'Media', a sub menu will open with a list of categories.
Click 'Gallery Manager' from the subcategory.
To delete a category click on the name of the category and select the 'Delete' button.
© 2014 WorldWeb Management Services Pty Ltd
122
123
Content ONE general user manual
Click the 'Ok' button in the pop up window to confirm you wish to delete the image selected.
Continue to delete folders/images by following the same process.
Please note this function can only delete one by one.
Once finished deleting images click the 'Close' button.
6.2.4
Add Album to Category
How to Add an Album to Category
On the left navigation bar click 'Media', a sub menu will open with a list of categories.
Click 'Gallery Manager' from the subcategory.
© 2014 WorldWeb Management Services Pty Ltd
Media
124
Click on the name of the Gallery Category that you wish to add an album to.
Click the 'Add' button.
Name: Select the name for the Album.
Parent: This allows you to choose where the root of the album will be linked.
Tag: Please contact your Content One Support if you wish to change.
Behaviours: Allow search engines to index images is pre-ticked for you. Only change this is you
require your images to be downloaded in a lightbox (the desired image will display as an overlay on the
current page).
Once finished click the 'Ok' button.
© 2014 WorldWeb Management Services Pty Ltd
125
6.2.5
Content ONE general user manual
Edit Album
How to Edit an Album
On the left navigation bar click 'Media', a sub menu will open with a list of categories.
Click 'Gallery Manager' from the subcategory.
To Edit an album click on the name of image/album/category name you wish to edit and click 'Edit'
button.
© 2014 WorldWeb Management Services Pty Ltd
Media
126
You would follow the same process as 'Add Album to Category. by editing the details you desire.
Name: Select the name for the Album.
Parent: This allows you to choose where the root of the album will be linked.
Tag: Please contact your Content One Support if you wish to change.
Behaviours: Allow search engines to index images is pre-ticked for you. Only change this is you
require your images to be downloaded in a lightbox (the desired image will display as an overlay on the
current page).
Once finished click the 'Ok' button.
© 2014 WorldWeb Management Services Pty Ltd
127
6.2.6
Content ONE general user manual
Delete Album
How to Delete an Album
On the left navigation bar click 'Media', a sub menu will open with a list of categories.
Click 'Gallery Manager' from the subcategory.
To delete an album click on the name of the album and click the 'Delete' button.
© 2014 WorldWeb Management Services Pty Ltd
Media
Click the 'Ok' button in the pop up window to confirm you wish to delete the album selected.
Continue to delete albums by following the same process.
Please note this function can only delete one by one.
Once finished deleting albums click the 'Close' button.
6.2.7
Add Images to Album
How to Add Images to Album
On the left navigation bar click 'Media', a sub menu will open with a list of categories.
Click 'Gallery Manager' from the subcategory.
© 2014 WorldWeb Management Services Pty Ltd
128
129
Content ONE general user manual
Click on the name of the Album that you wish to add images.
Click the 'Add' button.
'Add Gallery' will appear.
Click the 'Browse' button as shown below.
© 2014 WorldWeb Management Services Pty Ltd
Media
130
You will need to select the images you wish to upload from your computer.
Please note you can select multiple images at once by holding the 'Ctrl' and selecting the images.
© 2014 WorldWeb Management Services Pty Ltd
131
Content ONE general user manual
Click the 'Upload' button.
Click the 'Ok' button.
© 2014 WorldWeb Management Services Pty Ltd
Media
132
The images will appear on the right hand side of the box. You can also Delete / Move or Replace
images here before you click the 'Ok' button.
6.2.8
Delete Images from Album
How to Delete Images from Album
On the left navigation bar click 'Media', a sub menu will open with a list of categories.
Click 'Gallery Manager' from the subcategory.
Click on the name of the Album that you wish to delete images.
Select the image you wish to delete and click the 'Delete' button.
© 2014 WorldWeb Management Services Pty Ltd
133
Content ONE general user manual
If you have just added an image to an album you can also delete, move and replace images in the
album:
Delete image: Click the 'Delete' button.
Replace image: Click the 'Browse' button as shown below. You will need to select the image you
wish to upload from your computer.
Move image: You can move the images up and down by selecting the icon shown below.
© 2014 WorldWeb Management Services Pty Ltd
Media
Once finished click 'Ok'.
6.3
Image Rotator Manager
Image Rotator Manager
On the left navigation bar click 'Media', a sub menu will open with a list of categories.
Click 'Image Rotator Manager' from the subcategory.
Once 'Image Rotator Manager' is open you are able to 'Add', 'Edit' or 'Delete'.
To add an image rotator click on the 'Add' bottom on right of the box.
To edit an image rotator image click on the 'Edit' button in the middle of the box.
To delete a image rotator image click on the 'Delete' button on the left of the box.
© 2014 WorldWeb Management Services Pty Ltd
134
135
6.3.1
Content ONE general user manual
Add Image Rotator Album
How to Add a Image Rotator Album
On the left navigation bar click 'Media', a sub menu will open with a list of categories.
Click 'Image Rotator Manager' from the subcategory.
'Browse Image Rotator Library' will appear.
Click the 'Add' button.
© 2014 WorldWeb Management Services Pty Ltd
Media
136
Name: Select the name for the Image Rotator Album.
Parent: This allows you to choose where the root of the album will be linked.
Tag: Please contact your Content One Support if you wish to change.
Behaviours:
Rotate Speed: X seconds - Enter how fast/slow you would like your rotator to be (for e.g. rotate images
every 5 seconds)
Options:
- Show large image when mouse moves over small image
- Fade out previous image as new image is fading in
- Fade between thumbnail images
- Randomise the order of images
Click 'Ok'.
© 2014 WorldWeb Management Services Pty Ltd
137
6.3.2
Content ONE general user manual
Add Image to Image Rotator Album
How to Add an Image to Image Rotator Album
On the left navigation bar click 'Media', a sub menu will open with a list of categories.
Click 'Image Rotator Manager' from the subcategory.
© 2014 WorldWeb Management Services Pty Ltd
Media
'Browse Image Rotator Library' will appear.
Select the folder that you wish to add images.
Select 'Add Image' as shown below.
© 2014 WorldWeb Management Services Pty Ltd
138
139
Content ONE general user manual
'Add Rotator Image' will appear.
Title: Select the title for the Image Rotator.
Caption: If you wish for text to be visible under the image please enter here.
Description: Enter the full description for the image.
Link To: If a user clicks on the image they can be linked to another page.
Link Target: You can select from the following options of how your image will appear after a user clicks
on the image. The image
can appear in 'Same window', 'New window' or 'Lightbox'.
Large Image: Add the main image to use for the rotator.
Thumbnail Image: Add an icon here to represent when the image is not being displayed in the rotator.
Active Thumbnail image: Add an icon here to represent the position of the image in the rotator.
Once finished click the 'Ok' button.
© 2014 WorldWeb Management Services Pty Ltd
Media
Example of Rotator Image:
.
© 2014 WorldWeb Management Services Pty Ltd
140
141
6.3.3
Content ONE general user manual
Edit Image Rotator Album
How to Edit Image Rotator Album
On the left navigation bar click 'Media', a sub menu will open with a list of categories.
Click 'Image Rotator Manager' from the subcategory.
'Browse Image Rotator Library' will appear.
To edit a folder click on the name of the folder and select the 'Edit' button.
You would follow the same process as 'Add Image Rotator Album' by editing the details you desire.
Name: Select the name for the Image Rotator Album.
Parent: This allows you to choose where the root of the album will be linked.
© 2014 WorldWeb Management Services Pty Ltd
Media
142
Tag: Please contact your Content One Support if you wish to change.
Behaviours:
Rotate Speed: X seconds - Enter how fast/slow you would like your rotator to be (for e.g. rotate images
every 5 seconds)
Options:
- Show large image when mouse moves over small image
- Fade out previous image as new image is fading in
- Fade between thumbnail images
- Randomise the order of images
Click 'Ok'.
© 2014 WorldWeb Management Services Pty Ltd
143
6.3.4
Content ONE general user manual
Edit Image in Image Rotator Album
How to Edit Image in Image Rotator Album
On the left navigation bar click 'Media', a sub menu will open with a list of categories.
Click 'Image Rotator Manager' from the subcategory.
'Browse Image Rotator Library' will appear.
To edit a image click on the name of the folder and select the 'Edit' button.
© 2014 WorldWeb Management Services Pty Ltd
Media
Click the 'Edit' button on the right as shown below.
© 2014 WorldWeb Management Services Pty Ltd
144
145
Content ONE general user manual
Edit the details that you desire.
Title: Select the title for the Image Rotator.
Caption: If you wish for text to be visible under the image please enter here.
Description: Enter the full description for the image.
Link To: If a user clicks on the image they can be linked to another page.
Link Target: You can select from the following options of how your image will appear after a user clicks
on the image.
The image can appear 'Same window', 'New window' or 'Lightbox'.
Large Image: before add image to this part must be adjust the image site to the same banner site if not
the layout of
picture will not show up exactly you need.
Thumbnail Image: Add an icon here to represent when the image is not being displayed in the rotator.
Active Thumbnail image: Add an icon here to represent the position of the image in the rotator.
form normal thumbnail image that you can see from the sample in below.
Once finished click the 'Ok' button.
© 2014 WorldWeb Management Services Pty Ltd
Media
6.3.5
Delete Image Rotator Album
How to Delete Image Rotator Album
On the left navigation bar click 'Media', a sub menu will open with a list of categories.
Click 'Image Rotator Manager' from the subcategory.
© 2014 WorldWeb Management Services Pty Ltd
146
147
Content ONE general user manual
'Browse Image Rotator Library' will appear.
To delete an album click on the name of the folder and select the 'Delete' button.
Confirm by clicking 'Ok'.
© 2014 WorldWeb Management Services Pty Ltd
Media
6.3.6
Delete Image in Image Rotator Album
How to Delete an Image in Image Rotator Album
On the left navigation bar click 'Media', a sub menu will open with a list of categories.
Click 'Image Rotator Manager' from the subcategory.
'Browse Image Rotator Library' will appear.
To delete an image within an album click on the name of the image and select the 'Edit' button.
© 2014 WorldWeb Management Services Pty Ltd
148
149
Content ONE general user manual
'Edit Image Rotator': (Name of Album) will appear.
Click the 'Delete' button.
Click the 'Ok' button in the pop up window to confirm you wish to delete the image selected.
Continue to delete images by following the same process.
© 2014 WorldWeb Management Services Pty Ltd
Media
© 2014 WorldWeb Management Services Pty Ltd
150
Top Level Intro
This page is printed before a new
top-level chapter starts
Part
VII
News
7
152
News
News
On the left navigation bar click 'News', a sub menu will open with a list of categories.
View Articles - will open to a list of all pages, which will allow you to manage and maintain articles.
View Categories - will open to a list of categories and sub-categories. This will allow you to rearrange
the order of pages.
7.1
View Articles
View Articles
On the left navigation bar click 'News', a sub menu will open with a list of categories.
Click 'View Articles' from the subcategory.
Once 'View Articles' is open you are able to 'Add', 'Edit' or 'Delete'.
To add a new article, click ‘Add Article’ which is located in the navigation bar.
To edit an article click on the 'Title' within the list.
To delete an article click the 'delete' button on the right hand side of the news article.
Query: Type in a keyword or phrase that you want to search for within the list of articles.
List Categories: This will open a list of categories that the articles can be assigned/linked to.
© 2014 WorldWeb Management Services Pty Ltd
153
7.1.1
Content ONE general user manual
Add an Article
How to Add an Article
On the left navigation bar click 'News', a sub menu will open with a list of categories.
Click 'View Articles' from the subcategory.
Select 'Add Article'
The page ‘Add Article’ will have 5 steps detailing in this order:
1. Article Content
2. Attachments
3. Assign to Category
4. SEO
5. Preview
1 . Article Content
Title: This title will appear as the name of your article.
Date: Select the date of the article or by default the date is according to the date when you publish the
article.
Featured: Choose Yes/No to have this featured in the news/article page.
Teaser: Brief description of the article OR key focus points of the article.
Content: The full description of the article.
© 2014 WorldWeb Management Services Pty Ltd
News
154
2 . Attachments
Image: Upload an image to represent the article.
Attachments: Upload any additional relevant information.
Image Gallery: This will allow you to add a gallery of images that have been added previously through
Media Manager.
3 . Assign to Category
Categories: Assign the event to the corresponding category.
*P leas e note the c ategories will vary ac c ording to what you have s pec ified
© 2014 WorldWeb Management Services Pty Ltd
155
Content ONE general user manual
4 . SEO
Brow ser Title: The title is already defaulted from the name of the page - this will appear on the tab of
your browser.
Description: This section allows you to write a brief description of the page.
*P leas e note that the des c ription will b e us ed through s earc h engines , therefore us ing k eywords
andphras es is highly rec om m ended
Image: Upload an image that you want to represent the page - for example in social networking this will
be the image icon that represents the page viewers would click on.
Search Engines: Tick this box if you would like this page to be found in search engines
*P leas e note that the b ox is tic k ed as a default - only un-tic k this b ox if you do not want this page found
in your internal s earc h res ults .
Site Search: Tick this box if you would like this page to be found in an internal search of your website.
*P leas e note that the b ox is tic k ed as a default - only un-tic k this b ox if you do not want this page found
in your internal s earc h
res ults .
© 2014 WorldWeb Management Services Pty Ltd
News
156
5 . Preview
*This page will s how a preview of what the artic le will look lik e on the web s ite page.
Click the 'Finish' button.
7.1.2
Edit an Article
How to Add an Article
On the left navigation bar click 'News', a sub menu will open with a list of categories.
Click 'View Articles' from the subcategory
To edit an article click on the 'Title' of the article within the list.
You would follow the same process as 'Adding an Article' by editing the details you desire.
1 . Article Content
Title: This title will appear as the name of your article.
Date: Select the date of the article or by default the date is according to the date when you publish the
article.
Featured: Choose Yes/No to have this featured in the news/article page.
Teaser: Brief description of the article OR key focus points of the article.
Content: The full description of the article.
© 2014 WorldWeb Management Services Pty Ltd
157
Content ONE general user manual
2 . Attachments
Image: Upload an image to represent the article.
Attachments: Upload any additional relevant information.
Image Gallery: This will allow you to add a gallery of images that have been added previously through
Media Manager.
3 . Assign to Category
Categories: Assign the event to the corresponding category.
*P leas e note the c ategories will vary ac c ording to what you have s pec ified
© 2014 WorldWeb Management Services Pty Ltd
News
158
4 . SEO
Brow ser Title: The title is already defaulted from the name of the page - this will appear on the tab of
your browser.
Description: This section allows you to write a brief description of the page.
*P leas e note that the des c ription will b e us ed through s earc h engines , therefore us ing k eywords
andphras es is highly rec om m ended
Image: Upload an image that you want to represent the page - for example in social networking this will
be the image icon that represents the page viewers would click on.
Search Engines: Tick this box if you would like this page to be found in search engines
*P leas e note that the b ox is tic k ed as a default - only un-tic k this b ox if you do not want this page found
in your internal s earc h res ults .
Site Search: Tick this box if you would like this page to be found in an internal search of your website.
*P leas e note that the b ox is tic k ed as a default - only un-tic k this b ox if you do not want this page found
in your internal s earc h
res ults .
© 2014 WorldWeb Management Services Pty Ltd
159
Content ONE general user manual
5 . Preview
*This page will s how a preview of what the artic le will look lik e on the web s ite page.
Click the 'Finish' button.
7.1.3
Delete an Article
How to Delete an Article
On the left navigation bar click 'News', a sub menu will open with a list of categories.
Click 'View Articles' from the subcategory.
To find the article you can enter the name or keywords in the 'Query' box.
To delete an article click select the 'delete' button on the right hand side.
7.2
View Categories
View Categories
On the left navigation bar click 'News', a sub menu will open with a list of categories.
Click 'View Categories' from the subcategory.
© 2014 WorldWeb Management Services Pty Ltd
News
Once 'View Categories' is open you are able to 'Add', 'Edit' or 'Delete'.
To add a new category, click ‘Add New Article’ which is located in the navigation bar.
To edit an article click the 'Title' within the list.
To delete click the delete button on the right hand side of the news article.
7.2.1
Add Category
How to Add a Category
On the left navigation bar click 'News', a sub menu will open with a list of categories.
Click 'View Categories' from the subcategory.
Select 'Add Category'.
Name: This will appear as the name of your category.
Tag: Please contact your Content One Support if you wish to change.
Description: This section allows you to write a brief description of the natural of this category.
© 2014 WorldWeb Management Services Pty Ltd
160
161
Content ONE general user manual
Click 'Save Category'.
7.2.2
Edit Category
How to Edit a Category
On the left navigation bar click 'News', a sub menu will open with a list of categories.
Click 'View Categories' from the subcategory.
To edit a category click on the 'Title' of the category within the list.
You would follow the same process as 'Adding a Category'.
Name: This will appear as the name of your category.
Tag: Please contact your Content One Support if you wish to change.
Description: This section allows you to write a brief description of the natural of this category.
© 2014 WorldWeb Management Services Pty Ltd
News
Click 'Save Category'.
7.2.3
Delete Category
How to Delete a Category
On the left navigation bar click 'News', a sub menu will open with a list of categories.
Click 'View Categories' from the subcategory.
To delete a category select the 'delete' button on the right hand side.
© 2014 WorldWeb Management Services Pty Ltd
162
Top Level Intro
This page is printed before a new
top-level chapter starts
Part
VIII
Events
8
164
Events
Events
On the left navigation bar click 'Events', a sub menu will open with a list of categories.
Events Manager - will open to a list of all events which will allow you to manage and maintain events
Category Manager - will open to a list of all categories within the site, this will allow you to manage
and maintain all categories
8.1
Event Manager
Events Manager
On the left navigation bar click 'Events', a sub menu will open with a list of categories.
Click 'Event Manager' from the subcategory.
Once 'Event Manager' is open you are able to 'Add', 'Edit', 'Delete' or 'List Categories'.
To add, click on ‘Add Event’ which is located on the navigation bar.
To edit an event click on the 'Title' of the page within the list.
To delete click the 'delete' button on the right hand side of the page.
List Categories: This will open a list of categories that the events can be assigned/linked to.
© 2014 WorldWeb Management Services Pty Ltd
165
8.1.1
Content ONE general user manual
Add Event
How to Add an Event
On the left navigation bar click 'Events', a sub menu will open with a list of categories.
Click 'Event Manager' from the subcategory.
Once ‘Events Manager’ is open, click ‘Add Event’ which is located on the navigation bar.
The page ‘Add Event’ will have 5 steps detailing in this order:
1. Event Details
2. Attachments
3. Assign to Category
4. SEO
5. Preview
1. Event Details
Name: This will appear as the name of your event.
Date: Select the dates of the event.
Featured: Choose Yes/No to have this event featured on the events page.
Teaser: Enter a brief description of the event OR key focus points of the event (e.g. guest speakers).
Content: Enter the full description of the event.
© 2014 WorldWeb Management Services Pty Ltd
Events
166
2. Attachments
Image: Upload an image to represent the event.
Attachments: Upload any additional relevant information.
Gallery: This will allow you to add a gallery of images that have been added previously through Media
Manager.
3. Assign to Category
Categories: Assign the event to the corresponding category.
*P leas e note the c ategories will vary ac c ording to what you have s pec ified.
© 2014 WorldWeb Management Services Pty Ltd
167
Content ONE general user manual
4. SEO
M eta D ata
Brow ser Title: The title is already defaulted from the name of the page - this will appear on the tab of
your browser.
Description: This section allows you to write a brief description of the page.
*P leas e note that the des c ription will b e us ed through s earc h engines , therefore us ing k eywords and
phras es is highly rec om m ended.
Image: Upload an image that you want to represent the page - for example in social networking this will
be the image icon that
represents the page viewers would click on.
S ear c h i n g /In d ex i n g
Search Engines: Tick this box if you would like this page to be found in search engines.
*P leas e note that the b ox is tic k ed as a default - only un-tic k this b ox if you do not want this page found
in your internal s earc h res ults .
Site Search: Tick this box if you would like this page to be found in an internal search of your website.
*P leas e note that the b ox is tic k ed as a default - only un-tic k this b ox if you do not want this page found
in your internal s earc h res ults .
5. Preview
*This page will s how a preview of what the event will look lik e on the web s ite page.
Click the 'Finish' button
© 2014 WorldWeb Management Services Pty Ltd
Events
8.1.2
168
Edit Event
How to Edit an Event
On the left navigation bar click 'Events', a sub menu will open with a list of categories.
Click 'Event Manager' from the subcategory.
To edit an event click on the 'Title' of the event within the list.
You would follow the same process as 'Add Event' by editing the details you desire.
1. Event Details
Name: This will appear as the name of your event.
Date: Select the dates of the event.
Featured: Choose Yes/No to have this event featured on the events page.
Teaser: Enter a brief description of the event OR key focus points of the event (e.g. guest speakers).
Content: Enter the full description of the event.
© 2014 WorldWeb Management Services Pty Ltd
169
Content ONE general user manual
2. Attachments
Image: Upload an image to represent the event.
Attachments: Upload any additional relevant information.
Gallery: This will allow you to add a gallery of images that have been added previously through Media
Manager.
3. Assign to Category
Categories: Assign the event to the corresponding category.
*P leas e note the c ategories will vary ac c ording to what you have s pec ified.
© 2014 WorldWeb Management Services Pty Ltd
Events
170
4. SEO
M eta D ata
Brow ser Title: The title is already defaulted from the name of the page - this will appear on the tab of
your browser.
Description: This section allows you to write a brief description of the page.
*P leas e note that the des c ription will b e us ed through s earc h engines , therefore us ing k eywords and
phras es is highly
rec om m ended.
Image: Upload an image that you want to represent the page - for example in social networking this will
be the image icon that
represents the page viewers would click on.
S ear c h i n g /In d ex i n g
Search Engines: Tick this box if you would like this page to be found in search engines.
*P leas e note that the b ox is tic k ed as a default - only un-tic k this b ox if you do not want this page found
in your internal s earc h res ults .
Site Search: Tick this box if you would like this page to be found in an internal search of your website.
*P leas e note that the b ox is tic k ed as a default - only un-tic k this b ox if you do not want this page found
in your internal s earc h res ults .
5. Preview
*This page will s how a preview of what the event will look lik e on the web s ite page.
Click the 'Finish' button.
8.1.3
Delete Event
How to Delete an Event
© 2014 WorldWeb Management Services Pty Ltd
171
Content ONE general user manual
On the left navigation bar click 'Events', a sub menu will open with a list of categories.
Click 'Event Manager' from the subcategory.
To delete an event select the 'delete' button on the right hand side.
Click 'Ok' to confirm.
8.2
Category Manager
Category Manager
On the left navigation bar click 'Events', a sub menu will open with a list of categories.
Click 'Category Manager' from the subcategory.
Once 'Category Manager' is open you are able to 'Add', 'Edit' or 'Delete'.
To add a category click ‘Add Category’ which is located on the navigation bar.
To edit a category click on the 'Title' of the category within the list.
To delete a category click the 'delete' button on the right hand side of the page.
© 2014 WorldWeb Management Services Pty Ltd
Events
8.2.1
Add Category
How to Add a Category
On the left navigation bar click 'Events', a sub menu will open with a list of categories.
Click 'Category Manager' from the subcategory.
Once ‘Category Manager’ is open, click ‘Add Category’ which is located on the navigation bar.
Name: This will appear as the name of your category.
Description: This section allows you to write a brief description of the natural of this category.
Tag: Please contact your Content One Support if you wish to change.
© 2014 WorldWeb Management Services Pty Ltd
172
173
Content ONE general user manual
Once finished click 'Save changes'.
8.2.2
Edit Category
How to Edit a Category
On the left navigation bar click 'Events', a sub menu will open with a list of categories.
Click 'Category Manager' from the subcategory.
To edit a category click on the 'Title' of the category within the list.
You would follow the same process as 'Add Category' by editing the details you desire.
Name: This will appear as the name of your category.
Description: This section allows you to write a brief description of the natural of this category.
Tag: Please contact your Content One Support if you wish to change.
© 2014 WorldWeb Management Services Pty Ltd
Events
Once finished click 'Save changes'.
8.2.3
Delete Category
How to Delete a Category
On the left navigation bar click 'Events', a sub menu will open with a list of categories.
Click 'Category Manager' from the subcategory.
To delete a category select the 'delete' button on the right hand side.
© 2014 WorldWeb Management Services Pty Ltd
174
Top Level Intro
This page is printed before a new
top-level chapter starts
Part
IX
Contacts
9
Contacts
Contacts
On the left navigation bar click 'Contacts', a sub menu will open with a list of categories.
View Contacts - will open to a list of all contacts, which will allow you to manage and maintain
contacts.
Export Contacts - will allow you to extract the contacts information and place on a spreadsheet.
View Groups - will open to a list of all groups, which will allow you to manage and view members.
9.1
View Contacts
View Contacts
On the left navigation bar click 'Contacts', a sub menu will open with a list of categories.
Click 'View Contacts' from the subcategory.
Once 'View Contacts' is open you are able to 'Add', 'Edit', 'Delete' or Search.
To add a contact click ‘Add Contact’ which is located on the navigation bar.
To edit a contact click on the 'Title' of the contact within the list.
To delete a contact click the 'delete' button on the right hand side of the page.
To search a contact, enter the name or email address in the query box.
© 2014 WorldWeb Management Services Pty Ltd
176
177
9.1.1
Content ONE general user manual
Add Contact
How to Add a Contact
On the left navigation bar click 'Add', a sub menu will open with a list of categories.
Click 'Add Contact' from the subcategory.
Once ‘View Contacts’ is open, click ‘Add Contact’ which is located on the navigation bar.
Once you have selected 'Add Contact' three steps will appear for you to select. The steps will appear
in the following order:
1. Basic Details
2. Contact Details
3. Membership groups
1. Basic Details
Contacts are the lifeblood of any email marketing campaign. Without them, there is no point to any
campaign. It is, therefore, vital that you build your own list of contacts.
In building your list, you should ensure that you are building a “quality” list. In terms of email marketing,
the old cliché holds true, “Quality is better than Quantity.” It is important that you build a contact list
based on contacts who are interested in your product/service/message than random individuals who are
not.
When you add a new contact, they will become a member of your website. If you would like them to be
able to log in to the member area then you will need to set them up with a password as well.
© 2014 WorldWeb Management Services Pty Ltd
Contacts
178
Once you have the contact you will need to populate the basic information or details for that contact.
Email Address: enter the contact email address
Title: select a title from the dropdown menu
Given Name: enter the first name of contact
Surname: enter the surname of contact
Phone (Work): enter work phone number
Phone (Home): enter home phone number
Phone (Mobile): enter mobile number
Has Password:
New Password: enter new password
Confirm Password: confirm new password
Can log in? this is pre-ticked to yes, only tick no if you do not wish for the contact to be able to log in
2. Contact Details
Address 1: enter the 1st line of contact address
Address 2: enter the 2nd line of contact address
Suburb: enter the suburb
© 2014 WorldWeb Management Services Pty Ltd
179
Content ONE general user manual
Postcode: enter postcode
State: enter state
Country: enter country
3. Membership Groups
It is important that you tick the relevant box so that the contact is included in the correct groups for
email/sms campaigns.
Once you have selected the relevant box for the member you will need to click 'Finish'.
9.1.2
Edit Contact Details
How to Edit a Contact Details
On the left navigation bar click 'Contacts', a sub menu will open with a list of categories.
© 2014 WorldWeb Management Services Pty Ltd
Contacts
180
Click 'View Contacts' from the subcategory.
To find the contact details you can enter the name or email address in the 'Query' box and click 'Go'.
To edit a contact's details click on the 'name' of the contact within the list.
You would follow the same process as 'Add Contact' by editing the details you desire.
1. Basic Details
Email Address: enter the contact email address
Title: select a title from the dropdown menu
Given Name: enter the first name of contact
Surname: enter the surname of contact
Phone (Work): enter work phone number
Phone (Home): enter home phone number
Phone (Mobile): enter mobile number
Has Password:
© 2014 WorldWeb Management Services Pty Ltd
181
Content ONE general user manual
New Password: enter new password
Confirm Password: confirm new password
Can log in? this is pre-ticked to yes, only tick no if you do not wish for the contact to be able to log in
2. Contact Details
Address 1: enter the 1st line of contact address
Address 2: enter the 2nd line of contact address
Suburb: enter the suburb
Postcode: enter postcode
State: enter state
Country: enter country
© 2014 WorldWeb Management Services Pty Ltd
Contacts
3. Membership Groups
Tick the relevant boxes that you would like this contact to be included in for email/sms campaigns
Click 'Finish'.
9.1.3
Delete Contact Details
How to Delete a Contact Details
On the left navigation bar click 'Contacts', a sub menu will open with a list of categories.
Click 'View Contacts' from the subcategory.
© 2014 WorldWeb Management Services Pty Ltd
182
183
Content ONE general user manual
To find the contacts details you can enter the name or email address in the 'Query' box and click 'Go'.
To delete a contact select the 'delete' button on the right hand side.
9.2
Export Contacts
Export Contacts
On the left navigation bar click 'Contacts', a sub menu will open with a list of categories.
Click 'View Contacts' from the subcategory.
Once 'Export Contacts' is open you can export the selected information to a spreadsheet.
© 2014 WorldWeb Management Services Pty Ltd
Contacts
9.2.1
How to Export Contacts
How to Export Contacts
On the left navigation bar click 'Contacts', a sub menu will open with a list of categories.
Click 'View Contacts' from the subcategory.
The page ‘Export Contacts’ will have 3 steps detailing in this order.
1. Export Criteria
2. Export Fields
3. Confirm Export
Step 1 of 3: Export Criteria
Unsubscribed: Select from the dropdown list
In Group(s): Tick the relevant groups you wish to export
Click 'Next>'.
Step 2 of 3: Export Fields
By default all the boxes will be pre-ticked.
© 2014 WorldWeb Management Services Pty Ltd
184
185
Content ONE general user manual
Only un-tick the boxes that you do not want on the spreadsheet.
Click 'Next>'.
Step 3 of 3: Export Criteria
Choose the file format you would like the details to export.
Click 'Finish'.
© 2014 WorldWeb Management Services Pty Ltd
Contacts
9.3
186
View Groups
View Groups
On the left navigation bar click 'Contacts', a sub menu will open with a list of categories.
Click 'View Groups' from the subcategory.
Once 'View Groups' is open you are able to 'Add', 'Edit', 'Delete' and 'View Members' within a group.
To add a group click ‘Add Group’ which is located on the navigation bar.
To edit a group click on the 'Title' of the group within the list.
To delete a group click the 'delete' button on the right hand side of the page.
To view members click 'view members' on the right hand side of the page.
9.3.1
Add Groups
How to Add Groups
This section is very important for your marketing as it provides you with way to add and assign emails to
groups.
On the left navigation bar click 'Contacts', a sub menu will open with a list of categories.
Click 'View Groups' from the subcategory.
© 2014 WorldWeb Management Services Pty Ltd
187
Content ONE general user manual
Once ‘View Groups’ is open, click ‘Add Group’ which is located on the navigation bar.
'Add Contact Group' will appear.
© 2014 WorldWeb Management Services Pty Ltd
Contacts
188
Once you are in the 'Add Group' section, you will be prompted to add information for the group of
members you are about to create. You will need to complete all the requested information areas.
Name: This will appear as the name of your group
Description: This section allows you to write a brief description of the nature of this group
Analytics Custom Variable Name:
Subscriptions:
This section refers to the 'Subscription' permissions for this group. Please select the appropriate
permission level to be set for this contact group.
Administrators can only add members to this group
Members can choose to join this group when registering or updating their membership
Members will automatically join this group when registering
Unsubscriptions
This section refers to the permissions for this group when it comes to 'Unsubscribing'
Members can manually remove themselves from this group
Members will automatically be removed from this group when they unsubscribe
Image: Click the 'browse' button to upload any additional relevant information
Click 'Ok' once finished.
© 2014 WorldWeb Management Services Pty Ltd
189
9.3.2
Content ONE general user manual
Edit Groups
How to Edit Groups
On the left navigation bar click 'Contacts', a sub menu will open with a list of categories.
Click 'View Groups' from the subcategory.
To edit a group click on the name of the group within the list.
You would follow the same process as 'Add Group' by editing the details you desire.
'Add Contact Group' will appear.
© 2014 WorldWeb Management Services Pty Ltd
Contacts
Name: This will appear as the name of your group
Description: This section allows you to write a brief description of the natural of this group
Tag:
Analytics Custom Variable Name:
Subscriptions:
Administrators can only add members to this group Members can choose to join this group when registering or updating their membership
Members will automatically join this group when registering
Unsubscriptions
Members can manually remove themselves from this group
Members will automatically be removed from this group when they unsubscribe
Image: Click the 'browse' button to upload any additional relevant information
Click 'Ok' once finished.
9.3.3
Delete Groups
How to Delete Groups
On the left navigation bar click 'Contacts', a sub menu will open with a list of categories.
© 2014 WorldWeb Management Services Pty Ltd
190
191
Content ONE general user manual
Click 'View Groups' from the subcategory.
To delete a contact select the 'delete' button on the right hand side.
9.3.4
View Members
How to View Members
On the left navigation bar click 'Contacts', a sub menu will open with a list of categories.
Click 'View Groups' from the subcategory.
Once the list of all members is visible, you can select 'view members' to give you a list of members in
that specific group.
© 2014 WorldWeb Management Services Pty Ltd
Contacts
© 2014 WorldWeb Management Services Pty Ltd
192
Top Level Intro
This page is printed before a new
top-level chapter starts
Part
X
Marketing
10
194
Marketing
Marketing
On the left navigation bar click 'Marketing', a sub menu will open with a list of categories.
E-mail Campaigns:
Manage Campaigns: will open to a list of all email campaigns, which will allow you to manage,
maintain and add new email campaigns.
Social Campaigns:
Manage Campaigns: will open to a list of all social campaigns, which will allow you to manage,
maintain and add new social campaigns.
SMS Campaigns:
Manage Campaigns: will open to a list of all SMS campaigns, which will allow you to manage,
maintain and add new SMS campaigns.
Open Inbox: will open to a list of received SMS', which will allow you to manage, maintain, search
and export to CSV.
© 2014 WorldWeb Management Services Pty Ltd
195
10.1
Content ONE general user manual
Email Campaigns: Manage Campaigns
Email Campaigns: Manage Campaigns
On the left navigation bar click 'Marketing', a sub menu will open with a list of categories.
Click 'Manage Campaigns' from the subcategory.
Once "Manage Campaigns" is open you are able to 'Add', 'Edit', 'Re-activate' or 'Delete'.
To add a campaign, click on ‘New Campaign’ which is located on the navigation bar.
To edit a campaign, click on the title of the campaign (draft only).
To delete click the 'delete' button on the right hand side of the page.
To reactivate click on the 're-activate' button on the right hand side.
10.1.1 Add Campaign
How to Add a New Campaign
On the left navigation bar click 'Marketing', a sub menu will open with a list of categories.
Click 'Manage Campaigns' from the subcategory.
© 2014 WorldWeb Management Services Pty Ltd
Marketing
196
Select 'New Campaign' which is located on the navigation bar.
You can use e-mail to provide valuable information, to market yourself and your business to clients and
prospects. Every e-mail message you send is an opportunity for marketing your business.
Consider sending an e-mail communication to your client database once per month and on special dates
e.g. birthdays, anniversaries, mothers day etc. Remember, sending messages or newsletters too
frequently without a reason can make clients tune out your message and can damage your business,
however emails timed correctly and with the right content will build a relationship with your audience.
When creating a new campaign you will need click on the 'New Campaign' bab which is located next to
'View Campaign'. You will then need to complete the following 7 steps:
1.
2.
3.
4.
5.
6.
7.
General Settings
Change Template
Personalise
Edit Content
Attachments
Test Email
Recipients
1. General Settings
The purpose of the General Settings is to assign the campaign with an internal name, a tag to enable the
© 2014 WorldWeb Management Services Pty Ltd
197
Content ONE general user manual
tracking of the email statistics and the details of the sender and recipient.
Internal Name: This will be the internal name of the email.
Analytics Tag: Email campaigns are a cost-effective way of attracting quality return visitors to your site.
It's important that you tag your email campaigns with campaign tags so that you can track how well each
email performs. You can tag your emails with the name of the email marketing campaign, e.g. Email
News, Email Promo 15 May 2014, etc. Campaign tags are also additional information that you apply to
links. Once a link is clicked, the tag information is passed to Google Analytics. Tagged links will also allow
you to evaluate the performance of individual links within your emails.
From Address: Enter the email address of who sent this email.
From Name: Enter the name of who sent this email
Subject: Enter the title of the email.
2. Change Template
There will be various templates for you to select. Select the template you would like to use for your email
from the list below.
The template you select will define how the email looks overall, and how your content will fit into the
template.
© 2014 WorldWeb Management Services Pty Ltd
Marketing
3. Personalise
Select the type of personalisation you would like to use from the list below:
© 2014 WorldWeb Management Services Pty Ltd
198
199
Content ONE general user manual
4. Edit Content
Depending on which template you select under the 'Change Template' section there will be a number of
'block regions' for you to add formatted content. Some of the templates will have one block region and
some may have as many as 6.
In the example below you can edit the content area by clicking into the Region 1 and using the HTML
editor (WYSIWYG), just like any other page of your website.
You can insert images, hyperlinks, various text styles and tables to create a unique look for your email.
© 2014 WorldWeb Management Services Pty Ltd
Marketing
200
Based on the template you selected in point 2 this will reflect the numbers of block regions for you to
enter your content.
How to add content and images to email:
© 2014 WorldWeb Management Services Pty Ltd
201
Content ONE general user manual
Click the button ' +Add block to Region #'. In the example below there are 6 block regions which have
the following content requirements:
+ Add block to Region 1 = whatever formatted content you would like this to be from images to text
+ Add block to Region 2 = whatever formatted content you would like this to be from images to text
+ Add block to Region 3 = whatever formatted content you would like this to be from images to text
+ Add block to Region 4 = whatever formatted content you would like this to be from images to text
+ Add block to Region 5 = the footer is normally a link back to the website with the contact details of the
business
+ Add block to Region 6 = add header, this is the header of the email so it is important that you keep
this short
Once you click the '+Add block to Region #' button a pop up window will appear.
Click 'Formatted Content'.
You can add, edit, delete content or images etc by using the HTML editor (WYSIWYG).
© 2014 WorldWeb Management Services Pty Ltd
Marketing
202
You then continue to do the same with the other regions.
If you wish to 'Edit' the region you can select the icon as shown below or you can place the mouse
within the region.
If you wish to 'Delete' a region you can select the remove button.
An example after adding image and content to email:
© 2014 WorldWeb Management Services Pty Ltd
203
Content ONE general user manual
5. Attachments
It is important that the emails sent out are small and light weight in size to ensure that it is quick and
easy for the intended recipient to download and open the email. To do this we strongly recommend that
instead of attaching a file you upload the file to the Document library of your website and add the URL
link for the user to access it directly via your email.
Please refer to the 'Media' section of this manual under the 'Media Manager' on how to upload a
document.
Whilst its not recommended, if you would like to attach the file to send to a small number of recipients
via email please continue with instructions below:
1. Click the link to start
2. Click the 'Add' button to add the attachments
3. Click the 'Browse' button to find the attachments saved on your computer
© 2014 WorldWeb Management Services Pty Ltd
Marketing
4. Click the 'Ok' button to finish
You can attach numerous files to your email.
To add attachments click the 'Add' button.
To edit attachments click the 'Edit' button.
To delete attachments click the file name and select the 'Delete' button.
To sort the attachments click the file name and select either 'Up' or 'Down' buttons.
© 2014 WorldWeb Management Services Pty Ltd
204
205
Content ONE general user manual
6. Test Email
Prior to sending the email to all your recipients we recommend that you test the email first to ensure
that it is displayed correctly and that all the links and calls to actions work.
You can test your email to see how it will appear by entering your email address and first name in the
areas highlighted below.
Once you have done that press the 'Send Test Email' button. Then check your email to verify the
format of what you have just sent.
7. Recipients
© 2014 WorldWeb Management Services Pty Ltd
Marketing
206
The following area provides you with instructions of how you can select the recipients that will receive
your email. There are two options for you to choose from:
1. Send to existing contacts
2. Send to recipients in CSV
1. Send to existing contacts:
This section provides instructions of how you can send emails to your existing contacts. In the
recipients section there is an 'Add Criteria' button.
Click 'Add Criteria'.
From the Criteria dropdown menu select 'Contact Group'.
© 2014 WorldWeb Management Services Pty Ltd
207
Content ONE general user manual
From the Value dropdown select the group that you wish to send the email to.
© 2014 WorldWeb Management Services Pty Ltd
Marketing
208
To send to multiple groups, you will need to repeat this process by clicking 'Add Criteria'.
Once finished adding groups click the 'Finish' button, you will then be presented with 3 options:
save as draft - the campaign will not be sent and will require you to manually come back and select
either of the next 2 options
send now - the campaign will be sent now
send at specific time - the campaign will be send at a time that you program it to be activated
© 2014 WorldWeb Management Services Pty Ltd
209
Content ONE general user manual
2. Send to recipients in CSV:
This section provides instructions of how you can send emails to your new contacts by importing a
CSV.
Click the 'Browse' button and select the CSV file that you have saved on your computer.
Click 'Upload'.
10.1.2 Edit Campaign
How to Edit a Campaign
On the left navigation bar click 'Marketing', a sub menu will open with a list of categories.
Click 'Manage Campaigns' from the subcategory.
© 2014 WorldWeb Management Services Pty Ltd
Marketing
210
You can only edit campaigns that are saved as drafts.
To edit click on the 'Title' of the campaign.
You would follow the same process as 'Add Campaign'.
1. General Settings
The purpose of the General Settings is to assign the campaign with an internal name, a tag to enable the
tracking of the email statistics and the details of the sender and recipient.
Internal Name: This will be the internal name of the email.
Analytics Tag: Email campaigns are a cost-effective way of attracting quality return visitors to your site.
It's important that you tag your email campaigns with campaign tags so that you can track how well each
email performs. You can tag your emails with the name of the email marketing campaign, e.g. Email
News, Email Promo 15 May 2014, etc. Campaign tags are also additional information that you apply to
links. Once a link is clicked, the tag information is passed to Google Analytics. Tagged links will also allow
you to evaluate the performance of individual links within your emails.
From Address: Enter the email address of who sent this email.
From Name: Enter the name of who sent this email
Subject: Enter the title of the email.
© 2014 WorldWeb Management Services Pty Ltd
211
Content ONE general user manual
2. Change Template
There will be various templates for you to select. Select the template you would like to use for your email
from the list below.
The template you select will define how the email looks overall, and how your content will fit into the
template.
3. Personalise
Select the type of personalisation you would like to use from the list below:
© 2014 WorldWeb Management Services Pty Ltd
Marketing
212
4. Edit Content
Depending on which template you select under the 'Change Template' section there will be a number of
'block regions' for you to add formatted content. Some of the templates will have one block region and
some may have as many as 6.
In the example below you can edit the content area by clicking into the Region 1 and using the HTML
editor (WYSIWYG), just like any other page of your website.
You can insert images, hyperlinks, various text styles and tables to create a unique look for your email.
© 2014 WorldWeb Management Services Pty Ltd
213
Content ONE general user manual
Based on the template you selected in point 2 this will reflect the numbers of block regions for you to
enter your content.
How to add content and images to email:
© 2014 WorldWeb Management Services Pty Ltd
Marketing
214
Click the button ' +Add block to Region #'. In the example below there are 6 block regions which have
the following content requirements:
+ Add block to Region 1 = whatever formatted content you would like this to be from images to text
+ Add block to Region 2 = whatever formatted content you would like this to be from images to text
+ Add block to Region 3 = whatever formatted content you would like this to be from images to text
+ Add block to Region 4 = whatever formatted content you would like this to be from images to text
+ Add block to Region 5 = the footer is normally a link back to the website with the contact details of the
business
+ Add block to Region 6 = add header, this is the header of the email so it is important that you keep
this short
Once you click the '+Add block to Region #' button a pop up window will appear.
Click 'Formatted Content'.
You can add, edit, delete content or images etc by using the HTML editor (WYSIWYG).
© 2014 WorldWeb Management Services Pty Ltd
215
Content ONE general user manual
You then continue to do the same with the other regions.
If you wish to 'Edit' the region you can select the icon as shown below or you can place the mouse
within the region.
If you wish to 'Delete' a region you can select the remove button.
An example after adding image and content to email:
© 2014 WorldWeb Management Services Pty Ltd
Marketing
216
5. Attachments
It is important that the emails sent out are small and light weight in size to ensure that it is quick and
easy for the intended recipient to download and open the email. To do this we strongly recommend that
instead of attaching a file you upload the file to the Document library of your website and add the URL
link for the user to access it directly via your email.
Please refer to the 'Media' section of this manual under the 'Media Manager' on how to upload a
document.
Whilst its not recommended, if you would like to attach the file to send to a small number of recipients
via email please continue with instructions below:
1. Click the link to start
2. Click the 'Add' button to add the attachments
3. Click the 'Browse' button to find the attachments saved on your computer
© 2014 WorldWeb Management Services Pty Ltd
217
Content ONE general user manual
4. Click the 'Ok' button to finish
You can attach numerous files to your email.
To add attachments click the 'Add' button.
To edit attachments click the 'Edit' button.
To delete attachments click the file name and select the 'Delete' button.
To sort the attachments click the file name and select either 'Up' or 'Down' buttons.
© 2014 WorldWeb Management Services Pty Ltd
Marketing
218
6. Test Email
Prior to sending the email to all your recipients we recommend that you test the email first to ensure
that it is displayed correctly and that all the links and calls to actions work.
You can test your email to see how it will appear by entering your email address and first name in the
areas highlighted below.
Once you have done that press the 'Send Test Email' button. Then check your email to verify the
format of what you have just sent.
7. Recipients
© 2014 WorldWeb Management Services Pty Ltd
219
Content ONE general user manual
The following area provides you with instructions of how you can select the recipients that will receive
your email. There are two options for you to choose from:
1. Send to existing contacts
2. Send to recipients in CSV
1. Send to existing contacts:
This section provides instructions of how you can send emails to your existing contacts. In the
recipients section there is an 'Add Criteria' button.
Click 'Add Criteria'.
From the Criteria dropdown menu select 'Contact Group'.
© 2014 WorldWeb Management Services Pty Ltd
Marketing
From the Value dropdown select the group that you wish to send the email to.
© 2014 WorldWeb Management Services Pty Ltd
220
221
Content ONE general user manual
To send to multiple groups, you will need to repeat this process by clicking 'Add Criteria'.
Once finished adding groups click the 'Finish' button, you will then be presented with 3 options:
save as draft - the campaign will not be sent and will require you to manually come back and select
either of the next 2 options
send now - the campaign will be sent now
send at specific time - the campaign will be send at a time that you program it to be activated
© 2014 WorldWeb Management Services Pty Ltd
Marketing
222
2. Send to recipients in CSV:
This section provides instructions of how you can send emails to your new contacts by importing a
CSV.
Click the 'Browse' button and select the CSV file that you have saved on your computer.
Click 'Upload'.
10.1.3 Delete Campaign
How to Delete a Campaign
On the left navigation bar click 'Marketing', a sub menu will open with a list of categories.
Click 'Manage Campaigns' from the subcategory.
© 2014 WorldWeb Management Services Pty Ltd
223
Content ONE general user manual
To find the email campaign you can enter the name or email address in the 'Query' box and click 'Go'.
Once you found the email campaign click the 'delete' button on the right hand side.
10.1.4 Re-activate Campaign
How to Re-activate a Campaign
On the left navigation bar click 'Marketing', a sub menu will open with a list of categories.
Click 'Manage Campaigns' from the subcategory.
© 2014 WorldWeb Management Services Pty Ltd
Marketing
To re-activate an email campaign click the 're-activate' button on the right hand side.
You can set up and send as is or you can edit the details by referring back to 'Add Campaign'.
10.2
Social Campaigns: Manage Campaigns
Social Campaigns: Manage Campaigns
On the left navigation bar click 'Marketing', a sub menu will open with a list of categories.
Click 'Manage Campaigns' from the subcategory.
Once 'Manage Campaigns' is open you are able to 'Add', 'Edit' 'Re-activate' or 'Delete'.
© 2014 WorldWeb Management Services Pty Ltd
224
225
Content ONE general user manual
To add a campaign, click on ‘New Campaign’ which is located on the navigation bar.
To edit a campaign, click on the title of the campaign (draft only).
To delete click the 'delete' button on the right hand side of the page.
To reactivate click on the 're-activate' button on the right hand side.
10.2.1 Add Campaign
How to Add a New Campaign
On the left navigation bar click 'Marketing', a sub menu will open with a list of categories.
Click 'Manage Campaigns' from the subcategory.
Select 'New Campaign' which is located on the navigation bar.
The page 'New Campaign' will have 4 steps detailing in this order:
1. General Settings
© 2014 WorldWeb Management Services Pty Ltd
Marketing
2. Destinations
3. Edit Content
4. Preview
1. General Settings
Internal Name: This will be the name of the social campaign.
2. Destinations
Select '+ Add a service' at the right hand side.
'Choose service to add...' will appear.
Log in to the following Facebook, Twitter, LinkedIn etc to where you wish to post.
© 2014 WorldWeb Management Services Pty Ltd
226
227
Content ONE general user manual
Tick the box as highlighted below.
Click 'Next>'.
© 2014 WorldWeb Management Services Pty Ltd
Marketing
228
3. Edit Content
Enter the content for the social campaign in the field below.
*Please note you can only use 140 characters of which 23 characters will be reserved for the link .
Link to: Click the 'Browse' button and choose where you would like the user to go.
4. Preview
*This page will s how a preview of what the s oc ial c am paign will look lik e on your Fac eb ook , Twitter,
Link edIn etc ac c ount.
Click the 'Finish' button.
© 2014 WorldWeb Management Services Pty Ltd
229
Content ONE general user manual
You can save the email as a draft, send now or send at a specific time.
10.2.2 Edit Campaign
How to Edit a Campaign
On the left navigation bar click 'Marketing', a sub menu will open with a list of categories.
Click 'Manage Campaigns' from the subcategory.
© 2014 WorldWeb Management Services Pty Ltd
Marketing
You can only edit social campaigns that are saved as drafts.
To edit click on the 'Title' of the campaign.
You would follow the same process as 'Add Campaign'.
1. General Settings
Internal Name: This will be the name of the social campaign.
2. Destinations
Select '+ Add a service' at the right hand side.
© 2014 WorldWeb Management Services Pty Ltd
230
231
Content ONE general user manual
'Choose service to add...' will appear.
Log in to the following Facebook, Twitter, LinkedIn etc to where you wish to post.
Tick the box as highlighted below.
Click 'Next>'.
© 2014 WorldWeb Management Services Pty Ltd
Marketing
3. Edit Content
Enter the content for the social campaign in the field below.
*Please note you can only use 140 characters of which 23 characters will be reserved for the link .
Link to: Click the 'Browse' button and choose where you would like the user to go.
© 2014 WorldWeb Management Services Pty Ltd
232
233
Content ONE general user manual
4. Preview
*This page will s how a preview of what the s oc ial c am paign will look lik e on your Fac eb ook , Twitter,
Link edIn etc ac c ount.
Click the 'Finish' button.
© 2014 WorldWeb Management Services Pty Ltd
Marketing
You can save the email as a draft, send now or send at a specific time.
10.2.3 Delete Campaign
How to Delete a Campaign
On the left navigation bar click 'Marketing', a sub menu will open with a list of categories.
Click 'Manage Campaigns' from the subcategory.
To delete the social campaign click the 'delete' button on the right hand side.
© 2014 WorldWeb Management Services Pty Ltd
234
235
Content ONE general user manual
10.2.4 Re-activate Campaign
How to Re-activate a Campaign
On the left navigation bar click 'Marketing', a sub menu will open with a list of categories.
Click 'Manage Campaigns' from the subcategory.
To re-activate a social campaign click the 're-activate' button on the right hand side.
You can set up and send as is or you can edit the details by referring back to 'Add Campaign'.
10.3
SMS Campaigns: Manage Campaigns
SMS Campaigns: Manage Campaigns
On the left navigation bar click 'Marketing', a sub menu will open with a list of categories.
Click 'Manage Campaigns' from the subcategory.
© 2014 WorldWeb Management Services Pty Ltd
Marketing
Once 'Manage Campaigns' is open you are able to 'Add', 'Edit' 'Re-activate' or 'Delete'.
To add a campaign, click on ‘New Campaign’ which is located on the navigation bar.
To edit a campaign, click on the 'Title' of the campaign (draft only).
To delete click the 'delete' button on the right hand side of the page.
To reactivate click on the 're-activate' button on the right hand side.
10.3.1 Add Campaign
How to Add a New Campaign
On the left navigation bar click 'Marketing', a sub menu will open with a list of categories.
Click 'Manage Campaigns' from the subcategory.
© 2014 WorldWeb Management Services Pty Ltd
236
237
Content ONE general user manual
Select 'New Campaign' which is located on the navigation bar.
The page 'New Campaign' will have 5 steps detailing in this order:
1.
2.
3.
4.
5.
General Settings
Personalise
Recipients
Edit Content
Test SMS
1. General Settings
Internal Name: This will be the name of the social campaign.
© 2014 WorldWeb Management Services Pty Ltd
Marketing
2. Personalise
Select the type of personalisation you would like to use from the list below:
© 2014 WorldWeb Management Services Pty Ltd
238
239
Content ONE general user manual
3. Recipients
Select the Recipients that will receive your SMS campaign.
There is two options for you to choose:
1. Send to existing contacts
2. Send to recipients in CSV
© 2014 WorldWeb Management Services Pty Ltd
Marketing
1. Send to existing contacts:
Click 'Add Criteria'.
From the Criteria dropdown menu select 'Contact Group'.
© 2014 WorldWeb Management Services Pty Ltd
240
241
Content ONE general user manual
From the Value dropdown select the group.
To send to multiple groups, you will need to repeat this process.
4. Edit Contents
Message Content: Enter the content for the SMS campaign in the field below.
*Please note you can only use 160 characters of which 11 characters will be reserved for
personalisation.
5. Test SMS
© 2014 WorldWeb Management Services Pty Ltd
Marketing
242
You can test your SMS campaign to see how it will appear by entering your mobile number. Press the
'Send Test SMS' button.
Click the 'Finish' button.
You can save the SMS campaign as a draft, send now or send at a specific time.
10.3.2 Edit Campaign
How to Edit a Campaign
On the left navigation bar click 'Marketing', a sub menu will open with a list of categories.
Click 'Manage Campaigns' from the subcategory.
© 2014 WorldWeb Management Services Pty Ltd
243
Content ONE general user manual
You can only edit SMS campaigns that are saved as drafts.
To edit click on the Title of the campaign.
You would follow the same process as 'Add Campaign'.
1. General Settings
Internal Name: This will be the name of the social campaign.
2. Personalise
Select the type of personalisation you would like to use from the list below:
© 2014 WorldWeb Management Services Pty Ltd
Marketing
3. Recipients
Select the Recipients that will receive your SMS campaign.
There is two options for you to choose:
1. Send to existing contacts
2. Send to recipients in CSV
© 2014 WorldWeb Management Services Pty Ltd
244
245
Content ONE general user manual
1. Send to existing contacts:
Click 'Add Criteria'.
From the Criteria dropdown menu select 'Contact Group'.
© 2014 WorldWeb Management Services Pty Ltd
Marketing
From the Value dropdown select the group.
To send to multiple groups, you will need to repeat this process.
4. Edit Contents
Message Content: Enter the content for the SMS campaign in the field below.
*Please note you can only use 160 characters of which 11 characters will be reserved for
personalisation.
5. Test SMS
© 2014 WorldWeb Management Services Pty Ltd
246
247
Content ONE general user manual
You can test your SMS campaign to see how it will appear by entering your mobile number. Press the
'Send Test SMS' button.
Click the 'Finish' button.
You can save the SMS campaign as a draft, send now or send at a specific time.
10.3.3 Delete Campaign
How to Delete a Campaign
On the left navigation bar click 'Marketing', a sub menu will open with a list of categories.
Click 'Manage Campaigns' from the subcategory.
© 2014 WorldWeb Management Services Pty Ltd
Marketing
To find the email campaign you can enter the name or email address in the 'Query' box.
To delete the email campaign click the 'delete' button on the right hand side.
10.3.4 Re-activate Campaign
How to Re-activate a Campaign
On the left navigation bar click 'Marketing', a sub menu will open with a list of categories.
Click 'Manage Campaigns' from the subcategory.
© 2014 WorldWeb Management Services Pty Ltd
248
249
Content ONE general user manual
To re-activate a social campaign click the 're-activate' button on the right hand side.
You can set up and send as is or you can edit the details by referring back to 'Add Campaign'.
© 2014 WorldWeb Management Services Pty Ltd
Top Level Intro
This page is printed before a new
top-level chapter starts
Part
XI
251
11
Content ONE general user manual
Catalogue
Catalogue
On the left navigation bar click 'Catalogue', a sub menu will open with a list of categories.
View Products: will open to a list of all products, which will allow you to manage and maintain.
View Categories: will open to a list of categories and sub-categories. This will allow you to rearrange
the order of categories.
Export Tools: is the process to follow to upload products.
11.1
View Products
View Products
On the left navigation bar click 'Catalogue', a sub menu will open with a list of categories.
Click 'View Products' from the subcategory.
Once 'View Products' is open you are able to 'Add', 'Edit', 'Delete', Search and 'Manage Prices'.
To add a product click ‘Add Product’ which is located on the navigation bar.
To edit a product click on the 'Title' of the product within the list.
To delete a product click the 'delete' button on the right hand side of the page.
To search a product type a keyword or phrase into the 'Query' box that you want to search for within the
list of products.
© 2014 WorldWeb Management Services Pty Ltd
Catalogue
11.1.1 Add Products
How to Add Products
On the left navigation bar click 'Catalogue', a sub menu will open with a list of categories.
Click 'View Products' from the subcategory.
Once ‘View Products’ is open, click ‘Add Product’ which is located on the navigation bar.
The page ‘Add Product’ will have 9 steps detailing in this order.
© 2014 WorldWeb Management Services Pty Ltd
252
253
Content ONE general user manual
1.
2.
3.
4.
5.
6.
7.
8.
9.
General
Prices
Images
Categories
Variations
Attributes
Related
SEO
Preview
1. General
Name: this will be the name of the product.
SKU: every product must have a unique SKU, this identifies each product in the business.
Barcode (GTIN): enter the barcode if required to your business.
Purchase Online: select YES/NO if you would like customers to be able to purchase the product
online.
Visible: select YES/NO if you would like this product to be visible on the website.
Featured: select YES/NO
Packing Size: fill in the dimensions if relevant.
Packing Weight: fill in the dimensions if relevant.
No. of Cart Items: select the minimum and maximum of items you wish.
In Stock: select YES/NO
Quantity: select a number
2. Prices
Tax Class: Taxable Goods
Price Tax Rate: Select from the dropdown menu
Price: enter the price
RRP: enter the RRP price
© 2014 WorldWeb Management Services Pty Ltd
Catalogue
3. Images
Add Images: Select the browse button and choose the images saved on your computer.
Click 'Upload'.
4. Categories
Categories: Click the 'Add' button.
'Browse Product Categories...' will appear.
Select the category and click on the 'Add' button as highlighted below.
Click 'Close'.
© 2014 WorldWeb Management Services Pty Ltd
254
255
Content ONE general user manual
5. Variations
If there is multiple variations of a product you will need to add a variation code for each product.
Variations
Variations are defined by
© 2014 WorldWeb Management Services Pty Ltd
Catalogue
6. Attributes
Please add the following information:
Short Description
Is Organic
Quantity
Season Variety of product
Colour
Size
7. Related
Related Products: To add related products to the product being created click the 'Add' button.
'Browse Product Catalogues...' will appear.
© 2014 WorldWeb Management Services Pty Ltd
256
257
Content ONE general user manual
You can search for the product in the query box of manually find it be clicking the little '+' button beside
the letter.
Select the product and click the 'Add' button as shown below.
Click 'Close'.
© 2014 WorldWeb Management Services Pty Ltd
Catalogue
258
8. SEO
M eta D ata
Brow ser Title: The title is already defaulted from the name of the product - this will appear on the tab of
your browser
Description: This section allows you to write a brief description for this product
*P leas e note that the des c ription will b e us ed through s earc h engines , therefore us ing k eywords and
phras es is highly
rec om m ended
Image: this will be pre-ticked to 'Default' as you would have previously added an image in the 'Images'
section
S ear c h i n g /In d ex i n g
Search Engines: Tick this box if you would like this page to be found in search engines
*P leas e note that the b ox is tic k ed as a default - only un-tic k this b ox if you do not want this page found
in your internal
s earc h res ults
Site Search: Tick this box if you would like this page to be found in an internal search of your website
*P leas e note that the b ox is tic k ed as a default - only un-tic k this b ox if you do not want this page found
in your internal
s earc h res ults
© 2014 WorldWeb Management Services Pty Ltd
259
Content ONE general user manual
9. Preview
*This page will s how a preview of what the produc t will look lik e on the web s ite page
Click the 'Finish' button
11.1.2 Edit Products
How to Edit Products
On the left navigation bar click 'Catalogue', a sub menu will open with a list of categories.
Click 'View Products' from the subcategory.
To find the product details you can enter the product name in the 'Query' box.
© 2014 WorldWeb Management Services Pty Ltd
Catalogue
To edit a product click on the name of the product within the list.
You would follow the same process as 'Add Product' by editing the details you desire.
1. General
Name: this will be the name of the product.
SKU: every product must have a unique SKU, this identifies each product in the business.
Barcode (GTIN): enter the barcode if required to your business.
Purchase Online: select YES/NO if you would like customers to be able to purchase the product
online.
Visible: select YES/NO if you would like this product to be visible on the website.
Featured: select YES/NO
Packing Size: fill in the dimensions if relevant.
Packing Weight: fill in the dimensions if relevant.
No. of Cart Items: select the minimum and maximum of items you wish.
In Stock: select YES/NO
Quantity: select a number
© 2014 WorldWeb Management Services Pty Ltd
260
261
Content ONE general user manual
2. Prices
Tax Class: Taxable Goods
Price Tax Rate: Select from the dropdown menu
Price: enter the price
RRP: enter the RRP price
3. Images
Add Images: Select the browse button and choose the images saved on your computer.
Click 'Upload'.
© 2014 WorldWeb Management Services Pty Ltd
Catalogue
4. Categories
Categories: Click the 'Add' button.
'Browse Product Categories...' will appear.
Select the category and click on the 'Add' button as highlighted below.
Click 'Close'.
5. Variations
If there is multiple variations of a product you will need to add a variation code for each product.
© 2014 WorldWeb Management Services Pty Ltd
262
263
Content ONE general user manual
Variations
Variations are defined by
6. Attributes
Please add the following information:
Short Description
Is Organic
Quantity
Season Variety of product
Colour
Size
7. Related
Related Products: To add related products to the product being created click the 'Add' button.
© 2014 WorldWeb Management Services Pty Ltd
Catalogue
264
'Browse Product Catalogues...' will appear.
You can search for the product in the query box of manually find it be clicking the little '+' button beside
the letter.
Select the product and click the 'Add' button as shown below.
Click 'Close'.
© 2014 WorldWeb Management Services Pty Ltd
265
Content ONE general user manual
8. SEO
M eta D ata
Brow ser Title: The title is already defaulted from the name of the product - this will appear on the tab of
your browser
Description: This section allows you to write a brief description for this product
*P leas e note that the des c ription will b e us ed through s earc h engines , therefore us ing k eywords and
phras es is highly
rec om m ended
Image: this will be pre-ticked to 'Default' as you would have previously added an image in the 'Images'
section
S ear c h i n g /In d ex i n g
Search Engines: Tick this box if you would like this page to be found in search engines
*P leas e note that the b ox is tic k ed as a default - only un-tic k this b ox if you do not want this page found
in your internal
s earc h res ults
Site Search: Tick this box if you would like this page to be found in an internal search of your website
*P leas e note that the b ox is tic k ed as a default - only un-tic k this b ox if you do not want this page found
in your internal
s earc h res ults
© 2014 WorldWeb Management Services Pty Ltd
Catalogue
9. Preview
*This page will s how a preview of what the produc t will look lik e on the web s ite page
Click the 'Finish' button
11.1.3 Delete Products
How to Delete Products
On the left navigation bar click 'Catalogue', a sub menu will open with a list of categories.
Click 'View Products' from the subcategory.
To find the product details you need to enter the product name in the 'Query' box.
© 2014 WorldWeb Management Services Pty Ltd
266
267
Content ONE general user manual
Once the product is found you can delete the product by clicking the 'Delete' button at the right hand
side.
11.1.4 Search Products
How to Search Products
On the left navigation bar click 'Catalogue', a sub menu will open with a list of categories.
Click 'View Products' from the subcategory.
You can search products by simply entering the name of the product in the 'Query' box as highlighted
below and click 'Go'.
A list of products will appear that relate to the query.
© 2014 WorldWeb Management Services Pty Ltd
Catalogue
11.1.5 Manage Prices
How to Manage Prices
On the left navigation bar click 'Catalogue', a sub menu will open with a list of categories.
Click 'View Products' from the subcategory.
You can manage the products prices by selected the relevant boxes below.
11.2
View Categories
View Categories
On the left navigation bar click 'Catalogue', a sub menu will open with a list of categories.
Click 'View Categories' from the subcategory.
Once 'View Categories' is open you are able to 'Add', 'Edit', or 'Delete'.
© 2014 WorldWeb Management Services Pty Ltd
268
269
Content ONE general user manual
To add a category click ‘Add Category’ which is located on the navigation bar.
To edit a category click the 'Title' of the category within the list.
To delete a category click the 'delete' button on the right hand side of the page.
11.2.1 Add Category
How to Add Categories
On the left navigation bar click 'Catalogue', a sub menu will open with a list of categories.
Click 'View Categories' from the subcategory.
Once ‘View Categories’ is open, click ‘Add Category' which is located on the navigation bar.
'General | Add Category' will appear.
© 2014 WorldWeb Management Services Pty Ltd
Catalogue
270
The text box ‘Add Category’ will have 4 steps detailing in this order.
1. General
2. Attributes
3. SEO
4. Product Filtering
1. General
Name: This will be the name of the category.
Parent: This allows you to choose where the root of this page will be linked.
Options: Tick this only if you want to hide the category from the user
Image: upload an image for the category if required by clicking the 'Browse' button and selecting the
image you have saved on
your computer.
© 2014 WorldWeb Management Services Pty Ltd
271
Content ONE general user manual
2. Attributes
Short Description: enter a description for the category if required.
3. SEO
M eta D ata
Brow ser Title: The title is already defaulted from the name of the category - this will appear on the tab
of your browser.
Description: This section allows you to write a brief description for this category.
*P leas e note that the des c ription will b e us ed through s earc h engines , therefore us ing k eywords and
phras es is highly
rec om m ended.
© 2014 WorldWeb Management Services Pty Ltd
Catalogue
272
Image: This will be pre-ticked to 'Default' as you would have previously added an image in the 'Images'
section.
S ear c h i n g /In d ex i n g
Search Engines: Tick this box if you would like this page to be found in search engines.
*P leas e note that the b ox is tic k ed as a default - only un-tic k this b ox if you do not want this page found
in your internal
s earc h res ults .
4. Product Filtering
Please contact WorldWeb to discuss.
© 2014 WorldWeb Management Services Pty Ltd
273
Content ONE general user manual
11.2.2 Edit Category
How to Edit Categories
On the left navigation bar click 'Catalogue', a sub menu will open with a list of categories.
Click 'View Categories' from the subcategory.
To edit a category click on the 'name' of the category within the list.
You would follow the same process as 'Add Category' by editing the details you desire.
1. General
© 2014 WorldWeb Management Services Pty Ltd
Catalogue
274
Name: This will be the name of the category.
Parent: This allows you to choose where the root of this page will be linked.
Options: Tick this only if you want to hide the category from the user
Image: upload an image for the category if required by clicking the 'Browse' button and selecting the
image you have saved on
your computer.
2. Attributes
Short Description: enter a description for the category if required.
3. SEO
© 2014 WorldWeb Management Services Pty Ltd
275
Content ONE general user manual
M eta D ata
Brow ser Title: The title is already defaulted from the name of the category - this will appear on the tab
of your browser.
Description: This section allows you to write a brief description for this category.
*P leas e note that the des c ription will b e us ed through s earc h engines , therefore us ing k eywords and
phras es is highly
rec om m ended.
Image: This will be pre-ticked to 'Default' as you would have previously added an image in the 'Images'
section.
S ear c h i n g /In d ex i n g
Search Engines: Tick this box if you would like this page to be found in search engines.
*P leas e note that the b ox is tic k ed as a default - only un-tic k this b ox if you do not want this page found
in your internal
s earc h res ults .
4. Product Filtering
Please contact WorldWeb to discuss.
© 2014 WorldWeb Management Services Pty Ltd
Catalogue
11.2.3 Delete Category
How to Delete Categories
On the left navigation bar click 'Catalogue', a sub menu will open with a list of categories
Click 'View Categories' from the subcategory.
To delete a category click on the 'delete' button on the right hand side.
© 2014 WorldWeb Management Services Pty Ltd
276
277
11.3
Content ONE general user manual
Export Tools
Export Tools
On the left navigation bar click 'Catalogue', a sub menu will open with a list of categories.
Click 'Export Tools' from the subcategory.
Step 1 of 3: Export Fields
As a default all boxes will be ticked.
You will need to un-tick the boxes that you do not wish to export.
Click 'Continue'.
© 2014 WorldWeb Management Services Pty Ltd
Catalogue
278
Step 2 of 3: Export Criteria
In Stock: Select 'Any / Yes / No' if you want to export the the items that are in stock.
Visible: Select 'Any / Yes / No' if you want to export the the items that are visible on the website.
Featured: Select 'Any / Yes / No' if you want to export the the items that are featured on the website.
Categories: Tick the categories that you wish to export.
Click 'Continue'.
© 2014 WorldWeb Management Services Pty Ltd
279
Content ONE general user manual
Step 3 of 3: Confirm Export
This will show you a preview of what will be exported.
Click 'Start Export'.
© 2014 WorldWeb Management Services Pty Ltd
Top Level Intro
This page is printed before a new
top-level chapter starts
Part
XII
281
12
Content ONE general user manual
Orders & Payments
Orders & Payments
On the left navigation bar click 'Orders & Payments', a sub menu will open with a list of categories.
Manage Orders: will open to a list of all orders, which will allow you to manage and maintain.
Manage Payments: will open to a list of all orders, which will allow you to manage and maintain.
12.1
Manage Orders
Manage Orders
On the left navigation bar click 'Orders & Payments', a sub menu will open with a list of categories.
Click 'Manage Orders' from the subcategory.
Once 'Manage Orders' is open you are able to search for orders, Manage Payments and Export
Orders.
Query: Type in a keyword or phrase that you want to search for within the list of orders.
Manage Payments: will open to a list of all orders, which will allow you to manage and maintain.
Export Orders: will allow you to export orders from the relevant fields selected.
© 2014 WorldWeb Management Services Pty Ltd
Orders & Payments
12.2
282
Manage Payments
Manage Payments
On the left navigation bar click 'Orders & Payments', a sub menu will open with a list of categories.
Click 'Manage Payments' from the subcategory.
Once 'Manage Payments' is open you are able to search for payments, Manage Orders and Export
Orders.
Query: Type in a keyword or phrase that you want to search for within the list of payments.
Manage Orders: will open to a list of all orders, which will allow you to manage and maintain.
Export Orders: will allow you to export orders from the relevant fields selected.
© 2014 WorldWeb Management Services Pty Ltd
283
12.3
Content ONE general user manual
Export Orders
Export Orders
On the left navigation bar click 'Orders & Payments', a sub menu will open with a list of categories.
Click 'Manage Payments' from the subcategory.
Export Orders will allow you to export orders from the relevant fields selected.
12.3.1 How to export orders
How to Export Orders
On the left navigation bar click 'Orders & Payments', a sub menu will open with a list of categories.
Click 'Manage Payments' from the subcategory.
Select 'Export Orders' which is located on the navigation bar.
© 2014 WorldWeb Management Services Pty Ltd
Orders & Payments
Step 1 of 3: Export Fields
Click 'Continue'.
© 2014 WorldWeb Management Services Pty Ltd
284
Top Level Intro
This page is printed before a new
top-level chapter starts
Part
XIII
Glossary
13
286
Glossary
Glossary
Content ONE - is a Web Content Management System.
Content Management System (CMS) - CMS is software for managing content on a Web site directly
on the server.
Site - the website as displayed to your visitors or users, containing all the content added via the CMS.
It is sometime referred to as the 'front end'.
Back end - the Content ONE administration console where the Site Administrator manages the Web
Site and its content.
Front end - another name for the Web Site that your visitors (or members) see.
Database - a database is an organised collection of information. It contains a collection of records that
you can search, sort and analyse rapidly.
Workspace - the Workspace is the area of the Content ONE Admin section where the business of
configuration and content publishing takes place. The workspace dynamically updates as you select
tools and menu options. The workspace can include: HTML editor, Menu Editor, Page Editor, link
management and several other features.
© 2014 WorldWeb Management Services Pty Ltd
287
Content ONE general user manual
Index
-Aaction buttons
12
Administration Console
12
-MMenubar
12, 13
-Ttab menus
12
Title Bar
12
-WWorkspace
12
-Yyour system user status
13
© 2014 WorldWeb Management Services Pty Ltd
For more information on content management
systems, website design and other web
services, please visit our website:
www.worldweb.net.au
or contact us on
+61 8 8215 0020