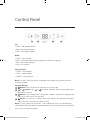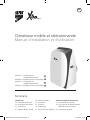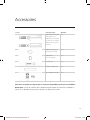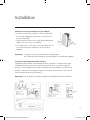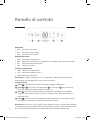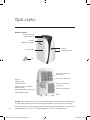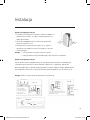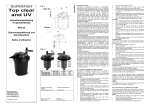
1
EN Portable Air Conditioning Unit & Remote Control manual AX3000/1 – COOL ONLY AX3005/1 – COOL & HEAT UK UK AX3001/1 – COOL ONLY AX3006/1 – COOL & HEAT EU AX3002/1 – COOL ONLY AX3003/1 – COOL & HEAT CH EU CH Contents Air Conditioning Unit 2 Safety Precaution 4 Parts Description 5Accessories 6 Control Panel FR 19 DE AX0040 Port AC manual multi_lang.indd 1 37 AC Unit Remote Control 14 Button description 17Usage 18 Fix batteries 7Operation 9 Installation 10Maintenance 12Troubleshooting 13 WEEE Warning ES 55 IT 73 PL 91 NL 109 27/11/2015 15:27 Safety Precaution Your safety and safety of others is very important. We have provided many important safety advisories in this manual and on your appliance. Always read and obey all safety requirements. WARNING This symbol indicates the possibility of death or serious injury. CAUTION This symbol indicates the possibility of injury or damage to properties only. WARNING This appliance can be used by anyone aged 8 years and above, any persons with reduced physical, sensory or mental capabilities or lack of experience and knowledge must be given supervision or instruction concerning the use of this appliance in a safe and correct manner. Children should not play with the appliance. Cleaning and user maintenance should not be made by children without supervision. Electrical connection of this appliance must be carried out in accordance to local codes of practice. An earth leakage breaker with rated capacity must be installed to avoid possible electric shocks. Do not install air conditioner in a place where there is flammable gas or liquid. It may cause fire. If the power supply cord is damaged, it must be replaced by the manufacturer or its service agent or a similar qualified person. The specification of fuse is AC250V T3.15AL. Voltage should be in the range of 220~240V. The appliance should be installed in accordance with national wiring regulation. The plug should be easily accessible after installation. If the fuse on the unit PCB is broken, please change it with the type of F3.15A/250V. 2 AX0040 Port AC manual multi_lang.indd 2 27/11/2015 15:27 Do not put fingers or other objects into the air outlet or inlets, as fan rotates at high speed and will cause injury. Do not touch the swinging wind vanes. It may clamp your finger and damage the driving parts of the wind vanes. Do not attempt to repair the air conditioner by yourself. All repair works must be carried out by a fully qualified engineer with the appropriate accreditations. Do not operate in lighting storm weather. Please cut off the primary power supply switch in order to prevent the machine from damage. Do not use liquid or corrosive detergent to clean the appliance and don’t splash water or other liquid onto it, otherwise, it may damage the plastic components, and cause electric shock. Do not operate the unit in laundry rooms. CAUTION Do not apply cold air to the body for a long period of time. Do clean the air conditioner with a soft dry cloth. Do not use chemical solvent, insecticide,inflammable spraying materials which will damage the air conditioner. Do not sprinkle water directly on the unit. If the air filter is very dirty, the cooling or heating capacity will be reduced. Please clean the air filter regularly . 3 AX0040 Port AC manual multi_lang.indd 3 27/11/2015 15:27 Parts Description Front view Control panel Air outlet Signal receiver windows Handle recess Front panel Air outlet Remote controller Rear view Upper air filter (Behind the grill) Upper air intake Handle recess Drain outlet Air outlet Lower air filter (Behind the grill) Drain outlet (only for Pump heating model) Power cord outlet Lower air intake Bottom tray drain outlet Truckle 4 Note: The descriptions in this user manual may differ slightly to the promotion information and actual appliance. Please refer to the real appliance purchased. The working temperature range of the air conditioner is 16-32oC under cooling mode; 5-27oC under heating mode. AX0040 Port AC manual multi_lang.indd 4 27/11/2015 15:27 Accessories Parts Parts name Quantity Exhaust hose Adaptor and 1 Adaptor B (flat mouth or round mouth: depending ou on models ) Window Slider Kit and bolt Wall Exhaust Adaptor A(#) 1 Adaptor B 1 (round mouth)(#) Bolt and Nut 1 Drain hose (#) 1 Remote controller 1 and Battery Note: Optional parts (#), some models without Note: Please select button on the remote controller according to the related functions on the display, additional buttons may be invalid. 5 AX0040 Port AC manual multi_lang.indd 5 27/11/2015 15:27 Control Panel 4 3 Temperature indicator 2 1 Fan • HIGH – High speed indicator • MID – Mid speed indicator • LOW – Low speed indicator Mode • COOL – Cool indicator • HEAT – Heating indicator (cold wind type unit without this display) • DRY – Dehumidify indicator • FAN – Fan indicator Extra Features • TIMER – Time indicator • SLEEP – Sleep indicator • SWING – Swing indicator Note: This icon is for all the buttons and display. Base models may not feature all the functions & modes. Function Buttons 1 Button. Press this button to make the unit start or stop. 2 or Button. Press or button to make the room setting temperature decrease or increase. 3 Button. Each time you press this button, a mode is selected in a sequence that goes from COOL, HEAT, DRY and FAN. 4 Button. This button is used for setting fan speed in the sequence that goes from LOW, MID, to HIGH, then back to LOW. 6 Note: 1. Timer, Sleep, Swing function, “Auto“ mode and “Auto” fan speed can be selected by remote controller not by control panel. 2. Other functions on control panel are as same as remote controller’s. AX0040 Port AC manual multi_lang.indd 6 27/11/2015 15:27 Operation WARNING Failure to follow the below precaution could result in electrical shock, fire or personal injury. 1. The plug must be plugged into an outlet that is properly installed and grounded. 2. Do not use an extension cord or plug adaptor with this unit. Before starting the unit • Select a suitable location, make sure the unit is near to an electrical outlet. • Install the flexible exhaust hose and the adjustable window slider kit. • Plug the unit into the correct outlet. • Turn the unit on. Heating operation mode (Cooling only model has no heating function) • Press the MODE button in sequence until the heat display is illuminated. • Press the “+” and “-” button to set your desired temperature. • Press FAN button to select the fan speed. • Press ON/OFF button to start the unit and press it again to stop Cooling operation mode • Press the MODE button in sequence until cool is illuminated. • Press the “+” and “-” button to set your desired temperature. • Press FAN button to select the fan speed. • Press ON/OFF button to start the unit and press it again to stop. 7 AX0040 Port AC manual multi_lang.indd 7 27/11/2015 15:27 Dehumidify operation mode • Press the MODE button in sequence until DRY is illuminated. • Press the “+”and “-”button to set your desired temperature. • Press FAN button to select the fan speed. • Press ON/OFF button to start the unit and press it again to stop. Circulation operation mode • Press MODE button in sequence until the fan display is illuminated. • Press the FAN button to select the fan speed. • Press the ON/OFF button to start the unit and press it again to stop. Timer operation • Press the TIMER button. • Press the “+” and “-” button to adjust your timer time. Note: “Time off” is effective only when the air-conditioner is running. “Time on” is effective only when the air-conditioner is stopped. Removal of condensate water When the internal water tank is full, the control panel display indicates “P1”. •Open the drain cover and extract it upwards. •Put a container under the drain pipe, take out the plug on the drain pipe and let out the condensate water. •After all the water has been emptied, replace the plug back onto the drainage outlet, and replace the cover. IMPORTANT This water is not suitable for drinking Drain outlet 8 AX0040 Port AC manual multi_lang.indd 8 27/11/2015 15:27 Installation Select a best location • Install the mobile air conditioner in a flat and spacious location where the air outlets will not be obstructed. • A minimum clearance of 50cm from walls or other obstacles should be kept. • The gradient can’t be more than 10 degrees in the horizontal plane while using the unit & fitting kit. More than 50 cm More than 50 cm Note:1. The air conditioner shall not be used in the laundry room. 2. The plug shall be accessible after the unit is positioned. Window kit installation Your window kit has been designed to fit most standard vertical and horizontal window applications. However, it may be necessary for you to improve or modify some aspects of the installation procedure for certain types of window. Please refer to Fig. A & Fig. B for minimum and maximum window openings. Note: The bolt and nut are used to fix window fixing board, Fig. C. Horizontal window Fig. B Fig. A Window slide kit Minimum: 67.5 cm Maximum:125 cm Fig. C Vertical window Window slide kit Minimum: 67.5 cm Maximum:125 cm Nut Bolt 9 AX0040 Port AC manual multi_lang.indd 9 27/11/2015 15:27 Maintenance Your new air conditioner is designed to give you dependable service for many years. This section tells you how to clean and care for your air conditioner properly. We advise that you contact your local accredited specialist for the annual maintenance. Remember the cost of this service call is your responsibility. Cleaning Air Filter If the air filter is covered by dust, the cooling capability will be decreased. Please clean the air filter every two weeks, dependant on use. • Turn off the power supply • Pull out the filter cover and remove the filter from cover • Hoover off the surface of the filter and then if necessary wash air filter in warm soapy water. Do not put air filter in the dishwasher or use any chemical cleaners. And dry filter completely before replacing. • Attach the air filter to the filter cover using the attachment hooks on the inner surface of the cover. Put the filter cover back to it’s place. 1a 3c 2b Duct mount instruction flexible 1a. Connect the exhaust air outlet hose by screwing into the round hose adaptor. Clip the hose and adaptor onto the air outlet of the unit. 2b. Connect the appropriate adaptor onto the opposite end of the air outlet hose. 3c. Fit the adaptor sub-assembly to a nearby window. Note •The duct can be compressed to 450mm minimum and extended to 1800mm maximum. It is better to keep the duct length to a minimum. •The exhaust air must always be vented to outside. • Stretching or bending the duct excessively will affect the cooling efficiency DO NOT! YES! 10 AX0040 Port AC manual multi_lang.indd 10 27/11/2015 15:27 Cleaning The Unit •For the purpose of safety, please turn off the air conditioner power supply. •Wipe the unit with a dry cloth. •If the unit is very dirty, please wipe with a damp cloth Note If the unit remains unused for a long period of time please remove the condensate water & leave the drain bung out. WARNING • Do not use gasoline, benzene, thinner or any other chemicals, or any liquid insecticide on the air conditioner, as these substances may cause flaking off of the paint, cracking or deformation of plastic parts. • Never attempt to clean the unit by pouring water directly over any of the surface areas, as this will cause deterioration of electrical components and risk of electrocution. • Never use hot water over 40oC (104oF) to clean the air filter. 11 AX0040 Port AC manual multi_lang.indd 11 27/11/2015 15:27 Troubleshooting Before making a service call, please try the suggestions below if your unit is not operating correctly. Air Conditionining unit will NOT operate Causes Solutions The power switch is off Switch on the power. Power supply failure Wait for the recovery of power supply The fuse is blown Check circuit breaker, replace the fuse (retest if fuse re-blows – contact electrician) It doesn’t reach the setting time for starting up Wait or eliminate the original setting Unit doesn’t start when pressing ON/OFF button Causes Solutions It is not three minutes after switch off Wait three minutes Room temperature is lower than the setting temperature Reset the temperature Air blowing out, but the cooling effect is bad Causes Solutions Mistakes in temperature setting Reset temperature. Set temperature should be lower than ambient temperature The air filter is blocked by dust Clean the air filter The air inlet or outlet of machine is blocked Remove the obstruction The air conditioner is on in a very hot room Allow additional time to remove stored heat from walls, ceiling, floor and furniture Cooling capacity is insufficient Reconfirm the required cooling capacity with your dealer. The doors or windows are open Close the doors and windows Noise or vibration Causes Solutions The ground is not level or not flat enough Place the unit on a flat, level ground if possible 12 AX0040 Port AC manual multi_lang.indd 12 27/11/2015 15:27 WEEE directive warning Meaning of crossed out wheeled dustbin Do not dispose of electrical appliances as unsorted municipal waste, use separate collection facilities. Contact your local government for information regarding the collection systems available. If electrical appliances are disposed of in landfills or dumps, hazardous substances can leak into the groundwater and get into the food chain, damaging your health and well-being. When replacing old appliances with new ones, the retailer is legally obligated to take back your old appliance for disposals at least free of charge. Compressor Manufacturer or Trade mark Refrigerant The name of oil Highly R410A 68HES-H or equivalent Meizhi R410A ESTER OIL Vg74 Rechi R410A NMOC Ze-Gles RB68EP or equivalent 13 AX0040 Port AC manual multi_lang.indd 13 27/11/2015 15:27 Portable Air Conditioning Unit Remote Control Manual Buttons description Running Mode display Speed display Temperature, time display etc Swing or ON/OFF display Features display Note: All the figures above are the displays after being initially electrified or re-electrified after power off. In actual operations, the remote controller screen displays related items only. The cooling only units don’t have the function of heating or electric heating. When the remote controller turns to such function buttons, the units will not result such effect. * Please don’t turn the remote controller to such buttons. Note: The picture is a general remote controller, and contains all function buttons. They may be slightly different – dependant on model. 1.«ON/OFF» button Start or stop the air-conditioner by pressing this button 2.«SPEED» button Select fan speed as following: LOW › MID › HIGH › AUTO 14 AX0040 Port AC manual multi_lang.indd 14 27/11/2015 15:27 3. «SWING » button The vertical wind direction vanes can rotate automatically, when you have the desired horizontal direction, press again, the vertical wind direction vanes will stop at the position of your choice. 4.«TURBO» button Only under the state of cooling or heating mode, press this button, the fan speed is adjusted to ‘HIGH’ automatically and the LCD displays “TURBO”, the “TURBO” function is used to reach the highest cooling or heating temperature quickly. 5.«TIMER» button Setting the «on» timer time a. When remote controller is at off state press «Timer» button, the LCD displays «Time on» and the timer time, the range of setting time is 0.5h to 24h. b. You can press the « » or « » button to adjust the timer time, each touch will be set time to increase or reduce 0.5h up to ten hours, after ten hours the set time will Increase or reduce 1h per press, to enable your required time. c. Press «Timer» button again, to set the timer on function. d. You can set another function to insure the suitable state after air conditioner turns on (include in mode, temperature, swing, fan speed etc.) The LCD will display all your setting and keep it, when the timer reaches the set time, the air conditioner will work according to your setting automatically. Setting the «OFF» timer time: a. When remote controller is at « ON STATE» press «TIMER» button, the LCD displays «TIMER OFF» and the timer time, the range of setting time Is 0.5h to 24h. b. You can press the « » or « » button to adjust the timer time, each press will set time to increase or reduce 0.5h up to 10h, after 10hours the set time will increase or reduce 1h per pressing, to ensure your required time. c. Press «TIMER» button again, to set the timer off function. 15 AX0040 Port AC manual multi_lang.indd 15 27/11/2015 15:27 6.«DISPLAY» button Turns LCD display ON or OFF. 7.« » or « » button Press the «+» or «-» button, you can set the temperature range from 16°C to 32°C 8.«MODE» button Enables you to select different operation modes after each press, the operation mode will be changes. It shown in the following display: AUTO COOL DRY HEAT FAN AUTO. Note: Cooling only units have no heating function. * * * * * 9.«SLEEP» button 1.Press the SLEEP button, the sleeping indicator light flashes on 2. After setting sleep mode, the cooling operation enables the set temperature to increase 1°C after 1 hour and another 1°C automatically after 1 hour 3. A fter setting sleep mode, the heating operation enables the set temperature to drop 2°C after 1 hour and another 2°C automatically after 1 hour 4. The air-conditioner runs in sleeping mode for 7 hours and stops automatically. Note: Press the MODE or ON/OFF button, to clear sleep mode 10. «SWING » button The horizontal wind direction vanes can swing automatically, when you have the desired vertical wind direction, press again, the horizontal wind direction vanes will be stopped at the position of your choice. 11. «HEALTH» button Turn ON or OFF for the «Health function». 16 AX0040 Port AC manual multi_lang.indd 16 27/11/2015 15:27 Usage Automatic operation mode • Press the ON/OFF button, the air conditioner starts to operate • Press the MODE button, select the automotive operation mode. • Press the SPEED button, to select the fan speed - you can select the fan speed from LOW, MID, HIGH, AUTO • Press the ON/OFF button to stop the air conditioning unit. Cooling/ heating operation mode (Cooling only units have no heating function) • Press the ON/OFF button, the air-conditioner started to operate • Press the MODE button, select the cooling or heating operation mode. • Press the « » or « » button, select the temperature, temperature can be set at 1°C difference range from 16-32°C. • Press the SPEED button, to select fan speed - you can select fan speed from LOW, MID, HIGH, AUTO. • Press the button again, the air-conditioner stops Fan operation mode • Press the ON/OFF button, the air-conditioner starts to operate • Press the MODE button and select FAN operation mode • Press the SPEED button, to select fan speed - you can select fan speed from LOW, MID, HIGH, AUTO. • Pres the ON/OFF button to stop the air-conditioning unit. Note: In “FAN“ operation mode the temperature setting is non effective Dehumidify operation mode • Press the ON/OFF button the air-conditioner starts to operate • Press the MODE button to select the Dehumidify operation mode • Press the « » or « » button to set the temperature, temperature can be set at 1°C differeence range from 16-32°C. • Press the SPEED button, to select fan speed - you can select fan speed from LOW, MID, HIGH, AUTO. • Press the ON/OFF button to stop the air-conditioning unit. 17 AX0040 Port AC manual multi_lang.indd 17 27/11/2015 15:27 Fix Batteries • Slide open the cover in the direction as indicated by the arrow on the handset • Put in two brand new batteries and position the batteries to the right electric poles (+ & -) • Replace the cover Attention: • Aim the remote controller towards the receive on the air-conditioner • The remote controller should be within 8 meters away from the receiver • No obstacles between the remote controller and receiver • Do not drop or throw the remote controller • Do not put the remote controller in direct sunlight or other heat sources • Use two batteries • Take batteries out of the remote controller if the unit is not being used for long periods of time. • If the unit does not respond to the remote control, replace the batteries • The waste battery should be disposed of properly The design and specifications are subject to change without prior notice for product improvement. Consult with the sales agency or manufacturer for details. 18 Information correct at time of going to press. AX0040 Port AC manual multi_lang.indd 18 27/11/2015 15:27 FR Climatiseur mobile et télécommande Manuel d’installation et d’utilisation AX3001/1 – Uniquement en mode refroidissement AX3006/1 – Refroidissement et chauffage AX3002/1 – Uniquement en mode refroidissement AX3003/1 – Refroidissement et chauffage EU EU CH CH Sommaire Climatiseur 20 Consigne de sécurité 22 Description des pièces 23Accessoires 24 Tableau de commande AX0040 Port AC manual multi_lang.indd 19 25Fonctionnement 27 Installation 28Entretien 30Dépannage 31 Elimination de l’appareil Télécommande du climatiseur 32 Description des touches 35 Utilisation de la télécommande Mode de fonctionnement 36 Installation des piles 27/11/2015 15:27 Consigne de sécurité Votre sécurité et la sécurité d’autrui sont très importantes. Dans ce manuel et sur l’appareil lui-même, nous avons consigné de nombreux conseils de sécurité importants. Lisez et observez toutes les consignes de sécurité. ATTENTION Ce panneau d’avertissement attire l’attention sur un danger de mort ou un risque de blessures. PRUDENCE Ce panneau d’avertissement attire l’attention sur le risque de blessures ou de détériorations de l’appareil. ATTENTION Cet appareil peut être manié par des enfants de plus de 8 ans et par des adultes. Les personnes aux capacités physiques, sensorielles ou mentales diminuées, ou manquant d’expérience et de formation, doivent recevoir des instructions au s ujet de l’utilisation correcte et sûre de cet appareil ou être surveillées lorsqu’elles l’utilisent. Les enfants ne doivent pas jouer avec l’appareil ni le nettoyer ou l’entretenir sans surveillance. Le raccordement électrique de cet appareil doit être effectué selon les règles techniques locales. Pour éviter d’éventuelles électrocutions, un coupe-circuit conçu en fonction de la puissance nominale de l’appareil doit être installé. N’installez pas le climatiseur à un endroit où l’on trouve des gaz ou des liquides inflammables – un incendie pourrait être déclenché. Si le câble d’alimentation est endommagé, il doit être remplacé par le fabricant, l’un de ses représentants ou une personne bénéficiant de la même qualification. La spécification du fusible est AC250V T3.15AL. La tension électrique doit être comprise entre 220 V et 240 V. Lors de l’installation de l’appareil, tenir compte des réglementations nationales respectives sur les lignes électriques. La fiche doit être facilement accessible après l’installation. Si le fusible de la carte du circuit imprimé a sauté, remplacez-le par un fusible de type F 3,15 A / 250 V. 20 AX0040 Port AC manual multi_lang.indd 20 27/11/2015 15:27 Ne mettez ni les doigts ni de quelconques objets dans le raccord d’évacuation d’air ou le raccord d’aspiration d’air. Le ventilateur tourne à grande vitesse et pourrait entraîner des blessures. Ne touchez pas les lamelles de guidage d’air lorsqu’elles sont en mouvement. Votre doigt pourrait se coincer et l’entraînement des lamelles pourrait être détérioré. N’essayez jamais de réparer le climatiseur vous-même. Tous les travaux de réparation doivent être exécutés par un technicien qualifié agréé. N’utilisez pas l’appareil en cas de tempête et d’orage. Débranchez l’alimentation principale afin de protéger l’appareil contre la détérioration. N’utilisez pas de nettoyants liquides ou corrosifs pour nettoyer l’appareil; ne pulvérisez jamais d’eau ou d’autres liquides, ce qui pourrait provoquer un endommagement des pièces en matière plastique ou des électrocutions. N’utilisez pas l’appareil dans une buanderie. PRUDENCE N’exposez pas votre organisme directement à l’air froid pendant une période prolongée. Nettoyez le climatiseur avec un chiffon sec et doux. N’utilisez pas de solvants chimiques, d’insecticides ou de pulvérisations inflammables, car le climatiseur s erait endommagé. Ne pulvérisez jamais d’eau directement sur l’appareil. Le climatiseur doit être utilisé dans une pièce où les fenêtres et les portes sont fermées. Si cela n’est pas le cas, l’appareil ne pourra garantir qu’insuffisamment la température et l’humidité de l’air ambiantes souhaitées. Si le filtre à air est fortement encrassé, la capacité de refroidissement et de chauffage est limitée. Veuillez nettoyer le filtre à air à intervalles réguliers. 21 AX0040 Port AC manual multi_lang.indd 21 27/11/2015 15:27 Description des pièces Vue de l’avant Tableau de commande Evacuation de l’air Champs de réception des signaux Moulure de poignée Capot avant Raccord d’évacuation d’air Télécommande Vue de l’arrière Filtre à air supérieur (situé derrière la grille) Moulure de poignée Grille supérieure d’aspiration d’air Raccord d’écoulement pour l’eau de condensation Raccord d’évacuation d’air Raccord d’écoulement pour l’eau de condensation (seulement pour le modèle de pompe à chaleur) Boîte de raccordement du câble d’alimentation Raccord inférieur d’écoulement pour l’eau de condensation 22 Filtre à air inférieur (situé derrière la grille) Grille supérieure d’aspiration d’air Roulettes Remarque: les descriptions de ce manuel d’utilisation peuvent différer, dans le détail, des informations de vente et de l’appareil effectif. Veuillez vous référer au type d’appareil acheté. La plage de température de fonctionnement du climatiseur est comprise entre 16° C et 32° C en mode refroidissement et entre 5° C et 27° C en mode chauffage. AX0040 Port AC manual multi_lang.indd 22 27/11/2015 15:27 Accessoires Pièces Nom de la pièce Quantité Tuyau flexible d’évacuation 1 kit d’air adaptateur I et adaptateur B (version plate ou ou ronde selon le modèle) Adaptateur pour fenêtre et boulon Adaptateur mural pour 1 pce l’évacuation d’air A (#) Adaptateur B 1 pce (version ronde) (#) Ecrou avec vis 1 pce Flexible de drainage (#) 1 pce Télécommande avec piles 1 pce Précision: les pièces en option (#) ne sont pas disponibles pour tous les modèles. Remarque: utilisez les touches de la télécommande d’après les fonctions indiquées à l’écran. Il est possible que certaines touches ne soient pas activées. 23 AX0040 Port AC manual multi_lang.indd 23 27/11/2015 15:27 Tableau de commande 4 3 Affichage de la température 2 1 Ventilateur • HIGH Affichage de vitesse élevée • MID Affichage de vitesse moyenne • LOW Affichage de vitesse réduite Mode • COOL • HEAT • DRY • FAN Affichage du refroidissement Affichage du chauffage (sur les appareils à air frais, cet affichage fait défaut) Affichage de la déshumidification Affichage de la ventilation Fonctions supplémentaires • TIMER Affichage de la programmation horaire • SLEEP Affichage du mode veille • SWING Affichage du basculement Remarque: les symboles se réfèrent à l’ensemble des touches et des écrans. Il est possible que les modèles dotés d’un équipement de base ne comportent pas l’intégralité des fonctions et des modes. Touches de fonction . Appuyez sur cette touche pour allumer ou éteindre l’appareil. 1 Touche ou . Appuyez sur la touche ou pour augmenter ou réduire la 2 Touche présélection de température ambiante. 3 Touche . Chaque actionnement de cette touche entraîne la sélection d’un mode de fonctionnement dans l’ordre suivant: refroidissement (COOL), chauffage (HEAT), déshumidification (DRY) et ventilation (FAN). . Cette touche sert à régler la vitesse du ventilateur dans l’ordre suivant: réduite 4 Touche (LOW), moyenne (MID), élevée (HIGH) puis à nouveau réduite (LOW). Remarques: 1. Les fonctions TIMER, SLEEP, SWING, le mode «Auto» et la vitesse du ventilateur «Auto» ne peuvent être sélectionnées que par la télécommande et non pas au niveau du tableau de commande. 2. Les autres fonctions du tableau de commande 24 correspondent à celles de la télécommande. AX0040 Port AC manual multi_lang.indd 24 27/11/2015 15:27 Fonctionnement ATTENTION Le non-respect des précautions suivantes peut entraîner des électrocutions, des incendies ou des dommages corporels. 1. La fiche doit être branchée dans une prise correctement installée et mise à la terre. 2. N’utilisez aucune rallonge et aucun adaptateur de prise avec cet appareil. Avant la mise en service de l’appareil • Sélectionnez un emplacement adapté et veillez à ce que l’appareil se trouve à proximité d’une prise de courant. • Installez le tuyau flexible d’évacuation d’air et l’adaptateur pour fenêtre. • Branchez l’appareil sur la prise de courant adaptée. • Allumez l’appareil. Mode chauffage (les modèles uniquement en mode refroidissement n’ont pas de fonction de chauffage) • Appuyez sur la touche MODE jusqu’à ce que l’écran de chauffage s’allume. • Réglez la température souhaitée avec les touches «+» et «–». • Réglez la vitesse du ventilateur avec la touche FAN. • Appuyez sur la touche ON/OFF pour allumer l’appareil; appuyez à nouveau sur la touche pour l’éteindre. Mode refroidissement • Appuyez sur la touche MODE jusqu’à ce que l’écran de refroidissement s’allume. • Réglez la température souhaitée avec les touches «+» et «–». • Réglez la vitesse du ventilateur avec la touche FAN. • Appuyez sur la touche ON/OFF pour allumer l’appareil; appuyez à nouveau sur la touche pour l’éteindre. 25 AX0040 Port AC manual multi_lang.indd 25 27/11/2015 15:27 Mode déshumidification • Appuyez sur la touche MODE jusqu’à ce que l’écran de déshumidification s’allume. • Dans ce mode de fonctionnement, le ventilateur tourne à vitesse constante. • Fermez les fenêtres et les portes afin d’obtenir le meilleur effet déshumidifiant. • Appuyez sur la touche ON/OFF pour allumer l’appareil; appuyez à nouveau sur la touche pour l’éteindre. Mode circulation • Appuyez sur la touche MODE jusqu’à ce que l’écran de ventilation s’allume. • Réglez la vitesse du ventilateur avec la touche FAN. • Appuyez sur la touche ON/OFF pour allumer l’appareil; appuyez à nouveau sur la touche pour l’éteindre. Mode minuterie • Appuyez sur la touche TIMER. • Réglez la durée souhaitée pour la minuterie avec les touches «+» et «–». Remarque: «Time off» n’est activable que lorsque le climatiseur est allumé. «Time on» n’est activable que lorsque le climatiseur est éteint. Elimination de l’eau de condensation Une fois le réservoir d’eau incorporé plein, «P1» apparaît à l’écran du tableau de commande. •Ouvrez le couvercle du raccord d’écoulement et t irez-le vers le haut. •Placez un récipient sous le tuyau flexible d’écoulement, retirez le bouchon du tuyau et laissez l’eau de condensation s’écouler. •Replacez le bouchon dans le tuyau flexible d’écoulement dès que la totalité de l’eau de condensation s’est écoulée, puis remettez le couvercle en place. IMPORTANT Cette eau n’est pas potable. Raccord d’écoulement pour l’eau de condensation 26 AX0040 Port AC manual multi_lang.indd 26 27/11/2015 15:27 Installation Choisissez le lieu d’installation le plus adapté • I nstallez le climatiseur mobile sur une surface plane, à un endroit dégagé, de sorte que la sortie d’air ne soit pas encombrée. • Une distance d’au moins 50 cm doit être respectée par rapport aux murs et aux autres objets. • A l’horizontale, l’inclinaison ne doit pas dépasser 10° au maximum lorsqu’un adaptateur est utilisé pour l’appareil. Au moins 50 cm Au moins 50 cm Remarque:1. Ne pas utiliser le climatiseur dans une buanderie. 2. La fiche doit être facilement accessible après l’installation de l’appareil. Installation de l’adaptateur pour fenêtre L’adaptateur pour fenêtre a été fabriqué de façon à convenir à la plupart des types standard de fenêtres coulissantes verticales et horizontales. Sur certains types de fenêtres, il peut cependant être nécessaire d’optimiser ou d’adapter l’installation par endroits. Veuillez tenir compte des figures A et B pour les dimensions minimales et maximales des ouvertures de f enêtres. Remarque: La vis et l’écrou sont nécessaires pour fixer la plaque de fixation à la fenêtre. Fenêtre coulissante horizontale Fig. B Fig. A Adaptateur pour fenêtre Minimum: 67,5 cm Maximum:125 cm Fig. C Fenêtre coulissante verticale Adaptateur pour fenêtre Minimum: 67,5 cm Maximum:125 cm Ecrou Vis 27 AX0040 Port AC manual multi_lang.indd 27 27/11/2015 15:27 Entretien Votre nouveau climatiseur est conçu de façon à vous rendre des services fiables pendant de nombreuses années. Dans cette section, vous apprendrez comment nettoyer et entretenir correctement votre climatiseur. Pour l’entretien annuel, nous vous recommandons de faire appel sur place à du personnel spécialisé agréé. Veuillez noter que les coûts de ce service sont à votre charge. Nettoyage du filtre à air La puissance de refroidissement diminue lorsque le filtre à air est encrassé par la poussière. Selon l’utilisation, veuillez nettoyer le filtre à air toutes les deux semaines. • Coupez l’alimentation électrique. • Sortez le couvercle du filtre et retirez le filtre. • Aspirez la surface du filtre et lavez le filtre à air, si nécessaire dans de l’eau savonneuse chaude. Ne nettoyez pas le filtre à air dans le lavevaisselle et n’utilisez pas de nettoyants chimiques. Séchez soigneusement le filtre avant de le réinsérer. • Fixez à nouveau le filtre à air à l’intérieur du couvercle du filtre à l’aide des agrafes de fixation. Réinsérez correctement le couvercle du filtre. 1a 3c 2b Instructions pour le montage du tuyau flexible 1a. Vissez le tuyau flexible d’évacuation d’air sur l’adaptateur rond pour tuyau flexible. Fixez le tuyau d’évacuation d’air au raccord d’évacuation d’air de l’appareil à l’aide de l’adaptateur et des agrafes. 2b.Fixez l’adaptateur approprié à l’autre extrémité du tuyau flexible d’évacuation d’air. 3c. Insérez l’adaptateur avec la pièce permettant l’adaptation à la fenêtre dans une fenêtre située à proximité. Non! 28 Remarques • Le tuyau flexible peut être réduit jusqu’à une longueur minimale de 450 mm et étendu jusqu’à une longueur maximale de 1800 mm. Il est conseillé de conserver une longueur de tuyau proche de la longueur minimale. • L’air évacué doit toujours être dirigé vers l’extérieur. • Un tuyau flexible trop étendu ou trop réduit perturbe la capacité de refroidissement de l’appareil. AX0040 Port AC manual multi_lang.indd 28 Oui! 27/11/2015 15:27 Nettoyage de l’appareil •Pour des raisons de sécurité, coupez l’alimentation électrique du climatiseur. • Nettoyez l’appareil avec un chiffon sec. • Veuillez nettoyer l’appareil avec un chiffon humide lorsqu’il est très sale. Remarque Retirez l’eau de condensation et n’enfoncez pas le bouchon dans le tuyau flexible d’écoulement si vous n’utilisez pas l’appareil pendant une période prolongée. ATTENTION • Pour le nettoyage de votre climatiseur, n’utilisez ni essence, ni benzène, ni solvants, ni d’autres produits chimiques ou quelconques insecticides liquides, ces substances pouvant entraîner, dans certains cas, un écaillement de la peinture ou une rupture voire une déformation des composants en matière plastique. • N’essayez jamais de nettoyer l’appareil en pulvérisant directement de l’eau sur le boîtier: cela endommagerait les composants électriques et accroîtrait le risque d’électrocution. • Pour le nettoyage du filtre à air, n’utilisez jamais d’eau d’une température supérieure à 40° C (104° F). 29 AX0040 Port AC manual multi_lang.indd 29 27/11/2015 15:27 Dépannage Avant de contacter le personnel spécialisé, veuillez examiner les solutions suivantes lorsque votre appareil ne fonctionne pas correctement. Le climatiseur ne fonctionne pas Causes Solutions au problème L’interrupteur d’alimentation est éteint. Allumez l’interrupteur d’alimentation. Coupure de courant. Attendez que le courant soit rétabli. Le fusible a sauté. Vérifiez le coupe-circuit, remplacez le fusible. (Refaites le test et contactez un électricien si le fusible saute à nouveau.) L’appareil n’atteint pas la durée préréglée pour la mise en service. Attendez ou réinitialisez les paramètres d’usine. L’appareil ne s’allume pas après l’actionnement de la touche ON/OFF Causes Solutions au problème L’appareil a été éteint il y a moins de trois minutes. Attendez trois minutes. La température ambiante est inférieure à la présélection de température. Réglez à nouveau la température. De l’air est évacué, mais la capacité de refroidissement est faible Causes Solutions au problème Réglage de température défectueux. Réglez à nouveau la température. La température présélectionnée doit être inférieure à la température ambiante. Le filtre à air est obstrué par la poussière. Nettoyez le filtre à air. Le raccord d’aspiration d’air ou le raccord d’évacuation d’air de l’appareil est obstrué. Supprimez l’obstruction. Le climatiseur se trouve dans une pièce très chaude. Attendez un peu que la chaleur accumulée sur les murs, le plafond, le sol et le mobilier se dissipe. La capacité de refroidissement est insuffisante. Faites vérifier la capacité de refroidissement requise par votre revendeur. Des portes ou des fenêtres sont ouvertes. Fermez les portes et les fenêtres. Bruits intenses ou vibrations Causes Solutions au problème Le sol n’est pas suffisamment plat. Placez si possible l’appareil sur un sol plat. 30 AX0040 Port AC manual multi_lang.indd 30 27/11/2015 15:27 Elimination de l’appareil Signification de la poubelle barrée d’une croix N’ajoutez pas ce produit aux déchets ménagers non triés; utilisez les équipements de collecte séparée des déchets. Renseignez-vous auprès de votre administration locale au sujet des procédés de collecte des déchets. Si des appareils électriques sont entreposés dans des décharges, des matières dangereuses peuvent s’infiltrer dans les eaux souterraines et rejoindre ainsi la chaîne alimentaire et nuire à votre santé et à votre bien-être. Si vous remplacez un appareil usagé par un appareil neuf, votre revendeur est légalement tenu de reprendre et d’éliminer gratuitement votre appareil usagé. Fabricant du compresseur ou marque de fabrique Produit réfrigérant Désignation de l’huile de marque Highly R410A 68HES-H ou équivalente Meizhi R410A ESTER OIL Vg74 Rechi R410A NMOC Ze-Gles RB68EP ou équivalente 31 AX0040 Port AC manual multi_lang.indd 31 27/11/2015 15:27 Télécommande pour climatiseurs mobiles Description des touches Écran de mode de fonctionnement Écran de vitesse Écran de température, de durée, etc. Écran swing ou marche/arrêt Écran pour les autres fonctions Remarque Toutes les figures ci-dessus montrent les écrans après la première mise en marche de l’alimentation ou après une remise en marche faisant suite à une coupure de courant. En fonctionnement effectif, l’écran de la télécommande n’affiche que les fonctions activées. Les appareils uniquement en mode refroidissement n’ont pas de fonction de chauffage ou de chauffage électrique. Les touches de fonction de la télécommande qui sont affectées à ces fonctions sont sans effet. Veuillez ne pas actionner ces touches. Remarque La figure montre une télécommande complète comprenant toutes les fonctions et touches. Votre modèle peut avoir une apparence légèrement différente. 1.Touche «ON/OFF» Allumez ou éteignez le climatiseur en actionnant cette touche. 2.Touche «SPEED» Sélection de la vitesse du ventilateur comme suit: Réduite (LOW) › Moyenne (MID) › Elevée (HIGH) › Automatique (AUTO) 32 AX0040 Port AC manual multi_lang.indd 32 27/11/2015 15:27 3.Touche «SWING » Les lamelles verticales de guidage d’air tournent automatiquement. Une fois que celles-ci ont atteint l’orientation horizontale souhaitée, appuyez à nouveau sur la touche afin qu’elles restent dans la position souhaitée. 4.Touche «TURBO» Si vous actionnez cette touche en mode refroidissement ou chauffage, la vitesse du ven tilateur passera automatiquement à «Elevée» (High) et «TURBO» apparaîtra sur l’affichage LCD. La fonction «TURBO» sert à atteindre le plus rapidement possible la température de chauffage la plus élevée ou la température de refroidissement la plus basse. 5.Touche «TIMER» Réglage de l’heure de démarrage de la minuterie («ON»): a.Actionnez la touche «TIMER» lorsque la télécommande est éteinte. L’affichage LCD indique «TIMER ON» et l’heure de la minuterie, réglable par intervalles d’une demi-heure au cours des 24 h. b. Pour le réglage de la durée de la minuterie, appuyez sur la touche « » ou « ». Pour régler la durée choisie, chaque actionnement de la touche augmente ou réduit la durée de 0,5 h pour les 10 premières heures; ensuite la durée est augmentée ou réduite d’1 h par pression de la touche. c. Appuyez à nouveau sur la touche «TIMER» pour activer la minuterie. d. Après l’allumage, vous pouvez sélectionner d’autres fonctions pour le mode de fonctionnement souhaité du climatiseur grâce à la minuterie (mode, température, swing, vitesse du ventilateur, etc.). L’écran LCD indiquera et conservera tous vos réglages et le climatiseur fonctionnera automatiquement d’après vos préréglages, une fois que la minuterie aura atteint l’heure préréglée. Réglage de l’heure d’arrêt de la minuterie («OFF»): a. Actionnez la touche «TIMER» lorsque la télécommande est allumée («ON»). L’affichage LCD indique «TIMER OFF» et l’heure de la minuterie, réglable par intervalles d’une demiheure au cours des 24 h. b. Pour le réglage de l’heure de la minuterie, actionnez la touche « » ou « ». Pour régler la durée de la minuterie choisie, chaque actionnement de la touche augmente ou réduit la durée de 0,5 h pour les 10 premières heures; ensuite la durée est augmentée ou réduite d’1 h par pression de la touche. c. Appuyez à nouveau sur la touche «TIMER» pour activer la fonction d’arrêt de la minuterie. AX0040 Port AC manual multi_lang.indd 33 33 27/11/2015 15:27 6.Touche «DISPLAY» Allume ou éteint l’affichage LCD. 7.Touche « » ou « » En actionnant la touche «+» ou «–», vous pouvez régler la température entre 16° C et 32° C. 8.Touche «MODE» Vous permet de régler le mode de fonctionnement. Chaque pression de la touche modifie le mode de fonctionnement, l’ordre suivant apparaît à l’écran: AUTO COOL DRY HEAT FAN AUTO. Remarque: les appareils uniquement en mode refroidissement n’ont pas de fonction de chauffage. * * * * * 9.Touche «SLEEP» 1.Appuyez sur la touche SLEEP: le voyant du mode veille s’allume. 2.En mode refroidissement et après l’activation du mode veille, la température préréglée augmente de 1° C après une heure et automatiquement de 1° C de plus après une heure supplémentaire. 3.En mode chauffage et après l’activation du mode veille, la température préréglée baisse de 2° C après une heure et automatiquement de 2° C de plus après une heure supplémentaire. 4.Le climatiseur fonctionne en mode veille pendant sept heures et s’éteint automatiquement. Remarque: pour quitter le mode veille, appuyez sur les touches MODE ou ON/OFF. 10. Touche «SWING » Les lamelles horizontales de guidage d’air tournent automatiquement. Une fois que celles-ci ont atteint l’orientation verticale souhaitée, appuyez à nouveau sur la touche afin qu’elles restent dans la position souhaitée. 11. Touche «HEALTH» Permet d’activer et de désactiver la «fonction santé». 34 AX0040 Port AC manual multi_lang.indd 34 27/11/2015 15:27 Utilisation de la télécommande Mode automatique • Appuyez sur la touche ON/OFF: le climatiseur s’allume. • Appuyez sur la touche MODE et choisissez le mode de fonctionnement automatique. • Appuyez sur la touche SPEED pour sélectionner la vitesse du ventilateur. Vous avez le choix entre Réduite (LOW), Moyenne (MID), Elevée (HIGH) et Automatique (AUTO). • Appuyez sur la touche ON/OFF pour éteindre le climatiseur. Modes de fonctionnement refroidissement/chauffage (les appareils uniquement en mode refroidissement n’ont pas de fonction de chauffage) • Appuyez sur la touche ON/OFF: le climatiseur s’allume. • Appuyez sur la touche MODE et choisissez le mode de fonctionnement refroidissement ou chauffage. • Appuyez sur la touche pour régler la température par paliers de 1° C entre 16° C et 32° C. • Appuyez sur la touche SPEED pour sélectionner la vitesse du ventilateur. Vous avez le choix entre Réduite (LOW), Moyenne (MID), Elevée (HIGH) et Automatique (AUTO). • Appuyez à nouveau sur la touche ON/OFF pour éteindre le climatiseur. Mode ventilation • Appuyez sur la touche ON/OFF: le climatiseur s’allume. • Appuyez sur la touche MODE et choisissez le mode de fonctionnement ventilation. • Appuyez sur la touche SPEED pour sélectionner la vitesse du ventilateur. Vous avez le choix entre Réduite (LOW), Moyenne (MID), Elevée (HIGH). • Appuyez sur la touche ON/OFF pour éteindre le climatiseur. Remarque: En mode de fonctionnement ventilation, la présélection de la température est désactivée. Mode déshumidification • Appuyez sur la touche ON/OFF: le climatiseur s’allume. • Appuyez sur la touche MODE et choisissez le mode de fonctionnement déshumidification. • Appuyez sur la touche « » ou « » pour régler la température par paliers de 1° C entre 16° C et 32° C. • Appuyez sur la touche SPEED pour sélectionner la vitesse du ventilateur. Vous avez le choix entre Réduite (LOW), Moyenne (MID), Elevée (HIGH) et Automatique (AUTO). • Appuyez sur la touche ON/OFF pour éteindre le climatiseur. 35 AX0040 Port AC manual multi_lang.indd 35 27/11/2015 15:27 Installation des piles •Ouvrez le couvercle dans le sens indiqué par la flèche sur la télécommande. •Insérez deux piles neuves et placez les pôles électriques (+ et –) dans le bon sens. •Fermez le couvercle. Veuillez noter les points suivants: •Tenez la télécommande en direction de la zone de réception des signaux du climatiseur. •La télécommande ne doit pas se trouver à plus de 8 mètres de la zone de réception des signaux. •Il ne doit pas y avoir d’obstacles entre la télécommande et la zone des réception de signaux. •Ne laissez pas tomber la télécommande et ne la jetez pas. •N’exposez pas la télécommande au rayonnement solaire direct et à d’autres sources de chaleur. •Utilisez deux piles. •Retirez les piles de la télécommande lorsque vous n’utilisez pas l’appareil pendant une période prolongée. •Remplacez les piles lorsque l’appareil ne réagit pas à l’actionnement de la télécommande. •Eliminez les piles de manière appropriée. Le design et les caractéristiques techniques peuvent être modifiés sans préavis en vue d’améliorer l’appareil. Demandez les détails à votre revendeur ou dans votre succursale de vente. 36 Informations correctes au moment de la publication. AX0040 Port AC manual multi_lang.indd 36 27/11/2015 15:27 DE Mobiles Klimagerät & Fernbedienung Installations- und Bedienungsanleitung AX3001/1 – Nur Kühlung AX3006/1 – Kühlung und Heizung AX3002/1 – Nur Kühlung AX3003/1 – Kühlung und Heizung EU EU CH CH Inhalt Klimagerät 38Sicherheitshinweis 40 Beschreibung der Teile 41Zubehör 42Bedienungspanel AX0040 Port AC manual multi_lang.indd 37 43Betrieb 45Installation 46Wartung 48Fehlerbehebung 49 Entsorgung des Geräts Fernbedienung des Klimageräts 50 Beschreibung der Tasten 53Gebrauch der Fernbedienung Betriebsmodus 54Batterieeinbau 27/11/2015 15:27 Sicherheitshinweis Ihre Sicherheit und die Sicherheit anderer Personen sind sehr wichtig. In diesem Handbuch und auf dem Gerät selbst haben wir viele wichtige Sicherheitsratschläge festgehalten. Lesen und befolgen Sie alle Sicherheitsvorschriften. ACHTUNG Dieses Warnzeichen weist hin auf Lebensgefahr bzw. erhebliche Verletzungsgefahr. VORSICHT Dieses Warnzeichen weist hin auf die Gefahr von Verletzungen oder Schädigungen am Gerät. ACHTUNG Dieses Gerät kann von Kindern ab 8 Jahren und von Erwachsenen bedient werden. Menschen mit beeinträchtigten körperlichen, sensorischen oder geistigen Fähigkeiten oder mangelnder Erfahrung und Bildung müssen in die korrekte und sichere Nutzung dieses Gerätes eingewiesen bzw. bei derselben beaufsichtigt werden. Kinder sollten nicht mit dem Gerät spielen und das Gerät nicht unbeaufsichtigt reinigen oder warten. Der elektrische Anschluss dieses Geräts muss gemäss den örtlichen Regeln der Technik erfolgen. Um mögliche Stromstösse zu vermeiden, muss ein Fehlerschutzschalter installiert werden, der auf die Nennleistung des Geräts ausgelegt ist. Installieren Sie das Klimagerät nicht an Orten, an denen sich entzündliche Gase oder Flüssigkeiten befinden – ein Brand könnte ausgelöst werden. Sollte das Netzkabel beschädigt sein, muss es vom Hersteller, einem seiner Vertreter oder einer ähnlich qualifizierten Person ausgetauscht werden. Die Sicherungsspezifikation lautet AC250V T3.15AL. 38 Die elektrische Spannung sollte zwischen 220 V und 240 V liegen. Bei der Installation des Geräts sollten die jeweiligen nationalen Regulierungen für elektrische Leitungen berücksichtigt werden. Der Stecker sollte nach der Installation leicht zugänglich sein. Sollte die Sicherung der Leiterplatteneinheit durchgebrannt sein, tauschen Sie diese mit einer Sicherung vom Typ F3.15 A / 250 V aus. AX0040 Port AC manual multi_lang.indd 38 27/11/2015 15:27 Stecken Sie weder Finger noch irgendwelche Gegenstände in den Abluftoder Luftansaugstutzen. Der Ventilator rotiert mit hoher Geschwindigkeit und könnte Verletzungen verursachen. Berühren Sie nicht die Luftlamellen, wenn sie in Bewegung sind. Ihr Finger könnte eingeklemmt und der Antrieb der Luftlamellen beschädigt werden. Versuchen Sie niemals, das Klimagerät selbst zu reparieren. Alle Reparaturarbeiten müssen von einem qualifizierten Techniker mit entsprechender Zulassung ausgeführt werden. Benutzen Sie das Gerät nicht bei Sturm und Gewitter. Trennen Sie die Hauptstromversorgung, um das Gerät vor Beschädigung zu schützen. Verwenden Sie keine flüssigen oder ätzenden Reinigungsmittel, um das Gerät zu reinigen, und sprühen Sie niemals Wasser oder andere Flüssigkeiten auf dasselbe, sonst könnten die Plastikteile beschädigt und Stromschläge ausgelöst werden. Verwenden Sie das Gerät nicht in Waschküchen. VORSICHT Setzen Sie Ihren Körper nicht längere Zeit direkt der Kaltluft aus. Reinigen Sie das Klimagerät mit einem weichen, trockenen Tuch. Verwenden Sie keine chemischen Lösungsmittel, Insektizide oder entzündlichen Spritzstoffe, diese beschädigen das Klimagerät. Sprühen Sie niemals direkt Wasser auf das Gerät. Das Klimagerät sollte in einem Raum genutzt werden, in dem die Fenster und Türen geschlossen sind. Ist dies nicht der Fall, wird das Gerät die gewünschte Raumtemperatur und -luftfeuchtigkeit nur unzureichend gewährleisten können. Sollte der Luftfilter stark verschmutzt sein, wird die Kühl- und Heizleistung eingeschränkt. Reinigen Sie den Luftfilter bitte regelmässig. 39 AX0040 Port AC manual multi_lang.indd 39 27/11/2015 15:27 Beschreibung der Teile Vorderansicht Bedienungspanel Luftauslass Signalempfangsfelder Griffmulde Frontabdeckung Abluftstutzen Fernbedienung Rückansicht Luftfilter oben (hinter dem Gitter) Luftansauggitter oben Griffmulde Kondenswasser-Ablaufstutzen Abluftstutzen Kondenswasser-Ablaufstutzen (nur beim Wärmepumpenmodell) Netzkabelanschlussbox Luftfilter unten (hinter dem Gitter) Luftansauggitter unten Unterer Kondenswasser-Ablaufstutzen Rollen 40 Hinweis: Die Beschreibungen dieser Bedienungsanleitung können im Einzelnen von den Verkaufsinformationen und dem tatsächlichen Gerät abweichen. Orientieren Sie sich bitte am tatsächlich erworbenen Gerät. Der Betriebstemperaturbereich des Klimageräts liegt zwischen 16 °C und 32 °C im Kühlbetrieb und zwischen 5 °C und 27 °C im Heizbetrieb. AX0040 Port AC manual multi_lang.indd 40 27/11/2015 15:27 Zubehör Teile Bauteilname Anzahl Abluftschlauch Adapter I 1 Set und Adapter B (flache oder runde Ausoder führung je nach Modell) Fensteradapter und Bolzen Abluft-Wandadapter A (#) 1 Stk. Adapter B 1 Stk. (runde Ausführung) (#) Schraube mit Mutter 1 Stk. Drainageschlauch (#) 1 Stk. Fernbedienung mit 1 Stk. Batterien Anmerkung: Optionale Teile (#) nicht bei allen Modellen. Hinweis: Verwenden Sie die Fernbedienungstasten gemäss den jeweiligen Funktionen laut Display. Einige Tasten sind u.U. nicht aktiviert. 41 AX0040 Port AC manual multi_lang.indd 41 27/11/2015 15:27 Bedienungspanel 4 3 TemperaturAnzeige 2 Ventilator • HIGH • MID • LOW Anzeige hohe Geschwindigkeit Anzeige mittlere Geschwindigkeit Anzeige niedrige Geschwindigkeit Modus • COOL • HEAT • DRY • FAN Kühlungsanzeige Heizanzeige (bei Kühlluftgeräten fehlt diese Anzeige) Entfeuchtungsanzeige Ventilatoranzeige 1 Zusatzfunktionen • TIMER Zeitsteuerungsanzeige • SLEEP Schlafanzeige • SWING Schwenkanzeige Hinweis: Die Symbole beziehen sich auf alle Tasten und Displays. Modelle mit Grundausstattung weisen u. U. nicht alle Funktionen und Modi auf. Funktionstasten 1 -Taste. Drücken Sie diese Taste, um das Gerät ein- oder auszuschalten. 2 - oder -Taste. Drücken Sie die - oder -Taste, um die Raumtemperaturvorwahl zu erhöhen oder zu verringern. 3 -Taste. Jede Betätigung dieser Taste führt zur Auswahl eines Betriebsmodus in der Reihenfolge COOL, HEAT, DRY und FAN. 4 -Taste. Diese Taste dient zur Einstellung der Ventilatorgeschwindigkeit in der Reihenfolge LOW, MID, HIGH und dann wieder LOW. 42 Hinweise: 1. Die Funktionen Timer, Sleep, Swing, «Auto»-Modus und «Auto»Ventilatorgeschwindigkeit können nur per Fernbedienung und nicht am Bedienungspanel ausgewählt werden. 2. Die übrigen Funktionen des Bedienungspanels stimmen mit denen der Fernbedienung überein. AX0040 Port AC manual multi_lang.indd 42 27/11/2015 15:27 Betrieb ACHTUNG Nichtbeachtung der folgenden Vorsichtsmassregeln kann Stromstösse, Brände oder Personenschäden verursachen. 1. Der Stecker muss mit einer Steckdose verbunden sein, die ordnungsgemäss installiert und geerdet ist. 2. Verwenden Sie mit diesem Gerät kein Verlängerungskabel und keinen Steckeradapter. Vor Inbetriebnahme des Geräts • Wählen Sie einen geeigneten Ort aus und sorgen Sie dafür, dass sich das Gerät in der Nähe einer Steckdose befindet. • Installieren Sie Abluftschlauch und Fensteradapter. • Verbinden Sie das Gerät mit der richtigen Steckdose. • Schalten Sie das Gerät ein. Heiz-Modus (Reine Kühl-Modelle haben keine Heizfunktion) • Drücken Sie die MODE-Taste so lange, bis das Heizdisplay aufleuchtet. • Stellen Sie mit der «+»- und der «-»-Taste die gewünschte Temperatur ein. • Stellen Sie mit der FAN-Taste die Ventilatorgeschwindigkeit ein. • Drücken Sie die ON/OFF-Taste, um das Gerät einzuschalten, und erneut, um es auszuschalten. Kühl-Modus • Drücken Sie die MODE-Taste so lange, bis das Kühldisplay aufleuchtet. • Stellen Sie mit der «+»- und der «-»-Taste die gewünschte Temperatur ein. • Stellen Sie mit der FAN-Taste die Ventilatorgeschwindigkeit ein. • Drücken Sie die ON/OFF-Taste, um das Gerät einzuschalten, und erneut, um es auszuschalten. 43 AX0040 Port AC manual multi_lang.indd 43 27/11/2015 15:27 Entfeuchtungs-Modus • Drücken Sie die MODE-Taste so lange, bis das Entfeuchtungsdisplay aufleuchtet. • Der Ventilator wird in diesem Betriebsmodus mit einer konstanten Geschwindigkeit arbeiten. • Schliessen Sie Fenster und Türen, um die beste Entfeuchtungswirkung zu erzielen. • Drücken Sie die ON/OFF-Taste, um das Gerät einzuschalten, und erneut, um es auszuschalten. Zirkulationsmodus • Drücken Sie die MODE-Taste so lange, bis das Ventilatordisplay aufleuchtet. • Stellen Sie mit der FAN-Taste die Ventilatorgeschwindigkeit ein. • Drücken Sie die ON/OFF-Taste, um das Gerät einzuschalten, und erneut, um es auszuschalten. Timer-Betrieb • Drücken Sie die TIMER-Taste. • Stellen Sie mit der «+»- und der «-»-Taste die gewünschte Timerzeit ein. Hinweis: «Time off» ist nur bei eingeschaltetem Klimagerät aktivierbar. «Time on» ist nur bei ausgeschaltetem Klimagerät aktivierbar. Kondenswasserentsorgung Ist der eingebaute Wassertank voll, erscheint im Display des Bedienungspanels «P1». • Öffnen Sie die Abdeckung des Ablaufstutzens und ziehen Sie sie nach oben hinaus. • Stellen Sie einen Behälter unter das Ablassrohr, ziehen Sie den Stöpsel aus dem Ablassrohr und lassen Sie das Kondenswasser abfliessen. • Stecken Sie den Stöpsel wieder in das Ablassrohr, sobald das gesamte Kondenswasser abgeflossen ist, und setzen Sie die Abdeckung wieder ein. KondenswasserAblaufstutzen WICHTIG Dieses Wasser ist nicht als Trinkwasser geeignet. 44 AX0040 Port AC manual multi_lang.indd 44 27/11/2015 15:27 Installation Den besten Installationsort wählen • Installieren Sie das mobile Klimagerät auf einer ebenen Fläche an einem Ort mit viel Platz drumherum, so dass die Luftauslässe nicht versperrt werden. • Mindestens 50 cm Abstand sollte zu Wänden und anderen Objekten eingehalten werden. • Die Neigung sollte in der Horizontalen höchstens 10 Grad betragen, wenn der Geräte- und Anpassungsadapter verwendet wird. Mindestens 50 cm Mindestens 50 cm Hinweis:1.Das Klimagerät darf nicht in Waschküchen betrieben werden. 2.Der Stecker muss nach der Installation des Geräts frei zugänglich sein. Installation des Fensteradapters Der Fensteradapter wurde so angefertigt, dass er in die meisten vertikalen und horizontalen Schiebefensterstandardtypen passt. Bei einigen Fenstertypen kann es allerdings notwendig sein, die Installation stellenweise zu optimieren bzw. anzupassen. Beachten Sie für die minimalen und maximalen Abmessungen der Fensteröffnungen bitte Abb. A & Abb. B. Hinweis: Schraube und Mutter werden zur Fixierung der Fensterbefestigungsplatte benötigt. Horizontales Schiebefenster Abb. B Abb. A Fensteradapter Minimum: 67.5 cm Maximum:125 cm Abb. C Vertikales Schiebefenster Fensteradapter Minimum: 67.5 cm Maximum:125 cm Mutter Schraube 45 AX0040 Port AC manual multi_lang.indd 45 27/11/2015 15:27 Wartung Ihr neues Klimagerät ist so gebaut, dass es Ihnen viele Jahre zuverlässige Dienste leisten wird. In diesem Abschnitt erfahren Sie, wie Sie Ihr Klimagerät richtig reinigen und warten. Wir empfehlen Ihnen, für die jährliche Wartung Fachpersonal mit Zulassung vor Ort zu kontaktieren. Beachten Sie, dass die Kosten dieser Dienstleistung zu Ihren Lasten gehen. Reinigung des Luftfilters Die Kühlleistung nimmt ab, wenn der Luftfilter durch Staub verschmutzt ist. Reinigen Sie den Luftfilter bitte je nach Nutzung alle zwei Wochen. • Schalten Sie die Stromversorgung aus. • Nehmen Sie die Filterabdeckung heraus und entfernen Sie den Filter aus der Abdeckung. • Saugen Sie die Filteroberfläche ab und waschen Sie den Luftfilter falls nötig in warmer Seifenlauge. Reinigen Sie den Luftfilter nicht in der Geschirrwaschmaschine und verwenden Sie keine chemischen Reinigungsmittel. Trocknen Sie den Filter sorgfältig vor dem Wiedereinsetzen. •Befestigen Sie den Luftfilter mithi 1a 3c 2b fe der Befestigungsklammern wieder an der Innenseite der Filterabdeckung. Setzen Sie die Filterabdeckung wieder richtig ein. Anweisungen für die Schlauchmontage 1a.Schrauben Sie den Abluftschlauch auf den runden Schlauchadapter. Befestigen Sie den Abluftschlauch mit dem Adapter mithilfe der Klammern an dem Abluftstutzen des Geräts. 2b.Befestigen Sie den geeigneten Adapter am anderen Ende des Abluftschlauches. 3c.Passen Sie den Adapter mit dem Fensteradapterbauteil in ein nah gelegenes Fenster So nicht! ein. 46 Hinweise • Der Schlauch kann minimal auf eine Länge von 450 mm reduziert und maximal auf 1800 mm ausgedehnt werden. Es ist ratsam, die Schlauchlänge nahe der Minimalgrösse zu halten. • Die Abluft muss immer ins Freie geleitet werden. • Zu starkes Dehnen oder Krümmen des Schlauches beeinträchtigt die Kühlleistung. AX0040 Port AC manual multi_lang.indd 46 So! 27/11/2015 15:27 Reinigung des Geräts • U nterbrechen Sie aus Sicherheitsgründen die Stromversorgung des Klimageräts. • Reiben Sie das Gerät mit einem trockenen Tuch ab. • eiben Sie das Gerät bitte mit einem feuchten Tuch ab, wenn es stark verschmutzt ist. Hinweis Entfernen Sie das Kondenswasser und stecken Sie den Stöpsel nicht wieder in das Ablassrohr, wenn Sie das Gerät längere Zeit nicht benutzen. ACHTUNG • Verwenden Sie zur Reinigung Ihres Klimageräts weder Benzin noch Benzol, noch Lösungsmittel oder andere Chemikalien bzw. irgendwelche flüssigen Insektizide, da diese Substanzen u.U. ein Abblättern der Farbe zur Folge haben könnten bzw. Bruch oder Deformation der Plastikkomponenten. • Versuchen Sie niemals das Gerät zu reinigen, indem Sie direkt Wasser auf das Gehäuse sprühen, dies wird die Elektrokomponenten beschädigen und erhöht die Stromschlaggefahr. • Verwenden Sie zur Reinigung des Luftfilters niemals Wasser über 40 °C (104 °F). 47 AX0040 Port AC manual multi_lang.indd 47 27/11/2015 15:27 Fehlerbehebung Prüfen Sie bitte folgende Lösungsvorschläge, wenn Ihr Gerät nicht fehlerfrei funktionieren sollte, bevor Sie Fachpersonal kontaktieren. Das Klimagerät funktioniert nicht Ursachen Problemlösungen Der Netzschalter ist ausgeschaltet. Schalten Sie den Netzschalter ein. Versorgungsausfall Warten Sie, bis die Stromversorgung wieder aufgenommen wird. Die Sicherung ist durchgebrannt. Prüfen Sie den Schutzschalter, tauschen Sie die Sicherung aus. (Testen Sie erneut und kontaktieren Sie einen Elektriker, sollte die Sicherung wieder durchbrennen.) Das Gerät erreicht die voreingestellte Zeit zur Inbetriebnahme nicht. Warten Sie oder setzen Sie die Werkseinstellungen zurück. Das Gerät schaltet sich nach Betätigung der ON/OFF-Taste nicht ein Ursachen Problemlösungen Das Gerät wurde vor weniger als drei Minuten ausgeschaltet. Warten Sie drei Minuten. Die Raumtemperatur ist niedriger als die Temperaturvorwahl. Stellen Sie die Temperatur neu ein. Luft wird ausgestossen, aber die Kühlleistung ist gering Ursachen Problemlösungen Fehlerhafte Temperatureinstellung Stellen Sie die Temperatur neu ein. Die Vorwahltemperatur muss unter der Umgebungstemperatur liegen. Der Luftfilter ist durch Staub verstopft. Reinigen Sie den Luftfilter. Luftansaug- oder Abluftstutzen des Geräts sind verstopft. Beseitigen Sie die Verstopfung. Das Klimagerät steht in einem sehr heissen Raum. Warten Sie noch ein wenig, bis die aufgestaute Hitze aus Wänden, Decke, Boden und Mobiliar entwichen ist. Die Kühlleistung ist ungenügend. Lassen Sie von Ihrem Händler die erforderliche Kühlleistung überprüfen. Türen oder Fenster sind geöffnet. Schliessen Sie Türen und Fenster. Laute Geräusche oder Vibrationen Ursachen Problemlösungen Der Boden ist nicht eben oder flach genug. Stellen Sie das Gerät wenn möglich auf einen ebenen und flachen Untergrund. 48 AX0040 Port AC manual multi_lang.indd 48 27/11/2015 15:27 Entsorgung des Geräts Bedeutung der durchgekreuzten Mülltonne Entsorgen Sie dieses Produkt nicht über den unsortierten Hausmüll, sondern nutzen Sie die Einrichtungen der getrennten Müllsammlung. Erkundigen Sie sich bei Ihrer örtlichen Verwaltung nach den verfügbaren Müllsammlungsverfahren. Werden Elektrogeräte in Deponien oder Halden gelagert, können Gefahrenstoffe ins Grundwasser und so in die Nahrungskette gelangen und Ihre Gesundheit und Ihr Wohlbefinden beeinträchtigen. Sollten Sie ein Altgerät gegen ein Neugerät austauschen, ist Ihr Händler gesetzlich verpflichtet, Ihr Altgerät kostenfrei zurückzunehmen und zu entsorgen. Kompressorenhersteller bzw. Handelsmarke Kühlmittel Markenölbezeichnung Highly R410A 68HES-H oder gleichwertiges Meizhi R410A ESTER OIL Vg74 Rechi R410A NMOC Ze-Gles RB68EP oder gleichwertiges 49 AX0040 Port AC manual multi_lang.indd 49 27/11/2015 15:27 Fernbedienung für mobile Klimageräte Beschreibung der Tasten Betriebsmodusdisplay Geschwindigkeitsdisplay Display für Temperatur, Zeit usw. Swing- bzw. Start / Stoppdisplay Display weitere Funktionen Hinweis Alle Abbildungen oben zeigen die Displays nach erstmaligem Einschalten der Stromversorgung bzw. nach auf eine Stromunterbrechung folgendem Wiedereinschalten. Im tatsächlichen Betrieb zeigt das Display der Fernbedienung lediglich die jeweils aktivierten Funktionen. Reine Kühlgeräte haben keine Heiz- bzw. elektrische Heizfunktion. Diesbezügliche Funktionstasten der Fern bedienung sind wirkungslos. Bitte betätigen Sie diese Tasten der Fernbedienung nicht. Hinweis Die Abbildung zeigt eine umfassende Fernbedienung mit allen Funktionen und Tasten, Ihr Modell kann leicht unterschiedlich aussehen. 1.«ON/OFF»-Taste Schalten Sie das Klimagerät durch Betätigung dieser Taste ein oder aus. 2.«SPEED»-Taste Auswahl der Ventilatorgeschwindigkeit wie folgt: Niedrig (Low) > Mittel (Mid) > Hoch (High) > Automatisch (Auto) 50 AX0040 Port AC manual multi_lang.indd 50 27/11/2015 15:27 3.«SWING »-Taste Die vertikalen Luftleitlamellen drehen sich automatisch. Haben sie die gewünschte horizontale Ausrichtung erreicht, drücken Sie die Taste erneut, und die vertikalen Luftleitlamellen werden in der gewünschten Position verbleiben. 4.«TURBO»-Taste Wenn Sie diese Taste im Kühl- oder Heizmodus betätigen, schaltet die Ventilatorgeschwindigkeit automatisch auf ‚Hoch‘ (HIGH) und in der LCD-Anzeige erscheint «TURBO». Die «TURBO»-Funktion dient dazu, die höchste Heiz- oder niedrigste Kühltemperatur schnellstmöglich zu erreichen. 5.«TIMER»-Taste Timerstartzeit («ON») einstellen: a. Betätigen Sie die «TIMER»-Taste, wenn die Fernbedienung ausgeschaltet ist. Die LCDAnzeige zeigt «TIMER ON» und die Timerzeit an, die in Halbstundenabständen innerhalb der 24 Std. einstellbar ist. b. Zur Einstellung der Timerzeit drücken Sie die « »- oder « »-Taste. Um die von Ihnen gewünschte Zeit einzustellen, erhöht oder reduziert jede Betätigung der Taste die Zeit um 0,5 Std., bis 10 Stunden erreicht sind, danach erhöht oder reduziert sich die Zeit um 1 Std. pro Tastendruck. c. Drücken Sie die «TIMER»-Taste erneut, um den Timer zu aktivieren. d. Sie können nach dem Einschalten weitere Funktionen für die gewünschte Betriebsweise des Klimageräts über den Timer auswählen (u.a. Modus, Temperatur, Swing, Ventilatorgeschwindigkeit usw.). Das LCD-Display wird all Ihre Einstellungen anzeigen und beibehalten und das Klimagerät wird automatisch entsprechend Ihren Voreinstellungen funktionieren, wenn der Timer die voreingestellte Zeit erreicht hat. Timerstoppzeit («Off») einstellen: a. Betätigen Sie die «TIMER»-Taste, wenn die Fernbedienung eingeschaltet («ON STATE») ist. Die LCD-Anzeige zeigt «TIMER OFF» und die Timerzeit an, die in Halbstundenabständen innerhalb der 24 Std. einstellbar ist. b. Betätigen Sie zur Einstellung der Timerzeit die « »- oder « »-Taste. Um die von Ihnen gewünschte Zeit einzustellen, erhöht oder reduziert jede Betätigung der Taste die Zeit um 0,5 Std., bis 10 Stunden erreicht sind, danach erhöht oder reduziert sich die Zeit um 1 Std. pro Tastendruck. c. Drücken Sie erneut die «TIMER»-Taste, um die Timer-Off-Funktion zu aktivieren. AX0040 Port AC manual multi_lang.indd 51 51 27/11/2015 15:27 6.«DISPLAY»-Taste Schaltet die LCD-Anzeige EIN oder AUS. 7.« »- oder « »-Taste Durch Betätigung der «+»- oder «-»-Taste können Sie die Temperatur zwischen 16 °C und 32 °C einstellen. 8.«MODE»-Taste Ermöglicht Ihnen, den Betriebsmodus einzustellen. Jeder Tastendruck ändert den Betriebsmodus, im Display erscheint folgende Reihenfolge: AUTO COOL DRY HEAT FAN AUTO. Hinweis: Reine Kühlgeräte haben keine Heizfunktion. * * * * * 9.«SLEEP»-Taste 1.Drücken Sie die SLEEP-Taste: Das Schlafanzeigelicht leuchtet auf. 2.Im Kühlmodus wird nach Aktivierung des Schlaf-Modus die voreingestellte Temperatur nach 1 Stunde um 1 °C erhöht und nach einer weiteren Stunde automatisch erneut um 1 °C. 3.Im Heizmodus wird nach Aktivierung des Schlaf-Modus die voreingestellte Temperatur nach 1 Stunde um 2 °C gesenkt und nach einer weiteren Stunde automatisch erneut um 2 °C. 4.Das Klimagerät läuft sieben Stunden lang im Schlafmodus und schaltet sich automatisch aus. Hinweis: Um den Schlafmodus zu beenden, drücken Sie die MODE- oder ON/OFF-Taste. 10. «SWING »-Taste Die horizontalen Luftleitlamellen drehen sich automatisch. Haben sie die gewünschte vertikale Ausrichtung erreicht, drücken Sie die Taste erneut, und die horizontalen Luftleitlamellen werden in der gewünschten Position verbleiben. 11. «HEALTH»-Taste Zum Ein- und Ausschalten der «Gesundheitsfunktion». 52 AX0040 Port AC manual multi_lang.indd 52 27/11/2015 15:27 Gebrauch der Fernbedienung Automatikmodus •Drücken Sie die ON/OFF-Taste: Das Klimagerät wird eingeschaltet. •Drücken Sie die MODE-Taste und wählen Sie den Betriebsmodus Automatik. •Drücken Sie die SPEED-Taste zur Auswahl der Ventilatorgeschwindigkeit, Sie können zwischen NIEDRIG (LOW), MITTEL (MID), HOCH (HIGH) und AUTOMATISCH (AUTO) wählen. •Drücken Sie die ON/OFF-Taste, um das Klimagerät auszuschalten. Betriebsmodus Kühlung/Heizung (Reine Kühlgeräte haben keine Heizfunktion) •Drücken Sie die ON/OFF-Taste: Das Klimagerät wird eingeschaltet. •Drücken Sie die MODE-Taste und wählen Sie den Betriebsmodus Kühlung oder Heizung. •Drücken Sie die « »- oder « »-Taste zur Einstellung der Temperatur in 1 °C-Schritten zwischen 16 °C und 32 °C. •Drücken Sie die SPEED-Taste zur Auswahl der Ventilatorgeschwindigkeit, Sie können zwischen NIEDRIG (LOW), MITTEL (MID), HOCH (HIGH) und AUTOMATISCH (AUTO) wählen. •Drücken Sie die Taste erneut, um das Klimagerät auszuschalten. Ventilatormodus •Drücken Sie die ON/OFF-Taste: Das Klimagerät wird eingeschaltet. •Drücken Sie die MODE-Taste und wählen Sie den Ventilator-Betriebsmodus. •Drücken Sie die SPEED-Taste zur Auswahl der Ventilatorgeschwindigkeit, Sie können zwischen NIEDRIG (LOW), MITTEL (MID) und HOCH (HIGH) wählen. •Drücken Sie die ON/OFF-Taste, um das Klimagerät auszuschalten. Hinweis: Im Ventilator-Betriebsmodus ist die Temperaturvorwahl deaktiviert. Entfeuchtungsmodus •Drücken Sie die ON/OFF-Taste: Das Klimagerät wird eingeschaltet. •Drücken Sie die MODE-Taste und wählen Sie den Betriebsmodus Entfeuchtung. •Drücken Sie die « »- oder « »-Taste zur Einstellung der Temperatur in 1°C-Schritten zwischen 16 °C und 32 °C. •Drücken Sie die SPEED-Taste zur Auswahl der Ventilatorgeschwindigkeit, Sie können zwischen NIEDRIG (LOW), MITTEL (MID), HOCH (HIGH) und AUTOMATISCH (AUTO) wählen. •Drücken Sie die ON/OFF-Taste, um das Klimagerät auszuschalten. 53 AX0040 Port AC manual multi_lang.indd 53 27/11/2015 15:27 Batterieeinbau • Ziehen Sie die Abdeckung in die Richtung auf, die durch den Pfeil auf der Fernbedienung angezeigt wird. • Legen Sie zwei fabrikneue Batterien mit den elektrischen Polen (+ & -) in richtiger Richtung ein. • Schliessen Sie die Abdeckung. Bitte beachten •Halten Sie die Fernbedienung in Richtung der Signalempfangsfelder des Klimagerätes. • Die Fernbedienung sollte nicht weiter als 8 Meter von den Signalempfangsfeldern entfernt sein. • Zwischen Fernbedienung und Signalempfangsfeldern sollten sich keine Hindernisse befinden. • Lassen Sie die Fernbedienung nicht fallen und werfen Sie nicht damit. • Setzen Sie die Fernbedienung keiner direkten Sonneneinstrahlung und keinen anderen Wärmequellen aus. • Verwenden Sie zwei Batterien. • Entfernen Sie die Batterien aus der Fernbedienung, wenn Sie das Gerät längere Zeit nicht benutzen. • Tauschen Sie die Batterien aus, wenn das Gerät nicht auf die Betätigung der Fernbedienung reagiert. • Entsorgen Sie die Altbatterien ordnungsgemäss. Design und technische Einzelheiten können zur Produktverbesserung ohne Vorankündigung geändert werden. Fragen Sie Ihren Händler oder in Ihrer Verkaufsniederlassung nach Einzelheiten. 54 Alle Angaben entsprechen dem Stand der Drucklegung. AX0040 Port AC manual multi_lang.indd 54 27/11/2015 15:27 ES Manual de la unidad de aire acondicionado portátil & del control remoto Manual de instalación y operaciones AX3001/1 – Solo refrigeración AX3006/1 – Refrigeración & calefacción AX3002/1 – Solo refrigeración AX3003/1 – Refrigeración & calefacción EU EU CH CH Índice Unidad de AA 56 Medidas de Seguridad 58 Descripción de las Piezas 59Accesorios 60 Panel de Control AX0040 Port AC manual multi_lang.indd 55 61Funcionamiento 63Instalación 64Mantenimiento 66 Resolución de Problemas 67 Advertencia RAEE Control Remoto de la Unidad de AA 68 Descripción del botón 71Uso 72 Cambiar las baterías 27/11/2015 15:27 Medidas de Seguridad Su seguridad y la seguridad de los demás es muy importante. Hemos proporcionado muchos consejos de seguridad tanto en este manual como en su aparato. Lea y tenga en cuenta siempre los requisitos de seguridad. ADVERTENCIA Este símbolo indica la posibilidad de muerte o lesión grave. ADVERTENCIA Este símbolo indica la posibilidad de lesiones o daños materiales solamente. ADVERTENCIA Este aparato puede ser utilizado por niños de 8 años en adelante. Cualquier persona con discapacidad física, sensorial o mental, o con falta de experiencia o de conocimientos, deberá ser supervisada o instruida en el manejo de este aparato de forma segura y correcta. Los niños no deben jugar con este aparato. Los niños no deben realizar labores de limpieza o mantenimiento sin supervisión. La conexión eléctrica de este aparato debe llevarse a cabo de acuerdo con los códigos de práctica locales. Debe instalarse un interruptor de fuga a tierra con capacidad nominal para evitar posibles descargas eléctricas. No instale la unidad de aire acondicionado en un lugar donde haya líquido o gas inflamable. Puede provocar un incendio. Si el cable de alimentación está dañado, debe ser sustituido por el fabricante o su agente de servicio, o por otra persona con cualificación similar. La especificación del fusible es AC250V T3.15AL. El voltaje debe situarse en el rango de 220~240V. El aparato debe ser instalado conforme al reglamento de cableado nacional. El enchufe debe estar accesible después de instalar la unidad. Si el fusible de la placa de circuito impreso se ha roto, por favor sustitúyalo por uno de tipo F3.15A/250V. 56 AX0040 Port AC manual multi_lang.indd 56 27/11/2015 15:27 No coloque los dedos u otros objetos en las entradas o salidas de aire. El ventilador gira a gran velocidad y puede causar lesiones. No toque las aspas del ventilador. Podrían atrapar sus dedos y dañar las piezas motrices de las aspas. No intente reparar la unidad de aire acondicionado usted mismo. Todos los trabajos de reparación deben llevarse a cabo por un técnico totalmente cualificado que posea las acreditaciones pertinentes. No haga funcionar el aparato durante una tormenta. Por favor, desconecte el suministro principal de energía para evitar daños en la máquina. No utilice líquidos o detergentes corrosivos para limpiar el aparato y no salpique agua u otro líquido sobre él; podrían dañarse las piezas de plástico y provocar una descarga eléctrica. No utilice la unidad en lavanderías. ATTENZIONE No aplique aire frío a la estructura durante un periodo prolongado. Limpie la unidad de aire acondicionado con un paño suave y seco. No utilice solventes químicos, insecticidas o pulverizadores inflamables que puedan dañar la unidad de aire acondicionado. No rocie agua directamente en la unidad. La unidad de aire acondicionado debe funcionar en un espacio con las puertas y ventanas cerradas. De lo contrario, puede reducirse su capacidad para mantener la temperatura y humedad deseadas. Si el filtro de aire está muy sucio, puede afectar a la capacidad de refrigeración o calentamiento de la unidad. Por favor, limpie el filtro de aire periódicamente. 57 AX0040 Port AC manual multi_lang.indd 57 27/11/2015 15:27 Descripción de las Piezas Vista frontal Panel de control Salida de aire Ventanas receptoras de señales Tirador empotrado Panel frontal Salida de aire Control remoto Vista posterior Filtro de aire superior (detrás de la parrilla) Toma de aire superior Salida de desagüe Salida de aire Salida de desagüe (solo para bombas modelo calefacción) Kondenswasser-Ablaufstutzen (nur beim Wärmepumpenmodell) Cable de tomacorriente Filtro de aire inferior (detrás de la parrilla) Toma de aire inferior Salida de desagüe de la bandeja inferior Rodillo Nota: Las descripciones en este manual de usuario pueden variar ligeramente de la información promocional y el aparato real. Por favor, consulte el aparato real adquirido. El rango de temperatura de funcionamiento de la unidad de aire acondicionado es de 16-32 ºC en modo de refrigeración y de 5-27 ºC en modo de calefacción. 58 AX0040 Port AC manual multi_lang.indd 58 27/11/2015 15:27 Accesorios Piezas Piezas Nombre de las piezas Adaptador y Adaptador 1 B (boca plana o boca redonda: dependiendo o de los modelos) para manguera de escape. Kit y perno para deslizador de ventana. Adaptador de escape de 1 pared A(#) Adaptador B (boca 1 redonda)(#) Perno y Tuerca 1 Manguera de desagüe (#) 1 Control remoto y batería 1 Nota: Piezas opcionales (#), no incluidas en algunos modelos. Nota: Por favor, seleccione el botón en el control remoto de acuerdo con las funciones que aparecen en la pantalla. Los botones adicionales podrían no estar activados. 59 AX0040 Port AC manual multi_lang.indd 59 27/11/2015 15:27 Panel de Control 4 Ventilator • ALTA • MEDIA • BAJA 3 Indicador de temperatura 2 1 Indicador de velocidad alta Indicador de velocidad media Indicador de velocidad baja Modo • FRÍO Indicador de frío • CALORIndicador de calentamiento (la unidad que genera aire frío no tiene esta pantalla) • SECO Indicador de deshumidificación • VENTILADOR Indicador de ventilador Características adicionales • TEMPORIZADOR – Indicador de tiempo • SUSPENSIÓN – Indicador de suspensión • ROTACIÓN – Indicador de rotación Nota: Este icono es para todos los botones y pantallas. Los modelos estándar pueden no incorporar todas las funciones y modos. Botones de función 1 Botón Pulse este botón para arrancar o detener la unidad o . Pulse el botón o para aumentar o disminuir el ajuste de 2 Botón temperatura de la habitación. 3 4 60 Botón . Cada vez que pulse este botón, se selecciona un modo en la secuencia FRÍO, CALOR, SECO y VENTILADOR. Botón . Este botón se utiliza para ajustar la velocidad del ventilador en la secuencia BAJA, MEDIA, ALTA y de nuevo BAJA. Nota: 1. Las funciones de temporizador, suspensión y rotación, el modo automático y el modo ventilador pueden seleccionarse desde el control remoto y no desde el panel de control. 2. Otras funciones en el panel de control son las mismas que en el control remoto. AX0040 Port AC manual multi_lang.indd 60 27/11/2015 15:27 Funcionamiento ADVERTENCIA De no tener en cuenta la siguiente precaución podría producirse una descarga eléctrica, un incendio o lesiones personales. 1. El enchufe debe enchufarse en un tomacorriente que esté correctamente instalado y conectado a tierra. 2. No utilice un cable de extensión ni un adaptador de enchufe con esta unidad. Antes de arrancar la unidad • Seleccione una ubicación adecuada y asegúrese de que la unidad esté cerca de un tomacorriente. • Instale la manguera de escape flexible y el kit ajustable del deslizador de ventana. • Enchufe la unidad en el tomacorriente correcto. • Encienda la unidad. Modo de funcionamiento «calefacción» (el modelo de solo refrigeración no tiene función de calefacción) • Pulse el botón «MODO» en la secuencia hasta que «calor» aparezca iluminado. • Pulse el botón «+» o «-» para ajustar la temperatura que desee. • Pulse el botón «VENTILADOR» para seleccionar la velocidad del ventilador. • Pulse el botón «ON/OFF» para iniciar la unidad y púlselo de nuevo para detenerla. Modo de funcionamiento «refrigeración» • Pulse el botón «MODO» en la secuencia hasta que «frío» aparezca iluminado. • Pulse el botón «+» o «-» para ajustar la temperatura que desee. • Pulse el botón «VENTILADOR» para seleccionar la velocidad del ventilador. • Pulse el botón «ON/OFF» para iniciar la unidad y púlselo de nuevo para detenerla. 61 AX0040 Port AC manual multi_lang.indd 61 27/11/2015 15:27 Modo de funcionamiento «deshumidificación» • Pulse el botón «MODO» en la secuencia hasta que «seco» aparezca iluminado. • El ventilador funcionará a una velocidad fija durante este modo de funcionamiento. • Cierre las ventanas y puertas para un mejor efecto deshumidificador. • Pulse el botón «ON/OFF» para iniciar la unidad y púlselo de nuevo para detenerla. Modo de funcionamiento «circulación» • Pulse el botón «MODO» en la secuencia hasta que «ventilador» aparezca iluminado. • Pulse el botón «VENTILADOR» para seleccionar la velocidad del ventilador. • Pulse el botón «ON/OFF» para iniciar la unidad y púlselo de nuevo para detenerla. Funcionamiento del temporizador • Pulse el botón «TEMPORIZADOR». • Pulse el botón «+» o «-» para ajustar el tiempo del temporizador. Nota: «Temporizador apagado» funciona solo mientras el aire acondicionado esté funcionando. «Temporizador encendido» funciona solo mientras el aire acondicionado esté parado. Eliminación de agua de condensado Cuando el tanque de agua interno está lleno, la pantalla del panel de control indica «P1». • Abra la tapa del desagüe y extráigalo hacia arriba. • Coloque un recipiente debajo del tubo de drenaje, retire el tapón en el tubo de drenaje y deje que salga el agua de condensado. • Después de vaciar toda el agua, vuelva a colocar el tapón y a continuación vuelva a colocar la tapa. IMPORTANTE Este agua no es potable. Salida de drenaje 62 AX0040 Port AC manual multi_lang.indd 62 27/11/2015 15:27 Instalación Elija la mejor ubicación • Instale la unidad de aire acondicionado móvil en un lugar plano y amplio donde las salidas de aire no queden obstruidas. • Guarde una distancia mínima de 50 cm con paredes u otros obstáculos. • El gradiente no puede ser de más de 10 grados en el plano horizontal mientras esté utilizando la unidad y el kit de instalación. Más que 50 cm Más que 50 cm Nota:1.No utilice la unidad de aire acondicionado en lavanderías. 2. El enchufe debe estar accesible tras instalar la unidad. Kit de instalación de ventana Su kit de ventana ha sido diseñado para utilizar en la mayoría de aplicaciones en ventanas horizontales y verticales estándar. Sin embargo, puede que deba mejorar o modificar algunos aspectos del procedimiento de instalación con determinados tipos de ventana. Consulte las figuras A y B sobre las aberturas máximas y mínimas de ventana. Nota: 1. No utilice la unidad de aire acondicionado en lavanderías. 2. El enchufe debe estar accesible tras instalar la unidad Horizontal ventana Abb. B Abb. A Kit de diapositivas Ventana Mínimo: 67.5 cm Máximo: 125 cm Abb. C Ventana vertical Kit de diapositivas Ventana Mínimo: 67.5 cm Máximo: 125 cm Tuerca Perno 63 AX0040 Port AC manual multi_lang.indd 63 27/11/2015 15:27 Mantenimiento Su nueva unidad de aire acondicionado está diseñada para darle un servicio de confianza durante muchos años. Esta sección explica cómo limpiar y cuidar su unidad de aire acondicionado correctamente. Le aconsejamos que contacte con su especialista local acreditado para realizar el mantenimiento anual del aparato. Recuerde que el coste de este servicio corre de su cuenta. Limpieza del filtro de aire Si el filtro de aire está cubierto de polvo, se reducirá la capacidad de refrigeración de la unidad. Por favor, limpie el filtro de aire cada dos semanas, dependiendo de uso. • Apague la fuente de alimentación • Tire y saque la tapa del filtro y a continuación retire el filtro de la tapa • Aspire la superficie del filtro y si fuera necesario lave el filtro de aire con agua templada con jabón. No meta el filtro de aire en el lavavajillas ni utilice limpiadores químicos. Seque por completo el filtro antes de volver a colocarlo. •A cople el filtro de aire a la tapa del filtro mediante los ganchos de sujeción situados 1a 3c 2b en la superficie interna de la tapa. Vuelva a colocar la tapa del filtro en su sitio. Instrucciones de montaje de los conductos 1a. Conecte la manguera de escape de aire atornillándola al adaptador redondo de manguera. Acople la manguera y el adaptador a la salida de aire de la unidad. 2b. Conecte el adaptador adecuado al extremo opuesto de la manguera de salida de aire. 3c. Ajuste el submontaje del adaptador a la ventana más cercana Nota • El conducto puede comprimirse hasta los 450 mm como mínimo y extenderse hasta los 1800 mm como máximo. Lo más conveniente es mantener la longitud del conducto al mínimo. • El aire de escape debe descargarse siempre al exterior del edificio. • Estirar o doblar excesivamente el conducto afectará a la eficiencia de refrigeración. ¡NO! ¡SÍ! 64 AX0040 Port AC manual multi_lang.indd 64 27/11/2015 15:27 Limpieza de la unidad • P or motivos de seguridad, por favor apague la fuente de alimentación de la unidad de aire acondicionado. • L impie la unidad con un paño seco. • S i la unidad está muy sucia puede utilizar paño humedecido. Nota: Si la unidad no va a utilizarse durante un periodo largo de tiempo, por favor retire el agua de condensado y deje el tapón de drenaje quitado. ADVERTENCIA • No utilice gasolina, benceno, diluyente o cualquier otro producto químico, así como ningún insecticida líquido en la unidad de aire acondicionado, ya que estas sustancias pueden provocar una descamación de la pintura, y el agrietamiento o deformación de las piezas de plástico. • Nunca intente limpiar la unidad vertiendo agua directamente sobre cualquier parte de su superficie, ya que puede deteriorar los componentes eléctricos y provocar riesgo de electrocución. • Nunca utilice agua caliente a más de 40 ºC (104 ºF) para limpiar el filtro de aire. 65 AX0040 Port AC manual multi_lang.indd 65 27/11/2015 15:27 Resolución de Problemas Si su unidad no funciona correctamente, antes de hacer una llamada de servicio intente las sugerencias a continuación. La Unidad de Aire Acondicionado No Funciona Causas Soluciones El interruptor eléctrico está apagado Encienda el suministro eléctrico. Fallo en el suministro eléctrico Espere a recuperar el suministro eléctrico. El fusible está quemado Compruebe el disyuntor, sustituya el fusible. (Pruebe si el fusible vuelve a fundirse – llame a un electricista). No se pone en marcha en el tiempo establecido. Espere o elimine la configuración original. La unidad no arranca al pulsar el botón «ON/OFF» Causas Soluciones No han pasado tres minutos desde que se apagó. Espere tres minutos. La temperatura ambiente es más baja que el ajuste de temperatura. Restablezca la temperatura. Sale aire pero la capacidad de refrigeración es insuficiente Causas Soluciones Errores en el ajuste de temperatura. Restablezca la temperatura. El ajuste de temperatura debe ser inferior a la temperatura ambiente. El filtro de aire está bloqueado por el polvo. Limpie el filtro de aire. La entrada o salida de aire de la máquina está bloqueada. Retire la obstrucción. El aire acondicionado está encendido en una habitación muy caliente. Permita un tiempo adicional para que desaparezca el calor acumulado en paredes, techo, suelo y mobiliario. La capacidad de refrigeración es insuficiente. Vuelva a confirmar la capacidad de refrigeración requerida con su distribuidor. Las puertas o ventanas están abiertas. Cierre las puertas y ventanas. Ruido o vibración Causas Soluciones El suelo no está nivelado o no es lo suficientemente plano. Coloque la unidad en un suelo nivelado y plano si es posible. 66 AX0040 Port AC manual multi_lang.indd 66 27/11/2015 15:27 Advertencia RAEE (residuos de aparatos eléctricos y electrónicos) Significado del cubo de basura con ruedas tachado: No deseche los electrodomésticos con el resto de residuos urbanos sin clasificar, sino en instalaciones de recogida selectiva. Para obtener información sobre los sistemas de recogida disponibles, póngase en contacto con las autoridades locales. Si los electrodomésticos se desechan en basureros o vertederos, algunas sustancias peligrosas podrían filtrarse en el agua subterránea y entrar en la cadena alimentaria, comprometiendo su salud y bienestar. Cuando sustituya aparatos antiguos por nuevos, el vendedor está obligado a recoger el aparato anterior para desecharlo de manera gratuita. Fabricante o marca registrada del compresor Refrigerante El nombre de aceite Highly R410A 68HES-H o equivalente Meizhi R410A ESTER OIL Vg74 Rechi R410A NMOC Ze-Gles RB68EP o equivalente 67 AX0040 Port AC manual multi_lang.indd 67 27/11/2015 15:27 Manual del Control Remoto de la Unidad de Aire Acondicionado Portátil Descripción de los botones Pantalla de modo de funcionamiento Pantalla de velocidad Pantalla de temperatura, tiempo, etc. Pantalla de rotación u ON/OFF Pantalla de características Nota: Todos los valores anteriores son las pantallas que aparecen al arrancar la unidad por primera vez o al reiniciarla tras un uso. En las operaciones actuales, las pantallas del control remoto solo muestran los elementos relacionados. Las unidades que son solo refrigerantes no tienen la función de calefacción o calefacción eléctrica. Por lo tanto, cuando se intenten accionar esos botones de función en el control remoto, la unidad no responderá. * Por favor, no utilice estos botones en el control remoto. Nota: La fotografía muestra un control remoto general que contiene todos los botones de función. Otros controles remotos variarán ligeramente dependiendo del modelo. 1.Botón «ON/OFF» Inicie o detenga el aire acondicionado pulsando este botón. 2.Botón «SPEED» Seleccione la velocidad del ventilador como sigue: Baja (Low) > Media (Mid) > Alta (High) > Automática (Auto) 68 AX0040 Port AC manual multi_lang.indd 68 27/11/2015 15:27 3.Botón «SWING » Las aspas de dirección vertical del aire pueden girar automáticamente. Cuando el aire fluya en la dirección horizontal que desea, pulse el botón de nuevo y las aspas de dirección vertical del aire se detendrán en esta posición de su elección. 4.Botón «TURBO» Solo cuando la unidad esté en modo refrigeración o calefacción, al presionar este botón la velocidad del ventilador se ajustará automáticamente a «HIGH» y aparecerá «TURBO» en la pantalla LCD. La función «TURBO» se utiliza para llegar más rápido a la temperatura más alta de enfriamiento o calentamiento. 5.Botón «TIMER» Establecer y activar el tiempo en el temporizador: a. A. Cuando el control remoto esté apagado, pulse el botón «TIMER» y leerá «TIMER ON» en la pantalla LCD junto al tiempo establecido en el temporizador. El rango de ajuste del tiempo va de 0,5 h a 24 h. b. Puede pulsar los botones « » o « » para ajustar el tiempo del temporizador. Cada pulsación aumentará o reducirá el tiempo 0,5 h hasta un máximo de 10 h. Por encima de las 10 horas el ajuste del tiempo se aumentará o reducirá en 1 hora con cada pulsación hasta que alcance el tiempo que desea establecer. c. Pulse el botón «TIMER» de nuevo para activar la función de temporizador. d. A continuación, puede ir seleccionando y configurando el resto de funciones (incluyendo modos, temperatura, rotación, velocidad del ventilador, etc.) para que cuando encienda el aire acondicionado esté a su gusto. La pantalla LCD mostrará y almacenará todos los ajustes. Cuando el temporizador alcance el tiempo preestablecido, el aire acondicionado empezará a funcionar automáticamente de acuerdo con la configuración que eligió. Desactivar el tiempo en el temporizador: a. Cuando el control remoto esté encendido, pulse el botón «TIMER» y leerá «TIMER OFF» en la pantalla LCD junto al tiempo establecido en el temporizador. El rango de ajuste del tiempo va de 0,5 h a 24 h. b. Puede pulsar los botones « » o « » para ajustar el tiempo del temporizador. Cada pulsación aumentará o reducirá el tiempo 0,5 h hasta un máximo de 10 h. Por encima de las 10 horas el ajuste del tiempo se aumentará o reducirá en 1 hora con cada pulsación hasta que alcance el tiempo que desea establecer. c. Pulse el botón «TIMER» de nuevo para desactivar la función de temporizador. AX0040 Port AC manual multi_lang.indd 69 69 27/11/2015 15:27 6.Botón «DISPLAY» Enciende o apaga la pantalla LCD. 7.Botón « »- oder « » Pulse el botón «+» o «-» para ajustar la temperatura que desee en un rango de 16 ºC a 32 ºC. 8.Botón «MODE» Le permite seleccionar diferentes modos de funcionamiento. Tras cada pulsación, el modo de funcionamiento cambiará. La secuencia que aparece en la pantalla es la siguiente: AUTO (AUTOMÁTICO) COOL (FRÍO) DRY (SECO) HEAT (CALOR) FAN (VENTILADOR) AUTO (AUTOMÁTICO). Nota: Las unidades que son solo refrigerantes no tienen la función de calefacción. * * * * * 9.Botón «SLEEP» 1.Pulse el botón «SLEEP» y la luz indicadora de suspensión parpadeará 2. Tras seleccionar el modo de suspensión, la operación de refrigeración permite al ajuste de temperatura aumentar 1 ºC tras 1 hora y otro 1 ºC automáticamente tras 1 hora. 3. Tras seleccionar el modo de suspensión, la operación de calentamiento permite al ajuste de temperatura bajar 2 ºC tras 1 hora y otros 2 ºC automáticamente tras 1 hora. 4. El aire acondicionado funciona en modo de suspensión durante 7 horas hasta detenerse automáticamente. Nota: Pulse los botones «MODE» u «ON/OFF» para eliminar el modo de suspensión 10. Botón «SWING » Las aspas de dirección horizontal del aire pueden girar automáticamente. Cuando el aire fluya en la dirección vertical que desea, pulse el botón de nuevo y las aspas de dirección horizontal del aire se detendrán en esta posición de su elección. 11. Botón «HEALTH» Encienda o apague la «HEALTH». 70 AX0040 Port AC manual multi_lang.indd 70 27/11/2015 15:27 Uso *Modo de funcionamiento «automático» •Pulse el botón «ON/OFF» para iniciar la unidad de aire acondicionado •Pulse el botón «MODE» y seleccione el modo de funcionamiento «automático». •Pulse el botón «SPEED» para seleccionar la velocidad del ventilador. Puede elegir entre velocidad BAJA (LOW), MEDIA (MEDIUM), ALTA (HIGH) y AUTOMÁTICA (AUTOMATIC). •Pulse el botón «ON/OFF» para detener la unidad de aire acondicionado Modo de funcionamiento «refrigeración/calefacción» (Las unidades que solo son refrigerantes no tienen la función de calefacción) •Pulse el botón «ON/OFF» para iniciar la unidad de aire acondicionado •Pulse el botón «MODO» y seleccione el modo de funcionamiento «refrigeración o calefacción». •Pulse los botones X o X para seleccionar la temperatura. Cada pulsación aumentará o disminuirá la temperatura en 1 ºC, siempre en un rango de entre 16 ºC y 32 ºC. •Pulse el botón VELOCIDAD para seleccionar la velocidad del ventilador. Puede elegir entre velocidad BAJA, MEDIA, ALTA y AUTOMÁTICA. •Pulse el botón de nuevo para detener la unidad de aire acondicionado Modo de funcionamiento «ventilador» •Drücken Sie die ON/OFF-Taste: Das Klimagerät wird eingeschaltet. •Pulse el botón «ON/OFF» para iniciar la unidad de aire acondicionado •Pulse el botón «MODO» y seleccione el modo de funcionamiento «VENTILADOR» •Pulse el botón «VELOCIDAD» para seleccionar la velocidad del ventilador. Puede elegir entre velocidad BAJA (LOW), MEDIA (MEDIUM), ALTA (HIGH) y AUTOMÁTICA (AUTOMATIC). •Pulse el botón «ON/OFF» para detener la unidad de aire acondicionado. Nota: Durante el modo de funcionamiento «VENTILADOR» la configuración de temperatura no funciona. Modo de funcionamiento «deshumidificación» •Pulse el botón «ON/OFF» para iniciar la unidad de aire acondicionado •Pulse el botón MODO y seleccione el modo de funcionamiento «deshumidificación» •Pulse los botones « » o « » para seleccionar la temperatura. Cada pulsación aumentará o disminuirá la temperatura en 1 ºC, siempre en un rango de entre 16 ºC y 32 ºC. •Pulse el botón «SPEED» para seleccionar la velocidad del ventilador. Puede elegir entre velocidad BAJA (LOW), MEDIA (MEDIUM), ALTA (HIGH) y AUTOMÁTICA (AUTOMATIC). •Pulse el botón «ON/OFF» para detener la unidad de aire acondicionado. AX0040 Port AC manual multi_lang.indd 71 71 27/11/2015 15:27 Cambiar las baterías • Abra y retire la tapa deslizándola en la dirección indicada por la flecha • Inserte dos baterías nuevas teniendo en cuenta la posición de los polos eléctricos + y • Vuelva a colocar la tapa. Atención •Apunte el control remoto hacia el sensor en la unidad de aire acondicionado •El control remoto debe situarse a menos de 8 metros del sensor •No debe haber obstáculos entre el control remoto y el sensor •No deje caer ni tire el control remoto •No exponga el control remoto directamente a la luz solar o a otras fuentes de calor •Utilice dos baterías •Extraiga las baterías del control remoto cuando no vaya a utilizar la unidad durante mucho tiempo •Si la unidad no responde al control remoto, sustituya las baterías •Las baterías antiguas deben desecharse como corresponde. El diseño y las especificaciones están sujetas a cambios sin previo aviso para mejorar el producto. Consulte con la agencia de ventas o con el fabricante para obtener más información. 72 Información correcta en el momento de enviarse a imprenta. AX0040 Port AC manual multi_lang.indd 72 27/11/2015 15:27 IT Condizionatore mobile & telecomando Istruzioni per l’installazione e l’uso AX3001/1 – Solo raffrescamento AX3006/1 – Raffrescamento e riscaldamento AX3002/1 – Solo raffrescamento AX3003/1 – Raffrescamento e riscaldamento EU EU CH CH Indice Condizionatore 74Avvertenze di sicurezza 76Designazione dei componenti 77Accessori 78Pannello di controllo 8Esercizio AX0040 Port AC manual multi_lang.indd 73 79Installazione 82Manutenzione 84Soluzione di problemi di funzionamento 85Smaltimento dell’apparecchio Telecomando del condizionatore 86Descrizione dei tasti 89Uso del telecomando 90Inserimento batterie 27/11/2015 15:27 Avvertenze di sicurezza La vostra sicurezza e la sicurezza di altre persone sono di primaria importanza. In queste istruzioni e sull’apparecchio stesso abbiamo formulato numerose raccomandazioni per la sicurezza. Leggete e osservate tutte le prescrizioni di sicurezza. PERICOLO Questo simbolo di avvertimento indica un pericolo letale o un elevato rischio di lesioni. ATTENZIONE Questo simbolo di avvertimento indica il rischio di lesioni o di danni all’apparecchio. PERICOLO Quest’apparecchio può essere utilizzato da bambini da 8 anni e da persone adulte con ridotte capacità fisiche, sensoriali o mentali o mancanza di esperienza e conoscenza, a condizione che siano istruiti riguardo l‘uso corretto e in sicurezza dell‘apparecchio, risp. a tal fine sorvegliati. I bambini non devono giocare con l’apparecchio né eseguire la pulizia o la manutenzione dello stesso senza sorveglianza. L’allacciamento elettrico dell’apparecchio deve avvenire in base alle vigenti norme tecniche nazionali. Per evitare scosse, occorre installare un interruttore differenziale corrispondente alla potenza d’uscita nominale dell’apparecchio. Non installate il condizionatore in ambienti con gas o liquidi infiammabili – potrebbe causare un incendio. Se il cavo di alimentazione è danneggiato, dev’essere sostituito dal costruttore, dal suo rappresentante o da un’altra persona in tal senso qualificata. La specifica del fusibile è AC250V T3.15AL. 74 La tensione elettrica dev’essere tra 220 V e 240 V. L’installazione dell’apparecchio va eseguita in conformità alle specifiche norme nazionali che disciplinano gli impianti elettrici. La spina deve rimanere facilmente accessibile dopo l’installazione. Un fusibile bruciato della scheda stampata va sostituito con un fusibile del tipo F3.15 A / 250 V. AX0040 Port AC manual multi_lang.indd 74 27/11/2015 15:27 Non infilate le dita o altri oggetti nelle bocchette di scarico o di aspirazione dell’aria. La ventola gira ad elevata velocità e potrebbe causare lesioni. Non toccate i deflettori in movimento. Le dita potrebbero rimanere incastrate e l’azionamento delle lamelle di convogliamento dell’aria potrebbe esserne danneggiato. Non cercate mai di riparare voi stessi il condizionatore. Tutte le riparazioni vanno eseguite da personale tecnico qualificato con corrispondente abilitazione. Non utilizzate l’apparecchio in caso di tempesta o temporale. Staccate l’alimentazione elettrica per proteggere l’apparecchio da danni. Non utilizzate detergenti liquidi o corrosivi per pulire l’apparecchio e non spruzzate acqua o altri liquidi sull’apparecchio per evitare danni ai componenti di plastica e il rischio di elettrocuzione. Non utilizzate l’apparecchio in lavanderie. ATTENZIONE Non esponetevi per un periodo prolungato direttamente al flusso di aria fredda. Pulite il climatizzatore con un panno morbido e asciutto. Non utilizzate solventi chimici, insetticidi o prodotti spray infiammabili poiché danneggiano il condizionatore. Non spruzzate mai acqua direttamente sull’apparecchio. Il condizionatore va utilizzato in un ambiente in cui le porte e le finestre sono chiuse. In caso contrario, l’apparecchio non può raggiungere appieno la temperatura e l’umidità ambiente impostata. Se il filtro dell’aria è molto sporco le prestazioni di raffrescamento e riscaldamento sono ridotte. Si raccomanda una regolare pulizia del filtro dell’aria. 75 AX0040 Port AC manual multi_lang.indd 75 27/11/2015 15:27 Designazione dei componenti Parte anteriore Pannello di controllo Deflettore di emissione aria Ricevitore Maniglia a incasso Carenatura frontale Bocchetta dell’aria di scarico Telecomando Parte posteriore Filtro dell’aria superiore (dietro la griglia) Griglia di aspirazione dell’aria superiore Maniglia a incasso Tronchetto di scarico dell’acqua di condensa Bocchetta dell’aria di scarico Tronchetto di scarico dell’acqua di condensa (solo nel modello a pompa di calore) Scatola di allacciamento elettrico Tronchetto di scarico dell’acqua di condensa inferiore 76 Filtro dell’aria inferiore (dietro la griglia) Griglia di aspirazione dell’aria inferiore Rotelle Avvertenza: Le descrizioni delle presenti istruzioni per l’uso possono in taluni punti divergere dalle informazioni di vendita e dall’apparecchio stesso. Vogliate considerare le caratteristiche dell’apparecchio acquistato. L’intervallo di temperatura d’esercizio del condizionatore si situa tra 16 °C e 32 °C nell’esercizio di raffrescamento e tra 5 °C e 27 °C nell’esercizio di riscaldamento. AX0040 Port AC manual multi_lang.indd 76 27/11/2015 15:27 Accessori Componenti Designazione Quantità Tubo flessibile per l’aria 1 set di scarico adattatore I e adattatore B (esecuoppure zione piatta o tonda a dipendenza del modello) Adattatore a finestra e perno Adattatore a parete A per 1 pz. lo scarico dell’aria (#) Adattatore B 1 pz. (esecuzione tonda) (#) Bullone e dado 1 pz. Tubo flessibile di 1 pz. drenaggio (#) Telecomando con pile 1 pz. Avvertenza: alcuni modelli sono sprovvisti delle parti opzionali (#). Avvertenza: utilizzate i tasti del telecomando secondo le corrispondenti funzioni del display. Eventualmente alcuni tasti non sono attivati. 77 AX0040 Port AC manual multi_lang.indd 77 27/11/2015 15:27 Pannello di controllo 4 3 Indicazione della Temperatura 2 1 Ventilatore • HIGH indicazione alta velocità • MID indicazione velocità media • LOW indicazione bassa velocità Modalità d’esercizio • COOL indicazione raffrescamento • HEAT indicazione riscaldamento (in apparecchi ad aria fredda manca questa indicazione) • DRY indicazione di deumidificazione • FAN indicazione ventola Funzioni supplementari • TIMER indicazione temporizzatore • SLEEP indicazione modalità notturna • SWINGindicazione oscillazione Avvertenza: i simboli si riferiscono a tutti i tasti e display. I modelli con dotazione di base eventualmente non dispongono di tutte le funzioni e modalità. Tasti di funzione . Premete questo tasto per accendere e spegnere l’apparecchio. 1 Tasto o . Premete i tasti di decremento - o incremento , per aumentare o 2 Tasto diminuire la preselezione della temperatura ambiente. 3 Tasto . Ogni azionamento di questo tasto comporta la selezione di una modalità d’esercizio nella sequenza raffrescare (COOL), riscaldare (HEAT), deumidificare (DRY) e ventilatore (FAN). 4 Tasto . Questo tasto serve all’impostazione della velocità della ventola nella sequenza bassa (LOW), media (MID), alta (HIGH) e di nuovo bassa (LOW). 78 Avvertenza: 1. Le funzioni Timer, Sleep, Swing, la modalità «Auto» e la velocità del ventilatore «Auto» possono essere selezionate solo tramite il telecomando e non sul pannello di comando. 2. Le altre funzioni del pannello di comando coincidono con quelle del telecomando. AX0040 Port AC manual multi_lang.indd 78 27/11/2015 15:27 Esercizio PERICOLO L’inosservanza delle seguenti misure precauzionali può comportare elettrocuzioni, incendi o lesioni alle persone. 1. L a spina va collegata a una presa installata a regola d’arte e correttamente messa a terra. 2. Non utilizzate per questo apparecchio prolunghe o adattatori spina. Prima della messa in esercizio dell’apparecchio • Scegliete un luogo adatto e accertatevi che l’apparecchio si trovi in prossimità di una presa. • Installate il tubo flessibile per l’aria di scarico e l’adattatore a finestra. • Collegate l’apparecchio a una presa adatta. • Accendete l’apparecchio. Modalità riscaldamento (i modelli solo raffrescamento non dispongono della funzione di riscaldamento) • Premete il tasto MODE finché si illumina la spia riscaldamento. • Selezionate la temperatura desiderata con i tasti «+» e «-». • Con il tasto FAN regolate la velocità della ventola. • Premete il tasto ON/OFF per accendere e di nuovo per spegnere l’apparecchio. Modalità raffrescamento • Premete il tasto MODE finché si illumina la spia raffrescamento. • Selezionate la temperatura desiderata con i tasti «+» e «-». • Con il tasto FAN regolate la velocità della ventola. • Premete il tasto ON/OFF per accendere e di nuovo per spegnere l’apparecchio. 79 AX0040 Port AC manual multi_lang.indd 79 27/11/2015 15:27 Modalità deumidificazione • Premete il tasto MODE finché si illumina la spia deumidificazione. • In questa modalità d’esercizio la ventola funziona a regime costante. • Tenete chiuse porte e finestre per ottenere il migliore effetto di deumidificazione. • Premete il tasto ON/OFF per accendere e di nuovo per spegnere l’apparecchio. Modalità ventilazione • Premete il tasto MODE finché si illumina la spia ventilazione. • Impostate con il tasto FAN la velocità della ventola. • Premete il tasto ON/OFF per accendere e di nuovo per spegnere l’apparecchio. Funzionamento a temporizzatore • Premete il tasto TIMER. • Impostate la durata desiderata con i tasti «+» e «-». Avvertenza: «Timer off» è attivabile solo a condizionatore acceso. «Timer on» è attivabile solo a condizionatore spento. Scarico dell’acqua di condensa Quando il serbatoio dell’acqua integrato è pieno, sul display del pannello di controllo compare l’indicazione «P1». • Aprite il coperchio del tronchetto di scarico dell’acqua di condensa ed estraetelo verso l’alto. • Collocate un recipiente sotto il tronchetto di scarico, togliete il tappo dal tronchetto e fate defluire l’acqua di condensa. • Al termine dello scarico reinserite il tappo nel tronchetto e ricollocate il coperchio nel suo alloggiamento. AVVERTENZA Quest’acqua non è potabile. Tronchetto di scarico dell’acqua di condensa 80 AX0040 Port AC manual multi_lang.indd 80 27/11/2015 15:27 Installazione Scegliere il punto d’installazione più adatto • Installate il condizionatore mobile su una superficie piana con sufficiente spazio per non ostruire i diffusori dell’aria. • Mantenere una distanza di almeno 50 cm dalle pareti e da altri oggetti. • L’inclinazione orizzontale non dovrebbe superare i 10 gradi in caso d’impiego dell’adattatore dell’apparecchio e dell’adattatore d’integrazione. Almeno 50 cm Almeno 50 cm Avvertenze:1. il climatizzatore non va usato in lavanderie. 2.Ad installazione avvenuta, la spina dev’essere liberamente accessibile. Installazione dell’adattatore a finestra L’adattatore a finestra è stato concepito per la maggior parte delle finestre standard a scorrimento verticale e orizzontale. Per alcuni tipi di finestre potrebbe tuttavia essere necessario modificare o adattare in alcuni punti l’installazione. Per le dimensioni minime e massime delle finestre fate riferimento alle fig. A & B. Avvertenza: Il bullone e il dado occorrono per fissare la piastra di fissaggio alla finestra. Finestra scorrevole verticale Fig. B Fig. A Adattatore a finestra Minimo: 67.5 cm Massimo: 125 cm Fig. C Finestra scorrevole orizzontale Adattatore a finestra Minimo: 67.5 cm Massimo: 125 cm Dado Bullone 81 AX0040 Port AC manual multi_lang.indd 81 27/11/2015 15:27 Manutenzione Il vostro nuovo condizionatore è fabbricato in modo da assicurare un funzionamento ineccepibile per molti anni. In questo capitolo spieghiamo i principi della corretta pulizia e manutenzione dell’apparecchio. Vi raccomandiamo di contattare per la manutenzione annuale un tecnico qualificato autorizzato sul posto. I costi del servizio sono a vostro carico. Pulizia del filtro dell’aria La prestazione di raffreddamento diminuisce quando il filtro dell’aria è sporco. Il filtro dell’aria va pulito, a dipendenza dell’utilizzazione, circa ogni due settimane. • Scollegate l’unità dall’alimentazione elettrica. • Rimuovete la griglia del filtro ed estraete il filtro dalla griglia. • Aspirate la polvere sulla superficie del filtro. Se necessario, lavate il filtro dell’aria con lisciva tiepida. Non lavate il filtro dell’aria in lavastoviglie e non utilizzate detergenti chimici. Asciugate accuratamente il filtro prima del reinserimento. • Fissate il filtro dell’aria mediante le graffe di fissaggio all’interno della griglia del filtro e reinseritelo correttamente. 1a 3c 2b Istruzioni per il montaggio del tubo flessibile 1a.Avvitate il tubo flessibile di scarico dell’aria sull’adattatore tondo al tubo flessibile. Fissate il tubo flessibile per l’aria di scarico con l’adattatore mediante le graffe alla bocchetta di scarico dell’aria dell’apparecchio. 2b.Fissate l’adattatore idoneo all’altra estremità del flessibile di scarico. 3c.Inserite l’adattatore con il componente adattatore per finestre in una finestra vicina. Avvertenze • Il tubo flessibile più essere ridotto a una lunghezza minima di 450 mm ed esteso a una lunghezza massima di 1800 mm. Si raccomanda di limitare l’estensione del tubo flessibile al minimo. • L’aria di scarico va sempre evacuata all’esterno. • Un’eccessiva estensione o curvatura del tubo flessibile pregiudica la prestazione di raffreddamento. Non così! Così! 82 AX0040 Port AC manual multi_lang.indd 82 27/11/2015 15:27 Pulizia dell’apparecchio • Per motivi di sicurezza, scollegate l’unità dall’alimentazione. • Pulite l’apparecchio con un panno asciutto • Se l’apparecchio è molto sporco, pulitelo con un panno umido. Avvertenza Fate defluire l’acqua di condensa e non chiudete il tronchetto di scarico con il tappo se l’apparecchio rimane inutilizzato per un periodo prolungato. ATTENZIONE PERICOLO • Per la pulizia del condizionatore non utilizzate benzina o benzene né solventi o altre sostanze chimiche, risp. qualunque tipo di insetticida liquido, poiché tali sostanze potrebbero comportare il distacco della vernice oppure la rottura o la deformazione dei componenti plastici. • Non lavate mai l’apparecchio spruzzando direttamente acqua sulla carenatura. Ciò comporterebbe un danneggiamento di componenti elettrici e aumenta il rischio di elettrocuzione. • Per la pulizia del filtro dell’aria non utilizzate mai acqua sopra i 40 °C (104 °F). 83 AX0040 Port AC manual multi_lang.indd 83 27/11/2015 15:27 Soluzione di problemi di funzionamento Se il vostro apparecchio dovesse presentare anomalie di funzionamento, prima di contattare il servizio tecnico verificate le seguenti proposte di soluzione. Il condizionatore non funziona Cause Possibili soluzioni L’interruttore di rete è spento. Accendete l’interruttore. Interruzione dell’erogazione di corrente. Attendete il ripristino dell’erogazione di corrente. È bruciato il fusibile. Verificate l’interruttore di protezione automatico. Sostituite il fusibile. (Riprovate e rivolgetevi a un elettricista se il fusibile dovesse saltare di nuovo.) L’apparecchio non raggiunge il tempo preimpostato per la messa in funzione. Attendete o resettate le impostazioni di fabbrica. L’apparecchio non si accende dopo aver azionato il tasto ON/OFF Cause Possibili soluzioni L’apparecchio è stato spento meno di tre minuti fa. Attendete tre minuti. La temperatura ambiente è inferiore alla temperatura preimpostata. Modificate l’impostazione della temperatura. L’aria è emessa, ma la prestazione di raffreddamento è scarsa. Cause Possibili soluzioni Impostazione errata della temperatura. Reimpostate la temperatura. La temperatura preimpostata dev’essere inferiore alla temperatura ambiente. Il filtro dell’aria è ostruito da polvere. Pulite il filtro dell’aria. Sono ostruite le vie di aspirazione e scarico dell’aria. Eliminate l’ostruzione. Il condizionatore è collocato in un ambiente molto caldo. Attendente finché il calore accumulato in pareti, soffitti, pavimenti e mobili si è dissipato. La prestazione di raffreddamento è insufficiente. Fate verificare dal vostro rivenditore la prestazione di raffreddamento richiesta. Le porte e le finestre sono aperte. Chiudete le porte e le finestre. Rumori o vibrazioni insoliti Cause Possibili soluzioni La superficie d’appoggio non è regolare e piana. Se possibile collocate l’apparecchio su una superficie d’appoggio regolare e piana. 84 AX0040 Port AC manual multi_lang.indd 84 27/11/2015 15:27 Smaltimento dell’apparecchio Significato del bidone dei rifiuti barrato Non conferire alla raccolta questo prodotto come rifiuto indifferenziato, affidatelo alle strutture di raccolta differenziata dei rifiuti. Informatevi presso l’Amministrazione locale sui servizi di raccolta di rifiuti disponibili. Il deposito di apparecchi elettrici in discariche e all’aperto mette a rischio la salute e il benessere in quanto le sostanze pericolose potrebbero infiltrarsi nelle falde acquifere e contaminare la catena alimentare. All’acquisto di un nuovo prodotto il dettagliante è tenuto per legge a ritirare e smaltire gratuitamente il vecchio apparecchio. Fabbricante del compressore risp. marchio commerciale Refrigerante Designazione di marca degli oli Highly R410A 68HES-H o equivalente Meizhi R410A ESTER OIL Vg74 Rechi R410A NMOC Ze-Gles RB68EP o equivalente 85 AX0040 Port AC manual multi_lang.indd 85 27/11/2015 15:27 Telecomando per condizionatori mobili Descrizione dei tasti Indicazione della modalità d’esercizio Indicazione della velocità Indicazione della temperatura, del tempo ecc. Indicazione oscillazione, risp. start/stop Display altre funzioni Avvertenza Le illustrazioni in alto mostrano le indicazioni dopo la prima messa in funzione dell’alimentazione elettrica, risp. dopo la riaccensione in seguito a un’interruzione della corrente. Nell’esercizio effettivo sul display del telecomando compaiono solo le funzioni attivate. Gli apparecchi solo raffrescamento non hanno una funzione di riscaldamento o riscaldamento elettrico. I relativi tasti funzione del telecomando non sono attivi. Evitate di azionare questi tasti del telecomando. Avvertenza L’illustrazione mostra un telecomando completo con tutte le funzioni e tutti i tasti; il modello effettivo può lievemente differire da quello illustrato. 1. Tasto «ON/OFF» Azionando questo tasto accendete o spegnete il climatizzatore. 86 2. Tasto «SPEED» Selezione della velocità della ventola come segue: Bassa (Low) > Media (Mid) > Alta (High) > Automatico (Auto) AX0040 Port AC manual multi_lang.indd 86 27/11/2015 15:27 3. Tasto «SWING |» Le lamelle di convogliamento dell’aria verticali oscillano automaticamente. Una volta raggiunta l’angolazione orizzontale desiderata, premete nuovamente il tasto e il deflettore verticale mantiene la posizione desiderata. 4. Tasto «TURBO» Azionando questo tasto in modalità raffrescamento o riscaldamento, la velocità della ventola passa automaticamente ad ‚Alto‘ (HIGH) e sul visualizzatore LCD compare l’indicazione «TURBO». La funzione «TURBO» serve a raggiungere al più presto la temperatura massima di riscaldamento o la temperatura minima di raffrescamento. 5. Tasto «TIMER» Impostare il tempo di avvio tramite temporizzatore («ON») a. Azionate il tasto «TIMER» a telecomando spento. Sul visualizzatore LCD compare «TIMER ON» e il tempo del temporizzatore regolabile in intervalli di mezz’ora entro 24 ore. b. Per l’impostazione del tempo del timer premete il tasto « » o « ». Per impostare il tempo desiderato, ogni azionamento del tasto incrementa o decrementa il tempo di 0,5 ore fino al raggiungimento delle 10 ore, quindi il tempo aumenta o si riduce di 1 ora a ogni azionamento del tasto. c. Premete nuovamente il tasto «TIMER» per attivare il temporizzatore. d. Dopo l’accensione potete selezionare altre funzioni per la modalità d’esercizio desiderata tramite timer (tra cui modalità, temperatura, swing, velocità della ventola ecc.). Sul visualizzatore LCD compariranno e saranno mantenute tutte le vostre impostazioni e il condizionatore funzionerà automaticamente in base alle preimpostazioni quando il timer avrà raggiunto il tempo preimpostato. Impostare il tempo di spegnimento tramite temporizzatore («OFF») a. Azionate il tasto «TIMER» a telecomando accesso («ON STATE»). Il visualizzatore LCD indica «TIMER OFF» e il tempo del timer regolabile in intervalli di mezz’ora entro 24 ore. b. Azionate per l’impostazione del timer il tasto « » o « ». Per impostare il tempo desiderato, ogni azionamento del tasto incrementa o decrementa il tempo di 0,5 ore fino al raggiungimento delle 10 ore, quindi il tempo aumenta o si riduce di 1 ora a ogni azionamento del tasto. c. Premete nuovamente il tasto «TIMER» per attivare la funzione Timer Off. 87 AX0040 Port AC manual multi_lang.indd 87 27/11/2015 15:27 6. Tasto «DISPLAY» ACCENDE o SPEGNE il display LCD. 7.Tasto « » o « » Mediante l’azionamento dei tasti «+» o «-» è possibile regolare la temperatura tra 16 °C e 32 °C. 8.Tasto «MODE» Consente di selezionare la modalità d’esercizio desiderata. Ogni azionamento del pulsante modifica la modalità d’esercizio; sul visualizzatore compare la seguente sequenza: AUTO COOL (raffrescare) DRY (deumidificare) HEAT (riscaldare) FAN (ventilare) AUTO. Avvertenza: gli apparecchi solo raffrescamento non dispongono della funzione di riscaldamento. * * * * * 9.Tasto «SLEEP» 1.Premete il tasto SLEEP: si illumina l’indicazione modalità notturna. 2. In modalità raffrescamento, dopo l’attivazione della modalità notturna la temperatura preimpostata è aumentata di 1 °C dopo un’ora e automaticamente ancora di 1 °C dopo un’altra ora. 3. In modalità riscaldamento, dopo l’attivazione della modalità notturna la temperatura preimpostata è diminuita di 2 °C dopo un’ora e automaticamente ancora di 2 °C dopo un’altra ora. 4. Il condizionatore funziona per sette ore in modalità notturna e si spegne automaticamente. Avvertenza: per terminare la modalità notturna, premete il tasto MODE o ON/OFF. 10. Tasto «SWING » Le lamelle di convogliamento dell’aria orizzontali oscillano automaticamente. Una volta raggiunta l’angolazione desiderata, premete nuovamente il tasto e il deflettore orizzontale mantiene la posizione desiderata. 11. Tasto «HEALTH» Per attivare e disattivare la «Funzione salute». 88 AX0040 Port AC manual multi_lang.indd 88 27/11/2015 15:27 Uso del telecomando Modalità automatica • Premete il tasto ON/OFF per accendere il condizionatore. • Premete il tasto MODE e selezionate la modalità d’esercizio automatica. • Premete il tasto SPEED per l’impostazione della velocità della ventola scegliendo tra le opzioni BASSA (LOW), MEDIA (MID), ALTA (HIGH) e AUTOMATICO (AUTO). • Premete il tasto ON/OFF per spegnere il condizionatore. Modalità d’esercizio raffrescamento/riscaldamento (Gli apparecchi solo raffrescamento non dispongono della funzione riscaldamento) • Premete il tasto ON/OFF per accendere il condizionatore. • Premete il tasto MODE e selezionate la modalità d’esercizio raffrescare o riscaldare. • Premete i tasti « » o « » per regolare la temperatura in intervalli di 1 °C tra 16 °C e 32 °C. • Premete il tasto SPEED per l’impostazione della velocità della ventola scegliendo tra le opzioni BASSA (LOW), MEDIA (MID), ALTA (HIGH) e AUTOMATICO (AUTO). • Premete nuovamente il tasto per spegnere il climatizzatore. Modalità ventilazione • Premete il tasto ON/OFF per accendere il condizionatore. • Premete il tasto MODE e selezionate la modalità d’esercizio ventilazione. • Premete il tasto SPEED per l’impostazione della velocità della ventola scegliendo tra le opzioni BASSA (LOW), MEDIA (MID), ALTA (HIGH). • Premete il tasto ON/OFF per spegnere il condizionatore. Avvertenza: Nella modalità d’esercizio ventilazione la preselezione della temperatura è disattivata. Modalità di deumidificazione • Premete il tasto ON/OFF per accendere il condizionatore. • Premete il tasto MODE e selezionate la modalità d’esercizio deumidificazione. • Premete i tasti « » o « » per regolare la temperatura in intervalli di 1 °C tra 16 °C e 32 °C. • Premete il tasto SPEED per l’impostazione della velocità della ventola scegliendo tra le opzioni BASSA (LOW), MEDIA (MID), ALTA (HIGH) e AUTO. • Premete il tasto ON/OFF per spegnere il condizionatore. 89 AX0040 Port AC manual multi_lang.indd 89 27/11/2015 15:27 Inserimento batterie • Rimuovete il coperchio nella direzione della freccia indicata sul telecomando. • Inserite nella corretta direzione di polarità (+ & –) due nuove pile. • Richiudete il coperchio. Avvertenze generali • Rivolgete il telecomando verso il ricevitore del condizionatore. • La distanza tra il telecomando e il ricevitore non dovrebbe superare gli 8 metri. • Tra il telecomando e il ricevitore non vi devono essere ostacoli. • Evitate di far cadere e non lanciate il telecomando. • Non esponete il telecomando alla luce solare diretta o ad altre fonti di calore. • Utilizzate due pile. • Rimuovete le pile dal telecomando se l’apparecchio rimane inutilizzato per un periodo prolungato. • Sostituite le batterie se l’apparecchio non reagisce all’azionamento del telecomando. • Smaltite correttamente le pile esauste. Il design e le caratteristiche tecniche possono essere modificati senza preavviso ai fini del miglioramento del prodotto. Informatevi presso il rivenditore o il concessionario in merito ai dettagli. 90 Informazioni corrette al momento della stampa. AX0040 Port AC manual multi_lang.indd 90 27/11/2015 15:27 PL Instrukcja obsługi klimatyzatora przenośnego i pilota zdalnego sterowania AX3001/1 – Tylko chłodzenie AX3006/1 – Raffrescamento e riscaldamento EU AX3002/1 – Tylko chłodzenie AX3003/1 – Raffrescamento e riscaldamento CH EU CH Spis treści Klimatyzator 92 Środki bezpieczeństwa 94 Opis części 95 Akcesoria 96 Panel sterowania 97Obsługa 99Instalacja AX0040 Port AC manual multi_lang.indd 91 100Konserwacja 102Wykrywanie i rozwiązywanie usterewk 103Ostrzeżenie dotyczące utylizacji odpadów elektrycznych i elektronicznych Pilot zdalnego sterowania klimatyzatora 104 Opis przycisków 107Stosowanie 108 Zakładanie baterii 27/11/2015 15:27 Środki bezpieczeństwa Bezpieczeństwo osoby użytkującej i obsługującej oraz bezpieczeństwo innych osób jest bardzo ważne. W tej instrukcji i na urządzeniu zamieściliśmy liczne ważne informacje dotyczące bezpieczeństwa. Zawsze należy zapoznać się ze wszystkimi wymogami bezpieczeństwa i stosować się do nich. UWAGA Ten symbol wskazuje na zagrożenie utraty życia lub odniesienia poważnych obrażeń. OSTRZEŻENIE Ten symbol wskazuje na możliwość urazu lub uszkodzenia tylko właściwości. UWAGA T o urządzenie może być używane przez dzieci w wieku od 8 lat. Osoby o ograniczonych możliwościach fizycznych, sensorycznych lub umysłowych lub braku doświadczenia i wiedzy muszą być nadzorowane lub poinstruowane odnośnie do bezpiecznego i prawidłowego korzystania z tego urządzenia. Dzieci nie mogą bawić się urządzeniem. Czyszczenia i konserwacji bieżącej nie mogą wykonywać dzieci bez nadzoru. Podłączenie elektryczne tego urządzenia musi być wykonane zgodnie z lokalnymi przepisami i normami. Niezbędna jest instalacja wyłącznika różnicowoprądowego o odpowiedniej wartości znamionowej, aby zapobiec porażeniom elektrycznym. Nie instalować klimatyzatora w miejscu, w którym znajduje się łatwopalny gaz lub ciecz. Może to spowodować pożar. Jeśli przewód zasilający jest uszkodzony, musi on zostać wymieniony przez producenta, przedstawiciela serwisu lub wykwalifikowaną osobę. Parametry bezpiecznika: 250V prądu zmiennego T3.15AL Napięcie powinno być w zakresie od 220 - 240V. Urządzenie powinno być zainstalowane zgodnie z krajowymi przepisami dotyczącymi instalacji elektrycznych. Po zainstalowaniu wtyczka powinna być łatwo dostępna. Jeśli bezpiecznik na płytce drukowanej urządzenia jest uszkodzony, należy go wymienić na bezpiecznik typu F3.15A/250V. 92 AX0040 Port AC manual multi_lang.indd 92 27/11/2015 15:27 Nie wolno wkładać palców ani innych przedmiotów do wlotów lub wylotów powietrza. - wentylator obraca się z dużą prędkością i spowoduje to obrażenia. Nie wolno dotykać wachlarzowych łopatek nadmuchowych. Może to spowodować zakleszczenie palca i uszkodzić części napędowe łopatek nadmuchowych. Nie należy podejmować prób naprawy klimatyzatora. Wszystkie prace naprawcze muszą być wykonywane przez wykwalifikowanego technika z odpowiednimi uprawnieniami. Nie używać urządzenia w czasie burzy. OSTRZEŻENIE Nie kierować zimnego powietrza bezpośrednio na ciało przez dłuższy czas Klimatyzator czyścić miękką, suchą szmatką. Nie stosować chemicznych rozpuszczalników, środków owadobójczych czy rozpylanych materiałów łatwopalnych - spowodują one uszkodzenie klimatyzatora Nie pryskać wodą bezpośrednio na klimatyzator. W pomieszczeniu, w którym działa klimatyzator powinny być zamknięte drzwi i okna. Niezastosowanie się do tej wskazówki zmniejszy zdolność jednostki do utrzymania pożądanej temperatury i wilgotności. Jeśli filtr powietrza jest bardzo brudny, obniży to wydajność chłodzenia i ogrzewania. Należy regularnie czyścić filtr powietrza. 93 AX0040 Port AC manual multi_lang.indd 93 27/11/2015 15:27 Opis części Widok z przodu Panel sterowania Wylot powietrza Okienka odbiornika sygnału Uchwyt Panel prezdni Wylot powietrza Pilot Górny filtr powietrza (za kratką) Uchwyt Odpływ wody Wylot powietrza Odpływ (tylko dla modelu z ogrzewaniem) Wyjście pzewodu zailającego Dolny odpływ wody 94 Górny wlot powietrza Dolny filtr powietrza (za kratką) Dolny wlot powietrza Kółka Uwaga: Opisy zamieszczone w tej instrukcji obsługi mogą nieznacznie różnić się od informacji w materiałach promocyjnych i od rzeczywistego urządzenia. Prosimy korzystać z informacji dotyczących faktycznie zakupionego urządzenia. Zakres temperatur roboczych klimatyzatora w trybie chłodzenia to 16-32w°C w trybie chłodzenia; 5-27oC w trybie ogrzewania. AX0040 Port AC manual multi_lang.indd 94 27/11/2015 15:27 Akcesoria Części Nazwa części Ilość Złączka A i złączka B węża wylotowego powietrza (z wylotem płaskim lub okrągłym w zależności od modelu) Zestaw listwy do montażu okiennego i śruba. 1 zestaw Złączka A wylotu ściennego (#) 1 szt. Złączka B (wylot okrągły) (#) 1 szt. Śruba i nakrętka 1 szt. Wąż spustowy (#) 1 szt. Pilot zdalnego sterowania i bateria 1 szt. Uwaga: Akcesoria opcjonalne (#) – niektóre modele nie są w nie wyposażone. Uwaga: Przycisk na pilocie zdalnego sterowania należy wybrać zgodnie z powiązaną funkcją na wyświetlaczu. Dodatkowe przyciski mogą być nieaktywne. 95 AX0040 Port AC manual multi_lang.indd 95 27/11/2015 15:27 Panel sterowania 4 3 Wentylator • HIGH – Wskaźnik wysokich obrotów • MID – Wskaźnik średnich obrotów • LOW – Wskaźnik niskich obrotów Wskaźnik temperatury 2 1 Tryb • COOL – Wskaźnik chłodzenia • HEAT – Wskaźnik ogrzewania (jednostka wyłącznie z zimnym nadmuchem nie ma tego wyświetlacza) • DRY – Wskaźnik osuszania • FAN – Wskaźnik wentylatora Dodatkowe funkcje • TIMER – Wskaźnik programatora • SLEEP – Wskaźnik trybu pracy nocnej • SWING – Wskaźnik wahadłowej zmiany kąta nadmuchu Uwaga: Ta ikona dotyczy wszystkich przycisków i wyświetlacza. Modele podstawowe mogą nie obejmować wszystkich funkcji i trybów. 96 Przyciski funkcyjne 1 Przycisk Nacisnąć ten przycisk, aby uruchomić lub wyłączyć klimatyzator. 2 Przycisk lub Nacisnąć przycisk lub , by podwyższyć lub obniżyć temperaturę w pomieszczeniu. 3 Przycisk Po każdym naciśnięciu tego przycisku następuje przełączenie trybu pracy, kolejno: chłodzenie, ogrzewanie, osuszanie i wentylator (COOL, HEAT, DRY, FAN). 4 Przycisk Ten przycisk służy do ustawiania prędkości wentylatora w następującej kolejności: niska, średnia, wysoka (LOW, MID, HIGH), a następnie z powrotem niska (LOW). Uwaga: 1. Tryb programatora czasowego („Timer”), funkcja wahadłowej zmiany kąta nadmuchu („Swing”), tryb automatyczny i tryb automatyczny prędkości wentylatora można wybrać przy użyciu pilota, a nie na panelu na urządzeniu. 2. Pozostałe funkcje na panelu sterowania są takie same jak w pilocie zdalnego sterowania. AX0040 Port AC manual multi_lang.indd 96 27/11/2015 15:27 Obsługa UWAGA! Niezastosowanie się do poniższego zalecenia może doprowadzić do porażenia prądem elektrycznym, pożaru lub obrażeń ciała. 1Wtyczkę należy podłączyć do poprawnie zainstalowanego i uziemionego gniazdka. 2 Nie należy używać do tego urządzenia przedłużacza ani wtyczki rozgałęźnej. Przed uruchomieniem urządzenia • Wybrać odpowiednie miejsce, upewnić się, że w pobliżu urządzenia znajduje się gniazdko elektryczne. • Zainstalować elastyczny wąż wylotowy powietrza i rozsuwaną listwę do montażu okiennego. • Podłączyć urządzenie do odpowiedniego gniazdka. • Włączyć urządzenie. Praca w trybie grzania (modele wyposażone wyłączne w funkcję chłodzenia nie mają funkcji grzania) • Nacisnąć przycisk MODE tyle razy, by na wyświetlaczu podświetlony był wskaźnik HEAT. • Ustawić żądaną temperaturę naciskając przycisk „+” i „-”. • Wybrać prędkość wentylatora przyciskiem FAN. • Nacisnąć przycisk ON/OFF, aby uruchomić urządzenie. Po ponownym naciśnięciu urządzenie zostanie wyłączone. Praca w trybie chłodzenia • Nacisnąć przycisk MODE tyle razy, by na wyświetlaczu podświetlony był wskaźnik COOL. • Ustawić żądaną temperaturę, naciskając przycisk „+” i „-”. • Wybrać prędkość wentylatora przyciskiem FAN. • Nacisnąć przycisk ON/OFF, aby uruchomić urządzenie. Po ponownym naciśnięciu urządzenie zostanie wyłączone. 97 AX0040 Port AC manual multi_lang.indd 97 27/11/2015 15:27 Praca w trybie suszenia • Nacisnąć przycisk MODE tyle razy, by na wyświetlaczu podświetlony był wskaźnik DRY. • W tym trybie pracy wentylator pracuje ze stałą prędkością. • Efekt suszenia osiąga się najskuteczniej po zamknięciu okien i drzwi. •Nacisnąć przycisk ON/OFF, aby uruchomić urządzenie. Po ponownym naciśnięciu urządzenie zostanie wyłączone. Praca w trybie wentylacji •Nacisnąć przycisk MODE tyle razy, by na wyświetlaczu podświetlony był wskaźnik FAN. •Wybrać prędkość wentylatora przyciskiem FAN. •Nacisnąć przycisk ON/OFF, aby uruchomić urządzenie. Po ponownym naciśnięciu urządzenie zostanie wyłączone. Obsługa programatora czasowego 1. Nacisnąć przycisk TIMER. 2. Nacisnąć przycisk „+” i „-”, aby ustawić czas programatora. Uwaga: Funkcja “Timer off” (wyłączenie urządzenia przez programator czasowy) działa tylko wtedy, gdy klimatyzator pracuje. Funkcja „Timer on” (włączenie urządzenia przez programator czasowy) działa tylko wtedy, gdy klimatyzator jest wyłączony. Usuwanie skroplin Gdy wewnętrzny zbiornik wody wypełni się, na wyświetlaczu panelu sterowania pojawi się “P1”. 1. Otworzyć pokrywę spustu i wyciągnąć go do góry. 2. Pod przewodem spustowym umieścić pojemnik , wyciągnąć zatyczkę na przewodzie spustowym i wypuścić zebraną wodę. 3. Po usunięciu całej wody włożyć zatyczkę z powrotem do wylotu spustowego i włożyć pokrywę na miejsce. WAŻNE Ta woda nie nadaje się do picia. 98 AX0040 Port AC manual multi_lang.indd 98 27/11/2015 15:27 Instalacja Wybór najlepszego miejsca 1. Przenośny klimatyzator instalować na płaskim podłożu w przestronnym miejscu, w którym wyloty powietrza nie będą ograniczone. 2. Minimalna odległość od ścian lub innych przeszkód Więcej niż 50 cm powinna wynosić 50 cm. 3. Nachylenie nie może wynosić więcej niż 10 stopni w poziomie w przypadku używania urządzenia i zestawu montażowego. Uwaga: 1. Klimatyzatora nie można używać w pralni. 2. Wtyczka powinna być łatwo dostępna po ustawieniu urządzenia. Więcej niż 50 cm Wybór najlepszego miejsca Zestaw okienny został zaprojektowany tak, aby pasował do większości standardowych zastosowań przy montażu na oknie zarówno w pionie jak i w poziomie. Jednak dla pewnych typów okien niektóre aspekty procedury instalacji mogą wymagać udoskonalenia lub modyfikacji. Minimalne i maksymalne otwory okienne podane są na rysunkach A i B. Uwaga: Śruba i nakrętka służą do mocowania listy okiennej. Okno w pionie Rys. B Rys. A Okno zasuwane pionowo Zestaw do montażu okiennego min. 67,5 mm. Maksymalny: 125 cm Rys. C Okno w poziomie Okno zasuwane pionowo Zestaw do montażu okiennego min. 67,5 mm. Maksymalny: 125 cm Nakrętka Śruba 99 AX0040 Port AC manual multi_lang.indd 99 27/11/2015 15:27 Konserwacja Nowy klimatyzator jest zaprojektowany tak, aby zapewnić niezawodną pracę przez wiele lat. W tej części instrukcji opisano prawidłowy sposób czyszczenia i pielęgnacji klimatyzatora. W celu konserwacji corocznej zalecamy skontaktowanie się z lokalnym przedstawicielem autoryzowanego serwisu. Zwracamy uwagę, że koszt tej usługi serwisowej ponosi użytkownik. Czyszczenie filtra powietrza Jeśli filtr powietrza jest pokryty kurzem, obniża to wydajność chłodzenia. Filtr powietrza czyścić co dwa tygodnie, w zależności od użytkowania. 1 Wyłączyć zasilanie 2 Wyciągną pokrywę filtra i wyjąć filtr z pokrywy 3Odkurzyć powierzchnię filtra odkurzaczem, a następnie, jeśli to konieczne, umyć filtr powietrza w ciepłej wodzie z mydłem. Nie wkładać filtra powietrza do zmywarki ani nie używać żadnych środków chemicznych. Przed ponownym założeniem filtra dokładnie go osuszyć. 4Założyć filtr powietrza na pokrywie filtra za pomocą zaczepów mocujących na wewnętrznej powierzchni pokrywy. Założyć pokrywę filtra z powrotem na jej miejsce. 1a 3c 2b Instrukcja montażu przewodu 1aPodłączyć wąż wylotowy powietrza przykręcając okrągłą złączkę węża. Założyć wąż i złączkę na wylot powietrza urządzenia. 2bPodłączyć odpowiednią złączkę na przeciwległym końcu przewodu wylotowego powietrza. 3cZamontować podzespół złączki wylotowej do znajdującego się w pobliżu okna. Uwaga: Nie rób 1Najmniejsza długość przewodu wylotowego wynosi 450mm, a po rozciągnięciu może ona wynosić maksymalnie 1800mm. Zaleca się ograniczenie długości przewodu do minimum. 2Wywiewane powietrze musi być zawsze wyprowadzone na zewnątrz. 100 Tak 3Nadmierne rozciąganie lub zginanie przewodu wylotowego powoduje obniżenie sprawności chłodzenia. AX0040 Port AC manual multi_lang.indd 100 27/11/2015 15:27 Czyszczenie urządzenia 1. Ze względów bezpieczeństwa należy wyłączyć zasilanie klimatyzatora. 2. Urządzenie należy wycierać suchą szmatką. 3. Jeżeli urządzenie jest bardzo zabrudzone, należy wytrzeć je wilgotną szmatką. Uwaga: Jeśli urządzenie pozostaje nieużywane przez dłuższy czas, należy usunąć skropliny i pozostawić zatyczkę wyciągniętą. UWAGA! •Nie należy używać do klimatyzatora benzyny, benzenu, rozpuszczalników ani innych środków chemicznych lub płynów owadobójczych, ponieważ substancje te mogą powodować łuszczenie się farby, pęknięcia lub odkształcenia elementów z tworzyw sztucznych. •Nigdy nie wolno czyścić klimatyzatora przez wylewanie wody bezpośrednio na którąkolwiek powierzchnię urządzenia, ponieważ może to spowodować uszkodzenie elementów elektrycznych i porażenia prądem. • Nigdy nie należy czyścić filtra powietrza gorącą wodą (o temp. powyżej 40oC). 101 AX0040 Port AC manual multi_lang.indd 101 27/11/2015 15:27 Wykrywanie i rozwiązywanie usterek Jeśli urządzenie nie działa prawidłowo, przed zgłoszeniem awarii do serwisu zaleca się wykonanie poniższych czynności. Klimatyzacja nie działa Przyczyny Rozwiązania Zasilanie jest wyłączone Włączyć zasilanie Awaria zasilania Poczekać na przywrócenie zasilania Bezpiecznik jest przepalony Sprawdzić bezpiecznik automatyczny, wymienić bezpiecznik (sprawdzić ponownie, a jeśli bezpiecznik zadziała ponownie – skontaktować się z elektrykiem) Urządzenie nie uruchamia się w ustawionym czasie uruchomienia. Poczekać lub usunąć pierwotne ustawienia. Urządzenie nie uruchamia się po naciśnięciu przycisku ON/OFF Przyczyny Rozwiązania Nie upłynęły trzy minuty od wyłączenia. Odczekać trzy minuty. Temperatura w pomieszczeniu jest niższa od temperatury nastawy. Ponownie ustawić temperaturę. Powietrze jest wydmuchiwane, ale chłodzenie jest niezadowalające. Przyczyny Rozwiązania Błędne ustawienie temperatury. Ustawić ponownie temperaturę. Ustawiona temperatura powinna być niższa od temperatury otoczenia. Filtr powietrza jest zatkany przez kurz. Oczyścić filtr powietrza. Wlot lub wylot powietrza jest ograniczony Usunąć przeszkodę. W pomieszczeniu, w którym pracuje klimatyzator, panuje bardzo wysoka temperatura. Uwzględnić dodatkowy czas na odprowadzenie ciepła odprowadzenie ciepła zmagazynowanego w ścianach, suficie, podłodze i meblach. Wydajność chłodzenia jest niewystarczająca. Potwierdzić wymaganą wydajność chłodzenia u sprzedawcy. Drzwi lub okna są otwarte. Zamknąć drzwi i okna. Hałas i drgania Przyczyny Rozwiązania Podłoże nie jest dostatecznie poziome lub płaskie. W miarę możliwości umieść urządzenie na płaskiej, równej powierzchni. 102 AX0040 Port AC manual multi_lang.indd 102 27/11/2015 15:27 Ostrzeżenie dotyczące utylizacji odpadów elektrycznych i elektronicznych Znaczenie symbolu przekreślonego pojemnika na śmieci: Nie należy wyrzucać urządzeń elektrycznych w postaci niesegregowanych odpadów komunalnych. Należy korzystać z osobnych punktów odbioru odpadów. W celu uzyskania informacji dotyczących dostępnych systemów odbioru odpadów należy skontaktować się z władzami lokalnymi. Jeśli urządzenia elektryczne są składowane na wysypiskach, może nastąpić przeciek niebezpieczne substancji się do wód gruntowych i przedostanie się ich do łańcucha pokarmowego, powodując uszczerbek na zdrowiu i utratę dobrego samopoczucia. W przypadku wymiany starych urządzeń na nowe sprzedawca jest prawnie zobowiązany do odebrania starego urządzenia w celu jego utylizacji co najmniej nieodpłatnie. Producent lub marka handlowa sprężarki Highly Meizhi Rechi Chłodziwo Nazwa oleju R410A R410A R410A 68HES-H lub odpowiednik ESTER OIL Vg74 NMOC Ze-Gles RB68EP lub odpowiednik 103 AX0040 Port AC manual multi_lang.indd 103 27/11/2015 15:27 Klimatyzator przenośny Instrukcja obsługi pilota zdalnego sterowania Opis przycisków Wyświetlanie trybu pracy Wyświetlanie prędkości wentylatora Wyświetlanie temperatury, godziny itp. Wyświetlanie nadmuchu wachlarzowego lub załączenia/wyłączenia Wyświetlanie funkcji UWAGA! Wszystkie powyższe elementy wyświetlane są po początkowym podłączeniu zasilania lub po przywróceniu zasilania. W czasie normalnego użytkowania na ekranie pilota zdalnego sterowania wyświetlane są tylko odpowiednie elementy. Gli apparecchi solo raffrescamento non hanno una funzione di riscaldamento o riscaldamento elettrico. I relativi tasti funzione del telecomando non sono attivi. Evitate di azionare questi tasti del telecomando. Uwaga Ilustracja przedstawia pilot uniwersalny, który zawiera wszystkie przyciski funkcyjne. Mogą one nieznaczne się różnić w zależności od modelu. 1. Przycisk «ON/OFF» Tym przyciskiem uruchamia się lub wyłącza klimatyzator. 2. Przycisk «SPEED» Wybór jednej z następujących prędkości: Niska (Low) > Średnia (Mid) > Wysoka (High) > Automatyczna (Auto) 104 AX0040 Port AC manual multi_lang.indd 104 27/11/2015 15:27 3. Przycisk «SWING» Pionowe łopatki kierujące nadmuchem mogą obracać się automatycznie w żądanym położeniu poziomym. Po ponownym naciśnięciu łopatki kierujące nadmuchem w pionie zatrzymają się wybranym położeniu. 4. Przycisk «TURBO» Przycisk używany tylko w trybie chłodzenia lub grzania. Po jego naciśnięciu prędkość wentylatora jest automatycznie ustawiana na bieg „wysoki”, a na wyświetlaczu pojawia się napis “TURBO”. Funkcja “TURBO” służy do szybkiego osiągnięcia maksymalnej temperatury chłodzenia lub grzania. 5. Przycisk «TIMER» Ustawienie czasu włączania przy użyciu programatora: a. Gdy pilot jest w wyłączony, nacisnąć przycisk TIMER. Na wyświetlaczu pojawi się napis “TIMER ON” oraz godzina zadziałania programatora. Ustawienia zmieniane są w przedziałach 0,5 godziny, w maksymalnym zakresie do 24 godzin. b. Godzinę uruchomienia programatora można ustawić przyciskami « » lub « ». Każde przyciśnięcie przycisku powoduje zwiększenie lub zmniejszenie ustawianego czasu o 0,5 godz. Powyżej dziesięciu godzin ustawiany czas będzie zwiększać się lub zmniejszać o 1 godzinę. c. Nacisnąć przycisk TIMER ponownie, aby ustawić zaprogramowane włączenia urządzenia. d. Można ustawić inną funkcję, aby zapewnić odpowiedni stan po włączeniu klimatyzatora (np. tryb, temperaturę, pracę ze zmianą kąta nadmuchu, prędkość wentylatora itp.). Wszystkie ustawienia będą wyświetlane na wyświetlaczu i zachowane. Gdy minie czas ustawiony na programatorze, klimatyzator rozpocznie automatycznie pracę zgodnie z wprowadzonymi ustawieniami. Ustawienie czasu włączania przy użyciu programatora: a. Gdy pilot jest w wyłączony, nacisnąć przycisk TIMER. Na wyświetlaczu pojawi się napis “TIMER OFF” oraz godzina zadziałania programatora. Ustawienia zmieniane są w przedziałach 0,5 godziny, w maksymalnym zakresie do 24 godzin. b. Godzinę uruchomienia programatora można ustawić przyciskami « » lub « ». Każde przyciśnięcie przycisku powoduje zwiększenie lub zmniejszenie ustawianego czasu o 0,5 godz. Powyżej dziesięciu godzin ustawiany czas będzie zwiększać się lub zmniejszać o 1 godzinę. c. Nacisnąć przycisk TIMER ponownie, aby ustawić zaprogramowane włączenia urządzenia. 105 AX0040 Port AC manual multi_lang.indd 105 27/11/2015 15:27 6. Przycisk «DISPLAY» Włącza lub wyłącza wyświetlacz LCD. 7. Przycisk « » lub « » Naciskając przycisk „+” lub „-” można ustawić zakres temperatury od 16°C do 32°C. 8. Przycisk «MODE» Umożliwia wybór różnych trybów pracy - po każdym naciśnięciu przycisku nastąpi zmiana trybu pracy. Na wyświetlaczu pojawia się następujący obraz: AUTO->COOL->DRY->HEAT->FAN->AUTO Uwaga: Niektóre modele wyposażone są wyłączne w funkcję chłodzenia, nie mają funkcji grzania. 9. Przycisk «SLEEP» Łopatki kierujące nadmuchem w poziomie mogą zmieniać kąt nadmuchu automatycznie. Jeśli użytkownik chce je zatrzymać w żądanym położeniu poziomym nadmuchu, po ponownym naciśnięciu przycisku łopatki kierujące nadmuchem w pionie zatrzymają się wybranym położeniu. 10. Przycisk «HEALTH» Włączanie lub wyłączanie funkcji Health (zdrowie)’. 106 AX0040 Port AC manual multi_lang.indd 106 27/11/2015 15:27 Stosowanie Praca w trybie automatycznym 1. Nacisnąć przycisk ON/OFF, aby uruchomić klimatyzator. 2. Nacisnąć przycisk MODE, wybrać tryb pracy automatycznej. 3. Wybrać prędkość wentylatora przyciskiem SPEED. Można wybrać następujące prędkości pracy wentylatora: LOW, MID, HIGH, AUTO (niska, średnia, wysoka, automatyczna). 4. Nacisnąć przycisk ON/OFF, aby uruchomić klimatyzator. *Tryb Cooling/Heating (chłodzenia/ogrzewania) (w niektórych modelach występuje tylko funkcja grzania) 1. Nacisnąć przycisk ON/OFF, aby uruchomić klimatyzator. 2. Nacisnąć przycisk MODE, wybrać tryb pracy Cooling (chłodzenie) lub Heating (ogrzewanie). 3. Nacisnąć przycisk « » lub « », by ustawić temperaturę. Temperaturę można ustawić w odstępach 1°C, w zakresie od 16 do 32 °C. 4. Wybrać prędkość wentylatora przyciskiem SPEED. Można wybrać następujące prędkości pracy wentylatora: LOW, MID, HIGH, AUTO (niska, średnia, wysoka, automatyczna). 5. Ponownie naciśnięcie przycisku powoduje wyłączenie klimatyzatora. Praca w trybie wentylacji 1. Nacisnąć przycisk ON/OFF, aby uruchomić klimatyzator. 2. Nacisnąć przycisk MODE, wybrać tryb pracy FAN (wentylator). 3. Wybrać prędkość wentylatora przyciskiem SPEED.. Można wybrać następujące prędkości pracy wentylatora: LOW, MID, HIGH, (niska, średnia, wysoka). 4. Nacisnąć przycisk ON/OFF, aby wyłączyć klimatyzator. Uwaga: W czasie pracy w trybie wentylacji nieaktywne jest ustawianie temperatury. Praca w trybie osuszania Uwaga 1. Nacisnąć przycisk ON/OFF, aby uruchomić klimatyzator. 2. Nacisnąć przycisk MODE, wybrać tryb pracy Dehumidify (osuszanie). 3. Nacisnąć przycisk « » lub « », by ustawić temperaturę. Temperaturę można ustawić w odstępach 1°C, w zakresie od 16 do 32 °C. 4. Wybrać prędkość wentylatora przyciskiem SPEED. Można wybrać następujące prędkości pracy wentylatora: LOW, MID, HIGH, AUTO (niska, średnia, wysoka, automatyczna). 107 5. Nacisnąć przycisk ON/OFF, aby wyłączyć klimatyzator. AX0040 Port AC manual multi_lang.indd 107 27/11/2015 15:27 Zakładanie baterii 1. Otworzyć pokrywę, przesuwając ją w kierunku wskazanym przez strzałkę na obudowie. 2. Włożyć dwie nowe baterie, umieszczając je zgodnie z odpowiednimi biegunami elektrycznymi (+ i -). 3. Załóż pokrywę. Uwaga 1. Skierować pilot w stronę odbiornika na klimatyzatorze. 2. Pilot powinien być nie dalej niż 8 metrów od odbiornika. 3. Zapewnić, że nie ma przeszkód na drodze między pilotem a odbiornikiem. 4. Nie należy upuszczać pilota ani rzucać nim. 5. Nie należy wystawiać pilota zdalnego sterowania na bezpośrednie działanie promieni słonecznych lub innych źródeł ciepła. 6. Używać dwóch baterii. 7. Wyjąć baterie z pilota, jeśli urządzenie nie jest używane przez dłuższy czas. 8. Jeżeli urządzenie nie reaguje na pilota należy wymienić baterie. 9. Zużyte baterie należy odpowiednio utylizować. Konstrukcja i dane techniczne mogą ulec zmianie withoutprior zawiadomienie do ulepszania produktu. Skonsultuj się z agencji sprzedaży lub producenta o szczegóły. 108 Informacje poprawne w chwili oddania do druku. AX0040 Port AC manual multi_lang.indd 108 27/11/2015 15:27 NL Handleiding voor de mobiele airconditioner Installatie- en bedieningshandleiding AX3001/1 – Alleen koeling AX3006/1 – Koeling en verwarming AX3002/1 – Alleen koeling AX3003/1 – Koeling en verwarming EU EU CH CH Inhoud Airconditioner 110Veiligheidsmaatregelen 112Beschrijving van de onderdelen 113Accessoires 114Bedieningspaneel AX0040 Port AC manual multi_lang.indd 109 115Werking 117Installatie 118Onderhoud 120 Problemen oplossen 121 AEEA-waarschuwing Afstandsbediening van de airconditioner 122 Beschrijving van de knoppen 125Gebruik 126Batterijen 27/11/2015 15:27 Veiligheidsmaatregelen Uw veiligheid en die van anderen is erg belangrijk. Deze handleiding bevat veel belangrijke veiligheidsaanwijzingen en er zijn ook veiligheidsstickers op de airco aangebracht. Lees altijd alle veiligheidsaanwijzingen en neem ze in acht. WAARSCHUWING Dit symbool wijst op mogelijk ernstig of fataal letsel. ATTENTIE Dit symbool wijst op mogelijk letsel of schade aan eigendom. WAARSCHUWING Dit apparaat mag worden gebruikt door kinderen van 8 jaar en ouder en door mensen met lichamelijke, zintuigelijke en mentale handicaps of onvoldoende ervaring en kennis, zolang ze onder toezicht staan of training hebben ontvangen over het veilige en juiste gebruik van het apparaat. Kinderen mogen niet met dit apparaat spelen. Dit apparaat mag alleen door kinderen worden gereinigd en onderhouden onder toezicht van een volwassene. De elektrische aansluiting van dit apparaat moet tot stand worden gebracht volgens de lokale wet- en regelgeving. Er moet een aardlekstroomonderbreker met een nominaal vermogen worden geïnstalleerd om mogelijke elektrische schokken te voorkomen.. Installeer de airco niet op een plaats waar brandbaar gas of brandbare vloeistoffen aanwezig zijn. Dit kan namelijk brand veroorzaken. Als het stroomsnoer beschadigd is, dient het vervangen te worden door de producent of de distributeur of door een vakbekwaam persoon. De specificatie van de zekering is AC250V T3.15AL. De benodigde spanning is 220 ~ 240 V. Het apparaat moet worden geïnstalleerd volgens de geldende wet- en regelgeving voor de bedrading. De stekker moet na de installatie eenvoudig toegankelijk zijn. Als de zekering van de PCB doorgeslagen is, 110 dient hij vervangen te worden door een zekering van het type F3.15A/250V. AX0040 Port AC manual multi_lang.indd 110 27/11/2015 15:27 Steek geen vingers of andere voorwerpen in de in- of uitlaten. De ventilator draait op hoge snelheid en zal letsel veroorzaken. Raak de draaiende lamellen niet aan. Uw vinger kan vastgeklemd raken, wat de aandrijving van de lamellen zal beschadigen. Probeer de airco nooit zelf te repareren. Alle reparaties moeten worden uitgevoerd door een vakbekwaam technicus die over de benodigde vaardigheden beschikt. Gebruik de airco niet tijdens onweer of wanneer het bliksemt. Schakel de netstroomschakelaar uit om te voorkomen dat het apparaat beschadigd raakt. Gebruik geen vloeibare of bijtende schoonmaakmiddelen om het apparaat te reinigen en zorg ervoor dat er geen water of andere vloeistoffen op worden gemorst, omdat dit de kunststofonderdelen kan beschadigen en een elektrische schok kan veroorzaken. Gebruik het apparaat niet in wasruimtes. ATTENTIE Richt geen koude lucht gedurende lange tijd op het lichaam. Reinig de airco met een zachte, droge doek. Gebruik geen chemische oplosmiddelen, insecticiden of brandbare sprays die de airco kunnen beschadigen. Nooit water direct op de airco aanbrengen. De airco moet worden gebruikt in een ruimte met gesloten ramen en deuren. Als er ramen of deuren open staan, kan de airco de gewenste temperatuur en vochtigheid niet goed handhaven. Als het luchtfilter erg vuil is, wordt de koeling of verwarming minder efficiënt. Reinig het luchtfilter regelmatig.. 111 AX0040 Port AC manual multi_lang.indd 111 27/11/2015 15:27 Beschrijving van onderdelen Vooraanzicht Bedieningspaneel Luchtuitlaat Vensters die signalen ontvangen Inkeping voor handvat Voorpaneel Luchtuitlaat Afstandsbediening Achteraanzicht Bovenste luchtinlaat Onderste luchtfilter Afvoeruitlaat Luchtuitlaat Afvoeruitlaat (alleen voor pompverwarmingsmodel) Onderste luchtfilter (achter het rooster) Stroomsnoer-uitlaat Onderste luchtinlaat Afvoeruitlaat onderste bak Bovenste luchtfilter (achter het rooster) Wieltjes Opmerking: De beschrijvingen in deze handleiding kunnen iets verschillen van de informatie in de brochure en van de eigenlijke apparatuur. Raadpleeg de informatie over het apparaat dat u hebt gekocht. Het bereik van de bedrijfstemperatuur van deze airco is 16 - 32oC op de koelingstand; 5 - 27oC op de verwarmingstand. 112 AX0040 Port AC manual multi_lang.indd 112 27/11/2015 15:27 Accessoires Onderdeel Naam van het onderdeel Hoeveelheid Uitlaatslangadapter en 1 adapter B (platte of ronde opening, afhankelijk van oder het model) Vensterschuifkit en bout Wanduitlaatadapter A (#) 1 Adapter B (ronde 1 opening) (#) Bout en moer 1 Afvoerslang (#) 1 Afstandsbediening en 1 batterijen Opmerking: Optionele onderdelen zijn aangeduid met een (#). Opmerking: Kies de knop van de afstandsbediening voor de bijbehorende functies op het display; niet alle knoppen hebben altijd een functie. 113 AX0040 Port AC manual multi_lang.indd 113 27/11/2015 15:27 Bedieningspaneel 4 3 Temperatuur Indicator 2 Ventilator • HIGH • MID • LOW Hoge snelheid Gemiddelde snelheid Lage snelheid Stand • COOL • HEAT • DRY • FAN Koeling Verwarming (koude wind-type zonder dit display) Ontvochtiger Ventilator 1 Zusatzfunktionen • TIMER Timer • SLEEP Slaapstand • SWING Draaifunctie Opmerking: Dit pictogram geldt voor alle knoppen en displays. Op basismodellen zijn niet allen functies en standen aanwezig. Functieknoppen 1 Druk op deze knop om de airco in of uit te schakelen. 2 of Druk op of om de ingestelde kamertemperatuur te verhogen of te verlagen. 3 Telkens wanneer u op deze knop drukt, wordt een stand geselecteerd. De volgorde is: COOL, dan HEAT, dan DRY en tot slot FAN. 4 Deze knop wordt gebruikt om de ventilatorsnelheid in te stellen. De volgorde is LOW, dan MID, vervolgens HIGH en weer terug naar LOW 114 Opmerking 1. De Timer-, Sleep-, Swing-functie, de Auto-stand en Autoventilatorsnelheid worden via de afstandsbediening geregeld, niet via het bedieningspaneel. 2. De overige functies op het bedieningspaneel zijn dezelfde als op de afstandsbediening AX0040 Port AC manual multi_lang.indd 114 27/11/2015 15:27 Werking WAARSCHUWING Als u onderstaande voorzorgsmaatregelen niet opvolgt, kan dit leiden tot een elektrische schok, brand of persoonlijk letsel. 1 De stekker moet in een stopcontact worden gestoken dat goed geïnstalleerd en geaard is. 2 Gebruik geen verlengsnoer of stekkeradapter voor dit apparaat. Voordat u de airco start • Kies een geschikte locatie, dicht in de buurt van een stopcontact. • Monteer de flexibele uitlaatslang en de verstelbare vensterschuifkit. • Steek de stekker in het stopcontact. • Schakel de airco in. Verwarming (modellen met alleen koeling hebben geen verwarmingstand) • Druk op de STAND-knop totdat HEAT (warm) wordt verlicht. • Druk op + en - om de gewenste temperatuur in te stellen. • Druk op de VENTILATOR-knop om de ventilatorsnelheid in te stellen. • Druk op de AAN/UIT-knop om de airco te starten. Druk opnieuw op de knop om de airco te stoppen Koeling • Druk op de STAND-knop totdat COOL (koel) wordt verlicht. • Druk op + en - om de gewenste temperatuur in te stellen. • Druk op de VENTILATOR-knop om de ventilatorsnelheid in te stellen. • Druk op de AAN/UIT-knop om de airco te starten. Druk opnieuw op de knop om de airco te stoppen. 115 AX0040 Port AC manual multi_lang.indd 115 27/11/2015 15:27 Ontvochtiger • Druk op de STAND-knop totdat DRY (droog) wordt verlicht. • De ventilator draait in deze stand op vaste snelheid. • Sluit alle ramen en deuren voor de beste ontvochtiging. • Druk op de AAN/UIT-knop om de airco te starten. Druk opnieuw op de knop om de airco te stoppen. Circulatie • Druk op de STAND-knop totdat FAN (ventilator) wordt verlicht. • Druk op de VENTILATOR-knop om de ventilatorsnelheid in te stellen. • Druk op de AAN/UIT-knop om de airco te starten. Druk opnieuw op de knop om de airco te stoppen. Timer • Druk op TIMER. • Druk op + en - om de timer in te stellen. Opmerking: ’Time off’ functioneert alleen wanneer de airco aan staat. ‘Time on’ functioneert alleen wanneer de airco uit staat. Condenswater verwijderen Wanneer de interne watertank vol is, wordt op het display ‘P1’ weergegeven. • Plaats de mobiele airco horizontaal in een grote ruimte, zodat de luchtuitlaten niet worden geblokkeerd. • Zorg voor een minimumspeling van 50 cm tussen de airco en muren of andere voorwerpen. • De helling mag niet meer zijn dan 10 graden van horizontaal, wanneer u de airco gebruikt en de kit plaatst. Afvoeruitlaat BELANGRIJK Dit water is geen drinkwater. 116 AX0040 Port AC manual multi_lang.indd 116 27/11/2015 15:27 Installatie Kies de beste locatie • Plaats de mobiele airco horizontaal in een grote ruimte, zodat de luchtuitlaten niet worden geblokkeerd. • Zorg voor een minimumspeling van 50 cm tussen de airco en muren of andere voorwerpen. • De helling mag niet meer zijn dan 10 graden van horizontaal, wanneer u de airco gebruikt en de kit plaatst. Mindestens 50 cm Mindestens 50 cm Opmerking:1. De airco mag niet in een wasruimte worden gebruikt. 2. De plug moet toegankelijk zijn wanneer de airco op zijn plaats staat. Installatie van de vensterkit De vensterkit is ontworpen voor de meeste standaard verticale en horizontale vensters. Het is echter mogelijk dat u sommige aspecten van de installatieprocedure voor bepaalde soorten vensters moet verbeteren of wijzigen. Raadpleeg afb. A en afb. B voor de minimum en maximum vensteropeningen. Opmerking: De bout en moer worden gebruikt om de vensterplaat te bevestigen. Horizontale venster Afb. B Afb. A Minimale vensteropening voor de kit: 67,5 cm; maximaal 125 cm Afb. C Verticaal venster Minimale vensteropening voor de kit: 67,5 cm; maximaal 125 cm Moer Bout 117 AX0040 Port AC manual multi_lang.indd 117 27/11/2015 15:27 Onderhoud Deze nieuwe airco zal vele jaren betrouwbaar functioneren. In dit deel leest u hoe de airco op de juiste wijze gereinigd en onderhouden wordt. We raden aan dat u contact opneemt met uw lokale distributeur voor de jaarlijkse onderhoudsbeurt. Deze onderhoudskosten zijn voor uw rekening. Het luchtfilter reinigen Als het luchtfilter bedekt is met stof, wordt de koelingcapaciteit gereduceerd. Reinig het luchtfilter om de twee weken, al naar gelang het gebruik. • Zet de stroom uit. • Trek het filterdeksel weg en verwijder het filter. • Stofzuig het filteroppervlak en was het luchtfilter zo nodig in warm zeepsop. U mag het luchtfilter niet in de vaatwasmachine of met chemische reinigingsmiddelen schoonmaken. Laat het filter helemaal drogen voordat u het terugplaatst. • Bevestig het luchtfilter aan het filterdeksel met de haken aan de binnenkant van het deksel. Zet het filterdeksel terug op zijn 1a 3c 2b plaats. Uitlaatleiding bevestigen 1a.Sluit de uitlaatslang aan door hem in de ronde adapter vast te draaien. Klem de slang en adapter vast op de luchtuitlaat van de airco. 2b.Sluit de juiste adapter aan op het andere uiteinde van de uitlaatslang. 3c.Bevestig het adapterelement aan een venster dicht in de buurt. Opmerking • De leiding kan tot 450 mm worden ingekort en tot 1800 mm worden verlengd. Het is beter om de leiding zo kort mogelijk te houden. • De uitlaat moet altijd aan de buitenlucht worden afgelaten. • Als de leiding te ver wordt uitgerekt of verbogen, zal de airco minder efficiënt koelen. FOUT! GOED! 118 AX0040 Port AC manual multi_lang.indd 118 27/11/2015 15:27 De airco reinigen • Voor alle veiligheid schakelt u de stroom naar de airco uit. • Veeg de airco met een droge doek schoon. • A ls de airco erg vuil is, veegt u hem schoon met een vochtige doek. Hinweis Entfernen Sie das Kondenswasser und stecken Sie den Stöpsel nicht wieder in das Ablassrohr, wenn Sie das Gerät längere Zeit nicht benutzen. WAARSCHUWING • Wrijf geen benzine, verdunner, andere chemicaliën, of vloeibare insecticiden op de airco om te voorkomen dat de verf afbladdert en de kunststofonderdelen barsten of verbuigen. • Probeer de airco nooit te reinigen door water direct op het oppervlak te gieten, omdat dit de elektrische onderdelen beschadigt en elektrische schokken kan veroorzaken. • Gebruik nooit heet water van meer dan 40oC om het luchtfilter te reinigen 119 AX0040 Port AC manual multi_lang.indd 119 27/11/2015 15:27 Problemen oplossen Voordat u hulp inroept, leest u eerst onderstaande aanwijzingen als de airco niet juist functioneert. Airconditioner functioneert niet Oorzaken Oplossingen De stroom staat uit. Schakel de stroom in. De stroom is uitgevallen. Wacht totdat de netstroom wordt hersteld. De zekering is doorgebrand. Controleer de stroomonderbreker, vervang de zekering. (test of de zekering opnieuw doorbrandt, zo ja, neem dan contact op met een elektricien) De opstarttijd wordt niet bereikt. Wacht of wis de originele instelling De airconditioner start niet wanneer u op de AAN/UIT-knop drukt Oorzaken Oplossingen Er zijn geen drie minuten verstreken nadat u de airco hebt uitgeschakeld. Wacht 3 minuten. De kamertemperatuur is lager dan de ingestelde temperatuur. Reset de temperatuur. Er wordt lucht uitgeblazen, maar de koeling is slecht Oorzaken Oplossingen Onjuiste temperatuurinstelling. Reset de temperatuur. De ingestelde temperatuur moet lager zijn dan de omgevingstemperatuur. De luchtinlaat- of uitlaat van de machine is verstopt Verwijder de verstopping. De airco functioneert in een zeer warme ruimte Wacht totdat alle opgeslagen warmte van muren, plafond, vloer en meubilair is verwijderd De airco heeft onvoldoende koelingcapaciteit Bevestig de benodigde koelingcapaciteit met uw leverancier. Die Kühlleistung ist ungenügend. Lassen Sie von Ihrem Händler die erforderliche Kühlleistung überprüfen. De deuren of ramen staan open. Sluit de deuren en ramen. Lawaai of trilling Oorzaken Oplossingen De ondergrond is niet egaal of plat genoeg. Plaats de airco zo mogelijk op een horizontale en egale ondergrond. 120 AX0040 Port AC manual multi_lang.indd 120 27/11/2015 15:27 AEEA-waarschuwing Betekenis van vuilnisbak op wieltjes met een kruis er doorheen Gooi elektrische apparatuur nooit met het huishoudafval weg. Gebruik alternatieve voorzieningen. Neem contact op met uw gemeente voor informatie over de beschikbare ophaaldiensten. Als elektrische apparatuur samen met het huishoudafval wordt begraven, kunnen gevaarlijke stoffen uitlekken en via het grondwater in de voedselketen terechtkomen, wat schadelijk is voor de gezondheid en het welzijn. Wanneer u een oud apparaat vervangt, is de winkelier wettelijk verplicht om het oude apparaat gratis van de hand te doen. Producent van de compressor of handelsmerk Koelmiddel Naam van de olie Highly R410A 68HES-H of equivalent Meizhi R410A ESTER OIL Vg74 Rechi R410A NMOC Ze-Gles RB68EP of equivalent 121 AX0040 Port AC manual multi_lang.indd 121 27/11/2015 15:27 Handleiding van de afstandsbediening van de mobiele airconditioner Beschrijving van de knoppen Bedrijfsstanddisplay Snelheidsdisplay Temperatuur-, tijddisplay, enz. Draaien- of AAN/UIT-display Functiedisplay Opmerking Alle bovenstaande displays worden weergegeven na de initiële activering of activering na uitschakeling. Tijdens de eigenlijke werking geeft het scherm van de afstandsbediening alleen gerelateerde informatie weer. De airco’s die alleen koelen hebben geen (elektrische) verwarmingsfunctie. Wanneer op deze functieknoppen van de afstandsbediening wordt gedrukt, gebeurt er niets. * Druk niet op deze knoppen op de afstandsbediening. Opmerking De afbeelding toont een algemene afstandsbediening compleet met alle functieknoppen. Deze kunnen iets verschillen, afhankelijk van het model. 1.«ON/OFF»-knop Druk op deze knop om de airco te starten of te stoppen. 2.«SPEED»-knop Selecteer de ventilatorsnelheid als volgt: Low > Mid > High > Auto 122 AX0040 Port AC manual multi_lang.indd 122 27/11/2015 15:27 3.«SWING »-knop De verticale lamellen kunnen automatisch draaien. Zodra u de gewenste horizontale richting hebt gekozen, drukt u opnieuw op de knop. De verticale lamellen stoppen op de gekozen stand. 4.«TURBO»-knop Druk alleen op deze knop wanneer de airco op koeling of verwarming staat. De snelheid van de ventilator wordt automatisch op HIGH gezet en op het display ziet u TURBO. De TURBOfunctie wordt gebruikt om snel de hoogste koeling- of verwarmingstemperatuur te bereiken. 5.«TIMER»-knop De ‘aan’ tijd van de timer instellen: a. Wanneer de afstandsbediening uit staat, drukt u op TIMER. Op het display ziet u ‘Time on’ en de timertijd. Het bereik van de instellingstijd is 0,5 tot 24 uur. b. U kunt op « »- of op « » X drukken om de timertijd te veranderen. Telkens wanneer u op de knop drukt wordt de tijd met 0,5 uur verhoogd of verlaagd, tot maximaal tien uur. Na tien uren wordt de ingestelde tijd met 1 uur per druk op de knop verhoogd of verlaagd, zodat u de gewenste tijd kunt instellen. c. Druk opnieuw op TIMER om de timer aan-functie te activeren. d. U kunt een andere functie instellen voor een geschikte stand nadat de airco is ingeschakeld (zoals de stand, temperatuur, draaien, ventilatorsnelheid). Op het display ziet u alle instellingen. Zodra de timer de ingestelde tijd bereikt, schakelt de airco automatisch over op de gekozen instellingen. De ‘uit’ tijd van de timer instellen: a. Wanneer de afstandsbediening aan staat, drukt u op TIMER. Op het display ziet u ‘Time off’ en de timertijd. Het bereik van de instellingstijd is 0,5 tot 24 uur. b. U kunt op « »- of op « » drukken om de timertijd te veranderen. Telkens wanneer u op de knop drukt wordt de tijd met 0,5 uur verhoogd of verlaagd, tot maximaal tien uur. Na tien uren wordt de ingestelde tijd met 1 uur per druk op de knop verhoogd of verlaagd, zodat u de gewenste tijd kunt instellen. c. Druk opnieuw op TIMER om de timer uit-functie te activeren 123 AX0040 Port AC manual multi_lang.indd 123 27/11/2015 15:27 6.«DISPLAY»-knop Hiermee wordt het display in- of uitgeschakeld 7.« »- of « »-knop Druk op + of op - om de temperatuur in te stellen van 16 tot 32°C. 8.«MODE»-knop Hiermee kunt u verschillende standen kiezen. De volgorde is als volgt: AUTO COOL DRY HEAT FAN AUTO. Opmerking: airco’s alleen voor koeling hebben geen verwarmingsfunctie * * * * * 9.«SLEEP»-knop 1.Druk op SLEEP, dan gaat het lampje knipperen. 2. Na instelling van deze slaapstand wordt de ingestelde temperatuur automatisch na 1 uur met 1°C verhoogd en na nog een uur opnieuw met 1°C. 3. Na instelling van deze slaapstand wordt de ingestelde temperatuur automatisch na 1 uur met 2°C verhoogd en na nog een uur opnieuw met 2°C. 4. De airco functioneert gedurende 7 uren in de slaapstand en stopt automatisch. Opmerking: druk op de MODE of op ON/OFF om de slaapstand te verlaten. 10. «SWING »-knop De horizontale lamellen kunnen automatisch draaien. Zodra u de gewenste verticale richting hebt gekozen, drukt u opnieuw op de knop. De horizontale lamellen stoppen op de gekozen stand. 11. «HEALTH»-knop Hiermee zet u de ‘Gezondheidsfunctie’ aan of uit. 124 AX0040 Port AC manual multi_lang.indd 124 27/11/2015 15:27 Gebruik Automatische werking •Druk op ON/OFF, dan schakelt de airco in. •Druk op MODE en kies de automatische stand. •Druk op SPEED om de snelheid van de ventilator te kiezen. De standen zijn LOW, MID, HIGH, AUTO. •Druk op ON/OFF, dan schakelt de airco uit. Koeling/verwarming (Airco’s alleen voor koeling hebben geen verwarmingsfunctie) •Druk op ON/OFF, dan schakelt de airco in. •Druk op MODE en kies de koeling- of verwarmingstand. •Druk op X of X om de temperatuur in te stellen. De instelling verandert telkens 1°C binnen het bereik van 16 - 32°C. •Druk op SPEED om de snelheid van de ventilator te kiezen. De standen zijn LOW, MID, HIGH, AUTO. •Druk opnieuw op ON/OFF, dan schakelt de airco uit. Ventilator •Druk op ON/OFF, dan schakelt de airco in. •Druk op MODE en selecteer de ventilatorstand. •Druk op SPEED om de snelheid van de ventilator te kiezen. De standen zijn LOW, MID, HIGH, AUTO. •Druk op ON/OFF, dan schakelt de airco uit. Opmerking: wanneer de airco op FAN staat, is de temperatuurinstelling niet geactiveerd. Ontvochtiger •Druk op ON/OFF, dan schakelt de airco in. •Druk op MODE en kies de ontvochtigerstand. •Druk op X of X om de temperatuur in te stellen. De instelling verandert telkens 1°C binnen het bereik van 16 - 32°C. •Druk op SPEED om de snelheid van de ventilator te kiezen. De standen zijn LOW, MID, HIGH, AUTO. •Druk op ON/OFF, dan schakelt de airco uit. 125 AX0040 Port AC manual multi_lang.indd 125 27/11/2015 15:27 Batterijen • Schuif het deksel open in de richting van de pijl. • Plaats twee nieuwe batterijen in het vakje en let op de goede richting van de plus- en minpolen. • Zet het deksel weer op zijn plaats. Opgelet •Richt de afstandsbediening op de ontvangstsensor van de airco. •Zorg ervoor dat er niet meer dan 8 meter afstand is tussen de afstandsbediening en de ontvangstsensor. •Zorg ervoor dat geen voorwerpen de signaaloverdracht tussen de afstandsbediening en de ontvangstsensor blokkeren. •Laat de afstandsbediening niet vallen en gooi niet met de afstandsbediening. •Leg de afstandsbediening niet in direct zonlicht of in de buurt van andere hittebronnen. •Gebruik twee batterijen. •Haal de batterijen uit de afstandsbediening als de airco lange tijd niet zal worden gebruikt. •Als de airco niet op de afstandsbediening reageert, vervangt u de batterijen. •Doe de batterijen altijd op milieuvriendelijke wijze van de hand. Het ontwerp en de specificaties kunnen zonder voorafgaande mededeling, voor verbetering van het product veranderen. Overleggen met de verkoop agentschap of de fabrikant voor meer informatie. 126 Informatie is correct bij het ter perse gaan. AX0040 Port AC manual multi_lang.indd 126 27/11/2015 15:27 127 AX0040 Port AC manual multi_lang.indd 127 27/11/2015 15:27 AX0040 11/15 ASPENPUMPS.COM/XTRA Follow us designed by engineers for engineers AX0040 Port AC manual multi_lang.indd 128 27/11/2015 15:27