1
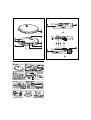
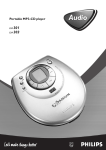
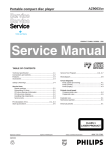
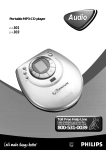
MP3-CD Player / FM Tuner
E
Return
your Warranty
Registration Card
within 10 days
S
For fast help, call us first!
1-800-531-0039
IM
If you have any problems, do not attempt
to return this product to the store.
CAUTION
RTAN
PO
T!
Read this manual first!
EXP7361
EE
WH
Y INS
User manual
Manuel d'utilisation
Manual del usuario
Use of controls or adjustments or performance
of procedures other than herein may result in
hazardous radiation exposure or other unsafe
operation.
ID
The set complies with the FCC-Rules, Part 15 and with 21
CFR 1040.10. Operation is subject to the following two
conditions:
1. This device may not cause harmful interference, and
2. This device must accept any interference received,
including interference that may cause undesired
operation.
MP3-CD Player / FM Tuner
PHILIPS CONSUMER ELECTRONICS
NORTH AMERICA
Knoxville, Tennessee 37914-1810, U.S.A.
Meet Philips at the Internet
http://www.philipsusa.com
EXP7361
CLASS 1
LASER PRODUCT
Canada
English
This digital apparatus does not exceed
the Class B limits for radio noise emissions from digital apparatus as set out in
the Radio Interference Regulations of the
Canadian Department of
Communications.
Français
Cet appareil numérique n'émet pas de
bruits radioélectriques dépassant les limites applicables aux appareils
numériques de Classe B prescrites dans
le Règlement sur le Brouillage
Radioélectrique édicté par le Ministère
des Communications du Canada.
IMPORTANT SAFETY INSTRUCTIONS
1. Read these instructions.
2. Keep these instructions.
3. Heed all warnings.
4. Follow all instructions.
5. Do not use this apparatus near water.
6. Clean only with a dry cloth.
7. Do not block any of the ventilation openings. Install in
accordance with the manufacturers instructions.
8. Do not install near any heat sources such as radiators, heat
registers, stoves, or other apparatus (including amplifiers) that produce heat.
9. Only use attachments/accessories specified by the manufacturer.
10.
Use only with a cart, stand, tripod, bracket, or table
specified by the manufacturer or sold with the apparatus. When a cart is used, use caution when moving the
cart/apparatus combination to avoid injury from tipover.
11. Refer all servicing to qualified service personnel. Servicing is
required when the apparatus has been damaged in any way, such
as if the power-supply cord or plug is damaged, liquid has been
spilled or objects have fallen into the apparatus, or when the apparatus has been exposed to rain or moisture, does not operate normally, or has been dropped.
12. Battery usage CAUTION – To prevent battery leakage which
may result in bodily injury, property damage, or damage to the unit:
● Install ALL batteries correctly, + and - as marked on the unit.
● Do not mix batteries (OLD and NEW or CARBON and ALKALINE,
etc.).
● Remove batteries when the unit is not used for a long time.
13. Apparatus shall not be exposed to dripping or splashing.
14. Do not place any sources of danger on the apparatus. (e.g. liquid
filled objects, lighted candles).
15. This product may contain lead and mercury. Disposal of these material may be regulated due to environment considerations. For disposal or recycling information, please contact your local
authorities or the Electronic Industries Alliance:
www.eiae.org.
EL 6475-E004: 03/12
2
1
QUICK START
MISE EN SERVICE RAPIDE
INCIO RAPIDO
English
REMOTE CONTROL AY3786
CONTROLS
CONTROLS ( see figure 1)
1 4.5V DC ................ jack for AC/DC adapter power supply
2 EXT BATT ............ jack for external battery supply
3 LOCK • UNLOCK... locks/ unlocks all buttons on the set only
4 p /LINE OUT ........ connect the remote control here and your headphones to
the remote control.
5 2;........................ switches the player on, starts or pauses CD play; stops CD
play, clears a program or switches the player off. Press
and hold 2; for 2 seconds to enter stop mode.
6
.................... switches radio on/off.
7 ∞ / §................. skips and searches CD tracks backwards/ forwards
............................ (FM) tunes to stations
8 •• ç••............ opens the CD lid
9 VOLUME +,- ...... adjusts the volume.
0 rechargeable battery compartment ............. inside the CD player.
The model & serial numbers are located inside the battery compartment.
CONTROLS ( see figure 2)
1 p ........................ 3.5 mm headphone jack.
2 Clip
3 LOCK•OFF ......... locks/ unlocks all buttons on the remote control only.
4 ∞ / §............... skips and searches backward/ forward tracks;
........................... (FM) tunes to stations
2; ...................... switches the player on, starts or pauses CD play; stops CD
play, clears a program or switches the player off. Press and
hold 2; for 2 seconds to enter stop mode.
ALBUM + / - ..... MP3/WMA-CD only :
– selects the previous or next album
– skips backward or forward
5 VOLUME +/- .... adjusts the volume
6 DBB ................... switches the bass enhancement on and off
7 PROG ................. – programs tracks;
– programs FM station presets.
8 MODE ................ selects playback options;
........................... to select and enter the display function, press and hold
MODE for 3 seconds.
9 Display
0 FM...................... switches radio on/ off.
Using the remote control
The remote control allows you to command all the functions on the player.
1 Firmly connect the remote control to p/ LINE OUT on the set.
2 Firmly connect the headphones to the jack p on the remote control.
3 On the remote control press and hold 2; to start playback.
➜ playback starts and the track number is displayed for CD Audio. Filename
is displayed for MP3/ WMA CDs.
4 Adjust the volume and sound on your remote control.
Supplied Accessories:
1 x headphones HE570
2 x rechargeable batteries, AY3365
1 x external battery case, AY3380
1 x remote control, AY3786
1 x AC/ DC adapter, AY3170
1 x CD-ROM with free Musicmatch Jukebox software
1 x pouch, AY3268
Helpful Hint: Replace the batteries as soon as
is displayed.
The display backlight only lights up if you are operating the controls on the
remote control.
BATTERIES
(supplied or optionally available)
You can use the following batteries with this CD-player:
◆ Normal batteries type LR6, UM3 or AA,
◆ Alkaline batteries type LR6, UM3 or AA (preferably Philips)
• PHILIPS rechargeable batteries, type AY3365
Recharging the ECO-PLUS NiMH battery on board
Recharging works only on players supplied with the rechargeable ECO-PLUS
NiMH battery AY3365.
1 Insert the rechargeable ECO-PLUS NiMH battery AY3365.
2 Connect the power adapter to the 4.5V DC jack of the player and then to the
wall outlet.
➜
Charging appears.
Helpful Hint:
• Recharging stops after a maximum of 7 hours, or when you start playback.
– Old and new batteries should not be combined.
– Remove batteries in the order ( 1, 2, 3) as shown if
they are empty or if the player is not going to be used
for a long time.
◆ For battery case only
3 When the battery is fully recharged,
and Batt Full appears in the dis-
play.
Helpful Hint:
Inserting rechargable batteries
1 Push •• ç•• to open the CD lid.
2 Open the battery compartment (inside the CD player) and insert 2 x PHILIPS
rechargeable batteries, type AY3365.
Battery indication
The approximate power level of your batteries is shown in the remote control display.
– It is normal for the batteries to become warm during recharging.
– If the batteries become too warm, recharging will be interrupted for
approximately 30 minutes.
– To ensure proper recharging on board, take care that contacts are clean.
– Use only the ECO-PLUS NiMH battery AY3365.
Battery two-thirds full
Handling instructions
• Recharging already charged or half-charged batteries will shorten their
lifetime. We therefore recommend that you let the rechargeable ECO-PLUS
NiMH battery run till it is completely empty before you recharge it.
Battery one-third full
• To avoid a short circuit, do not let the battery touch any metal object.
Battery full
Battery low or empty. When the batteries are low,
beep tone sounds repeatedly.
flashes, and the
Batteries contain chemical substances, so they should be disposed
of properly.
• If the battery becomes empty soon after recharging, then either its contacts
are dirty or it has reached the end of its lifetime.
USING THE EXTERNAL BATTERY CASE
(AA batteries not included)
The external battery case allows you to:
• increase playtime by using fully charged rechargeable batteries and new AA
alkaline batteries at the same time.
• have a convenient backup power supply if your
rechargeable batteries are flat. Operate the set on
just 2 x AA batteries instead.
1 Push on PUSH/ OPEN to open the battery case,
and lift off the case cover as indicated.
AC/ DC ADAPTER
(supplied or optionally available)
For best playback quality connect the set to AC/DC. Use
only the AY3170 adapter (4.5 V/ 300 mA direct
current, positive pole to the center pin). Any other product may damage the player.
1 Make sure the local voltage corresponds to the AC/
DC adapter’s voltage.
2 Connect the AC/ DC adapter to the 4.5V DC jack of the player and to the wall
outlet.
2 Insert 2 alkaline batteries, type AA/ LR6/ UM3 with
correct polarity, and replace the case cover.
3 Connect the battery case to the EXT BATT jack on the set.
Helpful Hint: Always disconnect the adapter when you are not using it.
Helpful Hint:
– When using the external battery case, avoid jolting the player and swinging the
case. Sudden movements may cause damage to the external battery connection
and pose a hazard.
– This player includes a motor mechanism that extends battery lifetime by varying the motor’s rotation rate. Motor noise may increase when the rate changes.
If the noise bothers you, use the AC/DC adapter to power the player. The motor
rotation rate does not change when operating on AC power.
ABOUT MP3/ WMA
MP3/ WMA music files
The music compression technology MP3 (MPEG Audio Layer 3) and WMA
(Windows Media Audio) reduces the digital data of an audio CD significantly
while maintaining CD-like sound quality. With MP3/ WMA you can record up to
10 hours of CD-like music on a single CD-ROM.
How to get music files
Either download legal music files from the internet to your computer hard disk
or create them from your own audio CDs. For this, insert an audio CD into
your computer´s CD-ROM drive and convert the music using an appropriate
encoder software. To achieve a good sound quality, a bit rate of 128 kbps is
recommended for MP3 music files, and 96 kbps for WMA files.
How to make a CD-ROM with MP3/ WMA files
Burn the music files from your computer hard disc on CDR or CDRW using your CD
burner. For more information, you can use the by-packed EXPANIUM CD-ROM (free
MUSICMATCH Jukebox software) to create your own MP3 CD.
Helpful Hint:
– Make sure that the file names of the MP3 files end with .mp3 and WMA files
and with .wma.
– Total number of music files and albums: around 500
– For more information on creating music files, please check out the free
MUSICMATCH Jukebox software on the by-packed CD-ROM.
– Make sure your WMA files are not protected.
Windows Media Audio® is a registered trademark of Microsoft Corporation.
MUSICMATCH Jukebox® is a registered trademark of Musicmatch, Inc.
Battery playtime
Average playing time of 2 alkaline AA and/ or AY3365 rechargable batteries
under normal conditions:
2 x AA alkaine + Ni-MH
2 x AA alkaine, Power Saving mode
2 x Ni-MH, Power Saving mode
Audio CD MP3/ WMA
65 hr
102 hr
46 hr
70 hr
20 hr
30 hr
FM Tuner
108 hr
73 hr
30 hr
CD PLAYER AND CD HANDLING, p
• Do not touch the lens A of the CD player.
• Do not expose the unit, batteries or CDs to humidity,
rain, sand or excessive heat (caused by heating
equipment or direct sunlight).
• You can clean the CD player with a soft, slightly
dampened, lint-free cloth. Do not use any cleaning
agents as they may have a corrosive effect.
• To clean the CD, wipe it in a straight line from the center toward the edge
using a soft, lint-free cloth. A cleaning agent may damage the disc! Never
write on a CD or attach a sticker to it.
• The lens may cloud over when the unit is moved suddenly from cold to warm
surroundings. Playing a CD is not possible then. Leave the CD player in a
warm environment until the moisture has evaporated.
• Active mobile phones in the vicinity of the CD player may cause malfunctions.
• Avoid dropping the unit as this may cause damage.
Headphones HE570, LINE OUT
• Connect the remote control to p/ LINE OUT jack of the
player and your headphones to the remote control.
• p/ LINE OUT can also be used for connecting the
player to your HiFi system (with a signal lead) or to
your car radio (with a cassette adapter/ FM stereo transmitter or signal lead).
In both cases, the volume of the player must be set to volume level 22.
IMPORTANT!
Hearing safety: listen at a moderate volume. using headphones at high volume can
impair your hearing.
Traffic safety: do not use headphones while driving or cycling as you may cause an
accident.
All trademarks used are owned by their respective owners.
PLAYING A CD
PLAYING A CD
With this set you can play
– all pre-recorded audio CDs (CDDA)
– all finalized audio CDRs and CDRWs
– WMA/MP3-CDs (CD-ROMs with WMA/MP3 files)
1 Push the open ••ç•• slider to open the CD lid.
2 Insert a disc, printed side up, by pressing gently on the
disc´s center so that it fits onto the hub. Close the lid
by pressing it down.
3 Press and hold 2; briefly to start playback.
➜ Display shows EXPANIUM. "Reading CD" will be
displayed only if the reading time exceed 2 sec
(MP3/WMA). For CD Audio, the current track number is displayed. For an MP3/WMA track, file name is displayed.
4 Press 2; briefly to interrupt playback.
➜ The time where playback was interrupted blinks.
5 To resume playback press 2; briefly again for MP3/
WMA CDs.
➜ Display shows your selected display mode, or [Filename]
7 Press and hold 2; 2-3 seconds to seconds again to
switch off the CD player.
8 To remove the disc, hold it by its edge and press the
hub gently while lifting the disc.
0
Helpful Hint:
– After pressing 2; it may take some time until the first MP3/WMA track is
played.
– By default, playback begins from the exact point when last switched off.
– If a CD-Recordable (CD-R) or a CD-Rewritable (CD-RW) is not recorded
properly, Unfinalized CD is displayed, indicating that the CD has not been
finalized. In that case, use FINALIZE on your CD recorder to complete the
recording.
– When playing a CD, please note that it can take 3-5 seconds after pressing
2; for sound reproduction to start.
– Playback will stop if you open the CD lid.
– While the CD is paused, the elapsed play time flashes in the display.
6 Press and hold 2; 2-3 seconds to stop playback.
➜ The total number of tracks, the track
types (CD, WMA,MP3), the number of albums on an
WMA/MP3-CD and the total playing time (of an
audio disc only) are displayed.
VOLUME, BEEP, DBB
VOLUME
Volume adjustment
• Adjust the volume by pressing VOLUME +/–
(up or down).
DBB
Bass adjustment (remote control only)
1 Press DBB once or more to select the bass enhancement options:
➜
moderate bass enhancement is activated.
➜
strong bass enhancement is activated.
2 Press DBB again to switch off the bass enhancement options.
➜
or
disappears.
BEEP
Acoustic feedback (remote control only)
Acoustic feedback is a beep signal that is heard when
buttons on the set or remote control are pressed. Also,
when the set or remote control is in pause mode or the
battery power is low, it beeps at intervals.
1 Keep DBB pressed for 2 seconds to switch the beep either on or off:
➜ Beep on is displayed: Beep is switched on.
➜ Beep off is displayed: Beep is switched off.
SELECTING A TRACK AND SEARCHING
Selecting and searching on all discs
Selecting a track during playback
• Briefly press ∞ or § once or several times to skip to the
beginning of the current, previous or subsequent track.
➜ Playback continues with the selected track.
Searching for a passage during playback
1 Keep ∞ or § pressed to find a particular passage in backward or forward direction.
➜Searching starts and playback continues at a low volume.
For CD audio tracks the search speeds up after 2 seconds.
2 Release the button at the desired passage.
➜ Normal playback continues.
Helpful Hint: During
searching is only possible within the current
track.
Selecting on WMA/MP3-CDs
Selecting an album during playback
• On the remote control, briefly press ALBUM + / – once
or several times to skip to the first track of the current,
previous or subsequent album.
➜ The first track of the selected album is played.
Selecting a track during playback
1 Keep ALBUM + / – pressed to skip quickly to previous or subsequent MP3
tracks.
➜ Skipping starts and speeds up after 5 seconds.
2 Release the button at the desired track.
➜ Playback continues with the selected track.
Helpful Hint: To skip from track to track at low speed, use ∞ or §.
SELECTING DIFFERENT PLAY OPTIONS − MODE
(remote control only)
1 Press MODE repeatedly during playback or stop to select either:
–
Shuffle album once (MP3/WMA only)
–
Shuffle all tracks of a disc once (MP3/WMA/ CDDA)
–
Shuffle repeat album (MP3/WMA)
–
Shuffle repeat all tracks of disc
(MP3/WMA/CDDA)
–
repeat one track ( MP3/WMA/CDDA)
–
repeat Album ( MP3/WMA)
–
• During playback, press and hold MODE 3 seconds to activate the display
option mode. Press MODE briefly again, once or more to change and select
your display option:
– Filename: the track´s file name
– Album: the album´s folder name
– Title: the track´s title (if this ID3 tag information is available)
– Artist: the artist´s name (if this ID3 tag information is available)
– the track type and the elapsed playing time
– Playtime: the elapsed playing time, album number and track number.
Helpful Hint:
repeat all tracks ( MP3/WMA/CDDA)
2 Playback starts in the selected mode after 2 seconds.
3 To return to normal playback, press MODE repeatedly until the play option icons e.g.
appear.
DISPLAY INFORMATION
(for WMA/MP3 tracks only)
and
The ID3 tag is part of an WMA/MP3 file and contains various track information
such as the track´s title or the artist´s name. Complete the ID3 tag information
with your MP3 encoder software before burning the WMA/MP3-CD.
dis-
ESP/ POWERSAVING MODE
With a conventional portable CD-player you might have experienced that the
music stopped e.g. when you were jogging. The Electronic Skip Protection (ESP)
prevents loss of sound caused by light vibrations and shocks. Continuous playback is ensured. However ESP does not prevent playback interruptions during vigorous running. It also does not protect the unit against any damage caused
by dropping!
• To give you optimum playback and help save battery energy, the powersave
mode is selected automatically.
1 ➜ No
indication:
– when player operating on AC adapter power. ESP option deactivated.
Optimum sound quality available.
2 ➜
:
in battery operation when ESP mode is automatically activated.
– when the player is free from vibration, powersaving is activated.
3 ➜ OOPs:
maximum ESP time exceeded. Playback skips but will resume optimum
playback when the player is free from vibration.
840 SEC MAGIC ESP
Average playing times when ESP skip protection activated:
840s
420s
180s
WMA (64kbps, equivalent of up to 3 tracks)
MP3
(128kbps, equivalent of up to 3 tracks)
Audio CD
PROGRAMMING TRACK NUMBERS
(remote control only)
You can select up to 50 tracks and store them in the memory in a desired
sequence. You can store any track more than once.
1 Select a track with ∞ or §.
2 Press PROG to store the track.
➜
is shown and P with the number of stored
tracks is displayed.
PROG
3 Select and store all desired tracks in this way.
4 If necessary press 2; to stop normal playback. Press 2; to start playback of
the program.
➜ Playback of the program starts. PROG indication appears.
Clearing the program
1 If necessary press 2; for 2-3 seconds to stop playback.
2 Press 2; 2-3 seconds to clear the program.
Cleared is displayed once.
Helpful Hint:
The program will also be cleared if you interrupt the
power supply or open the CD lid or if the set switches
off automatically. After storing 50 tracks, Prog full is
displayed.
FM TUNER
FM TUNER
Switching radio on/off
Storing radio stations
• Press FM/
once or more to switch the radio on/
off.
➜ Display shows briefly Radio on or Radio off
respectively.
You can store up to 30 radio stations. Select a preset
number 1-30.
Use the remote control or set to tune to any FM station
automatically or manually.
2 Press PROG while PROG is blinking to confirm the
Tuning to radio stations automatically
1 Tune to a desired radio station and press PROG
briefly.
storage.
➜ PROG, the FM frequency and the preset number of
the stored station are displayed.
1 Press and hold ∞ or § for at least 2 seconds.
3 Store all desired stations this way.
2 Repeat searching until you find the desired radio station.
Already stored stations can be recognized by a preset
number.
➜ Display shows briefly Searching.The radio tunes
to a station with sufficient strength and radio play
starts. The FM frequency is displayed.
Helpful Hint:
Tuning to radio stations manually
1 Keep ∞ or § pressed.
2 Release ∞ or §, then briefly press ∞ or § again
when you are close to the desired frequency.
3 Briefly press ∞ or § repeatedly until you reach the
desired frequency.
➜ Radio play starts. The FM frequency is displayed.
• To switch from radio play to CD play, press 2;.
• Press
to switch the radio off.
Tuning to a stored radio station
1 Press ALBUM + / - repeatedly if necessary to select
the preset number of the desired radio station.
➜ Radio play starts. The FM frequency and the preset number (P1-30) of the stored station are displayed.
Helpful Hint:
– To improve reception: The headphone wire is used as an FM antenna.
If necessary, move it for optimum reception.
– Tuner operation is not affected if you open the CD lid to change a disc.
LOCK
TROUBLESHOOTING
You can lock the buttons of the set/ remote control respectively by switching the
slider to LOCK. With LOCK activated, you can avoid
accidental activation of other functions.
WARNING: Under no circumstances should you try to repair the unit yourself as
this will invalidate the warranty. If a fault occurs, first check the points listed,
before taking the unit for repair. If you are unable to solve a problem by following
these hints, consult your dealer or service center.
1 Switch the slider to LOCK to activate LOCK.
➜ All buttons are locked. Hold is shown when you
press any button on the set / remote control
respectively. If the set is locked and switched off, Hold will be shown
only when pressed 2; .
2 To deactivate LOCK, switch the slider to OFF or UNLOCK.
The CD player has no power, or playback does not start
• Check that your batteries are not dead or empty, that they are inserted
correctly, that the contact pins are clean.
• Your adapter connection may be loose. Connect it securely.
The indication Please insert CD is displayed
• Check that the CD is clean and correctly inserted (label-side upward).
• If your lens has steamed up, wait a few minutes for this to clear.
The indication Unfinalized CD is displayed
• CD-RW (CD-R) was not recorded properly. Use FINALIZE on your CD-recorder.
ENVIRONMENTAL INFORMATION
• All redundant packing material has been omitted. We have done our utmost to
make the packaging easily separable into 4 materials: paper, PET, PE and PS.
• Your set consists of materials which can be recycled if disassembled by a
specialized company. Please observe the local regulations regarding the
disposal of packing materials, dead batteries and old equipment.
The indication Hold is on and/or there is no reaction to controls
• If LOCK is activated, then deactivate it.
• Electrostatic discharge. Disconnect power or remove batteries for a few seconds.
The CD skips tracks
• The CD is damaged or dirty. Replace or clean the CD.
•
,
or PROG is active. Switch off whichever is on.
No sound or bad sound quality.
• pause might be active. Press 2;.
• Loose, wrong or dirty connections. Check and clean connections.
• Volume might not be appropriately adjusted. Adjust the volume.
• Strong magnetic fields. Check player’s position and connections. Also keep
away from active mobile phones.