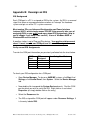
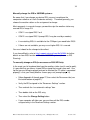
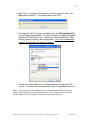
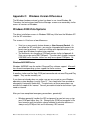
1
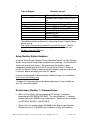
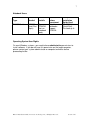
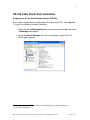
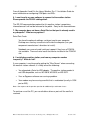
Heavy Weather 1.1 Installation Guide
© La Crosse Technology, Inc. All rights reserved.
Version 1.50
2
Table of Contents
I.
Overview, Requirements and Planning . . . . . . . . . . . . . page
3
II.
RS-232 Cable (Serial Port) Installation . . . . . . . .
8
III.
Appendix A – Reassign a COM Port . . . . . . . . . . . . . . .
27
IV.
Appendix B - Reassign an IRQ . . . . . . . . . . . . . . . . . . .
29
V.
Appendix C – Windows Version Differences . . . . . . . .
32
VI.
Appendix D – Frequently Asked Questions . . . . . . . . .
34
HW 1.1 Installation Guide, La Crosse Technology, Inc., All Rights Reserved.
Version 1.50
3
Heavy Weather Pro 1.1 Installation Guide1
Licensing Summary
The HeavyWeather Pro 1.1 software necessary to transfer Weather Station
Professional data to your PC is licensed to you at no charge with qualifying
purchase of any of the following 35/3600 Series hardware models: WS-3510,
WS-3512, and WS-3610. You may install it on one PC, and if desired, the same
owner may install one additional copy on one notebook. Reasonable backups of
the software may be made for disaster recovery purposes. If you transfer the
hardware to a new owner, you must uninstall and transfer the software CD with
the unit, safely destroying, to the reasonable extent possible, related backup
media.
This statement is a summarized version of the license. If you have further
questions, please contact La Crosse Technology Customer Support at 1-888211-1923.
System Requirements
La Crosse Technology software is supported only on Windows computer
systems. Full support is provided without charge during the one year weather
station hardware warranty period on PC operating systems for which Microsoft,
the publisher of Windows, maintains active service and support. Therefore, as of
08/2011, our supported versions are as follows:
Type of Support
Full Support
Windows Version
Windows 7/SP1 Any 32-bit editions
Vista/SP2 Any 32-bit editions
Windows XP Professional SP3 32-bit
Windows XP Media Center SP3
Windows XP Home SP3
Windows XP Tablet 2005 SP3
Limited support is provided on Windows operating systems for which Microsoft
has discontinued active support or for which features limit our ability to meet your
needs. 2 Limited support means that we will answer product functionality
questions, but cannot resolve operating system-related issues on a version we
did not design the product for use on.
1
HeavyWeather 1.1 software and WS-3510, WS-3512 and WS-3610 all registered to La Crosse
Technology, Inc. All rights reserved.
2
Weather stations are not designed for server, network, mulit-user or virtualized use. Any use is a Limited
Support situation.
HW 1.1 Installation Guide, La Crosse Technology, Inc., All Rights Reserved.
Version 1.50
4
Type of Support
Limited Support
Not Supported
Windows Version
Windows 2008 Server R2 (32-bit)
Windows 2003 Server R2 or SP2 (32bit)
Network, multi-user or virtualization
64-bit versions of Windows 7/Vista
Windows 2000 Server SP4
Windows 2000 Professional SP4
Windows 98 (prior to 2nd Edition)
Windows 98 SE
Windows ME
Windows NT SP6a (any type)
For additional details on Microsoft’s Operating System Lifecycle Policy,
please refer to
http://www.microsoft.com/windows/lifecycle/default.mspx. Specific
discontinuation dates for Windows support are available from the
Windows Lifecycle FAQ links.
Setup Weather Station Hardware
Using the Touch Screen Weather Center Operation Manual* for your Weather
Station, or the Quick Setup Guide included in your package, start the weather
station unit and related sensors. We recommend the weather station
components be operational without PC connection for at least 2-3 days to
ensure the Weather Station hardware functions properly and you understand
its features before you begin your initial PC upload.
If you do not have product documentation, additional copies are available at
www.lacrossetechnology.com.
*A copy of the Operation Manual (hardware) document is also available on
your CD, see section below.
Review Heavy Weather 1.1 Documentation
•
Make sure the title on the accompanying CD contains a reference
beginning with WS-3500 or WS-3600. The HeavyWeather 1.1 software
operates all series 35/3600 series workstations. Specifically these models
are WS-3510, WS-3512, and WS-3610.
•
Please verify the model number WS-#### on the back of your Weather
Station to ensure it is 35/3600 series hardware (usually on the battery
HW 1.1 Installation Guide, La Crosse Technology, Inc., All Rights Reserved.
Version 1.50
5
compartment cover). It is imperative you use the correct series
software.
3
•
Insert the accompanying WS #### CD in your DVD or CD drive. The
HeavyWeather installation screen should auto-start. The version to the
right of the logo should be a 3500 or 3600 series version. The exact
screen may vary a bit by weather station model:
•
Notice in particular the button(s) available in the right column. You may
click on any <Language> button or View button to open electronic copies
of the manuals.
•
At minimum, please review the Operation Manual (hardware) and this
Installation Guide before proceeding with software installation.
•
If you do not have a CD, or it does not match your weather station model,
then please download a new version of the HeavyWeather 1.1 software
from www.lacrossetechnology.com. If you cannot download, contact La
Crosse Technology Customer Support at 1-888-211-1923 for information
on replacement CDs.
•
Alternatively, you can download a current version of the
HeavyWeatherPro V1.1 software from http://www.heavyweather.info.3
Reminder: 3610 software runs the WS-3510 or WS-3512 models.
HW 1.1 Installation Guide, La Crosse Technology, Inc., All Rights Reserved.
Version 1.50
6
Plan for PC Communication Mode
All weather station 35/3600 Series models supported by the HeavyWeather 1.1
software come with an RS-232 (9-pin) serial port communication cable4. Use of
this cable is required to upload data from the weather station to your computer.
Please check your PC (usually in back) to verify that it has a serial port installed.
If the computer has a serial port, it will look like a rounded rectangle with 9 pins
protruding inside the frame:
Many newer PCs no longer have a serial port. If you cannot locate a serial port,
depending on your system, there are relatively simple upgrades you may be able
to install to support serial communication (see next page or Appendix D:
Frequently Asked Questions, item #7).
Caution: If you are not proficient with computer hardware, please consult a
qualified technician5 before investing in a solution. Please remember to verify
carefully the operating system supported by each new hardware component you
intend to purchase to ensure it matches your system.
We cannot provide you with complete instructions on how to buy and install the
necessary hardware upgrades, nor can we provide support on these
components. We can only provide a general concept summary as to what
hardware upgrade options are most commonly used and might be available.
Desktop Users
Communication Hardware
Type
Needed
How it
Installs
RS-232 Serial
Open slot
inside PC
Serial port
card (9pin)
Consider
before
Investment
May need help
to install.
HeavyWeather
Installation
Guide Used
RS-232 Cable
(Serial Port). This
book, p. 8.
4
The RS-232 communication for La Crosse Technology weather stations uses a proprietary communication
protocol. Design data will not be released.
5
e.g. professional computer technicians may carry an A+ Certification.
HW 1.1 Installation Guide, La Crosse Technology, Inc., All Rights Reserved.
Version 1.50
7
Notebook Users
Communication
Type
Hardware
Needed
How it
Installs
RS-232 Serial
PCMCIA
Serial Port
(9-pin)
Open
PCMCIA
slot on
notebook
body
Consider
before
Investment
Not all
notebooks
support
PCMCIA.
HeavyWeather
Installation
Guide Used
RS-232 Cable
(Serial Port).
This book, p. 8.
Operating System User Rights
On most Windows systems, you need to have administrative permissions to
install software. If you do not have this permission on the target computer,
please contact your system administrator or computer technician before
proceeding further.
HW 1.1 Installation Guide, La Crosse Technology, Inc., All Rights Reserved.
Version 1.50
8
RS-232 Cable (Serial Port) Installation
Preparing the PC for Serial Communication (RS-232)
All examples are provided using Windows XP Professional SP2. See Appendix
C if you use a different version of Windows.
•
Right click on the My Computer icon (usually on your desktop) and select
the Manage menu option.6
•
Select the Device Manager item in the left window, so that the list of
device types appears.
6
Alternatively, you can enter Device Manager via Start|Settings|Control Panel|Administrative
Tools|Computer Management.
HW 1.1 Installation Guide, La Crosse Technology, Inc., All Rights Reserved.
Version 1.50
9
•
Click on the plus sign on the Ports item to expand content. This
will show you which communication ports (COM ports) are available
for use on your computer.
•
COM ports are usually assigned to COM 1-4 by your operating
system, with COM1 being the most commonly available physical
port. (Note: If you use an internal modem or other serial device, the system will
also assign it a COM port, in which case two COM parts may show in Device
Manager, even if you only found one physical port on the PC).
Note: Your weather station must use COM ports 1-8. Windows XP, Windows
2000 or Vista may assign a COM port higher than 1-8. If so, see Appendix A for
changing a COM port assignment.
•
Use the chart below to record your computer’s COM port
assignments. Make note of the COM port you wish to use for
your Weather Station.
COM
Port
Item Using Com Port
Note: Users on Windows 98SE/ME should see Appendix B for
IRQ verification instructions.
•
Connect the serial cable to your PC serial port (using the 9-pin
connection).
HW 1.1 Installation Guide, La Crosse Technology, Inc., All Rights Reserved.
Version 1.50
10
HeavyWeather 1.1 Software Installation
Note: If the CD was removed previously, re-insert it to re-start the installation screen.
•
If the CD does not auto-start:
o select My Computer, find the CD drive, then right click on the drive
and select Explore on the menu. Try a double click on “autorun”.
o If that fails, open the \HW folder and then open the correct language
folder. Double-click on the either Setup.exe or Install.exe found on
the root of the CD (depending on your weather station model).
Begin Installation
If you haven’t already done so, verify that the WS #### version to the right of the
logo reflects a 35/3600 series software product. (You should already have
verified that the WS-#### on the back of your weather station is a 3500 or 3600
series model).
•
If prompted, select the desired language (German, English or French) and
click the OK button.
•
Then select the Install button in the HeavyWeather Pro PC Software section
of the screen.
HW 1.1 Installation Guide, La Crosse Technology, Inc., All Rights Reserved.
Version 1.50
11
•
After a brief delay, you should see the HeavyWeather installation “Welcome”
window. Select Next.
Note: The 3610 model designation will show on the Welcome screen regardless if you
are installing for a WS-3510 or WS-3512.
•
Select Next.
.
Note: We do not recommend that you change any HeavyWeather path entries as there
are certain tasks dependent on the default locations. The size of the installation is small,
and it will not consume much space on drive C.
HW 1.1 Installation Guide, La Crosse Technology, Inc., All Rights Reserved.
Version 1.50
12
•
Accept the defaults on the program shortcuts screen and select Next.
•
Proof-read your selections (as below) and select Install.
•
The software will display progress screens during installation.
HW 1.1 Installation Guide, La Crosse Technology, Inc., All Rights Reserved.
Version 1.50
13
•
When the message for completing installation comes up, select Finish.
•
Next click on the Red X (upper right corner of window) to close the
Heavy Weather software installation CD. You may remove the CD
from the drive and store it in the protective CD case.
•
A desktop icon should now be available for use of the product.
Select the icon with a double-click.
HW 1.1 Installation Guide, La Crosse Technology, Inc., All Rights Reserved.
Version 1.50
14
•
You will see the main screen of the software (without weather
data).
•
If your PC assigned your serial port to COM1, then you will notice
Wind and/or temperature data fill in quickly on WS-3610 models.
Note: WS-3510 users do not receive wind or rain data. WS-3512 users do not
receive temperature, humidity or rain data. These users can verify the Rel Pressure
area for data.
Even if you display data quickly, you should continue on and verify the basic
software configurations.
HW 1.1 Installation Guide, La Crosse Technology, Inc., All Rights Reserved.
Version 1.50
15
•
Find the icons in the toolbar at the top of the HeavyWeather screen.
Place your mouse at the yellow ? mark, and double-click to open
the Help File.
(Continued)
HW 1.1 Installation Guide, La Crosse Technology, Inc., All Rights Reserved.
Version 1.50
16
•
Notice the “Contents” entry on the left side of the Help screen. Find
section 5.0 on the right side for the “Basic Settings of the Heavy Weather
Pro 3610 Software”. Follow the directions in each portion of Section 5 to
configure your software.
(Continued)
HW 1.1 Installation Guide, La Crosse Technology, Inc., All Rights Reserved.
Version 1.50
17
•
Pay particular attention to section 5.2! The COM port configured
in the Options window must match the one you verified in Device
Manager for the weather station’s use. (Hint: This information is
likely recorded in the chart provided on page 9.)
Note: The other options can be set as desired later using the Help file on screen. In
7
particular you will want to set the Recording Interval (for which the base stores and
reports data) and the Units section.
7
Recording Interval is not displayed unless the base station is connected to your PC.
HW 1.1 Installation Guide, La Crosse Technology, Inc., All Rights Reserved.
Version 1.50
18
•
Again, once your COM port is correct, you should begin to see data
display in the application Window. The exact weather details
displayed will vary according to the features supported in the model
you purchased and the types of sensors you have activated.
At minimum, all series 35/3600 users should have an entry in the
Rel Pressure area (for barometric pressure data).
Users of WS-3510 and WS-3610 should also display Indoor
Temperature data if the PC serial connection is communicating.
Note: Please allow up to 72 hours for your weather station to collect sufficient outdoor
data to display all data types supported in the software (exact features vary by model).
HW 1.1 Installation Guide, La Crosse Technology, Inc., All Rights Reserved.
Version 1.50
19
Additional Configurations
The full software user Manual is contained in the HTML Help file. Examples of
content covered:
•
You have the option to view weather information as graphics or
data, set alarms, etc.
•
In Extras|Options, you will want to review the Units of measure
tab to ensure they reflect data in the measurement language you
prefer.
•
You can organize and graph your data with the HeavyWeather
Review module.
Additional Software Modules
HeavyWeather Review
HeavyWeather Review helps you graph the data uploaded to the PC from the
weather station.
This software was automatically installed as you installed HeavyWeather for
series 35/3600 weather stations. Details on how to use HeavyWeather Review
module start in the “Storage & Data Processing” section of the HTML help file
(see pp 23-25 for instructions to access the on-line help file as help functions
similarly in Review and Publisher).
Note: Please keep your template and graph files stored in the folders where HeavyWeather
Review saved them, as the software is location-dependent. You can and should, of course, make
backup copies of this material in a different location.
HeavyWeather Publisher
Users of WS-3510 and WS-3610 can install HeavyWeather Publisher (optional).
This software allows you to upload your weather data to a personal or public site
(via ftp), or e-mail it to one or more pre-defined address(es).
To install Publisher, re-insert the installation CD. It will re-start the main software
installation menu.
HW 1.1 Installation Guide, La Crosse Technology, Inc., All Rights Reserved.
Version 1.50
20
Note; The main installation screen for models WS-3610 and WS-3510 look slightly different, but
the instructions for both are the same.
•
Locate the Weather Publisher Software heading in the middle of the
screen.
•
Select the Install button.
•
After a brief delay, you should see the HeavyWeather Publisher
“Welcome” window Select Next.
HW 1.1 Installation Guide, La Crosse Technology, Inc., All Rights Reserved.
Version 1.50
21
Note: We do not recommend that you change any HeavyWeather Publisher path entries as
there are certain tasks dependent on the default locations. The size of the installation is
small, and it will not consume much space on drive C.
•
Select Next
•
Accept the defaults on the program shortcuts screen and select Next.
HW 1.1 Installation Guide, La Crosse Technology, Inc., All Rights Reserved.
Version 1.50
22
•
Proof-read your selections (as below) and select Install.
•
The software will display progress screens during installation.
•
When the message for completing installation comes up, select Finish.
HW 1.1 Installation Guide, La Crosse Technology, Inc., All Rights Reserved.
Version 1.50
23
•
A desktop icon should now be available for use of the product. Select
the HeavyWeather Publisher icon with a double-click.
The instructions for use of the HeavyWeather Publisher software are
found in the online help. When the main screen opens, find the ? on the
menu. Select the Help entry from the pull down menu.
•
Use the HeavyWeatherPublisher Help file that comes up to configure
and operate the software.
HW 1.1 Installation Guide, La Crosse Technology, Inc., All Rights Reserved.
Version 1.50
24
Alternatively, you can save a copy of the Publisher software manual on
your hard drive. To do so, find the View button on the main installation
screen (which should still be up on your screen behind Publisher). It can
be printed, if desired.
Note: The references to requiring HeavyWeather 2.0 are not applicable to series
35/3600 weather stations. HeavyWeather Publisher works with HeavyWeather 1.1 data,
but is installed to C:\Heavyweather because the Publisher module is the same for both
series of HeavyWeather software.
HW 1.1 Installation Guide, La Crosse Technology, Inc., All Rights Reserved.
Version 1.50
25
Now select File|Save A Copy to place a copy of the manual on your hard
drive for reference in or outside of the Publisher application. You can
print a copy of the manual.
If you do not have Adobe Reader version 7 or later installed, you may get
a warning message. Since you cannot edit the manual, you may select
OK to acknowledge the message.
You may select any location to save a copy of the manual as a .pdf file.
Continue the prompts on screen to find a location you will remember, then
click on Save to write the file to disk.
The “Save a Copy” window will close after writing the file. After you have
saved the manual:
HW 1.1 Installation Guide, La Crosse Technology, Inc., All Rights Reserved.
Version 1.50
26
•
Click on the Red X (upper right corner) to close the Adobe Reader
software.
•
Click on the Red X of the installation screen to close it, as well.
•
Remove the CD from the drive and store it in the protective CD case.
HW 1.1 Installation Guide, La Crosse Technology, Inc., All Rights Reserved.
Version 1.50
27
Appendix A: Reassign a COM Port
•
Right click on the My Computer icon and select Manage.
•
Find Device Manager in the left side of the screen.
•
Select the + sign in Ports (COM & LPT) to expand entries.
•
Find the port you wish to re-assign. Right click on it and select Properties
(or double-click).
•
Select the Port Settings tab.
•
Then select the Advanced Button.
HW 1.1 Installation Guide, La Crosse Technology, Inc., All Rights Reserved.
Version 1.50
28
•
Open the COM Port Number drop down (lower left corner).
•
You may select any COM port between 1 and 8 that does not show “(in
use)” beside it. Note: If there are none available, you will need to consult your
computer technician to free up a port.
•
Select OK to close the window.
•
Then select OK to close the Properties window.
•
You will need to reboot the computer to register your changes.
•
Device Manager should now show the new port number.
•
Remember to update your chart of registered COM ports on page
9.
•
You need to check if the change in COM port resulted in a change
in IRQ (see Appendix B). Note: This is usually only an issue on Windows
98SE/ME systems.
HW 1.1 Installation Guide, La Crosse Technology, Inc., All Rights Reserved.
Version 1.50
29
Appendix B: Reassign an IRQ
IRQ Background
Each COM port in a PC is assigned an IRQ by the system. An IRQ is a reserved
signal that allows a new communication resource to “interrupt” the hardware
system and get use of the PC’s system resources.
Most modern PCs use Advanced Configuration and Power Interface
features (ACPI), which simply means 2000/XP/Vista generally take care of
assigning IRQs so you rarely need worry about IRQ assignments (skip to
end of chapter if you have a rare conflict). Users of Windows 98SE or
Windows ME need to read on.
A weather station is not a Plug and Play device. Your weather station cannot
share! It must have its own COM port and it’s own IRQ assigned.
Verify current IRQ Assignments
Transfer the COM port information you previously collected into the chart below.
COM
Port
IRQ
Assigned
Item Using Com Port
To check your IRQ configuration for a COM port:
•
Open Device Manager. To do so on 98SE/ME systems, click Start, find
Settings, click Control Panel, then System. Select the Device Manager
tab.
•
Now double click to expand the System Devices branch. Find the COM
port for which you wish to verify the IRQ. Right click on it and select
Properties (or simply double-click on the entry).
•
Select the Resources tab.
•
The IRQ assigned the COM port will appear under Resource Settings. It
is the entry labeled IRQ.
HW 1.1 Installation Guide, La Crosse Technology, Inc., All Rights Reserved.
Version 1.50
30
Manually change the IRQ in 98SE/ME systems:
Be aware that if you change any device IRQ, you must reconfigure the
companion software so it calls the device correctly. Therefore generally, you
choose the weather station as the assignment to change.
Most commonly, in manual changes you would assign the weather station any
unused IRQ in range 2-5:
•
COM 1 is assigned IRQ 2 or 4
•
COM 2 is assigned IRQ 3 (except IRQ 1 may be used by a modem)
•
if no matching IRQ # is available for the COM port, you would take IRQ 5.
•
If those are not available, you may use a higher IRQ if it is unused.
You must reboot for the change to take effect.
If you have difficulty, refer to http://support.microsoft.com/kb/182604 for further
details on how IRQs function in Windows 98SE/ME systems (known as IRQ
Steering).
To manually change an IRQ (in rare cases on 2000/XP/Vista):
In the event you fail to upload data from the weather station (and it used to work),
it is possible that you have a shared IRQ assigned that cannot share well. One
tip that you are failing to upload (and you’ve checked the PC cable is connected
properly) is that your HeavyWeather screen greys out (example page 14).
•
Follow Appendix A through page 27, then select the Resources tab (see
illustration bottom of page 31).
•
Verify the IRQ assigned in the “Resources Settings” section.
•
Then uncheck the “use automatic settings” box.
•
Then double click on the IRQ entry.
•
Then select the Change Setting button.
•
If your computer will allow you, you can then edit the IRQ number
assigned entry in the Resource Settings section.
HW 1.1 Installation Guide, La Crosse Technology, Inc., All Rights Reserved.
Version 1.50
31
•
Most XP users, however, will generate a system error that states, “No
Modifications Allowed”. This control comes from ACPI.
•
To complete an ACPI change, you would select the Settings Based On
entry and open the drop down. You may have other configuration options
listed that ACPI will let you use. Watch the “Conflicting device list” box
carefully (below) as you try out configurations. Only use a configuration
for which the message “No conflicts” appears.
•
You do not need to reboot to use IRQ configuration changes on ACPI
systems. For other manual configurations, you should reboot before use.
Note: If at this point you are still unable to assign a separate functional IRQ to the weather
station, you will need to consult a computer technician. ACPI is powerful and a very useful
feature. Modification to it’s properties is beyond the scope of this document.
HW 1.1 Installation Guide, La Crosse Technology, Inc., All Rights Reserved.
Version 1.50
32
Appendix C: Windows Version Differences
The Windows hardware wizard system has been in use since Windows 98.
Therefore, the basic wizard and Device Manager screens are reasonably similar
across all versions of Windows.
Windows 2000/Vista Systems
The driver installation screens in Windows 2000 vary little from the Windows XP.
Use the XP instructions.
The screens in Vista have a few differences:
•
•
Vista has a new security feature known as User Account Control. As
you follow the XP instructions, you may be interrupted with requests for
permission to continue. If you are installing with reputable drivers, you
simply give Windows the permission required.
The mechanics for changing a COM port remain similar to Appendix A.
Vista can assign up to 256 COM ports. The rules don’t change, however.
A 35/3600 series weather station can only be assigned COM ports 1-8.
Windows 98SE/ME Series
Windows 98SE/ME have the earliest Plug and Play software support. Microsoft
has discontinued operating system support for these versions.
A weather station and the 9-pin COM port connection do not need Plug and Play
support. They can be manually set.
If you have not already done so, make sure you are current on your Windows
operating system backups (usually Drive C). You should also have created an
emergency startup disk (boot disk). The mechanics of these precautions are
outside the scope of this manual. Consult your administrator or technician if you
need assistance.
After you have completed emergency precautions, generically:
•
Windows generally handles the IRQ assignment for you, but may assign
your COM port higher than 1-8. Changing the COM port assigned is the
most common post-installation change needed for weather stations so
always verify COM port first and if necessary, IRQ second.
HW 1.1 Installation Guide, La Crosse Technology, Inc., All Rights Reserved.
Version 1.50
33
•
While not common, if you experience or suspect IRQ conflicts, Windows
98/ME are covered in Appendix B.
HW 1.1 Installation Guide, La Crosse Technology, Inc., All Rights Reserved.
Version 1.50
34
Appendix D: Frequently Asked Questions
This section contains updated Frequently Asked Questions on the WS-35/3600
series systems written since the original HeavyWeather Pro Help file manual was
published.
1. Why has my weather system stopped transmitting the outdoor data?
The lack of PC upload data is not always a computer issue. A basic reset on the
weather station may be necessary to re-synchronize it before further evaluation
of your PC issues. In short, the weather station must contain data to upload.
Most commonly a battery issue has occurred. Batteries can weaken under
outdoor or adverse conditions. Contact can also become disrupted (e.g.
component dropped).
All electronic circuit boards in weather displays (base unit) contain a capacitor,8
which retains a minimal bit of power even when batteries are removed. That
results in an incomplete reset when you change batteries. The 35/3600 series
has a synchronization routine to reconnect the display with the sensors when you
restart the weather station.
With fresh batteries, please attempt the following restart procedure:
•
Remove batteries from the thermo-hygro (outdoor) sensor, then
disconnect and reconnect the sensor cables.
•
Wait at least 1 minute, and reinsert the batteries in the sensor. Be sure to
use a new, quality alkaline battery (heavy duty and rechargeable types
should be avoided).
•
Return to the display and tap the bottom area of the LCD. Select setup
and choose next until Factory Reset is shown. Select confirm and follow
the prompts on the screen. Note you will be asked to Remove Battery
even if running on A/C power only. Please remove the power source
(batteries or a/c) and reinstall.
Do not press any other buttons for AT LEAST 30 minutes while the station
completes its startup sequence.
8
Capacitors are common; your PC, cordless phone, etc. have them.
HW 1.1 Installation Guide, La Crosse Technology, Inc., All Rights Reserved.
Version 1.50
35
2. What 3rd party Windows software products are compatible with LTC
Weather Stations?
La Crosse Technology does not guarantee 3rd party compatibility of other
vendor’s software products. The 3rd party vendor is responsible for that testing.
Any licensing fees required to use a 3rd party software application with a La
Crosse Technology weather station are your responsibility.
For your convenience, we do a basic content review before posting the vendor’s
links. At this time, the 3rd party vendors we are aware of that will support La
Crosse Technology weather station communication with a PC are:
•
Weather Display is published by Weather Display at http://www.weatherdisplay.com
•
Virtual Weather Station is published by Ambient Weather at
http://www.ambientweather.com. Please be aware you need to install Heavy
Weather software to use Virtual Weather.
rd
Note: To our knowledge, 3 party support is limited to the WS-3610 model.
If you decide to use 3rd party software, all software support issues should be
directed to the 3rd party publisher of the product at the web sites listed above.
3. Does La Crosse Technology have software for my Mac or Linux PC?
La Crosse technology weather stations do not support MAC or Linux at this time.
New development in the 3600 series is not planned, as our replacement product
is the 2800 series.
We are aware of releases reporting compatibility with the 2300 series weather
stations on a Mac. We have not reviewed them:
•
Weather Tracker posted a beta release at http://www.afterten.com/
•
Weather Display is published by Weather Display at http://www.weatherdisplay.com and lists support for Mac OSX.
For Linux users, the 3rd party vendors we were aware of appear to have
withdrawn offerings. Market share for Linux desktops have declined in
commercial product use.
La Crosse Technology does not guarantee 3rd party compatibility of other
vendor’s software products. The vendor is responsible for that testing and
support. Any licensing fees required to use a 3rd party software application with
a La Crosse Technology weather station are your responsibility.
HW 1.1 Installation Guide, La Crosse Technology, Inc., All Rights Reserved.
Version 1.50
36
4. As directed, I’m checking the COM port in Windows, but it is asking for
the Port Communications settings? What is this?
Different communications devices use different speeds to communicate via the
serial port. You must set that speed correctly.
La Crosse Technology Weather Stations use the Windows default port settings:
Bits per Second 9600
Data Bits
8
Parity
none
Stop Bits
1
Flow Control
none
Additional details on COM port connection issues are available in the new Heavy
Weather Pro 1.1 Installation Guide (this book) available at
http://www.lacrossetechnology.com.
5. I’ve installed my serial adapter without incident. However, I cannot
upload data? How do I verify which COM port is available for use with
Heavy Weather?
Note: a physical port located on the back of the PC is a 9 pin Connection. The operating system
generally assigns it to COM1.
To determine which COM Port your workstation is on:
•
Find My Computer (icon on the desktop or in start menu).
•
Right-Click My Computer and select Manage.
•
Click on Device Manager.
•
Move to the right screen and scroll down until you see Ports| COM and
LPT Double click.
•
You should see COM Ports listed with numbers after them [e.g.
Communications Port (COM 1).
•
Double click the COM Port (e.g. COM 7). This will bring up a
Communications Port Properties Box. Click the Port Settings Tab, Click
Advanced. In the lower Left corner, you should see the Com port listed.
•
Click the Drop Down and select Com 1, 2, 3, 4, 5, 6, 7 or 8. If they are all
”(in use)”, see your computer technician before changing.
Computers with Windows XP use Advanced Configuration and Power Interface
(ACPI). That means XP can change COM or IRQ assignments after installation.
HW 1.1 Installation Guide, La Crosse Technology, Inc., All Rights Reserved.
Version 1.50
37
Consult Appendix A and B in the Heavy Weather Pro 1.1 Installation Guide for
more information on configuring COM ports and IRQs.
6. I want to write my own software to connect to the weather station.
Please provide the RS-232 cabling detail.
The RS-232 communication protocol for this weather station is proprietary
information and it will not be released to the public. Sorry for the inconvenience.
7. My computer does not have a Serial Port or that port is already used in
my computer? What are my options?
Serial Port Cards
You have the option of adding a serial port card to your computer.
Desktop users can buy a card to install inside the computer (use your
component manufacturer’s directions to install).
Notebook users can only add serial port support if they have a PCMCIA
slot available. There are serial cards that can be installed in the PCMCIA
slot.
8. I installed my weather station, and now my computer crashes
frequently? What do I do?
If your computer is crashing and/or getting the "Blue Screen" when connecting
the weather station software, it is likely one of the following:
•
You attempted a Serial-to-USB adapter. The weather station product is
not USB compatible, such as WS-3610, WS-3510, or WS-3512.
•
Virus or Spyware software are causing a problem.
•
Your modem may be causing a conflict that is undetected (usually in COM
port or IRQ).
Note: See response to the previous question for additional tips and known issues.
To continue use of the PC, you can disable a driver or port until the conflict is
resolved.
HW 1.1 Installation Guide, La Crosse Technology, Inc., All Rights Reserved.
Version 1.50
38
9. I’m running Windows XP. If I open Heavy Weather from a command
prompt I get an error. What is wrong??
The 16-bit subsystem error you're seeing is caused by one or more missing or
corrupted Windows system files. For more information on this error and
instructions to fix it, please visit:
http://support.microsoft.com/default.aspx?scid=kb;en-us;324767&Product=winxp
10. When I select the Heavy Weather program icon, I receive error
message. What do I do?
You may have a corrupted installation. Please follow this procedure to re-install
the software properly.
If you have installed HW Publisher you will need to uninstall that as well. Open
Publisher, select extras, options and uncheck the 2 boxes at the bottom. If you
do not have Publisher installed disregard this reference.
Heavy Weather Uninstall
•
Go to your Control Panel, select Add/Remove Programs, Remove
anything related to Heavy Weather (e.g. HeavyWeather Pro 3610).
•
Close Control Panel and look on your desktop. If any Heavy Weather
icons remain right click and delete them.
•
Go to Start, My Computer and click on Local disk C or whatever your "C"
drive is called.
•
Find the folder call Program Files, double click to open it.
•
Find the Heavy Weather folder and right click to delete it.
•
Go Back to your "C" Drive and find the Program Files folder. Then find
the Heavy Weather folder within. Right click to delete it.
•
Find your Windows Folder, double click to open.
•
Find your Temp folder double click to open.
•
Go to Edit, Select All. Then go to File and Delete. Yes to delete all.9
•
Close out of everything and restart your computer.
9
The \temp directory is a work area for copies of work in progress. Deleting the \temp directory is a
normal Windows cleanup task and does not affect your saved work.
HW 1.1 Installation Guide, La Crosse Technology, Inc., All Rights Reserved.
Version 1.50
39
•
Reinstall Heavy Weather only. Connect your weather station and see if it
works. When it is working you can install Publisher.
11. When I open Heavy Weather, the window is too big for the monitor
screen. How do I adjust this?
When your weather software screen is too big for your monitor, you need to have
your display set to 96 dpi.
This is found on the advanced tab under display settings. Using a larger size
(such as 120) will cause the display problem you're seeing.
12. How can I reset MIN/MAX temperature on the computer?
To reset individual MIN/MAX values, follow these steps:
•
Double click on the min/max value on the Heavy Weather program while
your base station is connected to your computer.
•
Click on the Reset button. The min/max value will reset to current values,
0.00 or dashes, dependent on the value. Please Note this will also reset
the base station.
13. How do I transfer Heavy Weather 1.1 data to Excel for graphs and
charts?
Please refer to your Heavy Weather Pro Help file manual for more details. In
general:
•
In Heavy Weather 1.1 main window, in the left hand column, double-click
on the history file name that you wish to export. (If you do not have a list in
the left, click View, History Files).
•
Go to FILE and select EXPORT AS TEXT. Create a file name in the pop
up box. Please note the location of this file e.g.: C:\Program
Files\HeavyWeather\january.
•
Open Excel. Select File, Open. When the open box appears, on the
bottom under FILES OF TYPE select TEXT FILES.
•
On the top where it says LOOK IN, select the file location e.g. C:\Program
Files\HeavyWeather.
•
With the Heavy Weather folder open, you should see the text file you just
created (january).
HW 1.1 Installation Guide, La Crosse Technology, Inc., All Rights Reserved.
Version 1.50
40
•
Select that file and a 3 step Wizard will appear. On the first screen
choose DELIMITED. Then select Next.
•
On the second screen under Delimiters select SEMICOLON. Note how
you have nice neat columns in the Data Preview?
•
Click Next, and the last box will appear. No need to change anything
unless you would like the date formatted differently. Click finish. Your data
should appear in Excel. You may need to adjust the cell width.
14. There are “spikes” of rain on my history file. What causes this?
This can be caused be radio frequency interference or loss of signal while
connected to the computer.
When your weather station is connected to the computer while loss of signal from
the sensors, or a restart occurs, there can be a spike in rainfall on the computer
history file. (Often 70-80 inches). Please close the Heavy Weather first when
resetting the weather station and transmitter. This can also occur during loss of
power or connection during a storm.
Once the rain value is recorded to the history file you will need to start a new
history file edit the history file (WS 3610).
15. Please explain how the Weather Station stores data versus the PC
history?
The Heavy Weather program automatically records all the weather data from the
current period onwards to form a history of the weather events. The recording
interval can be set from 1 minute to up to 68 hours in the history section (default
setting 1 hour) together with the option of recording a next set of data. The next
set of data option can be used for example if the user set the initial recording
interval to every 1 hour and required the next set of data for in 5 minutes time,
the program would then initiate recording of the weather data in 5 minutes before
reverting to the previous setting of 1 hour. However based on the previously
given example, due to the mass communication of weather data and high
frequency transmission from the sensors to the base station to the PC and back
again, it is possible that the next set of data recording i.e. 5 minute interval will be
missed and will not in fact be executed in exactly 5 minutes time as will be seen
from the history file.
HW 1.1 Installation Guide, La Crosse Technology, Inc., All Rights Reserved.
Version 1.50
41
From the main Heavy Weather window, the history section will show the file
name used to save the weather data together with the date and time and the total
number of sets of data recorded. Each set of data consists of pressure, indoor
temperature, indoor humidity, outdoor temperature, outdoor humidity, dew point,
wind chill, wind speed, wind direction, total rain, time and date. The user can also
select to record a new history file at anytime by changing the history file or revert
to any saved history file that had been previously saved. The initial history file
name is history.dat. If a previously saved history file is used again, the current
recording interval will be regarded as the latest setting and all new data will be
recorded into that file (see 8.0 Settings below for working detail). The history file
can be displayed in a window parallel in running to the Heavy Weather program.
If desired the saved files can be saved as text files and opened in other formats.
•
It is recommended that you rename the history file to a easily
understandable name (not history, history 1, history 2, etc) and change the
file at least quarterly. Previous history is saved and can be retrieved at any
time.
•
If the base station has not been connected to the computer and is storing
data, when you connect to the computer, it should download the saved
dated at the interval selected by the computer. If 5 minute intervals are
selected, it will retrieve 1 random reading from the base station in 5 minute
intervals.
16. I can’t upload data to my PC and don’t know what to do next. What
information do I send in for technical support?
Please include the following responses in an email to
[email protected].
• How are you connecting to the computer? Are you connecting with the 9
Pin Serial cable provided or with something in addition to or in place of the
9 Pin Serial cable? If you are using something in addition to the 9 pin
serial cable provided, what brand is it? Is it Windows Certified? Does it
come with it’s own driver disk?
• What operating system, including Service Pack, do you have on your
computer?
• Did the Software load without errors? If there were errors what are they?
• What is the software name on the top left Header Bar of the Software
when opened on the computer?
• Do you have the software for other Active sync/Hot sync devices (e.g.
PDA) loaded on this computer?
HW 1.1 Installation Guide, La Crosse Technology, Inc., All Rights Reserved.
Version 1.50
42
•
•
•
•
•
•
What Model is your Weather Station? The model number will start with a
WS followed by 4 numbers and possibly letters.
How long have you had the Weather Station?
Has the Weather Station ever connected to the computer?
Describe exactly what you see on the computer screen. Can you attach a
screen shot?
If it worked previously, did you add software or hardware, move the
computer, of have a lightening storm or power outage about the time it
stopped connecting?
Are you a Ham radio operator? Are there large transformers near you?
17. Everything seems to work in HeavyWeather Review except the Time
and date are always several hours ahead and the wind chill data looks
incorrect. What does this mean?
The current version of Weather Review uses GMT for all time stamps. The
incorrect wind chills are caused by a bug; both of these issues have been
reported to our developers. Updates will be posted at www.heavyweather.info
when available.
18. How do I Email weather images from Heavy Weather Publisher?
To email a weather image, simply click on the "Export" tab of the main Publisher
window and enter the data in the spaces provided for the email fields as follows:
"Internet Connection":
Choose "Direct Connection" if you have a high-speed internet connection
such as DSL, cable or satellite. Choose "Dial Up Connection" if you use a
standard phone line and your computer's modem. You will need to type in
the dial-up number you use in the field to the right.
"Type and Interval":
1. Choose "Email" if you choose to upload you weather image to send a
message and image by email.
2. In the "First Start Date" field, choose the date which you choose to
begin the report of your weather image.
3. In the "First Start Time" field, choose the time which you choose to
begin the report of your weather image.
4. In "Export Interval" choose the number of minutes between updates of
your current weather image. The interval can be between 60 and 1440
minutes.
"Sender":
In the "SMTP" server field, input your email service provider name by
prefacing by the letters smtp." (Example: smtp.yahoo.com). Use all lower
case letters/characters for this line.
HW 1.1 Installation Guide, La Crosse Technology, Inc., All Rights Reserved.
Version 1.50
43
"Username":
Type the username you use through your service provider (ISP) to access
the account. Please assure the name used is correct with appropriate
upper and lower case characters.
"Password":
Type the password you use through your service provider (ISP) to access
the account. Please assure the name used is correct with appropriate
upper and lower case characters.
"Name":
In this field, simply type your name as you wish for it to appear in the
header of the email.
"Email"
In this field, simply type your email address.
"Recipient List"
In this field, type each of the email addresses that you wish to send the
email image to. Make sure to separate each individual email address with
a comma. (Example: [email protected], [email protected],
[email protected])
"Email Subject"
In this field, type the title your wish to put in the subject line of the email
(Example: "Greetings From Boston")
"Text"
Fill in whatever you wish to say along with your weather image.
After all of this information is filled in, press "Apply" to save the data, otherwise it
will be lost.
HW 1.1 Installation Guide, La Crosse Technology, Inc., All Rights Reserved.
Version 1.50
44
19. I’m satisfied with my Heavy Weather upload, now how do I publish this
information on the Internet?
To upload weather images to your website, use Heavy Weather Publisher:
To upload a weather image, simply click on the "Export" tab of the main
Publisher window and enter the data in the spaces provided for the FTP fields as
follows:
"Internet Connection":
Choose "Direct Connection" if you have a high-speed internet connection
such as DSL, cable or satellite. Choose "Dial Up Connection" if you use a
standard phone line and your computer's modem. You will need to type in
the dial-up number you use in the field to the right.
"Type and Interval":
1. Choose "FTP" if you choose to upload you weather image to your
website.
2. In the "First Start Date" field, choose the date which you choose to
begin the report of your weather image.
3. In the "First Start Time" field, choose the time which you choose to
begin the report of your weather image.
4. In "Export Interval" choose the number of minutes between updates of
your current weather image. If using "FTP", the interval can be between 1
and 1440 minutes.
"FTP Server":
In this field, type your FTP address for your site (Example:
ftp.mysite.com). Information on your FTP address can be found through
your service provider. Note: For this program to function properly, the host
server of your website must allow FTP protocols. Please contact your
website host/service provider (company which you subscribe your web
page account through) for information regarding FTP protocols and/or
your ability to use them with your website.
"Username":
Type the username you use through your website host. Please assure the
name used is correct with appropriate upper and lower case characters.
"Password":
Type the password you use to access your website host. Please assure
the name used is correct with appropriate upper and lower case
characters.
"Target":
HW 1.1 Installation Guide, La Crosse Technology, Inc., All Rights Reserved.
Version 1.50
45
In the "File Path" field, type in the file folder on your website which the
image will go to. (Example: /pictures) Note: The first file extension may
need to be input as your user name with your service provider/host for the
website, to be followed by the file names of the folder you wish to store the
image on your site (Example: /yourusername/pictures).
"File Name":
Type the file name which you will identify the file by. (Example:
"weather.jpg")
After all of this information is filled in, press "Apply" to save the data, otherwise it
will be lost.
HW 1.1 Installation Guide, La Crosse Technology, Inc., All Rights Reserved.
Version 1.50