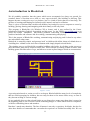
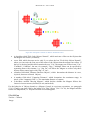
1
BlocksLab 2.0 - User‟s Guide 1 BlocksLab 2.0 - User‟s Guide Copyright Notice The information in this document is property of Fondazione Informatica per la Promozione della persona Disabile. All literary and artistic rights are reserved. No reproduction of this document is permitted without a written authorization from the manufacturer. All registered trademarks are the property of their respective owners. BlocksLab 1.0 User’s Guide, BlocksLab 1.2.1 User’s Guide: copyright © 2010 Fondazione Informatica per la Promozione della Persona Disabile. BlocksLab 2.0 User’s Guide: copyright © 2012 Fondazione Informatica per la Promozione della Persona Disabile. All rights reserved. BlocksLab: the Authors Designed by: Developed by: Gabriele Scascighini, CID Gabriele Hofmann (in collaboration with Philip Hubert) Salvatore Uras Documentation: Revision History 1.0 First release (June 2010) 1.2.1 December 2010 2.0 February 2012 We wish to express our thankfulness to OneLife Advisors SA (http://www.onelife.ch) for their most important support to this project. 2 BlocksLab 2.0 - User‟s Guide Table of Contents Where does BlocksLab come from? .................................................................................................. 10 An introduction to BlocksLab ............................................................................................................ 11 1. Setting up BlocksLab ..................................................................................................................... 16 1.1 Installation .......................................................................................................................... 16 1.2 Registration ........................................................................................................................ 16 1.3 Update ................................................................................................................................ 17 1.4 Web reference .................................................................................................................... 19 2. Quickstart: A Tutorial Guide ......................................................................................................... 20 2.1 Step 1: Our First Block....................................................................................................... 20 2.2 Step 2: A Beautiful Train ................................................................................................... 22 2.3 Step 3: Time To Glue ......................................................................................................... 23 2.4 Step 4: A Traveling Train................................................................................................... 23 2.5 Advanced: How do I edit an object with controls? ............................................................ 24 2.5.1 Build, glue and animate a car .................................................................................25 2.5.2 Remove the Control ................................................................................................25 2.5.3 Modifying the Object..............................................................................................26 3. Diving in depth: more guided Activities ........................................................................................ 27 3.1 Building a Fishtank: Alien Ally and the Space Mines ....................................................... 27 3.1.1 Step 1: Placing Blocks ............................................................................................27 3.1.2 Step 2: Gluing Objects ............................................................................................28 3.1.3 Step 3: Adding Controls .........................................................................................28 3.1.4 Step 4: Painting Background ..................................................................................29 3.2 Building a Game: Green George and his Grasseaters. ....................................................... 31 3.2.1 Step 1: Building Objects .........................................................................................31 3.2.2 Step 2: Adding Controls .........................................................................................32 3.2.3 Step 3: Cloning Objects ..........................................................................................34 3.2.4 Step 4: The Avatar ..................................................................................................34 3.2.5 Step 5: Placing the Actors ......................................................................................34 3.2.6 Step 6: First try .......................................................................................................36 3.2.7 Step 7: George carries a Bag and builds a Wall .....................................................36 4. Multiscreen Activities: an overview .............................................................................................. 39 4.1 Multiscreen Activities: a simple example .......................................................................... 39 5. User Interface Reference ................................................................................................................ 42 5.1 A word on disabilities ........................................................................................................ 42 5.2 The Object Properties Dialog ............................................................................................. 42 5.3 Toolbars .............................................................................................................................. 44 5.3.1 Blocks Toolbar .......................................................................................................44 5.3.2 Glue Toolbar ...........................................................................................................48 5.3.3 Background Colors Toolbar ...................................................................................50 5.3.4 Background Painting Toolbar .................................................................................52 5.3.5 Action Toolbar ........................................................................................................61 5.3.6 Controls Toolbar .....................................................................................................68 6. Menus ............................................................................................................................................. 91 6.1 File Menu ........................................................................................................................... 91 6.1.1 New… .....................................................................................................................92 6.1.2 Open…....................................................................................................................92 6.1.3 Save ........................................................................................................................92 6.1.4 Save As... ................................................................................................................92 3 BlocksLab 2.0 - User‟s Guide 6.1.5 Load Background ...................................................................................................92 6.1.6 Save Background ....................................................................................................92 6.1.7 Save Screen as Image .............................................................................................92 6.1.8 Page Setup... ...........................................................................................................92 6.1.9 Print... .....................................................................................................................93 6.1.10 Print Blocks Only... ..............................................................................................93 6.1.11 Print All Screens ...................................................................................................93 6.1.12 Print All Screens Blocks Only…. .........................................................................93 6.1.13 Generate Report… ................................................................................................93 6.1.14 Exit........................................................................................................................94 6.2 Edit Menu ........................................................................................................................... 94 6.2.1 Undo Background Changes ....................................................................................95 6.2.2 Cut ..........................................................................................................................95 6.2.3 Copy........................................................................................................................95 6.2.4 Copy Without Content ............................................................................................96 6.2.5 Paste ........................................................................................................................96 6.2.6 Clear........................................................................................................................96 6.2.7 Select All ................................................................................................................96 6.2.8 Unselect All ............................................................................................................96 6.2.9 Invert Selection .......................................................................................................96 6.2.10 Copy as Image ......................................................................................................96 6.2.11 Paste Image as Background ..................................................................................96 6.2.12 Paste Image on Background .................................................................................96 6.2.13 Erase Single Control .............................................................................................97 6.2.14 Clear All Controls .................................................................................................97 6.2.15 Clear Background .................................................................................................97 6.2.16 Document Memo ..................................................................................................97 6.2.17 Preferences............................................................................................................98 6.2.18 Text-to-speech configuration ................................................................................99 6.3 Screen Menu ..................................................................................................................... 100 6.3.1 New .......................................................................................................................101 6.3.2 Rename .................................................................................................................101 6.3.3 Delete ....................................................................................................................101 6.3.4 Next ......................................................................................................................101 6.3.5 Previous ................................................................................................................101 6.3.6 Go To ... ................................................................................................................101 6.3.7 Order ... .................................................................................................................101 6.4 Format menu .................................................................................................................... 101 6.4.2 Size .......................................................................................................................102 6.4.3 Style ......................................................................................................................102 6.4.4 Alignment .............................................................................................................102 6.4.5 Text Color .............................................................................................................102 6.4.6 Background Color.................................................................................................102 6.4.7 Custom Text Margin… .........................................................................................103 6.5 Toolbars menu .................................................................................................................. 103 6.5.1 Toolbars Selection... .............................................................................................103 6.5.2 Toolbars Content ..................................................................................................104 6.5.3 Saving and loading a Toolbars‟ layout .................................................................105 6.5.4 Toolbar selection commands ................................................................................105 6.5.5 Select Item Page Left... .........................................................................................106 6.5.6 Select Item Left... .................................................................................................106 4 BlocksLab 2.0 - User‟s Guide 6.5.7 Select Item Right... ...............................................................................................106 6.5.8 Select Item Page Right... ......................................................................................106 6.6 Activities menu ................................................................................................................ 106 6.6.1 Hide Menubar .......................................................................................................106 6.6.2 Show Grid .............................................................................................................106 6.6.3 Show Background Only........................................................................................107 6.6.4 Bring Blocks into Screen ......................................................................................107 6.6.5 "Stop Motion" and “Restart Motion” ...................................................................107 6.6.6 Volume .................................................................................................................107 6.6.7 Help ......................................................................................................................107 6.6.8 Check for Updates ................................................................................................107 6.6.9 Buy Registration Code..........................................................................................108 6.6.10 Register BlocksLab.............................................................................................108 6.6.11 Register Kit... ......................................................................................................108 6.6.12 About BlocksLab ................................................................................................109 6.7 Keyboard interface ........................................................................................................... 109 5 BlocksLab 2.0 - User‟s Guide Index of Figures Figure 1: a wolf ........................................................................................................................................... 11 Figure 2: a BlocksLab Activity ................................................................................................................... 12 Figure 3: a castle ......................................................................................................................................... 13 Figure 4: a space fishtank............................................................................................................................ 13 Figure 5: a videogame in BlocksLab .......................................................................................................... 14 Figure 6: a lunar landscape ......................................................................................................................... 15 Figure 7: Demo window in unregistered BlocksLab .................................................................................. 16 Figure 8: Title bar in unregistered BlocksLab ............................................................................................ 17 Figure 9: Help menu in unregistered BlocksLab ........................................................................................ 17 Figure 10: Registration dialog..................................................................................................................... 17 Figure 11: enable update in Preferences .................................................................................................... 18 Figure 12: confirmation for closing and updating of BlocksLab ................................................................ 18 Figure 13: confirmation of the close operation with or without saving ...................................................... 18 Figure 14: confirmation for BlocksLab update .......................................................................................... 18 Figure 15: BlocksLab is already up to date................................................................................................. 19 Figure 16: BlocksLab's interface ................................................................................................................ 21 Figure 17: Your first Block!........................................................................................................................ 22 Figure 18: A Train....................................................................................................................................... 22 Figure 19: Scrolling Arrow button .............................................................................................................. 22 Figure 20: Toolbar selection menu ............................................................................................................. 23 Figure 21: Glue Toolbar .............................................................................................................................. 23 Figure 22: Magic Glue button ..................................................................................................................... 23 Figure 23: Toolbar Selector button in Toolbar 2 ........................................................................................ 24 Figure 24: Toolbar Selection (Controls Toolbar) ....................................................................................... 24 Figure 25: The Controls Toolbar ................................................................................................................ 24 Figure 26: Travel Left button (Controls Toolbar) ....................................................................................... 24 Figure 27: a car ........................................................................................................................................... 25 Figure 28: using Remove Control in an Activity without Controls ............................................................ 25 Figure 29: a selected Object ........................................................................................................................ 26 Figure 30: confitmation dialog for the remotion of a Control .................................................................... 26 Figure 31: a car with a driver ...................................................................................................................... 26 Figure 32: Placing Blocks for Alien Ally ................................................................................................... 27 Figure 33: Messy Glue Button .................................................................................................................... 28 Figure 34: Messy Glue in action ................................................................................................................. 28 Figure 35: Start/Stop button (On) ............................................................................................................... 28 Figure 36: Start/Stop button (Off) ............................................................................................................... 29 Figure 37: Horizontal Bounce ..................................................................................................................... 29 Figure 38: Vertical Bounce ......................................................................................................................... 29 Figure 39: Toolbar 4, Background Painting................................................................................................ 29 Figure 40: Brush Selector ........................................................................................................................... 29 Figure 41: Brush Selector ........................................................................................................................... 30 Figure 42: Starry Sky Brush........................................................................................................................ 30 Figure 43: Brush Fill Button ....................................................................................................................... 30 Figure 44: Alien Ally with a starry Background......................................................................................... 31 Figure 45: Green George............................................................................................................................. 31 Figure 46: one of George's Green Grasseaters ............................................................................................ 32 Figure 47: Yellow Yuri ............................................................................................................................... 32 Figure 48: The Show/Hide button in Controls Toolbar .............................................................................. 32 Figure 49: The Hide/Show dialog window ................................................................................................. 33 6 BlocksLab 2.0 - User‟s Guide Figure 50: The Action Toolbar, with Clone button selected....................................................................... 34 Figure 51: The Keyboard button in Controls Toolbar ................................................................................ 34 Figure 52: How to make Green George move with keys ............................................................................ 34 Figure 53: The Action Toolbar, with Send button selected ........................................................................ 35 Figure 54: Sending Yuri to his starting position ......................................................................................... 35 Figure 55: Starting position for George, Yuri and the Grasseaters ............................................................. 36 Figure 56: The Bag button (Controls Toolbar) ........................................................................................... 36 Figure 57: Bricks for George's Wall ........................................................................................................... 37 Figure 58: George and his Bag ................................................................................................................... 37 Figure 59: The Bag dialog window............................................................................................................. 38 Figure 60: the Object Properties Dialog ..................................................................................................... 42 Figure 61: Blocks Toolbar .......................................................................................................................... 44 Figure 62: special "Image" Block ............................................................................................................... 45 Figure 63: multimedia properties for an Image Block ................................................................................ 45 Figure 64: an Image Block's resize phase ................................................................................................... 46 Figure 65: Edit Size dialog for a Multimedia Block ................................................................................... 46 Figure 66: Special Video Block .................................................................................................................. 47 Figure 67: multimedia Properties for a Video Block .................................................................................. 47 Figure 68: a special Color Block................................................................................................................. 47 Figure 69: multimedia properties for a Color Block ................................................................................... 47 Figure 70: some Blocks from the Letters&Numbers Kit ............................................................................ 48 Figure 71: the button for special Text Blocks ............................................................................................. 48 Figure 72: a Text Block .............................................................................................................................. 48 Figure 73: Glue Toolbar .............................................................................................................................. 49 Figure 74: Show Objects button (Glue Toolbar) ........................................................................................ 49 Figure 75: Messy Glue button (Glue Toolbar)............................................................................................ 49 Figure 76: Messy Unglue button (Glue Toolbar)........................................................................................ 50 Figure 77: Magic Glue button (Glue Toolbar) ............................................................................................ 50 Figure 78: Magic Unglue button (Glue Toolbar) ........................................................................................ 50 Figure 79: Background Color Toolbar ........................................................................................................ 51 Figure 80: special Color buttons (Background Colors Toolbar )................................................................ 51 Figure 81: lined and arithmetic backgrounds for Letters&Numbers Blocks ............................................. 51 Figure 82: Undo button (Background Colors) ............................................................................................ 52 Figure 83: Show/Hide Blocks button (Background Colors Toolbar) ......................................................... 52 Figure 84: Background Painting Toolbar.................................................................................................... 52 Figure 85: Color/Brush selector button (Background Painting Toolbar) ................................................... 53 Figure 86: Quick color selection in Background Painting Toolbar ............................................................ 54 Figure 87: Quick brush selection in Background Painting Toolbar............................................................ 54 Figure 88: Pen width/Brush size selector button (Background Painting Toolbar) ..................................... 54 Figure 89: Quick pen width selection in Background Painting Toolbar..................................................... 55 Figure 90: Undo button (Background Painting Toolbar) ............................................................................ 55 Figure 91: Show/Hide Blocks button (Background Painting Toolbar) ....................................................... 56 Figure 92: Line button (Background Painting Toolbar) ............................................................................. 56 Figure 93: Freehand button (Background Painting Toolbar) ...................................................................... 56 Figure 94: Outline ellipse button (Background Painting Toolbar) ............................................................. 56 Figure 95: Outline rectangle button (Background Painting Toolbar) ......................................................... 57 Figure 96: Filled ellipse button (Background Painting Toolbar) ................................................................ 57 Figure 97: Filled rectangle button (Background Painting Toolbar) ............................................................ 57 Figure 98: Solid color paint button (Background Painting Toolbar) .......................................................... 58 Figure 99: Color/Pattern selector button (Background Painting Toolbar) .................................................. 58 Figure 100: Solid color fill button (Background Painting Toolbar) ........................................................... 58 7 BlocksLab 2.0 - User‟s Guide Figure 101: Brush fill button (Background Painting Toolbar) ................................................................... 58 Figure 102: Color/Pattern selector button (Background Painting Toolbar) ................................................ 59 Figure 103: Brush spray button (Background Painting Toolbar) ............................................................... 59 Figure 104: Eraser button (Background Painting Toolbar) ........................................................................ 59 Figure 105: Image Paint button (Background Paint Toolbar) ..................................................................... 60 Figure 106: an image to paint on the Background ...................................................................................... 60 Figure 107: the Text Paint button (Background Paint Toolbar) ................................................................. 60 Figure 108: Action Toolbar......................................................................................................................... 61 Figure 109: “Send to point” button (Action Toolbar) ................................................................................. 62 Figure 110: Drag button (Action Toolbar) .................................................................................................. 62 Figure 111: Hear button (Action Toolbar) .................................................................................................. 62 Figure 112: Object properties dialog .......................................................................................................... 63 Figure 113: Record Sound dialog ............................................................................................................... 63 Figure 114: Freeze button (Action Toolbar) ............................................................................................... 63 Figure 115: “Bring to front” button (Action Toolbar) ................................................................................ 64 Figure 116: button (Action Toolbar) ........................................................................................................... 64 Figure 117: Clone button (Action Toolbar) ................................................................................................ 64 Figure 118: the Execute Action button (Action Toolbar) .......................................................................... 65 Figure 119: the Lock button (Action Toolbar)........................................................................................... 65 Figure 120: the Unlock button (Action Toolbar) ........................................................................................ 65 Figure 121: the Block‟s Action button (Action Toolbar) ........................................................................... 66 Figure 122: the Merge Actions button (Action Toolbar) ............................................................................ 66 Figure 123: a sequence of actions ............................................................................................................... 66 Figure 124: the Disassemble Sentence/Word button (Action Toolbar) ..................................................... 67 Figure 125: a "Disassembled" sentence ...................................................................................................... 67 Figure 126: the Assemble Sentence/Word button (Action Toolbar) ......................................................... 68 Figure 127: Controls Toolbar ...................................................................................................................... 68 Figure 128: command keys in the Properties of an Object ......................................................................... 69 Figure 129: Clear Controls button (Controls Toolbar) ............................................................................... 69 Figure 130: dialog for replacing a Control.................................................................................................. 70 Figure 131: Start/Stop buttons (Controls Toolbar) ..................................................................................... 70 Figure 132: Speed button (Controls Toolbar) ............................................................................................. 70 Figure 133: Travel Left/Right/Up/Down buttons (Controls Toolbar) ........................................................ 71 Figure 134: Object properties for the "Travel..." controls .......................................................................... 71 Figure 135: Bounce Horizontal/Vertical buttons (Controls Toolbar) ......................................................... 72 Figure 136: Object properties for the "Bounce..." controls ........................................................................ 72 Figure 137: Bouncing ball button (Controls Toolbar) ................................................................................ 73 Figure 138: Object properties for the "Travel..." control ............................................................................ 73 Figure 139: Maze button (Controls Toolbar) .............................................................................................. 74 Figure 140: Object properties for the "Maze" control ................................................................................ 74 Figure 141: Keyboard button (Controls Toolbar) ....................................................................................... 74 Figure 143: Object properties for the "Keyboard" control.......................................................................... 75 Figure 144: the Keyboard Control and Push Level ..................................................................................... 76 Figure 145: Trace button (Controls Toolbar) .............................................................................................. 76 Figure 146: Object properties for the Trace control ................................................................................... 77 Figure 147: “Go to Spot” button (Controls Toolbar) .................................................................................. 77 Figure 148: Object properties for the Trace control ................................................................................... 78 Figure 149: “Go to Object” button (Controls Toolbar)............................................................................... 78 Figure 150: Object properties for the Trace control ................................................................................... 79 Figure 151: Hide/Show button (Controls Toolbar) ..................................................................................... 80 Figure 152: Object properties for the Trace control ................................................................................... 80 8 BlocksLab 2.0 - User‟s Guide Figure 153: Bag button (Controls Toolbar) ................................................................................................ 81 Figure 154: Object properties for the Bag control ...................................................................................... 81 Figure 155: Record button (Controls Toolbar) ........................................................................................... 82 Figure 156: Object properties for the Record control ................................................................................. 83 Figure 157: Example of path recording ...................................................................................................... 83 Figure 158: the Tunnel Control (Controls Toolbar).................................................................................... 84 Figure 159: the Properties dialog for a Tunnel Object................................................................................ 84 Figure 160: Magnet Control (Controls Toolbar)......................................................................................... 86 Figure 161: Magnet Control's configuration ............................................................................................... 86 Figure 162: four subsequent executions of "Change Side Attachment" ..................................................... 87 Figure 163: subsequent executions of "Rotate Attachment Order" ............................................................ 88 Figure 164: Zap button (Controls Toolbar)................................................................................................. 89 Figure 165: Properties for a Zap Control .................................................................................................... 89 Figure 166: bullet selection for a Zap ......................................................................................................... 90 Figure 167: File menu ................................................................................................................................. 91 Figure 168: Registration remainder (demo version only) ........................................................................... 91 Figure 169: Page Setup dialog .................................................................................................................... 93 Figure 170: a Report's configuration ........................................................................................................... 94 Figure 171: File menu ................................................................................................................................. 95 Figure 172: Memo dialog box ..................................................................................................................... 97 Figure 173: Preferences dialog ................................................................................................................... 98 Figure 174: a BlocksLab's wrning with the disabling checkbox. ............................................................... 99 Figure 175: text-to-speech configuration dialog ....................................................................................... 100 Figure 176: the Screen menu .................................................................................................................... 100 Figure 177: the Format menu .................................................................................................................... 101 Figure 178: : the submenu for text color selection.................................................................................... 102 Figure 179: Toolbars menu ....................................................................................................................... 103 Figure 180: Toolbar selection dialog ........................................................................................................ 103 Figure 181: Toolbars content submenu ..................................................................................................... 104 Figure 182: Toolbar Edit dialog (Blocks Toolbar) ................................................................................... 104 Figure 183: :an example of custom Toolbar ............................................................................................. 105 Figure 184: Toolbars menu, selection commands .................................................................................... 105 Figure 185: Activities menu ...................................................................................................................... 106 Figure 186: File menu, unregistered and registered version ..................................................................... 107 Figure 187: Registration dialog................................................................................................................. 108 Figure 188: Registration confirmation dialog ........................................................................................... 108 Figure 189: Help menu with unregistered Kits ......................................................................................... 108 9 BlocksLab 2.0 - User‟s Guide Where does BlocksLab come from? The FIPPD (Fondazione Informatica per la Promozione della Persona Disabile) for more than twenty years has been actively working on the research/action front in the field of construction and adaptation of informatic aids devoted to reduce the serious communicative, educative and working handicap that strikes, from birth or later in the life, people with severe forms of disabilities. FIPPD The Centro Informatica Disabilità (CID) took on the executive mandate of the FIPPD's goal. The informatic and electronic instruments produced by CID are used at home, at school, in the sheltered workshops and even in hospitals or in residential aged care. They are appreciated not only by users but also by people who live in close contact with them, reducing, as far as possible, the daily stress of the heavy communicative barrier and of the motor, sensory and cognitive disabilities. You can find more information about FIPPD on the website www.fippd.com. 10 BlocksLab 2.0 - User‟s Guide An introduction to BlocksLab We all probably remember that the games which most accompanied us along our growth, for countless hours of fun that never tired us, were open activities, like building or drawing. This happens because owning nice toys is a pleasure, but it‟s a kind of desire that never lasts long. The pleasure of creating and shaping our internal world, instead, can last for a lifetime. There‟s a piece of software that can allow all children, boys and girls, to use a computer to create by building, glueing, drawing and imagining with their fantasy as the only limit. This program is BlocksLab (for Windows XP or better), and it was realized by the Centro Informatica Disabilità (Gabriele Scascighini and his team) for the FIPPD (www.fippd.com) a no profit, tax-exempt foundation, that studies problems concerning learning and disability, and produces hardware and software aids for teaching, communicating and playing. This is the purpose of BlocksLab: teaching, communicating and playing, and it‟s hard to say where one ends and the other starts. BlocksLab is ostensibly simple, and presents itself to children with all the charm of a blank sheet or a building box: a blank screen and a line of buttons with simply shaped colored blocks. The simplest way to use BlocksLab resembles building with bricks: by clicking on the screen we place the blocks, that can by chosen from the line. This is similar to forming a stack of blocks from building games like Meccano or Lego, and allows to create stylized images which are constructions. Figure 1: a wolf A growing mind needs to variate as well as to deepen. BlocksLab hides many levels of complexity that are not discouraging for children, but are ready for them a few mouse clicks away, as soon as they become willing or curious enough. So we gradually discover that colored blocks at our disposal are many more than what it seemed at the beginning, and we can even have blocks containing images or videos taken from our computers, or blocks with talking letters and numbers. But there‟s much more than this. The line of buttons is not only a repository for blocks, but also for other three families of commands that can make the experience of children incredibly rich. We can 11 BlocksLab 2.0 - User‟s Guide have commands to glue and unglue blocks to compose objects; and commands to move objects on screen, superimpose them deciding who‟s on the front and who‟s to the back, and listen to a sound that can be the “noise”, the call or the “voice” of the object. So children can glue their vblocks to compose objects that they move according to the history they are telling themselves. Figure 2: a BlocksLab Activity Then we can have a rich set of commands, simple and easy to understand, to draw and color the background, in order to create a scenario for our objects. This can be the simplest thing in the world, like a line that splits the screen, or a point that indicates a special place, or a curdev line representing a road; or it can become a house, a landscape, or even a digital photo. On this background children can build, glue and move objects that populate their games. 12 BlocksLab 2.0 - User‟s Guide Figure 3: a castle Lastly there are more advanced commands, that never appear discouragingly complex: commands that allow children to program a behavior for their objects, that can move in all directions, bounce, appear and disappear, and even “pick up” other objects and “drop” them elsewhere. All these actions can be executed according to rules assigned by children: thus a BlocksLab activity, like a fishtank, can live an independent life. Figure 4: a space fishtank 13 BlocksLab 2.0 - User‟s Guide Children can then enjoy the pleasure to notice that their activities behave as they had foreseen; or the pleasure of surprise in discovering that things work differently. In both cases, the game becomes an activity that, by means of design and verification, guides their minds to spontaneously explore future possibilities, leading them to further levels of growth. This overview on the different levels of use in BlocksLab lacks one last subject: the possibility to bind actions and behaviours to the pressure of keys: then an activity in BlocksLab can become a real interactive game, and reach a level of complexity that can capture an adult‟s attention. Figure 5: a videogame in BlocksLab Try to imagine being a child, and having at your disposal a game that allows you to build and draw at the same time, and interact with what you build like you would with dolls or toy soldiers, but also make it move on its own like a robot or a toy train, and also command lika a videogame, with tens of colored and animated shapes at your disposal, with talking letters and numbers, or your pictures or videos: can you figure out the incredible possibilities of this beautiful game, and how stimulating would be to build, paint, imagine, design and learn? This is BlocksLab: a program designed by expert paedagogists and developed by specialized engineers, fit to stimulate cognitive development in childhood, as well as in neuromotor and cognitive disabilities, but also fit to accompany growth to the secondary school and beyond. A conceived to allow parents and teachers as well to develop didactic activities, to explore side by side with children that beautiful territory where game and learning fade into each other. We already said that BlocksLab appears deceitfully simple: the basis of the project is the important pedagogical thinking of constructivist and constructionist school. The child is a first-person protagonist of the learning process, in total interaction with the surrounding environment, which he or she continuously provokes, experiences, questions, to make assumptions be confirmed, to design attempts of action and proposals of collaboration, in order to respond to the proposals he or she receives... All products developed by CID give much importance to the discovery and the exercise of the each person's capabilities. BlocksLab is accompanied by a rich, detailed and clear documentation, and guides and examples for all levels. In addition the user community has at its disposal an Internet site at the address 14 BlocksLab 2.0 - User‟s Guide www.blockslab.ch, which keeps informed about news and allows you to download samples, videos and documents, and also contains a section to publish and share activities created by children, parents and teachers. Figure 6: a lunar landscape We conclude these remarks with the authoritative words of a great linguist: "Teaching via computer powers up good but also bad sides of what happens in a class. It is invaluable to teachers, but in the hands of the mediocre has no or even bad effects. " (Tullio De Mauro, “Internazionale” 919, October 14, 2011) Our commitment is to create a tool capable to maximize the potential of growth and enrichment inherent in the teacher-pupil relationship. We offer you with pleasure this tool, with our wishes for good work. Gabriele Scascighini, CEO, Centro Informatica e Disabilità Gabriele Hofmann, Eng., Dipl. ETH Zürich Salvatore Uras, PT, software developer 15 BlocksLab 2.0 - User‟s Guide 1. Setting up BlocksLab 1.1 Installation BlocksLab requires Windows 2000 or better. Once you insert the installation CD-ROM in your drive, follow the onscreen instructions. If the installation does not automatically start, open the CDROM folder and double-click the "BlocksLab Setup.exe" file and follow instructions. After installation, BlocksLab will be available as an icon on your desktop as well as in your Start menu. 1.2 Registration The procedure described in this paragraph requires Internet connectivity. After the installation, run BlocksLab. After loading information, you will see the demo window: Figure 7: Demo window in unregistered BlocksLab in this window, as you see, you can: click on "Buy Now": opens a browser window on the online store, allowing you to buy a registration code immediately; Click on "Register": If you have already purchased a registration code, this will open a registration window (see (TODO ), “Register BlocksLab”), allowing you to enter your code and activate completely BlocksLab; Click on "Run in demo mode" (demonstration mode): this will allow you to run BlocksLab with limited functionality. Running BlocksLab in demo mode, the title bar will show as follows: 16 BlocksLab 2.0 - User‟s Guide Figure 8: Title bar in unregistered BlocksLab And the following commands in "File" menu will be disabled: Save Save As Save Background Save Screen As Image. To activate your copy of BlocksLab, you must first obtain a registration code. Even after selecting “Run in Demo Mode” in the initial dialog, you can visit the online shop by selecting "Buy Registration Code" in the Help Menu, as shown: Figure 9: Help menu in unregistered BlocksLab Like when you select “Buy Now”, a browser window will open and lead you to the online shop. Just follow the onscreen instructions to receive your registration code. Once you obtained the code, select "Register BlocksLab" in the "Help" menu. A simple dialog window will open, as shown: Figure 10: Registration dialog Just insert your registration data and click on "OK", and your copy of BlocksLab will be activated. 1.3 Update The procedure described in this paragraph requires Internet connectivity. BlocksLab can update itself: just follow these steps: Make sure that the menu labeled "Help" contains the command "Check for Updates". If so, continue reading after Figure 11. If this command is not visible, select command "Preferences" in the "Edit" menu. In the dialog box that will open, click on the ckeckbox labeled "Enable “Check For Updates” Menu Item", shown in the following image: 17 BlocksLab 2.0 - User‟s Guide Figure 11: enable update in Preferences Select "Check for Updates" in the "Help" menu; A simple dialog box will appear that asks for confirmation, since update requires BlocksLab to automatically shut down before proceeding: Figure 12: confirmation for closing and updating of BlocksLab Once confirmed that we want to close the program, BlocksLab will ask if we want to save the current document with the following dialog: Figure 13: confirmation of the close operation with or without saving Clicking on "Yes" will save the document, close BlocksLab and run the update procedure. Clicking on "No" button will close BlocksLab without saving, then run the update. Clicking on “Cancel” will return to BlocksLab and interrupt the update request. Unless we clicked on "Cancel", we will be asked a further confirmation with the following dialogue: Figure 14: confirmation for BlocksLab update 18 BlocksLab 2.0 - User‟s Guide if there is a newer version of BlocksLab available, it will be downloaded and installed. Otherwise, the upgrade will report that our copy of BlocksLab is updated to the latest version with the following dialog: Figure 15: BlocksLab is already up to date 1.4 Web reference This manual is a starting point. To keep in touch with the community of designers, developers and users of BlocksLab, refer to the Web address www.blockslab.ch. Here you will find: the presentation of additional Kits: stimulating new extensions that add new construction materials, new rules and new features to BlocksLab; in-depth articles and tutorials on techniques and the creative possibilities of BlocksLab; contributions from the community of BlocksLab‟s users (children, parents and teachers), such as Objects, Activities, discussions, and comments: maybe even yours! In addition, please refer to the Web address www.fippd.com for more general information about FIPPD and its projects. 19 BlocksLab 2.0 - User‟s Guide 2. Quickstart: A Tutorial Guide You can find a first introductory guide titled "Julia learns BlocksLab" and especially suited to children, which can be freely printed and distributed, on BlocksLab‟s website at the following address: blockslab.ch/index.php?option=com_content&view=article&id=56%3Agiulia&catid=41%3Atb&It emid=62&lang=it The following is a step-by-step guide to basic activities in BlocksLab, in complexity order. Follow it to quickly and easily learn the basics on authoring and editing your activities. For tutorial guides on more advanced features in BlocksLab, please refer to the following section, “Diving in depth: more guided Activities”. If instead you need detailed reference information on BlocksLab, its menus and commands, please refer to section 5, titled “User Interface Reference”. 2.1 Step 1: Our First Block In a land call Egypt, there are beautiful ancient buildings named the Pyramids. Pyramids are made of thousands of Blocks, but all Pyramids, even the tallest and most beautiful, started by placing the first Block. And so we shall do. Double-click on BlocksLab's icon. When BlocksLab starts, you will see the Canvas, the Menus, and the Toolbar. 20 BlocksLab 2.0 - User‟s Guide Figure 16: BlocksLab's interface 21 BlocksLab 2.0 - User‟s Guide How do we place our first Block? Easy. Click on the red square, then click on your Canvas. Figure 17: Your first Block! 2.2 Step 2: A Beautiful Train OK, I know, that was too easy. But are you able to make a train with Blocks? Like this one? Figure 18: A Train Yes, you can do it, but where are those cool wheels, and the chimney, and that blue windshield? Well, I'll give you a hint: try to click on the gray arrows to see many more beautiful Blocks... Figure 19: Scrolling Arrow button If you make a mistake in placing a Block, don't worry: just click on the wrong Block and it will disappear. Now it's your turn: go make that Train! 22 BlocksLab 2.0 - User‟s Guide 2.3 Step 3: Time To Glue Yes, our Train is really beautiful. Can you imagine how many different Objects you can build with your Blocks? I'll tell you a secret: you must be patient to your Computer, because it is not as intelligent as you are. You just need to look at those Blocks to understand that they are a Train - but you must explain this to BlocksLab. How do you tell BlocksLab that those Blocks make a Train? Glue them together! I bet you already used the gray arrows to see all Blocks in your Toolbar - they're really cool, aren't they? But you probably don't know that BlocksLab has more Toolbars for painting and gluing and moving things and stuff... Where are they? Just click on the first button in your Toolbar: This will open a Toolbar menu, like this one: Figure 20: Toolbar selection menu See that tube of Glue? Click on it, and your Blocks Toolbar will become Toolbar 2: Glue. Figure 21: Glue Toolbar Wow! Now click on this button: Figure 22: Magic Glue button This is your Magic Glue. Just click on your Train, and it will flash - you have glued your Blocks together, now they are a real Train that can do many things. 2.4 Step 4: A Traveling Train What do Trains do? They travel! 23 BlocksLab 2.0 - User‟s Guide Do we have a button to make our Train travel? Yes sir, we actually have more than one. Let me show you. First, we need a new Toolbar - the Toolbar of Controls. Controls are magic: they are what makes your Objects wake up to do things like moving and bouncing and more. Click on the first button in your Glue Toolbar: Figure 23: Toolbar Selector button in Toolbar 2 to open the Toolbar selection menu: Figure 24: Toolbar Selection (Controls Toolbar) See that shiny Robot, the last button? Click on it to open the Controls Toolbar: Figure 25: The Controls Toolbar OK, we're almost there. See this button? Figure 26: Travel Left button (Controls Toolbar) It means: travel to the left. Click on this button, then click on your Train, and watch it travel... Congratulations! You realized your first Activity in BlocksLab! It's not anything huge like a pyramid, but hey, even those Egyptians started by placing just a few Blocks together. Then they learned to do big things, like you will. 2.5 Advanced: How do I edit an object with controls? This section discusses an argument advanced, suitable for parents, teachers and anyone who knows already BlocksLab: If you are learning you can skip it and continue with the tutorial in Chapter 3, 24 BlocksLab 2.0 - User‟s Guide page 27. How do you change an Object that has been assigned a Control? Below we show the construction of a simple Object, which we assign a Control, and its modification. 2.5.1 Build, glue and animate a car Figure 27: a car Using the techniques we already described in the first tutorial, let‟s place the Bricks that make up the simple car in Figure 27, glue them and assign the Control Travel Right (see 5.3.6.6). As can easily happen, once assigned the Control we decide to modify our Object, replacing the top center “window” brick with a driver. How do you proceed? 2.5.2 Remove the Control Here are the steps: Open Toolbar 6 (Controls) and verify the status of the “switch On/Off” button (see 5.3.6.4): If it displays a green light, click on the button. The button will turn into a red light and our car will stop. If the car should stop while it‟s off the screen, you can use the menu command Activities/Bring Blocks into Screen (see 5.4.6.4) to bring back our Object into view; you can't edit the car if it has a Control: so we must remove the Control first. We can do this in two ways: the most direct way is to use the Remove button control in Toolbar Controls (see 5.3.6.3); alternatively, you can use the menu command Edit/Erase Single Control (see 5.4.2.13). We can then press the button or select the command from the menu: the following procedure is identical in both cases; Should not our Activity contain any Objects with Controls, BlocksLab will show a dialog box as follows: Figure 28: using Remove Control in an Activity without Controls In the case of our example, however, we do have a Control: let‟s move the pointer over our car, that will be highlighted like in the following image: 25 BlocksLab 2.0 - User‟s Guide Figure 29: a selected Object Let‟s click in the car: the following dialog will open, asking for confirmation: Figure 30: confitmation dialog for the remotion of a Control Click on "OK": a further dialog box will open to confirm that the Control has been removed. Click on "OK". Note that the confirmation dialogs can be avoided, if desired, by modifying the BlocksLab Preferences (see 5.4.2.17). 2.5.3 Modifying the Object Now let‟s open Toolbar 2 (Glue), click on the button Magic Unglue (see 5.3.2.5), and click on our car: the Object will blink briefly, indicating that is not glued anymore; Open Toolbar 1 (Blocks) and select the character you prefer, then click on the Block at the top and in the middle to get a result like this: Figure 31: a car with a driver Now let‟s open Toolbar 2 (Glue), click on the Magic Glue button (see 5.3.2.4) and then on our car: the car outline will blink to indicate that it is glued again; Open Toolbar 6 (Controls), click on the “Travel Right” button (see 5.3.6.6), then on our car; Finally click on the “Switch On/Off” button to restart the Activity. That‟s it! 26 BlocksLab 2.0 - User‟s Guide 3. Diving in depth: more guided Activities What I would like to do now is showing you a bit more of what BlocksLab can do. Building the Train Tutorial you created an Activity: placing Blocks, gluing Blocks into Objects, animating Objects. You can build two types of Activity: Fishtanks and Games. A Fishtank is when you build and place Objects, tell them how to move and what to do, press the „Start‟ button and see what happens. This is great! A Game is like a Fishtank, but with a special Object – your Avatar – that does things when you press keys: things like moving or hiding or picking up other Objects… This is also great! Which is best, building Fishtanks or building Games? I can‟t tell you. You can try both and discover for yourself. If you keep on reading, we‟ll try to build two more Activities together: a Fishtank and a Game. I have to be honest - it‟s going to be hard. But we‟ll have great fun. So when you feel like learning more, try the next two Tutorials. 3.1 Building a Fishtank: Alien Ally and the Space Mines 3.1.1 Step 1: Placing Blocks What‟s the first thing to do in a new Activity? Choosing and placing our Blocks. This time, we have to do something bigger than the Train: Figure 32: Placing Blocks for Alien Ally 27 BlocksLab 2.0 - User‟s Guide But don‟t worry, you‟ll find all these Blocks in your Toolbar. Just switch to Toolbar 1 and start picking up red bricks for the Galactic Wall. Remember: if you make a mistake, just click on the wrong Block to make it disappear! After the Wall, place the yellow-and-red-spiral Blocks: these are Space Mines. Finally, build Alien Ally in her Spaceship. Done? Enjoyed? Now we‟ll make things move. 3.1.2 Step 2: Gluing Objects Alien Ally wants to cross the Galactic Wall with her Spaceship, avoiding those nasty Space Mines. Tell BlocksLab about Ally: switch to the Glue Toolbar, number 2, and glue Ally together using Messy Glue or Magic Glue. You already know about Magic Glue. What about Messy Glue? Figure 33: Messy Glue Button Messy Glue is like a pen or a felt: just click on it and spread glue on Blocks to build an Object, like this: Figure 34: Messy Glue in action Remember: if you make a mistake, you can use Messy Unglue or Magic Unglue to correct it. So don‟t be afraid to try things. 3.1.3 Step 3: Adding Controls What happens in our Activity? Ally tries to travel back and forth across Galactic Wall, avoiding Mines. Space Mines patrol the corridor, moving up and down. So let‟s switch to Controls Toolbar. First step: turn off our Fishtank, so nothing will move until we‟re ready. Look at the Start/Stop button: Figure 35: Start/Stop button (On) If it‟s green, your Activity is on. Click on it to turn it off, and it will become red: 28 BlocksLab 2.0 - User‟s Guide Figure 36: Start/Stop button (Off) Then assign Controls: one for Ally, one for each Mine. For Ally, click on Horizontal Bounce: Figure 37: Horizontal Bounce Then click on Ally. Done. For Mines, click on Vertical Bounce: Figure 38: Vertical Bounce Then click on all Mines. Done. Our Fishtank is ready: click on Start/Stop button, step back, and laugh watching Alien Ally making her way across the Space Mines! 3.1.4 Step 4: Painting Background Do you like movies? There‟s something in every movie that‟s not an actor, doesn‟t speak, can‟t even be seen, yet makes you like movies even more. It‟s music. It helps moviemakers to tell tales. Do you like building Activities in BlocksLab? There‟s something that‟s not a Block or an Object and can‟t move, but can make your Activities even cooler: it‟s the Background. It can help you to tell your tales with BlocksLab. You can paint on your Canvas: just a road for your Objects, or the sky, mountains and a lake – you can even put a photo from your holidays as your Background! For Alien Ally in Space, we don‟t want anything complicated, just a starry sky. So switch to Toolbar 4, Background Painting: Figure 39: Toolbar 4, Background Painting Now we should select a Brush: it‟s a small image that will fill all squares in your Canvas. But don‟t worry, your Blocks will never be covered: whatever you paint, it will always be on the back – that‟s why it‟s called the Background. So click on this: Figure 40: Brush Selector A bigger window will open to show all Patterns: 29 BlocksLab 2.0 - User‟s Guide Figure 41: Brush Selector Look for a starry night sky: Figure 42: Starry Sky Brush Click on it, and click on the “OK” button. Now click on Brush Fill. It‟s this paint can with a green pattern: Figure 43: Brush Fill Button Then click on your Canvas, wherever you want. Wait a few seconds… et voila: 30 BlocksLab 2.0 - User‟s Guide Figure 44: Alien Ally with a starry Background You‟ve completed your Fishtank: step back and admire Ally‟ courage as she sneaks her way across the Minefield! 3.2 Building a Game: Green George and his Grasseaters. This is our last tutorial – the advanced one. It‟s not difficult like Mathematics, but we need many Objects and Controls to make a simple Game. You don‟t have to learn immediately how to build Games: there‟s so much you can do in BlocksLab that you can wait until you really feel like learning more. Anyway, if you feel like building Games, here‟s our first one. Green George has five Grasseaters: they‟re nice animals that calmly munch the grass in George‟s land. Yellow Yuri wants to steal Grasseaters, and George wants to build a wall to keep him out of his property. 3.2.1 Step 1: Building Objects This is Green George: Figure 45: Green George 31 BlocksLab 2.0 - User‟s Guide You can start building George: place the Blocks and glue them. Green George is a special actor: he‟ll be our Avatar. This means that we‟ll tell George where to go and what to do. This is a GrassEater: Figure 46: one of George's Green Grasseaters So let‟s build and glue a Grasseater – just one, for now. Big fat mean ugly Yellow Yuri wants to steal George‟s Grasseaters. This is Yuri: Figure 47: Yellow Yuri Build and glue Yuri. A Game is a story, like a movie, and now we have the actors. 3.2.2 Step 2: Adding Controls Now we can tell BlocksLab that Yuri steals Grasseaters. Hard? Not at all, it just takes a couple of clicks. Switch to the Controls Toolbar, look for the Show/Hide button, and click on it: Figure 48: The Show/Hide button in Controls Toolbar Then click on your Green Grasseater. A complicated window will open: 32 BlocksLab 2.0 - User‟s Guide Figure 49: The Hide/Show dialog window But don‟t worry, all you need to do is look for the two “Set Object” buttons and click on the upper one, then click on Yellow Yuri, then click on OK. The window will close. What happened? You just created a new rule for your Game: if Yellow Yuri touches a Grasseater, the poor animal disappears – it‟s been stolen by Yuri! Now tell Yuri to bounce trying to reach Grasseaters. This is really simple. But before, click on the Start/Stop button to turn off your Game, because we don‟t want Yuri to start stealing Grasseaters right now! Then click on the Bounce button, and click on Yuri. Done. 33 BlocksLab 2.0 - User‟s Guide 3.2.3 Step 3: Cloning Objects Now we‟ll make five Grasseaters. We could assemble four more Grasseaters, glue them, and assign the rule about Yuri. Or we can use a special button that will make copies of our Grasseater for us. It is the “Clone” button, and it‟s in Toolbar 5, the Action Toolbar: Figure 50: The Action Toolbar, with Clone button selected Click on the Clone button, then click on the Grasseater to drag a newly created Grasseater wherever you want. You can easily make five Grasseaters – and all of them can be stolen by Yuri. 3.2.4 Step 4: The Avatar Green George is our Avatar: how can we tell him to move when we press keys? Three clicks: switch to the Controls Toolbar, click on the Keyboard button, Figure 51: The Keyboard button in Controls Toolbar then click on Green George. Done. From now on, press keys to make George move: Figure 52: How to make Green George move with keys 3.2.5 Step 5: Placing the Actors Before we press the Start button, we want to place our Objects, that is our Actors, in their starting positions. There‟s a good button for this. The Send button in the Action Toolbar: 34 BlocksLab 2.0 - User‟s Guide Figure 53: The Action Toolbar, with Send button selected If you click on Send, you can pull a rope to the destination of your Object: release the rope, and the Object will go there. Figure 54: Sending Yuri to his starting position Decide the starting positions for your Actors: Yuri, George, and the Grasseaters. I send the Grasseaters together to the right: that‟s George‟s land, where they want to stay peacefully chewing grass all the time. Then I send Yuri to the left, far from the Grasseaters. Then I send George to the middle, so he can patrol the borders. So my starting position is: 35 BlocksLab 2.0 - User‟s Guide Figure 55: Starting position for George, Yuri and the Grasseaters 3.2.6 Step 6: First try Looks like everything is ready, so we can test our Game. Are you ready? Remember, „A‟,‟D‟, „W‟ and „X‟ move George. You must try to block Yuri, or he will steal our Grasseaters! Switch to Controls Toolbar, click on the Start/Stop button and go! Try as long as you want, then stop your Game and come back here. OK, maybe Yuri stole some Grasseater and maybe not, but there‟s something wrong: you can‟t win. Yuri must just wait until George becomes really tired or bored and stops patrolling, then he‟ll be free to steal Grasseaters. What can we do to make George able to stop Yuri forever? After all, George must be free to go eat his lunch or sleep or surf the Internet! Now I‟m going to show you how to make George build a Wall. Keep in mind, this is really superextra-optional, you don‟t have to learn this to have fun with BlocksLab. You can safely skip the next part and be proud to have made it so far. But if you *really* want to do something special, here we are. 3.2.7 Step 7: George carries a Bag and builds a Wall You were tired of trying to keep Yuri out of the way, and maybe he already stole one or two of your Grasseaters. But we have an extra special Control that will allow George to build a Wall! It‟s the Bag button – you find it, of course, in the Controls Toolbar. Figure 56: The Bag button (Controls Toolbar) There are two things we need before we use this button. 36 BlocksLab 2.0 - User‟s Guide One: a pile of bricks. You can place a few in a corner – don‟t glue them! I used green bricks: Figure 57: Bricks for George's Wall Two: a Bag. Place a red Block close to George‟s right arm, like this: Figure 58: George and his Bag Now we can press the Bag button, and then click on George‟s red Bag. This dialog window will open: 37 BlocksLab 2.0 - User‟s Guide Figure 59: The Bag dialog window Don‟t worry. Just click on “Set Object”, and the window will close. Click on George, and the window will reopen. Click on OK. That‟s all. Now George has a Bag, and two new command keys. „P‟ to pick up things; and „L‟ to let them down. We are ready for a test run. The rules are: try to keep Yuri away from your Grasseaters, but also try to pick up Bricks and lay them down to build a Wall. Three Bricks are enough, and they don‟t need to be close: Yuri‟s not very good at climbing Walls. The game is over if Yuri steals all Grasseaters, or if you build a Wall to keep him out. What are you waiting for? Go press that Start button and try your Game! And remember, you can do a world of other things with BlocksLab: just trust yourself, and you‟ll succeed. 38 BlocksLab 2.0 - User‟s Guide 4. Multiscreen Activities: an overview You can multiply the creative possibilities we simply illustrated so far by exploiting the ability to create Activities on multiple virtual Screens. In BlocksLab , only one Screen at a time is visible and available for interaction, and we call the current Screen; but we can create virtual Screens, and select any one of them as the current Screen. The management of Screens is done using the “Screen” menu: when I create aa Activity or open BlocksLab by clicking on its icon, there is only one Screen, the one I see. A menu titled "Screen" (see 5.4.3) allows you to create new Screens, change their names or sequence or delete them. In this menu we can also find commands to "move" from one Screen to another virtual Screen of our choice, selecting the latter as the current Screen. The most interesting side of the multiple Screens system in BlocksLab, though, is the interactive selection of Screens by means of the unnel Control (see 5.3.6.17), that you can assign to an Object. When a moving Object comes into contact with a Tunnel or is manually transported on a Tunnel by the user, the Object "jumps" to another Screen, which becomes the current Screen. Then our Objects can travel from one Screen to another, allowing you to create Activities with interactive, and open-ended plots, in the style of role-playing games. A third mode of navigation, similar to the menu-driven one but more suitable for children, allows you to activate the "jump" to another Screen by using the button "Execute Action” on an Object (see 5.2 and 5.3.5.8). 4.1 Multiscreen Activities: a simple example Let‟s create a new Activity in BlocksLab, and build a small house, the world around it and a child outside the house, as in this picture: Figure 60: the World outside Home 39 BlocksLab 2.0 - User‟s Guide Then let‟s select "New" from the "Screen" menu: we'll see a black Screen as if we had just opened BlocksLab. The Screen with the child and the house still exists, but is no longer the current Screen, so we can‟t see it. Now let‟s build in this Screen the world inside the House, with a door, for example like this: Figure 61: the world inside Home Now we can switch from one Screen to another using the Screen menu commands, "Previous" and "Next": the world inside the house is the second Screen, then using the "Previous" command we‟ll return to the first Screen, the world outside the house. This way of changing Screen is used when building an Activity. Now the two Screens have names that only serve to distinguish them, but it would be better if the names expressed what's in the Screens. It's simple: in the “inside home” Screen, select "Rename" from the "Screen" menu: in the simple dialog box that opens, instead of "Untitled Screen 2”, write "inside Home", and click OK. Then let‟s go with "Screen/Previous" to the “outside home” Screen, and let‟s change its name to "outside Home" with the same method. Now, however, we want the child to be able to enter or leave the house through the door. How can we achieve this? Simple. First of all, let's go back to the outside world. Glue the child, then open the properties for this object and call it "Julie". Then glue the house. And now, the magic: let‟s open Toolbar 6-Controls, and look for the Tunnel Control, i.e. this: Figure 62: the Tunnel Control 40 BlocksLab 2.0 - User‟s Guide Click on the Tunnel, then on the house: the house blinks to tell us that ithas become a Tunnel. Now open the properties for the House: you will find find the Properties dialog box for a Tunnel described and explained in paragraph 5.3.6.17. The most important thing we must say to BlocksLab is where comes Tunnel leads to: from the list titled "Go To" Screen, choose the “inside Home” Screen Then tell BlocksLab that only the child can use the door: in the field titled "Allow Objects Named" write "Julie". Now wespecify where the Tunnel emerges: from the list entitled "Jump To", choose "Fixed Position" and click on the button "Define Position". The “inside Home” Screen will appear: click on a point close to the blue door. Now the property sheet of the Tunnel reappears: we're done, we can click "Ok". What‟s changed? Just open the Toolbar 5-Action, click on "Drag", and drag Julie with your mouse on the house. Just an overlapping Block is enough: when we release Julie, she goes through the door and reappears inside her home! Now we have finished, but if you want to learn more you can try these exercises: assign to the blue door inside the house a Tunnel Control that leads Julie to the world outside; assign a movement Control to Julie: for example, Bounce or Keyboard ... And see that Julie goes through the Tunnel on her own. Try to make Julie‟s relatives use the Tunnels too. Do you want a tip? Read how the Tunnel Control works, and especially how the field titled "Allow Objects Named" works and what it does. 41 BlocksLab 2.0 - User‟s Guide 5. User Interface Reference This section offers reference information about menus, dialogs and toolbars. For a step-to-step tutorial guide, please refer to previous sections, "Quickstart: A Tutorial Guide" and “Diving in depth: more guided Activities” 5.1 A word on disabilities Special care was employed in designing BlocksLab, to make it equally easy to access for users of very different age and degree of cognitive development. Nevertheless, conditions exist where usage of ordinary input devices and modes is extremely difficult or impossible. BlocksLab can seamlessly interface with AccessX©, a special software tool developed to ease computer use for persons with neuromotor disabilities. For more information, please refer to http://www.blockslab.ch. 5.2 The Object Properties Dialog This dialog opens with a right click on an Object, selecting " Block Properties" if it is a Block, or "Glued Object Properties" if it is an Object. Figure 63: the Object Properties Dialog In the pane at the top we find: 42 BlocksLab 2.0 - User‟s Guide a list control, entitled "Action", which allows you to select an action that will execute when the user presses the "Execute Action" button in Toolbar 5 - Action: see 5.3.5.8. The actions available are as follows: o None: no action; o Execute Feedback: provides sound feedback as configured in the next pane; o Go To First Screen: the first Screen in the list of virtual Screens becomes the current Screen – if the current Screen is first on the list, nothing happens; o Go To Previous Screen: the Screen that precedes it in the list of virtual Screens becomes the current Screen – if the current Screen is first on the list, nothing happens; o Go To Next Screen: the Screen that follows in the list of virtual Screens becomes the current Screen – if the current one is the last Screen, nothing happens; o Go To Last Screen: the last Screen in the list of virtual Screens becomes the current Screen – if the current one is the last Screen, nothing happens; o Go To Screen …: activates list control "Screen" (see below), allowing you to directly select new current Screen from the list; o Show/Hide: assigns the Object a property similar to the Show/Hide Control (see 5.3.6.14): by clicking on the "Execute Action" button in the Toolbar, and then on the Object, if the Object is visible it will become invisible. If the Object is invisible, clicking on "Execute Action" and then on the Background, at the point where the Object is, will make it visible again. Note that you can make invisible, by this action, a moving Object. Imagine a sequence like the following: Create an object and glue it; Assign to the Object, using this dialog, the Show/Hide Action; Assign to the Object the Bounce Horizontal Control from the Controls Toolbar; Click on the "Execute Action" button in Toolbar 5, and then on the Object. At this point you would have an invisible Object that moves on the Screen. If you want to be sure to be able to make reappear an Object that you made invisible by using this action, you need to assign to the action a command button as well. Only for glued Objects, a checkbox entitled "Execute also actions of all single objects". If the box is checked, when the user requests the execution of configured action (see above), the following will be performed, in succession: the glued Object action and actions of individual Blocks that make up the Object. If the box is not checked, only the action of glued Object will run; A list control entitled "Key" which allows you to select a button whose pressure initiates the configured action. Note that uppercase and lowercase are distinct: i.e., for example, pressing "A" and "a" are two different commands for BlocksLab. Finally, selecting the list control and pressing the space bar means that no key will activate the command. A list control titled "Screens", which shows a list of available virtual Screens. In summary, through controls on this Panel you can configure an Object to play a feedback sound, configured in the next pane, or to "jump" to another virtual Screen. These behaviors are called the Object‟s Actions, and are executed when: The user clicks on the "Execute Action" button in Toolbar 5 - Action and then on configured Object (see 5.3.5.8), or the user presses on the keyboard the key specified by the “Key” list control (see above). 43 BlocksLab 2.0 - User‟s Guide In the second pane we find a series of controls that allow you to configure the audible feedback, i.e. the "reaction" sound for a mouse click on the Object, as follows: No Feedback: the Object is not associated with a sound feedback Default Block Feedback : the Object is associated with the global sound feedback Speak Following Text: the Object is associated with a spoken comment. Selecting this option activates the two controls below, which allow you to introduce a text and select the voice that reads the text Play Sound: the Object is associated with the playback of an audio file. The audio files can be imported in the Activity by selecting them on your Computer (the “Import …” button), chosen from a list of available imported audio samples(list control) or recorded (Record). At the bottom of the dialog, out of the two previous panes, you will find the check box "Lock Position", which makes position of an Object unalterable. If you select this check box, the object can be moved only by using the button "Drag" in Toolbar 5 (Action): see 5.3.5.2. The "Send" button in Toolbar 5 and motion Controls in Toolbar 6 (Controls) will have no effect on this Object. 5.3 Toolbars Toolbars in BlocksLab are 6, but all share the same window. The user needs to select the appropriate Toolbar. Selecting the desired Toolbar can be done by using menus, keyboard shortcuts or the Selector button in the Toolbar window. Each Toolbar can be divided in two sections: a fixed section, made of invariable buttons that don‟t scroll and can‟t be added or removed (see 6.5.2, “Toolbars Content”); the fixed section always contains at least: the Toolbar Selector button, which is always the first; the two Scrolling Arrow buttons, which are always the second and the last; a scrolling section, which can contain more buttons that the Toolbar can display, and can be browsed by clicking on the Scrolling Arrow buttons or by the appropriate keyboard shortcuts (see 6.7, “Keyboard interface”). You can customize your toolbars (see 6.5, “Toolbars menu” and 6.5.4, “Toolbar selection commands”). 5.3.1 Blocks Toolbar Image: Figure 64: Blocks Toolbar Provided functions: allows selecting Blocks to insert in current Activity. Fixed section contains: Toolbar selector; Scrolling arrows. Scrolling section contains: 44 BlocksLab 2.0 - User‟s Guide One button for each available Block. See also 6.5.2, “Toolbars Content” 5.3.1.1 Blocks selection buttons Toolbar: Blocks Image: that of any available Block. See also 6.5.2, “Toolbars Content” Section: scrolling Description: each of these buttons represents an available Block. Clicking on it means selecting the represented Block for editing operations. How to use: click on the button representing desired Block to select it. Clicking on the Canvas will produce different effects according to the contents of selected grid square: grid square contains no Block: placing - a copy of selected Block is deployed in the square; grid square already contains the same Block: erasing - the square is emptied; grid square contains a different Block: substituting - the square is overwritten with a copy of selected Block. In the special case that the Shift button is pressed when you click on the Canvas, the previous rule, as well as the grid, are ignored, so the Block will always be placed regardless of what occupies that grid square, and will be placed anywhere you click, without snapping to the grid. This kind of contiguity is effectively used by the Magic Glue instrument (see 5.3.2.4). 5.3.1.2 Special Blocks Some Blocks, listed below, have special properties. 5.3.1.2.1 Image (additional Multimedia Kit) Figure 65: special "Image" Block special Image Blocks allow you to display an image file. By right clicking on an image Block and selecting "Set Image and Multimedia Properties", the following dialog appears: Figure 66: multimedia properties for an Image Block The dialog contains, in order: 45 BlocksLab 2.0 - User‟s Guide A list control that allows you to select any image you already imported into the Activity. This list can be empty, of course; A button called "Import", which opens a standard file selection dialog, which allows you to choose an image file. Once selected, the image is imported into the Activity and becomes visible in the list (see above); A checkbox entitled "Border" that allows you to display a border around the Image Block, if checked; A checkbox titled "White Transparent", that makes the white areas transparent in the Image Block. Note that this works poorly with Jpeg images, where the apparently white color is never homogeneous; A slider titled "Transparency Level", which allows you to determine how transparent is the Block: the minimum means complete opacity, the maximum mean full transparency, i.e. the Block becomes invisible. Once you have completed the configuration, our Block will show the selected image. At this point you can resize the Block as you want, by clicking on it with right mouse button and selecting “Resize Graphically”: the brick will display a border with "handles", as in the following example: Figure 67: an Image Block's resize phase By clicking on handles and dragging them, you can change the size of the Block at will, and the image is scaled appropriately. Any action different from dragging the handles exits resizing, causing the border and handles to disappear. Another resizing mode is available by clicking with the right mouse button on the Brick and selecting "Edit Size": in this case you will get a dialog box like the following: Figure 68: Edit Size dialog for a Multimedia Block The two fields at the top allow you to introduce numerical values for the desired width and height, in pixels. The button "Resize to Grid” changes values to the closest multiples of the size of a Grid box. Finally, if you want to restore the Block to the exact dimensions of the selected image, you should right-click on the Block and select the "Reset Size" command. 46 BlocksLab 2.0 - User‟s Guide 5.3.1.2.2 Video (additional Multimedia Kit) Figure 69: Special Video Block Video Blocks allow displaying a video in a BlocksLab‟s Block. A Block can play the embedded video clip if you use the "Execute Action" button from the Toolbar action (see 5.3.5.8). The video playback can be stopped by pressing [ESC]. Right-clicking on a Video Block and selecting "Set Movie And Multimedia Properties", you can access the following dialog: Figure 70: multimedia Properties for a Video Block The properties are identical to the Image Blocks, except for the absence of the "White Transparent" checkbox: see the preceding paragraph (5.3.1.2.1). The scaling procedure is identical as well. 5.3.1.2.3 Color (additional Multimedia Kit) Figure 71: a special Color Block A Color Block is a square Block which can have any color. Right-clicking on a Color Block and selecting "Set Color And Multimedia Properties", you access the following dialog: Figure 72: multimedia properties for a Color Block The colored box in the upper left corner represents the color of the Block. Clicking this box will open a standard Windows dialog for color selection. The following controls have identical meaning to those already seen for the Image Block (see 5.3.1.2.1). The scaling procedure is identical as well. 47 BlocksLab 2.0 - User‟s Guide 5.3.1.2.4 Letters and Numbers (additional Letters&Numbers Kit) Figure 73: some Blocks from the Letters&Numbers Kit Blocks with letters, numbers, and punctuation from the Letters&Numbers Kit are normal Blocks, with the following exceptions: in the Object Properties of this type of Block, the feedback is set so that the computer's default voice speaks the letter or number that the brick represents; using on a series of such blocks the button “Merge Actions” of Toolbar 5 (see 5.3.5.12), BlocksLab will try to form a word with the Blocks and make the computer speak it. 5.3.1.2.5 Text (additional Letters&Numbers Kit) Figure 74: the button for special Text Blocks A Text Block appears as a white box with a border, sized 4 x 4 grid boxes, and containing a default text, as in the following image: Figure 75: a Text Block By pressing the right mouse button on the brick, we can access the following commands: Edit Text: the Block changes, showing a border with sizing handles (see 5.3.1.2.1). At this stage you can modify, writing it directly, the text, as well as the size and location of the Block. While you edit the text, the “Edit/Format” menu (see 5.4.4) is active to set features such as font, size, color and alignment. Clicking outside the Block allows you to exit textediting stage; Resize To Media: the Block is resized to contain exactly, if possible, the entire text; Resize To Grid: the Block is scaled so that its dimensions are exact multiples of a grid square; Set Text Voice: this command contains a submenu from which you can select a text-tospeech voice among those installed on your computer. 5.3.2 Glue Toolbar Image: 48 BlocksLab 2.0 - User‟s Guide Figure 76: Glue Toolbar Provided functions: allows joining multiple Blocks to create an Object, delete Objects, add or remove single Blocks from an existing Object. Fixed section contains: Toolbar selector; Scrolling arrows; Show Objects. Scrolling section contains: Messy Glue; Messy Unglue; Magic Glue; Magic Unglue. 5.3.2.1.1 Show Objects button Toolbar: Glue Image: Figure 77: Show Objects button (Glue Toolbar) Section: fixed. Description: shows glued Objects. How to use: click on this button: each glued Object in turn will blink to show composing Blocks. 5.3.2.2 Messy Glue Toolbar: Glue. Image: Figure 78: Messy Glue button (Glue Toolbar) Section: scrolling. Description: allows painting with mouse leaving a trail of glue in the Canvas. Blocks and Objects under this trail are then joined into a single Object. How to use: click on "Messy Glue", then click on the Canvas, and before releasing the mouse button drag the pointer around on Blocks and Objects you want to be joined. When you release the button, the newly-formed Object will blink three times. 49 BlocksLab 2.0 - User‟s Guide 5.3.2.3 Messy Unglue Toolbar: Glue. Image: Figure 79: Messy Unglue button (Glue Toolbar) Section: scrolling. Description: disassembles an Object removing single Blocks. How to use: click on "Messy Unglue", then click on the Canvas, and before releasing the mouse button drag the pointer around on one or more Blocks you want to unglue. Each time you unglue a Block, the rest of the Object will flash to show the result. You can also simply click on Blocks one at a time to remove them. 5.3.2.4 Magic Glue Toolbar: Glue. Image: Figure 80: Magic Glue button (Glue Toolbar) Section: scrolling. Description: joins all contiguous free Blocks to form a single Object with a single click. How to use: click on "Magic Glue", then click on a Block. If the Block you clicked on has contiguous free Blocks, they will join to form a new Object. Contiguous Objects will be ignored. Clicks on isolated Blocks, as well as clicks on Objects, will be ignored. 5.3.2.5 Magic Unglue Toolbar: Glue. Image: Figure 81: Magic Unglue button (Glue Toolbar) Section: scrolling. Description: unglues an Object into its composing Blocks with a single click. How to use: click on "Magic Unglue", then click on an Object to unglue. 5.3.3 Background Colors Toolbar Image: 50 BlocksLab 2.0 - User‟s Guide Figure 82: Background Color Toolbar Provided functions: allows to fill grid squares with solid colors or square-sized patterns. Fixed section contains: Toolbar selector; Scrolling arrows; Undo; Show/Hide Blocks. Scrolling section contains: one button for each available solid color and brush (see 6.5.2,”Toolbars Content”). 5.3.3.1 Special colors (additional Letter&Numbers Kit) Toolbar: Background Colors Image: Figure 83: special Color buttons (Background Colors Toolbar ) Section: scrolling Description: 5 lined and arithmetic backgrounds. How to use: click on these buttons, and then in the Background to generate lined and arithmetic squares to use along with Letters & Numbers Blocks (see 5.3.1.2.4). Figure 84: lined and arithmetic backgrounds for Letters&Numbers Blocks 5.3.3.2 Undo Toolbar: Background Colors. 51 BlocksLab 2.0 - User‟s Guide Image: Figure 85: Undo button (Background Colors) Section: fixed. Description: rolls back last background coloring operation. How to use: click on “Undo” to restore background to its previous state. 5.3.3.3 Show/Hide Blocks Toolbar: Background Colors. Image: Figure 86: Show/Hide Blocks button (Background Colors Toolbar) Section: fixed. Description: toggle shown/hidden state of Blocks to ease Background operations. How to use: outline Blocks in this button‟s image indicate that Blocks are shown: clicking on the button will hide them. Filled Blocks indicate that Blocks are hidden: clicking on the button will show them. 5.3.3.4 Solid colors and patterns Toolbar: Background Colors. Image: a square of a solid color, or any available square-sized brush. Section: scrolling. Description: these buttons represent elements you can use to fill grid squares. How to use: click on selected element, then click or click and drag on your Canvas. A click on a grid square in the Canvas overwrites any previous content. 5.3.4 Background Painting Toolbar Image: Figure 87: Background Painting Toolbar Provided functions: allows to edit Background pixel by pixel with basic painting tools. Fixed section contains: Toolbar selector; Scrolling arrows; Color/Brush selector; Pen width selector; 52 BlocksLab 2.0 - User‟s Guide Undo; Show/Hide Blocks. Scrolling section contains: Line tool; Freehand tool; Outline ellipse tool; Outline rectangle tool; Filled ellipse tool; Filled rectangle tool; Solid color paint tool; Brush paint tool; Solid color fill; Brush fill; Solid color spray; Brush spray; Eraser tool; Image Paint tool; Text Paint tool. 5.3.4.1 Color/Brush selector Toolbar: Background Painting. Image: Figure 88: Color/Brush selector button (Background Painting Toolbar) Section: fixed. Description: allows to select a solid color or a brush, according to the selected painting tool. How to use: this button shows as a color selector ( ) if any of the following tools is selected: Line; Freehand; Outline ellipse; Outline rectangle; Filled circle; Filled rectangle; Solid color paint; Solid color fill; Solid color spray. In this case, click on the arrows to cycle through available colors. If you double-click on color square, you can open a quick selection window: 53 BlocksLab 2.0 - User‟s Guide Figure 89: Quick color selection in Background Painting Toolbar This button will show as a brush selector instead ( ) if any of the following tools is selected: Brush paint; Brush fill; Brush spray. In this case, click on the arrows to cycle through available patterns. If you double-click on brush square, you can open a quick selection window: Figure 90: Quick brush selection in Background Painting Toolbar 5.3.4.2 Pen width/Brush size selector Toolbar: Background Painting. Image: Figure 91: Pen width/Brush size selector button (Background Painting Toolbar) Section: fixed. Description: allows to select a pen width or a brush size, according to the selected painting tool. How to use: this button shows as a pan width selector ( ) if any of the following tools is selected: Line; Freehand; Outline ellipse; Outline rectangle. In this case, click on the arrows to decrease or increase pen width. If you click on the square, you can open a quick selection window: 54 BlocksLab 2.0 - User‟s Guide Figure 92: Quick pen width selection in Background Painting Toolbar This button will show as a brush selector instead ( ) if any of the following tools is selected: Brush paint; Brush fill; Brush spray. In this case, click on the arrows to decrease or increase brush size. If you double-click on brush square, you can open a quick brush size selection window, similar to the one shown above in Figure 56. 5.3.4.3 Undo Toolbar: Background Painting. Image: Figure 93: Undo button (Background Painting Toolbar) Section: fixed. Description: Allows to undo last Background painting operation. How to use: Click on this button to restore Background to its previous state. 5.3.4.4 Show/Hide Blocks Toolbar: Background Painting. Image: 55 BlocksLab 2.0 - User‟s Guide Figure 94: Show/Hide Blocks button (Background Painting Toolbar) Section: fixed. Description: Allows to temporarily hide or restore Blocks to ease Background Painting operations. How to use: Click on this button to toggle the Hidden/Shown state of Blocks. 5.3.4.5 Line tool Toolbar: Background Painting. Image: Figure 95: Line button (Background Painting Toolbar) Section: scrolling. Description: Allows to paint a straight line. How to use: Click on this button, then click on the starting point for the line and drag it to the ending point, then release the mouse button. Line width and color are selectable (see 5.3.4.2 and 5.3.4.1). 5.3.4.6 Freehand tool Toolbar: Background Painting. Image: Figure 96: Freehand button (Background Painting Toolbar) Section: scrolling. Description: Allows to paint freehand on your Background. How to use: Click on this button, then click on the Canvas and drag the mouse. Release mouse button to stop painting. Line width and color are selectable (see 5.3.4.2 and 5.3.4.1). 5.3.4.7 Outline ellipse tool Toolbar: Background Painting. Image: Figure 97: Outline ellipse button (Background Painting Toolbar) Section: scrolling. Description: allows to draw outline ellipses or circles on your Background. 56 BlocksLab 2.0 - User‟s Guide How to use: Click on this button, then click on the Canvas and drag the mouse. Release mouse button when you‟re satisfied with the size, shape and position of your ellipse or circle. Line width and color are selectable (see 5.3.4.2 and 5.3.4.1). 5.3.4.8 Outline rectangle tool Toolbar: Background Painting. Image: Figure 98: Outline rectangle button (Background Painting Toolbar) Section: scrolling. Description: allows to draw outline rectangles or squares on your Background. How to use: Click on this button, then click on the Canvas and drag the mouse. Release mouse button when you‟re satisfied with the size, shape and position of your rectangle or square. Line width and color are selectable (see 5.3.4.2 and 5.3.4.1). 5.3.4.9 Filled ellipse tool Toolbar: Background Painting. Image: Figure 99: Filled ellipse button (Background Painting Toolbar) Section: scrolling. Description: allows to draw filled ellipses or circles on your Background. How to use: Click on this button, then click on the Canvas and drag the mouse. Release mouse button when you‟re satisfied with the size, shape and position of your ellipse or circle. The color is selectable (see 5.3.4.2 and 5.3.4.1). 5.3.4.10 Filled rectangle tool Toolbar: Background Painting. Image: Figure 100: Filled rectangle button (Background Painting Toolbar) Section: scrolling. Description: allows to draw filled rectangles or squares on your Background. How to use: Click on this button, then click on the Canvas and drag the mouse. Release mouse button when you‟re satisfied with the size, shape and position of your rectangle or square. The color is selectable (see 5.3.4.2 and 5.3.4.1). 57 BlocksLab 2.0 - User‟s Guide 5.3.4.11 Solid color paint Toolbar: Background Painting. Image: Figure 101: Solid color paint button (Background Painting Toolbar) Section: scrolling. Description: Allows to paint with a solid color, custom-sized round brush. How to use: see 5.3.4.6 (Freehand tool). Also see 5.3.4.2 (Pen width/Brush size selector) and 5.3.4.1 (Color/Brush selector) for instruction on how to adjust color and size of your brush. 5.3.4.12 Brush paint Toolbar: Background Painting. Image: Figure 102: Color/Pattern selector button (Background Painting Toolbar) Section: scrolling. Description: Allows to paint with a pattern-colored, custom-sized round brush. How to use: see 5.3.4.6 (Freehand tool). Also see 5.3.4.2 (Pen width/Brush size selector) and 5.3.4.1 (Color/Brush selector) for instruction on how to select pattern and size for your brush. 5.3.4.13 Solid color fill Toolbar: Background Painting. Image: Figure 103: Solid color fill button (Background Painting Toolbar) Section: scrolling. Description: Allows to fill an area of your Background with a solid color. How to use: Click on this button, then click on a point of the area you want to fill. BlocksLab will fill all contiguous pixels of the same color. The fill operation stops when it reaches a differently colored area. To select color, see 5.3.4.1 (Color/Brush selector). 5.3.4.14 Brush fill Toolbar: Background Painting. Image: Figure 104: Brush fill button (Background Painting Toolbar) 58 BlocksLab 2.0 - User‟s Guide Section: scrolling. Description: Allows to fill an area of your Background with a pattern. How to use: Click on this button, then click on a point of the area you want to fill. BlocksLab will fill all contiguous pixels of the same color. The fill operation stops when it reaches a differently colored area. To select pattern, see 5.3.4.1 (Color/Brush selector). 5.3.4.15 Solid color spray Toolbar: Background Painting. Image: Figure 105: Color/Pattern selector button (Background Painting Toolbar) Section: scrolling. Description: Allows to paint with a solid color simulating the effect of a spray can. How to use: see 5.3.4.6 (Freehand tool). Also see 5.3.4.1 (Color/Brush selector) for instruction on how to change color. 5.3.4.16 Brush spray Toolbar: Background Painting. Image: Figure 106: Brush spray button (Background Painting Toolbar) Section: scrolling. Description: Allows to paint with a pattern simulating the effect of a spray can. How to use: see 5.3.4.6 (Freehand tool). Also see 5.3.4.1 (Color/Brush selector) for instruction on how to change pattern. 5.3.4.17 Eraser Toolbar: Background Painting. Image: Figure 107: Eraser button (Background Painting Toolbar) Section: scrolling. Description: Allows to erase parts of your painting. How to use: See 5.3.4.12 (Brush paint). You can also select the size and color of your eraser as you would with a brush. 59 BlocksLab 2.0 - User‟s Guide 5.3.4.18 Image Paint tool Toolbar: Background image Figure 108: Image Paint button (Background Paint Toolbar) Section: scrolling Description: allows you to place an image in the Background. How to use: click on this command, then on the Background. This will open a standard dialog box for selecting the image file. Choose an image file on your computer, and the image will be placed on the Background, at the point where you clicked, with a border with handles, like in the following picture: Figure 109: an image to paint on the Background You can drag the handles to adjust position (the larger handle at the center of the top edge) or size (all other handles) of the image. When the placement and dimensions are the desired ones, click on the Background, out of the picture, and the picture will be "painted" on the Background. After exiting the move/resize mode, the picture is part of the Background and can no longer be moved or resized. 5.3.4.19 Text Paint tool Toolbar: Background Paint Image: Figure 110: the Text Paint button (Background Paint Toolbar) Section: scrolling Description: allows you to place text on the Background. How to use: click on this command, then on the background. You will get a text box in edit mode (see 5.3.1.3.5). In this box you can: 60 BlocksLab 2.0 - User‟s Guide change the text; format the text using the Format menu (see 5.4.4); change the size of the text box. When the TextBox has been modified as desired, to exit edit mode, simply click on the Background, out of the box. The text will be "painted" on the Background, and will no longer be editable, unlike a Text Block. 5.3.5 Action Toolbar Image: Figure 111: Action Toolbar Provided functions: allows to act on Objects by moving them, altering the order of superimposition, cloning them, hearing their sound or freezing moving Blocks. Fixed section contains: Toolbar selector; Scrolling arrows. Scrolling section contains: Send to point tool; Drag tool; Hear tool; Freeze tool; Bring to front tool; Send to back tool; Clone tool; Execute Action tool; Lock tool; Unlock tool; Block‟s Action tool; Merge Actions tool; Assemble Sentence/Word tool; Disassemble Sentence/Word tool. 5.3.5.1 Send to point Toolbar: Action. Image: 61 BlocksLab 2.0 - User‟s Guide Figure 112: “Send to point” button (Action Toolbar) Section: scrolling. Description: Allows to move a Block or Object to a point with preview. How to use: click on this button, then click on the Object or Block to move: you will see a line, starting from the center of the Object or Block, which you can stretch to the desired new position. When you are satisfied with the ending point of the line, release the mouse button, ant the Block or Object will move following the line until it reaches the desired position. 5.3.5.2 Drag Toolbar: Action. Image: Figure 113: Drag button (Action Toolbar) Section: scrolling. Description: Allows to move a Block or Object by dragging it with the mouse. How to use: click on this button, then click on the Block or Object you want to move, and drag the mouse until it reaches the desired position, then release the mouse button. 5.3.5.3 Hear Toolbar: Action. Image: Figure 114: Hear button (Action Toolbar) Section: scrolling. Description: allows to hear the feedback sound for a Block or Object. How to use: each Block or Object has a feedback sound: clicking on this button and clicking on a Block or Object will let you hear its sound. Sounds can only be heard if enabled in BlocksLab preferences (see 6.2.17 menu Edit/Preferences...). Right-click on the Block or Object and select “Properties” to see the properties dialog: 62 BlocksLab 2.0 - User‟s Guide Figure 115: Object properties dialog In this window you can choose between different types of hearable feedback from an Object. Clicking on “No Feedback” will make your Object emit no acoustic feedback. Clicking on “Default Block Feedback” will make your Object emit the standard feedback sound. Clicking on “Speak Following Text”, allows your Object to speak a feedback, if speech synthesis software is installed on the computer : enter your text in the box below, then select a voice from the listbox below. Finally, clicking on “Play Sound” will allow you to select a custom sound as a feedback for your Object. You can select a sound from the listbox below, if your Activity already contains sounds. Or, you can click on “Import” to open a file dialog and select a sound file. Or you can click on “Record”. This will open the following dialog: Figure 116: Record Sound dialog Here you can click on “Record” to use recording hardware connected to your computer, for example speaking into a microphone. Once you recorded a sound, you can listen to your recording by clicking on “Play”. Clicking on “Stop” will finish a recording or playback operation. You can record your sound as many times as you want, until you are satisfied with the result. Clicking on “OK” will allow you to close the recording window and keep what you recorded, after assigning a name to your new sound. Clicking on “Cancel” will exit the “Record Sound” dialog and discard what you recorded. Once you selected and set up a sound feedback, you can hear it by clicking on “OK” and using the “Hear” button on the Object. 5.3.5.4 Freeze Toolbar: Action. Image: Figure 117: Freeze button (Action Toolbar) 63 BlocksLab 2.0 - User‟s Guide Section: scrolling. Description: allows to stop animated Blocks. How to use: many Blocks are animated: see the Spiral Blocks used in 3.1, for example. If you want them to become static, select this button and click on animated Blocks to stop them. Click again on a Frozen Block to resume animation. 5.3.5.5 Bring to front Toolbar: Action. Image: Figure 118: “Bring to front” button (Action Toolbar) Section: scrolling. Description: allows to bring to front an Object or Block in an overlapping group. How to use: a grid square can be occupied by zero, one or many Blocks. In this case, only one of the overlapping Blocks will be visible, i.e. will be to the front. If you want a different Object to be to the front, click on it after selecting this button. 5.3.5.6 Send to back Toolbar: Action. Image: Figure 119: button (Action Toolbar) Section: scrolling. Description: allows to send to the back an Object or Block in an overlapping group. How to use: a grid square can be occupied by zero, one or many Blocks. In this case, only one of the overlapping Blocks will be visible, i.e. will be to the front. If you want send to the back an Object, click on it after selecting this button. 5.3.5.7 Clone Toolbar: Action. Image: Figure 120: Clone button (Action Toolbar) Section: scrolling. Description: allows to quickly create a copy of a Block or Object, including Controls and Properties. 64 BlocksLab 2.0 - User‟s Guide How to use: click on this button and then on a Block or Object do drag away a copy from it, then release the mouse button in the desired position for the copy. The cloned entity will replicate all Properties of the original, including Controls, making it easy to create groups of complex Objects. 5.3.5.8 Execute Action Toolbar: Action Image: Figure 121: the Execute Action button (Action Toolbar) Section: scrolling Description: executes the action configured in the Object's Properties. How to use: click on this button, and then on the Object or Block to execute its Action. For details about assigning an action to an Object, see 5.2. 5.3.5.9 Lock Toolbar: Action Image: Figure 122: the Lock button (Action Toolbar) Section: scrolling Description: sets the "Lock Position" property (see 5.2) of a Block or Object, so that the Object or Block is stuck in its current position, and can be moved only using the Drag button (Action Toolbar, see 5.3.5.2). How to use: click on this button, and then on the Object or Block that must be locked. 5.3.5.10 Unlock Toolbar: Action Image: Figure 123: the Unlock button (Action Toolbar) Section: scrolling Description: clears the "Lock Position" property (see 5.2) of a Block or Object so that the Object or Block, if it was blocked, is again free to be moved with all Controls or Actions. If the target was not locked, the button will have no effect. 65 BlocksLab 2.0 - User‟s Guide How to use: click on this button, and then on the Object or Block that must be unlocked. 5.3.5.11 Blocks’s Action (Multimedia additional Kit) Toolbar: Action Image: Figure 124: the Block’s Action button (Action Toolbar) Section: scrolling Description: Performs the action set in the Properties of a Block (see 5.2), although this Block is part of an Object. Note that the same effect is obtained by using the “Execute Action” button (see 5.3.5.8) on a Block while holding down the [Shift] key. How to use: click on this button, then on the Block whose action should be performed. For details about assigning an action to a Block, see 5.2. 5.3.5.12 Merge Actions Toolbar: Action Image: Figure 125: the Merge Actions button (Action Toolbar) Section: scrolling Description: performs the actions configured in the Properties of a series of Blocks or Objects. How to use: click on this button. Click on the Canvas and, keeping the left mouse button pressed, sketch a freehand line on selected Objects or Blocks, as in the following illustration. Figure 126: a sequence of actions 66 BlocksLab 2.0 - User‟s Guide As soon as you release the mouse button, using the line as a guide the actions of selected Blocks and/or Objects will be executed. For details about assigning an action to an Object, see 5.2. The Merge Actions button is specially useful when used on the Letters & Numbers Blocks (see 5.3.1.2.4): in fact, in this case BlocksLab will try to make your computer speak the word represented by the path between Blocks. 5.3.5.13 Disassemble Sentence/Word Toolbar: Action Image: Figure 127: the Disassemble Sentence/Word button (Action Toolbar) Section: scrolling Description: Copies a Text Object (see 5.3.1.2.5) splitting it into more elementary Text Objects: an Text Object with a sentence generates Objects with the components words; a Text Object with a word generates Text Objects with component letters, numbers and interpunctions. How to use: click on this button and then click a Text Object. The result of the operation, i.e. a group of text Objects, will “follow” the mouse pointer. Choose where to place the group and click: the Text Objects will be placed on the Canvas and the pointer will be "free", indicating that the operation has ended. Figure 128: a "Disassembled" sentence 5.3.5.14 Assemble Sentence/Word Toolbar: Action Image: 67 BlocksLab 2.0 - User‟s Guide Figure 129: the Assemble Sentence/Word button (Action Toolbar) Section: Scrolling Description: reverses the previous Action, i.e. uses the more basic Text Objects to produce a more complex Text Object: from Text Objects with letters it produces a word Text Object; from Text Objects with words, a text Object with a sentence. How to use: click on this button and then draw a line on a series of Text Objects. The result of the operation, a text object, will follow the mouse pointer. Choose where to place the object, and click: the Text Object will be placed on the Canvas and the pointer will be "free", indicating that the operation has ended. 5.3.6 Controls Toolbar Image: Figure 130: Controls Toolbar Provided functions: allows to assign to Blocks or Objects properties of motion or interactivity. Fixed section contains: Toolbar selector; Scrolling arrows; Clear Controls; Start/Stop; Global Speed; Scrolling section contains: Travel Left; Travel Right; Travel Up; Travel Down; Bounce Horizontal; Bounce Vertical; Bouncing Ball; Maze; Keyboard; Trace; Go to spot; Go to Object; Hide/Show; Bag; 68 BlocksLab 2.0 - User‟s Guide Record; Tunnel; Magnet; Zap. 5.3.6.1 Controls and command keys Many Controls assign to an Object behaviors controllable by pressing buttons: in this case, in the Object's Properties dialog box (see 5.2) appears a list control containing all keys that can be selected for different commands. For example, the in following image we see the Properties of command keys for movement in four directions. Figure 131: command keys in the Properties of an Object You can choose a key from the list, or click on the list and press the desired key. In the above example I could click on the list associated with the command "Go Left", i.e. the box that shows "a", and select the button "b" from the list or press the button "b" on my keyboard. This method can cause configuration errors if you do not keep in mind that for BlocksLab, "B" (uppercase) and "b" (lowercase) are two separate commands. Make sure that the letter that appears in the combo box exactly matches the desired command key. Finally, in the case where you want an object to respond only to some of the commands, you can disable unwanted selection button by resetting them: to do this, select the appropriate list control and press the SPACEBAR. The box will show a blank space, and the command will be disabled. 5.3.6.2 Container Controls and the “Copy” command Two controls can be defined as "containers": the Bag Control(5.3.6.15) and the Magnet Control(5.3.6.18). Their common feature is the ability to "collect" and "contain" other Blocks or Objects. For an Object associated with a Container Control, BlocksLab defines two different behaviors for copy and paste: normal Copy (menu Edit/Copy, see 5.4.2.3) means a later "Paste" (menu Edit/Paste, see 5.4.2.5) will create copies of the container Object and any contained Objects; Copy Container only (menu Edit/Copy Without Content, see 5.4.2.4): the "Paste" operations will create copies of the empty container Object only, and not of any contained Objects. 5.3.6.3 Clear Controls Toolbar: Controls. Image: Figure 132: Clear Controls button (Controls Toolbar) Section: fixed. 69 BlocksLab 2.0 - User‟s Guide Description: strips away Controls from selected Object. How to use: Click on this button, then click an item to reset the Controls. This step is necessary if you want to change an Object, for example to add or remove Blocks: since it is not allowed to use Glue tools on an Object with Controls, you must delete the Controls before you can modify the structure of the Object (see 2.5 for a detailed description). In case you want to replace a Control, you do not need to use this button, but simply click on the new Control button, and then on the Object. BlocksLab will ask if we want to replace the old Control with the new one, with the following dialog: Figure 133: dialog for replacing a Control If we click on the "Yes" button, the new Control will replace the previous one. 5.3.6.4 Start/Stop Toolbar: Controls. Image: Figure 134: Start/Stop buttons (Controls Toolbar) Section: fixed. Description: allows to stop your Activity if it‟s running, or resume if it‟s stopped. How to use: an activity can be running or stopped. Use this button to switch between the two states. 5.3.6.5 Global Speed Toolbar: Controls. Image: Figure 135: Speed button (Controls Toolbar) Section: fixed. Description: allows to regulate global speed for your Activity. How to use: click on the arrows to increase or decrease your Activity‟s global speed by 10, from 10 to a maximum of 100. The green indicator bar to the right will change according to the speed. Also right-click on the green bar to open a quick selection menu. 70 BlocksLab 2.0 - User‟s Guide 5.3.6.6 Travel Left/Right/Up/Down Toolbar: Controls. Image: Figure 136: Travel Left/Right/Up/Down buttons (Controls Toolbar) Section: scrolling. Description: allows to make an Object continuously travel in the selected direction: when the Object exits the Canvas, it will re-enter from the opposite border, continuing to travel in the same direction. How to use: click on one of these buttons, then on an Object. If the Activity is running, the Object will continuously travel in the selected direction. After applying this Control, the properties dialog for the target Object will be modified as follows: Figure 137: Object properties for the "Travel..." controls The checkbox “Stop On Collision” determines whether the Object will stop upon meeting an Obstacle (another Object or a Block). The sliding control determines travelling speed for this Object: the actual speed depends on this setting as well as on global activity speed (see 5.3.6.5, Global Speed). 71 BlocksLab 2.0 - User‟s Guide 5.3.6.7 Bounce Horizontal/Vertical Toolbar: Controls. Image: Figure 138: Bounce Horizontal/Vertical buttons (Controls Toolbar) Section: scrolling. Description: allows an Object to travel continuously in the selected direction, bouncing back when it reaches the border of the Canvas. How to use: click on one of these buttons, then on an Object. If the Activity is running, the Object will continuously travel in the selected direction, bouncing back when it reaches the borders. After applying this Control, the properties dialog for the target Object will be modified as follows: Figure 139: Object properties for the "Bounce..." controls The checkbox “Stop On Collision” determines whether the Object will stop upon meeting an Obstacle (another Object or a Block). If it‟s checked, the checkbox below becomes active, making it possible to decide whether the Object will stop or bounce upon collisions. The sliding control determines travelling speed for this Object: the actual speed depends on this setting as well as on global activity speed (see 5.3.6.5, Global Speed). 72 BlocksLab 2.0 - User‟s Guide 5.3.6.8 Bouncing Ball Toolbar: Controls. Image: Figure 140: Bouncing ball button (Controls Toolbar) Section: scrolling. Description: allows an Object to continuously bounce with an angle of 45°. How to use: click on this button, then on an Object. If the Activity is running, the Object will continuously travel at an angle of 45°, bouncing back when it reaches the borders. After applying this Control, the properties dialog for the target Object will be modified as follows: Figure 141: Object properties for the "Travel..." control The checkbox “Bounce On Collision” determines whether the Object will bounce upon meeting an Obstacle (another Object or a Block). The Object will always bounce on the borders of the Canvas. The sliding control determines travelling speed for this Object: the actual speed depends on this setting as well as on global activity speed (see 5.3.6.5, Global Speed). 5.3.6.9 Maze Toolbar: Controls. Image: 73 BlocksLab 2.0 - User‟s Guide Figure 142: Maze button (Controls Toolbar) Section: scrolling. Description: makes the Object travel, turning to the left each time it meets an obstacle. How to use: click on this button, then on an Object. If the Activity is running, the Object will start to travel to the left, turning to the left each time it meets a Block, an Object or the borders of the Canvas. After applying this Control, the properties dialog for the target Object will be modified as follows: Figure 143: Object properties for the "Maze" control The sliding control determines travelling speed for this Object: the actual speed depends on this setting as well as on global activity speed (see 5.3.6.5, Global Speed). 5.3.6.10 Keyboard Toolbar: Controls. Image: Figure 144: Keyboard button (Controls Toolbar) Section: scrolling. Description: makes an Object or Block move in the four directions upon pressure of selected keys. 74 BlocksLab 2.0 - User‟s Guide How to use: click on this button, then on an Object. Affected Object will move, regardless of the running/stopped state of the Activity, when the user presses configured keys (see Figure 142 below for default settings). After applying this Control, the properties dialog for the target Object will be modified as follows: Figure 145: Object properties for the "Keyboard" control The “Animated Motion” checkbox determines whether the Object will “jump” from a grid square to the next, or, if checked, will move fluidly displaying all frames of its action. The "Check Collision" checkbox determines whether the Object can move freely over the entire Canvas (unchecked) or if it will stop stop upon collision with other Blocks or Objects. If the box is checked, the check box "Push On Collision" (see below) is activated; The "Push On Collision" checkbox determines what happens upon contact between the Object and another Object or Block: if it is checked, the Object moved by the Keyboard Control will "push" ahead, in the direction of his movement, any Object or Block met. Checking this box will also activate the "Push Level" control (see below). If the box is not checked, Objects or Blocks met behave as a stationary obstacle; The selector titled "Push Level” allows you to select a number from 1 up, and is available only if you have selected the checkboxes "Check Collision” and “Push On Collision" (see above). The number represents how many Objects or Blocks can be pushed: for example, if the value is 1, the object moved by the Keyboard Control can push ahead just another Block or Object: if it meets a second one, the sum of the two Items will become immovable. If the 75 BlocksLab 2.0 - User‟s Guide value is 2, the Object may push ahead two items, while more than two become immovable, and so on. The following image shows an example: Figure 146: the Keyboard Control and Push Level the four subsequent selectors allow you to customize the command keys for four directions. For their use, see paragraph 5.3.6.1. This Control can act on more than one Object. If multiple targets share the same command keys for movement, they will move together when these keys are pressed. In the case of different selections for buttons, you can move targets independently, allowing, for example, two players to independently control their Avatar. 5.3.6.11 Trace Toolbar: Controls. Image: Figure 147: Trace button (Controls Toolbar) Section: scrolling. Description: similar to the Keyboard Control, but allows Objects to move leaving a trail of Blocks. How to use: usage is similar to the Keyboard Control (see 5.3.6.11). But the Object can leave a trail of copies, which are actually the unglued building Blocks of the Object. After applying this Control, the properties dialog for the target Object will be modified as follows: 76 BlocksLab 2.0 - User‟s Guide Figure 148: Object properties for the Trace control The “Animated Motion” checkbox determines whether the Object will “jump” from a grid square to the next, or, if checked, will move fluidly displaying all frames of its action. For the explanation of "check boxes Check On Collision" Push On "Collision" and "Push" Level, see paragraph 5.3.6.10; the four subsequent selectors allow you to customize the command keys for four directions. For their use, see paragraph 5.3.6.1. This Control can affect more than one Object. If the affected Objects share the same command keys for movement and Trace, they will move together when the keys are pressed. In the case of different sets of keys, they can move independently, thus allowing, for example, two players to independently control two Avatars. 5.3.6.12 Go to spot Toolbar: Controls. Image: Figure 149: “Go to Spot” button (Controls Toolbar) Section: scrolling. 77 BlocksLab 2.0 - User‟s Guide Description: allows the user to send Objects or Blocks to a specified spot by pressing configured keys. How to use: click on this button, then on an Object. The following properties dialog will open immediately: Figure 150: Object properties for the Trace control As you can see, the additional properties are empty by default, and one or more spots, up to four, must be configured for the Control to activate. Clicking on a “Set Spot” button will close the dialog, allowing the user to drag a line from the center of the target Object to the desired spot. The movement represented will automatically be assigned a command key, then the dialog will reopen, allowing you to modify the configuration before you confirm or reject it. Each destination command key can be canceled individually by clicking on the "Reset" button next to the command button selector. For details on configuring command keys, see paragraph 5.3.6.1. 5.3.6.13 Go to Object Toolbar: Controls. Image: Figure 151: “Go to Object” button (Controls Toolbar) Section: scrolling. Description: allows the user to send Objects or Blocks to a specified Object by pressing configured keys. How to use: click on this button, then on an Object. The following properties dialog will open immediately: 78 BlocksLab 2.0 - User‟s Guide Figure 152: Object properties for the Trace control As you can see, the additional properties are empty by default, and one or more target Objects, up to four, must be configured for the Control to activate. Clicking on a “Set Object” button will close the dialog, allowing the user to click on a target Object. The movement represented will automatically be assigned a command key, and the dialog will reopen for further operations. By clicking on "Position", the dialog box closes and the Object is temporarily shown in its position, which by default is the one with its Center superimposed to the center of the target Object. At this point you can click on the Object and drag it to a different location of arrival. Note that the Object's movements are bound to the Grid: If you want to move the Object by one pixel at a time, press and hold the [Shift] as you click on it. As soon as you release the Object, this returns to its original position and the dialog reopens for further operations, allowing you to modify the configuration before you confirm or reject it. To summarize: if I select Object A, click on the "Go to Object" button, then I select the letter "V" from the list titled "When Type", then I click on "Set Object" and select Object B, and finally click "OK" in the dialog, pressing "V" Object A moves up to the front to Object B, with its Center superimposed on the center of Object B; if I execute the same sequence, but before clicking on "OK" I click on "Position" and drag the Object to, for example, a position two boxes to the right of Object B, pressing "V" Object A will move up a position two boxes to the right of B. About configuring command keys, see paragraph 5.3.6.1. 79 BlocksLab 2.0 - User‟s Guide 5.3.6.14 Hide/Show Toolbar: Controls. Image: Figure 153: Hide/Show button (Controls Toolbar) Section: scrolling. Description: allows to make an Object disappear or reappear on specified events. How to use: click on this button, then on an Object. The following properties dialog will open immediately: Figure 154: Object properties for the Trace control two configurable command keys are associated with this Control, to manually make the Object disappear or reappear. About configuring command keys, see paragraph 5.3.6.1; The following section allows to associate Hide/Show behavior to collisions with specific Objects, which can be selected by clicking on the appropriate “Set Object” button; finally, the checkbox labeled “Allow Collisions When Hidden” determines whether the affected Object totally disappears (unchecked) or becomes invisible but still collides with other Objects (checked). 80 BlocksLab 2.0 - User‟s Guide 5.3.6.15 Bag Toolbar: Controls. Image: Figure 155: Bag button (Controls Toolbar) Section: scrolling. Description: allows an Object to “pick up” contiguous Objects or Blocks, becoming a Bag for an owner Object, which carries it along. How to use: click on this button, then on an Object. The following properties dialog will open immediately: Figure 156: Object properties for the Bag control While slightly complicated, the properties for the Bag Control allow very detailed and flexible configuration: The button labeled „Set Object‟, close to „Bag Belongs To:‟, allows to select the Bag‟s owner, clicking on an Object. The Bag will consequently move along with its owner. The owner can be associated with any Control. For example, associating the owner with a Keyboard Control will let the user move the owner and its Bag on the Canvas, picking up 81 BlocksLab 2.0 - User‟s Guide Objects and Blocks and dropping them on selected spots, interactively modifying the layout of the Activity; the button labeled „Reset‟ allows to clear the owner selection, making the Bag a static Object, which can still pick up colliding Objects; the configurable command key for „Pick Up‟ will make any contiguous Object be “collected”, disappearing from the Canvas. The command key for „Drop‟ will make a collected Object reappear by the Bag – if the Bag moves, this effectively looks as if the Object was picked up and then dropped somewhere else; About configuring command keys, see paragraph 5.3.6.1; the key labeled „Show Current‟ will make an Object appear blinking 3 times by the Bag, showing which Object will be dropped if the user presses the „Drop‟ key; the key labeled „Get Next and Show‟ will select the next Object in the drop list, readying it to be dropped, and show it like the „Show Current‟ command. Repeatedly pressing this key will make the Bag cycle through all collected Objects and show them, allowing the user to select which Object to drop; the next two checkboxes, labeled “First Picked Is First Dropped” and "First Picked Is Last Dropped" are mutually exclusive, i.e. selecting one will deselect the other. If you imagine the pickup operation like a stack of dishes, this choice tells whether the dropped Object is the dish on top of the stack (i.e. the last to be picked up) or the dish at the bottom (i.e. the first to be picked up); the last checkbox, „Moving Bag‟, affects a visual feedback: if checked, the Bag will slightly tremble to be easier to locate. 5.3.6.16 Record Toolbar: Controls. Image: Figure 157: Record button (Controls Toolbar) Section: scrolling. Description: allows the user to record a hand-drawn path for the Object‟s movement. How to use: click on this button, then on an Object. The following properties dialog will open immediately: 82 BlocksLab 2.0 - User‟s Guide Figure 158: Object properties for the Record control The „Record Path‟ button will make the dialog temporarily close, and highlight the target Object. The user shall then click on the Object and drag it to mark a path on the Canvas, as shown below: Figure 159: Example of path recording Releasing the mouse button will end the recording operation and reopen the dialog. This operation can be repeated as many times as necessary. 83 BlocksLab 2.0 - User‟s Guide The configurable command keys allow the user to start or stop the target Object‟s movement along the path, and also decide the direction of travel. For their configuration, see paragraph 5.3.6.1. The sliding control determines travelling speed for this Object: the actual speed depends on this setting as well as on global activity speed (see 5.3.6.5, Global Speed). 5.3.6.17 Tunnel Toolbar: Controls Image: Figure 160: the Tunnel Control (Controls Toolbar) Section: scrolling Description: turns an object into a Tunnel, which allows the transition to other Screens for an Object passing through it. How to use: click on this button, and then on the Object or Block you wish to transform into a Tunnel. To configure the Tunnel you should right click on the Object, to open its Properties dialog, which will appear as follows: Figure 161: the Properties dialog for a Tunnel Object At the bottom of the dialog box, after the checkbox labeled "Lock Position", we can see the configuration pane for the Tunnel, which contains: a list control titled "Go To Screen”, which shows a list of available virtual Screens, to select the Tunnel destination; 84 BlocksLab 2.0 - User‟s Guide a text field entitled "Allow Objects Named:" the contents of which serves as a filter for the Tunnel, as follows: o if this field is left blank, any object can traverse the Tunnel; o if this field contains some text, only Objects whose name is equal to the text or starts with the text can traverse the Tunnel. For example, if the field contains "cat", "cat" and "Blackcat" can traverse the Tunnel, while "dog" may not. Multiple filters can be separated by commas: If the field contains "cat,dog" only Objects whose names begin with "cat" or "dog" will cross the Tunnel; a list entitled "Change Screen", with the following options: o One Block Contained: the jump to target Screen takes place if the Tunnel contains at least one Block of the Object which crosses; o Half Contained: the jump to target screen takes place if the Tunnel contains at least half of the object that crosses; o Full Contained: the jump to target screen takes place if the Tunnel contains the whole Object that crosses; o On Collision: the jump occurs on any contact between the Object and the Tunnel; a list entitled "Jump to", with the following options: o Current Position: the Object that crosses the Tunnel will emerge in the same position it occupied when it entered the Tunnel; o Fixed Position: the Object that crosses the Tunnel will emerge in a precise point, selectable by clicking on the "Define Position" button (see below); o Object: the Object that crosses the Tunnel will emerge in a target point corresponding to the center of the rectangle that encloses a target Object, which can be chosen by clicking on the "Set Object" button (see below); a button whose state depends on the configuration of controls: o if you select "Current Position", then the button is inactive; o if you select "Fixed Position", the button becomes "Define Position": this will display the destination Screen, allowing you to click on the point you want as your destination; o If we select "Object", the button becomes "Set Object": clicking on it, the destination Screen will be displayed allowing you to select a target Object (see above); A "Reset" button to restore the configuration to its default control values; A list entitled "Transition", which allows you to select two options: o No Transition: the transition from one Screen to the other is immediate; o Crossfade: move from one Screen to another using a crossfade effect. In summary, according on the configuration, our Tunnel Object can be crossed by any Object, or only by Objects whose name starts with a specific text. It can be crossed if an Object overlaps completely to the Tunnel, or if overlaps with at least half of its Blocks, or with a single Block, or only at the slightest contact. The Tunnel can lead to any Screen, and the point of arrival may be the same where the Object was located when it crossed the Tunnel, or a specific point or the center of the rectangle that contains a specific Object. The passage from one Screen to another, can be visually immediate or with a crossfade effect. 85 BlocksLab 2.0 - User‟s Guide 5.3.6.18 Magnet Toolbar: Controls Image: Figure 162: Magnet Control (Controls Toolbar) Section: scrolling Description: turns an Object into a Magnet, which can capture other Objects and organize them into a row that moves together with the Magnet. How to use: click on this button, and then on the Object or Block to turn it into a Magnet. The Object's properties dialog box, with the configuration pane for the magnet, will appear as follows: Figure 163: Magnet Control's configuration To understand more easily the configuration you can imagine the Magnet as a version of the Bag Control (see 5.3.6.15) that does not keeps captured Objects "inside", but "outside". As the Bag Control, the Magnet Control has an Owner, i.e. an Object that the Magnet can follow in its movements, and command keys to configure, but it also has specific configuration options. In the dialog box we can find: 86 BlocksLab 2.0 - User‟s Guide a label saying "Belongs To:", followed by a blank space, which means that the Control does not have an owner; the "Set Object” button, which allows you to select an Owner. Once selected, its name will appear in the space after "Belongs To" (see above); the "Reset" button that allows you to clear the selection of the Owner; a list entitled "Pick Up", to select a command key to "pick up" objects near the Magnet; a list titled "Drop" to select a command key to "release" the last object of the row; A list entitled "Change Attachment Side", to select a command key: pressing this key will cause the Magnet and the row of collected Objects to stick to the next side, in clockwise order, of the rectangle that encloses the Owner. Here's a Visual example of the effect: every time the command key is pressed, the Magnet (blue rectangle) and trapped Objects (yellow and green) will move onto the next side of the imaginary rectangle which encloses the Owner (red). After four transformations the Magnet and its Objects will find themselves in the initial situation; Figure 164: four subsequent executions of "Change Side Attachment" A list control entitled "Rotate Attachment Order", to select a command key. Pressing will act on the order of captured Objects as follows: the first Object (the closest to the Magnet) becomes the second and the last Object (the furthest away from the Magnet) becomes the first. In the following image we can see, as an example, the effect of three consecutive executions of this command: 87 BlocksLab 2.0 - User‟s Guide Figure 165: subsequent executions of "Rotate Attachment Order" A checkbox titled "Pick Only Objects Named:", which activates a filter on the Objects that the Magnet can collect (see below); a text field, which becomes active only if you select the box "Pick Only Objects Named", where you can write the first part of the name of the Objects that the magnet can collect. If the box is checked and this head contains the text "Cat", the magnet can collect items "Cat", "CatBlack", CatWhite", but not, for example," Dog ". Multiple filters can be specified by separating them with commas: e.g. "dog cat" will allow the Magnet to collect only those objects whose names begin with "dog" or "cat"; a number field titled "Distance Between Objects", which determines the distance in a row, in pixels, between collected Objects; A number field titled "Capturing Distance", which determines the maximum range, in pixels, of the "magnetic field", i.e. the maximum distance of capture; a checkbox entitled "Moving Magnet", which decides whether the Magnet follows the Owner in its movements (checked) or not (unchecked). For the behavior of Objects bound to a Magnet Control in copy/paste operations, see paragraph 5.3.6.2. Finally, note that if hit by the bullets of a "Zap" Object (see 5.3.6.19), the Magnet and the Owner are independent, i.e. only the one that was hit disappears. 5.3.6.19 Zap Toolbar: Controls Image: 88 BlocksLab 2.0 - User‟s Guide Figure 166: Zap button (Controls Toolbar) Section: scrolling Description: allows an Object to shoot bullet that delete target Objects. How to use: click on this button, then on an Object. After you apply this control, the Properties dialog box of the Object will be modified as follows: Figure 167: Properties for a Zap Control In the bottom half of the dialog box, below the "Lock Position" checkbox, are specific properties for the Zap Control: four list controls for the selection of command keys to fire in four directions. For configuring command keys see 5.3.6.1; the text "Belongs To" followed by an empty space or the name of an Object: a Zap Object, like Bags and Magnets, can belong to another Object: imagine For example a machine gun that belongs to a plane. If we specified an Owner for the Zap (see below) we will see the Owner‟s name after "Belongs To:"; If there is no Owner this space is empty; two buttons to select an owner (Set Object) and to clear the selection (Reset); 89 BlocksLab 2.0 - User‟s Guide a checkbox entitled "Shoot only Objects Named:": if the box is checked, the following text field is activated and can contain a filter (see below); if the box is not checked, the following text field is disabled and any Object may be deleted by the bullets of the Zap; a text field that can contain a filter: Please see the description of the filter property in 5.3.6.15; a checkbox entitled "Moving": if it is checked, if Zap has an owner and this moves, the Zap moves as if part of the Owner; if it is not checked, the Zap remains immobile while the Owner moves; a series of radio buttons that allow you to select bullets of different sizes, as shown below. The "Custom" box, if selected, means that the user has chosen a Block as a bullet; Figure 168: bullet selection for a Zap the image of a custom bullet , if any (see above); a button titled "Select" which allows you to click on a Block, which will become the custom bullet for this Zap (see above); a control with a slider from a minimum to a maximum value, which allows you to select the traveling speed for the bullets of this Zap. 90 BlocksLab 2.0 - User‟s Guide 6. Menus BlocksLab‟s menus, a less evident part of the user interface, contain commands for advanced or less frequently used operations – younger users can, for example, learn to use the “File/Save…” and “File/Open…” commands and ignore the rest, concentrating on the more visually appealing elements of the interface. 6.1 File Menu This menu contains commands concerning disk files and print operations. Figure 169: File menu As not all operations in this menu are allowed by unregistered copies of BlocksLab, selecting one of them will open a remainder window: Figure 170: Registration remainder (demo version only) 91 BlocksLab 2.0 - User‟s Guide 6.1.1 New… Creates a new empty Activity, prompting the user to save current Activity if it was modified. 6.1.2 Open… If current Activity was modified, prompts the user to save it. Then opens a standard file open dialog to select a disk file to open. 6.1.3 Save If current Activity was modified, this command will store it to a disk file. If the Activity was never saved, the “File/Save” command will act as a “File/Save As…” command (see 6.1.4). This feature is disabled in demo version. 6.1.4 Save As... If current Activity was modified, this command will open a standard file save dialog to allow the user to specify a file name and a path. Specified file/path will become the implicit target for any subsequent “File/Save” command. This feature is disabled in demo version. 6.1.5 Load Background Displays a standard file open dialog, allowing the user to select a picture file to be used as the new Background. The image contained in selected file will be scaled to fill the Canvas. 6.1.6 Save Background Displays a standard file save dialog, allowing the user to select a file name and a path to be used to store the Background as a picture file. This feature is disabled in demo version. 6.1.7 Save Screen as Image Displays a standard file save dialog, allowing the user to select a file name and a path to be used to store the whole Canvas (Blocks+Objects+Background) as a picture file. This feature is disabled in demo version. 6.1.8 Page Setup... Opens the following dialog, allowing the user to specify print parameters for the “File/Print…” and “File/Print Blocks Only…” commands. 92 BlocksLab 2.0 - User‟s Guide Figure 171: Page Setup dialog 6.1.9 Print... Opens a standard print dialog, allowing the user to request a printout of the whole Canvas (Blocks+Objects+Background). 6.1.10 Print Blocks Only... Opens a standard print dialog, allowing the user to request a printout of interactive entities (Blocks+Objects) on a white Background, regardless of the Background‟s onscreen appearance. 6.1.11 Print All Screens Opens a standard print dialog box, allowing the user to request a printout of the entire Canvas (Blocks+Objects+Background) of all the Activity's virtual Screens. 6.1.12 Print All Screens Blocks Only…. Opens a standard print dialog box, allowing the user to request a printout of interactive entities (Blocks+Objects) of all the virtual Screens for current Activity, on a white background, ignoring the Background contents. 6.1.13 Generate Report… Allows you to save a text file that contains information about current Activity. Selecting this command will open the following dialog: 93 BlocksLab 2.0 - User‟s Guide Figure 172: a Report's configuration The configuration options are the following: Document Memo: if selected, include in the Report the contents of the Memo (see 5.4.2.17); All Screens/Screen Only: include in this Report information on all virtual Screens or, alternatively, on current Screen only; All Objects/With Control Only/No Objects: include in Report, respectively: o all Objects; o only Objects associated with a Control; o no information about Objects; Screen By Screen Keyboard Command List: include in the Report the list of command keys specific to each virtual Screen; Document Full Keyboard Command List: include in the Report the list of command keys for the entire document, specifying the Object they are associated with, but not the Screen; Store Settings: allows you to save the Report‟s settings as the default configuration. Clicking the "Generate" button will open a dialog box to specify the path and file name for the the Report text file. 6.1.14 Exit Exits BlocksLab, prompting the user to save current Activity if it was modified since the last save. 6.2 Edit Menu This menu contains commands concerning advanced editing operations and BlocksLab‟s settings. Editing operations in this menu only affect selected Blocks or Objects. Blocks or Objects can be selected or unselected in three ways: By means of the “Edit/Select All”, the “Edit/Unselect all” or the “Edit/Invert Selection” commands; By clicking on the Canvas while holding the “Ctrl” key; in this case, you can: 94 BlocksLab 2.0 - User‟s Guide Click on single Blocks or Objects to add (if unselected) or remove (if selected) them from current selection. Selected Blocks will be highlighted by a yellow outline; Click on the Canvas and drag the mouse to cover a rectangle-shaped area; all Blocks and Objects inside this rectangle will be added to current selection. Figure 173: File menu 6.2.1 Undo Background Changes Allows to revert the Background to its previous state, undoing last operation (an editing operation done by a Toolbar instrument as well as a Background operation from the menus) 6.2.2 Cut This operation erases Blocks and Objects in current selection, copying them to the clipboard. A subsequent “Edit/Paste” command can be used as many times as desired to restore cut entities. Restored Blocks and Objects will reappear in the same position as before, with the same properties and Controls, and will be highlighted as the new current selection. This command is only available if current selection isn‟t empty, i.e. if at least one Block or Object is selected. 6.2.3 Copy This operation copies Blocks and Objects in current selection to the clipboard. A subsequent “Edit/Paste” command can be used as many times as desired to restore copied entities. Restored Blocks and Objects will reappear in the same position as before, with the same properties and Controls, and will be highlighted as the new current selection. 95 BlocksLab 2.0 - User‟s Guide This command is only available if current selection isn‟t empty, i.e. if at least one Block or Object is selected. 6.2.4 Copy Without Content This command operates only on containers, i.e. Objects associated with a Bag or Magnet Control Board (see 5.3.6.15) or a magnet (see 5.3.6.18), and it works like the Copy command (see above). The difference between the two commands is this: while the Copy command copies the Container and contained Objects, Copy Without Content copies only the container. 6.2.5 Paste Restores Blocks and Objects, from the clipboard, as the new current selection. This command is only available if the clipboard isn‟t empty. 6.2.6 Clear After prompting the user for confirmation, permanently erases Blocks and Objects in current selection. This command is only available if current selection isn‟t empty, i.e. if at least one Block or Object is selected. 6.2.7 Select All Selects all Blocks and Objects in current Activity. 6.2.8 Unselect All Empties current selection. This command is only available if current selection isn‟t empty, i.e. if at least one Block or Object is selected. 6.2.9 Invert Selection This command inverts the selected/unselected state of all Blocks and Objects in current Activity. 6.2.10 Copy as Image This command copies the Canvas (Background+Blocks+Objects) to the system clipboard as an image, making it available for Paste commands in other applications. 6.2.11 Paste Image as Background This command will replace current Background image with the one contained in the clipboard (if any), after prompting the user for confirmation. 6.2.12 Paste Image on Background This command is similar to the “Paint Image” command in Background Paint Toolbar (see 5.3.4.18), with one important difference: while the Paint Image tool asks us to select an image file, 96 BlocksLab 2.0 - User‟s Guide the Paste Image on Background command uses, if any, the image contained in the clipboard. The procedure for the use of this command is as follows: use the "copy" command on an image, even outside of BlocksLab (e.g. on an image in a web page); switch to BlocksLab and select the Edit/Paste Image on Background command. A box with handles for moving and changing dimensions will appear on the Canvas, as described for the Paint Image tool. We can then move the box and resize its frame until we have the desired position and size. Then we have to click outside the box to "stamp" the image in the Background of our Activity. 6.2.13 Erase Single Control This command allows you to delete the Control assigned to an Object, like the Remove Control button in the Controls Toolbar (see 5.3.6.3). When you select this command, the movement of the Activity stops. At this point we can click a on Block or on an Object: the controls assigned to that Block or Object will be removed, and the movement of the Activity will resume. 6.2.14 Clear All Controls This command will eliminate all associated Controls from Blocks and Objects of current Activity, after prompting the user for confirmation. 6.2.15 Clear Background This command will restore the Background to its default state, after prompting the user for confirmation. 6.2.16 Document Memo This command allows you to associate a comment to current Activity. Selecting the command opens the following dialog box: Figure 174: Memo dialog box 97 BlocksLab 2.0 - User‟s Guide You can type the comment in the blank space, and click "OK" to attach the comment to current Activity, or "Cancel" to cancel the operation. You can review and/or change the comment at any time by selecting the Menu command Edit/Document Memo. The Memo can be included in any Report (see 5.4.1.13). 6.2.17 Preferences... This command opens BlocksLab‟s Preferences dialog: Figure 175: Preferences dialog The „Language‟ listbox allows to switch between available interface languages; the „New Document Size‟ group of settings affects Activities created with the “File/New…” command, as follows: o Fit to resolution: allows the user to select a Canvas size that will fit on selected screen resolution. A resolution of 800x600 is recommended for optimal interaction; o Width/Height: allow to independently select width and height; the “Editing Window Mode” group affects how the Canvas will open: o Window: will open the Canvas in a standard fixed size window; the size is determined by the „New Document Size‟ group of settings; o Full Screen (backdrop window): will open the Canvas in a borderless window sized as current system screen; 98 BlocksLab 2.0 - User‟s Guide o Full Screen (with resolution change): will open the Canvas in a borderless window and change the resolution as set by the „New Document Size‟ group of controls; the „Documents Folder‟ text box allows to select default path for BlocksLab‟s stored files; the “Enable „Check for Updates‟” checkbox determines whether BlocksLab will display the command „Check for Updates‟ in menu „Help‟: see 6.6.8; the „Hint Dialogs‟ group of settings affects warning dialogs displayed by BlocksLab to prompt for confirmation in some dangerous operations, as follows: o Show Hint About Protected Blocks: displays a warning if you try to modify a protected Block; o Show Hint About Glued Objects: show a warning if you try to edit an Object; o Show Hint About Objects With Control: displays a warning if you try to delete/modify an object Associated with a Control. o "Remove Control" confirmation: displays a warning if you try to remove a Control that is bound to an Object; o Alert “Control Removed": shows a confirmation notice after removing a Control that is bound to an Object; the „Enable Interaction Sounds‟ checkbox determines whether BlocksLab will play feedback sounds to make editing operations more evident. the "Default Voice" button opens the configuration window for text-to-speech (see next paragraph). Note that BlocksLab‟s warnings can be disabled not only from the Edit/Preferences dialog (see above) but also directly by checking the box "Never Show This Hint Again" in the warning window. Figure 176: a BlocksLab's wrning with the disabling checkbox. A category of warnings you disabled in this way can be re-enabled only as explained above, in the Edit/Preferences dialog box. 6.2.18 Text-to-speech configuration Text-to-speech configuration dialog appears as follows: 99 BlocksLab 2.0 - User‟s Guide Figure 177: text-to-speech configuration dialog In the window we find: a list control titled "Default Voice" that allows you to select which voice will be used for the speech synthesis, unless the user enters a different one; a checkbox entitled "use Custom Speed For Default Voice", which allows you to change the speed of text-to-speech default voice (see below); a scrolling slider that lets you adjust the speed of default voice, if the box "use Custom Speed For Default Voice" is checked; a text box where you can write some text to test the selected voice; a button titled "Try" that allows you to listen to text written in the test box (see above) with the selected default voice(see above). 6.3 Screen Menu This menu contains commands for dealing with virtual Screens. Figure 178: the Screen menu 100 BlocksLab 2.0 - User‟s Guide 6.3.1 New Allows you to create a new blank virtual Screen, whose default name is "Untitled Screen" followed by an ordinal number. The new Screen becomes the current Screen, i.e. the one displayed. 6.3.2 Rename Allows to change the name of current Screen. 6.3.3 Delete Allows you to delete current Screen and all of its contents. You will be asked to confirm before performing this operation, which is irreversible. 6.3.4 Next Allows to "move" to the next Screen, if it exists, making it the current Screen. If the Activity contains just one Screen, or if the current Screen is the lastone, this command is disabled. 6.3.5 Previous Allows to "move" to the previous virtual Screen, if any, making it the current Screen. If the Actovity contains just one Screen, or if the current Screen is the first, this command is disabled. 6.3.6 Go To ... Opens a window with a list of available virtual Screens, allowing you to select where to "jump". If the Activity contains just one Screen, or if the current Screen is the last, this command is disabled. 6.3.7 Order ... Opens a window with a list of available virtual Screens, allowing you to change the order by dragging Screens into desired positions. If the Activity contains just one Screen only, this command is disabled. 6.4 Format menu Figure 179: the Format menu 101 BlocksLab 2.0 - User‟s Guide The Format Menu is active only when you're editing the contents of a Text Block (see 5.3.1.2.5). Available commands act the selected text as in a normal word processor, with the exception of two commands for selecting the background color and the thickness of the margin, that are global for all text. 6.4.1.1 Font Lets you choose directly from a submenu a font among those installed on your computer. 6.4.2 Size Allows you to select the font size. The submenu contains some commonly used text sizes, and the “Other...” command, which allows you to directly introduce any desired size. 6.4.3 Style Lets you select from a submenu a style to apply to the selection. Available text styles are: Plain, Bold, Italic and Underline. 6.4.4 Alignment Allows you to select from a sub-menu a type of alignment for selected text: this can be left-aligned, right-aligned, or centered. 6.4.5 Text Color Lets you choose from a submenu a color for selected text. The submenu contains two boxes with a special meaning (the last 2 with checkered patterns): Figure 180: : the submenu for text color selection The box with a checkered black and white pattern resets the text color to its default value (typically black). The box with colored checkered pattern opens the standard Windows dialog for selecting a custom color. 6.4.6 Background Color Lets you pick a background color from a submenu similar to the one described above. This command applies to the entire Text Block and not just selected text. 102 BlocksLab 2.0 - User‟s Guide 6.4.7 Custom Text Margin… Opens a dialog box that allows you to enter a value in pixels for the thickness of the gap between the text and the bounding box of the Block. 6.5 Toolbars menu This menu contains commands concerning Toolbars content, its editing and its selection, and saving/loading customized layouts for your Toolbars. Figure 181: Toolbars menu 6.5.1 Toolbars Selection... This command will display the following dialog: Figure 182: Toolbar selection dialog This will allow, for example, a supervisor or educator to make BlocksLab only show Toolbars that are needed in a guided activity. 103 BlocksLab 2.0 - User‟s Guide 6.5.2 Toolbars Content This will allow to select a Toolbar from a sub menu, as follows: Figure 183: Toolbars content submenu Upon selection of a Toolbar from the submenu, the Toolbar Edit dialog will be displayed for the selected Toolbar: Figure 184: Toolbar Edit dialog (Blocks Toolbar) The upper listbox allows to select an installed Kit. If no additional Kits are installed, the Standard Kit is displayed and no alternate selection is available. The second listbox displays all buttons which are available in selected Kit for insertion into selected Toolbar. Already inserted buttons disappear from this list, to be displayed in the “Toolbar Content” listbox below. The “Add” and “Add All” buttons insert respectively selected button or all available buttons into selected Toolbar. Inserted buttons will disappear from this listbox to appear in the “Toolbar Content” listbox below. The “Toolbar Content” listbox displays all buttons which are already inserted in selected Toolbar. By clicking on the “Remove” button below, selected button will be removed from the Toolbar, disappearing from this listbox and reappearing in the “Available” toolbox above. By clicking on “Remove All” all buttons will be similarly removed. 104 BlocksLab 2.0 - User‟s Guide Manual editing of the buttons‟ order is possible by clicking on a button in this listbox and dragging it to the desired position. Clicking on the “Reorder” button will reset buttons to their default order. 6.5.3 Saving and loading a Toolbars’ layout Custom Toolbar allow to make the interface of BlocksLab suitable for educational needs: we can, for example, require a group of children to a paint or build a house and write the word "HOME" underneath; in this case, a Toolbar as shown below can eliminate difficulties and distractions. Figure 185: :an example of custom Toolbar The final section of "Toolbars Content" submenu contains the commands to load and save your custom Toolbar: the first command, "Save to File ...", opens a standard dialog box that allows you to select a path and file name to save the contents of your Toolbar; the second command, "Load from File ...", shows a standard dialog allowing you to select a Toolbar configuration file you saved earlier: the configuration will be loaded and will become active immediately; the third command, "Load Recent", displays a submenu with a list of the last 10 used configurations, allowing you to quickly restore any of these. 6.5.4 Toolbar selection commands This is a group of commands, as shown in figure below, that allow to quickly switch to a different Toolbar. Figure 186: Toolbars menu, selection commands 105 BlocksLab 2.0 - User‟s Guide 6.5.5 Select Item Page Left... This command allows to quickly scroll to the right by one “page” of buttons, thus displaying the whole preceding page of buttons (if any). If for example the scrolling area of current Toolbar has room for 6 buttons, this command is the equivalent of clicking 6 times on the left scrolling arrow button. 6.5.6 Select Item Left... This command is the equivalent of clicking on the left scrolling arrow button. 6.5.7 Select Item Right... This command is the equivalent of clicking on the right scrolling arrow button. 6.5.8 Select Item Page Right... This command allows to quickly scroll to the left by one “page” of buttons, thus displaying the whole successive page of buttons (if any). If for example the scrolling area of current Toolbar has room for 6 buttons, this command is the equivalent of clicking 6 times on the left scrolling arrow button. 6.6 Activities menu This menu contains commands concerning global behaviors of current Activity. Figure 187: Activities menu 6.6.1 Hide Menubar If BlocksLab is running in fullscreen mode (see 6.2.17) this command allows to make menu bar invisible and inactive, included keyboard shortcuts. This mode can be useful to eliminate unneeded details for young users. Menubar can be re-enabled by pressing [shift]+m. 6.6.2 Show Grid This command will show the Canvas grid, allowing more precise editing and planning. If the grid is shown, this command will become “Hide Grid”. 106 BlocksLab 2.0 - User‟s Guide 6.6.3 Show Background Only This command is used to facilitate Background drawing operations, and is disabled if the Background has not been modified using the Background Colors Toolbar (see 5.3.3) or the Background Paint Toolbar (see 5.3.4). If the Background has been modified, this command becomes available. Selecting Activities/ Show Background Only the command in the menu checked, and Objects and Blocks are temporarily hidden, allowing you to draw freely on the Background. Once drawing operations are completed, re-selecting Activities/ Show Background Only the checkmark on the menu disappears, and the Objects and Blocks reappear. 6.6.4 Bring Blocks into Screen This command will bring back on the Canvas moving Objects that were offscreen when a running Activity was stopped, typically as an undesired effect of the “Travel Left/Right” Control. 6.6.5 "Stop Motion" and “Restart Motion” These two commands allow you to stop or restart the movement in current Activity, like the “Switch On/Off” button in the Controls Toolbar (see 5.3.6.4). 6.6.6 Volume This command opens a submenu, allowing to select the following presets for global BlocksLab‟s volume: Silence (no sound) Low (1/3 volume) Middle (2/3 volume) High (maximum). 6.6.7 Help This menu contains commands concerning disk files and print operations. Figure 188: File menu, unregistered and registered version 6.6.8 Check for Updates This command will prompt the user for confirmation, then close BlocksLab and connect to the Internet to check for updates and, if found, download and install them. 107 BlocksLab 2.0 - User‟s Guide The procedure is described in detail at the beginning of the manual (section 1.3). 6.6.9 Buy Registration Code This command will initiate the process of buying a license for BlocksLab, opening a browser window to access the Internet site where online purchase is possible. After completing the online procedure, the user will receive a username and registration code, which can be used to activate a demo copy of BlocksLab (see next paragraph). 6.6.10 Register BlocksLab This command is only present in demo version. It will display the registration dialog as follows: Figure 189: Registration dialog If the user inserts a valid username and registration code, BlocksLab will switch to registered mode, activating locked features. This confirmation dialog will be displayed: Figure 190: Registration confirmation dialog The “Help/Register BlocksLab” command will permanently be disabled, and its text will become “BlocksLab is Registered”. 6.6.11 Register Kit... Additional Kits, even if installed, will only work on a registered copy of BlocksLab. Any installed Kit must be independently be registered. If BlocksLab is registered and detects the presence of valid Kits, additional commands will appear in this menu, as shown in the example below: Figure 191: Help menu with unregistered Kits 108 BlocksLab 2.0 - User‟s Guide Selecting these commands will display a Registration dialog for the Kit (see figure 125). Upon insertion of a valid username and registration code, a confirmation dialog will be displayed (see figure 126) and the registered Kit‟s contents will become available for insertion in Toolbars (see 6.5.2, Toolbars Content). 6.6.12 About BlocksLab This command will display a dialog window with information about BlocksLab‟s version number and release date, and the team of designers and developers. 6.7 Keyboard interface BlocksLab was conceived to be, if preferred, mostly keyboard-driven. Many mouse operations can be executed by using keys, according to the following rules: arrow keys move the pointer by a grid square in their direction; advanced operation is obtained by holding the [shift] key, as follows: o placing Blocks and Objects becomes free and no longer aligned to the grid; o You can resize an Image, Video or Text (see 5.3.1.2.1, 5.3.1.2.2 and 5.3.1.2.5) while maintaining the original ratio between width and height: for example, if the width of the box containing the object is twice its height, if I I change only the height by dragging the bottom border, width will vary automatically in order to always be twice the height; [return] or [space] generate a left mouse click; [Ctrl]+[return] or [Ctrl]+[space] select Object or Block under the mouse pointer or, if selected, unselect it; [return] or [space] also unselects all selected Objects; [Ctrl] combined with the arrow keys will move selected Objects on the Canvas by a grid square; again, for finer movements also hold the [shift] key. And, as far as menus are concerned: [alt]+ the initial letter of a menu opens that menu; once a menu is open you can browse through its commands with the up-down arrow keys; right arrow will open submenus, let arrow will close them; [return] will select current menu command; [esc] will close currently open menu and open its parent; if the main menu bar is open, [esc] will end menu operation; hidden menus (see 5.4.6.1) can be shown by pressing [shift]+m. Moreover, many menu commands can be invoked via keyboard shortcuts, as specified in menus. Here is a table of keyboard shortcuts in BlocksLab‟s menus: 109 BlocksLab 2.0 - User‟s Guide Menù File File File File File File Edit Edit Edit Edit Edit Edit Toolbars Toolbars Toolbars Toolbars Toolbars Toolbars Toolbars Toolbars Toolbars Toolbars Activities Activities Activities Activities Activities Command New Open Save Load Background Print Blocks Only Exit Undo Cut Copy Paste Erase Single Control Preferences Blocks Glue Background Colors Background Painting Action Controls Select Item Page Left Select Item Left Select Item Right Select Item Page Right Show Menubar if Hidden Show Grid/Hide Grid Stop Motion Restart Motion Volume/Silence Shortcut [Ctrl]+n [Ctrl]+o [Ctrl]+s [Ctrl]+l [Ctrl]+p [alt]+F4 [Ctrl]+z [Ctrl]+x [Ctrl]+c [Ctrl]+v [Ctrl]+e [Ctrl]+k [Ctrl]+1 [Ctrl]+2 [Ctrl]+3 [Ctrl]+4 [Ctrl]+5 [Ctrl]+6 [Ctrl]+7 [Ctrl]+8 [Ctrl]+9 [Ctrl]+0 [shift]+m [Ctrl]+g [Ctrl]+a [Ctrl]+b [Ctrl]+f Table 1: Keyboard shortcuts for menu commands 110