1
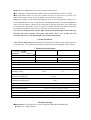
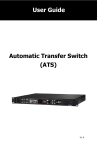
Wind/Solar Hybrid light controller
WSC15 USER MANUAL
Thank you for purchasing our Wind/Solar Hybrid light controller. Please read these instructions
before using, and keep for future reference.
Our controllers are designated according to the following convention. Please give clear indication
before placing orders, so that we can provide you products promptly and accurately.
WSC
15
|
|
|
|_____________
15: maximum current (A) 15 = 15A
|
|______________________
WSC: Wind/Solar Hybrid light controller
1. Functions and Features
Wind/Solar Hybrid light controller is controlled by micro-CPU, it is an intelligent controller and in
possession of Wind & Solar energy control, it is integrated with solar and wind control, it can
implement Breeze wind generation by exerting pressure on wind turbine; Intelligent control of the
generator brakes and unloading so that it can protect the generator and equipment safety; When
the wind is weak and the wind turbine output is insufficient to charge the battery, it will start the
boost circuit automatically; When the wind is too strong, it will start the unloading protection
circuit automatically.
Wind/Solar Hybrid light controller has the SOC (state of charge) battery system control function;
It can intelligently sense the outside light. It turns on lights at dark, and turns off lights at dawn or
the fixed time. This controller also intelligently monitors battery charging and discharging. It
will protect batteries by turning off lights automatically when the battery voltage is low. The
controllers will automatically turn to float-charge stage when battery is full the batteries by
pulse-width-modulation (PWM) automatically as the batteries approach full charge. It will stop
charging to protect batteries from discharging through solar panel at dark. The controller also has a
protection circuit to prevent accidental damage. The environmental defense grade is IP22
2. Connection
●Please connect the terminal of A, B, C separately
●Connection must be according to the figure. Before connection, please Check the negative and
positive terminal “+”
“-”to avoid failure.
●Waiting for 3 minutes after the connection, to make sure the solar controller has finished the
program entry before operation.
Notice: ●The controller must be connected to linear loads such as LED lamps, light bulbs, etc.
●Please reference the below technical parameter to choose the right wire size according to the
current.
●The terminal must be against oxidation and mould, to make sure the connection is in good
condition.
●Please make necessary protection from the water, wet, insect for this solar controller when use it
open-air. To make sure the wire connection inside is in good condition.
● Don’t use power from the illumination of light for the solar panel. (The
power of the light is too low to charge the battery.)
●Don’t use other DC source instead of the solar panel to charge the battery. It will damage the
solar controller.
●Please ensure the output of wind turbine must be three-phase alternating current and in good
contact.
●The wind turbine and solar panel can be connected individually or together. To make sure that
the battery is in good contact.
●When the battery is full and the indicator light is green, the controller will stop the wind turbine,
don't rotate the wind turbine compulsively at this time.
●When the wind speed is too large, the controller will brake automatically to reduce the speed of
the wind turbine.
3. Indicator Light
The controller has a red charging indicator LED light(CHARGE), a a green load indicator LED
light(LOAD), a Battery Energy indicator LED light(be the first from the left). The red indicator
LED light (CHARGE) will light when the batteries are being charged through the solar panel, and
the green light will be out. When the red light is out and green light is light, the street lamp will
work. The green light also helps with search and setup. Battery Energy indicator LED light(be the
first from the left) will be red if the battery voltage is low, orange during normal working range
and green for a fully charged battery.
working voltage range of the colour-changing lamp(reference)
colour-changing
12V
24V
Red light
10.5V—11V
21V—22V
Orange light
10.5~11V-13.7V
21~22V-27.4V
Green light
≥13.7V
≥27.4V
lamp
4. Button
• The controller has two buttons: Set and Resct, the Set button is used to query and
set the operating mode. Click and then release (less than 2 seconds), the query operation; press and
hold the set operation. Press the Set button on the controller, until the set time or set to release
the light control then complete the set.
• Resct for repairs or street light does not start until use.
5. Check and Setup
Inquiry: Press the SET button while observing the LOAD indicator:
●The controller is in light-adjusting condition when the light illuminates fast for 2 seconds.
●The light flashes slowly one time, the controller will turn on the load for 30 minutes, two
flashes for 60 minutes and so on up to 20 flashes for a maximum of 10 hours.
Setup: Our controller is in the default light-adjusting mode, no time-setting before sending to you.
Press the SET button for a few seconds until the LOAD light illuminates. Pressing the SET button
will increase the number of flashes which correspond to 30 minute increments of the lights being
on each night. The light flashes slowly one time, the controller will turn on the load for 30 minutes,
two flashes for 60 minutes and so on up to 20 flashes for a maximum of 10 hours.
If you want to change the time-control+ light control into the default light control mode, just
disconnect the solar controller, solar panel, and battery, after a few seconds, the solar
controller will recover to the default light control mode automatically.
6. Time-fixed mode
time-control+ light control: The time that the light load is switched on can be adjusted between
0.5 and 10 hours. The load will be switched on at dark, and turn off according to the fixed time.
7. Model and Specifications
model
WSC15
10A
WSC15 15A
parameter
12V / 24V automatic sense
System voltage
Max charge current
10A
15A
Max discharge current
10A
15A
High voltage disconnect(
(HVD)
)
13.7V~14.4V / 27.4V~28.8V /
Low Voltage disconnect (LVD )
10.5V—11V / 21V—22VV
Low Voltage restore (LVR )
11.5V~12V
Overpressure of Wind turbine and
unloading voltage
≥22V
/
/ 23V~24V /
≥44V
(Maximum wire length≤
≤1m)
Charge loop Voltage drop
<300mV
(Maximum wire length≤
≤1m)
<50mV
discharge loop Voltage drop
Light control
Light control + time control
Time control classification
Output route
Light control turn on + light control turn off
Light control turn on + light control turn off / time setting turn off
0.5 hours + 0.5 hour per step up to 10 hours
Single
Ambient temperature
-25℃—55℃
Quiescent dissipation
24mA
8.Trouble shooting
●Phenomenon:
:Green light goes out, the red indicator LED light (CHARGE) light.
Reason:
:Low voltage of battery
Solution:
:A. Cut off the load, and reconnect the load after the battery recharged.
B. If there is trouble with the battery charging, increase solar panel’s power or
change battery.
●Phenomenon :The three colors battery power indicator light is orange and the LOAD LED
light is green. But the load stops working.
Reason:
:Overload or short-circuit happens, the fuse inside disconnected automatically.
solution: eliminate the reason of the overload or short circuit load for 10-20 minutes, the
insurance can be automatically restored, when press the Reset, reset button the load will return to
work.