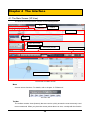
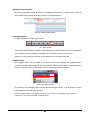
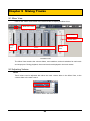
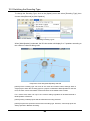
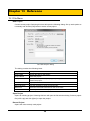
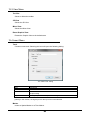
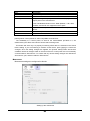
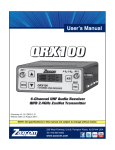
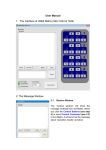
1
3D Sound Authoring Tool
SoundLocus
User Manual
ARNIS SOUND TECHNOLOGIES
Table of Contents
Chapter 1 Overview .................................................................................................................. 4
1-1 What is SoundLocus? ......................................................................................................... 4
1-2 Usage .................................................................................................................................. 5
1-3 System Configuration .......................................................................................................... 5
1-4 HRTF ................................................................................................................................... 6
1-5 Post Process ....................................................................................................................... 6
1-6 System Requirements ......................................................................................................... 6
Chapter 2 Launching SoundLocus ........................................................................................... 8
2-1 Launch ................................................................................................................................ 8
2-2 Startup Dialog ..................................................................................................................... 8
Chapter 3 Creating and Setting Up a Project ......................................................................... 10
3-1 Project Overview ............................................................................................................... 10
3-2 Creating a Project.............................................................................................................. 10
Chapter 4 The Interface .......................................................................................................... 12
4-1 The Main Screen (3D View) .............................................................................................. 12
4-2 The Mixer View .................................................................................................................. 15
Chapter 5 Adding and Setting Up Tracks ............................................................................... 16
5-1 Adding Tracks .................................................................................................................... 16
5-2 Track Operation (Mono Tracks) ......................................................................................... 16
5-3 Stereo Tracks .................................................................................................................... 21
5-4 Changing Track Order and Deleting Tracks ...................................................................... 22
5-5 Movie Track ....................................................................................................................... 23
Chapter 6 Track Playback....................................................................................................... 26
6-1 Playback Start/Stop ........................................................................................................... 26
6-2 Time Ruler and Time Display ............................................................................................ 28
6-3 Time Display Zooming ....................................................................................................... 28
6-4 Time Markers..................................................................................................................... 30
6-5 Auto Scroll ......................................................................................................................... 33
6-6 Syncing to External Applications Using ReWire ................................................................ 33
Chapter 7 Recording Loci ....................................................................................................... 35
7-1 Moving the Sound Location ............................................................................................... 35
7-2 Camera Movement ............................................................................................................ 38
7-3 Real Time Locus Recording .............................................................................................. 39
7-4 Locus Playback ................................................................................................................. 42
7-5 Exporting Sounds .............................................................................................................. 44
7-6 Spatial Marker ................................................................................................................... 45
Chapter 8 Editing Loci ............................................................................................................ 47
8-1 Setting the Edit Range ...................................................................................................... 47
8-2 Moving, Compressing, Stretching...................................................................................... 48
1
8-3 Copy, Paste, Cut ............................................................................................................... 49
8-4 Creating Basic Shapes ...................................................................................................... 52
8-5 Manipulating Loci .............................................................................................................. 57
8-6 Exporting/Importing Loci .................................................................................................... 57
Chapter 9 Mixing Tracks ......................................................................................................... 59
9-1 Mixer View ......................................................................................................................... 59
9-2 Adjusting Volume ............................................................................................................... 59
9-3 Mute and Solo ................................................................................................................... 60
9-4 Setting the Logical Output Port ......................................................................................... 61
9-5 Post Processing ................................................................................................................ 62
Chapter 10 Encoding Types ................................................................................................... 63
10-1 What is an Encoding Type? ............................................................................................. 63
10-2 Switching the Encoding Type .......................................................................................... 64
10-3 Multi-Speaker Parameters ............................................................................................... 65
10-4 Mapping to Physical Ports ............................................................................................... 66
10-5 Recording Locus Data ..................................................................................................... 67
10-6 Mixing in Multi-Speaker Mode ......................................................................................... 68
10-7 Exporting Sound .............................................................................................................. 69
Chapter 11 Origin Point Image ............................................................................................... 70
11-1 Switching the Origin Point Image ..................................................................................... 70
Chapter 12 Surround Mode .................................................................................................... 71
12-1 Converting from Multichannel to 2 Channels ................................................................... 71
12-2 Creating a Project............................................................................................................ 71
12-3 Track Assignments for a Surround Sound Source ........................................................... 72
12-4 Adjusting Speaker Placement ......................................................................................... 73
12-5 Mixing Down from Multichannel to 2 Channels ............................................................... 74
12-6 Exporting 3D Sound ........................................................................................................ 74
Chapter 13 Reference ............................................................................................................ 76
13-1 File Menu ........................................................................................................................ 76
13-2 Edit Menu ........................................................................................................................ 78
13-3 View Menu....................................................................................................................... 80
13-4 Insert Menu ..................................................................................................................... 80
13-5 Option Menu .................................................................................................................... 81
13-6 System Settings .............................................................................................................. 82
13-7 Help Menu ....................................................................................................................... 86
13-8 Toolbar ............................................................................................................................ 87
13-9 Context Menus ................................................................................................................ 87
13-10 List of Modes ................................................................................................................. 91
13-11 Keyboard Shortcuts ....................................................................................................... 92
2
Locus of sound: The future of sound starts here!
A new way to express space --- a 3D authoring tool
Introduction
SoundLocus is a tool that encodes mono, stereo, and multichannel audio sources to a binaural
format, and then allows these sounds to be placed or moved around an acoustic space. This
allows one to take advantage of the full acoustic space, and to increase clarity and "air" of
sound sources. It provides creators with more options in production, as well as greater freedom
of expression. There is no need to use bulky and heavy dummy heads to record sound sources
(although you may if you wish). Instead, normally recorded sources can be used and placed in
a virtual space.
Limitations
• Supports up to 8 tracks.
• Supports audio file formats listed in this manual.
• Supports 1 movie file at a time.
• 1 frame resolution for Loci movements.
• Usage on virtual machines not guaranteed.
• The range of movement is dependent on the selected HRTF.
• Descriptions regarding the effects of sound placement are based on our observations.
For the latest information on SoundLocus, visit http://www.soundlocus.com/
No part of this document may be copied or reproduced without the prior explicit consent by
Arnis Sound Technologies Co., Ltd.
The information provided in this document has been checked for accuracy, however it is not
guaranteed that the document is free of errors.
Windows XP and Windows Vista are registered trademarks of Microsoft Corporation.
Adobe Reader is a registered trademark of Adobe Systems Inc.
Wii is a registered trademark of Nintendo Co., Ltd.
SpaceNavigator is a registered trademark of 3Dconnexion.
PlayStation is a registered trademark of Sony Computer Entertainment Inc.
ReWire is a trademark of Propellerhead Software AB.
3
Chapter 1 Overview
1-1 What is SoundLocus?
SoundLocus is an authoring tool for the next generation of spatial acoustic content creation. In
standard stereo, sounds are panned left and right by differing the output level of the two
speakers. However, SoundLocus digitally processes the audio signal and allows free
placement and movement in a fully 3 dimensional space (forward/back, left/right, up/down).
A 3 dimensional space
Since humans only have two ears, if we could only locate sounds by detecting differences in
sound level, we would only be able to locate in a horizontal left-right axis. However, we are in
fact able to detect minute changes in the phase of sounds, which allow us to perceive sounds
from, not only left and right, but front or back, and above or below. SoundLocus uses digital
processing to generate phase changes that would be created from the shape of the human
head and ears, in order to create a 3 dimensional acoustic space with just 2 speakers (or
headphones).
[Note] SoundLocus calculates the location of sounds using a computer's CPU. Depending
on the processing power of your computer, the movement of the sound image may not be
as smooth as desired (the sound image may "jump").
4
1-2 Usage
SoundLocus can be used in many different types of sound production work, including music,
game and video. It can open up a new world of possibilities for not only sound effects, but also
for instrument and voice placement.
SoundLocus can create a sonic impact based on sound placement, in addition to the
conventional methods utilizing volume and tone. For example, it is now possible to create a
fresh experience by placing a sound outside of a listener's head, while they listen to a portable
audio player outdoor. Also, with sound for picture, an audio space can be created that extends
outside the boundaries of the screen.
SoundLocus has been developed as a tool that enables a stronger emotional connection
between artist and listener. We sincerely hope that it will open up new creative possibilities for
all who work in sonic expression.
1-3 System Configuration
Below is a typical system configuration for running SoundLocus:
A typical system configuration
Until now, the editing of sound placement and movement has typically been difficult and
unintuitive. SoundLocus solves this problem by enabling the use of not only a mouse, but also
3 other controllers: a game controller with an analog joystick (via USB: a.k.a. PS2 controller), 3
dimensional mouse (SpaceNavigator), and a Wii remote (Bluetooth connectivity planned). An
artist can choose a controller that best suits the production environment.
5
PS2 (Playstation 2) analog controllers can be used via an USB to PS Gamepad converter. You
may need to install drivers for the adapter.
We recommend the use of ASIO compatible sound devices. The use of ASIO compatible sound
devices allows lower latencies compared to DirectSound.
1-4 HRTF
HRTF (Head Related Transfer Function) is a mathematical function that virtually recreates the
way sound changes as it makes it's way from the source to the listener's ear.
SoundLocus solves a major issue with binaural recording - the size of the recording gear - and
also reduces the loss of spatial imaging during mixing. Although HRTF differs greatly from
person to person, we have created a "Referential-HRTF" based on years of simulations,
response extractions, and our unique R&D methods. By using this Referential-HRTF in
SoundLocus, we have succeeded in creating a 3 dimensional sound that can be experienced
by many.
In future versions, we plan on releasing other HRTFs developed through our research (such as
for game/entertainment, Characterized-HRTF, public address, Theoretical-HRTF, etc), as
options.
SoundLocus is equipped with a general purpose mixing capability, which allows multiple
sources to be moved around, while mixing them all down to stereo.
1-5 Post Process
In order to create effects which are optimal in many different listening environments,
SoundLocus uses an independent coefficient for post processing. Environments that can be
used with post processing will be continuously released as they become available. These will
be provided through updaters at the SoundLocus website (http://www.soundlocus.com/).
For detailed information and installation instructions for each updater, please refer to the
documentation provided with the updater.
1-6 System Requirements
Below are the system requirements for SoundLocus:
Item
Requirement
6
OS
Microsoft Windows XP (SP2 or later)
Microsoft Windows Vista (32bit)
Sound Device Compatibility
DirectSound / ASIO / ReWire
3D Interface Compatibility
Direct 3D
Input Device Compatibility
Direct Input
Recommended system (for running 8 simultaneous sound sources):
Item
Requirement
CPU
Intel Core2 2GHz or better
Memory
2GB or more
Display
1280x1024 or better resolution, full color
Video Card
VRAM 256MB or more, DirectX9 compatible
video chip
Sound Device
ASIO compatible multichannel output sound
device
USB port
1 or more available port (for locus controller)
Locus Controller
DUALSHOCK2 + PS2 to USB GAMEPAD
CONVERTER, or equivalent Direct Input
compatible USB game controller
Drive
DVD-ROM drive
Hard Disk
5GB or more of free space
Other
Internet connection
[Note] We do not guarantee that SoundLocus will run on all computers that fulfill the above
requirements. The number of simultaneously usable tracks will depend on the status of
other active software and background processes that are running concurrently. Operation
on virtual machines is not guaranteed.
7
Chapter 2 Launching SoundLocus
2-1 Launch
To launch SoundLocus, double click the SoundLocus icon on the desktop, or click on [Start]
menu and choose [All Programs] → [ARNIS] → [SoundLocus].
SoundLocus launch icon
[Note] For information regarding installation, please refer to the "SoundLocus Installation
Manual".
2-2 Startup Dialog
The following startup dialog will appear:
The startup dialog
8
In this dialog, the following actions are available:
• Under "Recent Projects", a list of recent projects is displayed. A project can be chosen here.
• Choose [New Project] to create a new project. The new project settings dialog will appear
(refer to section 3-2 "Creating a Project").
• Choose [Open Project] to open an existing project. The open project dialog will appear.
Any of these actions will open the initial SoundLocus screen:
SoundLocus' initial screen (with an existing project opened)
9
Chapter 3 Creating and Setting Up a Project
3-1 Project Overview
SoundLocus data is saved, loaded, copied and managed in a per-project basis. All
SoundLocus loci data and other setting information are stored in the project.
[NOTE] Audio and video files are NOT included in the project data. When copying to
another environment, audio and video files need to be copied over separately. These files
are located using a path relative to the project, so make sure that the file hierarchy remains
the same after copying.
3-2 Creating a Project
To create a new project, click on [File] menu and choose [New Project]. The following dialog
appears:
The “Create New Project” window
The dialog contains the following items:
Project Path
Choose the directory (folder) where the project data should be saved. Click [Select Folder] to
open the “Select Folder” dialog. Select your folder using the folder icons.
Project Name
Name your project. A directory with the project name will be created inside the directory
selected in the “Project Path” item. The project data will be saved inside this new folder. If there
is already another project with the same name within the project path, the following dialog will
appear:
10
Dialog warning another project with the same name already exists.
In this case, change either the project name or the project path.
Sample Rate
Choose the sound file sampling rate from 32.0kHz, 44.1kHz or 48kHz. Sound files which are
loaded into the project must match this sample rate. The sample rate cannot be changed later,
so make sure to check the sample rate of the audio files that you plan on using in the project.
Frame Rate
Choose the frame rate from 30NDF (most music equipment), 29.97DF (professional NTSC
video equipment), 29.97NDF (some NTSC video and music equipment), 25NDF (PAL/SECAM),
or 24NDF (film movies). If using a movie file, we recommend choosing the frame rate of that
movie file.
Choosing a frame rate that does not correspond to the movie, will result in loss of sync between
audio and video.
Surround Mode
This will create a surround mode project, where speakers can be placed in custom locations.
For more information on surround mode, refer to chapter 10 "Surround Mode".
Movie File
If syncing a movie, select a movie file. Movie file selection can be changed later.
Comment
Enter comments regarding the project. Comments can be viewed and edited by clicking on
[File] menu and choosing [Property].
11
Chapter 4 The Interface
4-1 The Main Screen (3D View)
The SoundLocus Main Screen consists of the following blocks:
Menu
Toolbar
Time Ruler
Track
Output Port Control
Movie Track
Time Display Scroller
Center Divider
3D View Section
The SoundLocus Main Screen
Menu
Access various functions. For details, refer to chapter 12 "Reference".
The menu bar
Toolbar
The toolbar contains icons (buttons) that are used to quickly access the most commonly used
menu commands. When you place the mouse pointer above an icon, a tooltip with the function
12
of the icon is displayed. For details, refer to "Toolbar" in chapter 12 "reference".
The toolbar
Time Ruler
Displays the time location on the track, in minute, second, frame/millisecond/sample units.
Markers that can be used as visual indicators, can be created and named on the track. For
details, refer to 6-2 "Time Ruler and Time Display".
The time ruler section
Track Control
You can import mono or stereo audio files to tracks. For mono audio, you can freely place and
move the sound source around in a 3 dimensional space. For details, refer to chapter 5 "Adding
and Setting Up Tracks" and chapter 6 "Track Playback".
The track section (mono)
Output Port Control
This control sets the output port for the audio track. For details, refer to chapter 9 "Mixing
Tracks".
The output port control
13
Movie Track
You can import a movie track to playback in sync with the audio. For details, refer to 5-5 "Movie
Track".
The movie track
Time Display Scroll Control
This control adjusts the time range that is displayed on screen. For details, refer to 6-3 "Time
Display Zooming".
The time display scroll section
Center Divider
Controls track recording, playback and the state of other display elements. For details, refer to
chapter 6 "Track Playback".
The center divider
3D View Section
This section displays the placement of the mono audio source being played back on the track,
in a 3 dimensional space. For details, refer to chapter 7 "Recording the Locus" and chapter 8
"Editing the Locus".
The 3D View section
14
4-2 The Mixer View
Multiple 3 dimensionally placed mono tracks, as well as stereo tracks (background music, etc.)
can be mixed in this view. The volume, solo, and mute settings can be performed with the
volume faders in the Mixer View. For details, refer to chapter 9 "Mixing Tracks".
Volume Fader
The Mixer View
15
Chapter 5 Adding and Setting Up Tracks
5-1 Adding Tracks
Click on [Insert] menu and choose [Track]. The following dialog appears:
Add Track
Name
Enter the track name.
Mono/Stereo
The track type can be either mono or stereo. To use 3 dimensional placement, you must
choose a mono track.
Logical Port
Select the logical track output from Outport1 ~ Outport8.
[NOTE] The input logical port (IN) cannot be selected in this version.
5-2 Track Operation (Mono Tracks)
Adjusting the display range
When a mono track is added, track and output port controls are displayed in the main screen.
By dragging the border with the output port control (Outport1), you can enlarge and reveal more
of the track controls.
16
Track Control
Output Port Control
Drag the border to adjust the display
Scrolling the displayed area
A maximum of 8 tracks can be used in a project. When using multiple tracks, it may be
necessary to adjust the displayed range, or use the scroll bar or mouse scroll wheel to change
the area being displayed.
Track display area scroll bar
Folding/Unfolding track control information
Clicking on the small triangle (▼) will reveal or hide detailed track information.
The unfolded detailed track view and the folded track view
Loading files
Click the music note icon to select a sound file:
Selecting a sound file
The “Open File” dialog appears. WAV and AIFF format files (mono) can be selected.
Alternatively, files can be loaded via drag & drop from the Windows Explorer to the track's
waveform display area.
17
Drag & drop of audio files
[NOTE] The sample rate of audio files must match the rate selected when the project was
created (either 32.0kHz, 44.1kHz, 48.0kHz).
Sound files supported on mono tracks are as follows:
Type
WAVE (.wav)
Format
32-bit (IEEE Float) mono
32-bit (signed integers) mono
24-bit mono
16-bit mono
8-bit mono
AIFF (.aif)
16-bit (uncompressed) mono
8-bit (uncompressed) mono
18
When a sound file is loaded, the track will look like this:
The waveform of the loaded audio
The track after loading a sound file
Loading multiple files
It is possible to load multiple audio files on a single track.
The waveform of the second audio file
A second audio file loaded
The audio data can be dragged left/right using the mouse. This will change the offset position
(the location of the sound along the time axis).
Selecting the playback priority of overlapped audio
It is possible to place audio so that they are overlapped. In this case, only the audio in the
forefront is played back.
Selecting the playback priority of overlapped audio
To change the playback priority of overlapped audio, [control]-click the waveform to open a
context menu. The option [Move to Top] will bring the audio to the forefront. [Move to Bottom]
will place it in the back. [Move Forward] and [Move Backward] will modify the priory by one
step.
19
Copying audio to another track
Audio can be copied to another track by [Alt]-dragging the waveform.
Hold down [Alt] and drag
Copying audio to another track
Deleting audio
To delete audio from a track, right-click the waveform, then choose [Delete] from the context
menu.
Sound properties
Right-clicking a waveform and selecting [Property] from the context menu, will open the
following dialog:
Sound properties
The dialog contains the following items:
Item
Description
Offset Position:Sample
The offset position can be set in samples.
Offset Position:HH:MM:S.FF
The offset position can be set in "hours : minutes : seconds :
frames" format.
File Name
Displays the file name.
File Path
Displays the file path.
Sampling Rate
Displays the sample rate.
Channel Num
Displays the channel width (mono/stereo).
File Type
Displays the file format.
20
5-3 Stereo Tracks
If you select [Stereo] when adding a new track, the following track control will be displayed in
the main screen. To select an audio file, click on the music note icon.
Stereo track controls
The “Open File” dialog will appear. WAV and AIFF format files (stereo) can be selected.
[NOTE] Alternatively, files can be loaded by dragging & dropping to the track's waveform
display area.
Supported sound file formats are as follows:
Type
WAVE (.wav)
Format
32-bit (IEEE Float) stereo
32-bit (signed integers) stereo
24-bit stereo
16-bit stereo
8-bit stereo
AIFF (.aif)
16-bit (uncompressed) stereo
8-bit (uncompressed) stereo
When a sound file is loaded, the track will look like this:
The waveform of the loaded audio
The track after loading a sound file
As with mono tracks, it is possible to load multiple audio files on a single track. Methods for
adjusting time location, setting playback priority, deleting sounds from tracks, and opening
sound properties are identical to that of mono tracks.
21
5-4 Changing Track Order and Deleting Tracks
Changing the order of tracks
To change the track order, right-click the track control, and select [Move Up] or [Move Down]
from the context menu.
[Move Up] and [Move Down] commands in the context menu
For example, if you execute the [Move Up] command on the second track from the top, that
track will be moved to the top.
Deleting tracks
To delete a track, first select it, then click on the [Edit] menu and choose [Delete Track].
Alternatively, right-click the track control, and select [Delete Track] from the context menu.
[Delete Track] command in the context menu
22
The following confirmation dialog will appear:
The dialog to confirm track deletion
Click on [Yes] to delete the track.
Copying tracks
To duplicate a track together with its contents, right-click the track, then select [Duplicate Track]
from the context menu. Alternatively, tracks can be duplicated using the [Duplicate Track]
button in the toolbar.
Copying a track
5-5 Movie Track
Loading a movie file
In order to sync audio with video, a movie file must be loaded onto a movie track. To load a
movie file onto a movie track, click on the film icon:
A movie track
The “Open File” dialog will appear. Select the desired movie file and click [Open].
[NOTE] The movie file formats that can be played back are determined by the codecs that
are installed on your operating system. Furthermore, only one movie file can be loaded for
playback.
23
When a file is loaded onto the movie track, a movie screen appears in the 3D View.
Movie screen displayed in the 3D View
With a movie loaded, the movie track will look like this:
The movie track with a file loaded
The time location of the movie can be changed by dragging the rectangular strip (this
represents the location of the movie) left or right.
Deleting a movie file
Right-click on the movie strip to open the following context menu:
The movie track context menu
To delete the movie file, click [Delete].
24
Movie properties
Select [Property] in the context menu to open the following dialog:
Movie properties
The dialog contains the following items:
Item
Description
Offset Position:Sample
The offset position can be set in samples.
Offset Position:
The offset position can be set in "hours : minutes : seconds :
HH:MM:SS.FF
frames" format.
File Name
Displays the file name.
File Path
Displays the file path.
[NOTE] The "Sample" only displays the current position, while the "HH:MM:SS.FF" value
can be changed.
Turning on/off the movie display
The movie display in the 3D View can be turned on/off by clicking the "eye" icon on the movie
track.
Turning the movie display on/off
25
Chapter 6 Track Playback
6-1 Playback Start/Stop
Transport buttons
To playback the audio and video loaded on the tracks, use the transport buttons located in the
center divider.
Transport buttons
Button
Button
Keyboard Shortcut
Description
Return to
[4]
Returns the playback position to the beginning of the
Beginning
[Shift]+[←]
project.
Rewind
[←]
Moves the playback position back by 1 second.
Stop
[Space]
Stops playback.
Play
[Space]
Begins playback.
Fast
[→]
Moves the playback position forward by 1 second.
[6]
Moves the playback position to the end of the project.
Name
Forward
Go to End
[Shift]+[→]
Loop
In this mode, playback repeats from the beginning as
soon as the end of the selection range is reached.
[NOTE] In the above chart, the numbers represent numeric keys, while [←] and [→]
represent arrow keys. The numeric keys can be used only when NumLock is on. For more
information on keyboard shortcuts, refer to the reference section at the end of this
document.
To start playback, click the “Play” button. To stop, click the “Stop” button.
Record/Playback pointer
The record/playback position is represented by the Record/Playback Pointer (the blue line):
26
Time marker area
Record/playback pointer
The record/playback pointer
Playback can also be started and stopped using the keyboard space bar. Furthermore, the
playback location can be moved in 0.1 second increments with the [←] and [→] keys. To move
the record/playback pointer to a desired location, just click and drag the triangle at the top of the
record/playback pointer.
You can also double click on the time marker area to move the record/playback pointer to a
desired location.
Setting the volume
Track volume can be adjusted using the volume slider on each track. The level meter displays
audio levels during playback. The level meter also displays the peak signal level. The peak
level display is held until playback is started again.
Volume
Peak level display
Level meter
The track
[NOTE] The audio volume can be specified by entering a numeric value in the text box next
to the volume slider. The volume can be set to a value between -40.0 and 20.0. When a
value of -40.0 is entered, the actual setting will be -∞.
The overall volume can be adjusted with the volume slider or text box in the center divider.
The volume control in the center divider
27
6-2 Time Ruler and Time Display
Time Ruler
The time ruler is the scale at the top of the track, that indicates the time from the beginning of
the project.
The time ruler
The time ruler consists of two scales. The upper scale displays hours, minutes, seconds, and
frames. The frames scale is based on the frame rate (the number of video frames played back
every second). The lower scale can be switched between "sample" and "HH:MM:SS.SSS"
using the pop-up menu on the left.
"Sample" is an unit used to describe quantization. If the sample rate is 44.1kHz, the location 1
second from the beginning of the project will be 44100. HH:MM:SS.SSS displays the time
location in hours, minutes, seconds, and milliseconds.
Center Divider
The playback location time information is also displayed on the center divider.
Time information display on the center divider
The upper display always shows hours, minutes, seconds, frames. The lower display can be
switched between "sample" and "HH:MM:SS.SSS" using the pop-up menu. "Sample" is an unit
used to describe quantization. HH:MM:SS.SSS displays the time location in hours, minutes,
seconds, and milliseconds.
6-3 Time Display Zooming
To zoom in/out the time axis, use the zoom slider above the center divider.
28
The time zoom slider
Moving the slider left will zoom out, while moving it right will zoom in.
Zoom in
Zoom out
Zooming in/out the time axis
29
6-4 Time Markers
Time locations can be marked with time markers. Time markers are represented as yellow
lines.
Time markers
Inserting time markers
To insert a time marker in the current playback location, open the [Insert] menu and choose
[Marker] then [Time Marker]. This will open a text box where the marker can be named. Time
markers can also be inserted by [Ctrl] - double-clicking the time marker area.
Time marker area
Inserting a time marker
After entering a marker name and pressing [return], the text box will disappear. At this point, the
time marker will be hidden underneath the record/playback pointer.
After entering the marker name
When the record/playback pointer is moved, the inserted time marker will be revealed. The
marker name is displayed when the mouse pointer is placed above the triangle at the top.
Displaying the time marker
30
Jumping to time markers
The playback position can be quickly moved to time marker locations by clicking on the “Time
Marker Jump” buttons.
Time Marker Jump buttons
Jumping to time markers
Clicking on the right “Time Marker Jump” button, will move the playback position to the nearest
time marker that is to the right of the current location. Clicking on the left “Time Marker Jump”
button, will move the playback position to the nearest time marker that is to the left of the
current location. Also, you can jump to the desired time marker using the time marker pop-up
menu on the left.
The time marker pop-up menu
Moving time markers
Time markers can be moved by dragging the triangular handle with the mouse.
Moving a time marker
Deleting time markers
To delete a time marker, right-click the triangle, then select [Delete] from the context menu that
appears.
The time marker context menu
31
Time marker properties
The following dialog can be opened by right-clicking the triangle, then selecting [Property] from
the context menu:
Time marker properties
The marker name can be edited in the "Name" field. Under the "Position" section, the marker
location can be specified in samples in the "Sample" field, or in hours, minutes, seconds, and
frames in the "HH:MM:SS.FF" fields.
Snapping time markers
If the [Snap] option in the [Edit] menu is checked, time markers will snap to sound and movie
file boundaries when they are moved. By snapping time markers in this way, they can be
precisely set to the beginning or end of sounds. If you do not wish to snap to boundaries, simply
uncheck the [Snap] option in the [Edit] menu.
Snap option on
The snap option can be switched on/off using [Ctrl]+[Alt]+[⧵]
32
6-5 Auto Scroll
If the screen is zoomed in, the current playback position might be outside of the displayed area.
Enabling the [AUTO] button on the right of the time marker jump buttons, will ensure that the
playback position is displayed at all times, by automatically scrolling the tracks.
Auto scroll off (left) and on (right)
Auto scroll will automatically be disabled if the scroll bar is manually moved.
6-6 Syncing to External Applications Using ReWire
SoundLocus can use ReWire (an inter-application sync interface developed by Propellerhead
Software) to send audio to a digital audio workstation software (ReWire host).
Tempo map
SoundLocus
ReWire host
Audio signal
ReWire sync
Connecting with ReWire
To use ReWire, first launch the ReWire host, then launch SoundLocus. Once the ReWire
communication is enabled, open a SoundLocus project. When SoundLocus and the ReWire
host is connected, the following dialog is displayed:
ReWire connection message
Acquiring tempo information
To acquire tempo information from the ReWire host, open the SoundLocus [Option] menu, and
select [ReWire], then [Get Tempo Map].
If there is a time selection made in SoundLocus, only the tempo information within this range
will be acquired. If there is no time selection, tempo information will be acquired from the
beginning of the project up until the point where the stop button is pressed. Even when there is
a time selection, tempo information acquisition can be stopped at any time by pressing the stop
button.
33
[NOTE] SoundLocus acquires tempo information in 16th note increments. If tempo changes
in the ReWire host occur at finer increments, there may be slight differences between the
SoundLocus record/playback pointer and the ReWire host time positions. If tempo
information is not acquired, SoundLocus will default to 4/4 120BPS.
Linking playback start/stop
After acquiring tempo information, playback start/stop and playback head location in
SoundLocus and the ReWire host will be linked.
[NOTE] For instructions on how to use your ReWire host, please refer to its user manual.
34
Chapter 7 Recording Loci
7-1 Moving the Sound Location
The location of a mono sound source is indicated by the sound location pointer (ball) in the 3D
View. By moving this, the sound can be placed freely in the sound field.
Using a mouse
The sound location pointer in the 3D View
Clicking and dragging the location pointer in the 3D View, will move the sound in the x-axis
(left/right) and z-axis (back/forth). At anytime, holding down both the left and right mouse
buttons will enable dragging in the y-axis (up/down).
Using a PS2 controller
To enable a PS2 controller to move sound location, click on the PS2 controller button in the
upper left of the 3D View.
[NOTE] To use a PS2 controller, it must be connected BEFORE launching SoundLocus.
35
PS2 controller button
Turn on the Analog button of the PS2 controller, then select the sound location pointer. The left
joystick of the PS2 controller will control the z-axis (back/forth) and x-axis (left/right), while the
right joystick will control the y-axis (up/down).
Back/forth, left/right
Up/down
Controlling with a PS2 controller
[NOTE] The functions assigned to a controller can be changed in [Setting] under the
[Option] menu. For details, refer to chapter 12 "Reference".
Using a SpaceNavigator
To enable a SpaceNavigator controller to move sound location, click on the SpaceNavigator
button in the upper left of the 3D View.
[NOTE] To use a SpaceNavigator controller, it must be connected BEFORE launching
SoundLocus.
36
The SpaceNavigator button
Once the sound location pointer is selected, the SpaceNavigator can be used to move the
sound source in the x-axis (left/right), z-axis (back/forth), and y-axis (up/down).
Up/down
Forth
Left
Right
Back
ろ
Controlling with a SpaceNavigator
Displaying the operation guide
Placing the mouse pointer on the blue bar of the 3D View, will reveal the operation guide:
The operation guide
The left hand side of the guide shows that the left-click will move the sound in the x and z axes,
while holding down both left and right mouse buttons will move it in the y-axis. The right side
shows that the [Enter] key will confirm and proceed, and the [Esc] key will cancel.
Using position properties
The sound can also be moved by selecting the sound pointer in the 3D View, then entering
values in the "Position Property" text boxes.
37
Position Property
The range of values that can be entered in the X, Y, and Z fields are whole numbers from -255
to 255. Setting all to 0 will place the sound in the original location. As the values are increased,
the distance from the origin will increase. The sound location can also be specified using polar
coordinates with the D, H, and V fields. D is the distance from the origin, set in whole numbers
from 0 to 255. H is the horizontal angle (0~359), and V is the vertical angle (0~359).
Locus Monitor
The tracking data for the movement of the sound is displayed on the Locus Monitor.
The Locus Monitor
On the Locus Monitor, the red, green, and blue lines represent the x, y, and z axes respectively.
The gray line represents the speed of movement.
7-2 Camera Movement
In order to better see the location of the sound source, the camera (the perspective of the 3D
View) can be moved (zoom and pan).
Using a mouse
To use a mouse to move the camera, use the camera setting buttons in the upper right of the
3D View.
38
The camera setting buttons
Click, hold and drag the camera setting buttons up/down or left/right to adjust the camera
location and direction.
Button
Button
Description
Name
Zoom
Adjusts the distance between the origin and the camera.
Camera
Adjusts the location of the camera in relation to the origin
Location
(up/down, left/right).
Rotate
Rotates the entire 3D View up/down and left/right.
Reset
Returns the camera position and settings back to default
values.
Using a PS2 controller
A PS2 controller can be used to zoom in/out.
Zoom in
Zoom out
(lower button)
(lower button)
Controlling with a PS2 controller
[NOTE] The functions assigned to a PS2 controller can be changed in [Setting] under the
[Option] menu. For details, refer to chapter 12 "Reference".
7-3 Real Time Locus Recording
Real time locus recording is the act of recording sound movements that are performed as a
39
track is played back.
Track selection
Click the [R] button to enable the track for locus recording.
The [R] button
Specifying record start position
Move the record/playback pointer to the location where you would like to begin locus recording.
Setting record start position
Setting a pre-roll
If recording begins immediately upon pressing the playback start button, you might not be able
to start performing your sound movements in time. By setting a pre-roll, playback will begin
before the record start point. Pre-roll settings are located in the center divider.
Pre-roll settings
Pre-roll time can be set in seconds, frames, or sample units by selecting [sec], [frame], or
[sample] respectively in the pop-up menu. To adjust the pre-roll time, click and drag the knob.
Selecting a controller
The controller used for moving the sound location can be selected. If none are selected, then
the sound location can be controlled with a mouse.
40
Controller selection buttons
Setting the initial location of the sound
Use the selected controller to place the sound in the desired initial location, then move to the
record start position. Creating a time marker at the record start position will make it easier to
record retakes.
Real time record mode
Enable record mode by clicking on the “Record” button in the center divider. When record mode
is enabled, the entire “Record” button will turn red. If using a PS2 controller, the [☐] button will
enable record mode.
The “Record” button
Starting the recording
To begin locus recording, press the “Play” button. If a pre-roll time is set, recording will begin
after the pre-roll. If using a PS2 controller, the [△] button will begin recording.
The “Play” button
Any moves of the sound made with your controller is recorded, and will be displayed in the
Locus Monitor.
[NOTE] The “Play” button functionality is also assigned to the keyboard space bar.
41
Ending the recording
To end locus recording, click on the “Stop” button. If using a PS2 controller, the [X] button will
stop the recording.
The “Stop” button
[NOTE] Recording can also be stopped using the keyboard space bar.
7-4 Locus Playback
Enabling/Disabling the 3D effect
The 3D effect for a track can be enabled/disabled using the [3D] button in the track control.
Normally 3D effect should be on. However, depending on factors such as computer processing
capacity and the number of tracks being played back, you may want to disable the 3D effect on
some tracks.
The [3D] button
Enabling/Disabling Locus Display
The Locus Display can be enabled/disabled using the “Locus Display” button in the track
control. Normally Locus Display should be on. However, depending on factors such as
computer processing capacity and the number of tracks being played back, you may want to
disable Locus Display on some tracks.
The “Locus Display” button
42
Setting the start position
Move the record/start pointer to the desired playback start position. Creating a time marker at
the playback start position will make it easier to repeat operations.
Setting playback start position
Starting playback
To begin playback, click the “Play” button.
The “Play” button
Tracks with their [3D] buttons enabled, will playback in a 3 dimensional space. Tracks with their
“Locus Display” buttons enabled, will display their loci (movements) in the 3D View.
[NOTE] The “Play” button functionality is also assigned to the keyboard space bar.
Doppler effect
The Doppler effect can be added to the moving sound by enabling the “Doppler Effect”
checkbox. Doppler effect refers to the phenomenon where sounds that are approaching the
listener will sound higher in pitch, while sounds moving away will sound lower.
Setting the Doppler Effect
The intensity of the Doppler effect may be adjusted using the slider, or by entering a numeric
value between 0 and 8.0 in the text box.
[NOTE] Doppler Effect: The apparent change in the pitch of an ambulance siren when it
passes by, is a common example of Doppler effect.
43
Selecting HRTF
HRTF can be selected from the pop-up menu. The characteristics of the 3D effect can be
changed by selecting different HRTFs.
Selecting HRTF
The following are the descriptions for basic HRTFs:
HRTF
Description
Referential01.HRTF
A basic HRTF.
This setting is optimized for a full range of movements in the
3D space. The volume loss is minimal when the sound source
is moved far away.
Referential02.HRTF
A basic HRTF.
Compared to Referential01.HRTF, distance is emphasized.
Theoretical01.HRTF
Further adjustments were made to the ReferentialHRTF using
unique algorithms that take into account physical changes
that occur near the human head.
This setting is optimized for a full range of movements in the
3D space. The volume loss is minimal when the sound source
is moved far away.
Theoretical02.HRTF
Further adjustments were made to the ReferentialHRTF using
unique algorithms that take into account physical changes
that occur near the human head.
Compared to Theoretical01.HRTF, distance is emphasized.
7-5 Exporting Sounds
The selected area can be exported as a sound file. The area to be exported can be set by
dragging in the Locus Monitor of any track. The selected range will be shown in
semi-transparent blue.
Selecting a range
44
[NOTE] The audio from all tracks will be included in the exported file. If this is not desired,
mute unnecessary tracks using the mute ([M]) button before exporting.
Click on [File] menu, then select [Export], then [Sound File]. The following dialog box will
appear:
Exporting sound
The sound can be exported to the following formats:
Type
Format
WAVE (.wav)
16-bit stereo
AIFF (.aif)
16-bit (uncompressed) stereo
Enter a file name, then click [Save] to export the sound file.
7-6 Spatial Marker
Adding spatial markers
Spatial markers can be used as guides within the 3D space. To add a spatial marker in the 3D
View, click on the “Spatial Marker” tool, or click on the [Insert] menu and choose [Marker], then
[Spatial Marker].
The “Spatial Marker” tool
The following dialog will open:
Adding a spatial marker
45
Enter a name in the text box, then click [OK] to add a spatial marker, which is then displayed in
the 3D View.
A spatial marker
Moving a spatial marker
Spatial markers can be moved in the same way as sound location pointers. If a controller is
selected using the controller selection buttons, then the spatial marker can be moved with that
controller. If not, then the spatial marker can be moved using the mouse.
[NOTE] In addition, spatial markers can be moved by entering numeric values in the
“Position Property” text boxes.
Deleting a spatial marker
With a spatial marker selected, press the [Delete] key, or right-click the spatial marker and then
select [Delete] from the context menu. The following dialog will appear:
Confirm the deletion of the spatial marker
Click on [Yes] to delete the spatial marker.
46
Chapter 8 Editing Loci
8-1 Setting the Edit Range
To specify the edit range, drag across the track in the Locus Monitor. The selected edit range
will be displayed as a semi-transparent blue band.
The edit range
The locus of the selected edit range is displayed as a colored band in the 3D View. The color of
this band will match the color displayed on the left side of the corresponding track’s track
control.
The locus display in the 3D View
The start and end times of the selected edit range will be displayed in the time information box
in the center divider.
The time information display in the center divider
47
8-2 Moving, Compressing, Stretching
Moving
When the mouse cursor is over the edit range, it will change to a hand. The locus data within
the edit range can then be moved by clicking and dragging left/right. Locus data in the
destination location will be overwritten with the moved data. In the blank space that is left after
an edit range is moved away, the sound will be stationary (no movements).
Moving an edit range
Compressing
The locus data can be compressed by [Ctrl]-dragging the edit range handles (the darker
colored area at each end of the edit range) inwards. Compressing the locus data will make the
sound move faster. A blank area will be created by this operation.
Handle
Compressing an edit range
Stretching
The locus data can be stretched by [Ctrl]-dragging the edit range handles (the darker colored
area at each end of the edit range) outwards. Stretching the locus data will make the sound
move slower. Adjacent areas will be overwritten by this operation.
Stretching an edit range
[Ctrl]-dragging the border of the edit range (not the handle) will automatically compress/stretch
48
adjacent data, so that no overwrites or blank areas are created.
8-3 Copy, Paste, Cut
Copying
To copy the locus data within the selected range to the clipboard, click on the [Edit] menu and
choose [Copy]. The copied data can then be pasted to another location.
Copying locus data
Pasting (Overwrite)
The locus data in the clipboard can be pasted to any location on the same track, or another
track. To paste the locus data, select the target location in the Locus Monitor, then click on the
[Edit] menu and choose [Paste]. Any existing locus data in the target location will be
overwritten.
Pasting (Overwrite)
Pasting (Insert)
The locus data in the clipboard can be pasted to any location on the same track, or another
track. To paste the locus data, select the target location in the Locus Monitor, then click on the
[Edit] menu and choose [Paste Insert]. The data will be inserted, and any existing locus data
after the target location will be moved back (to the right).
49
Pasting (Insert)
50
Deleting
To delete the locus data in the selected range, click on the [Edit] menu and choose [Delete].
The deleted area will become blank.
Deleting
Deleting (Shift Left)
With a range selected in the Locus Monitor, click on the [Edit] menu and choose [Delete Shift to
Left]. The locus data in the selected range will be deleted, and the data on the right will be
shifted left so that no blank space is created.
Deleting (Shift Left)
Cutting
With a range selected in the Locus Monitor, click on the [Edit] menu and choose [Cut]. The
locus data in the selected range is cut and placed in the clipboard. The area from where the
data was cut, will become blank.
Cutting
[NOTE] There are keyboard shortcuts and toolbar tool buttons assigned to each of these
operations. For detailed information on the toolbar and keyboard shortcuts, refer to chapter
12 “Reference”.
51
8-4 Creating Basic Shapes
Line tool
Movements in a straight line can be added using the Line tool at the upper left of the 3D View.
The “Line” tool
Set the edit range
Set the edit range.
Setting an edit range
Select the Line tool
Click the “Line” tool.
Selecting the “Line” tool
Set the start point
In the 3D View, place the sound location pointer in the desired start location, and press [Enter]
(if using a PS2 controller, press the [◯] button).
52
Setting the start point
Set the end point
Place the sound location pointer in the desired end location.
Setting the end point
Press [Enter] (or the [◯] button on a PS2 controller). A straight line is created.
The straight line inserted in the locus
53
Circle tool
Circular, oval, arcing, and spiral movements can be added using the Circle tool at the upper left
of the 3D View.
The “Circle” tool
Set the edit range
Set the edit range.
Setting an edit range
Select the Circle tool
Click the “Circle” tool.
Selecting the “Circle” tool
54
Set the start point
In the 3D View, place the sound location pointer in the desired start location. If using a mouse,
click and drag to move the pointer back/forth and left/right, or click both left and right buttons
and drag to move it up/down. If using a PS2 controller, the left analog joystick will move the
pointer back/forth and left/right, while the right analog joystick will move it up/down. Once you
are satisfied with the location, press [Enter] (if using a PS2 controller, press the [◯] button).
Setting the start point
Set the diameter
Move the sound location pointer to the location that will determine the diameter (the point
opposite of the start point). Once you are satisfied with the location, press [Enter] (if using a
PS2 controller, press the [◯] button).
Diameter
Setting the diameter
Set angle and rotation
The angle and amount of rotation can be adjusted. If using a mouse, click and drag left/right to
adjust the angle. Click both left and right buttons and drag left/right to adjust the amount of
rotation. If using a PS2 controller, move the left analog joystick left/right to adjust the angle, and
right analog left/right to adjust the amount of rotation. Once satisfied with the angle and rotation,
press [Enter] (if using a PS2 controller, press the [◯] button).
55
Angle
Rotation
Adjusting angle
Set the end point
The end point for a spiral locus can be set. If using a mouse, click and drag to move the pointer
back/forth and left/right, or click both left and right buttons and drag to move it up/down. If using
a PS2 controller, the left analog joystick will move the pointer back/forth and left/right, while the
right analog joystick will move it up/down. Once you are satisfied with the location, press [Enter]
(if using a PS2 controller, press the [◯] button).
Setting the rotation and end point
The resulting locus will then be displayed like this:
An inserted spiral locus
56
8-5 Manipulating Loci
Any part of the locus can be dragged (or clicked on and then manipulated with a controller) to
further adjust the shape of the locus.
Manipulating the locus
8-6 Exporting/Importing Loci
Any part of a locus on a track can be exported as a file, and then imported into another track or
a project.
Exporting
Select the range to be exported.
Selecting a range
Click on the [File] menu and choose [Export], then [Locus]. The following dialog box will open:
Exporting
57
Enter a name and click [Save]. If the export operation is successful, the following dialog will
appear:
Successful export
Importing
Click on the [File] menu and choose [Import Locus]. The following dialog will open:
Importing
Select a file and click on [Open]. The locus data will be imported.
Imported locus data
[NOTE] If the frame rate of the project does not match that of the imported locus data, the
length of the imported locus will change.
58
Chapter 9 Mixing Tracks
9-1 Mixer View
Click on the “Mixer View” button in the center divider to display the Mixer View.
“Mixer View” button
Level meters
Volume sliders
Output
Movie
Tracks
Port
track
The Mixer View
The Mixer View contains the volume sliders, mute switches, and solo switches for each track
and output port. During playback, the sound levels are displayed in the level meters.
9-2 Adjusting Volume
Tracks
Track volume can be adjusted with either the track volume slider in the Mixer View, or the
volume slider in the track control.
The volume slider in the track control
59
Movies
The movie track volume can be adjusted with either the movie track volume slider in the Mixer
View, or the volume slider in the movie track control.
The volume slider in the track control
Ouput Port
Output port volume can be adjusted with either the output port volume slider in the Mixer View,
or the volume slider in the output port control.
The volume slider in the output port control
Master Volume
The master volume can be adjusted with the volume slider in the center divider.
The volume slider in the center divider
[NOTE] Volume settings can also be set by entering values (-40.0~20.0) in the text box
associated with each volume slider. Entering -40.0 will set the value to -∞.
9-3 Mute and Solo
Mute
The mute function temporarily stops the sound of a track or output port. This enables
monitoring only certain tracks. The mute switch is the [M] button available in each track/output
port control and Mixer View.
60
The mute button
Solo
The solo function mutes all other tracks and output ports, so that the soloed track or output port
can be monitored individually. The solo switch is the [S] button available in each track/output
port control and Mixer View.
The solo button
9-4 Setting the Logical Output Port
For each audio track, the output port can be chosen from Outport1 ~ Outport8.
Choosing the output port
Logical ports are used to group several tracks together. The volume of the grouped tracks can
then be controlled together using a slider in the Mixer View. Furthermore, if you have an ASIO
compatible multi-output audio device, each logical output port can be sent to separate physical
outputs.
61
9-5 Post Processing
Post processing optimizes the 3D acoustic processing according to the intended playback
device (such as speakers or headphones). The post processing type can be specified for each
output port.
Selecting the post process type
Post Processing name
Description
HP-Enh-Normal-01
Processes the signal so that the acoustic field is expanded
outside of the listener’s head when using headphones.
Conventional stereo sources convey stereo placement
using only volume differences between the left and right
channels, and therefore all sound is perceived to be
located within the listener’s head. By processing the signal,
the left/right signals are expanded outside of the head,
providing a comfortable and non-fatiguing acoustic space.
Use this setting when producing content intended for
headphone consumption.
HP-Enh- Fat-01
Processes the signal so that the acoustic field is expanded
outside of the listener’s head when using headphones.
This setting has a fatter sound compared to
HP-Enh-Normal-01.
SP-Enh-TV15-01
This setting can spread the left/right sounds in a stereo
source, further outside of the speakers. It assumes a
listening environment where the speakers are placed 24cm
apart, while the listener is 75cm from those speakers.
SP-VHP-15TV-01
A “virtual headphone” setting. This takes a binaural
recording intended for headphone use, and translates it so
it can be listened to on speakers. It assumes a listening
environment where the speakers are placed 24cm apart,
while the listener is 75cm from those speakers.
[NOTE] The distance between the speakers is measured from the center of the speakers.
62
Chapter 10 Encoding Types
10-1 What is an Encoding Type?
One of the main functions of SoundLocus is to create a 3 dimensional acoustic space using
only two speakers or stereo headphones. However, the same locus data can be used to mix for
a multichannel listening environment such as 5.1ch or 7.1ch. The Encoding Type setting
switches between these functionalities.
Setting this to [Binaural] will enable binaural encoding, which creates a 3 dimensional space
using two speakers or headphones. Setting this to [Multi-Speaker] will enable multichannel
surround sound output (such as 5.1 and 7.1).
63
10-2 Switching the Encoding Type
To change the Encoding Type, click on the [Option] menu and select [Encoding Type], then
choose either [Binaural] or [Multi-Speaker].
Switching Encoding Types
When [Multi-Speaker] is selected, the 3D view section will display 5 or 7 speakers according to
the number of channels being used.
Perspective View with [Multi-Speaker] selected
[NOTE] Each encoding type can have its own track and master volume settings within a
single project. When the encoding type for a project is switched to Multi-Speaker for the first
time, the track volume and master volume will all be at the default value of 0dB.
For a movie track, there can only be one volume setting regardless of whether Binaural or
Multi-Speaker is selected.
[NOTE] Newly created projects will have Binaural encoding selected.
[NOTE] Projects are opened in the last used encoding type. However, surround projects are
always opened in Binaural encoding.
64
[NOTE] Surround projects cannot be switched to Multi-Speaker encoding.
10-3 Multi-Speaker Parameters
Click on the [Option] menu and select [Settings], then click the “Multi-Speaker” icon to open the
following screen. This screen contains parameters specific to the Multi-Speaker encoding.
Multi-Speaker parameters
The screen contains the following parameters:
Item
Description
Channels
Specifies the number of channels (5.1ch or 7.1ch).
Contrast
[High]: Provides clear stereo placement, but low linearity for movements.
[Normal]: Balances clarity of stereo placement with linearity for movements.
[Low]: Provides less clear stereo placement, but high linearity for
movements.
LFE
Configures the extraction method for low frequency material that will be sent
to the LFE speaker.
“Cutoff Freq”: Selects the cutoff frequency for the LFE signal.
“Slope”: Selects the steepness of the filter used for isolating the low
frequencies.
“Gain”: Adjusts the volume of the LFE signal.
65
In order to playback the sounds that are placed in a multi-speaker space, you will need a
multi-speaker listening environment using an ASIO sound device. For more information on
setting up a multi-speaker listening environment, refer to the section “Mapping to Physical
Ports”.
10-4 Mapping to Physical Ports
The speakers in a multi-speaker setup can be mapped to the physical ports of the ASIO sound
device in the “Sound Device” section in the “Settings” dialog. Click on the [Option] menu and
select [Settings], then click on the “Sound Device” icon to display the following screen.
The Sound Device screen in the Settings dialog
The L/R, Ls/Rs, Lbs/Rbs, and C/LFE stereo pairs can be mapped to the physical ports of your
ASIO device.
[NOTE] In order to correctly monitor multi-speaker encoded audio, you will need an ASIO
device with 3 stereo physical output ports for 5.1, and 4 stereo physical output ports for 7.1.
If your ASIO device has fewer outputs, multiple signals may merge to the existing physical
outputs, which may result in distortion or other artifacts.
66
10-5 Recording Locus Data
Locus data can be recorded in the same way as in Binaural encoding. When Multi-Speaker
encoding is selected, the track display changes as follows:
Vertical Filter
Distance slider
checkbox
The track display in Multi-Speaker
With Multi-Speaker encoding, the output port displays either [7.1ch Multi-Speaker] or [5.1ch
Multi-Speaker] (this setting cannot be changed in the pop-up menu). Additionally, the following
3D acoustic processing parameters can be set.
Parameter
Description
Vertical Filter
Enables a filter adding vertical placement in the sound field.
Distance
Changes the dynamic range of the volume in relation to distance. The following
settings are available:
Narrow (left): The decrease in volume is minimal even at longer distances.
Wide (right): The volume is lowered as sound is placed farther away.
With the [3D] button off, the audio on that track will only be outputted from the center speaker.
[NOTE] The same locus data is used for both Binaural and Multi-Speaker encoding.
[NOTE] Locus data cannot be recorded on stereo tracks. Stereo tracks are sent to the L and
R speakers.
67
10-6 Mixing in Multi-Speaker Mode
Tracks can be mixed in the same way as in Binaural encoding. In Multi-Speaker encoding, the
Mixer View displays level meters that correspond to each multi-speaker channel.
The track volume and master volume for Multi-Speaker encoding, are saved separately from
those for Binaural encoding.
Multi-speaker level meters
The Mixer View in Multi-Speaker encoding
The following speaker channels are displayed in the level meter:
Track
Channel
Description
C
Center Channel
Center Channel
L
Left Channel
Front Left Channel
R
Right Channel
Front Right Channel
Ls
Left Surround Channel
Surround Left Channel
Rs
Right Surround Channel
Surround Right Channel
Lbs
Left Back Surround Channel
Rear Surround Left Channel (7.1ch only)
Rbs
Right Back Surround Channel
Rear Surround Right Channel (7.1ch only)
Lfe
Low Frequency Effect Channel
Low Frequency Effect Channel
Each speaker channel is equipped with [M] (mute) and [S] (solo) buttons, which allow you to
listen to only certain channels.
Audio on stereo tracks is sent only to the L and R channels.
68
10-7 Exporting Sound
To export your mix as a sound file, first specify a range to be exported in the same way as in
Binaural encoding. To select a range, drag across the Locus Monitor in any track. The selected
range will be shown in semi-transparent blue.
Selecting a range
[NOTE] The audio from all tracks will be included in the exported file. If this is not desired,
mute unnecessary tracks using the mute ([M]) button before exporting.
Click on [File] menu and select [Export], then [Sound File]. The following dialog will appear:
Exporting sound
The sound can be exported in the following formats:
Type
WAVE (.wav)
Format
32-bit IEEE Float mono
32-bit signed integers mono
24-bit signed integers mono
16-bit signed integers mono
AIFF (.aif)
32-bit (uncompressed) mono
24-bit (uncompressed) mono
16-bit (uncompressed) mono
Enter a file name and click [Save] to export sound files that correspond to each channel in a
multi-speaker format.
69
Chapter 11 Origin Point Image
11-1 Switching the Origin Point Image
The image of the character shown in the origin point in the 3D view can be changed.
Open the [Option] menu and select [Settings], then click on the “Origin Point Image” icon to
display the following dialog. Another image can be selected from the “Selected Image” pop-up
menu. The selected image will be used for all projects, and will be remembered the next time
SoundLocus is launched.
The Origin Point Image screen in the Settings dialog
After changing the origin point image
70
Chapter 12 Surround Mode
12-1 Converting from Multichannel to 2 Channels
SoundLocus’ Surround mode can convert a 5.1 or 7.1 multichannel sound source to stereo
(2ch), using 3 dimensional acoustic processing. When converting, the placement of the virtual
speakers for the multichannel source can be moved freely.
Converting a multichannel source to 2 channels
[NOTE] Locus recording and playback is not available in Surround mode.
12-2 Creating a Project
In order to use Surround mode, “Surround Mode” must be selected when creating a project.
Selecting “Surround Mode”
71
12-3 Track Assignments for a Surround Sound Source
In Surround mode, the tracks are assigned as follows:
Track assignments in Surround mode
Each track corresponds to a surround sound source channel as follows:
Track
Channel
Description
C
Center Channel
Center Channel
L
Left Channel
Front Left Channel
R
Right Channel
Front Right Channel
Ls
Left Surround Channel
Surround Left Channel
Rs
Right Surround Channel
Surround Right Channel
Lb
Left Back Surround Channel
Rear Surround Left Channel
Rb
Right Back Surround Channel
Rear Surround Right Channel
Lfe
Low Frequency Effect Channel
Low Frequency Effect Channel
Right-click each track and select [Load Audio File], or click on the music note icon to open the
following dialog:
Loading a surround file
72
Select a sound file and click [Open] to load it in the track.
12-4 Adjusting Speaker Placement
In Surround mode, the virtual speakers are initially placed in the following manner:
Center channel
Front left channel
Front right channel
Surround left channel
Surround right channel
Rear surround left channel
Rear surround right channel
Virtual speaker placement
The placement of the virtual speakers can be adjusted using the mouse or controller.
Moving the virtual speakers
73
12-5 Mixing Down from Multichannel to 2 Channels
Clicking on the “Mixer View” button will reveal the Mixer View.
“Mixer View” button
The Mixer View in Surround mode
Clicking on the “Play” button in the center divider will playback the 3D sound that is mixed down
from multichannel to 2 channels.
12-6 Exporting 3D Sound
Once the tracks are balanced, the mix can be exported as a sound file. First, open the Locus
Monitor on any of the tracks, to specify the range to be exported. To open the Locus Monitor,
click on the triangular reveal button next to the music note icon.
“Reveal” button
The track “Reveal” button
Drag across the Locus Monitor with the mouse to select the range to be exported.
74
Selecting the export range
Click on the [File] menu and select [Export], then [Sound File]. The following dialog will open:
Exporting as a sound file
Enter a file name and click [Save]. The 3D sound that is mixed down from the multichannel
source will be exported as a sound file.
75
Chapter 13 Reference
13-1 File Menu
New Project
Creates a new project. Selecting this item will open the following dialog. Set up each option as
necessary and click the [OK] button to create a new project.
The “New Project” dialog
The dialog contains the following items:
Item
Description
Project Path
Specify the path for the project.
Project Name
Name the project.
Sample Rate
Specify the sample rate (sampling frequency) of the sound files to be
used in the project.
Frame Rate
Displays the frame rate.
Surround Mode
Tick this checkbox if using Surround mode.
Movie File
Select the movie file to be used on the movie track.
Comment
Enter any comments for the project.
Open Project
Opens an existing project. Selecting this item will open the file selection dialog. Select a project
file (suffix .slp) and click [Open] to open the project.
Recent Project
Opens the most recently used project.
76
Close Project
Closes the current project.
Save Project
Saves the current project by overwriting.
Save As
Saves the current data to a new file. Selecting this item will open a save file dialog. Enter a
project file name and click on [Save] to save as a new file.
Export
Exports the locus data, or a sound file with 3D acoustic processing. The content within the
selected range is exported.
Import Locus
Imports locus data.
Property
Opens a property dialog such as this:
Property dialog
The following items are displayed:
Item
Description
Project Name
Displays the project name.
Project File Path
Displays the project file path.
Sample Rate
Displays the sample rate (sampling frequency) of the sound files used
in the project.
Frame Rate
Displays the frame rate.
Mode
Displays the project mode.
Comment
Displays comments about the project. Can be edited.
77
Exit
Quits SoundLocus.
13-2 Edit Menu
Undo
Will undo the previous edit. Only one step can be undone.
Redo
Will redo the undone step (reverts back to the state before undo).
Cut
Cuts the data within the selected range and copies it to the clipboard.
Copy
Copies the data within the selected range to the clipboard.
Paste
Pastes the clipboard contents to the cursor location. Existing data is overwritten.
Paste Insert
Inserts the clipboard contents to the cursor location.
Delete
Deletes the data within the selected range. The deleted section will become blank.
Delete Shift to Left
Deletes the data within the selected range. The data following the deleted section will be shifted
left to fill the gap.
Insert Space...
Inserts blank space at the cursor location. The following dialog will open:
The “Insert Space” dialog
Specify the desired length of blank space in the Minutes:Seconds:Frames format, then click
[OK].
Smoothing...
Smoothes the locus. Selecting this item will open the following dialog:
78
The “Smoothing” dialog
Drag the slider to the right to increase the amount of smoothing. If the “Preview” option is
enabled, the effect of smoothing will be reflected in the 3D View. If the “Include Space” option is
enabled, areas with blank space will also be smoothed.
Create Basic Shapes
The “Line” or “Circle” tool are enabled. For information regarding these tools, refer to the
respective sections in chapter 8 “Editing Loci”.
Affect Whole Track
When executing [Paste Insert], [Delete Shift to Left], or [Insert Space] operations, any locus
data on the track after the edit point will be shifted left or right accordingly.
Fill with Current Position
This operation will fill the selected range with the locus data at the current location.
Select All
Selects all.
Delete Track
Deletes the track.
Snap
Enables/Disables the spatial snap and time snap functions. Each snap type operates as
follows:
Item
Description
Spatial Snap
Enables snapping to sound locations or loci of other tracks, or spatial
markers in the 3D space.
When this is enabled, moving an object to within a certain distance to
any of the above items, will snap to that item. Snap does not function
during recording.
Time Snap
Snaps sound files, loci, time markers, record playback pointer, and
movie files in the track area so the start or end points can be matched.
79
13-3 View Menu
Tool Bar
Shows or hides the toolbar.
3D View
Shows the 3D View.
Mixer View
Shows the Mixer View.
Reset Graphic View
Resets the Graphic View to the default state.
13-4 Insert Menu
Track
Creates a new track. Selecting this item will open the following dialog:
The “Add Track” dialog
Item
Description
Name
The name of the audio track can be edited.
Mono/Stereo
Sets the track to either mono or stereo. Mono must be selected to use
3D processing.
Logical Port
The logical port for the output can be assigned.
[NOTE] In this version, the logical port for the input cannot be selected.
Marker
Inserts a Spatial Marker or a Time Marker.
80
13-5 Option Menu
Show Start Up Dialog Next Time
Selects whether to display the startup dialog when the program is launched.
The startup dialog
Auto Scroll on Playing
Enables/Disables auto scrolling during playback.
Moving Along XYZ Axis
This option affects the directions in which objects are manipulated when using controllers in the
Perspective View. When this option is ON, object manipulations occur along the xyz axes of the
3D space. When it is OFF, they occur along the xyz axes of the Perspective View camera.
[NOTE] This option only applies to operation in the Perspective View. It does not affect other
views.
System Mode
Switches the system mode. The following options are available:
Item
Description
Stand Alone
Operates in stand alone mode.
ReWire
Operates in sync with a ReWire application.
DSP Box
Not supported in the current version.
ReWire
The tempo information is acquired from the ReWire host when [Get Tempo Map] is selected.
81
Settings
Accesses the system settings. See below for further information.
13-6 System Settings
Click on [Option] menu and select [Settings] to open the system “Settings” dialog. The following
options can be set.
Locus Control Device
Devices used for locus manipulation are configured in this tab.
Setting up a joystick
The following options are available:
Item
Description
Device
Selects the joystick device.
Type
Selects the joystick type.
Left Analog Stick
Assigns functionality to the left analog joystick.
Right Analog Stick
Assigns functionality to the right analog joystick.
Reverse V/H Operation
The right joystick can be set to use either left/right, or back/forth
operation. When this option is ON, the operation may be either
left/right or back/forth, depending on the controller being used.
Choose the setting that feels comfortable (there is no right or
wrong setting).
82
Item
Description
Reverse Polarity
Reverses the effect of the up/down or left/right movements of the
right joystick. Set as appropriate to the particular controller in use.
OK
Assigns a button to the [OK] command.
Record
Assigns a button to the [Record] command.
Cancel/Stop
Assigns a button to the [Cancel/Stop] command.
Playback
Assigns a button to the [Playback] command.
Zoom In
Assigns a button to the [Zoom In] command.
Zoom Out
Assigns a button to the [Zoom Out] command.
Jump to Start
Assigns a button to the [Jump to Start] command.
Rewind
Assigns a button to the [Rewind] command.
Forward
Assigns a button to the [Forward] command.
Reset Graphic View
Assigns a button to the [Reset Graphic View] command.
Change Velocity
Assigns a button to the [Change Velocity] command.
Jump to End
Assigns a button to the [Jump to End] command.
Velocity1
Specifies the speed for Velocity1.
Velocity2
Specifies the speed for Velocity2.
Sensitivity
Adjusts the sensitivity of the analog joystick.
Clicking on [Default] will reset all parameters to the default values.
Sound Device
Sound devices used to output the 3D processed audio are configured in this tab.
Setting up sound devices
The following options are available:
83
Item
Description
ASIO
Select this option to use an ASIO compatible sound device.
Sound Device
Selects a sound device.
Port Map
Assigns the logical output ports in SoundLocus, to physical
output ports on the sound device.
If the Virtualization Mode is set to “Multi-Speaker”, L/R, Ls/Rs,
Lbs/Rbs, and C/LFE are mapped as stereo pairs.
Control Panel
Opens the control panel for the selected ASIO compatible sound
device.
DirectSound
Select this option to use DirectSound.
Buffer Size
Selects the buffer size for DirectSound.
[NOTE] About control panels for ASIO compatible sound devices:
The availability of a control panel, as well as the functionalities provided in it, are
determined by the ASIO sound device drivers that are being used.
This button will work only if a properly functioning ASIO device is selected in the Sound
Device dialog. If you are switching to another sound device, press [Apply] to confirm the
changes. Once the setting changes are applied, the [Control Panel] button will become
available. Note that changes made in the sound device’s control panel are not necessarily
communicated to SoundLocus. To ensure that any device setting changes are reflected in
SoundLocus, quit, and then relaunch SoundLocus.
Metronome
Metronome settings are configured in this tab.
Setting up the metronome
84
The following options are available:
Item
Description
Launch Metronome
Selects when the metronome is enabled
[Before Recording]: Count in.
[On Start Recording]: At record start.
[While Recording]: During record.
Sec
Specifies the metronome interval in seconds.
Repeat Before
Specifies the number of clicks prior to record start.
Recording
Beat
Specifies the metronome settings based on bars and beats.
Tempo
Specifies the tempo.
Beat
Specifies the beat.
Repeat before
Specifies the count in length in bars.
Recording
Syncopation:
Specifies syncopation in quarter notes.
Volume
Adjusts the volume of the clicks.
Outport
Selects the output port.
Multi Speaker parameters
Click on the [Option] menu and choose [Settings], then click on the [Multi Speaker] icon to open
the following screen. This tab contains parameters specific to the Multi-Speaker mode.
85
Multi-Speaker parameters
The following options are available:
Item
Description
Channels
Selects the number of channels (5.1ch or 7.1ch).
Contrast
[High]: Provides clear stereo placement, but low linearity for movements.
[Normal]: Balances clarity of stereo placement with linearity for movements.
[Low]: Provides less clear stereo placement, but high linearity for
movements.
LFE
Configures the extraction method for low frequency material that will be
sent to the LFE speaker.
“Cutoff Freq”: Selects the cutoff frequency for the LFE signal.
“Slope”: Selects the steepness of the filter used for isolating the low
frequencies.
“Gain”: Adjusts the volume of the LFE signal.
13-7 Help Menu
SoundLocus Help
Opens the user manual on the computer. The manual is provided as a PDF file, therefore you
will need to have installed a program that can open PDF format files. One such program is
Adobe Reader, which can be downloaded free of charge from Adobe’s website
86
(http://www.adobe.com).
About SoundLocus
Displays the version and copyright information for SoundLocus.
13-8 Toolbar
The toolbar contains the following functions:
Button
Button Name
Description
New Project
Creates a new project.
Open Project
Opens an existing project.
Save Project
Saves the current session (overwrite).
Redo
Redo
Undo
Reverts the last operation.
Cut
Cuts the selected range.
Copy
Copies the selected range to the clipboard.
Paste
Pastes the clipboard contents to the cursor location
and overwrites existing data.
Paste Insert
Inserts the clipboard contents in the cursor location.
Delete
Deletes the selected range.
13-9 Context Menus
Monaural tracks
Menu Item
Description
Load Audio File
Opens a dialog for loading audio files.
Valid
Enables/Disables the track.
Edit Track Name
Allows editing the track name.
87
Menu Item
Description
Show Locus
Shows/Hides Locus Display.
3D
Enables/Disables the 3D acoustic effect.
Rec Target
Enables locus recording.
Mute
Toggles the mute function.
Solo
Toggles the solo function.
Show Detail
Shows/Hides track details.
Delete Track
Deletes the track.
Duplicate Track
Duplicates the track.
Move Up
Moves the track up.
Move Down
Moves the track down.
Stereo Track
Menu Item
Description
Load Audio File
Opens a dialog for loading audio files.
Valid
Enables/Disables the track.
Edit Track Name
Allows editing the track name.
Mute
Toggles the mute function.
Solo
Toggles the solo function.
Show Detail
Shows/Hides track details.
Delete Track
Deletes the track.
Duplicate Track
Duplicates the track.
Move Up
Moves the track up.
Move Down
Moves the track down.
Output Port
Menu Item
Description
3D
Enables/Disables the 3D acoustic effect.
Mute
Toggles the mute function.
Solo
Toggles the solo function.
Show Detail
Shows/Hides track details.
Movie Track
Menu Item
Description
Load Movie File
Opens a dialog for loading movie files.
Show Movie
Shows/Hides the movie in the 3D View.
Mute
Mutes the audio of the movie track.
88
Locus data
Menu Item
Description
Cut
Cuts the selected range.
Copy
Copies the selected range to the clipboard.
Paste
Overwrite pastes the clipboard contents to the cursor location.
Paste Insert
Inserts the clipboard contents to the cursor location.
Delete
Deletes the selected range.
Delete Shift to Left
Deletes the selected range, then fills it by shifting the following
data to the left.
Insert Space
Opens a dialog for inserting space.
Smoothing
Opens a dialog for data smoothing.
Create Basic Shapes
Enables the Line or Circle tool.
Affect Whole Track
When executing [Paste Insert], [Delete Shift to Left], or [Insert
Space] operation, any locus data on the track after the edit point
will be shifted left or right accordingly.
Fill with Current Position
Fills the selected range with the locus data at the current
location.
Select All
Selects the entire range of locus data.
Waveform data
Menu Item
Description
Delete
Deletes the waveform data from the track.
Move to Top
When there are overlapping waveforms, this command moves the
selected one to the forefront.
Move Forward
When there are overlapping waveforms, this command moves the
selected one up one.
Move Backward
When there are overlapping waveforms, this command moves the
selected one back by one.
Move to Bottom
When there are overlapping waveforms, this command moves the
selected one to the bottom.
Property
Displays the property dialog.
Movie
Menu Item
Description
Delete
Deletes the movie from the track.
Property
Displays the property dialog.
Time Marker
89
Menu Item
Description
Delete
Deletes the time marker.
Property
Displays the property dialog.
Spatial Marker
Menu Item
Description
Delete
Deletes the spatial marker.
Property
Displays the property dialog.
90
13-10 List of Modes
Mode
Settings
Description
System Mode
Stand Alone
Operates as a stand alone system.
ReWire
Uses the ReWire protocol to sync with external
systems.
Project Mode
Locus
Sound sources can be freely placed and moved in a 3
dimensional space.
Surround
Converts a 5.1ch or 7.1ch sound source to standard
stereo (2ch) that preserves the 3 dimensional space.
Virtualization
Binaural
Mode
Creates a 3 dimensional acoustic space using 2
speakers or stereo headphones.
Multi-Speaker
Creates an output for multichannel surround such as
5.1ch or 7.1ch.
91
13-11 Keyboard Shortcuts
Menu commands
Menu
Shortcut
Command
File
[Ctrl]+[N]
New Project
[Ctrl]+[O]
Open Project
[Ctrl]+[W]
Close Project
[Ctrl]+[S]
Save Project
[Ctrl]+[Shift]+[S]
Saves As
[Ctrl]+[Q]
Exit SoundLocus
[Ctrl]+[Z]
Undo
[Ctrl]+[Shift]+[Z]
Redo
[Ctrl]+[X]
Cut
[Ctrl]+[C]
Copy
[Ctrl]+[V]
Paste
[Ctrl]+[Alt]+[V]
Paste Insert
[Delete]
Delete
[Backspace]
Delete Shift to Left
[Ctrl]+[Alt]+[Shift]+[V]
Paste Insert with Affect Whole Track
[Shift]+[Backspace]
Delete Shift to Left with Affect Whole Track
[Ctrl]+[A]
Select All
[Ctrl]+[Alt]+[\]
Snap
[Ctrl]+[.]
3D View
[Ctrl]+M
Mixer View
[Ctrl]+G
Resets the 3D View to the default perspective
[Ctrl]+[Alt]+[T]
Insert Time Marker
[Ctrl]+[Alt]+[M]
Insert Spatial Marker
Option
[Ctrl]+[Alt]+[A]
Toggle Auto Scroll
Help
[F1]
Opens help (user manual)
Edit
View
Insert
92
Non-menu commands
Category
Time Marker
commands
Applies to
Shortcut
Operation
Time Marker
[Ctrl] - double
Inserts a time marker at
area
click
clicked location.
Time Marker
Transport
commands
[Alt] - double
click
Start/Stop Playback.
[3]
Record
[3] (num key)
Record
[←]
Rewind
[→]
Fast Forward
[Shift]+[←]
Go to Beginning
[Shift]+[→]
Go to End
[4] (num key)
Go to beginning
w/ NumLock off
[6] (num key)
Go to End
w/ NumLock off
Waveform
[Alt] - drag
commands
display
waveform
Locus inside
[Ctrl] - drag
selected range
handle
commands
Deletes time marker.
[Space]
Track
Locus
Notes
Dragging to another track
copies the sound file to that
track.
Stretches locus.
Adjacent locus data will not
be stretched.
[Ctrl] - drag
Stretches locus.
border of
Adjacent locus data
selection range
stretched to match.
93
w/ NumLock on