Download User Manual - SkylinkNet Alarm System
Transcript
Quick Guide
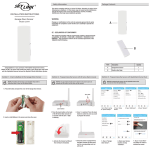
1. Package Contents
3. Insert Batteries for Sensors
2. Install the Internet Hub
NOTE: 6 x AAA- and 1 x AA-Batteries required to setup the SkylinkNet Alarm System.
1. Connect your Hub to an available Port on your Internet Router using the Ethernet cable.
1. Slightly push both sides of the Window/Door Sensor and pull out the cover to insert an AAA-Battery.
Alarm System Starter Kit
Protect your Home the Smart Way!
Model: SK-200
2. Plug in the Power Adapter.
Internet Hub
Motion Sensor
2 x Window/Door Sensor
2. Use a coin to open the Motion Sensor and insert an AA-Battery.
3. Insert 4 x AAA-Batteries in the Hub for backup power in case of power outage. (Optional)
2. Tap on Search Icon and
search for “Skylinknet”
Power Adapter
Ethernet Cable
Mounitng
Accessories
5. Create a SkylinkNet Account
4. Download the SkylinkNet App
1. Tap on App Store
Keychain Remote
iPhone not included.
P/N : 101Y250 Rev:1 | ©2014 SKYLINK GROUP.
3. Tap on Free Button
to download the App.
1. Open the SkylinkNet App
and tap on “Create Account”.
2. Enter your information
and tap on “Sign Up”.
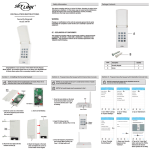
7. Add Sensors and Keychain Remote
6. Set up the Internet Hub
3. Check your email to activate
your account and tap on “Continue”
to log in.
1. Tap on “Set up Hub >”.
2. Tap on “Initialize a
new Hub >”.
3. Follow the instruction on screen
to connect the Internet Hub.
1. Go to “More” and tap
on “System Settings”.
2. Tap on “Setup Wizard”.
3. Tap on “Add Device”.
8. Now trigger the sensors
to test if the SkylinkNet App
is showing the sensor status
correctly.
.
NOTE: Only the “SkylinkNet” App will work with
the Internet Hub.
4. When download is completed,
it will show on your HomeScreen.
4. Tap on “Sensors” or
“Security Remote”.
(If you select Security Remote, skip to Step 6)
4. Click on the link from the email to activate your account.
5. Now you are ready to
login to your account.
4. Enter your information
and tap on “Continue”.
5. Follow the instruction on
screen to reset the Internet
Hub and tap “Continue”.
6. Hub is added and you will
see a green or red dot indicating
if it’s connected to the Hub.
5. Select the type of
sensor you want to add.
6. Name your sensor and
location and tap “Continue”.
7. Tap the “Learn Now”
button and follow the video
to activate the sensor.
NOTE: If motion is detected, a red
led light inside the sensor will flash.
Sensor will not be triggered by new
motion unless no motion has been
detached for 15 seconds.
8. Setup Hub Keypad Password
10. Home Screen Overview
12. Place the Sensors
11. Sensor Settings
Online/Offline
Place each of the device in the appropriate locations (see example below).
Shows the hub name
and connection.
Sensors
Sensor activation
Sensors icons
are blue/red.
1. Go to “More”.
2. Tap on “System Settings”.
3. Tap on ”Hub Keypad
Password”.
4. Enter Passcode
and tap on “Save”.
The blue sensor icons will
turn red if its activated.
Receivers
Settings
Push icons are
black.
Settings for individual sensor,
remote or receiver.
Tap on the gear
icon to edit the
settings of this
specific sensor.
4. Setup Hub Keypad Password / Time Zone
9. Setup Time Zone
Learn
Learn the sensor with the
internet hub.
.
(Learn the sensor if you have selected
“Learn Later” in Step 7 of “Add Sensors
and Keychain Remote).
Rename
Change the name of this sensor.
Menu Bar
Choose between
different screens.
1. Go to “More”.
2. Tap on “System Settings”.
3. Tap on “Time Settings”.
Receive push notification anytime a
new activity takes place.
4. Set your time zone
and tap on “Save.”
13. Alarm Screen Overview
Push Notification
14. Arm Home / Arm Away
Alarm Settings
Select when this sensor
should activate an alarm.
Push Notification
Chime
Select if you want to
If enabled, the internet hub
receive a push notification
will sound an alert chime when
during an alarm only or always
this sensor is activated.
when a sensor is activated.
Delete
Delete this sensor from the hub.
The motion sensor can be mounted with
a double-sided tape or screws on a ceiling.
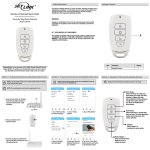
16. Keychain Remote
15. Disarm Alarm System
When an alarm is activated, a
push notification will be sent to
all users and your smartphone will
play an alarm sound.
Status of the
Alarm System
Mount the Window/Door Sensor on your door or
window with a included double-sided tape.
It can be also installed to monitor or protect
cabinets and safes.
Arm Away
Arm and disarm
the alarm system
with a keychain
remote.
Arm Home
Disarm
Panic Button
Press and hold the Panic Button
for 5 sec. to activate it.
17. Event Log
Arm Home,
Arm Away / Exit Delay
Tap the “Disarm” Button to
disarm the alarm system.
Slide to activate
the hub siren in
emergency.
Arm Home
Arm Away / Exit Delay
Select “Arm Home” to protect while
you’re at home. This mode deactivates
motion sensors but leaves other
sensors activated.
Select “Arm Away” to protect your home when you’re away.
This mode activates or triggers the alarm after a
default set of time, giving you enough time to get in and out of
your house to arm/disarm the alarm system.
See all the recent
actvities of the
Alarm System
on the Event Log.
1. Go to “More”:
2. Tap on “System Settings”
3. Tap on “Event Log”


