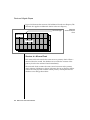
1
IBM Informix Administrator’s Reference Informix Dynamic Server, Version 9.3 August 2001 Part No. 000-8323 © Copyright International Business Machines Corporation 2001. All rights reserved. Trademarks AIX; DB2; DB2 Universal Database; Distributed Relational Database Architecture; NUMA-Q; OS/2, OS/390, and OS/400; IBM Informix; C-ISAM; Foundation.2000TM; IBM Informix 4GL; IBM Informix DataBlade Module; Client SDKTM; CloudscapeTM; CloudsyncTM; IBM Informix Connect; IBM Informix Driver for JDBC; Dynamic ConnectTM; IBM Informix Dynamic Scalable ArchitectureTM (DSA); IBM Informix Dynamic ServerTM; IBM Informix Enterprise Gateway Manager (Enterprise Gateway Manager); IBM Informix Extended Parallel ServerTM; i. Financial ServicesTM; J/FoundationTM; MaxConnectTM; Object TranslatorTM; Red Brick Decision ServerTM; IBM Informix SE; IBM Informix SQL; InformiXMLTM; RedBack; SystemBuilderTM; U2TM; UniData; UniVerse; wintegrate are trademarks or registered trademarks of International Business Machines Corporation. Java and all Java-based trademarks and logos are trademarks or registered trademarks of Sun Microsystems, Inc. in the United States and other countries. Windows, Windows NT, and Excel are either registered trademarks or trademarks of Microsoft Corporation in the United States and/or other countries. UNIX is a registered trademark in the United States and other countries licensed exclusively through X/Open Company Limited. Other company, product, and service names used in this publication may be trademarks or service marks of others. Documentation Team: Karen Goldman Smith, Diane Kirsten-Martin, Karin Moore ii IBM Informix Administrator’s Reference Table of Contents Table of Contents Introduction In This Introduction . . . . . . . . . About This Manual . . . . . . . . . . Types of Users . . . . . . . . . . Software Dependencies . . . . . . . Assumptions About Your Locale. . . . Demonstration Database . . . . . . New Features in Dynamic Server, Version 9.3 DataBlade API Enhancements . . . . Database Server Usability Enhancements . Extensibility Enhancements . . . . . Performance Enhancements . . . . . SQL Enhancements . . . . . . . . Other Significant Changes in Version 9.3 . Features from Dynamic Server 9.21 . . . Documentation Conventions . . . . . . Typographical Conventions . . . . . Icon Conventions . . . . . . . . . Command-Line Conventions . . . . . Additional Documentation . . . . . . . Related Reading . . . . . . . . . . . Compliance with Industry Standards . . . Informix Welcomes Your Comments . . . . . . . . . . . . . . . . . . . . . . . . . . . . . . . . . . . . . . . . . . . . . . . . . . . . . . . . . . . . . . . . . . . . . . . . . . . . . . . . . . . . . . . . . . . . . . . . . . . . . . . . . . . . . . . . . . . . . . . . . . . . . . . . . . . . . . . . . . . . . . . . . . . . . . . . . . . . . . . . . . . . . . . . . . . . . . . . . . . . 3 3 4 4 5 5 6 6 7 8 8 9 9 10 11 11 12 13 16 18 19 19 Chapter 1 Configuration Parameters In This Chapter . . . . . . . . . . . . . ONCONFIG File Conventions . . . . . . . Format of ONCONFIG File . . . . . . . ONCONFIG File Templates . . . . . . . Printing the onconfig.std File . . . . . . Specifying Hidden Configuration Parameters . Displaying ONCONFIG Settings . . . . . Summary of Configuration Parameters . . . . Parameter Attributes . . . . . . . . . Using a Utility to Change a Parameter Value . Environment Variables . . . . . . . . . AC_MSGPATH, AC_STORAGE, and AC_VERBOSE ADTERR, ADTMODE, ADTPATH, and ADTSIZE . ALARMPROGRAM . . . . . . . . . . . ALLOW_NEWLINE . . . . . . . . . . . BLOCKTIMEOUT . . . . . . . . . . . BUFFERS . . . . . . . . . . . . . . . CKPTINTVL . . . . . . . . . . . . . . CLEANERS . . . . . . . . . . . . . . CONSOLE . . . . . . . . . . . . . . DATASKIP . . . . . . . . . . . . . . DBSERVERALIASES . . . . . . . . . . . DBSERVERNAME . . . . . . . . . . . . DBSPACETEMP . . . . . . . . . . . . DD_HASHMAX . . . . . . . . . . . . DD_HASHSIZE . . . . . . . . . . . . DEADLOCK_TIMEOUT . . . . . . . . . DEF_TABLE_LOCKMODE . . . . . . . . DIRECTIVES . . . . . . . . . . . . . DRINTERVAL . . . . . . . . . . . . . DRLOSTFOUND . . . . . . . . . . . . DRTIMEOUT . . . . . . . . . . . . . DS_HASHSIZE . . . . . . . . . . . . DS_MAX_QUERIES . . . . . . . . . . . DS_MAX_SCANS . . . . . . . . . . . . DS_POOLSIZE . . . . . . . . . . . . . DS_TOTAL_MEMORY . . . . . . . . . . DUMPCNT . . . . . . . . . . . . . . iv IBM Informix Administrator’s Reference . . . . . . . . . . . . . . . . . . . . . . . . . . . . . . . . . . . . . . . . . . . . . . . . . . . . . . . . . . . . . . . . . . . . . . . . . . . . . . . . . . . . . . . . . . . . . . . . . . . . . . . . . . . . . . . . . . . . . . . . . . . . . . . . . . . . . . . . . . . . . . . . . . . . . . . . . . . . . . . . . . . . . . . . . . . . . . . . . . . . . . . . . . . . . . . . . . . . . . . . . . . . . . . . . . . . . . . . . . . . . . . . . . . . 1-7 1-7 1-7 1-8 1-9 1-9 1-9 1-10 1-16 1-17 1-17 1-18 1-18 1-19 1-20 1-21 1-22 1-24 1-25 1-25 1-26 1-28 1-30 1-31 1-34 1-35 1-36 1-37 1-38 1-39 1-39 1-40 1-41 1-42 1-43 1-44 1-45 1-47 DUMPCORE . . . . . . . . . . . . . DUMPDIR . . . . . . . . . . . . . . DUMPGCORE . . . . . . . . . . . . DUMPSHMEM . . . . . . . . . . . . DYNAMIC_LOGS . . . . . . . . . . . Enterprise Replication Configuration Parameters FILLFACTOR . . . . . . . . . . . . . HETERO_COMMIT . . . . . . . . . . ISM_DATA_POOL and ISM_LOG_POOL . . . Java Configuration Parameters . . . . . . . LOCKS . . . . . . . . . . . . . . . LOGBUFF . . . . . . . . . . . . . . LOGFILES . . . . . . . . . . . . . . LOGSIZE . . . . . . . . . . . . . . LRUS . . . . . . . . . . . . . . . . LRU_MAX_DIRTY . . . . . . . . . . . LRU_MIN_DIRTY . . . . . . . . . . . LTAPEBLK . . . . . . . . . . . . . . LTAPEDEV . . . . . . . . . . . . . LTAPESIZE . . . . . . . . . . . . . LTXEHWM . . . . . . . . . . . . . LTXHWM . . . . . . . . . . . . . . MAX_PDQPRIORITY . . . . . . . . . . MaxConnect Configuration Parameters . . . . MIRROR . . . . . . . . . . . . . . MIRROROFFSET . . . . . . . . . . . MIRRORPATH . . . . . . . . . . . . MSGPATH . . . . . . . . . . . . . . MULTIPROCESSOR . . . . . . . . . . NETTYPE . . . . . . . . . . . . . . OFF_RECVRY_THREADS . . . . . . . . ON_RECVRY_THREADS . . . . . . . . ON-Bar Configuration Parameters . . . . . ONDBSPACEDOWN . . . . . . . . . . OPCACHEMAX . . . . . . . . . . . . OPTCOMPIND . . . . . . . . . . . . OPT_GOAL . . . . . . . . . . . . . PC_HASHSIZE . . . . . . . . . . . . PC_POOLSIZE . . . . . . . . . . . . . . . . . . . . . . . . . . . . . . . . . . . . . . . . . . . . . . . . . . . . . . . . . . . . . . . . . . . . . . . . . . . . . . . . . . . . . . . . . . . . . . . . . . . . . . . . . . . . . . . . . . . . . . . . . . . . . . . . . . . . . . . . . . . . . . . . . . . . . . . . . . . . . . . . . . . . . . . . . . . . . . . . . . . . . . . . . . . . . . . . . . . . . . . . . . . . . . . . . . . . . . . . . . . . . . . . . . . . . . . . . . . . . . . . . . . . . . 1-47 1-48 1-49 1-50 1-51 1-52 1-53 1-53 1-54 1-55 1-56 1-57 1-58 1-59 1-61 1-62 1-63 1-64 1-65 1-66 1-67 1-68 1-69 1-70 1-71 1-72 1-72 1-73 1-74 1-75 1-80 1-81 1-82 1-84 1-85 1-86 1-87 1-89 1-89 Table of Contents v PHYSBUFF . . . . . . PHYSDBS . . . . . . . PHYSFILE . . . . . . RA_PAGES . . . . . . RA_THRESHOLD . . . RESIDENT . . . . . . RESTARTABLE_RESTORE . ROOTNAME . . . . . ROOTOFFSET . . . . . ROOTPATH . . . . . . ROOTSIZE . . . . . . SBSPACENAME . . . . SBSPACETEMP . . . . . SERVERNUM . . . . . SHMADD . . . . . . SHMBASE . . . . . . SHMTOTAL . . . . . . SHMVIRTSIZE . . . . . SINGLE_CPU_VP . . . . STACKSIZE . . . . . . STAGEBLOB . . . . . STMT_CACHE . . . . . STMT_CACHE_HITS . . STMT_CACHE_NOLIMIT . STMT_CACHE_NUMPOOL STMT_CACHE_SIZE . . . SYSALARMPROGRAM . . SYSSBSPACENAME . . . TAPEBLK . . . . . . . TAPEDEV . . . . . . TAPESIZE . . . . . . TBLSPACE_STATS . . . TXTIMEOUT . . . . . USEOSTIME . . . . . . VPCLASS . . . . . . . vi IBM Informix Administrator’s Reference . . . . . . . . . . . . . . . . . . . . . . . . . . . . . . . . . . . . . . . . . . . . . . . . . . . . . . . . . . . . . . . . . . . . . . . . . . . . . . . . . . . . . . . . . . . . . . . . . . . . . . . . . . . . . . . . . . . . . . . . . . . . . . . . . . . . . . . . . . . . . . . . . . . . . . . . . . . . . . . . . . . . . . . . . . . . . . . . . . . . . . . . . . . . . . . . . . . . . . . . . . . . . . . . . . . . . . . . . . . . . . . . . . . . . . . . . . . . . . . . . . . . . . . . . . . . . . . . . . . . . . . . . . . . . . . . . . . . . . . . . . . . . . . . . . . . . . . . . . . . . . . . . . . . . . . . . . . . . . . . . . . . . . . . . . . . . . . . . . . . . . . . . . . . . . . . . . . . . . . . . . . . . . . . . . . . . . . . . . . . . . . . . . . . . . . . . . . . . . . . . . . . . . . . . . . . . . . . . . . . . . . . . . . . . . . . . . . . . . . . . . . . . . . . . . . . . . . . . . . . . . . . . . . . . . . . . . . . . . . . . . . . . . . . . . 1-90 1-91 1-92 1-93 1-94 1-95 1-96 1-97 1-97 1-98 1-99 1-100 1-102 1-103 1-103 1-104 1-105 1-106 1-107 1-109 1-110 1-111 1-113 1-114 1-115 1-116 1-117 1-118 1-120 1-121 1-123 1-124 1-124 1-125 1-126 Chapter 2 The sysmaster Database In This Chapter . . . . . . . . . The sysmaster Database . . . . . . The buildsmi Script . . . . . . The bldutil.sh Script . . . . . . The System-Monitoring Interface . . . Understanding the SMI Tables . . Accessing SMI Tables . . . . . . The System-Monitoring Interface Tables . The sysutils Tables . . . . . . . sysadtinfo. . . . . . . . . . sysaudit . . . . . . . . . . syschkio . . . . . . . . . . syschunks. . . . . . . . . . sysconfig . . . . . . . . . . sysdatabases . . . . . . . . . sysdbslocale . . . . . . . . . sysdbspaces . . . . . . . . . sysdri . . . . . . . . . . . sysextents . . . . . . . . . . sysextspaces . . . . . . . . . syslocks . . . . . . . . . . syslogs . . . . . . . . . . . sysprofile . . . . . . . . . . sysptprof . . . . . . . . . . syssesprof. . . . . . . . . . syssessions . . . . . . . . . sysseswts . . . . . . . . . . systabnames . . . . . . . . . sysvpprof . . . . . . . . . . The SMI Tables Map . . . . . . . Information from onstat in the SMI Tables . . . . . . . . . . . . . . . . . . . . . . . . . . . . . . . . . . . . . . . . . . . . . . . . . . . . . . . . . . . . . . . . . . . . . . . . . . . . . . . . . . . . . . . . . . . . . . . . . . . . . . . . . . . . . . . . . . . . . . . . . . . . . . . . . . . . . . . . . . . . . . . . . . . . . . . . . . . . . . . . . . . . . . . . . . . . . . . . . . . . . . . . . . . . . . . . . . . . . . . . . . . . . . . . . . . . . . . . . . . . . . . . . . . . . . . . . . . . . . . . . . . . . . . . . . . . . . . . . . . . . . . . . . . . . . . . . . . . . . . 2-3 2-3 2-4 2-4 2-5 2-5 2-6 2-7 2-9 2-10 2-10 2-11 2-12 2-14 2-14 2-15 2-16 2-17 2-18 2-18 2-19 2-20 2-21 2-24 2-25 2-26 2-29 2-30 2-31 2-32 2-36 Table of Contents vii Chapter 3 Utilities In This Chapter . . . . . . . . . . . . . . . . . Complete List of Utilities . . . . . . . . . . . . . The -V Option . . . . . . . . . . . . . . . Multibyte Characters . . . . . . . . . . . . . Informix Server Administrator . . . . . . . . . . . Server Studio JE . . . . . . . . . . . . . . . . oncheck: Check, Repair, or Display . . . . . . . . . . Syntax . . . . . . . . . . . . . . . . . . Check System Catalog Tables with -cc . . . . . . . Check Pages with -cd and -cD . . . . . . . . . . Check the Chunk Free List with -ce and -pe . . . . . Check Index Node Links with -ci and -cI . . . . . . Check Reserved Pages with -cr and -cR . . . . . . . Check and Display Sbspaces with -cs, -cS, -ps, -pS . . . Display Blobspace Statistics with -pB . . . . . . . . Display Rows in Hexadecimal Format with -pd and -pD . Display Index Information with -pk, -pK, -pl, -pL . . . Display the Contents of a Logical Page with -pp and -pP . Display Reserved-Page Information with -pr and -pR . . Display Tblspaces for a Table or Fragment with -pt and -pT Turn On Locking with -x . . . . . . . . . . . . Send Special Arguments to the Access Method with -u. . ondblog: Change Logging Mode . . . . . . . . . . . oninit: Initialize the Database Server . . . . . . . . . Syntax . . . . . . . . . . . . . . . . . . Initialize Shared Memory Only . . . . . . . . . . Initialize Disk Space and Shared Memory . . . . . . Specify the Number of Virtual Processors . . . . . . Bring Up Database Server in Recovery Mode . . . . . onlog: Display Logical-Log Contents . . . . . . . . . onmode: Change Mode and Shared Memory . . . . . . Syntax . . . . . . . . . . . . . . . . . . Change Database Server Mode . . . . . . . . . . Force a Checkpoint . . . . . . . . . . . . . . Change Shared-Memory Residency . . . . . . . . Switch the Logical-Log File . . . . . . . . . . . Kill a Database Server Session . . . . . . . . . . Kill a Distributed Transaction . . . . . . . . . . viii IBM Informix Administrator’s Reference . . . . . . . . . . . . . . . . . . . . . . . . . . . . . . . . . . . . . . . . . . . . . . . . . . . . . . . . . . . . . . . . . . . . . . . . . . . . 3-5 3-6 3-6 3-6 3-6 3-8 3-8 3-13 3-20 3-20 3-21 3-22 3-23 3-24 3-24 3-24 3-25 3-26 3-27 3-27 3-28 3-29 3-29 3-31 3-31 3-32 3-33 3-34 3-34 3-35 3-39 3-40 3-41 3-44 3-45 3-46 3-46 3-47 Set Data-Replication Types . . . . . . . . . . . . . Add a Shared-Memory Segment . . . . . . . . . . . Add or Remove Virtual Processors . . . . . . . . . . Regenerate .infos File . . . . . . . . . . . . . . . Change Decision-Support Parameters . . . . . . . . . Free Unused Memory Segments . . . . . . . . . . . Override ONDBSPACEDOWN WAIT Mode . . . . . . . Change Usage of the SQL Statement Cache . . . . . . . Change Settings for the SQL Statement Cache . . . . . . Using ON-Monitor . . . . . . . . . . . . . . . . . onparams: Modify Log-Configuration Parameters . . . . . . Syntax . . . . . . . . . . . . . . . . . . . . Add a Logical-Log File . . . . . . . . . . . . . . Drop a Logical-Log File . . . . . . . . . . . . . . Change Physical-Log Parameters . . . . . . . . . . onspaces: Manage Storage Spaces . . . . . . . . . . . . Syntax . . . . . . . . . . . . . . . . . . . . Create a Dbspace, Temporary Dbspace, Blobspace, or Extspace Create an Sbspace or Temporary Sbspace . . . . . . . . Change Sbspace Default Specifications . . . . . . . . . Clean Up Stray Smart Large Objects in Sbspaces . . . . . Drop a Dbspace, Blobspace, Sbspace, or Extspace . . . . . Add a Chunk to a Dbspace or Blobspace . . . . . . . . Add a Chunk to an Sbspace . . . . . . . . . . . . Drop a Chunk in a Dbspace, Blobspace, or Sbspace . . . . Start Mirroring . . . . . . . . . . . . . . . . . End Mirroring . . . . . . . . . . . . . . . . . Change Status of a Mirrored Chunk . . . . . . . . . Specify DATASKIP Parameter . . . . . . . . . . . . onstat: Monitor Database Server Operation . . . . . . . . Monitor the Database Server Status . . . . . . . . . . Syntax . . . . . . . . . . . . . . . . . . . . Output Header . . . . . . . . . . . . . . . . . onstat . . . . . . . . . . . . . . . . . . . . onstat -- . . . . . . . . . . . . . . . . . . . onstat -a . . . . . . . . . . . . . . . . . . . onstat -b . . . . . . . . . . . . . . . . . . . onstat -c . . . . . . . . . . . . . . . . . . . onstat -d . . . . . . . . . . . . . . . . . . . 3-48 3-50 3-51 3-55 3-56 3-58 3-59 3-60 3-61 3-63 3-70 3-70 3-71 3-72 3-73 3-74 3-76 3-77 3-81 3-88 3-89 3-90 3-92 3-94 3-96 3-98 3-100 3-101 3-103 3-104 3-104 3-105 3-109 3-110 3-110 3-111 3-111 3-113 3-114 Table of Contents ix onstat -D. . . . . . . . onstat -f . . . . . . . . onstat -F . . . . . . . . onstat -g Monitoring Options onstat -G. . . . . . . . onstat -i . . . . . . . . onstat -k . . . . . . . . onstat -K. . . . . . . . onstat -l . . . . . . . . onstat -m . . . . . . . onstat -O. . . . . . . . onstat -p . . . . . . . . onstat -P . . . . . . . . onstat -R . . . . . . . . onstat -s . . . . . . . . onstat -t and -T . . . . . onstat -u . . . . . . . . onstat -x . . . . . . . . onstat -X . . . . . . . . onstat -z . . . . . . . . ontape: Log, Back Up, and Restore Syntax . . . . . . . . Prepare for Data Replication . Chapter 4 x . . . . . . . . . . . . . . . . . . . . . . . . . . . . . . . . . . . . . . . . . . . . . . . . . . . . . . . . . . . . . . . . . . . . . . . . . . . . . . . . . . . . . . . . . . . . . . . . . . . . . . . . . . . . . . . . . . . . . . . . . . . . . . . . . . . . . . . . . . . . . . . . . . . . . . . . . . . . . . . . . . . . . . . . . . . . . . . . . . . . . . . . . . . . . . . . . . . . . . . . . . . . . . . . . . . . . . . . . . . . . . . . . . . . . . . . . . . . . . . . . . . . . . . . . . . . . . . . . . . . . . . . . . . . . . . . . . . . 3-117 3-118 3-118 3-119 3-129 3-131 3-131 3-133 3-133 3-136 3-137 3-138 3-143 3-144 3-145 3-147 3-149 3-152 3-155 3-157 3-157 3-158 3-159 In This Chapter . . . . . . . . . . . . . . . About Logical-Log Records . . . . . . . . . . Transactions That Drop a Table or Index . . . . . Transactions That Are Rolled Back . . . . . . . Checkpoints with Active Transactions . . . . . Distributed Transactions . . . . . . . . . . Logical-Log Record Structure . . . . . . . . . . Logical-Log Record Header . . . . . . . . . Logical-Log Record Types and Additional Columns. Log Record Types for Smart Large Objects . . . . . . . . . . . . . . . . . . . . . . . . . . . . . . . . . . . . . . . . . . . . 4-3 4-3 4-4 4-4 4-5 4-5 4-6 4-6 4-7 4-22 Interpreting Logical-Log Records IBM Informix Administrator’s Reference Chapter 5 Disk Structures and Storage In This Chapter . . . . . . . . . . . . . Dbspace Structure and Storage . . . . . . . . Structure of the Root Dbspace . . . . . . . Reserved Pages . . . . . . . . . . . . Structure of a Regular Dbspace . . . . . . Structure of the Chunk Free-List Page . . . . Structure of the Tblspace Tblspace . . . . . Structure of the Database Tblspace . . . . . Structure and Allocation of an Extent . . . . Structure and Storage of a Dbspace Page . . . Structure of Fragmented Tables . . . . . . Structure of B-Tree Index Pages . . . . . . Structure of R-Tree Index Pages . . . . . . Storage of Simple Large Objects . . . . . . . Structure of a Blobspace . . . . . . . . . Structure of a Dbspace Blobpage . . . . . . Simple-Large-Object Storage and the Descriptor Blobspace Page Types . . . . . . . . . Structure of a Blobspace Blobpage . . . . . Sbspace Structure . . . . . . . . . . . . Structure of the Metadata Area . . . . . . Sbpage Structure . . . . . . . . . . . Multiple Chunk Sbspace. . . . . . . . . Time Stamps . . . . . . . . . . . . . . Database and Table Creation: What Happens on Disk Database Creation . . . . . . . . . . . Table Creation . . . . . . . . . . . . . . . . . . . . . . . . . . . . . . . . . . . . . . . . . . . . . . . . . . . . . . . . . . . . . . . . . . . . . . . . . . . . . . . . . . . . . . . . . . . . . . . . . . . . . . . . . . . . . . . . . . . . . . . . . . . . . . . . . . . . . . . . . . . . . . . . . . . 5-3 5-4 5-4 5-4 5-5 5-7 5-8 5-11 5-12 5-20 5-25 5-26 5-34 5-34 5-34 5-35 5-35 5-36 5-38 5-38 5-40 5-41 5-42 5-42 5-43 5-43 5-44 Table of Contents xi Appendix A Files That the Database Server Uses Appendix B Trapping Errors Appendix C Event Alarms Appendix D Discontinued Configuration Parameters Appendix E Error Messages Index xii IBM Informix Administrator’s Reference Introduction Introduction In This Introduction . . . . . . . . . . . . . 3 About This Manual . . . . . . . Types of Users . . . . . . . Software Dependencies . . . . Assumptions About Your Locale . Demonstration Database . . . . . . . . . . . . . . . . . . . . . . . . . . . . . . . . . . . . . . . . . . . . . . . . . . . . . . . . . . . . . . . 3 4 4 5 5 New Features in Dynamic Server, Version 9.3 DataBlade API Enhancements. . . . . Database Server Usability Enhancements . Extensibility Enhancements . . . . . Performance Enhancements . . . . . SQL Enhancements . . . . . . . . Other Significant Changes in Version 9.3 . Features from Dynamic Server 9.21 . . . . . . . . . . . . . . . . . . . . . . . . . . . . . . . . . . . . . . . . . . . . . . . . . . . . . . . . . . . . . . . . . . . . . . . . . . . 6 6 7 8 8 9 9 10 Documentation Conventions . . . . . . . Typographical Conventions . . . . . . Icon Conventions . . . . . . . . . . Comment Icons . . . . . . . . . Feature, Product, and Platform Icons . . Command-Line Conventions . . . . . . How to Read a Command-Line Diagram . . . . . . . . . . . . . . . . . . . . . . . . . . . . . . . . . . . . . . . . . . . . . . . . . . . . . . . . 11 11 12 12 12 13 15 Additional Documentation . . . . . . . . . . . . . . . . 16 Related Reading . . . . . . . . . . . . . . . . 18 Compliance with Industry Standards . . . . . . . . . . . . 19 Informix Welcomes Your Comments . . . . . . . . . . . . . 19 . . . . . . . . . 2 IBM Informix Administrator’s Reference In This Introduction This introduction provides an overview of the information in this manual and describes the conventions it uses. About This Manual This manual provides reference material for Informix Dynamic Server. It contains comprehensive descriptions of configuration parameters, the system-monitoring interface (SMI) tables in the sysmaster database, the syntax of database server utilities such as onmode and onstat, logical-log records, disk structures, event alarms, and unnumbered error messages. This manual has two companion volumes, the Administrator’s Guide and the Performance Guide. This section discusses the organization of the manual, the intended audience, and the associated software products that you must have to use the administrative utilities. Introduction 3 Types of Users Types of Users This manual is written for the following users: ■ Database administrators ■ System administrators ■ Performance engineers This manual is written with the assumption that you have the following background: ■ A working knowledge of your computer, your operating system, and the utilities that your operating system provides ■ Some experience working with relational databases or exposure to database concepts ■ Some experience with database server administration, operatingsystem administration, or network administration If you have limited experience with relational databases, SQL, or your operating system, refer to the Getting Started manual for your database server for a list of supplementary titles. Software Dependencies This manual is written with the assumption that you are using Informix Dynamic Server or Informix Dynamic Server with J/Foundation, Version 9.3, as your database server. 4 IBM Informix Administrator’s Reference Assumptions About Your Locale Assumptions About Your Locale Informix products can support many languages, cultures, and code sets. All the information related to character set, collation, and representation of numeric data, currency, date, and time is brought together in a single environment, called a Global Language Support (GLS) locale. The examples in this manual are written with the assumption that you are using the default locale, en_us.8859-1. This locale supports U.S. English format conventions for date, time, and currency. In addition, this locale supports the ISO 8859-1 code set, which includes the ASCII code set plus many 8-bit characters such as é, è, and ñ. If you plan to use nondefault characters in your data or your SQL identifiers, or if you want to conform to the nondefault collation rules of character data, you need to specify the appropriate nondefault locale. For instructions on how to specify a nondefault locale, additional syntax, and other considerations related to GLS locales, see the Informix Guide to GLS Functionality. Demonstration Database The DB-Access utility, which Informix provides with its database server products, includes one or more of the following demonstration databases: ■ The stores_demo database illustrates a relational schema with information about a fictitious wholesale sporting-goods distributor. Many examples in Informix manuals are based on the stores_demo database. ■ The sales_demo database illustrates a dimensional schema for datawarehousing applications. For conceptual information about dimensional data modeling, see the Informix Guide to Database Design and Implementation. ♦ ■ The superstores_demo database illustrates an object-relational schema. The superstores_demo database contains examples of extended data types, type and table inheritance, and user-defined routines. ♦ XPS IDS Introduction 5 New Features in Dynamic Server, Version 9.3 For information about how to create and populate the demonstration databases, see the DB-Access User’s Manual. For descriptions of the databases and their contents, see the Informix Guide to SQL: Reference. The scripts that you use to install the demonstration databases reside in the $INFORMIXDIR/bin directory on UNIX and in the %INFORMIXDIR%\bin directory on Windows. New Features in Dynamic Server, Version 9.3 The following tables provide information about the new features for Informix Dynamic Server, Version 9.3, that this manual covers. To go to the desired page, click a blue hyperlink. For a description of all new features, see the Getting Started manual. DataBlade API Enhancements Version 9.3 includes the following enhancements to the DataBlade API. 6 New Features Reference New PER_STMT_EXEC and PER_STMT_PREP memory durations onstat -g mem in “onstat -g Monitoring Options” on page 3-119 IBM Informix Administrator’s Reference Database Server Usability Enhancements Database Server Usability Enhancements Version 9.3 includes new features that make the database server easier to install, use, and manage. New Features Reference Ability to display the maximum number of connections Maximum server connections number in Appendix E, “Error Messages” Microsoft Transaction Server/XA support “onstat -x” on page 3-152 A modifiable shell script, ex_alarm.sh, to handle event alarms Appendix C, “Event Alarms” Several new configuration parameters: ■ DEF_TABLE_LOCKMODE ■ DYNAMIC_LOGS ■ CDR_SERIAL ■ CDR_QDATA_SBSPACE ■ CDR_QHDR_DBSPACE ■ SBSPACETEMP “DEF_TABLE_LOCKMODE” on page 1-37 “DYNAMIC_LOGS” on page 1-51 “Enterprise Replication Configuration Parameters” on page 1-52 “SBSPACETEMP” on page 1-102 Changed output for these commands: ■ onstat -l (displays temporary logs) “onstat -l” on page 3-133 ■ onstat -x (displays current log position) “onstat -x” on page 3-152 Introduction 7 Extensibility Enhancements Extensibility Enhancements Version 9.3 includes the following improvements in the area of extensibility. New Features Reference Sbspace enhancements Temporary sbspaces and smart large objects “Create an Sbspace or Temporary Sbspace” on page 3-81 Improved space allocation of user data and metadata in sbspaces “Sbspace Structure” on page 5-38 “Sbspace Metadata Messages” on page E-78 Performance Enhancements Version 9.3 includes many new features that help you monitor and improve the performance of your database. New Features Reference The onstat -g stm option onstat -g stm on page 3-128 Dynamic addition of logical logs “DYNAMIC_LOGS” on page 1-51 “Add a logical-log file” on page 3-70 “Dynamic Log Messages” on page E-75 8 IBM Informix Administrator’s Reference SQL Enhancements SQL Enhancements Version 9.3 includes several new SQL statements that ease migration from non-Informix databases to Dynamic Server, Version 9.3. New Features Reference Configurable default lock modes “DEF_TABLE_LOCKMODE” on page 1-37 Other Significant Changes in Version 9.3 The following lists significant changes to the Administrator’s Reference. Changes to the Manual Reference Server Studio JE has replaced Informix DB Administrator. “Server Studio JE” on page 3-8 Use the VPCLASS configuration parameter instead of the AFF_NPROCS, AFF_SPROC, NOAGE, NUMAIOVPS, and NUMCPUVPS configuration parameters. Appendix D, “Discontinued Configuration Parameters.” The conversion and reversion error messages are now in this manual. “Conversion/Reversion Messages” on page E-57 Introduction 9 Features from Dynamic Server 9.21 Features from Dynamic Server 9.21 These features were introduced in Informix Dynamic Server, Version 9.21. Features Reference SQL statement cache enhancements: “STMT_CACHE_HITS” on page 1-113 ■ new configuration parameters ■ onstat -g ssc option ■ onstat -g ssc all option ■ onstat -g ssc pool option ■ onmode -W STMT_CACHE_HITS ■ ■ “STMT_CACHE_NUMPOOL” on page 1-115 “onstat -g Monitoring Options” on onmode -W STMT_CACHE_NOLIMIT page 3-119 “Change Settings for the SQL onmode -W STMT_CACHE_SIZE Statement Cache” on page 3-61 Java features: Drop JVPs 10 “STMT_CACHE_NOLIMIT” on page 1-114 IBM Informix Administrator’s Reference “Add or Remove Virtual Processors” on page 3-51 Documentation Conventions Documentation Conventions This section describes the conventions that this manual uses. These conventions make it easier to gather information from this and other volumes in the documentation set. Typographical Conventions This manual uses the following conventions to introduce new terms, illustrate screen displays, describe command syntax, and so forth. Convention Meaning KEYWORD All primary elements in a programming language statement (keywords) appear in uppercase letters in a serif font. italics italics Within text, new terms and emphasized words appear in italics. Within syntax and code examples, variable values that you are to specify appear in italics. italics boldface boldface Names of program entities (such as classes, events, and tables), environment variables, file and pathnames, and interface elements (such as icons, menu items, and buttons) appear in boldface. monospace monospace Information that the product displays and information that you enter appear in a monospace typeface. KEYSTROKE Keys that you are to press appear in uppercase letters in a sans serif font. ♦ This symbol indicates the end of product- or platform-specific information. ➞ This symbol indicates a menu item. For example, “Choose Tools➞Options” means choose the Options item from the Tools menu. Tip: When you are instructed to “enter” characters or to “execute” a command, immediately press RETURN after the entry. When you are instructed to “type” the text or to “press” other keys, no RETURN is required. Introduction 11 Icon Conventions Icon Conventions Throughout the documentation, you will find text that is identified by several different types of icons. This section describes these icons. Comment Icons Comment icons identify three types of information, as the following table describes. This information always appears in italics. Icon Label Description Warning: Identifies paragraphs that contain vital instructions, cautions, or critical information Important: Identifies paragraphs that contain significant information about the feature or operation that is being described Tip: Identifies paragraphs that offer additional details or shortcuts for the functionality that is being described Feature, Product, and Platform Icons Feature, product, and platform icons identify paragraphs that contain feature-specific, product-specific, or platform-specific information. Icon Description IDS Identifies information or syntax that is specific to Informix Dynamic Server Java Identifies information that is specific to UDRs written in Java UNIX Identifies information that is specific to the UNIX operating system (1 of 2) 12 IBM Informix Administrator’s Reference Command-Line Conventions Icon Description Windows Identifies information that applies to all Windows environments WIN NT Identifies information that is specific to the Windows NT environment. (To distinguish from WIN 2000.) WIN 2000 Identifies information that is specific to the Windows 2000 environment. (To distinguish from WIN NT.) WIN NT/2000 Identifies information that is specific to the Windows NT and Windows 2000 environments. (For server manuals.) XPS Identifies information or syntax that is specific to Informix Extended Parallel Server (2 of 2) These icons can apply to an entire section or to one or more paragraphs within a section. If an icon appears next to a section heading, the information that applies ends at the next heading at the same or higher level. A ♦ symbol indicates the end of information that appears in one or more paragraphs within a section. Command-Line Conventions This section defines and illustrates the format of commands that are available in Informix products. These commands have their own conventions, which might include alternative forms of a command, required and optional parts of the command, and so forth. Each diagram displays the sequences of required and optional elements that are valid in a command. A diagram begins at the upper-left corner with a command. It ends at the upper-right corner with a vertical line. Between these points, you can trace any path that does not stop or back up. Each path describes a valid form of the command. You must supply a value for words that are in italics. Introduction 13 Command-Line Conventions You might encounter one or more of the following elements on a commandline path. Element Description command This required element is usually the product name or other short word that invokes the product or calls the compiler or preprocessor script for a compiled Informix product. It might appear alone or precede one or more options. You must spell a command exactly as shown and use lowercase letters. variable A word in italics represents a value that you must supply, such as a database, file, or program name. A table following the diagram explains the value. -flag A flag is usually an abbreviation for a function, menu, or option name, or for a compiler or preprocessor argument. You must enter a flag exactly as shown, including the preceding hyphen. .ext A filename extension, such as .sql or .cob, might follow a variable that represents a filename. Type this extension exactly as shown, immediately after the name of the file. The extension might be optional in certain products. (.,;+*-/) Punctuation and mathematical notations are literal symbols that you must enter exactly as shown. ' ' Single quotes are literal symbols that you must enter as shown. Privileges p. 5-17 Privileges ALL A reference in a box represents a subdiagram. Imagine that the subdiagram is spliced into the main diagram at this point. When a page number is not specified, the subdiagram appears on the same page. A shaded option is the default action. Syntax within a pair of arrows indicates a subdiagram. The vertical line terminates the command. (1 of 2) 14 IBM Informix Administrator’s Reference Command-Line Conventions Element -f Description OFF ON , variable , 3 size A branch below the main path indicates an optional path. (Any term on the main path is required, unless a branch can circumvent it.) A loop indicates a path that you can repeat. Punctuation along the top of the loop indicates the separator symbol for list items. A gate ( 3 ) on a path indicates that you can only use that path the indicated number of times, even if it is part of a larger loop. You can specify size no more than three times within this statement segment. (2 of 2) How to Read a Command-Line Diagram Figure 1 shows a command-line diagram that uses some of the elements that are listed in the previous table. Figure 1 Example of a Command-Line Diagram setenv INFORMIXC compiler pathname To construct a command correctly, start at the top left with the command. Follow the diagram to the right, including the elements that you want. The elements in the diagram are case sensitive. Figure 1 illustrates the following steps: 1. Type setenv. 2. Type INFORMIXC. 3. Supply either a compiler name or a pathname. After you choose compiler or pathname, you come to the terminator. Your command is complete. 4. Press RETURN to execute the command. Introduction 15 Additional Documentation Additional Documentation Informix Dynamic Server documentation is provided in a variety of formats: ■ Online manuals. The Informix OnLine Documentation Web site at http://www.informix.com/answers contains manuals that Informix provides for your use. This Web site enables you to print chapters or entire books. ■ Online help. Informix provides online help with each graphical user interface (GUI) that displays information about those interfaces and the functions that they perform. Use the help facilities that each GUI provides to display the online help. This facility can provide context-sensitive help, an error message reference, language syntax, and more. To order a printed manual, call 1800-331-1763 or send email to [email protected]. Provide the following information when you place your order: ■ 16 ❑ The documentation that you need ❑ The quantity that you need ❑ Your name, address, and telephone number Documentation notes. Documentation notes, which contain additions and corrections to the manuals, are also located at the OnLine Documentation site at http://www.informix.com/answers. Examine these files before you begin using your database server. IBM Informix Administrator’s Reference Additional Documentation ■ Release notes. Release notes contain vital information about application and performance issues. These files are located at http://www.informix.com/informix/services/techinfo. This site is a password controlled site. Examine these files before you begin using your database server. Documentation notes, release notes, and machine notes are also located in the directory where the product is installed. The following table describes these files. UNIX On UNIX platforms, the following online files appear in the $INFORMIXDIR/release/en_us/0333 directory. Online File Purpose adref_docnotes_9.30.html The documentation notes file for your version of this manual describes topics that are not covered in the manual or that were modified since publication. release_notes_9.30.html The release notes file describes feature differences from earlier versions of Informix products and how these differences might affect current products. This file also contains information about any known problems and their workarounds. machine_notes_9.30.txt The machine notes file describes any special actions that you must take to configure and use Informix products on your computer. Machine notes are named for the product described. ♦ Introduction 17 Related Reading The following items appear in the Informix folder. To display this folder, choose Start➞Programs➞Informix Dynamic Server 9.30➞ Documentation Notes or Release Notes from the task bar. Windows Program Group Item Description Documentation Notes This item includes additions or corrections to manuals with information about features that might not be covered in the manuals or that have been modified since publication. Release Notes This item describes feature differences from earlier versions of Informix products and how these differences might affect current products. This file also contains information about any known problems and their workarounds. Machine notes do not apply to Windows NT platforms. ♦ ■ UNIX Error message files. Informix software products provide ASCII files that contain Informix error messages and their corrective actions. For a detailed description of these error messages, refer to Informix Error Messages in Answers OnLine. To read the error messages on UNIX, use the following command. Command Description finderr Displays error messages online ♦ WIN NT To read error messages and corrective actions on Windows NT, use the Informix Find Error utility. To display this utility, choose Start➞Programs➞Informix from the task bar. ♦ Related Reading For a list of publications that provide an introduction to database servers and operating-system platforms, refer to your Getting Started manual. 18 IBM Informix Administrator’s Reference Compliance with Industry Standards Compliance with Industry Standards The American National Standards Institute (ANSI) has established a set of industry standards for SQL. Informix SQL-based products are fully compliant with SQL-92 Entry Level (published as ANSI X3.135-1992), which is identical to ISO 9075:1992. In addition, many features of Informix database servers comply with the SQL-92 Intermediate and Full Level and X/Open SQL CAE (common applications environment) standards. Informix Welcomes Your Comments We want to know about any corrections or clarifications that you would find useful in our manuals that would help us with future versions. Include the following information: ■ The name and version of the manual that you are using ■ Any comments that you have about the manual ■ Your name, address, and phone number Send electronic mail to us at the following address: [email protected] This address is reserved for reporting errors and omissions in our documentation. For immediate help with a technical problem, contact Informix Customer Services. We appreciate your suggestions. Introduction 19 Chapter Configuration Parameters In This Chapter . . . . . . . . . . . 1 . . . . . . . . . 1-7 ONCONFIG File Conventions . . . . . . . Format of ONCONFIG File. . . . . . . ONCONFIG File Templates . . . . . . Printing the onconfig.std File . . . . . . Specifying Hidden Configuration Parameters Displaying ONCONFIG Settings. . . . . . . . . . . . . . . . . . . . . . . . . . . . . . . . . . . . . . . . . . . . . . . . . . . . . 1-7 1-7 1-8 1-9 1-9 1-9 Summary of Configuration Parameters . . . . Parameter Attributes . . . . . . . . . Using a Utility to Change a Parameter Value Environment Variables . . . . . . . . . . . . . . . . . . . . . . . . . . . . . . . . . . . . . . . . 1-10 1-16 1-17 1-17 AC_MSGPATH, AC_STORAGE, and AC_VERBOSE . . . . . . . 1-18 ADTERR, ADTMODE, ADTPATH, and ADTSIZE . . . . . . . . 1-18 ALARMPROGRAM . . . . . . . . . . . . . . . . . . 1-19 ALLOW_NEWLINE . . . . . . . . . . . . . . . . . . 1-20 BLOCKTIMEOUT . . . . . . . . . . . . . . . . . . . 1-21 BUFFERS . . . . . . . . . . . . . . . . . . . . . . 1-22 CKPTINTVL . . . . . . . . . . . . . . . . . . . . . 1-24 CLEANERS . . . . . . . . . . . . . . . . . . . . . 1-25 CONSOLE . . . . . . . . . . . . . . . . . . . . . . 1-25 DATASKIP. . . . . . . . . . . . . . . . . . . . . . 1-26 1-2 DBSERVERALIASES . . . . . . . . . . . . . . . . . . 1-28 DBSERVERNAME . . . . . . . . . . . . . . . . . . . 1-30 DBSPACETEMP . . . . . . . . . . . . . . . . . . . . 1-31 DD_HASHMAX . . . . . . . . . . . . . . . . . . . 1-34 DD_HASHSIZE . . . . . . . . . . . . . . . . . . . . 1-35 DEADLOCK_TIMEOUT . . . . . . . . . . . . . . . . . 1-36 DEF_TABLE_LOCKMODE . . . . . . . . . . . . . . . . 1-37 DIRECTIVES . . . . . . . . . . . . . . . . . . . . . 1-38 DRINTERVAL . . . . . . . . . . . . . . . . . . . . 1-39 DRLOSTFOUND . . . . . . . . . . . . . . . . . . . 1-39 DRTIMEOUT . . . . . . . . . . . . . . . . . . . . . 1-40 DS_HASHSIZE . . . . . . . . . . . . . . . . . . . . 1-41 DS_MAX_QUERIES . . . . . . . . . . . . . . . . . . 1-42 DS_MAX_SCANS . . . . . . . . . . . . . . . . . . . 1-43 DS_POOLSIZE . . . . . . . . . . . . . . . . . . . 1-44 DS_TOTAL_MEMORY . . . . . . . . . . . . . . . . . 1-45 DUMPCNT . . . . . . . . . . . . . . . . . . . . . . 1-47 DUMPCORE . . . . . . . . . . . . . . . . . . . . . 1-47 DUMPDIR . . . . . . . . . . . . . . . . . . . . . . 1-48 DUMPGCORE . . . . . . . . . . . . . . . . . . . . 1-49 DUMPSHMEM . . . . . . . . . . . . . . . . . . . . 1-50 DYNAMIC_LOGS . . . . . . . . . . . . . . . . . . . 1-51 Enterprise Replication Configuration Parameters . . . . . . . . 1-52 FILLFACTOR . . . . . . . . . . . . . . . . . . . . . 1-53 HETERO_COMMIT . . . . . . . . . . . . . . . . . . 1-53 IBM Informix Administrator’s Reference ISM_DATA_POOL and ISM_LOG_POOL . . . . . . . . . . . 1-54 Java Configuration Parameters . . . . . . . . . . . . . . . 1-55 LOCKS . . . . . . . . . . . . . . . . . . . . . . . 1-56 LOGBUFF . . . . . . . . . . . . . . . . . . . . . . 1-57 LOGFILES . . . . . . . . . . . . . . . . . . . . . . 1-58 LOGSIZE . . . . . . . . . . . . . . . . . . . . . . . 1-59 LRUS . . . . . . . . . . . . . . . . . . . . . . . 1-61 LRU_MAX_DIRTY . . . . . . . . . . . . . . . . . . . 1-62 LRU_MIN_DIRTY . . . . . . . . . . . . . . . . . . . . 1-63 LTAPEBLK . . . . . . . . . . . . . . . . . . . . . . 1-64 LTAPEDEV . . . . . . . . . . . . . . . . . . . . . . 1-65 LTAPESIZE . . . . . . . . . . . . . . . . . . . . . . 1-66 LTXEHWM . . . . . . . . . . . . . . . . . . . . . . 1-67 LTXHWM . . . . . . . . . . . . . . . . . . . . . 1-68 MAX_PDQPRIORITY . . . . . . . . . . . . . . . . . . 1-69 MaxConnect Configuration Parameters . . . . . . . . . . . . 1-70 MIRROR . . . . . . . . . . . . . . . . . . . . . . . . 1-71 MIRROROFFSET . . . . . . . . . . . . . . . . . . . . 1-72 MIRRORPATH . . . . . . . . . . . . . . . . . . . . . 1-72 MSGPATH . . . . . . . . . . . . . . . . . . . . . 1-73 MULTIPROCESSOR . . . . . . . . . . . . . . . . . . . 1-74 NETTYPE . . . . . . . . . . . . . . . . . . 1-75 OFF_RECVRY_THREADS . . . . . . . . . . . . . . . . . 1-80 ON_RECVRY_THREADS . . . . . . . . . . . . . . . . . 1-81 ON-Bar Configuration Parameters . . . . . . . . . . . . . . 1-82 . . . . . . Configuration Parameters 1-3 1-4 ONDBSPACEDOWN . . . . . . . . . . . . . . . . . . 1-84 OPCACHEMAX . . . . . . . . . . . . . . . . . . . . 1-85 OPTCOMPIND . . . . . . . . . . . . . . . . . . . . 1-86 OPT_GOAL . . . . . . . . . . . . . . . . . . . . . 1-87 PC_HASHSIZE . . . . . . . . . . . . . . . . . . . . 1-89 PC_POOLSIZE . . . . . . . . . . . . . . . . . . . . 1-89 PHYSBUFF. . . . . . . . . . . . . . . . . . . . . . 1-90 PHYSDBS . . . . . . . . . . . . . . . . . . . . . . 1-91 PHYSFILE . . . . . . . . . . . . . . . . . . . . . . 1-92 RA_PAGES. . . . . . . . . . . . . . . . . . . . . . 1-93 RA_THRESHOLD . . . . . . . . . . . . . . . . . . . 1-94 RESIDENT . . . . . . . . . . . . . . . . . . . 1-95 RESTARTABLE_RESTORE . . . . . . . . . . . . . . . . 1-96 ROOTNAME . . . . . . . . . . . . . . . . . . . . . 1-97 ROOTOFFSET . . . . . . . . . . . . . . . . . . . . 1-97 ROOTPATH . . . . . . . . . . . . . . . . . . . . . 1-98 ROOTSIZE . . . . . . . . . . . . . . . . . . . . . 1-99 SBSPACENAME . . . . . . . . . . . . . . . . . . . . 1-100 SBSPACETEMP . . . . . . . . . . . . . . . . . . . . 1-102 SERVERNUM. . . . . . . . . . . . . . . . . . . . . 1-103 SHMADD . . . . . . . . . . . . . . . . . . . . . . 1-103 SHMBASE . . . . . . . . . . . . . . . . . . . . . . 1-104 SHMTOTAL . . . . . . . . . . . . . . . . . . . . . 1-105 SHMVIRTSIZE . . . . . . . . . . . . . . . . . . . . 1-106 SINGLE_CPU_VP . . . . . . . . . . . . . . . . . . . 1-107 . . . . IBM Informix Administrator’s Reference STACKSIZE . . . . . . . . . . . . . . . . . . . . . . 1-109 STAGEBLOB . . . . . . . . . . . . . . . . . . . . . 1-110 STMT_CACHE . . . . . . . . . . . . . . . . . . . . . 1-111 STMT_CACHE_HITS . . . . . . . . . . . . . . . . . . 1-113 STMT_CACHE_NOLIMIT . . . . . . . . . . . . . . . . . 1-114 STMT_CACHE_NUMPOOL . . . . . . . . . . . . . . . . 1-115 STMT_CACHE_SIZE. . . . . . . . . . . . . . . . . . . 1-116 SYSALARMPROGRAM. . . . . . . . . . . . . . . . . . 1-117 SYSSBSPACENAME . . . . . . . . . . . . . . . . . . . 1-118 TAPEBLK. . . . . . . . . . . . . . . . . . . . . . . 1-120 TAPEDEV . . . . . . . . . . . . . . . . . . . . . . 1-121 TAPESIZE . . . . . . . . . . . . . . . . . . . . . . 1-123 TBLSPACE_STATS . . . . . . . . . . . . . . . . . . . 1-124 TXTIMEOUT . . . . . . . . . . . . . . . . . . . . . 1-124 USEOSTIME. . . . . . . . . . . . . . . . . . . . . . 1-125 VPCLASS. . . . . . . . . . . . . . . . . . . . . . 1-126 . Configuration Parameters 1-5 1-6 IBM Informix Administrator’s Reference In This Chapter This chapter describes the ONCONFIG file conventions, lists the configuration parameters in the ONCONFIG file, and provides a short discussion of each parameter. ONCONFIG File Conventions The ONCONFIG environment variable specifies the file that contains the configuration parameters. This file is also called the ONCONFIG file. The database server uses the ONCONFIG file during initialization. Format of ONCONFIG File In the ONCONFIG file, each parameter is on a separate line. The file can also contain blank lines and comment lines that start with a # symbol. The following line shows the syntax for a parameter line: PARAMETER_NAME parameter_value #comment Parameters and their values in the ONCONFIG file are case sensitive. The parameter names are always uppercase. If the value entry is described with uppercase letters, you must use uppercase (for example, the CPU value of the NETTYPE parameter). You must put white space (tabs, spaces, or both) between the parameter name, parameter value, and optional comment. Do not use any tabs or spaces within a parameter value. Configuration Parameters 1-7 ONCONFIG File Templates ONCONFIG File Templates The database server provides a template for a configuration file that contains initial values for many of the ONCONFIG parameters. Informix Dynamic Server provides onconfig.std as a template configuration file that you can copy and tailor to your specific configuration. If you omit a parameter value in your copy of the configuration file, the database server either uses default values in onconfig.std or calculates values based on other parameter values. For information on the order of files in which the database server looks for configuration values during initialization, refer to the chapter on initializing the database server in the Administrator’s Guide. Warning: Do not modify or delete onconfig.std, which is a template and not a functional configuration. The following table lists the locations of the ONCONFIG and onconfig.std files. Operating System ONCONFIG File Template File UNIX $INFORMIXDIR/etc/$ONCONFIG $INFORMIXDIR/etc/onconfig.std Windows %INFORMIXDIR%\etc\%ONCONFIG% %INFORMIXDIR%\etc\onconfig.std To prepare the ONCONFIG file 1. Copy the onconfig.std template file. 2. Modify the copy of the template file. 3. Set the ONCONFIG environment variable to the name of the copy of the pertinent template file. If you do not set ONCONFIG, the default filename is onconfig. For more details on why you might want to modify the default configuration parameters, refer to the chapter on configuring the database server in the Administrator’s Guide. 1-8 IBM Informix Administrator’s Reference Printing the onconfig.std File Printing the onconfig.std File Important: Print out a copy of the onconfig.std file to see the latest default values for the configuration parameters and recommended settings. Specifying Hidden Configuration Parameters A few of the configuration parameters, such as DYNAMIC_LOGS, are omitted from the onconfig.std file. Informix recommends that you use the default values for these hidden parameters. If you want to change the value for a hidden parameter, add it to your ONCONFIG file. Displaying ONCONFIG Settings When the database server restarts, it reads the ONCONFIG file. To view the ONCONFIG settings, use one of the following tools: ■ Informix Server Administrator (ISA) ■ oncheck -pr The information under PAGE_CONFIG lists the configuration parameter settings at restart. For more information, see “Display Reserved-Page Information with -pr and -pR” on page 3-27. ■ .infos.dbservername If you set the ONCONFIG environment variable to the name of a different ONCONFIG file while the database server is online, the .infos.dbservername file contains the current settings. For more information, see “.infos.dbservername” on page A-9 and “The ONCONFIG File” on page A-12. For more information about the ONCONFIG environment variable, see the Informix Guide to SQL: Reference. Configuration Parameters 1-9 Summary of Configuration Parameters Summary of Configuration Parameters This section provides the following information: ■ A list of each configuration parameter with database server compatibility ■ A description of the attributes listed for each configuration parameter The configuration parameters and database server compatibility are as follows. For information on the discontinued configuration parameters, see Appendix D. If the configuration parameter has a related environment variable, it is listed in the following table. IDS Configuration Parameter Related Environment Variable Reference AC_MSGPATH AC_CONFIG page 1-18 AC_STORAGE AC_CONFIG page 1-18 AC_VERBOSE AC_CONFIG page 1-18 ADTERR page 1-18 ADTMODE page 1-18 ADTPATH page 1-18 ADTSIZE page 1-18 AFCRASH page 1-55 AFF_NPROCS page D-3 AFF_SPROC page D-4 ALARMPROGRAM page 1-19 ALLOW_NEWLINE page 1-20 BAR_ACT_LOG page 1-82 BAR_BSALIB_PATH page 1-82 (1 of 7) 1-10 IBM Informix Administrator’s Reference Summary of Configuration Parameters IDS Configuration Parameter Related Environment Variable Reference BAR_HISTORY page 1-82 BAR_MAX_BACKUP page 1-82 BAR_NB_XPORT_COUNT page 1-82 BAR_PROGRESS_FREQ page 1-82 BAR_RETRY page 1-82 BAR_XFER_BUF_SIZE page 1-82 BLOCKTIMEOUT page 1-21 BUFFERS page 1-22 CDR_DSLOCKWAIT page 1-52 CDR_EVALTHREAD page 1-52 CDR_NIFCOMPRESS page 1-52 CDR_QDATA_SBFLAGS page 1-52 CDR_QDATA_SBSPACE page 1-52 CDR_QHDR_DBSPACE page 1-52 CDR_QUEUEMEM page 1-52 CKPTINTVL page 1-24 CLEANERS page 1-25 CONSOLE page 1-25 DATASKIP page 1-26 DBSERVERALIASES page 1-28 DBSERVERNAME INFORMIXSERVER page 1-30 DBSPACETEMP DBSPACETEMP page 1-31 DD_HASHMAX page 1-34 DD_HASHSIZE page 1-35 (2 of 7) Configuration Parameters 1-11 Summary of Configuration Parameters IDS Configuration Parameter Related Environment Variable DEADLOCK_TIMEOUT Reference page 1-36 DEF_TABLE_LOCKMODE IFX_DEF_TABLE_LOCKMODE page 1-37 DIRECTIVES IFX_DIRECTIVES page 1-38 DRINTERVAL page 1-39 DRLOSTFOUND page 1-39 DRTIMEOUT page 1-40 DS_HASHSIZE page 1-41 DS_MAX_QUERIES page 1-42 DS_MAX_SCANS page 1-43 DS_POOLSIZE page 1-44 DS_TOTAL_MEMORY page 1-45 DUMPCNT page 1-47 DUMPCORE page 1-47 DUMPDIR page 1-48 DUMPGCORE page 1-49 DUMPSHMEM page 1-50 DYNAMIC_LOGS page 1-51 FILLFACTOR page 1-53 HETERO_COMMIT page 1-53 IMCLOG page 1-70 IMCTRANSPORTS page 1-70 IMCWORKERDELAY page 1-70 IMCWORKERTHREADS page 1-70 ISM_DATA_POOL page 1-54 (3 of 7) 1-12 IBM Informix Administrator’s Reference Summary of Configuration Parameters IDS Configuration Parameter Related Environment Variable Reference ISM_LOG_POOL page 1-54 JDKVERSION page 1-55 JVMTHREAD page 1-55 JVPCLASSPATH page 1-55 JVPDEBUG page 1-55 JVPHOME page 1-55 JVPJAVAHOME page 1-55 JVPJAVALIB page 1-55 JVPJAVAVM page 1-55 JVPLOGFILE page 1-55 JVPPROPFILE page 1-55 LOCKS page 1-56 LOGBUFF page 1-57 LOGFILES page 1-58 LOGSIZE page 1-59 LRUS page 1-61 LRU_MAX_DIRTY page 1-62 LRU_MIN_DIRTY page 1-63 LTAPEBLK page 1-64 LTAPEDEV page 1-65 LTAPESIZE page 1-66 LTXEHWM page 1-67 LTXHWM page 1-68 MAX_PDQPRIORITY page 1-69 (4 of 7) Configuration Parameters 1-13 Summary of Configuration Parameters IDS Configuration Parameter Related Environment Variable Reference MIRROR page 1-71 MIRROROFFSET page 1-72 MIRRORPATH page 1-72 MSGPATH page 1-73 MULTIPROCESSOR page 1-74 NETTYPE page 1-75 NOAGE page D-6 NUMAIOVPS page D-7 NUMCPUVPS page D-8 OFF_RECVRY_THREADS page 1-80 ON_RECVRY_THREADS page 1-81 ONDBSPACEDOWN page 1-84 OPCACHEMAX INFORMIXOPCACHE page 1-85 OPTCOMPIND OPTCOMPIND page 1-86 OPT_GOAL OPT_GOAL page 1-87 PC_HASHSIZE page 1-89 PC_POOLSIZE page 1-89 PHYSBUFF page 1-90 PHYSDBS page 1-91 PHYSFILE page 1-92 RA_PAGES page 1-93 RA_THRESHOLD page 1-94 RESIDENT page 1-95 RESTARTABLE_RESTORE page 1-96 (5 of 7) 1-14 IBM Informix Administrator’s Reference Summary of Configuration Parameters IDS Configuration Parameter Related Environment Variable Reference ROOTNAME page 1-97 ROOTOFFSET page 1-97 ROOTPATH page 1-98 ROOTSIZE page 1-99 SBSPACENAME page 1-100 SBSPACETEMP page 1-102 SERVERNUM page 1-103 SHMADD page 1-103 SHMBASE page 1-104 SHMTOTAL page 1-105 SHMVIRTSIZE page 1-106 SINGLE_CPU_VP page 1-107 STACKSIZE INFORMIXSTACKSIZE STAGEBLOB STMT_CACHE page 1-109 page 1-110 STMT_CACHE page 1-111 STMT_CACHE_HITS page 1-113 STMT_CACHE_NOLIMIT page 1-114 STMT_CACHE_NUMPOOL page 1-115 STMT_CACHE_SIZE page 1-116 SYSALARMPROGRAM page 1-117 SYSSBSPACENAME page 1-118 TAPEBLK page 1-120 TAPEDEV page 1-121 TAPESIZE page 1-123 (6 of 7) Configuration Parameters 1-15 Parameter Attributes IDS Configuration Parameter Related Environment Variable Reference TBLSPACE_STATS page 1-124 TXTIMEOUT page 1-124 USEOSTIME page 1-125 VPCLASS page 1-126 (7 of 7) Parameter Attributes This chapter describes one or more of the following attributes (if relevant) for each parameter. Attribute Description onconfig.std value The default value that appears in the onconfig.std file if not present The value that the database server supplies if the parameter is missing from your ONCONFIG file The database server uses these default values for all configurations. If this value is present in onconfig.std, the database server uses the onconfig.std value. If this value is not present in onconfig.std, the database server calculates the value based on other values in onconfig.std. units The units in which the parameter is expressed separators The separators that can be used when the parameter value has several parts Do not use white space within a parameter value. range of values The valid values for this parameter (1 of 2) 1-16 IBM Informix Administrator’s Reference Using a Utility to Change a Parameter Value Attribute Description takes effect The time at which a change to the value of the parameter affects the operation of the database server Disk is initialized means to reinitialize the database server. utilities The database server utilities that you can use to change the value of the parameter refer to Cross-reference to further discussion (2 of 2) Using a Utility to Change a Parameter Value Use one of these utilities to change the value of a configuration parameter. The utilities section for each configuration parameter lists the specific utilities to use. Tool Description ON-Monitor (UNIX) You can use ON-Monitor to change certain parameter values. In ON-Monitor, some of the responses are Y/N (yes/no). When those responses are recorded in the ONCONFIG file, Y becomes 1, and N becomes 0. ISA To use Informix Server Administrator (ISA) to change parameter values, select Configuration➞ONCONFIG. Command-line utility The utilities section lists one or more command-line utilities that you can use to change a parameter value. Text editor You can use a text editor to modify the ONCONFIG file. Environment Variables If you set the environment variable on the database server, it applies to all sessions. If you set the environment variable in the client environment, it applies to the current session and overrides the equivalent configuration parameter (if any). For a complete list of environment variables, and how to set them, see the Informix Guide to SQL: Reference. Configuration Parameters 1-17 AC_MSGPATH, AC_STORAGE, and AC_VERBOSE AC_MSGPATH, AC_STORAGE, and AC_VERBOSE The ac_config.std template contains the default archecker configuration parameters: AC_MSGPATH, AC_STORAGE, and AC_VERBOSE. Usually, you would not change these parameters. However, to change these parameters, copy the ac_config.std template to the AC_CONFIG file. (The AC_CONFIG environment variable specifies the location of the AC_CONFIG file.) ON-Bar uses these parameters when it verifies a backup. For information on these parameters, see the Backup and Restore Guide. These parameters take effect when ON-Bar starts. UNIX Configuration Parameter Description AC_MSGPATH Specifies the location of the archecker message file. AC_STORAGE Specifies the location of the temporary files that archecker builds. AC_VERBOSE Specifies either verbose or quiet mode for archecker messages. ADTERR, ADTMODE, ADTPATH, and ADTSIZE ADTERR, ADTMODE, ADTPATH, and ADTSIZE are configuration parameters for auditing. For information on these parameters, see the Trusted Facility Manual. 1-18 IBM Informix Administrator’s Reference ALARMPROGRAM ALARMPROGRAM onconfig.std value On UNIX: /usr/informix/etc/log_full.sh On Windows: %INFORMIXDIR%\etc\log_full.bat if not present On UNIX: /usr/informix/etc/no_log.sh On Windows: %INFORMIXDIR%\etc\no_log.bat range of values Full pathname takes effect When the database server is shut down and restarted refer to The following material: ■ “Writing Your Own Alarm Script” on page C-2 ■ Backup and Restore Guide Use the ALARMPROGRAM parameter to display event alarms. Informix provides the following sample scripts. Script Name Platform Description log_full.sh UNIX log_full.bat Windows To back up logical logs automatically when the database server issues a log-full event alarm, set ALARMPROGRAM to log_full.sh or log_full.bat. no_log.sh UNIX no_log.bat Windows ex_alarm.sh UNIX To disable automatic logical-log backups, set ALARMPROGRAM to no_log.sh or no_log.bat. Handles event alarms and controls logical-log backups. Modify ex_alarm.sh and set ALARMPROGRAM to the full pathname of ex_alarm.sh. See “Customizing ex_alarm.sh” on page C-2. Important: Backup media should always be available for automatic log backups. Instead of using the scripts that Informix supplies, you can write your own shell script, batch file, or binary program to execute events. Set ALARMPROGRAM to the full pathname of this file. The database server executes this script when noteworthy events occur. These events include database, table, index, or simple-large-object failure; all logs are full; internal subsystem failure; initialization failure; and long transactions. Configuration Parameters 1-19 ALLOW_NEWLINE ALLOW_NEWLINE onconfig.std value 0 range of values 0 = Disallow the newline character in quoted strings for all sessions. 1 = Allow the newline character in quoted strings for all sessions. takes effect When the database server is shut down and restarted refer to The following material: ■ Quoted strings in the Informix Guide to SQL: Syntax ■ Newline characters in quoted strings in the Informix ESQL/C Programmer’s Manual You can specify that you want the database server to allow the newline character (\n) in a quoted string either for all sessions or for a specific session. A session is the duration of a client connection to the database server. To allow or disallow newline characters in quoted strings for all sessions, set the ALLOW_NEWLINE parameter in the ONCONFIG file. To allow all remote sessions in a distributed query to support embedded newline characters, specify ALLOW_NEWLINE in their ONCONFIG files. To allow or disallow a newline character in a quoted string for a particular session when ALLOW_NEWLINE is not set, you must execute the ifx_allow_newline(boolean) user-defined routine (UDR). 1-20 IBM Informix Administrator’s Reference BLOCKTIMEOUT BLOCKTIMEOUT onconfig.std value 3600 units Seconds takes effect When the database server is shut down and restarted BLOCKTIMEOUT specifies the number of seconds that a thread or database server will hang. After the timeout, the thread or database server will either continue processing or fail. Configuration Parameters 1-21 BUFFERS BUFFERS onconfig.std value For Dynamic Server UNIX: 5000 Windows: 2000 units Number of buffers range of values For 32-bit platform on UNIX: 100 through 1,843,200 buffers (1843200 = 1800 * 1024) For 32-bit platform on Windows: 100 through 524,288 buffers (524,288 = 512 * 1024) For 64-bit platforms: 100 through 231-1 buffers (For the actual value for your 64-bit platform, see your release notes. The maximum number of buffers on Solaris is 536,870,912.) takes effect When the database server is shut down and restarted utilities onstat -b or -B (See page 3-111.) refer to The following material: ■ Shared-memory buffer pool in the sharedmemory chapter of the Administrator’s Guide ■ “RA_PAGES” on page 1-93 ■ “RA_THRESHOLD” on page 1-94 ■ Your Performance Guide BUFFERS specifies the maximum number of shared-memory buffers that the database server user threads have available for disk I/O on behalf of client applications. Therefore, the number of buffers that the database server requires depends on the applications. For example, if the database server accesses 15 percent of the application data 90 percent of the time, you need to allocate enough buffers to hold that 15 percent. Increasing the number of buffers can improve system performance. 1-22 IBM Informix Administrator’s Reference BUFFERS In general, buffer space should range from 20 to 25 percent of physical memory. Informix recommends that you calculate all other shared-memory parameters after you set buffer space (BUFFERS * system_page_size) to 20 percent of physical memory. BUFFERS and Read-Ahead If you also want to perform read-ahead, increase the value of BUFFERS further. Once you have configured all other shared-memory parameters, if you find that you can afford to increase the size of shared memory, increase the value of BUFFERS until buffer space reaches the recommended 25 percent maximum. System Page Size The system page size is platform dependent on Dynamic Server. You can use the following utilities to display the system page size. Utility Description onstat -b Displays the system page size, given as buffer size on the last line of the output oncheck -pr Checks the root-dbspace reserved pages and displays the system page size in the first section of its output ON-Monitor (UNIX) Displays the system page size under the Parameters➞SharedMemory option, which does not require the database server to be running, and the Parameters➞Initialize option BUFFERS and Smart Large Objects If your databases contain smart large objects, you need to consider them when you calculate the value for BUFFERS, because smart large objects are stored in the regular shared-memory buffer pool. Informix recommends the following formula for calculating the minimum impact of smart large objects on the value of BUFFERS: BUFFERS = BUFFERS + (concurrently open smart large objects * desired amount of large-object user data to buffer in pages) Configuration Parameters 1-23 CKPTINTVL If the system uses lightweight I/O (LO_BUFFER is set), the system allocates the buffers from shared memory and does not store the smart large objects in the buffer pool. CKPTINTVL onconfig.std value 300 units Seconds range of values Any value greater than or equal to 0 takes effect When the database server is shut down and restarted refer to The following material: ■ Checkpoints, in the shared-memory and fastrecovery chapters of the Administrator’s Guide ■ Your Performance Guide CKPTINTVL specifies the frequency, expressed in seconds, at which the database server checks to determine whether a checkpoint is needed. When a full checkpoint occurs, all pages in the shared-memory buffer pool are written to disk. When a fuzzy checkpoint occurs, nonfuzzy pages are written to disk, and the page numbers of fuzzy pages are recorded in the logical log. If you set CKPTINTVL to an interval that is too short, the system spends too much time performing checkpoints, and the performance of other work suffers. If you set CKPTINTVL to an interval that is too long, fast recovery might take too long. In practice, 30 seconds is the smallest interval that the database server checks. If you specify a checkpoint interval of 0, the database server does not check if the checkpoint interval has elapsed. However, the database server still performs checkpoints. Other conditions, such as the physical log becoming 75 percent full, also cause the database server to perform checkpoints. 1-24 IBM Informix Administrator’s Reference CLEANERS CLEANERS onconfig.std value 1 units Number of page-cleaner threads range of values 32-bit platforms: 1 through 128 64-bit platforms: 1 through 512 takes effect When the database server is shut down and restarted utilities onstat -F (See page 3-118.) refer to How the database server flushes data to disk, in the shared-memory chapter of the Administrator’s Guide CLEANERS specifies the number of page-cleaner threads available during the database server operation. By default, the database server always runs one page-cleaner thread. A general guideline is one page cleaner per disk drive. The value specified has no effect on the size of shared memory. CONSOLE onconfig.std value On UNIX: /dev/console On Windows: console.log range of values Pathname takes effect When the database server is shut down and restarted refer to The system console in the chapter on database server administration in the Administrator’s Guide CONSOLE specifies the pathname and the filename for console messages. Configuration Parameters 1-25 DATASKIP DATASKIP syntax DATASKIP state [dbspace1 dbspace2 ...] The state entry is required. If state is ON, at least one dbspace entry is required. onconfig.std value None if not present OFF separators Space range of values ALL = Skip all unavailable fragments. OFF = Turn off DATASKIP. ON = Skip some unavailable fragments. utilities onspaces -f (See page 3-103.) onstat -f (See page 3-118.) refer to The following material: ■ “Specify DATASKIP Parameter” on page 3-103 ■ Your Performance Guide DATASKIP lets you avoid points of media failure. This capability can result in higher availability for your data. To instruct the database server to skip some or all unavailable fragments, set this parameter. Whenever the database server skips over a dbspace during query processing, a warning is returned. E/C The previously reserved SQLCA warning flag sqlwarn.sqlwarn7 is set to W for Informix ESQL/C. ♦ Use the following syntax in the parameter line: DATASKIP OFF DATASKIP ON dbspace1 dbspace2... DATASKIP ALL Use the -f option of the onspaces utility to alter the value of the DATASKIP parameter at runtime. 1-26 IBM Informix Administrator’s Reference DATASKIP An application can use the SQL statement SET DATASKIP to override the DATASKIP value that the ONCONFIG parameter or onspaces sets. If the application then executes the SQL statement SET DATASKIP DEFAULT, the DATASKIP value for that session returns to whatever value is currently set for the database server. Configuration Parameters 1-27 DBSERVERALIASES DBSERVERALIASES onconfig.std value None if not present None separators Comma range of values For Dynamic Server: Up to 128 lowercase characters for the dbserver alias. The value for DBSERVERALIASES follows the same rules as the DBSERVERNAME parameter (see “DBSERVERNAME” on page 1-30). takes effect When the database server is shut down and restarted. In addition, you might need to update the sqlhosts file or registry of each database server. MaxConnect users To use MaxConnect with more than one communication protocol, specify additional dbservernames in the DBSERVERALIASES parameter in the ONCONFIG file. The value of the INFORMIXSERVER environment variable on the client must match either the DBSERVERNAME or one of the entries of the DBSERVERALIASES parameter. refer to The following topics in the chapter on client/server communications in the Administrator’s Guide: ■ ONCONFIG parameters for connectivity ■ Using multiple connection types DBSERVERALIASES specifies a list of alternative dbservernames. If the database server supports more than one communication protocol (for example, both an IPC mechanism and the TCP network protocol), you must describe each valid connection to the database server with an entry in the sqlhosts file or registry. DBSERVERALIASES lets you assign multiple aliases to a database server, so each entry in the sqlhosts file or registry can have a unique name. Important: You can specify up to 10 DBSERVERALIASES for a database server. If you attempt to define more than 10 DBSERVERALIASES, a warning message displays in the database server message log. 1-28 IBM Informix Administrator’s Reference DBSERVERALIASES For each alternate name listed in DBSERVERALIASES, the database server starts an additional listener thread. If you have many client applications connecting to the database server, you can distribute the connection requests between several listener threads and reduce connection time. To take advantage of the alternate connections, instruct some of your client applications to use a CONNECT TO dbserveralias statement instead of CONNECT TO dbservername. Configuration Parameters 1-29 DBSERVERNAME DBSERVERNAME onconfig.std value None if not present On UNIX: hostname On Windows: ol_hostname (The hostname variable is the name of the host computer.) range of values For Dynamic Server: Up to 128 lowercase characters DBSERVERNAME must begin with a letter and can include any printable character except the following characters: takes effect ■ Uppercase characters ■ A field delimiter (space or tab) ■ A newline character ■ A comment character ■ A hyphen, minus, or @ character When the database server is shut down and restarted. The sqlhosts file or registry of each database server that communicates with this database server might need to be updated. In addition, the INFORMIXSERVER environment variable for all users might need to be changed. MaxConnect users The value of the INFORMIXSERVER environment variable on the client must match either the DBSERVERNAME or one of the entries of the DBSERVERALIASES parameter. refer to DBSERVERNAME configuration parameter in the chapter on client/server communications in the Administrator’s Guide When you install the database server, specify the DBSERVERNAME. DBSERVERNAME specifies a unique name associated with this specific occurrence of the database server. The value of DBSERVERNAME is called the dbservername. Each dbservername is associated with a communication protocol in the sqlhosts file or registry. If the database server uses multiple communication protocols, additional values for dbservername must be defined with the DBSERVERALIASES configuration parameter. 1-30 IBM Informix Administrator’s Reference DBSPACETEMP Client applications use dbservername in the INFORMIXSERVER environment variable and in SQL statements such as CONNECT and DATABASE, which establish a connection to a database server. Important: To avoid conflict with other instances of Informix database servers on the same computer or node, Informix recommends that you use DBSERVERNAME to assign a dbservername explicitly. DBSPACETEMP DBSPACETEMP specifies a list of dbspaces that the database server uses to manage globally the storage of temporary tables. DBSPACETEMP improves performance by enabling the database server to spread out I/O for temporary tables efficiently across multiple disks. The database server also uses temporary dbspaces during backups to store the before-images of data that are overwritten while the backup is occurring. If a client application needs to specify an alternative list of dbspaces to use for its temporary-table locations, the client can use the DBSPACETEMP environment variable to list them. Important: The dbspaces that you list in the DBSPACETEMP configuration parameter must consist of chunks that are allocated as raw UNIX devices. On Windows, you can create temporary dbspaces in NTFS files. If both standard and temporary dbspaces are listed in the DBSPACETEMP configuration parameter or environment variable, the following rules apply: ■ Sort, backup, implicit, and nonlogging explicit temporary tables are created in temporary dbspaces if adequate space exists. ■ Explicit temporary tables created without the WITH NO LOG option are created in standard (rather than temporary) dbspaces. onconfig.std value None if not present ROOTNAME separators Comma or colon (no white space) Configuration Parameters 1-31 DBSPACETEMP range of values The list of dbspaces can contain standard dbspaces, temporary dbspaces, or both. Use a colon or comma to separate the dbspaces in your list. The length of the list cannot exceed 254 characters. takes effect When the database server is shut down and restarted environment variable Specifies dbspaces that the database server uses to store temporary tables for a particular session. If DBSPACETEMP is not set, the default location is the root dbspace. utilities onspaces -t (See page 3-80.) onstat -d flags field (See page 3-114.) refer to The following material: ■ What is a temporary table, in the chapter on data storage in the Administrator’s Guide ■ Informix Guide to SQL: Reference ■ The order of precedence that the database server uses when it creates implicit sort files, in the Performance Guide When you create a temporary dbspace with ISA or onspaces, the database server does not use the newly created temporary dbspace until you perform the following steps. To enable the database server to use the new temporary dbspace 1. Add the name of a new temporary dbspace to your list of temporary dbspaces in the DBSPACETEMP configuration parameter, the DBSPACETEMP environment variable, or both. 2. Restart the database server with the oninit command (UNIX) or restart the database server service (Windows). If you use the DBSPACETEMP environment variable to create a temporary dbspace in a user session, the change takes effect immediately and overrides the DBSPACETEMP value in the ONCONFIG file. 1-32 IBM Informix Administrator’s Reference DBSPACETEMP Using Hash Join Overflow and DBSPACETEMP Dynamic Server uses an operating-system directory or file to direct any overflow that results from the following database operations if you do not set the DBSPACETEMP environment variable or DBSPACETEMP configuration parameter. You can specify the operating-system directory or file in the following ways: ■ SELECT statement with GROUP BY clause ■ SELECT statement with ORDER BY clause ■ Hash-join operation ■ Nested-loop join operation ■ Index builds If you do not set the DBSPACETEMP environment variable or DBSPACETEMP configuration parameter, the database server directs any overflow that results from the preceding operations to the operating-system directory or file that you specify in one of the following variables: UNIX ■ On UNIX, the operating-system directory or directories that the PSORT_DBTEMP environment variable specifies, if it is set. If PSORT_DBTEMP is not set, the database server writes sort files to the operating-system file space in the tmp directory. ♦ WIN NT/2000 ■ On Windows, the directory specified in TEMP or TMP in the User Environment Variables window in Control Panel➞System. ♦ Configuration Parameters 1-33 DD_HASHMAX DD_HASHMAX onconfig.std value None units Maximum number of tables in a hash bucket range of values Positive integers takes effect When the database server is shut down and restarted utilities Use a text editor to modify the configuration file. refer to The following material: ■ Configuration effects on memory, in your Performance Guide ■ “DD_HASHSIZE” on page 1-35 DD_HASHMAX specifies the maximum number of tables in each hash bucket in the data-dictionary cache. A hash bucket is the unit of storage (typically a page) whose address is computed by the hash function. A hash bucket contains several records. For example, if DD_HASHMAX is 10 and DD_HASHSIZE is 100, you can store information about 1000 tables in the data-dictionary cache, and each hash bucket can have a maximum of 10 tables. 1-34 IBM Informix Administrator’s Reference DD_HASHSIZE DD_HASHSIZE onconfig.std value None units Number of hash buckets or lists range of values Any positive prime number takes effect When the database server is shut down and restarted utilities Use a text editor to modify the configuration file. refer to The following material: ■ Configuration effects on memory, in your Performance Guide ■ “DD_HASHMAX” on page 1-34 DD_HASHSIZE specifies the number of hash buckets or lists in the data- dictionary cache. Configuration Parameters 1-35 DEADLOCK_TIMEOUT DEADLOCK_TIMEOUT onconfig.std value 60 units Seconds range of values Positive integers takes effect When the database server is shut down and restarted utilities onstat -p dltouts field (See page 3-138.) refer to Configuration parameters used in two-phase commits, in the chapter on multiphase commit protocols in the Administrator’s Guide DEADLOCK_TIMEOUT specifies the maximum number of seconds that a database server thread can wait to acquire a lock. Use this parameter only for distributed queries that involve a remote database server. Do not use this parameter for nondistributed queries. 1-36 IBM Informix Administrator’s Reference DEF_TABLE_LOCKMODE DEF_TABLE_LOCKMODE onconfig.std value PAGE if not present PAGE range of values PAGE = sets lock mode to page for new tables ROW = sets lock mode to row for new tables takes effect When the database server is shut down and restarted environment variable IFX_DEF_TABLE_LOCKMODE refer to The following material: ■ Environment variables in the Informix Guide to SQL: Reference ■ Setting lock modes, in the Informix Guide to SQL: Tutorial ■ Configuring lock mode, in the Performance Guide If DEF_TABLE_LOCKMODE = ROW, it sets the lock mode to row for every newly created table for all sessions that are connected to logging or nonlogging databases. This parameter has no effect on the lock mode for existing tables. The rules of precedence for setting the lock mode are as follows. Precedence Command 1 (highest) CREATE TABLE or ALTER TABLE statement that use the LOCK MODE clause 2 IFX_DEF_TABLE_LOCKMODE environment variable set on the client side 3 IFX_DEF_TABLE_LOCKMODE environment variable set on the server side 4 DEF_TABLE_LOCKMODE value in ONCONFIG file 5 (lowest) Default behavior (page-level locking) Configuration Parameters 1-37 DIRECTIVES DIRECTIVES onconfig.std value 1 range of values 0 or 1 takes effect When the database server is shut down and restarted environment variable IFX_DIRECTIVES refer to The following material: ■ Environment variables in the Informix Guide to SQL: Reference ■ SQL directives, in the Informix Guide to SQL: Syntax ■ Performance impact of directives, in your Performance Guide The DIRECTIVES parameter enables or disables the use of SQL directives. SQL directives allow you to specify behavior for the query optimizer in developing query plans for SELECT, UPDATE, and DELETE statements. Set DIRECTIVES to 1, which is the default value, to enable the database server to process directives. Set DIRECTIVES to 0 to disable the database server from processing directives. Client programs also can set the IFX_DIRECTIVES environment variable to ON or OFF to enable or disable processing of directives by the database server. The setting of the IFX_DIRECTIVES environment variable overrides the setting of the DIRECTIVES configuration parameter. If you do not set the IFX_DIRECTIVES environment variable, all sessions for a client inherit the database server configuration for processing SQL directives. 1-38 IBM Informix Administrator’s Reference DRINTERVAL DRINTERVAL onconfig.std value 30 units Seconds range of values -1, 0, and positive integer values takes effect When the database server is shut down and restarted refer to When log records are sent, in the chapter on High-Availability Data Replication in the Administrator’s Guide DRINTERVAL specifies the maximum interval in seconds between flushing of the high-availability data-replication buffer. To update synchronously, set the parameter to -1. DRLOSTFOUND onconfig.std value On UNIX: /usr/etc/dr.lostfound On Windows: drive:\informix\etc\dr.lostfound range of values Pathname takes effect When the database server is shut down and restarted refer to Lost-and-found transactions, in the chapter on HighAvailability Data Replication in the Administrator’s Guide DRLOSTFOUND specifies the pathname to the dr.lostfound.timestamp file. This file contains transactions committed on the primary database server but not committed on the secondary database server when the primary database server experiences a failure. The file is created with a time stamp appended to the filename so that the database server does not overwrite another lostand-found file if one already exists. This parameter is not applicable if updating between the primary and secondary database servers occurs synchronously (that is, if DRINTERVAL is set to -1). Configuration Parameters 1-39 DRTIMEOUT DRTIMEOUT onconfig.std value 30 units Seconds range of values Positive integers takes effect When the database server is shut down and restarted refer to How High-Availability Data Replication failures are detected, in the chapter on High-Availability Data Replication in the Administrator’s Guide DRTIMEOUT applies only to high-availability data-replication pairs. This value specifies the length of time, in seconds, that a database server in a highavailability data-replication pair waits for a transfer acknowledgment from the other database server in the pair. Use the following formula to calculate DRTIMEOUT: DRTIMEOUT = wait_time / 4 In this formula, wait_time is the length of time, in seconds, that a database server in a high-availability data-replication pair must wait before it assumes that a high-availability data-replication failure occurred. For example, suppose you determine that wait_time for your system is 160 seconds. Use the preceding formula to set DRTIMEOUT as follows: DRTIMEOUT = 160 seconds / 4 = 40 seconds 1-40 IBM Informix Administrator’s Reference DS_HASHSIZE DS_HASHSIZE onconfig.std value None if not present 31 units Number of hash buckets or lists range of values Any positive prime number takes effect When the database server is shut down and restarted refer to The following material: ■ Performance Guide for how to monitor and tune the data-distribution cache ■ “DS_POOLSIZE” on page 1-44 The DS_HASHSIZE parameter specifies the number of hash buckets in the data-distribution cache that the database server uses to store and access column statistics that the UPDATE STATISTICS statement generates in the MEDIUM or HIGH mode. Use DS_HASHSIZE and DS_POOLSIZE to improve performance of frequently executed queries in a multiuser environment. Configuration Parameters 1-41 DS_MAX_QUERIES DS_MAX_QUERIES onconfig.std value On UNIX: None On Windows: 32 if not present For Dynamic Server: num_cpu_vps * 2 * 128 units Number of queries range of values For Dynamic Server: Minimum = 1 Maximum = 8 megabytes utilities onmode -Q (See page 3-56.) refer to The following material: ■ “Specifying the Number of CPU VPs” on page 1-132 ■ Parallel database query in your Performance Guide DS_MAX_QUERIES is the maximum number of PDQ queries that can run concurrently. The Memory Grant Manager (MGM) reserves memory for a query based on the following formula: memory_reserved = (DS_TOTAL_MEMORY / DS_MAX_QUERIES) * DS_MAX_QUERIES * (PDQ-priority / 100) * (MAX_PDQPRIORITY / 100) The value of PDQPRIORITY is specified in either the PDQPRIORITY environment variable or the SQL statement SET PDQPRIORITY. 1-42 IBM Informix Administrator’s Reference DS_MAX_SCANS DS_MAX_SCANS onconfig.std value 1,048,576 or (1024 * 1024) units Number of PDQ scan threads range of values 10 through (1024 * 1024) utilities onmode -S (See page 3-56.) refer to Parallel database query in your Performance Guide DS_MAX_SCANS limits the number of PDQ scan threads that the database server can execute concurrently. When a user issues a query, the database server apportions some number of scan threads, depending on the following values: ■ The value of PDQ priority (set by the environment variable PDQPRIORITY or the SQL statement SET PDQPRIORITY) ■ The ceiling that you set with DS_MAX_SCANS ■ The factor that you set with MAX_PDQPRIORITY ■ The number of fragments in the table to scan (nfrags in the formula) The Memory Grant Manager (MGM) tries to reserve scan threads for a query according to the following formula: reserved_threads = min (nfrags, (DS_MAX_SCANS * PDQPRIORITY / 100 * MAX_PDQPRIORITY / 100) ) If the DS_MAX_SCANS part of the formula is greater than or equal to the number of fragments in the table to scan, the query is held in the ready queue until as many scan threads are available as there are table fragments. Once underway, the query executes quickly because threads are scanning fragments in parallel. For example, if nfrags equals 24, DS_MAX_SCANS equals 90, PDQPRIORITY equals 50, and MAX_PDQPRIORITY equals 60, the query does not begin execution until nfrags scan threads are available. Scanning takes place in parallel. Configuration Parameters 1-43 DS_POOLSIZE If the DS_MAX_SCANS formula falls below the number of fragments, the query might begin execution sooner, but the query takes longer to execute because some threads scan fragments serially. If you reduce DS_MAX_SCANS to 40 in the previous example, the query needs fewer resources (12 scan threads) to begin execution, but each thread needs to scan two fragments serially. Execution takes longer. DS_POOLSIZE onconfig.std value None if not present 127 units Maximum number of entries in the data-distribution cache range of values Any positive value takes effect When the database server is shut down and restarted refer to The following material: ■ Performance Guide for how to monitor and tune the data-distribution cache ■ “DS_HASHSIZE” on page 1-41 The DS_POOLSIZE parameter specifies the maximum number of entries in each hash bucket in the data-distribution cache that the database server uses to store and access column statistics that the UPDATE STATISTICS statement generates in the MEDIUM or HIGH mode. Use DS_HASHSIZE and DS_POOLSIZE to improve performance of frequently executed queries in a multi-user environment. 1-44 IBM Informix Administrator’s Reference DS_TOTAL_MEMORY DS_TOTAL_MEMORY onconfig.std value On UNIX: None On Windows: 4,096 if not present For Dynamic Server: If SHMTOTAL=0 and DS_MAX_QUERIES is set, DS_TOTAL_MEMORY = DS_MAX_QUERIES * 128. f SHMTOTAL=0 and DS_MAX_QUERIES is not set, DS_TOTAL_MEMORY = num_cpu_vps * 2 * 128. units Kilobytes range of values For Dynamic Server: If DS_MAX_QUERY is set, the minimum value is DS_MAX_QUERY * 128. If DS_MAX_QUERY is not set, the minimum value is num_cpu_vps * 2 * 128. Maximum value for 32-bit platform: 2 gigabytes Maximum value for 64-bit platform: 4 gigabytes utilities onmode -M (See page 3-56.) refer to The following material: ■ Your Performance Guide for the algorithms ■ “SHMTOTAL” on page 1-105 ■ “SHMVIRTSIZE” on page 1-106 ■ “Specifying the Number of CPU VPs” on page 1-132 ■ The maximum memory available on your platform, in the machine notes DS_TOTAL_MEMORY specifies the amount of memory available for PDQ queries. It should be smaller than the computer physical memory, minus fixed overhead such as operating-system size and buffer-pool size. Configuration Parameters 1-45 DS_TOTAL_MEMORY Do not confuse DS_TOTAL_MEMORY with the configuration parameters SHMTOTAL and SHMVIRTSIZE. SHMTOTAL specifies all the memory for the database server (total of the resident, virtual, and message portions of memory). SHMVIRTSIZE specifies the size of the virtual portion. DS_TOTAL_MEMORY is part of SHMVIRTSIZE. For OLTP applications, set DS_TOTAL_MEMORY to between 20 and 50 percent of the value of SHMTOTAL in kilobytes. For applications that involve large decision-support (DSS) queries, increase the value of DS_TOTAL_MEMORY to between 50 and 80 percent of SHMTOTAL. If you use your database server for DSS queries exclusively, set this parameter to 90 and 100 percent of SHMTOTAL. Set the DS_TOTAL_MEMORY configuration parameter to any value not greater than the quantity (SHMVIRTSIZE - 10 megabytes). Algorithm for DS_TOTAL_MEMORY The database server derives a value for DS_TOTAL_MEMORY when you do not set DS_TOTAL_MEMORY, or if you set it to an inappropriate value. For information on the algorithms, see configuration effects on memory utilization in your Performance Guide. 1-46 IBM Informix Administrator’s Reference DUMPCNT UNIX DUMPCNT onconfig.std value 1 if not present 1 units Number of assertion failures range of values Positive integers takes effect When the database server is shut down and restarted refer to Collecting diagnostic information in the chapter on consistency checking in the Administrator’s Guide DUMPCNT specifies the number of assertion failures for which one database server thread dumps shared memory or generates a core file by calling gcore. An assertion is a test of some condition or expression with the expectation that the outcome is true. For example, the following statement illustrates the concept of an assertion failure: if (a != b) assert_fail("a != b"); UNIX DUMPCORE onconfig.std value 0 range of values 0 = Do not dump core image. 1 = Dump core image. takes effect When the database server is shut down and restarted refer to Collecting diagnostic information in the chapter on consistency checking in the Administrator’s Guide DUMPCORE controls whether assertion failures cause a virtual processor to dump a core image. The core file is left in the directory from which the database server was last invoked. (The DUMPDIR parameter has no impact on the location of the core file.) Configuration Parameters 1-47 DUMPDIR Warning: When DUMPCORE is set to 1, an assertion failure causes a virtual processor to dump a core image, which in turn causes the database server to abort. Set DUMPCORE only for debugging purposes in a controlled environment. UNIX DUMPDIR onconfig.std value tmp if not present tmp range of values Any directory to which user informix has write access takes effect When the database server is shut down and restarted refer to Collecting diagnostic information in the chapter on consistency checking in the Administrator’s Guide DUMPDIR specifies a directory in which the database server dumps shared memory, gcore files, or messages from a failed assertion. Because shared memory can be large, set DUMPDIR to a file system with a significant amount of space. 1-48 IBM Informix Administrator’s Reference DUMPGCORE UNIX DUMPGCORE onconfig.std value 0 range of values 0 = Do not dump gcore. 1 = Dump gcore. takes effect When the database server is shut down and restarted refer to Collecting diagnostic information in the chapter on consistency checking in the Administrator’s Guide DUMPGCORE is used with operating systems that support gcore. If you set DUMPGCORE, but your operating system does not support gcore, messages in the database server message log indicate that an attempt was made to dump a core image, but the database server cannot find the expected file. (If your operating system does not support gcore, set DUMPCORE instead.) If DUMPGCORE is set, the database server calls gcore whenever a virtual processor encounters an assertion failure. The gcore utility directs the virtual processor to dump a core image to the core.pid.cnt file in the directory that DUMPDIR specifies and continue processing. The pid value is the process identification number of the virtual processor. The cnt value is incremented each time that this process encounters an assertion failure. The cnt value can range from 1 to the value of DUMPCNT. After that, no more core files are created. If the virtual processor continues to encounter assertion failures, errors are reported to the message log (and perhaps to the application), but no further diagnostic information is saved. Configuration Parameters 1-49 DUMPSHMEM UNIX DUMPSHMEM onconfig.std value 1 range of values 0 = Do not dump shared memory. 1 = Dump shared memory. takes effect When the database server is shut down and restarted refer to Collecting diagnostic information in the chapter on consistency checking in the Administrator’s Guide DUMPSHMEM indicates that shared memory should be dumped on an assertion failure. All the shared memory that the database server uses is dumped; it is probably quite large. The shared-memory dump is placed in the shmem.pid.cnt file in the directory that DUMPDIR specifies. The pid value is the process identification number for the virtual processor. The cnt value is incremented each time that this virtual processor encounters an assertion failure. The cnt value can range from 1 to the value of DUMPCNT. After the value of DUMPCNT is reached, no more files are created. If the database server continues to detect inconsistencies, errors are reported to the message log (and perhaps to the application), but no further diagnostic information is saved. 1-50 IBM Informix Administrator’s Reference DYNAMIC_LOGS DYNAMIC_LOGS onconfig.std value None (this parameter is not in the onconfig.std file) if not present 2 (Default) range of values 0 = Turn off dynamic-log allocation. 1 = Set off the “log file required” alarm and pause to allow manual addition of a logical-log file. You can add a log file immediately after the current log file or to the end of the log file list. 2 = Turn on dynamic-log allocation. When the database server dynamically adds a log file, it sets off the “dynamically added log file” alarm. takes effect When the database server is shut down and restarted utilities “Add a Logical-Log File” on page 3-71 refer to The following material: ■ “LTXEHWM” on page 1-67 ■ “LTXHWM” on page 1-68 ■ Logical logs in the Administrator’s Guide If DYNAMIC_LOGS is 2, the database server automatically allocates a new log file when the next active log file contains an open transaction. Dynamic-log allocation prevents long transaction rollbacks from hanging the system. If you want to choose the size and location of the new logical-log file, set DYNAMIC_LOGS to 1. Use the onparams -a command with the size (-s), location (-d dbspace), and -i options to add a log file after the current log file. Even when DYNAMIC_LOGS is turned off, you do not have the same risks as in previous database server versions. In Version 9.3, if the database server hangs from a long transaction rollback, you can shut down the database server, set DYNAMIC_LOGS to 1 or 2, and then restart the database server. Important: If you are using Enterprise Replication with dynamic log allocation, set LTXEHWM to no higher than 70. Configuration Parameters 1-51 Enterprise Replication Configuration Parameters Enterprise Replication Configuration Parameters The following configuration parameters apply to Enterprise Replication. For more information, see the Guide to Informix Enterprise Replication. 1-52 Configuration Parameter Description CDR_DSLOCKWAIT Specifies the number of seconds that the Datasync (data synchronization) component waits for database locks to be released. CDR_EVALTHREADS Specifies the number of grouper evaluator threads to create when Enterprise Replication starts and enables parallelism. CDR_NIFCOMPRESS Specifies the level of compression that the database server uses before sending data from the source database server to the target database server. CDR_QUEUEMEM Specifies the maximum amount of memory that is used for the send and receive queues. CDR_QHDR_DBSPACE Specifies the location of the dbspace that Enterprise Replication uses to store the transaction record headers spooled from the send and receive queues. CDR_QDATA_SBSPACE Specifies the location of the sbspace that Enterprise Replication uses to store spooled transaction row data. CDR_QDATA_SBFLAGS Turns logging on or off for the sbspace that contains spooled row data. The CDR_QDATA_SBFLAGS parameter overrides the -Df=LOGGING attribute for the sbspace. CDR_SERIAL Controls generating values for SERIAL and SERIAL8 columns in tables defined for replication. Use this parameter to generate SERIAL column primary keys. IBM Informix Administrator’s Reference FILLFACTOR FILLFACTOR onconfig.std value 90 units Percent range of values 1 through 100 takes effect When the index is built. Existing indexes are not changed. To use the new value, the indexes must be rebuilt. refer to “Structure of B-Tree Index Pages” on page 5-26 FILLFACTOR specifies the degree of index-page fullness. A low value provides room for growth in the index. A high value compacts the index. If an index is full (100 percent), any new inserts result in splitting nodes. You can also set the FILLFACTOR as an option on the CREATE INDEX statement. The setting on the CREATE INDEX statement overrides the ONCONFIG file value. HETERO_COMMIT onconfig.std value 0 range of values 1 = Enable heterogeneous commit. 0 = Disable heterogeneous commit. takes effect When the database server is shut down and restarted refer to The following material: ■ Heterogeneous commit protocol, in the chapter on multiphase commit protocols in the Administrator’s Guide ■ INFORMIX-Enterprise Gateway Manager User Manual Configuration Parameters 1-53 ISM_DATA_POOL and ISM_LOG_POOL The HETERO_COMMIT configuration parameter specifies whether or not the database server is prepared to participate with Informix Gateway products in heterogeneous commit transactions. Setting HETERO_COMMIT to 1 allows a single transaction to update one non-Informix database (accessed with any of the Gateway products) and one or more Informix databases. If HETERO_COMMIT is 0, a single transaction can update databases as follows: ■ One or more Informix databases and no non-Informix databases ■ One non-Informix database and no Informix databases You can read data from any number of Informix and non-Informix databases, regardless of the setting of HETERO_COMMIT. ISM_DATA_POOL and ISM_LOG_POOL The ISM_DATA_POOL and ISM_LOG_POOL parameters control where Informix Storage Manager stores backed-up data and logical logs. For information on these parameters, see the Backup and Restore Guide or the Informix Storage Manager Administrator’s Guide. 1-54 IBM Informix Administrator’s Reference Java Configuration Parameters Java Java Configuration Parameters The following configuration parameters allow you to use J/Foundation, which incorporates an embedded Java virtual machine on the database server. For more information on these parameters, see J/Foundation Developer’s Guide. Configuration Parameter Description AFCRASH When the 0x10 bit is on for AFCRASH, all the messages that the Java Virtual Machine generates are logged into the JVM_vpid file, where vpid is the process ID of the Java virtual processor. This file is stored in the directory where the JVPLOG file is stored. JDKVERSION Version number of the Java Development Kit (JDK) or Java Runtime Environment (JRE) release JVPDEBUG When set to 1, writes tracing messages to the JVPLOG file JVPHOME Directory where the classes of the Informix JDBC Driver are installed JVPLOGFILE Absolute pathname for your Java VP log files JVPPROPFILE Absolute pathname for the Java VP properties file JVPJAVAVM Libraries to use for the Java Virtual Machine (JVM) JVPJAVAHOME Directory where the Java Runtime Environment (JRE) for the database server is installed JVMTHREAD Thread package (green or native) to use for the JVM JVPJAVALIB Path from JVPJAVAHOME to the location of the Java VM libraries JVPCLASSPATH Initial Java class path setting VPCLASS JVP Number of Java virtual processors that the database server should start. (See “VPCLASS” on page 1-126.) Configuration Parameters 1-55 LOCKS LOCKS onconfig.std value 2,000 units Number of locks in the internal lock table range of values 2,000 through 8,000,000 takes effect When the database server is shut down and restarted utilities onstat -k (See page 3-131.) refer to The following material: ■ The memory and locking chapters in your Performance Guide ■ The shared memory chapter in the Administrator’s Guide LOCKS specifies the initial size of the lock table. The lock table holds an entry for each lock that a session uses. If the number of locks that sessions allocate exceeds the value of LOCKS, the database server increases the size of the lock table. Although each additional lock takes up just 44 bytes of resident shared memory, locks can become a resource drain if you have a limited amount of shared memory. For example, if you set LOCKS to 1,000,000, the database server allocates 40 megabytes of resident shared memory for locks. Tip: When you drop a database, a lock is acquired and held on each table in the database until the database is dropped. For more information on the DROP DATABASE statement, see the “Informix Guide to SQL: Syntax.” 1-56 IBM Informix Administrator’s Reference LOGBUFF LOGBUFF onconfig.std value 32 units Kilobytes range of values (2 * pagesize) through LOGSIZE takes effect When the database server is shut down and restarted utilities onstat -l buffer field, second section (See page 3-133.) refer to Logical-log buffer, in the shared-memory chapter of the Administrator’s Guide LOGBUFF specifies the size in kilobytes of each of the three logical-log buffers in shared memory. Triple buffering permits user threads to write to the active buffer while one of the other buffers is being flushed to disk. If flushing is not complete by the time the active buffer fills, the user thread begins writing to the third buffer. Informix recommends that you set LOGBUFF to 16 or 32 kilobytes, or perhaps 64 kilobytes for heavy workloads. If you log user data in smart large objects, increase the size of the log buffer to make the system more efficient. The database server logs only the portion of a smart-large-object page that changed. Important: The database server uses the LOGBUFF parameter to set the size of internal buffers that are used during recovery. If you set LOGBUFF too high, the database server can run out of memory and shut down during recovery. System Page Size To set the system page size, use one of the utilities listed in “System Page Size” on page 1-23. Configuration Parameters 1-57 LOGFILES LOGFILES onconfig.std value 6 if not present For Dynamic Server: 6 For Extended Parallel Server: 3 units Number of logical-log files range of values 3 through 32,767 (integers only) takes effect During disk initialization and when you add a new log file. You add a new log with one of the following utilities. utilities onparams (See page 3-70.) refer to The following topics in the Administrator’s Guide: ■ Size of logical-log files, in the chapter on the logical log ■ Adding or dropping a logical-log file, in the chapter on managing the logical log LOGFILES specifies the number of logical-log files that the database server creates during disk initialization. To change the number of logical-log files, add or drop logical-log files. If you use ISA or onparams to add or drop log files, the database server automatically updates LOGFILES. 1-58 IBM Informix Administrator’s Reference LOGSIZE LOGSIZE onconfig.std value For Dynamic Server: 2000 if not present For Dynamic Server: UNIX: 1500 Windows: 500 units Kilobytes range of values Minimum = 200 Maximum =(ROOTSIZE - PHYSFILE - 512 (63 * ((pagesize)/1024))) / LOGFILES For Dynamic Server: The pagesize value is platform dependent. takes effect When the database server is shut down and restarted. The size of log files added after shared memory is initialized reflects the new value, but the size of existing log files does not change. utilities onparams See “Change Physical-Log Parameters” on page 3-73. refer to The following topics in the Administrator’s Guide: ■ Size of the logical log and logging smart large objects, in the chapter on the logical log ■ Changes to LOGSIZE or LOGFILES, in the chapter on managing logical logs ■ “LTXHWM” on page 1-68 LOGSIZE specifies the size that is used when logical-log files are created. It does not change the size of existing logical-log files. The total logical-log size is LOGSIZE * LOGFILES. To verify the page size that the database server uses on your platform, use one of the utilities listed in “System Page Size” on page 1-23. Configuration Parameters 1-59 LOGSIZE LOGSIZE for Smart Large Objects If you declare logging for a smart-large-object column, you must ensure that the logical log is considerably larger than the amount of data logged during inserts or updates. Important: The database server cannot back up open transactions. If many transactions are active, the total logging activity should not force open transactions to the log backup files. For example, if your log size is 1000 kilobytes and the highwatermark is 60 percent, do not use more than 600 kilobytes of the logical log for the smart-large-object updates. The database server starts rolling back the transaction when it reaches the high-watermark of 600 kilobytes. 1-60 IBM Informix Administrator’s Reference LRUS LRUS onconfig.std value 8 if not present If MULTIPROCESSOR is set: MAX(4, num_cpu_vps) If MULTIPROCESSOR is not set: 4 units Number of LRU queues range of values For Dynamic Server: 1 through 128 takes effect When the database server is shut down and restarted utilities onstat -R (See page 3-144.) refer to The following material: ■ LRU queues, in the shared-memory chapter of the Administrator’s Guide ■ Chapter on configuration effects on memory, in your Performance Guide LRUS specifies the number of LRU (least-recently-used) queues in the shared-memory buffer pool. You can tune the value of LRUS, in combination with the LRU_MIN_DIRTY and LRU_MAX_DIRTY parameters, to control how frequently the shared-memory buffers are flushed to disk. Setting LRUS too high might result in excessive page-cleaner activity. Configuration Parameters 1-61 LRU_MAX_DIRTY LRU_MAX_DIRTY onconfig.std value 60 units For Dynamic Server: Percent (integer values only) range of values 0 through 100 takes effect When the database server is shut down and restarted refer to The following topics in the shared-memory chapter of the Administrator’s Guide: ■ LRU queues ■ Limiting the number of pages added to the MLRU queues LRU_MAX_DIRTY specifies the percentage of modified pages in the LRU queues at which the queue is cleaned. 1-62 IBM Informix Administrator’s Reference LRU_MIN_DIRTY LRU_MIN_DIRTY onconfig.std value 50 units For Dynamic Server: Percent (integer values only) range of values 0 through 100 takes effect When the database server is shut down and restarted refer to The following topics in the shared-memory chapter of the Administrator’s Guide: ■ LRU queues ■ When MLRU cleaning ends LRU_MIN_DIRTY specifies the percentage of modified pages in the LRU queues at which page cleaning is no longer mandatory. Page cleaners might continue cleaning beyond this point under some circumstances. Configuration Parameters 1-63 LTAPEBLK LTAPEBLK onconfig.std value 16 units Kilobytes range of values Values greater than (page size/1024) To obtain the page size, see the commands listed in “System Page Size” on page 1-23 takes effect For ontape: When you execute ontape For onload and onunload: When the database server is shut down and restarted refer to The following material: ■ Using ontape, in the Backup and Restore Guide ■ Using onload and onunload, in the Informix Migration Guide ■ “TAPEBLK” on page 1-120 LTAPEBLK specifies the block size of the device to which the logical logs are backed up when you use ontape for dbspace backups. LTAPEBLK also specifies the block size for the device to which data is loaded or unloaded when you use the -l option of onload or onunload. If you are using onload or onunload, you can specify a different block size at the command line. Specify LTAPEBLK as the largest block size permitted by your tape device. The database server does not check the tape device when you specify the block size. Verify that the LTAPEDEV tape device can read the block size that you specify. If not, you might not be able to read from the tape. UNIX 1-64 The UNIX dd utility can verify that the LTAPEDEV tape device can read the block size. It is available with most UNIX systems. ♦ IBM Informix Administrator’s Reference LTAPEDEV LTAPEDEV onconfig.std value On UNIX: /dev/tapedev On Windows: \\.\TAPE1 if not present On UNIX: /dev/null On Windows: nul takes effect For ontape: when the database server is shut down and restarted, if set to /dev/null on UNIX or nul on Windows. When you execute ontape, if set to a tape device. For onload and onunload: when the database server is shut down and restarted refer to The following material: ■ How to set and change the LTAPEDEV value for ontape and how LTAPEDEV affects ON-Bar, in the Backup and Restore Guide ■ Using onload or onunload, in the Informix Migration Guide ■ “TAPEDEV” on page 1-121 LTAPEDEV specifies the device to which the logical logs are backed up when you use ontape for backups. LTAPEDEV also specifies the device to which data is loaded or unloaded when you use the -l option of onload or onunload. If you are using LTAPEDEV to specify a device for onunload or onload, the same information for TAPEDEV is relevant for LTAPEDEV. Warning: Do not set LTAPEDEV to /dev/null or nul when you use ON-Bar to back up logical logs. Configuration Parameters 1-65 LTAPESIZE LTAPESIZE onconfig.std value 10,240 units Kilobytes range of values Positive integers takes effect For ontape: when you execute ontape For onload and onunload: when the database server is shut down and restarted refer to The following material: ■ Using ontape, in the Backup and Restore Guide ■ Using onload or onunload, in the Informix Migration Guide ■ “TAPESIZE” on page 1-123 LTAPESIZE specifies the maximum tape size of the device to which the logical logs are backed up when you use ontape for backups. LTAPESIZE also specifies the maximum tape size of the device to which data is loaded or unloaded when you use the -l option of onload or onunload. If you are using onload or onunload, you can specify a different tape size on the command line. 1-66 IBM Informix Administrator’s Reference LTXEHWM LTXEHWM onconfig.std value For Dynamic Server: None (not present in onconfig.std if not present 90 (if DYNAMIC_LOGS is set to 1 or 2) 60 (if DYNAMIC_LOGS is set to 0) units Percent range of values LTXHWM through 100 takes effect When the database server is shut down and restarted refer to The following material: ■ “DYNAMIC_LOGS” on page 1-51 ■ “LTXHWM” on page 1-68 ■ Setting high-watermarks for rolling back long transactions, in the chapter on managing logical logs in the Administrator’s Guide A transaction is long if it is not committed or rolled back when it reaches the long-transaction high-watermark. LTXEHWM specifies the long-transaction, exclusive-access, high-watermark. When the logical-log space reaches the LTXEHWM threshold, the long transaction currently being rolled back is given exclusive access to the logical log. If your system runs out of log space before the rollback completes, lower the LTXEHWM value. Tip: To allow users to continue to access the logical logs, even during a long transaction rollback, set LTXEHWM to 100. Set DYNAMIC_LOGS to 1 or 2 so that the database server can add log files as needed to complete the transaction or rollback. Configuration Parameters 1-67 LTXHWM LTXHWM onconfig.std value For Dynamic Server: None (not present in onconfig.std) if not present 80 (if DYNAMIC_LOGS is set to 1 or 2) 50 (if DYNAMIC_LOGS is set to 0) units Percent range of values 1 through 100 takes effect When the database server is shut down and restarted refer to The following material: ■ “DYNAMIC_LOGS” on page 1-51 ■ “LTXEHWM” on page 1-67 ■ Setting high-watermarks for rolling back long transactions, in the chapter on managing logical logs in the Administrator’s Guide LTXHWM specifies the long-transaction high-watermark. The long-transaction high-watermark is the percentage of available log space that, when filled, triggers the database server to check for a long transaction. When the logicallog space reaches the LTXHWM threshold, the database server starts rolling back the transaction. If you decrease the LTXHWM value, increase the size or number of log files to make rollbacks less likely. If DYNAMIC_LOGS is set to 1 or 2, the database server adds as many logs are needed to complete the rollback. Warning: If you set both LTXHWM and LTXEHWM to 100, long transactions are never aborted. Although you can use this configuration to your advantage, you should set LTXHWM to below 100 for normal database server operations. If you set LTXHWM to 100, the database server issues a warning message: LTXHWM is set to 100%. This long transaction high water mark will never be reached. Transactions will not be aborted automatically by the server, regardless of their length. 1-68 IBM Informix Administrator’s Reference MAX_PDQPRIORITY If the transaction hangs, follow the instructions for recovering from a long transaction hang, in the chapter on managing logical-log files in the Administrator’s Guide. MAX_PDQPRIORITY onconfig.std value 100 if not present 100 range of values 0 through 100 takes effect On all user sessions utilities onmode -D refer to The following material: ■ The chapter on using PDQ, in the Performance Guide ■ “Change Decision-Support Parameters” on page 3-56 MAX_PDQPRIORITY limits the PDQ resources that the database server can allocate to any one DSS query. MAX_PDQPRIORITY is a factor that is used to scale the value of PDQ priority set by users. For example, suppose that the database administrator sets MAX_PDQPRIORITY to 80. If a user sets the PDQPRIORITY environment variable to 50 and then issues a query, the database server silently processes the query with a PDQ priority of 40. You can use the onmode utility to change the value of MAX_PDQPRIORITY while the database server is online. In Dynamic Server, PDQ resources include memory, CPU, disk I/O, and scan threads. MAX_PDQPRIORITY lets the database administrator run decision support concurrently with OLTP, without a deterioration of OLTP performance. However, if MAX_PDQPRIORITY is too low, the performance of decision- support queries can degrade. Configuration Parameters 1-69 MaxConnect Configuration Parameters You can set MAX_PDQPRIORITY to one of the following values. Value Database Server Action 0 Turns off PDQ. DSS queries use no parallelism. 1 Fetches data from fragmented tables in parallel (parallel scans) but uses no other form of parallelism. 100 Uses all available resources for processing queries in parallel. number An integer between 0 and 100. Sets the percentage of the userrequested PDQ resources actually allocated to the query. MaxConnect Configuration Parameters Before you start Informix MaxConnect, you need to specify the following configuration parameters in the IMCCONFIG file. This file contains both start-time and runtime parameters. Configuration Parameter Description IMCLOG Specifies the pathname of the MaxConnect log file. IMCTRANSPORTS Specifies the number of TCP network connections (transports) between MaxConnect and the database server. IMCWORKERDELAY Determines the time that worker threads wait to accumulate packets before they perform an aggregated send. IMCWORKERTHREADS Specifies the number of worker threads for MaxConnect. 1-70 IBM Informix Administrator’s Reference MIRROR MaxConnect uses the following environment variables. For more information, see the section on the configuration file in the Guide to Informix MaxConnect: ■ INFORMIXDIR ■ INFORMIXSERVER ■ INFORMIXSQLHOSTS ■ IMCADMIN ■ IMCCONFIG ■ IMCSERVER MIRROR onconfig.std value 0 range of values 0 = disable mirroring 1 = enable mirroring takes effect When the database server is shut down and restarted utilities onstat -d flags field (See page 3-114.) refer to The following topics in the Administrator’s Guide: ■ Mirroring critical data in the chapter on where is data stored ■ Enabling mirroring in the chapter on using mirroring The MIRROR parameter indicates whether mirroring is enabled for the database server. Informix recommends that you mirror the root dbspaces and the critical data as part of initialization. Otherwise, leave mirroring disabled. If you later decide to add mirroring, you can edit your configuration file to change the parameter value. Configuration Parameters 1-71 MIRROROFFSET MIRROROFFSET onconfig.std value 0 units Kilobytes range of values Any value greater than or equal to 0 takes effect When the database server is shut down and restarted refer to Mirroring the root dbspace during initialization, in the chapter on using mirroring in the Administrator’s Guide In Dynamic Server, MIRROROFFSET specifies the offset into the disk partition or into the device to reach the chunk that serves as the mirror for the initial chunk of the root dbspace. MIRRORPATH onconfig.std value None range of values 65 or fewer characters takes effect When the database server is shut down and restarted refer to The following material in the Administrator’s Guide: ■ Mirroring the root dbspace during initialization, in the chapter on using mirroring ■ Using links, in the chapter on managing disk space MIRRORPATH specifies the full pathname of the mirrored chunk for the initial chunk of the root dbspace. MIRRORPATH should be a link to the chunk pathname of the actual mirrored chunk for the same reasons that ROOTPATH is specified as a link. Similarly, select a short pathname for the mirrored chunk. 1-72 IBM Informix Administrator’s Reference MSGPATH UNIX Setting Permissions You must set the permissions of the file that MIRRORPATH specifies to 660. The owner and group must both be informix. If you use raw disk space for your mirror chunk on a UNIX platform, Informix recommends that you define MIRRORPATH as a pathname that is a link to the initial chunk of the mirror dbspace, instead of entering the actual device name for the initial chunk. MSGPATH onconfig.std value On UNIX: /usr/informix/online.log On Windows: online.log if not present On UNIX: /dev/tty range of values Pathname takes effect When the database server is shut down and restarted utilities onstat -m to view the message log (See page 3-136.) refer to Message log, in the chapter on overview of database server administration in the Administrator’s Guide MSGPATH specifies the full pathname of the message-log file. The database server writes status messages and diagnostic messages to this file during operation. If the file that MSGPATH specifies does not exist, the database server creates the file in the specified directory. If the directory that MSGPATH specifies does not exist, the database server sends the messages to the system console. If the file that MSGPATH specifies does exist, the database server opens it and appends messages to it as they occur. Configuration Parameters 1-73 MULTIPROCESSOR MULTIPROCESSOR onconfig.std value 0 if not present Platform dependent range of values 0 = No multiprocessor 1 = Multiprocessor available takes effect When the database server is shut down and restarted refer to CPU virtual processors, in the chapter on virtual proces- sors in the Administrator’s Guide If MULTIPROCESSOR is set to 0, the parameters that set processor affinity are ignored. MULTIPROCESSOR specifies whether the database server performs locking in a manner that is suitable for a single-processor computer or a multiprocessor computer. 1-74 IBM Informix Administrator’s Reference NETTYPE NETTYPE syntax NETTYPE protocol,poll_threads,connections,VP_class Specify the protocol as ddiiippp where: dd =[on|ol|se|dr] iii=[ipc|ipc|soc|tli] ppp=[shm|str|tcp|spx|imc] The protocol value is required. You cannot use any white space in the fields, but you can omit trailing commas. onconfig.std values On UNIX: None On Windows: onsoctcp,1,NET if not present protocol: On UNIX: protocol field from the sqlhosts file (with or without the database server prefix of on or ol) On Windows: onsoctcp number of poll_threads: 1 number of connections: 50 VP_class: NET for DBSERVERALIASES; CPU for DBSERVERNAME separators Commas Configuration Parameters 1-75 NETTYPE range of values number of poll_threads: On UNIX: If VP_class is NET, a value greater than or equal to 1 If VP_class is CPU, 1 through num_cpu_vps On Windows: Any value greater than or equal to 1 number of connections: 1 through 32,767 VP_class: CPU = CPU VPs (on UNIX) NET = Network VPs takes effect When the database server is shut down and restarted utilities onstat -g nsc (See page 3-119.) onstat -g nss onstat -nta refer to The following sections in the Administrator’s Guide: ■ Network protocol entry, in the chapter on client/server communications ■ Multiplexed connections, in the chapter on client/server communications ■ Network virtual processors, in the chapter on virtual processors ■ Should poll threads run on CPU or network virtual processors, in the chapter on virtual processors ■ Monitoring and tuning the number of poll threads and connections, in the Performance Guide Configuring MaxConnect in Guide to Informix MaxConnect The NETTYPE parameter usually provides tuning options for the protocols that dbservername entries define in the sqlhosts file or registry. Each dbservername entry in the sqlhosts file or registry is defined on either the DBSERVERNAME parameter or the DBSERVERALIASES parameter in the ONCONFIG file. 1-76 IBM Informix Administrator’s Reference NETTYPE The NETTYPE configuration parameter describes a network connection as follows: ■ The protocol (or type of connection) ■ The number of poll threads assigned to manage the connection ■ The expected number of concurrent connections per poll thread ■ The class of virtual processor that will run the poll threads You can specify a NETTYPE parameter for each protocol that you want the database server to use. The following example illustrates NETTYPE parameters for two types of connections to the database server: a shared memory connection for local clients, and a network connection that uses sockets: NETTYPE ipcshm,3,,CPU NETTYPE soctcp,,20,NET The NETTYPE parameter for the shared-memory connection (ipcshm) specifies three poll threads to run in CPU virtual processors. The number of connections is not specified, so it is set to 50. The NETTYPE parameter for the sockets connection (soctcp) specifies that only 20 simultaneous connections are expected for this protocol and that one poll thread (because the number of poll threads is not specified) will run in a network virtual processor (in this case, NET). Protocol The protocol entry is the same as the nettype field in the sqlhosts file or registry, except that the database server prefix of on or ol is optional. The first three characters of the protocol entry specify the interface type, and the last three characters specify the IPC mechanism or the network protocol. Number of Poll Threads This field specifies the number of poll threads for a specific protocol. The default value of poll_threads is 1. If your database server has a large number of connections, you might be able to improve performance by increasing the number of poll threads. In general, each poll thread can handle approximately 200 to 250 connections. Configuration Parameters 1-77 NETTYPE Number of Connections This field specifies the maximum number of connections per poll thread that can use this protocol at the same time. The default value of connections is 50. If only a few connections will be using a protocol concurrently, you might save memory by explicitly setting the estimated number of connections. Use this formula to calculate the maximum number of connections expected. For shared memory (ipcshm), double the number of connections. connections = max_connections / poll threads UNIX The following example specifies 3 poll threads and 20 connections for a total of 60 shared-memory connections. NETTYPE ipcshm,3,20,CPU For all net types other than ipcshm, the poll threads dynamically reallocate resources to support more connections, as needed. Avoid setting the value for the number of concurrent connections to much higher than you expect. Otherwise, you might waste system resources. ♦ WIN NT/2000 On Windows, the number of connections per poll thread is used for ipcshm connections. Other protocols ignore this value. Use NET virtual processors to run the poll threads. ♦ Class of Virtual Processor You can set the VP_class entry to specify either CPU or NET. However, the combined number of poll threads defined with the CPU VP class for all net types cannot exceed the maximum number of CPU VPS. For advice on whether to run the poll threads on CPU or NET virtual processors, refer to the chapter on virtual processors in the Administrator’s Guide. 1-78 IBM Informix Administrator’s Reference NETTYPE Default Values Informix recommends that you use NETTYPE to configure each of your connections. However, if you do not use NETTYPE, the database server uses the default values to create a single poll thread for the protocol. If the dbservername is defined by DBSERVERNAME, by default the poll thread is run by the CPU class. If the dbservername is defined by DBSERVERALIASES, the default VP class is NET. Multiplexed Connections To enable the database server to use multiplexed connections on UNIX, you must include a special NETTYPE parameter with the value SQLMUX, as in the following example: NETTYPE SQLMUX Informix MaxConnect If you are using Informix MaxConnect, see the Guide to Informix MaxConnect for how to specify the fields in the NETTYPE parameter. The ontliimc and onsocimc protocols use TCP/IP to communicate with MaxConnect. You can use these protocols to either connect MaxConnect or the application clients to the database server. Configuration Parameters 1-79 OFF_RECVRY_THREADS OFF_RECVRY_THREADS onconfig.std value 10 units Number of recovery threads that run in parallel range of values Positive integers takes effect When the database server is shut down and restarted refer to The following material: ■ Backup and Restore Guide ■ Performance Guide OFF_RECVRY_THREADS is the number of recovery threads used in logical recovery when the database server is offline (during a cold restore). This number of threads is also used to roll forward logical-log records in fast recovery. Before you perform a cold restore, you can set the value of this parameter to approximately the number of tables that have a large number of transactions against them in the logical log. For single-processor computers or nodes, more than 30 to 40 threads is probably too many, because the overhead of thread management offsets the increase in parallel processing. 1-80 IBM Informix Administrator’s Reference ON_RECVRY_THREADS ON_RECVRY_THREADS onconfig.std value 1 units Number of recovery threads that run in parallel range of values Positive integers takes effect When the database server is shut down and restarted refer to The following material: ■ Backup and Restore Guide ■ Performance Guide ON_RECVRY_THREADS is the maximum number of recovery threads that the database server uses for logical recovery when the database server is online (during a warm restore). You can tune ON_RECVRY_THREADS to the number of tables that are likely to be recovered, because the logical-log records that are processed during recovery are assigned threads by table number. The maximum degree of parallel processing occurs when the number of recovery threads matches the number of tables being recovered. With fuzzy checkpoints, fast recovery might take longer than with full checkpoints. To improve the performance of fast recovery, increase the number of fast-recovery threads with the ON_RECVRY_THREADS parameter. Configuration Parameters 1-81 ON-Bar Configuration Parameters ON-Bar Configuration Parameters The following table lists the configuration parameters that apply to the ON-Bar backup and restore utility. For more information on these parameters, see the Backup and Restore Guide. Configuration Parameter Description IDS XPS BAR_ACT_LOG Specifies the location of the ON-Bar activity log file. ✔ ✔ BAR_BSALIB_PATH Specifies the pathname and filename of the XBSA shared library for the storage manager. ✔ ✔ BAR_HISTORY Specifies whether the sysutils database maintains a backup history. ✔ ✔ BAR_MAX_BACKUP Specifies the maximum number of backup processes per ON-Bar command. ✔ BAR_NB_XPORT_COUNT Specifies the number of sharedmemory data buffers for each backup or restore process. ✔ BAR_PROGRESS_FREQ Specifies in minutes how frequently the backup or restore progress messages display in the activity log. ✔ ✔ BAR_RETRY Specifies how many times ON-Bar should retry a backup or restore operation. ✔ ✔ BAR_XFER_BUF_SIZE Specifies the size in pages of the buffers. ✔ Can be BAR_SM specific Always BAR_SM specific ✔ (1 of 2) 1-82 IBM Informix Administrator’s Reference ON-Bar Configuration Parameters Configuration Parameter Description IDS XPS Can be BAR_SM specific ISM_DATA_POOL Specifies the volume pool that you use for backing up storage spaces. ✔ ✔ ✔ ISM_LOG_POOL Specifies the volume pool that you use for backing up logical logs. ✔ ✔ ✔ RESTARTABLE_RESTORE Controls how ON-Bar restarts a failed physical or logical restore. For more information, see “RESTARTABLE_RESTORE” on page 1-96. ✔ Always BAR_SM specific (2 of 2) Configuration Parameters 1-83 ONDBSPACEDOWN ONDBSPACEDOWN onconfig.std value 0 range of values 0, 1, 2 refer to Monitoring the database server for disabling I/O errors, in the chapter on consistency checking in the Administrator’s Guide ONDBSPACEDOWN defines the action that the database server will take when any disabling event occurs on a noncritical dbspace. The following values are valid for this parameter. 1-84 Value Description 0 Continue. Causes the database server to mark a noncritical dbspace down and continue whenever a disabling I/O error occurs on it. 1 Abort. Causes the database server to fail without allowing a checkpoint to occur whenever a disabling I/O error occurs on any dbspace. Critical dbspaces run only in this mode. 2 Wait. Causes the database server to hang all updating threads as soon as the next checkpoint request occurs after a disabling I/O occurs on a noncritical dbspace. IBM Informix Administrator’s Reference OPCACHEMAX UNIX OPCACHEMAX onconfig.std value 0 if not present 128 units Kilobytes range of values 0 through (4 * 1024 * 1024) takes effect When the Optical Subsystem needs more memory utilities onstat -O (See page 3-137.) refer to The following material: ■ Guide to the Optical Subsystem ■ INFORMIXOPCACHE environment variable, in the Informix Guide to SQL: Reference OPCACHEMAX specifies the size of the memory cache for the Optical Subsystem. The database server stores pieces of TEXT or BYTE data in the memory cache before it delivers them to the subsystem. Use this parameter only if you use the Optical Subsystem. The INFORMIXOPCACHE environment variable lets the client restrict the size of the optical cache that it uses. Configuration Parameters 1-85 OPTCOMPIND OPTCOMPIND onconfig.std value 2 range of values 0 = When appropriate indexes exist for each ordered pair of tables, the optimizer chooses index scans (nested-loop joins), without consideration of the cost, over table scans (hash joins). This value ensures compatibility with previous versions of the database server. 1 = The optimizer uses costs to determine an execution path if the isolation level is not Repeatable Read. Otherwise, the optimizer chooses index scans (it behaves as it does for the value 0). Informix recommends this setting for optimal performance. 2 = The optimizer uses cost to determine an execution path for any isolation level. Index scans are not given preference over table scans; the optimizer bases its decision purely on cost. This value is the default if the variable is not set. refer to The following material: ■ Your Performance Guide ■ OPTCOMPIND environment variable, in the Informix Guide to SQL: Reference OPTCOMPIND helps the optimizer choose an appropriate query plan for your application. Tip: You can think of the name of the variable as arising from “OPTimizer COMPare (the cost of using) INDexes (with other methods).” 1-86 IBM Informix Administrator’s Reference OPT_GOAL Because of the nature of hash joins, an application with isolation mode set to Repeatable Read might temporarily lock all records in tables that are involved in the join (even those records that fail to qualify the join) for each ordered set of tables. This situation leads to higher contention among connections. Conversely, nested-loop joins lock fewer records but provide inferior performance when the database server retrieves a large number of rows. Thus, both join methods offer advantages and disadvantages. A client application can also influence the optimizer in its choice of a join method. OPT_GOAL onconfig.std value -1 range of values 0 or -1 takes effect When the database server is shut down and restarted refer to The following manuals: ■ ALL_ROWS and FIRST_ROWS directives and on the SET OPTIMIZATION statement, in the Informix Guide to SQL: Reference ■ OPT_GOAL environment variable, in the Informix Guide to SQL: Syntax ■ Performance issues associated with setting an optimization goal, in the Performance Guide The OPT_GOAL parameter enables you to specify one of the following optimization goals for queries: ■ Optimize for FIRST ROWS ■ Optimize for ALL ROWS A value of 0 sets the optimization goal to FIRST_ROWS. A value of -1 sets the optimization goal to ALL_ROWS, which is the default. Configuration Parameters 1-87 OPT_GOAL When you set the optimization goal to optimize for FIRST ROWS, you specify that you want the database server to optimize queries for perceived response time. In other words, users of interactive applications perceive response time as the time that it takes to display data on the screen. Setting the optimization goal to FIRST ROWS configures the database server to return the first rows of data that satisfy the query. When you set the optimization goal to optimize for ALL ROWS, you specify that you want the database server to optimize for the total execution time of the query. Making ALL ROWS the optimization goal instructs the database server to process the total query as quickly as possible, regardless of how long it takes to return the first rows to the application. You can specify the optimization goal in one of four ways: ■ By query (SELECT statement) Use the ALL_ROWS and FIRST_ROWS directives. ■ By session Use the SET OPTIMIZATION statement. ■ By environment Set the OPT_GOAL environment variable. ■ By database server Set the OPT_GOAL configuration parameter. To determine the optimization goal, the database server examines the settings in the order shown. The first setting encountered determines the optimization goal. For example, if a query includes the ALL_ROWS directive but the OPT_GOAL configuration parameter is set to FIRST_ROWS, the database server optimizes for ALL_ROWS, as the query specifies. 1-88 IBM Informix Administrator’s Reference PC_HASHSIZE PC_HASHSIZE onconfig.std value None range of values Any positive prime number takes effect When the database server is shut down and restarted refer to Your Performance Guide Use PC_HASHSIZE to specify the number of hash buckets in the caches that the database server uses. Cache types include UDR caches. PC_POOLSIZE onconfig.std value None range of values Any positive value takes effect When the database server is shut down and restarted refer to Your Performance Guide Use PC_POOLSIZE to specify the maximum number of entries in several memory caches that the database server uses. PC_POOLSIZE specifies the maximum number of UDRs and SPL routines stored in the UDR cache. Configuration Parameters 1-89 PHYSBUFF PHYSBUFF onconfig.std value 32 units Kilobytes range of values Size of one page through PHYSFILE takes effect When the database server is shut down and restarted utilities onstat -l buffer field, first section (See page 3-133.) refer to Physical-log buffer, in the shared-memory chapter of the Administrator’s Guide PHYSBUFF specifies the size in kilobytes of each of the two physical-log buffers in shared memory. Double buffering permits user threads to write to the active physical-log buffer while the other buffer is being flushed to the physical log on disk. The value of the PHYSBUFF parameter determines how frequently the database server needs to flush the physical-log buffer to the physical-log file. The recommended value for PHYSBUFF is 32 pages. A write to the physical-log buffer is exactly one page in length. Choose a value for PHYSBUFF that is evenly divisible by the page size. If the value of PHYSBUFF is not evenly divisible by the page size, the database server rounds down the size to the nearest value that is evenly divisible by the page size. The user-data portion of a smart large object does not pass through the physical-log buffers. System Page Size The system page size is platform dependent on Dynamic Server. To obtain the system page size, use the commands listed in the table in “System Page Size” on page 1-23. 1-90 IBM Informix Administrator’s Reference PHYSDBS PHYSDBS onconfig.std value rootdbs if not present The dbspace that ROOTNAME specifies units A dbspace range of values For Dynamic Server: Up to 128 characters. PHYSDBS must be unique, begin with a letter or underscore, and contain only letters, numbers, underscores, or $ characters. takes effect When the database server is shut down and restarted refer to The following material: ■ “Change Physical-Log Parameters” on page 3-73 ■ Where the physical log is located, in the chapter on what is the physical log in the Administrator’s Guide ■ Changing the physical-log location and size, in the chapter on managing the physical log in the Administrator’s Guide PHYSDBS specifies the name of the dbspace that contains the physical log. To reduce disk contention, you can move the physical log to a dbspace other than the root dbspace. When you initialize disk space (oninit -i), the PHYSDBS value must be equal to the ROOTDBS value. Configuration Parameters 1-91 PHYSFILE PHYSFILE onconfig.std value For Dynamic Server: 2000 if not present 200 units Kilobytes range of values 200 or more takes effect When the database server is shut down and restarted refer to The following topics in the Administrator’s Guide: ■ Sizing the physical log, in the chapter on the physical log ■ Changing the physical-log location and size, in the chapter on managing the physical log PHYSFILE specifies the size of the physical log. 1-92 IBM Informix Administrator’s Reference RA_PAGES RA_PAGES onconfig.std value None if not present 4 if MULTIPROCESSOR is 0; 8 if MULTIPROCESSOR is 1 units Number of data pages range of values RA_THRESHOLD through BUFFERS takes effect When the database server is shut down and restarted refer to The following material: ■ Configuring the database server to read ahead, in the shared-memory chapter of the Administrator’s Guide ■ Calculating RA_PAGES and RA_THRESHOLD, in your Performance Guide RA_PAGES specifies the number of disk pages to attempt to read ahead during sequential scans of data records. Read-ahead can greatly speed up database processing by compensating for the slowness of I/O processing relative to the speed of CPU processing. This parameter works with the RA_THRESHOLD parameter. Specifying values that are too large can result in excessive buffer-caching activity. Configuration Parameters 1-93 RA_THRESHOLD RA_THRESHOLD onconfig.std value None if not present RA_PAGES/2 units Number of data pages range of values 0 through (RA_PAGES - 1) takes effect When the database server is shut down and restarted refer to The following material: ■ Configuring the database server to read ahead, in the shared-memory chapter of the Administrator’s Guide ■ Calculating RA_PAGES and RA_THRESHOLD, in your Performance Guide RA_THRESHOLD is used with RA_PAGES when the database server reads during sequential scans of data records. RA_THRESHOLD specifies the read- ahead threshold; that is, the number of unprocessed data pages in memory that signals the database server to perform the next read-ahead. If the value of RA_THRESHOLD is greater than the value of RA_PAGES, RA_THRESHOLD has a value of RA_PAGES/2. Specifying values that are too large for RA_PAGES and RA_THRESHOLD can result in excessive buffer-caching activity. 1-94 IBM Informix Administrator’s Reference RESIDENT RESIDENT onconfig.std value 0 range of values For Dynamic Server: 0 = off 1 = keep resident portion of shared memory resident number = number of segments to keep resident Certain platforms have different values. For information, see your machine notes. if not present 0 takes effect When the database server is shut down and restarted utilities onmode -r (see “Change Shared-Memory Residency” on page 3-45) refer to The following topics in the Administrator’s Guide for a discussion of residency: ■ Resident portion of shared memory, in the shared-memory chapter ■ Setting database server shared-memory configuration parameters, in the chapter on managing shared memory The RESIDENT parameter specifies whether resident and virtual segments of shared memory remain resident in operating-system physical memory. Some systems allow you to specify that the resident portion of shared memory must stay (be resident) in memory at all times. If your operating system supports forced residency, you can specify that resident and virtual segments of shared memory not be swapped to disk. Warning: Before you decide to enforce residency, verify that the amount of physical memory available is sufficient to execute all required operating-system and application processes. If insufficient memory is available, a system hang could result that requires a reboot. Configuration Parameters 1-95 RESTARTABLE_RESTORE RESTARTABLE_RESTORE onconfig.std value ON if not present ON range of values OFF = restartable restore is disabled ON = restartable restore is enabled takes effect When the database server is shut down and restarted refer to Backup and Restore Guide If you set RESTARTABLE_RESTORE to ON, you enable the database server to restart a failed physical or cold logical restore at the point at which the failure occurred. To perform a restartable restore with ON-Bar, use the onbar -RESTART command. Increase the size of your physical log if you plan to use restartable restore. For more information, see “PHYSFILE” on page 1-92. Although a restartable restore slows down the logical restore if many logs need to be restored, you save a lot of time from not having to repeat the entire restore. Important: If the database server fails during a warm logical restore, you must repeat the entire restore. If the database server is still running, use onbar -r -l to complete the restore. The database server uses physical recovery and logical recovery to restore data as follows: 1-96 ■ Physical recovery. The database server writes data pages from the backup media to disk. This action leaves the storage spaces consistent to the point at which it was originally backed up. However, the backup times for each storage space are usually different. A restartable restore is restartable to the level of a storage space. If only some chunks of a storage space are restored when the restore fails, the entire storage space needs to be recovered again when you restart the restore. ■ Logical recovery. The database server replays logical-log records on media to bring all the storage spaces up to date. At the end of logical recovery, all storage spaces are consistent to the same point. IBM Informix Administrator’s Reference ROOTNAME ROOTNAME onconfig.std value rootdbs units A dbspace range of values For Dynamic Server: Up to 128 characters. ROOTNAME must begin with a letter or underscore and must contain only letters, numbers, underscores, or $ characters. takes effect When disk is initialized (destroys all data) refer to Allocating disk space, in the chapter on managing disk space in the Administrator’s Guide ROOTNAME specifies a name for the root dbspace for this database server configuration. The name must be unique among all dbspaces that the database server manages. Informix recommends that you select a name that is easily recognizable as the root dbspace. ROOTOFFSET onconfig.std value 0 units Kilobytes range of values Any value greater than or equal to 0 takes effect When disk is initialized (destroys all data) refer to Allocating raw disk space on UNIX, in the chapter on managing disk space in the Administrator’s Guide ROOTOFFSET specifies the offset into an allocation of disk space (file, disk partition, or device) at which the initial chunk of the root dbspace begins. Configuration Parameters 1-97 ROOTPATH UNIX On some UNIX platforms, it is not valid to set ROOTOFFSET to 0. When this parameter is set incorrectly, you must reinitialize disk space and reload data to resume proper operation of the database server. Before you configure the database server, always check your machine notes file for information about proper settings. ♦ ROOTPATH onconfig.std value On UNIX: /dev/online_root On Windows: None range of values Pathname takes effect When disk is initialized (destroys all data) refer to The following material in the chapter on managing disk space in the Administrator’s Guide ■ Allocating disk space ■ Creating links for raw devices ROOTPATH specifies the full pathname, including the device or filename, of the initial chunk of the root dbspace. ROOTPATH is stored in the reserved pages as a chunk name. On UNIX, you must set the permissions of the file that ROOTPATH specifies to 660, and the owner and group must both be informix. On Windows, a member of the Informix-Admin group must own the file that ROOTPATH specifies. UNIX 1-98 If you use unbuffered disk space for your initial chunk on UNIX, Informix recommends that you define ROOTPATH as a pathname that is a link to the initial chunk of the root dbspace instead of entering the actual device name for the initial chunk. ♦ IBM Informix Administrator’s Reference ROOTSIZE ROOTSIZE onconfig.std value For Dynamic Server UNIX: 30,000 Windows: 50,000 if not present 0 units Kilobytes range of values 0 through maximum capacity of the storage device takes effect When disk is initialized (destroys all data) refer to Calculating the size of the root dbspace, in the chapter on where is data stored in the Administrator’s Guide ROOTSIZE specifies the size of the initial chunk of the root dbspace, expressed in kilobytes. The size that you select depends on your immediate plans for your database server. To change ROOTSIZE after you initialize the database server, completely unload and reload your data. Configuration Parameters 1-99 SBSPACENAME SBSPACENAME onconfig.std value None if not present 0 range of values Up to 128 characters. SBSPACENAME must be unique, begin with a letter or underscore, and contain only letters, digits, underscores, or $ characters. takes effect When shared memory is reinitialized utilities onspaces -c -S refer to The following material: ■ Using onspaces to “Create an Sbspace or Temporary Sbspace” on page 3-81 ■ “SBSPACETEMP” on page 1-102 ■ “SYSSBSPACENAME” on page 1-118 ■ “Sbspace Structure” on page 5-38 ■ What is an sbspace, in the chapter on data storage in the Administrator’s Guide ■ Altering sbspace characteristics, in the chapter on managing data on disk in the Administrator’s Guide ■ Assigning a smart large object to an sbspace, in the section on the CREATE TABLE and ALTER TABLE statements, in the Informix Guide to SQL: Syntax ■ Creating an sbspace for Enterprise Replication usage, in the Guide to Informix Enterprise Replication ■ Using multirepresentational data, in the DataBlade API Programmer’s Manual SBSPACENAME specifies the name of the default sbspace. If your database tables include smart-large-object columns that do not explicitly specify a storage space, that data is stored in the sbspace that SBSPACENAME specifies. 1-100 IBM Informix Administrator’s Reference SBSPACENAME You must create the default sbspace with the onspaces -c -S utility before you can use it. The database server validates the name of the default sbspace when one of the following occurs: Java ■ You specify the default sbspace as the storage option for a CLOB or BLOB column in the PUT clause of the CREATE TABLE or ALTER TABLE statement. ■ The database server attempts to write a smart large object to the default sbspace when no sbspace was specified for the column. ■ You store multirepresentational data in the default sbspace. If you are using Informix Dynamic Server with J/Foundation, you must provide a smart large object where the database server can store the Java ARCHIVE (JAR) files. These JAR files contain your Java user-defined routines (UDRs). Informix suggests that when you use Java UDRs, you create separate sbspaces for storing smart large objects. ♦ Warning: When you use Enterprise Replication, you must set the CDR_QDATA_SBSPACE parameter and create the sbspace before you define the replication server. Configuration Parameters 1-101 SBSPACETEMP SBSPACETEMP onconfig.std value None if not present Temporary smart large objects are stored in a standard sbspace. range of values Up to 128 characters. SBSPACETEMP must be unique, begin with a letter or underscore, and contain only letters, digits, underscores, or $ characters. takes effect When shared memory is reinitialized utilities onspaces refer to The following material: ■ “Create an Sbspace or Temporary Sbspace” on page 3-81 ■ “SBSPACENAME” on page 1-100 ■ Temporary sbspaces, in the chapter on data storage in the Administrator’s Guide ■ Creating a temporary sbspace, in the chapter on managing disk space in the Administrator’s Guide ■ Using temporary smart large objects, in the DataBlade API Programmer’s Manual SBSPACETEMP specifies the name of the default temporary sbspace for storing temporary smart large objects without metadata or user-data logging. If you store temporary smart large objects in a standard sbspace, the metadata is logged. 1-102 IBM Informix Administrator’s Reference SERVERNUM SERVERNUM onconfig.std value 0 range of values 0 through 255 takes effect When the database server is shut down and restarted refer to Role of the SERVERNUM configuration parameter, in the multiple-residency chapter of the Administrator’s Guide SERVERNUM specifies a relative location in shared memory. The value that you choose must be unique for each database server on your local computer. The value does not need to be unique on your network. Because the value 0 is included in the onconfig.std file, Informix suggests that you choose a value other than 0 to avoid inadvertent duplication of SERVERNUM. SHMADD onconfig.std value 8192 range of values For Dynamic Server: 1024 through 524,288 units Kilobytes takes effect When the database server is shut down and restarted utilities onstat -g seg (see page 3-125) refer to The following material in the Administrator’s Guide: ■ Virtual portion of shared memory, in the sharedmemory chapter ■ Monitoring shared-memory segments with onstat -g seg, in the managing memory chapter SHMADD specifies the size of a segment that is dynamically added to the virtual portion of shared memory. Configuration Parameters 1-103 SHMBASE It is more efficient to add memory in large segments, but wasteful if the added memory is not used. Also, the operating system might require you to add memory in a few large segments rather than many small segments. Informix recommends the following guidelines for setting the initial value of SHMADD. Amount of Physical Memory Recommended SHMADD Value Less than 256 megabytes 8192 Greater than 256 megabytes and less than 512 megabytes 16,384 Greater than 512 megabytes 32,768 SHMBASE onconfig.std value On UNIX: Platform dependent On Windows: 0xC000000L units Address range of values Positive integers takes effect When the database server is shut down and restarted utilities To see the shared-memory segment addresses, use the onstat -g seg command. refer to Setting operating-system shared-memory configuration parameters, in the chapter on managing shared memory in the Administrator’s Guide SHMBASE specifies the base address where shared memory is attached to the memory space of a virtual processor. The addresses of the shared-memory segments start at the SHMBASE value and grow until the upper-bound limit, which is platform specific. 1-104 IBM Informix Administrator’s Reference SHMTOTAL Do not change the value of SHMBASE. The onconfig.std value for SHMBASE depends on the platform and whether the processor is 32-bit or 64-bit. For information on which SHMBASE value to use, see the machine notes. SHMTOTAL onconfig.std value 0 units Kilobytes range of values Integer greater than or equal to 1 takes effect When the database server is shut down and restarted refer to How much shared memory the database server needs, in the shared-memory chapter of the Administrator’s Guide SHMTOTAL specifies the total amount of shared memory (resident, virtual, communications, and virtual extension portions) to be used by the database server for all memory allocations. The onconfig.std value of 0 implies that no limit on memory allocation is stipulated. SHMTOTAL enables you to limit the demand for memory that the database server can place on your system. However, applications might fail if the database server requires more memory than the limit imposed by SHMTOTAL. When this situation occurs, the database server writes the following message in the message log: size of resident + virtual segments xx + yy > zz total allowed by configuration parameter SHMTOTAL This message includes the following values. Value Description xx Current size of resident segments yy Current size of virtual segments zz Total shared memory required Configuration Parameters 1-105 SHMVIRTSIZE UNIX Set the operating-system parameters for maximum shared-memory segment size, typically SHMMAX, SHMSIZE, or SHMALL, to the total size that your database server configuration requires. For information on the amount of shared memory that your operating system allows, see the machine notes. ♦ SHMVIRTSIZE onconfig.std value For Dynamic Server: 8000 on UNIX and 8192 on Windows if not present If SHMADD is present: SHMADD If SHMADD is not present: 8 units Kilobytes range of values 32-bit platforms: Positive integer with a maximum value of 2 gigabytes 64-bit platforms: Positive integer with a maximum value of 4 gigabytes The maximum value might be less on some platforms due to operating-system limitations. For the actual maximum value for your UNIX platform, see the machine notes. takes effect When the database server is shut down and restarted utilities onstat -g seg (see page 3-125) refer to The following material: ■ Virtual portion of shared memory, in the sharedmemory chapter of the Administrator’s Guide ■ Chapter on configuration effects on memory utilization, in your Performance Guide SHMVIRTSIZE specifies the initial size of a virtual shared-memory segment. Use the following algorithm to determine the size of the virtual portion of shared memory: shmvirtsize = fixed overhead + shared structures + mncs * private structures) + other buffers 1-106 IBM Informix Administrator’s Reference SINGLE_CPU_VP This algorithm includes the following values. Value Description fixed_overhead Global pool + thread pool after booting (partially dependent on the number of virtual processors) shared_structures AIO vectors + sort memory + dbspace backup buffers + dictionary size + size of stored-procedure cache + histogram pool + other pools (See the onstat display.) mncs Maximum number of concurrent sessions private_structures Stack (generally 32 kilobytes but dependent on recursion in SPL routines and triggers) + heap (about 30 kilobytes) + session-control-block structures If messages in the message file indicate that the database server is adding segments to the virtual portion of shared memory for you, add the amount that these messages indicate to the value of SHMVIRTSIZE. Informix recommends that you initially create a virtual portion of shared memory of a size that is more than sufficient for your daily processing, if possible. Use the onstat -g seg command to determine peak usage and lower the value of SHMVIRTSIZE accordingly. SINGLE_CPU_VP onconfig.std value 0 range of values 0 = running with multiple CPU VPs Any nonzero value = running with one CPU VP takes effect When the database server is shut down and restarted refer to Running on a single-processor computer, in the chapter on virtual processors in the Administrator’s Guide SINGLE_CPU_VP specifies whether or not the database server is running with only one CPU virtual processor. Configuration Parameters 1-107 SINGLE_CPU_VP Setting SINGLE_CPU_VP to nonzero allows the database server to use optimized code based on the knowledge that only one CPU virtual processor is running. It enables the database server to bypass many of the mutex calls that it must use when it runs multiple CPU virtual processors. Informix strongly recommends that you set this parameter when the database server will run only one CPU virtual processor. Depending on the application and workload, setting this parameter can improve performance by up to 10 percent. If you set SINGLE_CPU_VP to nonzero and try to add a CPU virtual processor, you receive one of the following messages: onmode: failed when trying to change the number of classname VPs by n. onmode: failed when trying to change the number of cpu virtual processors by n. If you set SINGLE_CPU_VP to nonzero and then attempt to bring up the database server with VPCLASS cpu,num set to a value greater than 1, you receive the following error message, and the database server initialization fails: Cannot have SINGLE_CPU_VP non-zero and CPU VPs greater than 1. IDS User-Defined VP Classes and SINGLE_CPU_VP Important: Dynamic Server treats user-defined virtual-processor classes as if they were CPU virtual processors. Thus, if you set SINGLE_CPU_VP to nonzero, you cannot create any user-defined virtual-processor classes. If you set this parameter to nonzero and then attempt to bring up the database server with the VPCLASS cpu value for num set to a value greater than 1, you receive the following error message, and the database server initialization fails: Cannot have SINGLE_CPU_VP non-zero and CPU VPs greater than 1. If you set this parameter to nonzero and then attempt to bring up the database server with a user-defined VPCLASS, you receive the following error message, and the database server initialization fails: oninit: Cannot have SINGLE_CPU_VP non-zero and user-defined VP classes 1-108 IBM Informix Administrator’s Reference STACKSIZE STACKSIZE onconfig.std value 32 for 32-bit database servers 64 for 64-bit database servers units Kilobytes range of values 32 through limit determined by the database server configuration and the amount of memory available takes effect When the database server is shut down and restarted refer to The following material: ■ Stacks, in the chapter on virtual processors in the Administrator’s Guide ■ CREATE FUNCTION statement, in the Informix Guide to SQL: Syntax The STACKSIZE parameter specifies the stack size for the database server user threads. The value of STACKSIZE does not have an upper limit, but setting a value that is too large wastes virtual memory space and can cause swapspace problems. For 32-bit platforms, the default STACKSIZE value of 32 kilobytes is sufficient for nonrecursive database activity. For 64-bit platforms, the recommended STACKSIZE value is 64 kilobytes. When the database server performs recursive database tasks, as in some SPL routines, for example, it checks for the possibility of stack-size overflow and automatically expands the stack. User threads execute user-defined routines. To increase the stack size for a particular routine, use the stack modifier on the CREATE FUNCTION statement. Warning: Setting the value of STACKSIZE too low can cause stack overflow, the result of which is undefined but usually undesirable. Configuration Parameters 1-109 STAGEBLOB STAGEBLOB onconfig.std value None range of values Up to 128 characters. STAGEBLOB must be unique, begin with a letter or underscore, and contain only digits, letters, underscores, or $ characters. takes effect When the database server is shut down and restarted refer to Guide to the Optical Subsystem Use this parameter only if you are storing TEXT or BYTE data on optical storage with the Optical Subsystem. This parameter has no effect on ordinary blobspaces or sbspaces. STAGEBLOB is the blobspace name for the area where the Optical Subsystem stages TEXT and BYTE data that is destined for storage on optical disk. 1-110 IBM Informix Administrator’s Reference STMT_CACHE STMT_CACHE onconfig.std value None (this parameter is not in onconfig.std) if not present 0 range of values 0, 1, or 2 takes effect When the database server is shut down and restarted utilities onmode -e refer to The following material: ■ “Change Usage of the SQL Statement Cache” on page 3-60 ■ Improving query performance, in the Performance Guide STMT_CACHE determines whether the database server uses the SQL statement cache. You can enable the SQL statement cache in one of two modes: ■ Always use the SQL statement cache unless a user explicitly specifies not to use it. Set the STMT_CACHE configuration parameter to 2 or onmode -e ON. ■ Use the SQL statement cache only when a user explicitly specifies to use it. Set the STMT_CACHE configuration parameter to 1 or onmode -e ENABLE. Configuration Parameters 1-111 STMT_CACHE The following table describes the possible values. 1-112 Possible Value Meaning 0 SQL statement cache not used (equivalent to onmode -e OFF). 1 SQL statement cache enabled, but user sessions do not use the cache. Users use the cache only if they set the environment variable STMT_CACHE to 1 or execute the SQL statement SET STATEMENT CACHE ON. 2 SQL statement cache turned on. All statements are cached. To turn off statement caching, set the environment variable STMT_CACHE to 0 or execute the SQL statement SET STATEMENT CACHE OFF. IBM Informix Administrator’s Reference STMT_CACHE_HITS STMT_CACHE_HITS onconfig.std value None (this parameter is not in onconfig.std) if not present 0 units Integer range of values Any value greater than or equal to 0 takes effect When the database server is shut down and restarted utilities onmode -W STMT_CACHE_HITS refer to The following material: ■ “Change Settings for the SQL Statement Cache” on page 3-61 ■ Improving query performance, in the Performance Guide STMT_CACHE_HITS specifies the number of hits (references) to a statement before it is fully inserted in the SQL statement cache. The following table describes the possible values. Value Meaning 0 Fully insert all qualified statements in the SQL statement cache. >0 The first time a user issues a unique statement, the database server inserts a key-only entry in the cache that identifies the statement. Subsequent identical statements increment the hit count of the key-only cache entry. When the hit count of the key-only cache entry reaches the specified number of hits, the database server fully inserts the statement in the cache. Set hits to 1 or more to exclude ad hoc queries from entering the cache. Configuration Parameters 1-113 STMT_CACHE_NOLIMIT STMT_CACHE_NOLIMIT onconfig.std value None (this parameter is not in onconfig.std) if not present 1 range of values 0 or 1 takes effect When the database server is shut down and restarted utilities onmode -W STMT_CACHE_NOLIMIT onstat-g ssc (Nolimit field) refer to The following material: ■ “Change Settings for the SQL Statement Cache” on page 3-61 ■ Improving query performance, in the Performance Guide STMT_CACHE_NOLIMIT controls whether to insert qualified statements into the SQL statement cache after its size is greater than the STMT_CACHE_SIZE value. The following table describes the possible values. Value Meaning 0 Prevents statements from being inserted in the cache when its size is greater than the value of STMT_CACHE_SIZE. The cache can grow beyond the size limit if most of the statements in the cache are currently in use, because the cache cleaning cannot catch up with the insert rate. If you are concerned about memory usage, turn off STMT_CACHE_NOLIMIT to prevent the database server from allocating a large amount of memory for the cache. 1 1-114 IBM Informix Administrator’s Reference Always insert statements in the SQL statement cache regardless of the cache size. STMT_CACHE_NUMPOOL STMT_CACHE_NUMPOOL onconfig.std value None (this parameter is not in onconfig.std) if not present 1 units Positive integer range of values 1 to 256 takes effect When the database server is shut down and restarted refer to Improving query performance, in the Performance Guide STMT_CACHE_NUMPOOL specifies the number of memory pools for the SQL statement cache. To obtain information about these memory pools, use onstat -g ssc pool. Because the database server does not insert not all statements that allocate memory from the memory pools in the cache, the cache size might be smaller than the total size of the memory pools. Configuration Parameters 1-115 STMT_CACHE_SIZE STMT_CACHE_SIZE onconfig.std value None (this parameter is not in onconfig.std) default size of SQL 512 kilobytes (524288 bytes) statement cache units Kilobytes range of values Positive integer takes effect When the database server is shut down and restarted utilities onmode -W STMT_CACHE_SIZE onstat-g ssc (Maxsize field) refer to The following material: ■ “Change Settings for the SQL Statement Cache” on page 3-61 ■ Improving query performance, in the Performance Guide The STMT_CACHE_SIZE configuration parameter specifies the size of the SQL statement cache in kilobytes. The new cache size takes effect the next time a statement is added to the cache. 1-116 IBM Informix Administrator’s Reference SYSALARMPROGRAM SYSALARMPROGRAM onconfig.std value On UNIX: /usr/informix/etc/evidence.sh On Windows: %INFORMIXDIR%\etc\evidence.bat range of values Pathname takes effect When the database server is shut down and restarted utilities None refer to None Set SYSALARMPROGRAM to the full pathname of the evidence.sh script. The database server executes evidence.sh when a database server failure occurs. Informix Technical Support uses the output from the evidence.sh script to diagnose the cause of a database server failure. Configuration Parameters 1-117 SYSSBSPACENAME SYSSBSPACENAME onconfig.std value None if not present 0 range of values Up to 128 characters. SYSSBSPACENAME must be unique, begin with a letter or underscore, and contain only digits, letters, underscores, or $ characters. takes effect When disk is initialized (destroys all data) utilities onspaces refer to The following material: ■ “Create an Sbspace or Temporary Sbspace” on page 3-81 ■ “Sbspace Structure” on page 5-38 ■ Updating statistics, in the chapter on individual query performance in your Performance Guide ■ Sbspace characteristics, in the chapter on configuration effects on I/O in your Performance Guide ■ Writing user-defined statistics, in the performance chapter in Creating User-Defined Routines and User-Defined Data Types ■ Providing statistics data for a column, in the DataBlade API Programmer’s Manual ■ “SBSPACENAME” on page 1-100 (specifies the name of the default sbspace) SYSSBSPACENAME specifies the name of the sbspace in which the database server stores statistics that the UPDATE STATISTICS statement collects for certain user-defined data types. Normally, the database server stores statistics in the sysdistrib system catalog table. Because the data distributions for user-defined data types can be large, you have the option to store them in an sbspace instead of in the sysdistrib system catalog table. If you store the data distributions in an sbspace, use DataBlade API or ESQL/C functions to examine the statistics. 1-118 IBM Informix Administrator’s Reference SYSSBSPACENAME Even though you specify an sbspace with the SYSSBSPACENAME parameter, you must create the sbspace with the -c -S option of the onspaces utility before you can use it. The database server validates the name of this sbspace when one of the following occurs: ■ The database server attempts to write data distributions of the multirepresentational type to SYSSBSPACENAME when it executes the UPDATE STATISTICS statement with the MEDIUM or HIGH keywords. ■ The database server attempts to delete data distributions of the multirepresentational type to SYSSBSPACENAME when it executes the UPDATE STATISTICS statement with the DROP DISTRIBUTIONS keywords. Although you can store smart large objects in the sbspace specified in SYSSBSPACENAME, Informix recommends keeping the distribution statistics and smart large objects in separate sbspaces because: ■ You avoid disk contention when queries are accessing smart large objects and the optimizer is using the distributions to determine a query plan. ■ Disk space takes longer to fill up when each sbspace is used for a different purpose. Configuration Parameters 1-119 TAPEBLK TAPEBLK onconfig.std value 16 units Kilobytes range of values Values greater than pagesize/1024 To obtain the page size, see the commands listed in “System Page Size” on page 1-23 takes effect For ontape: when you execute ontape For onload and onunload: when the database server is shut down and restarted refer to The following material: ■ Using onload and onunload, in the Informix Migration Guide ■ Using ontape, in the Backup and Restore Guide ■ “LTAPEBLK” on page 1-64 TAPEBLK specifies the block size of the device to which ontape writes during a storage-space backup. TAPEBLK also specifies the default block size of the device to which data is loaded or unloaded when you use onload or onunload. If you are using onload or onunload, you can specify a different block size on the command line. The database server does not check the tape device when you specify the block size. Verify that the TAPEBLK tape device can read the block size that you specify. If not, you might not able to read from the tape. 1-120 IBM Informix Administrator’s Reference TAPEDEV TAPEDEV onconfig.std On UNIX: /dev/tapedev value On Windows: \\.\TAPE0 if not present On UNIX: /dev/null units Pathname takes effect For ontape: when you execute ontape For onload and onunload: when the database server is shut down and restarted refer to The following material: ■ Using onload and onunload, in the Informix Migration Guide ■ Using ontape, in the Backup and Restore Guide ■ “LTAPEDEV” on page 1-65 TAPEDEV specifies the device to which ontape backs up storage spaces. TAPEDEV also specifies the default device to which data is loaded or unloaded when you use onload or onunload. If you change the tape device, verify that TAPEBLK and TAPESIZE are correct for the new device. UNIX Using Symbolic Links and a Remote Device TAPEDEV can be a symbolic link, enabling you to switch between tape devices without changing the pathname that TAPEDEV specifies. Use the following syntax to specify a tape device attached to another host computer: host_machine_name:tape_device_pathname The following example specifies a tape device on the host computer kyoto: kyoto:/dev/rmt01 ♦ Configuration Parameters 1-121 TAPEDEV Rewinding Tape Devices Before Opening and on Closing The tape device that TAPEDEV specifies must perform a rewind before it opens and when it closes. The database server requires this action because of a series of checks that it performs before it writes to a tape. When the database server attempts to write to any tape other than the first tape in a multivolume dbspace or logical-log backup, the database server first reads the tape header to make sure that the tape is available for use. Then the device is closed and reopened. The database server assumes the tape was rewound when it closed, and the database server begins to write. Whenever the database server attempts to read a tape, it first reads the header and looks for the correct information. The database server does not find the correct header information at the start of the tape if the tape device did not rewind when it closed during the write process. 1-122 IBM Informix Administrator’s Reference TAPESIZE TAPESIZE onconfig.std value 10,240 units Kilobytes range of values Positive integers takes effect For ontape: when you execute ontape For onload and onunload: when the database server is shut down and restarted refer to The following material: ■ Using onload and onunload, in the Informix Migration Guide ■ Using ontape, in the Backup and Restore Guide ■ “LTAPESIZE” on page 1-66 The TAPESIZE parameter specifies the size of the device to which ontape backs up storage spaces. TAPESIZE also specifies the size of the default device to which data is loaded or unloaded when you use onload or onunload. If you are using onload or onunload, you can specify a different tape size on the command line. Configuration Parameters 1-123 TBLSPACE_STATS TBLSPACE_STATS onconfig.std value 1 if not present 1 units Integer range of values 0 or 1 takes effect When the database server is shut down and restarted The TBLSPACE_STATS configuration parameter turns on and off the collection of tblspace statistics. Use onstat -g ppf to list tblspace statistics. To turn off the collection of tblspace statistics, set TBLSPACE_STATS to 0. When TBLSPACE_STATS is set to 0, onstat -g ppf displays “partition profiles disabled.” To turn on the collection of tblspace statistics, set TBLSPACE_STATS to 1. TXTIMEOUT onconfig.std value 300 units Seconds range of values Positive integers takes effect When the database server is shut down and restarted refer to How the two-phase commit protocol handles failures, in the chapter on multiphase commit protocols in the Administrator’s Guide TXTIMEOUT specifies the amount of time that a participant in a two-phase commit waits before it initiates participant recovery. This parameter is used only for distributed queries that involve a remote database server. Nondistributed queries do not use this parameter. 1-124 IBM Informix Administrator’s Reference USEOSTIME USEOSTIME onconfig.std value 0 range of values 0 = Off 1 = On takes effect During initialization refer to The following material: ■ Your Performance Guide ■ Using the CURRENT function to return a DATETIME value, in the Informix Guide to SQL: Syntax Setting USEOSTIME to 1 specifies that the database server is to use subsecond precision when it obtains the current time from the operating system for SQL statements. The following example shows subseconds in a DATETIME value: 2001-09-29 12:50:04.612 If subsecond precision is not needed, the database server retrieves the current time from the operating system once per second, making the precision of time for client applications one second. If you set USEOSTIME to 0, the CURRENT function returns a zero (.000) for the YEAR TO FRACTION field. When the host computer for the database server has a clock with subsecond precision, applications that depend on subsecond accuracy for their SQL statements should set USEOSTIME to 1. Systems that run with USEOSTIME set to nonzero notice a performance degradation of up to 4 to 5 percent compared to running with USEOSTIME turned off. This setting does not affect any calls regarding the time from application programs to Informix embedded-language library functions. Configuration Parameters 1-125 VPCLASS VPCLASS syntax classname, options The classname variable is required. Unlike most configuration parameters, VPCLASS has several option fields that can appear in any order, separated by commas. You cannot use any white space in the fields. VPCLASS has the following options: num=num_VPs max=max_VPs aff=affinity noage noyield For more information about using these options, refer to the individual discussions later in this section. onconfig.std value None range of values 1-126 IBM Informix Administrator’s Reference Up to 128 characters. VPCLASS must be unique, begin with a letter or underscore, and contain only digits, letters, underscores, or $ characters. VPCLASS takes effect When the database server is shut down and restarted utilities onmode -p (to add or delete VP classes) refer to The following material: ■ Specifying user-defined classes of virtual processors, in the chapter on virtual processors in the Administrator’s Guide ■ Specifying a nonyielding user-defined virtual processor (noyield option), in the chapter on virtual processors in the Administrator’s Guide ■ Using onmode -p in “Add or Remove Virtual Processors” on page 3-51 ■ “Using the noyield Option” on page 1-131 ■ Creating User-Defined Routines and User-Defined Data Types ■ J/Foundation Developer’s Guide The VPCLASS parameter allows you to designate a class of virtual processors (VPs), create a user-defined VP, and specify the following information for it: ■ The number of virtual processors that the database server should start initially ■ The maximum number of virtual processors allowed for this class ■ The assignment of virtual processors to CPUs if processor affinity is available ■ The disabling of priority aging by the operating system if the operating system implements priority aging You can put several VPCLASS parameter definitions in your ONCONFIG file. Each VPCLASS parameter describes one class of virtual processors. Put each definition on a separate line, as in the following example: VPCLASS cpu,num=8,aff=0-7,noage VPCLASS new,num=0 Configuration Parameters 1-127 VPCLASS Default Values for the VPCLASS Options The following table shows the defaults and value ranges for the VPCLASS parameter options. 1-128 VPCLASS option Class Default Value Range of Values aio,num AIO (2 * number_of_chunks) or 6, whichever is greater, where number_of_chunks is the number of chunks allocated 1 to 10,000 cpu,num CPU 1 if MULTIPROCESSOR is 0, 2 otherwise 1 to 10,000 num All other classes 1 1 to 10,000 max_VPs All Unlimited 1 to 10,000 affinity All VPs are assigned to available Integers from 0 to processors in round-robin fashion. (number of CPUs -1) noage All Priority aging is in effect. noage or omitted noyield User defined Threads will yield. noyield or omitted IBM Informix Administrator’s Reference VPCLASS Interaction of VPCLASS with Other Configuration Parameters Informix requires that you use the VPCLASS parameter instead of the AFF_SPROC, AFF_NPROCS, NOAGE, NUMCPUVPS, and NUMAIOVPS parameters. If you use VPCLASS, you must explicitly remove other parameters from your ONCONFIG file. The following table shows the parameters that you must remove. Parameter Parameter to Remove VPCLASS cpu NUMCPUVPS, AFF_SPROC, AFF_NPROCS, NOAGE VPCLASS user-defined SINGLE_CPU_VP VPCLASS aio NUMAIOVPS VPCLASS Name The first item in the VPCLASS parameter provides the name of the virtualprocessor class that you are describing. The VPCLASS name is not case sensitive. You can define new virtual-processor classes for user-defined routines or DataBlade modules, or you can set values for a predefined virtual-processor class. The following virtual-processor classes are predefined by the database server and have specific functions: adm adt cpu jvp kio lio msc ntk opt aio shm soc str tli pio The following example specifies that the database server should start three virtual processors of the CPU class: VPCLASS cpu,num=3 Java The JVP option of the VPCLASS configuration parameter sets the number of Java virtual processors. This parameter is required when you use the Informix JDBC Driver. On UNIX, you must define multiple Java virtual processors to execute Java user-defined routines in parallel. ♦ Configuration Parameters 1-129 VPCLASS Creating a User-Defined Class The VPCLASS configuration parameter also allows you to create a class of user-defined virtual processors (VPs). A user-defined class of VPs can run illbehaved user-defined routines (UDRs). Warning: Execution of an ill-behaved routine in the CPU VP can cause serious interference with the operation of the database server. In addition, the routine itself might not produce correct results. For more information on ill-behaved UDRs, see user-defined classes of virtual processors, in the chapter on virtual processors in the Administrator’s Guide. You might want to describe a user-defined class of virtual processors to run DataBlade or user-defined routines. The following example creates the userdefined class new, for which the database server starts three virtual processors initially: VPCLASS new,num=3 At a later time, you can use onmode -p to add virtual processors to the class. The following command adds three virtual processors to the new class: onmode -p +3 new Tip: When you create a user-defined routine or function, you use the CLASS parameter of the CREATE FUNCTION statement to assign it to a class of virtual processors. You must ensure that the name of the user-defined class agrees with the name that you assigned in the CREATE FUNCTION statement. If you try to use a function that refers to a user-defined class, that class must exist and have virtual processors assigned to it. If the class does not have any virtual processors, you receive an SQL error. For more information on how to assign a user-defined routine to either CPU or user-defined classes of virtual processors, refer to Creating User-Defined Routines and User-Defined Data Types. For more information on the syntax of the CREATE FUNCTION or CREATE PROCEDURE statement, refer to the Informix Guide to SQL: Syntax. 1-130 IBM Informix Administrator’s Reference VPCLASS Using the noyield Option By default, the VPCLASS parameter defines a yielding VP class, which allows the C UDR to yield to other threads that need access to the user-defined VP class. A UDR can perform blocking I/O calls if it executes in a yielding userdefined VP. However, it must still yield for other threads to have access to the VP. You can also define nonyielding user-defined VPs with the noyield option of VPCLASS. The noyield option specifies creation of a nonyielding userdefined VP class. A nonyielding user-defined VP class executes a userdefined routine in a way that gives the routine exclusive use of the virtualprocessor class. In other words, user-defined routines that use a noyield virtual-processor class run serially. They never yield the VP to another thread. You do not need to specify more than one VP in a nonyielding user-defined VP class, because the UDR runs on a single VP until it completes and any additional virtual processors would be idle. Important: If your UDR uses global variables, only one VP in the user-defined virtual-processor class should be nonyielding. The following example specifies a user-defined class of virtual processors called new_noyield, which runs in no-yield mode: VPCLASS new_noyield,noyield,num=1 The noyield option applies only to user-defined VP classes. The database server ignores noyield if it is part of a VPCLASS parameter that defines a predefined VP class such as CPU, AIO, and so on. Using the num Option The num option sets the number of virtual processors of the specified class that the database server should start during initialization. On a single-processor computer, allocate only one CPU virtual processor. On a multiprocessor computer, do not allocate more CPU and user-defined virtual processors, combined, than there are CPUs on the computer. Use the following syntax to specify the number of virtual processors: num=num_VPs Configuration Parameters 1-131 VPCLASS Specifying the Number of CPU VPs For example, the following parameter specifies that the database server should start four virtual processors for the cpu class: VPCLASS cpu,num=4 At a later time, you can use the onmode -p command to add virtual processors for the class. Using the max_VPs Option The max_VPs option specifies the maximum number of virtual processors that the database server can start for the class. Use the following syntax to specify the number of virtual processors: max=max_VPs The value can be any integer greater than 0. If you omit the max_VPs option, the number is unlimited. Using the affinity Option On multiprocessor computers that support processor affinity, the affinity option specifies the CPUs to which the database server binds virtual processors. The affinity option has the following two forms: aff=processor_number aff=start_range,end_range In the first form, the database server binds all virtual processors in the class to the CPU numbered processor_number. (On a multiprocessor system, the operating system numbers the CPUs from 0 to (number of CPUs-1)). In the second form, the database server assigns the virtual processors of the class to processors in the range start_range to end_range, inclusive. The value end_range must be larger than start_range, and all values must be less than the total number of available CPUs. 1-132 IBM Informix Administrator’s Reference VPCLASS For example, if your platform has eight CPUs, your ONCONFIG file might include the following VPCLASS entries: VPCLASS VPCLASS VPCLASS first,aff=3 second,num=3,aff=5-7 cpu,num=8,aff=0-7,noage For more information about using processor affinity, refer to the chapter on virtual processors in the Administrator’s Guide. Configuration Parameters 1-133 Chapter The sysmaster Database In This Chapter . . . 2 . . . . . . . . . . . . . . . . . 2-3 The sysmaster Database . The buildsmi Script . The bldutil.sh Script . . . . . . . . . . . . . . . . . . . . . . . . . . . . . . . . . . . . . . . . . . . . . . . . . 2-3 2-4 2-4 The System-Monitoring Interface . Understanding the SMI Tables Accessing SMI Tables. . . . SELECT Statements . . . Triggers and Event Alarms SPL and SMI Tables . . . Locking and SMI Tables . . . . . . . . . . . . . . . . . . . . . . . . . . . . . . . . . . . . . . . . . . . . . . . . . . . . . . . . . . . . . . . . . . . . . . . . . . . . . . . . . . . . . . . . . . . . 2-5 2-5 2-6 2-6 2-6 2-7 2-7 The System-Monitoring Interface Tables The sysutils Tables. . . . . . . sysadtinfo . . . . . . . . . sysaudit . . . . . . . . . . syschkio . . . . . . . . . . syschunks . . . . . . . . . sysconfig . . . . . . . . . . sysdatabases. . . . . . . . . sysdbslocale . . . . . . . . . sysdbspaces . . . . . . . . . sysdri . . . . . . . . . . . sysextents. . . . . . . . . . sysextspaces . . . . . . . . . syslocks . . . . . . . . . . syslogs. . . . . . . . . . . sysprofile . . . . . . . . . . . . . . . . . . . . . . . . . . . . . . . . . . . . . . . . . . . . . . . . . . . . . . . . . . . . . . . . . . . . . . . . . . . . . . . . . . . . . . . . . . . . . . . . . . . . . . . . . . . . . . . . . . . . . . . . . . . . . . . . . . . . . . . . . . . . . . . . . . . . . . . . . . . . . . . . . . . . . . . . . . . . . . . . . . . . . . . . . . 2-7 2-9 2-10 2-10 2-11 2-12 2-14 2-14 2-15 2-16 2-17 2-18 2-18 2-19 2-20 2-21 sysptprof . syssesprof . syssessions sysseswts . systabnames sysvpprof . 2-2 . . . . . . . . . . . . . . . . . . . . . . . . . . . . . . . . . . . . . . . . . . . . . . . . . . . . . . . . . . . . . . . . . . . . . . . . . . . . . . . . . . . . . . . . . . . . . . . . . . . . . . . . . . . . . . . . . . . . . . . . 2-24 2-25 2-26 2-29 2-30 2-31 The SMI Tables Map . . . . . . . . . . . . . 2-32 Information from onstat in the SMI Tables . . . . . . . . . . . 2-36 IBM Informix Administrator’s Reference . . . . . In This Chapter This chapter describes the sysmaster database and contains reference information for the system-monitoring interface (SMI). It provides information on the following topics: ■ What is the sysmaster database ■ How to use SMI tables ■ Descriptions of the SMI tables ■ A map of the documented SMI tables For information about the ON-Bar tables, see the Backup and Restore Guide. The sysmaster Database The database server creates and maintains the sysmaster database. It is analogous to the system catalog for databases, which is described in the Informix Guide to SQL: Reference. Just as a system catalog for every database managed by the database server keeps track of objects and privileges in the database, a sysmaster database for every database server keeps track of information about the database server. The sysmaster database contains the system-monitoring interface (SMI) tables. The SMI tables provide information about the state of the database server. You can query these tables to identify processing bottlenecks, determine resource usage, track session or database server activity, and so on. This chapter describes these tables, which are slightly different from ordinary tables. Warning: The database server relies on information in the sysmaster database. Do not change any of the tables in sysmaster or any of the data within the tables. Such changes could cause unpredictable and debilitating results. The sysmaster Database 2-3 The buildsmi Script The database server creates the sysmaster database when it initializes disk space. The database server creates the database with unbuffered logging. You cannot drop the database or any of the tables in it, and you cannot turn logging off. As user informix on UNIX or a member of the Informix-Admin group on Windows NT, you can create SPL routines in the sysmaster database. (You can also create triggers on tables within sysmaster, but the database server never executes those triggers.) Joins of multiple tables in sysmaster might return inconsistent results because the database server does not lock the tables during a join. You can join sysmaster tables with tables in other databases. However, to join sysmaster tables with tables in a nonlogging database, first make the nonlogging database the current database. The buildsmi Script When you bring the database server up for the first time, it runs a script called buildsmi, which is in the etc directory. This script builds the database and tables that support SMI. The database server requires approximately 1750 free pages of logical-log space to build the sysmaster database. If you receive an error message that directs you to run the buildsmi script, a problem probably occurred while the database server was building the SMI database, tables, and views. When you use buildsmi, the existing sysmaster database is dropped and then re-created. The bldutil.sh Script When you initialize the database server for the first time, it runs a script called bldutil.sh on UNIX or bldutil.bat on Windows NT. This script builds the sysutils database. If it fails, the database server creates an output file in the tmp directory. The output file is bldutil.process_id on UNIX and bldutil.out on Windows NT. The messages in this output file reflect errors that occurred during the script execution. 2-4 IBM Informix Administrator’s Reference The System-Monitoring Interface The System-Monitoring Interface This section describes the SMI tables and how you access them to monitor the database server operation. Understanding the SMI Tables The system-monitoring interface consists of tables and pseudo-tables that the database server maintains automatically. While the SMI tables appear to the user as tables, they are not recorded on disk as normal tables are. Instead, the database server constructs the tables in memory, on demand, based on information in shared memory at that instant. When you query an SMI table, the database server reads information from these shared-memory structures. Because the database server continually updates the data in shared memory, the information that SMI provides lets you examine the current state of your database server. The SMI tables provide information about the following topics: ■ Auditing ■ Disk usage ■ User profiling ■ Database-logging status ■ Tables ■ Chunks ■ Chunk I/O ■ Dbspaces ■ Locks ■ Extents ■ SQL statement cache statistics ■ Virtual-processor CPU usage ■ System profiling The data in the SMI tables changes dynamically as users access and modify databases that the database server manages. The sysmaster Database 2-5 Accessing SMI Tables Accessing SMI Tables Any user can use SQL SELECT statements to query an SMI table, but standard users cannot execute statements other than SELECT. Attempts to do so result in permission errors. The administrator can execute SQL statements other than SELECT, but the results of such statements are unpredictable. Dynamic Server provides the sysadtinfo and sysaudit tables. Only user informix on UNIX or members of the Informix-Admin group on Windows NT can query sysadtinfo and sysaudit. You cannot use dbschema or dbexport on any of the tables in the sysmaster database. If you do, the database server generates the following error message: Database has pseudo tables - can't build schema SELECT Statements You can use SELECT statements on SMI tables wherever you can use SELECT against ordinary tables (from DB-Access, in an SPL routine, with ESQL/C, and so on) with one restriction: you cannot (meaningfully) reference rowid when you query SMI tables. SELECT statements that use rowid do not return an error, but the results are unpredictable. All standard SQL syntax, including joins between tables, sorting of output, and so on, works with SMI tables. For example, if you want to join an SMI table with an non-SMI table, name the SMI table with the following standard syntax: sysmaster:[@dbservername][owner.]tablename Triggers and Event Alarms Triggers based on changes to SMI tables never run. Although you can define triggers on SMI tables, triggers are activated only when an INSERT, UPDATE, or DELETE statement occurs on a table. The updates to the SMI data occur within the database server, without the use of SQL, so a trigger on an SMI table is never activated, even though the data returned by a SELECT statement indicates that it should be. 2-6 IBM Informix Administrator’s Reference The System-Monitoring Interface Tables To create an event alarm, query for a particular condition at predefined intervals, and execute an SPL routine if the necessary conditions for the alarm are met. SPL and SMI Tables You can access SMI tables from within a SPL routine. When you reference SMI tables, use the same syntax that you use to reference a standard table. Locking and SMI Tables The information in the SMI tables changes based on the database server activity. However, the database server does not update the information using SQL statements. When you use SMI tables with an isolation level that locks objects, it prevents other users from accessing the object, but it does not prevent the data from changing. In this sense, all the SMI tables have a permanent Dirty Read isolation level. The System-Monitoring Interface Tables The database server supports the following SMI tables. Table Description Reference sysadtinfo Auditing configuration information (IDS) page 2-10 sysaudit Auditing event masks (IDS) page 2-10 syschkio Chunk I/O statistics page 2-11 syschunks Chunk information page 2-12 sysconfig Configuration information page 2-14 sysdatabases Database information page 2-14 sysdbslocale Locale information page 2-15 sysdbspaces Dbspace information page 2-18 (1 of 2) The sysmaster Database 2-7 The System-Monitoring Interface Tables Table Description Reference sysdri Data-replication information (IDS) page 2-17 sysextents Extent-allocation information page 2-18 sysextspaces External spaces information (IDS) page 2-18 syslocks Active locks information page 2-20 syslogs Logical-log file information page 2-20 sysprofile System-profile information page 2-21 sysptprof Table information page 2-24 syssesprof Counts of various user actions page 2-25 syssessions Description of each user connected page 2-26 sysseswts User’s wait time on each of several objects page 2-29 systabnames Database, owner, and table name for the tblspace tblspace page 2-30 sysvpprof User and system CPU used by each virtual processor page 2-31 (2 of 2) Many other tables in the sysmaster database are part of the systemmonitoring interface but are not documented. Their schemas and column content can change from version to version. 2-8 IBM Informix Administrator’s Reference The sysutils Tables The sysutils Tables ON-Bar uses the following tables in the sysutils database. For more infor- mation, see the Backup and Restore Guide. Table Description bar_action Lists all backup and restore actions that are attempted against an object, except during a cold restore. Use the information in this table to track backup and restore history. bar_instance Writes a record to this table for each successful backup. ON-Bar might later use the information for a restore operation. bar_object Describes each backup object. This table provides a list of all storage spaces and logical logs from each database server for which at least one backup attempt was made. bar_server Lists the database servers in an installation. This table is used to ensure that backup objects are returned to their proper places during a restore. The sysmaster Database 2-9 sysadtinfo sysadtinfo The sysadtinfo table contains information about the auditing configuration for the database server. For more information, see your Trusted Facility Manual. You must be user informix or user root on UNIX or a member of the Informix-Admin group on Windows NT to retrieve information from the sysadtinfo table. Column Type Description adtmode integer If auditing is on or off: adterr integer ■ 0 For off ■ 1 For on Action on errors: ■ 0 To continually retry audit writes until they succeed. Processing for the thread that generated the error stops. ■ 1 To write all failed audit writes to the message log and continue processing. adtsize integer Maximum size of an audit file adtpath char(256) Directory where audit files are written adtfile integer Number of the audit file sysaudit For each defined audit mask (that is, for each username), the sysaudit table contains flags that represent the database events that generate audit records. The success and failure columns represent the bitmasks that compose the audit masks. If a bit is set in both the success the and failure columns, the corresponding event generates an audit record whether or not the event succeeded. You must be user informix or user root on UNIX or a member of the Informix-Admin group on Windows NT to retrieve information from the sysaudit table. 2-10 IBM Informix Administrator’s Reference syschkio Use the onaudit utility to list or modify an audit mask. For information about onaudit and auditing, see your Trusted Facility Manual. Column Type Description username char(32) Name of the mask succ1 integer Bitmask of the audit mask for success succ2 integer Bitmask of the audit mask for success succ3 integer Bitmask of the audit mask for success succ4 integer Bitmask of the audit mask for success succ5 integer Bitmask of the audit mask for success fail1 integer Bitmask of the audit mask for failure fail2 integer Bitmask of the audit mask for failure fail3 integer Bitmask of the audit mask for failure fail4 integer Bitmask of the audit mask for failure fail5 integer Bitmask of the audit mask for failure syschkio The syschkio table provides I/O statistics for individual chunks that the database server manages. Column Type Description chunknum smallint Chunk number reads integer Number of physical reads pagesread integer Number of pages read writes integer Number of physical writes pageswritten integer Number of pages written (1 of 2) The sysmaster Database 2-11 syschunks Column Type Description mreads integer Number of physical reads (mirror) mpagesread integer Number of pages read (mirror) mwrites integer Number of physical writes (mirror) mpageswritten integer Number of pages written (mirror) (2 of 2) syschunks The syschunks table describes each of the chunks that the database server manages. In the flags and mflags columns, each bit position represents a separate flag. Thus, it might be easier to read values in the flags and mflags columns if the values are returned using the HEX function. Column Type Description chknum smallint Chunk number dbsnum smallint Dbspace number nxchknum smallint Number of the next chunk in this dbspace chksize integer Number of pages in this chunk offset integer Page offset of the chunk in its device or path nfree integer Number of free pages in the chunk is_offline integer 1 If the chunk is offline, 0 if not is_recovering integer 1 If the chunk is being recovered, 0 if not is_blobchunk integer 1 If the chunk is in a blobspace, 0 if not (IDS) is_sbchunk integer 1 If the chunk is a sbspace, 0 if not (IDS) is_inconsistent integer 1 If the chunk is undergoing logical restore, 0 if not (1 of 2) 2-12 IBM Informix Administrator’s Reference syschunks Column Type Description flags smallint Flags Hexadecimal Meaning 16 0x0010 Chunk is a mirrored chunk 32 0x0020 Chunk is in offline mode 64 0x0040 Chunk is in online mode 128 0x0080 Chunk is in recovery mode 256 0x0100 Chunk has just been mirrored 512 0x0200 Chunk is part of a blobspace (IDS) 1024 0x0400 Chunk is being dropped 2048 0x0800 Chunk is part of an optical stageblob (IDS) 4096 0x1000 Chunk is inconsistent 16384 0x4000 Chunk contains temporary log space 32768 0x8000 Chunk was added during roll forward fname char(256) Pathname for the file or device of this chunk mfname char(256) Pathname for the file or device of the mirrored chunk, if any moffset integer Page offset of the mirrored chunk mis_offline integer 1 If mirror is offline, 0 if not mis_recovering integer 1 If mirror is being recovered, 0 if not mflags smallint Mirrored chunk flags; values and meanings are the same as the flags column. (2 of 2) The sysmaster Database 2-13 sysconfig sysconfig The sysconfig table describes the effective, original, and default values of the configuration parameters. For more information about the ONCONFIG file and the configuration parameters, see Chapter 1, “Configuration Parameters.” Column Type Description cf_id integer Unique numeric identifier cf_name char(128) Configuration parameter name cf_flags integer Reserved for future use cf_original char(256) Value in the ONCONFIG file at boot time cf_effective char(256) Value currently in use cf_default char(256) Value provided by the database server if no value is specified in the ONCONFIG file sysdatabases The sysdatabases table describes each database that the database server manages. Column Type Description name char(128) Database name partnum integer The partition number (tblspace identifier) for the systables table for the database owner char(32) User ID of the creator of the database created date Date created is_logging integer 1 If logging is active, 0 if not is_buff_log integer 1 If buffered logging, 0 if not is_ansi integer 1 If ANSI-compliant, 0 if not (1 of 2) 2-14 IBM Informix Administrator’s Reference sysdbslocale Column Type Description is_nls integer 1 If GLS-enabled, 0 if not flags smallint Logging flags (hex values) 0 No logging 1 Unbuffered logging 2 Buffered logging 4 ANSI-compliant database 8 Read-only database 10 GLS database 20 Checking of the logging mode of syscdr database bypassed 100 Changed status to buffered logging 200 Changed status to unbuffered logging 400 Changed status to ANSI compliant 800 Database logging turned off 1000 Long ID support enabled (IDS) (2 of 2) sysdbslocale The sysdbslocale table lists the locale of each database that the database server manages. Column Type Description dbs_dbsname char(128) Database name dbs_collate char(32) The locale of the database The sysmaster Database 2-15 sysdbspaces sysdbspaces The sysdbspaces table describes each of the dbspaces that the database server manages. In the flags column, each bit position represents a separate flag. Thus, it might be easier to read values in the flags column if the values are returned using the HEX function. Column Type Description dbsnum smallint Dbspace number name char(128) Dbspace name owner char(32) User ID of owner of the dbspace fchunk smallint Number of the first chunk in the dbspace nchunks smallint Number of chunks in the dbspace is_mirrored integer 1 If dbspace is mirrored, 0 if not is_blobspace integer 1 If the dbspace is a blobspace, 0 if not (IDS) is_sbspace integer 1 If the dbspace is a sbspace, 0 if not (IDS) is_temp integer 1 If the dbspace is a temporary dbspace, 0 if not flags smallint Flags Hexadecimal Meaning 1 0x0001 Dbspace has no mirror 2 0x0002 Dbspace uses mirroring 4 0x0004 Dbspace mirroring is disabled 8 0x0008 Dbspace is newly mirrored 16 0x0010 Space is a blobspace (IDS) 32 0x0020 Blobspace is on removable media (IDS) 64 0x0040 Blobspace is on optical media (IDS) (1 of 2) 2-16 IBM Informix Administrator’s Reference sysdri Column Type Description 128 0x0080 Blobspace has been dropped (IDS). 256 0x0100 Blobspace is an optical stageblob (IDS) 512 0x0200 Space is being recovered 1024 0x0400 Space has been physically recovered 2048 0x0800 Space is in logical recovery 32768 0x8000 Space is an sbspace (IDS) (2 of 2) sysdri The sysdri table provides information about the High-Availability DataReplication status of the database server. Column Type Description type char(50) High-Availability Data Replication type Possible values: primary secondary standard not initialized state char(50) State of High-Availability Data Replication Possible values: off on connecting failure read-only name char(128) The name of the other database server in the HighAvailability Data-Replication pair (1 of 2) The sysmaster Database 2-17 sysextents Column Type Description intvl integer The High-Availability Data-Replication interval timeout integer The High-Availability Data-Replication timeout value for this database server lostfound char(256) The pathname to the lost-and-found file (2 of 2) sysextents The sysextents table provides information about extent allocation. Column Type Description dbsname char(128) Database name tabname char(128) Table name chunk integer Chunk number offset integer Number of pages into the chunk where the extent begins size integer Size of the extent, in pages sysextspaces The sysextspaces table provides information about external spaces. Indexes for the id column and the name column allow only unique values. Column Type Description id integer External space ID name char(128) External space name owner char(32) External space owner (1 of 2) 2-18 IBM Informix Administrator’s Reference syslocks Column Type Description flags integer External space flags (reserved for future use) refcnt integer External space reference count. locsize integer Size of external space location, in bytes location char (256) Location of external space (2 of 2) syslocks The syslocks table provides information about all the currently active locks in the database server. Column Type Description dbsname char(128) Database name tabname char(128) Table name rowidlk integer Real rowid, if it is an index key lock keynum smallint Key number of index key lock type char(4) Type of lock B Byte lock IS Intent shared lock S Shared lock XS Shared key value held by a repeatable reader U Update lock IX Intent exclusive lock SIX Shared intent exclusive lock X Exclusive lock (1 of 2) The sysmaster Database 2-19 syslogs Column Type Description XR Exclusive key value held by a repeatable reader owner integer Session ID of the lock owner waiter integer Session ID of the user waiting for the lock. If more than one user is waiting, only the first session ID appears. (2 of 2) syslogs The syslogs table provides information about space use in logical-log files. In the flags column, each bit position represents a separate flag. For example, for a log file, the flags column can have flags set for both current log file and temporary log file. Thus, it might be easier to read values in the flags column if the values are returned using the HEX function. Column Type Description number smallint Logical-log file number uniqid integer Log-file ID size integer Number of pages in the log file used integer Number of pages used in the log file is_used integer 1 If file is used, 0 if not is_current integer 1 If file is the current file, 0 if not is_backed_up integer 1 If file has been backed up, 0 if not is_new integer 1 If the log has been added since the last level-0 dbspace backup, 0 if not is_archived integer 1 If file has been placed on the backup tape, 0 if not is_temp integer 1 If the file is flagged as a temporary log file, 0 if not (1 of 2) 2-20 IBM Informix Administrator’s Reference sysprofile Column Type Description flags smallint Flags Hexadecimal Meaning 1 0x01 Log file is in use 2 0x02 File is current log file 4 0x04 Log file has been backed up 8 0x08 File is newly added log file 16 0x10 Log file has been written to dbspace backup media 32 0x20 Log is a temporary log file (2 of 2) sysprofile The sysprofile table contains profile information about the database server. Column Type Description name char(13) Name of profiled event. (See table that follows for a list of possible events.) value integer Value of profiled event. (See table that follows for a list of possible events.) The following table lists the events that, together with a corresponding value, make up the rows of the sysprofile table. Events Profiled in sysprofile Description dskreads Number of actual reads from disk bufreads Number of reads from shared memory dskwrites Actual number of writes to disk (1 of 3) The sysmaster Database 2-21 sysprofile Events Profiled in sysprofile Description bufwrites Number of writes to shared memory isamtot Total number of calls isopens isopen calls isstarts isstart calls isreads isread calls iswrites iswrite calls isrewrites isrewrite calls isdeletes isdelete calls iscommits iscommit calls isrollbacks isrollback calls ovlock Overflow lock table ovuser Overflow user table ovtrans Overflow transaction table latchwts Latch request waits bufwts Buffer waits lockreqs Lock requests lockwts Lock waits ckptwts Checkpoint waits deadlks Deadlocks lktouts Deadlock time-outs numckpts Number checkpoints plgpagewrites Physical-log pages written plgwrites Physical-log writes (2 of 3) 2-22 IBM Informix Administrator’s Reference sysprofile Events Profiled in sysprofile Description llgrecs Logical-log records llgpagewrites Logical-log writes llgwrites Logical-log pages written pagreads Page reads pagwrites Page writes flushes Buffer-pool flushes compress Page compresses fgwrites Foreground writes lruwrites Least-recently used (LRU) writes chunkwrites Writes during a checkpoint btradata Read-ahead data pages read through index leaf node btraidx Read-ahead data pages read through index branch or root node dpra Data pages read into memory with read-ahead feature rapgs_used Read-ahead data pages that user used seqscans Sequential scans totalsorts Total sorts memsorts Sorts that fit in memory disksorts Sorts that did not fit in memory maxsortspace Maximum disk space used by a sort (3 of 3) The sysmaster Database 2-23 sysptprof sysptprof The sysptprof table lists information about a tblspace. Tblspaces correspond to tables. Profile information for a table is available only when a table is open. When the last user who has a table open closes it, the tblspace in shared memory is freed, and any profile statistics are lost. 2-24 Column Type Description dbsname char(128) Database name tabname char(128) Table name partnum integer Partition (tblspace) number lockreqs integer Number of lock requests lockwts integer Number of lock waits deadlks integer Number of deadlocks lktouts integer Number of lock timeouts isreads integer Number of isreads iswrites integer Number of iswrites isrewrites integer Number of isrewrites isdeletes integer Number of isdeletes bufreads integer Number of buffer reads bufwrites integer Number of buffer writes seqscans integer Number of sequential scans pagreads integer Number of page reads pagwrites integer Number of page writes IBM Informix Administrator’s Reference syssesprof syssesprof The syssesprof table lists cumulative counts of the number of occurrences of user actions such as writes, deletes, or commits. Column Type Description sid integer Session ID lockreqs integer Number of locks requested locksheld integer Number of locks currently held lockwts integer Number of times waited for a lock deadlks integer Number of deadlocks detected lktouts smallint Number of deadlock timeouts logrecs integer Number of logical-log records written isreads integer Number of reads iswrites integer Number of writes isrewrites integer Number of rewrites isdeletes integer Number of deletes iscommits integer Number of commits isrollbacks integer Number of rollbacks longtxs integer Number of long transactions bufreads integer Number of buffer reads bufwrites integer Number of buffer writes seqscans integer Number of sequential scans pagreads integer Number of page reads pagwrites integer Number of page writes total_sorts integer Number of total sorts dsksorts integer Number of sorts that did not fit in memory (1 of 2) The sysmaster Database 2-25 syssessions Column Type Description max_sortdiskspace integer Maximum space used by a sort logspused integer Number of bytes of logical-log space used by current transaction of session maxlogsp integer Maximum number of bytes of logical-log space ever used by the session (2 of 2) syssessions The syssessions table provides general information on each user connected to the database server. In the state column, each bit position represents a separate flag. Thus, it might be easier to read values in the state column if the values are returned using the HEX function. Column Type Description sid integer Session ID username char(32) User ID uid smallint User ID number pid integer Process ID of the client hostname char(16) Hostname of client tty char(16) Name of the user’s stderr file connected integer Time that user connected to the database server feprogram char(16) Reserved for future use pooladdr integer Session pool address is_wlatch integer 1 If the primary thread for the session is waiting for a latch is_wlock integer 1 If the primary thread for the session is waiting for a lock is_wbuff integer 1 If the primary thread for the session is waiting for a buffer (1 of 3) 2-26 IBM Informix Administrator’s Reference syssessions Column Type Description is_wckpt integer 1 If the primary thread for the session is waiting for a checkpoint is_wlogbuf integer 1 If the primary thread for the session is waiting for a log buffer is_wtrans integer 1 If the primary thread for the session is waiting for a transaction is_monitor integer 1 If the session is a special monitoring process is_incrit integer 1 If the primary thread for the session is in a critical section state integer Flags Hexadecimal Meaning 1 0x00000001 User structure in use 2 0x00000002 Waiting for a latch 4 0x00000004 Waiting for a lock 8 0x00000008 Waiting for a buffer 16 0x00000010 Waiting for a checkpoint 32 0x00000020 In a read call 64 0x00000040 Writing logical-log file to backup tape 128 0x00000080 ON-Monitor (IDS, UNIX) 256 0x00000100 In a critical section 512 0x00000200 Special daemon 1024 0x00000400 Archiving (IDS) 2048 0x00000800 Clean up dead processes 4096 0x00001000 Waiting for write of log buffer 8192 0x00002000 Special buffer-flushing thread (2 of 3) The sysmaster Database 2-27 syssessions Column Type Description 16384 0x00004000 Remote database server 32768 0x00008000 Deadlock timeout used to set RS_timeout 65536 0x00010000 Regular lock timeout 262144 0x00040000 Waiting for a transaction 524288 0x00080000 Primary thread for a session 1048576 0x00100000 Thread for building indexes 2097152 0x00200000 B-tree cleaner thread (3 of 3) 2-28 IBM Informix Administrator’s Reference sysseswts sysseswts The sysseswts table provides information on the amount of time that users wait for various database objects. Column Type Description sid integer Session ID reason char(50) Description of reason for wait: ■ Unspecified ■ Buffer ■ Lock ■ Asynchronous I/O ■ Mt yield 0 ■ Mt yield n ■ Mt yield ■ Checkpoint ■ Log I/O ■ Log copy ■ Condition ■ Lock mutex ■ Lockfree mutex ■ Deadlock mutex ■ LRUs mutex ■ Tblspace mutex ■ Log mutex ■ Checkpoint mutex ■ Mutex ■ Mt ready ■ Mt yield x ■ Running (1 of 2) The sysmaster Database 2-29 systabnames Column Type Description numwaits integer Number of waits for this reason cumtime float Cumulative time waited for this reason (in microseconds) maxtime integer Maximum time waited during this session for this reason (2 of 2) systabnames The systabnames table describes each table that the database server manages. 2-30 Column Type Description partnum integer Tblspace identifier dbsname char(128) Database name owner char(32) User ID of owner tabname char(128) Table name collate char(32) Collation associated with a database that supports GLS IBM Informix Administrator’s Reference sysvpprof sysvpprof The sysvpprof table lists user and system CPU time for each virtual processor. Column Type Description vpid integer Virtual processor ID class char(50) for IDS Type of virtual processor: ■ cpu ■ adm ■ lio ■ pio ■ aio ■ tli ■ soc ■ str ■ shm ■ opt ■ msc ■ adt usercpu float Number of microseconds of user time syscpu float Number of microseconds of system time The sysmaster Database 2-31 The SMI Tables Map The SMI Tables Map Figure 2-1 displays the columns in some of the SMI tables. Figure 2-1 Columns in the SMI tables sysadtinfo (IDS) sysaudit (IDS) syschkio syschunks sysconfig sysdatabases adtmode username chunknum chknum cf_id name adterr succ1 reads dbsnum cf_name partnum adtsize succ2 pagesread nxchknum cf_flags owner adtpath succ3 writes chksize cf_originals created adtfile succ4 pageswritten offset cf_effective is_logging succ5 mreads nfree cf_default is_buff_log fail1 mpagesread is_offline is_ansi fail2 mwrites is_recovering is_nls fail3 mpageswritten is_blobchunk (IDS) flags fail4 is_sbchunk (IDS) fail5 is_inconsistent flags fname mfname moffset mis_offline mis_recovering mflags (1 of 4) 2-32 IBM Informix Administrator’s Reference The SMI Tables Map sysdbslocale sysdbspaces sysdri (IDS) sysextents sysextspaces (IDS) syslocks dbs_dbsname dbsnum type dbsname id dbsname dbs_collate name state tabname name tabname owner name chunk owner rowidlk fchunk intvl offset flags keynum nchunks timeout size refcnt type is_mirrored lostfound locsize owner location waiter is_blobspace (IDS) is_sbspace (IDS) is_temp flags (2 of 4) The sysmaster Database 2-33 The SMI Tables Map syslogs sysprofile sysptprof syssesprof syssessions number name dbsname sid sid uniqid value tabname lockreqs username size partnum locksheld uid used lockreqs lockwts pid is_used lockwts deadlks hostname is_current deadlks lktouts tty is_backed_up lktouts logrecs connected is_new isreads isreads feprogram is_archived iswrites iswrites pooladdr is_temp isrewrites isrewrites is_wlatch flags isdeletes isdeletes is_wlock bufreads iscommits is_wbuff bufwrites isrollbacks is_wckpt seqscans longtxs is_wlogbuf pagreads bufreads is_wtrans pagwrites bufwrites is_monitor seqscans is_incrit pagreads state pagwrites total_sorts dsksorts max_sort diskspace logspused maxlogsp (3 of 4) 2-34 IBM Informix Administrator’s Reference The SMI Tables Map sysseswts systabnames sysvpprof sid partnum vpid reason dbsname class numwaits owner usercpu cumtime tabname syscpu maxtime collate (4 of 4) The sysmaster Database 2-35 Information from onstat in the SMI Tables Information from onstat in the SMI Tables To obtain information provided by the onstat utility, you can use SQL to query appropriate SMI tables. The following table indicates which SMI tables to query to obtain the information provided by a given onstat option. For descriptions of the onstat options, see “onstat: Monitor Database Server Operation” on page 3-104. onstat Option SMI Tables to Query onstat Fields Not in SMI Tables -d sysdbspaces syschunks address bpages -D sysdbspaces syschkio -F sysprofile address flusher snoozer state data -g dri sysdri Last DR CKPT (id/pg) -g glo sysvpprof Listing of virtual processors by class -k syslocks address lklist tblsnum (1 of 2) 2-36 IBM Informix Administrator’s Reference Information from onstat in the SMI Tables onstat Option SMI Tables to Query onstat Fields Not in SMI Tables -l syslogs sysprofile All physical-log fields (except numpages and numwrits) All logical-log buffer fields (except numrecs, numpages, and numwrits) address begin % used -p sysprofile -u syssessions syssesprof address wait nreads nwrites (2 of 2) The sysmaster Database 2-37 Chapter Utilities In This Chapter . . 3 . . . . . . . . . . . . . . . . . 3-5 Complete List of Utilities . The -V Option . . . Multibyte Characters . . . . . . . . . . . . . . . . . . . . . . . . . . . . . . . . . . . . . . . . . . . . . . . . . 3-6 3-6 3-6 Informix Server Administrator . . . . . . . . . . . . . . . 3-6 Server Studio JE . . . . . . . . . . . . . . . 3-8 oncheck: Check, Repair, or Display . . . . . . . . . . Syntax . . . . . . . . . . . . . . . . . . . Check System Catalog Tables with -cc . . . . . . . . Check Pages with -cd and -cD. . . . . . . . . . . Check the Chunk Free List with -ce and -pe . . . . . . Check Index Node Links with -ci and -cI . . . . . . . Check Reserved Pages with -cr and -cR . . . . . . . Check and Display Sbspaces with -cs, -cS, -ps, -pS . . . . Display Blobspace Statistics with -pB . . . . . . . . Display Rows in Hexadecimal Format with -pd and -pD . Display Index Information with -pk, -pK, -pl, -pL . . . . Display the Contents of a Logical Page with -pp and -pP . Display Reserved-Page Information with -pr and -pR . . Display Tblspaces for a Table or Fragment with -pt and -pT Turn On Locking with -x . . . . . . . . . . . . Send Special Arguments to the Access Method with -u . . . . . . . . . . . . . . . . . . . . . . . . . . . . . . . . . . . . . . . . . . . . . . . . . . 3-8 3-13 3-20 3-20 3-21 3-22 3-23 3-24 3-24 3-24 3-25 3-26 3-27 3-27 3-28 3-29 ondblog: Change Logging Mode . . . . 3-29 . . . . . . . . . . . . . . . . oninit: Initialize the Database Server . . . . . . . . . . . . . Syntax . . . . . . . . . . . . . . . . . . . . . . Initialize Shared Memory Only . . . . . . . . . . . . . Initialize Disk Space and Shared Memory . . . . . . . . . . Specify the Number of Virtual Processors . . . . . . . . . . Bring Up Database Server in Recovery Mode . . . . . . . . 3-31 3-31 3-32 3-33 3-34 3-34 onlog: Display Logical-Log Contents . . . . . . . . . . 3-35 onmode: Change Mode and Shared Memory . . Syntax . . . . . . . . . . . . . . Change Database Server Mode . . . . . Force a Checkpoint . . . . . . . . . Change Shared-Memory Residency . . . . Switch the Logical-Log File . . . . . . . Kill a Database Server Session . . . . . . Kill a Distributed Transaction . . . . . . Set Data-Replication Types . . . . . . . Add a Shared-Memory Segment . . . . . Add or Remove Virtual Processors . . . . Regenerate .infos File . . . . . . . . . Change Decision-Support Parameters . . . Free Unused Memory Segments . . . . . Override ONDBSPACEDOWN WAIT Mode . Change Usage of the SQL Statement Cache . Change Settings for the SQL Statement Cache . . . . . . . . . . . . . . . . . . . . . . . . . . . . . . . . . . . . . . . . . . . . . . . . . . . . . . . . . . . . . . . . . . . . . . . . . . . . . . . . . . . . . . . . . . . . . . . . . . . . . . . . . . . . . . . . . . . . . . . . . . . . . . . . . . . . . . . . 3-39 3-40 3-41 3-44 3-45 3-46 3-46 3-47 3-48 3-50 3-51 3-55 3-56 3-58 3-59 3-60 3-61 Using ON-Monitor . . . . . . . . . 3-63 . . . . . . . . . . . . . . . . . . . . . . . . . . . . . . . . . . . . . . . . 3-70 3-70 3-71 3-72 3-73 . . . . . . . . . . . . . onparams: Modify Log-Configuration Parameters Syntax . . . . . . . . . . . . . . Add a Logical-Log File . . . . . . . . Drop a Logical-Log File . . . . . . . . Change Physical-Log Parameters . . . . 3-2 IBM Informix Administrator’s Reference onspaces: Manage Storage Spaces . . . . . . . . . . . . Syntax . . . . . . . . . . . . . . . . . . . . Create a Dbspace, Temporary Dbspace, Blobspace, or Extspace . Create an Sbspace or Temporary Sbspace . . . . . . . . Change Sbspace Default Specifications . . . . . . . . . Clean Up Stray Smart Large Objects in Sbspaces . . . . . . Drop a Dbspace, Blobspace, Sbspace, or Extspace . . . . . Add a Chunk to a Dbspace or Blobspace . . . . . . . . Add a Chunk to an Sbspace . . . . . . . . . . . . . Drop a Chunk in a Dbspace, Blobspace, or Sbspace . . . . . Start Mirroring . . . . . . . . . . . . . . . . . End Mirroring . . . . . . . . . . . . . . . . . Change Status of a Mirrored Chunk . . . . . . . . . . Specify DATASKIP Parameter . . . . . . . . . . . . . . . . . . . . . . . . . . . 3-74 . 3-76 . 3-77 . 3-81 . 3-88 . 3-89 . 3-90 . 3-92 . 3-94 . 3-96 . 3-98 . 3-100 . 3-101 . 3-103 onstat: Monitor Database Server Operation Monitor the Database Server Status . Syntax . . . . . . . . . . . Output Header . . . . . . . . onstat . . . . . . . . . . . . onstat -- . . . . . . . . . . . onstat -a . . . . . . . . . . . onstat -b . . . . . . . . . . . onstat -c . . . . . . . . . . . onstat -d . . . . . . . . . . . onstat -D. . . . . . . . . . . onstat -f . . . . . . . . . . . onstat -F . . . . . . . . . . . onstat -g Monitoring Options . . . onstat -G. . . . . . . . . . . onstat -i . . . . . . . . . . . onstat -k . . . . . . . . . . . onstat -K . . . . . . . . . . . onstat -l . . . . . . . . . . . onstat -m . . . . . . . . . . onstat -O. . . . . . . . . . . onstat -p . . . . . . . . . . . . . . . . . . . . . . . . . . . . . . . . . . 3-104 . 3-104 . 3-105 . 3-109 . 3-110 . 3-110 . 3-111 . 3-111 . 3-113 . 3-114 . 3-117 . 3-118 . 3-118 . 3-119 . 3-129 . 3-131 . 3-131 . 3-133 . 3-133 . 3-136 . 3-137 . 3-138 . . . . . . . . . . . . . . . . . . . . . . . . . . . . . . . . . . . . . . . . . . . . . . . . . . . . . . . . . . . . . . . . . . . . . . . . . . . . . . . . . . . . . . . . . . . . . . . . . . . . . . . . . . . . . . . . . . . . . . . . . . . . . . . . . . . . . . . . . . . . . . . . . . . . . . . . . . . . . . . . . . . . . . . . . . . . . . . . . . . . . . . . . . . . . . . . . . . . . . Utilities 3-3 onstat -P . . onstat -R . . onstat -s . . onstat -t and -T onstat -u . . onstat -x . . onstat -X . . onstat -z . . . . . . . . . . . . . . . . . . . . . . . . . . . . . . . . . . . . . . . . . . . . . . . . . . . . . . . . . . . . . . . . . . . . . . . . . . . . . . . . . . . . . . . . . . . . . . . . . . . . . . . . . . . . . . . . . . . . . . . . . . . . . . . . . . . . . . . . . . . . . . . . . . . . . . . . . . 3-143 3-144 3-145 3-147 3-149 3-152 3-155 3-157 ontape: Log, Back Up, and Restore . . . . . . . . . . . . . 3-157 Syntax . . . . . . . . . . . . . . . . . . . . . . 3-158 Prepare for Data Replication . . . . . . . . . . . . . . 3-159 3-4 IBM Informix Administrator’s Reference In This Chapter This chapter provides reference material for the Informix database server utilities. These utilities allow you to perform administrative tasks directly from the command line. For a complete listing of utilities, see your Getting Started manual. You can use the following utilities: ■ Informix Server Administrator (ISA) ■ ON-Bar ■ oncheck ■ ondblog ■ oninit ■ onlog ■ onmode ■ ON-Monitor ■ onparams ■ onspaces ■ onstat ■ ontape The database server must be online before you execute a utility, with the following exceptions: ■ oninit ■ Some onlog options ■ Some oncheck options Utilities 3-5 Complete List of Utilities Complete List of Utilities The appendix in your Getting Started manual contains a quick reference to all utilities and their options. The -V Option All Informix command-line utilities allow you to use the -V option. This option displays the software version number and the serial number. You use the -V option primarily for debugging. When an Informix Technical Support representative asks for the version number, you can use -V to find the information. GLS Multibyte Characters The database server utilities support multibyte command-line arguments. For a complete list of the utilities that support multibyte command-line arguments, see the Informix Guide to GLS Functionality. Informix Server Administrator Informix Server Administrator (ISA) allows a DBA to manage Informix database servers by executing Informix commands from any web browser. You do not need to be familiar with the syntax and format of database server commands. ISA presents the command output in an easy-to-read format. The database server CD-ROM distributed with your product includes ISA. For information on how to install ISA, see the following file on the CD-ROM. 3-6 Operating System File UNIX /SVR_ADM/README Windows NT or Windows 2000 \SVR_ADM\readme.txt IBM Informix Administrator’s Reference Informix Server Administrator With ISA, you can perform these database server administrative tasks: ■ Change configuration parameters temporarily or permanently. ■ Use Server Setup to configure or reconfigure the database server. ■ Change the database server mode. ■ Modify connectivity information in the sqlhosts file. ■ Check dbspaces, blobspaces, and sbspaces. ■ Manage logical logs and physical logs. ■ Examine and modify memory usage. ■ Read the message log. ■ Back up and restore dbspaces, blobspaces, and sbspaces. ■ Run various onstat commands to monitor performance. ■ Enter SQL statements and examine database schemas. ■ Add and remove chunks, dbspaces, blobspaces, sbspaces. ■ Examine and manage user sessions. ■ Examine and manage virtual processors (VPs). ■ Use the High-Performance Loader (HPL), dbimport, and dbexport. ■ Manage Enterprise Replication. ■ Manage a MaxConnect server. ■ Set up primary and secondary database servers for High-Availability Data Replication. ■ Use the following utilities: dbaccess, dbschema, onbar, oncheck, ondblog, oninit, onlog, onmode, onparams, onspaces, onstat, onpladm. ■ Enter any Informix utility, UNIX shell command, or Windows command. Utilities 3-7 Server Studio JE Server Studio JE The Server Studio JE is a stand-alone, Java-based Integrated Development Environment (IDE) for the Version 9.3 database server. Server Studio contains the following modules: ■ Object Explorer ■ SQL Editor ■ Table Editor The Server Studio modules are available for free. For more information, see the readme file with your database server installation and the Server Studio online help. oncheck: Check, Repair, or Display Depending on the options that you choose, oncheck can perform the following functions: 3-8 ■ Check specified disk structures for inconsistencies. ■ Repair indexes that are found to contain inconsistencies. ■ Display information about the disk structures. ■ Check and display information about user-defined data types across distributed databases. IBM Informix Administrator’s Reference oncheck: Check, Repair, or Display oncheck Check-and-Repair Options The oncheck utility can repair the following types of disk structures: ■ Partition page statistics ■ Bitmap pages ■ Partition blobpages ■ Blobspace blobpages ■ Indexes ■ Sbspace pages ■ Metadata partitions for sbspaces If oncheck detects inconsistencies in other structures, messages alert you to these inconsistencies, but oncheck cannot resolve the problem. For more information, see the chapter on consistency checking in the Administrator’s Guide and Chapter 5, “Disk Structures and Storage.” What Does Each Option Do? As Figure 3-1 on page 3-10 shows, the oncheck options fall into three categories: check, repair, and display. The display or print options (those prefixed with the letter p) are identical in function to the -c options, except that the -p options display additional information about the data that is being checked as the oncheck utility executes. You cannot combine oncheck option flags except as the following paragraphs describe. In general, the -c options check for consistency and display a message on the screen only if they find an error or inconsistency. Any user can execute the check options. On UNIX platforms, you must be user informix or root to display database data or initiate repair options. On Windows, you must be a member of the Informix-Admin group to display database data or initiate repair options. Figure 3-1 associates oncheck options with their function. Utilities 3-9 oncheck: Check, Repair, or Display Figure 3-1 oncheck Options and Their Function Object Check Repair Blobspace simple large objects 3-10 Display -pB System catalog tables -cc -pc Data rows, no simple large objects or smart large objects -cd -pd Data rows, simple large objects but no smart large objects -cD -pD Table with a user-defined access method -cd, -cD Chunks and extents -ce Index (key values) -ci, -cix -ci -y -pk -y, -pkx -y -pk Index (keys plus rowids) -cI, -cIx -cI -y -pK -y, -pKx -y -pK Index with a user-defined access method -ci, -cI Index (leaf key values) -pl -y, -plx -y -pl Index (leaf keys plus rowids) -pL -y, -pLx -y -pL -pe Pages (by table or fragment) -pp Pages (by chunk) -pP Root reserved pages -cr, -cR -pr, -pR Metadata for smart large objects -cs, -cS -ps, -pS Space usage (by table or fragment) -pt Space usage (by table, with indexes) -pT IBM Informix Administrator’s Reference oncheck: Check, Repair, or Display Using the -y Option to Perform Repairs Use the -y option to instruct oncheck to perform repairs automatically, as the following examples show: oncheck oncheck oncheck oncheck -cd -cD -ci -cI -y -y -y -y If you do not use the -y option, oncheck prompts you when it encounters an inconsistency and allows you to request a repair. If you specify option -n, oncheck does not prompt you because this option instructs oncheck to not perform repairs. Repairing Fragmented Tables The oncheck utility cannot repair a table in a dbspace, sbspace, or external space. Repairing Indexes in Sbspaces and External Spaces The oncheck utility can repair an index in an sbspace or external space if the index is created using an access method that supports the oncheck -y option. Although the oncheck utility does not repair fragmented indexes, userdefined access methods can repair them. For more information about the oncheck options that access methods support, see the DataBlade API Programmer’s Manual or the Virtual-Index Interface Programmer’s Manual. Locking and oncheck The oncheck utility places a shared lock on a table during the following operations, so no other users can perform updates, inserts, or deletes until the check has completed: ■ When it checks data ■ When it checks indexes (with -ci, -cI, -pk, -pK, -pl, or -pL) and the table uses page locking ■ When you specify the -x option with -ci, -cI, -pk, -pK, -pl, or -pL and the table uses row locking Utilities 3-11 oncheck: Check, Repair, or Display If the table does not use page locking, the database server does not place a shared lock on the table when you check an index with the oncheck -ci, -cI, -pk, -pK, -pl, or -pL options. When no shared lock is on the table during an index check, other users can update rows during the check. By not placing a shared lock on tables using row locks during index checks, the oncheck utility cannot be as accurate in the index check. For absolute assurance of a complete index check, you can execute oncheck with the -x option. With the -x option, oncheck places a shared lock on the table, and no other users can perform updates, inserts, or deletes until the check has completed. For more information about the -x option, refer to “Turn On Locking with -x” on page 3-28. For information on shared locks and intent shared locks, see the Performance Guide. The oncheck utility places a shared lock on system catalog tables when they are checked. It places an exclusive lock on a table when it executes repair options. 3-12 IBM Informix Administrator’s Reference Syntax Syntax oncheck Options (1 of 2) oncheck -ce -pe -cr -pr -cR -n -q -y -pR -ci -cI -pk -pK -pl -pL -cd database : x table owner. # index_name , frag_dbs , frag_dbs database : -cD table owner. -cc -pc database -pB database : -pt -pT -pd -pD table owner. database : table owner. , frag_dbs rowid tblspacenum logical pagenum Utilities 3-13 Syntax oncheck Options (2 of 2) oncheck - pp : database table rowid , owner. tblspacenum logical pagenum chunknum logical pagenum - pP frag_dbs - cs - cS sbspace. - ps - pS sbspace -u partnum pagenum option (arg_string) - cv : db1 : db2 - pv @server @server b c owner. owner. o t u 3-14 IBM Informix Administrator’s Reference object object Syntax Element -cc -cd -cD -ce -ci -cI -cr -cR -cs Purpose Checks system catalog tables for the specified database Reads all pages except simple large objects from the tblspace for the specified database, table, or fragment and checks each page for consistency Also checks tables that use a userdefined access method Same as -cd but also reads the header of each blobpage and checks it for consistency Key Considerations References: See “Check System Catalog Tables with -cc” on page 3-20. Restrictions: Does not check simple or smart large objects. References: See “Check Pages with -cd and -cD” on page 3-20. Restrictions: Checks simple large objects but not smart large objects. References: See “Check Pages with -cd and -cD” on page 3-20. Checks each chunk-free list and Additional Information: The oncheck process corresponding free space and each verifies that the extents on disk correspond to the tblspace extent. Also checks smart- current control information that describes them. large-object extents and sbspace References: See “Check the Chunk Free List with metadata -ce and -pe” on page 3-21. For background inforChecks the ordering of key values and the consistency of horizontal and vertical node links for all indexes associated with the specified table Also checks indexes that use a userdefined access method Same as -ci but also checks that the key value tied to a rowid in an index is the same as the key value in the row Checks each of the root dbspace reserved pages for several conditions Checks the root dbspace reserved pages, physical-log pages, and logical-log pages Checks smart large object and sbspace metadata for an sbspace mation, see “Next-Extent Allocation” on page 5-17. References: See “Check Index Node Links with -ci and -cI” on page 3-22. References:. See “Check Index Node Links with -ci and -cI” on page 3-22. References: See “Check Reserved Pages with -cr and -cR” on page 3-23. None. References: See “Check and Display Sbspaces with -cs, -cS, -ps, -pS” on page 3-24. (1 of 5) Utilities 3-15 Syntax Element -cS sbspace -n -pB -pc -pd -pD -pe -pk Purpose Checks smart large object and sbspace metadata for an sbspace as well as extents Indicates optional sbspace name If not supplied, all sbspaces are checked. Indicates that no index repair should be performed, even if errors are detected Displays statistics that describe the average fullness of blobspace blobpages in a specified table Same as -cc but also displays the system catalog information as it checks the system catalog tables, including extent use for each table Displays rows in hexadecimal format Displays rows in hexadecimal format and simple-large-object values stored in the tblspace or header information for smart large objects stored in an sbspace sbpage and simple large objects stored in a blobspace blobpage Same as -ce but also displays the chunk and tblspace extent information as it checks the chunk free list, the corresponding free space, and each tblspace extent Same as -ci but also displays the key values for all indexes on the specified table as it checks them Key Considerations References: See “Check and Display Sbspaces with -cs, -cS, -ps, -pS” on page 3-24. None. Additional Information: Use with the index repair options (-ci, -cI, -pk, -pK, -pl, and -pL). Additional Information: These statistics provide a measure of storage efficiency for individual simple large objects in a database or table. If a table or fragment is not specified, statistics are displayed for the entire database. References: See “Display Blobspace Statistics with -pB” on page 3-24. For information about optimizing blobspace blobpage size, see the chapter on managing disk space in the Administrator’s Guide. None. References: See “Display Rows in Hexadecimal Format with -pd and -pD” on page 3-24. References: See “Display Rows in Hexadecimal Format with -pd and -pD” on page 3-24. None. References: See “Display Index Information with -pk, -pK, -pl, -pL” on page 3-25. (2 of 5) 3-16 IBM Informix Administrator’s Reference Syntax Element -pK -pl -pL -pp -pP -pr -pR -ps -pS -pt -pT -q -x Purpose Same as -cI but also displays the key values and rowids as it checks them Same as -ci but also displays the key values. Only leaf-node index pages are checked Same as -cI but also displays the key values and rowids for leaf-node index pages only Displays contents of a logical page Key Considerations References: See “Display Index Information with -pk, -pK, -pl, -pL” on page 3-25. References: See “Display Index Information with -pk, -pK, -pl, -pL” on page 3-25. References: See “Display Index Information with -pk, -pK, -pl, -pL” on page 3-25. References: See “Display the Contents of a Logical Page with -pp and -pP” on page 3-26. Same as -pp but requires a chunk References: See “Display the Contents of a number and logical page number or Logical Page with -pp and -pP” on page 3-26. internal rowid as input Same as -cr but also displays the References: See “Display Reserved-Page Inforreserved-page information as it mation with -pr and -pR” on page 3-27. checks the reserved pages Same as -cR but also displays the None. information for the reserved pages, physical-log pages, and logical-log pages Checks and displays smart-largeReferences: See “Check and Display Sbspaces with object and sbspace metadata for an -cs, -cS, -ps, -pS” on page 3-24. sbspace Checks and displays smart-largeReferences: See “Check and Display Sbspaces with object and sbspace metadata. Lists -cs, -cS, -ps, -pS” on page 3-24. extents and header information for individual smart large objects Displays tblspace information for References: See “Display Tblspaces for a Table or a table or fragment Fragment with -pt and -pT” on page 3-27. Same as -pt but also displays References: See “Display Tblspaces for a Table or index-specific information and Fragment with -pt and -pT” on page 3-27. page-allocation information by page type (for dbspaces) Suppresses all checking and None. validation message Places a shared lock on the table Additional information: Use with the -ci, -cI, -pk, when you check and print an index -pK, -pl, or -pL options. References: See “Turn On Locking with -x” on page 3-28. (3 of 5) Utilities 3-17 Syntax Element -y chunknum database Specifies the name of a database that you want to check for consistency Specifies the local database that contains a data type that you want to check Specifies the remote database that contains a data type that you want to check Specifies the name of a dbspace that contains a fragment you want to check for consistency db1 db2 frag_dbs index_name logical pagenum object owner Purpose Repairs indexes when errors are detected Specifies a decimal value that you use to indicate a particular chunk Key Considerations None. Restrictions: Value must be an unsigned integer greater than 0. Chunk must exist. Additional Information: Execute the -pe option to learn which chunk numbers are associated with specific dbspaces, blobspaces or sbspaces. References: Syntax must conform to the Identifier segment; see Informix Guide to SQL: Syntax. Additional Information: Optionally specify the local database server name using the format db1@server1. Additional Information: Optionally specify the remote database server name using the format db2@server2. Restrictions: Dbspace must exist and contain the fragment that you want to check for consistency. References: Syntax must conform to the Identifier segment; see Informix Guide to SQL: Syntax. Specifies the name of the index that Restrictions: Index must exist on table and in you want to check for consistency database specified. Specifies an integer value that you use to indicate a particular page in a tblspace References: Syntax must conform to the Identifier segment; see Informix Guide to SQL: Syntax. Restrictions: Value must be an unsigned integer between 0 and 16,777,215, inclusive. Additional Information: Value can be expressed as an unsigned integer or hexadecimal that begins with 0x identifier. Specifies the name of the Additional Information: If you do not specify an DataBlade, cast, operator class, object name, the database server compares all user-defined data type, or UDR that objects of the same type with the same name and you want to check owner. Specifies the owner of a table Restrictions: You must specify the current owner of the table. References: Syntax must conform to the Table Name segment; see Informix Guide to SQL: Syntax. (4 of 5) 3-18 IBM Informix Administrator’s Reference Syntax Element pagenum partnum rowid sbspace server table tblspacenum Purpose Indicates the page number of the sbspace metadata portion to check and display Identifies the sbspace metadata partition to check and display Identifies the rowid of the row whose contents you want to display. The rowid is displayed as part of oncheck -pD output Specifies the name of the sbspace that you want to check for consistency Specifies the database server name Specifies the name of the table that you want to check for consistency Identifies the tblspace whose contents you want to display Key Considerations None. None. Restrictions: Value must be an unsigned integer between 0 and 4,277,659,295, inclusive. Additional Information: Value can be expressed as an unsigned integer or hexadecimal that begins with 0x identifier. None. Additional Information: If you omit the database server name, oncheck uses the name that INFORMIXSERVER specifies. Additional Information: Table exists when you execute the utility. References: Syntax must conform to the Table Name segment; see Informix Guide to SQL: Syntax. Restrictions: Value must be an unsigned integer between 0 and 208,666,624, inclusive. Additional Information: Value can be expressed as an unsigned integer or hexadecimal that begins with 0x identifier. (5 of 5) Utilities 3-19 Check System Catalog Tables with -cc Check System Catalog Tables with -cc The -cc option checks all system catalog tables for the specified database. If you do not specify a database, it checks all system catalog tables for all databases. Before you execute oncheck, execute the SQL statement UPDATE STATISTICS to ensure that an accurate check occurs. To check a table, oncheck compares each system catalog table to its corresponding entry in the tblspace tblspace. (See “Structure of the Tblspace Tblspace” on page 5-8.) The -pc option performs the same checks and also displays the system catalog information, including the physical address, type of locking used, row size, number of keys, extent use, the number of pages allocated and used, tblspace partnum, and index use for each table. oncheck -cc oncheck -cc superstores_demo Check Pages with -cd and -cD The -cd option reads all pages, excluding blobpages and sbpages, from the tblspace for the specified database, table, or fragment and checks each page for consistency. It checks entries in the bitmap page against the pages to verify mapping. If the database contains fragmented tables, but you do not specify a fragment, the option checks all fragments in the table. If you do not specify a table, it checks all tables in the database. (The -pd option displays a hexadecimal dump of specified pages but does not check for consistency.) For both the -cd and -cD options, the oncheck utility locks each table as it checks the indexes for the table. To repair the pages, specify oncheck -cd -y or -cD -y. The -cD option performs checks similar to those performed when you use the -cd option, but it includes a consistency check of blobpages. The -cD option checks only the header of each blobpage for consistency. Because oncheck does not read the entire page, it does not compare beginning time stamps (stored in the header) with ending time stamps (stored at the end of a blobpage). The -cD -y option also cleans up orphaned simple large objects in blobspaces (which could occur after a rollback across several log files). 3-20 IBM Informix Administrator’s Reference Check the Chunk Free List with -ce and -pe To monitor blobspace blobpages, refer to oncheck -pB. (See “Display Blobspace Statistics with -pB” on page 3-24). The following example checks the data rows, including simple large objects and smart large objects, in the catalog table: oncheck -cD superstores_demo:catalog If oncheck finds an inconsistency, it displays a message similar to the following one: BAD PAGE 2:28: pg_addr 2:28 != bp-> bf_pagenum 2:69 The physical address 2:28 represents page 28 of chunk number 2. If oncheck finds no inconsistencies, it displays a header similar to the following one for each table that it checks: TBLSPACE data check for stores_demo:informix.customer If you specify a single fragment, oncheck displays a single header for that fragment. The oncheck utility displays a header similar to the following one for fragmented tables, one per fragment: TBLspace data check for stores_demo:informix.tab1 Table fragment in DBspace db1 If an index that uses an access method provided by a DataBlade module cannot find the access method, you receive the following message: -9845 Access method access_method_name does not exist in database. Ensure that the DataBlade installation was successful. Check the Chunk Free List with -ce and -pe The -ce option checks each chunk free list and corresponding free space and each tblspace extent. (See “Next-Extent Allocation” on page 5-17 and “Structure of the Chunk Free-List Page” on page 5-7, respectively.) The oncheck process verifies that the extents on disk correspond to the current control information that describes them. The -pe option performs the same checks and also displays the chunk and tblspace extent information during the check. oncheck -ce oncheck -pe Utilities 3-21 Check Index Node Links with -ci and -cI The -ce and -pe options also check blobspaces, smart-large-object extents, and user-data and metadata information in sbspace chunks. For information about using oncheck -ce and -pe, see managing disk space in the Administrator’s Guide. Check Index Node Links with -ci and -cI The -ci option checks the ordering of key values and the consistency of horizontal and vertical node links for all indexes associated with the specified table. (See “Structure of B-Tree Index Pages” on page 5-26.) If you do not specify an index, the option checks all indexes. If you do not specify a table, the option checks all tables in the database. If the option detects inconsistencies, it prompts you for confirmation to repair the problem index. If you specify the -y (yes) option, indexes are automatically repaired. If you specify the -n (no) option, the problem is reported but not repaired; no prompting occurs. If oncheck does not find inconsistencies, the following message appears: validating indexes...... The message displays the names of the indexes that oncheck is checking. Index rebuilding can be time consuming if you use oncheck. Processing is usually faster if you use the SQL statements DROP INDEX and CREATE INDEX to drop the index and re-create it. The -cI option performs the same checks as -ci, but it also checks that the key value tied to a rowid in an index is the same as the key value in the row. The same -ci repair options are available with -cI. The following example checks all indexes on the customer table: oncheck -cI -n stores_demo:customer The following example checks the index zip_ix on the customer table: oncheck -cI -n stores_demo:customer#zip_ix 3-22 IBM Informix Administrator’s Reference Check Reserved Pages with -cr and -cR By default, the database server does not place a shared lock on the table when you check an index with the oncheck -ci or -cI options unless the table uses page locking. For absolute assurance of a complete index check, you can execute oncheck with the -x option. With the -x option, oncheck places a shared lock on the table, and no other users can perform updates, inserts, or deletes until the check has completed. For more information on option -x, see “Turn On Locking with -x” on page 3-28. When you execute oncheck on an external index, the user-defined access method is responsible for checking and repairing an index. If an index that employs a user-defined access method cannot find the access method, the database server reports an error. The oncheck utility does not repair inconsistencies in external indexes. Check Reserved Pages with -cr and -cR The -cr option checks each of the root dbspace reserved pages (see “Reserved Pages” on page 5-4) as follows: ■ It validates the contents of the ONCONFIG file with the PAGE_CONFIG reserved page. ■ It ensures that all chunks can be opened, that chunks do not overlap, and that chunk sizes are correct. The following example checks each of the root dbspace reserved pages: oncheck -cr The -cR option performs the same operations as the -cr option, but it also checks all logical-log and physical-log pages for consistency. The -cr option is considerably faster because it does not check the log-file pages. If you have changed the value of a configuration parameter (either through ISA or by editing the configuration file), but you have not yet reinitialized shared memory, oncheck -cr and oncheck -cR detect the inconsistency and return an error message. If oncheck -cr does not display any error messages after you execute it, you can assume that all three items in the preceding list were checked successfully. Utilities 3-23 Check and Display Sbspaces with -cs, -cS, -ps, -pS Check and Display Sbspaces with -cs, -cS, -ps, -pS The -cs option checks sbspaces. The -ps option checks sbspaces and extents. If you do not specify the sbspace name, these options check all sbspaces. The following example checks the sbspace test_sbspace: oncheck -cs test_sbspace The -cS and -pS options validate and display metadata for an sbspace. The -pS option also lists extents and header information for smart large objects. The following example checks and displays metadata for test_sbspace: oncheck -ps test_sbspace If you specify rootdbs as the sbspace name with the -cs or -ps options, oncheck checks the root dbspace. For information about using oncheck -cs, -cS, -ps, and -pS, see monitoring sbspaces in the Administrator’s Guide. Display Blobspace Statistics with -pB The -pB option displays statistics that describe the average fullness of blobspace blobpages in a specified table. These statistics provide a measure of storage efficiency for individual simple large objects in a database or table. If you do not specify a table or fragment, the option displays statistics for the entire database. (See optimizing blobspace blobpage size in the chapter on managing disk space in the Administrator’s Guide.) oncheck -pB photo_base:photos Display Rows in Hexadecimal Format with -pd and -pD The -pd option takes a database, a table, a fragment, and a specific rowid or tblspace number and logical page number as input. In every case, -pd prints page-header information and displays the specified rows for the database object (database, table, fragment, internal rowid, or page number) that you specify in hexadecimal and ASCII format. No checks for consistency are performed. If you specify an internal rowid (expressed as a hexadecimal value), the rowid maps to a particular page, and all rows from that page are printed. 3-24 IBM Informix Administrator’s Reference Display Index Information with -pk, -pK, -pl, -pL If you specify a logical page number (expressed as a decimal), all the rows of the tblspace number with the logical page number are printed. If you specify a fragment, all the rows in the fragment are printed, with their rowids, forward pointers, and page type. If you specify a table, all the rows in the table are printed, with their rowids, forward pointers, and page type. If you specify a database, all the rows in all the tables in the database are printed. TEXT and BYTE column descriptors stored in the data row are printed, but TEXT and BYTE data itself is not. The -pD option prints the same information as -pd. In addition, -pD prints TEXT and BYTE values stored in the tblspace or header information for simple large objects stored in a blobspace blobpage. oncheck -pd stores_demo:customer,frgmnt1 oncheck -pd stores_demo:customer oncheck -pD stores_demo:customer 0x101 Display Index Information with -pk, -pK, -pl, -pL Repair options are available for each option. The -pk option performs the same checks as the -ci option. (See “Check Index Node Links with -ci and -cI” on page 3-22.) In addition, -pk displays the key values for all indexes on the specified table as it checks them. The -pK option performs the same checks as the -cI option. The -pK option displays the key values and rowids as it checks them. The -pl option performs the same checks as the -ci option and displays the key values, but it checks only leaf-node index pages. It ignores the root and branch-node pages. See “Structure of B-Tree Index Pages” on page 5-26. The -pL option performs the same checks as the -cI option and displays the key values and rowids, but it checks only leaf-node index pages. It ignores the root and branch-node pages. oncheck -pL -n stores_demo.customer Utilities 3-25 Display the Contents of a Logical Page with -pp and -pP The following example displays information about all indexes on the customer table: oncheck -pl -n stores_demo:customer The following example displays information about the index zip_ix, which was created on the customer table: oncheck -pl -n stores_demo:customer#zip_ix By default, the database server does not place a shared lock on the table when you check an index with the oncheck -pk, -pK, -pl, or -pL options unless the table uses page locking. For absolute assurance of a complete index check, you can execute oncheck with the -x option. With the -x option, oncheck places a shared lock on the table, and no other users can perform updates, inserts or deletes until the check has completed. For more information on option -x, see “Turn On Locking with -x” on page 3-28. Display the Contents of a Logical Page with -pp and -pP The -pp option requires as input either of the following values: ■ A tblspace number and logical page number If the table that you want to check is fragmented, you must also supply the name of the dbspace in which the fragment is located. ■ A database name, table name, and an Informix internal rowid You can obtain this internal rowid with the oncheck -pD command. This internal rowid is not the serial rowid that is assigned in tables created with the CREATE TABLE tabname WITH ROWIDS statement. For more information, see “Definition of Rowid” on page 5-21. Use the -pp option to dump the contents of the logical page number contained in the rowid. The page contents appear in ASCII format. The display also includes the number of slot-table entries on the page. 3-26 IBM Informix Administrator’s Reference Display Reserved-Page Information with -pr and -pR The -pP option provides the same information as the -pp option but requires a chunk number and offset as input. oncheck -pp stores_demo:orders 0x211 oncheck -pp oncheck -pp oncheck -pP oncheck -pP # database:owner.table, # fragment rowid stores_demo:informix.customer,frag_dbspce1 0x211 0x100000a 25 # specify the tblspace number and # logical page number 3 15 # prints the page at offset 15 of chunk 3 1 12 # prints the first page of root chunk free list Display Reserved-Page Information with -pr and -pR The -pr and -pR options perform the same checks as oncheck -cr and oncheck -cR, respectively, and also display the reserved-page information. The -pR option displays detailed information about logical-log and physicallog pages, marking the start and end of the active physical-log pages. (For a description of the -cr option, see “Check Reserved Pages with -cr and -cR” on page 3-23.) For a listing and explanation of oncheck -pr output, see “Reserved Pages” on page 5-4. oncheck -pr If you have changed the value of a configuration parameter (either through ISA or by editing the configuration file), but you have not yet reinitialized shared memory, oncheck -pr and oncheck -pR detect the inconsistency and return an error message. Display Tblspaces for a Table or Fragment with -pt and -pT The -pt option prints a tblspace report for a given table or fragment whose name and database you specify when you execute oncheck at the command line. The report contains general allocation information including the maximum row size, the number of keys, the number of extents, their sizes, the pages allocated and used per extent, the current serial value, and the date that the table was created. The Extents fields list the physical address for the tblspace tblspace entry for the table and the address of the first page of the first extent. If you do not specify a table, the option displays this information for all tables in the database. Utilities 3-27 Turn On Locking with -x The -pT option prints the same information as the -pt option. In addition, the -pT option displays index-specific information and page-allocation information by page type (for dbspaces). Output for both -pt and -pT contains listings for Number of pages used. The value shown in the output for this field is never decremented because the disk space allocated to a tblspace as part of an extent remains dedicated to that extent even after you free space by deleting rows. For an accurate count of the number of pages currently used, refer to the detailed information on tblspace use (organized by page type) that the -pT option provides. oncheck -pT stores_demo:customer For examples of using oncheck -pt and -pT, see managing disk space in the Administrator’s Guide and the Performance Guide. Turn On Locking with -x If you append the -x option to the index-checking options, oncheck places a shared lock on affected tables while it checks the indexes, meaning no other users can perform inserts, updates, and deletions while oncheck checks or prints the index. Without the -x option for tables with row locking, oncheck only places an IS (intent shared) lock on the table, which prevents actions such as dropping the table or the indexes during the check. You can append the -x option to the -ci, -cI, -pk, -pK, -pl, and -pL options. For example, the following sample command instructs oncheck to lock indexes for the customer table while it validates the order of key values, validates horizontal links, and ensures that no node appears twice in the index: oncheck -cix stores_demo:customer When you specify option -x, oncheck locks indexes for tables that use row locking. If oncheck detects page-lock mode, it displays a warning message and places a shared lock on the table regardless. 3-28 IBM Informix Administrator’s Reference Send Special Arguments to the Access Method with -u Send Special Arguments to the Access Method with -u You can use the -u option to send special arguments to the access method. The possible arguments depend on the access method. For example, the R-tree access method supports the display option, as the following example shows: oncheck -pl -u "display" Use commas to separate multiple arguments in the argument string. For information on valid arguments for your access method, refer to the user manual for your access method. ondblog: Change Logging Mode The ondblog utility lets you change the logging mode for one or more databases. If you turn on transaction logging for a database, you must create a level-0 backup of all the storage spaces that contain data in the database before the change takes effect. For more information and examples, see the following topics in the chapter on managing database-logging status in the Administrator’s Guide: ■ Modifying the database-logging status ■ Modifying table-logging status Utilities 3-29 ondblog: Change Logging Mode Syntax ondblog buf unbuf nolog db_list -f dbfile ansi cancel Element buf unbuf nolog ansi cancel -f dbfile db_list 3-30 Purpose Sets the logging mode so that transaction information is written to a buffer before it is written to a logical log Sets the logging mode so that data is not written to a buffer before it is written to a logical log Sets the logging mode so that no database transactions are logged Changes database logging to be ANSI compliant Cancels the logging-mode change request before the next level-0 backup occurs Changes the logging status of the databases that are listed (one per line) in the text file whose pathname is given by dbfile Names a space-delimited list of databases whose logging status is to be changed IBM Informix Administrator’s Reference Key Considerations None. None. None. Additional Information: Once you create or convert a database to ANSI mode, you cannot change it back to any of the other logging modes. None. Additional Information: This command is useful if the list of databases is long or used often. Additional Information: If you do not specify anything, all databases that the database server manages are modified. oninit: Initialize the Database Server oninit: Initialize the Database Server Execute the oninit utility from the command line to initialize database server shared memory and bring the database server online. If you use the oninit -i option, you can also initialize disk space. On UNIX, you must be logged in as user root or informix to execute oninit. User informix should be the only member of the group informix. On Windows, you must be a member of the Informix-Admin group. Before you initialize the database server, set the INFORMIXSERVER environment variable to the dbservername that you chose when you set the configuration parameter DBSERVERNAME. INFORMIXSERVER is not required for initialization. However, if INFORMIXSERVER is not set, the database server does not build the sysmaster tables. Also, the DB-Access utility requires INFORMIXSERVER to be set. For information about what happens during initialization, see the chapter on initializing the database server in the Administrator’s Guide. Syntax oninit Initialize Shared Memory Only, p. 3-32 -y Initialize Disk Space and Shared Memory, p. 3-33 Element -y Purpose Key Considerations Causes the database server to None. automatically respond yes to all prompts Utilities 3-31 Initialize Shared Memory Only Initialize Shared Memory Only Initialize Shared Memory Only -p Element -p Purpose Directs oninit not to search for (and delete) temporary tables -s Initializes shared memory and leaves the database server in quiescent mode -s Key Considerations Additional Information: If you use this option, the database server returns to online mode more rapidly, but space used by temporary tables left on disk is not reclaimed. Additional Information: The database server should be in offline mode to initialize shared memory. See “Initializing Shared Memory with the -s Option.” Initializing Shared Memory with No Options If you execute oninit without options, the database server is left in online mode after shared memory is initialized. For example, the following commands take the database server offline and back online: onmode -ky oninit Initializing Shared Memory with the -s Option The -s option initializes shared memory and leaves the database server in quiescent mode. The following commands shut down and restart the database server in quiescent mode: onmode -ky oninit -s 3-32 IBM Informix Administrator’s Reference Initialize Disk Space and Shared Memory Initialize Disk Space and Shared Memory Initialize Disk Space and Shared Memory -i -s Element -i -s Purpose Key Considerations Causes the database server to initialize disk None. space and shared memory Leaves the database server in online mode after it initializes disk space When used with -i, causes the database None. server to be left in quiescent mode after disk initialization Warning: When you initialize disk space, the initialization destroys all data that your database server currently manages. The database server must be offline when you initialize disk space. Utilities 3-33 Specify the Number of Virtual Processors Specify the Number of Virtual Processors Use VPCLASS cpu,num and VPCLASS aio to specify the initial number of VPs for the CPU and AIO classes. For more information, see “VPCLASS” on page 1-126. The VPCLASS configuration parameter allows you to specify, for each class of virtual processors, the number of VPs that the database server should start on initialization. Alternatively, you can use NUMCPUVPS and NUMAIOVPS to specify the initial number of VPs for the CPU and AIO classes. However, you cannot use both VPCLASS and NUMCPUVPS and NUMAIOVPS in the same configuration file. If your ONCONFIG file contains conflicting parameters, oninit returns one of the following messages: oninit: Can't mix VPCLASS cpu and NUMCPUVPS, SINGLE_CPU_VP, AFF_SPROC, AFF_NPROCS, or NOAGE parameters oninit: Can't mix VPCLASS aio and NUMAIOVPS parameters For more information, refer to “VPCLASS” on page 1-126. Bring Up Database Server in Recovery Mode -r Element -r Purpose Starts the database server in recovery mode Also switches the database server mode for a High-Availability Data Replication pair 3-34 IBM Informix Administrator’s Reference Key Considerations Use this option to switch from: ■ Primary mode to secondary mode ■ Secondary mode to primary mode For more information, see data replication in the Administrator’s Guide. onlog: Display Logical-Log Contents onlog: Display Logical-Log Contents The onlog utility displays the contents of a logical-log file, either on disk or on backup. The onlog output is useful in debugging situations when you want to track a specific transaction or see what changes have been made to a specific tblspace. (For information about interpreting the logical-log file contents, see Chapter 4, “Interpreting Logical-Log Records.”) Any user can run all of the onlog options except the -l option. Only user informix on UNIX or a member of the Informix-Admin group on Windows can run the -l option. If the database server is in offline mode when you execute onlog, only the files on disk are read. If the database server is in quiescent or online mode, onlog also reads the logical-log records stored in the logical-log buffers in shared memory (after all records on disk have been read). When the database server reads a logical-log file with status U from disk while in online mode, the database server denies all access to the logical-log files, effectively stopping database activity for all sessions. (For more information, see “onstat -l” on page 3-133.) For this reason, Informix recommends that you wait until the files have been backed up and then read the contents of the logical-log files from backup. Syntax onlog Log-Record Read Filters, page 3-37 Log-Record Display Filters, page 3-38 -q Element -q Purpose Suppresses the initial header and the one-line header that appears every 18 records by default Key Considerations None. Utilities 3-35 onlog: Display Logical-Log Contents Read Filters You direct onlog to read the following portions of the logical log as it searches for records to display: ■ Records stored on disk ■ Records stored on backup media ■ Records from the specified logical-log file By default, onlog displays the logical-log record header, which describes the transaction number and the record type. The record type identifies the type of operation performed. In addition to the header, you can use the read filters to direct onlog to display the following information: ■ Logical-log record header and data (including copies of simple large objects stored in a dbspace or tblspace) ■ Copies of blobpages from blobspaces They are copied from the logical-log backup only. They are not available from disk. Display Filters You can display every logical-log record header, or you can specify output based on the following criteria: ■ Records associated with a specific table ■ Records initiated by a specific user ■ Records associated with a specific transaction If an Error Is Detected If onlog detects an error in the log file, such as an unrecognizable log type, it displays the entire log page in hexadecimal format and terminates. 3-36 IBM Informix Administrator’s Reference onlog: Display Logical-Log Contents Log-Record Read Filters The onlog utility uses the pathnames that are stored in the root dbspace reserved pages to locate the logical-log files. If you use ON-Bar to back up the logical logs, onlog asks the storage manager to retrieve the appropriate logical-log records from the backup media. Log-Record Read Filters -n uniqid -d device -b Element -b -d device Purpose Displays logical-log records associated with blobspace blobpages Names the pathname of the storage device where the desired logical-log backup is mounted Key Considerations Additional Information: The database server stores these records on the logical-log backup media as part of blobspace logging. Restriction: If you use ontape, the device that you name must be the same as the pathname of the device assigned to the configuration parameter LTAPEDEV. If the -d option is not used, onlog reads the logical-log files stored on disk, starting with the logical-log file with the lowest logid. Additional Information: You do not need to use the -d option if you use ON-Bar because the storage manager retrieves the logical-log records from the storage device. -n uniqid References: For pathname syntax, see your operatingsystem documentation. Directs onlog to read only Additional Information: The uniqid is the unique ID the logical-log records number of the logical log. It marks how many times the disk contained in the log file that space was used for the logical log. To determine the uniqid you specify with uniqid. of a particular logical-log file, use the onstat -l command. If you do not use the -n option, onlog reads all logical-log files that are available (either on disk or on tape). References: For information about the onstat utility, see “onstat: Monitor Database Server Operation” on page 3-104. Utilities 3-37 onlog: Display Logical-Log Contents Log-Record Display Filters Log-Record Display Filters 1 1 1 1 Element -l -t tblspace_num -u username -x transaction_id Purpose Displays the long listing of the logical-log record. -t tblspace_num Key Considerations Additional Information: The long listing of a log record includes a complex hexadecimal and ASCII dump of the entire log record. The listing is not intended for casual use. Displays records Restrictions: Unsigned integer. Number, greater than 0, associated with the must be in the partnum column of the systables system tblspace that you specify. catalog table. -u username Displays records for a specific user. -x transaction_id Displays only records associated with the transaction that you specify. 3-38 -l IBM Informix Administrator’s Reference Additional Information: Specify this value as either an integer or hexadecimal value. (If you do not use a 0x prefix, the value is interpreted as an integer.) To determine the tblspace number of a particular tblspace, query the systables system catalog table as described in “Tblspace Numbers” on page 5-9. Restrictions: User name must be an existing login name. User name must conform to operating-system-specific rules for login name. Restriction: Value must be an unsigned integer between 0 and TRANSACTIONS - 1, inclusive. Additional Information: You should need to use the -x option only in the unlikely case that an error is generated during a rollforward. When this situation occurs, the database server sends a message to the message log that includes the transaction ID of the offending transaction. You can use this transaction ID with the -x option of onlog to investigate the cause of the error. onmode: Change Mode and Shared Memory If you do not specify any options, onlog displays a short listing of all the records in the log. You can combine options with any other options to produce more selective filters. For example, if you use both the -u and -x options, onlog displays only the activities that the specified user initiated during the specified transaction. If you use both the -u and -t options, onlog displays only the activities initiated by the specified user and associated with the specified tblspace. onmode: Change Mode and Shared Memory The onmode flags determine which of the following operations onmode performs: ■ Change the database server operating mode. ■ Force a checkpoint. ■ Change residency of the resident and virtual portions of shared memory. ■ Switch the logical-log file. ■ Kill a database server session. ■ Add a shared-memory segment to the virtual shared-memory portion. ■ Add or remove virtual processors. ■ Regenerate a .infos file. ■ Set decision-support parameters. ■ Free unused memory segments. ■ Override the WAIT mode of the ONDBSPACEDOWN configuration parameter. ■ The onmode -b option to change data to an earlier database server format. For information about migrating from or reverting to earlier versions of the database server, see the Informix Migration Guide. ■ The onmode -d option to set data-replication types. ■ Set SQL statement cache options. If you do not use any options, the database server returns a usage statement. Utilities 3-39 Syntax On UNIX, you must be user root or user informix to execute onmode. On Windows, you must be a member of the Informix-Admin group. Syntax onmode Change Database Server Mode, p. 3-41 Force a Checkpoint, p. 3-44 Switch the Logical-Log File, p. 3-46 Kill a Database Server Session, p. 3-46 Add a Shared-Memory Segment, p. 3-50 Add or Remove Virtual Processors, p. 3-51 Regenerate .infos File, p. 3-55 Change Decision-Support Parameters, p. 3-56 Free Unused Memory Segments, p. 3-58 Override ONDBSPACEDOWN WAIT Mode, p. 3-59 Change Shared-Memory Residency, p. 3-45 Kill a Distributed Transaction, p. 3-47 Set Data-Replication Types, p. 3-48 Change Usage of the SQL Statement Cache, p. 3-60 Change Settings for the SQL Statement Cache, p. 3-61 Change Database Format with onmode -b See Informix Migration Guide. 3-40 IBM Informix Administrator’s Reference -y Change Database Server Mode Element -y Purpose Key Considerations Causes the database server to automatically respond yes None. to all prompts Change Database Server Mode Change Database Server Mode -k -m -s -u Element -k -m -s -u Purpose Key Considerations Takes the database server to offline Additional Information: To reinitialize shared memory, mode and removes shared memory shut down and restart the database server. Takes the database server from quiescent to online mode Shuts down the database server gracefully Shuts down the database server immediately References: See “Taking the Database Server to Offline Mode with the -k Option” on page 3-42. References: See “Bringing the Database Server Online with the -m Option” on page 3-42. Additional Information: Users who are using the database server are allowed to finish before the database server comes to quiescent mode, but no new connections are allowed. When all processing is finished, -s takes the database server to quiescent mode. The -s option leaves shared memory intact. References: See “Shutting Down the Database Server Gracefully with the -s Option” on page 3-42. Additional Information: This option brings the database server to quiescent mode without waiting for users to finish their sessions. Their current transactions are rolled back, and their sessions are terminated. References: See “Shutting Down the Database Server Immediately with the -u Option” on page 3-42. Utilities 3-41 Change Database Server Mode The following sections describe the options that take the database server from one mode to another. Taking the Database Server to Offline Mode with the -k Option The -k option takes the database server to offline mode and removes database server shared memory. A prompt asks for confirmation. Another prompt asks for confirmation to kill user threads before the database server comes offline. If you want to eliminate these prompts, execute the -y option with the -s option. Bringing the Database Server Online with the -m Option The -m option brings the database server online from quiescent mode. Shutting Down the Database Server Gracefully with the -s Option The -s option causes a graceful shutdown. Users who are using the database server are allowed to finish before the database server comes to quiescent mode, but no new connections are allowed. When all processing is finished, -s takes the database server to quiescent mode. The -s option leaves shared memory intact. A prompt asks for confirmation. If you want to eliminate this prompt, execute the -y option with the -s option. Shutting Down the Database Server Immediately with the -u Option The -u option causes immediate shutdown. This option brings the database server to quiescent mode without waiting for users to finish their sessions. Their current transactions are rolled back, and their sessions are terminated. A prompt asks for confirmation. Another prompt asks for confirmation to kill user threads before the database server comes to quiescent mode. If you want to eliminate these prompts, execute the -y option with the -s option. 3-42 IBM Informix Administrator’s Reference Change Database Server Mode UNIX Changing Database Server Mode with ON-Monitor You can also use ON-Monitor options to change the database server mode. The following table shows ON-Monitor options that are equivalent to the onmode options. onmode Option ON-Monitor Option -k Take-Offline -m On-Line -s Graceful-Shutdown -u Immediate-Shutdown Utilities 3-43 Force a Checkpoint Force a Checkpoint Force a Checkpoint -c fuzzy block unblock Element -c Purpose Forces a checkpoint that flushes the buffers to disk block Blocks the database server from any transactions unblock fuzzy Unblocks the database server Performs a fuzzy checkpoint Key Considerations Additional Information: You can use the -c option to force a sync checkpoint if the most recent checkpoint record in the logical log was preventing the logical-log file from being freed (status U-B-L). Additional Information: While the database server is blocked, users can access it in read-only mode. Use this option to perform an external backup on Dynamic Server. References: For more information, see the Backup and Restore Guide. When the database server is unblocked, data transactions and normal database server operations can resume. Use this option after you complete an external backup on Dynamic Server. References: For more information, see the Backup and Restore Guide. Additional Information: Use the onmode -c fuzzy option to force a fuzzy checkpoint. Then use the onstat -b command to check the number of modified (dirty) buffers. The modified buffers that are still in the buffer cache contain fuzzy transactions. References: For more information, see the chapter on checkpoints and fast recovery in the Administrator’s Guide. 3-44 IBM Informix Administrator’s Reference Change Shared-Memory Residency Change Shared-Memory Residency Change SharedMemory Residency -n -r Element -n -r Purpose Ends forced residency of the resident portion of shared memory Starts forced residency of the resident portion of shared memory Key Considerations Additional Information: This command does not affect the value of RESIDENT, the forced-residency parameter in the ONCONFIG file. Additional Information: This command does not affect the value of RESIDENT, the forced-memory parameter in the ONCONFIG file. Important: Set the RESIDENT parameter to 1 before you use the onmode -r or -n options. For information on using the forced-residency parameter to turn residency on or off for the next time that you restart the database server, see the chapter on managing shared memory in the Administrator’s Guide. Utilities 3-45 Switch the Logical-Log File Switch the Logical-Log File Switch the LogicalLog File -l Element -l Purpose Switches the current logical-log file to the next logical-log file Key Considerations Additional Information: You must use onmode to switch to the next logical-log file. References: For information on switching to the next logical-log file, see the chapter on managing logical-log files in the Administrator’s Guide. Kill a Database Server Session Kill a Database Server Session -z sid Element -z sid Purpose Kills the session that you specify in sid Key Considerations Restrictions: This value must be an unsigned integer greater than 0 and must be the session identification number of a currently running session. To use the -z option, first obtain the session identification (sessid) with onstat -u, then execute onmode -z, substituting the session identification number for sid. 3-46 IBM Informix Administrator’s Reference Kill a Distributed Transaction When you use onmode -z, the database server attempts to kill the specified session. If the database server is successful, it frees any resources that the session holds. If the database server cannot free the resources, it does not kill the session. If the session does not exit the section or release the latch, the database server administrator can take the database server offline, as described in “Taking the Database Server to Offline Mode with the -k Option” on page 3-42, to close all sessions. Kill a Distributed Transaction Kill a Distributed Transaction -Z address Element -Z address Purpose Kills a distributed transaction associated with the sharedmemory address address Key Considerations Restrictions: This argument must be the address of an ongoing distributed transaction that has exceeded the amount of time that TXTIMEOUT specifies. The address must conform to the operating-system-specific rules for addressing shared-memory. (The address is available from onstat -x output.) Additional Information: This option is not valid until the amount of time that the ONCONFIG parameter TXTIMEOUT specifies has been exceeded. The -Z option should rarely be used and only by an administrator of a database server involved in distributed transactions. References: For information on initiating independent actions in a two-phase commit protocol, see the chapter on multiphase commit protocols in the Administrator’s Guide. Distributed transactions provide the ability to query data on different database servers. Utilities 3-47 Set Data-Replication Types Warning: If applications are performing distributed transactions, killing one of the distributed transactions can leave your client/server database system in an inconsistent state. Try to avoid this situation. Set Data-Replication Types Set Data-Replication Types -d standard primary dbservername secondary Element -d Purpose Used to set the High-Availability Data-Replication type, either standard, primary, or secondary, as the following sections describe dbservername Identifies the database server name of the primary or secondary database server Key Considerations Restrictions: You can use the -d primary and -d secondary options only when the database server is in quiescent mode. You can use the -d standard option when the database server is in quiescent, online, or read-only mode. Restrictions: The dbservername argument must correspond to the DBSERVERNAME parameter in the ONCONFIG file of the intended secondary database server. It should not correspond to one of the database servers that the DBSERVERALIASES parameter specifies. Additional Information: The dbservername argument of the other database server in the data-replication pair and the type of a database server (standard, primary, or secondary) is preserved after reinitialization of shared memory. References: For more information, see range of values for the DBSERVERNAME configuration parameter in “DBSERVERNAME” on page 1-30. 3-48 IBM Informix Administrator’s Reference Set Data-Replication Types Using the -d standard Option The -d standard option drops the connection between database servers in a data replication pair (if one exists) and sets the database server type of the current database server to standard. This option does not change the mode or type of the other database server in the pair. Using the -d primary dbservername Option The -d primary dbservername option sets the database server type to primary and attempts to connect with the database server that dbservername specifies. If the connection is successful, data replication is turned on. The primary database server goes into online mode, and the secondary database server goes into read-only mode. If the connection is not successful, the database server comes to on-line mode, but data replication is not turned on. Using the -d secondary dbservername Option The -d secondary dbservername option sets the database server type to secondary and attempts to connect with the database server that dbservername specifies. If the connection is successful, data replication is turned on. The primary database server goes online, and the secondary database server goes into read-only mode. If the connection is not successful, the database server comes to read-only mode, but data replication is not turned on. Utilities 3-49 Add a Shared-Memory Segment Add a Shared-Memory Segment Add a SharedMemory Segment -a Element -a seg_size Purpose Allows you to add a new virtual shared-memory segment. Size is specified in kilobytes seg_size Key Considerations Restrictions: The value of seg_size must be a positive integer. It must not exceed the operating-system limit on the size of shared-memory segments. Ordinarily, you do not need to add segments to the virtual portion of shared memory because the database server automatically adds segments as they are needed. However, as segments are added, the database server might reach the operating-system limit for the maximum number of segments before it acquires the memory that it needs. This situation typically occurs when SHMADD is set so small that the database server exhausts the number of available segments before it acquires the memory that it needs for some operation. If you manually add a segment that is larger than the segment specified by SHMADD, you can avoid exhausting the operating-system limit for segments but still meet the need that the database server has for additional memory. 3-50 IBM Informix Administrator’s Reference Add or Remove Virtual Processors Add or Remove Virtual Processors Add or Remove Virtual Processors -p number + AIO LIO PIO SHM SOC TLI +/- number CPU vpclass JVP Element -p number AIO Purpose Adds or removes virtual processors. The number argument indicates the number of virtual processors to add or remove Key Considerations Restrictions: You can use the -p option only when the database server is in online mode, and you can add to only one class of virtual processors at a time. If this value is a negative integer, processors are removed. If this value is a positive integer, processors are added. Limits: If you are removing virtual processors, the maximum cannot exceed the actual number of processors of the specified type. If you are adding virtual processors, the maximum number depends on the operating system. Performs nonlogging disk I/O to cooked disk spaces References: For more information, see the chapter on using virtual processors in the Administrator’s Guide. Also performs nonlogging I/O to raw disk spaces if kernel asynchronous I/O (KAIO) is not used. For more details, see “Adding and Dropping Virtual Processors” on page 3-53. (1 of 3) Utilities 3-51 Add or Remove Virtual Processors Element CPU Purpose Runs all session threads and some system threads Key Considerations Limits: Informix recommends that the number of CPU VPs not be greater than the number of physical processors. If KAIO is used, performs I/O to raw disk spaces, including I/O to physical and logical logs. Runs thread for KAIO where available or a single poll thread. JVP LIO PIO SHM SOC STR Executes Java user-defined routines in the Java Virtual Machine (JVM) Writes to the logical-log files if they are in cooked disk space The database server uses the number of CPU VPs to allocate resources for parallel database queries (PDQ). If you drop CPU VPs, your queries will run significantly slower. The Reinit field of the onstat -g mgm output displays information on the number of queries that are waiting for running queries to complete after an onmode -p command. Also see the Performance Guide. Specify more JVPs if you are running many Java UDRs. Use two LIO virtual processors only if the logical logs are in mirrored dbspaces. The database server allows a maximum of two LIO virtual processors. Writes to the physical log if it is Use two PIO virtual processors only if the physical log is in cooked disk space in a mirrored dbspace. The database server allows a maximum of two PIO virtual processors. Performs shared-memory You can use the SHM virtual processor even if the communication database server is not configured for shared-memory communication. Uses sockets to perform You can use the SOC virtual processor only if the database network communications server is configured for network connections through sockets. Performs stream pipe connections (2 of 3) 3-52 IBM Informix Administrator’s Reference Add or Remove Virtual Processors Element TLI vpclass Purpose Uses the Transport Layer Interface (TLI) to perform network communication Names a user-defined virtual processor class Key Considerations You can use the TLI virtual processor only if the database server is configured for network connections through TLI. Additional Information: Use the VPCLASS parameter in the ONCONFIG to define the user-defined virtualprocessor class. Specify more user-defined virtual processors if you are running many UDRs. Restrictions: On Windows, you can have only one userdefined virtual processor class at a time. Omit the number parameter in the onmode -p vpclass command. References: For more information on extension classes, see “VPCLASS” on page 1-126. (3 of 3) Adding and Dropping Virtual Processors The following rules about adding or dropping virtual processors apply: WIN NT/2000 ■ You can add but not drop virtual processors of the AIO, PIO, LIO, TLI, SHM, SOC, and STR classes. ■ You cannot add or drop virtual processors of the OPT, ADM, ADT, and MSC classes. The database server adds them automatically. ■ You can add or drop virtual processors of the CPU and user-defined (vpclass) classes. ■ On Windows, you can add a virtual processor of any class, but you cannot drop virtual processors. ♦ Utilities 3-53 Add or Remove Virtual Processors Dropping Virtual Processors Automatically Figure 3-2 shows the virtual processors that the database server starts automatically. You cannot add or drop these virtual processors with the onmode -p command. To drop these virtual processors, shut down and restart the database server. Figure 3-2 Virtual-Processor Classes That the Database Server Starts Automatically Virtual-Processor Class Description ADM Performs administrative functions ADT Runs auditing processes The database server starts one virtual processor in the audit class when you turn on audit mode by setting the ADTMODE parameter in the ONCONFIG file (IDS). MSC Services requests for system calls that require a large stack The database server starts this virtual processor automatically. OPT Performs I/O to the optical disk The database server starts one OPT virtual processor when you use the Optical Subsystem (IDS). Monitoring Poll Threads with onstat While the database server is online, you cannot drop a CPU virtual processor that is running a poll thread. To identify poll threads that run on CPU virtual processors, use the following command: onstat -g ath | grep 'cpu.*poll' The following onstat -g ath output shows two CPU virtual processors with poll threads. In this situation, you cannot drop to fewer than two CPU virtual processors. tid 8 9 3-54 tcb a362b90 a36e8e0 IBM Informix Administrator’s Reference rstcb 0 0 prty status vp-class 2 2 running 1cpu cond wait arrived name tlitcppoll 3cpu Regenerate .infos File For more information on the types of virtual processors, see the chapter on virtual processors and threads in the Administrator’s Guide. Regenerate .infos File Regenerate .infos File -R Element -R Purpose Re-creates the .infos.dbservername file Key Considerations Restrictions: Before you use the -R option, set the INFORMIXSERVER environment variable to match the DBSERVERNAME parameter from the ONCONFIG file. Do not use the -R option if INFORMIXSERVER is one of the DBSERVERALIAS names. Additional Information: For more information, see “.infos.dbservername” on page A-9. The database server uses information from the .infos.dbservername file when it accesses utilities. The database server creates and manages this file, and you should never need to do anything to the file. However, if .infos.dbservername is accidentally deleted, you must either re-create the file or shut down and restart the database server. Utilities 3-55 Change Decision-Support Parameters Change Decision-Support Parameters Change DecisionSupport Parameters -D max_priority -M kilobytes -Q queries -S scans Element -D max_priority Purpose Changes the value of MAX_PDQPRIORITY Key Considerations Restrictions: This value must be an unsigned integer between 0 and 100. Additional Information: Specify max_priority as a factor to temper user requests for PDQ resources. -M kilobytes References: For information on parameters used for controlling PDQ, see “MAX_PDQPRIORITY” on page 1-69 and the Performance Guide. Changes the value of Restrictions: This value must be an unsigned integer DS_TOTAL_MEMORY between 128 * DS_MAX_QUERIES and 1,048,576. Additional Information: Specify kilobytes for the maximum amount of memory available for parallel queries. References: For more information, see “DS_TOTAL_MEMORY” on page 1-45 and the Performance Guide. (1 of 2) 3-56 IBM Informix Administrator’s Reference Change Decision-Support Parameters Element -Q queries Purpose Changes the value of DS_MAX_QUERIES Key Considerations Restrictions: This value must be an unsigned integer between 1 and 8,388,608. Additional Information: Specify queries for the maximum number of concurrently executing parallel queries. -S scans Changes the value of DS_MAX_SCANS References: For information on parameters used for controlling PDQ, see “DS_MAX_QUERIES” on page 1-42 and the Performance Guide. Restrictions: This value must be an unsigned integer between 10 and 1,048,576. Additional Information: Specify scans for the maximum number of concurrently executing parallel scans. References: For information on parameters used for controlling PDQ, see “DS_MAX_SCANS” on page 1-43 and the Performance Guide. (2 of 2) These options allow you to change configuration parameters while the database server is online. The new values affect only the current instance of the database server; the values are not recorded in the ONCONFIG file. If you shut down and restart the database server, the values of the parameters revert to the values in the ONCONFIG file. For more information about these configuration parameters, see Chapter 1, “Configuration Parameters.” To check the current values for the MAX_PDQPRIORITY, DS_TOTAL_MEMORY, DS_MAX_SCANS, and DS_MAX_QUERIES configuration parameters, use onstat -g mgm. Utilities 3-57 Free Unused Memory Segments Free Unused Memory Segments Free Unused Memory Segments -F Element -F Purpose Frees unused memory segments Key Considerations None. When you execute onmode -F, the memory manager examines each memory pool for unused memory. When the memory manager locates blocks of unused memory, it immediately frees the memory. After the memory manager checks each memory pool, it begins checking memory segments and frees any that the database server no longer needs. Informix recommends that you run onmode -F from an operating-system scheduling facility regularly and after the database server performs any function that creates additional memory segments, including large index builds, sorts, or backups. Running onmode -F causes a significant degradation of performance for any users that are active when you execute the utility. Although the execution time is brief (1 to 2 seconds), degradation for a single-user database server can reach 100 percent. Systems with multiple CPU virtual processors experience proportionately less degradation. To confirm that onmode freed unused memory, check your message log. If the memory manager frees one or more segments, it displays a message that indicates how many segments and bytes of memory were freed. 3-58 IBM Informix Administrator’s Reference Override ONDBSPACEDOWN WAIT Mode Override ONDBSPACEDOWN WAIT Mode Override ONDBSPACEDOWN WAIT Mode -O Element -O Purpose Overrides the WAIT mode of the ONDBSPACEDOWN configuration parameter Key Considerations None. Use the onmode -O option only in the following circumstances: ■ ONDBSPACEDOWN is set to WAIT. ■ A disabling I/O error occurs that causes the database server to block all updating threads. ■ You cannot or do not want to correct the problem that caused the disabling I/O error. ■ You want the database server to mark the disabled dbspace as down and continue processing. When you execute this option, the database server marks the dbspace responsible for the disabling I/O error as down, completes a checkpoint, and releases blocked threads. Then onmode prompts you with the following message: This will render any dbspaces which have incurred disabling I/O errors unusable and require them to be restored from an archive. Do you wish to continue?(y/n) If onmode does not find any disabling I/O errors on noncritical dbspaces when you run the -O option, it notifies you with the following message: There have been no disabling I/O errors on any noncritical dbspaces. Utilities 3-59 Change Usage of the SQL Statement Cache Change Usage of the SQL Statement Cache Change Usage of the SQL Statement Cache -e mode Element onmode -e ENABLE onmode -e FLUSH onmode -e OFF onmode -e ON Purpose Enables the SQL statement cache Key Considerations User sessions use the cache only when they perform either of the following For more information, see the actions: material on improving query ■ Set the environment variable performance in the PerforSTMT_CACHE to 1 mance Guide. ■ Execute the SQL statement SET STATEMENT CACHE ON Flushes the statements that The onstat -g ssc ref_cnt field shows 0. are not in use from the SQL statement cache Turns off the SQL statement No statements are cached. cache Turns on the SQL statement All statements are cached unless the user cache turns it off with one of the following actions: ■ Set the environment variable STMT_CACHE to 0 ■ Execute the SQL statement SET STATEMENT CACHE OFF The onmode -e changes are in effect for the current database server session only. When you restart the database server, it uses the default STMT_CACHE parameter value in the ONCONFIG file. 3-60 IBM Informix Administrator’s Reference Change Settings for the SQL Statement Cache IDS Change Settings for the SQL Statement Cache Change Settings for the SQL Statement Cache -W STMT_CACHE_HITS hits STMT_CACHE_NOLIMIT value STMT_CACHE_SIZE value Element STMT_CACHE_HITS hits Purpose Specifies the number of hits (references) to a statement before it is fully inserted in the SQL statement cache Key Considerations You can only increase or reset the value of STMT_CACHE_HITS. The new value displays in the #hits field of the onstat-g ssc output. If hits = 0, the database server inserts all qualified statements and its memory structures in the cache. Set hits to 1 or more to exclude ad hoc queries If hits > 0 and the number of times the SQL from entering the statement has been executed is less than cache. STMT_CACHE_HITS, the database server inserts key-only entries in the cache. It inserts qualified statements in the cache after the specified number of hits have been made to the statement. ONCONFIG Parameter: STMT_CACHE_HITS (1 of 2) Utilities 3-61 Change Settings for the SQL Statement Cache Element STMT_CACHE_NOLIMIT value STMT_CACHE_SIZE size Purpose Controls whether statements are inserted in the SQL statement cache when its size is greater than the STMT_CACHE_SIZE value Key Considerations If value = 0, the database server inserts statements in the cache when its size is greater than the value of STMT_CACHE_SIZE. If value = 1, the database server always inserts statements in the cache. If none of the queries are shared, turn off STMT_CACHE_NOLIMIT to prevent the database server from allocating a large amount of memory for the cache. ONCONFIG Parameter: STMT_CACHE_NOLIMIT Specifies the size of the Default size: 512 kilobytes SQL statement cache in The new value displays in the maxsize field of kilobytes the onstat-g ssc output. The new cache size You can increase or decrease the size. takes effect the next time a statement is added to the cache. (If the cache size reaches the highwatermark value, the cache is cleaned.) ONCONFIG Parameter: STMT_CACHE_SIZE (2 of 2) SQL Statement Cache Examples The following are examples of onmode -W commands for changing SQL statement cache (SSC) settings. The changes are in effect for the current database server session only and do not change the ONCONFIG values. When you restart the database server, it uses the default SSC settings, if not specified in the ONCONFIG file, or the ONCONFIG settings. To make the changes permanent, set the appropriate configuration parameter. onmode -W STMT_CACHE_HITS 2 # number of hits before statement is # inserted into SSC onmode -W STMT_CACHE_NOLIMIT 1 # always insert statements into # the cache onmode -W STMT_CACHE_SIZE 1000 # change the SSC size the next # time a stmt is added 3-62 IBM Informix Administrator’s Reference Using ON-Monitor UNIX Using ON-Monitor Use the ON-Monitor utility to perform various administrative tasks. This section provides a quick reference for the ON-Monitor screens. To start ON-Monitor, execute the following command from the operating-system prompt: onmonitor If you are logged in as user informix or user root, the main menu appears. All users other than informix and root have access only to the Status menu. The ON-Monitor main menu displays the following menus: ■ Status menu ■ Parameters menu ■ Dbspaces menu ■ Mode menu ■ Force-Ckpt menu ■ Archive menu ■ Logical-Logs menu ■ Exit option These menus are shown on the following pages (Figure 3-3 on page 3-64 through Figure 3-9 on page 3-67). Navigating ON-Monitor and Using Help All menus and screens in ON-Monitor function in the same way. For menus, use the arrow keys or SPACEBAR to scroll to the option that you want to execute and press RETURN, or press the first capitalized letter of the option (usually the first letter). When you move from one option to the next by pressing SPACEBAR or an arrow key, the option explanation (line 2 of the menu) changes. If you want general instructions for a specific screen, press CTRL-W. If you need help to determine what you should enter in a field on the screen, use the TAB key to highlight the field and press CTRL-F or F2. Utilities 3-63 Using ON-Monitor Some of the menus display ellipses (...) on the far right or left side. The ellipses indicate that you can move in the direction of the dots, using the arrow keys or SPACEBAR, to view other options. Executing Shell Commands Within ON-Monitor To execute a shell command from within ON-Monitor, type an exclamation point (!) followed by the command. For example, to list the files in the current directory, type the following command: !ls ON-Monitor Screen Options Figure 3-3 Status Menu 3-64 Menu Description Profile Displays database server performance statistics Userthreads Displays the status of active user threads Spaces Displays status information about database server storage spaces and chunks Databases Displays the name, owner, and logging mode of the 100 first databases Logs Displays status information about the physical-log buffer, the physical log, the logical-log buffer, and the logical-log files Archive Displays a list of all backup tapes and logical-log files that you require to restore data using ontape data-Replication Displays High-Availability Data-Replication (HDR) status and configuration Output Stores the output of other status information in a specified file Configuration Copies the current database server configuration to a file IBM Informix Administrator’s Reference Using ON-Monitor Figure 3-4 Parameters Menu Menu Description Initialize Initializes database server disk space or modifies disk-space parameters Shared-Memory Initializes database server shared memory or modifies sharedmemory parameters perFormance Specifies the number of virtual processors for each VP class data-Replication Specifies the HDR parameters diaGnostics Specifies values for the diagnostics parameters pdQ Changes parameters for parallel database queries Add-Log Adds a logical-log file to a dbspace Drop-Log Drops a logical-log file from a dbspace Physical-Log Changes the size or the location of the database server physical log Figure 3-5 Dbspaces Menu Menu Description Create Creates a dbspace BLOBSpace Creates a blobspace Mirror Adds mirroring to an existing storage space or ends mirroring for a storage space Drop Drops a storage space from the database server configuration Info Displays the identification number, location, and fullness of each chunk assigned to a storage space (1 of 2) Utilities 3-65 Using ON-Monitor Menu Description Add_chunk Adds a chunk to a storage space datasKip Changes the database parameter Status Changes the status of a chunk in a mirrored pair (2 of 2) Figure 3-6 Mode Menu Menu Description Startup Initializes shared memory and takes the database server to quiescent mode On-Line Takes the database server from quiescent to online mode Graceful-Shutdown Takes the database server from online to quiescent mode so users can complete work ImmediateShutdown Takes the database server from online to quiescent mode in 10 seconds Take-Offline Detaches shared memory and immediately takes the database server to offline mode Add-Proc Adds virtual processors Drop-Proc Drops virtual processors deCision-support Sets decision-support parameters dynamically Figure 3-7 Force-Ckpt Menu 3-66 Menu Description Force-Ckpt Displays the time of the most-recent checkpoint or forces the database server to execute a checkpoint IBM Informix Administrator’s Reference Using ON-Monitor Figure 3-8 Archive Menu Menu Description Tape-Parameters Modifies the ontape parameters for the backup tape device Figure 3-9 Logical Logs Menu Menu Description Databases Modifies the logging status of a database Tape-Parameters Modifies the ontape parameters for the logical-log backup tape device Setting Configuration Parameters in ON-Monitor Figure 3-10 shows which ONCONFIG parameters correspond to the Initialization screen. DISK PARAMETERS Page Size [ 2] Kbytes Tape Dev. Block Size Log Tape Dev. Block Size Stage Blob {TAPEDEV} {TAPEBLK} {LTAPEDEV} {LTAPEBLK} {STAGEBLOB} Root Name Primary Path {ROOTNAME} {ROOTPATH} Mirror Path {MIRRORPATH} Mirror {MIRROR} Total Tape Size Figure 3-10 Initialization Screen with Parameter Names {TAPESIZE} Total Tape Size {LTAPESIZE} Root Size {ROOTSIZE} Root Offset {ROOTOFFSET} Phy. Log Size {PHYSFILE} Mirror Offset {MIRROROFFSET} Log. Log Size {LOGSIZE} Number of Logical Logs {LOGFILES} Utilities 3-67 Using ON-Monitor Figure 3-11 shows which ONCONFIG parameters correspond to the SharedMemory screen. SHARED MEMORY PARAMETERS Server Number {SERVERNUM} Server Name {DBSERVERN AME} Server Aliases {DBSERVERALIASES} Dbspace Temp {DBSPACETEMP} Deadlock Timeout {DEADLOCK_TIMEOUT} Dbspace Down Option {ONDBSPD OWN} Forced Residency {RESIDENCY} Number of Page Cleaners {CLEANERS Non Res. SegSize (K) {SHMVIRTSIZE} Stack Size (K) {STACKSIZE} Heterogeneous Commit {HETERO_COMMIT} Optical Cache Size (K) {OPCACHEMAX} Physical Log Buffer Size {PHYSBUFF} Transaction Timeout {TXTIME OUT} Logical Log Buffer Size {LOGBUFF} Index Page Fill Factor {FILLFAC TOR} Max # of Locks {LOCKS} Add SegSize {SHM ADD} Max # of Buffers {BUFFERS} Total Memory {SHMTO TAL} Resident Shared Memory size Kbytes [ ] Kbytes Page Size [ Figure 3-11 Shared-Memory Screen with Parameter Names 2] Figure 3-12 shows which ONCONFIG parameters correspond to the Performance Tuning screen. PERFORMANCE TUNING PARAMETERS Multiprocessor Machine {MULTIPROCESSOR} Dirty {LRU_MAX_DIRTY} Num Procs to Affinity {VPCLASS aff} Dirty {LRU_MIN_DIRTY} Proc num to start with {VPCLASS num} Interval {CKPTINTVL} LRU Max LRU Min Checkpoint Num of Read Ahead Pages {RA_PAGES} CPU VPs {RA_THRESHOLD} AIO VPs Single CPU VP Use OS Time Disable Priority Aging Offline Recovery Threads Online Recovery Threads Num of LRU queues {LRUS} 3-68 {VPCLASS cpu} Read Ahead Threshold {VPCLASS aio} {SINGLE_CPU_VP} NETTYPE settings: {USE_OS_TIME} Protocol Threads Users VP-class {VPCLASS noage} [ ] [ ] [ ] [ ] {OFF_RECVRY_THREADS} {ON_RECVRY_THREADS} IBM Informix Administrator’s Reference Figure 3-12 Performance Screen with Parameter Names Using ON-Monitor Figure 3-13 shows which ONCONFIG parameters correspond to the Data Replication screen. DATA REPLICATION PARAMETERS Interval Timeout Lost & Found {DRINTERVAL} {DRTIMEOUT} {DRLOSTFOUND} Figure 3-13 Data-Replication Screen with Parameter Names Figure 3-14 shows which ONCONFIG parameters correspond to the Diagnostics screen. DIAGNOSTIC PARAMETERS Message Log Console Msgs. Alarm Program {MSGPATH} {CONSOLE} {ALARMPROGRAM} Dump Dump Dump Dump Dump {DUMPSHMEM} {DUMPGCORE} {DUMPCORE} {DUMPCNT} {DUMPDIR} Shared Memory Gcore Core Count Directory Figure 3-14 Diagnostics Screen with Parameter Names Figure 3-15 shows which ONCONFIG parameters correspond to the PDQ screen. PARALLEL DATABASE QUERIES PARAMETERS Maximum Priority Decision Support Queries Decision Support Memory (Kbytes) Maximum Decision Support Scans Dataskip Optimizer Hint {MAX_PDQPRIORITY} {DS_MAX_QUERIES} {DS_TOTAL_MEMORY} {DS_MAX_SCANS} {DATASKIP} {OPTCOMPIND} Figure 3-15 PDQ Screen with Parameter Names Utilities 3-69 onparams: Modify Log-Configuration Parameters onparams: Modify Log-Configuration Parameters The onparams flags determine which of the following operations onparams performs. Any onparams command fails if a storage-space backup is in progress. If you do not use any options, onparams returns a usage statement. Function onparams Command Database Server Mode Add a logical-log file onparams -a -d dbspace [-i] Online, quiescent, or fast-recovery mode Drop a logical-log file onparams -d -l lognum Online, quiescent, or fast-recovery mode Change the size or location of the physical log onparams -p Quiescent mode only On UNIX, you must be logged in as user root or user informix to execute onparams. On Windows, you must be a member of the Informix-Admin group. Syntax onparams Add a Logical-Log File p. 3-71 Drop a Logical-Log File p. 3-72 Change Physical-Log Parameters p. 3-73 3-70 IBM Informix Administrator’s Reference Add a Logical-Log File Add a Logical-Log File Add a LogicalLog File -a -d dbspace -s size Element -a -d dbspace Purpose Adds a logical-log file to the end of the log-file list to the specified dbspace -i Key Considerations Additional Information: You can add a log file to a dbspace only if the database server has adequate contiguous space. The newly added log files have a status of A and are immediately available for use. You can add a log file during a backup. You can have a maximum of 32,767 logical-log files. Use onstat -l to view the status of your logical-log files. Informix recommends that you take a level-0 backup of the root dbspace and the dbspace that contains the log file as soon as possible. Restrictions: You cannot add a log file to a blobspace or sbspace. -i -s size References: Syntax must conform to the Identifier segment; see Informix Guide to SQL: Syntax. Inserts the logical-log Use this option when the ‘Log File Required’ alarm prompts you file after the current log to add a logical-log file. file Specifies a size in Restrictions: This value must be an unsigned integer greater kilobytes for the new than or equal to 200 kilobytes. logical-log file Additional Information: If you do not specify a size with the -s option, the size of the log file is taken from the value of the LOGSIZE parameter in the ONCONFIG file when database server disk space was initialized. References: For information on changing LOGSIZE, see the chapter on managing logical-log files in the Administrator’s Guide. Utilities 3-71 Drop a Logical-Log File Drop a Logical-Log File Drop a LogicalLog File -d -l lognum -y Element -d -l lognum Purpose Allows you to drop a logical-log file specified by the log file number Key Considerations Restrictions: This value must be an unsigned integer greater than or equal to 0. The database server requires a minimum of three logical-log files at all times. You cannot drop a log file if the database server is configured for three logical-log files. Drop log files one at a time. Additional Information: You can obtain the lognum from the number field of onstat -l. The sequence of lognum might be out of order. -y Causes the database server to automatically respond yes to all prompts You can drop a log file immediately that has a status of newly Added (A). If you drop a log file that has a status of Used (U) or Free (F), the database server marks it as Deleted (D) and drops it when you take a level-0 backup of all the dbspaces. None. When you move logical-log files to another dbspace, use the onparams commands to add and drop logical-log files. See moving a logical-log file, in the chapter on managing logical-log files in the Administrator’s Guide. 3-72 IBM Informix Administrator’s Reference Change Physical-Log Parameters Change Physical-Log Parameters Change Physical-Log Parameters -p Element -p -d dbspace -s size -y 1 -s size 1 -d dbspace Purpose Changes the location or size of the physical log Changes the location of the physical log to the specified dbspace -y Key Considerations Additional Information: You can use onparams -p with -s, -d, or both. The database server must be quiescent. Additional Information: The space allocated for the physical log must be contiguous. References: Syntax must conform to the Identifier segment; see the Informix Guide to SQL: Syntax. Changes the size (in kilobytes) of Restrictions: This value must be an unsigned integer the physical log greater than or equal to 200 kilobytes. Causes the database server to automatically respond yes to all prompts Warning: If you move the log to a dbspace without adequate contiguous space or increase the log size beyond the available contiguous space, a fatal shared-memory error occurs when you attempt to restart the database server with the new value. None. Backing Up After You Change the Physical-Log Size or Location Changes to the physical log do not take effect until you restart the database server. To restart the database server immediately, execute the onparams command with the -y option. Create a level-0 backup of the root dbspace immediately after you restart the database server. This backup is critical for proper recovery of the database server. Utilities 3-73 onspaces: Manage Storage Spaces Using a Text Editor to Change the Physical-Log Size or Location Another way to change the size or location of the physical log is to edit the ONCONFIG file and restart the database server. For information on changing the physical-log location and size, see the chapter on managing the physical log in the Administrator’s Guide. Examples of onparams Commands The following are examples of onparams commands: onparams onparams log onparams onparams dbspace1 -a -d rootdbs -s 1000 -a -d rootdbs -i # adds a 1000-KB log file to rootdbs # inserts the log file after the current -d -l 7 # drops log 7 -p -d dbspace1 -s 3000 # resizes and moves physical log to onspaces: Manage Storage Spaces You can perform the following tasks with the onspaces utility: 3-74 ■ Create a dbspace, temporary dbspace, blobspace, or extspace. ■ Create an sbspace or temporary sbspace. ■ Change sbspace default specifications. ■ Clean up stray smart large objects in sbspaces. ■ Drop a dbspace, blobspace, sbspace, or extspace. ■ Add a chunk to a dbspace or blobspace. ■ Add a chunk to an sbspace. ■ Drop a chunk in a dbspace, blobspace, or sbspace. ■ Start mirroring. ■ End mirroring. ■ Change status of a mirrored chunk. ■ Specify the DATASKIP parameter. IBM Informix Administrator’s Reference onspaces: Manage Storage Spaces When you use onspaces or ISA to manage a storage space, the database server updates information about the space in the oncfg_servername.servernum file. For more information on the oncfg* file, refer to Appendix A, “Files That the Database Server Uses.” You can specify a maximum of 2047 chunks for a storage space, and a maximum of 2047 storage spaces on the database server system. The storage spaces can be any combination of dbspaces, blobspaces, and sbspaces. On UNIX, you must be logged in as user root or user informix to execute onspaces. On Windows, you must be a member of the Informix-Admin group. Utilities 3-75 Syntax Syntax onspaces Create a Dbspace, Temporary Dbspace, Blobspace, or Extspace, p. 3-77 Create an Sbspace or Temporary Sbspace, p. 3-81 Change Sbspace Default Specifications, p. 3-88 Clean Up Stray Smart Large Objects, p. 3-89 Drop a Dbspace, Blobspace, Sbspace, or Extspace, p. 3-90 Add a Chunk to a Dbspace or Blobspace, p. 3-92 Add a Chunk to an Sbspace, p. 3-94 Drop a Chunk in a Dbspace, Blobspace, or Sbspace, p. 3-96 Start Mirroring, p. 3-98 End Mirroring, p. 3-100 Change Status of a Mirrored Chunk, p. 3-101 Specify DATASKIP, p. 3-103 3-76 IBM Informix Administrator’s Reference Create a Dbspace, Temporary Dbspace, Blobspace, or Extspace Create a Dbspace, Temporary Dbspace, Blobspace, or Extspace Create a Dbspace, Temporary Dbspace, Blobspace, or Extspace -c -d dbspace -p pathname -t -b blobspace WIN -g pageunit -o offset -p \\.\drive -s size -m pathname offset WIN -m \\.\drive offset -x extspace Element -b blobspace Purpose Names the blobspace to be created -l location Key Considerations Restrictions: The blobspace name must be unique and cannot exceed 128 characters. It must begin with a letter or underscore and must contain only letters, numbers, underscores, or the $ character. References: For more information, see creating a blobspace, in the chapter on managing disk space in the Administrator’s Guide. The syntax must conform to the Identifier segment. For more information, see the Informix Guide to SQL: Syntax. (1 of 4) Utilities 3-77 Create a Dbspace, Temporary Dbspace, Blobspace, or Extspace Element -c Purpose Creates a dbspace, blobspace, sbspace, or extspace You can create up to 2047 storage spaces of any type. drive Specifies the Windows drive to allocate as unbuffered disk space -d dbspace -g pageunit -l location The format can be either \\.\<drive>, where drive is the drive letter assigned to a disk partition, or \\.\PhysicalDrive<number>, where PhysicalDrive is a constant value and number is the physical drive number. Names the dbspace to be created Specifies the blobspace blobpage size in terms of page_unit, the number of disk pages per blobpage Specifies the location of the extspace The access method determines the format of this string. Key Considerations Additional Information: After you create a storage space, you must back up both this storage space and the root dbspace. If you create a storage space with the same name as a deleted storage space, perform another level-0 backup to ensure that future restores do not confuse the new storage space with the old one. References: For more information, see creating a dbspace, blobspace, or extspace, in the chapter on managing disk space in the Administrator’s Guide. References: For information on allocating unbuffered disk space, see allocating unbuffered disk space on Windows in the chapter on managing disk space in the Administrator’s Guide. Examples: \\.\F: \\.\PhysicalDrive2 References: For pathname syntax, see your operating-system documentation. Restrictions: The dbspace name must be unique and cannot exceed 128 characters. It must begin with a letter or underscore and must contain only letters, numbers, underscores, or the $ character. References: For more information, see creating a dbspace, in the chapter on managing disk space in the Administrator’s Guide. The syntax must conform to the Identifier segment. For more information, see the Informix Guide to SQL: Syntax. Restrictions: Unsigned integer. Value must be greater than 0. References: For more information, see blobpage size considerations, in the chapter on I/O Activity in the Performance Guide. Restrictions: String. Value must not be longer than 255 bytes. References: For more information, see creating an extspace, in the chapter on managing disk space in the Administrator’s Guide. (2 of 4) 3-78 IBM Informix Administrator’s Reference Create a Dbspace, Temporary Dbspace, Blobspace, or Extspace Element -m pathname offset -o offset -p pathname Purpose Specifies an optional pathname and offset to the chunk that mirrors the initial chunk of the new blobspace or dbspace Also see the entries for -p pathname and -o offset in this table. Indicates, in kilobytes, the offset into the disk partition or into the device to reach the initial chunk of the new blobspace, dbspace, or sbspace Key Considerations References: For more information, see creating a dbspace or a blobspace in the chapter on managing disk space in the Administrator’s Guide. Restrictions: Unsigned integer. The starting offset must be equal to or greater than 0. The starting offset plus the chunk size cannot exceed the maximum chunk size. The maximum offset is 2 or 4 gigabytes, depending on the platform. References: For more information, see allocating raw disk space, in the chapter on managing disk space in the Administrator’s Guide. Indicates the disk partition or Additional Information: The chunk must be an device of the initial chunk of the existing unbuffered device or buffered file. When blobspace or dbspace that you you specify a pathname, you can use either a full are creating pathname or a relative pathname. However, if you use a relative pathname, it must be relative to the directory that was the current directory when you initialized the database server. UNIX example (unbuffered device): /dev/rdsk/c0t3d0s4 UNIX example (buffered device): /ix/ids9.2/db1chunk Windows example: c:\Ifmxdata\ol_icecream\mychunk1.dat -s size Indicates, in kilobytes, the size of the initial chunk of the new blobspace or dbspace References: For pathname syntax, see your operating-system documentation. Restrictions: Unsigned integer. The size must be equal to or greater than 1000 kilobytes and a multiple of the page size. The starting offset plus the chunk size cannot exceed the maximum chunk size. The maximum chunk size is 2 or 4 gigabytes, depending on the platform. (3 of 4) Utilities 3-79 Create a Dbspace, Temporary Dbspace, Blobspace, or Extspace Element -t Purpose Creates a temporary dbspace for storage of temporary tables -x extspace Names the extspace to be created Key Considerations Restrictions: You cannot mirror a temporary dbspace. References: For more information, see temporary dbspaces, in the chapter on data storage, and creating a temporary dbspace, in the chapter on managing disk space in the Administrator’s Guide. Restrictions: Extspace names can be up to 128 characters. They must be unique, begin with a letter or underscore, and contain only letters, digits, underscores, or $ characters. References: For more information, see extspaces, in the chapter on managing disk space in the Administrator’s Guide. (4 of 4) Creating a Temporary Dbspace with the -t Option When you create a temporary dbspace with onspaces, the database server uses the newly created temporary dbspace, after you perform the following steps: 3-80 ■ Add the name of the new temporary dbspace to your list of temporary dbspaces in the DBSPACETEMP configuration parameter, the DBSPACETEMP environment variable, or both. ■ Restart the database server. IBM Informix Administrator’s Reference Create an Sbspace or Temporary Sbspace Create an Sbspace or Temporary Sbspace Create an Sbspace -c -S sbspace -p pathname -o offset -s size -t -m pathname offset Element -S sbspace -Ms mdsize -Mo mdoffset -Df default list Purpose Key Considerations Names the sbspace to be created Restrictions: The sbspace name must be unique and must not exceed 128 characters. It must begin with a letter or underscore and must contain only letters, numbers, underscores, or the $ character. -c Creates an sbspace References: Syntax must conform to the Identifier segment; see the Informix Guide to SQL: Syntax. None. -m pathname offset You can create up to 2047 storage spaces of any type. Specifies an optional pathname and offset to the chunk that mirrors the initial chunk of the new sbspace References: For more information, see sbspaces in the chapter on data storage, and creating an sbspace, in the chapter on managing disk space in the Administrator’s Guide. -Mo mdoffset Also see the entries for -p pathname and -o offset in this table. Indicates, in kilobytes, the offset into the disk partition or into the device where metadata will be stored. Restrictions: Value can be an integer between 0 and the chunk size. You cannot specify an offset that causes the end of the metadata space to be past the end of the chunk. References: For more information, see sizing sbspace metadata, in the chapter on managing disk space in the Administrator’s Guide. (1 of 3) Utilities 3-81 Create an Sbspace or Temporary Sbspace Element -Ms mdsize The remainder is user-data space. Indicates, in kilobytes, the offset into the disk partition or into the device to reach the initial chunk of the sbspace -o offset -p pathname -s size Purpose Specifies the size, in kilobytes, of the metadata area allocated in the initial chunk Indicates the disk partition or unbuffered device of the initial chunk of the sbspace Indicates, in kilobytes, the size of the initial chunk of the new sbspace Key Considerations Restrictions: Value can be an integer between 0 and the chunk size. References: For more information, see sizing sbspace metadata, in the chapter on managing disk space in the Administrator’s Guide. Restrictions: Unsigned integer. The starting offset must be equal to or greater than 0. The starting offset plus the chunk size cannot exceed the maximum chunk size. The maximum chunk size is 4 terabytes for systems with a two-kilobyte page size and 8 terabytes for systems with a four-kilobyte page size. References: For more information, see allocating raw disk space on UNIX, in the chapter on managing disk space in the Administrator’s Guide. Additional Information: The chunk must be an existing unbuffered device or buffered file. When you specify a pathname, you can use either a full pathname or a relative pathname. However, if you use a relative pathname, it must be relative to the directory that was the current directory when you initialized the database server. References: For pathname syntax, see your operating-system documentation. Restrictions: Unsigned integer. The size must be equal to or greater than 1000 kilobytes and a multiple of the page size. The starting offset plus the chunk size cannot exceed the maximum chunk size. The maximum chunk size is 2 or 4 gigabytes, depending on the platform. (2 of 3) 3-82 IBM Informix Administrator’s Reference Create an Sbspace or Temporary Sbspace Element -t -Df default list Purpose Creates a temporary sbspace for storage of temporary smart large objects. You can specify the size and offset of the metadata area Key Considerations Restrictions: You cannot mirror a temporary sbspace. You can specify any -Df option, except the LOGGING=ON option, which has no effect. References: For more information, see “Creating a Temporary Sbspace with the -t Option” on page 3-83. Lists default specifications for Restrictions: Tags are separated by commas. If a tag smart large objects stored in the is not present, system defaults take precedence. The sbspace list must be enclosed in double quotation marks (“) on the command line. References: For a list of tags and their parameters, see Figure 3-16 on page 3-84. (3 of 3) Creating a Temporary Sbspace with the -t Option This example creates a temporary sbspace of 1000 kilobytes: onspaces -c -S tempsbsp -t -p ./tempsbsp -o 0 -s 1000 You can optionally specify the name of the temporary sbspace in the SBSPACETEMP configuration parameter. Restart the database server so that it can use the temporary sbspace. Creating an Sbspace with the -Df option When you create an sbspace with the optional -Df option, you can specify several default specifications that affect the behavior of the smart large objects stored in the sbspace. The default specifications must be expressed as a list separated by commas. The list need not contain all of the tags. The list of tags must be enclosed in double quotation marks (“). The table in Figure 3-16 on page 3-84 describes the tags and their default values. The four levels of inheritance for sbspace characteristics are system, sbspace, column, and smart large objects. For more information, see smart large objects in the chapter on where data is stored in the Administrator’s Guide. Utilities 3-83 Create an Sbspace or Temporary Sbspace Figure 3-16 -Df Default Specifications Tag ACCESSTIME AVG_LO_SIZE Values ON or OFF Windows: 4 to 2**31 Default OFF 8 UNIX: 2 to 2**31 Description When set to ON, the database server tracks the time of access to all smart large objects stored in the sbspace. References: For information about altering storage characteristics of smart large objects, see the DataBlade API Programmer’s Manual. Specifies the average size, in kilobytes, of the smart large object stored in the sbspace The database server uses this value to calculate the size of the metadata area. Do not specify AVG_LO_SIZE and -Ms together. You can specify AVG_LO_SIZE and the metadata offset (-Mo) together. If the size of the smart large object exceeds 2**31, specify 2**31. If the size of the smart large object is less than 2 on UNIX or less than 4 in Windows, specify 2 or 4. Error 131 is returned if you run out of space in the metadata and reserved areas in the sbspace. To allocate additional chunks to the sbspace that consist of metadata area only, use the -Ms option instead. BUFFERING ON or OFF ON References: For more information, see creating smart large objects, in the chapter on managing data on disk in the Administrator’s Guide. Specifies the buffering mode of smart large objects stored in the sbspace If set to ON, the database server uses the buffer pool in the resident portion of shared memory for smart-large-object I/O operations. If set to OFF, the database server uses light I/O buffers in the virtual portion of shared memory (lightweight I/O operations). References: For more information, see lightweight I/O, in the chapter on configuration effects on memory in the Performance Guide. (1 of 3) 3-84 IBM Informix Administrator’s Reference Create an Sbspace or Temporary Sbspace Tag LOCK_MODE Values Default RANGE or BLOB BLOB Description Specifies the locking mode of smart large objects stored in the sbspace If set to RANGE, only a range of bytes in the smart large object is locked. If set to BLOB, the entire smart large object is locked. LOGGING ON or OFF OFF References: For more information, see smart large objects, in the chapter on locking in the Performance Guide. Specifies the logging status of smart large objects stored in the sbspace If set to ON, the database server logs changes to the user data area of the sbspace. When you turn on logging for an sbspace, take a level-0 backup of the sbspace. When you turn off logging, the following message displays: You are turning off smart large object logging. EXTENT_SIZE 4 to 2**31 None References: For more information, see smart large objects, in the chapters on data storage and logging in the Administrator’s Guide. For information about onspaces -ch messages, see Appendix E, “Error Messages.” Specifies the size, in kilobytes, of the first allocation of disk space for smart large objects stored in the sbspace when you create the table Let the system select the EXTENT_SIZE value. To reduce the number of extents in a smart large object, use mi_lo_specset_estbytes (DataBlade API) or ifx_lo_specset_estbytes (ESQL/C) to hint to the system the total size of the smart large object. The system attempts to allocate a single extent for the smart large object. References: For more information, see smart large objects, in the chapter on where data is stored in the Administrator’s Guide. For information about altering storage characteristics of smart large objects, see the DataBlade API Programmer’s Manual or the Informix ESQL/C Programmer’s Manual. (2 of 3) Utilities 3-85 Create an Sbspace or Temporary Sbspace Tag Values MIN_EXT_SIZE 2 to 2**31 Default Description Windows: 4 Specifies the minimum amount of space, in kilobytes, to allocate for each smart large object UNIX: 2 The following message displays: Changing the sbspace minimum extent size: old value value1 new value value2. NEXT_SIZE 4 to 2**31 None References: For information about tuning this value, see smart large objects, in the chapter on configuration effects on I/O utilization in the Performance Guide. For information about onspaces -ch messages, see Appendix E, “Error Messages.” Specifies the extent size, in kilobytes, of the next allocation of disk space for smart large objects when the initial extent in the sbspace becomes full Let the system select the NEXT_SIZE value. To reduce the number of extents in a smart large object, use mi_lo_specset_estbytes or ifx_lo_specset_estbytes to hint to the system the total size of the smart large object. The system attempts to allocate a single extent for the smart large object. References: For more information, see smart large objects, in the chapter on where data is stored in the Administrator’s Guide. For information about obtaining the size of smart large objects, see the DataBlade API Programmer’s Manual or the Informix ESQL/C Programmer’s Manual. (3 of 3) This example creates a 20-megabyte mirrored sbspace, eg_sbsp, with the following specifications: ■ An offset of 500 kilobytes for the primary and mirrored chunks ■ An offset of 200 kilobytes for the metadata area ■ An average expected smart-large-object size of 32 kilobytes ■ Log changes to the smart large objects in the user-data area of the sbspace % onspaces -c -S eg_sbsp -p /dev/raw_dev1 -o 500 -s 20000 -m /dev/raw_dev2 500 -Mo 200 -Df "AVG_LO_SIZE=32,LOGGING=ON" UNIX ♦ 3-86 IBM Informix Administrator’s Reference Create an Sbspace or Temporary Sbspace Changing the -Df Settings As the database server administrator, you can override or change the -Df default settings in one of the following ways: ■ To change the default settings for an sbspace, use the onspaces -ch option. For more information, refer to “Change Sbspace Default Specifications” on page 3-88. ■ To override the following -Df default settings for a specific table, use the SQL statements CREATE TABLE or ALTER TABLE: ❑ LOGGING ❑ ACCESSTIME ❑ EXTENT_SIZE ❑ NEXT_SIZE For more information on the ALTER TABLE and CREATE TABLE statements, see the Informix Guide to SQL: Syntax. The programmer can override these -Df default settings with DataBlade API and ESQL/C functions. For information about altering storage characteristics of smart large objects, see the DataBlade API Programmer’s Manual and the Informix ESQL/C Programmer’s Manual. Using the onspaces -g Option The onspaces -g option is not used for sbspaces. The database server uses a different method to determine the number of pages to transfer in an I/O operation for sbspaces than for blobspaces. The database server can automatically determine the block size to transfer in an I/O operation for smart large objects. For more information, see sbspace extent sizes in the chapter on I/O activity in your Performance Guide. Utilities 3-87 Change Sbspace Default Specifications Change Sbspace Default Specifications Change Sbspace Default Specifications -ch Element -ch sbspace Purpose Indicates that one or more sbspace default specifications are to be changed Names the sbspace for which to change the default specifications sbspace -Df default list -Df default list Key Considerations None. References: Syntax must conform to the Identifier segment; see the Informix Guide to SQL: Syntax. For background information, see changing default specifications of an sbspace with onspaces in the Performance Guide. Lists new default specifications Restrictions: Tags are separated by commas. If a tag for smart large objects stored in is not present, system defaults take precedence. The the sbspace list must be enclosed in double quotation marks (“) on the command line. References: For a list of tags and their parameters, see Figure 3-16 on page 3-84. You can change any of the -Df tags with the onspaces -ch option. The database server applies the change to each smart large object that was created prior to changing the default specification. For example, to turn off logging for the sbspace that you created in “Creating an Sbspace with the -Df option” on page 3-83, use the following command: onspaces -ch eg_sbsp -Df "LOGGING=OFF" Important: After you turn on logging for an sbspace, take a level-0 backup of the sbspace to create a point from which to recover. 3-88 IBM Informix Administrator’s Reference Clean Up Stray Smart Large Objects in Sbspaces Clean Up Stray Smart Large Objects in Sbspaces Clean Up Stray Smart Large Objects in Sbspaces -cl Element -cl sbspace sbspace Purpose Cleans up stray smart large objects in an sbspace Names the sbspace to be cleaned up Key Considerations To find any stray smart large objects, use the oncheck -pS command when no users are connected to the database server. The smart large objects with a reference count of 0 are stray objects. For more information, see “Check and Display Sbspaces with -cs, -cS, -ps, -pS” on page 3-24. References: Syntax must conform to the Identifier segment; see the Informix Guide to SQL: Syntax. During normal operation, no unreferenced (stray) smart large objects should exist. When you delete a smart large object, the space is released. If the database server fails or runs out of system memory while you are deleting a smart large object, the smart large object might remain as a stray object. The following is an example of the onspaces -cl command: onspaces -cl myspace The best way to find the reference count for a smart large object is to call the mi_lo_stat or ifx_lo_stat functions from a C program. Although the mi_lo_increfcount and mi_lo_decrefcount functions return the reference count, they increment or decrement the reference count. For more information on these functions, see the DataBlade API Function Reference. Utilities 3-89 Drop a Dbspace, Blobspace, Sbspace, or Extspace Drop a Dbspace, Blobspace, Sbspace, or Extspace Drop a Dbspace, Blobspace, Sbspace, or Extspace -d dbspace -y blobspace sbspace -f extspace Element -d Purpose Indicates that a dbspace, blobspace, sbspace, or extspace is to be dropped Key Considerations Additional Information: You can drop a dbspace, blobspace, sbspace, or extspace while the database server is online or in quiescent mode. After you drop a storage space, you must back it up to ensure that the sysutils database and the reserved pages are up-to-date. Restriction: Execute oncheck -pe to verify that no table is currently storing data in the dbspace, blobspace, or sbspace. -y -f References: For more information, see dropping a storage space, in the chapter on managing disk space in the Administrator’s Guide. Causes the database server to None. automatically respond yes to all prompts Drops an sbspace that Additional Information: You must use the -f (force) option contains user data and to drop an sbspace that contains data. metadata Restriction: Use the -f option with sbspaces only. Warning: If you use the -f option, the tables in the database server might have dead pointers to the smart large objects that were deleted with this option. References: For more information, see dropping a chunk from an sbspace with onspaces, in the chapter on managing disk space in the Administrator’s Guide. (1 of 2) 3-90 IBM Informix Administrator’s Reference Drop a Dbspace, Blobspace, Sbspace, or Extspace Element blobspace Purpose Names the blobspace to be dropped dbspace Names the dbspace to be dropped extspace Names the extspace to be dropped Names the sbspace to be dropped sbspace Key Considerations Additional Information: Before you drop a blobspace, drop all tables that include a TEXT or BYTE column that references the blobspace. Additional Information: Before you drop a dbspace, drop all databases and tables that you previously created in the dbspace. Additional Information: You cannot drop an extspace if it is associated with an existing table or index. Additional Information: Before you drop an sbspace, drop all tables that include a BLOB or CLOB column that references the sbspace. (2 of 2) Important: Do not specify a pathname when you drop these storage spaces. Utilities 3-91 Add a Chunk to a Dbspace or Blobspace Add a Chunk to a Dbspace or Blobspace Add a Chunk to a Dbspace or Blobspace -a dbspace -p pathname WIN blobspace -o offset -p \\.\drive -s size -m pathname offset WIN -m \\.\drive offset Element -a Purpose Indicates that a chunk is to be added Specifies the Windows drive to allocate as unbuffered disk space drive -m pathname offset The format can be either \\.\<drive>, where drive is the drive letter assigned to a disk partition, or \\.\PhysicalDrive<number>, where PhysicalDrive is a constant value and number is the physical drive number. Specifies an optional pathname and offset to the chunk that mirrors the new chunk Key Considerations Additional Information: A dbspace, blobspace, or sbspace can contain up to 2047 chunks. References: For more information on allocating unbuffered disk space, see allocating raw disk space on Windows in the chapter on managing disk space in the Administrator’s Guide. Example: \\.\F: References: For pathname syntax, see your operatingsystem documentation. References: For more information, see adding a chunk to a dbspace and adding a chunk to a blobspace, in the chapter on managing disk space in the Administrator’s Also see the entries for pathname Guide. and offset in this table. (1 of 2) 3-92 IBM Informix Administrator’s Reference Add a Chunk to a Dbspace or Blobspace Element -o offset -p pathname Purpose After the -a option, offset indicates, in kilobytes, the offset into the disk partition or into the device to reach the initial chunk of the new blobspace or dbspace Indicates the disk partition or unbuffered device of the initial chunk of the blobspace or dbspace that you are adding The chunk must be an existing unbuffered device or buffered file. Key Considerations Restrictions: Unsigned integer. The starting offset must be equal to or greater than 0. The starting offset plus the chunk size cannot exceed the maximum chunk size. The maximum offset is 2 or 4 gigabytes, depending on the platform. References: For more information, see allocating raw disk space on UNIX, in the chapter on managing disk space in the Administrator’s Guide. Additional Information: The chunk name can be up to 128 characters. When you specify a pathname, you can use either a full pathname or a relative pathname. However, if you use a relative pathname, it must be relative to the directory that was the current directory when you initialized the database server. UNIX example (unbuffered device): /dev/rdsk/c0t3d0s4 UNIX example (buffered device): /ix/ids9.2/db1chunk Windows example: c:\Ifmxdata\ol_icecream\mychunk1.dat -s size blobspace dbspace References: For pathname syntax, see your operatingsystem documentation. Indicates, in kilobytes, the size Restrictions: Unsigned integer. The size must be equal to of the new blobspace or dbspace or greater than 1000 kilobytes and a multiple of the page size. The starting offset plus the chunk size cannot exceed chunk the maximum chunk size. Names the blobspace to which you are adding a chunk Names the dbspace to which you are adding a chunk The maximum chunk size is 2 or 4 gigabytes, depending on the platform. Restrictions: See adding a chunk to a blobspace in the chapter on managing disk space in the Administrator’s Guide. References: Syntax must conform to the Identifier segment; see the Informix Guide to SQL: Syntax. Restrictions: See adding a chunk to a dbspace, in the chapter on managing disk space in the Administrator’s Guide. References: Syntax must conform to the Identifier segment; see the Informix Guide to SQL: Syntax. (2 of 2) Utilities 3-93 Add a Chunk to an Sbspace Add a Chunk to an Sbspace Add a Chunk to an Sbspace -a sbspace -p pathname -o offset -s size -m pathname offset -Ms mdsize Element -a -Mo mdoffset -U Purpose Indicates that a chunk is to be added Specifies an optional pathname and offset to the chunk that mirrors the new chunk Key Considerations Additional Information: An sbspace can contain up to 2047 chunks. References: For background information, see adding a chunk to an sbspace, in the chapter on managing disk space in the Administrator’s Guide. -Mo mdoffset Also see the entries for pathname and offset in this table. Indicates, in kilobytes, the offset into the disk partition or into the device where metadata should be stored Restrictions: Value can be an integer between 0 and the chunk size. You cannot specify an offset that causes the end of the metadata space to be past the end of the chunk. -Ms mdsize References: For background information, see sizing sbspace metadata, in the chapter on managing disk space in the Administrator’s Guide. Specifies the size, in kilobytes, Restrictions: Value can be an integer between 0 and of the metadata area allocated in the chunk size. the initial chunk. The remainder References: For background information, see sizing is user-data space sbspace metadata, in the chapter on managing disk -m pathname offset space in the Administrator’s Guide. (1 of 2) 3-94 IBM Informix Administrator’s Reference Add a Chunk to an Sbspace Element -o offset -p pathname Purpose After the -a option, offset indicates, in kilobytes, the offset into the disk partition or into the unbuffered device to reach the initial chunk of the new blobspace or dbspace. Indicates the disk partition or unbuffered device of the initial chunk of the sbspace that you are creating The chunk must be an existing unbuffered device or buffered file. -U -s size sbspace Specifies that the entire chunk should be used to store user data Indicates, in kilobytes, the size of the new sbspace chunk Names the sbspace to which you are adding a chunk Key Considerations Restrictions: Unsigned integer. The starting offset must be equal to or greater than 0. The starting offset plus the chunk size cannot exceed the maximum chunk size. The maximum offset is 2 or 4 gigabytes, depending on the platform. References: For more information, see allocating raw disk space on UNIX, in the chapter on managing disk space in the Administrator’s Guide. Additional Information: The chunk name can be up to 128 characters. When you specify a pathname, you can use either a full pathname or a relative pathname. However, if you use a relative pathname, it must be relative to the directory that was the current directory when you initialized the database server. References: For pathname syntax, see your operating-system documentation. Restrictions: The -M and -U options are mutually exclusive. References: For background information, see adding a chunk to an sbspace, in the chapter on managing disk space in the Administrator’s Guide. Restrictions: Unsigned integer. The size must be equal to or greater than 1000 kilobytes and a multiple of the page size. The starting offset plus the chunk size cannot exceed the maximum chunk size. The maximum chunk size is 2 or 4 gigabytes, depending on the platform. Restrictions: See adding a chunk to an sbspace in the chapter on managing disk space in the Administrator’s Guide. References: Syntax must conform to the Identifier segment; see the Informix Guide to SQL: Syntax. (2 of 2) Utilities 3-95 Drop a Chunk in a Dbspace, Blobspace, or Sbspace Drop a Chunk in a Dbspace, Blobspace, or Sbspace Drop a Chunk -d dbspace -p pathname -o offset -y blobspace sbspace -f Element -d Purpose Drops a chunk Drops an sbspace chunk that contains user data but no metadata -f -o offset If the chunk contains metadata for the sbspace, you must drop the entire sbspace. Indicates, in kilobytes, the offset into the disk partition or into the unbuffered device to reach the initial chunk of the dbspace, blobspace, or sbspace that you are dropping Key Considerations Restrictions: You can drop a chunk from a dbspace, temporary dbspace, or sbspace when the database server is online or quiescent. For more information, see the chapter on managing disk space in the Administrator’s Guide. You can drop a chunk from a blobspace only when the database server is in quiescent mode. Restrictions: Use the -f option with sbspaces only. If you omit the -f option, you cannot drop an sbspace that contains data. References: For more information, see dropping a chunk from an sbspace with onspaces, in the chapter on managing disk space in the Administrator’s Guide. Restrictions: Unsigned integer. The starting offset must be equal to or greater than 0. The starting offset plus the chunk size cannot exceed the maximum chunk size. The maximum offset is 2 or 4 gigabytes, depending on the platform. References: For more information, see allocating raw disk space on UNIX, in the chapter on managing disk space in the Administrator’s Guide. (1 of 2) 3-96 IBM Informix Administrator’s Reference Drop a Chunk in a Dbspace, Blobspace, or Sbspace Element -p pathname -y blobspace dbspace sbspace Purpose Indicates the disk partition or unbuffered device of the initial chunk of the dbspace, blobspace, or sbspace that you are dropping Key Considerations Additional Information: The chunk must be an existing unbuffered device or buffered file. When you specify a pathname, you can use either a full pathname or a relative pathname. However, if you use a relative pathname, it must be relative to the directory that was the current directory when you initialized the database server. References: For pathname syntax, see your operatingsystem documentation. None. Causes the database server to automatically respond yes to all prompts Names the blobspace from References: Syntax must conform to the Identifier which the chunk is dropped segment; see the Informix Guide to SQL: Syntax. For more information, see dropping a chunk from a blobspace, in the chapter on managing disk space in the Administrator’s Guide. Names the dbspace from which References: Syntax must conform to the Identifier the chunk is dropped segment; see the Informix Guide to SQL: Syntax. For more information, see dropping a chunk from a dbspace with onspaces, in the chapter on managing disk space in the Administrator’s Guide. Names the sbspace from which References: Syntax must conform to the Identifier the chunk is dropped segment; see the Informix Guide to SQL: Syntax. For background information, see dropping a chunk from a dbspace with onspaces, in the chapter on managing disk space in the Administrator’s Guide. (2 of 2) Important: You must specify a pathname to indicate to the database server that you are dropping a chunk. Utilities 3-97 Start Mirroring Start Mirroring Start Mirroring -m dbspace -p pathname blobspace -o offset -m pathname offset -f filename -y sbspace Element -f filename -m Purpose Indicates that chunk-location information is in a file named filename Adds mirroring for an existing dbspace, blobspace, or sbspace -m pathname offset The second time that pathname occurs in the syntax diagram, it indicates the disk partition or unbuffered device of the initial chunk of the dbspace, blobspace, or sbspace that performs the mirroring. Key Considerations Additional Information: The file must be a buffered file that already exists. The pathname must conform to the operating-system-specific rules for pathnames. References: For more information, see “Using a File to Specify Chunk-Location Information with the -f Option” on page 3-100. Additional Information: User-data chunks in a mirrored sbspace need not be mirrored. The mirrored chunks should be on a different disk. You must mirror all the chunks at the same time. None. The second time offset appears in the syntax diagram, it indicates the offset to reach the mirrored chunk of the newly mirrored dbspace, blobspace, or sbspace. Also see the entries for pathname and offset in this table. (1 of 2) 3-98 IBM Informix Administrator’s Reference Start Mirroring Element -o offset -p pathname -y blobspace dbspace sbspace Purpose The first time that offset occurs in the syntax diagram, it indicates, in kilobytes, the offset into the disk partition or into the unbuffered device to reach the initial chunk of the newly mirrored dbspace, blobspace, or sbspace. The first time pathname occurs in the syntax diagram, it indicates the disk partition or unbuffered device of the initial chunk of the dbspace, blobspace, or sbspace that you want to mirror. Key Considerations Restrictions: Unsigned integer. The starting offset must be equal to or greater than 0. The starting offset plus the chunk size cannot exceed the maximum chunk size. The maximum offset is 2 or 4 gigabytes, depending on the platform. References: For more information, see allocating raw disk space on UNIX, in the chapter on managing disk space in the Administrator’s Guide. Additional Information: The chunk must be an existing unbuffered device or buffered file. When you specify a pathname, you can use either a full pathname or a relative pathname. However, if you use a relative pathname, it must be relative to the directory that was the current directory when you initialized the database server. References: For pathname syntax, see your operating-system documentation. None. Causes the database server to automatically respond yes to all prompts Names the blobspace that you References: Syntax must conform to the Identifier want to mirror segment; see Informix Guide to SQL: Syntax. For more information, see the chapter on using mirroring in the Administrator’s Guide. Names the dbspace that you References: Syntax must conform to the Identifier want to mirror segment; see Informix Guide to SQL: Syntax. For background information, see the chapter on using mirroring in the Administrator’s Guide. Names the sbspace that you References: Syntax must conform to the Identifier want to mirror segment; see Informix Guide to SQL: Syntax. For background information, see the chapter on using mirroring in the Administrator’s Guide. (2 of 2) Utilities 3-99 End Mirroring Using a File to Specify Chunk-Location Information with the -f Option You can create a file that contains the chunk-location information. Then, when you execute onspaces, use the -f option to indicate to the database server that this information is in a file whose name you specify in filename. If the dbspace that you are mirroring contains multiple chunks, you must specify a mirrored chunk for each of the primary chunks in the dbspace that you want to mirror. For an example that enables mirroring for a multichunk dbspace, see starting mirroring for unmirrored dbspaces with onspaces in the chapter on using mirroring in the Administrator’s Guide. End Mirroring End Mirroring -r dbspace blobspace -y sbspace Element -r -y Purpose Indicates to the database server that mirroring should be ended for an existing dbspace, blobspace, or sbspace Causes the database server to respond yes to all prompts automatically Key Considerations References: For background information, see the chapter on using mirroring in the Administrator’s Guide. None. (1 of 2) 3-100 IBM Informix Administrator’s Reference Change Status of a Mirrored Chunk Element blobspace Purpose Names the blobspace for which you want to end mirroring dbspace Names the dbspace for which you want to end mirroring. sbspace Names the sbspace for which you want to end mirroring Key Considerations References: Syntax must conform to the Identifier segment; see the Informix Guide to SQL: Syntax. For more information, see the chapter on using mirroring in the Administrator’s Guide. References: Syntax must conform to the Identifier segment; see the Informix Guide to SQL: Syntax. For more information, see the chapter on using mirroring in the Administrator’s Guide. References: Syntax must conform to the Identifier segment; see the Informix Guide to SQL: Syntax. For background information, see the chapter on using mirroring in the Administrator’s Guide. (2 of 2) Change Status of a Mirrored Chunk Change Chunk Status -s dbspace -p pathname -o offset -D -O blobspace -y sbspace Element -D -o offset Purpose Indicates that you want to take the chunk down Indicates, in kilobytes, the offset into the disk partition or unbuffered device to reach the chunk Key Considerations None. Restrictions: Unsigned integer. The starting offset must be equal to or greater than 0. The starting offset plus the chunk size cannot exceed the maximum chunk size. The maximum offset is 2 or 4 gigabytes, depending on the platform. References: For more information, see allocating raw disk space on UNIX, in the chapter on managing disk space in the Administrator’s Guide. (1 of 2) Utilities 3-101 Change Status of a Mirrored Chunk Element -O -p pathname Purpose Indicates that you want to restore the chunk and bring it online Indicates the disk partition or unbuffered device of the chunk Indicates that you want to change the status of a chunk -s -y blobspace Causes the database server to respond yes to all prompts automatically Names the blobspace whose status you want to change dbspace Names the dbspace whose status you want to change sbspace Names the sbspace whose status you want to change Key Considerations None. Additional Information: The chunk can be an unbuffered device or a buffered file. When you specify a pathname, you can use either a full pathname or a relative pathname. However, if you use a relative pathname, it must be relative to the directory that was the current directory when you initialized the database server. References: For pathname syntax, see your operatingsystem documentation. Restrictions: You can only change the status of a chunk in a mirrored pair. References: For more information, see changing the mirror status in the Administrator’s Guide. None. References: Syntax must conform to the Identifier segment; see the Informix Guide to SQL: Syntax. For more information, see changing the mirror status in the Administrator’s Guide. References: Syntax must conform to the Identifier segment; see the Informix Guide to SQL: Syntax. For more information, see changing the mirror status in the Administrator’s Guide. References: Syntax must conform to the Identifier segment; see the Informix Guide to SQL: Syntax. For background information, see changing the mirror status in the Administrator’s Guide. (2 of 2) 3-102 IBM Informix Administrator’s Reference Specify DATASKIP Parameter Specify DATASKIP Parameter Specify DATASKIP -f OFF ON Element -f OFF Purpose Indicates to the database server that you want to change the DATASKIP default for specified dbspaces or all dbspaces Causes the database server to automatically respond yes to all prompts Specifies the name of one or more dbspaces for which DATASKIP will be turned ON or OFF Turns off DATASKIP ON Turns on DATASKIP -y dbspace-list dbspace-list -y Key Considerations Additional Information: All changes in the DATASKIP status are recorded in the message log. None. References: Syntax must conform to the Identifier segment; see the Informix Guide to SQL: Syntax. For more information, see “DATASKIP” on page 1-26 and the Performance Guide. Additional Information: If you use OFF without dbspace-list, DATASKIP is turned off for all fragments. If you use OFF with dbspace-list, only the specified fragments are set with DATASKIP off. Additional Information: If you use ON without dbspace-list, DATASKIP is turned on for all fragments. If you use ON with dbspace-list, only the specified fragments are set with DATASKIP on. The onspaces utility lets you specify DATASKIP on a dbspace level or across all dbspaces. Utilities 3-103 onstat: Monitor Database Server Operation onstat: Monitor Database Server Operation The onstat utility reads shared-memory structures and provides statistics about the database server at the time that the command executes. The systemmonitoring interface also provides information about the database server. For information on the system-monitoring interface, see Chapter 2, “The sysmaster Database.” You can combine multiple onstat option flags in a single command. The contents of shared memory might change as the onstat output displays. The onstat utility does not place any locks on shared memory, so running the utility does not affect performance. Monitor the Database Server Status One useful feature of onstat output is the heading that indicates the database server status. Whenever the database server is blocked, onstat displays the following line after the banner line: Blocked: reason The variable reason can take one of the following values. 3-104 Reason Description CKPT Checkpoint LONGTX Long transaction ARCHIVE Ongoing archive MEDIA_FAILURE Media failure HANG_SYSTEM Database server failure DBS_DROP Dropping a dbspace DDR Discrete high-availability data replication LBU Logs full high-watermark IBM Informix Administrator’s Reference Syntax Syntax onstat filename_source 1 1 1 1 -a -b -B -c 1 1 1 1 1 1 -C -d -D -f -F -g 1 -G 1 -h 1 -i 1 -k 1 -K -l 1 1 1 -m -o 1 1 1 1 -O -p -P -r 1 1 1 1 1 1 1 -R 1 -z filename_dest seconds -s -t -T -u -x -X -Utilities 3-105 Syntax Element -- Purpose Displays the output header Displays a listing of all onstat options and their functions -a Interpreted as onstat -cuskbtdlp. Displays output in that order Displays information about buffers currently in use, including number of resident pages in the buffer pool Obtains information about all database server buffers, not just buffers currently in use. See the entry for -b in this table Displays the ONCONFIG file: -b -B -c ■ Key Considerations References: See “Output Header” on page 3-109. Additional Information: This option is the only option flag that you cannot combine with any other flag. References: See “onstat --” on page 3-110. References: See “onstat -a” on page 3-111. References: See “onstat -b” on page 3-111. Additional Information: The -B output display fields are the same as the fields that appear in the -b output. References: See “onstat -c” on page 3-113. $INFORMIXDIR/etc/ $ONCONFIG for UNIX %INFORMIXDIR%\etc\ %ONCONFIG% for Windows Prints B-tree cleaner information Displays information for chunks in each storage space Displays page-read and page-write information for the first 50 chunks in each dbspace Lists the dbspaces currently affected by the DATASKIP feature Displays a count for each type of write that flushes pages to disk Provides monitoring options ■ -C -d -D -f -F -g -G -h -i -k None. References: See “onstat -d” on page 3-114. References: See “onstat -D” on page 3-117. References: See “onstat -f” on page 3-118. References: See “onstat -F” on page 3-118. References: See “onstat -g Monitoring Options” on page 3-119. Prints global transaction IDs None. Prints information about buffer hash None. chain Puts the onstat utility into interactive References: See “onstat -i” on page 3-131. mode Displays information about active References: See “onstat -k” on page 3-131. locks (1 of 3) 3-106 IBM Informix Administrator’s Reference Syntax Element -K -l -m Purpose Displays information about byterange locks Displays information about physical and logical logs, including page addresses Displays the 20 most recent lines of the database server message log -o Saves copies of the shared-memory segments to filename -O Displays information about the Optical Subsystem memory cache and staging-area blobspace Displays profile counts. Displays for all partitions the partition number and the break-up of the buffer-pool pages that belong to the partition Repeats the accompanying onstat options after they wait the specified seconds between each execution -p -P -r -R -s -t -T -u The default value of seconds is 5. Displays detailed information about the LRU queues, FLRU queues, and MLRU queues Displays general latch information Displays tblspace information, including residency state, for active tblspaces Displays tblspace information for all tblspaces Prints a profile of user activity Key Considerations References: See “onstat -K” on page 3-133. References: See “onstat -l” on page 3-133. Additional Information: Output from this option lists the full pathname of the message-log file and the 20 file entries. A date-and-time header separates the entries for each day. A time stamp prefaces single entries within each day. The name of the message log is specified as MSGPATH in the ONCONFIG file. References: See “onstat -m” on page 3-136. Additional Information: If you omit a filename in the onstat command, the copy of shared memory is saved to onstat.out in the current directory. References: See “onstat -O” on page 3-137. References: See “onstat -p” on page 3-138. References: See “onstat -P” on page 3-143. Additional Information: To end execution, press DEL or CTRL-C. References: See “onstat -R” on page 3-144. References: See “onstat -s” on page 3-145. References: See “onstat -t and -T” on page 3-147. References: See “onstat -t and -T” on page 3-147. References: See “onstat -u” on page 3-149. (2 of 3) Utilities 3-107 Syntax Element -x -X -z filename_dest filename_source seconds Purpose Displays information about transactions Obtains precise information about the threads that are sharing and waiting for buffers Sets the profile counts to 0 Specifies destination file for the copy of the shared-memory segments Specifies file that onstat reads as source for the requested information Key Considerations References: See “onstat -x” on page 3-152. References: See “onstat -X” on page 3-155. References: See “onstat -z” on page 3-157. Restrictions: Name must not match the name of any existing file. References: For pathname syntax, see your operating-system documentation. Restrictions: This file must include a previously stored shared-memory segment that you created with the -o option of onstat. References: For specific details on this option, see “Statistics Culled from Source File.” For pathname syntax, see your operating-system documentation. Specifies number of seconds between Restrictions: This value must be an unsigned each execution of the onstat -r integer greater than 0. command (3 of 3) Statistics Culled from Source File Use the filename_source parameter with other option flags to derive the requested onstat statistics from the shared-memory segments that filename_source contains. You must first use the onstat -o command to create a file that contains the shared-memory segments. Interactive Execution To put the onstat utility in interactive mode, use the -i option. Interactive mode allows you to enter multiple options, one after the other, without exiting the program. For information on using interactive mode, see “onstat -i” on page 3-131. 3-108 IBM Informix Administrator’s Reference Output Header Continuous onstat Execution Use the seconds parameter with the -r option flag to cause all other flags to execute repeatedly after they wait the specified seconds between each execution. Output Header All onstat output includes a header. The onstat - option displays only the output header and is useful for checking the database server mode. The header takes the following form: Version--Mode (Type)--(Checkpnt)--Up Uptime--Sh_mem Kbytes Version Is the product name and version number Mode Is the current operating mode. (Type) If the database server uses High-Availability Data Replication, indicates whether the type is primary or secondary If the database server is not involved in data replication, this field does not appear. If the type is primary, the value P appears. If the type is secondary, the value S appears. (Checkpnt) Is a checkpoint flag If it is set, the header might display two other fields after the mode if the timing is appropriate: (CKPT REQ) Indicates that a user thread has requested a checkpoint (CKPT INP) Indicates that a checkpoint is in progress. During the checkpoint, access is limited to read only. The database server cannot write or update data until the checkpoint ends Uptime Indicates how long the database server has been running Sh_mem Is the size of database server shared memory, expressed in kilobytes Utilities 3-109 onstat A sample header for the database server follows: Dynamic Server Version 9.30.UC1--On-Line--Up 15:11:41--9216 Kbytes Logs Full Subheader If the database server is blocked, the onstat header output includes an extra line that reads as follows: Blocked: reason(s) The reason can be one or more of the following. Reason Explanation CKPT Checkpoint LONGTX Long transaction ARCHIVE Ongoing storage-space backup MEDIA_FAILURE Media failure HANG_SYSTEM Database server failure DBS_DROP Dropping a dbspace DDR Discrete data replication (IDS) LBU Logs full high-watermark onstat If you invoke onstat without any options, the command is interpreted as onstat -pu (-p option and -u option). onstat -The -- option displays a listing of all onstat options and their functions. This option is the only option flag that you cannot combine with any other flag. 3-110 IBM Informix Administrator’s Reference onstat -a onstat -a The -a option is interpreted as onstat -cuskbtdlp, and output is displayed in that order. For an explanation of each option, refer to the appropriate flag in the paragraphs that follow. onstat -b The -b option displays information about buffers currently in use, including the total number of resident pages in the buffer pool. (For information about all buffers, not just those in use, refer to onstat -B.) You can interpret output from the -b option as follows: address Is the address of the buffer header in the buffer table userthread is the address of the most recent user thread to access the buffer table. Many user threads might be reading the same buffer concurrently. flgs Uses the following flag bits to describe the buffer: 0x01 Modified data 0x02 Data 0x04 LRU 0x08 Error pagenum Is the physical page number on the dis memaddr Is the buffer memory address nslots Is the number of slot-table entries in the page This field indicates the number of rows (or portions of a row) that are stored on the page. pgflgs Uses the following values, alone or in combination, to describe the page type: 1 Data page 2 Tblspace page Utilities 3-111 onstat -b xflgs 3-112 4 Free-list page 8 Chunk free-list page 9 Remainder data page b Partition resident blobpage c Blobspace resident blobpage (IDS) d Blob chunk free-list bit page e Blob chunk blob map page 10 B-tree node page 20 B-tree root-node page 40 B-tree branch-node page 80 B-tree leaf-node page 100 Logical-log page 200 Last page of logical log 400 Sync page of logical log 800 Physical log 1000 Reserved root page 2000 No physical log required 8000 B-tree leaf with default flags Uses the following flag bits to describe buffer access: 0x10 share lock 0x80 exclusive lock IBM Informix Administrator’s Reference onstat -c owner Is the user thread that set the xflgs buffer flag waitlist Is the address of the first user thread that is waiting for access to this buffer For a complete list of all threads waiting for the buffer, refer to “onstat -X” on page 3-155. The maximum number of buffers available is specified as BUFFERS in the ONCONFIG file. The -b and -B options also provide summary information about the number of modified buffers, the total number of resident pages in the buffer pool, the total number of buffers available, the number of hash buckets available, and the size of the buffer in bytes (the page size). 123 modified, 23 resident, 2000 total, 2048 hash buckets, 2048 buffer size. onstat -c Use the onstat -c option to display the contents of the ONCONFIG file. The database server first checks if you have assigned a value to the environment variable ONCONFIG. You can use the onstat -c option with the database server in any mode, including offline. UNIX WIN NT/2000 On UNIX, if you have set ONCONFIG, onstat -c displays the contents of the $INFORMIXDIR/etc/$ONCONFIG file. If not, by default, onstat -c displays the contents of $INFORMIXDIR/etc/onconfig. ♦ On Windows, if you have set ONCONFIG, onstat -c displays the contents of the %INFORMIXDIR%\etc\%ONCONFIG% file. If not, by default, onstat -c displays the contents of %INFORMIXDIR%\etc\onconfig. ♦ Utilities 3-113 onstat -d onstat -d Use the -d option to display information for chunks in each storage space. You can interpret output from this option as follows. The first section of the display describes the storage spaces: 3-114 address Is the address of the storage space in the shared-memory space table number Is the unique ID number of the storage space assigned at creation flags Uses the following hexadecimal values to describe each storage space: 0x00000000 Mirror not allowed and dbspace is unmirrored 0x00000001 Mirror is allowed and dbspace is unmirrored 0x00000002 Mirror is allowed and dbspace is mirrored 0x00000004 Down 0x00000008 Newly mirrored 0x00000010 Blobspace (IDS) 0x00000020 Blobspace on removable media (IDS) 0x00000040 Blobspace is on optical media (IDS) 0x00000080 Blobspace is dropped (IDS) 0x00000100 Blobspace is the optical STAGEBLOB (IDS) 0x00000200 Space is being recovered 0x00000400 Space is fully recovered 0x00000800 Logical log is being recovered 0x00001000 Table in dbspace is dropped IBM Informix Administrator’s Reference onstat -d 0x00002000 Temporary dbspace 0x00004000 Blobspace is being backed up (IDS) 0x00008000 Sbspace (IDS) 0x0000a001 Temporary sbspace (IDS) 0x00010000 Physical or logical log changed (IDS) 0x00020000 Dbspace or chunk tables have changed (IDS) fchunk Is the ID number of the first chunk nchunks Is the number of chunks in the storage space flags Uses the following letter codes to describe each storage space: Position 1: Position 2: Position 3: M Mirrored N Not Mirrored X Newly mirrored P Physically recovered, waiting for P -logical recovery L Being logically recovered R Being recovered B Blobspace (IDS) S Sbspace (IDS) owner Is the owner of the storage space name Is the name of the storage space The line immediately following the storage-space list includes the number of active spaces (the current number of dbspaces in the database server instance including the rootdbs) and the number of total spaces. Active spaces refers to the current number of storage spaces in the database server instance including the rootdbs. Total refers to total allowable spaces for this database server instance. Utilities 3-115 onstat -d The second section of the onstat -d output describes the chunks: address Is the address of the chunk chk/dbs Is the chunk number and the associated space number offset Is the offset into the file or raw device in pages size Is the size of the chunk in page free Is the number of free pages in the chunk for a dbspace For a blobspace, a tilde indicates an approximate number of free blobpages. (IDS) For an sbspace, indicates the number of free pages of user data space and total user data space. (IDS) bpages Is the size of the chunk in blobpages Blobpages can be larger than disk pages; therefore, the bpages value can be less than the size value. (IDS) For an sbspace, is the size of the chunk in sbpages (IDS) flags Provides the chunk status information as follows: Position 1: Position 2: Position 3: 3-116 IBM Informix Administrator’s Reference P Primary M Mirror O Online D Down X Newly mirrored I Inconsistent - Dbspace B Blobspace (IDS) onstat -D pathname S Sbspace (IDS) T Temporary dbspace Is the pathname of the physical device The line immediately following the chunk list displays the number of active chunks (including the root chunk) and the total number of chunks. For information about page reads and page writes, refer to “onstat -D.” Using onstat -d with Sbspaces For information about using onstat -d to determine the size of sbspaces, userdata areas, and metadata areas, see monitoring sbspaces in the Administrator’s Guide. Using onstat -d with Blobspaces If you issue the onstat -d command on an instance with blobspace chunks, the database server displays the following message: NOTE: For BLOB chunks, the number of free pages shown is out of date. Run ‘onstat -d update’ for current stats. To obtain the current statistics for blobspace chunks, issue the onstat -d update command. The onstat utility updates shared memory with an accurate count of free pages for each blobspace chunk. The database server displays the following message: Waiting for server to update BLOB chunk statistics ... onstat -D Use the -D option to display page-read and page-write information for the first 50 chunks in each space. All but two of the fields that appear in the -D output also appear in the onstat -d output. You can interpret the two fields that are unique to the -D output as follows: page Rd Is the number of pages read page Wr Is the number of pages written Utilities 3-117 onstat -f onstat -f Use the -f option to list the dbspaces that the dataskip feature currently affects. The -f option lists both the dbspaces that were set with the DATASKIP configuration parameter and the -f option of onspaces. When you execute onstat -f, the database server displays one of the following three outputs: ■ Dataskip is OFF for all dbspaces. ■ Dataskip is ON for all dbspaces. ■ Dataskip is ON for the following dbspaces: dbspace1 dbspace2... onstat -F Use the -F option to display a count for each type of write that flushes pages to disk. You can interpret output from this option as follows: 3-118 Fg Writes Is the number of times that a foreground write occurred LRU Writes Is the number of times that an LRU write occurred Chunk Writes Is the number of times that a chunk write occurred address Is the address of the user structure assigned to this page-cleaner thread flusher Is the page-cleaner number state Uses the following codes to indicate the current page-cleaner activity: C Chunk write E Exit I Cleaner is idle L LRU queue IBM Informix Administrator’s Reference onstat -g Monitoring Options The exit code indicates either that the database server is performing a shutdown or that a page cleaner did not return from its write in a specific amount of time. When an operation fails to complete within the allotted time, this situation is known as a time-out condition. The database server does not know what happened to the cleaner, so it is marked as exit. In either case, the cleaner thread eventually exits. data Provides additional information in concert with the state field If state is C, data is the chunk number to which the page cleaner is writing buffers. If state is L, data is the LRU queue from which the page cleaner is writing. The data value is displayed as a decimal, followed by an equal sign, and repeated as a hexadecimal. onstat -g Monitoring Options The following onstat -g options are provided for support and debugging only. You can include only one of these options per onstat -g command For more information, see your Performance Guide. onstat -g Option IDS XPS Topic or Function -g act ✔ ✔ Prints active threads. -g afr pool name | session id ✔ ✔ Prints allocated memory fragments for a specified session or shared-memory pool. Each session is allocated a pool of shared memory. To obtain the pool name, see the -mem option. -g all ✔ ✔ Prints all multithreading information. (1 of 10) Utilities 3-119 onstat -g Monitoring Options onstat -g Option IDS XPS Topic or Function -g ath ✔ ✔ Prints all threads. The sqlmain threads represent client sessions. The rstcb value corresponds to the user field of the onstat -u command. For information on using onstat -g ath to print Enterprise Replication threads, see the Guide to Informix Enterprise Replication. -g bus ✔ Prints current backup scheduler sessions, backups in progress, and backups to be performed. Issue from any coserver. -g bus_sm ✔ Prints current storage manager configuration and active work. Issue from any coserver. -g cat [modifier] ✔ Prints information from the Enterprise Replication global catalog. The global catalog contains a summary of information about the defined servers, replicates, and replicate sets on each of the servers within the enterprise. For more information, see the Guide to Informix Enterprise Replication. -g cac agg ✔ Prints the definitions for user-defined aggregates that are currently in the cache. -g cac stmt ✔ Prints the contents of the SQL statement cache. Prints the same output as the -g ssc statement. -g con ✔ -g ddr ✔ -g dfm ✔ Prints conditions with waiters. Prints the status of the Enterprise Replication database log reader. If log reading is blocked, data might not be replicated until the problem is resolved. For more information, see the Guide to Informix Enterprise Replication. ✔ Prints data flow information between coservers. Can be used with the xctl utility. (2 of 10) 3-120 IBM Informix Administrator’s Reference onstat -g Monitoring Options onstat -g Option IDS XPS Topic or Function -g dic table ✔ ✔ Without any parameters, prints one line of information for each table cached in the shared-memory dictionary. If given a specific table name as a parameter, prints internal SQL information for that table. For more information, see your Performance Guide. -g dis ✔ ✔ Prints a list of database servers and their status, and information about each database server, INFORMIXDIR, sqlhosts file, ONCONFIG file, and hostname. You can use this option with the database server in any mode, including offline. -g dll ✔ ✔ Prints a list of dynamic libraries that have been loaded. -g dri ✔ -g dsc ✔ -g dss [modifier] ✔ Prints detailed statistical information about the activity of individual data sync threads and about user-defined data types. For more information, see the Guide to Informix Enterprise Replication. -g dtc ✔ Prints statistics about the delete table cleaner which removes rows from the delete table when they are no longer needed. For more information, see the Guide to Informix Enterprise Replication. -g ffr pool name | session id ✔ Prints data-replication information. See monitoring High-Availability DataReplication status in the Administrator’s Guide. ✔ ✔ Prints data-distribution cache information. Prints free fragments for a pool of shared memory. (3 of 10) Utilities 3-121 onstat -g Monitoring Options onstat -g Option IDS XPS Topic or Function -g glo ✔ ✔ Prints global multithreading information. This information includes CPU use information about the virtual processors, the total number of sessions, and other multithreading global counters. -g grp [modifier] ✔ Prints statistics about the Enterprise Replication grouper. The grouper evaluates the log records, rebuilds the individual log records into the original transaction, packages the transaction, and queues the transaction for transmission. For more information, see the Guide to Informix Enterprise Replication. -g imc ✔ Prints information about MaxConnect instances that are connected to the database server. If MaxConnect is not connected to the database server, this command displays No MaxConnect servers are connected. -g ioa ✔ ✔ Prints combined information from -g ioq and -g iov. -g iof ✔ ✔ Prints asynchronous I/O statistics by chunk or file. This option is similar to the -D option, except it also displays information on nonchunk, temporary, and sort-work files. -g iog ✔ ✔ Prints AIO global information. -g ioq queue name ✔ ✔ Prints pending I/O operations for the queue name. If given the gfd or kaio queue name, a queue for each CPU VP is displayed. If queue name is omitted, I/O statistics for all queues are displayed. -g iov ✔ ✔ Prints asynchronous I/O statistics by virtual processor. -g lmx ✔ ✔ Prints all locked mutexes. (4 of 10) 3-122 IBM Informix Administrator’s Reference onstat -g Monitoring Options onstat -g Option IDS -g lsc ✔ -g mem pool name | session id ✔ XPS Topic or Function Displays information about light scans. (The equivalent command in XPS is onstat -g scn.) ✔ Prints statistics for a memory pool. Also displays the pool name, type of shared memory segment that contains the pool, the address of the pool, the total size of the pool, the number of bytes of free memory that it contains, and the number of free and allocated fragments in the pool. If no argument is provided, displays information about all pools. The block pools are listed in a separate section after the main pool list. You also can use ISA to obtain detailed information about a memory pool. If you run an SQL query that allocates memory from the PER_STMT_EXEC and PER_STMT_PREP memory duration pools, onstat -g mem displays information on the PRP.sessionid.threadid pool and the EXE.sessionid.threadid pool. For more information, see the DataBlade API Programmer’s Manual. -g mgm ✔ -g nbm ✔ -g nif [modifier] ✔ -g nsc client id ✔ Prints Memory Grant Manager resource information. ✔ Prints block bit map for the nonresident segments, one bit per 8-kilobyte block. Bit set indicates block free. Prints statistics about the network interface. Useful to determine why data is not replicating. For more information, see the Guide to Informix Enterprise Replication. ✔ Prints shared-memory status by client id. If client id is omitted, all client status areas are displayed. This command prints the same status data as the nss command. (5 of 10) Utilities 3-123 onstat -g Monitoring Options onstat -g Option IDS XPS Topic or Function -g nsd ✔ ✔ Prints network shared-memory data for poll threads. -g nss session id ✔ ✔ Prints network shared-memory status by session id. If session id is omitted, all session status areas are displayed. This command prints the same status data as the nsc command. -g nta ✔ ✔ Prints combined network statistics from -g ntd, -g ntm, -g ntt, and -g ntu. If MaxConnect is installed, this command prints statistics that you can use to tune MaxConnect performance. -g ntd ✔ ✔ Prints network statistics by service. -g ntm ✔ ✔ Prints network mail statistics. -g ntt ✔ ✔ Prints network user times. -g ntu ✔ ✔ Prints network user statistics. -g pos ✔ ✔ Prints $INFORMIXDIR/etc/ .infos.DBSERVERNAME file for UNIX and %INFORMIXDIR%\etc\ .infos.DBSERVERNAME for Windows. -g ppf partition number | 0 ✔ ✔ Prints partition profile for partition number; 0 prints profiles for all partitions. If TBLSPACE_STATS configuration parameter is set to 0, displays: Partition profiles disabled. -g prc ✔ ✔ Prints information about SPL routine cache. -g qst ✔ ✔ Prints queue statistics. -g que ✔ Prints statistics for the high-level queue interface. For more information, see the Guide to Informix Enterprise Replication. (6 of 10) 3-124 IBM Informix Administrator’s Reference onstat -g Monitoring Options onstat -g Option IDS XPS Topic or Function -g rbm ✔ ✔ Prints block bit map for the resident segment (communication message area). -g rcv [serverid] ✔ -g rea ✔ -g rep [replname] ✔ Prints statistics about the receive manager, which is a set of service routines between the receive queues and data sync. For more information, see the Guide to Informix Enterprise Replication. ✔ Prints events that are in the queue for the schedule manager. For more information, see the Guide to Informix Enterprise Replication. ✔ -g rgm Prints ready threads. Prints Resource Grant Manager information. Issue from coserver 1 only. Can be used with the xctl utility. -g rqm [modifier] ✔ -g rwm ✔ ✔ Prints read/write mutexes. -g rwm ✔ ✔ Prints read/write Mutex lists. -g sch ✔ ✔ Prints the number of semaphore operations, spins, and busy waits for each virtual processor. ✔ Displays information about light scans. (The equivalent command in IDS is onstat -g lsc.) ✔ Prints shared-memory-segment statistics. This option shows how many segments are attached and their sizes. -g scn -g seg ✔ Prints statistics and contents of the lowlevel queues managed by the Reliable Queue Manager (RQM). For more information, see the Guide to Informix Enterprise Replication. (7 of 10) Utilities 3-125 onstat -g Monitoring Options onstat -g Option IDS XPS Topic or Function -g ses session id ✔ ✔ Prints session information by session id. If session id is missing, a one-line summary of each session prints. -g sle ✔ ✔ Prints all sleeping threads. -g smb option ✔ Prints detailed information about sbspaces: ■ c = lists all the chunks in the sbspace. ■ fdd = lists the smart-large-object file descriptors. ■ lod = lists the smart-large-object headers in the header table. ■ s = lists the sbspace attributes (owner, name, page size, -Df flag settings). Fields with a value of 0 or -1 were not initialized during sbspace creation. -g spi ✔ ✔ Prints spin locks that virtual processors have spun more than 10,000 times to acquire. These spin locks are called longspins. The total number of longspins is printed in the heading of the glo command. Excessive longspins might indicate an overloaded system, too many virtual processors for a given computer or node, or an internal problem. To reduce longspins, reduce the number of virtual processors (generally class CPU), reduce the load on the computer, or use the no-age or processor affinity features. -g sql session id ✔ ✔ Prints SQL information by session id. If session id is omitted, a one-line summary for each session prints. (8 of 10) 3-126 IBM Informix Administrator’s Reference onstat -g Monitoring Options onstat -g Option IDS -g ssc ✔ XPS Topic or Function Monitors the number of times that the database server reads the SQL statement in the cache. In the Statement Cache Summary section, the #hits column is the value of the STMT_CACHE_HITS configuration parameter. The Statement Cache Entries section shows the entries that are fully inserted into the cache. The hits column shows the number of times a statement matches a statement in the cache. The match can be for a key-only or fully cached entry. The -F flag indicates the statement is fully cached. Displays the same output as onstat -g cac stmt. For more information, see improving query performance in the Performance Guide. -g ssc all ✔ Reports the key-only cache entries as well as the fully cached statements. If the value in the hits column is less than the STMT_CACHE_HITS value, that entry is a key-only cache entry. For more information, see memory utilization in the Performance Guide. -g ssc pool ✔ Reports usage of all memory pools for the SQL statement cache. The output displays information on the name, class, address, and total size of the memory pools. For more information, see improving query performance in the Performance Guide. -g stk tid | all ✔ ✔ Dumps stack of thread specified by thread ID or stacks for all threads. This option is not supported on all platforms and is not always accurate. (9 of 10) Utilities 3-127 onstat -g Monitoring Options onstat -g Option IDS -g stm [session id] ✔ XPS Topic or Function Displays the memory that each prepared SQL statement uses (see the heapsz column). To display the memory for only one session, specify the session ID in the onstat -g stm option. For more information, see memory utilization and improving query performance in the Performance Guide. -g sts ✔ ✔ Prints maximum and current stack use per thread. -g tpf tid ✔ ✔ Prints thread profile for tid; 0 prints profiles for all threads. -g ufr pool name | session id ✔ ✔ Prints allocated fragments by use. -g wai ✔ ✔ Prints waiting threads; all threads waiting on mutex or condition, or yielding. -g wmx ✔ ✔ Prints all mutexes with waiters. -g wst ✔ ✔ Prints wait statistics. -g xmf ✔ Prints communication information between coservers. Can be used with the xctl utility. -g xmp ✔ Prints information about the query segments and SQL operators that are currently executing on a coserver. Issue from the connection coserver only. Can be used with xctl utility. -g xqp qryid ✔ Prints information about a specific query plan. Issue from the connection coserver only. -g xqs qryid ✔ Prints query statistics for an active plan. Issue from the connection coserver only. Can be used with the xctl utility. (10 of 10) 3-128 IBM Informix Administrator’s Reference onstat -G onstat -G Use the -G option to display information about global transactions generated through TP/XA. For more information on TP/XA, see the TP/XA Programmer’s Manual. You can interpret output from this option as follows: address Is the in-memory address of the transaction control block flags Is the current status of the global transaction using a combination of the following hexadecimal values: x00000001 User attached to transaction x00000002 Open transaction x00000004 Transaction between xa_start() and xa_end() x00000008 Global transaction x00000010 Transaction marked as abort-only x00000020 TP/XA-prepared transaction x00000040 Distributed transaction x00000080 Aborted transaction x00000100 Committed transaction x00000200 Heuristically completed transaction x00000400 BEGIN WORK log record written x00000800 Roll back completed x00001000 Started committing dropped tables and indexes x00002000 Started aborting the transaction x00004000 No undo operations were performed x00008000 Global save point is active x00010000 Save point rollback x00020000 Clean up dead transaction Utilities 3-129 onstat -G x00040000 Transaction is for a remote database server x00080000 Transaction entry is in use x00100000 Transaction has done remote work x00200000 Save point has begun x00400000 Coordinator in a distributed transaction x00800000 Subordinate in a distributed transaction x01000000 Long or suspended transaction has no owner x02000000 Transaction is being recovered x04000000 Redo failed for this transaction x08000000 Undo failed for this transaction x10000000 Transaction active while I/O failure occurred x20000000 Transaction did some work during recovery x40000000 Transaction contains locks x80000000 Transaction did DDR work fID Is the format ID for transaction data gtl Is the length of the global transaction bql Is the length of the byte stream for the transaction data Is the hexadecimal dump of the transaction ID and data Summary Definitions 3-130 active Is the number of active global transactions total Is the current number of transactions dynamically allocated to the database server IBM Informix Administrator’s Reference onstat -i onstat -i Use the -i option to put onstat in interactive mode. In interactive mode, you can enter multiple onstat options per session, but only one at a time. An onstat prompt appears and allows you to enter an option. In interactive mode, do not precede the option with a dash. Two additional options, r seconds and rz seconds, are available in interactive mode. The r seconds option is similar to the current onstat -r seconds option, which repeatedly generates a display. If an administrator executes r seconds at the interactive-mode prompt, the prompt changes to reflect the specified interval in seconds and reappears, waiting for the next command. In the following example, the display generated by the next command repeats every three seconds: onstat> r 3 onstat[3]> The rz seconds option enables you to repeat the next command as specified and set all profile counters to 0 between each execution. To terminate interactive mode, press CTRL-D. To terminate a repeating sequence, press CTRL-C. onstat -k Use the -k option to display information about active locks. You can interpret output from this option as follows: address Is the address of the lock in the lock table If a user thread is waiting for this lock, the address of the lock appears in the wait field of the onstat -u (users) output. wtlist Is the first entry in the list of user threads that is waiting for the lock, if there is one Utilities 3-131 onstat -k owner Is the shared-memory address of the thread that is holding the lock This address corresponds to the address in the address field of onstat -u (users) output. lklist Is the next lock in a linked list of locks held by the owner just listed type Uses the following codes to indicate the type of lock: tblsnum (IDS) 3-132 HDR Header B Bytes S Shared X Exclusive I Intent U Update IX Intent-exclusive IS Intent-shared SIX Shared, intent-exclusive Is the tblspace number of the locked resource IBM Informix Administrator’s Reference onstat -K rowid Is the row identification number The rowid provides the following lock information: key#/bsiz ■ If the rowid equals zero, the lock is a table lock. ■ If the rowid ends in two zeros, the lock is a page lock. ■ If the rowid is six digits or fewer and does not end in zero, the lock is probably a row lock. ■ If the rowid is more than six digits, the lock is probably an index key-value lock. Is the index key number, or the number of bytes locked for a VARCHAR lock If this field contains 'K-' followed by a value, it is a key lock. The value identifies which index is being locked. For example, K-1 indicates a lock on the first index defined for the table. The maximum number of locks available is specified as LOCKS in the ONCONFIG file. onstat -K Use the -K option to display information about byte-range locks held. onstat -l Use the -l option to display information about physical and logical logs. You can interpret output from this option as follows. The first section of the display describes the physical-log configuration: buffer Is the number of the physical-log buffer bufused Is the number of pages of the physical-log buffer that are used bufsize Is the size of each physical-log buffer in pages numpages Is the number of pages written to the physical log Utilities 3-133 onstat -l numwrits Is the number of writes to disk pages/io Is calculated as numpages/numwrits This value indicates how effectively physical-log writes are being buffered. phybegin Is the physical page number of the beginning of the log physize Is the size of the physical log in pages phypos Is the current position in the log where the next log-record write is to occur phyused Is the number of pages used in the log %used Is the percent of pages used The second section of the onstat -l display describes the logical-log configuration: buffer Is the number of the logical-log buffer bufused Is the number of pages used in the logical-log buffer bufsize Is the size of each logical-log buffer in pages numrecs Is the number of records written numpages Is the number of pages written numwrits Is the number of writes to the logical log recs/pages Is calculated as numrecs/numpages You cannot affect this value. Different types of operations generate different types (and sizes) of records. pages/io is calculated as numpages/numwrits You can affect this value by changing the size of the logical-log buffer (specified as LOGBUFF in the ONCONFIG file) or by changing the logging mode of the database (from buffered to unbuffered, or vice versa). 3-134 IBM Informix Administrator’s Reference onstat -l The following fields are repeated for each logical-log file: address Is the address of the log-file descriptor number Is logid number for the logical-log file The logid numbers might be out of sequence because either the database server or administrator can insert a log file in-line. flags Provides the status of each log as follows: A Newly added (and ready to use) B Backed up C Current logical-log file D Marked for deletion To drop the log file and free its space for reuse, you must perform a level-0 backup of all storage spaces F Free, available for use L The most recent checkpoint record U Used uniqid Is the unique ID number of the log begin Is the beginning page of the log file size Is the size of the log in pages used Is the number of pages used %used Is the percent of pages used active Is the number of active logical logs total Is the total number of logical logs Utilities 3-135 onstat -m The database server uses temporary logical logs during a warm restore because the permanent logs are not available then. The following fields are repeated for each temporary logical-log file: address Is the address of the log-file descriptor number Is logid number for the logical-log file flags Provides the status of each log as follows: B Backed up C Current logical-log file F Free, available for use U Used uniqid Is the unique ID number of the log begin Is the beginning page of the log file size Is the size of the log in pages used Is the number of pages used %used Is the percent of pages used active Is the number of active temporary logical logs onstat -m Use the -m option to display the 20 most-recent lines of the system message log. You can use the onstat -m option with the database server in any mode, including offline. Output from this option lists the full pathname of the message-log file and the 20 file entries. A date-and-time header separates the entries for each day. A time stamp prefaces single entries within each day. The name of the message log is specified as MSGPATH in the ONCONFIG file. 3-136 IBM Informix Administrator’s Reference onstat -O onstat -O Use the -O option of the onstat utility to display information about the Optical Subsystem memory cache and staging-area blobspace. You can interpret output from this option as follows. The totals shown in the display accumulate from session to session. The database server resets the totals to 0 only when you execute onstat -z. The first section of the display provides the following information on systemcache totals: size Is the size that the OPCACHEMAX configuration parameter specifies alloc Is the number of 1-kilobyte allocations to the cache avail Describes how much of alloc (in kilobytes) is not used number Is the number of simple large objects that the database server successfully put in the cache without overflowing kbytes Is the number of kilobytes of TEXT or BYTE data that the database server put in the cache without overflowing number Is the number of simple large objects that the database server wrote to the staging-area blobspace kbytes Is the number of kilobytes of TEXT or BYTE data that the database server wrote to the staging-area blobspace Although the size output indicates the amount of memory that is specified in the configuration parameter OPCACHEMAX, the database server does not allocate memory to OPCACHEMAX until necessary. Therefore, the alloc output reflects only the number of 1-kilobyte allocations of the largest simple large object that has been processed. When the values in the alloc and avail output are equal to each other, the cache is empty. Utilities 3-137 onstat -p The second section of the display describes the following user-cache totals information: SID Is the session ID for the user user Is the user ID of the client size Is the size specified in the INFORMIXOPCACHE environment variable, if it is set If you do not set the INFORMIXOPCACHE environment variable, the database server uses the size that you specify in the configuration parameter OPCACHEMAX. number Is the number of simple large objects that the database server put into cache without overflowing kbytes Is the number of kilobytes of TEXT or BYTE data that the database server put in the cache without overflowing number Is the number of simple large objects that the database server wrote to the staging-area blobspace kbytes Is the number of kilobytes of TEXT or BYTE data that the database server wrote to the staging-area blobspace The last line of the display lists the total number of sessions that are using the cache. onstat -p Use the -p option to display profile counts either since you started the database server or since you ran onstat with the -z option. The first portion of the display describes reads and writes. Reads and writes are tabulated in three categories: from disk, from buffers, and number of pages (read or written). The first %cached field is a measure of the number of reads from buffers compared to reads from disk. The second %cached field is a measure of the number of writes to buffers compared to writes to disk. 3-138 IBM Informix Administrator’s Reference onstat -p The database server buffers information and writes to the disk in pages. For this reason, the number of disk writes displayed as dskwrits is usually less than the number of writes that an individual user executes: dskreads Is the number of actual reads from disk pagreads Is the number of pages read bufreads Is the number of reads from shared memory %cached Is the percent of reads cached, calculated as follows: 100 * (bufreads - dskreads) / bufreads If bufreads exceeds the maximum integer (or long) value, its internal representation becomes a negative number, but the value appears as 0.0. dskwrits Is the actual number of physical writes to disk This number includes the writes for the physical and logical logs reported in onstat -l. pagwrits Is the number of pages written bufwrits Is the number of writes to shared memory %cached Is the percent of writes cached, calculated as follows: 100 *(bufwrits - dskwrits) / bufwrits If dskwrits exceeds bufwrits, the value appears as 0.0. The next portion of the -p display tabulates the number of times different ISAM calls were executed. The calls occur at the lowest level of operation and do not necessarily correspond one-to-one with SQL statement execution. A single query might generate multiple ISAM calls. These statistics are gathered across the database server and cannot be used to monitor activity on a single database unless only one database is active or only one database exists: isamtot Is the total number of calls open Increments when a tblspace is opened start Increments the pointer within an index Utilities 3-139 onstat -p read Increments when the read function is called write Increments with each write call rewrite Increments when an update occurs delete Increments when a row is deleted commit Increments each time that an iscommit() call is made No one-to-one correspondence exists between this value and the number of explicit COMMIT WORK statements that are executed. rollbk Increments when a transaction is rolled back The next portion of the -p display provides information on generic pages. The Generic Page Manager provides an API for Dynamic Server to manage nonstandard pages in the database server buffer pool. The following table describes the Generic Page Manager fields in the onstat -p output. 3-140 gp_read The number of generic page reads gp_write The number of generic page writes gp_rewrt The number of generic page updates gp_del The number of generic page deletes gp_alloc The number of generic page allocations gp_free The number of generic pages freed and returned to tblspaces gp_curs The number of cursors used against generic pages IBM Informix Administrator’s Reference onstat -p The next portion of the -p display tracks the number of times that a resource was requested when none was available: ovlock Is the number of times that the database server attempted to allocate locks more than 15 times For more information, see “LOCKS” on page 1-56. ovuserthread Is the number of times that a user attempted to exceed the maximum number of user threads ovbuff Is the number of times that the database server could not find a free shared-memory buffer When no buffers are free, the database server writes a dirty buffer to disk and then tries to find a free buffer. usercpu Is the total user CPU time that all user threads use, expressed in seconds This entry is updated every 15 seconds. syscpu Is the total system CPU time that all user threads use, expressed in seconds This entry is updated every 15 seconds. numckpts Is the number of checkpoints since the boot time flushes Is the number of times that the buffer pool has been flushed to the disk The next portion of the -p display contains miscellaneous information, as follows: bufwaits Increments each time that a user thread must wait for a buffer lokwaits Increments each time that a user thread must wait for a lock lockreqs Increments each time that a lock is requested deadlks Increments each time that a potential deadlock is detected and prevented Utilities 3-141 onstat -p dltouts Increments each time that the distributed deadlock time-out value is exceeded while a user thread is waiting for a lock ckpwaits Is the number of checkpoint waits compress Increments each time that a data page is compressed seqscans Increments for each sequential scan The last portion of the -p display contains the following information: ixda-RA Is the count of read-aheads that go from index leaves to data pages idx-RA Is the count of read-aheads that traverse index leaves da-RA Is the count of data-path-only scans RA-pgsused Indicates the number of pages used that the database server read ahead If this number is significantly less than the total number of pages read ahead, the read-ahead parameters might be set too high. lchwaits Stores the number of times that a thread was required to wait for a shared-memory latch A large number of latch waits typically results from a high volume of processing activity in which the database server is logging most of the transactions. 3-142 IBM Informix Administrator’s Reference onstat -P onstat -P Use the -P option to display for all partitions the partition number and the pages in the buffer pool that belong to the partition. partnum Is the partition number total Is the total number of partitions btree Is the number of B-tree pages in the partition data Is the number of data pages in the partition other Is the number of other pages in the partition resident Is the number of resident pages in the partition dirty Is the number of dirty pages in the partition Utilities 3-143 onstat -R onstat -R Use the -R option to display detailed information about the LRU queues, FLRU queues, and MLRU queues. For an in-depth discussion of the three types of queues, see LRU queues in the shared-memory chapter of the Administrator’s Guide. For each queue, onstat -R lists the number of buffers in the queue and the number and percentage of buffers that have been modified. You can interpret output from this option as follows: # Shows the queue number Each LRU queue is composed of two subqueues: an FLRU queue and a MLRU queue. (For a definition of FLRU and MLRU queues, see LRU queues in the shared-memory chapter of the Administrator’s Guide.) Thus, queues 0 and 1 belong to the first LRU queue, queues 2 and 3 belong to the second LRU queue, and so on. f/m Identifies queue type This field has four possible values: f Free LRU queue In this context, free means not modified. Although nearly all the buffers in an LRU queue are available for use, the database server attempts to use buffers from the FLRU queue rather than the MLRU queue. (A modified buffer must be written to disk before the database server can use the buffer.) F Free LRU with fewest elements The database server uses this estimate to determine where to put unmodified (free) buffers next. 3-144 m MLRU queue M MLRU queue that a flusher is cleaning IBM Informix Administrator’s Reference onstat -s length Tracks the length of the queue measured in buffers % of Shows the percent of LRU queue that this subqueue composes For example, suppose that an LRU queue has 50 buffers, with 30 of those buffers in the MLRU queue and 20 in the FLRU queue. The % of column would list percents of 60.00 and 40.00, respectively. pair total Provides the total number of buffers in this LRU queue The -R option also lists the priority levels. Summary information follows the individual LRU queue information. You can interpret the summary information as follows: dirty Is the total number of buffers that have been modified in all LRU queues queued Is the total number of buffers in LRU queues total Is the total number of buffers hash buckets Is the number of hash buckets buffer size Is the size of each buffer start clean Is the value of LRU_MAX_DIRTY stop at Is the value of LRU_MIN_DIRTY onstat -s Use the -s option to display general latch information. You can interpret output from this option as follows: name Identifies the resource that the latch controls with the following abbreviations: archive Storage-space backup bf Buffers Utilities 3-145 onstat -s address bh Hash buffers chunks Chunk table ckpt Checkpoints dbspace Dbspace table flushctl Page-flusher control flushr Page cleaners locks Lock table loglog Logical log LRU LRU queues physb1 First physical-log buffer physb2 Second physical-log buffer physlog Physical log pt Tblspace tblspace tblsps Tblspace table users User table Is the address of the latch This address appears in the -u (users) output wait field if a thread is waiting for the latch. 3-146 IBM Informix Administrator’s Reference onstat -t and -T lock Indicates if the latch is locked and set The codes that indicate the lock status (1 or 0) are computer dependent. wait Indicates if any user thread is waiting for the latch userthread Is the shared-memory address of any user thread that is waiting for a latch Instead this field contains the thread-control block address, which all threads have. You can compare this address with the user addresses in the onstat -u output to obtain the user-process identification number. To obtain the rstcb address from the tcb address, examine the output of the onstat -g ath option, which lists both addresses for each user thread. onstat -t and -T Use the -t option to display tblspace information for active tblspaces, including whether tblspaces are memory resident. Use the -T option to display the total number of tblspaces. You can interpret output from this option as follows: n Is a counter of open tblspaces address Is the address of the tblspace in the shared-memory tblspace table flgs Uses the following flag bits to describe the flag: 0x00000001 Partition structure is being initialized 0x00000002 Partition was modified. The modified pages have not been flushed to disk. 0x00000004 Partition is being dropped 0x00000008 Partition is for a pseudo table 0x00000010 Partition is being altered in an ADD INDEX or DROP INDEX operation Utilities 3-147 onstat -t and -T 0x00000020 Partition is being altered in an ALTER TABLE operation 0x00000080 Partition is being dropped while the dbspace is down 0x00000100 Simple large objects in blobspaces are not deleted when the table is dropped 0x00000200 Partition alter page count is updated 0x00000400 Pages have been altered to the latest database schema 0x00000800 System temp table 0x00001000 User temp table 0x00002000 Partition is resident 0x00004000 Index operations are deferred during recovery 0x00008000 Partition is being truncated 0x00010000 Partition is partially truncated ucnt Is the usage count, which indicates the number of user threads currently accessing the tblspace tblnum Is the tblspace number expressed as a hexadecimal value The integer equivalent appears as the partnum value in the systables system catalog table. 3-148 physaddr Is the physical address (on disk) of the tblspace npages Is the number of pages allocated to the tblspace nused Is the number of used pages in the tblspace npdata Is the number of data pages used IBM Informix Administrator’s Reference onstat -u nrows Is the number of data rows used nextns Is the number of noncontiguous extents allocated This number is not the same as the number of times that a next extent has been allocated. resident Indicates whether tblspace is memory-resident; 1 = yes, 0 = no The -t option also lists the number of active tblspaces and the total number of tblspaces. onstat -u Use the -u option to print a profile of user activity. The -u option provides the following output for each user thread. address Is the shared-memory address of the user thread (in the user table) Compare this address with the addresses displayed in the -s output (latches); the -b, -B, and -X output (buffers); and the -k output (locks) to learn what resources this thread is holding or waiting for. flags Provides the status of the session. The flag codes for position 1: B Waiting for a buffer C Waiting for a checkpoint G Waiting for a write of the logical-log buffer L Waiting for a lock S Waiting for mutex T Waiting for a transaction Y Waiting for condition X Waiting for a transaction cleanup (rollback) Utilities 3-149 onstat -u DEFUNCT The thread has incurred a serious assertion failure, and has been suspended to allow other threads to continue their work. The flag code for position 2: * Transaction active during an I/O failure The flag code for position 3: A A dbspace backup thread For other values that appear here, see the third position of flag codes for the -x option. The flag code for position 4: P Primary thread for a session The flag codes for position 5: R Reading X Thread in critical section (IDS) The flag codes for position 7: sessid B A B-tree cleaner thread C Terminated user thread waiting for cleanup D A daemon thread F A page-cleaner thread M Special ON-Monitor thread (IDS, UNIX) Is the session identification number During operations such as parallel sorting and parallel index building, a session might have many user threads associated with it. For this reason, the session ID identifies each unique session. user 3-150 Is the user login name (derived from the operating system) IBM Informix Administrator’s Reference onstat -u tty Indicates the tty that the user is using (derived from the operating system) This field is blank on Windows. wait If the user thread is waiting for a specific latch, lock, mutex, or condition, this field displays the address of the resource. Use this address to map to information provided in the -s (latch) or -k (lock) output. If the wait is for a persistent condition, run a grep for the address in the onstat -a output. tout Is the number of seconds left in the current wait If the value is 0, the user thread is not waiting for a latch or lock. If the value is -1, the user thread is in an indefinite wait. locks Is the number of locks that the user thread is holding (The -k output should include a listing for each lock held.) nreads Is the number of disk reads that the user thread has executed nwrites Is the number of write calls that the user thread has executed All write calls are writes to the shared-memory buffer cache. Figure 3-17 shows output from onstat -u. The last line of onstat -u output displays the maximum number of concurrent user threads that were allocated since you initialized the database server. For example, the last line of a sample onstat -u output is as follows: 4 active, 128 total, 17 maximum concurrent The last part of the line, 17 maximum concurrent, indicates that the maximum number of user threads that were running concurrently since you initialized the database server is 17. Userthreads address flags sessid user tty nwrites 80eb8c ---P--D 0 informix 80ef18 ---P--F 0 informix 80f2a4 ---P--B 3 informix 80f630 ---P--D 0 informix 4 active, 128 total, 17 maximum concurrent wait tout locks nreads 0 0 0 0 0 0 0 0 0 0 0 0 33 0 0 0 Figure 3-17 Output from onstat -u 19 0 0 0 Utilities 3-151 onstat -x The output also indicates the number of active users and the maximum number of users allowed. onstat -x Use the -x option to display transaction information on the database server. The transaction information is required only in the following situations: ■ X/Open environment ■ Database server participation in distributed queries ■ Database server uses the Microsoft Transaction Server (MTS) transaction manager You can interpret output from onstat -x as follows: address Is the shared-memory address of the transaction structure flags The flag codes for position 1 (current transaction state): A User thread attached to the transaction S TP/XA suspended transaction C TP/XA waiting for rollback The flag codes for position 2 (transaction mode): T Tightly-coupled mode (MTS) L Loosely-coupled mode (default mode) The flag codes for position 3 (transaction stage): 3-152 B Begin work P Distributed query prepared for commit X TP/XA prepared for commit C Committing or committed R Rolling back or rolled back H Heuristically rolling back or rolled back IBM Informix Administrator’s Reference onstat -x The flag codes for position 5 (type of transaction): G Global transaction C Distributed query coordinator S Distributed query subordinate B Both distributed query coordinator and subordinate userthread Is the thread that owns the transaction (rstcb address) locks Is the number of locks that the transaction holds beginlg Is the log in which the BEGIN WORK record was logged curlog Is the current log that the transaction is writing to logposit Is the log position The format of a 4-byte log position is 0xPPPPPBBB, where PPPPP is the page offset in the log and BBB is the byte offset in the page. The logposit can refer to a maximum of 0x100000 (or 1048576) pages in a log file. For example, a record on the first page of log 12, at a byte offset of 24 would have a log position of 0x18 (page 0, byte offset 18). For more information, see “Determining the Position of a Logical-Log Record” on page 3-154. isol Is the isolation level. retrys Are the attempts to start a recovery thread for the distributed query coord Is the name of the transaction coordinator when the subordinate is executing the transaction This field tells you which database server is coordinating the two-phase commit. The last line of the onstat -x output indicates that 8 is the maximum number of concurrent transactions since you initialized the database server. 8 active, 128 total, 8 maximum concurrent Utilities 3-153 onstat -x Determining the Position of a Logical-Log Record The curlog and logposit fields provide the exact position of a logical-log record. If a transaction is not rolling back, curlog and logposit describe the position of the most recently written log record. When a transaction is rolling back, these fields describe the position of the most recently “undone” log record. As the transaction rolls back, the curlog and logposit values decrease. In a long transaction, the rate at which the logposit and beginlg values converge can help you estimate how much longer the rollback is going to take. For an onstat -x example, see monitoring a global transaction in the chapter on multiphase commit protocols in the Administrator’s Guide. Determining the Mode of a Global Transaction The onstat -x utility is useful for determining whether a global transaction is executing in loosely-coupled or tightly-coupled mode. The second position of the flags column displays the flags for global transactions. The T flag indicates tightly-coupled mode and the L flag indicates loosely-coupled mode. Loosely-coupled mode means that the different database servers coordinate transactions but do not share locks. Each branch in a global transaction has a separate transaction XID. The records from all branches display as separate transactions in the logical log. Tightly-coupled mode means that the different database servers coordinate transactions and share resources such as locking and logging. In a global transaction, all branches that access the same database share the same transaction XID. Log records for branches with the same XID appear under the same session ID. MTS uses tightly-coupled mode. 3-154 IBM Informix Administrator’s Reference onstat -X Figure 3-18 shows output from onstat -x. The S flag in the first position for the transaction at address a4165b0 means that it is suspended. The transaction at address a447c74 is in tightly-coupled mode, has 13 locks, and is being logged in log 12. The B flag in the third position means the transaction has begun work, and the G flag in the fifth position means the transaction is global. Transactions address flags userthread locks beginlg curlog a447018 A---- a414018 0 0 a4471dc A---- a41465c 0 0 a4473a0 A---- a414ca0 0 0 a447564 A---- a4152e4 0 0 a447728 A---- a415928 0 0 a4478ec A---- a415f6c 0 0 a447ab0 S---- a4165b0 1 0 a447c74 ATB-G a415928 13 12 8 active, 128 total, 8 maximum concurrent logposit isol retrys coord COMMIT 0 COMMIT 0 COMMIT 0 COMMIT 0 COMMIT 0 COMMIT 0 COMMIT 0 COMMIT 0 Figure 3-18 Output from onstat -x onstat -X Use the -X option to obtain precise information about the threads that are waiting for buffers. For each buffer in use, the -X option displays general buffer information that is also available with either the -b or -B option. For more information, refer to onstat -b in “onstat -b” on page 3-111. The onstat -b and -B options contain a waitlist field that displays the address of the first user thread that is waiting for the buffer. The maximum number of shared buffers is specified as BUFFERS in the ONCONFIG file. address Is the address of the buffer header in the buffer table flags Uses the following flag bits to describe the buffer: 0x01 Modified data 0x02 Data 0x04 LRU 0x08 Error pagenum Is the physical page number on the disk memaddr Is the buffer memory address Utilities 3-155 onstat -X nslots Is the number of slot-table entries in the page This field indicates the number of rows (or portions of a row) that are stored on the page. pgflgs 3-156 Uses the following values, alone or in combination, to describe the page type: 1 Data page 2 Tblspace page 4 Free-list page 8 Chunk free-list page 9 Remainder data page b Partition resident blobpage c Blobspace resident blobpage (IDS) d Blob chunk free-list bit page e Blob chunk blob map page 10 B-tree node page 20 B-tree root-node page 40 B-tree branch-node page 80 B-tree leaf-node page 100 Logical-log page 200 Last page of logical log 400 Sync page of logical log 800 Physical log 1000 Reserved root page 2000 No physical log required 8000 B-tree leaf with default flags IBM Informix Administrator’s Reference onstat -z scount Displays the number of threads that are waiting for the buffer waiter Lists the addresses of all user threads that are waiting for the buffer onstat -z Use the -z option to clear database server statistics, including statistics that relate to Enterprise Replication, and set the profile counts to 0. If you use the -z option to reset and monitor the count of some fields, be aware that profile counts are incremented for all activity that occurs in any database that the database server manages. Any user can reset the profile counts and thus interfere with monitoring that another user is conducting. ontape: Log, Back Up, and Restore The ontape utility lets you perform the following tasks: ■ Back up data that the database server manages ■ Change database-logging status ■ Back up logical-log files ■ Start continuous logical-log file backups ■ Restore data from a backup tape ■ Use data replication On UNIX, you must be logged in as user root or user informix to execute ontape. On Windows, you must be a member of the Informix-Admin group. For information about ontape and ON-Bar, see the Backup and Restore Guide. Utilities 3-157 Syntax Syntax Back Up Database Server see BAR ontape Change DatabaseLogging Status see AG Back Up Logical-Log Files see BAR Start Continuous Logical-Log Backups see BAR Restore Data from Backup see BAR Prepare for Data Replication p. 3-159 BAR refers to the Backup and Restore Guide. AG refers to the Administrator’s Guide. Syntax for ontape options other than -t and -l appears in that manual. Things to Consider If more than one tape is needed during data replication, ontape prompts for each additional tape. Do not run ontape in background mode because you might need to provide input from the terminal or window. 3-158 IBM Informix Administrator’s Reference Prepare for Data Replication Exit Codes The ontape utility has two exit codes: 0 indicates a normal exit from ontape. 1 indicates an exceptional condition. Prepare for Data Replication Prepare for Data Replication -p -l Element -l -p Purpose Directs ontape to perform a logical restore on all the storage spaces that have just been physically restored on the database server in a data-replication pair. Directs ontape to perform a physical restore of a database server. Key Considerations Additional Information: This option rolls forward logical-log records from the last checkpoint up to the last available logical-log record on disk. Additional Information: Use this option to replicate data before you initiate High Availability Data Replication. Use the -p and -l options to replicate data initially in a pair of database servers that use data replication. For information on starting High-Availability Data Replication, see the chapter on using High-Availability Data Replication in the Administrator’s Guide. Utilities 3-159 Chapter Interpreting Logical-Log Records In This Chapter . . . . . . . . . . About Logical-Log Records . . . . . . Transactions That Drop a Table or Index Transactions That Are Rolled Back . . Checkpoints with Active Transactions . Distributed Transactions . . . . . 4 . . . . . . . . . . 4-3 . . . . . . . . . . . . . . . . . . . . . . . . . . . . . . . . . . . . . . . . . . . . . . . . . . 4-3 4-4 4-4 4-5 4-5 . . . . . . . . . . . . . . . . . . . . . . . . 4-6 4-6 4-7 4-22 Logical-Log Record Structure . . . . . . . . . Logical-Log Record Header . . . . . . . . Logical-Log Record Types and Additional Columns Log Record Types for Smart Large Objects . . . 4-2 IBM Informix Administrator’s Reference In This Chapter To display the logical-log records that the logical-log files contain, use the onlog utility. This chapter provides the following information: ■ Brief guidance on reading logical-log records ■ A listing of the different logical-log record types In general, you do not need to read and interpret your logical-log files. However, onlog output is useful in debugging situations. For example, you might want to use onlog to track a specific transaction or to see what changes the database server made to a specific tblspace. You can also use onlog to investigate the cause of an error that occurs during a rollforward. For more information, see “onlog: Display Logical-Log Contents” on page 3-35. About Logical-Log Records Most SQL statements generate multiple logical-log records. Interpreting logical-log records is more complicated when the database server records the following events in the logical log: ■ A transaction that drops a table or index ■ A transaction that rolls back ■ A checkpoint in which transactions are still active ■ A distributed transaction The following sections discuss the logical-log records for these events. Interpreting Logical-Log Records 4-3 Transactions That Drop a Table or Index Transactions That Drop a Table or Index Once the database server drops a table or index from a database, it cannot roll back that drop operation. If a transaction contains a DROP TABLE or DROP INDEX statement, the database server handles this transaction as follows: 1. The database server completes all the other parts of the transaction and writes the relevant logical-log records. 2. The database server writes a BEGCOM record to the logical log and the records associated with the DROP TABLE or DROP INDEX (DINDEX, for example). 3. The database server writes a COMMIT record. If the transaction is terminated unexpectedly after the database server writes the BEGCOM record to the logical log, the database server rolls forward this transaction during recovery because it cannot roll back the drop operation. Transactions That Are Rolled Back When a rollback occurs, the database server generates a compensation-log record (CLR) for each record in the logical log that is rolled back. The database server uses the CLRs if a system failure takes place during a rollback. The CLRs provide the database server with information on how far the rollback progressed before the failure occurred. In other words, the database server uses the CLRs to log the rollback. If a CLR contains the phrase includes next record, the next log record that is printed is included within the CLR log record as the compensating operation. Otherwise, you must assume that the compensating operation is the logical undo of the log record to which the link field of the CLR points. 4-4 IBM Informix Administrator’s Reference Checkpoints with Active Transactions Checkpoints with Active Transactions If any transactions are active at the time of a checkpoint, checkpoint records include subentries that describe each of the active transactions using the following columns: ■ Log begin (decimal format) ■ Transaction ID (decimal format) ■ Unique log number (decimal format) ■ Log position (hexadecimal format) ■ User name Distributed Transactions When distributed transactions (transactions that span multiple database servers) generate log records, they are slightly different than nondistributed transactions. You might need to read and interpret them to determine the state of the transaction on both database servers if a failure occurs as a transaction was committing. The following log records are involved in distributed transactions: ■ BEGPREP ■ ENDTRANS ■ HEURTX ■ PREPARE ■ TABLOCKS For more information about this type of logical-log record, see the material on two-phase commit and logical-log records in the Administrator’s Guide. If you are performing distributed transactions with TP/XA, the database server uses an XAPREPARE record instead of a PREPARE record. Interpreting Logical-Log Records 4-5 Logical-Log Record Structure Logical-Log Record Structure Each logical-log record has header information. Depending on the record type, additional columns of information also appear in the output, as explained in “Logical-Log Record Types and Additional Columns” on page 4-7. Logical-Log Record Header Figure 4-1 contains sample output to illustrate the header columns that display for a logical-log record. Figure 4-1 Sample Output from onlog addr len type xid id link 2c018 32 BEGIN 6 3 0 2c038 140 HDELETE 6 0 2c018 2c0c4 64 DELITEM 6 0 2c038 2c104 40 DELITEM 6 0 2c0c4 2c12c 72 HDELETE 6 0 2c104 2c174 44 DELITEM 6 0 2c12c 2c1a0 72 HDELETE 6 0 2c174 2c1e8 44 DELITEM 6 0 2c1a0 2c214 64 HDELETE 6 0 2c1e8 2c254 56 DELITEM 6 0 2c214 2c28c 48 DELITEM 6 0 2c254 2c2bc 24 PERASE 6 0 2c28c 2c2d4 20 BEGCOM 6 0 2c2bc (1 of 2) 4-6 IBM Informix Administrator’s Reference Logical-Log Record Types and Additional Columns addr len type xid id link 2c2e8 24 ERASE 6 0 2c2d4 2c300 28 CHFREE 6 0 2c2e8 2c31c 24 COMMIT 6 0 2c300 (2 of 2) Figure 4-2 defines the contents of each header column. Figure 4-2 Definition of onlog Header Columns Header Field Contents Format addr Log-record address (log position) Hexadecimal len Record length in bytes Decimal type Record-type name ASCII xid Transaction number Decimal id Logical-log number Decimal link Link to the previous record in the transaction Hexadecimal Figure 4-3 Logical-Log Record Types and Additional Columns In addition to the six header columns that display for every record, some record types display additional columns of information. The information that appears varies, depending on record type. Figure 4-4 on page 4-8 lists all the record types and their additional columns. The Action column indicates the type of database server action that generated the log entry. The Additional Columns and Format columns describe what information appears for each record type in addition to the header described in “Logical-Log Record Header” on page 4-6. Interpreting Logical-Log Records 4-7 Logical-Log Record Types and Additional Columns Figure 4-4 Logical-Log Record Types Record Type Action Additional Columns Format ADDCHK Add chunk. chunk number Decimal chunk name ASCII ADDDBS Add dbspace. dbspace name ASCII ADDITEM Add item to index. tblspace ID Hexadecimal rowid Hexadecimal logical page Decimal key number Decimal key length Decimal log number Decimal log size (pages) Decimal pageno Hexadecimal tblspace ID Decimal rowid Decimal slot flags and length Decimal page version if delete Decimal flags, vimage record Decimal rowid for previous Decimal data ASCII tblspace ID Hexadecimal physical page number previous page Hexadecimal logical page number Decimal version of alter Decimal number of columns Decimal special column list array number of columns Decimal special column list array ADDLOG ALLOCGENPG ALTERDONE ALTSPCOLSNEW ALTSPCOLSOLD Add log. Allocate a generic page. Alter of fragment complete. Changed columns in an alter table. Changed columns in an alter table. (1 of 15) 4-8 IBM Informix Administrator’s Reference Logical-Log Record Types and Additional Columns Record Type Action Additional Columns Format BADIDX Bad index tblspace ID Hexadecimal BEGCOM Begin commit. (None) (None) BEGIN Begin work. date Decimal time Decimal SID Decimal user ASCII flags Decimal (Value is 0 in a distributed transaction.) number of participants Decimal begin transaction time Decimal user ID Decimal process ID Decimal tblspace ID Hexadecimal bpageno Hexadecimal status USED/FREE log ID Decimal prev page Hexadecimal tblspace ID Hexadecimal fextsize Decimal nextsize Decimal row size Decimal ncolumns Decimal table name ASCII tblspace ID Hexadecimal bitmap page num Decimal BEGPREP (IDS) BEGWORK BFRMAP BLDCL BMAPFULL Written by the coordinator database server to record the start of the twophase commit protocol. Begin a transaction. Simple-large-object free-map change. Build tblspace. Bitmap modified to prepare for alter. (2 of 15) Interpreting Logical-Log Records 4-9 Logical-Log Record Types and Additional Columns Record Type Action Additional Columns Format BMAP2TO4 2-bit bitmap altered to two 4-bit bitmaps. tblspace ID Hexadecimal 2-bit bitmap page number Decimal flags Decimal BSPADD (IDS) Add blobspace. blobspace name ASCII BTCPYBCK Copy back child key to parent. tblspace ID Hexadecimal parent logical page Decimal child logical page Decimal slot Decimal rowoff Decimal key number Decimal tblspace ID Hexadecimal parent logical page Decimal left logical page Decimal right logical page Decimal left slot Decimal left rowoff Decimal right slot Decimal right rowoff Decimal key number Decimal tblspace ID Hexadecimal parent logical page Decimal left logical page Decimal right logical page Decimal left slot Decimal left rowoff Decimal key number Decimal flags Hexadecimal BTMERGE BTSHUFFL Merge B-tree nodes. Shuffle B-tree nodes. (3 of 15) 4-10 IBM Informix Administrator’s Reference Logical-Log Record Types and Additional Columns Record Type Action Additional Columns Format BTSPLIT Split B-tree node. tblspace ID Hexadecimal rowid Hexadecimal parent logical page Decimal left logical page Decimal right logical page Decimal infinity logical page Decimal rootleft logical page Decimal midsplit Decimal key number Decimal key length Decimal database name ASCII owner ASCII table name ASCII index name ASCII CDINDEX CDR Create detached index. Captures the set of table columns name of CDR record modified by an update statement such partition number as a bitvector. This log record allows Enterprise Replication to capture only bitvector the changed data to avoid transmitting the unchanged columns to a target site. ASCII Hexadecimal Binary In the example, the first six columns of the table are unchanged (6 leftmost bits in the bitvector are 0), the seventh and eighth columns have been updated (seventh and eighth bits are 1), and so on. The onlog output displays as many bits of bitvector as fit in a single line of the output. To see the entire bitvector displayed in hexadecimal, use the onlog -l command. Sample onlog output for CDR log record: adr len type xid id link name 40 36 CDR 14 0 18 UPDCOLS partno 10009a bitvector 000000110100110100 (4 of 15) Interpreting Logical-Log Records 4-11 Logical-Log Record Types and Additional Columns Record Type Action Additional Columns Format CHALLOC Chunk extent allocation. pageno Hexadecimal size Hexadecimal CHCOMBINE Chunk extent combine. pageno Hexadecimal CHFREE Chunk extent free. pageno Hexadecimal size Hexadecimal Update chunk adjunct on disk. chunk number Integer The database server writes this record when it moves space from the reserved area to the metadata or user-data area or when the user adds an sbspace chunk. ud1_start_page Integer ud1_size Integer md_start_page Integer md_size Integer ud2_start_page Integer ud2_size Integer flags Hexadecimal pageno Hexadecimal size in kilobytes Hexadecimal dbspace name ASCII Reserve extent for metadata stealing. chunk number Integer This record is written when you add an sbspace chunk. page number Integer length Integer CHSPLIT Chunk extent split. pageno Hexadecimal CINDEX Create index. tblspace ID Hexadecimal low rowid Decimal high rowid Decimal index descriptor ASCII tblspace ID Hexadecimal old coarse-locking flag value Decimal new coarse-locking flag value Decimal CHKADJUP (IDS) CHPHYLOG CHRESERV (IDS) COARSELOCK Change physical-log location. Coarse-grain locking (5 of 15) 4-12 IBM Informix Administrator’s Reference Logical-Log Record Types and Additional Columns Record Type Action Additional Columns Format CKPOINT Checkpoint. max users Decimal number of active transactions Decimal CLR Compensation-log record; created during a rollback. (None) (None) CLUSIDX Create clustered index. tblspace ID Hexadecimal key number Decimal Adjust BYTE, TEXT, or VARCHAR column. tblspace ID Hexadecimal number of columns adjusted Decimal Commit work. date Decimal time Decimal logical page number Decimal number slots moved Decimal compressed slot pairs ASCII end transaction time Decimal begin transaction time Decimal tblspace ID Hexadecimal rowid Hexadecimal tblspace ID Hexadecimal rowid Hexadecimal logical page Decimal key number Decimal key length Decimal tblspace number Hexadecimal table lock number Decimal tblspace ID Hexadecimal key number Decimal COLREPAI COMMIT COMTAB COMWORK DELETE DELITEM DERASE DINDEX Compact slot table on a page. End a transaction and commit work. Delete before-image. Delete item from index. Drop tblspace in down dbspace. Drop index. (6 of 15) Interpreting Logical-Log Records 4-13 Logical-Log Record Types and Additional Columns Record Type Action Additional Columns Format DPT List all dirty pages not flushed to disk during a fuzzy checkpoint. This record is written just before the CKPOINT record and linked to it. number of dirty pages Hexadecimal The DPT records are not written during a full checkpoint because all the dirty pages are flushed to disk DRPBSP (IDS) Drop blobspace. blobspace name ASCII DRPCHK Drop chunk. chunk number Decimal chunk name ASCII DRPDBS Drop dbspace. dbspace name ASCII DRPLOG Drop log. log number Decimal log size (pages) Decimal pageno Hexadecimal (None) (None) tblspace ID Hexadecimal ENDTRANS (IDS) Written by both the coordinator and participant database servers to record the end of the transaction. ENDTRANS instructs the database server to remove the transaction entry from its sharedmemory transaction table and close the transaction. In the coordinator logical log, each BEGPREP that results in a committed transaction is paired with an ENDTRANS record. If the final decision of the coordinator is to roll back the transaction, no ENDTRANS record is written. In the participant logical log, each ENDTRANS record is paired with a corresponding HEURTX record. ERASE Drop tblspace. (7 of 15) 4-14 IBM Informix Administrator’s Reference Logical-Log Record Types and Additional Columns Record Type Action Additional Columns Format FREE_RE (IDS) Allocate extent from reserve extent to metadata or user-data area of an sbspace chunk. chunk number Integer page number Integer length Integer flag Hexadecimal tblspace ID Hexadecimal rowid Hexadecimal slotlen Decimal HDELETE Delete home row. HEURTX (IDS) Written by a participant database server to record a heuristic decision to roll back the transaction. It should be associated with a standard ROLLBACK record indicating that the transaction was rolled back. flag Hexadecimal (Value is always 1.) HINSERT Home row insert. tblspace ID Hexadecimal rowid Hexadecimal slotlen Decimal tblspace ID Hexadecimal rowid Hexadecimal slotlen Decimal tblspace ID Hexadecimal rowid Hexadecimal slotlen Decimal tblspace ID Hexadecimal rowid Hexadecimal forward ptr rowid Hexadecimal old slotlen Decimal new slotlen Decimal number of pieces Decimal tblspace ID Hexadecimal key number Hexadecimal HUPAFT HUPBEF HUPDATE IDXFLAGS Home row update, after-image. Home row update, before-image. If the home row update before-images and after-images can both fit into a single page, the database server writes a single HUPDATE record. Index flags. (8 of 15) Interpreting Logical-Log Records 4-15 Logical-Log Record Types and Additional Columns Record Type Action Additional Columns Format INSERT Insert after-image. tblspace ID Hexadecimal rowid Hexadecimal end transaction time Decimal begin transaction time Decimal tblspace ID Hexadecimal old lockmode Hexadecimal new lockmode Hexadecimal tblspace ID Hexadecimal old page number Decimal new page number Decimal parent page number Decimal parent slot number Decimal parent slot offset Decimal key number Decimal bpageno Hexadecimal status USED/FREE unique ID Decimal bpageno Hexadecimal tblspace ID Hexadecimal rowid Hexadecimal slotlen Decimal pbrowid Hexadecimal ISOSPCOMMIT LCKLVL MVIDXND PBDELETE PBINSERT Log an isolated save-point commit. Locking mode (page or row). Index node moved to allow for 2-bit to 4-bit bitmap conversion. Delete tblspace blobpage. Insert tblspace blobpage. PDINDEX Predrop index. tblspace ID Hexadecimal PGALTER Page altered in place. tblspace ID Hexadecimal physical page number Hexadecimal (9 of 15) 4-16 IBM Informix Administrator’s Reference Logical-Log Record Types and Additional Columns Record Type Action Additional Columns Format PGMODE Page mode modified in bitmap. tblspace ID Hexadecimal logical page number Decimal old mode Hexadecimal new mode Hexadecimal Hexadecimal PERASE Preerase old file. Mark a table that is to be dropped. The database server frees the space on the commit. tblspace ID PNGPALIGN8 Use the pages in this tblspace as generic pages. None PNLOCKID Change tblspaces lockid. tblspace ID Hexadecimal old lock ID Hexadecimal new lock ID Hexadecimal tblspace ID Hexadecimal fextsize Decimal nextsize Decimal PNSIZES Set tblspace extent sizes. PREPARE (IDS) Written by a participant database server to record the ability of the participant to commit the transaction, if so instructed. DBSERVERNAME of coordinator ASCII PTADESC Add alter description information. tblspace ID Hexadecimal physical page number of previous page Hexadecimal logical page number number of columns added Decimal Decimal (10 of 15) Interpreting Logical-Log Records 4-17 Logical-Log Record Types and Additional Columns Record Type Action Additional Columns Format PTALTER Alter of fragment begun. tblspace ID Hexadecimal physical page number previous page Hexadecimal logical page number Decimal alter desc page number Decimal num columns added version of alter added rowsize Decimal Decimal Decimal PTALTNEWKEYD PTALTOLDKEYD PTCOLUMN PTEXTEND PTRENAME RDELETE REVERT Update key descriptors in a tblspace header after an alter table command. bytes in key descriptor Decimal data in key descriptor ASCII Update key descriptors after an alter table command. bytes in key descriptor Decimal data in key descriptor ASCII Add special columns to fragment. tblspace ID Hexadecimal number of columns Decimal tblspace ID Hexadecimal last logical page Decimal first physical page Hexadecimal tblspace ID Hexadecimal old table name ASCII new table name ASCII tblspace ID Hexadecimal rowid Hexadecimal slotlen Decimal type of reversion event Decimal Tblspace extend. Rename table. Remainder page delete. Logs the reversion of a database space to a database space of an earlier version. arg1 arg2 Decimal arg3 Decimal Decimal (11 of 15) 4-18 IBM Informix Administrator’s Reference Logical-Log Record Types and Additional Columns Record Type Action Additional Columns Format RINSERT Remainder page insert. tblspace ID Hexadecimal rowid Hexadecimal slotlen Decimal date Decimal time Decimal end transaction time Decimal begin transaction time Decimal Logs the extension to the reserved pages. number of pages Decimal physical page number of extent Hexadecimal Logs inserts and deletions for R-tree index pages. (Other operations on R-tree indexes are physically logged.) The record subtypes are: record subtype ASCII [index page rowid Hexadecimal tuple length Decimal ROLLBACK ROLWORK RSVEXTEND RTREE RUPAFT RUPBEF RUPDATE Rollback work. End a transaction and roll back work. ■ LEAFINS - insert item in a leaf page base table rowid Decimal ■ LEAFDEL - delete item from leaf page base table fragid Decimal delete flag] Decimal tblspace ID Hexadecimal rowid Hexadecimal slotlen Decimal Remainder page update, after-image. Remainder page update, before-image. tblspace ID If the remainder page update before-images and after-images can both fit into a single page, the database server writes a single RUPDATE record. Hexadecimal rowid Hexadecimal slotlen Decimal tblspace ID Hexadecimal rowid Hexadecimal forward ptr rowid Hexadecimal old slotlen Decimal new slotlen Decimal number of pieces Decimal (12 of 15) Interpreting Logical-Log Records 4-19 Logical-Log Record Types and Additional Columns Record Type Action Additional Columns Format SBLOB (IDS) Indicates a subsystem log record for a smart large object. Varies Varies The various record subtypes are: CHALLOC CHCOMBINE For more information, see “Log Record Types for Smart Large Objects” on page 4-22. CHFREE CHSPLIT CREATE DELETES EXTEND HDRUPD PDELETE PTRUNC REFCOUNT UDINSERT UDINSERT_LT UDUPAFT UDUPAFT_LT UDUPAFT UDUPAFT_LT UDWRITE UDWRITE_LT SYNC Written to a logical-log file if that log file is empty and administrator instructs the database server to switch to next log file. (None) (None) (13 of 15) 4-20 IBM Informix Administrator’s Reference Logical-Log Record Types and Additional Columns Record Type Action Additional Columns Format TABLOCKS (IDS) Written by either a coordinator or a participant database server. It is associated with either a BEGPREP or a PREPARE record and contains a list of the locked tblspaces (by tblspace number) held by the transaction. (In a distributed transaction, transactions are shown as the owners of locks.) number of locks Decimal tblspace number Hexadecimal TRUNCATE Truncate has freed the extents and the transaction will be committed. tblspace ID Hexadecimal UDINSERT Append new user data. chunk Decimal page within chunk Hexadecimal offset within page Hexadecimal data length Hexadecimal chunk Decimal page within chunk Hexadecimal offset within page Hexadecimal data length Hexadecimal chunk Decimal page within chunk Hexadecimal offset within page Hexadecimal data length Hexadecimal chunk Decimal page within chunk Hexadecimal offset within chunk Hexadecimal length before write Hexadecimal length after write Hexadecimal count Decimal UDUPAFT UDUPBEF UDWRITE UNDO Update user data after-image if a UDWRITE is too expensive. Update user-data before-image if a UDWRITE is too expensive. Update user data (difference image). Header record to a series of transactions to be rolled back. (14 of 15) Interpreting Logical-Log Records 4-21 Log Record Types for Smart Large Objects Record Type Action Additional Columns Format UNDOBLDC This record is written if a CREATE TABLE statement should be rolled back but cannot be because the relevant chunk is down. When the log file is replayed, the table will be dropped. tblspace number Hexadecimal UNIQID Logged when a new serial value is assigned to a row. tblspace ID Hexadecimal unique ID Decimal Update after-image. tblspace ID Hexadecimal rowid Hexadecimal tblspace ID Hexadecimal rowid Hexadecimal (None) (None) UPDAFT UPDBEF XAPREPARE Update before-image. Participant can commit this XA transaction. (15 of 15) Log Record Types for Smart Large Objects All smart-large-object log records are the SBLOB type. Each smart-large-object log record contains six header columns, described in “Logical-Log Record Header” on page 4-6; the record subtype; and additional information. The information that appears varies, depending on record subtype. Figure 4-5 lists all the smart-large-object record types. The Subtype column describes the smart-large-object record type. The Action column indicates the type of database server action that generated the log entry. The Additional Columns and Format columns describe what information appears for each record type. 4-22 IBM Informix Administrator’s Reference Log Record Types for Smart Large Objects Figure 4-5 Record Subtypes for Smart Large Objects Record Subtype Action Additional Columns Format CHALLOC Allocate chunk extent. extent [chk, page, len] Decimal flags Hexadecimal chunk number Decimal first page Decimal second page Decimal CHCOMBINE Combine two pages in the user-data extent list. CHFREE Frees chunk extent. extent [chk, page, len] Decimal CHSPLIT Split a page in the userdata extent list. chunk number Decimal UDFET page to split Decimal Create smart large object. smart-large-object ID [sbs, chk, page, oid] Decimal number of extents in lomaphdr Decimal CREATE DELETE Delete a smart large object at commit. smart-large-object ID [sbs, chk, page, oid] Decimal EXTEND Add extent to an extent list of a smart large object. smart-large-object ID [sbs, chk, page, oid] Decimal extent [chk, page, len] Decimal lomap overflow page number Decimal smart-large-object ID [sbs, chk, page, oid] Decimal old EOF offset String new EOF offset String old times Decimal new times Decimal smart-large-object ID [sbs, chk, page, oid] Decimal HDRUPD PDELETE Update smart-largeobject header page. Queue a smart large object for deletion at commit. (1 of 2) Interpreting Logical-Log Records 4-23 Log Record Types for Smart Large Objects Record Subtype Action Additional Columns Format PTRUNC Queue a smart large object for truncation at commit. smart-large-object ID [sbs, chk, page, oid] Decimal old offset String new offset String Increment or decrement the reference count of a smart large object. smart-large-object ID [sbs, chk, page, oid] Decimal 1 if increment; 0 if decrement Decimal Append new user data. chunk Decimal page within chunk Decimal offset within page Decimal data length Decimal chunk Decimal page within chunk Decimal offset within page Decimal data length Decimal chunk Decimal page within chunk Decimal offset within page Decimal data length Decimal chunk Decimal page within chunk Decimal offset within page Decimal length before write Decimal length after write Decimal number of different image pieces Decimal REFCOUNT UDINSERT, UDINSERT_LT UDUPAFT, UDUPAFT_LT UDUPBEF, UDUPBEF_LT UDWRITE, UDWRITE_LT Update user-data afterimage if a UDWRITE is too expensive. Update user-data beforeimage if a UDWRITE is too expensive. Update user data (difference image). (2 of 2) For an example of smart-large-object records in onlog output, see smartlarge-object log records in the chapter on what is the logical log in the Administrator’s Guide. 4-24 IBM Informix Administrator’s Reference Log Record Types for Smart Large Objects Figure 4-6 shows an example of smart-large-object records in onlog output. The first two records show that an extent was freed. The next group of records, flanked by BEGIN and COMMIT, shows the allocation of storage and creation of the smart large objects. addr len type xid id 4e8428 4e8450 40 40 SBLOB SBLOB 8 8 c8018 informix c8040 c8148 c8174 (2,53,8) c81b8 c82c0 c82ec (2,61,1) c8330 c8368 c83a0 40 BEGIN 264 44 68 -1 264 44 68 -1 56 56 36 c83c4 informix c83ec c84f4 c8520 (2,62,1) c8564 c859c Figure 4-6 Smart-Large-Object Records in onlog Output link subtype specific-info 0 0 4e7400 4e8428 CHFREE CHFREE (2,53,421) (2,579,421) 8 3 0 07/13/98 10:23:04 34 SBLOB SBLOB SBLOB 8 8 8 0 0 0 c8018 c8040 c8148 CREATE CHALLOC EXTEND [2,2,1,900350517] (2,53,8) 0x1 [2,2,1,900350517] 10 SBLOB SBLOB SBLOB 8 8 8 0 0 0 c8174 c81b8 c82c0 CREATE CHALLOC EXTEND [2,2,2,900350518] (2,61,1) 0x1 [2,2,2,900350518] 10 SBLOB SBLOB COMMIT 8 8 8 0 0 0 c82ec c8330 c8368 REFCOUNT [2,2,1,900350517] 1 REFCOUNT [2,2,2,900350518] 1 07/13/98 10:23:05 40 BEGIN 8 3 0 07/13/98 10:23:05 34 264 44 68 -1 56 36 SBLOB SBLOB SBLOB 8 8 8 0 0 0 c83c4 c83ec c84f4 CREATE CHALLOC EXTEND SBLOB COMMIT 8 8 0 0 c8520 c8564 REFCOUNT [2,2,3,900350519] 1 07/13/98 10:23:05 [2,2,3,900350519] (2,62,1) 0x1 [2,2,3,900350519] 10 Interpreting Logical-Log Records 4-25 Chapter Disk Structures and Storage In This Chapter . . . . . . . . . . . . 5 . . . . . . . . 5-3 Dbspace Structure and Storage . . . . . . . . Structure of the Root Dbspace . . . . . . . Reserved Pages . . . . . . . . . . . . Structure of a Regular Dbspace . . . . . . Structure of an Additional Dbspace Chunk . Structure of a Mirrored Chunk . . . . . Structure of the Chunk Free-List Page . . . . Structure of the Tblspace Tblspace . . . . . Tblspace Tblspace Entries . . . . . . . Tblspace Numbers . . . . . . . . . Tblspace Number Elements . . . . . . Tblspace Tblspace Size . . . . . . . . Tblspace Tblspace Bitmap Page . . . . . Structure of the Database Tblspace . . . . . Database Tblspace Number . . . . . . Database Tblspace Entries. . . . . . . Structure and Allocation of an Extent . . . . Extent Structure . . . . . . . . . . Next-Extent Allocation . . . . . . . . Structure and Storage of a Dbspace Page . . . Rows in Nonfragmented Tables . . . . . Rows in Fragmented Tables . . . . . . Recommendations on Use of Rowid . . . Data-Row Format and Storage . . . . . Structure of Fragmented Tables . . . . . . Attached Indexes . . . . . . . . . . Detached Indexes. . . . . . . . . . . . . . . . . . . . . . . . . . . . . . . . . . . . . . . . . . . . . . . . . . . . . . . . . . . . . . . . . . . . . . . . . . . . . . . . . . . . . . . . . . . . . . . . . . . . . . . . . . . . . . . . . . . . . . . . . . . . . . . . . . . . . . . . . . . . . . . . . . . . . . . . . . . . . . . . . . . . . . . . . . . . . . . . . . . . . . . . . . . . . . . . . . . . . . . 5-4 5-4 5-4 5-5 5-5 5-6 5-7 5-8 5-8 5-9 5-10 5-10 5-10 5-11 5-11 5-11 5-12 5-12 5-17 5-20 5-20 5-22 5-22 5-23 5-25 5-25 5-25 Structure of B-Tree Index Pages Definition of B-Tree Terms . Logical Storage of Indexes . Functional Indexes . . . Structure of R-Tree Index Pages . . . . . . . . . . . . . . . . . . . . . . . . . . . . . . . . . . . . . . . . . . . . . . . . . . . . . . . . . . . . . . . . . 5-26 5-26 5-28 5-33 5-34 . . . . . . . . . . . . . . . . . . . . . . . . . . . . . . . . . . . . . . . . . . . . . . . . . . . . . . . . . . . . . . . . . . . . . . . . . . . . . . . . . . . . 5-34 5-34 5-35 5-35 5-36 5-36 5-36 5-36 5-37 5-37 5-37 5-38 Sbspace Structure . . . . . . . . . . . . . . . . . . . Structure of the Metadata Area . . . . . . . . . . . . . Sbpage Structure . . . . . . . . . . . . . . . . . . Multiple Chunk Sbspace. . . . . . . . . . . . . . . . 5-38 5-40 5-41 5-42 Time Stamps . Storage of Simple Large Objects . . . . . . . Structure of a Blobspace . . . . . . . . . Structure of a Dbspace Blobpage . . . . . . Simple-Large-Object Storage and the Descriptor Creation of Simple Large Objects . . . . Deletion or Insertion of Simple Large Objects Size Limits for Simple Large Objects . . . Blobspace Page Types. . . . . . . . . . Blobspace Free-Map Page . . . . . . . Blobspace Bitmap Page . . . . . . . . Blobpage . . . . . . . . . . . . . Structure of a Blobspace Blobpage . . . . . . . . . . . . . . . . . . . Database and Table Creation: What Happens on Disk . Database Creation . . . . . . . . . . . . Disk-Space Allocation for System Catalog Tables Tracking of System Catalog Tables . . . . . Table Creation . . . . . . . . . . . . . Disk-Space Allocation . . . . . . . . . Entry in the Tblspace Tblspace . . . . . . Entries in the System Catalog Tables . . . . Creation of a Temporary Table . . . . . . 5-2 IBM Informix Administrator’s Reference . . . . . . 5-42 . . . . . . . . . . . . . . . . . . . . . . . . . . . . . . . . . . . . . . . . . . . . . . . . . . . . . . 5-43 5-43 5-43 5-44 5-44 5-45 5-45 5-45 5-46 In This Chapter The database server achieves its high performance by managing its own I/O. The database server manages storage, search, and retrieval. As the database server stores data, it creates the structures it needs to search for and retrieve the data later. The database server disk structures also store and track control information needed to manage logging and backups. Database server structures contain all the information needed to ensure data consistency, both physical and logical. Before you read this chapter, familiarize yourself with the disk-space terms and definitions in the chapter on where data is stored in the Administrator’s Guide. This chapter discusses the following topics related to disk data structures: ■ Dbspace structure and storage ■ Storage of simple large objects ■ Sbspace structure ■ Time stamps ■ Database and table creation: what happens on disk Disk Structures and Storage 5-3 Dbspace Structure and Storage Dbspace Structure and Storage This section explores the disk structures and storage techniques that the database server uses to store data in a dbspace. Structure of the Root Dbspace The ROOTNAME, ROOTOFFSET, ROOTPATH, and ROOTSIZE configuration parameters specify the size and location of the initial chunk of the root dbspace. If the root dbspace is mirrored, the MIRROROFFSET and MIRRORPATH configuration parameters specify the mirror-chunk location. For more information about these parameters, see Chapter 1, “Configuration Parameters.” As part of disk-space initialization, the database server initializes the following structures in the initial chunk of the root dbspace: ■ Twelve reserved pages ■ The first chunk free-list page ■ The tblspace tblspace ■ The database tblspace ■ The physical log ■ The logical-log files ■ oncheck -pe For more information, see “Check the Chunk Free List with -ce and -pe” on page 3-21. Reserved Pages The first 12 pages of the initial chunk of the root dbspace are reserved pages. Each reserved page contains specific control and tracking information used by the database server. To obtain a listing of the contents of your reserved pages, execute the command oncheck -pr. To also list information about the physical-log and logical-log pages, including the active physical-log pages, execute oncheck -pR. 5-4 IBM Informix Administrator’s Reference Structure of a Regular Dbspace Structure of a Regular Dbspace After disk-space initialization, you can add new dbspaces. When you create a dbspace, you assign at least one chunk (either raw or cooked disk space) to the dbspace. This chunk is referred to as the initial chunk of the dbspace. Figure 5-1 on page 5-5 illustrates the structure of the initial chunk of a regular (nonroot) dbspace. When the dbspace is first created, it contains the following structures: ■ Two reserved pages ■ The first chunk free-list page in the chunk ■ The tblspace tblspace for this dbspace ■ Unused pages Chunk free-list page Reserved pages Figure 5-1 Initial Chunk of Regular Dbspace Tblspace tblspace Unused pages Structure of an Additional Dbspace Chunk You can create a dbspace that contains more than one chunk. The initial chunk in a dbspace contains the tblspace tblspace for the dbspace. Additional chunks do not. When an additional chunk is first created, it contains the following structures: ■ Two reserved pages ■ The first chunk free-list page ■ Unused pages Disk Structures and Storage 5-5 Structure of a Regular Dbspace Figure 5-2 illustrates the structure of all additional chunks in a dbspace. (The structure also applies to additional chunks in the root dbspace.) Chunk free-list page Figure 5-2 Additional Dbspace Chunk Reserved pages Unused pages Structure of a Mirrored Chunk Each mirrored chunk must be the same size as its primary chunk. When a mirrored chunk is created, the database server writes the contents of the primary chunk to the mirrored chunk immediately. The mirrored chunk contains the same control structures as the primary chunk. Mirrors of blobspace, sbspace, (Dynamic Server) or dbspace chunks contain the same physical contents as their primary counterpart after the database server brings them online. 5-6 IBM Informix Administrator’s Reference Structure of the Chunk Free-List Page Figure 5-3 illustrates the mirror-chunk structure as it appears after the chunk is created. Overhead pages Number and type of overhead pages vary, depending on chunk type. Figure 5-3 Mirror-Chunk Structure The mirror-chunk structure always shows no free space because all of its space is reserved for mirroring. For more information, see the chapter on what is mirroring in the Administrator’s Guide. Structure of the Chunk Free-List Page In every chunk, the page that follows the last reserved page is the first of one or more chunk free-list pages that tracks available space in the chunk. For a non-root chunk, the initial length of the free space is equal to the size of the chunk minus three pages. If an additional chunk free-list page is needed to accommodate new entries, a new chunk free-list page is created in one of the free pages in the chunk. Figure 5-4 illustrates the location of the free-list page. Use oncheck -pe to obtain the physical layout of pages in the chunk. For more information, see “Check the Chunk Free List with -ce and -pe” on page 3-21. Disk Structures and Storage 5-7 Structure of the Tblspace Tblspace Chunk free-list page Figure 5-4 Free-List Page Reserved pages Free pages Structure of the Tblspace Tblspace Each dbspace contains a tblspace called the tblspace tblspace that describes all tblspaces in the dbspace. When the database server creates a tblspace, it places an entry in the tblspace tblspace that describes the characteristics of the newly created tblspace. A dbspace can have a maximum number of 2**20 tblspaces. Tblspace Tblspace Entries To display information on the tblspace, use the oncheck -pt command. For more information, see “Display Tblspaces for a Table or Fragment with -pt and -pT” on page 3-27. Component Description Page header 24 bytes, standard page-header information (IDS) Page-ending time stamp 4 bytes Tblspace header 68 bytes, general tblspace information Column information Each special column in the table is tracked with an 12-byte entry. (A special column is defined as a VARCHAR, BYTE, or TEXT data type.) (1 of 2) 5-8 IBM Informix Administrator’s Reference Structure of the Tblspace Tblspace Component Description Tblspace name 80 bytes, database.owner.tablename Index information Each index on the table contains a 20-byte header that contains general information about the index, followed by a 4-byte entry for each column component of the index Extent information Each extent allocated to this tblspace is tracked with a 12-byte entry (2 of 2) Tblspace Numbers Each tblspace that is described in the tblspace tblspace receives a tblspace number. This tblspace number is the same value that is stored as the partnum field in the systables system catalog table and as the partn field in the sysfragments system catalog table. The following SQL query retrieves the partnum for every table in the database (these can be located in several different dbspaces) and displays it with the table name and the hexadecimal representation of partnum: SELECT tabname, tabid, partnum, HEX(partnum) hex_tblspace_name FROM systables If the output includes a row with a table name but a partnum of 0, this table consists of two or more table fragments, each located in its own tblspace. For example, Figure 5-5 shows a table called account that has partnum 0. tabname tabid sysfragments branch teller account history results 25 100 101 102 103 104 partnum 1048611 1048612 1048613 0 1048615 1048616 hex_tblspace_name 0x00100023 0x00100024 0x00100025 0x00000000 0x00100027 0x00100028 Figure 5-5 Output from systables Query with partnum Values Disk Structures and Storage 5-9 Structure of the Tblspace Tblspace To obtain the actual tblspace numbers for the fragments that make up the table, you must query the sysfragments table for the same database. Figure 5-6 shows that the account table from Figure 5-5 has three table fragments and three index fragments. tabid fragtype 102 102 102 102 102 102 T T T I I I partnhex_tblspace_name 10486140x00100026 20971540x00200002 31457300x00300002 10486170x00100029 20971550x00200003 31457310x00300003 Figure 5-6 Output from sysfragments Table with partn Values Tblspace Number Elements The first page in a tblspace is logical page 0. (Physical page numbers refer to the address of the page in the chunk.) The root space tblspace tblspace is always contained in the first dbspace and on logical page 1 within the tblspace tblspace. (The bitmap page is page 0.) Tblspace Tblspace Size The initial size of the tblspace tblspace is always 50 pages. These tblspace tblspace pages are allocated as an extent when the dbspace is initialized. If the database server attempts to create a table, but the tblspace tblspace is full, the database server allocates a next extent to the tblspace. When a table is removed from the dbspace, its corresponding entry in the tblspace tblspace is deleted. Tblspace Tblspace Bitmap Page The first page of the tblspace tblspace, like the first page of any initial extent, is a bitmap that describes the page fullness of the following pages. Each page that follows has an entry on the bitmap page. If needed, additional bitmap pages are located throughout the contiguous space allocated for the tblspace, arranged so that each bitmap describes only the pages that follow it, until the next bitmap or the end of the dbspace. Bitmap pages fall at distinct intervals within tblspaces pages. Each bitmap page describes a fixed number of pages that follow it. 5-10 IBM Informix Administrator’s Reference Structure of the Database Tblspace Structure of the Database Tblspace The database tblspace appears only in the initial chunk of the root dbspace. The database tblspace contains one entry for each database managed by the database server. Figure 5-7 illustrates the location of the database tblspace. Reserved pages Chunk free-list page Figure 5-7 Database Tblspace Location in Initial Chunk of Root Dbspace Tblspace tblspace Database tblspace Free pages Database Tblspace Number The tblspace number of the database tblspace is always 0x100002. This tblspace number appears in an onstat -t listing if the database tblspace is active. Database Tblspace Entries Each database tblspace entry includes the following five components: ■ Database name ■ Database owner ■ Date and time that the database was created ■ The tblspace number of the systables system catalog table for this database ■ Flags that indicate logging mode Disk Structures and Storage 5-11 Structure and Allocation of an Extent The database tblspace includes a unique index on the database name to ensure that every database is uniquely named. For any database, the systables table describes each permanent table in the database. Therefore, the database tblspace only points to the detailed database information located elsewhere. When the root dbspace is initialized, the database tblspace first extent is allocated. The initial-extent size and the next-extent size for the database tblspace are four pages. You cannot modify these values. Structure and Allocation of an Extent This section covers the following topics: ■ Extent structure ■ Next-extent allocation Extent Structure An extent is a collection of contiguous pages within a dbspace. Every permanent database table has two extent sizes associated with it. The initialextent size is the number of kilobytes allocated to the table when it is first created. The next-extent size is the number of kilobytes allocated to the table when the initial extent, and every extent thereafter, becomes full. Blobspaces do not use extents. For specific instructions on how to specify and calculate the size of an extent, see your Performance Guide. Extent Size The minimum size of an extent is four pages. The default size of an extent is eight pages. The maximum size of an extent is 2**31 pages, equivalent to the maximum chunk size. If the chunk is smaller than the maximum size, the maximum extent size depends on the contiguous space available in the chunk. 5-12 IBM Informix Administrator’s Reference Structure and Allocation of an Extent Tblspaces that hold index fragments follow different rules for extent size. The database server bases the extent size for these tblspaces on the extent size for the corresponding table fragment. The database server uses the ratio of the row size to index key size to assign an appropriate extent size for the index tblspace (see the sections on estimating index page size and fragmenting table indexes in the Performance Guide). Page Types Within a Table Extent Within the extent, individual pages contain different types of data. Extent pages for a table can be separated into the following categories: ■ Data pages Data pages contain the data rows for the table. ■ Bitmap pages Bitmap pages contain control information that monitors the fullness of every page in the extent. ■ Blobpages Blobpages contain TEXT and BYTE data that is stored with the data rows in the dbspace. TEXT and BYTE data that resides in a blobspace is stored in blobpages, a structure that is completely different than the structure of a dbspace blobpage. ■ Free pages Free pages are pages in the extent that are allocated for tblspace use, but whose function has not yet been defined. Free pages can be used to store any kind of information: data, including TEXT or BYTE data types; index; or bitmap. Figure 5-8 on page 5-14 illustrates the possible structure of a nonfragmented table with an initial-extent size of 8 pages and a next-extent size of 16 pages. Disk Structures and Storage 5-13 Structure and Allocation of an Extent Figure 5-8 Extent Structure of a Table Initial extent Bitmap page Data pages Blobpage Data pages Next extent Data pages Blobpage Free pages 5-14 IBM Informix Administrator’s Reference Structure and Allocation of an Extent Page Types Within an Index Extent The database server stores index pages into different tblspaces than the table with which it is associated. Within the extent, individual index pages contain different types of data. Index pages can be separated into the following categories: ■ Index pages (root, branch, and leaf pages) Index pages contain the index information for the table. ■ Bitmap pages Bitmap pages contain control information that monitors the fullness of every page in the extent. ■ Free pages Free pages are pages in the extent that are allocated for tblspace use, but whose function has not yet been defined. Free pages can be used to store any kind of information: data, index, TEXT or BYTE data, or bitmap. All indexes are detached unless you explicitly specify attached indexes. Important: An extent that is allocated for a table fragment does not contain index pages. Index pages for a fragmented table always reside in a separate tblspace. For more information, see fragmenting table indexes in the chapter on table fragmentation and PDQ in the “Administrator’s Guide.” Figure 5-9 on page 5-16 illustrates the extent structure of an index. Disk Structures and Storage 5-15 Structure and Allocation of an Extent Figure 5-9 Extent Structure of an Index Initial extent Bitmap page Index pages Next extent Index pages Free pages 5-16 IBM Informix Administrator’s Reference Structure and Allocation of an Extent Next-Extent Allocation After the initial extent fills, the database server attempts to allocate another extent of contiguous disk space. The procedure that the database server follows is referred to as next-extent allocation. Extents for a tblspace are tracked as one component of the tblspace tblspace information for the table. The maximum number of extents allocated for any tblspace is application and machine dependent because it varies with the amount of space available on the tblspace tblspace entry. Next-Extent Size The number of kilobytes that the database server allocates for a next extent is, in general, equal to the size of a next extent, as specified in the SQL statement CREATE TABLE. However, the actual size of the next-extent allocation might deviate from the specified size because the allocation procedure takes into account the following three factors: ■ Number of existing extents for this tblspace ■ Availability of contiguous space in the chunk and dbspace ■ Location of existing tblspace extents The effect of each of these factors on next-extent allocation is explained in the paragraphs that follow and in Figure 5-10 on page 5-19. Extent Size Doubling If a permanent tables or user-defined temporary table already has 16 extents allocated, the database server automatically doubles the size for subsequent allocations. This doubling occurs every 16 extents. For example, if you create a table with NEXT SIZE equal to 20 kilobytes, the database server allocates the first 16 extents at a size of 20 kilobytes each. The database server allocates extents 17 to 32 at 40 kilobytes each, extents 33 to 48 at 80 kilobytes each, and so on. For system-created temporary tables, the next-extent size begins to double after 4 extents have been added. Disk Structures and Storage 5-17 Structure and Allocation of an Extent Lack of Contiguous Space If the database server cannot find available contiguous space in the first chunk equal to the size specified for the next extent, it extends the search to the next chunk in the dbspace. Extents are not allowed to span chunks. If the database server cannot find adequate contiguous space anywhere in the dbspace, it allocates to the table the largest available amount of contiguous space. (The minimum allocation is four pages. The default value is eight pages.) No error message is returned if an allocation is possible, even when the amount of space allocated is less than the requested amount. Merge of Extents for the Same Table If the disk space allocated for a next extent is physically contiguous with disk space already allocated to the same table, the database server allocates the disk space but does not consider the new allocation as a separate extent. Instead, the database server extends the size of the existing contiguous extent. Thereafter, all disk-space reports reflect the allocation as an extension of the existing extent. That is, the number of extents reported is always the number of physically distinct extents, not the number of times a next extent has been allocated plus one (the initial extent). Figure 5-10 illustrates extent-allocation strategies. 5-18 IBM Informix Administrator’s Reference Structure and Allocation of an Extent Figure 5-10 Next-Extent Allocation Strategies Extent sizes double every 16 extents. Chunk 6 16th extent 17th extent size is doubled. Some other tblspace extent If the dbspace is too full to accommodate the next-extent size, the database server allocates the largest available contiguous block of disk space. Chunk 1 3rd extent 4th extent If the next extent is physically contiguous to an existing extent for the same tblspace, the disk space is treated as a single extent. Chunk 1 3rd extent Next extent allocation Chunk 1 3rd extent After disk space is allocated to a tblspace as part of an extent, the space remains dedicated to that tblspace even if the data contained in it is deleted. For alternative methods of reclaiming this empty disk space, see your Performance Guide. Disk Structures and Storage 5-19 Structure and Storage of a Dbspace Page Structure and Storage of a Dbspace Page The basic unit of database server I/O is a page. Page size might vary among computers. In Dynamic Server, the page size depends on the operating system. Rows in Nonfragmented Tables The database server can store rows that are longer than a page. The database server also supports the VARCHAR data type, which results in rows of varying length. As a result, rows do not conform to a single format. Rows within a table are not necessarily the same length if the table contains one or more columns of type VARCHAR. In addition, the length of a row in such a table might change when an end user modifies data contained in the VARCHAR column. The length of a row can be greater than a page. TEXT and BYTE data is not stored within the data row. Instead, the data row contains a 56-byte descriptor that points to the location of the data. The descriptor can point to a dbspace page. The descriptor can point to a blobspace blobpage. If you are using the Optical Subsystem, the descriptor can also point to an optical-storage subsystem. For instructions about how to estimate the length of fixed-length and variable-length data rows, see your Performance Guide. 5-20 IBM Informix Administrator’s Reference Structure and Storage of a Dbspace Page Definition of Rowid Informix uses two different types of rowids to identify data in tables: ■ Serial rowid These rowids are fields in a table and are assigned to tables created with the WITH ROWID option. ■ Internal rowid The database server identifies each data row in a table with a unique internal rowid. This rowid identifies the location of the row within the dbspace. To obtain the internal rowids for a table, use the oncheck -pD option. For more information, see “Check Pages with -cd and -cD” on page 3-20. In a nonfragmented table, the term rowid refers to a unique 4-byte integer that defines the physical location of the row in the table. The page that contains the first byte of the data row is the page that is specified by the rowid. This page is called the data row home page. Fragmented tables can also have rowids, but they are implemented in a different way. For more information on this topic, see “Rows in Fragmented Tables” on page 5-22. Use of Rowids Every data row in a nonfragmented table is uniquely identified by an unchanging rowid. When you create an index for a nonfragmented table, the rowid is stored in the index pages associated with the table to which the data row belongs. When the database server requires a data row, it searches the index to find the key value and uses the corresponding rowid to locate the requested row. If the table is not indexed, the database server might sequentially read all the rows in the table. Eventually, a row might outgrow its original storage location. If this occurs, a forward pointer to the new location of the data row is left at the position defined by the rowid. The forward pointer is itself a rowid that defines the page and the location on the page where the data row is now stored. Disk Structures and Storage 5-21 Structure and Storage of a Dbspace Page Rows in Fragmented Tables Unlike rows in a nonfragmented table, the database server does not assign a rowid to rows in fragmented tables. If you want to access data by rowid, you must explicitly create a rowid column as described in your Performance Guide. If user applications attempt to reference a rowid in a fragmented table that does not contain a rowid that you explicitly created, the database server returns an appropriate error code to the application. Access to Data in Fragmented Tables with Rowid From the viewpoint of an application, the functionality of a rowid column in a fragmented table is identical to the rowid of a nonfragmented table. However, unlike the rowid of a nonfragmented table, the database server uses an index to map the rowid to a physical location. When the database server accesses a row in a fragmented table using the rowid column, it uses this index to look up the physical address of the row before it attempts to access the row. For a nonfragmented table, the database server uses direct physical access without an index lookup. As a consequence, accessing a row in a fragmented table using rowid takes slightly longer than accessing a row using rowid in a nonfragmented table. You should also expect a small performance impact on the processing of inserts and deletes due to the cost of maintaining the rowid index for fragmented tables. Primary-key access can lead to significantly improved performance in many situations, particularly when access is in parallel. Recommendations on Use of Rowid Informix recommends that application developers use primary keys as a method of access rather than rowids. Because primary keys are defined in the ANSI specification of SQL, using them to access data makes your applications more portable. For a complete description on how to define and use primary keys to access data, see the Informix Guide to SQL: Reference and the Informix Guide to SQL: Tutorial. 5-22 IBM Informix Administrator’s Reference Structure and Storage of a Dbspace Page Data-Row Format and Storage The variable length of a data row has the following consequences for row storage: ■ A page might contain one or more whole rows. ■ A page might contain portions of one or more rows. ■ A page might contain a combination of whole rows and partial rows. ■ An updated row might increase in size and become too long to return to its original storage location in a row. The following paragraphs describe the guidelines that the database server follows during data storage. Storage of Row To minimize retrieval time, rows are not broken across page boundaries unnecessarily. Rows that are shorter than a page are always stored as whole rows. A page is considered full when the count of free bytes is less than the number of bytes needed to store a row of maximum size. Location of Rows When the database server receives a row that is longer than a page, the row is stored in as many whole pages as required. The database server then stores the trailing portion in less than a full page. The page that contains the first byte of the row is the row home page. The number of the home page becomes the logical page number contained in the rowid. Each full page that follows the home page is referred to as a bigremainder page. If the trailing portion of the row is less than a full page, it is stored on a remainder page. After the database server creates a remainder page to accommodate a long row, it can use the remaining space in this page to store other rows. Disk Structures and Storage 5-23 Structure and Storage of a Dbspace Page Figure 5-11 illustrates the concepts of home page, big-remainder page, and remainder page. Data row represented in whole-page-sized segments Figure 5-11 Remainder Pages Remainder page Big-remainder page Big-remainder page Home page Page Compression Over time, the free space on a page can become fragmented. When the database server attempts to store data, it first checks row length against the number of free bytes on a page to determine if the row fits. If adequate space is available, the database server checks if the page contains adequate contiguous free space to hold the row (or row portion). If the free space is not contiguous, the database server calls for page compression. 5-24 IBM Informix Administrator’s Reference Structure of Fragmented Tables Structure of Fragmented Tables Although table fragmentation is transparent to applications, as database server administrator you should be aware of how the database server allocates disk space for table fragments and how the database server identifies rows in those fragments. Each table fragment has its own tblspace with a unique tblspace_id or fragment_id. Figure 5-12 shows the disk allocation for a fragmented table. Figure 5-12 Disk Structures for a Fragmented Table Extent 1 Extent 2 Fragments of a fragmented table Tblspace Dbspace 1 Extent 1 Extent 2 Tblspace Dbspace 2 Attached Indexes With an attached index, the index and data are fragmented in the same way. You can decide whether to store the index pages with the corresponding data pages in the same dbspace or store them in separate dbspaces. For information on choosing a fragmentation strategy, see the Performance Guide. Detached Indexes For detached indexes, the table fragment and index fragment are stored in tblspaces in separate dbspaces. Disk Structures and Storage 5-25 Structure of B-Tree Index Pages Structure of B-Tree Index Pages This section provides general information about the structure of B-tree index pages. It is designed as an overview for the interested reader. For more information on B-tree indexes, see your Performance Guide. Definition of B-Tree Terms The database server uses a B-tree structure to organize index information. Figure 5-13 shows that a fully developed B-tree index is composed of the following three different types of index pages or nodes: ■ One root node A root node contains node pointers to branch nodes. ■ Two or more branch nodes A branch node contains pointers to leaf nodes or other branch nodes. ■ Many leaf nodes A leaf node contains index items and horizontal pointers to other leaf nodes. 5-26 IBM Informix Administrator’s Reference Structure of B-Tree Index Pages Each node serves a different function. The following sections describe each node and the role that it plays in indexing. Figure 5-13 Full B-Tree Structure Root node Index item Branch nodes Leaf nodes Index Items The fundamental unit of an index is the index item. An index item contains a key value that represents the value of the indexed column for a particular row. An index item also contains rowid information that the database server uses to locate the row in a data page. Nodes A node is an index page that stores a group of index items. For the three types of nodes, see “Definition of B-Tree Terms” on page 5-26. Disk Structures and Storage 5-27 Structure of B-Tree Index Pages Logical Storage of Indexes This section presents an overview of how the database server creates and fills an index. Creation of Root and Leaf Nodes When you create an index for an empty table, the database server allocates a single index page. This page represents the root node and remains empty until you insert data in the table. At first, the root node functions in the same way as a leaf node. For each row that you insert into the table, the database server creates and inserts an index item in the root node. Figure 5-14 illustrates how a root node appears before it fills. Root node 1 Albertson Baxter Beatty Currie Keyes Lawson Mueller Wallach Figure 5-14 Root Node rowid information rowid information rowid information rowid information rowid information rowid information rowid information rowid information When the root node becomes full of index items, the database server splits the root node by performing the following steps: ■ Creates two leaf nodes ■ Moves approximately half of the root-node entries to each of the newly created leaf nodes ■ Puts pointers to leaf nodes in the root node As you add new rows to a table, the database server adds index items to the leaf nodes. When a leaf node fills, the database server creates a new leaf node, moves part of the contents of the full index node to the new node, and adds a node pointer to the new leaf node in the root node. 5-28 IBM Informix Administrator’s Reference Structure of B-Tree Index Pages For example, suppose that leaf node 3 in Figure 5-15 becomes full. When this situation occurs, the database server adds yet another leaf node. The database server moves part of the records from leaf node 3 to the new leaf node, as Figure 5-15 shows. Figure 5-15 Leaf Node 4 Created After Leaf Node 3 Fills Root node 1 Leaf node 2 Leaf node 3 Leaf node 4 Creation of Branch Nodes Eventually, as you add rows to the table, the database server fills the root node with node pointers to all the existing leaf nodes. When the database server splits yet another leaf node, and the root node has no room for an additional node pointer, the following process occurs. The database server splits the root node and divides its contents among two newly created branch nodes. As index items are added, more and more leaf nodes are split, causing the database server to add more branch nodes. Eventually, the root node fills with pointers to these branch nodes. When this situation occurs, the database server splits the root node again. The database server then creates yet another branch level between the root node and the lower branch level. This process results in a four-level tree, with one root node, two branch levels, and one leaf level. The B-tree structure can continue to grow in this way to a maximum of 20 levels. Disk Structures and Storage 5-29 Structure of B-Tree Index Pages Branch nodes can point either to other branch nodes below them (for large indexes of four levels or more) or to leaf nodes. In Figure 5-16, the branch node points to leaf nodes only. The first item in the left branch node contains the same key value as the largest item in the leftmost leaf node and a node pointer to it. The second item contains the largest item in the next leaf node and a node pointer to it. The third item in the branch node contains only a pointer to the next higher leaf node. Depending on the index growth, this third item can contain the actual key value in addition to the pointer at a later point during the lifespan of the index. Leaf node 3 Grant rowid information Hanlon rowid information Henry rowid information Higgins rowid information Higgins Lawson 5-30 Branch node 2 pointer to leaf node pointer to leaf node pointer to leaf node IBM Informix Administrator’s Reference Jaeger Jewell Keyes Lawson Leaf node 4 rowid information rowid information rowid information rowid information Miller Neelie Leaf node 5 rowid information rowid information Figure 5-16 Typical Contents of a Branch Node Structure of B-Tree Index Pages Duplicate Key Values Duplicate key values occur when the value of an indexed column is identical for multiple rows. For example, suppose that the third and fourth leaf nodes of a B-tree structure contain the key value Smith. Suppose further that this value is duplicated six times, as Figure 5-17 illustrates. Higgins Lawson Smith Branch node 2 pointer to leaf node pointer to leaf node pointer to leaf node Left leaf node 3 Smith rowid information rowid information rowid information rowid information Figure 5-17 Leaf Nodes 3 and 4 Right leaf node 4 Smith rowid information rowid information The first item on the third leaf page contains the duplicate key value, Smith, and the rowid information for the first physical row in the table that contains the duplicate key value. To conserve space, the second item does not repeat the key value Smith but instead contains just the rowid information. This process continues throughout the page; no other key values are on the leaf, only rowid information. The first item on the fourth leaf page again contains the duplicated key value and rowid information. Subsequent items contain only rowid information. Now consider the branch node. The third item in the branch node contains the same key value and rowid as the largest item in the third leaf node and a node pointer to it. The fourth item would contain only a node pointer to the fourth leaf node, thus saving the space of an additional duplicate key value. Disk Structures and Storage 5-31 Structure of B-Tree Index Pages Key-Value Locking To increase concurrency, the database server supports key-value locking in the B-tree index. Key-value locking locks only the value of the key instead of the physical location in the B-tree index. One of the most important uses for key-value locking is to assure that a unique key remains unique through the end of the transaction that deleted it. Without this protection mechanism, user A might delete a unique key within a transaction, and user B might insert a row with the same key before the transaction commits. This scenario makes rollback by user A impossible. Key-value locking prevents user B from inserting the row until the end of user A’s transaction. Adjacent Key Locking With Repeatable Read isolation level, the database server is required to protect the read set. The read set consists of the rows that meet the filters in the WHERE clause of the query. To guarantee that the rows do not change, the database server obtains a lock on the index item that is adjacent to the rightmost item of the read set. Freed Index Pages When the database server physically removes an index item from a node and frees an index page, the freed page is reused. Filling Indexes When you create an index, you can specify how densely or sparsely filled you want the index. The index fill factor is a percentage of each index page that will be filled during the index build. Use the FILLFACTOR option of the CREATE INDEX statement or the FILLFACTOR configuration parameter to set the fill factor. This option is particularly useful for indexes that you do not expect to grow after they are built. For additional information about the FILLFACTOR option of the CREATE INDEX statement, see the Informix Guide to SQL: Syntax. 5-32 IBM Informix Administrator’s Reference Structure of B-Tree Index Pages Calculating the Length of Index Items For data types other than VARCHAR, the length of an index item is calculated by adding the length of the key value plus 5 bytes for each rowid information associated with the key value. The key values in an index are typically of fixed length. If an index holds the value of one or more columns of the VARCHAR data type, the length of the key value is at least the sum of the length-plus-one of each VARCHAR value in the key. In Dynamic Server, the maximum length of a key value is 390 bytes. The combined size of VARCHAR columns that make up a key must be less than 390, minus an additional byte for each VARCHAR column. For example, the key length of the index that the database server builds for the following statements equals 390, or ((255+1) + (133+1)): CREATE TABLE T1 (c1 varchar(255, 10), c2 varchar(133, 10)); CREATE INDEX I1 on T1(c1, c2); Functional Indexes A functional index is one in which all keys derive from the results of a function. If you have a column of pictures, for example, and a function to identify the predominant color, you can create an index on the result of the function. Such an index would enable you to quickly retrieve all pictures having the same predominant color, without re-executing the function. A functional index uses the same B-tree structure as any other B-tree index. The only difference is that the determining function is applied during an insert or an update whenever the column that is the argument to the function changes. For more information on the nature of functional indexes, refer to your Performance Guide. To create a functional index, use the CREATE FUNCTION and CREATE INDEX statements. For more information on these statements, refer to the Informix Guide to SQL: Syntax. Disk Structures and Storage 5-33 Structure of R-Tree Index Pages Structure of R-Tree Index Pages An index structure that relies on one-dimensional ordering of key values does not work for spatial data; for example, two dimensional geometric shapes such as circles, squares, and triangles. Efficient retrieval of spatial data, such as the data used in geographic information systems (GIS) and computer-aided design (CAD) applications, requires an access method that handles multidimensional data. The database server implements an R-tree index to access spatial data efficiently. For information about the structure of index pages, refer to the Informix R-Tree Index User’s Guide. Storage of Simple Large Objects This section explains the structures and storage techniques that the database server uses to store simple large objects (TEXT or BYTE data). Structure of a Blobspace When you create a blobspace, you can specify the effective size of the data pages, which are called blobpages. The blobpage size for the blobspace is specified when the blobspace is created. Blobpage size must be a multiple of page size. (For information on determining database server page size, see the chapter on managing disk space in the Administrator’s Guide.) All blobpages within a blobspace are the same size, but the size of the blobpage can vary between blobspaces. Blobpage size can be greater than the page size because data stored in a blobspace is never written to the page-sized buffers in shared memory. The advantage of customizing the blobpage size is storage efficiency. Within a blobspace, TEXT and BYTE data is stored in one or more blobpages, but simple large objects do not share blobpages. Storage is most efficient when the TEXT or BYTE data is equal to or slightly smaller than the blobpage size. The blobspace free-map pages and bitmap pages are the size specified as a database server page, which enables them to be read into shared memory and to be logged. 5-34 IBM Informix Administrator’s Reference Structure of a Dbspace Blobpage When the blobspace is first created, it contains the following structures: ■ Blobspace free-map pages ■ The blobspace bitmap that tracks the free-map pages ■ Unused blobpages Structure of a Dbspace Blobpage TEXT or BYTE data that is stored in the dbspace is stored in a blobpage. The structure of a dbspace blobpage is similar to the structure of a dbspace data page. The only difference is an extra 12 bytes that can be stored along with the TEXT or BYTE data in the data area. Simple large objects can share dbspace blobpages if more than one simple large object can fit on a single page, or if more than one trailing portion of a simple large object can fit on a single page. For a discussion of how to estimate the number of dbspace blobpages needed for a specific table, see your Performance Guide. Each segment of TEXT or BYTE data stored in a dbspace page might be preceded by up to 12 bytes of information that does not appear on any other dbspace page. These extra bytes are overhead. Simple-Large-Object Storage and the Descriptor Data rows that include TEXT or BYTE data do not include the data in the row itself. Instead, the data row contains a 56-byte descriptor with a forward pointer (rowid) to the location where the first segment of data is stored. The descriptor can point to one of the following items: ■ A page (if the data is stored in a dbspace) ■ A blobpage (if the data is stored in a blobspace) ■ An optical platter (if you are using the Optical Subsystem) Disk Structures and Storage 5-35 Blobspace Page Types Creation of Simple Large Objects When a row that contains TEXT or BYTE data is to be inserted, the simple large objects are created first. After the simple large objects are written to disk (or optical medium), the row is updated with the descriptor and inserted. Deletion or Insertion of Simple Large Objects The database server cannot modify simple large objects. It can only insert or delete them. Deleting a simple large object means that the database server frees the space consumed by the deleted object for reuse. When TEXT or BYTE data is updated, a new simple large object is created, and the data row is updated with the new blob descriptor. The old image of the row contains the descriptor that points to the obsolete value for the simple large object. The space consumed by the obsolete simple large object is freed for reuse after the update is committed. Simple large objects are automatically deleted if the rows that contain their blob descriptors are deleted. (Blobpages that stored a deleted simple large object are not available for reuse until the logical log that contains the original INSERT record for the deleted simple large object is backed up. For more information, see backing up logical-log files to free blobpages in the chapter on what is the logical log in the Administrator’s Guide.) Size Limits for Simple Large Objects The largest simple large object that the blob descriptor can accommodate is (231 - 1), or about 2 gigabytes. Blobspace Page Types Every blobspace chunk contains three types of pages: 5-36 ■ A blobspace free-map page ■ A bitmap page ■ Blobpages IBM Informix Administrator’s Reference Blobspace Page Types Blobspace Free-Map Page The blobspace free-map page identifies unused blobpages so that the database server can allocate them as part of simple-large-object creation. When a blobpage is allocated, the free-map entry for that page is updated. All entries for a single simple large object are linked. A blobspace free-map page is the size of one database server page. Each entry on a free-map page is 8 bytes, stored as two 32-bit words, as follows: ■ The first bit in the first word specifies whether the blobpage is free or used. ■ The next 31 bits in the first word identify the logical-log file that was current when this blobpage was written. (This information is needed for logging TEXT or BYTE data.) ■ The second word contains the tblspace number associated with the simple large object stored on this page. The number of entries that can fit on a free-map page depends on the page size of your computer. The number of free-map pages in a blobspace chunk depends on the number of blobpages in the chunk. Blobspace Bitmap Page The blobspace bitmap page tracks the fullness and number of blobspace freemap pages in the chunk. Each blobspace bitmap page is capable of tracking a quantity of free-map pages that represent more than 4,000,000 blobpages. Each blobspace bitmap page is the size of one page. Blobpage The blobpage contains the TEXT or BYTE data. Blobpage size is specified by the database server administrator who creates the blobspace. Blobpage size is specified as a multiple of the page size. Disk Structures and Storage 5-37 Structure of a Blobspace Blobpage Structure of a Blobspace Blobpage The storage strategy used to store simple large objects in a blobspace differs from the dbspace storage strategy. The database server does not combine whole simple large objects or portions of a simple large object on a single blobspace blobpage. For example, if blobspace blobpages are 24 kilobytes each, a simple large object that is 26 kilobytes is stored on two 24-kilobyte pages. The extra 22 kilobytes of space remains unused. The structure of a blobpage includes a blobpage header, the TEXT or BYTE data, and a page-ending time stamp. The blobpage header includes, among other information, the page-header time stamp and the blob time stamp associated with the forward pointer in the data row. If a simple large object is stored on more than one blobpage, a forward pointer to the next blobpage and another blob time stamp are also included in the blobpage header. Sbspace Structure An sbspace is similar to a blobspace except that it holds smart large objects. When an sbspace is created in a database, it contains an sbspace descriptor. Each sbspace chunk contains the following structures: ■ Sbspace chunk descriptors ■ Chunk free-page list ■ An sbspace metadata area (up to one for each chunk) ■ Reserved data areas (up to two for each chunk) ■ User-data areas (up to two for each chunk) For best performance, Informix recommends that the metadata area be located in the middle of the sbspace. The database server automatically places the metadata area in the correct location. However, to specify the location of the metadata area, specify the -Mo flag in the onspaces command. If you do not specify the size of the metadata area in the -Ms flag of the onspaces command, the database server uses the value of AVG_LO_SIZE (defaults to 8 kilobytes) to calculate the size of the metadata area. For more information, see “Creating an Sbspace with the -Df option” on page 3-83. 5-38 IBM Informix Administrator’s Reference Sbspace Structure Normally, you can let the system calculate the metadata size for you. If you want to estimate the size of the metadata area, see the chapter on table performance considerations in the Performance Guide. Figure 5-18 illustrates the chunk structure of an sbspace as it appears immediately after the sbspace is created. Each reserved area can be allocated to either the user-data or metadata area. Reserved areas are always within the user-data area of the chunk. A single sbspace chunk Chunk header pages User data area 1 Figure 5-18 A Single Sbspace Chunk Chunk one Pages 0 through 52 compose the chunk header. Reserved area 1 Metadata User data area 2 Reserved area 2 Because the chunk in Figure 5-18 is the first in the sbspace, it contains an sbspace descriptor. The chunk descriptor tblspace in chunk one contains information about chunk one and all chunks added to the sbspace thereafter. Disk Structures and Storage 5-39 Structure of the Metadata Area Structure of the Metadata Area As with the chunk header pages, four areas are exclusive to the first chunk in a sbspace: the sbspace descriptor tblspace, the chunk adjunct tblspace, and the level-1 and level-2 archive tblspaces. The tblspace header section contains a tblspace header for each of these tblspaces (notably excluding the tblspace tblspace). Figure 5-19 shows the layout of the metadata in the single-chunk sbspace. Structure of the metadata area for a single-chunk sbspace Sbspace descriptor tblspace Figure 5-19 Structure of the Metadata Area for a Single-Chunk Sbspace Chunk header pages Chunk adjunct tblspace User data 1 Reserved area 1 Level-1 archive tblspace Metadata Level-2 archive tblspace User data 2 Chunk one LO header tblspace Reserved area 2 Chunk one user-data free-list tblspace Chunk one Metadata area When you specify the sbspace name in the oncheck -ps option, you can display the number of pages allocated and used for each tblspace in the metadata area. The following describes how the metadata area grows: 5-40 ■ The sbspace descriptor tblspace does not grow. ■ The chunk adjunct tblspace grows as chunks are added. ■ The LO header tblspace grows as chunks are added. ■ The tblspace for user-data free list grows if free spaces in the chunk are heavily fragmented. IBM Informix Administrator’s Reference Sbpage Structure Sbpage Structure Each sbpage is composed of three elements: an sbpage header, the actual user data itself, and an sbpage trailer. Figure 5-20 shows the structure of an sbpage. The sbpage header consists of the standard page header. The sbpage trailer is used to detect an incomplete write on the page and to detect page corruption. Figure 5-20 Sbpage Structure Sbpage structure Chunk header pages User & reserved data Sbpage header User data Metadata Sbpage trailer User & reserved data Sbpage Chunk one Disk Structures and Storage 5-41 Multiple Chunk Sbspace Multiple Chunk Sbspace Figure 5-21 illustrates a possible configuration for a three-chunk sbspace. In this example, chunk two contains no metadata of its own. Metadata information for chunk two is stored in the metadata area of chunk one. Figure 5-21 Multiple-Chunk Sbspace Structure Multiple-chunk sbspace structure Chunk descriptor Chunk header pages User data Chunk header pages User data Reserved data User data Reserved data Metadata for chunks one and two Reserved data User data Reserved data Chunk two Metadata for chunk three Chunk three Chunk one Sbspace one The user-data area in chunk one of the example is actually optional. Chunk one could contain metadata for all other chunks in the sbspace. Time Stamps The database server uses a time stamp to identify a time when an event occurred relative to other events of the same kind. The time stamp is not a literal time that refers to a specific hour, minute, or second. It is a 4-byte integer that the database server assigns sequentially. 5-42 IBM Informix Administrator’s Reference Database and Table Creation: What Happens on Disk Database and Table Creation: What Happens on Disk This section explains how the database server stores data related to the creation of a database or table and allocates the disk structures that are necessary to store your data. Database Creation After the root dbspace exists, users can create a database. The paragraphs that follow describe the major events that occur on disk when the database server adds a new database. Disk-Space Allocation for System Catalog Tables The database server searches the chunk free-list pages in the dbspace, looking for free space in which to create the system catalog tables. For each system catalog table, in turn, the database server allocates eight contiguous pages, the size of the initial extent of each system catalog table. The tables are created individually and do not necessarily reside next to each other in the dbspace. They can be located in different chunks. As adequate space is found for the initial extent of each table, the pages are allocated, and the associated chunk free-list page is updated. Disk Structures and Storage 5-43 Table Creation Tracking of System Catalog Tables The database server tracks newly created databases in the database tblspace, which resides in the root dbspace. An entry describing the database is added to the database tblspace in the root dbspace. (See “Structure of the Database Tblspace” on page 5-11.) For each system catalog table, the database server adds a one-page entry to the tblspace tblspace in the dbspace where the database was built. (See “Structure of the Tblspace Tblspace” on page 5-8.) Figure 5-22 illustrates the relationship between the database tblspace entry and the location of the systables system catalog table for the database. An entry in the database tblspace (located in the root dbspace) points to the database systables system catalog table. Database tblspace Figure 5-22 New Databases Dbspace systables Tblspaces For instructions on how to list your databases after you create them, see monitoring databases in the chapter on managing database-logging status in the Administrator’s Guide. Table Creation After the root dbspace exists, and a database has been created, users with the necessary SQL privileges can create a database table. When users create a table, the database server allocates disk space for the table in units called extents (see what is an extent in the chapter on where data is stored in the Administrator’s Guide). The paragraphs that follow describe the major events that occur when the database server creates a table and allocates the initial extent of disk space. 5-44 IBM Informix Administrator’s Reference Table Creation Disk-Space Allocation The database server searches the chunk free-list pages in the dbspace for contiguous free space equal to the initial extent size for the table. When adequate space is found, the pages are allocated, and the associated chunk free-list page is updated. If the database server cannot find adequate contiguous space anywhere in the dbspace, it allocates to the table the largest available amount of contiguous space. No error message is returned if an allocation is possible, even when the amount of space allocated is less than the requested amount. If the minimum extent size cannot be allocated, an error is returned. (Extents cannot span two chunks.) Entry in the Tblspace Tblspace The database server adds a one-page entry for this table to the tblspace tblspace in this dbspace. The tblspace number assigned to this table is derived from the logical page number in the tblspace tblspace where the table is described. See “Tblspace Numbers” on page 5-9. The tblspace number indicates the dbspace where the tblspace is located. Tblspace extents can be located in any of the dbspace chunks. If you must know exactly where the tblspace extents are located, execute the oncheck -pe command for a listing of the dbspace layout by chunk. Entries in the System Catalog Tables The table itself is fully described in entries stored in the system catalog tables for the database. Each table is assigned a table identification number or tabid. The tabid value of the first user-defined table in a database is always 100. For a complete discussion of the system catalog, see the Informix Guide to SQL: Reference. A table can be located in a dbspace that is different than the dbspace that contains the database. The tblspace itself is the sum of allocated extents, not a single, contiguous allocation of space. The database server tracks tblspaces independently of the database. Disk Structures and Storage 5-45 Table Creation Creation of a Temporary Table The tasks involved in creating temporary tables are similar to the tasks that the database server performs when it adds a new permanent table. The key difference is that temporary tables do not receive an entry in the system catalog for the database. For more information, see the section defining a temporary table, in the chapter on where data is stored in the Administrator’s Guide. 5-46 IBM Informix Administrator’s Reference Appendix Files That the Database Server Uses This appendix provides brief summaries of the files that you use when you configure and use the database server. It also includes descriptions of files (and one directory) created and used internally by the database server. For many of these files, your only responsibilities are to recognize that those files are legitimate and refrain from deleting them. Pathnames that appear in the following format indicate files that reside on UNIX: /directory/filename. Pathnames that appear in the following format indicate files that reside on Windows NT: \directory\filename. In some cases, environment variables are used to specify the initial pathname of a file. On UNIX, references to environment variables begin with a dollar sign: $INFORMIXDIR. On Windows NT, references to environment variables begin and end with percent signs: %INFORMIXDIR%. A Database Server Files Database Server Files Figure A-1 lists the database server files and the directories in which they reside. Figure A-1 List of Files That the Database Server Uses Filename Directory Purpose Created af.xxx Specified by DUMPDIR configuration parameter Assertion-failure information By the database server ac_msg.log (IDS) /tmp, %INFORMIXDIR%\etc archecker message log (for Informix Technical Support) By the database server ac_config.std (IDS) $INFORMIXDIR/etc, %INFORMIXDIR%\etc Template for archeckerparameter values By the database server bar_act.log /tmp, %INFORMIXDIR%\etc ON-Bar activity log By ON-Bar bldutil.process_id /tmp, \tmp Error messages about the sysutils database appear in this file By the database server buildsmi.xxx /tmp, %INFORMIXDIR%\etc Error messages about SMI database By the database server concdr.sh $INFORMIXDIR /etc/conv, %INFORMIXDIR% \etc\conv Converts the syscdr database to Version 9.3 format By the database server The onsnmp utility uses this file to obtain the database server configuration By the database server .conf.dbservername core Directory from which the database server was invoked Core dump By the database server Emergency boot files (For filenames, see page A-7.) $INFORMIXDIR/etc, %INFORMIXDIR%\etc Used in a cold restore By ON-Bar (1 of 4) A-2 IBM Informix Administrator’s Reference Database Server Files Filename Directory Purpose Created gcore (UNIX) Specified by DUMPDIR configuration parameter Assertion failure information By the database server illlsrra.xx $INFORMIXDIR/lib, %INFORMIXDIR%\lib Shared libraries for the database server and some utilities By install procedure .informix (UNIX) User’s home directory Set personal environment variables By the user informix.rc (UNIX) $INFORMIXDIR/etc Set default environment variables for all users By the database administrator INFORMIXTMP /tmp, \tmp Temporary directory for internal files By the database server .inf.servicename /INFORMIXTMP, drive:\INFORMIXTMP Connection information By the database server .infos.dbservername $INFORMIXDIR/etc, %INFORMIXDIR%\etc Connection information By the database server .infxdirs /INFORMIXTMP, drive:\INFORMIXTMP Database server discovery file that onsnmp uses By the database server InstallServer.log (IDS, Windows) C:\temp Database server installation log By the database server ISM catalog $INFORMIXDIR/ism, %ISMDIR% Records saved backup objects and storage volumes that Informix Storage Manager (ISM) uses By ISM ISM logs $INFORMIXDIR/ ism/logs, %ISMDIR%\logs Operator alert messages, backend status, additional ISM information By ISM ISMversion $INFORMIXDIR/ism, %ISMDIR% ISM version During installation JVM_vpid Specified by JVPLOG configuration parameter Messages that the Java virtual machine generates By the Java virtual machine JVPLOG Specified by JVPLOG configuration parameter Messages from the Java virtual processor By the database server (2 of 4) Files That the Database Server Uses A-3 Database Server Files Filename Directory Purpose Created .jvpprops Specified by JVPPROFILE configuration parameter Template for Java VP properties During installation Message log Specified by MSGPATH configuration parameter Error messages and status information By the database server The ONCONFIG file $INFORMIXDIR/etc, %INFORMIXDIR%\etc Configuration information By the database administrator onconfig $INFORMIXDIR/etc, %INFORMIXDIR%\etc Default ONCONFIG file (optional) By the database server administrator onconfig.std $INFORMIXDIR/etc Template for configurationparameter values During installation oncfg_servername. servernum (IDS) $INFORMIXDIR/etc, %INFORMIXDIR%\etc Configuration information for whole-system restores By the database server onsnmp.servername (IDS) /tmp, \tmp Log file that the onsnmp subagent uses By onsnmp onsrvapd.log /tmp, \tmp Log file for the database server daemon onsrvapd By onsnmp revcdr.sh $INFORMIXDIR /etc/conv, %INFORMIXDIR% \etc\conv Reverts the syscdr database to an earlier format By the database server servicename.exp /INFORMIXTMP, drive:\INFORMIXTMP Connection information By the database server servicename.str /INFORMIXTMP, drive:\INFORMIXTMP Connection information By the database server shmem.xxx (UNIX) Specified by DUMPDIR configuration parameter Assertion-failure information By the database server sm_versions.std $INFORMIXDIR/etc, %INFORMIXDIR%\etc Identifies storage manager in use During installation snmpd.log /tmp, \tmp Log file for the SNMP master agent, snmpdm By onsnmp (3 of 4) A-4 IBM Informix Administrator’s Reference Descriptions of Files Filename Directory Purpose Created sqlhosts (UNIX) $INFORMIXDIR/etc Connection information; contained in the registry on Windows During installation; modified by the database server administrator VP.servername.nnx /INFORMIXTMP, drive:\INFORMIXTMP Connection information By the database server xbsa.messages $INFORMIXDIR /ism/applogs, %ISMDIR%\applogs XBSA library call information By ISM (4 of 4) Descriptions of Files This section provides short descriptions of the files listed in Figure A-1. af.xxx The database server writes information about an assertion failure to the af.xxx file. The file is stored in the directory that the DUMPDIR configuration parameter specifies. For more information, see the information on monitoring for data inconsistency in your Administrator’s Guide. ac_msg.log When you use archecker with ON-Bar to verify a backup, it writes brief status and error messages to the ON-Bar activity log and writes detailed status and error messages to the archecker message log (ac_msg.log). Informix Technical Support uses the archecker message log to diagnose problems with backups and restores. You specify the location of the archecker message log with the AC_MSGPATH configuration parameter. For more information, see the Backup and Restore Guide. Files That the Database Server Uses A-5 ac_config.std ac_config.std The ac_config.std file contains the default archecker (archive checking) utility parameters. To use the template, copy it into another file, and modify the values. For a comprehensive list of the archecker parameters and how to use archecker with ON-Bar, see the Backup and Restore Guide. bar_act.log As ON-Bar backs up and restores data, it writes progress messages, warnings, and error messages to the ON-Bar activity log (bar_act.log). You specify the location of the ON-Bar activity log with the BAR_ACT_LOG configuration parameter. For more information, see the Backup and Restore Guide. bldutil.process_id If the database server cannot build the sysutils database, it creates the bldutil.<process_id> file which contains the error messages. The process_id value is the process ID of the bldutil.sh program. To access this output file, specify ${RESFILE}. buildsmi.xxx If the database server cannot build the sysmaster database, it places a message in the message log that refers you to the buildsmi.xxx file. This file provides information about why the build failed. For information about the sysmaster database, refer to Chapter 2, “The sysmaster Database.” concdr.sh To convert the syscdr database from 7.31, 9.20, or 9.21 to 9.3 format, run the concdr.sh script on UNIX or the concdr.bat script on Windows. For details, see the Informix Migration Guide. A-6 IBM Informix Administrator’s Reference .conf.dbservername .conf.dbservername The .conf.dbservername file is created when you initialize the database server. The onsnmp utility queries this file to find out the configuration status of the database server. Do not delete this file. The .conf.dbservername file contains information on shared memory and configuration that allows shared-memory clients to connect to the database server when they use utilities such as onstat or onmode. core The core file contains a core dump caused by an assertion failure. The database server writes this file to the directory from which the database server was invoked. For more information on monitoring for data inconsistency, see the chapter on consistency checking in the Administrator’s Guide. Emergency Boot Files for ON-Bar The ON-Bar emergency boot files contain the information needed to perform a cold restore, and are updated after every backup. For details, see the Backup and Restore Guide. The filename for the Dynamic Server emergency boot file is ixbar_hostname.servernum. UNIX gcore.xxx The database server writes information about an assertion failure to the gcore.xxx file. The file is stored in the directory specified by the DUMPDIR configuration parameter. For more information on monitoring for data inconsistency, see the chapter on consistency checking in the Administrator’s Guide. illlsrra.xx The illlsrra.xx files are shared libraries that the database server and some database server utilities use. The shared libraries, if supported on your platform, are installed in $INFORMIXDIR/lib or %INFORMIXDIR%\lib. Files That the Database Server Uses A-7 ~/.informix The naming convention of the Informix shared library filename is as follows: illlsrra.xx UNIX lll library class (for example, asf or smd) s library subclass (d=DSA; s=standard) rr major release number (for example, 07 or 08) a library version ID (for example, a or b) xx shared-library filename extension (for example, so) Symbolic links to these files are automatically created in /usr/lib when the products are installed on your computer. Important: The symbolic links to the shared libraries in /usr/lib are automatically created by the product installation procedures. However, if your $INFORMIXDIR is not installed using the standard installation method (for example, your $INFORMIXDIR is NFS-mounted from another computer), you or your system administrator might need to create manually the symbolic links of the shared libraries in /usr/lib. ♦ ~/.informix The ~/.informix file is the private-environment file. Users can create this file and store it in their home directory. The Informix Guide to SQL: Reference discusses the environment-configuration files. UNIX informix.rc The /informix.rc file is the environment-configuration file. You can use it to set environment variables for all users of Informix products. The Informix Guide to SQL: Reference discusses the environment-configuration files. A-8 IBM Informix Administrator’s Reference INFORMIXTMP INFORMIXTMP The INFORMIXTMP directory is an internal database server directory. During initialization, the database server creates this directory (if it does not exist yet) for storing internal files that must be local and relatively safe from deletion. The onsnmp utility uses the files in the INFORMIXTMP directory. .inf.servicename The database server creates the .inf.servicename file if any DBSERVERNAME or DBSERVERALIASES uses a shared-memory connection type. The database server removes the file when you take the database server offline. The name of this file is derived from the servicename field of the sqlhosts file or registry. The database server keeps information about client/server connections in this file. You do not use the .inf.servicename file directly. You only need to recognize that it is a legitimate file when it appears in the INFORMIXTMP directory. If this file is accidentally deleted, you must restart the database server. .infos.dbservername The database server creates the .infos.dbservername file when you initialize shared memory and removes the file when you take the database server offline. This file resides in $INFORMIXDIR/etc or %INFORMIXDIR%\etc. The name of this file is derived from the DBSERVERNAME parameter in the ONCONFIG configuration file. The .infos.dbservername file contains information on shared memory and configuration that allows shared-memory clients to connect to the database server when they use utilities such as onstat or onmode. Do not delete this file. Files That the Database Server Uses A-9 .infxdirs .infxdirs The database server maintains an .infxdirs file in the INFORMIXTMP directory. This file contains a line for every INFORMIXDIR from which a database server has been launched. If you remove the .infxdirs file, onsnmp cannot discover any database servers until the next time you restart the database server. Each time you restart the database server, it re-creates the .infxdirs file. WIN NT/2000 InstallServer.log The database server creates the InstallServer.log during installation. ISM Catalog ISM creates the ISM catalog during the ism_startup initialization. The ISM catalog records information about backup and restore save sets and about storage volumes that the storage manager uses. The ISM catalog records are stored in the mm, index, and res files in the $INFORMIXDIR/ism or %ISMDIR%\ism directory. For more information, see the Informix Storage Manager Administrator’s Guide. ISM Logs ISM creates several logs during ON-Bar backup and restore operations. The message window in the ISM Administrator GUI displays messages from these logs. Log Description daemon.log ISM backend status messages Operator alert messages summary Additional ISM information For more information, see the Informix Storage Manager Administrator’s Guide. A-10 IBM Informix Administrator’s Reference ISMversion ISMversion The ISMversion file, which is installed with the database server, identifies the ISM version. Do not edit this file. JVM_vpid When the 0x10 bit is on for AFCRASH or the AFDEBUG environment variable is on, all the messages that the Java virtual machine generates are logged into the JVM_vpid file, where vpid is the process ID of the Java virtual processor. For more information, see J/Foundation Developer’s Guide. JVPLOG When JVPDEBUG is set to 1, the database server writes tracing messages to the JVPLOG file. You can adjust the tracing level. On UNIX, you can have multiple JVPLOG files, one for each JVP virtual processor. On Windows NT, only one JVPLOG file exists. To obtain the JVP IDs, use the onstat -g glo command. For more information, see Creating UDRs in Java. .jvpprops The .jvpprops file sets the Java virtual processor properties. Copy the .jvpprops.template to a new file named .jvpprops, and modify the values. For more information, see Creating UDRs in Java. Message Log The database server writes status and error information to the message-log file. You specify the filename and location of the message log with the MSGPATH configuration parameter. For more information, refer to “MSGPATH” on page 1-73. Files That the Database Server Uses A-11 onconfig.std onconfig.std The onconfig.std file serves as the template for creating the ONCONFIG configuration file. To use the template, copy it to another file and modify the values. Important: Do not modify or delete onconfig.std. The database server uses values listed in this file when those values are missing from the ONCONFIG file. For a comprehensive list of the ONCONFIG parameters, see Chapter 1, “Configuration Parameters.” The ONCONFIG File The current configuration file is the %INFORMIXDIR%\etc\%ONCONFIG% or $INFORMIXDIR/etc/$ONCONFIG file. The database server uses the ONCONFIG file during initialization. If you start the database server with oninit and do not explicitly set the ONCONFIG environment variable, the database server looks for configuration values in the onconfig.std file. If no onconfig.std file exists, the database server returns the following error message: WARNING: Cannot access configuration file $INFORMIXDIR/etc/$ONCONFIG. For more information on the order of files where the database server looks for configuration values during initialization, refer the material on initializing the database server in the Administrator’s Guide. For more information on setting up your ONCONFIG file, refer to the materials on installing and configuring the database server in the Administrator’s Guide. A-12 IBM Informix Administrator’s Reference onconfig onconfig The onconfig file is an optional file that you create in the $INFORMIXDIR/etc or %INFORMIXDIR%\etc directory. The onconfig file is the default configuration file if the ONCONFIG environment variable is not set. For more information, refer to processing the configuration file in the Administrator’s Guide. To create the onconfig file, you can copy onconfig.std or one of your customized configuration files. For more information on setting up your ONCONFIG file, refer to installing and configuring the database server in the Administrator’s Guide. oncfg_servername.servernum The database server creates the oncfg_servername.servernum file in the $INFORMIXDIR/etc or %INFORMIXDIR%\etc directory when you initialize disk space. The database server updates the file every time that you add or delete a dbspace, a logical-log file, or a chunk. The database server uses the oncfg_servername.servernum file when it salvages logical-log files during a whole-system restore. The database server derives the name of this file from the values of the DBSERVERNAME and SERVERNUM parameters in the ONCONFIG configuration file. The database server uses the oncfg_servername.servernum files, so do not delete them. For more information, refer to creating the oncfg_servername.servernum file in the Administrator’s Guide and the Backup and Restore Guide. onsnmp.servername The onsnmp subagent uses this log file. For more information, see the Informix SNMP Subagent Guide. This log file is called onsnmp.servername on Dynamic Server. Files That the Database Server Uses A-13 onsrvapd.log onsrvapd.log The onsrvapd daemon uses this log file. For more information, see the Informix SNMP Subagent Guide. revcdr.sh To revert the syscdr database from 9.3 to 7.31, 9.20, or 9.21 format, run the revcdr.sh script on UNIX or the revcdr.bat script on Windows. For details, see the Informix Migration Guide. UNIX shmem.xxx The database server writes information about an assertion failure to the shmem.xxx file. The file is stored in the directory that the DUMPDIR configuration parameter specifies. For more information on monitoring for data inconsistency, see the chapter on consistency checking in the Administrator’s Guide. sm_versions.std The sm_versions.std file is a template for the sm_versions file that you create. The sm_versions file contains a line identifying the current storagemanager version. The storage manager uses the data in the sm_versions file (no .std suffix). To update the storage-manager version, edit the sm_versions file and then run the ism_startup command. For more information, see the Backup and Restore Guide. snmpd.log The SNMP master agent, snmpdm uses this log file. For more information, see the Informix SNMP Subagent Guide. A-14 IBM Informix Administrator’s Reference sqlhosts sqlhosts UNIX WIN NT/2000 The sqlhosts file is the connectivity file on UNIX platforms. It contains information that lets an Informix client connect to an Informix database server. For more information on the sqlhosts file, see client/server communications in the Administrator’s Guide. ♦ On Windows, the connectivity information is in the HKEY_LOCAL_MACHINE\SOFTWARE\Informix\SQLHOSTS key in the Windows registry. ♦ VP.servername.nnx The database server creates the VP.servername.nnx file, if needed, when you initialize shared memory. The name of this file comes from DBSERVERNAME or DBSERVERALIASES in the ONCONFIG file, the VP number (nn), and an internal identifier (x). The database server keeps information about client/server connections in the VP.servername.nnx file. You do not use the file directly. You only need to recognize that it is a legitimate file. If this file is accidentally deleted, you must restart the database server. xbsa.messages The xbsa.messages log contains XBSA library call information. ON-Bar and ISM use XBSA to communicate with each other. Informix Technical Support would use the xbsa.messages log to diagnose problems with ON-Bar and ISM communications. Files That the Database Server Uses A-15 Appendix Trapping Errors Occasionally, a series of events causes the database server to return unexpected error codes. If you do not have the appropriate diagnostic tools in place when these events occur, it might be difficult for you to determine the cause of these errors. This section discusses the following diagnostic tools: ■ onmode -I ■ tracepoints Collecting Diagnostics using onmode -I To help collect additional diagnostics, you can use onmode -I to instruct the database server to perform the diagnostics collection procedures that the Administrator’s Guide describes. To use onmode -I when you encounter an error number, supply the iserrno and an optional session ID. The -I option is just one of many onmode options. For more information about onmode, see “onmode: Change Mode and Shared Memory” on page 3-39. B Creating Tracepoints Syntax -I onmode iserrno , sid Element -I iserrno sid Purpose Key Considerations Error number of the error for which you want to collect diagnostic None. information Session ID of the session for which you want to collect diagnostic None. information Whenever the database server sets iserrno to this value, the corresponding diagnostics events produce an af.* file that you can fax or email to Informix Technical Support. Creating Tracepoints Tracepoints are useful in debugging user-defined routines. You can create a user-defined tracepoint to send special information about the current execution state of a user-defined routine. Each tracepoint has the following parts: ■ A trace class groups related tracepoints together so that they can be turned on or off at the same time. You can either use the built-in trace class called _myErrors or create your own. To create your own trace class, you insert rows into the systraceclasses system catalog table. ■ A trace message is the text that the database server sends to the tracing-output file. You can store internationalized trace messages in the systracemsgs system catalog table. ■ A tracepoint threshold determines when the tracepoint executes. B-2 IBM Informix Administrator’s Reference Creating Tracepoints By default, the database server puts all trace messages in the trace-output file in the tmp directory with the following filename: session_num.trc For more information on tracing user-defined routines, see the DataBlade API Programmer’s Manual. Trapping Errors B-3 Appendix Event Alarms The database server provides a mechanism for automatically triggering administrative actions based on an event that occurs in the database server environment. This mechanism is the event-alarm feature. Events can be informative (for example, Backup Complete) or can indicate an error condition that requires your attention (for example, Unable to Allocate Memory). Using ALARMPROGRAM to Capture Events Use the ex_alarm.sh shell script for handling event alarms and starting automatic log backups on UNIX. For the setup instructions, see “Customizing ex_alarm.sh” on page C-2. To automate logical-log backups only, Informix provides two ready-made scripts: log_full.[sh|bat] and no_log.[sh|bat]. Set ALARMPROGRAM to the full pathname of the script. For information, see “ALARMPROGRAM” on page 1-19. C Writing Your Own Alarm Script Writing Your Own Alarm Script Alternatively, you can write your own shell script, batch file, or binary program that contains the event-alarm parameters. When an event occurs, the database server invokes this executable file and passes it the event-alarm parameters (see Figure C-1 on page C-4). For example, your script can use the class_id and class_msg parameters to take administrative action when a table failure occurs. Set ALARMPROGRAM to the full pathname of this executable file. Customizing ex_alarm.sh Follow these steps to customize the ex_alarm.sh script. You can use ex_alarm.sh instead of log_full.sh to automate log backups. 1. Change the value of ADMINEMAIL to the e-mail address of the database server administrator. 2. Change the value of PAGEREMAIL to the pager service e-mail address. 3. To automatically back up logical logs as they fill, change BACKUP to yes. To stop automatic log backups, change BACKUP to any value other than yes. 4. In the ONCONFIG file, set ALARMPROGRAM to the full pathname of ex_alarm.sh. 5. Reboot the database server. Alarms with a severity of 1 or 2 do not write any messages to the message log nor send e-mail. Alarms with severity of 3 or greater send e-mail to the database administrator. Alarms with severity of 4 and 5 also notify a pager via e-mail. This table shows the actions that occur with alarms. C-2 IBM Informix Administrator’s Reference Interpreting Error Messages Interpreting Error Messages Some of the events that the database server reports to the message log cause it to invoke the alarm program. The class messages indicate the events that the database server reports. The database server reports a nonzero exit code in the message log. In the alarm program, set the EXIT_STATUS variable to 0 for successful completion and to another number for a failure. For example, if a thread attempts to acquire a lock, but the maximum number of locks that LOCKS specifies has already been reached, the database server writes the following message to the message log: 10:37:22 10:51:08 10:51:10 10:51:12 Checkpoint Lock table Lock table Checkpoint Completed: duration was 0 seconds. overflow - user id 30032, rstcb 10132264 overflow - user id 30032, rstcb 10132264 Completed: duration was 1 seconds. When the database server invokes ex_alarm.sh or your alarm program, it generates a message that describes the severity and class of the event. If the severity is greater than 2, the message takes the following format: Reasonably severe server event: Severity: 3 Class ID: 21 Class msg: Database server resource overflow: 'Locks'. Specific msg: Lock table overflow - user id 30032, rstcb 10132264 See Also: # optional message The following message appears at the end of each e-mailed message: This e-mail was generated by the server ALARMPROGRAM script on servername because something untoward just happened to eventname. Event Alarms C-3 Event-Alarm Parameters Event-Alarm Parameters Figure C-1 lists the event-alarm parameters. Figure C-1 Event-Alarm Parameters Parameter Meaning Type severity Event severity (See Figure C-2 for values.) integer class_id Event class ID (See Figure C-3 for values.) integer class_msg Event class message (See Figure C-3 for IDS messages.) string specific_msg Event specific message (IDS) string see_also Event see-also file string Event Severity The first parameter passed to the alarm program is the event-severity code. All events reported to the message log have one of the severity codes listed in Figure C-2. Message-log events that have severity 1 do not cause the database server to invoke the alarm program. Figure C-2 Event-Severity Codes Severity Description 1 Not noteworthy. The event is not reported to the alarm program (for example, date change in the message log). 2 Information. No error has occurred, but some routine event completed successfully (for example, checkpoint or log backup completed). (1 of 2) C-4 IBM Informix Administrator’s Reference Event Class ID Severity Description 3 Attention. This event does not compromise data or prevent the use of the system; however, it warrants attention (for example, one chunk of a mirrored pair goes down). Sends e-mail to the system administrator. 4 Emergency. Something unexpected occurred that might compromise data or access to data (assertion failure, or oncheck reports data corrupt). Take action immediately. Pages the system administrator. 5 Fatal. Something unexpected occurred and caused the database server to fail. Pages the system administrator. (2 of 2) Event Class ID An event class ID is an integer that the database server substitutes as the second parameter in your alarm program. Each event class ID is associated with one of the events that causes the database server to run your alarm program. Class Message A class message is the text of the message that the database server substitutes for the third parameter of your alarm program when an event causes the database server to run your alarm program. The class messages are different for Dynamic Server and Extended Parallel Server. Specific Messages The database server substitutes additional information for the fourth parameter of your alarm program. In general, the text of this message is that of the message written to the message log for the event. Event Alarms C-5 See Also Paths See Also Paths For some events, the database server writes additional information to a file when the event occurs. The pathname in this context refers to the pathname of the file where the database server writes the additional information. Event Alarms on Dynamic Server Figure C-3 on page C-6 shows the class IDs and class messages for alarms on Dynamic Server. The first column lists the class IDs that identify each alarm and the second column lists the class messages. For more information about setting the ALARMPROGRAM parameter, which controls alarms, see “ALARMPROGRAM” on page 1-19. Figure C-3 Event Alarms on Dynamic Server Class ID Class Message 1 Table failure: 'dbsname:"owner".tabname' 2 Index failure: 'dbsname:"owner".tabname-idxname' 3 Blob failure: 'dbsname:"owner".tabname' 4 Chunk is offline, mirror is active: chunk number 5 Dbspace is offline: 'dbspace name' 6 Internal subsystem failure: 'message' 7 Database server initialization failure 8 Physical restore failure 9 Physical recovery failure 10 Logical recovery failure 11 Cannot open chunk: 'pathname' 12 Cannot open dbspace: 'dbspace name' (1 of 2) C-6 IBM Informix Administrator’s Reference Event Alarms on Dynamic Server Class ID Class Message 13 Performance improvement possible 14 Database failure. 'database name' 15 High-Availability Data-Replication failure 16 Backup completed: 'dbspace list' 17 Backup aborted: 'dbspace list' 18 Log backup completed: log number 19 Log backup aborted: log number 20 Logical logs are full—backup is needed 21 Database server resource overflow: 'resource name' 22 Long transaction detected 23 Logical log 'number' complete 24 Unable to allocate memory 25 Internal subsystem initialized: 'message' (starts the optical subsystem) 26 Dynamically added log file logid 27 Log file required 28 No space for log file N/A Chunk (storage) failure N/A Data capacity N/A Logical log capacity N/A Maximum locks N/A Maximum capacity N/A Maximum sessions (2 of 2) Event Alarms C-7 Appendix Discontinued Configuration Parameters D This section lists the discontinued and obsolete configuration parameters for Dynamic Server. Figure D-1 summarizes the discontinued parameters. Although these parameters are still supported, Informix recommends that you do not use them. Remove these parameters from the ONCONFIG file before using the VPCLASS parameter. Figure D-1 Discontinued Configuration Parameters Configuration Parameter Reference AFF_NPROCS page D-3 AFF_SPROC page D-4 NOAGE page D-6 NUMAIOVPS page D-7 NUMCPUVPS page D-8 Figure D-2 summarizes the configuration parameters that Informix no longer supports. Figure D-2 Obsolete Configuration Parameters Configuration Parameter Reference DRAUTO page D-5 LBU_PRESERVE page D-5 LOGSMAX page D-5 D-2 IBM Informix Administrator’s Reference AFF_NPROCS AFF_NPROCS onconfig.std value 0 units Number of CPUs range of values 0 through number of CPUs in the computer takes effect When the database server shuts down and restarts refer to The following material: ■ Virtual-processor classes, in the chapter on virtual processors and threads in the Administrator’s Guide ■ “AFF_SPROC” on page D-4 ■ “VPCLASS” on page 1-126 On multiprocessor computers that support processor affinity, AFF_NPROCS specifies the number of CPUs to which the database server can bind CPU virtual processors. Binding a CPU virtual processor to a CPU causes the virtual processor to run exclusively on that CPU. The database server assigns CPU virtual processors to CPUs in serial fashion, starting with the processor number that AFF_SPROC specifies. If you specify more CPU virtual processors than there are processors, the database server starts over again at the beginning. For example, if you set AFF_NPROCS to 3 and AFF_SPROCS to 5, the database server assigns two CPU virtual processors to processor 5, two CPU virtual processors to processor 6, and one CPU virtual processor to processor 7. Important: Informix recommends that you use VPCLASS instead of AFF_NPROCS to specify the number of CPUs. You cannot use both AFF_NPROCS and VPCLASS cpu in the same ONCONFIG file. Discontinued Configuration Parameters D-3 AFF_SPROC AFF_SPROC onconfig.std value 0 units CPU number range of values 0 through (AFF_NPROCS - NUMCPUVPS + 1) takes effect When the database server shuts down and restarts refer to The following material: ■ Virtual-processor classes, in the chapter on virtual processors and threads in the Administrator’s Guide ■ “AFF_NPROCS” on page D-3 ■ “VPCLASS” on page 1-126 On multiprocessor computers that support processor affinity, AFF_SPROC specifies the CPU, starting with 0, on which the database server starts binding CPU virtual processors to CPUs. The AFF_NPROCS parameter specifies the number of CPUs that the database server will use. The NUMCPUVPS parameter specifies the number of CPU virtual processors to be started, and the AFF_SPROC parameter specifies the CPU on which the first virtual processor is to start. For example, if you assign eight CPUs (AFF_NPROCS = 8), and set NUMCPUVPS to 3 and AFF_SPROC to 5, the database server binds CPU virtual processors to the fifth, sixth, and seventh CPUs. Important: Informix recommends that you use VPCLASS instead of AFF_SPROC to specify processor affinity. You cannot use both AFF_SPROC and VPCLASS cpu in the same ONCONFIG file. D-4 IBM Informix Administrator’s Reference DRAUTO DRAUTO High-Availability Data Replication (HDR) no longer supports the DRAUTO configuration parameter. If an HDR failure occurs, the secondary database server remains in read-only mode. You must perform the transition from secondary to standard mode manually. The database server automatically sets DRAUTO to 0. LBU_PRESERVE Dynamic Server no longer supports the LBU_PRESERVE parameter, which reserves the last logical log for ON-Archive use. ON-Archive, which has been discontinued, was the only utility that required free log space to back up a logical log. LOGSMAX Dynamic Server no longer supports the LOGSMAX parameter. LOGSMAX specifies the maximum number of logical-log files for a database server instance. The database server requires at least three logical-log files for operation. The maximum number of logical logs is 32,767. The LOGSMAX value must be equal to or less than the highest log file number. Discontinued Configuration Parameters D-5 NOAGE NOAGE onconfig.std value 0 range of values 0 = Use priority aging. 1 = Disable priority aging. takes effect When the database server shuts down and restarts refer to The following material: ■ Preventing priority aging, in the chapter on virtual processors and threads in the Administrator’s Guide ■ “VPCLASS” on page 1-126 Some operating systems lower the priority of processes as the processes run over a long period of time. NOAGE, when set to 1, disables priority aging of CPU virtual processors by the operating system. When NOAGE is set to the default of 0, the operating system might lower the priority of CPU virtual processors, as well as other processes, as they accumulate processing time. If your operating system supports priority aging, Informix recommends that you set NOAGE to 1. Important: Informix recommends that you specify priority aging with the VPCLASS parameter instead of the NOAGE parameter. You cannot use both NOAGE and VPCLASS cpu in the same ONCONFIG file. D-6 IBM Informix Administrator’s Reference NUMAIOVPS NUMAIOVPS onconfig.std value None if not present (2 * number_of_chunks) or 6, whichever is greater; number_of_chunks is the number of chunks that you have allocated. units Number of AIO VPs range of values Integer greater than or equal to 1 takes effect When the database server shuts down and restarts utilities onmode -p in “Add or Remove Virtual Processors” on page 3-51 refer to The following material: ■ Asynchronous I/O, in the chapter on virtual processors and threads in the Administrator’s Guide ■ “VPCLASS” on page 1-126 NUMAIOVPS specifies the number of virtual processors of the AIO class to run. Unless kernel asynchronous I/O is implemented, the AIO virtual processors perform all the database server disk I/O, other than I/O to the log files. Important: Informix recommends that you specify the number of AIO VPs with VPCLASS aio instead of NUMAIOVPS. You cannot use both NUMAIOVPS and VPCLASS aio in the same ONCONFIG file. UNIX If your platform has kernel-asynchronous I/O (KAIO) turned on, the database server uses AIO virtual processors to perform I/O only to cooked chunks. The database server uses KAIO to perform all I/O to raw disk space and to the physical and logical logs. For details, see the machine notes. ♦ Discontinued Configuration Parameters D-7 NUMCPUVPS NUMCPUVPS onconfig.std value 1 units Number of CPU VPs range of values 1 through the number of CPUs takes effect When the database server shuts down and restarts utilities onmode -p in “Add or Remove Virtual Processors” on page 3-51 refer to The following material: ■ CPU virtual processors, in the chapter on virtual processors and threads in the Administrator’s Guide ■ “VPCLASS” on page 1-126 NUMCPUVPS specifies the number of virtual processors of the CPU class to run. CPU virtual processors run all threads that start as the result of a connection by a client application, as well as internal threads. In general, allocate only one CPU virtual processor on a single-processor computer or node. On a multiprocessor computer or node, do not allocate more CPU virtual processors than there are CPUs. Important: Informix recommends that you specify the number of CPU virtual processors with VPCLASS cpu instead of NUMCPUVPS. You cannot use both NUMCPUVPS and VPCLASS cpu in the same ONCONFIG file. On UNIX, use the onmode -p -1 CPU command to decrease the number of CPU VPs. On Windows, you can add a CPU VP, but you cannot subtract it. D-8 IBM Informix Administrator’s Reference Appendix Error Messages This chapter lists nonnumbered messages that are printed in the database server message log and provides corrective actions. For information on numbered messages and the unnumbered ON-Bar messages, see Informix Error Messages in Answers OnLine. Some of the messages included here might require you to contact Informix Technical Support staff. Such messages are rarely, if ever, seen at customer locations. For information on what the message log is, see installing and configuring the database server in the Administrator’s Guide. For information on specifying the path to the message file, see “MSGPATH” on page 1-73. E How the Messages Are Ordered in This Chapter How the Messages Are Ordered in This Chapter Database server message-log messages are arranged in this chapter in alphabetical order, sorted with the following additional rules: ■ The time stamp that precedes each message is ignored. ■ Letter case is ignored in alphabetization. ■ Spaces are ignored. ■ Quotation marks are ignored. ■ Leading ellipses are ignored. ■ The word the is ignored if it is the first word in the message. ■ Messages that begin with numbers or punctuation symbols appear toward the end of the list in a special section labeled “Messages: Symbols” on page E-56. ■ Certain related messages are grouped together, as follows: ❑ “Conversion/Reversion Messages” on page E-57 ❑ “Conversion and Reversion Messages for Enterprise Replication” on page E-70 ❑ “Dynamic Log Messages” on page E-75 ❑ “Sbspace Metadata Messages” on page E-78 ❑ “Truncate Table Messages” on page E-79 A cause and suggested corrective action for a message or group of messages follow the message text. E-2 IBM Informix Administrator’s Reference How the Messages Are Ordered in This Chapter How to View These Messages Use one of the following methods to view these messages: ■ Online message log To see the messages displayed as they occur, use the tail -f online.log command. ■ onstat -m command For more information, see “onstat -m” on page 3-136. ■ Informix Server Administrator (ISA) For more information, see the ISA online help. To see the error number associated with these unnumbered messages, view the logmessage table in the sysmaster database: SELECT * FROM logmessage; Message Categories Four general categories of unnumbered messages exist, although some messages fall into more than one category: ■ Routine information ■ Assertion-failed messages ■ Administrative action needed ■ Fatal error detected Informix Technical Support uses the assertion-failed messages to assist in troubleshooting and diagnostics. The information that they report often falls into the category of unexpected events that might or might not develop into problems caught by other error codes. Moreover, the messages are terse and often extremely technical. They might report on one or two isolated statistics without providing an overall picture of what is happening. This information can suggest to technical support possible research paths. Error Messages E-3 Messages: A-B Messages: A-B Aborting Long Transaction: tx 0xn. Cause: The transaction spans the log space specified by transaction highwatermark (LTXHWM), and the offending long transaction is rolling back. Action: No additional action is needed. The address of the transaction structure in shared memory is displayed as a hexadecimal value. Affinitied VP mm to phys proc nn. Cause: The database server successfully bound a CPU virtual processor to a physical processor. Action: None required. Affinity not enabled for this server. Cause: You tried to bind your CPU virtual processors to physical processors, but the database server that you are running does not support process affinity. Action: Set AFF_NPROCS to 0, or remove the affinity setting from VPCLASS. Assert Failed: Error from SBSpace cleanup thread. Cause: The sbspace cleanup thread encountered an error while cleaning up stray smart large objects. Action: See the action suggested in the message log file. Most of the time, running onspaces -cl sbspacename on the failed sbspace succeeds in cleaning up any stray smart large objects. If you encounter an unrecoverable error, contact Informix Technical Support. E-4 IBM Informix Administrator’s Reference Messages: A-B Assert Failed: Short description of what failed Who: Description of user/session/thread running at the time Result: State of the affected database server entity Action: What action the database administrator should take See Also: DUMPDIR/af.uniqid containing more diagnostics. Cause: This message indicates an internal error. Action: The af.uniqid file in the directory specified by the ONCONFIG parameter DUMPDIR contains a copy of the assertion-failure message that was sent to the message log, as well as the contents of the current, relevant structures and/or data buffers. The information included in this message is intended for Informix Technical Support. Contact Informix Technical Support. Begin re-creating indexes deferred during recovery. Cause: During recovery, indexes to be created are deferred until after recovery completes. This message indicates that the database server deferred re-creating indexes and that it is now creating the indexes. During the time that the database server re-creates the indexes, it locks the affected tables with a shared lock. Action: None required. Building 'sysmaster' database requires ~mm pages of logical log. Currently there are nn pages available. Prepare to back up your logs soon. Cause: You do not currently have the approximate amount of free log space necessary to complete a build of the sysmaster database. Action: Back up your logs. Building 'sysmaster' database... Cause: The database server is building the sysmaster database. Action: None required. Error Messages E-5 Messages: C Messages: C Cannot Allocate Physical-log File, mm wanted, nn available. Cause: The database server attempted to initialize shared memory with a physical-log size that exceeds the amount of contiguous space available in the dbspace (specified as PHYSDBS in ONCONFIG). Both quantities of space, wanted and available, are expressed as kilobytes. Action: You must either reduce the size of the physical log (specified as PHYSFILE in ONCONFIG) or change the location of the physical log to a dbspace that contains adequate contiguous space to accommodate the physical log. Cannot alter a table which has associated violations table. Cause: The user tried to add, drop, or modify a column in a table that has a violations table associated with it. Action: Do not change the columns in the user table. Cannot change to mode. E-6 Cause: Some error during fast or full recovery has prevented the system from changing to online or quiescent mode. Action: See previous messages in the log file for information, or contact Informix Technical Support. IBM Informix Administrator’s Reference Messages: C Cannot Commit Partially Complete Transactions. Cause: Transactions that drop tables or indexes do not perform the drop until a COMMIT statement is processed (with a few exceptions). In these cases, a beginning commit log record is written, followed by the usual commit log record. If the database server fails in between the two, the fast recovery process attempts to complete the commit the next time that you initialize the database server. If this completion of the commit fails, the database server generates the preceding message. Action: To determine if you need to take action, examine the logical log as described in Chapter 4, “Interpreting Logical-Log Records.” Cannot create a user-defined VP class with 'SINGLE_CPU_VP' nonzero. Cause: SINGLE_CPU_VP is set to nonzero, and onmode was used to create a user-defined VP class. Action: If user-defined VP classes are necessary, stop the database server, change SINGLE_CPU_VP to zero, and restart the database server. Error Messages E-7 Messages: C Cannot create violations/diagnostics table. Cause: Action: E-8 The user issued a START VIOLATIONS TABLE statement for a target table. The database server cannot create the violations table for this target table. Any of the following situations might be the reason for this failure: ■ The target table already has a violations table. ■ You specified an invalid name for the violations table in the START VIOLATIONS TABLE statement. For example, if you omit the USING clause from the statement and if the number of characters in the target table plus four characters is longer than the maximum identifier length, the generated names of the violations table exceed the maximum identifier length. ■ You specified a name for the violations table in the START VIOLATIONS TABLE statement that match the names of existing tables in the database. ■ The target table contains columns with the names informix_tupleid, informix_optype, or informix_recowner. Because these column names duplicate the informix_tupleid, informix_optype, or informix_recowner columns in the violations table, the database server cannot create the violations table. ■ The target table is a temporary table. ■ The target table is serving as a violations table for some other table. ■ The target table is a system catalog table. To resolve this error, perform one of the following actions: IBM Informix Administrator’s Reference ■ If the violations table name was invalid, specify a unique name for the violations table in the USING clause of the START VIOLATIONS TABLE statement. ■ If the target table contains columns with the names informix_tupleid, informix_optype, or informix_recowner, rename them to something else. ■ Choose a permanent target table that is not a system catalog table or a violations table for some other table. Messages: C Cannot insert from the violations table to the target table. Cause: The user has issued a statement that attempts to insert rows from the violations table into the target table. For example, the user enters the following invalid statement: INSERT INTO mytable SELECT * FROM mytable_vio; Also, if the target table has filtering-mode constraints, you receive this error. Extended Parallel Server does not support filteringmode constraints. Action: To recover from this error, perform the following actions: ■ Do not use filtering constraints. ■ Stop the violations table. ■ Insert rows from the violations table into a temporary table, and then insert rows from the temporary table into the target table. Cannot modify/drop a violations/diagnostics table. Cause: The user has tried to alter or drop a table that is serving as a violations table for another table. Action: Do not alter or drop the violations table. Cannot Open Dbspace nnn. Cause: The database server is unable to access the specified dbspace. This message indicates a problem opening the tblspace or corruption in the initial chunk of the dbspace. Action: Verify that the device or devices that make up the chunks of this dbspace are functioning properly and that you assigned them the correct operating-system permissions (rw-rw----). You might be required to perform a data restore. Error Messages E-9 Messages: C Cannot Open Logical Log. Cause: The database server is unable to access the logical-log files. Because the database server cannot operate without access to the logical log, you must resolve this problem. Action: Verify that the chunk device where the logical-log files reside is functioning and has the correct operating-system permissions (rw-rw----). Cannot Open Mirror Chunk pathname, errorno = nn. Cause: The database server cannot open the mirrored chunk of a mirrored pair. The chunk pathname and the operating-system error are returned. Action: For more information about corrective actions, see your operating-system documentation. Cannot Open Primary Chunk pathname, errorno = nnn. Cause: The primary chunk of a mirrored pair cannot be opened. The chunk pathname and the operating-system error are returned. Action: For more information about corrective actions, see your operating-system documentation. Cannot Open Primary Chunk chunkname. Cause: The initial chunk of the dbspace cannot be opened. Action: Verify that the chunk device is running properly and has the correct operating-system permissions (rw-rw----). Cannot open sysams in database name, iserrno number. E-10 Cause: An error occurred when the database server opened the sysams system table. Action: Note the error number and contact Informix Technical Support. IBM Informix Administrator’s Reference Messages: C Cannot open sysdistrib in database name, iserrno number. Cause: An error occurred when the database server accessed the sysdistrib system table. Action: Note the error number and contact Informix Technical Support. Cannot open system_table in database name, iserrno number. Cause: An error occurred when the database server opened the specified system table. Action: Note the error number and contact Informix Technical Support. Cannot open systrigbody in database name, iserrno number. Cause: An error occurred when the database server accessed the systrigbody system table. Action: Note the error number and contact Informix Technical Support. Cannot open systriggers in database name, iserrno number. Cause: An error occurred when the database server accessed the systriggers system table. Action: Note the error number and contact Informix Technical Support. Cannot open sysxtdtypes in database name, iserrno number. Cause: An error occurred while accessing the sysxtdtypes system table. Action: Note the error number and contact Informix Technical Support. Cannot Perform Checkpoint, shut system down. Cause: A thread that is attempting to restore a mirrored chunk has requested a checkpoint, but the checkpoint cannot be performed. Action: Shut down the database server. Error Messages E-11 Messages: C Cannot Restore to Checkpoint. Cause: The database server is unable to recover the physical log and thus unable to perform fast recovery. Action: If the database server does not come online, perform a data restore from dbspace backup. Cannot Rollback Incomplete Transactions. Cause: Within the fast-recovery or data-restore procedure, the logical-log records are first rolled forward. Then, open transactions that have not committed are rolled back. An open transaction could fail during the rollback, leaving some of the modifications from the open transaction in place. This error does not prevent the database server from moving to quiescent or online mode, but it might indicate an inconsistent database. Action: To determine if any action is needed, use the onlog utility to examine the logical log. Cannot update pagezero. Cause: A failure occurred while the database server was trying to rewrite a reserved page during the reversion process. Action: See previous messages in the log file for information, or call Informix Technical Support. Cannot update syscasts in database name. Iserrno number. Cause: An internal error occurred while inserting data into the syscasts system table. Action: Contact Informix Technical Support. Can’t affinity VP mm to phys proc nn. E-12 Cause: The database server supports process affinity, but the system call to bind the virtual processor to a physical processor failed. Action: See your operating-system documentation. IBM Informix Administrator’s Reference Messages: C Changing the sbspace minimum extent value: old value value1, new value value2. Cause: This informational message occurs when you issue the following command: onspaces -ch sbspace -Df “MIN_EXT_SIZE=value1“ -y Action: None. For more information, see “Change Sbspace Default Specifications” on page 3-88. Checkpoint blocked by down space, waiting for override or shutdown. Cause: A dbspace has gone down during a checkpoint interval. The database server is configured to wait for an override when this situation occurs. Action: Either shut down the database server or issue an onmode -O command to override the down dbspace. For more information on the onmode utility, see “onmode: Change Mode and Shared Memory” on page 3-39. Checkpoint Completed: duration was n seconds. Cause: A checkpoint completed successfully. Action: None required. Checkpoint Page Write Error. Cause: The database server detected an error in an attempt to write checkpoint information to disk. Action: For additional assistance in resolving this situation, contact Informix Technical Support. Checkpoint Record Not Found in Logical Log. Cause: The logical log or the chunk that contains the logical log is corrupted. The database server cannot initialize. Action: Perform a data restore from dbspace backup. Error Messages E-13 Messages: C Chunk chunkname added to space spacename. Cause: Action: The variables in this message have the following values: chunkname is the name of the chunk that the database server administrator is adding. spacename is the name of the storage space to which the database server administrator is adding the chunk. None required. Chunk chunkname dropped from space spacename. Cause: The database server administrator dropped chunk chunkname from space spacename. Action: None required. Chunk number nn pathname -- Offline. Cause: The indicated chunk in a mirrored pair has been marked with status D and taken offline. The other chunk in the mirrored pair is operating successfully. Action: Take steps now to repair the chunk device and restore the chunk. The chunk number and chunk device pathname are displayed. Chunk number nn pathname -- Online. E-14 Cause: The indicated chunk in a mirrored pair has been recovered and is online (marked with status O). The chunk number and chunk device pathname are displayed. Action: None required. IBM Informix Administrator’s Reference Messages: C The chunk pathname must have READ/WRITE permissions for owner and group. Cause: The chunk pathname does not have the correct owner and group permissions. Action: Make sure that you assigned the correct permissions (-rw-rw---) to the device on which the chunk is located. The chunk pathname must have owner-ID and group-ID set to informix. Cause: The chunk chunkname does not have the correct owner and group ID. Action: Make sure the device on which the chunk is located has the ownership. On UNIX, both owner and group should be informix. On Windows NT, the owner must be a member of the InformixAdmin group. The chunk pathname will not fit in the space specified. Cause: The chunk pathname does not fit in the space that you specified. Action: Choose a smaller size for the chunk, or free space where the chunk is to be created. Cleaning stray LOs in sbspace sbspacename. Cause: The database server administrator is running onspaces -cl sbspacename. Action: None required. Completed re-creating indexes. Cause: The database server finished re-creating the deferred indexes. Action: None required. Error Messages E-15 Messages: C Configuration has been grown to handle up to integer chunks. Cause: The database server administrator increased the number of chunks to the specified value by changing CONFIGSIZE or setting MAX_CHUNKS to a higher value. Action: None required. The change was successful. Configuration has been grown to handle up to integer dbslices. Cause: The database server administrator increased the number of dbslices to the specified value by changing CONFIGSIZE or setting MAX_DBSLICES to a higher value. Action: None required. The change was successful. Configuration has been grown to handle up to integer dbspaces. Cause: The database server administrator increased the number of dbspaces to the specified value by changing CONFIGSIZE or setting MAX_DBSPACES to a higher value. Action: None required. The change was successful. Continuing Long Transaction (for COMMIT): tx 0xn. Cause: The logical log has filled beyond the long-transaction high-watermark (LTXHWM), but the offending long transaction is in the process of committing. In this case, the transaction is permitted to continue writing to the logical log and is not rolled back. The address of the transaction structure in shared memory is displayed as hexadecimal value tx 0xn. Action: None required. Could not disable priority aging: errno = number. E-16 Cause: An operating-system call failed while it was trying to disable priority aging for the CPU virtual processor. The system error number associated with the failure is returned. Action: See your operating-system documentation. IBM Informix Administrator’s Reference Messages: C Could not fork a virtual processor: errno = number. Cause: The fork of a virtual processor failed. The database server returns the operating-system error number associated with the failure. Action: For information on determining the maximum number of processes available per user and for the system as a whole, refer to your operating-system documentation. Create_vp: cannot allocate memory. Cause: The database server cannot allocate new shared memory. Action: The database server administrator must make more shared memory available. This situation might require increasing SHMTOTAL or reconfiguring the operating system. This message is usually accompanied by other messages that give additional information. Error Messages E-17 Messages: D-E-F Messages: D-E-F Dataskip is OFF for all dbspaces. Cause: Informational. Action: None required. Dataskip is ON for all dbspaces. Cause: Informational. Action: None required. Dataskip is ON for dbspaces: dbspacelist. Cause: Informational; DATASKIP is ON for the specified dbspaces. Action: None required. Dataskip will be turned {ON|OFF} for dbspacename. Cause: Informational; DATASKIP is ON or OFF for the specified dbspace. Action: None required. DBSPACETEMP internal list not initialized, using default. Cause: An error occurred while initializing a user-specified DBSPACETEMP list. Typically this condition is due to a memoryallocation failure. Action: Check for accompanying error messages. The DBspace/BLOBspace spacename is now mirrored. E-18 Cause: You successfully added mirroring to the indicated storage space. Action: None required. IBM Informix Administrator’s Reference Messages: D-E-F The DBspace/BLOBspace spacename is no longer mirrored. Cause: You have ended mirroring for the indicated storage space. Action: None required. Dbspace dbspacename for Physical-log File not found. Cause: The dbspace dbspacename specified by the PHYSDBS configuration parameter does not exist. As a consequence, the database server cannot complete initialization. Action: Use a dbspace known to exist. devname: write failed, file system is full. Cause: Because the file system devname is full, the write failed. Action: Free some space in devname. Dropping temporary tblspace 0xn, recovering nn pages. Cause: During shared-memory initialization, the database server routinely searches for temporary tables that are left without proper cleanup. If the database server finds a temporary table, it drops the table and recovers the space. The database server located the specified temporary tblspace and dropped it. The value 0xn is the hexadecimal representation of the tblspace number. Action: None required. Dynamically allocated new shared memory segment (size nnnn). Cause: This status message informs you that the database server successfully allocated a new shared-memory segment of size nnnn. Action: None required. Error Messages E-19 Messages: D-E-F ERROR: NO "wait for" locks in Critical Section. Cause: The database server does not permit a thread to own locks that might have to wait while that thread is within a critical section. Any such lock request is denied, and an ISAM error message is returned to the user. Action: The error reported is an internal error. Contact Informix Technical Support. Error building sysmaster database. See outfile. Cause: Errors were encountered in building the sysmaster database. The file outfile contains the result of running the script buildsmi. Action: See the file outfile. Error in dropping system defined type. Cause: An internal error occurred while updating either the sysxtdtypes, sysctddesc, or sysxtdtypeauth system table. Action: Contact Informix Technical Support. Error in renaming systdist. Cause: An internal error occurred while trying to find and rename the Informix.systdist SPL routine. Action: Contact Informix Technical Support. Error removing sysdistrib row for tabid = tabid, colid = colid in database name. iserrno = number E-20 Cause: An error occurred while updating the sysdistrib system table. Action: Note the error number and contact Informix Technical Support. IBM Informix Administrator’s Reference Messages: D-E-F Error writing pathname errno = number. Cause: The operating system cannot write to pathname. Number is the number of the operating-system error that was returned. Action: Investigate the cause of the operating-system error. Usually it means that no space is available for the file. It might also mean that the directory does not exist or that no write permissions exist. Error writing shmem to file filename (error). Unable to create output file filename errno=mm. Error writing filename errno=nn. Cause: The database server detected an error in an attempt to write shared memory to filename. The first message is followed by one of the next two. Either the attempt failed because the output file could not be created or because the contents of shared memory could not be written. The error refers to the operating-system error that prompted the attempted write of shared memory to a file. The value of nn is the operating-system error. Action: See your operating-system documentation. Fatal error initializing CWD string. Check permissions on current working directory. Group groupname must have at least execute permission on '.'. Cause: Group groupname does not have execute permission for the current working directory. Action: Check permissions on the current working directory. You or the system administrator must give your group execute permission on the current working directory. After your group has been given permission, retry the operation that generated this message. Error Messages E-21 Messages: D-E-F The following tables have outstanding old version data pages due to an In-Place Alter Table. Perform UPDATE tablename SET column = column WHERE 1=1; to clear these pages from the following tables. Cause: Reversion to a previous version of the database server has been attempted while an in-place ALTER TABLE is in progress. The previous versions of the database server cannot handle tables that have multiple schemas of rows in them. Action: Force any in-place alters to complete by updating the rows in the affected tables before you attempt to revert to a previous version of the database server. To do this, create a dummy update in which a column in the table is set to its own value, forcing the row to be updated to the latest schema in the process without actually changing column values. Rows are always altered to the latest schema, so a single pass through the table that updates all rows completes all outstanding in-place alters. Fragments dbspacename1 dbspacename2 of table tablename set to non-resident. Cause: The specified fragments of tablename either have been set to nonresident by the SET TABLE statement. Action: None required. Forced-resident shared memory not available. Cause: The database server port for your computer does not support forced-resident shared memory. Action: None required. Freed mm shared-memory segment(s) number bytes. E-22 Cause: The database server sends this message to the message log after you run the -F option of the onmode utility to free unused memory. The message informs you of the number of segments and bytes that the database server successfully freed. Action: None required. IBM Informix Administrator’s Reference Messages: G-H-I Messages: G-H-I gcore pid; mv core.pid dir/core.pid.ABORT. Cause: This status message during a database server failure provides the name and place of each core file associated with the virtual processors. Action: None required. I/O function chunk mm, pagenum nn, pagecnt aa --> errno = bb. Cause: An operating-system error occurred during an attempt to access data from disk space. The operating-system function that failed is defined by function. The chunk number and physical address of the page where the error occurred are displayed as integers.The pagecnt value refers to the number of pages that the thread was attempting to read or write. If an errno value is displayed, it is the number of the operating-system error and might explain the failure. If function is specified as bad request, some unexpected event caused the I/O attempt on an invalid chunk or page. Action: If the chunk status changes to D, or down, restore the chunk from its mirror or repair the chunk. Otherwise, perform a data restore. I/O error, primary/mirror Chunk pathname -- Offline (sanity). Cause: The database server detected an I/O error on a primary or mirrored chunk with pathname. The chunk was taken offline. Action: Check that the device on which the chunk was stored is functioning as intended. Indexes idx1 and idx2 set to non-resident. Cause: The specified indexes have been set to nonresident through the SET TABLE statement. Action: None required. Error Messages E-23 Messages: G-H-I Informix database_server Initialized - Complete Disk Initialized. Cause: Disk space and shared memory have been initialized. Any databases that existed on the disk before the initialization are now inaccessible. Action: None required. Informix database_server Initialized - Shared Memory Initialized. Cause: Shared memory has been initialized. Action: None required. Informix database_server Stopped. Cause: The database server has moved from quiescent mode to offline mode. The database server is offline. Action: None required. ERROR: Insufficient available disk in the root dbspace to increase the entire Configuration save area. E-24 Cause: The user attempted to increase the number of storage objects to a specific value by changing CONFIGSIZE or setting MAX_DBSPACES, MAX_DBSLICES, or MAX_CHUNKS to a higher value, but the database server did not have enough rootspace for the increased number of storage objects. A storage object might be a dbspace, dbslice, or chunk. Action: Increase the size of the root dbspace or reset CONFIGSIZE, MAX_DBSPACES, MAX_DBSLICES, or MAX_DBSLICES to a lower value and restart the database server. For example, if you set MAX_CHUNKS to 32,768, but the root dbspace did not have enough space, set MAX_CHUNKS to a lower value. IBM Informix Administrator’s Reference Messages: G-H-I Insufficient available disk in the root dbspace for the CM save area. Increase the size of the root dbspace in the ONCONFIG file and reinitialize the server. Cause: Action: The cause might be one of the following: ■ The user attempted to increase the number of storage objects to a specific value by changing CONFIGSIZE or setting MAX_DBSPACES, MAX_DBSLICES, or MAX_CHUNKS to a higher value, but the database server did not have enough rootspace for the increased number of storage objects. A storage object might be a dbspace, dbslice, or chunk. ■ The user converted to a database server version that requires slightly more rootspace, but it is not available (this case is unlikely). Take one of the following actions: ■ Increase the size of the root dbspace or reset CONFIGSIZE, MAX_DBSPACES, MAX_DBSLICES, or MAX_DBSLICES to a lower value and restart the database server. For example, if you set MAX_DBSPACES to 32,768 but the root dbspace did not have enough space, set MAX_DBSPACES to a lower value. ■ Increase the size of the root dbspace and reinitialize the database server. Internal overflow of shmid's, increase system max shared memory segment size. Cause: The database server was initializing shared memory when it ran out of internal storage for the shared-memory IDs associated with this segment. Action: Increase the value of your maximum kernel shared-memory segment size, usually SHMMAX. For more information, see your operating-system documentation. Error Messages E-25 Messages: J-K-L-M Messages: J-K-L-M Listener-thread err = error_number: error_message. Cause: A listener thread has encountered an error. This message displays the error number and message text. Action: For the cause and corrective action, see Informix Error Messages in Answers OnLine. Lock table overflow - user id mm session id nn. Cause: A thread attempted to acquire a lock when no locks were available. The user ID and session ID are displayed. Action: Increase the LOCKS configuration parameter, and initialize shared memory. Logical-log File not found. Cause: The checkpoint record in the root dbspace reserved page is corrupted. Action: Perform a data restore from dbspace backup. Logical Log nn Complete. Cause: The logical-log file identified by log-ID number nn is full. The database server automatically switches to the next logical-log file in the sequence. Action: None required. Logical logging vberror for type:subtype in (failed_system). Cause: Logging failed. The log record that caused the error is identified as follows: type E-26 IBM Informix Administrator’s Reference Is the logical-log record type. Messages: J-K-L-M Action: subtype Is the logging subsystem. failed_system Is the name of an internal function that indicates what system failed to log. Contact Informix Technical Support. Log Record: log = ll, pos = 0xn, type = type:subtype(snum), trans = xx Cause: The database server detected an error during the rollforward portion of fast recovery or logical-log restore. The log record that caused the error is identified as follows: Action: ll Is the logical-log ID where the record is stored. 0xn Is the hexadecimal address position within the log. type Is the logical-log record type. subtype Is the logging subsystem. snum Is the subsystem number. xx Is the transaction number that appears in the logical log. Contact Informix Technical Support. Log record (type:subtype) at log nn, 0xn was not undone. Cause: A log undo failed because a log is corrupt. The log record that caused the error is identified as follows: type Is the logical-log record type. subtype Is the logging subsystem. Error Messages E-27 Messages: J-K-L-M Action: nn Is the logical-log ID where the record is stored. 0xn Is the hexadecimal address position within the log. To determine if any action is needed, use the onlog utility to examine the logical log. Contact Informix Technical Support. Log record (type:subtype) failed, partnum pnum row rid iserrno num. Cause: A logging failure occurred. The log record that caused the error is identified as follows: Action: type Is the logical-log record type. subtype Is the logging subsystem. pnum Is the part number. rid Is the row ID. num Is the iserror number. Contact Informix Technical Support. Log record (type:subtype) in log nn, offset 0xn was not rolled back. Cause: A log undo failed because a log is corrupt. The log record that caused the error is identified as follows: Action: E-28 type Is the logical-log record type. subtype Is the logging subsystem. log Is the logical-log ID where the record is stored. offset Is the hexadecimal address position within the log. To determine if any action is needed, use the onlog utility to examine the logical log. Contact Informix Technical Support. IBM Informix Administrator’s Reference Messages: J-K-L-M Logical Recovery allocating nn worker threads thread_type. Cause: The database server determined the number of worker threads that will be used for parallel recovery. The variable thread_type can assume the values ON_RECVRY_THREADS or OFF_RECVRY_THREADS. Action: This status message requires no action. If you want a different number of worker threads allocated for parallel recovery, change the value of the ONCONFIG configuration parameter ON_RECVRY_THREADS or OFF_RECVRY_THREADS. Logical Recovery Started. Cause: Logical recovery began. Action: This status message requires no action. Maximum server connections number. Cause: Outputs with each checkpoint message to indicate the maximum number of concurrent connections to the database server since the last restart. Action: This message helps the customer track license usage to determine when more licenses need to be purchased. For assistance, contact Informix Technical Support. Error Messages E-29 Messages: J-K-L-M Memory allocation error. Cause: The database server ran out of shared memory. Action: Take one of the following actions: 1. Increase swap space on the computer. 2. Check kernel shared-memory parameters for limits on shared memory. 3. Decrease the size of the memory allocated, with the BUFFERS configuration parameter. 4. Increase the virtual-memory size (SHMVIRTSIZE), the size of the added segments, (SHMADD), or your total shared-memory size (SHMTOTAL). Mirror Chunk chunkname added to space spacename. Perform manual recovery. Cause: Fast recovery, full recovery, or an HDR secondary has recovered the add of a mirror chunk. It does not perform automatic mirror recovery, however. The administrator must do this. Action Use either the onspaces utility or ON-Monitor to attempt to recover the mirror chunks. Mixed transaction result. (pid=nn user=userid). E-30 Cause: You receive this message only when more than one database server is involved in a transaction. This message indicates that a database server, after preparing a transaction for commit, heuristically rolled back the transaction, and the global transaction completed inconsistently. The pid value is the user-process identification number of the coordinator process. The value of user is the user ID associated with the coordinator process. Action: See the information on recovering manually from failed twophase commit in your Administrator’s Guide. IBM Informix Administrator’s Reference Messages: J-K-L-M mt_shm_free_pool: pool 0xn has blocks still used (id nn). Cause: An internal error occurred during a pool deallocation because blocks are still associated with the pool. Action: Contact Informix Technical Support. mt_shm_init: can’t create resident/virtual segment. Cause: The causes for the failure to create the resident or virtual segment are as follows: (1) the segment size is less than the minimum segment size; (2) the segment size is larger than the maximum segment size; (3) allocating another segment would exceed the allowable total shared-memory size; or (4) a failure occurred while the database server was trying to allocate the segment. Action: If you suspect that this error was generated because of item 1 or 2 in the preceding paragraph, contact Informix Technical Support. To correct item 3, increase the SHMTOTAL value in your ONCONFIG configuration file. For additional information about errors generated because of item 4, see your logical-log file. mt_shm_remove: WARNING: may not have removed all/correct segments. Cause: When the operating system tried to remove the shared-memory segments associated with the database server, the last segment did not equal the last segment registered internally. This situation is probably due to the unexpected failure of the database server. Action: Remove any segments that were not cleaned up. Error Messages E-31 Messages: N-O-P Messages: N-O-P Newly specified value of value for the pagesize in the configuration file does not match older value of value. Using the older value. Cause: This message displays upon database server restart. The PAGESIZE value changed in the ONCONFIG file after the database server was initialized. Action: The database server uses the older PAGESIZE value. Not enough main memory. Cause: The database server detected an error in an attempt to acquire more memory space from the operating system. Action: For more information about shared-memory configuration and management, refer to your operating-system documentation. Not enough logical-log files, Increase LOGFILES. Cause: During a data restore, the value of the LOGFILES configuration must always be greater than or equal to the total number of logical-log files. At some point during the restore, the number of logical-log files exceeded the value of LOGFILES. Action: Increase the value of LOGFILES in ONCONFIG. Not enough physical procs for affinity. E-32 Cause: The ONCONFIG parameters AFF_NPROCS and AFF_SPROC are not correctly set. AFF_SPROC plus AFF_NPROCS is greater than the number of physical processors on your computer or node. Action: Reset AFF_NPROCS and AFF_SPROC, such that the value AFF_SPROC plus value of AFF_NPROCS is less than or equal to the number of physical processors. IBM Informix Administrator’s Reference Messages: N-O-P The number of configured CPU poll threads exceeds NUMCPUVPS. Cause: The number of in-line poll threads that you specified in the ONCONFIG configuration file exceeds the number of CPU virtual processors. Action: Reduce the number of in-line poll threads to be less than or equal to the number of CPU virtual processors. onconfig parameter parameter modified from old_value to new_value. Cause: When the database server shared memory is reinitialized, this message documents any changes that occurred since the last initialization. Action: None required. oninit: Cannot have SINGLE_CPU_VP non-zero and number of CPU VPs greater than 1. Cause: The ONCONFIG file contains VPCLASS cpu with a num= value greater than 1 and a nonzero value for SINGLE_CPU_VP. SINGLE_CPU_VP must be 0 (or omitted) when there are more than 1 CPU VPS. Action: Correct the ONCONFIG file and restart the database server. oninit: Cannot have SINGLE_CPU_VP non-zero and user-defined VP classes. Cause: The ONCONFIG file contains a user-defined VPCLASS as well as a nonzero value for SINGLE_CPU_VP. SINGLE_CPU_VP must be 0 (or omitted) when the ONCONFIG file contains a user-defined VPCLASS. Action: Correct the ONCONFIG file and restart the database server. Error Messages E-33 Messages: N-O-P oninit: Cannot mix VPCLASS cpu and NUMCPUVPS, AFF_SPROC, AFF_NPROCS, or NOAGE parameters. Cause: The ONCONFIG file contains both VPCLASS cpu and one or more of the other listed parameters. It cannot contain both. Action: Correct the ONCONFIG file and restart the database server. oninit: Cannot mix VPCLASS aio and NUMAIOVPS parameters. Cause: The ONCONFIG file contains both VPCLASS aio and NUMAIOVPS. It cannot contain both. Action: Correct the ONCONFIG file and restart the database server. oninit: Fatal error in initializing ASF with 'ASF_INIT_DATA' flags asfcode = '25507'. Cause: The nettype value specified in the sqlhosts file or registry for the database server is invalid or unsupported, or the servicename specified in the sqlhosts file or registry for the database server is invalid. Action: Check the nettype and servicename values in the sqlhosts file or registry for each DBSERVERNAME and for the DBSERVERALIASES. Check the nettype value in each NETTYPE parameter in the ONCONFIG file. oninit: invalid or missing name for Subsystem Staging Blobspace. Cause: You set the configuration parameter STAGEBLOB to a blobspace that does not exist. Action: Use the -d option of onspaces to create the blobspace specified in STAGEBLOB, and restart the database server. oninit: Too many VPCLASS parameters specified. E-34 Cause: Too many VPCLASS parameter lines have been specified in the ONCONFIG file. Action: Reduce the number of VPCLASS lines, if possible. If not possible, contact Informix Technical Support. IBM Informix Administrator’s Reference Messages: N-O-P oninit: VPCLASS classname bad affinity specification. Cause: The affinity specification for the VPCLASS line is incorrect. Affinity is specified as a range: For m, use processor m. For m to n, use processors in the range m to n inclusive, where m <= n, m >= 0, and n >= 0. Action: Correct the VPCLASS parameter in the ONCONFIG file and restart the database server. oninit: VPCLASS classname duplicate class name. Cause: The VPCLASS classname in the ONCONFIG file has a duplicate name. VP class names must be unique. Action: Correct the duplicate name and restart the database server. oninit: VPCLASS classname illegal option. Cause: One of the fields in the VPCLASS classname parameter is illegal. Action: Correct the parameter in the ONCONFIG file and restart the database server. oninit: VPCLASS classname maximum number of VPs is out of the range 0-10000. Cause: The maximum number of VPs specified by a VPCLASS parameter line must be in the range 1 to 10,000. Action: Correct the value and restart the database server. oninit: VPCLASS classname name is too long. Maximum length is maxlength. Cause: The length of the name field in VPCLASS classname is too long. Action: Choose a shorter class name, correct the ONCONFIG file, and restart the database server. Error Messages E-35 Messages: N-O-P oninit: VPCLASS classname number of VPs is greater than the maximum specified. Cause: The initial number of VPs specified by a VPCLASS parameter is greater than the maximum specified by the same VPCLASS parameter. Action: Correct the VPCLASS PARAMETER AND restart the database server. oninit: VPCLASS classname number of VPs is out of the range 0-10000. Cause: The initial number of VPs specified by a VPCLASS parameter line must be in the range 1 to 10,000. Action: Correct the value and restart the database server. onmode: VPCLASS classname name is too long. Maximum length is maxlength. Cause: The name of a dynamically added VP class that onmode -p specifies is too long. Action: Choose a shorter name, and retry the onmode -p command. Optical Subsystem is running. Cause: You set the value of the STAGEBLOB parameter in the configuration file, and the database server is communicating properly with the optical-storage subsystem. Action: No action is required. Optical Subsystem is not running. E-36 Cause: You set the value of the STAGEBLOB parameter in the configuration file, but the database server cannot detect the existence of the optical-storage subsystem. Action: Check that the optical subsystem is online. IBM Informix Administrator’s Reference Messages: N-O-P Optical Subsystem STARTUP Error. Cause: The database server detects that the optical-storage subsystem is running, but the database server cannot communicate with it properly. Action: Check your optical subsystem for errors. Online Mode. Cause: The database server is in online mode. Users can access all databases Action: This status message requires no action. onspaces: unable to reset dataskip. Cause: This error message comes from the onspaces utility. For some reason, the utility cannot change the specification of DATASKIP (ON or OFF) across all dbspaces in the database server instance. Action: You are unlikely to receive this message. If the error persists after you restart the database server, contact Informix Technical Support. Open transaction detected when changing log versions. Cause: The database server detected an open transaction while it was trying to convert the data from a previous version of the database server. Action: Conversion is not allowed unless the last record in the log is a checkpoint. You must restore the previous version of the database server, force a checkpoint, and then retry conversion. Out of message shared memory. Cause: The database server could not allocate more memory for the specified segment. Action: For additional information, see the log file. Error Messages E-37 Messages: N-O-P Out of resident shared memory. Cause: The database server could not allocate more memory for the specified segment. Action: For additional information, see the log file. Out of virtual shared memory. Cause: The database server could not allocate more memory for the specified segment. Action: For additional information, see the log file. PANIC: Attempting to bring system down. Cause: A fatal database server error occurred. Action: See the error that caused the panic and attempt the corrective action suggested by the error message. For additional information that might explain the failure, refer also to other messages in the message-log file. Participant site database_server heuristically rolled back. E-38 Cause: A remote site rolled back a transaction after it reached the prepared-for-commit phase. Action: You might need to roll back the transaction on other sites and then restart it. IBM Informix Administrator’s Reference Messages: N-O-P Physical recovery complete: number pages examined, number pages restored. Cause: This message displays during fast recovery. The number of pages examined indicates the number of page images that exist in the physical log. The number of pages restored indicates the actual number of pages that are restored from the physical log. The number of pages restored is always less than or equal to the number examined. The database server might physically log a page image multiple times between checkpoints. Physical recovery restores only the first logged page image. If a page stays in the memory buffer pool, the database server physically logs it once per checkpoint, and stores one page image in the physical log. If the buffer pool is too small, a page that is being updated many times might get forced out of the buffer pool to disk and then brought back into memory for the next update. Each time the page is brought into memory, it is physically logged again, resulting in duplicate page images in the physical log. Action: If the number of pages examined is much larger than the number of pages restored, increase the size of the buffer pool to reduce the number of duplicate before-images. For more information, see the Performance Guide. Physical recovery started at page (chunk:offset). Cause: This message displays during fast recovery. Chunk is the number of the chunk that contains the physical log. Offset is the page offset of the start of the physical log entries. Physical recovery begins restoring pages from that point. Action: No action required. For information on fast recovery, see the Administrator’s Guide. Error Messages E-39 Messages: N-O-P Portions of partition partnum of table tablename in database dbname were not logged. This partition cannot be rolled forward. Cause: Light appends occurred to the operational table since the last backup. Action: If you want full access to data in this table, you need to alter the table to raw and then to the desired table type. This alter operation removes inconsistencies in the table that resulted from replaying non-logged operations such as light appends. Possible mixed transaction result. Cause: This message indicates that error -716 has been returned. Associated with this message is a list of the database servers where the result of a transaction is unknown. Action: For information on determining if a transaction was implemented inconsistently, see the Administrator’s Guide. Prepared participant site server_name did not respond. Cause: Too many attempts were made to contact remote site server_name. After several timeout intervals were met, the site was determined to be down. Action: Verify that the remote site is online and that it is correctly configured for distributed transactions. Once the remote site is ready, reinitiate the transaction. Prepared participant site server_name not responding. E-40 Cause: The database server is attempting to contact remote site server_name. For some unknown reason, the database server cannot contact the remote site. Action: Verify that the remote site is online and that it is correctly configured for distributed transactions. IBM Informix Administrator’s Reference Messages: Q-R-S Messages: Q-R-S Quiescent Mode. Cause: The database server has entered quiescent mode from some other state. On UNIX, only users logged in as informix or as root can interact with the database server. On Windows NT, only members of the Informix-Admin group can interact with the database server. No user can access a database. Action: None required. Read failed. Table name, Database name, iserrno = number Cause: An error occurred reading the specified system table. Action: Note down the error number and contact Informix Technical Support. Recovery Mode. Cause: The database server entered the recovery mode. No user can access a database until recovery is complete. Action: None required. Recreating index: 'dbsname:"owner".tabname-idxname'. Cause: This message indicates which index is currently being re-created. Action: None required. Error Messages E-41 Messages: Q-R-S Rollforward of log record failed, iserrno = nn. Cause: The message appears if, during fast recovery or a data restore, the database server cannot roll forward a specific logical-log record. The database server might be able to change to quiescent or online mode, but some inconsistency could result. For further information, see the message that immediately precedes this one. The iserrno value is the error number. Action: Contact Informix Technical Support. Root chunk is full and no additional pages could be allocated to chunk descriptor page. Cause: The root chunk is full. Action: To free space in the root chunk, take one of the following actions: ■ Drop and re-create the sysmaster database. ■ Move user tables from the root dbspace to another dbspace. ■ Refragment tables. scan_logundo: subsys ss, type tt, iserrno ee. Cause: A log undo failed because log type tt is corrupt. The variables in this message have the following values: Action: E-42 ss Is the subsystem name. tt Is the logical-log record type. ee Is the iserror number. Examine the logical log with the onlog utility to determine if any action is needed. Contact Informix Technical Support. IBM Informix Administrator’s Reference Messages: Q-R-S Session completed abnormally. Committing tx id 0xm, flags 0xn. Cause: Abnormal session completion occurs only when the database server is attempting to commit a transaction that has no current owner, and the transaction develops into a long transaction.The database server forked a thread to complete the commit. Action: None required. Session completed abnormally. Rolling back tx id 0xm, flags 0xn. Cause: Abnormal session completion occurs only when the database server is attempting to commit a distributed transaction that has no current owner, and the transaction develops into a long transaction. The database server forked a thread that rolled back the transaction. Action: None required. semctl: errno = nn. Cause: When the database server initialized a semaphore, an error occurred. The operating-system error is returned. Action: See your operating-system documentation. semget: errno = nn. Cause: An allocation of a semaphore set failed. The operating-system error is returned. Action: See your operating-system documentation. shmat: some_string os_errno: os_err_text. Cause: An attempt to attach to a shared-memory segment failed. The system error number and the suggested corrective action are returned. Action: Review the corrective action (if given), and determine if it is reasonable to try. For more information, refer to your operating-system documentation. Error Messages E-43 Messages: Q-R-S shmctl: errno = nn. Cause: An error occurred while the database server tried to remove or lock a shared-memory segment. The operating-system error number is returned. Action: See your operating-system documentation. shmdt: errno = nn. Cause: An error occurred while the database server was trying to detach from a shared-memory segment. The operating-system error number is returned. Action: See your operating-system documentation. shmem sent to filename. Cause: The database server wrote a copy of shared memory to the specified file as a consequence of an assertion failure. Action: None. shmget: some_str os_errno: key shmkey: some_string. E-44 Cause: Either the creation of a shared-memory segment failed, or an attempt to get the shared-memory ID associated with a certain key failed. The system error number and the suggested corrective action are returned. Action: Consult your operating-system documentation. IBM Informix Administrator’s Reference Messages: Q-R-S Shutdown (onmode -k) or override (onmode -O). Cause: A dbspace has gone down during a checkpoint interval. The database server is configured to wait for an override when this situation occurs. When the checkpoint actually happens, the following message appears: Checkpoint blocked by down space, waiting for override or shutdown. Action: Either shut down the database server or issue an onmode -O command to override the down dbspace. For more information on the onmode utility, see “onmode: Change Mode and Shared Memory” on page 3-39. Shutdown Mode. Cause: The database server is in the process of moving from online mode to quiescent mode. Action: None required. Space spacename added. Cause: The database server administrator added a new storage space spacename to the database server. Action: None required. Space spacename dropped. Cause: The database server administrator dropped a storage space spacename from the database server. Action: None required. Error Messages E-45 Messages: Q-R-S Space spacename -- Recovery Begins(addr). Cause: This informational message indicates that the database server is attempting to recover the storage space. The variables in this message have the following values: Action: spacename Is the name of the storage space that the database server is recovering. addr Is the address of the control block. None required. Space spacename -- Recovery Complete(addr). Cause: This informational message indicates that the database server recovered the storage space. The variables in this message have the following values: Action: spacename Is the name of the storage space that the database server has recovered. addr Is the address of the control block. None required. Space spacename -- Recovery Failed(addr). Cause: This informational message indicates that the database server was unable to recover the storage space. The variables in this message have the following values: Action: E-46 spacename Is the name of the storage space that the database server failed to recover. addr Is the address of the control block. None required. IBM Informix Administrator’s Reference Messages: T-U-V sysmaster database built successfully. Cause: The database server successfully built the sysmaster database. Action: None required. Messages: T-U-V Table tablename set to resident. Cause: The indicated table has been made resident by the SET TABLE statement. Action: No action is required. Table tablename and all its indexes set to resident. Cause: The indicated table and all its indexes have been made resident by the SET TABLE statement. Action: No action is required. This ddl operation is not allowed due to deferred constraints pending on this table and dependent tables. Cause: This error gets returned when you attempt to start a violations table when constraints are in deferred mode. Note: No error is returned if you start a violations table and then later set the constraints to deferred. However, the violations get undone immediately rather than written into the deferred constraint buffer. For more information, see the Informix Guide to SQL: Syntax. Action: If you would like to start a violations table, you must either change the constraint mode to immediate or commit the transaction. Error Messages E-47 Messages: T-U-V This type of space does not accept log files. Cause: Adding a logical-log file to a blobspace or sbspace is not allowed. Action: Add the logical-log file to a dbspace. For more information, see “Add a Logical-Log File” on page 3-71. TIMER VP: Could not redirect I/O in initialization, errno = nn. Cause: The operating system could not open the null device or duplicate the file descriptor associated with the opening of that device. The system error number is returned. Action: See your operating-system documentation. Too Many Active Transactions. E-48 Cause: During a data restore, there were too many active transactions. At some point during the restore, the number of active transactions exceeded 32 kilobytes. Action: None. IBM Informix Administrator’s Reference Messages: T-U-V Too many violations. Cause: The number of violations in the diagnostics table exceeds the limit that is specified in the MAX VIOLATIONS clause of the START VIOLATIONS TABLE statement. When a single statement on the target table (such as an INSERT or UPDATE statement) inserts more records into the violations table than the limit that is specified by the MAX VIOLATIONS clause, this error is returned to the user who issued the statement on the target table. This MAX VIOLATIONS limit applies to each coserver. For example, if you reach the MAX VIOLATIONS limit on coserver 2, you can continue to issue statements that violate rows on other coservers until you reach the MAX VIOLATIONS limit. Action: To resolve this error, perform one of the following actions: ■ Omit the MAX VIOLATIONS clause in the START VIOLATIONS TABLE statement when you start a violations table. Here, you are specifying no limit to the number of rows in the violations table. ■ Set MAX VIOLATIONS to a high value. Transaction Not Found. Cause: The logical log is corrupt. This situation can occur when a new transaction is started, but the first logical-log record for the transaction is not a BEGWORK record. Action: Contact Informix Technical Support. Transaction heuristically rolled back. Cause: A heuristic decision occurred to roll back a transaction after it completed the first phase of a two-phase commit. Action: None required. Error Messages E-49 Messages: T-U-V Transaction table overflow - user id nn, process id nn. Cause: A thread attempted to allocate an entry in the transaction table when no entries in the shared-memory table were available. The user ID and process ID of the requesting thread are displayed. Action: Try again later. Unable to create output file filename errno = nn. Cause: The operating system cannot create output file filename. The errno is the number of the operating-system error returned. Action: Verify that the directory exists and has write permissions. Unable to extend nn reserved pages for purpose in root chunk. Cause: The operating system cannot extend to nn reserved pages for purpose in root chunk. (The value purpose can be either Checkpoint/Log, DBSpace, Chunk, or Mirror Chunk.) Action: Reduce the ONCONFIG parameter for the resource cited; bring the database server up and free some space in the primary root chunk. Then reattempt the same operation. Unable to initiate communications with the Optical Subsystem. Cause: The optical driver supplied by the optical-drive vendor has indicated that the drive is not accessible. Action: Check driver installation and cabling between the computer and the drive. Unable to start SQL engine. E-50 Cause: The database server encountered an out-of-memory condition. Action: No action is necessary. IBM Informix Administrator’s Reference Messages: T-U-V Unable to open tblspace nn, iserrno = nn. Cause: The database server cannot open the specified tblspace. (The value nn is the hexadecimal representation of the tblspace number.) Action: See the ISAM error message number nn, which should explain why the tblspace cannot be accessed. The error message appears in Informix Error Messages in Answers OnLine. The value of pagesize pagesize specified in the config file is not a valid pagesize. Use 2048, 4096 or 8192 as the value for PAGESIZE in the onconfig file and restart the server. Cause: This message displays upon disk initialization. The value of PAGESIZE that was specified in the ONCONFIG file is not a valid value. Action: Restart the database server with a valid PAGESIZE value. Violations table is not started for the target table. Cause: If you issue a STOP VIOLATIONS TABLE statement for which no violations table is started, you receive this message. Action: To recover from this error, you must start a violations table for the target table. Violations table reversion test completed successfully. Cause: This message is recorded in the logmessage table in the sysmaster database when the revtestviolations.sh script has completed successfully (no open violations tables were found). Action: No action is necessary. For more information on revtestviolations.sh, see the Informix Migration Guide. Error Messages E-51 Messages: T-U-V Violations table reversion test failed. Cause: When the database server finds an open violations table, it reports errors 16992 and 16993 in the logmessage table in the sysmaster database and aborts the reversion process. Action: When this message appears, you must issue the STOP VIOLATIONS TABLE FOR table_name command for each open violations table. After you close all open violations tables, you can restart the reversion process. Violations table reversion test start. Cause: This message is recorded in the logmessage table in the sysmaster database when the revtestviolations.sh script is executed. Action: No action is necessary. For more information on revtestviolations.sh, see the Informix Migration Guide. Violations tables still exist. Cause: This message is recorded in the logmessage table in the sysmaster database when an open violations table is found. Action: When this message appears, you must issue the STOP VIOLATIONS TABLE FOR table_name command for each open violations table. After you close all open violations tables, you can restart the reversion process. Virtual processor limit exceeded. E-52 Cause: You configured the database server with more than the maximum number of virtual processors allowed (1000). Action: To reduce the number of virtual processors, decrease the values of VPCLASS, NUMCPUVPS, NUMAIOVPS, or NETTYPE in your ONCONFIG file. IBM Informix Administrator’s Reference Messages: T-U-V VPCLASS classname name is too long. Maximum length is maxlength. Cause: This message indicates an internal error. Action: Contact Informix Technical Support. VPCLASS classname duplicate class name. Cause: This message indicates an internal error. Action: Contact Informix Technical Support. VPCLASS classname Not enough physical procs for affinity. Cause: The physical processors in the affinity specification for the VP class classname do not exist or are offline. The problem might be with the VPCLASS parameter for cpu class VPs or with the AFF_SPROC and AFF_NPROCS parameters. Action: Make sure the named processors are online. Correct the affinity specification for the named VP class. Restart the database server. Error Messages E-53 Messages: W-X-Y-Z Messages: W-X-Y-Z WARNING: aio_wait: errno = nn. Cause: While the database server was waiting for an I/O request to complete, it generated error number nn on an operation that it was attempting to execute. Action: Contact Informix Technical Support for assistance. WARNING: Buffer pool size may cause database server to get into a locked state. Recommended minimum buffer pool size is num times maximum concurrent user threads. Cause: There are not enough buffers in the buffer pool. The database server could use all available buffers and cause a deadlock to occur. Action: Change the BUFFERS parameter in the ONCONFIG FILE to the number that this message recommends. For more information on the BUFFERS parameter, see “BUFFERS” on page 1-22. warning: Chunk time stamps are invalid. Cause: A sanity check is performed on chunks when they are first opened at system initialization. The chunk specified did not pass the check and will be brought offline. Action: Restore the chunk from a dbspace backup or its mirror. Warning: name_old is a deprecated onconfig parameter. Use name_new instead. See the release notes and the Informix Administrator's Reference for more information. E-54 Cause: A deprecated ONCONFIG parameter was used. This message displays the first time that you use a deprecated parameter. The shorter form of the message displays thereafter. Action: Use the suggested alternative ONCONFIG parameter. IBM Informix Administrator’s Reference Messages: W-X-Y-Z Warning: name_old is a deprecated onconfig parameter. Use name_new instead. Cause: A deprecated ONCONFIG parameter was used. Action: Use the suggested alternative ONCONFIG parameter. Warning: Unable to allocate requested big buffer of size nn. Cause: The internal memory allocation for a big buffer failed. Action: Increase either virtual memory size (SHMVIRTSIZE), the size of the added segments (SHMADD), or your total shared-memory size (SHMTOTAL). You are turning off smart large object logging. Cause: These changes will become the new sbspace default values. Changes have been made to the sbspace. The onspaces utility will read and update 100 smart large objects at a time and commit each block of 100 smart large objects as a single transaction. This utility might take a long time to complete. Action: This informational message occurs when you issue the following command: onspaces -ch sbspace -Df “LOGGING=OFF“ -y For more information, see “Change Sbspace Default Specifications” on page 3-88. Error Messages E-55 Messages: Symbols Messages: Symbols HH:MM:SS Informix database server Version R.VV.PPPPP Software Serial Number RDS#XYYYYYY. Cause: This message indicate the start-up of the database server, after the initialization of shared memory. Action: No action is required. argument: invalid argument. Cause: This internal error indicates that an invalid argument was passed to an internal Informix routine. Action: Contact Informix Technical Support. function_name: cannot allocate memory. E-56 Cause: The database server cannot allocate memory from internal sharedmemory pool. Action: Increase either virtual-memory size (SHMVIRTSIZE), the size of the added segments (SHMADD), or your total shared-memory size (SHMTOTAL). IBM Informix Administrator’s Reference Conversion/Reversion Messages Conversion/Reversion Messages These messages might display during database server conversion or reversion. Messages: A-C Cannot revert constraint with id id (in syschecks). Cause: The database has a constraint that was defined in a version more recent than the one to which you are reverting. Action: Drop the specified constraint and retry reversion. Cannot revert new fragment expression for index index, tabid id. Cause: The index fragmentation was defined in a version more recent than the one to which you are reverting. Action: Drop the problem index-fragmentation scheme and retry reversion. Cannot revert new table fragment expression for table with id id. Cause: The fragmentation of this table was defined in a version more recent than the one to which you are reverting. Action: Drop the problem table fragmentation scheme and retry reversion. Cannot update page zero. Cause: Attempt to write page zero failed. Action: Contact Informix Technical Support. Error Messages E-57 Conversion/Reversion Messages Checking database name for revertibility. Cause: Indicates that start of the reversion checks on the specified database. Action: None required. Conversion of pre 7.3 in-place alter started status. Cause: The database server is converting data structures for in-place alters to the new format. Action: None required. Conversion of pre 9.2 database tablespaces status. Cause: The database server is converting tablespaces to the new format. Action: None required. The conversion of the database name has failed. Cause: Indicates that the conversion of the specified database has failed. Action: Connect to the database. This action triggers conversion of the database. If it fails, the relevant error message appears. Contact Informix Technical Support. Converting database name... Cause: This message appears at the start of conversion of each database in the system. Action: None required. Converting in-place alters to new format. E-58 Cause: The database server is converting data structures for in-place alters to the new format. Action: None required. IBM Informix Administrator’s Reference Conversion/Reversion Messages Converting 'onpload' database... Cause: Printed in online.log at the beginning of onpload conversion. Action: None required. Converting partition header from version 7.x. Cause: The database server is converting the partition header page to the new format that contains the chunk number and offset. This message is optional verbose output that is logged only if you start oninit with the -v flag. Action: None required. Converting partition header page address. Cause: The database server is converting the partition header page to the new format that contains the chunk number and page offset. This message is optional verbose output that is logged only if you start oninit with the -v flag. Action: None required. Converting partition header pages status. Cause: Action: This message tracks the progress of the conversion of the partition header pages. The status is identified as follows: ■ started ■ succeeded ■ FAILED If the status is started or succeeded, no action is required. If conversion of the partition header pages failed, restart the database server. It will attempt to continue converting where it left off in the restartable conversion phase. If this action fails, diagnose the problem, restore from tape, fix the problem, and retry conversion. Error Messages E-59 Conversion/Reversion Messages Converting partition keys to 9.2. Cause: The database server is converting the partition keys to the Version 9.2 format. This message is optional verbose output that is logged only if you start oninit with the -v flag. Action: None required. Converting partition name for databasename:tablename. Cause: The database server is converting the partition name for the databasename:tablename. This message is optional verbose output that is logged only if you start oninit with the -v flag. Action: None required. Messages: D-F The database name has been converted successfully. Cause: Indicates successful completion of the conversion of the specified database. Action: None required. Database name is not revertible... Cause: The database has failed one of the reversion checks and is not revertible. Action: Take action to correct the error displayed as a separate message. Database name is revertible... E-60 Cause: The database has passed all reversion checks and is revertible to the specified version. Action: None required. IBM Informix Administrator’s Reference Conversion/Reversion Messages Database name: Must drop trigger (id = id_number). Cause: The database contains a trigger that was created in a version more recent than the one to which you are converting. Action: Drop the trigger with the specified trigger identification number and then attempt reversion. Database name SUCCESSFULLY reverted... Cause: Indicates the success of reversion of the specified database. Action: None required. ... dropping sysmaster database. Cause: The database server is dropping sysmaster database during the reversion process. Action: No action is required. The dummy updates failed while converting database name. This may imply data corruption in the database. If so, restore the original database with the tape backup. For more information, see output_file. Cause: During conversion of a database from a version earlier than Version 9.2, dummy update statements are run against the system tables in the database being converted. This message indicates failure in running one of these update statements. Action: To retry the dummy updates, run the dummy update script for your old database server version. For instructions, refer to the Informix Migration Guide. If data corruption occurred, restore the original database with the tape backup. For more information, see the Backup and Restore Guide. Error Messages E-61 Conversion/Reversion Messages The dummy updates succeeded while converting database name. Cause: During conversion of a database from a version earlier than Version 9.2, dummy update statements are run against the system tables in the database being converted. This message indicates successful completion of these updates. Action: None required. Error in slow altering a system table. Cause: An internal error occurred while performing reversion. Action: Contact Informix Technical Support. External conversion aborted due to incompatible sysmaster database. Cause: The sysmaster database was not converted to the current database server version. A current sysmaster database is needed for external conversion to complete. Action: Drop the sysmaster database and reboot the database server. It will build a new sysmaster database and relaunch external conversion automatically. Messages: I-P Internal server error. Cause: An unexpected error occurred during database reversion. Action: Contact Informix Technical Support. Must drop long identifiers in table name in database name E-62 Cause: Identifiers greater than 18 characters in length are not supported in the database server version to which you are reverting. Action: Make sure that all long identifiers in the system are either dropped or renamed before you attempt reversion. IBM Informix Administrator’s Reference Conversion/Reversion Messages Must drop new database (name) before attempting reversion. Iserrno error_number Cause: The system contains a database that was created in a more recent version of the database server. Action: Drop the new database and attempt reversion. Must drop new user defined statistics in database name, iserrno number Cause: Some distributions in the sysdistrib system table use user-defined statistics. This feature is not supported in the version to which you are reverting. Action: Ensure that no user-defined statistics are present or used in the system and then attempt reversion. ON-Bar conversion completed successfully. Cause: ON-Bar conversion completed successfully. Action: None. ON-Bar conversion failed see /tmp/bar_conv.out. Cause: ON-Bar conversion failed. Action: For failure details, see /tmp/bar_conv.out. ON-Bar conversion start: Cause: ON-Bar conversion script is now running. Action: None. ON-Bar reversion completed successfully. Cause: ON-Bar reversion was completed successfully. Action: None. Error Messages E-63 Conversion/Reversion Messages ON-Bar reversion failed see /tmp/bar_rev.out. Cause: ON-Bar reversion failed. Action: For failure details, see /tmp/bar_rev.out. ON-Bar reversion start: Cause: ON-Bar reversion script is now running. Action: None. ON-Bar reversion test completed successfully. Cause: ON-Bar reversion test was completed successfully. Action: None. ON-Bar reversion test start: Cause: ON-Bar reversion test script is now running. Action: None. 'onpload' conversion completed successfully. Cause: Displayed in online.log at the successful completion of onpload conversion. Action: None required. 'onpload' conversion failed. For details, look in $INFORMIXDIR/etc/conpload.out. E-64 Cause: Conversion of the onpload database failed. Action: Find out the cause of failure from $INFORMIXDIR/etc/conpload.out. Fix the problem before you reattempt conversion. IBM Informix Administrator’s Reference Conversion/Reversion Messages ...'onpload' reversion completed successfully. Cause: Printed in online.log at the successful completion of reversion. Action: None required. ...'onpload' reversion failed. For details, look in $INFORMIXDIR/etc/revpload.out. Cause: Reversion of the onpload database failed. Action: Find the cause of failure in $INFORMIXDIR/etc/revpload.out. Fix the problem before you reattempt reversion. 'onpload' reversion test completed successfully. Cause: Printed in online.log if the onpload database is revertible. Action: None required. 'onpload' reversion test start: Cause: Printed in online.log at the beginning of onpload reversion testing. Action: None required. The pload database contains load/unload jobs referring to long table names, column names, or database names. These jobs will not work as expected until they are redefined. Cause: Printed during onpload reversion testing if the onpload database contains references to long table names, column names, or database names. But the reversion will complete. Action: Redefine the load and unload jobs in the onpload database that have references to long identifiers. Error Messages E-65 Conversion/Reversion Messages Messages: R-W ...reverting 'onpload' database. Cause: Printed in online.log at the beginning of onpload reversion. Action: None required. Reverting partition header from version 9.2. Cause: The database server is reverting the partition header page to the old format that contains the physical address. This message is optional verbose output that is logged only if you start oninit with the -v flag. Action: None required. Reverting partition header page address. Cause: The database server is reverting the partition header page to the old format that contains the physical address. This message is optional verbose output that is logged only if you start oninit with the -v flag. Action: None required. Reverting partition header pages status. Cause: Action: E-66 The database server is reverting the partition header pages to the old format. The status is identified as follows: ■ started ■ succeeded ■ FAILED If reversion of the partition header pages started or succeeded, no action is required. If reversion of the partition header pages failed, restore from a tape backup, diagnose and fix the problem, and retry conversion. IBM Informix Administrator’s Reference Conversion/Reversion Messages Reverting partition keys to pre 9.2. Cause: The database server is reverting the partition keys to the preVersion 9.2 format. This message is optional verbose output that is logged only if you start oninit with the -v flag. Action: None required. Reverting partition name for databasename:tablename. Cause: The database server is reverting the partition name for databasename:tablename. This message is optional verbose output that is logged only if you start oninit with the -v flag. Action: None required. ... reverting reserved pages. Cause: The database server is reverting reserved pages. Action: No action is required. ... reverting tables that underwent In-Place Alter. Cause: The database server is reverting tables that underwent in-place alter. Action: No action is required. R-tree error message conversion completed successfully. Cause: R-tree error message conversion was completed successfully. Action: None required Error Messages E-67 Conversion/Reversion Messages R-tree error message conversion failed. (See /tmp/conrtree.out or %TMP%\conrtree.out) Cause: R-tree error message conversion failed. Action: See /tmp/conR-tree.out and /tmp/R-tree.databases. R-tree error message conversion started. Cause: R-tree error message conversion script is now running. Action: None required. Reversion cancelled. Cause: The reversion process was cancelled because of errors encountered. Action: Correct the cause of the errors, and restart reversion. Reversion complete. Install Informix database server version before restarting. Cause: The reversion process was completed successfully. Action: You must install either the Version 7.3x or Version 9.2x database server. In Version 9.3, Informix does not support conversion or reversion from or to versions earlier than Version 7.30. Reversion of database name FAILED Cause: Indicates the failure of reversion of the specified database. Action: None required. ...reverting 'syscdr' database. E-68 Cause: Printed in online.log at the beginning of Enterprise Replication reversion. Action: None required. IBM Informix Administrator’s Reference Conversion/Reversion Messages ...starting reversion of database name. Cause: Indicates the start of actual reversion of the specified database. Action: None required. There is a semi-detached index in this table, which cannot be reverted. Drop this index, and retry reversion. Cause: A semi-detached index on this table cannot be reverted. Action: To see the list of all semi-detached indexes, refer to the database server message log. These indexes cannot be reverted. To continue reversion, drop these semi-detached indexes and retry reversion. If needed, you will need to re-create these indexes after reversion is complete. Unable to read reserved page chunk:offset - reserved_page. Cause: Both disk pages in a given reserved page pair are bad. On the disk page, chunk represents the chunk number and offset represents the page offset for the chunk. Action: Contact Informix Technical Support. WARNING: Target server version must have a certified Storage Manager installed after conversion/reversion and before bringing up server. Cause: ON-Bar is being converted or reverted. The user must ensure that a storage manager, certified with the target database server version, is installed. Action: None. Error Messages E-69 Conversion and Reversion Messages for Enterprise Replication Conversion and Reversion Messages for Enterprise Replication Use the concdr.sh script on UNIX or the concdr.bat script on Windows to convert Enterprise Replication and the syscdr database to Version 9.3. Use the revcdr.sh script on UNIX the or revcdr.bat script on Windows to revert Enterprise Replication and the syscdr database to an earlier version. These scripts write conversion and reversion messages for Enterprise Replication to the following locations: ■ Output of the concdr.sh or concdr.bat script, which is standard output by default ■ concdr.out file ■ Output of the revcdr.sh or revcdr.bat script, which is standard output by default ■ revcdr.out file ■ revtestcdr.out file You can find the concdr.out, revcdr.out, and revtestcdr.out files in $INFORMIXDIR/etc on UNIX or %INFORMIXDIR%\etc on Windows. For more information on converting and reverting Enterprise Replication, see the Informix Migration Guide. CDR reversion test completed successfully. E-70 Cause: The syscdr database is revertible. Action: None required. Print to: Prints the output of the revcdr.sh or revcdr.bat script to standard output. IBM Informix Administrator’s Reference Conversion and Reversion Messages for Enterprise Replication CDR reversion test failed; for details look in $INFORMIXDIR/etc/revtestcdr.out. Cause: Enterprise Replication is not revertible. Action: For more information, look at the messages in revtestcdr.out. Fix the reported problem before you attempt reversion. Print to: Prints the output of the revcdr.sh or revcdr.bat script to standard output. Enterprise Replication is not ready for conversion. The Control and TRG send queues should be empty for conversion/reversion to proceed. Cause: There are elements in the control and Transaction Send Queue (also called TRG) send queues. The database server sends replicated data to the TRG queue before sending it to the target system. Action: Wait for these queues to empty before you attempt either conversion or reversion. For more information, see the Guide to Informix Enterprise Replication. Print to: Prints this message to concdr.out during conversion or to revcdr.out during reversion. Enterprise Replication is not ready for conversion. The syscdr database should NOT contain old-style group definitions for conversion to succeed. Cause: The syscdr database should not contain old-style group definitions for conversion to succeed. Action: Use the cdr delete group command to delete the old-style groups before attempting conversion. For more information, see the Guide to Informix Enterprise Replication. Print to: Prints this message to concdr.out. Error Messages E-71 Conversion and Reversion Messages for Enterprise Replication Enterprise Replication should be in a stopped state for conversion/reversion to proceed. Cause: Enterprise Replication should be in a stopped state for conversion or reversion to proceed. Action: Stop Enterprise Replication. For more information, see the Guide to Informix Enterprise Replication. Print to: Prints this message to concdr.out during conversion or to revcdr.out during reversion. Reversion of ‘syscdr’ failed; for details look in $INFORMIXDIR/etc/revcdr.out. Cause: The reversion of the syscdr database failed. Action: Find the cause of failure in the revcdr.out file, then fix the problem before you attempt reversion. Print to: Prints the output of the revcdr.sh or revcdr.bat script to standard output. Starting CDR reversion test... Cause: This message displays at the beginning of Enterprise Replication reversion testing. Print to: Prints the output of the revcdr.sh or revcdr.bat script to standard output. Action: None required. Starting 'syscdr' conversion... E-72 Cause: This message displays when you run the concdr.sh or concdr.bat script to convert the syscdr database to Version 9.3. Action: None required. Print to: Prints the output of the concdr.sh or concdr.bat script to standard output. IBM Informix Administrator’s Reference Conversion and Reversion Messages for Enterprise Replication Starting ‘syscdr’ reversion... Cause: This message displays when you run the revcdr.sh or revcdr.bat script to revert the syscdr database to an earlier version. Action: None required. Print to: Prints the output of the revcdr.sh or revcdr.bat script to standard output. 'syscdr' conversion completed successfully. Cause: This message displays after you complete converting Enterprise Replication and the syscdr database to Version 9.3. Action: None required. Print to: Prints the output of the concdr.sh or concdr.bat script to standard output. 'syscdr' conversion failed. For details, look in $INFORMIXDIR/etc/concdr.out. Cause: Conversion of the syscdr database failed. Action: If conversion fails, resolve the problem reported in concdr.out. Restore the syscdr database from backup and reattempt conversion. Print to: Prints the output of the concdr.sh or concdr.bat script to standard output. Syscdr should NOT contain new replicate sets for reversion to succeed. Cause: The new replicate sets in the syscdr database are not compatible with older versions. Action: Use the cdr delete replicateset command to delete the replicate sets. Then rerun the revcdr.sh or revcdr.bat script to reattempt reversion. Print to: Prints this message to revtestcdr.out. Error Messages E-73 Conversion and Reversion Messages for Enterprise Replication Syscdr should not contain replicates defined with the --floatieee option for reversion to succeed. E-74 Cause: Replicates have been defined with the --floatiee option. You cannot revert these replicates to the older version. Action: Use the cdr delete replicateset command to delete replicates defined with the --floatiee option, then reattempt reversion. Print to: Prints this message to revtestcdr.out. IBM Informix Administrator’s Reference Dynamic Log Messages Dynamic Log Messages Dynamically added log file logid to DBspace dbspace_number. Cause: The next active log file contains records of an open transaction. Whenever the database server adds a log dynamically, it logs this message. Example: Dynamically added log file 38 to DBspace 5. Action: Complete the transaction as soon as possible. Log file logid added to DBspace dbspace_number. Cause: Whenever the administrator adds a log file manually, the database server logs this message. Example: Log file 97 added to Dbspace 2. Action: None required. Log file number logid has been dropped from DBspace dbspace_number. Cause: When you drop a newly-added log file, the database server logs this message. Example: Log file number 204 has been dropped from DBspace 17. Action: None required. Log file logid has been pre-dropped. Cause: When you drop a used log file, it is marked as deleted (status D) and cannot be used again. After you perform a level-0 backup, the database server drops this log file and can reuse the space. Example: Log file 12 has been pre-dropped. Action: To delete the log file, perform a level-0 backup of all storage spaces. Error Messages E-75 Dynamic Log Messages Pre-dropped log file number logid has been deleted from DBspace dbspace_number. Cause: After a backup, the database server deletes a pre-dropped log file and logs this message. Example: Pre-dropped log file number 12 has been deleted from DBspace 3. Action: None required. ALERT: Because the oldest logical log (logid) contains records from an open transaction (transaction_address), the server is attempting to dynamically add a log file. But there is no space available. Please add a DBspace or chunk. Then complete the transaction as soon as possible. Cause: If the database server is unable to dynamically add a log file because the instance is out of space, it logs this message. Action: Add a dbspace or chunk to an existing dbspace. Then complete the transaction as soon as possible. ALERT: The oldest logical log (logid) contains records from an open transaction (transaction_address). Logical logging will remain blocked until a log file is added. Add the log file with the onparams -a command, using the -i (insert) option, as in: onparams -a -d dbspace -s size -i Then complete the transaction as soon as possible. E-76 Cause: If the DYNAMIC_LOGS parameter is set to 1, the database server prompts the administrator to add log files manually when they are needed. Action: Use the onparams -a command with the -i option to add the log file after the current log file. Then complete the transaction as soon as possible. IBM Informix Administrator’s Reference Dynamic Log Messages Log file logid has been pre-dropped. It will be deleted from the log list and its space can be reused once you take level-0 archives of all BLOBspaces, Smart BLOBspaces and non-temporary DBspaces. Cause: When you drop a used log file, it is marked as deleted (status D) and cannot be used again, and onparams prints this message. Action: To delete the log file, perform a level-0 backup of all storage spaces. Error Messages E-77 Sbspace Metadata Messages Sbspace Metadata Messages Allocated number pages to Metadata from chunk number. The database server freed the specified number of pages from the reserved area and moved them to the metadata area of chunk number. None required. Allocated number pages to Userdata from chunk number. The database server freed the specified number of pages from the reserved area and moved them to the user-data area of chunk number. None required. Freeing reserved space from chunk number to Metadata. The metadata area in chunk number is full. The database server is trying to free space from the reserved area to the metadata area. None required. Freeing reserved space from chunk number to Userdata. The user-data area in chunk number is full. The database server is trying to free space from the reserved area to the user-data area. None required. E-78 IBM Informix Administrator’s Reference Truncate Table Messages Truncate Table Messages The table cannot be truncated if it has an open cursor or dirty readers. Cause: You must have exclusive access to the table. Action: Wait for dirty readers to complete or close all the open cursors and reissue the TRUNCATE TABLE command. The table cannot be truncated. It has at least one non-empty child table with referential constraints. Cause: You cannot truncate a table if it has child tables with referential constraints and at least one row. Action: Empty the child tables before you truncate this table. Error Messages E-79 TRUNCATE table statement cannot be executed if already inside a transaction. Cause: Because you must issue the TRUNCATE TABLE statement as a singleton transaction, you cannot nest it inside another transaction. For example, you cannot issue TRUNCATE TABLE within a BEGIN WORK and COMMIT WORK block or inside a trigger. Action: Issue the TRUNCATE TABLE statement as a singleton transaction, outside of a BEGIN WORK and COMMIT WORK block or trigger. Break the transaction into several parts, as follows: ■ Commit the first part of the transaction. You can roll back only the first part of the transaction. ■ Issue the TRUNCATE TABLE statement. ■ Execute the remaining part of the transaction as a new transaction inside a BEGIN WORK and COMMIT WORK block. Example: COMMIT WORK; TRUNCATE TABLE tab1; BEGIN WORK; INSERT INTO tabl1 VALUES ("James"); ... COMMIT WORK; A B C D E F G H I J K L M N O P Q R S T U V W X Y Z @ Index Index Numerics 64-bit addressing and buffer pool 1-22 and memory 1-103 9.3 features, overview Intro-6 A ACCESSTIME tag 3-84 Active threads, printing 3-119 AC_CONFIG environment variable 1-18 ac_config.std file 1-18, A-6 AC_MSGPATH parameter 1-18 ac_msg.log file A-5 AC_STORAGE parameter 1-18 AC_VERBOSE parameter 1-18 ADDCHK logical-log record 4-8 ADDDBS logical-log record 4-8 Adding CPU virtual processors 3-51, 3-53 logical-log files 3-71 ADDITEM logical-log record 4-8 ADDLOG logical-log record 4-8 ADTERR parameter 1-18 ADTMODE parameter 1-18 ADTPATH parameter 1-18 ADTSIZE parameter 1-18 AFCRASH parameter 1-55, A-11 AFDEBUG environment variable A-11 AFF_NPROCS parameter description of D-3 VPCLASS D-3 AFF_SPROC parameter description of D-4 VPCLASS D-4 af.xxx file A-5 ALARMPROGRAM parameter 1-19, C-2 Aliases. See DBSERVERALIASES parameter. Allocating unbuffered disk space 3-78 ALLOCGENPG log record 4-8 ALLOW_NEWLINE parameter 1-20 ALTERDONE log record 4-8 Alternate dbservername 1-28 ALTSPCOLSNEW log record 4-8 ALTSPCOLSOLD log record 4-8 ANSI compliance level Intro-19 archecker parameters 1-18 Assertion failure af.xxx file A-5 DUMPCNT parameter 1-47 DUMPCORE parameter 1-48 DUMPSHMEM parameter 1-50 gcore file A-7 shmem.xxx file A-14 Assertion-failed messages E-3 Asynchronous I/O cooked chunks D-7 printing by virtual processor 3-122 onstat -g ioa option 3-122 onstat -g iof 3-122 onstat -g iog 3-122 Attributes, configuration parameters 1-16 A B C D E F G H I Audit records configuration parameters 1-18 sysadtinfo table 2-10 sysaudit table 2-10 AVG_LO_SIZE tag 3-84 B Backup adding log files 3-71 after creating a storage space 3-78 automatic log 1-19, C-2 changing physical log 3-73 displaying contents of 3-35 dropping log files 3-72 external 3-44 ixbar (boot) file A-7 onstat -g bus 3-120 onstat -g bus_sm 3-120 using ontape 3-157 Backup Scheduler, printing sessions 3-120 BADIDX logical-log record 4-9 bar_action table 2-9 bar_act.log file A-6 BAR_ACT_LOG parameter 1-82 BAR_BSALIB_PATH parameter 1-82 BAR_HISTORY parameter 1-82 bar_instance table 2-9 BAR_MAX_BACKUP parameter 1-82 BAR_NB_XPORT_COUNT parameter 1-82 bar_object table 2-9 BAR_PROGRESS_FREQ parameter 1-82 BAR_RETRY parameter 1-82 bar_server table 2-9 BAR_XFER_BUF_SIZE parameter 1-82 Before-image journal. See Physical log. BEGCOM logical-log record 4-9 BEGIN logical-log record 4-9 beginlg field 3-154 BEGPREP logical-log record 4-9 BEGWORK logical-log record 4-9 2 IBM Informix Administrator’s Reference J K L M N O P Q R BFRMAP logical-log record 4-9 Big-remainder page 5-23 Binding CPU virtual processors D-3 Bitmap page blobspace 5-37 tblspace tblspace 5-10 Bit-map page tblspace tblspace 5-10 bitvector field 4-11 BLDCL logical-log record 4-9 bldutil.sh script 2-4, A-6 BLOB data type. See Smart large object. Blobpage average fullness statistics 3-16, 3-24 blobpage size 5-34 dbspace blobpage structure 5-35 specifying size of 3-78, 5-34 structure and storage 5-34, 5-38 Blobspace adding a chunk 3-92 bit-map page 5-37 blobpage structure 5-38 blobspace mirror chunk, structure 5-6 blobspace structure 5-34 creating 3-77 dropping a chunk 3-96 dropping blobspaces 3-90 ending mirroring 3-100 free-map page description of 5-37 location in blobspace 5-35 role in blobpage logging 5-37 tracked by bitmap 5-37 maximum number 3-78 naming conventions 3-77 page types 5-36 restriction, dropping 3-90 simple-large-object storage 5-35 starting mirroring 3-98 Block bitmap nonresident segments 3-123 onstat -g nbm 3-123 onstat -g rbm 3-125 resident segment 3-125 Blocking database server 3-44 S T U V W X Y Z @ BMAP2TO4 logical-log record 4-10 BMAPFULL logical-log record 4-9 Boldface type Intro-11 Bringing the database server online 3-41, 3-42 BSPADD logical-log record 4-10 BTCPYBCK logical-log record 4-10 BTMERGE logical-log record 4-10 B-tree functional index 5-33 key-value locking 5-32 structure 5-26 BTSHUFFL logical-log record 4-10 BTSPLIT logical-log record 4-11 Buffer access-level flag bits 3-112 page-type codes 3-111, 3-156 Buffer pool, 64-bit addressing 1-22 Buffered disk space examples 3-93 Buffered transaction logging. See Logging. BUFFERING tag 3-84 BUFFERS parameter 1-22 Buffers, read-ahead and page size 1-23 buildsmi script buildsmi.xxx file, description A-6 error log message E-20 failure of A-6 initializing database server 2-4 buildsmi.xxx file A-6 BYTE data type. See Simple large object. Byte-range locks 3-133 C Cache data dictionary 3-121 SQL statement, printing 3-127 CDR logical-log record 4-11 CDR_DSLOCKWAIT parameter 1-52 CDR_EVALTHREADS parameter 1-52 CDR_LOGBUFFERS parameter 1-52 A B C D E F G H CDR_NIFCOMPRESS parameter 1-52 CDR_QDATA_SBFLAGS parameter 1-52 CDR_QDATA_SBSPACE parameter 1-52 CDR_QHDR_DBSPACE parameter 1-52 CDR_QUEUEMEM parameter 1-52 CDR_SERIAL parameter Intro-7, 1-52 CHALLOC logical-log record 4-12 record subtype (SBLOB) 4-23 Changing ONCONFIG in ISA 1-17 physical log 3-73 sbspace attributes 3-88 CHCOMBINE logical-log record 4-12 record subtype (SBLOB) 4-23 Checkpoint CKPTINTVL parameter 1-24 disabling I/O errors 1-84 fast recovery performance 1-81 CHFREE logical-log record 4-12 record subtype (SBLOB) 4-23 CHKADJUP log record 4-12 CHPHYLOG log record 4-12 CHRESERV logical-log record 4-12 CHSPLIT logical-log record 4-12 record subtype (SBLOB) 4-23 Chunk changing mirroring status 3-101 checking for overlap 3-23 free-list page 5-5, 5-7 initial chunk of dbspace 5-4 initial mirror offset 1-72 maximum number 3-92 monitoring 2-11 structure additional dbspace chunk 5-5 initial dbspace chunk 5-5 mirror chunk 5-6 using a symbolic link for the pathname 1-73, 1-98 I J K L M N O P Q R Chunk free list, checking with oncheck 3-15, 3-21 CINDEX logical-log record 4-12 CKPOINT logical-log record 4-13 CKPTINTVL parameter 1-24 CLEANERS parameter 1-25 Client killing sessions (onmode -z) 3-46 results of connection D-8 specifying dbservername 1-31 USEOSTIME parameter 1-125 CLOB data type. See Smart large object. CLR logical-log record 4-13 CLUSIDX logical-log record 4-13 COARSELOCK log record 4-12 Cold restore, number of recovery threads 1-80 COLREPAI logical-log record 4-13 Command-line conventions elements of Intro-14 example diagram Intro-15 how to read Intro-15 Comment icons Intro-12 COMMIT logical-log record 4-13 Communication configuration file. See ONCONFIG configuration file. Compactness of index page 1-53 Compliance with industry standards Intro-19 COMTAB logical-log record 4-13 COMWORK log record 4-13 concdr.out file E-70 concdr.sh script A-2, A-6, E-70 Configuration file displaying settings 1-9 format 1-7 preparing 1-8 processing A-12 warning about modifying onconfig.std 1-8, A-12 Configuration parameter AC_MSGPATH 1-18 AC_STORAGE 1-18 AC_VERBOSE 1-18 ADTERR 1-18 ADTMODE 1-18 ADTPATH 1-18 S T U V W X Y Z @ ADTSIZE 1-18 AFCRASH 1-55, A-11 AFF_NPROCS D-3 AFF_SPROC D-4 ALARMPROGRAM 1-19, C-2 ALLOW_NEWLINE 1-20 attributes 1-16 BAR_ACT_LOG 1-82 BAR_BSALIB_PATH 1-82 BAR_HISTORY 1-82 BAR_MAX_BACKUP 1-82 BAR_NB_XPORT_COUNT 1-82 BAR_PROGRESS_FREQ 1-82 BAR_RETRY 1-82 BAR_XFER_BUF_SIZE 1-82 BUFFERS 1-22 CDR_DSLOCKWAIT 1-52 CDR_EVALTHREADS 1-52 CDR_LOGBUFFERS 1-52 CDR_NIFCOMPRESS 1-52 CDR_QDATA_SBFLAGS 1-52 CDR_QDATA_SBSPACE 1-52 CDR_QHDR_DBSPACE 1-52 CDR_QUEUEMEM 1-52 CDR_SERIAL Intro-7, 1-52 changing a value 1-17 CKPTINTVL 1-24 CLEANERS 1-25 CONSOLE 1-25 current default values 1-9 DATASKIP 1-26 DBSERVERALIASES 1-28, 3-48 DBSERVERNAME 1-30, 3-48 DBSPACETEMP 1-31 DD_HASHMAX 1-34 DD_HASHSIZE 1-35 DEADLOCK_TIMEOUT 1-36 DEF_TABLE_LOCKMODE 1-37 DIRECTIVES 1-38 DRAUTO D-5 DRINTERVAL 1-39 DRLOSTFOUND 1-39 DRTIMEOUT 1-40 DS_HASHSIZE 1-41, 1-44 DS_MAX_QUERIES 1-42, 3-57 DS_MAX_SCANS 1-43, 3-57 DS_POOLSIZE 1-41, 1-44 DS_TOTAL_MEMORY 1-45, 3-56 DUMPCNT 1-47 Index 3 A B C D E F G H I DUMPCORE 1-47 DUMPDIR 1-48 DUMPGCORE 1-49 DUMPSHMEM 1-50 DYNAMIC_LOGS 1-51 FILLFACTOR 1-53, 5-32 HETERO_COMMIT 1-54 hidden 1-9 IMCLOG 1-70 IMCTRANSPORTS 1-70 IMCWORKERDELAY 1-70 IMCWORKERTHREADS 1-70 ISM_DATA_POOL 1-54 ISM_LOG_POOL 1-54, 1-83 JDKVERSION 1-55 JVMTHREAD 1-55 JVPCLASSPATH 1-55 JVPDEBUG 1-55, A-11 JVPHOME 1-55 JVPJAVAHOME 1-55 JVPJAVALIB 1-55 JVPJAVAVM 1-55 JVPLOGFILE 1-55, A-11 JVPPROPFILE 1-55 LBU_PRESERVE D-5 LOCKS 1-56 LOGBUFF 1-57 LOGFILES 1-58 LOGSIZE 1-59 LOGSMAX D-5 LRUS 1-61 LRU_MAX_DIRTY 1-62 LRU_MIN_DIRTY 1-63 LTAPEBLK 1-64 LTAPEDEV 1-65 LTAPESIZE 1-66 LTXEHWM 1-67 LTXHWM 1-68 MAX_PDQPRIORITY 1-69, 3-56 MIRROR 1-71 MIRROROFFSET 1-72 MIRRORPATH 1-72 MSGPATH 1-73 MULTIPROCESSOR 1-74 NETTYPE 1-76 NOAGE D-6 NUMAIOVPS D-7 NUMCPUVPS D-8 OFF_RECVRY_THREADS 1-80 4 IBM Informix Administrator’s Reference J K L M N O P Q R ON-Bar, types of 1-82 ONDBSPACEDOWN 1-84, 3-59 ON_RECVRY_THREADS 1-81 OPCACHEMAX 1-85 OPTCOMPIND 1-86, 1-87 OPT_GOAL 1-87 PC_HASHSIZE 1-89 PC_POOLSIZE 1-89 PHYSBUFF 1-90 PHYSDBS 1-91 PHYSFILE 1-92 RA_PAGES 1-93 RA_THRESHOLD 1-94 RESIDENT 1-95, 3-45 RESTARTABLE_RESTORE 1-83, 1-96 ROOTOFFSET 1-97 ROOTPATH 1-97, 1-98 ROOTSIZE 1-99 SBSPACENAME 1-100, 1-118 SBSPACETEMP 1-102, 3-83 SERVERNUM 1-103 setting decision-support with onmode 3-56 SHMADD 1-103 SHMBASE 1-104 SHMTOTAL 1-105 SHMVIRTSIZE 1-106 SINGLE_CPU_VP 1-107 STACKSIZE 1-109 STAGEBLOB 1-110 STMT_CACHE 1-111 STMT_CACHE_HITS 1-113, 3-61 STMT_CACHE_NOLIMIT 1-114 STMT_CACHE_NUMPOOL 1-1 15 STMT_CACHE_SIZE 1-116 summary 1-10 to 1-16 SYSALARMPROGRAM 1-117 SYSSBSPACENAME 1-118 TAPEBLK 1-120 TAPEDEV 1-121 TAPESIZE 1-123 TBLSPACE 3-124 TBLSPACE_STATS 1-124 TXTIMEOUT 1-124, 3-47 USEOSTIME 1-125 VPCLASS 1-55, 1-127, 3-53 S T U V W X Y Z @ See also Individual parameter names and Administrator’s Guide. Configuration parameter use Data-replication screen 3-69 Initialization screen 3-67 PDQ screen 3-69 .conf.dbservername file A-7 CONSOLE parameter 1-25 Contact information Intro-19 Conversion messages database server E-57 to E-69 Enterprise Replication E-70 to E-74 Core dump contained in core file A-7 DUMPCORE parameter 1-48 See also DUMPCNT; DUMPDIR; DUMPGCORE; DUMPSHMEM. core.pid.cnt file 1-49 Coserver group. See Cogroup. Coserver, query plans and statistics 3-128 CPU virtual processor binding D-3 SINGLE_CPU_VP parameter 1-107 CPU, time tabulated 3-141 CREATE FUNCTION statement 1-130 CREATE INDEX statement, using FILLFACTOR 1-53 CREATE record subtype (SBLOB) 4-23 curlog field 3-154 D daemon.log A-10 Data block. See Page. Data distributions, sbspaces 1-118 Data files. See Logging. Data pages number to read ahead 1-93 oncheck -cd and -cD 3-15, 3-20 Data replication flush interval 1-39 A B C D E F G H information in sysdri table 2-17 lost-and-found file 1-39 onstat -g dri statistics 3-121 switching database server mode 3-34 wait time for response 1-40 Data row big-remainder page 5-23 forward pointer 5-21 home page 5-21, 5-23 locating the row 5-21 rowid 5-21 storage strategies 5-20 storing data on a page 5-23 TEXT and BYTE data descriptor 5-35 Data storage. See Disk space. Data sync threads 3-121 Data Type segment. See Disk space. Database effect of creation 5-43 ER log reader 3-120 locale, in sysdbslocale table 2-15 owner, in sysmaster database 2-14 sysdatabases table 2-14 Database server blocking 3-44 bringing online from quiescent mode 3-41, 3-42 mode, switching 3-34 name 1-30 parallel database query 3-52 quiescent mode 3-41, 3-42 remote 2-28 restarting 1-17 shutting down 3-41, 3-42 unblocking 3-44 using onstat -g pos 3-124 Database tblspace entries 5-11 location in root dbspace 5-4, 5-11 relation to systable 5-44 structure and function 5-11 tblspace number 5-11 Data-dictionary cache 1-35 Data-distribution cache onstat -g dsc 3-121 specifying entries 1-44 I J K L M N O P Q R specifying hash buckets 1-41 Data-flow, onstat -g dfm 3-120 DATASKIP parameter description of 1-26 using onspaces -f 3-103 dbexport. See Informix Migration Guide. dbimport. See Informix Migration Guide. dbschema. See Informix Migration Guide. DBSERVERALIASES parameter description of 1-28 using onmode -d 3-48 DBSERVERNAME parameter description of 1-30 using onmode -d 3-48 Dbspace adding a chunk 3-92 blobpage structure 5-35 creating with onspaces 3-78 dropping a chunk 3-96 dropping with onspaces 3-90 ending mirroring 3-100 list of structures contained in 5-5 maximum number 3-78 modifying with onspaces 3-103 monitoring with SMI 2-16 naming conventions 3-78 root name 1-97 simple-large-object storage 5-35 starting mirroring 3-98 storage 5-4 structure of additional dbspace chunk 5-5 chunk free-list page 5-7 dbspace 5-4, 5-5 mirror chunk 5-6 nonroot dbspace 5-5 tblspace tblspace 5-8 DBSPACETEMP parameter 1-31 DD_HASHMAX parameter 1-34 DD_HASHSIZE parameter 1-35 Deadlock 1-36 DEADLOCK_TIMEOUT parameter 1-36 Decision-support query DS_MAX_QUERIES parameter 1-42 S T U V W X Y Z @ DS_TOTAL_MEMORY parameter 1-45 MAX_PDQPRIORITY parameter 1-69 setting parameters with onmode 3-56 See also PDQ. Default configuration file 1-8, A-13 Default locale Intro-5 DEF_TABLE_LOCKMODE parameter 1-37 DELETE logical-log record 4-13 record subtype (SBLOB) 4-23 Delete table cleaner 3-121 DELITEM logical-log record 4-13 Dependencies, software Intro-4 DERASE logical-log record 4-13 Descriptor, TEXT and BYTE data 5-35 Diagnostic messages. See Message log. Diagnostics, using onmode B-1 DINDEX logical-log record 4-13 DIRECTIVES parameter 1-38 Disabling SQL statement cache 3-60 Disk I/O buffers 1-22 PDQ resources 1-69 Disk page page compression 5-24 storing data on a page 5-23 structure blobspace blobpage 5-13 dbspace page 5-20 types of pages in an extent 5-13, 5-15 Disk space allocating for system catalogs 5-43 when a database is created 5-43 when a table is created 5-45 chunk free-list page 5-7 initializing (oninit -i) 3-31 list of structures 5-3 maximum chunk size 3-79, 3-82, 3-93 page compression 5-24 Index 5 A B C D E F G H I tracking available space in blobspace 5-37 chunk 5-7 Distributed transactions, killing 3-47 Documentation notes Intro-17 Documentation notes, program item Intro-18 Documentation, types of Intro-16 documentation notes Intro-17 machine notes Intro-17 release notes Intro-17 DPT logical-log record 4-14 DRAUTO parameter D-5 DRINTERVAL parameter 1-39 DRLOSTFOUND parameter 1-39 DROP DISTRIBUTIONS keyword 1-119 Dropping logical-log files 3-72 DRPBSP logical-log record 4-14 DRPCHK logical-log record 4-14 DRPDBS logical-log record 4-14 DRPLOG logical-log record 4-14 DRTIMEOUT parameter 1-40 dr.lostfound file 1-39 DS_HASHSIZE parameter 1-41, 1-44 DS_MAX_QUERIES parameter changing the value 3-57 description of 1-42 DS_MAX_SCANS parameter changing the value of 3-57 description of 1-43 DS_POOLSIZE parameter 1-41, 1-44 DS_TOTAL_MEMORY parameter changing the value of 3-56 description of 1-45 Dump stack, thread 3-127 DUMPCNT parameter 1-47 DUMPCORE parameter 1-47 DUMPDIR parameter af.xxx assertion failure file A-5 description of 1-48 gcore file A-7 shmem file A-14 DUMPGCORE parameter 1-49 Dumping stack of thread 3-127 DUMPSHMEM parameter 1-50 6 IBM Informix Administrator’s Reference J K L M N O P Q R Dynamic libraries, loaded 3-121 Dynamic log messages E-75 to E-77 DYNAMIC_LOGS parameter 1-51 E Emergency boot files A-7 Enabling SQL statement cache 3-60 ENDTRANS logical-log record 4-14 Enterprise Replication CDR log record 4-11 configuration parameters 1-52 messages E-70 to E-74 onstat commands -g cat 3-120 -g ddr 3-120 -g dss 3-121 -g dtc 3-121 -g grp 3-122 -g nif 3-123 -g que 3-124 -g rcv 3-125 -g rep 3-125 -g rqm 3-125 queued events 3-125 RQM statistics 3-125 See also Guide to Informix Enterprise Replication. Environment configuration file A-8 Environment variables AC_CONFIG 1-18 AFDEBUG A-11 description of 1-17 IFX_DEF_TABLE_LOCKMODE 1-37 IFX_DIRECTIVES 1-38 IMCADMIN 1-71 IMCCONFIG 1-71 IMCSERVER 1-71 INFORMIXDIR 1-71 INFORMIXOPCACHE 1-85 INFORMIXSERVER 1-31, 1-71, 3-55 INFORMIXSQLHOSTS 1-71 ONCONFIG described A-12 onstat -c 3-113 S T U V W X Y Z @ setting 1-8 OPTCOMPIND 1-86 STMT_CACHE 1-112, 3-60 typographical conventions Intro-11 en_us.8859-1 locale Intro-5 ERASE logical-log record 4-14 Error messages. See Messages. Event alarms ALARMPROGRAM parameter 1-19, C-1 automatic log backup 1-19, C-2 class ID parameter C-5 class message parameter C-5 description C-1 event severity codes C-4 exit code C-3 mentioned 2-7 using ex_alarm.sh C-2 writing your own script C-2 Event severity codes C-4 Exclusive-access, high-water mark 1-67 EXE.sessionid.threadid 3-123 Exit codes, ontape utility 3-159 EXIT_STATUS exit code C-3 EXTEND record subtype (SBLOB) 4-23 Extensibility enhancements Intro-8 Extent automatic doubling of size 5-17 default size 5-12 disk page types 5-13, 5-15 merging 5-18 next-extent, allocating 5-17, 5-19 procedure for allocating 5-17 size index fragments 5-13 initial extent 5-12 next extent 5-17 structure 5-12 sysextents table 2-18 EXTENT_SIZE tag 3-85 External backup, commands 3-44 External space. See Extspace. Extspace creating 3-80 dropping 3-90 naming conventions 3-80 A B C D E F G H specifying location 3-78 sysextspaces table 2-18 ex_alarm.sh script 1-19, C-2 F Feature icons Intro-12 Features in 9.3 Intro-6 File ac_config.std A-6 ac_msg.log A-5 af.xxx A-5 archecker configuration file A-6 bar_act.log A-6 buildsmi.xxx A-6 .conf.dbservername A-7 core.pid.cnt 1-49, A-7 default configuration file A-13 dr.lostfound 1-39 gcore 1-48, A-7 .informix A-8 INFORMIXTMP directory A-9 informix.rc environment file A-8 .infos.dbservername A-9 .infxdirs A-10 .inf.servicename A-9 ISM logs A-10 ISMVersion A-11 JVM_vpid 1-55, A-11 JVPLOG 1-55, A-11 .jvpprops 1-55, A-11 oncfg* A-13 ONCONFIG A-13 private environment file A-8 shmem.pid.cnt 1-50 shmem.xxx A-14 sm_versions A-14 summary of database server files A-1 VP.servername.nnx A-15 xbsa.messages A-15 File I/O. See Disk I/O. FILLFACTOR parameter control how indexes fill 5-32 description of 1-53 finderr utility Intro-18 Flushing data-replication buffer 1-39 I J K L M N O P Q R SQL statement cache 3-60 Force option, onspaces 3-90 Forced residency, starting and ending with onmode 3-45 Forcing a checkpoint. See Checkpoint. Forward pointer blobspace blobpage 5-38 dbspace storage of simple large objects 5-35 description of 5-21 Fragment allocated by use 3-128 index 5-13 internal structure of tables 5-25 rowids 5-22 table, using primary keys 5-22 turning DATASKIP ON or OFF for 3-103 warning returned when skipped during query 1-26 Fragmentation. See Fragment. Free list. See Chunk free list. Freeing blobpages 3-117 unused memory segments 3-58 Free-map page, blobspace 5-37 FREE_RE logical-log record 4-15 Functional index 5-33 Fuzzy checkpoint forcing 3-44 log record 4-14 G Gateway transactions 1-54 gcore file A-7 gcore, utility 1-47, 1-49 General Page Manager 3-140 Global catalog, Enterprise Replication 3-120 Global Language Support (GLS) Intro-5 Global transactions using onstat -G 3-129 using onstat -x 3-154 Grouper, Enterprise Replication 3-122 S T U V W X Y Z @ H Hash buckets data-dictionary cache 1-35 data-distribution cache specifying hash buckets 1-41 HDELETE logical-log record 4-15 HDRUPD record subtype (SBLOB) 4-23 Help Intro-16 Heterogeneous-commit transactions 1-54 HETERO_COMMIT parameter 1-54 HEURTX logical-log record 4-15 High-Availability Data Replication (HDR). See Data replication. High-water mark, transaction 1-68 HINSERT logical-log record 4-15 Home page 5-21, 5-23 HUPAFT logical-log record 4-15 HUPBEF logical-log record 4-15 HUPDATE logical-log record 4-15 I Icons feature Intro-12 Important Intro-12 platform Intro-12 product Intro-12 Tip Intro-12 Warning Intro-12 Identifier, description of 1-30 IDXFLAGS logical-log record 4-15 ifx_allow_newline() routine 1-20 IFX_DEF_TABLE_LOCKMODE environment variable 1-37 IFX_DIRECTIVES environment variable 1-38 ifx_lo_specset_estbytes function 3-85, 3-86 ifx_lo_stat function 3-89 illlsrra.xx file A-7 IMCADMIN environment variable 1-71 IMCCONFIG environment variable 1-71 Index 7 A B C D E F G H I IMCLOG parameter 1-70 IMCSERVER environment variable 1-71 IMCTRANSPORTS parameter 1-70 IMCWORKERDELAY parameter 1-70 IMCWORKERTHREADS parameter 1-70 Important paragraphs, icon for Intro-12 Index branch node 5-26 configuration 5-32 duplicate key values 5-31 functional 5-33 how created and filled 5-28 item described 5-27 key-value locking 5-32 leaf node 5-26 repairing structures with oncheck utility 3-8 reuse of freed pages 5-32 root node 5-26 structure of B-tree 5-26 Index item calculating the length of 5-33 defined 5-27 Index page compactness 1-53 creation of first 5-28 effect of creation 5-28 structure of 5-26 Industry standards, compliance with Intro-19 .informix file A-8 Informix Server Administrator (ISA) adding or dropping logs 1-58 description of 3-6 setting ONCONFIG parameters 1-9, 1-17 Informix Storage Manager (ISM) catalog A-10 ISMversion file A-11 logs A-10 sm_versions file A-14 INFORMIXDIR environment variable 1-71 8 IBM Informix Administrator’s Reference J K L M N O P Q R INFORMIXDIR/bin directory Intro-6 INFORMIXOPCACHE environment variable 1-85 INFORMIXSERVER environment variable 1-31, 1-71, 3-55 INFORMIXSQLHOSTS environment variable 1-71 INFORMIX-STAR queries 3-152 INFORMIXTMP directory A-9 informix.rc environment file A-8 .infos.dbservername file description of A-9 printing 3-124 regenerating 3-55 .infxdirs file A-10 .inf.servicename file A-9 Initialization disk structures 1-17, 5-4 shared memory 1-17 INSERT logical-log record 4-16 InstallServer.log file A-10 Interval, checkpoint 1-24 ISAM calls tabulated 3-139 ISMVersion file A-11 ISM. See Informix Storage Manager (ISM). ISM_DATA_POOL parameter 1-54, 1-83 ISM_LOG_POOL parameter 1-54, 1-83 ism_startup command A-14 ISO 8859-1 code set Intro-5 ISOSPCOMMIT log record 4-16 I/O, lightweight 3-84 J Java configuration parameters 1-55 Java virtual processor 1-55 JDBC parameters 1-55 JDKVERSION parameter 1-55 JVMTHREAD parameter 1-55 JVM_vpid file 1-55, A-11 JVPCLASSPATH parameter 1-55 JVPDEBUG parameter 1-55, A-11 JVPHOME parameter 1-55 JVPJAVAHOME parameter 1-55 S T U V W X Y Z @ JVPJAVALIB parameter 1-55 JVPJAVAVM parameter 1-55 JVPLOG file 1-55, A-11 JVPLOGFILE parameter 1-55, A-11 JVPPROPFILE parameter 1-55 .jvpprops file 1-55, A-11 K Key value checking order with oncheck 3-15, 3-22 duplicates 5-31 locking 5-32 Key-only entries, inserting 1-113, 3-61 Killing a session 3-46 L Latch displaying with onstat -s 3-107, 3-145 identifying the resource controlled 3-145 LBU_PRESERVE parameter D-5 LCKLVL logical-log record 4-16 LG_CDINDEX log record 4-11 LG_TRUNCATE log record 4-21 Libraries, dynamic 3-121 Licensed users, maximum allowed E-29 Light scans 3-123, 3-125 Lightweight I/O 3-84 Limits SQL statement cache size 1-114, 3-62 virtual processors 3-51 Linking, name of root dbspace 1-98 Locale Intro-5 Location, extspace 3-78 Lock buffer-access-level flag bits 3-112 for multiprocessor 1-74 information in syslocks table 2-19 key-value 5-32 maximum time to acquire 1-36 A B C D E F G H monitoring with onstat -k 3-106, 3-131 oncheck options 3-10 type codes 3-132 Lock mode, page or row 1-37 Locked mutexes 3-122 LOCKS parameter 1-56 LOCK_MODE tag 3-85 Log position 3-153, 3-154 LOGBUFF parameter 1-57 LOGFILES parameter 1-58 Logging blobspace free-map page 5-37 flags for mode 5-11 See also Administrator’s Guide. LOGGING tag 3-85 Logical log backup, alarm triggered 1-19, C-2 checking consistency 3-23 in root dbspace 5-4 log position 3-153, 3-154 maximum number of files D-5 maximum size 3-153 monitoring with SMI 2-20 See also Logical-log file. Logical recovery, number of threads 1-81 Logical-log buffer and LOGBUFF parameter 1-57 Logical-log file adding with onparams 3-71 created during initialization 1-58 displaying contents 3-35 dropping with onparams 3-72 log position 3-154 maximum number of 3-71 moving 3-72 reading the log file 3-35 size 1-59 switching with onmode 3-46 See also Logical log. Logical-log record additional columns of 4-7 displaying 3-35 for a checkpoint 4-5 for a DROP TABLE operation 4-4 generated by a rollback 4-4 grouper information 3-122 header columns 4-6 I J K L M N O P Q R in distributed transactions 4-5 types 4-7, 4-22 logical-log record 4-14 logmessage table E-3 logposit field 3-154 LOGSIZE parameter 1-59 LOGSMAX parameter D-5 log_full scripts 1-19, C-2 Long transaction LTXEHWM 1-67 LTXHWM 1-68 Longspins 3-126 Long-transaction high-water mark 1-68 Loosely-coupled mode 3-154 LRU queues displaying with onstat -R 3-107, 3-144 FLRU queues 3-144 MLRU queues 3-144 modified pages, percentage of 1-62, 1-63 LRUS parameter 1-61 LRU_MAX_DIRTY parameter 1-62 LRU_MIN_DIRTY parameter 1-63 LTAPEBLK parameter 1-64 LTAPEDEV parameter 1-65 LTAPESIZE parameter 1-66 LTXEHWM parameter 1-67 LTXHWM parameter 1-68 M Machine notes Intro-17 MaxConnect configuration parameters 1-70 DBSERVERALIASES parameter 1-28 DBSERVERNAME parameter 1-30 environment variables 1-71 NETTYPE parameter 1-79 network statistics 3-124 onstat -g imc 3-122 onstat -g nta 3-124 Maximum number chunks 3-92 storage spaces 3-78, 3-81 S T U V W X Y Z @ Maximum user connections E-29 MAX_PDQPRIORITY parameter changing the value 3-56 description of 1-69 Memory allocated fragments 3-119 freeing unused segments 3-58 pools, SQL statement cache 1-115 specifying size of 1-85 SQL statements 3-128 statistics for pools 3-123 See also Shared memory. Memory Grant Manager (MGM) 3-123 Message file for error messages Intro-18 Message log alphabetical listing of messages E-2 categories of messages E-3 described A-11, E-1 displaying with onstat -m 3-107, 3-136 event alarms C-3 location of 1-73 viewing messages E-3 Messages A-B E-4 to E-6 assertion-failed E-3 C E-6 to E-18 changing sbspace minimum extent size 3-86 conversion and reversion E-57 to E-69 D-E-F E-18 to E-23 dynamic log E-75 to E-77 Enterprise Replication E-70 to E-74 G-H-I E-23 to E-26 in-place ALTER TABLE E-22 J-K-L-M E-26 to E-32 N-O-P E-32 to E-41 onspaces E-37 Q-R-S E-41 to E-47 sbspace metadata E-78 symbols E-56 to E-57 truncate table E-79 to E-80 turning off smart-large-object logging 3-85 Index 9 A B C D E F G H I T-U-V E-47 to E-54 W-X-Y-Z E-54 to E-56 Metadata area, structure of 5-40 checking with oncheck 3-9 creating 3-81, 5-39 messages E-78 size 3-81, 3-84 specifying offset 3-81, 5-38 specifying size 3-82, 5-39 temporary sbspace 1-102 Microsoft Transaction Manager (MTS) described 3-152 onstat -x output 3-154 MIN_EXT_SIZE tag 3-86 Mirror chunk, structure 5-6 MIRROR parameter 1-71 Mirroring changing chunk status 3-101 enable flag 1-71 initial chunk 1-72 starting 3-98 stopping 3-100 MIRROROFFSET parameter 1-72 MIRRORPATH parameter 1-72 mi_lo_decrefcount function 3-89 mi_lo_increfcount function 3-89 mi_lo_specset_estbytes function 3-85, 3-86 mi_lo_stat function 3-89 MLRU queues. See LRU queues. Mode, switching primary and secondary 3-34 Monitoring distributed queries 3-152 licensed user connections E-29 Moving logical-log files 3-72 MSGPATH parameter 1-73 Multiprocessor computer AFF_SPROC parameter D-4 processor affinity 1-132 MULTIPROCESSOR parameter 1-74 Multithreads, printing all threads 3-119 Mutex locked 3-122 onstat -g rwm 3-125 10 IBM Informix Administrator’s Reference J K L M N O P Q R with waiters 3-128 MVIDXND logical-log record 4-16 N Name blobspace 3-77 dbspace 3-78 extspace 3-80 sbspace 3-81 NETTYPE parameter description of 1-76 tuning example 1-77 Network statistics Enterprise Replication 3-123 shared memory 3-124 Newline character, quoted strings 1-20 Next-extent allocation 5-17 allocation strategy 5-19 doubling of size 5-17 initial size 5-12 nonfragmented table 5-13 NEXT_SIZE tag 3-86 NOAGE parameter description of D-6 VPCLASS 1-129 Node, index branch creating 5-29 definition of 5-26 what points to 5-30 checking horizontal and vertical nodes 3-15, 3-22 definition of 5-27 leaf contents of 5-28 definition of 5-26 pointer 5-28 root node creating 5-28 definition of 5-26 when fills 5-28 types of 5-26 Nonresident segment, printing 3-123 no_log scripts 1-19 S T U V W X Y Z NUMAIOVPS parameter description of D-7 VPCLASS 1-129 Number of page-cleaner threads 1-25 NUMCPUVPS parameter description of D-8 VPCLASS 1-129 O Object Explorer 3-8 Offset mirrored chunk 3-81 size 3-79, 3-82, 3-93 OFF_RECVRY_THREADS parameter 1-80 ON-Bar activity log A-6 configuration parameters 1-82 emergency boot files A-7 sm_versions file A-14 system tables 2-9 xbsa.messages log A-15 oncfg file and onspaces 3-75 description of A-13 oncheck utility check-and-repair options 3-9 description of 3-8 display reserved, physical-log, and logical-log pages 5-4 list of functions 3-9 locking 3-11 option descriptions 3-13 options -cc 3-20 -cd and -cD 3-20 -ce 3-15, 3-21 -ci and -cI 3-22 -cr and -cR 3-23 -cs and -cS 3-24 -cS and -pS 3-24 -cs and -ps 3-24 -n 3-11, 3-16 -pB 3-24 -pd and -pD 3-25 -pe 3-21, 5-4 @ A B C D E F G H -pk and -pK 3-25 -pl and -pL 3-25 -pp and -pP 3-27 -pR 5-4 -pr 1-9, 3-27, 5-4 -ps and -pS 3-24 -pt and -pT 3-28 -u 3-29 -x 3-28 -y 3-11, 3-18 overview of functionality 3-8 suppressing messages 3-17 syntax 3-13 ONCONFIG configuration file changing parameter values 1-17 changing with ISA 1-17 conventions 1-10 description of A-13 displaying 1-9, 3-106, 3-113 format 1-7 preparing 1-8 specifying hidden parameters 1-9 templates 1-8 white space 1-7 ONCONFIG environment variable ONCONFIG file A-12 setting 1-8 using onstat -c 3-113 ONCONFIG file parameters. See Configuration parameter. onconfig.std file default value 1-16 description 1-8 hidden parameters 1-9 printing 1-9 ondblog utility 3-29 to 3-30 ONDBSPACEDOWN parameter description of 1-84 overriding WAIT mode 3-59 oninit utility option descriptions 3-33 options -i 3-33 -p 3-32 -r 3-34 -s 3-32, 3-33 starting database server 3-31 temporary tables 3-32 Online help Intro-16 I J K L M N O P Q R Online manuals Intro-16 onload utility. See Informix Migration Guide. onlog utility description of 3-35 filters for logical-log records displaying 3-38 reading 3-37, 4-11 options -b 3-37 -d 3-37 -l 3-38, 4-11 -n 3-37 -q 3-35 -t 3-38 -u 3-38 -x 3-38 onmode utility adding shared-memory segment 3-50 virtual processors 3-51 blocking the database server 3-44 changing database server mode 3-41, 3-43 DS_MAX_QUERIES 3-57 DS_MAX_SCANS 3-57 DS_TOTAL_MEMORY 3-56 MAX_PDQPRIORITY 3-56 shared-memory residency 3-45 SQL statement cache usage 1-112, 3-60, 3-61 description of 3-39 forcing a checkpoint 3-44 freeing memory segments 3-58 killing distributed transactions 3-47 session 3-46 marking disabled dbspace as down 3-59 options -a 3-50 -c block 3-44 -c fuzzy 3-44 -c unblock 3-44 -D 3-56 -d 3-49 -e 1-112, 3-60 -F 3-58 -I B-1 S T U V W X Y Z @ -k 3-41, 3-42 -l 3-46 -M 3-56 -m 3-41, 3-42 -n 3-45 -O 3-59 -p 3-51 -Q 3-57 -R 3-55 -r 3-45 -S 3-57 -s 3-41, 3-42 -u 3-41, 3-42 -W 3-61 -y confirm action 3-41 -Z 3-47 -z 3-46 regenerating .infos file 3-55 removing virtual processors 3-51 setting data replication type 3-49 decision-support parameters 3-56 Starting or ending forced residency 3-45 switching logical-log files 3-46 trapping errors B-1 unblocking the database server 3-44 ON-Monitor Archive menu options 3-67 changing database server mode 3-43 parameter values 1-17 Dbspaces menu options 3-65 Diagnostics screen 3-69 displaying system page size 1-23 executing shell commands 3-64 Force-Ckpt menu options 3-66 help 3-63 Initialization screen 3-67 Logical-Logs menu options 3-67 Mode menu options 3-66 navigating 3-63 Parameters menu options 3-65 Performance screen 3-68 Shared-memory screen 3-68 Status menu options 3-64 using 3-63 Index 11 A B C D E F G H I onparams utility adding a logical-log file 3-71 changing physical log size and location 3-73 description of 3-70 dropping a logical-log file 3-72 examples 3-74 onsnmp log file A-13 onsocimc protocol 1-79 onspaces utility adding a chunk to dbspace or blobspace 3-92 sbspace 3-94 changing chunk status 3-101 changing sbspace defaults 3-87, 3-88 cleaning up sbspaces 3-89 creating a blobspace, dbspace, extspace, or temporary dbspace 3-77 creating an sbspace 3-81 description of 3-74 -Df options 3-83 dropping a blobspace, dbspace, extspace, or sbspace 3-90 dropping a chunk 3-96 ending mirroring 3-100 forcing a drop 3-90 options -a 3-92, 3-94 -b 3-77 -c 3-78 -cl 3-89 -d 3-90, 3-96 -Df 3-83 -f 3-103 -g 3-78, 3-87 -l 3-78 -m 3-98 -Mo 3-81, 3-94 -Ms 3-82, 3-94 -r 3-100 -S 3-81 -s 3-102 -t 3-80, 3-83 -x 3-80 specifying DATASKIP 3-103 starting mirroring 3-98 onsrvapd.log file A-14 12 IBM Informix Administrator’s Reference J K L M N O P onstat utility - option 3-109 -- option 3-106, 3-110 -a option 3-106, 3-111 -B option 3-106, 3-113 -b option 1-23, 3-106, 3-111 -C option 3-106 -c option 3-106, 3-113 -D option 3-106, 3-117 -d option 1-32, 3-106, 3-114 -d update option 3-117 description of 3-104 displaying chunk information 3-114 global transactions 3-129 ONCONFIG file 3-106 -F option 1-25, 3-106, 3-118 -f option 1-26, 3-106 filename_dest 3-108 filename_source 3-108 freeing blobpages 3-117 -g act option 3-119 -g afr option 3-119 -g all option 3-119 -g ath option 3-120 -g bus option 3-120 -g bus_sm option 3-120 -g cac agg option 3-120 -g cac stmt option 3-120 -g cat option 3-120 -g con option 3-120 -g ddr option 3-120 -g dfm option 3-120 -g dic option 3-121 -g dis option 3-121 -g dll option 3-121 -g dri option 3-121 -g dsc option 3-121 -g dss option 3-121, 3-122 -g dtc option 3-121 -g ffr option 3-121 -g glo option 3-122 -g glo options A-11 -g imc option 3-122 -g ioa option 3-122 -g iof option 3-122 -g iog option 3-122 -g ioq option 3-122 -g iov options 3-122 Q R S T U V W X Y Z @ -g lmx option 3-122 -g lsc option 3-123 -g mem option 3-123 -g mgm option 3-57, 3-123 -g nbm option 3-123 -g nif option 3-123 -g nsc option 1-76, 3-123 -g nsd option 3-124 -g nss option 3-124 -g nta option 3-124 -g ntd option 3-124 -g ntm option 3-124 -g ntt option 3-124 -g ntu option 3-124 -G option 3-106, 3-129 -g options 3-119 to 3-128 -g pos option 3-124 -g ppf option 1-124, 3-124 -g prc option 3-124 -g qst option 3-124 -g que option 3-124 -g rbm option 3-125 -g rcv option 3-125 -g rea option 3-125 -g rep option 3-125 -g rgm option 3-125 -g rqm option 3-125 -g sch option 3-125 -g scn option 3-125 -g seg option 1-103, 3-125 -g ses option 3-126 -g sle option 3-126 -g smb option 3-126 -g spi option 3-126 -g sql option 3-126 -g ssc all option 3-127 -g ssc option 1-114, 1-116, 3-127 -g ssc pool option 1-115, 3-127 -g stk option 3-127 -g stm option 3-128 -g sts option 3-128 -g tpf option 3-128 -g ufr option 3-128 -g wai option 3-128 -g wmx option 3-128 -g wst option 3-128 -g xmf option 3-128 -g xmp option 3-128 -g xqp option 3-128 A B C D E F G H -g xqs option 3-128 -h option 3-106 header 3-109 -i option 3-106, 3-131 -K option 3-133 -k option 1-56, 3-106, 3-131 -l option 1-57, 3-71, 3-107, 3-133 -m option 1-73, 3-107, 3-136, E-3 no options 3-110 -O option 1-85, 3-107 -o option 3-107 -P option 3-107 -p option 1-36, 3-138 -R option 1-61, 3-107, 3-144 -r option 3-107 repeated execution -r option 3-107 seconds parameter 3-109 -s option 3-107, 3-145 syntax 3-105 -T option 3-147 -t option 3-107, 3-147 table of options 3-106 terminating interactive mode or repeating sequence 3-131 -u option 3-107, 3-149 using SMI tables for onstat information 2-36 using with shared-memory source file 3-108 -X option 3-108, 3-155 -x option 3-47, 3-108 -z option 3-108, 3-157 ontape utility data-replication functions 3-159 description of 3-157 exit codes 3-159 LTAPEBLK, use of 1-64, 1-120 LTAPEDEV, use of 1-65 LTAPESIZE, use of 1-66 TAPEDEV, use of 1-121 TAPESIZE, use of 1-123 tasks performed by 3-157 ontliimc protocol 1-79 onunload utility LTAPEBLK, use of 1-64, 1-120 LTAPEDEV, use of 1-65 LTAPESIZE, use of 1-66 See also Informix Migration Guide. I J K L M N O P Q R TAPEDEV, use of 1-121 TAPESIZE, use of 1-123 onxfer utility. See Informix Migration Guide. ON_RECVRY_THREADS parameter 1-81 OPCACHEMAX parameter 1-85 OPTCOMPIND configuration parameter 1-86 environment variables 1-86 Optical storage and STAGEBLOB parameter 1-110 Optical Subsystem memory cache 3-107, 3-137, 3-138 Optimizing hash and nested-loop joins 1-87 OPT_GOAL parameter 1-87 P Page bitmap page 5-36 blobspace blobpage 5-36 blobspace free-map page 5-36 components of dbspace page 5-20 compression 5-24 dbspace blobpage 5-35 dbspace page types 5-13, 5-15 definition of full page 5-23 displaying contents with oncheck 3-26 free page, definition of 5-13, 5-15 page types in extent 5-13, 5-15 reuse of index page 5-32 size, shown with onstat -b 3-113 structure and storage of 5-20 Page compression 5-24 Page header, length of 5-8 Page-cleaner threads codes for activity state 3-118 monitoring activity 3-106, 3-118 number of 1-25 PAGE_CONFIG reserved page 1-9, 3-23 Parallel database query. See PDQ. Partition profile statistics 3-124 Partition. See Tblspace. Partnum field in systables 5-9 S T U V W X Y Z @ Pathname, specifying 3-79, 3-82 PBDELETE logical-log record 4-16 PBINSERT logical-log record 4-16 PC_HASHSIZE parameter 1-89 PC_POOLSIZE parameter 1-89 PDELETE record subtype (SBLOB) 4-23 PDINDEX logical-log record 4-16 PDQ (parallel database query) CPU VPs 3-52 DS_MAX_QUERIES parameter 1-42 DS_MAX_SCANS parameter 1-43 DS_TOTAL_MEMORY parameter 1-45 MAX_PDQPRIORITY parameter 1-69 PDQPRIORITY parameter 1-69 PDQPRIORITY parameter 1-69 Pending transaction 3-152 PERASE logical-log record 4-17 Performance enhancements Intro-8 PER_STMT_EXEC memory duration pool 3-123 PER_STMT_PREP memory duration pool 3-123 PGALTER logical-log record 4-16 PGMODE logical-log record 4-17 PHYSBUFF parameter 1-90 PHYSDBS parameter 1-91 PHYSFILE parameter 1-92 Physical log changing size and location 3-73 checking consistency 3-23 in root dbspace 5-4 size of 1-92 Physical-log buffer dbspace location 1-91 size of 1-90 Platform icons Intro-12 PNGPALIGN8 log record 4-17 PNLOCKID logical-log record 4-17 PNSIZES logical-log record 4-17 Point-in-time restore. See Backup and Restore Guide. Poll threads, printing data 3-124 Pools allocated fragments 3-119 Index 13 A B C D E F G H I free fragments 3-121 printing memory statistics 3-123 SQL statement cache 3-127 PREPARE logical-log record 4-17 Preventing long transactions 1-68 Primary key, use in fragmented table 5-22 Printing active threads 3-119 AIO global information 3-122 allocated memory fragments 3-119, 3-128 Backup Scheduler sessions 3-120 block bitmap nonresident segments 3-123 resident segments 3-125 client shared-memory status 3-123 conditions with waiters 3-120 coserver communications 3-128 data-distribution cache 3-121 data-flow information 3-120 diagnostics, onmode -I B-1 Enterprise Replication data sync threads 3-121 database log reader 3-120 delete table cleaner 3-121 global catalog 3-120 grouper information 3-122 network statistics 3-123 queued events 3-125 receive manager 3-125 RQM statistics 3-124, 3-125 free fragments, shared memory pool 3-121 global multithreading 3-122 global transactions 3-129 HDR information 3-121 light scans 3-123, 3-125 loaded dynamic libraries 3-121 locked mutexes 3-122 MaxConnect information 3-122 memory fragments 3-119 memory statistics 3-123 memory usage of SQL statements 3-128 MGM resources 3-123 multithreading information 3-119 14 IBM Informix Administrator’s Reference J K L M N O P Q R mutexes with waiters 3-128 network statistics 3-124 network user times 3-124 onconfig.std file 1-9 partition profile 3-124 pending I/O operations 3-122 query plans 3-128 query segments 3-128 queue statistics 3-124 ready threads 3-125 read/write mutexes 3-125 RGM information 3-125 sbspace information 3-126 semaphores, spins, busy waits 3-125 session ID 3-126 shared memory poll threads 3-124 segment statistics 3-125 session status 3-124 sleeping threads 3-126 spin locks 3-126 SPL routine cache 3-124 SQL information 3-126 SQL statement cache 3-120, 3-127 stack use per thread 3-128 storage manager configuration 3-120 tables cached in shared-memory dictionary 3-121 threads onstat -g ath 3-120 onstat -g tpf 3-128 user-defined aggregates 3-120 user-defined types 3-121 wait statistics 3-128 waiting threads 3-128 Priority aging, of CPU virtual processors D-6 Private environment file A-8 Processor affinity AFF_NPROCS parameter D-3 AFF_SPROC parameter D-4 multiprocessors 1-74 set with VPCLASS 1-132 Processor, locking for multiple or single 1-74 Product icons Intro-12 S T U V W X Y Z @ Profile displaying count, onstat -p 3-107, 3-138 monitoring with SMI 2-21 setting counts to zero 3-108, 3-157 Profile, partition 1-124 Program group Documentation notes Intro-18 Release notes Intro-18 PRP.sessionid.threadid 3-123 PTADESC logical-log record 4-17 PTALTER logical-log record 4-18 PTALTNEWKEYD log record 4-18 PTALTOLDKEYD log record 4-18 PTCOLUMN log record 4-18 PTEXTEND logical-log record 4-18 PTRENAME log record 4-18 PTRUNC record subtype (SBLOB) 4-24 Q Query plan 3-128 Query segments 3-128 Quiescent mode (oninit -s) 3-32, 3-41, 3-42 R Raw disk space UNIX 3-93 Windows 3-78, 3-92 RA_PAGES parameter 1-93 RA_THRESHOLD parameter 1-94 RDELETE logical-log record 4-18 Read-ahead, data pages buffers 1-23 number of 1-93 threshold 1-94 Ready threads 3-125 Receive manager, Enterprise Replication 3-125 Recovery threads offline 1-80 online 1-81 REFCOUNT record subtype (SBLOB) 4-24 Release notes Intro-17 A B C D E F G H Release notes, program item Intro-18 Reliable Queue Manager (RQM) 3-124, 3-125 Remainder page, description of 5-23 Removing CPU virtual processors 3-53 stray smart large objects 3-89 virtual processors 3-51 Replication server. See Data replication. Reserved area, sbspace 5-39 Reserved pages checking with oncheck 3-15, 3-23 description of 5-4 location in root dbspace 5-4 viewing contents 5-4 RESIDENT parameter description of 1-95 onmode -r or -n 3-45 Resident segment, printing 3-125 Resident shared memory RESIDENT parameter 1-95 turning on and off residency 3-45 Resource Grant Manager (RGM) 3-125 RESTARTABLE_RESTORE parameter 1-83, 1-96 Restarting the database server 1-17 Reuse of freed index pages 5-32 revcdr.out file E-70 revcdr.sh script A-4, A-14, E-70 Reversion messages database server E-57 to E-69 Enterprise Replication E-70 to E-74 Reversion. See Informix Migration Guide. REVERT logical-log record 4-18 revtestcdr.out file E-70 RINSERT logical-log record 4-19 ROLLBACK logical-log record 4-19 Rolling back long transactions 1-67 ROLWORK logical-log record 4-19 Root dbspace initial chunk 1-98 mirroring 1-72 I J K L M N O P Q R specifying ROOTNAME parameter 1-97 structure 5-4 using a link 1-98 ROOTNAME parameter description of 1-97 use by PHYSDBS 1-91 ROOTOFFSET parameter 1-97 ROOTPATH parameter description of 1-98 specifying as a link 1-73, 1-98 ROOTSIZE parameter 1-99 Row data, storage of 5-23 displaying contents with oncheck 3-24 storage location 5-23 Rowid description of 5-21 for fragmented table 5-22 functions as forward pointer 5-21 locking information 3-133 stored in index pages 5-21 RSVEXTEN logical-log record 4-19 RTREE logical-log record 4-19 RUPAFT logical-log record 4-19 RUPBEF logical-log record 4-19 RUPDATE logical-log record 4-19 S SBLOB logical-log record 4-20, 4-22 Sbpage structure 5-41 Sbspace adding a chunk 3-94 changing defaults 3-87, 3-88 cleaning up references 3-89 creating with onspaces 3-81 default name 1-100 dropping a chunk 3-96 dropping a sbspace 3-90 ending mirroring 3-100 -g option 3-87 maximum number 3-78, 3-81 metadata area calculating size 5-39 size and offset 3-81, 3-84 structure 5-40 S T U V W X Y Z @ multiple chunk 5-42 naming conventions 3-81 onstat -d usage 3-115, 3-117 onstat -g smb 3-126 reserved area 5-39 sbpage structure 5-41 starting mirroring 3-98 structure 5-38 temporary 1-102, 3-83, 3-115 creating 3-83 user-defined data statistics 1-118 SBSPACENAME parameter 1-100, 1-118 SBSPACETEMP parameter 1-102, 3-83 Scripts concdr.sh A-6 ex_alarm.sh 1-19, C-2 log_full 1-19, C-2 no_log 1-19 revcdr.sh A-14 Segment. See Chunk or Shared memory. Semaphores 3-125 Server Studio JE 3-8 SERVERNUM parameter 1-103 Session information global transactions 3-154 in SMI tables 2-24, 2-25 setting environment variables 1-17 using onstat -g ses 3-126 using onstat -g sql 3-126 SET STATEMENT CACHE statement 1-112, 3-60 Setting data replication type 3-49 Shared library files A-7 Shared memory adding segment with onmode 3-50 base address 1-104 buffer, frequency of flushing 1-61 buffer, maximum number 1-22 changing decision-support parameters 3-56 residency with onmode 3-45 dumps 1-48, 1-50 examining with SMI 2-5 Index 15 A B C D E F G H I freed fragments 3-121 initializing 3-31 monitoring 3-104 network poll threads 3-124 network status 3-124 physical-log buffer 1-90 pool statistics 3-123 resident portion, flag 1-95 saving copy of with onstat 3-107 segment statistics 3-125 segments, dynamically added, size of 1-103 SERVERNUM parameter 1-103 size displayed by onstat 3-109 status 3-123 virtual segment, initial size 1-106 Shared-memory dictionary 3-121 SHMADD parameter 64-bit addressing 1-103 description of 1-103 SHMBASE parameter 1-104 shmem file DUMPSHMEM parameter 1-50 shmem.xxx A-14 SHMTOTAL parameter 1-105 SHMVIRTSIZE parameter 1-106 Shutting down the database server 3-41, 3-42 SINGLE_CPU_VP parameter 1-107 Size chunk 3-93, 3-95 index fragments 5-13 metadata 3-82 offset 3-79, 3-82 Sleeping threads 3-126 Smart large object cleaning up references 3-89 default name 1-100 logging 3-85, 3-88 logical-log records 4-22 user-defined data statistics 1-118 See also Temporary smart large object. SMI table. See sysmaster database; System-monitoring interface. sm_versions.std file A-14 snmpd.log file A-14 Software dependencies Intro-4 Specifying pathname 3-93 16 IBM Informix Administrator’s Reference J K L M N O P Q R Spin locks, printing 3-126 SPL routine cache 3-124 SQL Editor 3-8 SQL operators 3-128 SQL statement printing information 3-126 printing memory usage 3-128 SET STATEMENT CACHE 1-112, 3-60 SQL statement cache enabling the cache 1-111, 3-60 flushing the cache 3-60 inserting key-only entries 1-113, 3-61 qualified statements 1-113, 3-61 limiting the cache size 1-114 memory pools 1-115 printing contents 3-120, 3-127 specifying number of hits 1-113, 3-61 turning off the cache 3-60 turning on the cache 1-111, 3-60 SQL statements UPDATE STATISTICS 1-119 SQLCA, warning flag when fragment skipped during query 1-26 sqlhosts file or registry description of A-15 multiple dbservernames 1-28 sqlmux, multiplexed connections in NETTYPE parameter 1-79 Stack use 3-128 STACKSIZE parameter 1-109 STAGEBLOB parameter 1-110 Starting database server with oninit 3-31 Statistics. See onstat utility. STMT_CACHE environment variables 1-112, 3-60 STMT_CACHE parameter 1-111 STMT_CACHE_HITS parameter 1-113, 3-61 STMT_CACHE_NOLIMIT parameter 1-114 STMT_CACHE_NUMPOOL parameter 1-115 STMT_CACHE_SIZE parameter 1-116 S T U V W X Y Z @ Storage manager onstat -g bus_sm 3-120 xbsa.messages log A-15 Storage space. See Blobspace; Dbspace; or Sbspace. stores_demo database Intro-5 superstores_demo database Intro-5 Suspension, thread. See Thread Suspension. Symbolic link using with shared libraries A-8 using with TAPEDEV 1-121 SYNC logical-log record 4-20 sysadtinfo table 2-10 SYSALARMPROGRAM parameter 1-117 sysaudit table 2-10 syschkio table 2-11 syschunks table 2-12 sysconfig table 2-14 sysdatabases table 2-14 sysdbslocale table 2-15 sysdbspaces table 2-16 sysdri table 2-17 sysessions table 2-26 sysextents table 2-18 sysextspaces table 2-18 syslocks table 2-19 syslogs table 2-20 sysmaster database buildsmi.xxx file A-6 description 2-3 failure to build A-6 functionality of 2-3 initialization 3-31 list of topics covered by 2-5 SMI tables 2-5 space required to build 2-4 sysextspaces 2-18 types of tables 2-3 warning 2-3 when created 2-4 See also System-monitoring interface. sysprofile table 2-21 sysptprof table 2-24 SYSSBSPACENAME parameter 1-118 syssesprof table 2-25 A B C D E F G H sysseswts table 2-29 systabnames table 2-30 System catalog tables disk space allocation for 5-43 how tracked 5-44 listing 3-16 oncheck -cc 3-20 sysdistrib 1-118 sysfragments table 5-10 systraceclasses B-2 systracemsgs B-2 tracking a new database 5-44 tracking a new table 5-45 System page size, specifying 1-23 System requirements database Intro-4 software Intro-4 System-monitoring interface (SMI) accessing SMI tables 2-6 description 2-3 list of SMI tables 2-7 locking 2-7 obtaining onstat information 2-36 SPL 2-7 tables described 2-5 list of supported 2-7 sysadtinfo 2-10 sysaudit 2-10 syschkio 2-11 syschunks 2-12 sysconfig 2-14 sysdatabases 2-14 sysdbslocale 2-15 sysdbspaces 2-16 sysdri 2-17 sysextents 2-18 sysextspaces 2-18 syslocks 2-19 syslogs 2-20 sysprofile 2-21 sysptprof 2-24 syssesprof 2-25 syssessions 2-26 sysseswts 2-29 systabnames 2-30 sysvpprof 2-31 triggers 2-6 using SELECT statements 2-6 I J K L M N O P Q R viewing tables with dbaccess 2-6 systraceclasses table B-2 systracemsgs table B-2 sysutil tables 2-9 sysvpprof table 2-31 T Table creating, what happens on disk 5-43, 5-44 displaying allocation information 3-27 extent size doubling 5-17 lock mode 1-37 monitoring with SMI 2-30 pseudotables 2-5 shared-memory dictionary 3-121 SMI tables 2-5 temporary effects of creating 5-46 message reporting cleanup E-19 migration. See also Informix Migration Guide. Table editor 3-8 TABLOCKS logical-log record 4-21 tail -f command E-3 Tape device, block size 1-64 TAPEBLK parameter 1-120 TAPEDEV parameter description of 1-121 using a symbolic link 1-121 TAPESIZE parameter 1-123 Tblspace displaying (onstat -t or -T) 3-107, 3-147 for table fragment 5-10, 5-25 monitoring blspace statistics 1-124 with SMI 2-24 number 3-148, 5-9 Tblspace number description of 5-9 elements 5-10 for table fragment 5-10 includes dbspace number 5-9 TBLSPACE parameter 3-124 S T U V W X Y Z @ Tblspace tblspace bitmap page 5-10 location in a chunk 5-5 location in root dbspace 5-4 size 5-10 tracking new tables 5-45 TBLSPACE_STATS parameter 1-124 Template ac_config.std file A-6 onconfig.std file A-12 Temporary dbspace creating with onspaces 3-80 DBSPACETEMP parameter 3-80 Temporary sbspace creating with onspaces 3-83 onstat -d 3-115 SBSPACETEMP parameter 1-102 Temporary smart large object default sbspace 1-102 SBSPACETEMP parameter 1-102 Temporary table DBSPACETEMP parameter 1-31 extent size doubling 5-17 rules for use 1-31 with oninit utility 3-32 TEXT and BYTE data blob descriptor 5-20, 5-35, 5-36 modifying storage 5-36 page descriptor 5-35 size limitations 5-36 storage on disk 5-34, 5-35 updating 5-36 when modified 5-36 when written 5-36 TEXT data type. See Simple large object. Threads data sync 3-121 dump stack 3-127 onstat -g tpf 3-128 onstat -X usage 3-108, 3-155 poll 3-124 printing sqlmain 3-120 printing, onstat -g all 3-119 ready 3-125 sleeping 3-126 waiting 3-128 Tightly-coupled mode 3-154 Index 17 A B C D E F G H I Time stamp blobspace blobpage 5-38 description of 5-42 Time-out condition 3-119 Tip icons Intro-12 Trace class B-2 Trace message B-2 Tracepoints B-2 Transaction heterogeneous commit 1-54 kill with onmode -Z 3-47 pending 3-152 XID 3-154 Transaction logging. See Logging. Transaction manager loosely-coupled mode 3-154 tightly-coupled mode 3-154 Transaction Replicate Group E-71 Trapping errors with onmode B-1 Truncate table messages E-79 to E-80 Tuning large number of users 1-77 use of NETTYPE parameter 1-76 Turning on SQL statement cache 3-60 Two-phase commit protocol, killing distributed transactions 3-47 TXTIMEOUT parameter description of 1-124 onmode utility 3-47 U UDINSERT logical-log record 4-21 record subtype (SBLOB) 4-24 UDUPAFT logical-log record 4-21 record subtype (SBLOB) 4-24 UDUPBEF logical-log record 4-21 record subtype (SBLOB) 4-24 UDWRITE logical-log record 4-21 record subtype (SBLOB) 4-24 Unblocking database server 3-44 18 IBM Informix Administrator’s Reference J K L M N O P Q R Unbuffered disk space UNIX 3-93 Windows 3-78, 3-92 Unbuffered transaction logging. See Logging. UNDO logical-log record 4-21 UNDOBLDC log record 4-22 UNIQID logical-log record 4-22 UNIX buffered disk space 3-93 unbuffered disk space 3-93 using onspaces 3-75 UPDAFT logical-log record 4-22 UPDATE STATISTICS statement 1-41, 1-44, 1-119 Updating blobspace statistics 3-117 UPDBEF logical-log record 4-22 Usability enhancements Intro-7 USEOSTIME parameter 1-125 User connections, monitoring E-29 User session monitoring with SMI 2-26 status codes 3-149 User-defined aggregate, printing definitions 3-120 User-defined routines, debugging B-2 User-defined type data distributions 1-118 printing ER information 3-121 Utilities changing parameter values 1-17 gcore 1-47, 1-49 Informix Server Administrator 3-6 oncheck 3-8 to 3-29 ondblog 3-29 to 3-30 oninit 3-31 to 3-34 onlog 3-35 to 3-39 onmode 3-39 to 3-62 ON-Monitor 1-17, 1-23, 3-63 to 3-68 onparams 3-70 to 3-74 onspaces 3-74 to 3-103 onstat 3-104 to 3-157 onstat -g options 3-119 to 3-128 ontape 3-157 to 3-159 quick reference 3-6 -V option 3-6 S T U V W X Y Z @ V -V option 3-6 VARCHAR data type 4-bit bit map requirement 5-13, 5-15 implications for data row storage 5-23 indexing considerations 5-33 storage considerations 5-20 Verifying backups 1-18 Violations table messages E-6, E-51 Virtual processor adding or removing with onmode 3-51 AIO statistics 3-122 limits 3-51 number in AIO class D-7 CPU class D-8 priority aging D-6 processor affinity 1-74 VPCLASS parameter 1-55 AFF_NPROCS D-3 AFF_SPROC D-4 default values 1-128 description of 1-127 in ONCONFIG file 1-127 NOAGE D-6 NUMAIOVPS D-7 onmode utility 3-53 reserved names 1-129 setting maximum VPs 1-132 setting number of VPs 1-131 setting processor affinity 1-132 user-defined classes 1-130 VP.servername.nnx file A-15 W Waiters, using onstat -g con 3-120 Waits threads 3-128 virtual processor 3-125 Warning buildsmi script 2-4 A B C D E F G H I J K L M N O P Q R S T U V W X Y Z @ when fragment skipped during query processing 1-26 Warning icons Intro-12 White space in ONCONFIG file 1-7 Windows adding or removing virtual processors 3-53 buffered disk space 3-93 unbuffered disk space 3-78, 3-92 using onspaces 3-75 X XAPREPARE logical-log record 4-22 xbsa.messages log A-15 X/Open compliance level Intro-19 Index 19