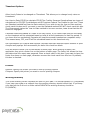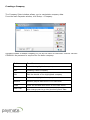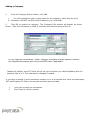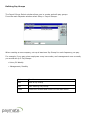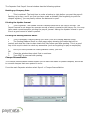
1
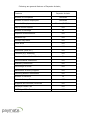
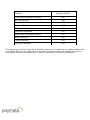
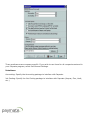
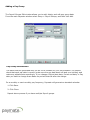
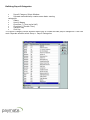
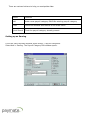
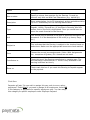
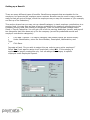
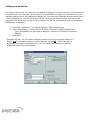
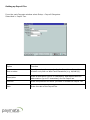
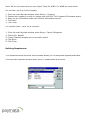
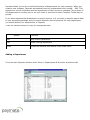
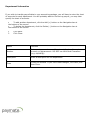
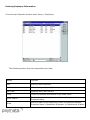
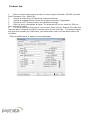
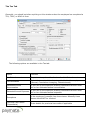
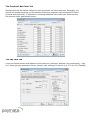
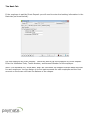
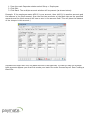
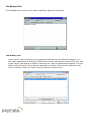
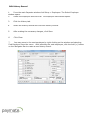
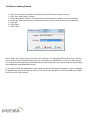
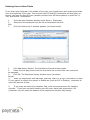
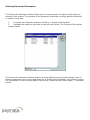
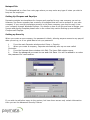
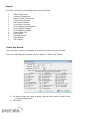
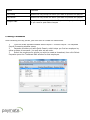
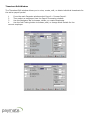
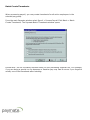
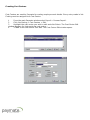
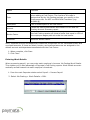
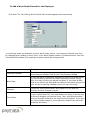
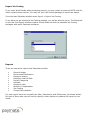
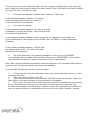
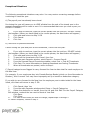
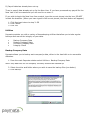
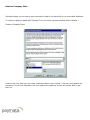
Acclaim USER MANUAL Updated May 2010 Table of Contents Using this Manual..........................................................................................4 The Online Help .........................................................................................4 Readme File ..............................................................................................4 Introduction .................................................................................................5 Installing Paymate for Windows ......................................................................8 Setup ..........................................................................................................8 Setup Preferences ......................................................................................8 Creating a Company.................................................................................11 Defining Pay Groups .................................................................................13 Defining Payroll Categories........................................................................16 Defining Departments...............................................................................22 Entering Employee Information ..................................................................25 Entering Year-to-Date Totals......................................................................34 Entering Personnel Information ..................................................................36 Setting Up Cheques and Payslips................................................................38 Setting up Security...................................................................................38 Payroll.......................................................................................................39 Select Pay Period .....................................................................................39 Creating Timesheets.................................................................................40 Batch Create Timesheets...........................................................................42 Creating Cost Centres...............................................................................43 Entering Work Details ...............................................................................44 Printing the Payroll Journal........................................................................47 Printing Cheques and Payslips....................................................................47 Printing Cheque Register...........................................................................49 Printing Deposit Register...........................................................................49 Creating the Bank File...............................................................................49 Posting Payroll.........................................................................................51 Cheque Reconciliation...............................................................................52 Exporting Payroll Data ..............................................................................53 Export Job Costing....................................................................................54 Reports .....................................................................................................54 General Ledger Report..............................................................................55 Government Remittance............................................................................55 Employee History Detail ............................................................................56 Employee History Summary.......................................................................56 Employee Year to Date Report....................................................................57 Payroll Category Report.............................................................................57 Accrual Report.........................................................................................57 Employee Master Report............................................................................58 Employee Phone List Report.......................................................................58 Employee Notepad List Report....................................................................58 Employee Labels ......................................................................................58 WSIB Report............................................................................................59 Table of Contents Work Details Edit List................................................................................59 Cost Centre Edit List.................................................................................59 Employee Work Summary .........................................................................60 Cost Centre Work Detail............................................................................60 Job Costing General Ledger Summary.........................................................60 Cheque Reconciliation Report.....................................................................60 Forms........................................................................................................61 Record of Employment..............................................................................61 T4's, T4A's, Relevé Forms..........................................................................62 Year End....................................................................................................62 Utilities......................................................................................................65 Backup Company Data..............................................................................65 Restore Company Data .............................................................................66 Re-index Company Data............................................................................67 Integrity Check........................................................................................67 Help..........................................................................................................68 Support Services......................................................................................68 Calling for Support .................................................................................. 68 Using this Manual This Manual contains general information on how to set up your company, enter Employee and Payroll information, and process payroll runs. In addition, it also provides information on how you may create the bank file, export your payroll data into an accounting package, enter job costing details and export job costing details as well. It gives you an overview of the different reports and forms that Paymate generates and the utilities available in Paymate. The information present in this manual is the information that does not change often. This manual should be used in conjunction with the Online Help, the Support Guide, and the Read Me file. The Online Help The Online Help contains • Detailed step-by-step explanations on how to use Paymate to its best • Hyperlinks to all topics you may need to search • Screen shots to make explanations user-friendly and easy to understand • Examples to assist you at every step The information in the Online Help has the latest information and is constantly updated Readme File Please refer to the Readme file for the latest changes to Paymate. • To access the Readme file, go to the Windows desktop and click Start > Programs • Then click Paymate > Readme icon When you need support please refer to the Help section of this manual. Introduction Welcome to Paymate for Windows, the complete solution for all your payroll needs. Paymate is extremely user-friendly and easy to use with extraordinary features. • While processing payroll runs, it also: • Instantly Calculates Earnings • Instantly Calculates Source Deductions • Prints Cheques • Prints Payroll Journal • Prints Cheque and Deposit Registers • Imports hours and/or amounts from as ASCII file • Produces the Bank File for Direct Deposit (Acclaim Only) • It provides for all your accounting needs by • Interfacing with a large variety of Accounting packages • Producing the General Ledger Report • It generates extensive reports for • Payroll Details for any period • Payroll Summary for any period • Government Remittance Reports • Employee Lists and Labels • It produces forms for • Record of Employment • T4, T4A, Relevé 1 • It incorporates the Job Costing feature by • Allowing the breakdown of employee wages by Cost Centre • Producing Employee Work Detail and Summary Reports • Producing Cost Centre Detail and Summary Reports • Interfacing with popular job costing packages This manual helps you to get started with Paymate and assists you in processing payroll. It is divided into the following sections: • Introduction - explains the features of Paymate • Installation - explains how to go about installing Paymate • Setup - helps you set up your company, payroll, department, and employee information • Process payroll - gives you step-by-step instructions on how to process payroll • Reports - gives you an overview of Paymate extensive reporting features • Forms - introduces you to the different forms that Paymate produces • Year End - assists you with the year end processing • Utilities - familiarizes you with the different utilities for backup, restore, and to ensure the integrity of your data Following are general features of Paymate Acclaim; Features Paymate Acclaim Number of Companies Unlimited Number of Active Employees Unlimited Record of Employment Standard/ROE Web Pay by Direct Deposit YES Number of Earnings 50 Expense Reimbursement YES Vacation Pay YES Multiple Pay Rates YES Piece Work YES Commissions YES Premiums (Shift etc.) YES Formula (e.g. Statutory) YES Number of User Defined Deductions 50 Formula Based Deductions YES Statutory Deductions YES Percentage of Gross YES Garnishees & Family Support YES Declining Balance Deductions YES Number of Benefits 15 Formula & Lump Sum YES Supports all Provinces/Territories YES Employer Health Tax YES NWT Payroll Tax Deductions YES Features Paymate Acclaim Customized Cheques & Payslips YES Sick Pay Accrual YES Prepares T4's and Relevé 1 YES Prepares T4's Supplementaries YES E-Filing T4s, T4A and RL1 YES Personal Information YES Salary and Performance History YES Skills Inventory YES Training Record YES Free Form Notepad YES This manual gives you an overview of Paymate. However, for details on any subject please refer to Paymate Help from the Help menu on the main Paymate window. We suggest you use the Help system as much as possible as it is easy to use and has a wealth of information. Installing Paymate for Windows The installation of Paymate for Windows is fast and easy. Whether you are installing Paymate for the first time or installing an update, please follow the instructions in the leaflet enclosed with the CD. Installation instruction from downloaded software is available online under document section. These instructions will take you step-by-step through the installation process. After program is installed, you will find Paymate icon on the desktop. Double click on the icon to start Paymate program. Setup The first step in setting up Paymate is to enter your company information. This is divided into the following steps. 1. 2. 3. 4. 5. 6. 7. 8. 9. Create a New Company Define Pay Groups Define Payroll Categories Define Departments Enter Employee Information Enter Year to Date Totals Enter Personnel Information Set up Cheques and Payslips Set the Password Note: By default, the working directory would be where the program is installed (e.g. C:\PaymateW). If you wish to change the working directory you must click Setup > Preferences and change the working directory in the program. This should be done before creating a new company. Setup Preferences The Preferences window allows you to set up and change specific program options. From the main Paymate window click Setup > Preferences. These preferences are company specific. If you wish to use them for all companies entered in your Paymate program, select Use General Settings. Interfaces Accounting: Specify the Accounting package to interface with Paymate Job Costing: Specify the Job Costing package to interface with Paymate (Accpac, Flex, Yardi, etc.) Timesheet Options Allow Hourly Rates to be changed on Timesheet: This allows you to change hourly rates on timesheets Use Year-to-Date CPP/EI to calculate CPP/EI Tax Credits: Revenue Canada allows two types of calculations for CPP/QPP Contributions and EI Premium Federal Tax Credits for the Year. These are Standard method and Year-to-Date method. If you wish to use the Year-to-Date method, check mark this box and if you want to use the Standard method DO NOT check mark this box. The Government claims the Year-to-Date method to be more concise; tests show that the difference is negligible. Calculate Deductions Based on Totals of the Pay Period: If you check mark this box the taxes on the timesheet will be calculated based on total of all the timesheets for that Pay period. If you leave this box unchecked, Paymate will treat the second timesheet as a separate entity. This means taxes, CPP, and EI will be calculated based on this timesheet only. Use QuickReport for Cheques and Payslips: Paymate uses two different report builders to print cheques and payslips. We recommend you leave this check box blank. Print the Report Footer Line on the Bottom of Each Page: When printing a report, the application may print a footer line on the bottom of each page. The footer line shows the time and date when the report was prepared. Place a check mark in this box if you want to have the footer line shown on each page, otherwise remove the check mark from this box. By default, this box is checked. Printers Reports: Specify the printer you want to use for printing reports Cheques: Specify the printer you want to use for printing cheques Working Directory This is the directory where Paymate will look for your data. The normal default is C:\Paymatew\ if you keep your data on a network then the working directory should reflect that. If you keep your data on the G drive in a folder called PMDATA the working directory should be G:\PMDATA\. Creating a Company The Company Select window allows you to manipulate company data. From the main Paymate window, click Setup > Company. Paymate creates a default company for you by the name of ONTARIO TEALEAF IMPORT COMPANY. No password is required for the demo company. Buttons Functions Select Select the highlighted company Add Creating a New Company Edit Edit the details of the highlighted company Delete Delete the highlighted company Restore Restore payroll data from CD or Hard Disk. Close Close the window and return to the main menu Data Year Select current Data Year to process payroll, you can also change year to go into previous year’s data. Adding a Company 1. From the Company Select window, click Add. You will be asked to enter a short name for the company, which may be up to 8 characters. DO NOT use Wild Card Characters (e.g. #$%&*@). • 2. Click OK to create the company. The Company Edit window will appear as shown below. After the information is filled in, the Save and Cancel buttons will be lit. Fill out required information. Under Taxation information setup Pension number (for Registered pension plan only) and WCB rate if applicable. Taxation By default, one RCT Group will be set up for Number you called Standard, with the employer rate of 1.4. This rate may be changed if needed. If you have a second or third remittance number for EI at a reduced rate, enter the description, RCT and Employer EI Rate in the second and third rows provided. 1 2 Click Save to save the information. Click Close to exit the window. Defining Pay Groups The Payroll Group Select window allows you to create and edit pay groups. From the main Paymate window select Setup > Payroll Groups. When creating a new company, set up at least one Pay Group for each frequency you pay. For example, if you pay union employees every two weeks, and management once a month, you would set up 2 Pay Groups: • Union, Bi-Weekly • Management, Monthly Button Function Add Adds a Pay Group Edit Edits existing Pay Group Close Closes the window and returns to the main menu Adding a Pay Group The Payroll Groups Edit window allows you to add, delete, and edit pay group data. From the main Paymate window select Setup > Payroll Groups, and then click Add. Pay Group Information The dates that are generated may not be 100% suitable for your pay schedule. You should check that each pay date is correct (make sure the pay date does not land on a holiday) and make any adjustments accordingly. If you change a Period start date, Period end date, or Pay date you have to change these dates on periods that fall after the change. For a monthly or semi-monthly pay frequency, Paymate will generate a standard calendar. 1. Click Save. 2. Click Close. Repeat above process if you have multiple Payroll groups. Note: When you enter the next pay period's end date and the next pay period's pay date, Paymate will create the calendar from the first pay period in January to the last pay period in December for you automatically. Option Function Number Enter a unique number for the Pay Group (alphanumeric only). DO NOT use Wild Card Characters (e.g. #$%&*@). Description Enter a description for the Pay Group up to 14 characters in length Type Select how many pay periods will be associated with the Pay Group (e.g. Weekly, Bi-Weekly, etc.) Security It is recommended that you leave the Security field Level at Low unless you intend to use this Pay Group for a special group, such as upper management, in which case you should set it to High Defining Payroll Categories • Payroll Category Select Window • Paymate automatically creates some basic earning categories • Salary • Hourly Wages • Overtime 1 (Time and a Half) • Overtime 2 (Double Time) • Vacation Pay • Sick Pay The Payroll Category Select window allows you to create and edit payroll categories. From the main Paymate window select Setup > Payroll Categories. There are various buttons to help you manipulate data: Button Function Add Adds a new payroll category Edit Edits existing payroll category Close Closes the window and returns to the main menu Quick Search Finds the payroll category already present Setting up an Earning From the main Paymate window select Setup > Payroll Categories. Select Add > Earning. The Payroll Category Edit window opens. Option Function Item number Specify a unique item number for the Earning. It must be numeric only with no Wild Card Characters (e.g. #$%&*@). Description Enter a description (up to 25 characters) and an and abbreviation (up to 10 characters) for the Earning Abbreviation Type Select the appropriate type of Earning you are setting up (e.g. Regular, Hourly, Formula etc.) If the type is Formula, then the button next to the field is highlighted. Here you would have to enter the exact formula for the earning. Unit This should only be entered if the type is specified Description as piecework. It is the description of the units (e.g. Hours, Days, etc.) Subject to This indicates that the Earning is subject to the checked taxes or deductions. Make sure the appropriate boxes are check marked Form Choose the correct box assignments. (Note: With Assignments the exception of Quebec, RL-1 boxes are not used Contributes to Check this box if the Earning contributes to vacation pay. The box that says Contributes to E.I. Hours is only available if the earning is defined as Hourly Show on Check mark this box if you want this Earning to Paystub appear on the paystub. Click Save. Paymate will ask, ‘Do you wish to assign this pay code to every active employee?’ Select Yes if you want to assign to all employees, select NO if this category is applicable for specific employees only. You can assign this category to specific employee under Employee Paycard. Setting up a Benefit There are many different types of benefits. Benefits are amounts that are taxable for the employee, but amounts the employee never receives. Benefits may be used in many creative ways to track all sorts of things, which the employee may or may not be aware of (for example, see Set up a Tax Reduction). This section shows how you may set up a benefit category to track employer contributions to a pension fund. You may also see how to set up a deduction for employee contributions to the company pension fund, see Deduction Categories. From the main Paymate window select Setup > Payroll Categories. You will get a list of all the earning, deduction, benefit, and payroll tax categories that have been set up for the company (as well as predefined accrual and employer contribution categories). Click Add > Benefit. The Payroll Category Edit window opens (as shown below). Under Identification, enter the Item Number, Description, Abbreviation, and Type. Click Save. Paymate will ask, ‘Do you wish to assign this pay code to every active employee?’ Select Yes if you want to assign to all employees, select NO if this category is applicable for specific employees only. You can assign this category to specific employee under Employee Paycard. Setting up a Deduction This section shows how you may set up a deduction category to track employer contributions to a pension fund. You may also see how to set up a deduction for employee contributions to the company pension fund, see Deduction Categories. From the main Paymate window select Setup > Payroll Categories. You will get a list of all the earning, deduction, benefit, and payroll tax categories that have been set up for the company (as well as predefined accrual and employer contribution categories). 1. Click Add > Deduction. The Payroll Category Edit window opens 2. Under Identification, enter the Item Number, Description, Abbreviation, and Type. Deductions can be setup as Regular, Lump sum, Formula or Declining Balance. 3. Click Save. Paymate will ask, ‘Do you wish to assign this pay code to every active employee?’ Select Yes if you want to assign to all employees, select NO if this category is applicable for specific employees only. You can assign this category to specific employee under Employee Paycard. Setting up Payroll Tax From the main Paymate window select Setup > Payroll Categories. Select Add > Payroll Tax. Option Function Item number Specify a unique item number for the Payroll tax. It must be numeric only with no Wild Card Characters (e.g. #$%&*@). Description Enter a description (up to 25 characters) and Abbreviation an abbreviation (up to 10 characters) for the Payroll tax Province Enter the province for which you want to create the Payroll Tax Rate Enter the rate of the Payroll Tax Note: We do not recommend you use Payroll Taxes for WSIB. For WSIB we recommend: For one rate -set it up in the Company 1. From the main Paymate window select Setup > Company. 2. Choose the company you wish to change and click Edit. The Company Edit window opens. 3. Enter the tax information under the Taxation Information section. 4. Click Save. 5. Click Close. For multiple rates – set it up as a Benefit 1. From the main Paymate window select Setup > Payroll Categories. 2. Click Add > Benefit. 3. Create a Benefit category as you normally would. 4. Click Save. 5. Click Close. Defining Departments The Departments and Accounts Select window allows you to manipulate departmental data. From the main Paymate window select Setup > Departments & Accounts. Paymate allows you to set an unlimited amount of departments for each company. When you create a new company, Paymate automatically sets up a department with number -999. This department cannot be deleted and the department number cannot be changed. The purpose of this department is to allow you to set up a chart of accounts to which Company Totals may be posted. If you want departmental breakdowns on payroll reports, or if you want to transfer payroll data to your accounting package and you keep a separate chart of accounts for each department, you should define your departments in Paymate. There are various buttons to help you manipulate data: Button Function Add Add a New Department Edit Edits existing department Close Closes the window and returns to the main menu Adding a Department From the main Paymate window select Setup > Departments & Accounts and select add. Department Information If you wish to transfer payroll data to your accounting package, you will have to enter the chart of accounts for each department. You will probably want to first set up payroll, you may later specify the chart of accounts. • To add another department, click the Add (+) button on the Navigation bar at the bottom of the screen • To delete the department, click the Delete (-) button on the Navigation bar at the bottom of the screen 1 2 Click Save. Click Close. Option Function Number Enter a unique number as a Department Number. It may be numeric or alphanumeric. DO NOT use Wild Card Characters (e.g. #$%&*@). Description Enter a description for the department Close Closes the window. If you have made changes, click Save, and then Close. Entering Employee Information From the main Paymate window select Setup > Employees. The following buttons help you manipulate your data: Button Function Add Adding a New Employee Edit Edits existing employee(s) Net Claim Updating Net Claim Amount Close Closes the window and returns to the main menu Quick Search Finds employees already present either by Employee Number or Employee Name Order Sets the order for all employees, either by Employee Number, Employee Name, Department & Number, or Department & Name The Basic Tab 1 Enter a unique and numeric number for the Employee Number. DO NOT use Wild Card Characters (e.g. #$%&*@). 2 Specify the Pay Group to which the employee belongs. 3 Specify the department to which the employee belongs, if applicable. 4 Specify the RCT Group to which the employee belongs. 5 Enter all other information as listed. The program will let you know if a SIN you have entered is invalid. 6 You must enter the Employee’s Tax Province, Date of Birth, Original Hire Date and Last Hire date ( Original Hire date is usually same as Last Hire date. If employee leaves and joins the company at a later date, you would enter return to work date under Last Hire date. Click on Add button to setup a new employee; The Tax Tab Generally, you should not alter anything on this window unless the employee has completed a TD1, TD1X, or MR19-V form. The following options are available in the Tax tab: Option Function Net Claim Amount Paymate sets up the default values for Net Claim Amount Tax Calculation Select the tax calculation that is applicable for the employee (Normal, Cumulative Averaging, Commissioned) Estimated Annual Remuneration If you set up the employee as being commissioned then enter his or her estimated annual remuneration Estimated Annual Expenses If you set up the employee as being commissioned then enter his or her estimated annual expenses Exemptions Check the corresponding boxes for Federal Tax, CPP, and EI only if the employee is exempt from these taxes. Normally these boxes should NOT be checked Provincial Tax Credits (Dependents) Enter details for provincial tax credits if applicable The Provincial Net Claim Tab Paymate sets up the default values for each province’s net claim amounts. Generally, you should not change anything on this window unless the employee has completed TD forms (Federal and provincial). If employee is claiming additional tax credits you would the key the amount under appropriate boxes. The Pay Card Tab Check the boxes beside what applies to the employee (Earnings, Benefits, and Deductions). Type in EI hours per pay and select Accrue Vacation pay and type in rate for e.g. 6.00 for 6% (3weeks) The Bank Tab If the employee is paid by Direct Deposit you will need to enter the banking information in the Bank tab (as shown below). Pay this employee by Direct Deposit - Check this box to pay the employee by Direct Deposit. Enter the Institution Code, Transit Number, and Account Number for the employee Note: CPA Standard 005, Royal Bank, and CIBC interfaces can support multiple bank accounts for each employee. You can assign up to five bank accounts for each employee and the final account on the screen will have the balance of the cheque. 1. From the main Paymate window select Setup > Employees. 2. Click Edit. 3. Click Bank. The multiple-account window will be present (as shown below). Example: If the employee wants $50.00 in one account, then $100.00 in another account and the balance in the third account, then the first two accounts on the Bank tab are the specified amounts and the third account will have a zero in the amount field. This will place the balance of the cheque in this account.) Paymate will begin with only one bank account in the Bank tab. In order to have the multiple bank accounts appear you must first create your bank file under Process Payroll. See Creating a Bank File. The Notepad Tab The Notepad tab is used to enter notes regarding a particular employee. The History Tab Under History Tab you can see all the payrolls processed for the selected employee. You can make adjustment by clicking on Edit History record. Add History record will let you add a new record, this feature is helpful if there are any Year-to-adjustments required. You can Delete History Record if the employee was paid by mistake. Once record is deleted it can not be restored, unless you have a current backup to restore from. Edit History Record 1. From the main Paymate window click Setup > Employees. The Select Employee window opens. 2. Select the employee and click Edit. The Employee Edit window opens. 3. Click the History tab. 4. Select the History Record and click Edit History Record. 5. After making the necessary changes, click Save. 6. Click Close 7. You may move to the next employee by right clicking on the window and selecting Find Employee from the menu. After selecting the next employee, click the Add (+) button on the Navigator Bar to create a new history record. To Delete a History Record 1. 2. 3. 4. 5. 6. 7. Click on the history record to be deleted and click Delete History Record. Click Yes. Add History Record Click Add History Record. The Add History Record window opens (as shown below). Select the pay period from the drop-down box that the new record will be assigned. Click OK. Click Save. Click Close. Note: When you add a history record in this manner, it is automatically treated as an Adjustment record. Each employee may have no more than one adjustment record per pay period. You may select any pay period associated with the employee's pay group and one not already been assigned an adjustment record. If you wish to add an adjustment record and the pay period does not appear, there is already an adjustment record in that pay period. You will not be allowed to enter an additional adjustment record for that period. Entering Year-to-Date Totals If you start using Paymate in the middle of the year, you should enter each employee's totals from the beginning of the year. This ensures that CPP and QPP deductions will stop when required. You may use Sprint Forms (another product from AK Microsystems) to print the T4, T4A, and Relevé 1 information. 1 From the main Paymate window select Setup > Employees. 2 Select the first employee from the list of employees and click Edit. 3 Click the History tab. A window appears (as shown below). 1. Click Add History Record. The Add History Record window opens. 2. Select the first pay period from the drop-down list to which the new record will be assigned. 3. Click OK. The Employee History window opens (as shown below). 4. Enter the employee's total earnings, total tax, total CPP or QPP, and total EI to date. If your payroll is subject to a payroll or health tax (such as EHT in Ontario), remember to enter this amount as well. 5. If you enter an amount for Vacation Paid, enter the same amount for Vacation Accrued. If you have not paid Vacation pay this year, leave both amounts at 0.00 (otherwise you will upset the balance of the employee's Vacation Pay Owing). 6. Click Save. 7. To move to the next employee, right click on the window and select Find Employee. 8. After selecting the next employee, click the Add (+) button on the Navigator Bar to create a new history record. Entering Personnel Information The Personnel Information window allows you to keep personnel records for each employee entered in the system. The contents of the personnel records do not affect payroll processing or reports in any way. 1 From the main Paymate window click Setup > Personnel Information. 2 Highlight the employee you wish to edit and click Select. The Personnel Information window opens. The Personnel Information window consists of seven different screens (listed below). Most of these screens have one or more drop-down list or Picklist field. By default, the picklist is empty. For information on how to setup data for the picklist, please see the section below — Personnel Picklist. Personnel Picklist The Personnel Picklist appears at the bottom of each tab. Click Picklist. The Picklist Setup window will be displayed and will let you edit codes and descriptions. This is to consistently allow the use of codes. For example, you may have a code for each Skill and a code for each Review Rating. The type of information you enter is entirely up to you. The information you enter is used as a picklist when you are entering personnel information. Some examples of code information are listed below: • • • • • • • Car Sick Leave Allowed Last Review Date Last Review Rating Next Review Date Skill Type 1 Skill Level 1 User ID and Information Tab The first section of the User ID and Information tab is filled in automatically for you and appears in light gray. You may add such information as marital status, emergency phone numbers, and family information. Benefits Information Tab The Benefits Information tab is where you enter vacation and sick pay entitlements, along with which benefits the employee is entitled to by placing a check mark beside your selection. Reviews and Increments The Reviews and Increments tab displays reviews and increments the employee has received over time and when the next review is scheduled to occur. You may also enter in here the amount of the increase any of the employees are to receive. Skills Tab The Skills tab is where you may enter specific skills the employee has such as computers, typing, and forklift operator. Miscellaneous Info Tab The Miscellaneous Info tab will let you put in comments about the employee as they pertain to certain situations. Notepad Tab The Notepad tab is a free form note page where you may enter any type of notes you wish to keep on the employee. Setting Up Cheques and Payslips Paymate provides two templates for cheques and payslips for any new company you set up. However, the Demo company has a variety of templates that will not be present in your own company. If you need the templates present in the Demo company you need to copy it into your company through Windows Explorer. For details on how to do this and how to design your cheque and payslip template please refer to the online Help section Setting up user-defined Cheques and Payslips. Setting up Security When you create a new company, the password is blank, allowing anyone access to any payroll data you set up, so it is a good idea to set up a password. 1 From the main Paymate window select Setup > Security. 2 When you create a company, Paymate automatically sets up one user called Controller. 3 From the Paymate Users window click Edit. The Users Edit window opens. 4 Enter the password you want to use and click Save. You will be asked to re-enter the password for confirmation. If you wish to add other users to the system, but have them access only certain information then you use the Advanced Security Feature Payroll The steps involved in processing payroll are as follows: • • • • • • • • • • • • • • Select Pay Period Creating Timesheets Batch Create Timesheets Create Cost Centres Enter Work Details Print Payroll Journal Print Cheques and Payslips Print Cheque Register Print Deposit Register Create Bank File Post Payroll Transfer Payroll Data Export Job costing Select Pay Period The first step in Payroll Processing is to select the pay period for the pay. From the main Paymate window, click on Payroll > Select Pay Period. 1. For each section you want to apply, place a check mark in each of the corresponding boxes. 2. Click Save. Option Function Pay Group Select the Pay Group for which you want to process the payroll Pay Period Select the Pay Period for which you want to process the payroll Cheque Date Keep the same cheque date that Paymate brings up or change it if you need to post-date cheques Creating Timesheets After Selecting the Pay period, you now have to create the timesheets. 1 From the main Paymate window select Payroll > Process Payroll. The Paymate Payroll Processing window opens. 2 Paymate provides you with Quick Search, which helps you find an employee by either number or surname. You may also set an order. 3 Select the employee for whom you wish to create a timesheet, then click Select. Paymate opens the Timesheet Edit window for that employee. Timesheet Edit Window The Timesheet Edit window allows you to view, create, edit, or delete individual timesheets for the active payroll period. 1 From the main Paymate window select Payroll > Process Payroll. 2 Then select an employee from the Payroll Processing window. 3 Use the Navigator Bar to browse, delete, or create timesheets. 4 Use the Job Costing button to browse, add, or change Work Details for the current employee. Batch Create Timesheets When processing payroll, you may create timesheets for all active employees in the selected pay group. From the main Paymate window select Payroll > Process Payroll Click Batch > Batch Create Timesheets. The Paymate Batch Timesheets window opens. IMPORTANT: Do not use Batch function when you are processing a special run. For example, if you are doing a special run for bonuses or Vacation pay may lead to errors if you forget to modify one of the timesheets after batching. Creating Cost Centres Cost Centres are used by Paymate for costing employee work details. Every entry made in Job Costing must be assigned to a Cost Centre. 1 From the main Paymate window select Payroll > Process Payroll. 2 Click Job Costing > Cost Centres > Edit. 3 Highlight the cost centre you wish to edit and click Select. The Cost Centre Edit window appears for that particular cost centre. 4 To add a new cost centre click Add. The Cost Centre Edit window opens. Option Function Code This must be a unique code. You may only specify this code when adding a Cost Centre. The format of the code is determined by the Job Costing package you specify on the Preferences tab. Do NOT use Wild Card Characters (e.g. #$%&*@). Description This is a description of the cost centre. Account These are used to summarize work details on the and Job Costing Account Summary report. Burden Factor Used to calculate an additional cost (e.g. if you enter 15%, then the Job Costing reports will show an extra cost equal to 15% of the employee wages paid out under the cost centre. Overhead Same as Burden Factor Note: Separate account and department codes can be specified for the calculated burden and overhead amounts. If these are blank, burden, and overhead amounts are assigned to the default account and department associated with the Cost Centre. 1. When complete, click Save. 2. Click Close. Entering Work Details When processing payroll, you may enter each employee's hours as Job Costing Work Details. This enables you to take advantage of Paymate's Job Costing reports. Work Details are automatically carried forward into each employee's timesheet. 1. From the main Paymate window select Payroll > Process Payroll 2. Select Job Costing > Work Details > Edit. To Add a Work Detail Record for the Employee Click Add. The Job Costing Work Details Edit window appears as shown below. The following fields are available on each Work Detail record. The employee number may only be changed when adding a record. Also, if the Work Details window is initiated directly from the Timesheet Edit window, the employee number cannot be changed at all. Header Description Employee Number Enter the employee number, or click on the speedbutton next to the employee number field for the Find Employee Dialog. Work Date It may be easier to total the employee's hours for a whole week (or the whole pay period) and make summary entries. Doing this, you may use the pay period end date. If you enter a date that is not within the start and end dates of the active pay period you will get a warning message when you save the entry. Category These are used to summarize work details on the and Job Costing Account Summary report. Cost Centre Enter the payroll category number, or click on the speed button to get a drop-down list. You must assign the entry to an earning or benefit category so that the hours, rate, and dollar amounts may be brought forward to the employee's timesheet. If you pick an hourly-based category, the employee's default rate will automatically be shown. Header Description Account and Department These will automatically be the default account and department you specified when you set up the cost centre. You may override any field. The account and department affect how the amounts will be summarized when you run the Job Costing Account Summary. The Rate will automatically be set to the employee's default rate when you select the payroll category. If the payroll category that you select is not an hourly type, you will not be able to enter the rate, but you will be able to enter the amount. 1. When you have entered all the work details click Save. 2. Click Close. Note: If you need a listing of the work details entered, from the Payroll Processing window select Job Costing. Then select Work Details and click on List. Select the cost centre or the range of cost centre, enter the start and end dates for the list, and you may either Preview or Print it. Note: When you have finished processing the payroll, post the timesheets to the employee history file. Work Details get posted to a history file as well. Once they are posted, they may be accessed only on an individual employee basis. You may access them by clicking Job Costing on the History Edit window. Quick Entry You may also use the Quick Entry method from the Payroll Processing window. Printing the Payroll Journal The Payroll Journal prints out all the timesheets you have entered for the active selected pay period and should be printed after you have entered all the timesheets, and before you print the cheques. 1. From the main Paymate window select Payroll > Process Payroll. 2. Click Print > Payroll Journal. 3. 4. 5. 6. Adjust the settings. Click Setup to setup the printer options. Click Preview to see your report. Click Print to print your report. Printing Cheques and Payslips Cheques and Payslips may be printed at any time while you are processing the active payroll. 1. From the main Paymate window select Payroll > Process Payroll 2. Select Print > Cheques & Payslips Generally, before printing cheques, the employee timesheets should be entered and the Payroll Journal should be printed. Section Function Print for Employees Specify if you are printing for employees who are Paid by Cheque, Paid by Deposit, or With 0.00 Payable. Starting Enter the starting cheque/voucher Cheque/Voucher number. Number Payment Date Verify if the Payment Date is correct. Broadcast Message If you want a small note to be printed on the cheques and payslips, you may enter it here. Select Range Select the employee or a range of Employees employees. If you wish to select all the employees displayed click Select All. There are also various buttons to assist you Button Function Sample Print out a sample of the format you have selected Preview Preview your cheque and payslip Print Print a copy Close Close the window Cheques and Payslips Layout Style You may select from 8 pre-defined styles for cheques and payslips that Paymate offers, or, if you have designed your own format previously, you may select User Defined and select your format from the drop-down list. If you have selected a predefined cheque and payslip format, you have Optional Items to Print. Paper Feed Specify if this is Continuous for Dot Matrix printers or Single Sheets for Laser or Bubblejet printers. Note: If you select a user-defined format for cheques and payslips you will NOT have the Optional Items to Print tab. Cheques and Payslips Optional Items to Print If you have selected a predefined cheque and payslip format, Paymate opens a 4th tab for you. This is the Optional Items to Print tab. Here you may select the optional items you wish to print on the payslip or on the cheque portion. • Print the dollar figures in letters only (Amount Alphabetic) If you leave this box unchecked, Paymate will print the dollar figure in numeric values. If the box is checked Paymate will print the dollar amount in words. Job Description • If you leave this box unchecked Paymate will not print the Job Description. • If you check this box Paymate will print the Job Description as it appears on the employee basic window on the Payslip portion of the cheque and payslip. This feature is of special use for clients in Quebec. Printing Cheque Register The cheque register prints out a list of all payments made by cheque for the Active pay period and should be printed after you have printed all the cheques. This report will also show any timesheet entries which have 0.00 payable, and any timesheets that are not paid by cheque or deposit. Payments made by deposit are listed on the Deposit Register. 1. From the main Paymate window select Payroll > Process Payroll. 2. Click Print > Cheque Register. 3. Adjust the settings. 4. Click Setup to setup the printer options. 5. Click Preview to see your Cheque Register. 6. Click Print to print your Cheque Register. Printing Deposit Register The deposit register prints out a list of all payments made by deposit for the active pay period. It should be printed after you have printed any Advice of Deposit (Cheques & Payslips) for employees paid by deposit. If you download your deposits to the bank via modem or diskette, you should print this report before creating the bank file. This report is a control report, which shows all the entries that will be written to the bank file. There are no settings necessary on the Parameters tab of the Report window, but on the Preferences tab you will need to specify the Sort Order. 1. From the main Paymate window select Payroll > Process Payroll. 2. Click Banking > Deposit Register. 3. Adjust the settings. 4. Click Setup to setup the printer options. 5. Click Preview to see your Deposit Register. 6. Click Print to print your Deposit Register. Creating the Bank File If you have not used Paymate to create a Bank file before, you will be asked to select a financial institution from a drop down list. 1. From the main Paymate window select Payroll > Process Payroll. Select Banking > Create File for Bank. • Select the financial institution you want. Note: You will only be prompted with this selection ONCE. 3. Make sure you have entered your company's banking information properly. 4. (This usually consists of a name, some kind of ID number, and account information. Your bank will provide you with this information). 5. Specify the name and location of the bank file you want to create. Remember where you save the file, because you will have to specify the location and name of the file when you go to upload to the bank. We recommend that the bank file name be either BANK.DAT or BANK.TXT. 6. Make sure the Next Bank File Sequence Number is correct. THIS IS VERY IMPORTANT! • Users who process payroll for more than one group of employees (payroll groups) have the option of including both payroll groups in the bank file. (For example, if you have management and hourly employees paid at the same time you will want to avoid sending two files to the bank, because there is a charge for every file you send. If you want to do this, make sure you click on All Pay Groups 7. Some institutions require that you specify a Transaction Code. The Transaction code will default to whatever it should be for a regular payroll run, so you will rarely, if ever, have to change it. If you are processing a special run outside the normal payroll (such as a Christmas bonus), your bank may require that you use a different transaction code. Check with your financial institution. 8. Depending on the financial institution, you may be required to specify a Due Date. This should be the date the payments have to be present in the employees' accounts. 9. Once you are satisfied the settings are correct, click Save. 10. Click Create and Paymate creates the bank file for you. 11. Transmit file created to your bank for processing. Next Bank File Sequence Number Your financial institution uses the sequence number as a control to make sure you do not send them the wrong file. If the last file you sent had sequence number 02, the next file you send must have sequence number 03, or the file will be rejected and the deposits not made. When you first sign on to your financial institution's direct deposit system, they will put you in test mode, and they will ask you to send a few test files before you actually go on-line. Some banks require that you use a special sequence number to do this, for example 0. When you do go live, your financial institution should tell you what your first sequence number will be. Paymate increments the NEXT BANK FILE SEQUENCE NUMBER every time you create a bank file, so usually you will not need to modify it. Note: If you create a bank file that you do not send, you will have to reset the sequence number. For example, you process the payroll, and create the bank file using sequence number 71. Before sending the file to the bank, you realize you forgot to pay someone, so you go back and add a timesheet for that employee. You then go to create the bank file again. The sequence number will default to 72. You will have to change the number back to 71. Posting Payroll Posting the timesheets to the employee history file completes processing a payroll run. After you have printed all the cheques and the cheque register, you post all the timesheets. Posting Timesheets 1. From the main Paymate window select Payroll > Process Payroll 2. Click Post > Post all Timesheets. The Paymate Post Payroll Journal window opens. The Paymate Post Payroll Journal window has the following options: Backing up Company Data This is optional. The best time to make a backup is right before you post the payroll. Backing up is easy, and if you find you have made a mistake (like forgetting to print the cheque register), you may easily restore the data and re-post. • Printing the Update Journal This is optional. The Update Journal is almost identical to the Payroll Journal. The Payroll Journal is not always an accurate record of what is posted to the history file. You may have made corrections after printing the payroll journal. Having the Update Journal in your files is a good record of what is posted. • Printing the Posting Balance Sheet • This is necessary. Before posting you MUST print the Posting Balance Sheet. • The Posting Balance Sheet is a one-page report showing the totals that will be posted, and what the Year-to-date totals look like before and after posting. This is a good way to do a quick check to catch any anomalies (such as forgetting to pay an employee). 1 OK 2 3 Cheque Once you have printed the Posting Balance Sheet, you click Close the window then select Post to continue. Type POST to proceed with posting. Reconciliation The Cheque Reconciliation window allows you to mark the status of posted cheques, as well as to reverse cheques that were posted in error. From the main Paymate window select Payroll > Cheque Reconciliation. Exporting Payroll Data Transferring Payroll Data This section explains the procedure for transferring payroll totals to your accounting package. Before following these procedures, you should be certain you have properly set up all the account information in Paymate. For more information see Setting up the Accounting Interface Once you have set up the accounting interface, transferring the payroll data consists of the following steps: 1. Make sure you have finished processing the entire payroll for the month. If you transfer the payroll data after every payroll run, make sure you have completed processing the payroll run you want to transfer. 2. Make sure you have posted the timesheets from the last payroll run to the history 3. file. From the main Paymate window select Payroll > Export 4. Payroll. Check the Preferences tab. The Preferences tab shows settings that you would usually set up once. 5. Make sure the Export File Name is specified, and if you think you might forget what it is, write it down. 6. Choose an Application of Date Range setting. There may be other information specific to your accounting package. For example, you may have to specify a Source (or Journal Source, Transaction Source, etc). 7. Check the Parameters tab. This page allows you select which Department(s), Payroll group(s), and RCT group(s) you want to include. See Groups to Include for more information. 8. You must also specify a Date Range, and, in most cases, a Batch, Transaction, or Distribution Date. 9. Depending on the Accounting package you have selected, you may have to enter some parameters specific to the package. For example, you may have to specify Fiscal Period. 10. When you are satisfied with the settings, click Export to create the interface file. 11. You may see warning or error messages. If you do, an explanation of what you have to do to correct the specific problem will be shown. The most common error situation is when the totals do not balance. This indicates an omission in the chart of accounts setup in Paymate. 12. When Paymate has finished creating the export file, run your accounting package to import the file. You will have to check your accounting package's documentation for instructions on how to import a file. Some packages will automatically detect that something needs to be imported, others require that you run a special option. Some packages even require that you specify the import file format. In these cases, you specify ASCII Delimited. Export Job Costing If you enter Work Details when processing payroll, you may create an external ASCII text file, which contains these entries. You may use your Job Costing package to import the details. From the main Paymate window select Payroll > Export Job Costing. If you have not yet selected a Job Costing package, you will be asked to do so. The Setup tab on the Job Cost Export window contains a drop-down list with the available Job Costing packages with which Paymate interfaces. Reports There are numerous reports that Paymate provides: • • • • • • • • • • General Ledger Government Remittance Employee History Employee Year-to-Date Payroll Categories Accruals Employee Lists Worker’s Compensation Job Costing Cheque Reconciliation For each report there are normally two tabs: Parameters, and Preferences (as shown below). On each of these tabs you will have to specify certain options to produce the report to your needs. General Ledger Report The General Ledger Report gives credit and debit totals, Period totals and Year to Date totals. 1. From the main Paymate window select Reports > General Ledger. 2. Adjust the settings. 3. Click Setup to setup the printer options. 4. Click Preview to see your report. 5. Click Print to print your report. Government Remittance The Government Remittance report shows the remittance of federal and provincial source deductions for a specified period. 1. From the main Paymate window select Reports > Government Remittance. 2. Adjust the settings. 3. Click Setup to setup the printer options. 4. Click Preview to see your report. 5. Click Print to print your report. Employee History Detail The Employee History Detail report shows each individual timesheet, adjustment, and reversal for a specified period. 1. From the main Paymate window select Reports > Employee History > Detail. 2. Adjust the settings. • Click Setup to setup the printer options • Click Preview to see your report • Click Print to print your report Employee History Summary The Employee History Summary report shows each individual timesheet, adjustment, and reversal for a specified period. 1. From the main Paymate window select Reports > Employee History > Summary. 2. Adjust the settings. 3. Click Setup to setup the printer options. 4. Click Preview to see your report. 5. Click Print to print your report. Employee Year to Date Report The Employee Year to Date report shows each employee's totals since the beginning of the payroll year. 1 From the main Paymate window select Reports > Employee Year to Date. 2 Adjust the settings. 3 Click Setup to setup the printer options. 4 Click Preview to see your report. 5 Click Print to print your report. Payroll Category Report The Payroll Category report shows details for a particular earning, benefit, deduction, or other item. The report may be printed for any period. 1 From the main Paymate window select Reports > Payroll Categories. 2 The first page of the Payroll Category Report window contains a drop-down list for Payroll Category Item. 3 Select the category you are interested in. For example, it may be you want to see each employee’s Insurable Earnings for a specified period. 4 Adjust the settings. 5 Click Setup to setup the printer options. 6 Click Preview to see your report. 7 Click Print to print your report. Accrual Report The Accrual report shows each employee's balance owing for Vacation Pay or Sick Pay at any particular point in time. It also shows the amounts accrued in the specified period. 1 From the main Paymate window select Reports > Accruals. 2 The first page of the Accrual Report window contains a drop-down list for Payroll Category Item. Select the category you are interested in (either Vacation Pay or Sick Pay). 3 Adjust the settings. 4 Click Setup to setup the printer options. 5 Click Preview to see your report. 6 Click Print to print your report. Employee Master Report The Employee Master report shows each employee's setup information, as entered in the Employee window. 1. From the main Paymate window select Reports > Employees Lists > Master. 2. Adjust the settings. 3. Click Setup to setup the printer options. 4. Click Preview to see your report. 5. Click Print to print your report. Employee Phone List Report The Employee Phone List report shows each telephone information, as entered in the Employee window. 1. From the main Paymate window select Reports > Employees Lists > Phone. 2. Adjust the settings. 3. Click Setup to setup the printer options. 4. Click Preview to see your report. 5. Click Print to print your report. Employee Notepad List Report The Employee Notepad List report shows each employee's setup information, as entered in the Employee window. 1. From the main Paymate window select Reports > Employees Lists > Notepad. 2. Adjust the settings. 3. Click Setup to setup the printer options. 4. Click Preview to see your report. 5. Click Print to print your report. Employee Labels The Employee Labels report shows each employee's setup information, as entered in the Employee window. 1. From the main Paymate window select Reports > Employees Lists > Labels. 2. Adjust the settings. 3. Click Setup to setup the printer options. 4. Click Preview to see your labels. 5. Click Print to print your labels. WSIB Report Note: If you have Multiple WSIB Rates you will have to set them up as a benefit. The Workplace Safety Insurance Board (Worker’s Compensation), report shows each employee's total assessable earnings for a specified period. 1 From the main Paymate window select Reports > Worker’s Compensation. 2 Any earnings that have been flagged as subject to WSIB are considered assessable earnings (this flag is set on the Earnings and Benefits windows). The report also shows the premiums payable, based on the WSIB rate you have specified on the Company window. 3 Adjust the settings. 4 Click Setup to setup the printer options. 5 Click Preview to see your report. 6 Click Print to print your report. Work Details Edit List The Work Details Edit list shows all the Work Details entered in Job Costing for the active pay period. 1 From the main Paymate window select Payroll > Process Payroll. The Job Costing Employee Work Detail Edit List opens. 2 Click Job Costing > Work Details > List. 3 Adjust the settings. 4 Click Setup to setup the printer options. 5 Click Preview to see your list. 6 Click Print to print your list. Cost Centre Edit List The Cost Centre Edit list shows a list of Cost Centres and any corresponding information such as accounts and burden & overhead factors. 1 List. 2 3 4 5 From the main Paymate window select Reports > Job Costing > Cost Centre Edit Adjust the settings. Click Setup to setup the printer options. Click Preview to see your list. Click Print to print your list. Employee Work Summary The Employee Work Summary report shows the total of all Job Costing entries for each employee, with subtotals for each cost centre. 1 Work 2 3 4 5 From the main Paymate window select Reports > Job Costing > Employee Summary. Adjust the settings. Click Setup to setup the printer options. Click Preview to see your report. Click Print to print your report. Cost Centre Work Detail The Cost Centre Detail report shows all the Job Costing entries for each cost centre, with totals for each cost centre. 1 Work 2 3 4 5 From the main Paymate window select Reports > Job Costing > Cost Centre Detail. Adjust the settings. Click Setup to setup the printer options. Click Preview to see your report. Click Print to print your report. Job Costing General Ledger Summary The Job Costing Account Summary report shows the totals of the entire Job Costing entries by account number. 1 From the main Paymate window select Reports > Job Costing > Account Summary. 2 Adjust the settings. 3 Click Setup to setup the printer options. 4 Click Preview to see your report. 5 Click Print to print your report. Cheque Reconciliation Report The Cheque Reconciliation Report lists the status of each cheque for a specified period. 1 From the main Paymate window select Reports > Cheque Reconciliation. 2 Adjust the settings. 3 Click Setup to setup the printer options. 4 Click Preview to see your report. 5 Click Print to print your report. Forms Paymate provides a variety of forms: • • Record of Employment T 4’s, T4A’s, and Relevée 1 Record of Employment Paymate allows you to prepare, edit, and print to the Record of Employment form. This window lists all the Record of Employment (ROE) records you have already prepared. 1. From the main Paymate window select Forms > Record of Employment. The Record of Employment Select window opens (as shown below). Note: Paymate may print the new HRDC Laser ROE. The software required is available at no charge from your local HRDC office. Paymate does not provide support for the use of this software. • 1 Click Add. The Find Employee window opens. Specify the employee you are terminating by name, number, department, or you may select the employee from the drop-down list. 2 Click Select. You need to Edit the Record of Employment. T4's, T4A's, Relevé Forms Paymate allows you to create, edit, and print your T4’s, T4A’s, and RL-1 forms both supplementary and summaries. Choose create and choose the form you want to produce, T4, T4A, or RL-1. If your company has more than one RCT (EI) number you must create a set of forms for each number. After creating T4’s, T4A’s, or RL-1 you may edit them and verify that they are correct before printing. You should verify that all amounts are correct before printing your forms and make certain the summaries are correct. The audit report is best for verifying company totals. Remember, if necessary, Paymate allows you to create or print your forms as many times as necessary. Paymate also allows you to file your T4’s by magnetic media. Year End Close Year Closing the current payroll year and preparing for the first payroll of the New Year. Closing the current year enables you to begin processing payroll for the New Year. Before closing the current payroll year, it is important that you • Ensure that all payrolls are complete for the year • Run the Integrity Check and do a backup (this is RECOMMENDED) • Uninstall the old version of Paymate then install the upgraded version of Paymate for Windows Note: When closing the year, a series of windows will give you precise instructions. If any problems arise, the Exceptional Circumstances (at the end of this section) will assist you in resolving these problems. You may cancel closing the year at any time. Closing the year will not change any data, with the exception of marking the year as having been closed. You will be able to access the years’ data AT ANY TIME and you will still be able to print your T4, T4A, and Relevé 1 slips. 1. From the main Paymate window select Yearend > Close Year. If the following messages appears, The payroll year has already been closed. see section A under Exceptional Circumstances. 2. Click Next to proceed. If the following message appears, You have un-posted timesheets in the payroll journal. see section B under Exceptional Circumstances If the following message appears, Payroll categories are flagged to carry forward the Year-to-date total for each employee to the New Year. see section C under Exceptional Situations If the following message appears, 1Payroll data has already been set up. see section D under Exceptional Circumstances 3. Pay close attention to the message displayed. At this point it is STRONGLY recommended that you make a backup (leave the first box UNCHECKED). If you wish to carry forward terminated or inactive employees check the second box. Note: When carrying forward terminated or inactive employees, ALL terminated AND inactive employees will be carried forward remaining in the database. If you are NOT backing up your files, move to step 6. 1 Choose the drive from the drop-down menu then choose the folder where you wish to backup your files. 2 After you backup the files, click OK. 3 Type the correct phrase into the text box. DO NOT include the brackets. (When you have typed in the correct phrase, the finished button will appear.) 4 Click Finish. The year is now closed and payroll data for the following year has been set up. Once the year is closed, you may begin processing payroll for the New Year. Re-select the company from the Select Company window. Be certain that you specify the year you want to access by checking the current year on the Select Company window. Exceptional Situations The following exceptional situations may arise. You may receive a warning message before continuing to close the year. A) The payroll year has already been closed. Re-closing the year will cause you to LOSE all data from the end of the closed year to the present; everything will be reset to zero. It is recommended that once you close a year you LEAVE IT CLOSED. 1 If you wish to continue, type the correct phrase into the text box. DO NOT include the brackets. (When you have typed in the correct phrase, the Next button will appear.) 2 Click next and return to step 3. OR 3 Click Cancel. 4 Click Yes. B) There are un-posted timesheets. Cancel closing the year and post all the timesheets, THEN close the year. 1 If you wish to continue, type the correct phrase into the text box. DO NOT include the brackets. (When you have typed in the correct phrase, the Next button will appear.) 2 Click next and return to step 3. OR 3 To post all the timesheets click Cancel, then Yes. 4 From the main Paymate window, select Payroll > Process Payroll. 5 From the Paymate Payroll Processing window, select Post > Post All Timesheets. 6 Click Post. For more information on posting timesheets see Posting Timesheets. 7 When all timesheets are posted, return to step 1. C) Payroll categories are flagged to carry forward the Year-to-date total for each employee to the New Year. For example, if your employees buy into Canada Savings Bonds (which run from November to October), this is normal. You may have improperly set up a benefit or deduction category. If you wish to carry forward to the New Year the employee year-to-date totals for the items listed, click Next and return to step 3. OR i. Click Cancel, then Yes. ii. From the main Paymate window select Setup > Payroll Categories. iii. Select the deduction or benefit from the list and click Edit. On the Payroll Category Edit window, uncheck the box next to Reset at Year End. Click Save. Click Close. vi. For each of the items you wish to change, repeat steps ii through v. vii. When complete, return to step 1. D) Payroll data has already been set up. There is payroll data already set up for the New Year. If you have processed any payroll for the New Year it will be erased and you will need to re-enter it. If you wish to begin the New Year from scratch, type the correct phrase into the box. DO NOT include the brackets. (When you have typed in the correct phrase, the Next button will appear.) 1. Click Next and return to step 3. OR 2. Click Cancel. 3. Click Yes. Utilities Paymate provides you with a variety of housekeeping utilities that allow you to take regular backups and ensure the integrity of your data. • • • • Backup Company Data Restore Company Data Re-index Company Data Integrity Check Backup Company Data Paymate allows you to backup each company's data, either to the hard disk or to removable diskettes. 1. From the main Paymate window select Utilities > Backup Company Data. Note: Only data files for the company currently selected are backed up! 2. Select the drive and folder where you wish to save the backup files (see below). 3. Click Backup. Restore Company Data Paymate allows you to backup each company's data to the hard disk or to removable diskettes. To restore a backup made with Paymate From the main Paymate window select Utilities > Restore Company Data. Restore the files, and from the main Paymate window select Setup > Security and update the password. Do not exit Paymate until you update the password or you will not be able to get back in! Re-index Company Data Paymate maintains indexes for all your data. Indexes are like index cards you would find in an old-fashioned library. Occasionally the indexes may get corrupt, or mixed up, particularly if your system freezes when running Paymate. This is not a function you would normally run. You only need to run the re-index utility if this is suggested by an error message, or if advised to do so by technical support. You may run this utility at your own discretion. If you are getting strange results when running a report, for example, you probably need to re-index the data files. Re-indexing the data files will never result in lost data and it is safe to do at any time. 1. From the main Paymate window select Utilities > Re-index Company Data. 2. Click Re-index. 3. Click OK. Integrity Check The Integrity Check is available in case your company data files become corrupt. Data files may become corrupt if you run out of disk space or if the system freezes while Paymate is running. 1. From the main Paymate window select Utilities > Integrity Check. 2. Click OK. Any problems that arise will be displayed with a solution. Help Support Services The Paymate Team is always here to help you. We offer the following support services: • Telephone, Fax and Email Support - on the operation of Paymate • Training - direct training in/around the Greater Toronto Area. For customers outside this area, our dealers provide training. We do not provide training or step-by-step orientation over the phone. This is a chargeable service • Payroll Issues - We help customers with How to do it in Paymate. We cannot advise customers on payroll issues. For all payroll issues we recommend you contact your accountant, Canada Customs and Revenue Agency or the Canadian Payroll Association • Networking/Operating System Issues - by explaining how Paymate may be set up on a network. We cannot help customers on the networking/operating systems issues. We recommend that you contact your network consultant • Data Repair - Data Repair Service to solve problems caused by data errors. The data may be sent to us by mail, courier, or by email. This is a chargeable service. Not all data may be repaired. If we are unable to repair your database, you will not be billed Calling for Support We recommend that you use the STANDARD DEFAULT DIRECTORIES during the installation of Paymate (e.g. C:\PAYMATEW). Please do NOT change directories during installation. Do NOT let anyone change the database structure or alter data using other programs or alter the program in any way. We cannot support you if this is the case. Make backups regularly. It is customary to keep 3 sets of backup on separate diskettes and rotate the sets overwriting the oldest diskettes with new backup. We also advise you to write the date on the 3 sets of diskettes. When you encounter a problem We advise you to refer to the Knowledgebase as the first step in problem solving. It gives a detail listing of all the problems that you are likely to encounter. To access the Knowledgebase 1 From the Windows desktop click Start > Programs. 2 Click the Paymate folder and then click the Knowledgebase icon. You may also access the Knowledgebase from within Paymate Click Help > Knowledgebase. If the problem is still not resolved, gather the data described in the next section and call us. Before you call us The information we will require before you call us is: • The Operating System you use (e.g. Win 95, Win 98, Win 2000, or Win XP) • The version of Paymate you are using. This may be found on the bar that appears across the bottom of the screen, just above where it says Selected Company on the left side of the screen (e.g. Version 4.06/Standard) • If your machine is on a network (specify the network) or if it is a standalone/single machine • Identify where the program is installed (e.g. in which directory) and in which directory the data is stored • Exactly what you were doing when the problem occurred • If any error messages were received and the EXACT wording of the error When you call us Please be at your computer so we may work on the problem together. Please avoid putting us on HOLD as this prevents us from providing support to the next customer. Notes AK Microsystems 30 Wertheim Court Suite 16 Richmond Hill, Ontario L4B 1B9 Telephone (905)771-1155 • Fax (905)771-1344 Web www.paymatesoftware.com • Email [email protected]