1
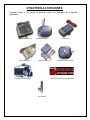
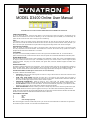
“Simply The best Incar Security” MODEL D3400 Online User Manual 7/07/2008 The D3400 have been tested and meets AS/NZS 4601:2003 and AS/NZS 3749.1-2003 Part B. ARMING AND DISARMING To arm or disarm the system, press the larger button on the remote control. Arming the system is accompanied by two flashes from the indicators and one f lash for disarming. If the horn confirmation option is enabled (n o t recommended ) the system will also "sound" the horn twice for arming and once for disarming. PANIC If the primary button on the remote control is pressed and held down for more than two seconds the system will go into a panic mode. In this mode the indicators will flash and the horn will sound. The panic mode will continue for thirty seconds. If you wish to cancel the panic signal before the thirty seconds then simply press the larger button of the remote control again. BOOT RELEASE (OPTIONAL) Disarm the system by pressing the top button on the remote control. Then press the lower button on the remote control and keep it depressed un til the boot releases. This will take about 3 seconds. This function will only operate if the vehicle is equipped with an electrical boot release and it is connected. AUTO-ARMING The system is set to automatically immobilize the vehicle. The engine will be immobilized within 30 - 40 seconds after the ignition has been turned off. If turned off with the remote control, the system will re -immobilize itself within the same time period. ENGINE IMMOBILISATION When the system is armed the engine is also immobilized. The independent, normally open circuits of immobilization ensure the engine is starved of either fuel or spark. Immobilization points vary from vehicle to vehicle; common engine kill places include fuel injection, fuel pump, fuel cut-off solenoids, main ignition feed, low-tension distributor supplies and starter motor solenoids, etc. INTRUSION DETECTION The D3400 is equipped with three zones of protection - doors, bonnet & auxiliary. Each zone can be triggered a maximum of three times after arming. When a zone is triggered, the horn will sound for 30 seconds and the indicators will flash for one minute. The horn will reset for five seconds after each 30 -second trigger period before sounding due to subsequent triggers. OPTIONS SELECTABLE OP TIONS (please contact vendor for more Information) The system is featured with selectable options ANTIHIJACK: Locks the doors when the ignition is turned on so long as all the doors are closed. Also unlocks the doors when the ignition is turned off. DOME LIGHT UPON DISARM: Illuminates the dome light of the vehicle for thirty seconds when the system is disarmed. The light will extinguish if ignition switch is turned to the on position. HORN OUTPUT: Determines whether the 30 seconds of alarm trigger output on the horn wire is constant or pulsed. ARM/DISARM CONFIRMATION: Allows the system to arm in silent mode. The standard indicator flashes will accompany each arm/disarm command, but the horn will remain silent. This option has no effect on the triggered sound. 120 SEC RELOCK: Enables the auto relock feature. The doors will automatically relock when (a) the vehicle has been disarmed by remote control, (b) The doors remain closed for more than 120 seconds. OPEN DOOR WARNING: Produces a warning in the form of multiple chirps from the horn when arming with the door open. DIAGNOSTICS: W henever the alarm system is triggered, the memory of the module will be automatically updated with the number of the zone responsible. The report will be displayed upon the next disarm command. Both the indicators and status LED will flash a number of times. The table below describes the number for each zone. ZONE NUMBER ZONE NAME 1 Bonnet 2 Aux 3 Doors 4 Glass breakage (Optional) Each zone will trigger a maximum of three times per arm cycle. Once a zone has sounded the horn three times it is ignored until the next time the system is armed. At no time does the immobiliser disarm. BATTERY REPLACEMENT Using a small Phillips -head screwdriver, remove the three screws at the back of the remote and carefully separate the two body housings taking take care not to disturb the circuit board. Remove the old battery whilst paying attention to t he orientation of the positive and negative terminals. Insert new battery in identical fashion to the original and re -assemble remote. Replace screws and test remote control by pressing main button. For further information, please contact your local DYNATRON service centre. Remote battery type 12 V 27a PROBLEM SOLVING System won't activate when the door is opened: - Make sure you have used the remote to set the system. It will not trigger if the system has auto armed. - Make certain the system is activated. LED should be flashing on the dashboard. - Make sure that the interior dome light has not been left in the permanently ON position. - Make sure that you have allowed at least 30 seconds after setting the system, before opening the door. System won't activate or deactivate. LED won't flash or extinguish: - Make sure that ignition switch is in the OFF position. - Make sure the vehicle battery is not flat. - Try your spare remote transmitter unit. The remote fails to operate: If the remote fails to operate and the LED does not light up when the button i s pressed then change the battery. 'As above'. OVERRIDE The system can be overridden by means of a Personal Identification Number (PIN). Every unit has it's own PIN. This PIN is issued with every system by means of a credit card sized PIN card. Do not lose this card. Do not leave it in your vehicle. Do not tell anyone your PIN number. Do store the PIN card in a safe and confidential place. Storing the PIN number in a secure place in your cell phone is an ideal way to store the number. OVERRIDE PROCEDURE 1. Insert the ignition key into the ignition switch and turn to the ON position. The blue or red status LED mounted on the dash will glow constantly. 2. Turn the ignition key back to the ACC position, the status LED will begin to flash slowly. Count the number of flashes for the first digit in the PIN of the alarm/immobiliser. Return the key to the ON position when the correct number is counted. 3. Repeat step 2 for the remaining digits in the PIN. W hen all four digits are entered, the indicators will flash once the system will then disarm. Please Note “Any digit marked '0', indicates 10 flashes. NB> If the engine is not started within 40 seconds of over -riding, the alarm/immobiliser will immobilize the engine It is necessary to enter the PIN each time the engine is turned off and the system has auto immobilized. WARRANTY This product is warranted by DYNATRON (NZ) Ltd, P.O Box. 302-384, North Harbour, Auckland. New Zealand. Subject to the conditions stated below, to be free from manufacturing defects and faulty material within the warranty period stated below. CONDITIONS That the warranty registration has been completed in full at the time of purchase and / or installation and is produced when warranty service is sought. The warranty does not cover general maintenance such as cleaning of bonnet switches, door switches, light switches etc, nor replacement of consumable items such as pilot lamps or transmitter batteries. Should a product defect become apparent within the warranty period DYNATRON (NZ) LTD will repair the product free of charge for parts only. Labour to remove and install the serviced product will be the responsibility of the original installer and their prescribed labour warranty terms and conditions. This is a return to base warranty and should a mobile service be required, a call out charge will apply. This warranty shall be null and void if: 1. 2. 3. 4. 5. The product has been repaired by any other person other than by an authorized DYNATRON service centre. The product has been altered or tampered with in any way or the serial number altered, defaced or removed. The defect has been caused by negligence by the owner or their agent. The product has not been operated correctly, installed by an authorized DYNATRON installer or has been subjected to misuse or undue wear and tear. The control module is damaged by water. THE WARRANTY DOES NOT COVER THE FOLLOWING COSTS: - Transport of the product to and from DYNATRON service centres. Insurance of the product in transit to or from the DYNATRON service centres Cost of any service call where the product is found by Dynatron to be in good working order. DISCLAIMER Dynatron systems have all been tested and approved to Australian and New Zealand Standards an d only Dynatron Authorised Installers have been given the information to install your system correctly to those same standards. Dynatron (NZ) Limited will accept no liability for any independent installation of this product, its performance or operation. We believe that the responsibility for a system performing according to published and verifiable standards rests primarily with you as the owner and end user. Should you have any concerns about your Dynatron system then please call us at Dynatron direct during working h ours toll free 0800 508 904 and speak to Customer Services or one of our Technical team. We are here to help and we will see that you get “Simply The best Incar Security” for your car. 2 PLEASE COMPLETE DETAILS BELOW AND REGISTER YOUR DYNATRON: It is very important that your DYNATRON product details are recorded below. The units Serial Number is recorded in our secure database which is directly associated with the Emergency Override PIN and it is this PIN Number that will enable you r security system to be overridden If in the unlikely event that you need our Free 24hr 0800 Assist and you can provide the serial number then we will be more than likely able to start your car over the phone. REMEMBER, A THREE YEAR WARRANTY ON MODULE APPLIES ONLY IF THE INSTALLATION IS PERFORMED BY AN AUTHORIZED DYNATRON INSTALLER 12 MONTHS ON REMOTES AND ACCESSORIES. OWNERS DETAILS: OW NER NAME DYNATRON MODEL MODULE SERIAL NUMBER VEHICLE REGISTRATION NUMBER VEHICLE MAKE VEHICLE MODEL _YEAR INSTALLER DETAILS: INSTALLER COMPANY NAME_ INSTALLER NAME _ DATE INSTALLED ***PHONE US ON 0800 508 904 TO REGISTER YOUR DYNATRON***' 3 DYNATRON ACCESSORIES Dynatron offers a full range of sensors, each one designed for a specific application. Microwave Sensor Shock Sensors Glassbreak Sensor Ultrasonic Sensor Dynapage Cellular pager Tilt Sensor Battery backed up Siren Dynatrace GPS Tracking Systems Door Motors 4