1
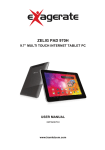
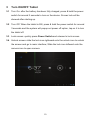
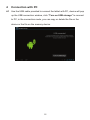
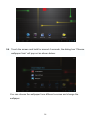
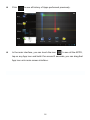
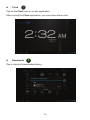
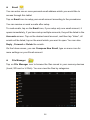
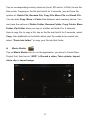
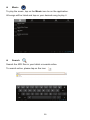
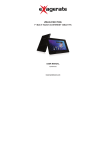
ZELIG PAD 270G
7” MULTI TOUCH DUAL CORE 3G INTERNET TABLET PC
USER MANUAL
XZPAD270G
www.hamletcom.com
Dear Customer,
thanks for choosing an Hamlet product. Please carefully follow the
instructions for its use and maintenance and, once this item has run
its life span, we kindly ask You to dispose of it in an environmentally
friendly way, by putting it in the separate bins for electrical/electronic
waste, or to bring it back to your retailer who will collect it for free.
We inform You this product is manufactured with materials and components in
compliance with ROHS directives: 2002/95/CE; with RAEE Directives:
2003/96/CE, Italian Legislative Decree 2005/151 and EMC Directive
2004/108/EC for the following standards:
EN 55022: 2010
EN 55024: 2010
EN 61000-3-2: 2006 + A1: 2009 + A2: 2009
EN 61000-3-3: 2008
CE Mark Warning
This is a Class B product. In a domestic environment, this product may cause
radio interference, in which case the user may be required to take adequate
measures.
The complete CE declaration of conformity of the product can be obtained by
contacting Hamlet at [email protected].
2
The information on the importer for your country are available in the “About Us”
section of the Hamlet website at www.hamletcom.com.
Trademarks
All trademarks and company names mentioned in this manual are used for
description purpose only and remain property of their respective owners.
Changes
The material in this document is for information only and subject to change
without notice. Specifications and appearance are subject to change without
prior notice.
Support
To obtain technical information or assistance please visit Hamlet website at
page http://english.hamletcom.com/support.aspx.
If the website service did not resolve your problem or the information received
were not exhaustive, please contact directly Hamlet at e-mail address
[email protected].
3
Frequently Asked Questions
Before use of technical assistance, please find answers to frequently asked
questions listed below.
I can not connect to download the app from the market
The tablet have to be updated, contact the technical assistance via the support
area of the Hamlet website.
Tablet does not start
Press the reset button on the tablet (if present) for at least 3 seconds and
restart the device. If the problem persists, restore the firmware of the tablet
following the instructions provided in the support area of the Hamlet website.
An accessory of the tablet is not working (e.g. power supply)
Contact technical support by e-mail to get the replacement of the defective part
only at [email protected].
The touch screen does not respond well or is not accurate
With the battery level close to zero or tablet connected to the power supply,
electrical interference may make the tablet touch screen inaccurate. Charging
the batteries or disconnecting the power supply is restore full functionality.
If I connect the tablet to a PC or pen drive can not transfer files
To activate the connection between tablet and computer the "Turn on USB
storage" must be enabled (see section 4 of the manual). For connecting
peripherals such as pen drives, memory card readers or external hard drives a
4
specific OTG USB cable is required (not included).
Android
Q: What Android OS version is on my Device?
A: Android 4.1.
Basic Functionality
Q: Do I have to charge the battery before use?
A: You should charge the battery for at least 6 hours, but you can use the
device while it’s being charged. Use the included power adapter to charge.
Media Cards
Q: Which media cards are compatible with my Device?
A: Micro SD cards with capacity up to 32 GB.
Music
Q: What type of music files can I play on my device?
A: MP3, WAV, AAC, WMA.
Q: How do I add music files to my device?
A: Copy the music files from your PC, Micro SD card or USB storage device
directly to your device.
Photos
Q: What type of photo files can I view on my device?
A: JPEG, BMP, GIF, PNG.
5
Q: How do I add photo files to my device?
A: Copy the photos from your PC, Micro SD card or USB storage device.
Videos
Q: What type of video files can I play on my device?
A: Video decoding (Full HD) support all formats of video such as MPEG-4,
MOV, AVI, MKV and other popular video formats.
Q: Can I play YouTube videos on my device?
A: Yes, you can use the YouTube application downloadable for free from online
markets.
Q: How do I add video files to my device?
A: Copy the video files from your PC, Micro SD card or USB storage device.
Wi-Fi
Q: Do I need a Wi-Fi adapter to connect to the Internet?
A: No, the Wi-Fi adapter is built-in to the device.
6
1
Introduction
1.1 What’s Included
The following components are included with your purchased product:
• Zelig Pad 270G Tablet PC
• Power Adapter
• USB Cable
• Instruction Manual
1.2 Getting Started
Before operating your Tablet PC for the first time, please read this manual
carefully and follow the instructions as below.
1.3 Battery charging
The tablet is equipped with a built-in rechargeable Lithium battery. It is
suggested to fully charge the battery before use.
We strongly recommend to use the power adapter included in the packaging,
using other adapter may damage the tablet and void the warranty.
Charging Process
• Connect the power adapter to your tablet, and plug the power adapter to
the nearest electrical outlet.
• Users can still use the tablet while it is being charged.
7
2
Appearance and buttons
2.1 Volume – button
2.2 Volume + button
2.3 Home button
2.4 Front camera
2.5 Front speaker
2.6 Micro USB port
Connect to PC for data transmission or connection with external USB
devices. The USB cable must be OTG compliant. The micro USB port is
also used to charge the device.
2.7 Power button
Turn on/off tablet.
2.8 Headphone socket
3.5 mm standard earphone jack.
8
Micro SD and SIM card slot
The micro SD and SIM card slots are inside the device. To install a micro SD or
a SIM card is you must remove the back cover.
9
3
Turn ON/OFF Tablet
3.1 Turn On: after the battery has been fully charged, press & hold the power
switch for around 3 seconds to turn on the device. Screen lock will be
showed after starting up.
3.2 Turn Off: When the tablet is ON, press & hold the power switch for around
3 seconds and the system will popup out power off option, tap on it to turn
the tablet off.
3.3 Lock screen: quickly press Power Switch and release to lock screen.
3.4 Unlock screen: slide the lock icon rightward onto the unlock icon to unlock
the screen and go to main interface; Slide the lock icon leftward onto the
camera icon to open camera.
10
Remarks:
!
When battery power has been used up, the tablet will shut down itself
automatically.
!
If you illegally turn off the device, restart will scan and restore the disk, it
may take longer time to enter into system.
11
4
Connection with PC
4.1 Use the USB cable provided to connect the tablet with PC, device will pop
up the USB connection window, click “Turn on USB storage” to connect
to PC, in the connection mode, you can copy or delete the file on the
device or the file on the memory device.
12
5
Tablet Operation Interface
5.1 After starting up, you will enter into below main screen interface.
5.2 In the main interface, you can manage main interface software icons:
press the icon and hold it for 3 seconds, then you can drag anywhere in
the main interface.
5.3 Delete icons: press the icon and hold it for 3 seconds, and drag the icon
onto the “Remove” icon, then you can delete that icon from desktop.
13
5.4 Touch the screen and hold for around 4 seconds, the dialog box “Choose
wallpaper from” will pop out as shown below:
You can choose the wallpaper from different sources and change the
wallpaper.
14
5.5 Status Bar Descriptions
From left to right: Back to previous interface, Back to main interface, Display the
Apps performed previously, Menu key, USB connected, USB connected, USB
debugging connected, microSD-card information, Current time, battery charge
icons, current time.
5.6 Quick Guide For Touch Operations
!
No matter which interface you are on the screen, you can go back to main
screen by tapping the home key
located at the left bottom corner of
the main screen.
AttentionThe home key functions as back to main screen interface.
!
During options, by tapping the back key
at the left bottom corner of
the touch screen, you can return to previous screen interface.
15
!
Click
to see all history of Apps performed previously.
!
In the main interface, you can touch the icon
to see all the APPS,
tap on any App icon and hold it for around 3 seconds, you can drag that
App icon onto main screen interface.
16
6
Basic Settings
6.1 WIRELESS & NETWORKS
!
Wi-Fi
Tap on setting icon, then tap on the “OFF” to open Wi-Fi, All available
Wi-Fi networks will be listed, tap on your Wi-Fi network and start to
connect. If the Wi-Fi network does not need a password, tap "connect" to start
the connection. If the Wi-Fi network needs a password, then input the
password and tap “connect” to start the connection. If the Wi-Fi network
has been successfully connected before, that information will be stored.
Connection will be done automatically. Once your tablet connects to Wi-Fi
successfully, the Wi-Fi icon
will appear on the status bar at the below
of the screen.
17
!
Data Usage
Select to turn on/off Mobile data, Set mobile data limit.
!
More!
Select to turn on/off Airplane mode, to setup Ethernet connection, VPN and
Mobile networks.
18
Configuring the 3G connection
The following steps describe how to configure the device for browsing the
Internet via a 3G connection.
Before proceeding to the following configuration please check that the charge
of the battery is at least 50%.
1. Turn off Wi-Fi and turn off the Tablet.
2. Enter the phone card (SIM) in the SIM slot and turn on the Tablet.
Note: it is recommended to turn off the SIM card PIN code request via a
mobile phone or smartphone before insertion.
3. For the first connection, make sure to be in an area with good coverage of
the 3G signal.
Note: You can check the coverage with a last generation mobile phone or
smartphone (3G symbol should appear on display).
4. After switching on the tablet, wait about 2 minutes to allow the device to be
configured for the SIM card.
5. In the lower right of the screen the 3G icon will appear to indicate the signal
strength.
6. Enter the "Settings" screen and under "Wireless & Networks" select
"More..." and then "Mobile networks".
7. On the "Mobile networks settings" screen verify that the "Modem power"
option is enabled. If not turn it on and go back to step 2.
8. Open the "Access Point Names" to view the list of APNs (Access Point
Name) provided by your mobile operator (check the correct APN with your
mobile operator).
9. Select the desired APN and wait a few seconds. In presence of 3G
coverage the icon in the lower right will turn blue.
19
10. Exit the current screen and verify the access to the Internet via the
"Browser" App.
These settings are to be made only to the first insertion of the SIM card. On
subsequent reboots of the device it will be configured automatically.
Before performing this procedure please contact the customer service of your
mobile network provider to check the correct APN connection and the
compatibility of the SIM for 3G network connection.
Sometimes it may be useful to reset the tablet to factory settings. For the
recovery process, please refer to section 6.3 of this manual.
20
6.2 DEVICE
!
Sound
Settings on Volume, Ringtone & Notifications, you can also tick to select or
untick to unselect for Vibrate and ring, Touch sounds, Screen lock sound and
Vibrate on touch.
!
Display
Settings on LCD Panel brightness, Wallpaper, Auto-rotate screen, sleep, Font
size, Accelerometer coordinate system, Screen adaption.
21
!
HDMI
Select this option to turn on HDMI output. Adjust resolution and screen zoom
according to your TV.
!
Storage
To view the available storage space, Erase SD card (format the internal
memory) and select the option of enabling media scanning of external SD card
or external USB devices.
22
Remarks
:
1. If you want to safely remove the Micro SD card or USB flash drive, please
tap on the option “Unmount SD card”, and confirm the selection, after this,
you can safely remove SD card/USB host.
2. Make sure to tick the option of “Enable media scanning on extsd” and
“Enable media scanning on usbhost 1”, this way, your tablet can scan and
display the files in the external SD card and USB devices.
!
Battery
To know the battery usage information.
23
!
Apps
To Manage the applications. Tap on the directories (DOWNLOAD, ON SD
CARD, RUNNING or ALL) and select the application which you want to
uninstall, you will enter into the following interface, tap on Uninstall, then you
can remove that application from tablet.
24
6.3 PERSONAL
!
Accounts & sync
To set up the account and synchronization information.
!
Location services
Options for you to select “Google’s location service” and “Location & Google
search”.
25
!
Security
Settings for Screen lock, Owner info, Encrypt tablet, Make passwords visible,
Device administrators, Unknown sources, Trusted credentials, Install from SD
card.
!
Language & input
Language selection, text input and automatic error correction option, select
your desired Keyboard & Input methods, and settings on Text-to-speech output,
Pointer speed.
26
!
Backup & reset
Option of for backup & restore, erase personal data.
Warning: once you perform the “Factory data reset”, it will erase all
personal data in tablet, make sure to back up your personal data before
performing this function.
27
6.4 SYSTEM
!
Date & time
You can use network-provided time or time zone, or you can manually setup
date, time, select time zone and you can also select time and date format.
!
Accessibility
TalkBack provides spoken feedback to help blind and low-vision users.
You can also choose the options for Large text, Auto-rotate screen, Speak
passwords, Touch & hold delay time and Install web scripts.
28
!
Developer options
Some advanced settings for developers.
!
About tablet
Additional informations about the Tablet.
29
7
Apps Installation
You can download the Apps from online markets and install them online, or you
can install the Apps from your Micro SD card or USB devices. Just tap on the
App and run the installation, you can finish the installation and run that App
right away.
30
8
!
Introductions of Typical Applications
Browser
After connecting your tablet to Wi-Fi network, tap the Browser icon on desktop
to open web browser. The following interface pops up immediately:
Then you can start web surfing now, during web surfing, tap on the menu
icon located at the right top corner of the screen to get more options:
New window: to open up new window of web browser.
Bookmarks: to see the Bookmarks, Most visited websites and History.
Windows: to see different windows of web surfing.
Refresh: to refresh the page.
More: more options of “Add bookmark”, “Find on page”, “Select text”, “Page
info”, “Share page”, “Downloads”, “Settings”.
31
!
Calculator
The tablet is with built-in calculator, tap on the Calculator icon to carry out your
calculations.
!
Calendar
Users can use the Calendar to check date, time and memorandum or add
memorandum etc. But before doing this, you have to sign in the Google
Account.
1. Tap on the Calendar icon, then a dialog box of “New a Google Account” will
pop up. Tap “Next” to go the next step.
2. If you do not have a Google Account, then tap “Create” to create a new
Google account, if you already had a Google Account, tap on “Sign in” to go
to next step.
3. Input Gmail address and password, then tap “Next” to go forward.
4. After you finish the setup, the interface will automatically exit and return to
the main interface. Tap on the Calendar icon again to check date, time and
add memorandum etc. Tap on the menu button to popup more setting
32
options of 1 Day, 7 Weeks, Agenda, Today, More, see the screen interface
as below.
33
!
Camera
Tap on the Camera icon to run the application.
The camera is located at the right of tablet top, aim at it when you take photo or
video. Tap on the circular button to start to take photo or video.
If you want to take photo, tap on the icon
take video, tap on the icon
to take photo; if you want to
to take video.
The photos or videos will be saved automatically to internal memory, select
“File Manager”, then select “DCIM” folder, select “Camera” to find the photos or
videos just took.
You can also view your previous photos or videos by tapping on the photo icon
at the top right corner of screen. When you view the photos or videos, tap on it
to display more options of slideshow, delete, share, zoom in/out, clip, rotating,
or set as wallpaper etc.
34
!
Clock
Tap on the Clock icon to run the application.
After running the Clock application, you can setup alarm clock.
!
Downloads
Tap to check all downloaded history.
35
!
Email
You can enter one or more personal email address which you would like to
access through this tablet.
Tap on Email icon to setup your email account according to the procedures.
You can receive or send e-mails after setup.
To read emails, tap on the Email icon, if you setup only one email account, it
opens immediately, if you have setup multiple accounts, they will be listed in the
Accounts screen. Tap on the desired email account, and then tap “Inbox”, all
emails will be listed, tap on the email which you want to open. You can also
Reply , Forward or Delete the emails.
On the Inbox screen, you can Compose New Email, type on menu icon for
more settings on your Email account.
!
File Manager
Tap on File Manager icon to browse the files saved in your memory devices
(Local, SD card or U-Disk). You can view the files by categories.
36
Tap on corresponding memory devices (Local, SD card or U-Disk) to see the
files inside. Tapping on the file and hold it for 3 seconds, you will have the
options of: Delete File, Rename File, Copy File, Move File and Email File.
You can also Copy, Move or Paste files between each memory device. You
can have the options of Delete Folder, Rename Folder, Copy Folder, Move
Folder, Zip Folder when you tap on a folder and hold it for 3 seconds.
How to copy file: to copy a file: tap on the file and hold it for 3 seconds, select
Copy, then tap&hold on the folder which your file needs to be copied into,
select “Paste into folder” to copy your file into that folder.
!
Movie Studio
Tap on Movie Studio icon to run the application, you have to Create New
Project first, then tap on “ADD” to Record a video, Take a photo, Import
video clip or import image.
37
!
Music
To play the music, tap on the Music icon to run the application.
All songs will be listed and tap on your desired song to play it.
!
Search
Search the APK files in your tablet or search online.
To search online, please tap on the icon
38
!
Sound Recorder
To start the sound recorder, tap on the Sound Recorder icon.
Tap on the icon
to start recording.
Tap on the icon
to stop recording.
Once you stopped the recording, system will prompt: Discard or Done.
Tap on Discard to discard the recording; Tap on Done to save the recording.
The recorded files can be found at root directory of folder File Manager.
!
Video Player
To play the videos, tap on the Video Player icon to run the application.
All videos will be listed and tap on your desired video to play it.
39
9
Forced shutdown
In case of your tablet was down and you are unable to turn it off according to
standard procedures, press the power switch and hold it for 7 seconds, the
tablet will be turned off.
10 Factory Reset
To restore the tablet to original factory settings and erase all personal
informations, tap on “Settings”! “Backup&reset” ! “Factory data reset”.
Warning: After resetting the device, Google account, data, system settings,
and downloaded applications will be removed from your tablet.
40
11 Battery Management
The battery is not fully charged from factory, so it is recommended that you
charge the battery for at least 6 hours before you start to use the device.
The rechargeable battery is designed and manufactured to be used and
recharged frequently. As same with all of lithium batteries, the capacity of the
battery reduces each time it is charged. However, you can still try to prolong the
battery’s lifetime by following the suggestions below:
• Use your Tablet at least once a week.
• Fully charge the battery regularly.
• Never leave the battery fully discharged for a long period of time.
• Always keep the device and the battery away from heat and moisture.
12 Charge Battery
Plug the power adapter into an electrical wall outlet and then connect to the
device to fully charge the battery before use.
You can charge the battery by using the USB cable.
When fully charged, the battery icon displays as:
A fully discharged battery will take you approximately 6 hours, but you can use
the device while it is being charged.
Do not use other adapters than the one provided in your packaging, it may
cause damage to the Lithium battery inside.
Do not attempt to open the tablet to replace the battery inside, this will damage
the tablet and void the warranty.
41
13 Important Safety Precautions
Always follow these basic safety precautions when using your Tablet. This
reduces the risk of fire, electric shock, and injury.
• Do not expose this product to rain or moisture.
• Keep the device out of direct sunlight and heat sources.
• Do not place other objects on LCD screen, as it may crush and damage the
LCD screen.
• Do not use any sharp objects to touch the LCD screen, as this will scratch
the screen.
• Only use the AC adapter included with the device. Using any other power
adapters will damage your tablet and void the warranty.
• Do not attempt to dismantle the tablet by yourself to do any repair, this will
damage the tablet and void the warranty.
14 Clean Your Device
To clean fingerprints or dust from the screen, we recommend to use soft,
non-abrasive and non-corrosive cloth for cleaning, such as a camera lens cloth.
42


![[PMID703C] User Manual [FINAL] 20121101](http://vs1.manualzilla.com/store/data/005666959_1-067077325a260bbbb3ca6efa56d2ba06-150x150.png)