1
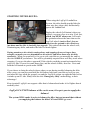
LITE
User’s Manual
Version 2.1
Copyright 2011, Pete Giarrusso, Inc.
D/B/A Chopper Design Services
All Rights Reserved
2
Table of Contents
INTRODUCTION ..............................................................................4
USER AGREEMENT ........................................................................5
WARRANTY ......................................................................................6
UNDERSTANDING HOW THE SYSTEM WORKS: ............................... 8
STOPPING WITH LEGUP®: ..................................................................... 10
PULLING AWAY WITH LEGUP® DEPLOYED: .................................. 11
USER INSTRUCTIONS .................................................................. 13
COMPONENTS: .......................................................................................... 13
1)
2)
3)
4)
Control Switch Box............................................................................................ 13
Linear Actuator ................................................................................................. 13
Center Stand ...................................................................................................... 14
Leg/Wheel System .............................................................................................. 14
USING THE SYSTEM ....................................................................................... 15
Turn on the system: .................................................................................................. 15
Lowering the Wheels:............................................................................................... 15
Raising the Wheels:.................................................................................................. 15
Normal riding:.......................................................................................................... 16
Other Features and Operations: .............................................................................. 17
Using LegUp® as a Kick Stand: .....................................................................................................17
Using LegUp® to Help you raise the Bike off the Kickstand: ......................................................18
Pushing your bike with the wheels down: ......................................................................................18
3
INTRODUCTION
The LegUp® system by Chopper Design Services is intended to act as a stabilization
system for Harley-Davidson® touring motorcycles, Honda Gold Wings and other sizeable
touring bikes. The system is NOT designed to be a 4-wheeled vehicle; stabilization, safety
and convenience are the reasons to purchase and install LegUp®! The system allows your
bike to function as it always has when underway. Your lean angle is not affected by this
system, so you can enjoy motorcycling as you always have, and just get a little help at
slow speeds.
If you have been looking for a system that will keep your feet on the pegs, this is NOT the
system for you! On the other hand, if a system that will relieve you of the weight of the
bike and help you avoid balance problems as you approach a stop, LegUp® is what you
need.
LegUp® is very easy to use, and we will cover user controls in the text below. It is
extremely important that you understand the function of the LegUp® System, before going
out on the road with it. You must also sign and date the release form before using this
system. LegUp® will help you enjoy your motorcycle more, but,
“YOU STILL ARE RESPONSIBLE FOR THE BALANCE OF THE
VEHICLE!!”
There is one set of controls, mounted above your left switch housing that allows you to
access the entire functionality of the LegUp® System. Please become familiar with these
controls and indicators, so you may enjoy the benefits of LegUp® to the fullest.
Thanks for choosing LegUp®!
4
USER AGREEMENT
Users of the LegUp® system agree that Chopper Design Services is NOT responsible for
personal injuries or damage to property arising from the use of the system. While we
believe this system to be safe and reliable, the user is advised that: ’Use of LegUp® is
done so at the users’ own risk.’
Use of the system implies agreement to the above statements.
All LegUp® systems are shipped with this manual and ‘User Agreement’. Not reading,
signing or returning this document to Chopper Design Services, yet using/installing the
LegUp® system constitutes acceptance of the terms above, and holds Chopper Design
Services harmless in regards to anything but the LegUp® System and its components.
If you can’t agree with the above, Chopper Design Services and its dealers would be
happy to refund your full purchase price, before you use the LegUp® System.
Agreed to this day ______, 20__
End User Signature
End User Printed Name
Please return this signed document to: Chopper Design Services,
1365 Bennett Dr. Longwood, FL 32750,
Or sign, scan and email to [email protected].
5
Warranty
Chopper Design Services warrants the LegUp® system for a period of 12 months from
date of purchase. This warranty covers replacement parts and/or manufacturer defects.
Incidental damages or costs are the responsibility of the purchaser.
Defective parts are to be returned to Chopper Design at the address below. Purchaser must
contact Chopper Design to receive a Return Material Authorization, prior to returning
defective parts to Chopper Design.
Abuse, improper installation or use, collisions or accidents, are not covered under this
warranty. Replacement parts for this type of damage are available through Chopper
Design.
Chopper Design Services
1365 Bennett Dr #101
Longwood, FL 32750
407-834-5007
[email protected]
6
System Theory & Operation
READ THIS FIRST!!!!
It is CRITICAL that the user of the LegUp® system understands what it is and what it is
NOT! The LegUp® LandinGear System is NOT a Trike kit! It is a Motorcycle
Stabilization System that allows you to help balance the bike as you start, stop and
maneuver slowly. You can and will drop the bike with the wheels down if you don’t
maintain the balance yourself! Please read and understand the following to allow you to
get the most from you new LegUp® LandinGear!
Thanks!
7
UNDERSTANDING HOW THE SYSTEM WORKS:
Later in this manual we will detail the mechanics of using the system. Here
we want to teach you the best methods and theories of operation. Some folks
have their own ideas as to what LegUp® LandinGear is all about. We want
to make sure new users understand the system and its capabilities as well as
its limitations before using the LegUp® LandinGear! Please read the entire
manual before attempting to use your new LegUp® LandinGear System.
The LegUp® LITE System uses a two buttons to lower and raise a set of wheels, to HELP
you balance your motorcycle.
The legs DEPLOY (lower) when the left button on the control box is pressed and held.
Similarly, the system RETRACTS (raises) the wheels manually when the right button is
pressed and held.
In the event you are stopping on ground banked one way or the other, you CAN allow
LegUp® to help you keep your bike level, by leaning a small amount to the high side of
the banking.
The system will NOT push the bike to
the low side in this case, but will stop
with the high-side wheel in touch with
the ground, and the low side off the
ground (picture at left). Your high side
leg and the high-side wheel will
combine for your stability and balance!
When DEPLOYED, the wheels allow you to lean a bit in both directions; they rotate on
springs. This Articulation system lets you maneuver at slow speeds with the wheels
down, and lean the bike as needed until the wheels retract. Using this capability, in the
event the bike starts to wander as you leave a stop, you can and should lean the bike away
from this misdirection, and the symptom will disappear!
8
EXAMPLE: You pull away
from a stop with the wheels
down. The bike starts to move to
the right a bit. Lean to the left
(photo at right)! The right side
wheel will come off the ground;
the left will flex or articulate. If
you wish, you can raise the
wheels by pushing the right
button until they are up, and you
are on your way. Avoiding any
wandering with the wheels
lowered is COMPLETELY
within your control! The
system is designed to allow you
to ride as you always have. If the
bike is moving right; lean left,
and vice versa. We will cover
this more as we discuss leaving
with the legs down.
9
STOPPING WITH LEGUP®:
When using the LegUp® LandinGear
System, the rider should stop the bike the
same way they always did, and basically
ignore the LandinGear!
Deploy the wheels (left button) when you
wish as you come close to a stop. Your feet,
which you MUST always use, will reach
the ground at almost the same time as the
LegUp® wheels (notice Ben’s feet are
almost on the ground as the wheels are
just down and the bike is basically just stopped). This reduces the time the wheels roll;
eliminating any drifts, and makes the bike feel much lighter.
Paying attention to the wheels coming down, and stopping slower or longer than
normal, can make you over dependent on the wheels, and allow them steer the bike
needlessly. What you want here is for you to ride your bike as you normally do, and let
the wheels HELP you balance. You will be pleasantly surprised how well they work when
stopping, if you use the above approach! If the wheels reach the ground an instant before
your feet; fine! If your feet come down first, and the wheels follow; also fine. Press and
hold the left button at speeds under 9MPH.
If you choose to bring the wheels down when you are having trouble balancing the bike
after a stop, you can press and hold the left button, hold onto your bike as best you can,
and when the legs reach the ground, you and the LegUp® system can right the bike before
it winds up on its’ side. Many folks use this ‘Emergency Only’ methodology to their
advantage!
Keep in mind; LegUp® can support a bike that is balanced and make it feel lighter than it
normally does.
LegUp® CANNOT balance a bike on its own; it is up to you to supply the
balance!
The system WILL make it easier to balance the bike, but rest assured that without
you supplying the balance the bike CAN and WILL go over!
10
PULLING AWAY WITH LEGUP® DEPLOYED:
Let’s assume you are at a light or stop sign with the wheels down. First you will find it
takes away a good amount of fatigue to not have to balance the bike very much while
waiting for the light. LegUp® LITE will NOT raise
its wheels automatically; you have to press and hold
the right button for the wheels to come up. Make sure
you raise the wheels at a speed of about 9MPH.
Faster makes the system harder to control; slower is
fine as long as you are comfortable!
As previously discussed, the wheels of the system
allow some leaning left and right when they are
deployed. When it is time to leave, pull away from
the light or stop sign as you normally would.
I usually like to lean a bit left or right as soon as I leave (assuming a straight line
departure), so I have only one of the wheels on the ground and have the best control of the
direction of the bike. On flat ground, you
may not need this; only practice and your
bike skills will help you determine the
best way for you!
If your first maneuver upon leaving is a
turn, you can lean into the turn as you
always have (picture at right shows a turn
as you leave… notice right wheel off the
ground!). Depending on how sharp the
turn is, LegUp® may allow you to lean
over far enough to make the turn or not.
ALWAYS be prepared to push the button
and raise the legs in this case. The instant
you start the wheels up, the system will give you your full lean angle back.
Don’t worry if you scrape the system a bit in turns of this sort. We built your LandinGear
to take this type of scraping with no negative results. Your pegs don’t mind and neither
does LegUp®!
11
Of course you can raise the wheels before you leave at any time if you like! If you are
concerned that your first maneuver, or an upcoming maneuver may need more lean than
you can get with the wheels down, bring them up whenever you like!
Slow speed maneuvering in parking lots and in bumper-to-bumper traffic can be difficult;
LegUp® can be a big help here.
Caution must be used here to take
advantage of this convenience.
You MUST realize that if you are
relying on the wheels being down
(keep your feet close to the ground
please!), be prepared to raise them
before advancing your speed over
8MPH! Do not get complacent! You
are ALWAYS responsible to keep
your bike balanced; mind your speed
and be prepared to use your legs for
balance.
In a parking lot, for example, you can lean on one wheel or another to help you make slow
speeds turns that are otherwise more difficult (picture above). Straighten the bike up after
the lean, and LegUp® will help support the bike. Please don’t ever forget that if you lean
over far enough with the wheels lowered, and don’t supply balance to the bike, it CAN and
WILL go over!
12
User Instructions
Here are the Specific instructions to enhance your new understanding of the systems
capabilities. Again, please read and understand everything for your safety and success
with LegUp® Lite LandinGear!
The LegUp® system is very easy to use. Remember, LegUp® helps you maintain the
balance of you motorcycle; it does NOT balance the bike for you!
COMPONENTS:
1)
Control Switch Box
The ‘Control Switch Box’ is mounted on your left handlebar switch housing.
It contains two switches and two
LED’s.
The leftmost switch is the
‘DOWN’ switch and the
rightmost switch is the ‘UP’
switch. Between these switches,
you’ll find the LED’s. On the
LITE system, these LED’s are
NOT used.
2)
Linear Actuator
The ‘Linear Actuator’ is the power that lowers and raises the wheels that help
you keep the bike upright. It is mounted on the left side of the bike, just in
front of the left saddlebag. Your input by the switches, allows the actuator to
move the legs and wheels up and down as needed.
13
3)
Center Stand
The ‘Center Stand’, is the attachment point for the LegUp® leg/wheel
system. It bolts directly to the frame of the motorcycle.
4)
Leg/Wheel System
The ‘Leg/Wheel System’ is the centerpiece of the LegUp® system. It
attaches to the Center Stand, to secure it to the bike. It includes a set of legs,
and a set of wheel holders.
The wheel holders attach
the replaceable wheels and
its sophisticated spring
system. This spring system
allows you the rider to
actually lean the vehicle
into a turn while the wheels
are down, making slow
speed turns much more
normally than you would on
a 3-wheeled motorcycle.
14
Using the System
Here we will cover how to use the LegUp® LITE System.
Turn on the system:
The LITE system is always ready to be used if your motorcycle is on. The system is
powered by the bike and will only function with the bike in ignition or accessory
modes of the key switch. There is no need to turn the system on or off.
Lowering the Wheels:
Once the bike is on, the system is activated. To lower the wheels, you will use the
‘DOWN Switch’, the leftmost switch. Press and hold this switch until the legs are
supporting the bike. DO NOT hold this switch for more than 3 seconds (there is no
need to)! Doing so will just wear out the actuator. Once the wheels are down, let go
of the switch. If the motorcycle is on the kickstand, and the legs are up, you can use
LegUp® to help you get the motorcycle to stand up straight. Simply press and the
‘DOWN Switch’ and give some power toward the right with your arms or legs, and
LegUp® will help you straighten up the bike. Remember; At all times when the
bike is still and supported by LegUp®, you MUST have your feet on the ground!!
While the LegUp® system can easily hold the bike upright, you and you alone are
responsible for the motorcycles’ balance. Chopper Design is NOT responsible for
damage caused by your motorcycle tipping over at any time! This system will
definitely help you keep the rubber side down, but that is all it is designed to do;
help. You will find that you will barely have to exert any strength to maintain this
balance; that is the beauty of LegUp®.
Now that the bike is upright, you can drive off, push the vehicle around more easily
than ever before, or now that it is balanced, raise the wheels!
Raising the Wheels:
To raise the wheels, press and hold the ‘UP Switch’ (right-most). The wheels will
rise until they come all the way up or hit an obstruction such as the pipes. Again,
holding the button after the wheels are all the way up, wears out the actuator and
serves no purpose.
If you choose to just ride off when the wheels are lowered, you can do just that and
raise the wheels sometime before you reach 9MPH.
15
You can start raising them as soon as the wheels start to turn and you are
comfortable, or you can wait until a higher speed.
NOTE: If your first maneuver with the wheels down is a turn of any sort, you may
wish to retract the legs early if you must turn more sharply than LegUp will allow.
Simply press and hold the button as soon as you start rolling, and the wheels will
get out of your way quickly.
If you find yourself in traffic with the wheels down, you can move the bike at slow
speeds with them lowered (remember your legs are down as well, helping to balance
the bike). Be Careful!
Normal riding:
During normal operation, LegUp® is unobtrusive. Riding down the road, the
system does not get in the way of your lean angles or any other function of your
motorcycle.
If you are riding and approaching a stop, you will want to be prepared to lower the
wheels. LegUp® LITE, unlike our computerized versions, will only allow you to
bring the wheels down at any speed! Be careful NOT to lower them at speeds above
10 M.P.H.
We suggest making controlled stops, slowly approaching these stops as best you
can, to make the transition to wheels down as seamless as possible. Again, if you
ask the system to lower the wheels, you MUST be prepared to lower your legs as
well for safety. ON ground that is not flat, the system will try to lean the bike
parallel to the ground. Be Prepared for this! Use your legs! Once stopped, you
can lean the bike against the UPHILL wheel easily, to get the bike in a perfectly
upright stance. If you are prepared for this, you will find it is no big deal! We also
covered how to lean away from downhill stops, earlier in this manual!
A little practice and you will see how easy it is to adapt your riding style to the
LegUp® system. Practice; Practice; Practice in a safe area at slow speeds to get
used to LegUp®.
As discussed earlier, once stopped and balanced, you can raise the wheels if you
wish, or leave them down until underway!
If the wheels are down, and your first maneuver under acceleration is a turn, you can
lean into this turn a small amount (this avoids what we call trike syndrome) and
16
drive off raising the LegUp® wheels at the appropriate speed. You may find it takes
a little extra nudge for the bike to lean; this is normal as you are asking the springs
in the wheels to compress! You will also find that LegUp® only allows a certain
amount of lean (plenty for slow, non-aggressive turns), without scraping the wheels
system on the ground. Again, this is normal and the wheel system can take a good
deal of punishment if you lean too far. Practice will show you how far you can lean
into a turn with the wheels down. If this concerns you at all, consider raising the
wheels before or as soon as you start moving to avoid this situation. Only you can
learn how you might like using LegUp® LITE to best suit your riding style. If at
any time the bike wants to wander with the wheels down, leaning a bit away from
the wandering direction will raise the inside wheel and STOP the wandering!!!
Other Features and Operations:
Using LegUp® as a Kick Stand:
The ‘Actuator’ of the LegUp® system, will remain in whatever position it is
in when power is removed. With this in mind, you can store your bike in the
upright position if you wish with the following cautions:
A bike with the wheels down CAN be pushed over!
We suggest you lower your kickstand, balance the bike, and lower the
wheels, then turn your handlebars to the left slightly. Using this
method, if something breaks, or the bike is bumped hard, it will land on
its’ kickstand.
Using LegUp® to Help you lower the Bike onto the Kickstand:
If you want to let LegUp® help you put the bike on the kickstand, all you
need to do is have the wheels down when you get the bike to where you want
it to be parked on its’ kickstand. Assuming the system is on, balance the bike,
lower the kickstand, and press and hold the right button. LegUp® will lower
the bike gently onto the kickstand.
17
Using LegUp® to Help you raise the Bike off the Kickstand:
If you want to let LegUp® help you raise the bike off the kickstand, all you
need to do is have the system on with the bike on its’ stand, and the wheels
up. Straddle the motorcycle, press and hold the left button, and lean the bike
just a bit to the right. With just a little help from you, LegUp® will raise the
bike fully upright!
Pushing your bike with the wheels down:
With Caution, you can push your bike out of parking spots, or move it
forward or back to clean the tire/wheels. Understand that LegUp® will hold
the bike up, but with the right nudge, over it can go!
18