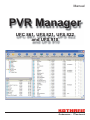
1
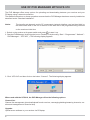
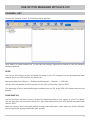
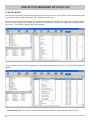
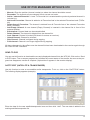
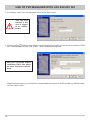
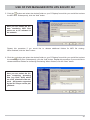
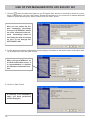
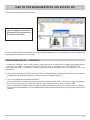
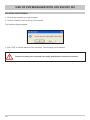
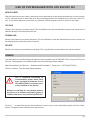
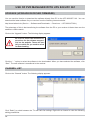
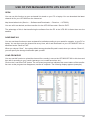
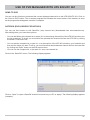
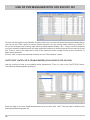
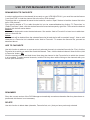
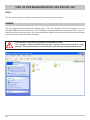
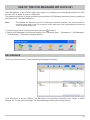
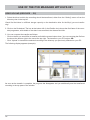
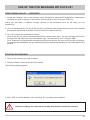
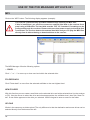
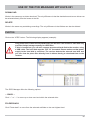
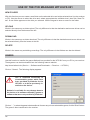
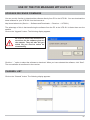
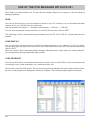
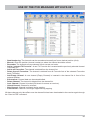
Manual
PVR Manager
UFC 861, UFS 821, UFS 822
and UFS 910
CONTENTS
CONTENTS ............................................................................................................................... 2
IMPORTANT NOTES .................................................................................................................
SAFETY INSTRUCTIONS .........................................................................................................
KATHREIN RECEIVERS CURRENTLY SUPPORTED .................................................................
GENERAL NOTICE ..................................................................................................................
SYSTEM REQUIREMENTS ......................................................................................................
REQUIRED SOFTWARE ..........................................................................................................
CROSSED NETWORK CABLE OR USB CABLE .........................................................................
3
3
3
3
3
3
3
STANDARD INSTALLATION ...................................................................................................... 4
USE OF PVR MANAGER WITH UFS 910 .................................................................................... 6
CHANNEL LIST ....................................................................................................................... 7
UPGRADE (UPDATE RECEIVER FIRMWARE) .......................................................................... 11
USE OF PVR MANAGER WITH UFS 822/UFC 861..................................................................... 12
MFSERVER (SETTING FOR FILE SHARING) .......................................................................... 13
RECORDINGS....................................................................................................................... 17
FOLDER ADMINISTRATION (CREATE, RENAME, DELETE) ...........................................................
VIDEO UPLOAD (RECEIVER → PC) .........................................................................................
VIDEO DOWNLOAD (PC → RECEIVER) ....................................................................................
DELETING RECORDINGS ......................................................................................................
MP3 ......................................................................................................................................
PHOTOS ...............................................................................................................................
GAMES .................................................................................................................................
UPGRADE (UPGRADE RECEIVER FIRMWARE)......................................................................
CHANNEL LIST .....................................................................................................................
SAMBA .................................................................................................................................
18
18
19
20
21
22
23
24
24
30
USE OF THE PVR MANAGER WITH UFS 821 ........................................................................... 31
RECORDINGS....................................................................................................................... 31
VIDEO UPLOAD (RECEIVER → PC) .........................................................................................
VIDEO DOWNLOAD (PC → RECEIVER) ....................................................................................
DELETING RECORDINGS ......................................................................................................
MP3 ......................................................................................................................................
PHOTOS ...............................................................................................................................
GAMES .................................................................................................................................
UPGRADE RECEIVER FIRMWARE.........................................................................................
CHANNEL LIST .....................................................................................................................
CHANNEL LIST .....................................................................................................................
2
32
33
33
34
35
36
37
37
37
IMPORTANT NOTES
SAFETY INSTRUCTIONS
Before installing the KATHREIN receiver PVR Manager, make sure to read the receiver‘s safety instructions
and to regard them at all times.
KATHREIN RECEIVERS CURRENTLY SUPPORTED
UFC 861si, UFS 822si/sw and UFS 910si/sw (network connection), UFS 821si/sw (USB connection)
GENERAL NOTICE
KATHREIN cannot be held liable for damage, loss of data or consequential loss of any kind (e.g. loss of
profit, interruption of production, loss of data and information, or other detriment to assets) resulting from
the use or non-usability of this KATHREIN product, even where KATHREIN has pointed out the possibility
of such loss occurring.
SYSTEM REQUIREMENTS
Your PC must be running Windows 2000, Windows XP or Windows Vista (32-bit version only) and your PC/
laptop/server must possess a free network or USB connection. To enable streaming of VLC data (only possible with UFS 822/UFC 861), your PC/laptop should have an Intel Pentium IV or comparable processor.
REQUIRED SOFTWARE
“PVR Manager“ Version 2.0.0.1 of 18.12.2007 (application, manual as a PDF file and USB driver (only for
UFS 821) can be downloaded from “http://www.kathrein.de“ . Software is located under “Service” → “Software and Downloads“ → “Receivers“ → “UFC 861“, “UFS 821“, “UFS 822“ or “UFS 910“)
UFC 861
UFS 821
UFS 822
UFS 910
as of software version 1.00
as of software version 1.00
as of software version 1.00
as of software version 1.04
CROSSED NETWORK CABLE OR USB CABLE
A crossed network cable is required to connect your PC to a network-enabled receiver (UFC 861, UFS 822
and UFS 910).
To connect your PC to the receiver (UFS 821), you will need a USB cable with both type A and B connectors.
Do not connect the receiver to your PC‘s USB port until the software has been installed!
3
STANDARD INSTALLATION
Important notes:
UFC 861 and UFS 822
First, set up the network (connect the receiver to your PC using the crossed network cable
mentioned before and assign the desired IP addresses to your receiver and PC). For IP address
allocation on the receiver, please refer to the chapter “System Setup”, “Ethernet Settings”; for IP
address allocation on the PC, please consult your PC’s documentation or ask a specialist.
UFS 821
The software must be installed before the receiver is first connected to the PC!
UFS 910
With Software version 1.04, the UFS 910 has the following networkl configuration:
IP address: 192.168.1.100, subnet mask: 255.255.255.0. In order to establish a connection to the
receiver, the connected PC/laptop must be configured for this network area, e.g.: IP address:
192.168.1.101, subnet mask: 255.255.255.0
1. Double-click the “Setup.exe” file to start the installation routine .
2. Select the language desired and confirm by clicking the “OK” button.
3. Click to select the receiver model being used. The receivers marked with a checkbox are set up. Click on
the “Next” button.
4
STANDARD INSTALLATION
4. Click the “Install button. The software is installed on your PC
5. The software has been installed on your PC. Once this display has disappeared, installation has been
completed. (You will not receive a completion message).
5
USE OF PVR MANAGER WITH UFS 910
The PVR Manager offers many options for uploading and downloading between your receiver and your
PC/laptop using a network connection.
The detailed instructions on these operations assume that the PVR Manager has been correctly installed as
described under “Standard Installation”.
.
Notice:
The transfer rate depends on the PC components (network interface card and hard disk) or
the data media used on the PC as well as on the data rate of the programme being received
on the receiver at that time.
to start it up.
1. Switch on the receiver at its power switch and press
2. Start the PVR Manager ( by clicking the icon on “Desktop“ or by choosing “Start“ - “Programmes”- “Kathrein” “DVR Manager“ - “UFS 910” ). The following display appears:
3. Click “UFS 910” and then click on the button “Connect”. The following display appears:
When used with the UFS 910, the PVR Manager offers the following options:
Channel list:
Channel list management (download/upload from/to receiver, rearranging/deleting/renaming channels, creation and management of favourite lists)
Upgrade:
Upload a new software to your receiver via PC/laptop
6
USE OF PVR MANAGER WITH UFS 910
CHANNEL LIST
Click on the “Channel” button. The following display appears:
Click “Radio” to switch between the TV and radio list settings. Right-click a channel to view the following
editing possibilities:
OPEN
You can use this function to open a channel list stored on your PC or laptop. You can download the latest
channel list for your UFS 910 from the Internet at:
http://www.kathrein.de (Service → Software and Download → Receiver → UFS 910)
You can edit it as desired, and then transfer it to the UFS 910 as under “Send to PVR”.
The advantage of this is that transferring the software from the PC to the UFS 910 is faster than over the
satellite.
SAVE/SAVE AS
You can use these functions to save a channel list edited according to your needs, to your PC or laptop.
You can then open the channel list at any time, edit it and download it to your UFS 910 as described under
“Send to PVR”.
When you choose “Save” the system default storage location/file path is used; when you choose “Save As”
you can specify the storage location/file path yourself.
7
USE OF PVR MANAGER WITH UFS 910
LOAD FROM PVR
You can use this function to upload the channel list currently in use on the UFS 821 to this view and then edit
it according to your needs (rearrange, sort, create favourites, etc.).
Click on the “Load from PVR” button. The on-screen progress bar indicates the current status of the transfer.
As soon as the progress bar disappears, transfer is complete (the receiver will display the message “Download done”). The following display appears (example):
Click a channel (channel will be highlighted in blue) and subsequently right-click. The following display will
appear
.
- Start Numbering: The channels can be renumbered manually as from a desired position (click).
8
USE OF PVR MANAGER WITH UFS 910
- Move to: Enter the position (channel number) to where the channel should be moved.
- Renumber: The channels are renumbered in their current sort order.
- Add to “selected Favourite”: A new TV Favourite list is created and the previously selected channel is
included in it.
- Add to all Favourites: Channel is added to all Favourites lists in the selected Favourites bank (TV/Radio)
- Delete from all Favourites: The channel is deleted from all Favourite lists of the selected Favourites
bank (TV/Radio).
- Add Empty Channel: A new channel (Empty Channel) is inserted in the channel list in front of the
selected position.
- Edit channel: Channel data can be entered/edited
- Delete Channel: The channel is deleted from the channel list.
- Lock Channel: Channel is locked (PIN check for access on receiver).
- Unlock Channel: Channel is unlocked.
- Skip Channel: Channel is skipped during zapping
- Free channel: Channel is no longer skipped during zapping.
All these changes only take effect once the channel list has been downloaded to the receiver again through
the “Send to PVR” command.
SEND TO PVR
You can use this function to download the currently displayed channel list to the UFS 910. Click on the “Send
to PVR” button. The on-screen progress bar indicates the current status of the transfer. As soon as the progress bar disappears, transfer is complete (“Upload done” appears in the receiver display).
SAT/TP EDIT (SATELLITE & TRANSPONDER)
Use this function to enter a new satellite and/or transponder. To do so, click on the “Sat/TP Edit” button.
The following display appears (example):
Enter the data for the new satellite/transponder here and then click “Add”. The new data is added to the
existing satellite/transponder list.
9
USE OF PVR MANAGER WITH UFS 910
RENAME/DELETE FAVOURITE
In order to perform this on the channel list currently on your UFS 910, you must first use the feature “Load
from PVR” to load the channel list to the menu “Edit channel”.
To perform this on a channel list saved to the hard disk, use the “Open” feature to load the channel list to the
menu “Edit channel”.
First, specify whether a TV or radio favourite list is to be renamed/deleted by clicking “TV Favourites“ or
“Radio Favourites”. Next, click the desired favourite list and subsequently right-click. Then select the desired
function with the left mouse button.
Rename:
Now use the keyboard to enter the desired name. See section “Add to Favourite” to learn how to add channels to a favourite list.
Delete:
All channels will be deleted from the selected favourite list and the list will be marked “empty”. How to add
channels to a Favourite list is detailed under “Add to Favourite”. To rename the favourite list, proceed as
described above.
ADD TO FAVOURITE
Use this function to add one or more previously selected channels to a desired favourite list. First, click the
favourite list to which you would like to add the channel. Then, click the desired channel. Now click the “Add
to Favourite” button. OR:
Click the desired channel and hold down. Now drag the channel to the favourite list to which the channel
is to be added. To select several channels, hold the Ctrl key down while clicking on the channels with your
mouse (see screenshot).
RENUMBER
Since the current version of the PVR Manager automatically renumbers channels after they have been repositioned, this feature is not necessary.
DELETE
Use this function to delete data (channels, Favourite lists, etc.) that you have previously selected.
10
USE OF PVR MANAGER WITH UFS 910
RADIO
You can use this function to switch between the TV and radio channel listings.
UPGRADE (UPDATE RECEIVER FIRMWARE)
You can use this function to download the software directly from PC to the UFS 910. You can download the
latest software for your UFS 910 from the Internet at:
http://www.kathrein.de (Service → Software and Downloads → Receiver → UFS 910)
The advantage of this is that transferring the software from the PC to the UFS 910 is faster than over the
satellite.
Click on the “Upgrade” button. The following display appears:
Be sure to follow the download instructions for the software given on
the website. They will also tell you
which file you need to select for
downloading.
Click the “...” option to select the software to download. When you have selected the software, click “Start”.
The new software is transferred to the receiver.
11
USE OF PVR MANAGER WITH UFS 822/UFC 861
The PVR Manager offers many options for uploading and downloading between your receiver and your
PC/laptop using a network connection.
The detailed instructions on these operations assume that the PVR Manager has been correctly installed as
described under “Standard Installation”.
Notice:
The transfer rate depends on the PC components (network interface card and hard disk) or
the data media used on the PC as well as on the data rate of the programme being received
on the receiver at that time.
1. Switch on the receiver at its power switch and press
to start it up.
2. Start the PVR Manager ( by clicking the icon on “Desktop“ or by choosing “Start“ - “Programmes”- “Kathrein” “DVR-Manager“ - “UFS 822” or “UFC 861”). The following display appears:
3. Click “UFS 822/UFC 861” and then click on the button “Connect”. The following display appears:
12
USE OF PVR MANAGER WITH UFS 822/UFC 861
MFSERVER (SETTING FOR FILE SHARING)
The menu “MFServer” allows you to define the settings for file sharing between your PC/laptop and the UFS
822/UFC 861 using a network connection. The following display appears:
An existing home network is mandatory.
1. Click the “Next” button.
2. Select the desired server type.
UPnP:
Stands for “Universal Plug and Play”. In this setting, the MFServer functions as a UPnP audio/video
Server.
File Sharing Server:
You can see the folders released from your PC/laptop on the receiver.
Click the “Next” button.
13
USE OF PVR MANAGER WITH UFS 822/UFC 861
3. If necessary, enter your user password and click the “Next” button.
This will only
function if the
user is logged
in as administrator.
4. Click the button
and select the folder on your PC/laptop from which you would like to share the JPEG
files. Subsequently, click the “Add” button. The following display appears:
Here you can select folders
containing JPEG files which
are to be released in the network.
Repeat this procedure if you would like to release additional folders for JPEG file sharing. When finished,
click the “Next” button.
14
USE OF PVR MANAGER WITH UFS 822/UFC 861
5. Click the
button and select the desired folder on your PC/laptop from which you would like to share
the MP3 files. Subsequently, click the “Add” button.
Here you can select the folders containing MP3 files
which are to be released in
the network.
Repeat this procedure if you would like to release additional folders for MP3 file sharing.
When finished, click the “Next” button.
6. Click the
button and select the desired folder on your PC/laptop from which you would like to share
the streaming(VLC) files. Subsequently, click the “Add” button. Repeat this procedure if you would like to
release additional folders for streaming file sharing. When finished, click the “Next” button.
Here you can select the folders containing streaming
files (e.g. DivX, XviD) which
are to be released in the network. All formats supported
by the VLC Player can be played back.
15
USE OF PVR MANAGER WITH UFS 822/UFC 861
7. Click the
button and select the folder on your PC/laptop from which you would like to share your recordings. Subsequently, click the “Add” button. Repeat this procedure if you would like to release additional
folders to share recording files. When finished, click the “Next” button.
Here you can select the folders containing recordings
from your UFS 822/861 which
are to be released in the network. Recordings saved in
this folder can later be viewed
on your TV set through the
UFS 822/UFC 861.
8. Set the desired streaming configuration and the display of subtitles as well as the status at Windows startup. Subsequently click the “Next” button.
When using the MFServer as
a UPnP audio/video server, it
is recommended to activate
the Windows Autostart function .
9. Click the “Start” button.
A summary of all installation
steps you have performed
will be displayed.
16
USE OF PVR MANAGER WITH UFS 822/UFC 861
The following display appears:
If installation was not successful, please check your
settings and/or your firewall
configuration
10. Click the “Finish” button to finish installation.
RECORDINGS
Click the menu “Record”. The following display appears (example):
Click “Multi-View” to exit “Details”. The first frame of a recording is displayed. Click “Radio” to switch between the TV and radio recordings.The Record Manager offers the following options:
17
USE OF PVR MANAGER WITH UFS 822/UFC 861
FOLDER ADMINISTRATION (CREATE, RENAME, DELETE)
Creating a folder:
Select the position on which you would like to create a new folder. If you
would like to create e.g. a folder in the Root (main directory) erstellen,
click the “Root” folder and subsequently press the right mouse button.
Now use the left button to click the option “New folder”. The new folder
will be created.
Renaming a folder:
To select the folder to be renamed, click it and then subsequently press
the right mouse button. Now use the left button to click the option
“Rename”. The folder to be renamed will be highlighted. Enter the new
name using your keyboard and press ↵ (Return) to confirm.
Deleting a folder:
Click on the folder to be deleted and then press the right mouse button. Now use the left button to click the option “Delete”. Your PC/laptop
will ask you if you really want to delete the folder. Confirm deletion by
clicking “OK”.
If a folder is deleted, the recordings contained
in it will automatically be permanently deleted!
Recordings can only be moved to the corresponding folders using the “Move” option in the
receiver‘s recording list (see manual, section “Recording list”). It is not yet possible to move
recordings using the PVR Manager.
VIDEO UPLOAD (RECEIVER → PC)
1. Select the drive to which the recording should be transferred, either from the “Setting” menu or from the
directory view in the top left.
Check first that there is sufficient storage capacity on the destination drive for the file(s) you are transferring!
2. Click on the file desired. The box at the bottom left (in the Details view) shows the first frame of the recorded programme, with details of the date it was recorded, the channel and title
3. You can now start the transfer as follows:
- Click on the file you would like to transfer and hold the mouse button down. You can now drag the file from
the box at the bottom right to the one at the top right. The transfer to your PC begins. OR:
- Click “Upload” to transfer the selected recording to the directory you previously selected on your PC.
18
USE OF PVR MANAGER WITH UFS 822/UFC 861
The following display appears (example):
The recording is copied to the
PC/laptop but is preserved on
the receiver hard disk.
As soon as the transfer is complete, the progress bar disappears and you additionally see the transferred
recording in the top pane of the window.
VIDEO DOWNLOAD (PC → RECEIVER)
1. Access the “Settings” menu or the directory view at the top left to select the PC/laptop drive containing the
recording you wish to transfer to the receiver (the recording must be from your UFS 822/UFC 861).
Check first that there is sufficient storage capacity on the destination drive for the file(s) you are
transferring!
2. Click on the desired file. The box at the top left (in the Details view) shows the first frame of the recorded
programme, with details of the date it was recorded, the channel and title.
3. You can now start the download as follows:
- Click on the file you want to download and hold the mouse button down. You can now drag the file from
the box at the top right to the one at the bottom right. The download to your PC begins. OR:
- Click “Download” to download the selected recording to the receiver. As soon as the transfer is complete,
the progress bar disappears and you additionally see the transferred recording in the bottom pane of the
window.
19
USE OF PVR MANAGER WITH UFS 822/UFC 861
DELETING RECORDINGS
1. Click on the recording you want to delete.
2. Click the “Delete” button at the top of the screen.
The following display appears:
3. Click “YES” to confirm deletion of the recording. The recording is then deleted.
Deleted recordings are removed irrevocably and therefore cannot be restored!
20
USE OF PVR MANAGER WITH UFS 822/UFC 861
MP3
Click on the “MP3” button. The following display appears (example):
The receiver‘s hard disk only provides limited storage capacity for MP3 files.
If this is insufficient, you can also connect an external hard disk to the receiver using
a USB cable. The hard disk must be “FAT 32” formatted. Formatting can be performed
through the receiver. Please make sure that power supply to the hard disk is sufficient.
The receiver detects the external hard disk and you can play the MP3 files directly from
it without having to download them to the receiver.
The MP3 Manager offers the following options:
← BACK →
Click “←” or “→” to move up or down one level within the selected drive.
FOLDER BACK
Click “Folder back” to move from the selected subfolder to the next highest level.
NEW FOLDER
With this function you can create a new folder on the selected drive and at the selected level (on the receiver
or PC). Use the mouse to select the drive and where appropriate, the subfolder level, then click “New Folder”. A new folder appears on the drive you selected. Use the keypad to enter a name for the folder.
UPLOAD
Works in the same way as video upload. The only difference is that the destination and source drives can be
selected directly from the boxes at the left.
21
USE OF PVR MANAGER WITH UFS 822/UFC 861
DOWNLOAD
Works in the same way as video download. The only difference is that the destination and source drives can
be selected directly from the boxes at the left.
DELETE
Works in the same way as deleting recordings. The only difference is that folders can also be deleted.
PHOTOS
Click on the “JPEG” button. The following display appears (example):
Only photo files in JPEG format (RGB mode) can be used. The receiver‘s hard disk only
provides limited storage capacity for JPEG files.
If this is insufficient, you can also connect an external hard disk to the receiver using
a USB cable. The hard disk must be “FAT 32” formatted. Please make sure that power
supply to the hard disk is sufficient. The receiver detects the external hard disk and
you can view the photo files directly from it without having to download them to the
receiver.
The JPEG Manager offers the following options:
← BACK→
Click “←” or “→” to move up or down one level within the selected drive.
FOLDER BACK
Click “Folder back” to move from the selected subfolder to the next highest level.
22
USE OF PVR MANAGER WITH UFS 822/UFC 861
NEW FOLDER
With this function you can create a new folder on the selected drive and at the selected level (on the receiver
or PC). Use the mouse to select the drive and where appropriate, the subfolder level, then click “New Folder”. A new folder appears on the drive you selected. Use the keypad to enter a name for the folder.
UPLOAD
Works in the same way as video upload. The only difference is that the destination and source drives can be
selected directly from the boxes at the left.
DOWNLOAD
Works in the same way as video download. The only difference is that the destination and source drives can
be selected directly from the boxes at the left.
DELETE
Works in the same way as deleting recordings. The only difference is that folders can also be deleted.
GAMES
Use this function to transfer the games Kathrein has provided for the UFS 822/UFC 861 from your PC to your
receiver. These games can be downloaded from the following Internet website:
http://www.kathrein.de (Service → Software and Downloads → Receivers → UFS 822/UFC 861)
Click on “Games“. The following display appears:
Use is restricted exclusively to
downloadable games which have
been provided by Kathrein for the
UFS 822/UFC 861 or to those previously installed on the device.
Kathrein is not liable for any damage done to
the device or its software caused by games or
software that were not provided by Kathrein!
Click on “...”, to select the game to be transferred. As soon as you have selected the game, click the “Start”
button. The game is then transferred to the receiver.
23
USE OF PVR MANAGER WITH UFS 822/UFC 861
UPGRADE (UPGRADE RECEIVER FIRMWARE)
You can use this function to download the software directly from PC to the UFS 822/UFC 861. You can
download the latest software for your receiver from the following Internet website:
http://www.kathrein.de (Service → Software and Downloads → Receivers → UFS 822/UFC 861)
The advantage of this is that transferring the software from the PC to your receiver is faster than over the
satellite or cable network.
Click on the “Upgrade” button. The following display appears:
Be sure to follow the download instructions for the software as specified on the website. These will also
tell you which file you need to select
for downloading.
Click the “...” option to select the software to be downloaded. When you have selected the software, click
“Start”. The new software is transferred to the receiver.
CHANNEL LIST
Click on the “Channel” button. The following display appears:
Click “Radio” to switch between the TV and radio list settings. Right-click a channel to view the following
editing possibilities:
24
USE OF PVR MANAGER WITH UFS 822/UFC 861
OPEN
You can use this function to open a channel list stored on your PC or laptop. You can download the latest
channel list for your UFS 822 from the Internet at:
http://www.kathrein.de (Service → Software and Downloads → Receiver → UFS 822)
You can edit it as desired, and then transfer it to the UFS 822 as under “Send to PVR”.
The advantage of this is that transferring the software from the PC to the UFS 822 is faster than over the
satellite.
SAVE/SAVE AS
You can use these functions to save a channel list, edited according to your needs for example, to your PC or
laptop. You can then open the channel list at any time, edit it and download it to your UFS 822/UFC 861 as
described under “Send to PVR”.
When you choose “Save”, the system default storage location/file path is used; when you choose “Save As”,
you can specify the storage location/file path yourself.
LOAD FROM PVR
You can use this function to upload the channel list currently in use on the UFS 822/UFC 861 to this view and
then edit it according to your needs (rearrange, sort, create favourites, etc.).
Click on the “Load from PVR” button. The on-screen progress bar indicates the current status of the transfer.
As soon as the progress bar disappears, transfer is complete. The following display appears (example):
25
USE OF PVR MANAGER WITH UFS 822/UFC 861
-
Start Numbering: The channels can be renumbered manually as from a desired position (click).
Move to: Enter the position (channel number) to where the channel should be moved.
Renumber: The channels are renumbered in their current sort order.
Add to “selected TV Favourite”: A new TV Favourite list is created and the previously selected channel
is included in it.
Add to all Favourites: The channel is deleted from the channel list.
Delete from all Favourites: The channel is deleted from all Favourite lists of the selected Favourites
bank (TV/Radio).
Add Empty Channel: A new channel (Empty Channel) is inserted in the channel list in front of the
selected position.
Edit channel: Channel data can be entered/edited.
Delete Channel: The channel is deleted from the channel list.
Lock Channel: Channel is locked (PIN check for access on receiver).
Unlock Channel: Channel is unlocked.
Skip Channel: Channel is skipped during zapping.
Free channel: Channel is no longer skipped during zapping.
All these changes only take effect once the channel list has been downloaded to the receiver again through
the “Send to PVR” command.
26
USE OF PVR MANAGER WITH UFS 822/UFC 861
SEND TO PVR
You can use this function to download the current displayed channel list to the UFS 822/UFC 861. Click on
the “Send to PVR” button. The on-screen progress bar indicates the current status of the transfer. As soon
as the progress bar disappears, transfer is complete.
SATCODX (EXCLUSIVELY FOR UFS 822)
You can use this function to edit SatcoDX (.sdx) channel lists (downloaded from www.satcodx.com).
After editing them, you have three options:
- You can add either the complete list or a part of it to the existing channel list of the UFS 822 and then sort
the list as desired. To do so, you must have first uploaded the channel list from the UFS 822 by clicking
the button “Load from PVR”.
- You can add the complete list, or part of it, to a channel list of the UFS 821 stored on your hard disk and
then sort the list as you want. To do so, you must have first downloaded the channel list from the hard disk
by clicking the “Open” button on the Edit menu screen.
- You can use the complete list, or just part of it, as a new channel list.
Click on the “SatcoDX” button. The following display appears:
Click on “Open” to open a SatcoDX channel list stored on your PC or laptop. The following display appears
(example):
27
USE OF PVR MANAGER WITH UFS 822/UFC 861
Click on one of the grey boxes (Satellite, Position, Name etc.) to sort the channels according to these criteria.
You can use the “Filter” option to exclude certain channels. You can sort by further criteria (e.g. Radio,TV
etc.) in the small grey box at the top right which by default shows “Display - ALL”. Once you have completed
your sort, select the channels which you later would like to add to an existing channel list or insert into a new
one. To do so, click on the empty box in front of the channel to select a single channel or click “Select All” to
select all the channels.
Click on “Add” to import the selected channels into the “Edit Channel” screen.
SAT/TP EDIT (SATELLITE & TRANSPONDER) (EXCLUSIVELY FOR UFS 822)
Use this function to enter a new satellite and/or transponder. To do so, click on the “Sat/TP Edit” button.
The following display appears (example):
Enter the data for the new satellite/transponder here and then click “Add”. The new data is added to the
existing satellite/transponder list.
28
USE OF PVR MANAGER WITH UFS 822/UFC 861
RENAME/DELETE FAVOURITE
In order to perform this on the channel list currently on your UFS 822/UFC 861, you must first use the feature
“Load from PVR” to load the channel list to the menu “Edit channel” .
To perform this on a channel list saved to the hard disk, use the “Open” feature to load the channel list to the
menu “Edit channel”.
First, specify whether a TV or radio favourite list is to be renamed/deleted by clicking “TV Favourites“ or
“Radio Favourites”. Next, click the desired favourite list and subsequently right-click. Then select the desired
function with the left mouse button.
Rename:
Now use the keyboard to enter the desired name. See section “Add to Favourite” to learn how to add channels to a favourite list.
Delete:
All channels will be deleted from the selected favourite list and the list will be marked “empty”. How to add
channels to a Favourite list is detailed under “Add to Favourite”. To rename the favourite list, proceed as
described above.
ADD TO FAVOURITE
Use this function to add one or more previously selected channels to a desired favourite list. First, click the
Favourite list to which you would like to add the channel. Then, click the desired channel. Now click the „Add
to Favourite“ button. OR:
Click the desired channel and hold down. Now drag the channel to the Favourite list to which the channel
is to be added. To select several channels, hold the Ctrl key down while clicking on the channels with your
mouse (see screenshot).
RENUMBER
Since the current version of the PVR Manager automatically renumbers channels after they have been repositioned, this feature is not necessary.
DELETE
Use this function to delete data (channels, Favourite lists, etc.) that you have previously selected.
29
USE OF PVR MANAGER WITH UFS 822/UFC 861
RADIO
You can use this function to switch between the TV and radio channel listings.
SAMBA
Use this function to directly access the folders “jpeg”, “mp3” and “program” from your PC/laptop. You can
copy MP3/JPEG files from a directory in your PC/laptop to a designated directory on the receiver. In the corresponding folders (jpeg and mp3), you can create/delete folders and save/sort the files contained in them
in the same way as you can with a PC/laptop.
This function is currently not possible with Windows Vista.
The “program” folder contains important files relevant to the receiver such as “epg_
backup”. The samba function should therefore only be used by experienced users!
30
USE OF THE PVR MANAGER WITH UFS 821
The PVR Manager of the UFS 821 offers many options for uploading and downloading between your UFS
821 and a PC or laptop by way of a USB cable.
The detailed instructions on these operations assume that the PVR Manager has been correctly installed as
described under “Standard Installation”.
Note:
The transfer rate depends on the PC components (network interface card and hard disk) or
the data media used on the PC as well as on the data rate of the programme being received
on the receiver at that time.
to start it.
1. Switch on the receiver at its power switch and press
2. Start the PVR Manager by clicking the desktop icon or choosing “Start” - “Programmes” - “PVR Manager”“PVR Manager”). The following display appears:
RECORDINGS
Click on the “Record” button. The following display appears (example):
Click “Multi-View” to exit the “Details”. The first frame of a recording is displayed. Click “Radio” to switch
between the TV and radio recordings. The Record Manager offers the following options:
31
USE OF THE PVR MANAGER WITH UFS 821
VIDEO UPLOAD (RECEIVER → PC)
1. Select the drive to which the recording should be transferred, either from the “Setting” menu or from the
directory view in the top left.
Check first that there is sufficient storage capacity on the destination drive for the file(s) you are transferring!
2. Click on the file desired. The box at the bottom left (in the Details view) shows the first frame of the recorded programme, with details of the date it was recorded, the channel and title.
3. You can now start the transfer as follows:
- Click on the file you would like to transfer and hold the mouse button down. You can now drag the file from
the box at the bottom right to the one at the top right. The transfer to your PC begins. OR:
- Click “Upload” to transfer the selected recording to the directory you previously selected on your PC.
The following display appears (example):
As soon as the transfer is complete, the progress bar disappears and you additionally see the transferred
recording in the top pane of the window.
32
USE OF THE PVR MANAGER WITH UFS 821
VIDEO DOWNLOAD (PC → RECEIVER)
1. Access the “Settings” menu or the directory view at the top left to select the PC/laptop drive containing the
recording you wish to transfer to the receiver (the recording must be from your UFS 821).
Check first that there is sufficient storage capacity on the destination drive for the file(s) you are
transferring!
2. Click on the desired file. The box at the top left (in the Details view) shows the first frame of the recorded
programme, with details of the date it was recorded, the channel and title.
3. You can now start the download as follows:
- Click on the file you want to download and hold the mouse button down. You can now drag the file from
the box at the top right to the one at the bottom right. The download to your PC begins. OR:
- Click “Download” to download the selected recording to the receiver. As soon as the transfer is complete,
the progress bar disappears and you additionally see the transferred recording in the bottom pane of the
window.
DELETING RECORDINGS
1. Click on the recording you want to delete.
2. Click the “Delete” button at the top of the screen.
The following display appears:
3. Click “YES” to confirm deletion of the recording. The recording is then deleted.
Deleted recordings are removed irrevocably and therefore cannot be restored!
33
USE OF THE PVR MANAGER WITH UFS 821
MP3
Click on the “MP3” button. The following display appears (example):
The receiver‘s hard disk only provides limited storage capacity for MP3 files.
If this is insufficient, you can also connect an external hard disk to the receiver front
panel using a USB cable. The hard disk must be “FAT 32” formatted. Formatting can be
performed through the receiver. Please make sure that power supply to the hard disk
is sufficient. The receiver detects the external hard disk and you can play the MP3 files
directly from it without having to download them to the receiver.
The MP3 Manager offers the following options:
← BACK →
Click “←” or “→” to move up or down one level within the selected drive.
FOLDER BACK
Click “Folder back” to move from the selected subfolder to the next highest level.
NEW FOLDER
With this function you can create a new folder on the selected drive and at the selected level (on the receiver
or PC). Use the mouse to select the drive and where appropriate, the subfolder level, then click “New Folder”. A new folder appears on the drive you selected. Use the keypad to enter a name for the folder.
UPLOAD
Works in the same way as video upload. The only difference is that the destination and source drives can be
selected directly from the boxes at the left.
34
USE OF THE PVR MANAGER WITH UFS 821
DOWNLOAD
Works in the same way as video download. The only difference is that the destination and source drives can
be selected directly from the boxes at the left.
DELETE
Works in the same way as deleting recordings. The only difference is that folders can also be deleted.
PHOTOS
Click on the “JPEG” button. The following display appears (example):
Only photo files in JPEG format (RGB mode) can be used. The receiver‘s hard disk only
provides limited storage capacity for JPEG files.
If this is insufficient, you can also connect an external hard disk to the receiver using
a USB cable. The hard disk must be “FAT 32” formatted. Please make sure that power
supply to the hard disk is sufficient. The receiver detects the external hard disk and
you can view the photo files directly from it without having to download them to the
receiver.
The JPEG Manager offers the following options:
← BACK→
Click “←” or “→” to move up or down one level within the selected drive.
FOLDER BACK
Click “Folder back” to move from the selected subfolder to the next highest level.
35
USE OF THE PVR MANAGER WITH UFS 821
NEW FOLDER
With this function you can create a new folder on the selected drive and at the selected level (on the receiver
or PC). Use the mouse to select the drive and, where appropriate the subfolder level, then click “New Folder”. A new folder appears on the drive you selected. Use the keypad to enter a name for the folder.
UPLOAD
Works in the same way as video upload. The only difference is that the destination and source drives can be
selected directly from the boxes at the left.
DOWNLOAD
Works in the same way as video download. The only difference is that the destination and source drives can
be selected directly from the boxes at the left.
DELETE
Works in the same way as deleting recordings. The only difference is that folders can also be deleted.
GAMES
Use this function to transfer the games Kathrein has provided for the UFS 821 from your PC to your receiver.
These games can be downloaded from the following Internet website:
http://www.kathrein.de (Service → Software and Downloads → Receiver → UFS 821)
Click on “Games“. The following display appears:
Use is restricted exclusively to
downloadable games which have
been provided by Kathrein for the
UFS 821 or to those previously installed on the device.
Kathrein is not liable for any damage done to
the device or its software caused by games or
software that were not provided by Kathrein!
Click on “...”, to select the game to be transferred. As soon as you have selected the game, click the “Start” button.
The game is then transferred to the receiver.
36
USE OF THE PVR MANAGER WITH UFS 821
UPGRADE RECEIVER FIRMWARE
You can use this function to download the software directly from PC to the UFS 821. You can download the
latest software for your UFS 821 from the Internet at:
http://www.kathrein.de (Service → Software and Downloads → Receiver → UFS 821)
The advantage of this is that transferring the software from the PC to the UFS 821 is faster than over the
satellite.
Click on the “Upgrade” button. The following display appears:
Be sure to follow the download instructions for the software given on
the website. They will also tell you
which file you need to select for
downloading.
Click the “...” option to select the software to download. When you have selected the software, click “Start”.
The new software is transferred to the receiver.
CHANNEL LIST
Click on the “Channel” button. The following display appears:
37
USE OF THE PVR MANAGER WITH UFS 821
Click “Radio” to switch between the TV and radio list settings. Right-click a channel to view the following
editing possibilities:
OPEN
You can use this function to open a channel list stored on your PC or laptop. You can download the latest
channel list for your UFS 821 from the Internet at:
http://www.kathrein.de (Service → Software und Download → Receiver → UFS 821)
You can edit it as desired, and then transfer it to the UFS 821 as under “Send to PVR”.
The advantage of this is that transferring the software from the PC to the UFS 821 is faster than over the
satellite.
SAVE/SAVE AS
You can use these functions to save a channel list edited according to your needs, to your PC or laptop.
You can then open the channel list at any time, edit it and download it to your UFS 821 as described under
“Send to PVR”.
When you choose “Save” the system default storage location/file path is used; when you choose “Save As”
you can specify the storage location/file path yourself.
LOAD FROM PVR
You can use this function to upload the channel list currently in use on the UFS 821 to this view and then edit
it according to your needs (rearrange, sort, create favourites, etc.).
Click on the “Load from PVR” button. The on-screen progress bar indicates the current status of the transfer.
As soon as the progress bar disappears, transfer is complete. The following display appears (example):
38
USE OF THE PVR MANAGER WITH UFS 821
-
Start Numbering: The channels can be renumbered manually as from a desired position (click).
Move to: Enter the position (channel number) to where the channel should be moved.
Renumber: The channels are renumbered in their current sort order.
Add to “selected TV Favourite”: A new TV Favourite list is created and the previously selected channel
is included in it.
Add to all Favourites: The channel is deleted from the channel list.
Delete from all Favourites: The channel is deleted from all Favourite lists of the selected Favourites
bank (TV/Radio).
Add Empty Channel: A new channel (Empty Channel) is inserted in the channel list in front of the
selected position.
Edit channel: Channel data can be entered/edited.
Delete Channel: The channel is deleted from the channel list.
Lock Channel: Channel is locked (PIN check for access on receiver).
Unlock Channel: Channel is unlocked.
Skip Channel: Channel is skipped during zapping.
Free channel: Channel is no longer skipped during zapping.
All these changes only take effect once the channel list has been downloaded to the receiver again through
the “Send to PVR” command.
39
USE OF THE PVR MANAGER WITH UFS 821
SEND TO PVR
You can use this function to download the channel list currently displayed to the UFS 821. Click on the “Send
to PVR” button. The on-screen progress bar indicates the current status of the transfer. As soon as the
progress bar disappears, transfer is complete.
SATCODX
You can use this function to edit SatcoDX (.sdx) channel lists (downloaded from www.satcodx.com).
After editing them, you have three options:
- You can add either the complete list or a part of it to the existing channel list of the UFS 821 and then sort
the list as desired. To do so, you must have first uploaded the channel list from the UFS 821 by clicking
the button “Load from PVR”
- You can add the complete list, or part of it, to a channel list of the UFS 821 stored on your hard disk and
then sort the list as desired. To do so, you must have first downloaded the channel list from the hard disk
by clicking the “Open” button on the “Edit menu screen”.
- You can use the complete list, or just part of it, as a new channel list.
Click on “SatcoDX”. The following display appears:
Click on “Open” to open a SatcoDX channel list stored on your PC or laptop. The following display appears
(example):
40
USE OF THE PVR MANAGER WITH UFS 821
Click on one of the grey boxes (Satellite, Position, Name etc.) to sort the channels according to these criteria.
You can use the “Filter” option to exclude certain channels. You can sort by further criteria (e.g. Radio,TV
etc.) in the small grey box at the top right which by default shows “Display - ALL”. Once you have completed
your sort, select the channels which you later would like to add to an existing channel list or insert into a new
one. To do so, click on the empty box in front of the channel to select a single channel or click “Select All” to
select all the channels. Click on “Add” to import the selected channels into the “Edit Channel” screen.
SAT/TP EDIT (SATELLITE & TRANSPONDER)
You can use this function to enter a new satellite and/or transponder.
To do so, click on the “Sat/TP Edit” button. The following display appears (example):
Enter the data for a new satellite/transponder here and click “Add” after each entry. The new data is added
to the existing satellite/transponder list.
41
USE OF THE PVR MANAGER WITH UFS 821
RENAME/DELETE FAVOURITE
In order to perform this on the channel list currently on your UFS 821, you must first use the feature “Load
from PVR” to load the channel list to the menu “Edit channel” .
To perform this on a channel list saved to the hard disk, use the “Open” feature to load the channel list to the
menu “Edit channel”.
First, specify whether a TV or radio favourite list is to be renamed/deleted by clicking “TV Favourites“ or
“Radio Favourites”. Next, click the desired favourite list and subsequently right-click. Then select the desired
function with the left mouse button.
Rename:
Now use the keyboard to enter the desired name. See section “Add to Favourite” to learn how to add channels to a favourite list.
Delete:
All channels will be deleted from the selected favourite list and the list will be marked “empty”. How to add
channels to a Favourite list is detailed under “Add to Favourite”. To rename the favourite list, proceed as
described above.
ADD TO FAVOURITE
Use this function to add one or more previously selected channels to a desired favourite list. First, click the
Favourite list to which you would like to add the channel. Then, click the desired channel. Now click the „Add
to Favourite“ button. OR:
Click the desired channel and hold down. Now drag the channel to the Favourite list to which the channel
is to be added. To select several channels, hold the Ctrl key down while clicking on the channels with your
mouse (see screenshot).
RENUMBER
Since the current version of the PVR Manager automatically renumbers channels after they have been repositioned, this feature is not necessary.
DELETE
Use this function to delete data (channels, Favourite lists, etc.) that you have previously selected.
42
USE OF THE PVR MANAGER WITH UFS 821
RADIO
You can use this function to switch between the TV and radio channel listings.
43
936.3252/A/0208/ZWT - Technical data subject to change!
Internet: http://www.kathrein.de
KATHREIN-Werke KG • Anton-Kathrein-Straße 1 - 3
P.O.Box 10 04 44 • 83004 Rosenheim/GERMANY