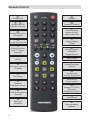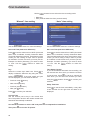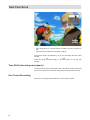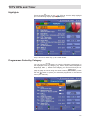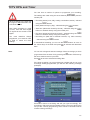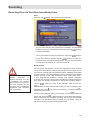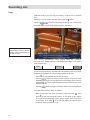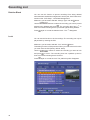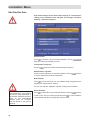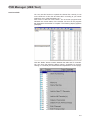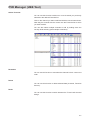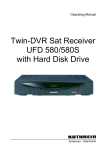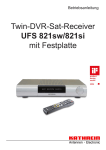
1
Operating Manual Twin-PVR Satellite Receiver UFS 821sw/821si with hard disk Preface Dear customer, this Operating Manual is intended to help you make the fullest use of the extensive range of functions offered by your new satellite receiver. We have tried to make the operating instructions as easy as possible to understand, and to keep them as concise as possible. To help you understand particular specialist terms that cannot be translated, we have added a short glossary at the end of the manual. The power switch is an environmentally friendly feature. If you will not be using your receiver for a longer period, you should therefore use the power switch to disconnect it from the power supply to save energy. For shorter breaks, you can switch the receiver to standby on the remote control, which uses only a minimal amount of energy. We wish you good reception and much pleasure using your new PVR satellite receiver. Your KATHREIN Team Important Information The channels available on the satellites and transponders are subject to continual change. In such cases, it is necessary to reset the channels as the factory preset programming corresponds to the situation on the date of manufacture. The information for this reset can be found on the Internet or in relevant magazines. Your receiver is factory fitted with the latest software version. We, however, always work on adapting the software to the wishes of our customers and to developments in technology. The “Software and Programme List Update” section contains additional information. Please keep the original packaging in case you need to return the product at any time. The hard disks are fragile due to their construction and are only adequately protected in the receiver by the original packaging. If receiver is not shipped correctly the warranty on the hard disk will be voided. Make a note of the receiver’s basic settings, so as to be able to restore them if necessary! DiSEqC™ is a trademark of Eutelsat. 2 Contents Preface 2 Contents 3 Safety Instructions - Important Notes 6 Receiver Features 7 Controls, Displays and Connections 8 Connection and Setup 9 Remote Control 12 First Installation 14 Operating Instructions 21 21 22 23 23 Menu Concept Menu Tree Alphanumeric Inputs Language Selection - OSD On-Screen Display (OSD) Channel Notifications Programme Information Error Signalling TV / Radio Channel List 24 24 24 25 25 Common Interface 27 System Setup 30 31 31 32 32 32 34 35 35 35 36 36 37 37 37 37 TV Settings AV (Audio/Video) Settings OSD Position Setup TV Standard Time Setup Common Interface STB (Receiver) Management System Information Factory Default Change Receiver Name Hard Disk Management Format Recording List Format MP3 Archive Format Photo Archive USB Devices User Preference Language Setup Sleep Timer Parental Control Receiver Lock Age Rating Control STB (Receiver) Management Lock Change PIN Appearance Setup PVR setup Automatic Time-Shift Time-Shift Buffer Size 38 39 39 39 40 40 40 40 41 42 42 42 3 Contents Hard Disk Management Prompt on Recording Default Record Duration EPG Grabbing Setup 42 43 43 43 Videotext (Teletext) 44 Organise Channels 45 46 46 46 47 47 47 48 49 49 49 49 49 50 TV Channel List Lock Channels Rename Channels Rearrange Channels Skip Channels Delete Channels Radio Channel List TV Favourite Lists Create Favourite List Rename Favourite List Delete Favourite List Add/Remove Channels (Favourite List) Radio Favourite Lists Twin Functions Picture-in-Picture (PIP) Time-Shift (time-delayed playback) One-Touch Recording Time-Shift Time-Shift (time-delayed playback) TVTV EPG and Timer Accessing the TVTV EPG for the First Time Accessing the TVTV EPG “Current” View Programme List Highlights Programmes Sorted by Category Search Function Details Programming a Recording Timer List Important Additional Information Key to Symbols Channel List 51 51 52 52 53 53 54 54 55 55 56 57 57 58 58 60 63 64 64 65 Audio Settings 66 Recording 67 67 69 Recording Direct to Hard Disk (Store Time-Shift Recording) Recording Direct to Hard Disk Immediately/Later Recording List Playing Back a Recording Decoding a Recording Edit Recordings Delete Rename Copy Cut 4 70 70 71 72 73 73 74 75 Contents Merge Deletion Block Lock Bookmarks Multimedia/Games MP3 Player Organising MP3 Files Photo Album Organising Photo Files Games Applications Installation Menu First Installation Antenna Setup Tuner 1 Setup Tuner 2 Setup Channel Search Motorised Antenna Edit Satellite Data Edit Transponders On Air Download 77 78 78 79 80 81 82 83 85 86 86 87 88 88 89 90 90 92 96 97 97 Connecting up the Video/PVR 98 Software and Programme List Update 99 PVR Manager (USB Tool) Standard Installation Start PVR Manager Recordings MP3 Photos Games Upgrade Receiver Firmware Channel List 103 103 106 106 109 110 111 111 112 Using the Front Panel 118 Receiver to Receiver Data Transfer 119 Technical Appendix 120 120 122 122 123 Technical Features Accessories Scart Socket Assignment Connection Example Short Technical Guide Glossary 124 126 Troubleshooting 127 Service 128 5 Safety Instructions - Important Notes 6 Receiver Features Our new UFS 821 multifunction satellite receiver has two independent reception and signal processing circuitries as well as a computer hard disk with a recording capacity of 160 GB. This 160 GB hard disk enables over 100 hours of TV and radio programmes to be recorded and replayed either simultaneously or time-shifted without quality loss. The tvtv EPG, which is professionally edited, provides free information on some 60 channels without the need to change programme, even up to a week in advance. However, the really special attraction of this multi-talented unit lies in the wealth of features offered by the receiver, such as the picture-inpicture (PIP) function, transfer of the MPEG data stream to PC, and import, playback and storage of MP3 files. The JPEG viewer allows you to save your photographs on the hard disk and create a slide show. The alphanumeric display shows channel names and radio data. The multifunction control on the front of the unit matches the modern design of the receiver and enables the receiver to be operated manually. The receiver operating system is based on LINUX and offers additional convenient functions. The UFS 821 has two separate tuners for simultaneous reception of two channels, and a hard disk for recording and playback. Depending on constellation, you can • view one programme and record another to hard disk, • play back one recording from the hard disk and record one programme to hard disk, or • record two programmes to hard disk and play back one recording from the hard disk, or • record two programmes to hard disk and view a programme from one of the programme packages being received. To take advantage of all these opportunities, complex operating procedures are necessary. You should therefore read this operating manual thoroughly. 7 Controls, Displays and Connections This section provides a brief description of all the controls, displays and connections. The button symbols shown here will also be found in the description of the operating steps. View of front panel (flap folded down) View of rear panel Front Panel Controls and Displays Rear Panel Controls and Displays 1. Common Interface for two CA modules for Pay-TV cards*) 2. USB 1.1 port 3. Menu button to call up or exit menus or sub-menus 4. Record button to start recording manually 5. Play button to start playback manually 6. Stop/Exit button to stop playback/recording manually or exit the menu 7. Multifunction control 1. 2. 3. 4. 5. 6. 7. 8. 9. *) CA modules and Pay TV cards are not included 8 On/Off switch (with mains disconnect) Mains power cable RS 232 port (for Service only) S-Video output Video output (composite colour) Audio outputs (L/R) cinch sockets Scart socket for TV connection Scart socket for VCR/AUX connection Optical data stream output (SPDIF/Sony Philips Digital Interface Format) for Dolby Digital AC 3 audio 10. USB 2.0 port (USB-B connector) 11. LNB 2 input and loop-through output 12. LNB 1 input and loop-through output Connection and Setup The following section is intended specifically for specialist dealers. You only need to read this section if you are carrying out the installation yourself. The “Connection Examples” section provides a sample configuration. Do not connect the unit to the mains until all installation work has been properly carried out. Refer to the information in the “Safety Instructions” section. Connecting the Unit Sat IF Connections Connect the Sat IF inputs on the receiver to the satellite reception system. Use coaxial cable with a standard F connector. If the F connectors are not yet fitted on the cable, strip the insulation from the cables as shown in the following illustration and carefully twist the F connectors onto the ends of the cables until they are securely fitted. When fitting the connector, make sure that no wires from the braiding are touching the inner conductor, so no short circuit can occur. The quality of the reception signal depends on the connection. Reception Requirements Make sure that your own satellite antenna system is equipped at least with a universal LNB for digital reception in the high-band range. Reception System Presets The presets for the control signals have been made for standard reception systems, i.e. 14/18 V for polarity reversal and 22 kHz switching signal for low/high band changeover on multi-feed reception systems. If tone-burst switch matrices are used in the reception system, the default selection in the installation menu, Antenna Setup, Tuner 1 and Tuner 2, under “DiSEqC™ Switch”, must be changed. Refer to the “Installation Menu” section on this, under “Antenna Setup”, “Tuner 1” and “Tuner 2”. Be sure to follow the operating instructions for the matrix used. 9 Connection and Setup Operation on one Antenna Connection To enable you to utilise all the reception and recording properties of your UFS 821 twin-PVR satellite receiver, such as 1. recording one programme and at the same time viewing any other programme or zapping through the channels, and 2. recording two different programmes at the same time, the two tuner inputs of the satellite receiver must each be supplied with a dedicated satellite signal from the antenna system/Sat outlet. The receiver tuner inputs are factory preset on the installation menu to work with two separate Sat antenna connections. If you only have one antenna connection available, we recommend you interconnect the output of tuner 1 and the input of tuner 2 by a coaxial cable with F connectors. Coaxial cable with F connectors For this, in “First Installation” for tuner input 2 select “Loop-through mode” (see “First Installation” section). Press the button to access the “Tuner Input” menu option, then choose “Installation” and “First Installation”. Go through step-by-step until you get to Tuner Setup. You can make the settings here. 10 Connection and Setup Though a restriction on this is that with tuner 2 you can only receive the additional channels of the plane currently set by tuner 1 (e.g. Horizontal High). This will only work when receiving one satellite, not in multifeed reception! Note: If only tuner 1 is connected (with no connection to tuner 2), the “Single Mode” setting must be selected for the tuner input. You can then have only the possibilities offered by a normal “single” receiver available to you. If this setting is not made, malfunctions will occur and the following message will be displayed: No signal! TV and Video Recorder Connection Connect the satellite receiver (TV Scart socket) and the TV set by a Scart cable (see “Connection example”). If your TV has a stereo feature, you can receive the sound in stereo via the Scart connection. Connect the satellite receiver (VCR/AUX Scart socket) and the video recorder/PVR likewise by a Scart cable. For system reasons, the same video signals are to be found on the Scart outputs and on the video cinch output. If you are recording using an external video recorder, remember not to operate the receiver during recording, otherwise all the on-screen displays will appear on your recording. Audio Connection If you want to play the sound on your hi-fi system, connect the audio cinch sockets to the input sockets on the hi-fi system with an appropriate cable (see “Connection Example”). Optical Digital Output The fibre-optic output is intended for the connection of a Dolby Digital system (see “Connection Example”). Inserting Batteries in the Remote Control Remove the cover on the rear of the remote control. Insert the two supplied batteries into the remote control. Ensure correct polarity of the batteries; the + and – markings are indicated inside the battery compartment. Slide the cover back into the housing until it locks in place. Used batteries are special waste! Do not throw spent batteries into your domestic waste; take them to a collection point for old batteries! Electronic equipment is not domestic waste - in accordance with directive 2002/96/EC OF THE EUROPEAN PARLIAMENT AND THE COUNCIL dated 27th January 2003 on used electrical and electronic equipment, it must be disposed of properly. At the end of its service life, take this unit for disposal at a relevant official collection point. 11 Remote Control Sound on/off ... Standby Number input for channels, timers etc. Videotext (Teletext) Access channel options Sound/ subtitles selection Access main menu Exit menus Access Favourite list Picture-in-picture from 2nd tuner or hard disk Volume Exit menu - back to TV picture Switch between TV/radio Access channel notification Programme info AV mode Channel selection up/down Confirm input Access channel list Cursor buttons Access TVTV EPG (Electronic Programme Guide) Fast rewind Playback Hard disk contents Pause (freeze-frame) Time-shift One-touch recording 12 Fast forward Stop recording/ playback Remote Control Remote control RC 660 The RC 660 remote control supports up to four devices (supplied as standard with the RC 660) as well as the receivers of the UFD 5xx (not UFD 552, 554, 558) and UFD 4xx families. First switch all receivers off at the power switch. To configure a receiver to an infrared code: Switch on the relevant receiver. On the remote control simultaneously press Address 1 = ++ Then switch the receiver off again at the power switch and do the same + + for second receiver; + + for third receiver and + + for fourth receiver). for the other units ( Make sure only one receiver is on at a time! To switch the remote control to an infrared code: When you have configured all receivers to their infrared code, to switch between units on the remote control do the following: + ; for the second receiver + ; for the third receiver + ; and for the fourth receiver + . For the first receiver’s remote (address 1) press + = Kathrein UFD 5xx code for remote control RC 400 The RC 600 and RC 650 remote controls cannot be replaced! 13 First Installation Before using your unit for the first time, read the “Safety Instructions” and “Connection and Setup” sections. The “Connection configuration. Examples” section provides a sample Do not connect the unit to the mains until all installation work has been properly carried out. The guidance given in the “First Installation” section assumes that the receiver has been properly connected, as per the “Safety Instructions” and “Connection and Setup” sections. First switch your TV set on and select the AV programme position. Switch on your receiver at the power switch on the rear of the unit. The following display appears: Also pay attention to the bars at the bottom of the on-screen display! They provide hints on what to do next. buttons. Available Select the menu language you want using the options: German, English, Turkish, Italian, Spanish, Polish, Dutch and French. Press 14 to move to the next menu. The following display appears: First Installation Note: If you are unsure whether you chose the right option from a previous menu, you can go back a step at any time during the first installation process by pressing the button. buttons here to select the connection mode and signal Press the configuration for the second tuner set on the receiver by you or the engineer. You have the following options: Connection mode for tuner 2 - Separated: Tuner 2 (input) has its own signal input, i.e. a direct connection between the antenna socket and the tuner 2 input - Loop-through: The signal currently connected to the tuner 1 loopthrough output is looped-through to tuner 2 (input). Refer also to the section headed “Operation on one Antenna Connection” Signal configuration for tuner 2 (only in “Separated” connection mode) - Same with tuner 1: Both tuners are connected to the same signal source (same cable from LNB) - Different to tuner 1: The two tuners are connected to different signal sources (separate cables from LNB) Press to move to the next menu. The notes on the subsequent First Installation menus are divided into two columns. The left-hand column indicates the further installation procedure for the “Same with tuner 1”, signal configuration, while the right-hand column details the “Different to tuner 1” procedure. The satellites shown in the following screenshots are factory preset. To be able to receive the satellites you want, your system must be aligned to them! 15 First Installation Signal configuration “As tuner 1” Signal configuration “Different to tuner 1” Press to view the satellites by continent - that is, which satellites are accessible on which continent. The continents are displayed above the list of satellite names. The selected continent is shown in yellow. The satellites from the pre-programmed channel list are automatically pre-entered in the right-hand column, and can be changed/deleted according to your reception system. Press the and buttons here to select the satellites you want tuners 1 and 2 to receive signals Press the and buttons here to select the satellites you want tuner 1 to receive signals from. from. When you press to confirm your selection, the chosen satellite is moved into the tuner satellite list on the right. When you press to confirm your selection, the chosen satellite is moved into the tuner satellite list on the right. If you have unintentionally transferred a satellite If you have unintentionally transferred a satellite into the list on the right, you can press the to switch lists and then press satellite concerned. button to remove the When you have selected all the satellites you want, press . into the list on the right, you can press the to switch lists and then press satellite concerned. button to remove the When you have selected all the satellites you want, press . Select here the satellites you want tuner 2 to receive signals from, as you did for tuner 1. When you have selected all the satellites you want, press . 16 First Installation Press the and buttons here to select the satellite configuration for each satellite you previously selected. Press the and buttons here to select the satellite configuration for each satellite you previously selected. LNB Type: LNB Type: Press to open the LNB Settings menu. Use the buttons to make your selection. To confirm your selection use the buttons to select “OK” and press . Press to open the LNB Settings menu. Use the buttons to make your selection. To confirm your selection use the buttons to select “OK” and press . - Single (LNB Low frequency 9750 MHz) - Dual (LNB Low frequency 9750 MHz + LNB High frequency 10600 MHz) - Universal (LNB Low frequency 9750 MHz + LNB High frequency 10600 MHz + Limit frequency 11700 MHz) - Single (LNB Low frequency 9750 MHz) - Dual (LNB Low frequency 9750 MHz + LNB High frequency 10600 MHz) - Universal (LNB Low frequency 9750 MHz + LNB High frequency 10600 MHz + Limit frequency 11700 MHz) 22kHz Control: 22kHz Control: Use the buttons to make your selection (On/ Off). The 22kHz signal is needed to switch LNBs in multifeed reception and to switch between Low and High band. Use the buttons to make your selection (On/ Off). The 22kHz signal is needed to switch LNBs in multifeed reception and to switch between Low and High band. DiSEqC™ Input: DiSEqC™ Input: Use the buttons to make your selection. - 1 of 4: for the first satellite of the tuner - 2 of 4: for the second satellite of the tuner - 3 of 4: for the third satellite of the tuner - 4 of 4: for the fourth satellite of the tuner - Mini A: Tone-burst control signal 1 for the first satellite of the tuner (if reception system not DiSEqC™ compatible) - Mini B: Tone-burst control signal 2 for the second satellite of the tuner (if reception system not DiSEqC™ compatible) - Disable: If your reception system is not DiSEqC™ compatible and only one satellite per tuner is selected. Use the buttons to make your selection. - 1 of 4: for the first satellite of the tuner - 2 of 4: for the second satellite of the tuner - 3 of 4: for the third satellite of the tuner - 4 of 4: for the fourth satellite of the tuner - Mini A: Tone-burst control signal 1 for the first satellite of the tuner (if reception system not DiSEqC™ compatible) - Mini B: Tone-burst control signal 2 for the second satellite of the tuner (if reception system not DiSEqC™ compatible) - Disable: If your reception system is not DiSEqC™ compatible and only one satellite per tuner is selected. 17 First Installation Transponder: Transponder: buttons to scroll through the Use the transponders of the satellite highlighted in yellow at the top of the display. At the right you will see the signal strength of the transponder on the two tuners, enabling you to check that the satellite configuration you just set up is OK. buttons to scroll through the Use the transponders of the satellite highlighted in yellow at the top of the display. At the right you will see the signal strength of the transponder on the two tuners, enabling you to check that the satellite configuration you just set up is OK. When you have finished configuring this satellite, When you have finished configuring the satellite press . press . If in the preceding “Select Satellite” menu you selected more than one satellite, you will now see the configuration for the next of the satellites you selected. Configure the satellite as described above. If in the preceding “Select Satellite” menu you selected more than one satellite, you will now see the configuration for the next of the satellites you selected. Configure the satellite as described above. When you have finished configuring the satellite When you have configured all the satellites you previously selected for tuner 1, you see the satellite configuration display for the second tuner (see example screenshot): press . The receiver then automatically calls up the selection menu for the channel search. Configure the satellites for the second tuner in the same way as for tuner 1. When you have finished configuring the satellite press . The receiver then automatically calls up the selection menu for the channel search. The notes on first installation are unified once again from this point! 18 First Installation Number of channels in the pre-programmed channel list Use the buttons to make the settings. Channel Search Encoded channels can only be decoded with a CA module and matching Smartcard. CA modules and Smartcards are not included in the product package. Please contact your Pay-TV provider. Use the buttons to select whether you want to use the factory default channel list or whether you want to search for more/new channels. FTA CA Select: - All: FTA (free-to-air) and encoded channels are searched for - FTA: Only free-to-air channels, such as ZDF in Germany, are searched for - CA: Only encoded channels, such as Austria’s ORF, are searched for Network Search If you set the network search to “Off”, only the factory stored transponders of the satellites you previously selected will be scanned for new as yet unlisted channels. If you set the network search to “On”, the transponder network enables additional transponders that have not yet been stored to be located. They are then stored and scanned for new channels in the same way as the existing transponders. Press to start the channel search, or if you set the channel search to “Off” you are guided straight to the next item in the first installation process. If the search is successful, you see the following message (example): Press to confirm storing of the newly found channels and move on to the next step in first installation. 19 First Installation Use the buttons here to select the time recording mode: • Manual or • Auto (receiver takes time from preset channel) “Manual” time setting Use the “Auto” time setting buttons to make the settings. Set Local Time (time zone difference) buttons to make the Day Select the current day’s date here. Press to display a calendar. Select the day using the cursor buttons ( ). If the right month and year are not displayed, you can select as follows: • Previous month ( button) • Next month ( button) • Previous year ( button) • Next year ( button) Press buttons to make the settings. Set Local Time (time zone difference) Press to set the variance from UMTC (Universal Mean Time Coordinate; formerly Greenwich Mean Time) and Winter/Summer time. At the bottom of the screen you see a listing of major cities to provide an indication of which time zone you have just set. Example: for Berlin (Germany) you need to enter +1 hour. Use the setting. Use the to confirm your selection. Press to set the variance from UMTC (Universal Mean Time Coordinate; formerly Greenwich Mean Time) and Winter/Summer time. At the bottom of the screen you see a listing of major cities to provide an indication of which time zone you have just set. Example: for Berlin (Germany) you need to enter +1 hour. Use the setting. Time Setup Channel If you have selected automatic time recording, set the channel here from which you want the receiver to get the time. Press to call up a channel list from which you can select the channel you want using the selection. buttons. Press to confirm your Setup Time Now Press to set the time immediately. It may take a few seconds for the right time and date to be displayed. Current Time Use the number pad to key in the current time here. The position at which the number needs to be entered is automatically underlined. buttons to select “OK” and press to complete first installation. Then press to view the TV picture. Use the 20 buttons to make the Operating Instructions Menu Concept The structure of the menu concept is based on logical operating sequences. The programme showing on the current selected channel always appears in the top right-hand corner of the screen. You will find detailed descriptions of the selected menu items in the relevant sections of the operating manual! Note: The selected menus, sub-menus and positions, as well as the parameters to be set, are each highlighted in colour. The menus are self-explanatory. Pay attention to the bar at the bottom of the on-screen display! They provide hints on what to do next. Press the button to access the main menu, and use the buttons to select the sub-menus. Press to access the sub-menus. Use the buttons to select the sub-menu options. The settings under the various options are made either by pressing the buttons or using the number pad. You can exit the main menu and sub-menus, and the various options, step-by-step by pressing the button (the settings/changes you made are saved). Press to return directly from one of the menus to the TV picture (the settings/ changes you made are saved). 21 Operating Instructions Menu Tree Main menu Organise Channels TV Channel List Radio Channel List TV Favourite List Radio Favourite List Programme Guide System Setup TV Settings Time Setup Common Interface STB Management Hard Disk Management USB Devices Installation First Installation Antenna Setup Channel Search Motorised Antenna Edit Satellite Data Edit Transponders On Air Download User Preference Language Setup Sleep Timer Parental Control Appearance Setup PVR Setup EPG Grabbing Setup Recording List Multimedia/Games MP3 Player Photo Album Games Applications 22 Operating Instructions Alphanumeric Inputs To enter the names of channels, favourites and satellites use the on-screen keypad (shown here at the left), using the cursor keys and to input characters. You can switch between capitals and small letters, and between numbers and special characters key). Then place the cursor on the character you want to input. Press to apply the character. Press to move one position to the left and to move one to the right. Press to delete the previous ( character. Once you have selected all the characters you want to enter, select “Save” using the cursor keys and confirm your input with Select “Delete” to delete completely the name you entered. . Language Selection - OSD The language for the on-screen display is set as follows: → → User Preference → → Language Setup → → → English The languages available are German, English, Italian, French, Dutch, Polish, Spanish and Turkish. You can now make the other possible settings: - Subtitles language - Audio language - SI (Event) language Settings are made in the same way as the OSD language. When you have made all the settings, press save your settings. Press to exit the menu and to return directly to the TV picture. 23 On-Screen Display (OSD) Channel Notifications TV Channel Identifier Channel number from master list Number of Videotext/ FTA = audio tracks Teletext Free-to-air available (unencoded) button programme/ $ Encoded programme Signal strength Channel name Selected channel list Selected satellite Day of week with time Start time of current and next programmes The channel notification is displayed for a few seconds (configurable on the “User Preference” menu under “Appearance Setup”) every time you change channel, or can be displayed permanently by pressing . Radio Channel Identifier The message for the set radio channel has the same layout. Programme Information Press twice to view information on the current programme, if transmitted by the programme provider. Use the through the pages. 24 buttons to scroll On-Screen Display (OSD) Error Signalling “No signal” indicates that an error has occurred in the reception system or in the receiver settings, or that the transponder is not sending. Check the Sat IF connection and the LNB configuration. If you have changed settings, compare them against the basic settings (provided you had made a note of them as suggested). TV / Radio Channel List Press the button to access the channel list. At the top left a TV set or radio icon indicates whether the list is a TV channel list or a radio channel list. Press the blue between the TV and radio channel lists. button to switch To the right of it you see the current channel list sort order as selected by you. The channel list can display channels according to various selection and sort criteria, combined variably (see also the example screenshot at the bottom of the next page). Selection options: - Press the red button to switch between your own Favourite lists and the list containing all the channels. - Press the green button to view only the channels from a specific satellite (e.g. ASTRA) or from all the satellites being received (corresponding to the “All channels” list). 25 On-Screen Display (OSD) Sort options (accessed by pressing yellow button): - Press the red button to access the alphabetical listing. It shows all the channels sorted alphabetically, or the ones beginning with the selected initial letter. - Press the button to sort the channels by provider, or to view the channels from a specific provider. - Press the blue button to sort the channels either by channel number, A-Z, Z-A, or by FTA and encoded (CI) channels. ) to select from the menus, and confirm your selection by pressing . Press to view the following items of information on a channel (see Use the cursor buttons ( example screenshot at left): - Transmitting satellite Frequency (MHz) Symbol rate Polarisation Audio and video PID (Packet Identification Number, used to assign the data of a channel on the transponder) - ID (Identification Number) of the channel on the transponder The following screenshot is an example of how selection and sort criteria can be combined in the channel list (selection: TV channels from all satellites, sorted by: channel names beginning with “B”): 26 Common Interface Important Information! Always follow the operating instructions from your Pay-TV provider and the instructions supplied with the Smartcard and the CA module! Smartcards and CA modules are not included with this product! The cards and modules are issued by the respective Pay TV providers, and contain the subscriber data and details of the programmes for which the subscriber has paid. These programmes are always decoded. Contact the Pay TV provider if you are interested in subscribing to a particular Pay TV channel. You are responsible for the use of the Smartcard in the CA module! The Smartcard sold by the Pay TV provider, specific to a particular decoding technology, is inserted into the CA module. Store your card and PIN code securely when not in use! Inserting the Smartcard and the CA Module The Common Interface (CI) on the UFS 821 is suitable for the use of two CA (Conditional Access) modules. These two CI slots are located at the bottom left on the front. The CA module receives Smartcard (chip contacts pointing upwards and towards socket board) and is then inserted into one of the two CI slots . The Smartcard should be inserted into the CA module without exerting too much force. This also applies to inserting the CA module into the CI slot. Do not use a lot of force and follow the instructions supplied with the Smartcard and the CA module. To remove the module, press the relevant eject button . When you turn on the receiver, the following message appears: 27 Common Interface You can find out which Conditional Access modules are in the CI slots on the UFS 821 and which Smartcard is in which CA module from the main menu under “System Setup”, “Common Interface” and confirm with . The screenshots below depend on the specific module and card, and so are only intended as examples: Press the 28 button to access the menu generated by the CA module: Common Interface From this menu, your card and your PIN code allow you to access various programmes from your Pay-TV provider. “Alphacrypt Light” has been selected as an example here. The details can be different for each CA module. Always follow the instructions supplied by your Pay-TV provider! Note: The displays appear in English, even if you have selected German as the menu language for the receiver! Information for Conax, SECA, Viaccess and CryptoWorks users: Note that with monthly activation intervals, the programme providers have different procedures for activating Pay TV cards. Activation may therefore be a few days before or after the beginning of a new month. During this activation period, the CA module and card must be in the slot, and the receiver must be turned on a set to the booked Pay TV channel. Follow the instructions from the Pay TV provider. If your Pay TV card is then still not enabled, we recommend you briefly withdraw the CA module with the card out of the slot, with the receiver switched on, and then re-insert it. This information has nothing to do with the properties of the unit; it is merely intended to assist you. 29 System Setup The selected menus, sub-menus and positions, as well as the parameters to be set, are each highlighted in colour. The menus are self-explanatory to a great extent. Pay attention to the bar at the bottom of the on-screen display! They provide hints on what to do next. Select the “System Setup” menu using the menu button buttons on the main menu and , the . buttons to select the further items. If there is another sub-menu layer, press to open it. If there are no more sub-menus, make the settings using the or number pad. Use the to save your settings and return Press to return directly to the TV picture. Press 30 to the previous menu. System Setup TV Settings Press appears: to access the “TV Settings” menu. The following display AV (Audio/Video) Settings Video Output Select the type of video signal at the Scart socket here. Select the signal that your TV set can process. Refer to the operating instructions for your television set! • • • • Audio Output Composite baseband signal RGB – Red/Green/Blue signal or Y/C – S-Video signal (luminance/chrominance) YPbPr – Component signal Select the type of audio signal at the Scart socket here. • Stereo – Left and right side audio channel • Mono left – Left side audio channel only, or • Mono right – Right side audio channel only You will need to select further audio settings for the specific channel (such as Dolby Digital playback) directly on the TV screen using the button. 31 System Setup TV Type Select the TV‘s picture format. Either: • 4:3 or • 16:9 Display Format Select the screen display mode here • Pan & Scan • Letterbox Separate Channel Volume Choose whether the volume setting is to be applied to all channels here (selection: Off) or whether you want to set the volume for each channel separately (selection: On). OSD Position Setup You can use the cursor buttons ( ) to select and arrange the position where the menus are displayed on the TV screen. The receiver displays are then positioned on-screen as you specified. TV Standard Here you specify whether your TV set is a • PAL or • NTSC set. Time Setup Press to access the “Time Setting” menu. Depending on the setting (Manual or Auto), you see the following: 32 System Setup Time Mode Select the time recording mode here: • Manual or • Auto (receiver takes time from preset channel) Time Mode Manual Set Local Time Set the variance from UMTC (Universal Mean Time Coordinate; formerly Greenwich Mean Time) here. At the bottom of the screen you see a listing of major cities to provide an indication of which time zone you have just set. See example screenshot: Summer Time / Winter Time Choose between Summer and Winter time. In the above example Summer time is selected. Day to display a calendar. Select the day using the cursor buttons (). If the right month and year Select the current date here. Press are not displayed, you can select as follows: • Previous month ( button) • Next month ( button) • Previous year ( button) • Next year ( button) Press to confirm your selection. Current Time Use the number pad to key in the current time here. The position at which the number needs to be entered is automatically underlined. 33 System Setup Time Mode Auto Set Local Time See “Set Local Time” - “Time Mode Manual” Summer Time / Winter Time Choose between Summer and Winter time. In the above example Summer time is selected. Time Setup Channel If you have selected automatic time recording, set the channel here from which you want the receiver to get the time. Press to call up a channel list from which you can select the channel you want using the buttons. Press to confirm your selection. Setup Time Now Confirm with the Common Interface 34 button to update the time immediately. See “Common Interface” section System Setup STB (Receiver) Management Press to access the “STB Management” menu. The following display appears: System Information Press to view the current software version. Press cancel the display. again to Factory Default When you press you are asked whether you want to reset all settings to their factory defaults. Use the and start the reset by pressing buttons to select “OK” . All your personal settings are deleted (Favourite lists, channel sort, etc.)! Download Firmware Transfer Channel Data Satco-DX Transfer the firmware from one UFS 821 to another UFS 821. Not available in this software version. Transfer the channel list from one UFS 821 to another UFS 821. See “Receiver to Receiver Data Transfer” section. Download satellite channel lists from the Internet at “http://www.satcodx.com/”. See “PVR Manager (USB Tool)” section. 35 System Setup Change Receiver Name Press the button and enter the unit ID here. This is useful for identification in case of theft. The alphanumeric input procedure is as described in the “Alphanumeric Inputs” section. In the example shown here the ID “UFS 821” has been assigned. Hard Disk Management Press to access the “Disk Management” menu. The following display appears: 36 System Setup Format Recording List button you are asked whether you want to delete all recordings. Use the buttons to select “OK” and start the reset by pressing . When you press the All the recordings on the hard disk are irrevocably deleted! Format MP3 Archive button you are asked whether you want to delete all MP3 files. Use the buttons to select “OK” and start the reset by pressing . When you press the All the MP3 files on the hard disk are irrevocably deleted! Format Photo Archive button you are asked whether you want to delete all photos. Use the buttons to select “OK” and start the reset by pressing . When you press the All the photos on the hard disk are irrevocably deleted! USB Devices Press to access the “USB Devices” menu. The following display appears (example), showing all the devices connected to the receiver via USB: 37 User Preference Select the “User Preference” menu using the menu button the , buttons on the main menu and . buttons to select the further items. If there is another sub-menu layer, press to open it. If there are no more sub-menus, make the settings using the or number pad. Use the to save your settings and return Press to return directly to the TV picture. Press 38 to the previous menu. User Preference Language Setup See “Operating Instructions” section under “Language Selection - OSD”. On this menu you can select the language for the menu, the subtitles, the audio and the programme. Sleep Timer buttons to select the time after which you want Use the the UFS 821 to automatically switch off (Standby). The minimum time you can set is 15 minutes, and the maximum 360 minute. Each press of the buttons increases or reduces the power-off time by 15 minutes. The calculated time at which the receiver will switch off is shown in the grey box underneath. Parental Control This menu is password-protected and can only be accessed by entering the password. The factory default password is “0000”. The following display appears: 39 User Preference Receiver Lock Use the buttons (On/Off) to choose whether use of the receiver should be protected by a four-digit PIN. When switching the unit on from Standby you are then prompted to enter the PIN. If the PIN is not entered the receiver cannot be operated. Age Rating Control Use the buttons to select the age rating to watch TV programmes. The minimum age rating you can set is “under 4”, and the maximum “under 18”. Each press of the buttons increases or reduces the age rating by 2 years. The programmes concerned can then only be viewed by entering the PIN. This lock is only effective if the necessary locking signals are transmitted. STB (Receiver) Management Lock Use the buttons (On/Off) to select whether settings/changes on the STB Management menu (a sub-menu of the System Setup menu) may be made without entering the PIN or not. Change PIN Press to replace the old PIN with a new one. Enter the new buttons to select “OK” and confirm the changed PIN by pressing . (four-digit) PIN. On the screen which then appears use the Keep your password in a safe place, so that you always have access to your channels should you ever forget it. If you have forgotten your password, you must contact your dealer, who will be able to unlock your receiver for you. 40 User Preference Appearance Setup On this menu you can set how long the channel notification and the playback information are displayed on-screen. You can also specify whether the volume bar is displayed when adjusting the volume. InfoBox Duration Use the buttons to select the time after which you want the on-screen channel notification display to be automatically cancelled. You can choose between 5, 8, 10, 12 and 15 seconds, or “Hide”. Play Indicator Duration Use the buttons to select the time after which you want the on-screen playback information display to be automatically cancelled. You can choose between 5, 8, 10, 12 and 15 seconds, or “Hide”. Volume Bar Use the buttons (On/Off) to specify whether the volume bar is displayed when adjusting the volume. 41 User Preference PVR Setup On this menu you can make settings for your recordings and for time-shifting. Automatic Time-Shift Use the buttons to select whether automatic time-shifting is enabled or disabled. When you select “On” the receiver automatically (in the background) starts recording the programme you are viewing as soon as you switch to the channel. Then, in manual record mode, you button to choose whether to record the programme can press the from the current time or from the time you switched to the channel. The advantage of this is that you do not lose the part of the programme you were watching before you decided to record it! When you select “Off” you can only record the programme as from the point you press Record, and lose the portion of the programme before you started recording. Time-Shift Buffer Size Use the buttons here to select the size of the background buffer the receiver makes available for time-shift recording. You can choose between 1 and 8 GB, in 1 GB increments. The receiver indicates in brackets after the GB figure how long this will enable it to backgroundrecord for. Hard Disk Management Use the buttons to select whether hard disk management is controlled by the receiver (“Automatic”) or by you (“Manual”). If you select “Automatic”, the receiver automatically deletes older recordings when it reaches the maximum disk capacity, so as to make room for planned recordings. (You can, however, protect recordings from being deleted by the receiver, as described in the “Recording List” section under “Edit Recordings” - “Deletion Block”. If you select “Manual” you must always ensure there is sufficient hard disk capacity yourself. If the available disk capacity falls below five percent, a warning appears the next time you restart the unit. 42 User Preference Prompt on Recording Use the buttons here to select whether to enable on-screen of the advanced recording settings on starting (press display button) or not. If you select “Disable”, in manual recording mode, timeshift recording is automatically started (see “Recording” section). Other recording modes are then excluded. Default Record Duration Use the buttons here to select the default recording time. If you forget to stop a recording you started manually, it is automatically stopped by the receiver when the default recording time elapses. You can choose between 30 minutes and 4 hours, in 30 minute increments. Save When you have made all the settings, press to save them. EPG Grabbing Setup buttons to set the time at which you want On this menu use the the UFS 821 to update the EPG data. The receiver (which must be in Standby mode) switches on from Standby, updates the data and then returns to Standby. Scheduled recordings do not affect this; the receiver then carries out the update automatically later when recording is finished. Invalidate tvtv-Data On this menu you can use the button to delete the stored tvtv data. You can then have the UFS 821 update the tvtv data at the selected to switch your receiver to Standby. The receiver time or press automatically starts updating the tvtv data. The progress of the tvtv data update is indicated on-screen. After updating the data, the receiver automatically switches back to Standby. You can now restart the receiver by pressing the button. 43 Videotext (Teletext) This symbol in the channel notification shows you whether Videotext/ Teletext is available for the selected channel. When you press the button, the receiver processes the broadcast Videotext/Teletext service for your TV set to display, even when the signal is decoded. During the search, the programme page which is being searched for is displayed in the top left-hand corner, and the permanent time and date display is shown at the top right. When the search is finished, the Videotext/Teletext being broadcast by the relevant programme provider appears. You have several options for calling up the desired pages: - Input with number pad. - Page through using the buttons. - Select one of the links on the current page (at the top of the screen, e.g. pages 133, 135, 116, ...) using the buttons and open by pressing . - Select one of the coloured option buttons at the bottom of the screen and ). ( , , Press 44 or to exit the Videotext/Teletext. Organise Channels Select the “Organise Channels” menu using the menu button , the buttons on the main menu and . This menu is password-protected and can only be accessed by entering the password. The factory default password is “0000”. The factory pre-programmed channel lists can be changed on this menu. You can organise and sort your preferred TV and radio channels, such as all English-language channels or those that broadcast with no commercial breaks. Also pay attention to the bars at the bottom of the on-screen display! They provide hints on what to do next. buttons to select the further items. If there is another sub-menu layer, press to open it. Use the to save your settings and return Press to return directly to the TV picture. Press to the previous menu. 45 Organise Channels TV Channel List Press to access the “Edit TV Channels” menu. The following display appears: Lock Channels Select the channel you want to lock using the cursor buttons ( ) and press unlock the channel. to activate the lock. Press again to You can also sort the channels first, according to the following criteria: • by satellite ( button) • by Favourite list ( button) • alphabetically or numerically ( button) Select the sort order you want to apply using the confirm with buttons and . Rename Channels Select the channel you want to rename using the cursor buttons ( ) and press to activate the on-screen keypad. You can now rename the channel as you want, applying the method described in the “Alphanumeric Inputs” section. You can also sort the channels first, according to the following criteria: • by satellite ( button) 46 Organise Channels • by Favourite list ( button) • alphabetically or numerically ( button) Select the sort order you want to apply using the confirm with buttons and . Rearrange Channels Select the channel you want to move using the cursor buttons ) and press . You can now move the channel to the intended channel number using the cursor buttons, then press ( again to insert it there. Skip Channels Go to the channel you want to skip during zapping using the cursor ) and press to select it. The channel name is displayed in grey. Press again to cancel the skip. buttons ( You can also sort the channels first, according to the following criteria: • by satellite ( button) • by Favourite list ( button) • alphabetically or numerically ( button) Select the sort order you want to apply using the confirm with buttons and . Delete Channels Go to the channel you want to delete using the cursor buttons ) and press to select it. The channel name is underlined in red. Press again to cancel your channel selection for deletion ( (this will only work as long as you have not yet quit the menu by pressing ). Deleted channels can only be relocated by a channel search! You can also sort the channels first, according to the following criteria: 47 Organise Channels • by satellite ( button) • by Favourite list ( button) • alphabetically or numerically ( button) Select the sort order you want to apply using the confirm with buttons and . You can also press global selection. to select all channels at once, or cancel the Radio Channel List Press to access the “Edit Radio Channels” menu. The following display appears: The functions on the “Edit Radio Channels” menu are controlled in the same way as those on the “Edit TV Channels” menu. 48 Organise Channels TV Favourite Lists Press to access the “Edit TV Favourites” menu. The following display appears: Create Favourite List Press to access the menu. You can now use the on-screen keypad (operated as described under “Alphanumeric Inputs”) to name the next free Favourite list. You can set up a total of eight Favourite lists (including radio favourites) for your favourite channels. Each family member can then save their own favourite channels and call them up at any time. Rename Favourite List to access the menu. Select the Favourite list you want to rename using the buttons and confirm with . You can now Press use the on-screen keypad (operated as described under “Alphanumeric Inputs”) to name or rename the Favourite list. Delete Favourite List to access the menu. Select the Favourite list you want to delete using the buttons and confirm its deletion with . Use the buttons to select “OK” and confirm again by pressing . Press Note: Only the Favourite list is deleted; the channels in the Favourite list are retained. Add/Remove Channels (Favourite List) Press to access the menu. Use the buttons to select the Favourite list to/from which you want to add or delete channels and confirm your selection with . 49 Organise Channels Add: (one channel up/down) or (sideways) buttons to select the channel you want and press to transfer it into the Use the Favourite list. You can add more channels to the current selected Favourite list in the same way. You can also sort the channels first, according to the following criteria: • by satellite ( button) • alphabetically or numerically ( button) Select the sort order you want to apply using the confirm with buttons and . Remove: to switch to the right-hand list (listing of channels in Favourite list). Use the (one channel up/down) or (sideways) buttons to select the channel you want and press to confirm deleting it from Press the Favourite list. You can remove more channels from the current selected Favourite list in the same way. Radio Favourite Lists Press to access the “Edit Radio Favourites” menu. The following display appears: The radio Favourites are edited in the same way as the TV Favourites. 50 Twin Functions The UFS 821 is equipped with two tuners, enabling you to perform two separate functions at the same time, including: • Picture-in-Picture (PIP) • Time-shift and • One-touch recording. Picture-in-Picture (PIP) The picture-in-picture function permits simultaneous viewing of two programmes. This allows you to see when a programme you want to watch begins without having to leave the programme you are currently watching. When you press the green button the first time a window opens up in the top right-hand corner. The channel is indicated underneath the picture: You can then change channel in the main picture with the channel buttons . The channel displayed in the PIP window can be changed with buttons. Press to swap the channels being received (switch between main the picture and picture-in-picture). Press the green button a second time to view a picture played back from the hard disk in the PIP window (see screenshot example): 51 Twin Functions • If the programme is currently being recorded, the PIP is framed in red. • A previously recorded PIP is framed in yellow. The picture caption is prefixed by an H (for hard disk) and the serial number. Press the green function. button again or the button to exit the PIP Time-Shift (time-delayed playback) The time-shift function is described in the “Time-Shift” section. Note that the receiver switches to hard disk mode when executing this function. One-Touch Recording One-touch recording is described in the “Recording” section. 52 Time-shift Time-Shift (time-delayed playback) If you miss the start of a programme because you are busy, or need a short break while a programme is running, you can view the programme time-shifted while it is still being broadcast. Press the button to activate this function. The receiver continues recording the programme in the background while you see a freeze-frame with an inset circular icon and the pause button (see screenshot): Once you have viewed the programme in full it is not available for you to retrieve from the hard disk! To save a programme to the hard disk, you must record it as described in the “Recording” section. “TSR” (Time-Shift Recording) is shown on the receiver display in front of the channel number and name. To start time-shifted playback, press the or button. You can control the recorder fast forward (to the point the broadcast has currently reached), rewind (to the point at which you started recording the programme), pause and playback functions by the corresponding button the TV picture freezes, but the recording continues in the background. Press or again to buttons. When you press the resume. You can cancel time-shifted playback any time by pressing the button. 53 TVTV EPG and Timer The EPG is a latest-generation Electronic Programme Guide. It provides all the EPG information for around 60 TV channels at no charge, without you having to change channel, and also offers schedule information up to a week ahead (depending on programme provider). Accessing the TVTV EPG for the First Time Press to access the EPG. The first time you access it (if you have not yet run an ASTRA satellite scan and the data have not yet been updated!) you see the following on-screen display: To safeguard the functionality of the EPG, the satellite scan must be run on the ASTRA satellite (in multifeed reception mode for “All satellites”). In this operation the necessary signal identifiers for the EPG are downloaded (SID, TSID and OID). Press to cancel the display. Exit the EPG by pressing the button. You now have two options for updating the data: button. - To get the data immediately, switch the receiver off by the The receiver first displays the message “Receiving tvtv”, then the download status as a percentage (Downloading tvtv ...%). As soon as the display no longer indicates this message, you can switch the receiver back on by pressing the EPG. button and begin using the - To download the data at a specific time when you will not be using the receiver, you can set a download time on the receiver as described under “User Preference” - “EPG Grabbing Setup”. 54 TVTV EPG and Timer Accessing the TVTV EPG The EPG is accessed by pressing the button, and automatically displays the “Current” (Now showing) view (see “Current” menu item), regardless of which EPG view you had been in beforehand. “Current” View The EPG automatically displays the “Current” (Now showing) view when first accessed, highlighting the current selected channel and the current programme. In the main window you see the channel number at the left, the channel name and current programme in the centre, and a progress bar at the right. In the top right-hand corner of the picture you see the current day, date and time. The box at the right indicates the day, date and duration of the programme, the programme category (in the example above: “News”), the programme‘s country of origin and the year it was made. The bottom section of the display contains the EPG options selectable from any EPG view. Press • • • • • • (red) to view the recording schedule (“Timer list”), (green) to view the “Current” (Now showing) display, (yellow) to view the programme list (of the selected channel), (blue) to view the daily highlight tips (one tip per day, a week ahead), to view details of the selected programme, and (red) to access the Record menu (the timer). 55 TVTV EPG and Timer You can scroll line-by-line or page-by-page through the channels using ) or access channels directly using the number pad. With the buttons you can scroll back and forth 24 hours the arrow buttons ( at a time (day-by-day). to confirm a change of channel. Press to view the upcoming programme schedules in 15-minute blocks. Press to return step-by-step to the start point (current time), or press the green button to go back directly. Quit the EPG by pressing either or , or press twice. Press Programme List Press the yellow button to access the schedule for the channel to EPG. The following display which you are currently tuned in the appears (example): You can scroll line-by-line or page-by-page through the programme list of the selected channel using the arrow buttons ( ). Press the buttons to switch channels and then view the new channel's programme list. The symbol next to the programme title indicates programme details are available to view (see “Details”). Press the red button to place your selected programme in the Record menu (see “Record”). With the buttons you can scroll back and forth 24 hours at a time (day-by-day). 56 TVTV EPG and Timer Highlights Press the blue button in the EPG to view the daily highlight tips. The following display appears (example): A tip is shown for each day, up to a week ahead. Programmes Sorted by Category You can use the buttons to view the following programmes on the Highlights menu by category (e.g. Series, Sport, News, Magazine/ Reportage, Kids ...). Within each category you can scroll line-by-line or ). Press page-by-page as usual using the arrow buttons ( the red button to place your selected programme in the Record menu (see “Record”). 57 TVTV EPG and Timer Search Function The “Search” function of the EPG allows you to search through all the information available to the EPG (programme name, description, title, cast, director, details) for a word or phrase you enter, with the results being displayed in a list. buttons to go to the “Search” From the “Highlights” menu use the function. You can use the number pad to input letters in the search form. The assignment of letters to the number pad buttons is displayed at the bottom of the screen as follows: buttons to enter a space or to delete the last letter entered. Press to start the search. Use the The results found are displayed at the left in the main display box. If the programmes found do not fit on one page, you can scroll page-by-page as well as line-by-line as usual using the arrow buttons ( ). Press to start a new search. This function is useful if you are looking for programmes about the country you are going to visit on holiday, for example. Details Press in the EPG to call up details on the selected programme. symbol is displayed next to The information is only available if the the programme title. The symbol only appears once you have selected the channel and programme by highlighting it with the yellow cursor bar in the various views of the EPG however. 58 TVTV EPG and Timer When you press the following display appears (example): Use the buttons to switch pages in the programme details. The third page displays the upcoming episodes (such as of a series; see example on next page). 59 TVTV EPG and Timer buttons to switch to the details on the next programme in the selected view. Press to return to the previous You can use the display, such as the programme list. Programming a Recording A time window of two minutes at the beginning and five minutes at the end is automatically set. You can programme a recording from the various views of the EPG (“Current”, “Programme list”, “Highlights” and “Det.inform.” [Details]) and from within their various sub-menus. When programming recordings, the EPG automatically adapts to the actual SAT IF input signal mode (Single/Loop Through/Double Tuner). Example: If you are operating the UFS 821 in loop-through mode, you cannot simultaneously record one programme on the ARD channel and one on the ProSieben channel, because the two channels are not transmitted on the same transponder. Use the arrow buttons ( If there are no EPG data available for the channel you selected: Select the channel for which you want to programme a recording in the “Current” view and press the red button. As there is no EPG data, you must enter the data (date, start, end) manually. Enter the data using the cursor ) and number pad. Press to save your settings. ( 60 and press the red ) to select the programme you want button. The following display appears (example): TVTV EPG and Timer You now have a number of options to programme your recording. The settings are made using the arrow buttons ( number pad: When recording to the hard disk the signal is not forwarded to the VCR Scart socket! Also, when recording to a VCR or PVR, note that most digital TV signals do not contain a VPS signal. You must therefore always programme your external video or PVR to match the timer settings. • Recording status (once, daily, weekly, user-defined, series) - selected using the buttons buttons Start time (advanced minute-by-minute) - selected using the • Date (advanced day-by-day) - selected using the • buttons or entered directly using the number pad • End time (advanced minute-by-minute) - selected using the buttons or entered directly using the number pad • Recording on (hard disk or external recorder, e.g. video recorder) - selected using the buttons. In user-defined recording you can use the the various days of the week and press them. Note: ) and the buttons to move to to activate and deactivate You can also change the data and settings of timer recordings you have programmed from the timer list by pressing the the same method used to input them. Press button. Edit data by to save the selected recording data. If the timer recording you are programming overlaps with one or more recordings already programmed, you will see the following message (example): Press to return to the listing and edit your input accordingly. The recordings in black are the ones already stored. The one in white is the one you are currently programming which cannot be entered because of other existing recordings. 61 TVTV EPG and Timer If you nevertheless want to programme the recording shown in white, you can edit or delete the pre-programmed recordings. Example of user-defined recording: Example of series recording: Note: 62 If every edition or episode of a series is programmed to be recorded using the “Series recording” function, the EPG locates the series in question in the updated schedules and automatically programmes recording of them. A change in the time the series is broadcast is no problem for the EPG, as its programming is based on the series title. This does, however, mean that the schedule change needs to have EPG. been notified prior to the last update of the TVTV EPG and Timer Timer List The timer list (recording schedule) is accessed by pressing the red button. The timer list shows all the programmed recordings. You can use the buttons to toggle back and forth between the master timer list and the “once” and “series” displays. You can scroll line-by-line or pageby-page through the timer list using the arrow buttons ( ). In the box at the bottom right of the screenshot above you see the day, date and time of recording and the recording mode. Overlaps are indicated in orange text. Use the buttons to move to the orange listing and you will see the overlapping recording shaded in white (see screenshot above). Press to call up a programmed timer entry and edit it. You can delete a programmed timer recording by pressing the red button. If it is a (recurring) series recording, you are additionally asked whether you want to delete all the programmed recordings of this series (in the example below: “Record every episode no more?”) or merely the specific recording selected (“No recording on this day only”). Press to confirm, or press / to cancel. 63 TVTV EPG and Timer Important Additional Information • The button does not become active until 15-20 seconds after the picture appears on the TV. • Updating of the EPG is only started if the EPG data is more than 36 hours old. • The EPG is broadcast over the ASTRA satellite at the frequency of 12,603.75 MHz, with a symbol rate of 22 MSymb/s and horizontal polarisation (18 V). If you have accidentally deleted the transponder at this frequency, you will need to start a new satellite and transponder scan for the ASTRA satellite (see “Channel Search”). • Digital-compatible single-cable solutions, such as “Technisat DisiCon 4 LNB”, do not permit transmission of the EPG data, because the necessary transponder (12,603.75 MHz, symbol rate 22 MSymb/s, horizontal) is not transmitted in that system. This transponder must not be deleted, as the EPG data is transmitted on it. Key to Symbols Symbol Explanation Widescreen format Programme broadcast in blackand-white Dolby Digital 5.1 is a sound transmission method enabling digital surround sound to be reproduced on a home cinema system Dolby Surround Subtitles for the hard-of-hearing Mono Stereo Two-channel sound (e.g. multiple languages available) Daily highlight tips Programme details Recurring programme recording (series) Programme recording 64 scheduled for TVTV EPG and Timer Channel List The channels in the table below are provided with Kathrein receivers as at September 12, 2005. The assignment of the channels below to the at any time! EPG data on EPG may change 3sat MDR Television Sky News Intl ARD Das Erste MTV Central DE Super RTL ARTE Germany N24 TELE 5 ARTE France NDR Television TRT-Internat‘l ATVplus Neun Live TV Berlin BBC World n-tv TV5 EUROPE Bloomberg TV Ger ORF 1 TW 1 BR Alpha ORF 2 VIVA BR3 Phoenix VIVA Plus CNN Internat‘l Premiere Start VOX DSF ProSieben WDR Television Eins Plus QVC GERMANY XXP TV Eins Extra RBB Television ZDF Eins Festival RNF PLUS ZDF documentary channel Eins Muxx RTL 2 ZDF info channel Euronews DE RTL shop ZDF theatre channel Eurosport Germany RTL Television hr television RTP Internac‘l HSE24 SAT.1 Kabel 1 SF1 Kika SF2 To receive the EPG data for the “SF1”, “SF2” and “TRTInternational” channels (received over HOTBIRD 13° East) in addition to the other channels listed above, you must additionally run a channel search for the “HOTBIRD 13° East” satellite. 65 Audio Settings Setting the Volume Set the required volume level using the buttons on the remote control of the receiver. A bar indicator is displayed on the screen to show the set volume. Muting Press to mute the sound. “Sound off” is displayed. Press the button again to restore the sound. Stereo and Two-Channel Sound Playback Use the yellow button to open the Audio menu for sound and language selection, where you can make the desired settings, e.g. subtitles, language selection (soundtrack), audio mode, digital output (MPEG stereo, AC 3), as long as they are included in the reception signal: buttons and make the desired setting using the buttons. Press the yellow button again to exit Select the menu options using the the menu. Possible audio settings include: - Audio Track: 1st option = Auto (oriented to menu setting) 2nd option = Audio tracks 1 - X (of the tracks transmitted by the channel) - Audio Channel: Choose between menu setting, Stereo, Mono left and Mono right - Subtitle: Enable/disable AC 3 Always follow the operating instructions for your Dolby Digital system. 66 The receiver has an optical audio output for AC3 format (Dolby Digital). This gives you the opportunity to bring cinema quality sound into your living room. The AC 3 sound is recorded and can be selected during playback. Connect the corresponding digital audio output to a Dolby Digital system. If no AC3 signal is received, you can only make the normal stereo or mono settings, and choose the broadcast languages. Recording The UFS 821 offers you the following options for recording a programme: - Time-shift Allowing you to include the background recordings made up to that point to be included in your recording - Record direct to hard disk Allowing you to start recording immediately or later - Timer recording (see tvtv EPG) Allowing you to coordinate your recordings and plan them well ahead, also providing a range of options such as the series timer Check that there is adequate hard disk capacity available before every recording! You can see this on the right-hand side of the “Recording List” menu, indicated as “Disk Usage”. It is impossible to say exactly how much storage space a recording will take up, as this depends on the volume of data content transmitted. You can work on a basis of about 1.5 GB for one hour’s recording. Recording Direct to Hard Disk (Store Time-Shift Recording) The UFS 821 offers you a special feature in this context. As soon as you switch to a channel, the receiver automatically starts recording the programme you are viewing to the hard disk in the background. When you change channel again, the stored data is deleted and background recording begins again. If, after viewing the programme for a time, you decide you want to record it, you can do so as from the point you switched to the channel in question. Precondition: On the “PVR Setup” menu the “Automatic time-shift” option must be set to “On” and the “Time-Shift Buffer Size” entry must allow sufficient hard disk capacity for the time-shift recording. Also refer to the “User Preference” section on this, under “PVR Setup”. 67 Recording Start Press the red button. The following display appears: When recording starts, only the data of the current programme is recorded. The programme running before you switched channels is not recorded. You can start recording the programme as from the point you switched to the channel in question simply by pressing the button, or you can simply wait the 5 seconds for automatic recording to begin. If you want to alter the end time or recording duration, you can do so as described under “Duration/End” before pressing to start recording. Duration/End If there is an overlap with another scheduled or ongoing recording, the fact is indicated. The receiver then presets the end time for your new recording as the start time of the overlapping programme (see “Duration/ End” at the right). You can specify the duration of a recording regardless of when it starts. The receiver automatically retrieves the end time of the programme you are currently viewing from the EPG data (where available) and inserts it in the “Duration” field. Otherwise the end time is based on the default duration you set on the “User Preference” menu under “PVR Setup”. If your programmed recording overlaps with another scheduled recording, the end time of the current recording is matched to the start time of the one already scheduled. To change the recording duration, use the buttons to move to the “Duration” field and use the buttons to select the time after which you want recording to stop automatically. Press to shorten the recording by 10 minutes and to extend it by 10 minutes. When you have finished making your settings, use the buttons to select “OK” and press to start recording. If the end time still overlaps with the start time of a scheduled recording, the receiver automatically switches to the tvtv-EPG's timer list, where you can delete, cancel or edit one of the two programmed recordings listed. You can also cancel a recording at any time by pressing the button. 68 Recording Recording Direct to Hard Disk Immediately/Later Start Press the red button. The following display appears: - You can start recording the programme immediately. Use the buttons to move to the “Start Record” field and use the to select “Immediate”. buttons - You can also start recording at a later time. Move the buttons to the “Start Record” field and use the buttons to select the time after which you want recording to start. You can choose between 1 minute and 119 minutes, in 1 minute increments. Duration/End If there is an overlap with another scheduled or ongoing recording, the fact is indicated. The receiver then presets the end time for your new recording as the start time of the overlapping programme (see “Duration/ End” at the right). You can specify the duration of a recording regardless of when it starts. The receiver automatically retrieves the end time of the programme you are currently viewing from the EPG data (where available) and inserts it in the “Duration” field. Otherwise the end time is based on the default duration you set on the “User Preference” menu under “PVR Setup”. If your programmed recording overlaps with another scheduled recording, the end time of the current recording is matched to the start time of the one already scheduled. To change the recording duration, use the buttons to move to the “Duration” field and use the buttons to select the time after which you want recording to stop automatically. Press to shorten the recording by 10 minutes and to extend it by 10 minutes. When you have finished making your settings, use the buttons to select “OK” and press to start recording. If the end time still overlaps with the start time of a scheduled recording, the receiver automatically switches to the tvtv-EPG's timer list, where you can delete, cancel or edit one of the two programmed recordings listed. 69 Recording List You can also cancel a recording at any time by pressing the button. Select the “Recording List” menu using the menu button buttons on the main menu and display appears (example): , the , or the button. The following Playing Back a Recording Use the buttons to select a recording and press to start playing it. The recorded programme is played in full-screen mode. Press list. to choose between TV and radio recordings in the recording Press to sort the recordings in the recording list according to the following criteria: 70 Recording List - Date of recording (ascending) Recording duration (descending) Recording duration (ascending) Recorded channel (descending) Recorded channel (ascending) Title of recording (descending) Title of recording (ascending) Date recording (descending) The next time you call up the recording list the last mode (TV/Radio) and sort order you selected are displayed. During playback you can keep the channel notification info-box button, and press it again to view the accompanying EPG data (see example below). Press to permanently on-screen by pressing the cancel the on-screen displays. Accompanying EPG data. Use the buttons to scroll through the EPG data. Recorded programme Channel name Playback time so far/Total recording duration Decoding a Recording You can record encoded programmes even when the CA module with the Smartcard is not inserted. However, to view what you have recorded the CA module with Smartcard must be inserted in the Common Interface on the receiver. You can also decode a recording after having recorded it, so as to be able to view it in future without the CA module/Smartcard combination. For this the CA module with Smartcard must be inserted in the Common Interface on the receiver. Encoded recordings are indicated by a $ sign at the end of the line (after the recording duration). Use the buttons to select the encoded recording and press . On the screen which the receiver then displays use the buttons to select “OK” and press to prepare decoding. The receiver then displays the following message: “Decoding will be started in standby”. Press to confirm this message. As soon as you next switch the receive to standby the recording will be decoded. The progress of decoding is indicated on the display. Wait for the decoding to complete before switching on the receiver. 71 Recording List Edit Recordings Before specifying the mode of editing, press the button to choose whether you want to edit a TV or radio recording. You can sort the recordings as described under “Playing Back a Recording”. Press to view the various editing options. Each time you press the button the selection switches between the various available editing options: - Delete Rename Copy Cut Merge Deletion Block Lock Press Display of editing options. The selected editing function is shown in yellow. Also pay attention to the bars at the bottom of the on-screen display! They provide hints on what to do next. 72 to quit these editing levels and return to the recording list. Recording List Delete buttons to select the recording you want to delete and press . The recording being deleted is underlined in red and Use the the cursor jumps automatically to the next programme. You can then prepare other recordings for deleting in the same way. As long as you button, you can deselect a recording you previously selected for deleting by pressing . The have not quit this menu by pressing the recording will only be definitively deleted when you quit the menu by pressing . Rename Make sure you have also selected “Rename” with the button. buttons to select the recording you want to rename and press . The following display appears (example): Use the buttons to select “Input Directly” and confirm by pressing . You can now assign the recording any name you like as Use the described under “Alphanumeric Inputs”. 73 Recording List Copy With this function you can copy a recording, or parts of it, to the hard disk. Make sure you have also selected “Copy” with the button. buttons to select the recording you want to copy and press . The following display appears (example): Use the Also pay attention to the bars at the bottom of the on-screen display! They provide hints on what to do next. The receiver automatically starts playing back the recording. You now have several options for specifying the range to be copied (see example bar): Start Middle End To set the exact times for the start and end markers of the copy range as quickly as possible you can use various buttons as aids: to stop playback and freeze the frame Use the buttons to rewind or fast forward at up to 24 times - Press - playback speed (you can only fast forward recordings which have not yet decoded at 4 times playback speed and rewind them at 2 times playback speed) - Use the buttons to jump forward or back in 30-second blocks Copy the range marked “Start” as follows: - Move to the end of the range you want to copy and press . Then press to set the start point marker of the range to be copied. The receiver automatically marks the full range back to the start of recording. Then press to set the end marker at the end of the recording range you want to copy. 74 Recording List Copy the range marked “Middle” as follows: - Move to the start of the range you want to copy and press . Then to set the start point marker of the range to be copied. Then move on to the end of the copy range. Press again and to set press the end marker. Copy the range marked “End” as follows: - Move to the start of the range you want to copy and press press . Then to set the start point marker of the range to be copied. Then press recording. to automatically mark the full range to the end of the Copy the complete recording as follows: - Press twice to select the complete recording. to copy the selected range (the selection will be darkened on-screen) or press to reset the markers. Press The UFS 821 then internally duplicates the selected recording range as a new recording. When the copy operation is complete the recording list appears. The copy is indicated by a “C:” in front of the name. Cut You can use this function, for example, to remove ad breaks from your recorded programmes. Make sure you have also selected “Cut” with the button. buttons to select the recording you want to cut and press . The following display appears (example): Use the The removed portion of a recording cannot be recovered! Make a backup copy of the recording before cutting it for the first time (see “Copy”). Also pay attention to the bars at the bottom of the on-screen display! They provide hints on what to do next. 75 Recording List The receiver automatically starts playing back the recording. You now have several options for specifying the range to be cut (see example bar): Start Middle End To set the exact times for the start and end markers as quickly as possible you can use various buttons as aids: to stop playback and freeze the frame Use the buttons to rewind or fast forward at up to 24 times - Press - playback speed (you can only fast forward recordings which have not yet decoded at 4 times playback speed and rewind them at 8 times playback speed) - Use the buttons to jump forward or back in 30-second blocks Cut the range marked “Start” as follows: - Move to the end of the range you want to cut and press . Then press to set the start point marker of the range to be cut. The receiver automatically marks the full range back to the start of recording. Then press to set the end marker at the end of the recording range you want to cut. Cut the range marked “Middle” as follows: - Move to the start of the range you want to cut and press . Then to set the start marker and move forward to the end of the cut range. Press again and to set the end marker. press Cut the range marked “End” as follows: - Move to the start of the range you want to cut and press You can only remove one block from the recording in each cut operation. To remove multiple blocks you have to repeat the process. 76 press to set the start marker and press the full range to the end of the recording. . Then to automatically select Press to remove the selected range from the recording, or press to reset the markers. Recording List Merge You can use this function to merge together two or more recordings on one channel. Make sure you have also selected “Merge” with the button. buttons to select the recordings you want to merge and press . The following display appears (example): Use the The merged recording adopts the name of the first recording selected. You can change the name after merging on the “Rename” menu though. When you have selected all the recordings you want to merge press . The receiver shows the following display (example): Use the buttons to select “OK” and press to start merging the recordings. The receiver merges the two recordings. The newly created single recording is assigned the name of the first recording you selected for merging. 77 Recording List Deletion Block You can use this function to protect recordings from being deleted when automatic hard disk management is active (see “User Preference” section under “PVR Setup”, “Hard Disk Management”. Make sure you have also selected “Change Type” with the button. buttons to select the recording you want to protect against being deleted and press . The recording then has a “*” in Use the front of its name indicating that it is protected against being deleted. Press Lock again to cancel the deletion block. The “*” disappears. You can use this function to lock recordings. The recording can only be played back by entering the PIN. Make sure you have also selected “Lock” with the button. This editing function is PIN-protected. When you select the lock function you must enter the PIN (factory default: 0000). buttons to select the recording you want to lock and press to lock it. The recording then has a padlock symbol in Use the front of its name indicating that it is locked. Press 78 again to cancel the lock. The padlock symbol disappears. Recording List Setting bookmarks This function lets you divide recordings into chapters and allows you to quickly find certain sequences in a recording. button. Press the button at Start a recorded programme using the the position in the recording where you want to set a bookmark. A small flag appears at this position. You can repeat this procedure as often as you like. After you have set all of your bookmarks, press the button to access the chapter menu. Here you can see the starting images of the bookmarks you have set: buttons. Press the button to start playback from the selected bookmark. Press the Select the required bookmark using the button to skip to the next bookmark during playback. Deleting bookmarks buttons to select the bookmark you wish to delete in the chapter menu. Then press the button. Use the buttons Use the to select „OK“ in the message that appears and reconfirm by pressing the button. Press the button in the chapter menu to delete all bookmarks. Use the buttons to select „OK“ in the message that appears and reconfirm by pressing the button. 79 Multimedia/Games Select the “Multimedia/Games” menu using the menu button the buttons on the main menu and appears (example): Select the desired function using the with 80 , . The following display buttons and confirm . The following displays appear (examples only): Multimedia/Games MP3 Player Use the buttons to select the desired directory and press to open the directory and access its subfolders. In the above example the first directory listed is the local hard disk of the UFS 821 (Local HDD). The second directory is a USB memory stick. You can also access an external hard disk via the USB port on the UFS 821 and open files on it without having to save them to the UFS 821. The following display appears (example): Also pay attention to the bars at the bottom of the on-screen display! They provide hints on what to do next. buttons to select the file to play or select multiple files using the button. Press to open the MP3 player. The following Use the display appears on the TV screen (example): 81 Multimedia/Games The MP3 player automatically starts playing the first file you selected. You now have the following options: buttons to jump to the next/previous track Use the buttons to rewind or fast forward through the current - Use the - selected track to pause playback and press to resume Press to cancel playback Press to access additional play settings and select them using the buttons - Press • • Repeat: On (everything is repeated; Current song; Off Shuffle: On/Off • Close: Press - Use the Press to quit the settings buttons to adjust the volume. to return to the MP3 selection list (MP3 Files). Organising MP3 Files You can organise the files on the “MP3 Files” menu. Press the The following display appears (example): 82 button. Multimedia/Games Select the folder or file you want by pressing the button. Your selection is marked by a “+” sign at the end. You now have the following options: to delete the folder/file you selected Press to move the files (such as from the hard disk to an external - Press - storage device or vice versa). The receiver automatically jumps to the drive selection listings (selected using the button). to start the move operation or press to cancel Press to create a new folder in the selected directory (for how Press - to input the name using the on-screen keypad see “Alphanumeric Inputs”) - Press to copy the selected file/folder (such as from the hard disk to an external storage device or vice versa). The receiver automatically jumps to the drive selection listings (selected using the Press button). to start the copy operation or press to cancel. Photo Album Use the buttons to select the desired directory and press to open the directory and access its subfolders. In the above example the first directory listed is the local hard disk of the UFS 821 (Local HDD). You can also access an external hard disk via the USB port on the UFS 821 and open files on it without having to save them to the UFS 821. The following display appears (example): 83 Multimedia/Games Also pay attention to the bars at the bottom of the on-screen display! They provide hints on what to do next. buttons to select the file you want to view. Press to open the preview. Press to start a slide show. The following display Use the appears on the TV screen (example): The slide show starts automatically with the first selected photo. You now have the following options: to show the slide show help bar (see screenshot above, - Press at bottom) to stop the slide show and then use the buttons to scroll back and forth through the individual photos. Press to - Press resume the slide show. - Press to open a PIP (Picture-in-Picture) window running the current selected channel. 84 Multimedia/Games Use the the PIP. buttons to switch PIP channels. Press again to cancel to change the position of the PIP window on the TV screen Press to open the slide show settings. Make the settings using the buttons. You have the following options: - Press • • • Picture effects (picture layout): You can switch between various picture layout variants Duration: Here you specify how long each photo is shown for in the slide show Control box: Here you specify whether the control box (at the top right of the picture) is to be shown or hidden - Press to return to the photo selection list (JPEG Files). Organising Photo Files You can organise the files on the “JPEG Files” menu. Press the button. The following display appears (example): Select the folder or file you want by pressing the button. Your selection is marked by a “+” sign at the end. You now have the following options: to delete the folder/file you selected. Press to move the files (such as from - Press - the hard disk to an external storage device or vice versa). The receiver automatically jumps to the drive selection listings (selected using the Press button). to start the move operation or press to cancel. 85 Multimedia/Games - Press to create a new folder in the selected directory (for how to input the name using the on-screen keypad see “Alphanumeric Inputs”) - Press to copy the selected file/folder (such as from the hard disk to an external storage device or vice versa). The receiver automatically jumps to the drive selection listings (selected using the Press to start the copy operation or press to cancel. Games Not yet available in the current software version. Applications Not yet available in the current software version. 86 button). Installation Menu Select the “Installation” menu using the menu button buttons on the main menu and , the . buttons to select the further items. If there is another sub-menu layer, press to open it. If there are no more sub-menus, make the settings using the or number pad. Use the Press or to save your settings and return to the previous menu or the TV picture. 87 Installation Menu First Installation See “First Installation” section. Only make changes to this menu when settings or circumstances on/relating to your reception system have changed. You made the settings for the antenna during first installation. The settings should be made by a specialist engineer. Antenna Setup Use the buttons to select whether you want to use only tuner 1 (single mode) or both tuners (dual mode). In dual mode (both tuners receiving a dedicated signal or the signal from tuner 1 is looped-through to tuner 2) a SAT IF signal must be connected to both tuners. 88 Installation Menu Tuner 1 Setup Antenna Number: Each tuner can receive from up to four satellites. Use the buttons to select the position to which you want to assign a new or different satellite. Satellite Name: to access the list of available satellites. Select the satellite you want using the buttons and confirm your selection with . Press Make sure your reception system is aligned to the selected satellite. LNB Frequency: Use the buttons to select the LNB frequency applicable to your reception system or press to view the same listing as on first installation, containing the most common variants as follows. - Single (LNB Low frequency 9750 MHz) - Dual (LNB Low frequency 9750 MHz + LNB High frequency 10600 MHz) - Universal (LNB Low frequency 9750 MHz + LNB High frequency 10600 MHz + Limit frequency 11700 MHz) buttons to make your selection. To confirm your selection use the buttons to select “OK” and press . Use the 22kHz Control: Use the buttons to make your selection (On/Off). The 22kHz signal is needed to switch LNBs in multifeed reception and to switch between Low and High band. 89 Installation Menu DiSEqC™ Switch: Use the buttons to make your selection. - 1 of 4: for the first satellite of the tuner - 2 of 4: for the second satellite of the tuner - 3 of 4: for the third satellite of the tuner - 4 of 4: for the fourth satellite of the tuner - Mini A: Tone-burst control signal 1 for the first satellite of the tuner (if reception system not DiSEqC™ compatible) - Mini B: Tone-burst control signal 2 for the second satellite of the tuner (if reception system not DiSEqC™ compatible) - Disable: If your reception system is not DiSEqC™ compatible and only one satellite per tuner is selected. Transponder: Use the buttons to scroll through transponders on the selected satellite. At the bottom right you will see the signal strength of the transponder on the two tuners, enabling you to check that the satellite configuration you just set up is OK. Save: Once you have made all the settings, use the “Save” and press buttons to select to save the data. Tuner 2 Setup Settings are made as detailed for tuner 1. Channel Search Use the buttons to select whether you want the search to cover all satellites or only a specific one. If you select “All Satellites” only “Automatic Search” mode is possible. If you choose a specific satellite, your options are: 90 Installation Menu - Automatic Search: Unrestricted search across all transponders on all satellites (network search possible, selection of FTA and encoded channels possible) - Manual Search (transponder selection possible, FTA and encoded channels possible, network search possible) - Advanced Search: Search for a specific channel possible, based on transponder data and PIDs Automatic Search Network Search: Use the buttons to select the setting for the network search. If you set the network search to “On”, the transponder network enables additional transponders that have not yet been stored to be located. They are then stored and scanned for new channels in the same way as the existing transponders. If you set the network search to “Off”, only the current stored transponders of the satellites you previously selected will be scanned for new as yet unlisted channels. FTA CA Select: Use the buttons to select whether you want to search through all channels or only FTA (Free to Air) or CA (Conditional Access) channels (Common Interface “required”). Start Search: When you have made your selection, use the “Start Search” and press buttons to select to start searching. 91 Installation Menu Manual Search Select Transponder: Press to call up a list of available stored transponders on the satellite you previously selected. Use the buttons to select the transponder you want. If the transponder you want is not listed, select the “Enter New Transponders” option. Press selection. to save your If you have selected an already stored transponder, skip the next points and resume from “Network Search”. Transponder Frequency (input field only active if “Enter New Transponders” selected): Use the number pad on your remote control to key in the frequency of the new transponder here. Transponder Polarisation (input field only active if “Enter New Transponders” selected): Use the here. buttons to select the polarisation of the new transponder Symbol Rate (input field only active if “Enter New Transponders” selected): Use the number pad on your remote control to key in the symbol rate of the new transponder here. At the bottom right you will see the signal strength of the transponder on the two tuners, enabling you to check that the transponder data you just entered is OK. Network Search: Use the 92 buttons to select the setting for the network search. Installation Menu If you set the network search to “On”, the transponder network enables additional transponders that have not yet been stored to be located. They are then stored and scanned for new channels in the same way as the existing transponders. If you set the network search to “Off”, only the factory stored transponders of the satellites you previously selected will be scanned for new as yet unlisted channels. FTA CA Select: Use the buttons to select whether you want to search through all channels or only FTA (Free to Air) or CA (Conditional Access) channels (Common Interface “required”). Start Search: When you have made your selection, use the “Start Search” and press buttons to select to start searching. Advanced Channel Search Transponder Frequency: Use the number pad on your remote control to key in the frequency of the transponder on which the channel you are searching for is located. Transponder Polarisation: Use the here. buttons to select the polarisation of the transponder Symbol Rate: Use the number pad on your remote control to key in the symbol rate of the transponder here. 93 Installation Menu Video PID: Use the number pad on your remote control to key in the video PID (Packet Identification Number) identifying the video data of the new channel you want on the transponder. Audio PID: Use the number pad on your remote control to key in the audio PID (Packet Identification Number) identifying the audio data of the new channel you want on the transponder. PCR PID: Use the number pad on your remote control to key in the PCR PID (Programme Clock Reference Packet Identification Number) of the new channel here. It is normally identical to the video PID. Start Search: When you have made your selection, use the “Start Search” and press buttons to select to start searching. If the search is successful, you see the following message (example): Motorised Antenna Only make changes to this menu when settings or circumstances on/relating to your reception system have changed. The settings should be made by a specialist engineer. 94 Installation Menu buttons to select the tuner for which you want to make the settings and confirm your menu selection by pressing the button. Use the Tuner Settings The settings for both tuners are made in the same way. Select Satellite: Use the buttons to select the satellite here. Select Transponder: Use the The optimum setup is shown by the signal strength and quality bar charts at the bottom. With the East/West limit you can set the extreme stop points (limited by a wall or other obstacles) in the westward and eastward directions. Always read the operating manual supplied by the rotor/antenna manufacturer thoroughly (particularly with regard to settings different to those described here). buttons to select the transponder here. Motorised Antenna Setup: Use the buttons to select the control signal you want to use for the motorised antenna here (DiSEqC™1.2, DiSEqC™1.3 (USALS) or OFF for none). Motor Control: Use the buttons to select the command for the motorised antenna here. You can choose between: - Stop - Save - Set East Limit (Start rotation eastwards with button/step-by-step eastwards with ) - Set West Limit (Start rotation westwards with button/step-by-step westwards with ) - Limits Off - Reset Action: or choose “OK” to activate the “Stop”, “Save”, “Limits Off” and “Reset” actions. You can also press the / button here to stop Press ongoing rotations and save the current position. 95 Installation Menu Edit Satellite Data Only make changes to this menu when settings or circumstances relating to the satellites have changed. The settings should be made by a specialist engineer. Satellite Name: Press to access a list of all stored satellite. Use the buttons to select the satellite you want. Transponder Frequency: Use the buttons to select the transponder frequency. Edit Satellite Longitude: Use the number pad to key in the new longitude. Use the to choose between E (East) and W (West). buttons New Satellite: Press to enter the name of a new satellite using the alphanumeric keypad (see “Alphanumeric Inputs”). You can now edit the “Satellite Longitude” setting for this satellite. Deleted satellites must be reentered manually. If the satellite was factory pre-programmed, it can also be restored by a factory reset. All your personalised settings (such as Favourite lists) will be lost in the process however. 96 Delete Satellite: to delete the current selected satellite. Use the buttons to select “OK” on the on-screen prompt and press to confirm deletion Press of the satellite with all its transponders and channels. Installation Menu Edit Transponders Only make changes to this menu when settings or circumstances relating to the transponders have changed. The settings should be made by a specialist engineer. Satellite Name: Press to access a list of all stored satellite. Use the buttons to select the satellite you want. Transponder Frequency: Use the buttons to select the transponder frequency. New Transponder: Press to access the input form to enter the data of a new transponder on the satellite you previously selected. Enter the data (frequency, polarisation, symbol rate) using the number buttons. When you have entered all the data and settings, use the buttons to select “OK” and press to add pad and the the new transponder. The new transponder is inserted into the list of available transponders on the satellite. Deleted transponders can be re-located by way of an automatic search with active network search on the transmitting satellite. Delete Transponder: to delete the current selected transponder. Use the buttons to select “OK” on the on-screen prompt and press to confirm Press deletion of the transponder and its channels. On Air Download See “Software and Programme List Update” section 97 Connecting up the Video/PVR For details of how to connect your external recorder to the receiver refer to the connection diagram provided at the end of this manual and the instructions for the external recorder. Recording Playback In order to make a VCR recording (Record), the satellite receiver must be switched on or the timers must be pre-programmed (see “Timer Settings” section). For VCR/PVR playback (Play), the UFS 821 must be set to “Standby”, so that the signal path is switched through from the VCR or PVR/AUX Scart socket to the TV Scart socket. You must first set the Scart socket of the UFS 821 to “AUX” with the button while the receiver is in operation in order for your TV set to automatically play back the picture from the external recorder. In this setting, the picture from the external recorder is switched through to the TV set during playback. Pressing signal from the UFS 821. Note: 98 again restores priority to the For system reasons the TV and VCR Scart sockets carry the same signal! Software and Programme List Update Thanks to digital technology, you can receive satellite updates of the software and programme list for your receiver. The “On Air Download” sub-menu on the “Installation” menu tells you whether new software or programme lists are available. The only requirement is that your satellite reception system is aligned with ASTRA 19.2° East. to access the main menu, use the buttons to select the “Installation” sub-menu and confirm with . Then move the cursor bar to the “On Air Download” menu item and select it by pressing . Press Your receiver automatically searches for the ASTRA transponder, which broadcasts the current software and programme list. The following display appears (example): Move the light-coloured cursor bar using the settings using the buttons. Make the buttons. 99 Software and Programme List Update Transponder Info Current SW Version The transponder frequency and symbol rate are displayed here. The current software version is displayed here. Download Information Text Use the buttons to select whether you want to download the latest information text. The information text is displayed during the software download, providing details of the new features offered by the software update. Download channel data Use the buttons to select whether you want to download the latest channel list. Download Firmware The software currently available on the transponder is displayed here. Compare the version with the one listed under “Current SW Version”. If the version on the transponder is higher than the current version buttons to select whether you want to on the receiver, use the download the latest software. Start Downloading When you have made all the settings, press here to start the download. The following display appears (see next page): Note: 100 If you are not sure whether you want to download new software to your receiver, you can first activate the “information text” and then start the download. Only the information text is displayed. If you want the changes the new software offers, you can then still run the download as described above. Software and Programme List Update The receiver starts downloading. On the next screen you see the following: - The number of modules being downloaded The elapsed time The current operation The information text, if previously selected When the software has been successfully downloaded the receiver asks you whether you want to upgrade the firmware. 101 Software and Programme List Update buttons to select “OK” and pressing . The following display appears: Use the start the update by Follow all on-screen instructions. Check the time setting following a software update! You can also download the updates from the Internet. The address is: h t t p : / / w w w. k a t h r e i n . d e / e s c kathrein/download/receiv_soft.htm You can install these updates by way of the USB controller (PVR Manager). 102 Once the update is complete, the receiver is re-initialised and starts operation again. Never turn off the receiver during the update process, as otherwise you could lose the entire software. If this happened, the receiver would have to be re-installed at a workshop or using a PC and USB cable. On the “STB Management” - “System Information” menu you can see whether the new software has been installed. PVR Manager (USB Tool) Safety Instructions General Notice Before installing the USB tool for KATHREIN receivers, refer to the safety instructions for your KATHREIN receiver. KATHREIN cannot be held liable for damage, loss of data or consequential loss of any kind (e.g. loss of profit, interruption of production, loss of data and information, or other detriment to assets) resulting from the use or non-usability of this KATHREIN product, even where KATHREIN has advised of the possibility of such loss occurring. System Requirements/USB Port/Receiver Requirements Your PC must be running Windows 2000 or Windows XP as its operating system. The USB port must be USB 2.0-compatible. Your receiver must be a UFS 821sw or UFS 821si. Required Software USB Cable “PVR Manager” (USB application and USB driver) can be downloaded from http://www.kathrein.de/esc-kathrein/download/receiv_soft.htm. To connect your PC to the receiver you will need a USB cable with type A and B connectors. Do not connect the receiver to your PC‘s USB port until you have installed the software! Standard Installation Note: The software must be installed before the receiver is first connected to the USB port! 1. Double-click on the “Setup.exe” file to start the installation routine. 2. Click “Next” to confirm the prompt which appears. 103 PVR Manager (USB Tool) 3. Click “Next” to confirm the default directory selected by your PC. 4. Click the “Install” button. The software is installed on your PC. 104 PVR Manager (USB Tool) 5. Once the software has been installed on your PC, you will need to restart it. Click “Finish” to restart. Note: Connect the receiver by the USB cable mentioned on page 2 to your PC and then switch on the receiver (operating mode). The operating system detects the receiver as new hardware. 105 PVR Manager (USB Tool) The PVR Manager of the UFS 821 offers many options for uploading and downloading between your UFS 821 and a PC or laptop by way of a USB cable. The detailed instructions on these operations assume that the PVR Manager has been correctly installed as described under “Standard Installation”. The transfer rate depends on the PC‘s USB bus and hard disk, or on the data media used on the PC. The transfer rate is around 2 MB per second (so 1 GB takes around 10 minutes). Using USB 1.1, to transfer 1 GB would take about 60 minutes. Start PVR Manager 1. Connect the UFS 821 and the PC’s USB port by the USB cable mentioned at the beginning of this section. to start it 2. Switch on the receiver at its power switch and press up. 3. Start the PVR Manager by clicking the desktop icon or choosing “Start” - “Programmes” - “PVR Manager” - “PVR Manager”). The following display appears: Recordings Click on the “Record” button. The following display appears (example): Click “Multi-View” to exit the “Details”. The first frame of a recording is displayed. Click “Radio” to switch between the TV and radio recordings. The Record Manager offers the following options: 106 PVR Manager (USB Tool) Video Upload (Receiver → PC) 1. From the “Setting” menu select the drive to which you want to transfer the recording. Check first that there is sufficient storage capacity on the destination drive for the file(s) you are transferring! 2. Click on the file you want. The box at the bottom left (in the Details view) shows the first frame of the recorded programme, with details of the date it was recorded, the channel and title. 3. You can now start the transfer as follows: - Click on the file you want to transfer and hold the mouse button down. You can now drag the file from the box at the bottom right to the one at the top right. The transfer to your PC begins. OR - Click “Upload” to transfer the selected recording to the directory you previously selected on your PC. The following display appears (example): As soon as the transfer is complete, the progress bar disappears and you additionally see the transferred recording in the top pane of the window. 107 PVR Manager (USB Tool) Video Download (PC → Receiver) 1. From the “Setting” menu select the drive on your PCs or laptop containing the recording you want to download to your receiver. Check first that there is sufficient storage capacity on the destination drive for the file(s) you are transferring! 2. Click on the file you want. The box at the top left (in the Details view) shows the first frame of the recorded programme, with details of the date it was recorded, the channel and title. 3. You can now start the download as follows: - Click on the file you want to download and hold the mouse button down. You can now drag the file from the box at the top right to the one at the bottom right. The download to your PC begins. OR - Click “Download” to download the selected recording to the receiver. As soon as the transfer is complete, the progress bar disappears and you additionally see the transferred recording in the bottom pane of the window. Deleting Recordings 1. Click on the recording you want to delete. 2. Click the “Delete” button at the top of the screen. Deleted recordings are removed irrevocably, and cannot be restored! The following display appears: 3. Click “YES” to confirm deletion of the recording. The recording is then deleted. 108 PVR Manager (USB Tool) MP3 Click on the “MP3” button. The following display appears (example): The receiver‘s hard disk provides a maximum 1 GB storage capacity for MP3 files. If this is insufficient, you can also connect an external hard disk to the receiver by a USB cable. The receiver detects the external hard disk and you can play the MP3 files directly from it without having to download them to the receiver. The MP3 Manager offers the following options: ← Back → Click “←” or “→” to move up or down one level within the selected drive. Folder back Click “Folder back” to move from the selected subfolder to the next highest level. New Folder With this function you can create a new folder on the selected drive and at the selected level (on the receiver or PC). First click to select the drive and, where appropriate the subfolder level, then click “New Folder”. A new folder appears on the drive you selected. Use the keypad to enter a name for the folder. Upload Works in the same way as video upload. The only difference is that the destination and source drives can be selected directly from the boxes at the left. Download Works in the same way as video download. The only difference is that the destination and source drives can be selected directly from the boxes at the left. Delete Works in the same way as deleting recordings. The only difference is that folders can also be deleted. 109 PVR Manager (USB Tool) Photos Click on the “JPEG” button. The following display appears (example): Only photo files in JPEG format can be used. The receiver‘s hard disk provides a maximum 512 MB storage capacity for photo files. If this is insufficient, you can also connect an external hard disk to the receiver by a USB cable. The receiver detects the external hard disk and you can view the photo files directly from it without having to download them to the receiver. The JPEG Manager offers the following options: ← Back → Click “←” or “→” to move up or down one level within the selected drive. Folder back Click “Folder back” to move from the selected subfolder to the next highest level. New Folder With this function you can create a new folder on the selected drive and at the selected level (on the receiver or PC). First click to select the drive and, where appropriate the subfolder level, then click “New Folder”. A new folder appears on the drive you selected. Use the keypad to enter a name for the folder. Upload Works in the same way as video upload. The only difference is that the destination and source drives can be selected directly from the boxes at the left. Download Works in the same way as video download. The only difference is that the destination and source drives can be selected directly from the boxes at the left. Delete Works in the same way as deleting recordings. The only difference is that folders can also be deleted. 110 PVR Manager (USB Tool) Games Currently not used. To be implemented in later software versions. Upgrade Receiver Firmware You can use this function to download the software directly from PC to the UFS 821. You can download the latest software for your UFS 821 from the Internet at: http://www.kathrein.de/esc-kathrein/download/receiv_soft.htm The advantage of this is that transferring the software from the PC to the UFS 821 is faster than over the satellite. Click on the “Upgrade” button. The following display appears: Be sure to follow the download instructions for the software given on the website. They will also tell you which file you need to select for downloading. Click the “...” option to select the software to download. When you have selected the software, click “Start”. The receiver receives the new software. 111 PVR Manager (USB Tool) Channel List Click on the “Channel” button. The following display appears: Click “Radio” to switch between the TV and radio list settings. The Channel Edit screen offers the following options: Open You can use this function to open a channel list stored on your PC or laptop. You can download the latest channel list for your UFS 821 from the Internet at: http://www.kathrein.de/esc-kathrein/download/receiv_soft.htm You can edit it as you want, and then transfer it to the UFS 821 as under “Send to PVR”. The advantage of this is that transferring the software from the PC to the UFS 821 is faster than over the satellite. Save/Save As You can use these functions to save a channel list, edited according to your needs for example, to your PC or laptop. You can then open the channel list at any time, edit it and download it to your UFS 821 as described under “Send to PVR”. When you choose “Save” the system default storage location/file path is used; when you choose “Save As” you can specify the storage location/file path yourself. 112 PVR Manager (USB Tool) Load from PVR You can use this function to upload the channel list currently in use on the UFS 821 to this view and then edit it according to your needs (rearrange, sort, create favourites, etc.). Click on the “Load from PVR” button. The on-screen progress barer indicates the current status of the transfer. As soon as the progress bar disappears the transfer is complete. The following display appears (example): Click the “Radio” button to switch between the radio and TV channels. You now have the following editing options, accessible by reverseclicking on a channel (see screenshot and explanations on next page). 113 PVR Manager (USB Tool) - Start Numbering: The channels can be renumbered manually as from a desired position (click). - Move to: Enter the position (channel number) where you want the channel to move to. - Renumber: The channels are renumbered in their current sort order. - Add to new TV Favourite: A new TV Favourite list is created and the previously selected channel is included in it. - Add to all Favourites: The channel is added to all Favourite lists of the selected Favourites bank (TV/Radio). - Delete Channel: The channel is deleted from the channel list. - Delete from all Favourites: The channel is deleted from all Favourite lists of the selected Favourites bank (TV/Radio). - Insert New Channel: A new channel (Empty Channel) is inserted in the channel list in front of the selected position. - Edit Channel: Channel data can be entered/edited. - Edit Transponder: Transponder data can be entered/edited. - Lock Channel: Channel is locked (PIN check for access on receiver). - Unlock Channel: Channel is unlocked. - Skip Channel: Channel is skipped during zapping. - Restore Channel: Channel is no longer skipped during zapping. All these changes take effect only once the channel has been downloaded to the receiver again by the “Send to PVR” command. Send to PVR You can use this function to download the current displayed channel list to the UFS 821. Click on the “Send to PVR” button. The on-screen progress barer indicates the current status of the transfer. As soon as the progress bar disappears the transfer is complete. SatcoDX You can use this function to edit channel lists downloaded from www.satcodx.com. After editing them, you have three options: - You can add the complete list, or part of it, to the existing channel list of the UFS 821 and then sort the list as you want. You must have first uploaded the channel list from the UFS 821 to do this though (“Load from PVR”). - You can add the complete list, or part of it, to a channel list of the UFS 821 stored on your hard disk and then sort the list as you want. You must have first downloaded the channel list from the hard disk to do this though (“Open” button on Edit Menu screen). - You can apply the complete list, or part of it, as a new channel list. Click on the “SatcoDX” button. The following display appears: 114 PVR Manager (USB Tool) Click on “Open” to open a SatcoDX channel list stored on your PC or laptop. The following display appears (example): Now click on one of the grey boxes (Satellite, Position, Name etc.) to sort the channels by those criteria. You can use the “Filter” option to exclude certain channels. You can sort by further criteria (e.g. Radio, TV etc.) in the small grey box at the top right which by default shows “Display - ALL”. Once you have completed your sort, select the channels which you later want to add to an existing channel list or insert into a new one. To do so, click on the empty box in front of the channel to select a single channel or click “Select All” to select all the channels. Click on “Add” to import the selected channels into the “Edit Channel” screen. 115 PVR Manager (USB Tool) Sat/TP Edit (Satellite & Transponder) You can use this function to enter a new satellite and/or transponder. To do so, click on the “Sat/TP Edit” button. The following display appears (example): Enter the data for the new satellite/transponder here and then click “Add”. The new data is added to the existing satellite/transponder list. Create Favourite You can use this function to create a new Favourites folder. To do this in the channel list currently used on the UFS 821, you must first upload it (“Load from PVR”) from the receiver to the “Edit Channel” screen. To do this in a channel list stored on hard disk, you must first choose “Open” to download it from the hard disk to the “Edit Channel” screen. First click TV or Radio Favourites to select whether you want to create a new Favourite list for radio or TV. Then click “Create Favourite”. A new Favourite list appears, which you can name as you want using the keypad. How to add channels to a Favourite list is detailed under “Add to Favourite”. 116 PVR Manager (USB Tool) Add to Favourite You can use this function to add one or more channels you previously selected to the desired Favourite list. Click on the channel you want to add and hold the mouse button down. Now drag the channel with the mouse onto the Favourite list to which you want to add it. You can also select multiple channels to add by holding down the Ctrl key while selecting (see example screenshot). Renumber You can use this function to renumber the channels in their current sort order. Delete You can use this function to delete selected data (channels, Favourite lists etc.). Radio You can use this function to switch between the TV and radio channel listings. 117 Using the Front Panel If you have misplaced your remote control, or if the batteries are empty, you can still operate your receiver from the front panel. Backup Operation The front panel houses four buttons and the multifunction control (from now on referred to as “the control”). Because there are no number buttons, no password/PIN-protected functions can be called up. Menu button: Press the Menu button to access the main menu. Move to the various sub-menu items by rotating the control. Select the sub-menus by pressing the middle of the control. Press the Menu button to exit the selected menu and save your changes. Press the Stop/Exit button to exit the menu. Record button: Press the Record button to start a manual recording. Select the setting by rotating the control. Press the middle of the control to make your settings. Press the Stop/Exit button to exit the menu without recording the current programme. Play button: Press the Play button to access the recording list. Select the programme you want to view by rotating the control and start playback by pressing the middle of the control. Press the Stop/Exit button to exit the menu without starting playback. Stop/Exit button: Used to cancel all ongoing actions, such as Record and Play. Multifunction control: - Rotate the control to switch channels. - Tap the middle of the control to call up the volume bar, then rotate the control to adjust the volume. - Press the control button twice to switch between TV and radio reception. - Press and hold down the control button to switch the receiver to Standby mode. Tap the control button to restart the receiver. 118 Receiver to Receiver Data Transfer Your receiver is able to receive data from another receiver via its RS232 port. For this, the two receivers are interconnected via a so-called zero-modem cable. The transmitting receiver is the “master”, and the receiving receiver is the “slave”. Only possible between two UFS 821 receivers!!!! Preparations The master and slave are both switched on. Then the RS 232 ports of the two receivers are interconnected by a zero-modem cable. Channel List Download Master: Select “System Setup” - “STB Management” - “Transfer Channel Data”. button. Use the buttons to select “OK” and start the download by pressing . The master searches for the slave and, once Press the it has found it, automatically begins downloading the channel list. The following display appears: “Channel data being transmitted”. Slave: The following display appears: “Receiving data”. Once all the data has been received, first remove the zero-modem cable and then switch the receiver off and back on again at the power switch (hard reset). You can now use the new channel data. Firmware Download Not yet available in the current software version. 119 Technical Appendix Technical Features The UFS 821 twin satellite receiver has two separate reception and signal processing paths. This allows you to record a programme and simultaneously zap through other channels, or to record two different programmes and at the same time watch one of them (either live or time-shifted) or another previously recorded programme. Reception of DVB TV and radio satellite channels 2 x Sat tuners with loop-through output 4000 channel memory positions Integrated 160 GB hard disk providing over 100 hours of recording capacity tvtv EPG (Electronic Programme Guide) for weekly detailed information on around 60 channels Unlimited number of timer recordings Convenient timer programming via EPG Automatic time-shift function Suitable for software updating (firmware and programme list) separately via satellite and PC Picture-in-picture (PIP) function, controllable through all channels Transmission of MPEG data stream to PC or laptop via USB 2.0 port 1) Import and playback of MP3 files JPEG viewer for viewing (slide show) and storing images 16-character alphanumeric display for channel names, radio data, MP3 file names etc. Multifunction control on front of unit Common Interface (CI) for 2 CA modules (CAM) for Pay-TV ²) Automatic date and time generation via DVB data stream Videotext/Teletext decoder with memory for 800 pages (display via receiver) and Videotext/Teletext generation (display via TV set) On Screen Display (OSD) in 8 languages (D, GB, F, I, NL, P, E, TR) Automatic format recognition 4:3 and 16:9, Letterbox, P & S with optional output format Optical audio output for Dolby Digital data stream (AC 3) Channel search and sort function Composite colour, RGB and S-VHS signal output, programmable with SCART socket DiSEqC™1.2 control signal 8 Favourite channel lists Mute Remote control with command set switching Linux-based operating system Power switch ¹) PC software can be downloaded from: http://www.kathrein.de/esc-kathrein/download/receiv_soft.htm ²) CA modules and Smartcards are not included with this product 120 Technical Appendix Designation UFS 821si UFS 821sw Order no. 20210071 20210072 Silver Black Colour RF band Sat IF band MHz 2 x 950-2150 Input level band dBµV 44-83 dB < 4.5 Reception threshold (EB/NO) TV system Video Modulation, FEC, demultiplexer DVB-S standard Video resolution CCIR 601 (720 x 576 lines) Video decoding MPEG-1 and 2 compatible Input data rate MSymb/s 2-45 Bit rate MB/s 1.5-15 Frequency range MHz 0.02-5 Output voltage S/N Vss dB 1 > 53 TV system Audio Audio decoding MPEG 1 and 2, Layer 1 and 2 Sampling rate kHz 32/44.1/48 Frequency range kHz 0.04-20 Output voltage mVss S/N 770 dB > 65 Flash RAM MB 4 SDRAM MB 32 Processor pulse frequency MHz 166 Capacity GB 160 Recording time hrs > 100 (depending on data rate and refresh rate) V/Hz 100-240/50-60 Memory Hard disk recorder Power supply Power supply voltage Power consumption (power/standby LNB supply (horiz./vert.) Control signal W < 35/< 10 V / mA 14/18; max. 500 kHz 22; tone-burst; DiSEqC™1.2 Connections Sat IF input/output 4 x F socket TV/VCR connection 2 x Scart socket Cinch socket Video output Audio output (analogue) 2 x Cinch socket Audio output (optical) Standard fibre-optic Data interface Sub-D 9-pin / RJ 11 / 2 x USB ports (1.1 and 2.0) Common Interface For 2 CA modules General Ambient temperature °C Max. + 5 to + 40 Unit dimensions (W x H x D) mm 342 x 67 x 273 kg 3.1 Weight 121 Technical Appendix Accessories Scart Socket Assignment VHS/S-VHS Switching 122 1 infrared remote control (RC 660) 2 batteries 1.5 V, type: LR 03, size: AAA (Micro) 1 Scart cable 1 operating manual Signal Terminal no. TV VCR/AUX Audio right output 1 X X Audio right input 2 Audio left output 3 X X Audio earth 4 X X Blue earth 5 X X Audio left input 6 Blue signal 7 X X Switching voltage 8 X X Green earth 9 X X Data signal 10 Green signal 11 X X Data signal 12 Red earth 13 X X Data earth 14 Red signal (C) 15 X X Blanking signal 16 X X Video earth 17 X X Blanking signal earth 18 X X Video output (Composite colour video signal/Y) 19 X X Video input 20 Connector shield 21 X X X X X The Scart sockets are switchable between VHS and S-VHS. The switch is made by selecting “System Setup” - “TV Settings” - “AV Settings” from the main menu. VHS (RGB): The RED signal is connected to terminal 15, the Composite Colour output to terminal 19. S-VHS (C/Y): The C output is connected to terminal 15, the Y output to terminal 19. Technical Appendix Connection Example Cinch DVR (VCR) Digital audio AC 3 optical Hi-fi PC Dolby Digital system PC oder or Laptop laptop 123 Short Technical Guide DiSEqC™ DiSEqC™ components DVB MPEG-2 EB/NO ratio FEC OTR PID Programme package 124 DiSEqC™ (Digital Satellite Equipment Control) is a communication system between a satellite receiver (master) and the peripheral satellite components (slaves), such as LNBs, multi-switches, rotating antenna systems. It is a single master/multi-slave system, i.e. there is only ever one master in the satellite system. All activities start from the master. If DiSEqC™ switching matrices are cascaded, the master receiver must transmit the DiSEqC™ signal several times, so that all DiSEqC™ multi-switches in the cascade receive their commands. These days, DiSEqC™ components (slaves) must be reverse compatible, i.e. respond to the analogue switching criteria from receivers that are only equipped with H/V and 22 kHz control signals. A DiSEqC™ switching matrix will work with analogue switching criteria until the DiSEqC™ command from the master is received. All analogue switching criteria are then ignored. DVB is the abbreviation for Digital Video Broadcasting. DVB-S refers to the transmission method (S = satellite). MPEG is the abbreviation for Moving Picture Experts Group, a working group that formulates internationally applicable standards for the digital compression of video and audio. MPEG-2 has established itself as the standard for compression of digital TV signals. MPEG-2 works up to a data rate of 100 MB/s. The EB/NO ratio is a measure of the signal to noise ratio of a digital signal. The value is not identical to the C/N value familiar from analogue reception technology. At EB/NO values below 5 dB, no reception is normally possible. FEC is the abbreviation for Forward Error Correction. The FEC error rate corresponds to the Viterbi rate. One Touch Recording The PID (Packet IDentification) number is an identification number for video signals and audio signals in the digital data stream of DVBMPEG-2 signals. The receiver uses the PID number to create a unique assignment for the video and audio data transmission. The PCR PID is the identification number for the synchronisation signal. The PCR PID is normally identical to the video PID. For programmes broadcast in multiple languages, the audio PID can be entered manually to assign a different language to the TV programme. After the PID is entered, the digital receiver automatically selects the audio data identified by the PID number from the data stream and assigns it to the video signal. The programme package for a digital transponder normally includes several TV and radio programmes. Each programme package has a fixed assignment for the transponder transmission frequency, for polarisation (horizontal or vertical), for the symbol rate and for the Viterbi rate or error rate. Short Technical Guide PIP Symbol rate Transponder Picture-In-Picture function The symbol rate describes the quantity of data that is transmitted per second. The symbol rate is measured in MSymbols/s and is equal to the number of symbols received per second. A transponder is a satellite channel which transmits TV and radio signals. A satellite has several transponders. Analogue transponders transmit only one TV channel and possibly multiple radio channels on the transmission frequency. Digital transponders simultaneously transmit several TV channels and several radio channels at a transmission frequency. If a programme provider is broadcasting several TV channels via a digital transponder, we refer to the provider’s programme package. The terms “digital transponder” and “programme package” have the same meaning. Video bit rate Viterbi rate The video bit rate describes the quantity of data from the digitised video signal that is transmitted per second. The Viterbi rate (code rate, error rate) characterises the error protection used by the programme provider. The DVB standard provides the following values: 1/2 - 2/3 - 3/4 - 5/6 - 7/8 125 Short Technical Guide Glossary AC 3 Output for Dolby Digital signal Audio Output Sound output on the receiver AV programme position Preferred programme position on TV set for Scart input CA Conditional Access (for decoding of encrypted programmes) CI Internationally standardised interface for CA modules Decoder Decoding device for Pay TV DiSEqC™ Control system between receiver and LNB, multi-switch DVB Digital Video Broadcasting EB/NO [dB] Power density per unit of information EB/NO ratio Digital signal to noise ratio LED display Display on receiver LNB Low Noise Block Converter Mute Muting of sound OSD On-Screen Display PAL Analogue TV standard Pay TV Television channels available on subscription (e.g. PREMIERE) PCMCIA Standard for internal decoder interface for pay TV PID See Short Technical Guide PIN Personal Identification Number PIP See Short Technical Guide Receiver Satellite receiver RGB Video signal made up of three individual colour signals (red, green, blue) Satellite IF signal Receiver input signal Scart cable 21-pin connecting cable (e.g. receiver/TV) Smartcard Card from Pay TV provider to decode its programmes standby Standby mode S-VHS Super Video Home System (video recorder standard) Symbol rate Rate of data transmission of satellite signal Time-shift function Time-shifted playback Timer function Clock function for pre-programmed switch on and off times Transponder See Short Technical Guide UFO micro and UFO mini Kathrein-specific satellite signal processing systems VCR connection Video recorder connection Viterbi rate See Short Technical Guide ® 126 ® Troubleshooting In the event of a malfunction, first check all the cable connections and operating states: 1. Receiver and TV set power plugs are connected to wall socket 2. Antenna cable on receiver input 3. Receiver and TV set correctly interconnected by a Scart or cinch cable 4. Audio connections are made to hi-fi or Dolby Digital system as appropriate (see previous page) 5. Receiver and TV set (hi-fi/Dolby Digital system) are switched on (check power indicators) 6. Receiver is responding to remote control A selection of troubleshooting tips is offered below. Problem Cause Antenna signal of satellite reception system missing or faulty. Incorrect “No signal!!” warning appears on some oscillator frequencies set in LNB or all channels Configuration menu. Only one cable from satellite system connected Remedy Consult an antenna specialist to have it checked and repaired as necessary. On “Installation” menu check LNB configuration for satellite in question: High L.O. “10.600” GHz and Low L.O. “9.750” GHz, and change as necessary Connect tuner input “LNB2 IN” with second cable (connect coaxial cable with F connection of SAT socket). OR: On “Installation” menu change LNB configuration tuner input to “#1” (if only one satellite being received) Remote control no longer responding Receiver or remote control command Set infrared code 1, as described in set may have been unintentionally operating manual under “Remote changed Control RC 660”; check batteries Wrong time being displayed On “System Setup” - “Time Setup” menu check “Summer Time Enabled” “Summer Time” setting wrong. An and change as necessary Switch off incorrect time was imported from the receiver at mains switch from current reception signal channel, e.g. ARD or ZDF, wait 10 seconds and then switch back on DECT telephones are operating The following channels cut out or “Poor on the same frequency as these signal or no signal!!” appears: PRO 7, channels. Interference may occur due Consult your antenna specialist SAT 1, Kabel 1, DSF,N 24, Tele 5, 9 to inadequate level or poor screening Live, HSE 24 and Sonnenklar TV factor of cable Black or blue screen, no on-screen Scart connection to TV deactivated by Keep pressing 0 button until TV picture displays accidentally pressing 0 button reappears on-screen 127 Service If, despite studying this operating manual, you still have questions about getting started with the unit or using it correctly, or if unexpected problems occur, please contact your specialist dealer. The Kathrein Customer Hotline is also at your disposal. Phone: 0900/1122240* 936.2858/A/1205/ZWT - Technical data subject to change. * (0.89 EUR per minute on land lines of Deutsche Telekom AG) Internet: www.kathrein.de KATHREIN-Werke KG • phone +49 8031 184-0 • Fax +49 8031 184-306 Anton-Kathrein-Straße 1 - 3 • P.O. Box 100 444 • 83004 Rosenheim GERMANY