1
SD-PCIPCM-260203
·User
Manual
Introduction
This PCMCIA to PCI card allows the user to connect one PC Card to the back panel of a desktop PC:-It is
compliant with the PCMCIA 2.1IJEIDA 4.1 specification. The data interface to the PC card is 16/32 bit and
powered at 3.3V or 5Y. The user is beneficial from what they can connect to their PC with a wide range of
devices compliance to Type IfIIIIII CardBuslPCMCIA specification, i.e. wireless LAN, Bluetooth, USB host controller, Firewire host controller, Memory card reader, lO/lOOM LAN.
Features
•
•
Compliant with PCI Local Bus specification 2.2
Hot Swapping and Plug-n-Play compatible
Compliant with PC Card Standard Release 8.0 specification
•
•
•
•
•
-
.
-~
Support 16-bit (pCMCIA 2.lIJEIDA 4.2) and 32-bit (CardBus) PC Card ~
3.3V or 5V power light indicator
Compliant with i82365SL register set and ExCA
Support Type IIII./,IIICardBuslPCMCIA
card
Software'c!river supports Windows 98SE, ME, 2000, XP and other most popular OS
HaFGWaFe iBStallation.{)t:.the-l!CMGIA-to-PCI
Car
It is assumed that the user must have the experience in installing hardware and software on a PC. If not, contact
your dealer or ask a person who is qualified to do it. Installing the PCMCIA to PCI card into your computer is a
simple process. Please follow these steps:
I.
Turn off your computer and all external devices connect to it.
2.
Disconnect your computer from the power sources.
3.
Open the computer case. Refer to your computer user manual for more details.
4.
Find an available PCI slot and remove the slot bracket. Save the bracket screw for later use.
5.
Align the PCMCIA to PCI card horizontally with respect to the PCI slot and insert it into the slot firmly and
evenly. Take care not to force it into the slot. Once you have properly positioned the PCMCIA to PCI card
into the slot, fasten it to the computer case with the bracket screw you have saved.
6.
Secure the computer case and switch on your computer.
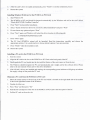
Installing Windows XP/2000 drivers for the PCMCIA
to PCI Card
1. Start Windows XP/2000
2.
Once the Windows XP/2000 starts up, the card's driver is installed automatically
Installing
Windows ME drivers for the PCMCIA
to PCI Card
1.
Start Windows ME
2.
The PCMCIA to PCI card should be detected automatically by the Windows and ask for the card's driver
"Ricoh RL5C475(II) CardBus Controller"
3.
Select "Automatic search for a better driver (Recommended)"
and press "Next"
4.
After the card's driver is loaded automatically, press "Finish" to end the installation process
5.
Restart the system
Installing Windows 98 drivers for the PCMCIA to PCI Card
1.
Start Windows 98
2.
The PCMCIA to PCI card should be detected automatically by the Windows and ask for the card's driver
"Ricoh RL5C475(1I) CardBus Controller"
3.
Press "Next" to proceed the installation
4.
Select "Search for the best driver for your device (Recommended)"
5.
Do not choose any option and press "Next"
6.
Press "Next" again, and Windows will select the driver location in following path
and press "Next"
C:\WlNDOWS\INF\PCMCIA.INF
7.
Press "Next" again
8.
The PC Card (PCMCIA) wizard will be launched. Read the instructions carefully
appropriate options. It is a good practice to choose default options if you are uncertain.
9.
Press "Finish" when the installation ends
and choose the
10. Restart the system
Installing a PC card to the PCMCIA to PC! Card
1. Start the system
2.
Align the PC card to the slot on the PCMCIA to PCT Card at the back panel of the PC
3.
Gently push the PC card inside into the slot until the Ejector of the card comes out from the slot
4.
The Windows should recognize the PC card automatically and it might ask for the software driver. Please
refer to the user manual of that card for the driver installation
5.
After all card's drivers are installed and running, the corresponding power indicator will light up to indicate
the supply voltage of that particular PC card
Dismount a PC card from the PCMCIA
to PCI Card
1. Move the mouse cursor to device icon of the PC card which is located on the right hand side of the toolbar
in the lower right hand comer of the Windows
2.
Double click the icon
3.
Press "Stop" and then press "Ok"
4.
Push the PC card Ejector of the slot on the PCMCIA to PCI Card at the back panel of the PC
5.
Pull the PC card out from the slot