1
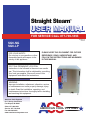
Straight Steam
™
USER MANUAL
FOR SERVICE CALL 877-749-1893
Version 1.5
05/2011
SG6-NG
SG6-LP
FOR YOUR SAFETY:
Do not store or use gasoline or other
flammable liquids and vapors in the
vicinity of this appliance.
PLEASE KEEP THIS DOCUMENT FOR FUTURE
REFERENCE. READ, UNDERSTAND, AND
FOLLOW THE INSTRUCTIONS AND WARNINGS
IN THIS MANUAL.
POST IN A PROMINENT LOCATION:
Instructions to be followed in the event user smells
gas. This information shall be obtained by consulting
your local gas supplier. Ensure all users of this
equipment understand the instructions.
WARNING:
Improper installation, adjustment, alteration, service,
or maintenance can cause property damage, injury,
or death. Read the installation, operating, and
maintenance instructions thoroughly before installing
and servicing this equipment.
American Cook Systems
6117 Stoney Creek Drive
Fort Wayne, IN 46825
Sales: 877-480-2332
Service: 877-749-1893
Fax: 260-484-0979
www.americancooksystems.com
AMERICAN COOK SYSTEMS
TABLE OF CONTENTS
INSTALLATION
General Safety ...................................................................................2
Gas Leak Instructions ..........................................................................2
Operational Safety ..............................................................................2
Location & Placement ........................................................................2
On a Stand .............................................................................3
On a Stand with Casters ........................................................3
Exhaust Hood Requirements .............................................................3
Water Line & Drain Connections ........................................................3
Gas Supply .........................................................................................4
Gas Supply Requirements ......................................................4
Installation of Gas Supply Lines..............................................4
Testing Gas Supply Lines .......................................................4
Pressure Testing Gas Supply Lines .........................................5
Electrical Connections.........................................................................5
In-Field Modifications .........................................................................5
High Limit Lockout .............................................................................5
Burner Blower Information .................................................................6
Power Failure and Ignition Warnings ...................................................6
OPERATION
Daily Preparation ................................................................................7
Initial Lighting ....................................................................... 7
Filling with Water ...................................................................7
Cooking ...................................................................................7
Shutdown and Cleaning .........................................................7
GENERAL INFORMATION
Control Panel ...................................................................................8
Tips & Tricks ......................................................................................9
High Volume / A la Carte Cooking ......................................................9
WARRANTY ............................................................................10
INSTALLATION
General Safety
Please make sure each operator reads and understands this manual completely before operating the
steamer. The owner and operator(s) must keep these instructions in an easily accessible location for
reference and training.
Steam can cause serious injuries and equipment damage. Pay attention to the Operational Safety
section, the warnings in this manual, and on the equipment.
Gas Leak Instructions
⚠ DANGER
GAS LEAKS ARE FIRE AND EXPLOSION HAZARDS.
INJURY, DEATH AND PROPERTY DAMAGE WILL RESULT.
If anyone smells gas, or suspects a gas leak, immediately refer to the posted gas
leak instructions. The posted instructions are provided by the local gas supplier and
supersede any other instructions.
Observe the following precautions in addition to the posted instructions:
• Do NOT light or start any appliance.
• Do NOT touch any electrical switch.
• Do NOT use any phone in the building.
• Immediately call the gas supplier from a phone away from the building.
• Follow the gas supplier’s instructions.
• If the gas supplier cannot be reached, call the fire department.
Operational Safety
•
•
•
Do not store anything on top of the steamer.
Keep the area around and under the steamer free and clear of combustible material.
Do NOT obstruct the flow of combustion and ventilation air.
Location and Placement
The Straight Steam™ is designed to be placed on a standard commercial kitchen countertop
or on an American Cook Systems Straight Steam™ stainless steel stand. For safe and efficient
operation, observe the following criteria when selecting an operating location for this appliance.
•
•
•
•
2
Installation must comply with all local fire and health codes.
The location selected must be capable of supporting this appliance (the operating weight of
a single SG6 is 250 lbs).
Position this appliance so it will not tip or slide.
The operating surface must be level enough to allow leveling of this appliance with its
adjustable legs. This appliance MUST be level both front to back and side to side before
operation.
•
•
•
•
•
The location must include space for Operating and Service/Secondary Clearances and the
Exhaust Hood.
KEEP THE AREA FREE AND CLEAR OF COMBUSTIBLES.
Proper air supply for ventilation and combustion is REQUIRED for and CRITICAL to safe,
efficient operation of a Straight Steam™ SG6. Do NOT obstruct the flow of combustion and
ventilation air.
Make sure the air vents of the steamer are not blocked with or by anything.
Allow for sufficient clearance if a “high heat source”, (e.g. a fryer) is located next to the
steamer.
CLEARANCES
Combustible Construction
Back
2”
Right Side
2”
Left Side
2”
Noncombustible Construction
-------------------
A. On a Stand
If installing the unit onto an American Cook Systems Straight Steam™ stand, bolt the unit(s) in place at
the four locations on the bottom of the cooker, using the hardware provided with the stand. Level the
unit(s) by adjusting the four legs on the stand.
B. On a Stand With Casters
The installation shall be made with a connector that complies with the standard for connectors for
moveable gas appliances; ANSI Z21.69 • CSA 6.16, and a quick-disconnect device that complies with
the standard for quick-disconnect devices for use with gas fuel, ANSI Z21.41 • CSA 6.9.
Adequate means must be provided to limit the movement of the appliance without depending on the
connector and the quick-disconnect device or its associated piping to limit the appliance movement.
The location where the restraining device may be attached to the appliance shall be in accordance with
American Cook Systems specifications for the device.
Exhaust Hood Requirements
Install and operate this gas appliance in a well ventilated area. Adequate air must be supplied to
replenish air used for combustion. Installation must conform to local codes and/or with the National
Fuel Gas Code, ANSI Z223.1/NFPA-54 (latest edition) or the National Gas and Propane Code CSA
B149.1 as applicable.
Do not restrict the flow of air for combustion and ventilation. Do not obstruct the flue cover or
control side vents after installation.
Water Line & Drain Connections
A water line connection is required to operate the automatic water fill feature. A drain must be
connected at installation.
3
Gas Supply
⚠ DANGER
GAS LEAKS ARE FIRE AND EXPLOSION HAZARDS.
INJURY, DEATH AND PROPERTY DAMAGE WILL RESULT.
If anyone smells gas, or suspects a gas leak, immediately refer to the posted gas
leak instructions. The posted instructions are provided by the local gas supplier and
supersede any other instructions.
Observe the following precautions in addition to the posted instructions:
• Do NOT light or start any appliance.
• Do NOT touch any electrical switch.
• Do NOT use any phone in the building.
• Immediately call the gas supplier from a phone away from the building.
• Follow the gas supplier’s instructions.
• If the gas supplier cannot be reached, call the fire department.
A. Gas Supply Requirements
•
•
•
•
Gas supply type MUST match the type of gas shown on the rating plate.
Gas supply pressure must NOT exceed 14” water column (½ PSI) and fall within the
acceptable pressure range shown below when using ¾” NPT line and a ½” NPT connection
Gas supply pressure must be between 5” - 14” water column.
If the gas supply pressure exceeds 14” water column, a pressure-regulating valve (pressure
regulator) must be installed in the gas supply plumbing to reduce pressure to the Straight
Steam™.
B. Installation of the Gas Supply Lines
The Installer/owner is responsible for furnishing and installing gas supply lines, valves, regulators,
and accessories.
When installing gas supply lines and accessories, observe the following:
• Use a non-hardening pipe thread sealant resistant to LP gas.
• The ½” NPT gas inlet is on the back of the Straight Steam™.
• Install main manual shut-off valve between gas supply and the Straight Steam™. This main
manual shut-off valve is called the “Main Manual Gas Valve”.
• Install a sediment trap (drip leg) in gas supply line.
C. Testing Gas Supply Lines
•
•
•
•
•
•
•
4
Test all pipe joints for leaks with soap and water solution.
Check all connections for proper tightness.
Remove the control side panel to inspect gas connections inside.
Open the gas supply valves.
Check all lines and connections for leaks, both inside and outside.
All leaks must be corrected before operating the Straight Steam™.
Replace the side panel and secure it before starting the Straight Steam™.
D. Pressure Testing Gas Supply Lines
If any pressure testing is required, the Straight Steam™ must be disconnected or isolated from the
gas supply piping system during any pressure testing as follows:
•
•
The appliance and its main manual shut-off valve must be disconnected from the gas supply
piping system during any pressure testing of the system at test pressures in excess of 14”
water column (½ psi or 3.45 kPa).
The appliance must be isolated from the gas supply piping system by closing its main manual
shut-off valve during any pressure testing of the gas supply piping system at test pressures in
equal to or less than 14” water column (½ psi or 3.45 kPa).
Electrical Connections
If any of these instructions are not completely understood, or you have any doubt as to whether
your supply receptacle is of the correct voltage, amperage, or is properly grounded, consult a
qualified electrician or serviceman.
A.Check the rating plate to make sure the Straight Steam™ is compatible with the electric
supply.
• The rating plate is located on the control side panel.
• The electrical diagram is located in this manual and on the inside of the control side
panel.
B.The electrical supply must match all electrical and wiring requirements specified on the rating
plate and the connection must be made in accordance with the following requirements:
The electrical power lines must be installed in accordance with:
• The National Electric Code, ANSI/NFPA No. 70 LATEST EDITION (USA).
• Canadian Electric Code, CSA C22.2
• Any other applicable national, state, or local laws, codes, and regulations.
C.To reduce the risk of shock in the event of an electrical short circuit, this appliance must be
grounded. The unit is equipped with a cord having a grounding wire and plug, which must
be plugged into an outlet that is properly installed and grounded. Under no circumstances
should the plug be cut or bent to fit a receptacle other than the one specified.
D.Optionally, a permanent supply connection may be made using rigid or flexible conduit.
Consult a qualified electrician or serviceman to ensure all wiring is performed to the electrical
codes specified above.
In-Field Modifications
Any in-field modifications made without written authorization from the American Cook Systems
Engineering Department will void your warranty. Please call 877-749-1893 to reach the American
Cook Systems Engineering Department.
High Limit Lockout
The Straight Steam™ SG6 has a High Limit Lockout to protect the unit from overheating.
If the Straight Steam™ SG6 overheats and shuts completely down while cooking (no lights), open the door and verify that water is in the reservoir.
5
If there is water in the reservoir:
1) Turn OFF the steamer and drain the water from reservoir
2) Wait for the steamer to cool
3) Restart the steamer
If there is no water in the reservoir:
1)Wait for the steamer to cool
2)Fill the steamer with water
3)Restart the steamer
If the problem repeats, call the American Cook Systems Service Department at 877-749-1893
Burner Blower Information
The bearings in the burner blower are permanently lubricated and do not require any periodic
maintenance.
Power Failure and Ignition Warnings
⚠ DANGER
Do
attempt
to operate
an Intek
XSG-5
during
a power
failure.
DoNOT
NOT
attempt
to operate
an SG6
during
a power
failure.
DEATH,
INJURY
and
EQUIPMENT
DAMAGE
can
result.
DEATH, INJURY and EQUIPMENT DAMAGE can result.
During a power failure, turn the steamer OFF and close the Main Gas Shut-Off
Valve.
⚠ DANGER
DO NOT TRY TO LIGHT BURNER WITH A FLAME
Xtreme Steam
XSG-5
The Straight
Steam™
SG6 has
has an
an electronic
electronic ignition
ignition system,
system, which
which automatically
automatically
lights the burner, senses flame and controls gas flow. This provides precise burner
control, safe ignition and safe shutdown.
DEATH, INJURY, and EQUIPMENT DAMAGE may result from trying to light
burners with a flame or from an improperly adjusted gas control and ignition
system. Do not try to light the burner with a flame and do not alter the gas control
adjustments.
ACS Service Department at 877-482-7150.
877-749-1893
If adjustment is required, contact the Intek
American
Cook Systems
Intek Manufacturing
LLC is in no way responsible for the operation or safety
of this equipment if the controller, valve, igniter probe or any other gas system
component is adjusted by anyone other than a qualified Intek
ACS authorized service
representative.
6
OPERATION
Daily Preparation
Preparing the Straight Steam™ for use each day requires very little time and effort. The
A. Initial Lighting
Make sure the gas is on, push the ON button and turn the timer between 10-15 minutes to allow the
unit to preheat.
IMPORTANT: IF GAS SUPPLY IS INTERRUPTED DURING OPERATION, A FIVE (5) MINUTE
PERIOD OF COMPLETE SHUT-OFF OF GAS SUPPLY IS REQUIRED BEFORE RE-STARTING.
B. Filling with Water
The unit has an automatic water fill connection. It is OK to use hot water as long as it is not more than
160ºF.
C. Cooking
To begin cooking, place the food to be cooked into the steamer and set the timer to the desired cooking
time. When the cycle is complete, the End of Cook Cycle Buzzer will sound and the cooker will
automatically switch to HOLD mode.
You can check the food at anytime during the cook cycle. Just open the door - check the food, and
reclose the door. You do not have to turn the unit off. To maintain proper water level DO NOT TURN
UNIT OFF when loading and unloading.
D. Shutdown and Cleaning
At the end of each day the Straight Steam™ should be drained and cleaned. First, turn the cooker off
and allow a few minutes for it to cool down. Use caution when draining a warm or hot cooker. Clean
with mild detergent, rinse and leave the door ajar.
7
GENERAL INFORMATION
Control Panel
Chamber temperature- NSF
approved thermometer for
NSF approved holding feature.
Temperatures of less than 212º
Chamber
temperature
during
cook cycle
is normal.
Indicator
light:
Timerininuse
use
Indicator
light:
Timer
Indicator
light:
Heater
Indicator
light:
Heaterisin on
on
Indicator
light:Power
Power is
in on
Indicator
light:
on
Set to
for for
untimed,
Set
to“CONT”
“CONT”
untimed,
continuous
cook
continuous
cook
Set toto“HOLD”
for for
untimed,
continuous
Set
“HOLD”
untimed,
hold at temperature
by at
continuoussethold
“Temperature
a setController”
temperature
Setcook
cook
in
Set
timetime
in minutes
for
minutes for timed cook
timed cook
Onswitch
switch
turns
ON
turns
unitunit
on on
Indicator light: A la carte
function is on
Indicator
light:
Waterisislow
low
Indicator
light:
Water
8
Off switch
turns
OFF
switch turns
unitunit
off off
Temperature
controlsets
setsholding
Temperature
Controllerholding
temperature
temperature.
Temperature
setting does
not affect cooking temperature set to
200º degrees between batches for fast
A la carte switch can be used
recovery.
at the beginning of any new
batch when faster cook time
is desired
Tips & Tricks
For faster cook times in the Straight Steam™, try one or more of the following methods.
DO NOT PUT LIDS OVER PRODUCTS. This will double or sometimes triple cook times. The
only products you may want to put lids on are soups, sauces, and anything desired crunchy.
USE PERFORATED PANS WHENEVER POSSIBLE. You can put a solid pan on the rack beneath
the product cooking to catch drips. If you must use a solid pan, pour one cup of water in the pan
per pound of product being cooked. This shortens cook times and helps cook more evenly.
Use of deeper solid pans will increase your cook times by 10-40%. The shallower the solid pan,
the better. For example: Ten pounds of frozen loose corn will take less time if cooked in two 2.5”
pans rather than one 4” pan.
High Volume/A la Carte Cooking
Frozen Vegetables: In perforated pans, roughly a minute per pound and a minute per pan. For
example: 15 lbs of corn in 3 perforated pans will take approximately 15 minutes.
Dry Pasta: Preheat water in 4” solid pan. Add pasta. Cook time is similar to stove top, but stirring
is not necessary.
Rice: Do not cover. Institutional rice takes about 35 minutes and all others take about 25 minutes.
Use 1.8 parts water to 1 part rice. For example: For 5 cups of rice you need 9 cups of water. The
Straight Steam™ is a great rice cooker.
Pre-cooked Breakfast Meat: Pre-cooked sausages and bacon can be rethermalized in the Straight
Steam™ by steaming the product until internal temperature reaches 165°F (20-30 minutes).
Scrambled Eggs: Cover the bottom of a solid 4” pan with plastic wrap and fill with eggs. Cook until
done, around 25 minutes. Do not stir. Invert the eggs into another solid 4” pan. Eggs will not stick
because of the plastic lining, saving time with clean up.
Frozen Pancakes: Simply layer them in a perforated pan and steam for 6-10 minutes until their
internal temperature reaches 150°F.
Cornbread: Use milk instead of water in your recipe and cook for 15 minutes or until a knife
inserted comes out clean. Do not cover. It will be moist, but not soggy.
9
Warranty
1 Year Parts & Labor Warranty
American Cook Systems warrants that your Straight Steam™ steam cooker will be free of defects in
material and workmanship under normal use for a period of one (1) years from the date of shipment
from the factory.
During the warranty period, American Cook Systems agrees to repair or replace, at its option, F.O.B.
factory, any part which proves to be defective due to defects in material or workmanship, provided the
equipment has not been altered in any way, and has been properly installed, maintained, and operated
in accordance with the instructions in the Straight Steam™ User Manual.
During the warranty period, American Cook Systems also agrees to pay any factory authorized
equipment service agency (within the continental United States and Canada) for reasonable labor
required to repair or replace parts due to defects in material or workmanship, provided the service
agency has received advance approval from American Cook Systems factory service to perform the
repair or replacement. This warranty includes travel time not to exceed two hours and mileage not
to exceed 50 miles (100 miles round trip), but does not include post start-up assistance or training,
tightening of loose fittings or external electrical connections, minor adjustments, maintenance or
cleaning. American Cook Systems will not reimburse the expense of labor required to repair or replace
parts after the one year warranty period.
Proper installation is the responsibility of the dealer, owner-user, or installing contractor and is not
covered by this warranty. While American Cook Systems products are built to comply with applicable
standards for manufacturers, including Underwriter’s Laboratories (UL) and the National Sanitation
Foundation (NSF), it is the responsibility of the owner and installer to comply with any applicable local
codes that may exist.
American Cook Systems makes no other warranties or guarantees, whether expressed or implied,
including any warranties of performance, merchantability, or fitness for any particular purpose.
American Cook Systems’s liability on any claim of any kind, including negligence, with respect to the
goods and services covered hereunder, shall in no case exceed the price of the goods and services,
or parts thereof, which give rise to the claim. In no event shall American Cook Systems be liable for
special, incidental, or consequential damages, or damages in the nature of penalties.
This constitutes the entire warranty, which supersedes and excludes all other warranties, whether
written, oral or implied.
10