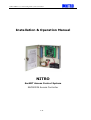
1
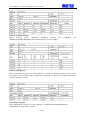
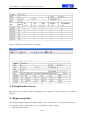
USP SecNET access control management system user manual
Installation & Operation Manual
NITRO
SecNET Access Control System
NAC8000N Access Controller
1 / 79
USP SecNET access control management system user manual
Note: Please read the manual before installation of NAC8000N Access
Controller
JSM0045006-41
Index
1.1
1.2
2.1
2.2
Summary ...........................................................................................................................4
Product Feature .................................................................................................................4
Access Control(NAC8000N) Installation .........................................................................6
TCP/IP Connection ...........................................................................................................7
2.2.1Straight Cable....................................................................................................................7
2.2.2 Cross Cable ......................................................................................................................8
2.3
Installation Environment...................................................................................................8
2.4
MSDE Database Installation .............................................................................................8
2.5
Software Installation .........................................................................................................9
2.6
Database Linkage Setup....................................................................................................9
2.7
System Login ..................................................................................................................10
3.1 Menu Operation ........................................................................................................................12
3.2 controller Connection................................................................................................................13
3.2.1 Connection .....................................................................................................................13
3.2.2 Quick Setup....................................................................................................................15
3.2.3 Add Controller ...............................................................................................................16
3.3 Controller ..................................................................................................................................17
3.3.1 Controller name and MAC Address Editor....................................................................17
3.3.2 Reader Setup ..................................................................................................................17
3.3.3 Input ...............................................................................................................................18
3.3.4 Temper and Fire .............................................................................................................19
3.3.5 Output (Relay) ...............................................................................................................19
3.3.6 Net and GMT .................................................................................................................20
3.3.7 Advanced........................................................................................................................21
3.4 Door Setup ................................................................................................................................21
3.4.1 Door new........................................................................................................................21
3.4.2 General...........................................................................................................................22
2.4.3 Event ..............................................................................................................................24
2.4.4 Advanced........................................................................................................................25
2.4.5 Alarm System Link ........................................................................................................26
2.4.6 Video system link...........................................................................................................27
3.5 Schedule Setup..........................................................................................................................28
3.5.1 Date................................................................................................................................29
3.5.2 Date Group.....................................................................................................................29
2 / 79
USP SecNET access control management system user manual
3.5.3 Time ...............................................................................................................................30
3.5.4 Time Group ....................................................................................................................30
3.5.5 Access Level ..................................................................................................................31
3.6 Department Setup......................................................................................................................32
3.7 Cardholder Setup ......................................................................................................................33
3.7.1 Add Cardholders ............................................................................................................33
3.7.1.1 Auto Add .............................................................................................................33
3.7.1.2 Manually Add......................................................................................................35
3.7.2 Cardholder New And Edit..............................................................................................37
3.7.2.1 Cardholder Edit ...................................................................................................37
3.7.2.2 Edit By Department ............................................................................................38
3.7.2.3 Delete Cardholder ...............................................................................................38
3.7.2.4 Delete by Department .........................................................................................39
3.7.2.5 Export Name and Pair .........................................................................................39
3.7.2.6 Attendance...........................................................................................................40
3.7.2.7 Image Search.......................................................................................................41
3.7.2.8 Report..................................................................................................................41
3.7.2.9 Enable Auto Download .......................................................................................42
3.8 Site Map....................................................................................................................................42
3.9 Event View................................................................................................................................43
3.10 System User ............................................................................................................................48
3.11 Database ..................................................................................................................................49
3.12 Card Specification...................................................................................................................54
3.13 Attendance Parameter .............................................................................................................55
3.14 Time Attendance .....................................................................................................................57
3.15 Anti-passback Area Stat ..........................................................................................................61
3.16 Video Equipment.....................................................................................................................62
3.17 Reports ....................................................................................................................................63
4.1 Attendance Execute...................................................................................................................69
4. 2 Setup Database Server .............................................................................................................73
4.3 Engineering Tools .....................................................................................................................73
4.4 Language...................................................................................................................................77
4.5 operator Record view................................................................................................................77
4.6 Quick Setup...............................................................................................................................79
3 / 79
USP SecNET access control management system user manual
chapter1 Product Introduction
1.1 Summary
NITRO USP SecNET is not only a smart access control management system, but also a professional
Time Attendance system. She can be a single-door two-way, two-door two-way, three- door single-way,
four-door one-way etc. multi-channel management; system adopt common TCP / IP communications
protocols, networking more convenient; Uploading events through the controller to provide professional
Time Attendance reports, to make your work more convenient and easy!
The whole system is easy and user-friendly. You can according with requirements of the practical
application of the door, Different functions can be combined to achieve a more complicated task. The
reporting of the system can be customized for varies office administration purposes.
The following table would show the differences among the software versions.
1.2 Product Feature
32 bit ARM7 high performance processor
4 Wiegand Input
Support Wiegand 26bit, 32bit, 34bit, 66bit Input
Internal Memory : 12,000 Transactions
4 Magenetic contact Input
4 Exit Button Input
4 Relay Output
10M Base Network Port
Fire Alarm Input
Tamper Input
Backup Battery Connection
System support from 1door to 256 doors
Support DHCP and Manual IP Address Input
Support MSDE/ SQL2000 Database Structure
Time/ Time Group/ Date/ Date Group Setting
Multiple Cardholder Access Levels
Multiple System User with Selectable Access Right
System User Log
4 / 79
USP SecNET access control management system user manual
E-Map
Multiple Input and Output Association
Anti-passback (Multiple Zone within or across different NAC8000N Controllers)
Cardholder Management with different access level
Batch Card Data Input
Time Attendance Analysis and Reporting
Time Attendance Record Exporting
Database Backup and Restore
Card Format Customization
Holiday Define
Department Define
Workgroup Define
Event View and Event Search by conditions
Software API for Integrating other systems
5 / 79
USP SecNET access control management system user manual
Chapter2
Installation
2.1 Access Control(NAC8000N) Installation
Device connection
6 / 79
USP SecNET access control management system user manual
i) Reader Input : Connect to TB1, TB2, TB3 and TB4
(Power +12Vdc / Power GND / LED / Beeper / Data D1 / Data D2)
TB1 : Wiegand Reader Input 1
TB2 : Wiegand Reader Input 2
TB3 : Wiegand Reader Input 3
TB4 : Wiegand Reader Input 4
ii) Power Output for Accessories and Fire Alarm Input : Connect to TB5
iii) Magnettic Contact / Exit Button : Connect to TB6 and TB7
TB6 : Magnetic Contact 1 and 2 / Exit Button 1 and 2
TB7 : Magnetic Contact 3 and 4 / Exit Button 3 and 4
iv) Door Lock : Connect to TB8 and TB9
TB8 : Door Lock 1 and 2
TB9 : Door Lock 3 and 4
v) Power Input : Connect to TB10 (AC/DC)
Remark :
- Connect the power source after all the devices has been connected to NAC8000N controller
- The voltage power input should be within the typical power input range.
(14VAC – 28VAC or 18VDC – 40VDC)
vi) Backup Battery : Connect to BATT
Remark : DO NOT connect the backup battery until all the devices have been connected properly.
vii) TCP/IP Network : Connect to RJ45 Network Por
2.2 TCP/IP Connection
According to the system requirement, it is recommended to use the network cable with the grading
CAT-5 or above, and the network environment should be based on the standard of either ANSI EIA/TIA
568A or 568B. The NAC8000N access controller and the SecNET server computer should be installed in
the same subnet environment.
NAC8000N access controller would support 10M network connection. For all the devices connecting the
controller, they should support either 10M or 10/100M.
There are two different pin assignment of network cables, this would depend on the actual installation
condition.
2.2.1Straight Cable
when the NAC8000N access controller is connected to a network hub or switch or router.
7 / 79
USP SecNET access control management system user manual
2.2.2 Cross Cable
when the NAC8000N access controller is connected directly to SecNET Server computer.
2.3 Installation Environment
SecNET access control software should be installed in the computer with the following configuration.
Min. Pentium III 1G or above
Min. 256M Ram
Min. 1G Hard Disk Capacity
Microsoftware Windows 2000 or Windows XP Professional Operation System
Min. Display Resolution : 1024 x 768 (16 bit Colour or Above)
Microsoftware MSDE / SQL Server 2000 Database System
2.4 MSDE Database Installation
Before installing the SecNET application software, user should decide which database system would be
used for the access control system. The software CD would include the MSDE Service Manager. The
user can also have the choice to purchase SQL Server 2000 for database management.
Double clicking“setup.exe” in MSDE file would start the system database installation.
8 / 79
USP SecNET access control management system user manual
After the database system has been installed. Automatically exit Setup, Database Server icon
appears
in the lower right corner of the desktop.
2.5 Software Installation
After the database system has been selected and installed, the user can start to install the SecNET
applicaton software. In the software CD, there is a “SecNET V4.1” file package. Open the package,
Double clicking setup.exe would start the software installation, and click the “Next” button to complete
the software installation procedure.
2.6 Database Linkage Setup
i)
Double click the icon of SQL Server Desktop Engine. (At the right bottom corner of the screen.)
The SQL Server Service Manager dialogue box would be pop-up on the screen. (When
operating the SecNET software, SQL Service must be started and connected well, as shown
below figure. If there is red, you must click "Start / continue" in the SQL Server for starting
server)
ii)
Click on the SecNET icon to activate the program.
iii) Select “Cancel” in SecNET login dialogue box.
iv) Select “Setup Database Server” in the “Tools”, and the “Setup Database Server” dialogue box will
be pop-up.
9 / 79
USP SecNET access control management system user manual
v)
Make sure the name of “Server” in the SQL Server Service Manager to be the same as “Data
Source”. Input the name in the “Database Name”, and this is the name of the database file in the
SecNET system.
2.7 System Login
After clicking on the “Login” icon, the login dialogue will appear. The default login User Name is
“admin”, and the Password is blank.
(Remark: all the new database would use the same default login User Name and Password.)
10 / 79
USP SecNET access control management system user manual
Click the “Ok” button to enter the software.
11 / 79
USP SecNET access control management system user manual
Chapter3
Software Setup
3.1 Menu Operation
Function List:
Connection | Start the operation of Server computer and add controller in the system
Map View | Use the site map to show the door status
Event View | Show the real time door access event and search the event from the local database
Controller | Setup the hardware configuration of the NAC8000N Controller
Door | Setup the access rule of the Door
Schedule – Date | Setup the period of date schedule
Schedule – Date Group | Setup and combine different date schedule to form a date group
Schedule – Time | Setup time zone (24 hour scale)
Schedule – Time Group | Setup and combine the time zone to form a time group
Schedule – Access Level | Setup the access right for the cardholder
Department | Define the department of the cardholder in the system
Cardholder | Add/Delete/Edit the access card for the Cardholder
System User | Add/Delete/Edit the System user of the SecNET program
Database Management | System Database management
Card Specification | Define the specific card format for reader (Standard format: 26bit, 32bit, 34bit and
64bit)
Attendance Parameter | Define the name of workgroup/holiday and select the parameter for time
attendance analysis.
Time Attendance | Setup the time attendance parameter for the cardholder
Anti-passback Area Stat. | Show the statistic record of cardholders in the specific anti-passback zones
12 / 79
USP SecNET access control management system user manual
At the top of the software, there are some short-cut keys for software operation.
shortcut menu
Logout: sign out the existing system user, and return to the startup screen.
Fresh: refresh the system after setting system configuration.
New: add the new item in some of the software functions.
Edit: edit the selected item in some of the software functions.
Delete: delete the selected item in some of the software functions.
Download : download the system configuration into the NAC8000N system controller
Search: enter the search page for some of the software functions.
Remarks: No all software functions would have the response to the short-cut key.
3.2 controller Connection
3.2.1 Connection
After login into the system, the SecNET program would be started in the “Connection” setup page. In
the Connection page, it can be used to search and add the NAC8000N access controller.
1) Server
In the server section, you can click “start” or ”stop” to start or stop the sever operation.
13 / 79
USP SecNET access control management system user manual
2) Active controller
When the user click “Start” to start the server operation, SecNET program will search and list out all the
NAC8000N controller in the same network. The available controller will be shown in the “Offline
controller list”. There will display the time of some a controller which last time online but out in now in
the “Last Arrive Time”.
3) Remote link
Remote connection is SecNET system software provides a port, through the port it can be achieved
communication between SecNET and SecNET, between SecNET and other software.
If you will set the SecNET 1 to communicate with SecNET 2, and events of SecNET system1 can be
viewed in SecNET 2, firstly set a remote server port number in SecNET 1, such as 10050, and set the
appropriate password as 123456; secondly enter the server host the IP as 192.168.1.121 in the "remote
link" of SecNET 2, and set the same port number and the server, and the same password as 10050
123456, click the "connect" to normally communicate. At this point in SecNET 2 can be also viewed
events that are being uploaded in SecNET 1, and in the "Download" window of SecNET 2 can be seen
online controller in the SecNET 1 system, you can click “download” in the SecNET 2 to download the
system configuration to the line controller.
Remark: To be able to see the configuration of SecNET 1 in the SecNET 2 necessary to set the correct
database connection: you can select “Specify user name and password authorization” and enter the
correct “User name and Password” in setup database server window of the SecNET 2, (this user name
and password had been set when installed server database in the SecNET 1, can not select “windows
integrated authentication” when installed, you can select “user name and password” to install); and enter
the same "database server and database name in the SecNET 1 set."
14 / 79
USP SecNET access control management system user manual
Third-party software can download system configuration to SecNET online controller by providing
the port of course, to be requires a password to confirm download successfully.
3.2.2 Quick Setup
After searching successfully of the controller, you can begin to add and set the controller.
The quick setup function of software SecNET, you can help the basic needs of the customers to add and
set the controller. Select "Tools" menu, click on "Quick Setup" to enter the quick setup interface.
Select Controller- Select the MAC address of the controller, enter the name of controller, select “Is there
a Router in your access control network ” .”Next” enter the next setting.
Connect to Controller- begin connect server , after connect successfully click “Next”
15 / 79
USP SecNET access control management system user manual
Select Solution- Select solution of controller use door, can select single ways (most support four doors)
two ways (most support two doors), then click “Next”.
Apply Solution- Software write Apply solution into database, After shown ”successful” click “Next”
enter “Create Access Level” page.
Access level- Setting Access level for controller, can select setting Top Access level or not.
Add Cardholder-Add Cardholder and setting Access Level for cardholder throw “Capture new card”.
Please click “OK” when don’t add cardholder.
Download- Apply Add Cardholder, and write Data into the software database
3.2.3 Add Controller
If you believe that the quick setup function does not meet your needs, you can add its own controller,
and then edit and settings.
When there is a controller shown in the list, user can choose the “Add Controller” button, and the “Add
controller to database” dialogue box will be pop-up.
There would be two options to add the controller, either via DHCP or Fixed IP address. If DHCP would
be used, then it should choose “Auto (DHCP Client)”; otherwise, user should choose “Manual” to assign
a specific IP address to the controller.
After the controller has been searched and added in the database, it would be in the “Accept Controllers”
list. User can click “Stop” and “OK” to exit the dialogue.
Added successfully, you can view the directory has been added to the controller in controller list.
16 / 79
USP SecNET access control management system user manual
3.3 Controller
In the controller setup, user can mainly select the hardware configuration of the NAC8000N controller.
From the controller list, user should select the controller for programming, and the name of the
controller can be changed. In the edit controller list, there are a few setup pages, including Reader, Input,
Temper and Fire, Output, Net and GMT and Advanced.
3.3.1 Controller name and MAC Address Editor
You can edit name and MAC in the first of "Edit controller setting", In order to better distinguish a
number of different controllers.
3.3.2 Reader Setup
“Enable” –for activating or deactivating the reader.
“Wiegand Format” –for selecting the card format of the reader, some standard formats would be
provided for selection. If the card format of the reader is unknown, user can have the choose to
select “Auto”.
“With Keypad” –for the reader with keypad in the case of access password input needed.
“Reverse LED Colour” –: The LED colour of NR series smart card reader would be red in normal
state and be green in card access state. The checkbox would be used to reverse the colour of
reader’s status. (Not all kinds of readers in the market would have this function)
Beep control –When readers need to control "Beep control". "Beep control" is that reader will ring
continuity two when unregistered user punch the card (registered only one “di”)
“Description” –input the name of the reader
17 / 79
USP SecNET access control management system user manual
3.3.3 Input
ST (Magnetic Contact Input)
“Enable” - for activating or deactivating the magnetic contact input.
“Normal State” – select NO or NC for the contact input
EOLR The end of resistance control, used to detect between input and control lines normal or not,
when detected off-line or short-circuit the control center will report to the police.
“Time Group Control” – select the time group to use the magnetic contact input.
“Description” – Input the name of the magnetic contact input.
ET (Exit Button Input)
“Enable” - for activating or deactivating the exit button input.
“Normal State” – select NO or NC for the exit button input
“Time Group Control” – select the time group to use the exit button input.
“Description” – Input the name of the exit button input.
:
18 / 79
USP SecNET access control management system user manual
3.3.4 Temper and Fire
The temper and fire input contact would have the default status of “Enable” and “NC”.
3.3.5 Output (Relay)
“Enable” - for activating or deactivating the selected relay output.
“Usage” – select “Normal” or “Reverse” for the application of the relay output.
Normal: the relay output status would be “NO”. This setting would be used for the door lock which
would unlock the door in the case of no power input.
Reverse: the relay output status would be “NC”. This setting would be used for the door lock which
would lock the door in the case of no power input.
(Remark: This situation may be changed due to varies applications of the system. For the case of
using the access control system in the warehouse, the door should be locked in the case of power
shortage. Please consult your system installer for the actual usage of the relay.)
19 / 79
USP SecNET access control management system user manual
“Time Group Control” – select the time group to activate the usage of the relay output.
“Schedule” – select the time group to switch on the relay automatically by schedule “Description” –
Input the name of the Relay Output.
3.3.6 Net and GMT
“Net” – for setting up or change the network setting of the controller, changing from DHCP to
Fixed IP address or from Fixed IP address to DHCP.
“GMT” – select GMT Time zone of the Controller.
Host GMT : Setting the GMT Time zone of the controller to be the same as the server computer
Specify GMT : Defining a GMT Time zone for the controller
“Location” : Input a name of the location for the controller
Time Sync: Click on the checkbox to synchronize the date and time between server computer and
controller.
“Misc”: show the firmware version of the controller.
20 / 79
USP SecNET access control management system user manual
Click “Engineering Tools” in the “tool” menu, and then select “WAN settings”, select controller, click
“Set Device IP” button, you can view the “WAN Server IP” value had changed to the IP have been set in
“Net and GMT”. After update the Controller, the controller will restart. So if customers want to fix the
controller IP, only updated the settings in the "WAN settings". (After download IP to the controller, close
the software, within the “cmd”, you can ping through downloaded to the controller's IP)
3.3.7 Advanced
This function would be used to associate the input devices to different relay output.
3.4 Door Setup
In the door setup, the door status can be defined. The event actions can be set and assigned to particular
relay output, And Alarm system link or Video system link.
3.4.1 Door new
Select work list “door”, click “new” button will pop-up dialog box doors
21 / 79
USP SecNET access control management system user manual
3.4.2 General
“Description” – Input the name of the door
“Controller” – select the controller for the door.
“Reader in” – select the reader of the corresponding controller for door entry purpose
“Reader out” – select the reader of the corresponding controller for door exit purpose
“Lock” – select the relay output for controlling the open and close of the door.
“Door Status” – select the magnetic contact (ST) for the door
“Exit Button” – select the exit button (ET) for the door
“Door open delay” – select the delay time period for opening the door (Default : 4000ms)
“Door open timeout” – select the timeout period of door open status (Default : 8000ms)
“Door debounce time” –select the delay time period of door debounce (Default:20s), each
successful authentication, open the door, after closed the door beginning " Door debounce time "
time, after time certification, if not successfully pushed card to open the door on the situation occur,
will have a "forced entry" warning;
“Lock control type” – select the type of door close status
On open door delay lapse : the door would be locked after the time has passed the time delay
setting.
On door return : the door would be locked when the door has been returned at the close state.
“Time group control” – select the time group to set the door open at particular period of time. After
setting the time group, it is needed to use an access card to open the door, and the door would be in
the open state until the end time of the time group.
Two Door Interlock –setup the doors for the “Two Door Interlock” a door (Two Door Interlock
setup one door before didn’t closed another can’t open). Note: only in the same controller can set
“Two Door Interlock” functions.
22 / 79
USP SecNET access control management system user manual
For example: door 1 and door2 of the need for “Two Door Interlock” function, the door1 needs to set
"Two Door Interlocking "and select drop-down box of the "door2", the door2 needs to set "Two Door
Interlocking "and select drop-down box of the "door1",
Attendance Point –punched card data of the door to do access data analysis.
Multi-Card Control –setting “Multi-Card Control” function, to choose the card number of
“Multi-Card Control” in the drop-down box. After any Multi-card (up to 8) of all cardholder that
can access the door t punched card can open the door. Each Card of the longest interval the time of
10 seconds.
For example: door1 need two card control to open the door ,software settings need to click the
"multi-Card Control" and select drop-down box “door2”, that show after any two cards of all cardholder
that can access the door t punched card can open the door.
Remote Control Door –setting the door for the “Remote Control Door”, after the registered user
punch card successfully, that must need to authorized by administrator in the control center (in the
"event view" and "Request Open Door" to determine) to open the door.
Enable Open by Duress –encountered opening by duress, only the “door” used “Enable Open by
Duress” option to open the door action.
Time Group control: Must check the "Enable" to enable the following three features. To select a
group time to control the following three functions from ”time group” drop-down box.
Hold Door Open: select the time group to set the door open at particular period of time. After
setting the time group, it is needed to use an access card to open the door, and the door would
be in the open state until the end time of the time group.
Auto Open Door: Do not capture card in the settings time group, the relay automatically jump
and then the door open until the end of settings time. If the settings time end, the door will be
immediately closed in place, this time to open the door must credit card.
Toggle Lock: In the period of settings time only through credit card to drive this feature, credit
once card, the relay from NO or NC of status into NC or NO, the next credit card, the relay
from NC o NO into NO or NC.
Remark: you can only enable one” Hold Door Open” “Auto Open Door” “Toggle Lock” of them at
the same times.
23 / 79
USP SecNET access control management system user manual
2.4.3 Event
“System event filter” – select the event which the user would like to filter out from the event view
“System Event Trigger” – select the relay out for those events. There are maximum 4 individual
triggering setup.
Signal to: select the relay output
Duration: select the time duration for triggering the relay output
Action: select whether the relay output triggering can be cleared.
24 / 79
USP SecNET access control management system user manual
2.4.4 Advanced
Access level options –
“Check private PIN” – select the time group for using the private PIN. During this period of time,
the cardholder should use both the access card and his own password for door access purpose
“Enable Public PIN” – select the time group for using the public PIN. During this period of time,
the user can use either access card or the public password for door access purpose.
Anti-passback :
“Anti-passback group number” – select the group number of anti-passback zone for this door, and
maximum is 64 zones. The doors with the same zone number would form one anti-passback zone.
“Type” – Select the type of anti-passback to be Entry, Exit or All
Entry: entry the door must be credit card, if didn’t credited card to enter the door and then enter
the door next credit card will violate the rules of entry anti-passback, exit uncertain.
Exit: exit the door must be credit card, if didn’t credited card to enter the door and then enter the
door next credit card will violate the rules of exit anti-passback, entry uncertain.
All: each entry and exit must credit card , entry and exit one-to-one.
“Rule” – Select the actions for handling anti-passback, either Hold or Ignore
Hold: When there is a cardholder violate the rules of anti-passback will not open the door.
Ignore: When there is a cardholder violate the rules of anti-passback can open the door, but in
alarm event will report to anti-passback violation.
“Plan Set” – Select the time for activating the anti-passback function. Maximum is 3 different
plans.
25 / 79
USP SecNET access control management system user manual
2.4.5 Alarm System Link
Access control linked alarm system software and equipment, can set Certification successfully or
password set alarm or clear alarm, Linked alarm action.
Alarm System Link Settings: Select the controller’s baud rate, the default baud rate is
9600bps;
Alarm System Link Trigger: Settings trigger type and trigger commands. There are the same
setup steps for arm, the trigger password of arm and disarm must be different, so that the
system is can not determine arm or disarm;
After enter password or card+password arm: reader’s LED light turn to green, at the same times an
arm event had been uploaded;
After enter password or card+password disarm: reader’s LED light turn to red, at the same times a
disarm event had been uploaded;
Trigger Type: you can select any of password or card+password type;
Trigger Password: Password length is limited to 1-12 bits;
Trigger Command: Trigger command for the user to input characters.
Remark: After download information, not only clear the configuration, but also clear the controller's
status, that is to say the controller fully into the disarm state, including the LED Control, input and
output are back to pre-trigger state.
26 / 79
USP SecNET access control management system user manual
2.4.6 Video system link
Access control linked video system software and equipment, you can set “capture on access ok” or
“capture on alarm” and password or card+password link DVR arm or disarm.
1) Video System Link Trigger
2)
Toggle Event Type: Select the video equipment needed to trigger action, the election of one or
more
DVR name: enter the name of the DVR server Linkage, which had been added in video equipment.
Camera no: enter the no of the camera Linkage, each DVR device has 16 channels DVR
Capture On Access Ok: When user select this option, system default select “Access Ok by
Card(Reader In)” and “Access Ok by Card(Reader Out)” two type events. That is, access ok by
card and event upload, the controller sends UDP command to the DVR, the card NO had been read
in the corresponding door uploaded to the DVR and trigger DVR drawings savings.
Capture On Alarm: When user select this option, system default select “Unregister User” “User
Access Rule Fail” “Intruding” “Open Door Too Long” “Anti-passback In Occur” “Anti-passback
Out Occur” those options. When one of these events occur, the controller sends UDP command to
the DVR, the card NO had been read in the corresponding door uploaded to the DVR and trigger
DVR drawings savings.
DVR Arm Link
You can set password or card+password arm and disarm, the arm password and the disarm password
must be different.
When user select password arm or disarm, you must enter password in the corresponding reader. If
you select card+password arm or disarm, you must first punch the card, then enter password,
Password length is limited to 1-12 bits. Arm command has been send successfully, the reader’s LED
turn to green and keep always. If send disarm command, the reader’s LED turn to red and keep
always.
。
27 / 79
USP SecNET access control management system user manual
Remark: The linkage function, a DVR can only select a door for linkage, that is: When there is a
door linkage selected DVR1 to arm and disarm, that other door in the video linked with the DVR1
set, the "linkage DVR arm and disarm," the set items can not be selected for the gray state. When
the linkage arm and disarm function enabled, the access control software "LED CONTROL"
function is not available. The same door can only be used arm and disarm a function of linkage
alarm systems and video linkage in the in the same times,
3.5 Schedule Setup
In the Schedule setup, the time, time group, date, date group and access level can be defined. The time
group would be used in the previous controller and door setup sections.
28 / 79
USP SecNET access control management system user manual
3.5.1 Date
Select “Schedule” list “Date”, click “new” button will pop-up “Create new DATE Schedule” dialog box.
“Description” – Input the name of the Date Schedule
“From (yy-mm-dd)” – select the starting date of this date schedule
“To (yy-mm-dd)” – select the end date of this date schedule
“Holiday” – click the check box if the selected time schedule should be assigned as holiday.
3.5.2 Date Group
Select “Schedule” list “Date group”, click “new” button will pop-up “Create a new DATE GROUP”
dialog box.
“Description” – Input the name of the Date Group
“Date list” – select the date schedule which should be included in this Date Group.
The Data Group can be composed of numbers of Date Schedule, and this makes the system more
flexible to set the date
29 / 79
USP SecNET access control management system user manual
3.5.3 Time
Select “Schedule” list “Time”, click “new” button will pop-up “Create a new TIME ZONE schedule”
dialog box.
“Description” – Input the name of the Time Zone
“From” – select the starting time of this Time Zone
“To” – select the end time of this Time Zone
“Weekdays” – click the check box for the weekdays which should be included in this Time Zone.
“Holiday” –click the check box if the holiday schedule should be included in this Time Zone.
3.5.4 Time Group
Select “Schedule” list “Time Group”, click “new” button will pop-up “Create a new TIME GROUP”
dialog box.
“Description” – Input the name of the Time Group
“Time Zone list” – select the Time Zone which should be included in this Time Group.
30 / 79
USP SecNET access control management system user manual
The Time Group can be composed of numbers of Time Zones, and this makes the system more
flexible to set the time.
3.5.5 Access Level
Select “Schedule” list “Access Level”, click “new” button will pop-up “Create a new ACCESS LEVEL”
dialog box. Access Level is a important setting. When setting cardholder must select “Access Level”. It
decide what time and date cardholder can access which door. It most set 256 Access Levels.
“Description” – Input the name of the Access Level
“Door and group” – select the door, date group and time group which would be assigned for the
Access Level.
“Date” – select the date which would be assigned for the Access Level.
“Time Zone” – select the time zone which would be assigned for the Access Level.
31 / 79
USP SecNET access control management system user manual
3.6 Department Setup
Before setting the cardholder, it is recommended to firstly define the “Department” if it is needed.
Department
i) Select the “Department” option in the software function list.
ii) Click “New” to add the new department
iii) Enter the name of the department or company name
(Remark: the department structure would be set as tree diagram, it would have only one top level.)
iv) If there is any sub-division of the department, then click on that department and select “New” again.
v) Enter the name of sub-division department, and the new department would be added.
32 / 79
USP SecNET access control management system user manual
3.7 Cardholder Setup
3.7.1 Add Cardholders
Add cardholders and setting information and access of cardholder, add in two ways: automatically add,
add manually.
3.7.1.1 Auto Add
i) Select the “Cardholder” option in the software function list.
ii) Click “New” to add the new cardholder or right-click the screen to choose “Capture New Card”.
iii) In the “Capture Card” dialogue box, the “Cardholder Settings” would be used to select the
information for the new cardholder, including Department, Access Level, Password PIN.
iv) In the Capture Center, a list of doors would be selected for capturing the access card.
33 / 79
USP SecNET access control management system user manual
v) Click “Start” to capture card number by scanning the card.
vi) After the capture card process completes, the selected information have been input into the
cardholder.
34 / 79
USP SecNET access control management system user manual
3.7.1.2 Manually Add
i) Select “Cardholder” in software function list.
ii) Click right button to select “new” or click “new”, pop-up “Create a new CARDHOLDER” dialogue.
General
First Name and Last Name: Enter the name of cardholder, you can choose to import Excel files.
Card Number: Select the Card Format, enter the card number (can select single number or continual
numbers)
Photo: enter the photo for cardholder. (Remark: “continual numbers” can’t use this function)
With PIN: with PIN for adding card , there are four PIN type.
Private PIN: The Private PIN different for each cardholder, when a door set “chick private
PIN” need to enable your PIN here.
Public PIN: All cardholders share a PIN, setting only need to enable "Public PIN" in some one
cardholder, and then the other cardholders can also use the PIN.
System Admin PIN : When the cardholder pressing the PIN, all door cardholder can access
will open .
Duress PIN: When unregistered cardholder duress the registered cardholders to open the door,
the registered cardholder can enter a duress PIN, if the door is not enabled ”Enable Open Door
By Duress”, there are alarm events upload, the control center also received a alarm message
but will not open the door. When the door enable the "Enable Open By duress" option , the
door will be opened and there are alarm events upload.
Enable cardholder: Select this, new cardholder have function of punching card open the door.
Duress Alarm: If the "Duress Alarm" option is enabled in the "Edit Cardholder". when cardholder
punch card, it will have "Duress Alarm events" (the main instrument for the fingerprint reader), if
the door is not enabled ”Enable Open Door By Duress”, there are alarm events upload, the control
35 / 79
USP SecNET access control management system user manual
center also received a alarm message but will not open the door. When the door enable the "Enable
Open By duress" option , the door will be opened and there are alarm events upload.
Access level: Select Access Level created give the new cardholder created.
Property: Show that chosen Access level -related attributes.
Expire Data: expire data of cardholder, year\month\day can be selected, after select data and select
“Enable”, Right-click "Enable Auto Download" options in the cardholder interface. The auto
download function is that software automatically download cardholder enabled expire data in the
zero of every night, after the expire data to end, the description color of cardholder is automatic
from black to yellow in the cardholder interface.
In the Private Information section, some personal information of the cardholder can be input in the
system. The department of the cardholder can be selected in this section.
36 / 79
USP SecNET access control management system user manual
In the “Anti-passback Area Options”, it can be used to set if the door access rule of selected cardholder
should be restricted by the anti-passback regulation. The “Time 1”, “Time 2” and “Time 3” should be
referred to the “Plan Set” time group schedule of “Door – Advanced” setting.
3.7.2 Cardholder New And Edit
3.7.2.1 Cardholder Edit
After “Continual Numbers”, You may need to edit information of cardholder, select the cardholder need
to edit click right button , select "Edit" will pop-up edit menu. User can select more than one cardholder
at the same times to enter editing dialogue box.
37 / 79
USP SecNET access control management system user manual
3.7.2.2 Edit By Department
Select software function list “Cardholder”, click right button in cardholder section will pop-up menu,
select "Edit By Department" pop-up editing dialogue box.
Department: select department that needs to edit.
Access Level: Distribute Access Level for department.
(Remark: before use “Edit by Department” make sure the cardholder is department of the sector)
3.7.2.3 Delete Cardholder
Select cardholder has been deleted, click right button will pop-up menu, to select “delete” can delete this
cardholder. User can select more than one Cardholder at the same times to delete.
38 / 79
USP SecNET access control management system user manual
3.7.2.4 Delete by Department
Select software function list “Cardholder”, click right button in cardholder section will pop-up menu,
select "Delete By Department" pop-up editing dialogue box.
Select department have needed to delete, click “OK”.
(Remark: before use “Edit By Department” make sure the cardholder is department of the sector)
3.7.2.5 Export Name and Pair
Use “Export Name And Card Pair” will export the text document (TXT) format cardholder list has been
added.
39 / 79
USP SecNET access control management system user manual
3.7.2.6 Attendance
User can click the menu bar "Tools" and "attendance data analysis," attendance for all cardholders, but
also right-click in the cardholder interface and click “Attendance” for the individual cardholder. Select
some a cardholder and right-click and click “Attendance” in the cardholder total interface.
Pop-up attendance analysis dialog box, when you don’t select “Department” will only pop-up
Attendance of the designated cardholder, when you select “Department”, the attendance is same with
attendance by click “Attendance” in tool bar. There are several output reports, the attendance details,
please refer to Section 4.1 Attendance Analysis. Select Excel file (. xls) option, click on the back of the
attendance output settings option button
, pop-up option set, the user can choose depending on the
circumstances, for the whole election by default. As shown:
40 / 79
USP SecNET access control management system user manual
3.7.2.7 Image Search
Image search, is playback for picture had been capture by DVR when some one went in door or out door
to punch card, right click some a cardholder, and then click “Image Search”, will pop-up “Remote Image
Search” windows, default display card NO and cardholder photo in there. Select the appropriate search
criteria, you can search to the cardholder's punch time and make picture playback.
3.7.2.8 Report
Users can output report for cardholders of SecNET system, can choose preview and print. Select the
cardholder required view, right-click will pop-up list, then select the "Report". There are some reports in
the list: Event Report\Cardholder Summary Report\Cardholder Detail Report1\ Cardholder Detail
Report2\Door Access Report\Door Access Detail Report\Access Level Report. The specific use will be
detail described in 6.9.
41 / 79
USP SecNET access control management system user manual
3.7.2.9 Enable Auto Download
Right-click "Enable Auto Download" options in the cardholder interface. User can according to
requirement decide whether enable action of “Auto Download” function. “Enable Auto Download” is
that software automatically download cardholder enabled expire data in the zero of every night, after the
expire data to end. Do not enable the cardholder and enable the cardholder of expire data will not
enabled download.
3.8 Site Map
The E-map is platform for the user to observe the door status in easier way. The status of the door would
be represented by the door icon, and the position of the doors can be adjusted according to the actual
environment of the map.
i) Click “New” to add the new map.
ii) Click “Image” to choose the picture.
iii) Select the controller and the door, and then put the icons of them onto the map.
iv) Click “OK” to exit the setting.
42 / 79
USP SecNET access control management system user manual
v) If there is more than one map, the names of different maps can be found at the bottom of the screen.
3.9 Event View
The Event View function would be used to display the real-time event transaction or searched event
from the database. After the event has been downloaded from the controller to the server computer, the
event record of the controller would be deleted accordingly.
At the top of the event view screen, there is an alarm event list. The list will show all the abnormal event
transaction. User can have the choice to answer or silence the alarm signal. After the alarm event has
been answered, the record would be transferred to the normal event list.
At the bottom of the list, it would include the real-time event transaction information and the event
search result. In the real-time event list, user can choose to clear the all the events in the viewing list or
43 / 79
USP SecNET access control management system user manual
to set the event log filtering function. For those event being filtered, they will be not recorded in the
database as event.
In the event view, click the “Search” button, then the event search dialogue box will be pop-up on the
screen. User can search the result based on the requirement. The search result can be based on time
during, card number, cardholder name, door and event type. For the card number and cardholder name,
user can input multiple items for event searching. If the user wants to search all events, then no any
items would be required to be filled in.
44 / 79
USP SecNET access control management system user manual
After the record has been searched, the result would be displayed in the Search Result.
The incident right top of Event view Interface. There is an “Alarm event option “,"silence", Select the "
45 / 79
USP SecNET access control management system user manual
silence " ,Opened software even if there is a real-time alarm events ,the incident would not have a sound
alarm, If don’t choose there will be alarm sound.
The lower right corner of Event view Interface, There is a "Access photo list" , showed eight different
cardholders the photo by card at the same times, And the card number and time by card. "Enable access
ok counter " automatic statistics the number of Access ok within the Auto reset time , reset time can
choose from 1 to 99 seconds, if enter “zero” seconds that is not reset and have been accumulated.
When run “Auto Trigger” option, the system will start the controller to records "Duress Alarm"
information.
Remark: Only the "Duress Alarm" option in "Cardholder" that had been enabled, the "duress alarm"
event produced was only upload and triggered, after 5 seconds duress alarm process information dialog
box will be pop-up in the “event view” interface, administrator can show video or open door for duress
alarm cardholder.
“Request Open Door” option in “Event view Interface”, Some door will install the “Remote Control”
button; it will not open when eligible card punched at it. Opening request will show in the request list of
46 / 79
USP SecNET access control management system user manual
the remote control, you can choose “open” or “clear the request” to open the door.
Video Linkage
If adds the DVR video equipment within SecNET software, so you can really-time see the front video
image from there, you can choose any one of them within the DVR channel to view video image, and
also do focus, iris and other operations on a particular channel in the software. Of course, you also can
click the "replay" playback the video image for a channel. Right-click on video image and then click
“Start Voice Talk”, can be achieved voice talk between the DVR and SecNET software.
47 / 79
USP SecNET access control management system user manual
3.10 System User
In the System User setup, the system can add and manage the new system user, and the system access
right of each system user can be adjusted. “admin” is the default system which cannot be deleted, and its
system access right would be the most powerful.
i) The user can only change the password of the “admin” system user by clicking “alter” button.
ii) Click “New” button to add the New System User.
The expire data can be set for the operator by administrators, the system detected every day 00:00:00 pm,
48 / 79
USP SecNET access control management system user manual
over the expire data, the system will automatically log off users and can not be used. Users also
according to requirement select operations to the new operator. Once have the new operator in there,
admin can no longer modify the operator's password, operator must modify the user.
3.11 Database
The database structure of the SecNET program would be either MSDE or SQL Server 2000. SecNET
would have the built-in database backup and restore function, so that the event record can be stored and
saved for long period of time. And it would be more secure to backup the database.
Select the Database in the software function
Setup database connection - connection and create the new database file for the system.
Database backup and restore - this function is used to backup and then restore the database to and
from a separate “dat” file.
Clear all log - this function is used to clear all the event log in the database.
Export system settings - this function is used to export and save settings data of total access system.
Import system settings - his function is used to import system setting which have been exported.
Enable auto save system settings: select saving cycle and path for automatically saving system
setting. For example, enter “1” in the “Saving Cycle” and “D:\” in the “Select Path”, that is system
settings has been saved in the “D:\” once a hour.
Export event - his function is used to export and save event recordings
Import event - his function is used to import event recordings which have been export
Enable auto save event: select saving cycle and path for auto saving events.
Auto Clear Event Parameter: this function has used for auto clearing event, that is saving the last
event. On a monthly basis, up to 24 months, at least 1 month (can choose), the software
49 / 79
USP SecNET access control management system user manual
automatically detects and judge once a day, remove the extended events. If you do not use the
function, the database will keep all of events, does not automatically delete the event.
i)
In the “Setup Database Server”, if a new database would be needed, then enter a new name for the
database and click “OK”. The whole system would return to startup menu, and all the settings and
event in the server log would be the blank new one. If the user would like to recall the previous
database, then type in the name of the previous database in the “Database Name”. The previous
database would be opened again.
50 / 79
USP SecNET access control management system user manual
ii)
When the user selects the “Database Backup and Restore”, a dialogue would be shown. If user
would like to Backup the database file, select the Database Restore page.
Click the “Browse” button to select the path for the backup file, Backup file called "dat".
iii) If user would like to restore the database file, select the Database Restore page.
Click “Add” button to select the folder. After selecting the database file from the list, and then click
51 / 79
USP SecNET access control management system user manual
“OK”. The system would be restored.
iv) Clear all log: the “delete” dialogue box will be pop-uped when click “clear all log”, user woude
delete event according to required condition, for example, the time period and card number or name
of cardholder etc.. then click “ok” to delete events.
v)
Export settings data access system, Click” Export system settings” and select saving path, Enter the
file name, the file in format of the "dbo", click "save" Exporting completed.
52 / 79
USP SecNET access control management system user manual
vi) Import system settings Click “Import system settings” and select file imported, Click “open”
importing completed.
vii) Click” Export event export event log which have been download to computer from controller. And
select saving path, Enter the file name, the file in format of the “dbo”, click "save" Exporting
completed.
53 / 79
USP SecNET access control management system user manual
viii) Click “Import event” and select file imported Click ”open” importing completed, After clicking
“Search Result” in “Event View ”click ”search” in tools. Now showing event log exported in the”
Search Result”.
3.12 Card Specification
In the Card Specification setup, the system can add the new defined card format in the system. The
default card formats in the system are 26bit, 32bit, 34bit and 66bit wiegand input, and they cannot be
changed.
If some other specific card format is needed, it can be added by either edit the custom define format or
click the “New” button to add the new card format
54 / 79
USP SecNET access control management system user manual
3.13 Attendance Parameter
SecNET Access Control system can support the time attendance record and reporting for the cardholders.
It is needed to perform some steps for setting up the time attendance record.
Remark :
i) The time attendance function can only support the 24 hour mode of the Microsoft Windows Operation
System. The time format can be set in the “Control Panel” of the Windows Operation System. The time
format can be either H:mm:ss or HH:mm:ss. (whereas hh:mm:ss or h:mm:ss would be 12 hour mode.)
ii) ** Before setting up the time attendance, it is needed to reboot the SecNET program.
The Attendance Parameter setting would be used for defining the work group, holiday and door for time
attendance application.
i) Select the “Attendance Parameter” option in the software function list.
55 / 79
USP SecNET access control management system user manual
ii)
In the Work Title Define, click “New” to add the name of new workgroup.
iii) In the Holiday Title Define, click “New” to add the name of the new holiday.
The holiday title can be sick leave, annual leave, public holiday, etc. This would depend on the different
countries and companies.
56 / 79
USP SecNET access control management system user manual
Enter description and remark, click ”OK”.
Remark there will be not inputted the information containing special character in the ”Description”
above the “Workgroup” and “Holiday” dialog box, for example ~ ! @ # () / etc. special character,
otherwise the errors may occur when analysis time attendance execute. The other comments can fill into
the "Remarks", there would be contained special character inside.
:
3.14 Time Attendance
The Time Attendance setting would be used to assign the workgroup, holiday, leave application, manual
sign in and manual sign out record for the cardholder. The time attendance record would depend on
those settings.
Select the “Time Attendance” option in the software function list.
i) Work Assignment
Click “New” to add the new work assignment for one or more cardholders.
In the work assignment, there would be different options for the selected cardholders.
Description : Select the workgroup
Type : Select the type of the workgroup to be fixed or not. (Not available in the SecNET Basic
57 / 79
USP SecNET access control management system user manual
Version)
Onduty Time : select the start time of the workgroup
Offduty Time : select the end time of the workgroup
Onduty Ahead : time period before the start time of workgroup which would not be counted for
work overtime.
OffDuty Delay : time period after the end time of the workgroup which would not be counted for
work overtime.
OnDuty Allow: After onduty times don’t do late deal in the setting time, for example, user set 5
minutes in the “OnDuty Allow”, the start time of the workgroup is 9:00:00, then when you punch
card in period of 9:00:00 ~ 9:05:00 will not be recorded as late.
ConfineType : this can set the workgroup to have any time limitation.
Unconfined
would not
have the time limitation of the workgroup; whereas Confined
would have the time limitation
“
”
“
”
setting for the workgroup.
Weekdays: select the days for applying that workgroup.
Create a new Plan must select Description\ Type\ Onduty\ Offduty\ Onduty Ahead\ OffDuty Delay\
ConfineType and Weekdays.
ii) Over time
Select “Over time” option of “Time Attendance” , click “new” pop-up over time dialog box. In the
Overtime setting, there would be different options for the selected cardholders.
Description : Select the workgroup
Type : Select the type of the workgroup to be fixed or not. (Not available in the SecNET Basic
Version)
Onduty Time : select the start time of the workgroup
Offduty Time : select the end time of the workgroup
Onduty Ahead : time period before the start time of workgroup which would not be counted for
work overtime.
58 / 79
USP SecNET access control management system user manual
OffDuty Delay : time period after the end time of the workgroup which would not be counted for
work overtime.
Confine Type : this can set the workgroup to have any time limitation.
Unconfined
would not
would have the time limitation
have the time limitation of the workgroup; whereas Confined
“
”
“
”
setting for the workgroup.
Weekdays: select the days for applying that workgroup.
iii) Holiday Assignment
In the Holiday Assignment, user can define the holiday title and the period for the selected cardholder.
59 / 79
USP SecNET access control management system user manual
iv) Leave
In the leave section, user can define the leave application of the selected cardholder.
The leave application should be set to be confirmed.
User can right-click in the leave interface, will pop-up an “Import” dialog box, you can use excel or a
text document to import leave (leave and travel) content.
60 / 79
USP SecNET access control management system user manual
The import format has been offered with the following figure, first name\last name\exception
type\description\time from\time to\remark. Between each option uses the "Tab" key to separating.
v) Sign In/Out
In the Sign In/Out function, it can be used if a cardholder cannot use his own access card to access the
door. All the entry and exit record of that cardholder should be marked by this Sign In/Out function.
3.15 Anti-passback Area Stat
Anti-passback Area Stat will Statistics the number of cardholders in the region, must after setting
Anti-passback can perform anti-passback area stat., setting anti-passback option in the "Advance" of the
door. The number of anti-passback setting will appear in " Anti-passback Area Stat " below of software
function list. The APB area will show index\cardholder name and department of cardholder who have
punched card to enter APB area.
61 / 79
USP SecNET access control management system user manual
3.16 Video Equipment
The video section is used to set the linkage of the video equipment, include
new\edit\delete\synch date time\synch net ports settings.
Click “Video Equipment” in the function list into video equipment settings interface. You can create a
new video equipment when you right-click “New” in the “DVR Information” section.
62 / 79
USP SecNET access control management system user manual
After click “New” fill device information in the “Video Equipment”, you must fill these options: Device
Name\Device IP\User Name\Password. Other options can not fill. In the “HDD Space” SecNET
Software provides 0%, 10%, 20% DVR hard drive capacity configuration options. SecNET can issue
commands to the DVR, so DVR to find figure. Set finished, click “save” complete settings, then the user
can click the "event view" of "video linkage" section to preview and operate the DVR device of linkage.
Note: Get correctly DVR storage space for picture, as following steps:
1) First install DVR (Digital Video Recorder) hard drive;
2) In the "video equipment" select capacity of stores picture;
3) And then format the hard disk recorder.
3.17 Reports
NITRO SecNET system software supports a variety of report output, you can choose to preview and
print. Click "Reports" on the toolbar, pop up a drop-down list box: Including: Event Report\Cardholder
Summary Report\ Cardholder Detail Report\Door Access Report\ Detail Door Access Report and Access
Level Report.
63 / 79
USP SecNET access control management system user manual
Event Report
Event Report used to list events of choice period,. Click the "Event Report" of" Reports" drop-down box
will pop-up Event Reports dialogue box.
Filling the company name in the report dialog box , select the start date and end dates of the event
reports, click "OK" will pop-up event reports.
64 / 79
USP SecNET access control management system user manual
Cardholder Summary Report
Cardholder Summary Report will list personal information all cardholders, such as name, card No,
department, position, employee No, sex and status.
65 / 79
USP SecNET access control management system user manual
Cardholder Detail Report
Cardholder Detail Report will list personal detail information all cardholders, such as name, card No,
department, position, employee No, working place, phone and photo, etc.
66 / 79
USP SecNET access control management system user manual
Door Access Report
Door access report will list stately all cardholders and their card No. were able to access to a door.
67 / 79
USP SecNET access control management system user manual
Detail Door Access Report
Detailed door access report will list stately all door somebody can access, and the report will shown card
NO., department and employee No. of the cardholder.
Access Level Report
Access level report will list stately detail contents of some access level, such as door, data, data group
time and time group of the access level.
68 / 79
USP SecNET access control management system user manual
Chapter4 Tools
System Tools include system data downloading, attendance execute, setup databases server,
engineering tools, language tools, operational records view, quick setup.
System Data download
The Download function would be used to transfer all the system configuration and the software setting
from the server computer to the NAC8000N controller. To prevent any abnormal operation during the
downloading process, user should make sure the network status to be working properly.
After clicking the Download icon, a dialogue box will be shown on the screen. User can select the
controller and the required software setting in the list, and then click download to start the process.
During transferring the data, the program should show the downloading status. If the download process
can be done successfully, it would show “Completed” on the screen.
The firmware of the NAC8000N controller can also be upgraded via the downloading process. Please
ensure the continued supply of equipment and network flow in downloading, in order to avoid
downloaded can not be successful and lead to the normal operation of equipment.
4.1 Attendance Execute
Attendance Execute analysis use for automatic analysis and export of attendance records, you can use
variety documents format to view attendance records, and print them out.
Select "tools" in the upper left menu of software .And in drop-down menu, select "Attendance Execute,"
pop-up “Attendance Analysis” dialog box.
69 / 79
USP SecNET access control management system user manual
Company\Department: Own definition of the company's name, select the department that
need to check the attendance records.
Select Analysis Mode: Daily Record Analysis or Workgroup Record Analysis
1) Daily Record Analysis
Daily Record Analysis Requests Each daily must Access ok Work in times and Work out times ,to
complete a daily.
2) Workgroup Record Analysis
By day analysis of the rules is the time of the first daily by card and the last dialysis by card , the dialysis
Between the first daily and the last dialysis fail by card can be completed.
Date: select Date from and Date to
Output: select output modes,there are five modes:Excel File(.xls)\Print Attendance Report\Print
Work Statistic Report\Print Overtime Report\Print Summary Report
( )
Excel File .xls :
Fill in “Date From” and “Date To” in the attendance analysis dialog box, and select “Excel File(.xls)” in
“Output” section. You can click the
to popup “Excel File configuration” dialog box, select
output colum, you can also click “Enable auto generate attendance report on the last day each month” to
analysis and save automatically attendance report.
70 / 79
USP SecNET access control management system user manual
Select output options, click "OK" will pop-up "txt" document attendance report, when click ”save” wil
change to excel document stored automatically.
:
Print attendance Report
Print
attendance
Report
showing
specific
cardholder's
attendance:
Including
Company\Name\Period\Work In Date\Wokr In Time\ Work Out Date\ Work Out Time\Remark Etc.
71 / 79
USP SecNET access control management system user manual
Print work statistics Report:
Report showing specific cardholder's attendance. Statistics each
WT(Mins)\Late\Early\WIT-WTO and remark in the times of choice analysis
cardholder's
total
Print overtime Report:
Print overtime Report statistics for each cardholder’s overtime statements during the period of choice
time, Report show overtime work in data\work in time\work out date\work out time\overtime(mins)
One-time statistics overtime.
Print summary Report:
Print summary Report statistics for each cardholder’s total WT(mins)\Late\Early\Overtime\
WIT-WTO(mins) in the times of analysis
72 / 79
USP SecNET access control management system user manual
Show a cardholder's record can turn to next page:
4. 2 Setup Database Server
This function is the database setup and maintenance, the specific use can be found in 3.11 (database
settings)
4.3 Engineering Tools
The setting in Engineering Tools would be mainly for the advanced users for system maintenance. It is
recommended for the technical support or system engineer to use this setting.
i) Manufactory Information
73 / 79
USP SecNET access control management system user manual
Currnent / New Mac – this setting is used for changing or updating the Mac Address of the selected
NAC8000N Controller
Synch Date and Time – user can select to synchronize the date and time between the server
computer and NAC8000N Controller. After the time synchronization has been completed, the time
of the controller would follow the record of the server computer.
ii) Remote Open Door
Open Door – user can select the reader of the selected controller, and then send the signal to simulate the
card reading process.
74 / 79
USP SecNET access control management system user manual
iii) DUK
DUK can be assigned as the unqiue ID of the NAC8000N controller. User would be able to control a
series of controllers using the same DUK. This function can be used to manage multiple controllers by
different server computers (system users).
Old DUK : When it is the first time to use the DUK function, it is not needed to input the Old DUK.
After the DUK has been set for the first time, it is needed to remember the DUK number for any
future system adjustment.
New DUK : If the user would like to change the system configuration or structure, it is needed to
input the New DUK value for setting another series of controllers.
Repeat New DUK : Input the New DUK value for confirmation
75 / 79
USP SecNET access control management system user manual
iv) WAN Connection
NITRO SecNET system software support WAN connection, remote operation, controls open orclose the
doors. Software settings: click after "tool factory" after "tools", pop-up "configured devices information
" dialog list, click the "network settings." Select devices NAC8000N which need to connects remotely.
IP of the specified device must enter manually in the WAN connection application,can not use DHCP.
Server IP-IP address of the computer installs control software (IP must be fixed)
Server Port-the port of computer installs control software
Speecify Device IP- IP address of Terminal device(controller)
Gateway IP-Gateway IP of the computer installs control software
Sub NET mask-Sub NET mask of the computer installs control software
76 / 79
USP SecNET access control management system user manual
4.4 Language
Through the language tool to switch the language for the use of type, is to support Simplified Chinese,
Traditional Chinese, English three languages.
4.5 operator Record view
In order to manage the operation of the system user, the SecNET program would have the system log for
the system user. The log file would record the actions done by the registered system user, and the record
can be searched by the specific criteria.
i) Select the “Operation Record View”, the Operator Record dialogue will be shown on the screen.
77 / 79
USP SecNET access control management system user manual
ii) Click the “Search” Button, and then input the required search information.
iii) The search result would be shown as below.
78 / 79
USP SecNET access control management system user manual
iv) Click the “Export” button to export the search result. Output in” txt” format.
4.6 Quick Setup
Setting controller through the “Quick Setup” can set basic access control program, specific operation see
section 3.2.2 (Quick Setup )
79 / 79