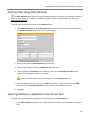
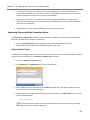
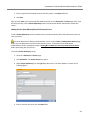
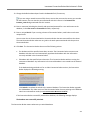
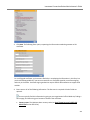
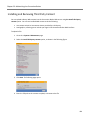
1
Connection Broker Managing User Connections to Workstations, Blades, VDI, and more Administrator’s Guide Version 8.1 October 21, 2015 Contacting Leostream Leostream Corporation 465 Waverley Oaks Rd. Suite 200 Waltham, MA 02452 USA http://www.leostream.com Telephone: +1 781 890 2019 Fax: +1 781 688 9338 To submit an enhancement request, email [email protected]. To request product information or inquire about our future direction, email [email protected]. Copyright © Copyright 2002-2015 by Leostream Corporation This software program and documentation are copyrighted by Leostream. The software described in this document is provided under a license agreement and may be used or copied only under the terms of this agreement. No part of this manual may be copied or reproduced in any form without prior written consent from Leostream. Trademarks The following are trademarks of Leostream Corporation. Leostream™ The Leostream graphical logo™ The absence of a product name or logo from this list does not constitute a waiver of the trademark or other intellectual property rights concerning that product, name, or logo by Leostream. HP is a registered trademark that belong to Hewlett-Packard Development Company, L.P. Linux is the registered trademark of Linus Torvalds in the U.S. and other countries. The OpenStack Word Mark and OpenStack Logo are either registered trademarks/service marks or trademarks/service marks of the OpenStack Foundation, in the United States and other countries and are used with the OpenStack Foundation's permission. Leostream is not affiliated with, endorsed or sponsored by the OpenStack Foundation, or the OpenStack community. OpenLDAP is a trademark of The OpenLDAP Foundation. UNIX is a registered trademark of The Open Group. OpenLDAP is a trademark of The OpenLDAP Foundation. Microsoft, Active Directory, SQL Server, Excel, ActiveX, Hyper-V, Windows, and the Windows logo are trademarks or registered trademarks of Microsoft Corporation in the United States and/or other countries. Other brand and product names are trademarks or registered trademarks of their respective holders. Leostream claims no right to use of these marks. Patents Leostream software is protected by U.S. Patent 8,417,796. Leostream Connection Broker Administrator’s Guide Contents CONTENTS .................................................................................................................................... 3 CHAPTER 1: INTRODUCTION ................................................................................................... 13 USING THIS DOCUMENTATION............................................................................................................. 13 Navigational Conventions .......................................................................................................... 13 Formatting Conventions ............................................................................................................. 13 RELATED DOCUMENTATION ................................................................................................................. 13 LEOSTREAM™ COMPONENTS ............................................................................................................. 14 WHAT IS THE CONNECTION BROKER? ................................................................................................ 14 HOW THE CONNECTION BROKER MANAGES USERS ......................................................................... 16 CHAPTER 2: GETTING STARTED ............................................................................................. 18 INSTALLING THE CONNECTION BROKER ............................................................................................. 18 STARTING THE CONNECTION BROKER ............................................................................................... 18 ENTERING YOUR LICENSE................................................................................................................... 19 CHANGING YOUR PASSWORD ............................................................................................................. 20 SETTING NETWORK CONFIGURATION AND CONNECTION BROKER VIP ........................................... 20 USING STANDARD CONNECTION BROKER W EB INTERFACE CONTROLS ......................................... 21 Getting Context Sensitive Help ................................................................................................. 21 Customizing Tables ..................................................................................................................... 21 Performing Bulk Actions ............................................................................................................. 22 Saving and Deleting Records .................................................................................................... 23 Sorting, Searching, and Filtering Lists ..................................................................................... 23 Using Searchable Drop-Down Menus...................................................................................... 24 Highlighting Active Filters ........................................................................................................... 25 Formatting the Display of Actions in Tables ............................................................................ 26 RESTORING CONNECTION BROKER DEFAULT VIEWS ........................................................................ 27 CHAPTER 3: CONFIGURING CONNECTION BROKER SETTINGS ....................................... 28 ENABLING GLOBAL CONNECTION BROKER FEATURES...................................................................... 28 ENABLING AUTHENTICATION SERVER FEATURES .............................................................................. 29 ENABLING RADIUS AUTHENTICATION ............................................................................................... 30 SETTING TIME AND DATE ..................................................................................................................... 32 WEB INTERFACE LOOK-AND-FEEL ...................................................................................................... 33 Selecting a Connection Broker Skin ......................................................................................... 33 Displaying a Custom Logo and Favicon .................................................................................. 33 Setting the Landing Page for Administrator Web Interface Logins ...................................... 35 Setting Message Board Text...................................................................................................... 36 Suppressing Headers and Footers on the Sign In Page....................................................... 36 Adding Customized Text, Links, and Images to the Sign In Page ....................................... 37 URL Redirect on User Logout ................................................................................................... 37 CREATING COLOR SCHEMES (SKINS) ................................................................................................ 38 CONFIGURING COMMUNICATIONS WITH THE LEOSTREAM AGENT .................................................... 39 CONFIGURING LEOSTREAM CONNECT ............................................................................................... 41 3 Contents SETTING CONNECTION BROKER PERFORMANCE THRESHOLDS ...................................................... 45 CONFIGURING SECURE CONNECTION BROKER COMMUNICATION ................................................... 46 SPECIFYING VMWARE VCENTER SERVER CLUSTERS FOR DESKTOP FILTERS ............................... 47 OTHER CONNECTION BROKER SETTINGS .......................................................................................... 48 Allow URL Access to the Logs .................................................................................................. 48 Dell Wyse Sysinit Command ..................................................................................................... 49 CHAPTER 4: PREPARING REMOTE WORKSTATIONS AND VIRTUAL MACHINES ............ 50 CHAPTER 5: UNDERSTANDING CONNECTION BROKER CENTERS .................................. 51 OVERVIEW ............................................................................................................................................ 51 CREATING CENTERS ............................................................................................................................ 52 The Uncategorized Desktops Center ....................................................................................... 52 VMware® vSphere and vCenter Server Centers ................................................................... 53 Citrix® XenServer® 6.x Centers ............................................................................................... 58 Citrix XenApp™ Centers ............................................................................................................ 59 Citrix XenDesktop Centers ........................................................................................................ 61 Red Hat Enterprise Virtualization Manager Centers .............................................................. 64 Open Source Xen® Centers ...................................................................................................... 65 Active Directory Centers ............................................................................................................ 67 HP Moonshot System Centers .................................................................................................. 70 Microsoft® System Center Virtual Machine Manager (SCVMM) 2012 Centers ................ 72 Microsoft Windows Deployment Services ............................................................................... 74 OpenStack® Centers .................................................................................................................. 75 Leostream Cloud Desktops ....................................................................................................... 76 Amazon Web Services Centers ................................................................................................ 77 Remote Desktop Services / Multi-User Centers ..................................................................... 78 DELETING CENTERS ............................................................................................................................ 80 DISPLAYING CENTER CHARACTERISTICS ........................................................................................... 80 CHAPTER 6: WORKING WITH DESKTOPS AND APPLICATIONS ......................................... 83 REGISTERING DESKTOPS IN THE UNCATEGORIZED DESKTOPS CENTER ......................................... 83 Registering Desktops Using the Leostream Agent ................................................................ 83 Importing a Desktop by IP Address .......................................................................................... 83 Importing a Range of Desktops by IP Address ....................................................................... 85 USING THE DESKTOPS PAGE .............................................................................................................. 86 Available Desktop Characteristics ............................................................................................ 87 Filtering the Desktop List............................................................................................................ 94 Editing Desktop Characteristics ................................................................................................ 95 Viewing HP Blade Locations...................................................................................................... 97 Manually Releasing Desktops ................................................................................................... 99 USING VIRTUAL MACHINE SNAPSHOTS .............................................................................................. 99 HANDLING DUPLICATE DESKTOPS ...................................................................................................... 99 WORKING WITH FAILOVER DESKTOPS .............................................................................................. 101 Specifying a Failover Desktop................................................................................................. 101 Creating Failover Plans ............................................................................................................ 101 Manually Failing Over a Desktop ............................................................................................ 103 Failing Back a Desktop............................................................................................................. 104 Combining Backup Pools and Failover Desktops ................................................................ 105 4 Leostream Connection Broker Administrator’s Guide PERFORMING ACTIONS ON MULTIPLE DESKTOPS ........................................................................... 106 Removing Desktop Affinities .................................................................................................... 106 Changing the Availability of Multiple Desktops ..................................................................... 107 Updating the Leostream Agent on Multiple Desktops ......................................................... 107 Applying Tags to Multiple Desktops........................................................................................ 108 Converting Desktops to Remote Desktop Services / Multi-User Centers ........................ 108 Bulk Release, Refresh, and Remove for Desktops ............................................................. 108 POWER CONTROL FOR DESKTOPS ................................................................................................... 109 Determining Power State for Physical Desktops .................................................................. 110 Manually Changing a Desktop’s Power State ....................................................................... 110 Configuring Power Control Options for Physical Desktops ................................................ 110 Using Wake-on-LAN for Power Control ................................................................................. 111 Configuring 1E WakeUp Communications ............................................................................ 111 DESKTOP ASSIGNMENT MODES ........................................................................................................ 112 Follow Me Mode ........................................................................................................................ 113 Kiosk Mode................................................................................................................................. 113 Hard-Assigning a Desktop to a User ...................................................................................... 114 Hard-Assigning a Desktop to a Client .................................................................................... 114 Assigning Desktops to Rogue Users ...................................................................................... 115 MANAGING APPLICATIONS ................................................................................................................. 116 Available Application Characteristics ..................................................................................... 117 Filtering the Application List ..................................................................................................... 117 CHAPTER 7: CREATING DESKTOP AND APPLICATION POOLS .........................................119 OVERVIEW .......................................................................................................................................... 119 DISPLAYING POOLS ........................................................................................................................... 120 CREATING DESKTOP POOLS ............................................................................................................. 123 CREATING APPLICATION POOLS ........................................................................................................ 124 DEFINING POOLS USING CENTERS .................................................................................................. 124 DEFINING POOLS USING DESKTOP ATTRIBUTES ............................................................................. 125 DEFINING POOLS USING VMWARE VCENTER SERVER CLUSTERS ................................................ 127 DEFINING POOLS USING VMWARE VCENTER SERVER RESOURCE POOLS................................... 127 DEFINING POOLS USING TAGS.......................................................................................................... 128 Creating Tags ............................................................................................................................. 128 Naming Tag Groups .................................................................................................................. 130 Continuously Applying Tags to Desktops .............................................................................. 130 Tagging Individual Desktops .................................................................................................... 131 Simultaneously Tagging Multiple Desktops ........................................................................... 132 Creating Pools Using Tags ...................................................................................................... 132 Example: Using Tags to Define the Contents of a Pool ...................................................... 133 DEFINING POOLS USING LDAP ATTRIBUTES ................................................................................... 135 SELECTING DESKTOPS OR APPLICATIONS FROM PARENT POOL .................................................... 135 CREATING POOLS OF VMS IN A SHARED CITRIX XENDESKTOP GROUP ........................................ 136 SPECIFYING NUMBER OF RUNNING DESKTOPS IN A POOL.............................................................. 137 JOINING POOLED DESKTOPS TO A DOMAIN ...................................................................................... 137 LOGGING DESKTOP POOL LEVELS ................................................................................................... 138 TRACKING DESKTOP USAGE FROM POOLS ...................................................................................... 139 REFRESHING POOL STATISTICS ........................................................................................................ 140 5 Contents CHAPTER 8: PROVISIONING NEW DESKTOPS .....................................................................141 OVERVIEW .......................................................................................................................................... 141 ENABLING PROVISIONING OF VIRTUAL MACHINES........................................................................... 141 SETTING UPPER AND LOWER LEVELS FOR POOLS .......................................................................... 142 PROVISIONING IN OPENSTACK.......................................................................................................... 143 PROVISIONING IN AMAZON W EB SERVICES ..................................................................................... 144 PROVISIONING FROM VMWARE TEMPLATES .................................................................................... 145 Creating Configuration Files in VMware vCenter Server .................................................... 148 PROVISIONING USING URL NOTIFICATION ........................................................................................ 148 Using Dynamic Tags to Create Provisioning Variables ....................................................... 149 CHAPTER 9: CONFIGURING USER ROLES AND PERMISSIONS ........................................150 OVERVIEW .......................................................................................................................................... 150 The Default Administrator Role ............................................................................................... 150 The Default User Role .............................................................................................................. 151 CREATING NEW ROLES ..................................................................................................................... 151 SESSION PERMISSIONS ..................................................................................................................... 152 Overview ..................................................................................................................................... 153 Managing another User’s Resources..................................................................................... 156 ADMINISTRATOR W EB INTERFACE PERMISSIONS ............................................................................ 159 Setting Permission Levels........................................................................................................ 159 Permissions that Control Multiple Connection Broker Pages............................................. 159 Providing Administrator Access to Users, Roles, and Desktops ........................................ 160 Customizing Access to Desktops............................................................................................ 161 Customizing Access to the Authentication Servers Page ................................................... 164 Customizing Access to the Maintenance Page .................................................................... 165 CHAPTER 10: BUILDING POOL-BASED PLANS ....................................................................166 OVERVIEW OF POLICIES AND PLANS ................................................................................................ 166 PROTOCOL PLANS ............................................................................................................................. 167 How Protocol Plans Work ........................................................................................................ 167 Building Protocol Plans ............................................................................................................ 170 Protocol Plans for Wyse WTOS Thin Clients ........................................................................ 173 Using Dynamic Tags ................................................................................................................. 174 POWER CONTROL PLANS .................................................................................................................. 179 Using Power Control Options .................................................................................................. 179 Creating Power Control Plans ................................................................................................. 180 RELEASE PLANS ................................................................................................................................ 181 Using Release Options............................................................................................................. 181 Creating Release Plans............................................................................................................ 181 CHAPTER 11: CONFIGURING USER EXPERIENCE BY POLICY ..........................................186 OVERVIEW .......................................................................................................................................... 186 DISPLAYING AVAILABLE POLICIES ..................................................................................................... 186 ADDING A NEW POLICY AND CONFIGURING GENERAL POLICY OPTIONS ....................................... 188 CONFIGURING DESKTOP POLICY OPTIONS ...................................................................................... 190 Offering Desktops from Pools ................................................................................................. 191 Defining Behaviors for Assigned Desktops ........................................................................... 198 6 Leostream Connection Broker Administrator’s Guide CONFIGURING VMWARE HORIZON VIEW POLICY OPTIONS ............................................................ 200 OFFERING RESOURCES FROM A CITRIX XENAPP SERVICES SITE.................................................. 202 CONFIGURING APPLICATION POLICY OPTIONS ................................................................................ 203 CONFIGURING POLICIES FOR HARD-ASSIGNED DESKTOPS............................................................ 203 When User Logs into the Connection Broker ....................................................................... 204 When User Disconnects from Desktop .................................................................................. 206 When User Logs Out of Desktop ............................................................................................ 206 When Connection is Closed .................................................................................................... 206 When Desktop is Idle ................................................................................................................ 207 Assigning Plans to Hard-Assigned Desktops ....................................................................... 207 ASSOCIATING PLANS TO ROGUE USERS .......................................................................................... 207 POLICY FILTERS ................................................................................................................................. 207 Using Dynamic Tags in Policy Filters ..................................................................................... 209 Using VMware Custom Attributes in Filters ........................................................................... 209 Example: Persistently Assigning Users to a Particular Desktop Using Filters ................. 210 CONFIGURING USB DEVICE MANAGEMENT ..................................................................................... 211 TESTING POLICIES ............................................................................................................................. 212 USING W EBHOOKS IN POLICIES ....................................................................................................... 212 Defining Custom Actions at Login........................................................................................... 213 Defining Custom Actions on Log Out and Disconnect......................................................... 213 Example WebHook ................................................................................................................... 214 CHAPTER 12: CONFIGURING USER EXPERIENCE BY CLIENT LOCATION ......................215 OVERVIEW .......................................................................................................................................... 215 CREATING LOCATIONS ....................................................................................................................... 215 Using Subnet Masks to Create Locations ............................................................................. 217 CREATING DISPLAY PLANS ................................................................................................................ 217 The Default Display Plan and Display Options ..................................................................... 218 Saving and Restoring Application Window Positions .......................................................... 219 Managing Window Placement for Spanned Sessions ......................................................... 220 Setting Display Protocol Configurations for Multi-Monitor Support ................................... 222 ATTACHING NETWORK PRINTERS ..................................................................................................... 224 How it Works .............................................................................................................................. 224 System Requirements .............................................................................................................. 225 Registering Printers with the Connection Broker ................................................................. 226 Viewing Available Printers........................................................................................................ 228 Identifying Duplicate Printers ................................................................................................... 230 Creating Printer Plans .............................................................................................................. 230 MANIPULATING REGISTRY KEYS ....................................................................................................... 232 Creating Registry Plans............................................................................................................ 234 Using Dynamic Tags in Registry Plans .................................................................................. 235 ASSIGNING PLANS TO LOCATIONS .................................................................................................... 236 Example: Creating a Location for a Particular Client Device ............................................. 237 USING THE CLIENTS PAGE ................................................................................................................ 238 Available Client Characteristics............................................................................................... 238 Filtering the Client List .............................................................................................................. 240 Editing Clients ............................................................................................................................ 241 Bulk Editing Clients ................................................................................................................... 242 7 Contents Assigning Plans to Clients ....................................................................................................... 243 Deleting Clients.......................................................................................................................... 243 Hard-Assigning Clients to Desktop ......................................................................................... 244 Hard-Assigning a Display Plan to a Client............................................................................. 245 Opting out of Multi-Monitor Support ....................................................................................... 245 CHAPTER 13: AUTHENTICATING USERS ............................................................................... 247 OVERVIEW .......................................................................................................................................... 247 UNIQUE VERSUS NON-UNIQUE USER IDENTIFICATION ................................................................... 247 TYPES OF USER AUTHENTICATION ................................................................................................... 249 Username Authentication ......................................................................................................... 249 User Name and Password Authentication............................................................................. 250 Smart Cards ............................................................................................................................... 251 Fingerprint .................................................................................................................................. 251 ADDING MICROSOFT® ACTIVE DIRECTORY® AUTHENTICATION SERVERS .................................... 252 Loading Users ............................................................................................................................ 256 ADDING NOVELL® EDIRECTORY® AUTHENTICATION SERVERS ..................................................... 257 Using Novell® Single Sign On ................................................................................................ 262 ADDING OPENLDAP AUTHENTICATION SERVERS ........................................................................... 262 AUTHENTICATING WITH NIS .............................................................................................................. 266 POPULATING THE DOMAIN DROP-DOWN AND SETTING DEFAULT DOMAIN .................................... 268 TESTING THE AUTHENTICATION SERVER .......................................................................................... 269 LOCALLY AUTHENTICATED USERS .................................................................................................... 270 MANAGING USERS ............................................................................................................................. 272 Displaying User Characteristics .............................................................................................. 272 Logging Users Out .................................................................................................................... 274 Removing Multiple Users ......................................................................................................... 274 Editing User Characteristics .................................................................................................... 274 CHAPTER 14: ASSIGNING USER ROLES AND POLICIES .................................................... 276 OVERVIEW .......................................................................................................................................... 276 ASSIGNING ROLES AND POLICIES BASED ON GROUP MEMBERSHIP .............................................. 278 ASSIGNING ROLES AND POLICIES BASED ON ANY ATTRIBUTE ........................................................ 279 ASSIGNING ROLES AND POLICIES BASED ON MULTIPLE ATTRIBUTES ............................................ 280 REORDERING USER ROLE AND POLICY RULES ............................................................................... 281 ASSIGNING ROLES WITHOUT POLICIES ............................................................................................ 281 USING THE DEFAULT ROLE AND POLICY........................................................................................... 282 TESTING USER ROLE AND POLICY ASSIGNMENT ............................................................................. 282 CHAPTER 15: USING THE LEOSTREAM WEB CLIENT .........................................................286 OVERVIEW .......................................................................................................................................... 286 AUTHENTICATING USERS FROM THE CONNECTION BROKER SIGN IN PAGE .................................. 287 Username and Password Authentication .............................................................................. 287 CAS Authentication ................................................................................................................... 287 Adding a Domain Field ............................................................................................................. 289 WORKING WITH RESOURCES IN THE W EB CLIENT .......................................................................... 289 Filtering the Resource List ....................................................................................................... 290 Changing the Resource List Format ...................................................................................... 290 8 Leostream Connection Broker Administrator’s Guide Refreshing the Resource List .................................................................................................. 290 Connecting to Desktops from the Web Client ....................................................................... 291 Restarting Desktops.................................................................................................................. 291 Releasing Desktops .................................................................................................................. 292 Connecting to Applications from the Web Client .................................................................. 292 CUSTOMIZING THE W EB CLIENT MESSAGE BOARD ......................................................................... 293 OPENING THE ADMINISTRATOR W EB INTERFACE............................................................................. 293 LAUNCHING CONNECTIONS IN NEW W INDOWS................................................................................ 294 SETTING URL FOR USER LOGOUT ................................................................................................... 295 DISPLAY PROTOCOLS FOR W EB CLIENT ACCESS ............................................................................ 295 Microsoft® ActiveX® RDP Viewer .......................................................................................... 296 RDP Viewer ................................................................................................................................ 297 Exceed onDemand ................................................................................................................... 298 Citrix HDX ................................................................................................................................... 299 VNC ............................................................................................................................................. 299 NoMachine NX........................................................................................................................... 299 Juniper SSL VPN ...................................................................................................................... 299 External Viewer.......................................................................................................................... 300 Citrix XenApp ICA ..................................................................................................................... 302 USING CLIENT-SIDE CERTIFICATES .................................................................................................. 303 CHAPTER 16: SSL VPN INTEGRATION ...................................................................................306 OVERVIEW .......................................................................................................................................... 306 HOW SSL VPNS WORK ..................................................................................................................... 306 Authentication ............................................................................................................................ 306 Networking and Encryption ...................................................................................................... 306 JUNIPER NETWORKS® SSL VPN SETUP ......................................................................................... 307 Configuring Juniper Networks Roles ...................................................................................... 308 Defining Role Mappings ........................................................................................................... 313 Configuring Connection Broker Web Resource Profiles in Juniper Networks ................. 315 Assigning the Connection Broker Resource to the Juniper Networks Role ..................... 322 Configuring Resource Policies ................................................................................................ 322 Configuring Single Sign-On to Leostream ............................................................................. 327 Configuring Protocol Plans in the Connection Broker ......................................................... 329 CISCO® 55XX SSL VPN SETUP ....................................................................................................... 335 General Cisco SSL VPN Setup ............................................................................................... 336 Setting up the Cisco SSL VPN to Work with the Connection Broker ................................ 338 Configuring Protocol Plans in the Connection Broker ......................................................... 341 Logging in Through the Cisco SSL VPN................................................................................ 342 Using the Cisco Systems VPN Client with Leostream Connect ........................................ 342 ORACLE SECURE GLOBAL DESKTOP SETUP ................................................................................... 344 General Oracle Secure Global Desktop Server Setup ........................................................ 345 Installing Leostream Connect .................................................................................................. 346 Adding a Leostream Application ............................................................................................. 348 Logging in to Secure Global Desktop with Leostream Connect ........................................ 353 F5® FIREPASS® SSL VPN SETUP .................................................................................................. 354 CHAPTER 17: USING LEOSTREAM WITH TERADICI® PCOIP® REMOTE WORKSTATION CARDS ........................................................................................................................................355 9 Contents OVERVIEW .......................................................................................................................................... 355 ENABLING PCOIP SUPPORT IN THE CONNECTION BROKER ........................................................... 356 ENABLING SINGLE SIGN-ON TO REMOTE W ORKSTATIONS ............................................................. 356 REGISTERING PCOIP REMOTE W ORKSTATION CARDS ................................................................... 357 Discovering PCoIP Devices Using a DNS SRV Record ..................................................... 357 Adding Individual PCoIP Remote Workstation Cards .......................................................... 358 Uploading PCoIP Remote Workstation Cards ...................................................................... 359 Deleting PCoIP Remote Workstation Cards ......................................................................... 360 ADDING DESKTOPS THAT SUPPORT PCOIP CONNECTIONS ........................................................... 360 Adding Blades Using the Uncategorized Desktops Center ................................................ 360 Adding Workstations Using a Microsoft® Active Directory® Center ................................. 361 Duplicate Blades ....................................................................................................................... 361 Troubleshooting Missing Desktops ......................................................................................... 362 ASSOCIATING PCOIP HOST CARDS AND DESKTOPS ....................................................................... 362 Automatic PCoIP Host Card Matching for a Windows Desktop ......................................... 363 Automatic PCoIP Host Card Mapping for a Linux Desktop ................................................ 363 Confirming and Editing Host Card Mappings ........................................................................ 364 PCOIP PROTOCOL PLAN OPTIONS................................................................................................... 365 MANAGING PCOIP CLIENT DEVICES ................................................................................................ 366 Resetting PCoIP Zero Clients.................................................................................................. 366 Direct Connections to Hard-Assigned Desktops .................................................................. 366 Local Leostream Options on PCoIP Client Devices ............................................................ 367 Working with Firmware Version 5.0 ........................................................................................ 368 Editing Client Devices in the Connection Broker Web Interface ........................................ 368 QUAD-MONITOR SUPPORT FOR TERA1 PCOIP CLIENTS ................................................................ 371 Configuring Desktops for Quad-Monitor Support ................................................................. 371 Manually Binding Two Clients.................................................................................................. 372 Automatically Binding Two Clients .......................................................................................... 372 MANAGING ANOTHER USER’S RESOURCES VIA PCOIP................................................................... 373 CHAPTER 18: SCALING DEPLOYMENTS ............................................................................... 375 CONSIDERATIONS FOR PRODUCTION DEPLOYMENTS ..................................................................... 375 USING CLUSTERS TO MAXIMIZE AVAILABILITY.................................................................................. 376 Benefits of Using a Cluster ...................................................................................................... 376 Creating a Cluster ..................................................................................................................... 376 Using the Cluster Management Page .................................................................................... 377 Modifying Cluster-Wide Time Zone Settings ......................................................................... 380 Removing Connection Brokers from a Cluster ..................................................................... 380 Updating Connection Broker Clusters to New Connection Broker Versions.................... 381 Spreading a Cluster across Multiple Datacenters/Regions ................................................ 381 Managing Different Clusters in Different Datacenters ......................................................... 382 Building a Cluster for Disaster Recovery ............................................................................... 384 DISTRIBUTING USER LOGINS ............................................................................................................ 384 Using DNS for Load Balancing ............................................................................................... 384 Using Commercial Load Balancers ........................................................................................ 385 Connection Broker User Redirection...................................................................................... 387 USING AN EXTERNAL DATABASE ....................................................................................................... 390 Sizing the External Database .................................................................................................. 390 10 Leostream Connection Broker Administrator’s Guide Switching to an External Database......................................................................................... 392 Database Mirroring.................................................................................................................... 393 CHAPTER 19: MONITORING THE CONNECTION BROKER ..................................................400 SEARCHING FOR CONNECTION BROKER OBJECTS ......................................................................... 400 Global Search ............................................................................................................................ 400 Per-Page Search ....................................................................................................................... 402 GENERATING CONNECTION BROKER REPORTS .............................................................................. 404 Reporting Connection Broker Metrics .................................................................................... 404 Reporting Resource Usage ..................................................................................................... 408 Generating Resource Usage Summary Reports .................................................................. 409 Policy Reports ............................................................................................................................ 411 User Login History Reports...................................................................................................... 411 User Connection History Reports ........................................................................................... 413 INTEGRATING WITH SYSLOG SERVERS ............................................................................................. 414 VIEWING THE CONNECTION BROKER LOG ....................................................................................... 415 Customizing Log Levels ........................................................................................................... 415 Purging Connection Broker Logs ............................................................................................ 416 Available Log Characteristics .................................................................................................. 416 Filtering the Log List ................................................................................................................. 418 Using Logs to Track Connection Broker Configuration Changes ...................................... 419 Exporting the Log Contents ..................................................................................................... 420 VIEWING THE JOB QUEUE ................................................................................................................. 421 Rescheduling Pending Jobs .................................................................................................... 422 Purging Completed Jobs .......................................................................................................... 423 Purging Pending and Running Jobs ....................................................................................... 423 USING W EB QUERIES TO OBTAIN CONNECTION BROKER STATUS ................................................. 424 USING THE XML API.......................................................................................................................... 425 Testing the XML-RPC API........................................................................................................ 426 ISSUING SNMP TRAPS ...................................................................................................................... 427 CHAPTER 20: MAINTAINING THE CONNECTION BROKER .................................................430 OVERVIEW .......................................................................................................................................... 430 UPDATING CONNECTION BROKERS .................................................................................................. 431 REMOVING THE UPDATE OPTION ...................................................................................................... 431 UPGRADING LEOSTREAM CONNECT AND LEOSTREAM AGENT ....................................................... 432 Upgrading Leostream Connect ............................................................................................... 432 Upgrading Leostream Agents .................................................................................................. 433 ENTERING A NEW LICENSE KEY ........................................................................................................ 434 SWITCHING DATABASES .................................................................................................................... 434 Connecting to a PostgreSQL Database................................................................................. 435 Connecting to a Microsoft SQL Server Database ................................................................ 436 Connecting to the Internal Connection Broker Database ................................................... 439 BACKING UP AND RESTORING AN INTERNAL CONNECTION BROKER DATABASE ........................... 439 BACKING UP YOUR CONNECTION BROKER ...................................................................................... 440 Recommended Practices ......................................................................................................... 440 Scheduling Connection Broker Backups ............................................................................... 441 GENERATING AND INSTALLING SELF-SIGNED SSL CERTIFICATES .................................................. 442 11 Contents GENERATING AND INSTALLING THIRD PARTY SSL CERTIFICATES .................................................. 444 Installing a Signed SSL Certificate and Intermediate Certificate ....................................... 445 Sharing SSL Credentials between Connection Brokers...................................................... 445 Uninstalling an SSL Certificate ................................................................................................ 447 RESTARTING THE CONNECTION BROKER ......................................................................................... 448 SHUTDOWN THE CONNECTION BROKER .......................................................................................... 448 PURGING THE DATABASE .................................................................................................................. 448 INSTALLING AND REMOVING THIRD PARTY CONTENT ...................................................................... 450 UPLOADING DATA FROM CSV FILES ................................................................................................. 451 Uploading Users ........................................................................................................................ 452 Uploading Desktop Assignments ............................................................................................ 453 Uploading Clients ...................................................................................................................... 454 CHECKING COMPONENT VERSION NUMBERS .................................................................................. 455 12 Leostream Connection Broker Administrator’s Guide Chapter 1: Introduction Using This Documentation The Connection Broker Administrator’s Guide is intended for system administrators who are configuring and administering the Connection Broker via the Administrator Web interface. The term you in this document represents the administrator installing and configuring the Connection Broker. The term user or end user represents an end user that logs into the Connection Broker to access their assigned resources. Navigational Conventions The Connection Broker Administrator Web interface contains two navigational menus, in addition to a set of links on each page, as shown in the following figure. This document refers to these menus and links, using the following syntax: > Resources indicates a main menu selection > Resources > Centers indicates a secondary menu selection Add Center indicates selecting a particular link or action on a page Formatting Conventions Format Indicates Bold The name of a menu item, button, or link to be clicked, or a selection from a drop-down menu. Courier New Example code, commands, or directory/file name, or text to be entered into an edit field Italics Part of a command to be replaced by information specific to your configuration Related Documentation Installation Guide: Instructions on installing the Connection Broker, Leostream Connect, and Leostream Agent 13 Chapter 1: Introduction Quick Start Guides: Step-by-step instructions on setting up common Connection Broker configurations Thin Client Guide: Information specific to thin clients supported by the Connection Broker Trouble-Shooting Guide: Tips on addressing common Connection Broker configurations and complications Security Review: Pieces of the Connection Broker relevant to a security audit Glossary of Terms: Connection Broker Terminology used throughout this document Leostream™ Components The Leostream Connection Broker consists of the following four components. Connection Broker: The main virtual appliance that manages the hosted desktop infrastructure, both physical and virtual. The Connection Broker is the central management layer for configuring your deployment, including: inventorying desktops, applications, printers, and other resources, assigning these resources to users, and defining the end-user experience. Leostream Agent: When installed on the remote desktops, the Leostream Agent provides the Connection Broker with insight into the connection status of remote users. On Microsoft® Windows® operating systems, the Leostream Agent also performs functions related to the Leostream printing and USB management features and multi-monitor support. The Leostream Agent is a critical component when scaling out deployments to a large number of end users. Leostream Connect: A client provided by Leostream that allows users to log in to desktops from any Windows or Linux® device. Using Leostream Connect, you can repurpose existing desktops and laptops, lowering the cost of VDI deployments. Certain thin clients provide built-in Leostream Connect clients. Database: The Connection Broker stores all information in an internal database. A typical installation requires one Gbyte of disk space for the internal database. Large scale deployments that require Connection Broker clusters must use an external PostgreSQL or Microsoft® SQL Server® 2012 or 2014 database. What is the Connection Broker? A connection broker lies at the heart of any hosted desktop deployment, and is the key component for assigning resources to end users and controlling the end-user experience. The Leostream Connection Broker runs as a virtual appliance within a VMware®, Citrix®, Microsoft, or Red Hat virtualization layer, making it easy to install, maintain, and update. The Connection Broker provides end users with consistent, reliable access to data and desktops from a wide range of fat and thin clients. The Connection Broker allows you to manage: 14 Leostream Connection Broker Administrator’s Guide Desktop sessions, to optimize resource and power consumption USB devices, to ensure data security End user experience, to provide the optimal working environment for your end users And, much more! Using the Connection Broker, you define: Authentication Servers: A server that provides authentication services to users logging into the Connection Broker. The Connection Broker supports Microsoft Active Directory®, Novell® eDirectory™, OpenLDAP™, and NIS directory services. You can specify any number of trusted or nottrusted domains, using any combination of authentication server types. In addition, the Connection Broker allows you to define local users without configuring an authentication server. Centers: The external systems from which the Connection Broker pulls resources, including desktops, applications, and printers. Centers can be created from the following systems: HP® Moonshot Systems; Red Hat Enterprise Virtualization Manager; VMware vSphere, ESXi, and vCenter Server; Citrix XenDesktop®, XenServer® and XenApp; OpenStack® clouds and open source Xen; Microsoft Hyper-V™ via System Center Virtual Machine Manager (SCVMM), Remote Desktop Services (RDS), Active Directory, and Leostream Cloud Desktops. Resources: Desktops, applications, and printers available for assignment to an end user. Desktops: Virtual machines, physical machines, blades, HP Moonshot nodes, and Microsoft RDS sessions to assign to end users. The Connection Broker supports desktops that run Windows and Linux operating systems. Applications: Applications and desktops hosted in a Citrix XenApp farm. Pools: Collections of desktops or applications, gathered from a single or multiple centers. Clients: An application or system used to access a remote desktop or application. The Connection Broker supports Linux and Windows clients and a variety of thin clients, as well as Web browsers and mobile devices. Locations: A group of clients defined by client attributes such as manufacturer, device type, OS version, IP address, etc. The end-user experience can be defined based on the location of their client, including assigning printers and modifying registry keys. Plans: Rules that define the end-user experience. The Connection Broker defines three types of plans: pool-based plans such as protocol, power control, and release plans are applied to pools in a policy and define how the Connection Broker manages the desktops in that pool; location-based plans such as display, printer, and registry plans are applied to desktops based on the user’s client device; and desktop-based plans such as the failover plans apply to specific desktops. Policies: Rules that assign desktops and applications to users and define what occurs at all steps of the user’s session, including assignment, login, disconnect, and logout. Policies assign plans to desktops based on the desktop’s pool membership, and manage USB pass through permissions. 15 Chapter 1: Introduction Roles: Permissions that control the actions an end user is allowed to take on their desktops and the level of access they have to the Connection Broker Administrator Web interface. Roles can be used to secure desktop access by automatically adding and removing users from the Remote Desktop Users group. Assignments: A list of rules that determine which role and policy the Connection Broker assigns to a user, based on the authentication server the user was found in, the attributes of the user’s account in that authentication server, and the location the user is logging in from, as depicted in the following figure. How the Connection Broker Manages Users The following figure illustrates the different steps involved in connecting users to desktops, which are described in more detail after the illustration. With the exception of authenticating users, policy and plan logic determines how the Connection Broker handles each step. User signs in to Connection Broker Connection Broker authenticates user Connection Broker assigns desktop and connects user User ends remote desktop connection Connection Broker offers desktop based on user’s policy Connection Broker applies release plan User requests connection to desired desktops Connection Broker applies power plans 1. User signs into the Connection Broker: End users can log into the Connection Broker from a Web browser, thin client, mobile device, or Leostream Connect. Different clients support different types of credentials, such as user name/password, smart cards, or fingerprints. 16 Leostream Connection Broker Administrator’s Guide 2. Connection Broker authenticates user: After the Connection Broker receives the user’s credentials from the client device, it searches for the user in the domains defined in the broker. If the user previously logged in, the Connection Broker begins by looking in the authentication server used for the previous login then searches the remaining authentication servers in the order defined by the authentication server’s Position. If this is the first time the user logged in, the Connection Broker searches all authentication servers in order of their position. 3. Connection Broker offers resources based on user’s policy: The Connection Broker assigns a Leostream policy to the user using the assignment table associated with the authentication server chosen in step 2. The policy determines the desktops and applications offered to the user, USB pass through permissions, and the display protocol to use. 4. User requests connection to desired desktop: The client lists all desktops offered to the user by their policy. The user then requests a connection to their desired desktop. 5. Connection Broker assigns desktop: After the user requests a connection, the Connection Broker assigns that desktop to the user. When a desktop is assigned to a particular user, the Connection Broker never offers that desktop to another user. After the assignment is made, the Connection Broker passes the protocol configuration information defined in the Protocol Plan to the client device. The client device, such as Leostream Connect, then launches the native client for the display protocol. Neither the Connection Broker nor the Leostream Connect client proxy the connection from the display protocol’s client to the remote desktop. 6. User ends remote viewer session: When the user disconnects or logs out of their remote session, the Connection Broker receives notification from the Leostream Agent running on the remote desktop. The Leostream Agent is required to distinguish disconnect from logout events, and to monitor user idle time on the remote desktop. 7. Connection Broker applies release plan: The Release plan indicates if the Connection Broker releases the desktop back to its pool and unassigns the desktop. Otherwise, the Connection Broker retains the desktop assignment. 8. Connect Broker applies power plan: Lastly, the Connection Broker takes any power control actions set in the user’s Power Control plan. 17 Chapter 2: Getting Started Chapter 2: Getting Started Installing the Connection Broker The Connection Broker runs as a virtual appliance within the following virtualization platforms: Citrix® XenServer™ 6.x Microsoft® Hyper-V™ Server 2012 (requires SCVMM) Microsoft Windows Server® 2012 R2 Hyper-V (requires SCVMM) Red Hat Enterprise Virtualization 3.0 (requires the Red Hat Enterprise Virtualization Manager) VMware Workstation 9 and higher VMware ESXi and vSphere 5.x KVM in an OpenStack Cloud See the Leostream Installation Guide for complete instructions on downloading and installing the Connection Broker, Leostream Connect, and the Leostream Agent. The following sections describe how to perform the following basic set-up: Enter your license Change your password Enable general features Starting the Connection Broker After you install the Connection Broker, start the virtual machine. After the virtual machine is running, the Connection Broker IP address appears in the console, for example: If the console cannot obtain an IP address from DHCP, you can manually configure the network. See “Manually Configuring the Connection Broker Address” section in the Leostream Installation Guide for more information. Point your Web browser at the Connection Broker IP address. The Connection Broker Sign In dialog, shown in the following figure, opens. By default, log in as: 18 Leostream Connection Broker Administrator’s Guide User name: admin Password: leo Entering Your License The first time you sign in, the Leostream license dialog, shown in the following figure, opens. Enter a valid Connection Broker license key, as follows: 1. Cut-and-paste your Leostream license key into the License key edit field. Ensure that there are no spaces in or after the sequence and that you include the lines containing the text -----BEGIN LICENSE----- and -----END LICENSE----- line. If the system responds that the license key is out of date even though the expiration date is still current, you may have a problem with the Virtual Machine BIOS settings. 2. Click on the License Agreement link to open the End User License Agreement for the Connection Broker. 3. Read the agreement and, if you accept it, select the I have read and accept the license agreement check box. 4. Click Save. The Connection Broker Administrator Web interface opens. For more information, including how to update your license, see “Installing a New License” in the Leostream Licensing Guide. 19 Chapter 2: Getting Started Changing Your Password For security reasons, change the default administrator password the first time you use your Connection Broker. To change the administrator password, log in to the Connection Broker as the administrator and go to the > Users > My Options page, shown in the following figure. 1. Enter a new password in the Password edit field. 2. Reenter the new password in the Re-type password edit field. 3. Click Save. The Connection Broker cannot remind you of your password. If you forget your administrator password, you must reset it using the Connection Broker virtual machine console. See “The Local Connection Broker Administrator” in the Connection Broker Security Review document for complete instructions. Setting Network Configuration and Connection Broker VIP By default, the Connection Broker uses DHCP to determine its IP address. Leostream recommends using a static IP address or DNS SRV record for the appliance, and configuring DNS with your primary search domain. Otherwise, if your DHCP has a short lease time, your Connection Broker IP address may time-out and your end users will not be able to log in to their desktops. Beginning with Connection Broker 8.1, you must use the Connection Broker virtual machine console to specify your Connection Broker network configuration. See the “Network Options” section in Chapter 2 of the Connection Broker Virtual Appliance Guide for complete instructions. You can use DNS A records instead of DNS SRV records. However, the Leostream Agents and Leostream Connect clients will not automatically discover the Connection Broker address in a DNS A record. If using DNS A records, you must manually configure the Connection Broker address in every Leostream Agent and Leostream Connect client. In addition, to have the Connection Broker send the name 20 Leostream Connection Broker Administrator’s Guide in the A record instead of the Connection Broker IP address, you must enter the A record name into the Connection Broker VIP field. The Connection Broker VIP address serves the same purpose as a DNS SRV record, and can be used in cases where you do not have or cannot create a DNS SRV record. The information you enter into this setting depends on your Connection Broker configuration, as follows. If you have a single Connection Broker, in most cases, leave this field empty. Specify the VIP only if you configured a DNS SRV record that points to a different Connection Broker. For example, you may have a production Connection Broker that uses the DNS SRV record and want to set up a second test environment Connection Broker. In this example, enter the test environment’s Connection Broker IP address into its Connection Broker VIP edit field. If you have a cluster of Connection Brokers and you configured a DNS SRV record with either the Connection Broker addresses or the VIP address of a load balancer, leave the Connection Broker VIP edit field empty. If you have a cluster of Connection Brokers that are load balanced through a third-party load balancer and do not have a DNS SRV record with the VIP address of a load balancer, enter the IP address of the load balancer in the Connection Broker VIP edit. Using Standard Connection Broker Web Interface Controls Getting Context Sensitive Help You can access context sensitive help for Connection Broker forms by clicking on the question mark icon at the top-right of each form, as shown in the following figure. Clicking the help button opens a reference page that describes the options available on that form. Customizing Tables Clicking the customize link at the bottom of any table in the Connection Broker opens the List Layout dialog. This dialog, shown in the following figure, allows you to change the content and order of the columns in the associated table. 21 Chapter 2: Getting Started To add specific columns to the table: 1. Select the desired item or items in the Available Items list on the left 2. Click the Add highlighted items link To add all available columns to the list, click the Add all items in list link. To remove specific columns from the table: 1. Select the appropriate item or items in the Selected Items list on the right 2. Click the Remove highlighted items link To remove all columns from the table, click the Remove all items in list link. Click OK to save the changes, or Cancel to discard your changes. Performing Bulk Actions You can quickly select or deselect all items in any of the Connection Broker tables by clicking the checkbox at the top of the Bulk Actions column, shown in the following figure. Select an action from the drop-down menu in the column header to apply an action to all selected items. If the Bulk Actions column does not appear on one of the Connection Broker tables, use the customize link at the bottom of the table to add this column (see Customizing Tables) 22 Leostream Connection Broker Administrator’s Guide Saving and Deleting Records All Connection Broker forms provide some or all of the following command buttons. Button Description Stores the information on the screen in the Connection Broker database. Save To exit from a form without saving changes to the data, click a menu link or the Web browser’s Back button. The Connection Broker discards all changes. Removes the record from the Connection Broker database. In all cases, the Connection Broker asks you to confirm your choice. Delete Cancel The Delete button may not appear if the record is in use. For example, in the Edit Role dialog, the Delete button does not appear if the role is assigned to one or more users. To delete the role, you must first ensure that all users are assigned to another role. Discards any changes made in the form. For forms that are accessed from a link, the Cancel button closes the form without saving changes and navigates back to the page containing the original link. For forms accessed directly from a secondary menu, the Cancel button reverts any changes made since the form was last saved. For forms that open in a separate Web browser, the Cancel button closes the browser without saving changes. Sorting, Searching, and Filtering Lists You can sort, search, and filter the contents of all lists using the links and drop-down menus at the top of each column. Links sort the table using the entries in this column. Drop-down menus filter the table to show only entries that match the selected characteristic 23 Chapter 2: Getting Started If you want to… Click on the… Column heading link of the appropriate field. An arrow next to the link indicates the current sorted order, either ascending or descending. Sort a list of records For example, on the > Resources > Desktops page, to sort by name, click the Name link. Until you specifically sort a table, the rows in the table are presented in the order in which the table was filled. Drop-down list below the column heading link of the field, and choose the field value or character. Filter a list by a selected field value or an alphabetic character For example, on the > Resources > Desktops page, to display only desktop with names starting with the letter T, choose T from the dropdown list under the Name link. To display only running desktops, choose Running from the dropdown list under the Status link. To clear the filter restriction for a specific field, choose All from the drop-down list for that field. Drop-down list below the column heading link of the field, and select the Search option. Search a list specific items For example, on the > Resources > Desktops page, to display only desktop with names starting with the text QA, enter QA in the box that appears after selecting Search from the drop-down list under the Name link. See Per-Page Search for more detailed instructions. In order to keep track of which filters are in use, you can highlight active filters on all Connection Broker tables (see Highlighting Active Filters.) Using Searchable Drop-Down Menus Connection Broker searchable drop-down menus allow you to search for items in a long list, for example, when selecting a user to hard-assign to a particular desktop. These controls, shown in the following figure, replace standard drop-down menus on forms where you select users or desktops. 24 Leostream Connection Broker Administrator’s Guide If no text is entered in the edit field, click the drop-down arrow to display the first 20 items in the list of users or desktops. If text is entered in the edit field, the list displays the first 20 users or desktops that start with the entered string. Searchable drop-down menus never display more than 20 items. You must enter or select a valid user or desktop in the edit field. The edit field will not accept a string that does not match a current user or desktop in the Connection Broker You can use the following wildcards to modify the search. The percent (%) wildcard matches any character string. For example: %DEV searches for any string that contains DEV The underscore wildcard (_) matches any one character in a fixed position. For example: _EE_ searches for any string whose second and third character are EE Highlighting Active Filters You can use the Highlight active table filters option on the > Users > My Options page, shown in the following figure, to call attention to all active filters on any Connection Broker page that displays a table. Filters can be used to limit the amount of data shown in any table (see Sorting, Searching, and Filtering Lists). When highlighting filters, as shown in the following figure, you can ensure that you understand what 25 Chapter 2: Getting Started data is shown, and what data may be missing, in a particular table. Formatting the Display of Actions in Tables On pages that display tables, such as the > Resources > Desktops page, you can display the available actions as a series of links or combined into a drop-down menu. Use the Display table actions as a drop-down option on the > Users > My Options page, shown in the following figure, to switch between formats. When this option is selected, actions appear in the web page as drop-down menus, as follows: If this option is not selected, actions appear as a series of links, as follows: 26 Leostream Connection Broker Administrator’s Guide Restoring Connection Broker Default Views The Connection Broker stores page configurations for all users with access to the Connection Broker Administrator Web interface, including how columns are arranged in tables, which filters are applied, etc. This information is stored in the user’s session state file. The session file grows as you customize a large number of display settings, which may result in degraded response times in the Administrator web interface. If the load time for pages in the Connection Broker becomes slow, you can remove your stored configurations from the session file to improve performance, as follows. 1. Go to the > Users > My Options page. 2. Select the Remove table customizations (improves web interface performance) option 3. Click Save. The My Option form reloads with the Remove table customizations (improves web interface performance) option unchecked. The Connection Broker removes stored customizations from the session file, but you must log out and log back in to see the changes in the Connection Broker lists. 27 Chapter 3: Configuring Connection Broker Settings Chapter 3: Configuring Connection Broker Settings Before you begin configuring your Connection Broker, enable the necessary features and configure clusterwide options on the > System > Settings page. Enabling Global Connection Broker Features The Enable Features section of the > System > Settings page, shown in the following figure, allows you to show or hide features on the Connection Broker Administrator Web interface. Leave unrequired features unchecked to simplify your experience with the web interface. The following features can be toggled on or off. PCoIP Remote Workstation Card support: Enables the Connection Broker to work with workstations and client devices that are equipped with Teradici PCoIP Remote Workstation Cards. You do not need to enable this option if you are managing connections to workstations running the Teradici Workstation Access Software. See Chapter 17: PCoIP Setup and Configuration for more information. USB passthrough control: Allows you to use policy settings to define which USB devices can be passed through to remote desktops. Connection Broker forwarding: Allows the Connection Broker to forward user logins to Connection Brokers in another cluster (see Connection Broker User Redirection). Virtual machine provisioning: Allows you to provision new virtual machines from templates in a VMware® environment (see Chapter 8: Provisioning New Desktops). Windows deployment services provisioning: Enables the feature to deploy Windows operating systems to HP Moonshot System cartridges using Microsoft Windows Deployment Services (see the Getting Started Guide for HP Moonshot Systems available on the Leostream Hosted Desktop Infrastructure solution page). 28 Leostream Connection Broker Administrator’s Guide Registry plans: Allows you to use the Connection Broker to create and modify registry keys on remote desktop (see Manipulating Registry Keys). Resource offers from XenApp Services Site: Allows you to configure policies that give users access to the desktops and applications offered by a Citrix XenApp Services Site (see Offering Resources from a Citrix XenApp Services Site). Connection Broker metrics: Collects metrics that indicate the health of your Connection Broker and cluster, if appropriate. The > Status > Connection Broker Metrics page lists the values collected for the report, including free disk space and load average on the Connection Broker virtual appliance. Power control for physical machines: Determines the method the Connection Broker uses to power on desktops inventoried from an Active Directory Center (see Configuring Power Control Options for Physical Desktops). Wake-on-LAN port: When using Wake-on-LAN for physical machine power up, specifies the port on which to send Wake-on-LAN packets. Enabling Authentication Server Features The following figure shows the options available for configuring user authentication. The following features can be toggled on or off. Enable CAS feature: Displays the CAS Authentication section on the Create/Edit Authentication Server forms. Use this section to configure Connection Broker Web interface logins to work correctly with CAS authentication (see Web Interface – CAS Authentication). Show domain as drop-down: When selected, the Domain field on Leostream Web clients and Leostream Connect clients appears as a drop-down menu. Otherwise, the Domain field appears as an edit field. The Domain field is always an edit field if the Connection Broker contains a single authentication server, regardless of if this option is selected. When using a drop-down menu, the Include domain in drop-down option on the individual Edit Authentication Server pages determines if a particular domain is included in the list. Login name unique across domains: Determines if a specific login name applies to the same physical user across multiple domains. 29 Chapter 3: Configuring Connection Broker Settings o If the Login name unique across domains option is not selected, the Connection Broker assumes that a username that is repeated in multiple domains belongs to a different physical user and creates a new user record for each instance of the username. In this case, the Domain drop-down menu contains a <None> option. Selecting <None> instructs the Connection Broker to authenticate users only if they are defined locally in the Connection Broker. If your user names are not unique across domains, ensure that you select the Add domain field to login page option to display the Domain field on all client login pages, to ensure that users can select their correct domain. o If the Login name unique across domains option is selected, the Connection Broker assumes that a username that is repeated in multiple domains belongs to the same physical user, and creates a single user record for that username. In this case, the Domain dropdown menu contains an <Any> option. Selecting <Any> instructs the Connection Broker to search through all the authentication servers in the order of their priority Add domain field to login page: When selected, the Domain field is shown on the Sign in page of the Leostream Web client and the Login dialog of Leostream Connect. This option automatically selects when you uncheck the Login name unique across domains option, and Leostream recommends leaving this option on in this configuration. Leostream Connect clients older than 2.9 of the Windows version and 2.3 of the Java version do not honor this setting. Enable the unauthenticated login feature: Displays the Allow unauthenticated logins option on the Create/Edit Authentication Server forms. Selecting this option in an authentication server allows users to log in through that authentication server without entering a password. Enable the unauthenticated VPN login feature: Allows users to log in via a web browser and an SSL/VPN connection using a shared secret. Enter the shared secret in the Shared secret for the unauthenticated VPN login field. Shared secret for the unauthenticated VPN login: Enter the secret that the Connection Broker should expect from users logging in through a Web browser with an SSL/VPN connection. When you enable unauthenticated VPN logins, if the user logs in through an SSL/VPN connection, the Web browser sends a post to the Connection Broker with their username and secret. If the secret matches the secret entered into the Shared secret for the unauthenticated VPN login field, the Connection Broker logs the user into their desktop without prompting the user for their username and password. Enabling RADIUS Authentication The Connection Broker supports RADIUS authentication for users logging in using Leostream Connect o the Leostream Web client. After RADIUS authentication is enabled, all domain users that log into the Connection Broker must provide a RADIUS token to gain access to their offered resources. 30 Leostream Connection Broker Administrator’s Guide Users who are defined locally in the Connection Broker never require a RADIUS token. To enable RADIUS authentication, select the Enable RADIUS authentication option in the Authentication Server Features section of the > System > Settings page to require users to enter a RADIUS token to log into the Connection Broker. After you select this option, the > System > Settings page expands to include fields that allow you to specify your RADIUS server, for example: Enter the following information in this form: 1. In the RADIUS server edit field, enter the address of your primary RADIUS server. If your primary RADIUS server fails, you must manually enter the address of your backup RADIUS server. 2. In the RADIUS port edit field, enter the port used by your RADIUS server. 3. In the Timeout edit field, specify the time interval that the Connection Broker waits for the RADIUS server to reply before sending a subsequent request. 4. In the Retries edit field, specify the number of times the Connection Broker tries to send the RADIUS request before concluding that the RADIUS server cannot be contacted. 5. In the Secret edit field, enter the shared secret key to use with your RADIUS server. After you enable RADIUS authentication, the Leostream Connect and the Leostream Web client Login dialog contain an extra field where the user enters their RADIUS PIN and token. For example: The Connection Broker authorizes the user against the RADIUS server using their entered PIN and token. If the RADIUS authorization passes, the Connection Broker then searches for the user in your authentication servers, in order to assign the user to a policy. You can enable the Allow unauthenticated logins (hides password field) and Enable the unauthenticated login feature options on the Connection Broker > System > Settings page if you do not require the user enter their authentication server password. 31 Chapter 3: Configuring Connection Broker Settings Setting Time and Date Use the Time zone drop-down menu to select your appropriate time zone. After you change the time zone you must reboot your Connection Broker using the Reboot option on the > System > Maintenance page. If your Connection Broker is connected to its internal database, the Connection Broker logs all events in your selected time zone. Connection Broker clusters log events in the time zone of their connected database. If your Connection Brokers are clustered, the Time and Date section is read-only. To set the time and date of clustered Connection Brokers, use the > System > Cluster Management page (see Modifying ClusterWide Time Zone Settings). The Connection Broker uses an internal clock that you can synchronize with an external NTP (Network Time Protocol) server or, if you installed your Connection Broker on a VMware® platform, with the VMware Host Server. To set up synchronization: 1. Select the appropriate synchronization method: Select None if you do not want to synchronize the Connection Broker clock with an external system. Select Use VMware Tools to synchronize with host to synchronize the Connection Broker clock with the VMware virtualization layer on which it is installed. This option is available only if the Connection Broker is installed in a VMware environment. Select Synchronize with external NTP server option to synchronize the Connection Broker clock with an external NTP server. 2. If you selected Synchronize with external NTP server, enter one or more DNS names into the edit field, as shown in the following figure. To specify multiple NTP servers, separate each name by a blank space. The Connection Broker queries the NTP server every hour. If multiple addresses are entered, the Connection Broker tries each server, in order, and uses the first server that is reachable. 32 Leostream Connection Broker Administrator’s Guide A list of public NTP servers is provided at: http://www.ntp.org Web Interface Look-and-Feel The Web Browser Configuration section, shown in the following figure, allows you to define aspects of the end-user experience and brand identity for the Leostream Web client and Connection Broker Administrator Web interface. The following sections describe the options shown in the previous figure. Selecting a Connection Broker Skin Select a color scheme for Connection Broker forms from the Skin drop-down menu in the Web Browser Configuration section of the > System > Settings page, shown in the following figure. You define color schemes on the > System > Skins page (see Creating Color Schemes (Skins)). Skins enable you to customize the background and font colors for all forms in the Connection Broker, as well as to set the text to display for the prompts on the Sign In form. Displaying a Custom Logo and Favicon Use the Display Connection Broker logo and favicon drop-down menu in the Web Browser Configuration section of the > System > Settings page to show or hide the Leostream branding on all Connection Broker Web pages. Select Leostream to display the default Leostream logo and favicon. Select Custom to display a logo and favicon you load into the Connection Broker, as described in the following procedure. 33 Chapter 3: Configuring Connection Broker Settings Select None to hide the Leostream logo and favicon. If the Leostream favicon continues to appear, close all instances of the Connection Broker Web interface and clear your Web browser’s cache. To display a custom logo and favicon. 1. Create your custom logo and favicon, using the following constraints a. The logo must be saved to a file named custom_logo. b. The logo must be saved in one of the following formats: gif png jpg If you load multiple logos, the Connection Broker displays the first file, as determined by the ordered shown in the previous list. c. The filename must be all lower case, for example, custom_logo.jpg. d. The logo can be any size. However, for best results, use the same size as the default Leostream logo, which is 175 x 40 pixels. e. The favicon must be stored in a file named favicon.ico. f. The favicon must be 16x16 pixels. 2. After you create your files, go to the > System > Maintenance page to upload them into the Connection Broker. 3. Select the Install third-party content option, as shown in the following figure. 34 Leostream Connection Broker Administrator’s Guide 4. Click Next. 5. In the Install Third Party Content form that opens, shown in the following figure, enter or browse for the custom_logo file. 6. Click Install to upload the file. 7. Repeat steps 3 through 6 to install the favicon.ico file. 8. If you have a cluster of Connection Brokers, repeat steps 2 through 7 to upload the image into each Connection Broker in the cluster. 9. After all image files are installed, go to the > System > Settings page. 10. In the Web Browser Configuration section, select Custom from the Display Connection Broker logo and favicon drop-down menu, as shown in the following figure. 11. Click Save. In many web browsers, you must close all instances of the Connection Broker Web interface and clear the browser’s cache before the new favicon displays. Setting the Landing Page for Administrator Web Interface Logins The Skip status page on Administrator Interface option in the Web Browser Configuration section of the > System > Settings page, shown in the following figure, determines which page is shown when you log in to the Connection Broker Administrator Web interface. If you select the Skip status page on Administrator Interface option, you arrive at the > Resources > Centers page. If you do not select the Skip status page on Administrator Interface option, you arrive at the > Status > Message Board page. 35 Chapter 3: Configuring Connection Broker Settings Setting Message Board Text Select the Show Message Board on Web Client option to display the information on the > Status > Message Board page to end users logging into the Leostream Web client. To edit the message board: 1. Log in to the Connection Broker Administrator Web interface. 2. Go to the > Status > Message Board page. 3. Click the Edit the message board link at the bottom of the page. The following form opens. 4. Enter the new message board text in HTML format. See Adding Customized Text, Links, and Images to the Login Page for instructions on adding images and links to documents in the message text. 5. Click Save. Suppressing Headers and Footers on the Sign In Page Select the Suppress header and footer on Sign in page option in the Web Browser Configuration section of the > System > Settings page, shown in the following figure, to remove the header containing the Leostream logo from the Sign In page. To replace the Leostream logo with your own logo, select the Custom option in the Display Connection Broker logo and favicon drop-down menu, described in Displaying a Custom Logo and Favicon. 36 Leostream Connection Broker Administrator’s Guide Adding Customized Text, Links, and Images to the Sign In Page Use the Additional text field in the Web Browser Configuration section of the > System > Settings page to place customized text and images on the Sign In page. You can enter any text in HTML format. The text appears in the Web page to the right of the Sign In form. To add images or links to your own documents, first upload the file into the Connection Broker. See Installing and Removing Third Party Content for information on how to upload files. Then, place the following HTML code in the Additional text field to display an uploaded image in your Sign In form. <IMG SRC=http://cb-address/tpc/filename WIDTH=w HEIGHT=h> Where: cb-address is your Connection Broker IP address filename is the name of your image file you uploaded into the Connection Broker w is the image width h is the image height Use the following HTML code in the Additional text field to display a link to an uploaded document. <A HREF=http:// cb-address /tpc/filename>Text to display here</A> Where: cb-address is your Connection Broker IP address filename is the name of your file you uploaded into the Connection Broker Text to display here is text you want displayed on the login page URL Redirect on User Logout When a user logs out of the Connection Broker Web client, by default, they are redirected back to the Connection Broker Sign In page. You can redirect users to a different web page by entering the web address into the URL redirect on user logout edit field in the Web Browser Configuration section of the > System > Settings page, shown in the following figure. 37 Chapter 3: Configuring Connection Broker Settings Creating Color Schemes (Skins) The Leostream Connection Broker, by default, is branded with the Leostream color scheme. You can create alternate color schemes for all Connection Brokers in a particular cluster by defining skins. You can create as many skins as you like; however only one skin applies at any point in time. To see your available skins, or create a new skin: 1. Go to the > System > Skins page, shown in the following figure. 2. To create a new skin, click the Create link. The Create Skin form opens. By default, this form contains the colors used for the default Leostream color scheme. 3. Enter a name for the skin in the Name edit field. You will reference this name when applying this skin to the Connection Broker. 4. In the Page title edit field, enter a new title to use in the Web browser’s title bar and tab. Leave this field blank to display the Connection Broker address in the title bar and tab. 5. In the Form Background Colors section, specify the colors to use for the background of the three sections of each form. To specify a color, enter a common color name or a hexadecimal color code. The following figure shows which sections of the form each field in the Form Background Colors section controls. 6. In the Form Text Colors section, specify the colors to use for the text on each form. To specify a color, enter a common color name or a hexadecimal color code. The following figure shows which text on the form each field in the Form Text Colors section controls. Section headers, for example, the Form Text Colors text in the previous figure, are always black. 38 Leostream Connection Broker Administrator’s Guide 7. In the Form Link Colors section, specify the colors to use for links located within the forms. These colors do not apply to Action links or the links found in the footer text of the Administrator Web interface. The four edit fields in this section control the following links. a. Link: The color of an unvisited link. b. Visited: The color of a visited link after the Web page has been refreshed. The link reverts back to the Link color when the Web browser’s cache is cleared. c. Active: The color of a link that has been clicked on, but the Web page has not been refreshed. d. Hover: The color of the link when it is hovered over. 8. In the Sign In Form Text Prompts section, specify the prompts to use on the main login form. The following figure shows how the edit fields in the Sign In Form Text Prompts section map to the prompts on the Login form. 9. Click Save to store the skin. To use your new skin, go to the > System > Settings page. Use the Skin drop-down menu in the Web Browser Configuration section, shown in the following figure, so select the skin to use. The selected skin is used for all Connection Brokers in this cluster. Configuring Communications with the Leostream Agent The Leostream Agent is an optional component that can be installed on your remote desktops to provide the Connection Broker with insight into the connection status of remote users to their desktops. See the Leostream Agent Administrator’s Guide for a complete description of the Leostream Agent. By default, the Leostream Agent listens for communications from the Connection Broker on port 8080, as set in the Port to listen on field in the Leostream Agent Control Panel dialog, shown in the following figure. 39 Chapter 3: Configuring Connection Broker Settings The port number displayed in the Port to listen on field must match the port number shown in the Leostream Agent section of the Edit Desktop page of the desktop’s record in the Connection Broker, as shown, for example, in the following figure. If you change the default Leostream Agent port in the Leostream Agent Control Panel before your desktops have registered with the Connection Broker, use the Default port for Leostream Agent communications field in the > System > Settings page, shown in the following figure, to specify the new default port and ensure that the Connection Broker can successfully communicate with the Leostream Agent when the desktops register. When a desktop registers with the Connection Broker, the Connection Broker uses the port value in the Default port for Leostream Agent communications field to try to communicate with the Leostream Agent on the desktop. If the value in the Default port for Leostream Agent communications field does not match the value in the Leostream Agent Control Panel, the Leostream Agent is marked as Unreachable in the > Resources > Desktops page. If multiple desktops register with the Connection Broker with an incorrect default Leostream Agent port, you can use the bulk Edit action to change the Leostream Agent port for all desktops simultaneously (see Configuring the Leostream Agent on Multiple Desktops). 40 Leostream Connection Broker Administrator’s Guide Configuring Leostream Connect The Leostream Connect client allows users to access their resources from Microsoft Windows® or Linux® machines. Use the options in the Leostream Connect Configuration section of the > System > Settings page, shown in the following figure, to control the function and appearance of Leostream Connect. Except where specified, the following options apply to the Windows and Java version of Leostream Connect. ` Allow unauthenticated logins (hides password field): Select this option to hide the password field on the Leostream Connect Login page. With this option checked, if you invoke Leostream Connect from the command line with the user’s password, the Connection Broker does not validate the user’s password. Allow multiple logins using different credentials: (Applies to the Windows version of Leostream Connect, only.) Select this option to allow a user to log into Leostream Connect with multiple sets of credentials, simultaneously. Leostream Connect displays the desktops offered to all logged in users in the same resource dialog. Allow user to select certificate for smart card login: (Applies to the Windows version of Leostream Connect, only.) Select this option if users have smart cards containing multiple certificates, and must be able to select which certificate to use during login. With this option unchecked, the Connection Broker always uses the first valid certificate on the smart card. Microsoft XP desktops default to the first certificate on the card, regardless of the certificate selected by the user. Allow user to manually lock client workstation: (Applies to the Windows version of Leostream Connect, only.) Select this option if users need to use Leostream Connect to lock their client workstation session. See “Locking the Session” in the Leostream Connect Administrator’s Guide and End User’s Manual for more information. 41 Chapter 3: Configuring Connection Broker Settings Provide client workstation idle time actions: (Applies to the Windows version of Leostream Connect, only.) Select this option to allow the user to automatically lock their client workstation or close all open desktop connections when the client device running Leostream Connect is idle for a specified length of time. See the “Using Client-Side Idle Actions” section in the Leostream Connect Administrator’s Guide and End User’s Manual for more information. Log out user after last connection is closed (opens Login dialog): Select this option to specify that Leostream Connect should automatically log out the user after the user closes, either by disconnecting or logging out, their last resource connection. After the user is logged out, the Leostream Connect Login dialog automatically opens. Use this option in conjunction with the Close connections when smart card is removed from reader option to automatically prompt the next user to log in after the previous user removes their smart card or taps their proximity card to log out. With both of these options selected, after the initial users removes their smart card or taps their proximity card, all of their open resources are disconnected, they are logged out of Leostream Connect, and the Login dialog opens. Close connections when smart card is removed from reader: (Applies to the Windows version of Leostream Connect, only.) Select this option to automatically disconnect all the user’s desktops and applications when they remove their smart card from the reader or when they tap their proximity card to log out of the client. Exit client after connection to resource is established: Select this option to automatically exit the user’s Leostream Connect session after the connection to their resources is established. If the user is launching a connection to a resource they are managing for another user, Leostream Connect will not automatically exit after the connection is established. This option applies only when the user launches their assigned resource. Refresh offer list before displaying to user: Select this option to instruct Leostream Connect to perform an automatic refresh of the user’s offered desktops when the user opens their offer list, ensuring that any desktops that are no longer available are removed from the list. Uniquely identify clients using: Select the primary client characteristic to use when identifying unique clients on the > Clients > Clients page. You must select Device UUID if users log in from Sun Ray thin clients. Client devices that register with the Connection Broker have the option to provide one or more of the following attributes. o o o o Device UUID – An ID unique to the client hardware Client UUID – An ID unique to the software client that handles the user login MAC address – The client device MAC address Serial number – The client device serial number 42 Leostream Connection Broker Administrator’s Guide When a client device registers with the Connection Broker and, for example, Device UUID is selected, the Connection Broker searches the Device UUID column on the > Clients > Clients page for a client with the provided device UUID. If the Connection Broker finds the device UUID, the Connection Broker assumes a record for the registering client already exists. If the Connection Broker does not find the device UUID, the Connection Broker creates a new client record for the registering client. If clients register without providing the selected characteristic, the Connection Broker searches the Device UUID, Client UUID, MAC Address, and Serial Number columns on the > Clients > Clients page, in order. When a client registers, if the Connection Broker finds a client on the > Clients > Clients page that matches the value for any of these attributes of the registering client, the Connection Broker assumes a record for the registering client already exists. If the Connection Broker does not find a match for any of these attributes, the Connection Broker creates a new client record for the registering client. Show additional login button (Java client only): (Applies to the Java version of Leostream Connect, only.) Select an option to show or hide an additional button on the Login dialog of Leostream Connect. Available options include: o Do not display: Never display an additional button on the Login dialog. o Use client settings: Show or hide the Advanced Login button based on the value set for the hide_advanced_login parameter in the lc.conf file stored in each client device. Clicking the Advanced Login button always opens the Connect dialog. The Advanced Login button is required for users with a role that allows them to manage another user’s desktops. o Advanced Login: Display the Advanced Login button. Clicking the Advanced Login button always opens the Connect dialog. On this dialog, end users with the appropriate policy and role settings can restart and connect to their desktop. The Advanced Login button is required for users with a role that allows them to manage another user’s desktops. o Restart: Display the Restart button. The behavior of the Restart button differs based on the number of desktops the user is offered, and if they have permission to restart their desktops. If the user is offered one desktop and they do not have permission to restart that desktop, clicking the Restart button displays a warning that the user’s desktop cannot be restarted. The user should click Login to connect to the desktop without restarting it. If the user is offered one desktop and they have permission to restart that desktop, clicking the Restart button automatically restarts the desktop and subsequently connects the user to that desktop. If the user is offered multiple desktops and they do not have permission to restart 43 Chapter 3: Configuring Connection Broker Settings any of their desktops, clicking the Restart button displays a warning that the user’s desktops cannot be restarted. The user should click Login to open the Connect dialog. If the user is offered multiple desktops and they can start at least one of these desktops, clicking the Restart button opens the Connect dialog, where the user has options to restart or connect to their desktops. On this dialog, if the user tries to restart a desktop that they are not allowed to restart, Leostream Connect warns the user that the desktop will not be restarted and proceeds to connect the user to that desktop. Otherwise, Leostream Connect restarts the desktops and subsequently connects the user to these desktops. Upgrade client to latest version: When the version of Leostream Connect shown on the > Status > Downloads page is newer than the version currently installed on your clients, use this option to push updates of Leostream Connect to the user’s client device. Choose one of the following three options: o Never: Do not update Leostream Connect. In this case, you must manually update end users’ clients. o Always: Always update Leostream Connect. In this case, when an end user runs Leostream Connect, the Connection Broker warns them that an update is in process. Leostream Connect restarts when the update is finished. o Prompt user: Let the user decide if they want to update Leostream Connect. In this case, when the user runs Leostream Connect, the client prompts the user to install the update. If your users do not have administrator privileges on their Windows client device and Leostream Connect was originally installed with a task that required administrator privileges, such as USB redirection, you must install the Leostream Update service on the client device. The Leostream Update service is available in version 2.9 and later of Leostream Connect for Windows operating systems. Authentication Methods: (Applies to the Windows version of Leostream Connect, only.) Use this option to restrict or permit various authentication methods. To allow users to log in using any of the different types of authentication methods: o Select Permit from the drop-down menu in the Authentication Methods section o Check each of the allowed authentication method. You must permit user name and password authentication. To require the user to use certain authentication methods: o Select Require from the drop-down menu in the Authentication Methods section o Check each of the authentication method the user is required to use. HID proximity card logins: (Applies to the Windows version of Leostream Connect, only.) Use this option to allow users to log into the Connection Broker using an RF IDeas proximity card reader and 44 Leostream Connection Broker Administrator’s Guide HID proximity card. For complete instructions on using proximity cards for user logins, see “HID Proximity Card Authentication with RF IDeas pcProx© Readers” in the Leostream Connect Administrator’s Guide and End User’s Manual. Allow username/password override for proximity cards: Provide a link on the Leostream Connect proximity card Login dialog that allows users to enter a username and password instead of tapping their proximity card. Show message at startup: Indicate if a message should be displayed to the user directly after they launch Leostream Connect. Selecting this option displays the following two fields. o Dialog title: Enter a string to include in the title bar of the message dialog. o Message text: Specify the message to display. You can enter text formatted as plain text or HTML. Setting Connection Broker Performance Thresholds If you have applications, for example, thin clients, that communicate with the Connection Broker, you can change the default load average threshold on the > System > Settings page. Scroll down to the bottom of the form to the Connection Broker Performance Tuning section, shown in the following figure. 45 Chapter 3: Configuring Connection Broker Settings To use this section: The setting in the Stall client requests when load average exceeds edit field sets the threshold on the load averaged number of client calls the Connection Broker is allowed to process. The default value allows the Connection Broker to process client calls without sacrificing performance. You can increase this number if your clients are receiving too many “Server Busy” warnings. Be aware that, if you set this number too high, your Connection Broker may become clogged with client calls, and cease to function properly. The setting in the Seconds to stall client requests edit field indicates how long the Connection Broker will wait before returning the “Server Busy” warnings to a client. If you typically experience a login storm at some point in your business week, stalling the “Server Busy” warning may prevent the user from instantly trying to log in again, giving the Connection Broker time to process client calls and fall below its load average limit. The setting in the Maximum number of simultaneous server requests edit field sets the maximum number of client connections the Connection Broker accepts. After a client has connected, the Stall client requests when load average exceeds option determines the conditions for which requests from that client are accepted. Configuring Secure Connection Broker Communication The Connection Broker includes a default Leostream certificate used to encrypt traffic between the Connection Broker, Leostream Agent, and Leostream Connect clients. By default, HTTP access is also available to the Connection Broker Web interfaces, including the Administrator Web interface and Web client. If your security guidelines require to you restrict all communications to port 443, including access to the Connection Broker Administrator Web interface, select the Block all traffic on port 80 option available in the Connection Broker Security Options section of the > System > Settings page, shown in the following figure. After selecting this option, click Save on the > System > Settings page to store the change. You must then reboot the Connection Broker to finalize the change to port 80 access (see Restarting the Connection Broker). When port 80 is blocked, you cannot access the Connection Broker Administrator Web interface or Leostream Web client using HTTP. You must use an HTTPS address to sign into the Connection Broker. 46 Leostream Connection Broker Administrator’s Guide HTTP addresses are not redirected to HTTPS. If you block all traffic to port 80 and try to use an HTTP address to access the Connection Broker, the Web browser is not able to contact the Connection Broker. When negotiating secure communications between the Connection Broker and Leostream Agents or Leostream Connect clients, the Connection Broker tries any of the protocol options selected on the > System > Settings page. By default, TLSv1, TLSv1.1, and TLSv1.2 are all enabled. To restrict the Connection Broker to a particular protocol, uncheck the appropriate Enable TLSv1.x protocol options. The Connection Broker Security Options section of the > System > Settings page includes an additional option that allows you to configure the Cipher Suite used for SSL. In the Web server “SSLCipherSuite” directive edit field, enter a colon-separated cipher-spec string consisting of OpenSSL cipher specifications to configure the Cipher Suite. For more information on the syntax entered in this field, see the Apache Module mod_ssl documentation. Specifying VMware vCenter Server Clusters for Desktop Filters After you define centers for VMware vCenter Server (see VMware® Centers), you can use the custom attributes defined in that center as desktop filters in policies (see Policy Filters). You can specify up to four custom attributes for use as desktop filters. Use the vCenter Server Custom Attributes section in the > System > Settings page, shown in the following figure, to indicate which custom attributes you want to use as desktop filters. To select custom attributes for desktop filters: 1. Select up to four attributes in the Available attributes list. 2. Move the attributes to the Selected attributes list by clicking the Add highlighted items link. Alternatively, if you have four or less attributes, click the Add all items in list link to move all attributes to the Selected attributes list. 3. Click Save to store the settings. If you move more than four items into the Selected attributes list, you cannot save the form. If this is the case, use the Remove highlighted items link or Remove all items in list link to clear items out of the Selected attributes list. 47 Chapter 3: Configuring Connection Broker Settings If the same custom attribute exists in multiple vCenter Server centers, that attribute appears once in the Available attributes list. The selected custom attributes appear at the bottom of the Desktop attribute drop-down menu in the Pool Filters and Policy Filters in every policy. The vCenter Server “Notes” attribute is always available for filtering. Additional custom attributes are listed directly above the notes item, as shown, for example, in the following figure. For more information on building pool and policy filters, see Policy Filters. The custom attributes selected on > System > Settings page also become available as columns on the > Resources > Desktops page (see Available Desktop Characteristics). Other Connection Broker Settings Allow URL Access to the Logs The Connection Broker logs a variety of user and system activities (see Viewing the Connection Broker Log). To access these logs from a Web browser, select the Allow unauthenticated URL access to the logs option near the bottom of the > System > Settings page. After you click Save, an example URL appears at the bottom of the > System > Settings page, as shown in the following figure. 48 Leostream Connection Broker Administrator’s Guide Copy-and-paste or click the example link to open an example log. Change the value of n in the command to access a different number of log items. Logs are not password protected and are available to anyone with your Connection Broker URL. Dell Wyse Sysinit Command When using Dell Wyse thin clients, you can use the Wyse sysinit command edit field to specify the global wnos.ini file. When the Wyse thin client boots and successfully connects, the client sends the sysinit command to the Connection Broker. The Connection Broker responds by sending back the wnos.ini (global profile) file. If the file contains any variables, these variables over-ride any existing values. If you are using Wyse thin clients and plan to display desktops and applications to users using either the Pool name : Desktop name or Pool name : Windows machine name policy option (see Configuring Desktop Policy Options), ensure that you include the following parameter in the Wyse sysinit command: LongApplicationName=yes With LongApplicationName set to yes, the icons on the Wyse desktop display with 38 characters, instead of the default 19 characters. After the thin client successfully receives the wnos.ini from the Connection Broker, a sign-on window prompts the user for user name and password credentials. The thin client then sends the signon command to the Connection Broker with the username and password as its parameter. If the sign on is successful, the Connection Broker sends back the user.ini (User profile) file, specified by the protocol plan assigned to the user’s desktop by the user’s policy. If the sign on is unsuccessful, the user is prompted again for username and password credentials. The signoff command is sent when a user disconnects from the connection; and the shutdown command is sent when a user turns off the thin client power. Use protocol plans to override the global wnos.ini variables when a user connects to a particular desktop, as described in the following section. 49 Chapter 4: Preparing Microsoft® Windows® Machines Chapter 4: Preparing Remote Workstations and Virtual Machines Leostream recommends that you install the Leostream Agent on all remote Linux and Microsoft Windows desktops. The Connection Broker requires the agent to perform advanced policy logic. In addition, the Leostream Agent is required if you plan to use Leostream USB management or location-based printing features. The Leostream Agent supports the following Microsoft Windows operating systems: Windows Server 2008 Windows Server 2008 R2 Windows 7, including Windows 7 SP1 Windows Server 2012 Windows Server 20012 R2 Windows 8 Windows 8.1 The Leostream Agent can be installed on Windows XP desktops. The Leostream Agent for Linux is a Java application, which requires an Oracle Java Run Time Environment (JRE) version 1.7 or higher. The Leostream Agent supports the following Linux operating systems: CentOS Debian Fedora SUSE Linux Enterprise Red Hat Enterprise Linux Ubuntu For instructions on installing the Leostream Agent, see the Leostream Installation Guide. The Leostream Agent must be running on operating systems installed on HP Moonshot Systems. 50 Leostream Connection Broker Administrator’s Guide Chapter 5: Understanding Connection Broker Centers Overview The Connection Broker adds desktops, sessions, applications, and printers by gathering available resources from external systems, called centers. The Connection Broker provides centers for: Virtual desktops from Red Hat®, Microsoft®, VMware®, Citrix®, OpenStack, and Xen® virtualization hosts Citrix XenApp™ applications and desktops Microsoft Windows® Remote Desktop Services servers or multi-user Linux servers Physical or virtual machines registered in a Microsoft Active Directory® service HP Moonshot Systems Teradici® PC-over-IP® Remote Workstation cards Citrix XenDesktop farms, for establishing HDX connections Leostream Cloud Desktops Microsoft Windows Deployment Services servers Printers registered in an Active Directory service If you do not want to create centers to register desktops, you can manually register desktops with the Connection Broker, in two ways: By installing a Leostream Agent on any virtual or physical desktops By specifying a reachable IP address (see Registering a Desktop by IP Address) Manually registered desktops are placed in the Uncategorized Desktops center. See Chapter 6: Working with Desktops and Applications for information on manually registering desktops. The remainder of Chapter 5 focuses on creating resource centers. The > Resources > Centers page, shown in the following figure, provides a summary of all centers registered with the Connection Broker. 51 Chapter 5: Understanding Connection Broker Centers After you add a center, you can view the imported resources on one of the following pages: The > Resources > Desktops page lists the desktops imported from all centers, including physical machines, virtual machines, and blades. Use the Centers column in the desktop table to see which center each desktop originated in. See Using the Desktops Page for more information on displaying desktops. The > Resources > Applications page lists the applications and sessions imported from all the Citrix XenApp centers. The > Resources > Printers page lists all the printers imported from the Printer Repository center or manually entered into the Connection Broker. See Attaching Network Printers for information on using the Connection Broker to manage and assign printers. The > Resources > PCoIP Host Devices page lists all PCoIP Remote Workstation cards installed in remote workstations. This page is available only when the Hardware PCoIP support option is selected on the > System > Settings page. See Chapter 17: PCoIP Setup and Configuration for more information. Creating Centers The Uncategorized Desktops Center The Uncategorized Desktops center is a repository for all desktops not inventoried from another center. When you install a Leostream Agent on a desktop, it registers with the Connection Broker. If you do not have any centers defined in your Connection Broker, the broker automatically creates an Uncategorized Desktops center and places the new desktop into that center. If you previously defined centers in your Connection Broker, and need to register uncategorized desktops with the Connection Broker, you must manually add the Uncategorized Desktops center, as follows. 1. Go to the > Resources > Centers page. 2. Click Add Center. The Add Center form opens. 3. Select Uncategorized from the Type drop-down menu. 4. Select a time from the Inventory refresh interval drop-down menu. This setting tells the Connection Broker how often to refresh the desktops imported from this center. The refresh interval is the length of time between when one refresh action finishes and the next refresh action starts. The refresh interval checks the Leostream Agent status on each desktop in the Uncategorized Center and updates the Leostream Agent status and marks the desktop as duplicate if it matches a desktop found in another center. 52 Leostream Connection Broker Administrator’s Guide 5. Select a time from the Power state refresh interval drop-down menu. During a power state scan, the Connection Broker uses the Nmap command to probe all remove viewer ports used in any protocol plan. If any of the scanned ports is open, the Connection Broker marks the desktop as Running. If all ports are closed, the Connection Broker marks the desktop as Stopped. 6. Uncheck the Offer desktops from this center option if you do not want users to be offered desktops from this center when they log into the Connection Broker. Users assigned to desktops in this center will continue to be offered their assigned desktops, even if this option is not selected. 7. Select Assign rogue users to desktops from this center (requires Agent) if you want the Connection Broker to manage users that log into desktops in this center when they do not log in through Leostream. The desktop must have a running Leostream Agent, which informs the Connection Broker of user logins. (see Assigning Desktops to Rogue Users). 8. Select the Set newly-discovered desktops to “Unavailable” option if the Connection Broker should mark desktops as unavailable as they are discovered. Otherwise, leave this option unchecked. 9. Select the Continuously apply any Auto-Tags option if you want to set tags on desktops that are discovered when the center is refreshed (see Continuously Applying Tags to Desktops for more information). Leave this option unchecked if you are not using tags. 10. Select the Resolve addresses in this center using short hostnames option to instruct the Connection Broker to reference the desktop using only the portion of the hostname before the first dot. 11. Click Save. Once you, or the Connection Broker, create the Uncategorized Desktops center, any desktop with a Leostream Agent that announces its presence to the Connection Broker and is not inventoried from another center is added to this center. You can delete the Uncategorized Desktops center at any time (see Deleting Centers). If the Uncategorized Desktops center is not present and Leostream Agents register with the Connection Broker, the Connection Broker stores the register events, but does not display the desktops on the > Resources > Desktops page. If you subsequently create an Uncategorized Desktops center, the previously registered desktops automatically appear in the > Resources > Desktops page. For more information on adding desktops to the Uncategorized Desktops center, see Registering Desktops in the Uncategorized Desktops Center. VMware® vSphere and vCenter Server Centers The Connection Broker uses VMware APIs to manage virtual machines hosted in vSphere. You can create a center that points either directly to vSphere, or that uses the vCenter Server management tools. You must create a center for vCenter Server if you want to use the Connection Broker to provision new virtual machines. 53 Chapter 5: Understanding Connection Broker Centers To add a center for either vSphere, ESXi, or vCenter Server: 1. Go to the > Resources > Centers page. 2. Click Add Center. The Add Center form opens. 3. Select VMware vSphere and vCenter Server from the Type drop-down menu. The form updates, as follows: 4. Enter a name for the center in the Name edit field. 5. Enter the vCenter Server address in the Hostname or IP address edit field. You must enter the full URL to the VMware SDK if users connect to the virtual machines using Citrix HDX or if you use a non-standard port for vCenter Server, for example: https:// VCaddress:port/sdk Where VCaddress and port are the vCenter Server address and port, respectively 6. In the Username edit field, enter the name of a user with administrative privileges. See the “What privileges do I need to interact with VMware vCenter Server?” article in the Leostream Knowledge Center for a description of the privileges required to register virtual machines from vCenter Server. 7. Enter this user’s password into the Password edit field. 54 Leostream Connection Broker Administrator’s Guide 8. To import virtual machines from a particular datacenter, enter the name of the datacenter in the Datacenter edit field. Ignore the Datacenter option when pointing the center directly to a vSphere server, instead of to the vCenter Server management tool. 9. Select a time from the Inventory refresh interval drop-down menu. This setting tells the Connection Broker how often to refresh the desktops imported from this center. The refresh interval is the length of time between when one refresh action completes and the next refresh action begins. If your vCenter Server manages a large number of machines, refreshing the center can place a substantial load on vCenter Server. If you are experiencing responsiveness issues, try increasing the refresh rate. You can manually refresh the contents from the center at any time, using the Refresh action associated with the center on the > Resources > Centers page. 10. Uncheck the Offer desktops from this center option if the Connection Broker should not offer desktops from this center to users. The Connection Broker continues to offer assigned desktops in this center to the assigned user, even when this option is not selected. 11. Select Assign rogue users to desktops from this center (requires Agent) if you want the Connection Broker to manage users that log into desktops in this center when they do not log in through Leostream. The desktop must have a running Leostream Agent, which informs the Connection Broker of user logins (see Assigning Desktops to Rogue Users). 12. Select the Set newly-discovered desktops to “Unavailable” option if the Connection Broker should mark desktops as unavailable as they are discovered. Otherwise, leave this option unchecked. There are a number of situations where you may not want to assign a desktop to a user when it is imported into the Connection Broker. The most common situation is when the Connection Broker discovers the desktop while the desktop is still being provisioned, and is not in a state that can be assigned to a user. You can manually mark any Unavailable desktop as Available using the Availability drop-down menu on the desktop’s Edit Desktop page. To access the Edit Desktop page, go to the > Resources > Desktops page and select the Edit action associated with that desktop. 13. Select the Continuously apply any Auto-Tags option if you want to set tags on desktops that are discovered when the center is refreshed (see Continuously Applying Tags to Desktops for more information). Leave this option unchecked if you are not using tags. 14. If you have users that can restart their desktops from the Java version of Leostream Connect, you can choose to display a countdown time while the desktop restarts. From the Start time for countdown timer drop-down menu, select a start time for a countdown timer based on the typical start time for the VMs in vCenter Server. If the desktop restarts before the countdown timer reaches zero, Leostream Connect dismisses the countdown timer. If the desktop has not completely restarted when the countdown timer reaches zero, the timer begins again at a fraction of the selected start time. 55 Chapter 5: Understanding Connection Broker Centers 15. If you have users logging in through Sun Ray DTUs, open the Sun Ray Details section to configure the Sun Ray Servers physically closest to your vCenter Server clusters. 16. Click Save. If you defined custom attributes in your vCenter Server, you can use these attributes to filter desktops in a policy (see Policy Filters). You can use up to four custom attributes as policy filters. You define which custom attributes are available on the > System > Settings page (see Specifying VMware vCenter Server Clusters for Desktop Filters). Required vCenter Server Permissions The Connection Broker requires specific vCenter Server privileges in order to perform various actions, such as starting and stopping virtual machines or provisioning virtual machines from templates. In order to ensure that your Connection Broker functions properly, you must provide the Connection Broker with the credentials for a vCenter Server account that is assigned the required privileges. The following table lists the privileges that the Connection Broker uses. Control Action Power On Within All Privileges > Virtual Machine > Interaction > Power On Power Off > Virtual Machine > Interaction > Power Off Shutdown > Virtual Machine > Interaction > Power Off Suspend > Virtual Machine > Interaction > Suspend Resume > Virtual Machine > Interaction > Power On Reboot > Virtual Machine > Interaction > Power On > Virtual Machine > Interaction > Power Off Revert to snapshot > Virtual Machine > State > Revert To Snapshot Provisioning > Virtual Machine > Provisioning > Deploy Template > Virtual Machine > Inventory > Create > Resource > Assign Virtual Machine To Resource Pool > Virtual Machine > Provisioning > Read Customization Specifications > Virtual Machine > Provisioning > Customize Testing vCenter Server Centers Use the center’s Test action on the > Resources > Centers page, shown in the following figure, to check the following: If you can successfully log into the vCenter Server If you provided a login account with sufficient privileges to perform the actions required by the Connection Broker 56 Leostream Connection Broker Administrator’s Guide If the test fails to log in to the vCenter Server, check that you correctly entered the hostname or IP address and login credentials. If you still cannot log onto the vCenter Server, use a Web browser to point to the following page, and log in using the Web services username and password: https://VCaddress/mob/?moid=ServiceInstance&doPath=content%2eabout Where VCaddress is your vCenter Server address. You may still have problems connecting to vCenter Server because the Virtual Infrastructure client does not use the same API, or port, as the SDK API. If this occurs, manually check the network settings in vCenter Server. If the test login succeeds, the Connection Broker displays a report with the following format. The table at the bottom of the report lists the permissions required to perform various Connection Broker actions, and indicates which actions the user whose credentials were provided in the center is allowed to perform. The columns in this table include: Control Action: Actions that the Connection Broker may try to take, depending on your configuration. VMware Privilege: VMware vCenter Server privileges required to perform the action in the associated row. 57 Chapter 5: Understanding Connection Broker Centers Privilege Enabled: Indicates if the user whose credentials were provided in the center is granted the associated VMware privileges. Action Allowed: Indicates if the user whose credentials were provided in the center is granted all the privileges required for performing this action. If set to No the Connection Broker cannot take the associated action. For example, if the Action Allowed for the Provisioning action is No, the Connection Broker cannot provision new virtual machines. In this case, if you configure your Connection Broker to try to provision new VMs, you see errors in the Connection Broker logs. Citrix® XenServer® 6.x Centers To add a Citrix XenServer center: 1. Go to the > Resources > Centers page. 2. Click Add Center. The Add Center form opens. 3. Select Citrix XenServer from the Type drop-down menu. The form updates, as follows: 4. Enter a name for the center in the Name edit field. 5. Enter the XenServer hostname or IP address in the Hostname or IP address edit field. 6. In the Username edit field, enter the name of a user with administrative privileges. 7. Enter this user’s password into the Password edit field. 8. Select a time from the Inventory refresh interval drop-down menu. This setting tells the Connection Broker how often to refresh the desktops imported from this center. The refresh 58 Leostream Connection Broker Administrator’s Guide interval is the length of time between when one refresh action completes and the next refresh action begins. 9. Uncheck the Offer desktops from this center option if the Connection Broker should not offer desktops from this center to users who log into the Connection Broker. The Connection Broker continues to offer assigned desktops in this center to the assigned users, even when this option is not selected. 10. Select Assign rogue users to desktops from this center (requires Agent) if you want the Connection Broker to manage users that log into desktops in this center when they do not log in through Leostream. The desktop must have a running Leostream Agent, which informs the Connection Broker of user logins (see Assigning Desktops to Rogue Users). 11. Select the Set newly-discovered desktops to “Unavailable” option if the Connection Broker should mark desktops as unavailable as they are discovered. Otherwise, leave this option unchecked. You can manually mark any Unavailable desktop as Available using the Availability drop-down menu on the desktop’s Edit Desktop page. To access the Edit Desktop page, go to the > Resources > Desktops page and select the Edit action associated with that desktop. 12. Select the Continuously apply any Auto-Tags option to set tags on desktops that are discovered when the center is refreshed (see Continuously Applying Tags to Desktops for more information). Leave this option unchecked if you do not want to tag desktops. 13. Click Save. Citrix XenApp™ Centers By default, the Connection Broker uses the Citrix XML-RPC service to communicate with the XenApp server. If you do not enable this service, install the Leostream Agent on the primary XenApp server before creating the XenApp center. To add a Citrix XenApp center: 1. Go to the > Resources > Centers page. 2. Click Add Center. The Add Center form opens. 3. Select Citrix XenApp from the Type drop-down menu. The form updates, as follows: 59 Chapter 5: Understanding Connection Broker Centers 4. Enter a name for the center in the Name edit field. 5. Enter the IP address or hostname of the XenApp server into the Hostname or IP address field. If your XenApp farm consists of multiple servers, create a single center that points to the IP address of the primary server, or the virtual IP of the farm. 6. Specify either: a. The Leostream Agent RPC port, if you installed the Leostream Agent on the XenApp server. b. The Citrix XML RPC port, if you are using the Citrix XML RPC to communicate with the XenApp server. Leostream recommends using the Citrix XML RPC port for communications, especially for large XenApp farms. 7. Select the Refresh interval. This setting tells the Connection Broker how often to refresh the applications imported from this center. The refresh interval is the length of time between when one refresh action completes and the next refresh action begins. 8. Enter any optional notes into the Notes edit field. 9. Click Save. If you are using the Leostream Agent, the service must run under the same account as XenApp, otherwise your center appears offline. See the Leostream Connection Broker Installation Guide for instructions on changing the account that runs the Leostream Agent service. 60 Leostream Connection Broker Administrator’s Guide Citrix XenDesktop Centers Connection Broker centers for your Citrix XenDesktop 7.x and 5.x farms allow users to establish HDX connections to compatible virtual and physical machines within a Leostream environment. The Connection Broker eases administration by automatically creating a pre-assigned desktop group for the user, allowing them to log into XenDesktop directly from Leostream. You do not need to create a XenDesktop center to allow the Connection Broker to offer resources that are already assigned to a user by XenDesktop. Instead, use the Desktop Assignment from Citrix XenApp Services Site section of user’s policy to indicate which XenApp Services site offers the user’s XenDesktop resources (see Offering Resources from a Citrix XenApp Services Site). Before integrating XenDesktop into your Leostream Environment, ensure that the following general requirements are met. You must separately obtain all necessary Citrix licensing. For information on XenDesktop licensing, contact your Citrix sales representative. You must install a Leostream Agent on the server running the Citrix Studio or Desktop Studio, as described in the remainder of this section. Open the Citrix Powershell prompt from the Start menu and ensure that the GetExecutionPolicy command returns RemoteSigned. If the execution policy is anything other than RemoteSigned you must use the Set-ExecutionPolicy command to switch to RemoteSigned before you can integration XenDesktop into Leostream. Before creating your XenDesktop center, you must install the Leostream Agent on the server running your Citrix Studio. When installing the Leostream Agent, ensure that no additional features are installed, as shown in the following figure. For complete installation instructions, see the Leostream Installation Guide. After the Leostream Agent is installed, ensure that it communicates on a port that is different from all ports already in use by Citrix. Leostream recommends configuring the Leostream Agent to use port 8730, as follows. 1. On the Citrix Studio server, open the Leostream Agent Control Panel dialog. 61 Chapter 5: Understanding Connection Broker Centers 2. Go to the Options tab. 3. Change the Port to listen on to 8730, as shown in the following figure. After the Leostream Agent is installed you can create the XenDesktop centers. Use different centers to manage versions 7.x and 5.x of XenDesktop, as described in the following sections. XenDesktop centers currently support HDX connections to the following types of machines: o Persistent desktops that are assigned by Leostream must be inventoried using an Active Directory center. o Non-persistent desktops provisioned by Citrix Provisioning Server that are assigned by Leostream must be inventoried using the VMware vCenter Server center. If you want to manage HDX connections to virtual machines VMs in vSphere that were not created by Citrix Provisioning Server, you must inventory these VMs using an Active Directory center, not a vCenter Server center. To create a center for XenDesktop 5.x or 7.x: 1. Go to the > Resources > Centers page. 2. Click Add Center. The Add Center form opens. 3. Select Citrix XenDesktop 5 or Citrix XenDesktop 7 from the Type drop-down menu, depending on your XenDesktop version. The form updates, as follows: 62 Leostream Connection Broker Administrator’s Guide 4. Enter a name for the center in the Name edit field. 5. In the XenDesktop Controller address edit field, enter the address the Connection Broker uses to communicate with the Citrix Studio in your XenDesktop farm. 6. In the Agent RPC port edit field, enter the Leostream Agent port for the agent installed on the Citrix Studio. Ensure that this port is different from any port used by the Citrix Studio. 7. In the Catalog for Leostream assignments edit field, enter the name of the catalog you want to hold all desktops assigned created by Leostream. Do not manually create this catalog. The Connection Broker automatically creates the catalog in the Desktop Studio when you save the Create Center form. 8. In the Username edit field, enter the username for a user with administrator rights to the server where the Desktop Studio is installed. Include the user’s domain in the field, in the form: domain\username. 9. Enter this user’s password in the Password edit field. 10. Select a value from the Refresh Interval drop-down menu to indicate how often the Connection Broker checks if the XenDesktop center is still online. 11. Click Save. After you successfully save the center (the center is listed as Online on the > Resources > Centers page), the Connection Broker automatically creates a catalog in the Citrix Studio. This new catalog has the name 63 Chapter 5: Understanding Connection Broker Centers you specified in the Catalog for Leostream assignments edit field. See the Leostream Quick Start Guide with Citrix XenDesktop 7 for complete information on integrating Leostream and Citrix XenDesktop. Red Hat Enterprise Virtualization Manager Centers The Connection Broker uses the Red Hat Enterprise Virtualization REST API to communicate with the Red Hat Enterprise Virtualization Manager, allowing you to manage virtual machines hosted in a Red Hat Enterprise Virtualization Hypervisor. The Connection Broker supports Red Hat Enterprise Virtualization 3.0. To create a center for managing virtual machines hosted in a Red Hat environment: 1. Go to the > Resources > Centers page. 2. Click Add Center. The Add Center form opens. 3. Select Red Hat Enterprise Virtualization Manager from the Type drop-down menu. The form updates, as follows: 4. Enter a name for the center in the Name edit field. 5. In the URL for REST API edit field, enter the URL to the Red Hat REST API. This URL typically takes the following form. https://RHEV-M.company.com:8443/api 64 Leostream Connection Broker Administrator’s Guide Where RHEV-M.company.com is the fully qualified domain name for your Red Hat Enterprise Virtualization Manager machine. 6. In the Port used by RHEV Manager edit field, enter the port that the Connection Broker should use to retrieve the certificate from the Red Hat Enterprise Virtualization Manager. The certificate is required when establishing SPICE connections to VMs hosted in RHEV. 7. In the Username edit field, enter the login name of a user that can log into the Red Hat realm. 8. In the Password edit field, enter this user’s password. 9. Select the Inventory refresh interval. This setting tells the Connection Broker how often to refresh the desktops imported from this center. The refresh interval is the length of time between when one refresh action completes and the next refresh action begins. 10. Uncheck the Offer desktops from this center option if the Connection Broker should not offer desktops from this center to users who log into the Connection Broker. The Connection Broker continues to offer assigned desktops in this center to the assigned user, even when this option is not selected. 11. Select Assign rogue users to desktops from this center (requires Agent) if you want the Connection Broker to manage users that log into desktops in this center when they do not log in through Leostream. The desktop must have a running Leostream Agent, which informs the Connection Broker of user logins (see Assigning Desktops to Rogue Users). 12. Select the Set newly-discovered desktops to “Unavailable” option if the Connection Broker should mark desktops as unavailable as they are discovered. Otherwise, leave this option unchecked. You can manually mark any Unavailable desktop as Available using the Availability drop-down menu on the desktop’s Edit Desktop page. To access the Edit Desktop page, go to the > Resources > Desktops page and select the Edit action associated with that desktop. 13. Select the Continuously apply any Auto-Tags option if you want to set tags on desktops that are discovered when the center is refreshed (see Continuously Applying Tags to Desktops for more information). Leave this option unchecked if you do not want to tag desktops. 14. Click Save. Open Source Xen® Centers To manage virtual machines hosted on the Xen hypervisor, you must install the Java version of the Leostream Agent on the server hosting the Xen hypervisor. After the Leostream Agent is installed, to create a Xen center: 1. Go to the > Resources > Centers page. 65 Chapter 5: Understanding Connection Broker Centers 2. Click Add Center. The Add Center form opens. 3. Select Open Source Xen from the Type drop-down menu. The form updates, as follows: 4. Enter a name for the center in the Name edit field. 5. Enter the IP address or hostname of the Xen server into the Hostname or IP address field. 6. Specify the port that the Leostream Agent listens on in the Agent RPC port field. 7. In the Username edit field, enter the name of a user with root privileges. 8. In the Password edit field, enter the password for this user. 9. Select the Inventory refresh interval. This setting tells the Connection Broker how often to refresh the desktops imported from this center. The refresh interval is the length of time between when one refresh action completes and the next refresh action begins. 10. Uncheck the Offer desktops from this center option if the Connection Broker should not offer desktops from this center to users when they log into the Connection Broker. The Connection Broker continues to offer assigned desktops in this center to the assigned user, even when this option is not selected. 11. Select Assign rogue users to desktops from this center (requires Agent) if you want the Connection Broker to manage users that log into desktops in this center when they do not log in through Leostream. The desktop must have a running Leostream Agent, which informs the Connection Broker of user logins (see Assigning Desktops to Rogue Users). 12. Select the Set newly-discovered desktops to “Unavailable” option if the Connection Broker should mark desktops as unavailable as they are discovered. Otherwise, leave this option unchecked. 66 Leostream Connection Broker Administrator’s Guide You can manually mark any Unavailable desktop as Available using the Availability drop-down menu on the desktop’s Edit Desktop page. To access the Edit Desktop page, go to the > Resources > Desktops page and select the Edit action associated with that desktop. 13. Select the Continuously apply any Auto-Tags option if you want to set tags on desktops that are discovered when the center is refreshed (see Continuously Applying Tags to Desktops for more information). Leave this option unchecked if you do not want to tag desktops. 14. Click Save. Active Directory Centers The Connection Broker uses Active Directory to manage physical and virtual machines that are part of your domain. After you add an Active Directory authentication server to the Connection Broker (see Adding Microsoft® Active Directory® Authentication Servers), you can add the machines associated with that domain into the Connection Broker inventory. You must add an Active Directory authentication server before you can add an Active Directory center. To add an Active Directory center: 1. Go to the > Resources > Centers page. 2. Click Add Center. The Add Center form opens. 3. Select Active Directory from the Type drop-down menu. The form updates, as follows: 67 Chapter 5: Understanding Connection Broker Centers 4. Enter a name for the center in the Name edit field. 5. Select an authentication server from the Authentication Server drop-down menu. This drop-down menu contains the Active Directory centers you entered in the > Users > Authentication Servers page. See Adding Microsoft® Active Directory® Authentication Servers for instructions on adding an authentication server. 6. In the Sub-tree edit field, specify the sub-tree within Active Directory that contains the computer records. If you do not specify a sub-tree, the Connection Broker assumes the same sub-tree starting point as specified in the Active Directory authentication server selected in step 3. You can begin the search at a node higher up the search tree than what is specified in the Active Directory authentication server. 7. Enter an optional filter expression in the Advanced filter expression edit field. See the example in Determining Appropriate Sub-Tree Strings for more information. 8. Select the Inventory refresh interval. This setting tells the Connection Broker how often to query the center for information on existing or new desktops in this center. The refresh interval is the length of time between when one refresh action completes and the next refresh action begins. 9. Select the Power state refresh interval. During a power state scan, the Connection Broker uses the Nmap command to probe the ports associated with all display protocols used in your protocol plans. If any of the scanned ports are open, the Connection Broker marks the desktop as Running. If all ports are closed, the Connection Broker marks the desktop as Stopped. 68 Leostream Connection Broker Administrator’s Guide To limit the number of ports that the Connection Broker probes during a power state refresh, ensure that all protocol plans, including the Default protocol plan, select Do not use for the priority unused protocols you do not plan to offer to users. 10. Uncheck the Offer desktops from this center option if the Connection Broker should not offer desktops from this center when users log in. The Connection Broker continues to offer assigned desktops in this center to the assigned user, even when this option is not selected. 11. Select Assign rogue users to desktops from this center (requires Agent) if you want the Connection Broker to manage users that log into desktops in this center when they do not log in through Leostream. The desktop must have a running Leostream Agent, which informs the Connection Broker of user logins (see Assigning Desktops to Rogue Users). 12. Select the Set newly-discovered desktops to “Unavailable” option if the Connection Broker should mark desktops as unavailable as they are discovered. Otherwise, leave this option unchecked. You can manually mark any Unavailable desktop as Available using the Availability drop-down menu on the desktop’s Edit Desktop page. To access the Edit Desktop page, go to the > Resources > Desktops page and select the Edit action associated with that desktop. 13. Select the Continuously apply any Auto-Tags option if you want to set tags on desktops that are discovered when the center is refreshed (see Continuously Applying Tags to Desktops for more information). Leave this option unchecked if you do not want to tag desktops. 14. Select the Resolve addresses in this center using short hostnames option to instruct the Connection Broker to reference the desktop using only the portion of the hostname before the first dot. 15. Click Save. The Connection Broker registers a particular desktop in a single Active Directory center. If you create multiple Active Directory centers and each contains a particular desktop record, that desktop is considered to be a member of the first center you created. Therefore, if you create pools based on your Active Directory centers, the desktop appears in only one pool. Determining Appropriate Sub-Tree Strings To determine an appropriate sub-tree string, use the ldp.exe tool described in the Using Microsoft Active Directory administration tool (ldp.exe) section. A typical string takes the form: CN=Computers,DC=leostream,DC=net Where CN=Computers narrows the search down to computers, as opposed to users. If you include the user string CN=Users, the Connection Broker does not find any computers. To group machines, place them in an Active Directory group and specify the group in the sub-tree string. For example, if you have two pools of machines, Red and Blue, define one group using the string; 69 Chapter 5: Understanding Connection Broker Centers CN=Computers,DC=leostream,DC=net,CN=Red To add the second Blue group of machines, use CN=Blue instead of CN=Red. Use the Advanced filter expression to narrow down the selection of desktops from the Active Directory tree. The default expression is &(objectclass=Computer). You can override the default with a more complex Microsoft SQL Server® search command that, for example, searches only for computers whose cn value start with a or b, as shown by the following line: (&(objectCategory=computer) (objectClass=computer)(|(cn=a*)(cn=b*))) Refer to the Microsoft sample scripts for searching Active Directory services for more information. HP Moonshot System Centers Connection Broker 8.0 manages HP Moonshot Systems using the HP Chassis Manager command line interface. Leostream supports chassis manager firmware version 1.2 and 1.3. Connection Broker 8.1 manages HP Moonshot Systems using the HP Chassis Manager RESTful API. Connection Broker 8.1 does not support deploying operating systems to Moonshot nodes using Windows Deployment Services. Ensure that the operating system installed on each Moonshot node contains an installed and running Leostream Agent. The Leostream Agent returns operating system information about the node, such as IP address, to the Connection Broker. Without a Leostream Agent, the Connection Broker gathers only MAC address information from the Chassis Manager, and you cannot offer Moonshot nodes to your end users. To create a center that communicates with the chassis manager: 1. Go to the > Resources > Centers page. 2. Click on Add Center. The Add Center form opens. 3. Select HP Moonshot System from the Type drop-down menu. The form updates, as follows: 70 Leostream Connection Broker Administrator’s Guide 4. Enter a name for the center in the Name edit field. 5. Enter the appropriate information in the Hostname or IP address of Chassis Management Module edit field. 6. In the Username and Password edit fields, enter the credentials for a user with administrator privileges to the Chassis Manager. 7. Select a time from the Inventory refresh interval drop-down menu. This setting tells the Connection Broker how often to refresh the desktops imported from this center. The refresh interval is the length of time between when one refresh action is completes and the next refresh action begins. 8. Uncheck the Offer desktops from this center option if the Connection Broker should not offer desktops from this center to users who log into the Connection Broker. The Connection Broker continues to offer assigned desktops to the assigned user, even when this option is not selected. 9. Select Assign rogue users to desktops from this center (requires Agent) if you want the Connection Broker to manage users that log into desktops in this center when they do not log in through Leostream. The desktop must have a running Leostream Agent, which informs the Connection Broker of user logins (see Assigning Desktops to Rogue Users). 10. Select the Set newly-discovered desktops to “Unavailable” option if the Connection Broker should mark desktops as unavailable as they are discovered. Otherwise, leave this option unchecked. You can manually mark any Unavailable desktop as Available using the Availability drop-down menu on the desktop’s Edit Desktop page. To access the Edit Desktop page, go to the > Resources > Desktops page and select the Edit action associated with that desktop. 11. Select the Continuously apply any Auto-Tags option if you want to set tags on desktops that are 71 Chapter 5: Understanding Connection Broker Centers discovered when the center is refreshed (see Continuously Applying Tags to Desktops for more information). Leave this option unchecked if you do not want to tag desktops. 12. Click Save. For more information on using Leostream with HP Moonshot System, download the Leostream and HP Moonshot System Reference Architecture or contact [email protected]. Microsoft® System Center Virtual Machine Manager (SCVMM) 2012 Centers The Connection Broker manages virtual machines hosted in a Microsoft Hyper-V virtualization layers by integrating with Microsoft System Center Virtual Machine Manager (SCVMM) 2012 or 2012 R2. The Connection Broker does not support Microsoft Hyper-V Server 2008. The Connection Broker uses Microsoft Windows PowerShell commands to communicate with SCVMM. To ensure that the Connection Broker can communicate with SCVMM, you must issue the following PowerShell command in SCVMM: Set-ExecutionPolicy RemoteSigned You must have a Leostream Agent installed on the SCVMM server. If you reboot the SCVMM server, the Leostream Agent may not automatically restart. You can manually restart the Leostream Agent using the Leostream Agent Control Panel Options dialog. To add an SCVMM center to your Connection Broker: 1. Go to the > Resources > Centers page. 2. Click on Add Center. The Add Center form opens. 3. Select Microsoft Hyper-V SCVMM Server from the Type drop-down menu. The form updates, as follows: 72 Leostream Connection Broker Administrator’s Guide 4. Enter a name for the SCVMM center in the Name edit field. 5. Enter the hostname for the SCVMM in the SCVMM Server hostname or IP address edit field. You may not be able to use the SCVMM IP address in this field if the SCVMM creates a root agency certificate with the fully qualified domain name of the SCVMM server during installation. 6. In the Username edit field, enter the name of a user with administrative privileges. 7. In the Password edit field, enter this user’s password. 8. In the Domain edit field, enter this user’s domain. 9. Select a time from the Inventory refresh interval drop-down menu. This setting tells the Connection Broker how often to refresh the desktops imported from this center. The refresh interval is the length of time between when one refresh action is completes and the next refresh action begins. 10. Uncheck the Offer desktops from this center option if the Connection Broker should not offer desktops from this center to users who log into the Connection Broker. The Connection Broker continues to offer assigned desktops to the assigned user, even when this option is not selected. 11. Select Assign rogue users to desktops from this center (requires Agent) if you want the Connection Broker to manage users that log into desktops in this center when they do not log in through Leostream. The desktop must have a running Leostream Agent, which informs the Connection Broker of user logins (see Assigning Desktops to Rogue Users). 12. Select the Set newly-discovered desktops to “Unavailable” option if the Connection Broker should 73 Chapter 5: Understanding Connection Broker Centers mark desktops as unavailable as they are discovered. Otherwise, leave this option unchecked. You can manually mark any Unavailable desktop as Available using the Availability drop-down menu on the desktop’s Edit Desktop page. To access the Edit Desktop page, go to the > Resources > Desktops page and select the Edit action associated with that desktop. 13. Select the Continuously apply any Auto-Tags option if you want to set tags on desktops that are discovered when the center is refreshed (see Continuously Applying Tags to Desktops for more information). Leave this option unchecked if you do not want to tag desktops. 14. Click Save. Microsoft Windows Deployment Services The Leostream Connection Broker can deploy Windows operating systems to HP Moonshot System nodes using Microsoft Windows Deployment Services (WDS). After you create a WDS center in your Connection Broker, Leostream inventories the available install images on your WDS server and provides tools for you to deploy these images out to one of more Moonshot nodes. For complete information on using WDS with Leostream, download the Getting Started Guide for HP Moonshot Systems or contact [email protected]. Before you add a WDS center to your Connection Broker, ensure that you install the Leostream Agent on your WDS server. Then, to add the WDS center: 1. Go to the > Resources > Centers page. 2. Click on Add Center. The Add Center form opens. 3. Select Windows Deployment Services from the Type drop-down menu. 4. Enter a name for the center in the Name edit field. 5. Enter the appropriate information in the Hostname or IP address of Windows deployment services server edit field. 6. In the Agent RPC port edit field, enter the port used by the Leostream Agent installed on the WDS server. 7. In the Maximum concurrent deployments edit field, indicate a limit to the number of simultaneous operating system deployments the Connection Broker will run. Set to zero to allow the Connection Broker to start an unlimited number of deployments. 8. Click Save. The center reports as Offline if the Connection Broker cannot retrieve a list of install images from the Leostream Agent. 74 Leostream Connection Broker Administrator’s Guide OpenStack® Centers OpenStack centers allow you to manage and provision desktops in an OpenStack environment, including HP Helion OpenStack. To create an OpenStack center: 1. Go to the > Resources > Centers page. 2. Click on Add Center. The Add Center form opens. 3. Select OpenStack from the Type drop-down menu. 4. Enter a name for the center in the Name edit field. 5. In the Auth URL edit field, enter the authentication URL for your OpenStack Environment. The authorization URL often takes the form: http://openstack.yourcompany.net:5000/v2.0 where openstack.yourcompany.net is the hostname or IP address of your OpenStack environment. 6. Enter your project name into the Project edit field. 7. Enter an administrator username and password into the Username and Password edit fields, respectively. 8. In the Network UUID edit field, enter the network ID to use when provisioning new desktops in OpenStack. 9. Uncheck the Offer desktops from this center option if the Connection Broker should not offer desktops from this center to users who log into the Connection Broker. The Connection Broker continues to offer assigned desktops to the assigned user, even when this option is not selected. 10. Select Assign rogue users to desktops from this center (requires Agent) if you want the Connection Broker to manage users that log into desktops in this center when they do not log in through Leostream. The desktop must have a running Leostream Agent, which informs the Connection Broker of user logins (see Assigning Desktops to Rogue Users). 11. Select the Set newly-discovered desktops to “Unavailable” option if the Connection Broker should mark desktops as unavailable as they are discovered. Otherwise, leave this option unchecked. You can manually mark any Unavailable desktop as Available using the Availability drop-down menu on the desktop’s Edit Desktop page. To access the Edit Desktop page, go to the > Resources > Desktops page and select the Edit action associated with that desktop. 12. Select the Continuously apply any Auto-Tags option if you want to set tags on desktops that are discovered when the center is refreshed (see Continuously Applying Tags to Desktops for more information). Leave this option unchecked if you do not want to tag desktops. 75 Chapter 5: Understanding Connection Broker Centers 13. Click Save. Leostream Cloud Desktops Leostream Cloud Desktops are on-demand, fully-functional, personalizable desktops hosted in the public cloud. You must have an existing account with Leostream Cloud Desktops to use this Center in the Connection Broker. For more information, visit http://www.leostreamdesktops.com. After you create your Leostream Cloud Desktops account, to add a center that inventories your Leostream Cloud Desktops in the Connection Broker: 1. Go to the > Resources > Centers page. 2. Click on Add Center. The Add Center form opens. 3. Select Leostream Cloud Desktops from the Type drop-down menu. 4. Enter a name for the center in the Name edit field. 5. Select the public cloud that hosts your desktops from the Hosting provider drop-down menu. 6. Enter the email address for the owner of the Leostream Cloud Desktops account in the Email edit field. 7. Enter this user’s password in the Password edit field. 8. Select a time from the Refresh interval drop-down menu. This setting tells the Connection Broker how often to refresh the desktops imported from this center. The refresh interval is the length of time between when one refresh action is completes and the next refresh action begins. 9. Uncheck the Offer desktops from this center option if the Connection Broker should not offer desktops from this center to users who log into the Connection Broker. The Connection Broker continues to offer assigned desktops to the assigned user, even when this option is not selected. 10. Select the Set newly-discovered desktops to “Unavailable” option if the Connection Broker should mark desktops as unavailable as they are discovered. Otherwise, leave this option unchecked. You can manually mark any Unavailable desktop as Available using the Availability drop-down menu on the desktop’s Edit Desktop page. To access the Edit Desktop page, go to the > Resources > Desktops page and select the Edit action associated with that desktop. 11. Select the Continuously apply any Auto-Tags option if you want to set tags on desktops that are discovered when the center is refreshed (see Continuously Applying Tags to Desktops for more information). Leave this option unchecked if you do not want to tag desktops. 12. Click Save. 76 Leostream Connection Broker Administrator’s Guide Amazon Web Services Centers If you want to manage connections to AWS EC2 instances without introducing Leostream Cloud Desktops into your environment, you can connect the Connection Broker directly to your AWS account. The Connection Broker can then inventory the instances and images in your AWS account, and manage provisioning and terminating instances based on the pool, policy, and plan settings in your Connection Broker. To manage desktops hosted in AWS, you must install the Leostream Agent on your AWS instance and ensure that the Connection Broker has network access to the instances. To manage connections to AWS instances, create an Amazon Web Services center, as follows. 1. Go to the > Resources > Centers page. 2. Click on Add Center. The Add Center form opens. 3. Select Amazon Web Services from the Type drop-down menu. The form updates, as follows: 4. Enter a name for the multi-user center in the Name edit field. 5. Select the AWS region you want to manage from the Region drop-down menu. Create separate centers for each region you want to manage in the Connection Broker. 6. Enter your AWS access key into the Access Key ID edit field. You can create an IAM user to use with Leostream. Ensure that user has sufficient privileges to access EC2. 7. Enter the secret key associated with your access key into the Secret Access Key field. 77 Chapter 5: Understanding Connection Broker Centers 8. Select a time from the Inventory refresh interval drop-down menu. This setting tells the Connection Broker how often to refresh the desktops imported from this center. The refresh interval is the length of time between when one refresh action is completes and the next refresh action begins. 9. Uncheck the Offer desktops from this center option if the Connection Broker should not offer desktops from this center to users who log into the Connection Broker. The Connection Broker continues to offer assigned desktops to the assigned user, even when this option is not selected. 10. Select the Set newly-discovered desktops to “Unavailable” option if the Connection Broker should mark desktops as unavailable as they are discovered. Otherwise, leave this option unchecked. You can manually mark any Unavailable desktop as Available using the Availability drop-down menu on the desktop’s Edit Desktop page. To access the Edit Desktop page, go to the > Resources > Desktops page and select the Edit action associated with that desktop. 11. Select the Continuously apply any Auto-Tags option if you want to set tags on desktops that are discovered when the center is refreshed (see Continuously Applying Tags to Desktops for more information). Leave this option unchecked if you do not want to tag desktops. 12. Click Save. After you create an AWS center, you can view the available instances on the > Resources > Desktops page. The Connection Broker also inventories the AMIs available in the region, which you can use to provision new desktops in pools (see Provisioning in Amazon Web Services). Remote Desktop Services / Multi-User Centers The Connection Broker allows you to offer session from multi-user servers, such as Microsoft Remote Desktop Services (RDS) or NoMachine NX servers, alongside your other offered resources. Before creating the multi-user center, ensure that you install the Leostream Agent on each multi-user server. If the server already appears on the > Resources > Desktops page, typically by being inventoried from another Center, you can use the Bulk Edit dialog to convert the desktop into a center. See Converting Desktops to Remote Desktop Services / Multi-User Centers for more information. Adding a Remote Desktop Services / Multi-User Center To add a center for managing sessions: 13. Go to the > Resources > Centers page. 14. Click on Add Center. The Add Center form opens. 15. Select Remote Desktop Services/Multi-User from the Type drop-down menu. The form updates, as follows: 78 Leostream Connection Broker Administrator’s Guide 16. Enter a name for the multi-user center in the Name edit field. 17. Enter the hostname or IP address in the Hostname or IP address edit field. 18. Enter the Leostream Agent port number in the Agent RPC port edit field. 19. Enter the maximum number of concurrent user connections in the Maximum concurrent connections edit field. 20. Select a time from the Inventory refresh interval drop-down menu. This setting tells the Connection Broker how often to refresh the sessions created for this center. The refresh interval is the length of time between when one refresh action completes and the next refresh action begins. If you select Manual from the Refresh interval drop-down menu, ensure that you manually refresh the center after it is created. The manual refresh is required to correctly set the operating system and IP address of the sessions displayed in the > Resources > Centers page. 21. Uncheck the Offer desktops from this center option if the Connection Broker should not offer sessions from this center to users who log into the Connection Broker. The Connection Broker continues to offer assigned sessions to the assigned user, even when this option is not selected. 22. Select Assign rogue users to desktops from this center (requires Agent) if you want the Connection Broker to manage users that log into desktops in this center when they do not log in through Leostream. The desktop must have a running Leostream Agent, which informs the Connection Broker of user logins (see Assigning Desktops to Rogue Users). 23. Click Save. The sessions appear as a series of entries in the list of desktops, shown in the following figure. 79 Chapter 5: Understanding Connection Broker Centers Modifying the Number of Available Sessions You can add or remove sessions after the center is added, as follows. 1. Go to the > Resources > Centers page. 2. Click the Edit action associated with the multi-user center. The Edit Center form opens. 3. Modify the number in the Maximum concurrent connections field. 4. Click Save. When changing the number of available sessions, the Connection Broker first deletes all existing sessions then creates new sessions. The Connection Broker does not disconnect users logged into any of the previous sessions, however these sessions are no longer displayed in the Connection Broker Web interface. Deleting Centers You can delete a center at any time. Deleting a center removes all desktops, applications, sessions, or printers associated with that center. To delete a center: 1. Go to the > Resources > Centers page. 2. Select the Edit option from the Actions list of the appropriate center. The Edit Center form opens. 3. In the Edit Center form, click Delete. 4. Click OK in the confirmation dialog to finish the deletion. Displaying Center Characteristics The > Resources > Centers page, shown in the following figure, displays the centers and their characteristics. You can modify the order and type of characteristics displayed on this page by clicking the customize link at the bottom left side of the page (see Customizing Tables). 80 Leostream Connection Broker Administrator’s Guide The following sections describe the available centers characteristics. Actions Drop-down menu or list of links indicating the actions you can perform on a particular center. Available actions include: Edit: Opens the Edit Center form for this center Refresh: Forces the Connection Broker to refresh the contents from this center. If the center has separate refresh intervals for inventory and power state, the forced refresh performs both actions. Test: (Available for virtualization layer centers, only) Attempts to log in to the center using the credentials provided on the Edit Center page View: (Available for vCenter Server, only) Navigates to the vCenter Server URL Log: Displays the log entries and job queue for this center Upgrade: Indicates the Leostream Agent installed on the server needs to be upgraded Name The name you specified for the center. Type The center’s type, selected when the center was created. Datacenter For vCenter Server, the data center used to retrieve virtual machines. If blank, the Connection Broker retrieves all virtual machines from this center. Status Displays the center’s current status. Deleting: Displays when you choose to delete a particular center. During deletion, the virtual machines are removed, followed by the center. The center remains in the list until you navigate away from the page. Disk Full: Indicates the center’s disk is full. 81 Chapter 5: Understanding Connection Broker Centers Needs Upgrade: Indicates that the Leostream Agent in this center needs to be upgraded. This setting applies only to centers that use the Leostream Agent. Offline: Indicates the Connection Broker cannot contact this center. Online: Indicates this center is operating normally. Refreshing: Displays when the Connection Broker is refreshing the contents of this center. Desktops The number of desktops inventoried from this center. Version The center’s version, or the operating system version of the server running the center. Online Indicates if the center is online (Yes) or offline (No). Server Hostname or IP address for the server. Refresh The center’s refresh interval. The refresh interval is the length of time between when one refresh action completes and the next refresh action begins. For Active Directory and Uncategorized Desktops centers, this column corresponds to the setting in the Inventory refresh interval drop-down menu. During a refresh, the Connection Broker scans the center for changes to the inventory of desktops, adding new desktops to the > Resources > Desktops page, as necessary, and removing records for desktops that no longer exist in the center. For centers that return information about the desktop’s IP address or power state, the Connection Broker updates this information, as well. If the Connection Broker receives a list of empty desktops from the center, the Connection Broker does not remove any of the desktops from the inventory, to prevent inadvertently deleting active desktops when a center API call fails to retrieve the desktops. After the scan completes, the Connection Broker contacts the Leostream Agents on the desktops to update any information provided by the agents. Power State Refresh For Active Directory and Uncategorized Desktops centers, the length of time between when the Connection Broker performs a port scan to determine the power state of the desktops in the center. Offer Desktops Indicates if the Offer desktops from this center option is selected. If the center is not offering its desktops, the desktops appear as Unavailable on the > Resources > Pools page. Assign Rogue Users Indicates if the Assign rogue users to desktops from this center option is selected. 82 Leostream Connection Broker Administrator’s Guide Chapter 6: Working with Desktops and Applications Registering Desktops in the Uncategorized Desktops Center The Uncategorized Desktops center contains desktops that have registered with the Connection Broker, but are not inventoried from another center. The Uncategorized Desktops center allows you to: Add physical machines without creating an Active Directory center Add virtual machines from any hypervisor that does not have an associated Connection Broker center Register newly provisioned virtual machines with the Connection Broker before a scan is performed on the center that contains these desktops. Registering Desktops Using the Leostream Agent You can install the Leostream Agent onto any physical or virtual machine you want to register with your Connection Broker. The Leostream Agent contacts the Connection Broker when the agent starts. If this is the first registration the Connection Broker receives from this desktop, the broker places the desktop in the Uncategorized Desktops center. To determine which Connection Broker to register with, the Leostream Agent either queries the DNS server for the Connection Broker SRV record or uses the IP address entered into the Leostream Agent Control Panel dialog (see “Registering Desktops with the Connection Broker” in the Leostream Agent Administrator’s Guide). The Availability property of a desktop registered by the Leostream Agent is determined by the state of the Set newly-discovered desktops to “Unavailable” option for the Uncategorized Desktops center. If this option is selected, the Connection Broker marks desktops registered by the Leostream Agent as Unavailable. Unavailable desktops are not offered to users. Importing a Desktop by IP Address You can import one or more desktops into the Connection Broker using the desktop’s IP address. To import an individual desktop: 1. Go to the > Resources > Desktops page. 2. Click Import Desktop, as shown in the following figure. The Import Desktop form opens. 83 Chapter 6: Working with Desktops and Applications 3. In the Name field, enter a name for the desktop. This name appears in the Name column on the > Resources > Desktops page. 4. In the Display Name field, enter an optional display name for the desktop. This name can be displayed to the user at offer time. If left blank, the Connection Broker uses the value in the Name field as the display name. 5. In the Desktop Attributes section: 1. Enter the desktops hostname in the Hostname edit field. 2. Enter the desktop’s IP address in the IP Address edit field. 3. Optionally, enter the desktop’s MAC address and alternate MAC address in the MAC address, and Alternate MAC addresses edit fields. 4. Optionally, select the desktop’s operating system from the Operating system drop-down menu. 5. Uncheck the Allow Center scans to overwrite these desktop attributes option if you do not want the Connection Broker to replace the IP address, MAC address, and operating system you specified with values it learns from a center that registers this desktop. 6. In the Assignment section: 1. In the Assignment mode drop-down menu: Select Policy-driven to assign this desktop to users via Connection Broker policies. Select Hard-assigned to specific user to assign this desktop to a specific user. If you select this option, use the Assigned User drop-down menu to select the user to assign to this desktop. 2. In the Assign rogue users to this desktop (requires Agent) drop-down menu, indicate if the Connection Broker should manage assignments for rogue users who log into the desktop. The setting defaults to the value associated with the primary center that inventories the desktop. 3. In the Rogue user policy drop-down menu, if the Connection Broker does manage rogue users, indicate the policy assigned to those users. 7. In the Availability section, if Connection Broker should not offer this desktop to users, select Unavailable from the Desktop status drop-down menu. 84 Leostream Connection Broker Administrator’s Guide 1. In the Failover section: Enter the name of a desktop to connect the user to in the event that the imported desktop is unreachable. 2. Select the Failover plan to invoke in the event a user is connected to this failover desktop. See Specifying Failover Desktops for more information. In the Leostream Agent section, enter the Hostname or IP address and Port for the Leostream Agent installed on the desktop. The Connection Broker assumes the agent’s hostname or IP address is the same the desktop’s unless you specify otherwise. 8. Click Save. If you are importing a blade that contains PCoIP Host cards, save the record and then select the Edit action associated with the desktop to associate the PCoIP Host cards with the blade. Importing a Range of Desktops by IP Address To import a range of desktops: 1. Go to the > Resources > Desktops page. 2. Click Import Range of Desktops, as shown in the following figure. The Import Range of Desktops form opens. 3. In the Naming template field, enter a prefix for the display name for the desktop. This name appears in the Name column on the > Resources > Desktops page. The Connection Broker adds an index to the end of this name. You can subsequently modify the name of individual desktops. 4. Enter the range of desktop IP addresses in the IP address range edit field. Define the range according to mask. See the following Microsoft article for information on specifying a range of IP addresses using a mask; http://technet.microsoft.com/en-us/library/cc784393.aspx 5. Optionally, select the desktops’ operating system from the Operating system drop-down menu. If the desktops have different operating systems, leave this option as Unspecified and edit the individual desktops to specify the operating system of each desktop. 6. In the Assignment section: 1. In the Assignment mode drop-down menu: 85 Chapter 6: Working with Desktops and Applications Select Policy-driven to assign these desktops to users via Connection Broker policies. Select Hard-assigned to specific user to assign all the imported desktops to a single user. If you select this option, use the Assigned user drop-down menu to select the user to assign to all of these desktops. 2. In the Assign rogue users to this desktop (requires Agent) drop-down menu, indicate if the Connection Broker should manage assignments for rogue users who log into the desktop. The setting defaults to the value associated with the primary center that inventories the desktop. 3. In the Rogue user policy drop-down menu, if the Connection Broker does manage rogue users, indicate the policy assigned to those users. 7. Select Unavailable from the Desktop status drop-down menu if the Connection Broker should not offer the imported desktops to users. 8. In the Failover section: 1. Enter the name of a desktop to connect the user to in the event that one of the imported desktops is unreachable. 2. Select the Failover plan to invoke in the event a user is connected to the failover desktop. See Specifying Failover Desktops for more information. 9. Enter the Port for the Leostream Agent installed on the imported desktops. The Connection Broker assumes the agent’s IP address is the same as the corresponding desktop’s IP address. 10. Click Save. Using the Desktops Page The > Resources > Desktops page, shown in the following figure, lists the desktops inventoried in your Connection Broker, and their characteristics. You can modify the order and type of characteristics displayed on this page by clicking the customize link at the bottom left side of the page (see Customizing Tables). 86 Leostream Connection Broker Administrator’s Guide Available Desktop Characteristics Bulk actions Checkboxes that allow you to select multiple desktops for performing batch processes. Not all actions are available for batch processing (see Performing Actions on Multiple Desktops). Actions Drop-down menu or list of links indicating the actions you can perform on a particular desktop. Available actions include some or all of the following: Control: Opens a dialog for controlling the power state of the desktop. See Power Control for Desktops for more information. Edit: Opens the Edit Desktop form for this desktop. See Editing Desktop Characteristics for more information. View: Opens a list of available remote viewers. Log: Displays the log entries and job queue for this desktop. Status: Queries the Leostream Agent for this desktop’s active sessions. You can also use this option to refresh the Leostream Agent Status column on the > Resources > Desktops page. If the desktop does have active sessions, you can log these users off by selecting the session and clicking Log out the selected session, as shown in the following figure. Release: Releases an assigned desktop from the user and returns the desktop to the pool. See Manually Releasing Desktops for more information. After releasing the desktop, the Connection Broker applies the user’s Release Plan, which may log the user out or reboot the desktop. This option does not appear for desktops that are hard-assigned to a user. Upgrade: If applicable, indicates the Leostream Agent needs to be upgraded. The Connection Broker runs the same tasks during the upgrade as you specified for the original Leostream Agent installation. The Connection Broker always calls the Leostream Agent upgrade with the reboot flag. Name The name given by the management system controlling this desktop. Display Name A customizable name that can be displayed to the user when the desktop is offered to the user. 87 Chapter 6: Working with Desktops and Applications User Name The user name associated with the user currently assigned to this desktop. User AD CN, User AD distinguishedName, User AD Email, User AD sAMAccountName, User AD userPrincipalName The Active Directory attributes associated with the user currently assigned to this desktop. Last Login Time The last time a user logged into the desktop. Last Logout Time The last time a user logged out of the desktop. Last Connect Time The last time a user connected to the desktop. Last Disconnect Time The last time a user disconnected from the desktop. User Connected Displays Yes if a user is connected to the desktop. Otherwise, displays No. User Logged In Displays Yes if a user is logged into the desktop. Otherwise, displays No. If the User Logged In column displays Yes and the User Connected column display No, the user is logged in, but disconnected from their remote desktop. User Assignment Mode Indicates if this desktop is hard-assigned to a user. Possible values include: Hard-assigned: The desktop is hard-assigned to a particular user. The Connection Broker does not consider hard-assigned desktop as available in a pool to offer to another user Policy-driven: The desktop is assigned to a user via a policy. To change the User Assignment Mode, edit the desktop. See Hard-Assigning a Desktop to a User for more information. Client Assignment Mode Indicates if this desktop is hard-assigned to a client device. Possible values include: Hard-assigned: The desktop is hard-assigned to a particular user. The Connection Broker will not include this desktop in any pool or offer it to another user Policy-driven: The desktop is assigned to a user via a policy. See Hard-Assigning a Desktop to a Client for more information. Availability Indicates the availability of a desktop, either: 88 Leostream Connection Broker Administrator’s Guide Available indicates that the desktop is available for use. Unavailable indicates that the desktop has been taken out of service, for example, if the desktop is still being configured. Duplicate indicates that another desktop with the same IP address exists in the desktop list. Duplicate machines result when a desktop is imported from multiple centers. You may also see duplicate entries if you have multiple DNS records pointing to an identical machine. See Handling Duplicate Desktops for more information Unreachable indicates that this desktop failed a port check that the Connection Broker performed when offering this desktop to a user, or that the Connection Broker failed to make a viable XenDesktop Desktop Group for the desktop. If the user’s policy is configured with a backup pool, when the desktop was marked Unreachable, the Connection Broker offered the user an alternative desktop from a backup pool (see Specifying Backup Pools). The Connection Broker continues to offer desktops that are marked as Unreachable. If subsequent port checks pass, the Connection Broker automatically switches the desktop’s status back to Available. To change the availability of a desktop: 1. Select the Edit action for that the desktop. The Edit Desktop form, shown in the following figure, opens. 2. In the Availability section, use the Desktop status drop-down menu to change the desktop availability. 3. Click Save. To simultaneously modify the availability of several desktops, use the bulk edit action for desktops (see Performing Actions on Multiple Desktops). 89 Chapter 6: Working with Desktops and Applications Power Status Reflects the overall power state of the desktop, including the virtual machine, the operating system, and the remote viewer software (see Determining Power State for Physical Desktops). When a virtual machine is first powered up, the power status values may differ from those displayed for the machine in vCenter Server or XenServer. The Connection Broker considers a desktop as Running when the remote viewer service on the desktop is available, not when the virtualization layer considers the desktop as running. Possible status values include: Starting Running Rebooting Resuming Reverting Suspending Suspended Pausing Paused Stopping Stopped Failed Unavailable Power is on, operating system (if present) is booting Power is on, operating system is running Stopping and then restarting Restarting after being suspended Returning to the pre-snapshot state Memory is being suspended to disk Memory is suspended to disk CPU is halting, Virtual Machine is kept in memory CPU is halted, Virtual Machine is kept in memory Power is on, operating system is shutting down Power is off Power up failed The Connection Broker cannot determine the desktop’s power state The Failed status generally occurs when you try to power up a machine. If the power up fails, the Failed status briefly appears before the status changes to Stopped. The Unavailable state appears when a desktop is registered by an Active Directory center, and the Connection Broker cannot determine the desktop’s power state. To see the log entries associated with a desktop, select the Log action for that desktop. Selecting Log opens the relevant log page, showing all of the actions that have occurred to that desktop. Hostname The hostname as reported by the desktop’s center. For physical machines, the Active Directory services reports the hostname. For virtual machines, the virtualization tools installed on the VM return this information, for example VMtools installed on VMs hosted in VMware or XenTools installed on VMs hosted in XenServer. Alternatively, you can install the Leostream Agent on the remote desktop. 90 Leostream Connection Broker Administrator’s Guide IP Address The IP address as reported by the desktop’s center. For physical machines, the Active Directory services reports the IP address. For virtual machines, the virtualization tools installed on the VM return this information, for example VMtools installed on VMs hosted in VMware or XenTools installed on VMs hosted in XenServer. Alternatively, you can install the Leostream Agent on the remote desktop. Leostream Agent Address The hostname or IP address of the Leostream Agent, if applicable. MAC Address The desktop’s MAC address Machine Name The machine name. For physical machines, the Active Directory services reports the machine name. For virtual machines, the virtualization tools installed on the VM return the machine name, for example VMtools for VMs hosted in VMware or XenTools for VMs hosted in XenServer. Alternatively, you can install the Leostream Agent on the remote desktop. Center The name of the center that is managing this desktop. Operating System The operating system hosted within each virtual or physical machine. With VMware and Citrix XenServer hosts, the Connection Broker displays the operating system specified when the virtual machine was created. For physical machines, the Connection Broker obtains the operating system from the Leostream Agent installed on the machine. OS Version For Windows desktops, the version of the operating system hosted within each virtual or physical machine, as reported by the Leostream Agent installed on the desktop. OS Service Pack For applicable Windows desktops, the installed service pack for the operating system hosted within each virtual or physical machine, as reported by the Leostream Agent installed on the desktop. Computer Model The desktop’s model number. The desktop must have the most recent version of the Leostream Agent installed and this agent must have registered itself with the Connection Broker or this value will be blank. BIOS Serial Number The desktop’s BIOS serial number. The desktop must have the most recent version of the Leostream Agent installed and this agent must have registered itself with the Connection Broker or this value will be blank. CPU Speed (GHz) The desktop’s processor speed. The desktop must have the most recent version of the Leostream Agent installed and this agent must have registered itself with the Connection Broker or this value will be blank. 91 Chapter 6: Working with Desktops and Applications Number of CPUs Number of CPUs RAM (MB) The total amount of RAM in the desktop. On Linux operating systems, the Leostream Agent determines RAM using the meminfo function. When used in a virtual machine, meminfo may not include reserved memory, resulting in a RAM in the Connection Broker that differs slightly from the RAM reported in vCenter Server. Number of NICs The number of network interface cards available on the desktop. Boot Time Indicates the date and time the desktop powered up, as reported by the Leostream Agent installed on the desktop. Leostream Agent Status The last known status of the Leostream Agent. The Leostream Agent reports its status to the Connection Broker when the Leostream Agent registers. The Leostream Agent Status column is blank if there is no Leostream Agent installed on the desktop or if a previously registered Leostream Agent is no longer running. The status can take one of the following three values. Running: The Connection Broker located a Leostream Agent on the desktop and the broker is successfully communicating with the Agent. Unreachable: The Leostream Agent’s incoming port is blocked or closed. This state indicates that the Connection Broker did, at some point, contact the Leostream Agent, but can no longer contact the Agent. An unreachable Leostream Agent may be blocked by a firewall or the desktop it is installed on may not be running. In this state, the Connection Broker cannot use the Agent to distinguish between a user logging out and disconnecting. Therefore, any policy settings based on this information are ignored. Unresponsive: The Leostream Agent is running on the desktop and the Connection Broker is able to contact it, but the Leostream Agent is unable to initiate calls back to the Connection Broker. In this state, the Connection Broker may not be able to distinguish between a user logging out and disconnecting. Any of the following configurations may block the Leostream Agent from calling the Connection Broker. o A firewall may be blocking the communication o The Internet Explorer Enhanced Security Configuration Windows component may be installed and blocking the communication o The Leostream Agent may not have the correct Connection Broker address o The Connection Broker VIP on the > System > Network page may not be set correctly (see 92 Leostream Connection Broker Administrator’s Guide Setting Network Configuration and Connection Broker VIP). If the Leostream Agent is Unresponsive you may need to enter your Connection Broker address into the Connection Broker VIP field on the > System > Network page. Leostream Agent Version The last known version of the Leostream Agent, if it was ever present. This entry is blank if no Leostream Agent has ever been detected on this desktop. If the desktop shows a value for the Leostream Agent Version, but the Leostream Agent Status is empty, an agent registered with the Connection Broker, but was subsequently uninstalled or stopped. Snapshot Available Indicates if a snapshot is available. If there is a snapshot image of the desktop available, this column displays Yes. Only VMware and Microsoft Hyper-V virtual machines display snapshots. Desktop Type The type of desktop as determined by the center that registers the desktop, such as VMware, Citrix, or AD Machine. PCoIP Host Device For blades, the PCoIP host card associated with this machine. This property is available only if the Hardware PCoIP support option is selected on the > System > Settings page. PCoIP Host Device 2 For blades, the optional second PCoIP host card associated with this machine. This property is available only if the Hardware PCoIP support option is selected on the > System > Settings page. Assigned from Pool, Assigned from Backup Pool, Assigned from Policy When a desktop is assigned to a user, the Assigned from Pool or Assigned from Backup Pool columns show which pool that desktop was pulled from as a result of the policy shown in the Assigned from Policy column. If the desktop is hard assigned, or if it is not assigned to a user, these columns are blank. Connected to Client The last client that connected to this desktop. Current Protocol Indicates the protocol currently used to connect to this desktop. Uploaded Indicates if the desktop record in the Connection Broker was modified using the bulk upload functionality on the > System > Maintenance page. Tag Group Displays the tag assigned to this desktop from each of the four different tag groups. 93 Chapter 6: Working with Desktops and Applications Host UUID Displays the reported SMBIOS UUID. Computer UUID Displays the reported ComputerSystemProduct UUID. HP Blade Location For HP ProLiant Blades within an HP BladeSystem enclosure, displays the rack name, enclosure name, and blade location (see Viewing HP Blade Locations). vCenter Server Custom Attributes If custom attributes are selected on the > System > Settings page, up to four additional columns may be available on the > Resources > Desktops page. These columns display the value for the selected custom attributes. Failover Desktop Displays the name of the failover desktop associated with this desktop (see Working with Failover Desktops). Failed Over Displays Yes if the user attempted to connect to this desktop but, instead, was connected to their failover desktop. The Connection Broker does not offer a desktop after it has failed over. You must manually fail back the desktop (see Working with Failover Desktops). vCenter Server “Notes” Displays the contents of the Notes field entered in VMware vCenter Server. If the field contains 70 characters or more, the Connection Broker truncates the text and displays a (show all) link. Click the (show all) link to expand the row to display the entire field. Use the (hide all) link to collapse the row and hide the field. Notes Displays the contents of the desktop’s Notes field. If the field contains 70 characters or more, the Connection Broker truncates the text and displays a (show all) link. Click the (show all) link to expand the row to display the entire Notes field. Use the (hide all) link to collapse the row and hide the Notes field. Filtering the Desktop List You can filter the list of desktops in the > Resources > Desktops page using the Filter this list drop-down menu, shown in the following figure. Select the No filter option to list all desktops currently registered with the Connection Broker, divided into a series of pages if applicable. Every time you create a desktop pool (see Chapter 7: Creating Desktop and Application Pools) the 94 Leostream Connection Broker Administrator’s Guide Connection Broker automatically creates a corresponding filter in the drop-down menu. Select one of the pool filters to limit the list to desktops within the chosen pool. To edit an existing filter, or create a new filter: 1. Select Edit an existing filter or Create a new filter from the Filter this list drop-down menu. 2. If editing an existing filter, select the filter to edit from the Select a filter drop-down menu. 3. Enter a name for the filter in the Filter name edit field. 4. Select the pool to associate with this filter from the Pool drop-down menu. 5. Use the controls in the Include data that matches section to create rules that further filter the desktops from this pool. 6. By default, only the user that creates a filter can use it. To allow other user to access your filter, check the Share the filter with other users option when you create the filter. This filter then appears in the Filter this list drop-down menu of other users that log into this Connection Broker. Shared filters are useful if you have additional users with administrative privileges in the Connection Broker, for example, a Help Desk group that can manage the desktops. 7. Click Save. Editing Desktop Characteristics Use the Edit Desktop page to view and modify desktop characteristics. The information to the right of the Edit Desktop form provides details about the desktop, including any duplicate desktops registered with the Connection Broker You cannot edit a desktop marked as a duplicate (see Handling Duplicate Desktops). You must use the Edit Desktop page of the master desktop to edit the desktop attributes. The form allows you to modify: Name: This field appears only if you are editing a desktop in the Uncategorized Desktops center. Specify a name to use for this desktop, typically the machine name. Display name: Optionally specify a customized name to display when this desktop is offered to a user. If this field is left blank, the display name defaults to the desktop name Hostname: Specify the desktop’s hostname. In general, modify this field only if the Connection Broker is unable to correctly determine the desktop’s hostname. If you select the Allow Center to overwrite these desktop attributes option, the Connection Broker may overwrite any changes you made to the hostname when the broker subsequently scans the desktop’s center. IP address: Specify the desktop’s IP address. In general, modify this field only if the Connection 95 Chapter 6: Working with Desktops and Applications Broker is unable to correctly determine the desktop’s IP address. If you select the Allow Center to overwrite these desktop attributes option, the Connection Broker may overwrite any changes you made to the IP address when the broker subsequently scans the desktop’s center. MAC address: Specify the desktop’s MAC address. The Connection Broker typically populates this field with the value it obtains from the Leostream Agent running on the desktop. If the Connection Broker cannot determine the desktop’s MAC address, or incorrectly determines the address, modify this field with the correct MAC address. A correct MAC address is required when using the wake-on-LAN feature for powering up physical desktops. If you select the Allow Center to overwrite these desktop attributes option, the Connection Broker may overwrite any changes you made to the MAC address when the broker subsequently scans the desktop’s center. Alternate MAC address: Specify the desktop’s alternate MAC address. The Connection Broker typically populates this field with the value it obtains from the Leostream Agent running on the desktop. Operating system: Specify the desktop’s operating system. If you select the Allow Center to overwrite these desktop attributes option, the Connection Broker may overwrite any changes you made to the operating system when the broker subsequently scans the desktop’s center. Allow Center to overwrite these desktop attributes: By default, the Connection Broker gather information about the desktop’s attributes from the center containing the desktop. To manually overwrite the desktop attributes returned by the center, uncheck the Allow Center to overwrite these desktop attributes option. Assignment mode: o Select Policy-driven to assign this desktop to users via policy logic (see Chapter 11: Configuring User Experience by Policy). o Select Hard-assigned to specific user to limit this desktop to a particular user. If you choose this option, select the user from the Assigned user drop-down menu. See Desktop Assignment Modes for more information on the different types of assignment modes. Rogue user settings: o In the Assign rogue users to this desktop (requires Agent) drop-down menu, indicate if the Connection Broker should manage assignments for rogue users who log into the desktop. The setting defaults to the value associated with the primary center that inventories the desktop. o In the Rogue user policy drop-down menu, if the Connection Broker does manage rogue users, indicate the policy assigned to those users. Desktop status: o o Available indicates the desktop can be assigned to a user. Unavailable indicates the desktop cannot be assigned to a user. 96 Leostream Connection Broker Administrator’s Guide o Duplicate indicates this desktop is a duplicate of another desktop in the list. Duplicate machines result, for example, when a desktop is imported from multiple centers. Duplicate desktop records are not considered as part of any pool. Allow this desktop to be deleted from disk: Use this setting to allow the Connection Broker to honor release plans that schedule virtual machine deletions. Only virtual machines in a vCenter Server center can be marked as deletable. Failover: Use this section to indicate if the desktop has an associated failover desktop. See Working with Failover Desktops for a description of planning desktop failover scenarios. Tag Editing: (Not shown in the previous figure) Use the drop-down menus in this section to select the appropriate tags from any tag group. The Tag Editing section does not appear if you have not defined any tags (see Defining Pools Using Tags). Leostream Agent: Configures the Leostream Agent on this desktop, including the IP address and port number. The port setting must match the value entered into the desktop’s Leostream Agent Control Panel dialog. See Configuring Communications with the Leostream Agent for more information. PCoIP Host Device: (Not shown in the previous figure) Selects the PCoIP host cards installed on this desktop, if relevant. Viewing HP Blade Locations The Connection Broker can display the physical location of HP ProLiant Blades within an HP BladeSystem enclosure, if the Leostream Agent is installed on the blade. To correctly display blade location, you must enter the blade location, enclosure name, and rack name in the BladeSystem Onboard Administrator, shown in the following figure. In order for the Leostream Agent to correctly pick up the location information, after entering the information, reboot the blade. After you enter this information into the BladeSystem enclosure, you can view the location in the Onboard Administrator for the individual blade on the BL c-class tab, shown in the following figure. 97 Chapter 6: Working with Desktops and Applications The Connection Broker queries the Leostream Agent installed on the blade for the location information. The Connection Broker then displays the location information on the right side of the Edit Desktop page for the blade, for example: You can display this information directly on the > Resources > Desktops page by adding the HP Blade Location column, which is off, by default. See Customizing Tables for information on adding this column to the > Resources > Desktops page. After you add the HP Blade Location column, any HP blade that provides location information includes a partial display of this information, as shown in the following figure. The information is displayed in the following format. Rack: Enclosure: Blade location Where Rack, Enclosure, and Blade location are replaced with the values for the rack name, enclosure name, and blade location you entered in the BladeSystem Onboard Administrator. 98 Leostream Connection Broker Administrator’s Guide Manually Releasing Desktops You can release a desktop that is assigned to a user by selecting the Release action associated with the desktop, as shown in the following figure. The Connection Broker prompts you to confirm the release action, as shown in the following figure. Use the Release bulk action if you need to release several desktops, simultaneously (see Bulk Release, Refresh, and Remove for Desktops). Manually releasing the desktop immediately invokes the When Desktop is Released section of the power control and release plan assigned to this desktop in the user’s policy. For example, if the release plan is configured to log the user out, the Connection Broker immediately logs out the user when you click the Release action. Using Virtual Machine Snapshots VMware and Hyper-V virtualization layers allow you to take snapshots of running or stopped virtual machines. This snapshot contains a complete system image (disk and memory) of a virtual machine at a particular moment in time, providing a way to restore a machine to a previous state. Users can continue to use machines after a snapshot is taken. You can use snapshots to ensure that, to revert a desktop back to a known state after a user is finished using that desktop. The power control plan assigned to the desktop decides when to revert to a snapshot. See Power Control Plans for more information. Handling Duplicate Desktops If the same desktop (physical or virtual) is registered with the Connection Broker from multiple centers, the Connection Broker marks the Availability of a single instance of the desktop as Available and the remaining instances as Duplicate in the > Resources > Desktops page. 99 Chapter 6: Working with Desktops and Applications The Connection Broker sets the available desktop as the instance registered from the center providing the most power control options, as follows: 1. The instance registered from a virtualization layer, such as VMware vCenter Server 2. The instance registered from an Active Directory center 3. The instance manually registered with the Uncategorized Desktops center If you create a center associated with an Active Directory tree that contains multiple records for the same desktop, the Connection Broker marks a single instance as available. The Connection Broker uses the union of desktop attributes from the Available and Duplicate desktop instances when determining if a desktop is part of a particular pool, as well is if a desktop is policy-offered to a user. The Connection Broker places only the Available desktop into the pool. Desktops that are marked as Duplicates are never members of a pool nor are they offered to users. The text on the right-hand side of the Edit Desktop page shows the union of the attributes for all available and duplicate desktop instances, as shown for example in the following figure. Use the Edit Desktop page associated with the available desktop to edit the desktop attributes. You cannot modify desktop attributes on the Edit Desktop page associated with a duplicate desktop. 100 Leostream Connection Broker Administrator’s Guide Working with Failover Desktops Failover desktops allow you to provide users with a secondary desktop in the event the Connection Broker cannot contact the user’s primary desktop. Failover desktops are primarily intended for desktops that are hard-assigned to a user. For pool-based failovers, please see Specifying Backup Pools. Specifying a Failover Desktop Use the Edit Desktop page to specify a failover desktop for a particular primary desktop, as described in the following procedure. 1. Select the Edit action associated with the primary desktop. 2. On the Edit Desktop page that opens, scroll down to the Failover section, shown in the following figure. 3. In the Failover desktop field, enter or select the name of the desktop to use for failover. The list does not contain any desktops that are already assigned to a user, either by policy or by hard-assignment. If the desired failover desktop does not appear in the list, you can check the User column on the > Resources > Desktops page to see what user is currently assigned to the desired failover desktop. 4. From the Failover plan drop-down menu, select the failover plan to invoke when the primary desktop fails over. Failover plans allow you to warn the user when their primary desktop has failed. Failover plans apply only when the user is logging in from Leostream Connect. 5. Save the Edit Desktop form. Creating Failover Plans The Connection Broker provides a default failover plan that informs the user when their primary desktop fails, causing the Connection Broker to connect the user to their failover desktop. The failover plan is invoked the first time the Connection Broker detects the desktop has failed. After 101 Chapter 6: Working with Desktops and Applications the Connection Broker marks the desktop as failed, the Connection Broker does not offer that desktop to the user until you manually failback the desktop (see Failing Back a Desktop). Failover plans are listed on the > Plans > Failover page, shown in the following figure. To create a new failover plan: 1. Click the Create Failover Plan link. The Create Failover Plan page opens. 2. Provide a name for the plan in the Plan name edit field. Use this name to associate the plan with desktops. 3. From the Display mode drop-down menu, indicate the warning to issue when the user’s primary desktop fails over. a. Do not display notification: Silently connects the user to their failover desktop. b. Display default notification: Display the default warning. This warning informs the user that their primary desktop is unavailable, and provides the name of the fail over desktop that will be launched in its place. c. Define custom notification: Display a custom dialog. 4. If Define custom notification is selected, the Edit Failover Plan displays the extra fields shown in the following figure. a. In the Dialog title field, enter a name to display in the title bar of the warning dialog. 102 Leostream Connection Broker Administrator’s Guide b. In the Notification text field, enter the message to display in the warning dialog. 5. Click Save. Manually Failing Over a Desktop You can test if users are receiving the correct failover desktop and failover plan by manually failing over the primary desktop, as follows. 1. Go to the > Resources > Desktops page. This page must include the Bulk action column. See Customizing Tables for information on adding this column to the table, if it is not shown. 2. Select the bulk action checkboxes associated with each desktop to fail over. 3. From the drop-down menu at the top of the bulk action column, select Edit as shown in the following figure. 4. In the Edit desktop page that opens, select the Fail over option in the Failover section, as shown in the following figure. 103 Chapter 6: Working with Desktops and Applications 5. Click Save. The Failed Over column for the selected desktops on the > Resources > Desktops page displays Yes. Failing Back a Desktop After you manually, or the Connection Broker automatically, fails over a desktop, you must manually fail back that desktop before it will be offered to another user. To fail back one or more desktops: 1. Go to the > Resources > Desktops page. This page must include the Bulk action column. See Customizing Tables for information on adding this column to the table, if it is not shown. 2. Select the bulk action checkboxes associated with each desktop to fail back. 3. From the drop-down menu at the top of the bulk action column, select Edit as shown in the following figure. 104 Leostream Connection Broker Administrator’s Guide 4. In the Edit desktop page that opens, select the Fail back to primary desktop option in the Failover section, as shown in the following figure. 5. Click Save. The Failed Over column for the selected desktops on the > Resources > Desktops page for these desktops displays No. Combining Backup Pools and Failover Desktops In general, use backup pools for policy-assigned desktops and failover desktops for hard-assigned desktops. If you policy-assign a desktop that has a failover desktop, the Connection Broker does not perform any backup pool checks on the desktop selected from the primary pool. Instead, the Connection Broker always offers the selected desktop and checks the desktops at assignment time to determine if the failover desktop should be launched. 105 Chapter 6: Working with Desktops and Applications Performing Actions on Multiple Desktops You can perform the following actions simultaneously on several desktops: Control: Perform power control actions, such as shut down or start up, on a group of desktops. You must have the necessary Role permissions to complete the requested power control action. Edit: Perform actions such as upgrading installed Leostream Agents, managing failover states, changing the desktop status, and converting a desktop to a multi-user center. For information on changing the desktops’ failover states, please see Working with Failover Desktops. The remaining bulk actions are described in the following sections. Refresh: If one of the selected desktops is part of an Active Directory center, perform a refresh of that center. Remove: Removes these desktops from the > Resources > Desktops page. The desktops may reappear after a subsequent center scan. Release: Releases the desktop from the assigned user. The Connection Broker immediately performs any actions on the associated release and power control plans. Upgrade: Push out upgrades to the Leostream Agent installed on the selected desktops. The desktop must have an existing Leostream Agent. Deploy: Deploy a Windows operating system to an HP Moonshot System node. See the Leostream and HP Moonshot System Reference Architecture for complete details. To perform an action on a multiple desktops: 1. In the Bulk Action column, select the checkbox associated with each desktop. To select all the listed desktops, click the check box at the top of the Bulk action column (see Performing Bulk Actions). If the check boxes are not visible, click the customize link at the bottom of the page and add the Bulk actions column. See Customizing Tables for more information. 2. Select the action to perform from the drop-down menu at the top of the column of checkboxes. Removing Desktop Affinities When the user’s policy selects Favor desktops previously assigned to this user from the Desktop selection preference drop-down menu, the Connection Broker always attempts to offer the user the last desktop they were assigned from a particular pool. In some cases, you may want to force the Connection Broker to select a new desktop from the pool, instead of automatically offering the last assigned desktop, for example, if you need to perform maintenance on the user’s desktop. You can remove the user’s affinity to their previously assigned desktop, as follows. 106 Leostream Connection Broker Administrator’s Guide 1. Go to the > Resources > Desktops page. 2. In the Bulk Action column, select the checkbox associated with the user’s desktop. 3. Select the Forget previously assigned user, as shown in the following figure. 4. Click Save. The next time the user logs into the Connection Broker, the broker will select a desktop from the pool using the rules defined in the policy, without giving preference to this desktop. Changing the Availability of Multiple Desktops When editing multiple desktops, the setting in the Desktop status drop-down menu indicates if the desktops are available for assignment to a user. To change the availability of all the desktops being edited, select either Available or Unavailable from the Desktop status drop-down menu. After you save the bulk Edit form, all the edited desktops have the selected availability. Updating the Leostream Agent on Multiple Desktops You can use the Upgrade option in the Bulk actions column to push out Leostream Agent upgrades to multiple desktops. Alternatively, you can use the bulk Edit form to upgrade the Leostream Agent on all selected desktops by selecting the Upgrade Agent to latest version option in the Leostream Agent section. When you request a Leostream Agent upgrade, the Connection Broker updates all desktops running a Leostream Agent older than the version shown on the > Status > Downloads page. When using the bulk Edit form, you can change the Leostream Agent port on multiple desktops by entering the new Leostream Agent port into the Port edit field in the Leostream Agent section. 107 Chapter 6: Working with Desktops and Applications Applying Tags to Multiple Desktops See Bulk Tagging Desktops for a description of using the Tag Editing section in the bulk Edit page. Converting Desktops to Remote Desktop Services / Multi-User Centers You can use the bulk Edit action to convert desktops listed on the > Resources > Desktops page into Remote Desktop Services / Multi-User Centers. If, for example, you inventoried Windows Servers using an Active Directory center, this feature simplifies setting up the RDS sessions to offer out to users. To convert the desktops into centers, in the Edit n desktops form, select the Convert to a Remote Desktop Services / Multi-User Center option, as shown in the following figure. Enter the number of sessions to allocate for each center in the Maximum concurrent connections edit field, and configure the refresh interval using the Refresh interval drop-down. After you click Save, the Connection Broker automatically creates a Remote Desktop Services / Multi-User center for each selected desktop, and initializes the specified number of sessions for each center. The new centers appear on the > Resources > Centers page, while the new sessions appear on the > Resources > Desktops page. The Connection Broker marks the original desktops as Unavailable on the > Resources > Desktops page, to ensure that the sessions, and not the desktop, are offered to users via policies. Bulk Release, Refresh, and Remove for Desktops After you select either the Release, Refresh, or Remove bulk action, the Connection Broker opens a confirmation window, for example: 108 Leostream Connection Broker Administrator’s Guide Click OK to proceed with the action, or Cancel to close the window without completing the action. When refreshing multiple desktops, the Connection Broker refreshes only the desktops from an Active Directory center. Power Control for Desktops The Connection Broker provides different levels of power control, depending on the center that registered the desktop and on the options selected in the > System > Settings page. Virtual Machines from a VMware, Citrix, Microsoft, Red Hat, or Xen Center: Shutdown, power off, start, suspend, resume, and reboot is available for virtual machines hosted in VMware, Citrix, Microsoft, Red Hat, and Xen virtualization hosts. Reboot can be either the Shutdown and Start option or the Power Off and Start option. The Connection Broker uses the virtualization layer APIs to perform the power control action. If a power down or reboot is requested for a VMware virtual machine that does not have a running version of VMware Tools, the Connection Broker attempts to power control that VM using the Leostream Agent, if an agent is present. Virtual Machines in the Uncategorized Desktops center: Shutdown and reboot is available for virtual machines on other hypervisors only if a Leostream Agent is installed on the virtual machine. Reboot must be done using the Shutdown and Start option. Virtual Machines in an Active Directory center: Shutdown and reboot is available for virtual machines that are registered with the Connection Broker from an Active Directory center if the virtual machine has an installed and running Leostream Agent. Reboot must be done using the Shutdown and Start option. Physical Machines: Shutdown and reboot is available for physical desktops with an installed Leostream Agent. Reboot must be done using the Shutdown and Start option. The Power Off and Start option is not supported. Wake-on-LAN-enabled Physical Machines: Start is available for physical desktops that are Wake-onLAN-enabled, or that integrate with 1E WakeUp using a Microsoft System Management Server (SMS) 2003 plug-in (see Configuring Power Control Options for Physical Desktops). Hardware-based Teradici PC-over-IP Blades/Workstations: Start, shutdown, and reboot is available for IBM blades equipped with a Teradici PC-over-IP card via API calls to the Teradici host card. Remote Desktop Services Sessions: No power control is available for RDS sessions. 109 Chapter 6: Working with Desktops and Applications The Shutdown and Start options first attempts to shutdown the guest OS. In VMware and Citrix virtualization layers, this is identical to the reboot option, and requires fewer resources then completely shutting down the VM. If the Connection Broker cannot shutdown the guest OS, it completely shuts down the desktop before the restart. Determining Power State for Physical Desktops The Connection Broker uses the VM management system to determine the power state of virtual machines registered from a virtualization center. To determine the power state of desktops from an Active Directory or Uncategorized Desktops center, the Connection Broker polls the desktops in the center, checking for open display protocol ports or Leostream Agent ports. By default, when new desktops appear in the Connection Broker from an Active Directory or Uncategorized Desktops center, their Power Status is shown as Unavailable. During the poll, the Connection Broker marks the desktop as running if it finds an open display protocol or Leostream Agent port. If no open ports are found, the Connection Broker marks the desktop as stopped. If the Connection Broker cannot locate the desktop, for example the desktop has no IP address and the hostname does not resolve, the desktop power status remains set to unavailable. Manually Changing a Desktop’s Power State To manually control a desktop, on the > Resources > Desktops page, select the Control action associated with the desktop. Depending on the status of the desktop, whether it is physical or virtual, and the type of virtualization layer, you can select one of the power control options. All power control options are displayed, although not all may apply. For example: If the desktop is Running, you can Shutdown, Power Off, Suspend, Shutdown and Start, or Power Off and Start If the desktop is Suspended, you can Resume If the desktop is Stopped, you can Start All Power Off options forcefully power off the machine, with no attempt to gracefully shutdown the operating system. Configuring Power Control Options for Physical Desktops You can power up physical machines using either Wake-on-LAN or a 1E WakeUp server. To enable power control for physical machines, select one of the options for the Power control for physical machines dropdown menu on the > System > Settings page. Options include: No power control: The Connection Broker will not attempt to power up physical machines Send Wake-on-LAN packets: The Connection Broker sends Wake-on-LAN packets. The target desktop must be on the same subnet as the Connection Broker (see Using Wake-on-LAN for Power Control). 110 Leostream Connection Broker Administrator’s Guide Use SMS Server call to 1E WakeUp: The Connection Broker calls Microsoft SMS, which uses 1E WakeUp to power up physical machines (see Configuring 1E WakeUp Communications). Using Wake-on-LAN for Power Control To use Wake-on-LAN to power control a physical machine, the machine must be powered on when the Connection Broker first discovers the machine. In addition, the machine must have an installed Leostream Agent, which is successfully communicating with the Connection Broker. The Leostream Agent provides the Connection Broker with a list of the machine’s MAC addresses. When Wake-on-LAN is enabled, the Connection Broker sends out a magic packet to every MAC address in the list every time a request is made to power up a physical machine. By default, the Connection Broker does not send Wake-on-LAN packets. To enable Wake-on-LAN, select Send Wake-on-LAN packet from the Power control for physical machines option on the > System > Settings page, as shown in the following figure. In the Wake-on-LAN port edit field, enter the port that should receive the Wake-on-LAN magic packets from the Connection Broker. If the Connection Broker is not successfully powering up one of your physical desktops, ensure that the Connection Broker has the correct MAC address in the MAC address field on the Edit Desktop page. If this field is empty, or incorrect, enter the desktop’s MAC address and deselect the Allow Center to overwrite these desktop attributes option. With this option unchecked, the Connection Broker will not change entries in the IP address, MAC address, or Operating system fields when the desktop’s center is scanned. The machine’s NIC must not be password protected for the Connection Broker to power up the machine using a Wake-on-LAN packet. In addition, the Connection Broker and desktop must be in the same subnet. Configuring 1E WakeUp Communications To use 1E WakeUp to power up physical machines, you must install 1E WakeUp on a server that is running Microsoft System Management Server (SMS) 2003, and ensure that the SMS plug-ins are installed for 1E WakeUp. After 1E WakeUp is installed and configured, enable the feature in your Connection Broker by selecting Use 111 Chapter 6: Working with Desktops and Applications SMS Server call to 1E WakeUp from the Power control for physical machines drop-down menu on the > System > Settings page. Your Connection Broker now contains a > Resources > 1E Power Control page, shown in the following figure. Click the Edit 1E SMS Configuration link to enter the IP addresses and credentials for your SMS servers that communicate with 1E WakeUp. At a minimum, enter the following information for the primary SMS server. 1. In the Primary SMS server edit field, enter either the DNS name or IP address of the primary SMS server for 1E WakeUp calls. By default, the Connection Broker sends SMS calls only to this server. 2. In the User Name edit field, enter the user name for an account with administrator privileges to the SMS server. 3. In the Domain edit field, enter the domain in which the administrator resides. 4. In the Password edit field, enter the password for this administrator. For fault tolerance, you can specify secondary SMS servers. If the primary server fails, the Connection Broker sends the SMS call to all the secondary servers. To specify more than three secondary SMS servers, select an item from the [Add rows] drop-down menu. The Connection Broker requires the desktop’s NetBIOS name in order to successfully issue a wake-up command using 1E WakeUp. To obtain the NetBIOS name, the Connection Broker queries the Active Directory center that registers this desktop. If the desktop’s Active Directory record does not contain an accurate NetBIOS name, the wake-up command fails. Desktop Assignment Modes The Connection Broker provides several different modes for assigning desktops to a user, including: In policy-assigned mode, the desktop is assigned to users using a Connection Broker policy. Policyassigned desktops can be in one of two modes: o In follow me mode, the user’s assigned desktops follow the user from client to client, assuming the user is offered the same policy at the new client (see Follow Me Mode). Therefore, if the user establishes a connection to a desktop from one client, Leostream moves that desktop connection to the user’s next client. 112 Leostream Connection Broker Administrator’s Guide o Kiosk mode is designed to support generic user accounts (see Kiosk Mode). When using kiosk mode, you have one login identity that is shared by multiple users, and each user needs a unique desktop. In kiosk mode, if a user establishes a connection to a desktop at one client and then that same username logs in at a different client, Leostream does not move the original desktop connection to the new client. Instead, the user is offered a different desktop. In hard-assigned to user mode, a desktop is assigned and, therefore, always offered to a particular user regardless of which client device they use (see Hard-Assigning a Desktop to a User). In hard-assigned to client mode, the same desktop is assigned and, therefore, offered to any user that logs in at a particular client device (see Hard-Assigning a Desktop to a Client). In rogue-assigned, the Connection Broker assigns the desktop to the user after the user has logged in as rogue (see Assigning Desktops to Rogue Users). Follow Me Mode By default, Connection Broker policies assign desktops using follow-me mode. The policy assigns a desktop to the user irrespective of the client they are using. In this case, if user A logs into their desktop from the thin client on their desk, the policy assigns them a desktop. If user A then logs in from another client at another desk, the policy disconnects user A from their previous client and reconnects them to their original desktop at the new client. Kiosk Mode Using kiosk mode allows the same username to be simultaneously logged into different desktops at different clients, meaning the Connection Broker selects desktops to offer based on the username and client, not just the username. Kiosk mode is commonly used in call centers, classrooms, and public computer kiosks where a single login identity is shared by everyone. In this case, all users enter the same username to log in at different clients, for example, in a classroom of computers all using the user name student. Each client requires its own desktop, even though the user name is the same on each client. To enable kiosk mode for a particular policy, select User and client (“kiosk” mode) from the Select desktops to offer based on drop-down menu on the Edit Policy page, shown in the following figure. See Chapter 11: Configuring User Experience by Policy for information on configuring user policies. 113 Chapter 6: Working with Desktops and Applications Use the Current Client column on the > Resources > Desktop page to differentiate between desktops assigned to the same user from different clients. Hard-Assigning a Desktop to a User You can hard-assign a desktop to users that require a persistent desktop. The Connection Broker always offers users their hard-assigned desktops, in addition to any policy-assigned desktops. To hard-assign a desktop to a user: 1. Go to the > Resources > Desktops > Edit page. 2. Select the Hard-assigned to specific user option from the Assignment mode drop-down menu. The Assigned user drop-down menu appears, as shown in the following figure. 3. Select the user you want to hard-assign to this desktop from the Assigned user drop-down menu. See Using Searchable Drop-Down Menus for instructions on using this GUI element. 4. Click Save. The Connection Broker uses the Desktop Hard Assignments section of the user’s policy to determine the settings for hard-assigned desktops. Hard-Assigning a Desktop to a Client You can hard-assign a desktop to a particular client device, to ensure that any user logging in through that client receives the same desktop. A user who logs in at a client that is hard-assigned to a desktop is not offered their hard-assigned or policy-assigned desktops. To hard-assign a desktop to a client: 1. Go to the > Clients > Clients page. 2. Select the Edit action for the appropriate client. The Edit Client form opens. 3. Select the Hard-assigned to a specific desktop option from the Desktop assignment mode dropdown menu. The Assigned desktop drop-down menu appears, as shown in the following figure. 114 Leostream Connection Broker Administrator’s Guide 4. Select the desktop you want to assign to this client from the Assigned desktop drop-down menu. See Using Searchable Drop-Down Menus for instructions on using this GUI element. The desktops available for hard-assignment are filtered based on the desktops your role gives you permission to access (see Customizing Access to Desktops) 5. Click Save. All users that log in at this client receive same hard-assigned desktop. You cannot hard-assign an application to a client. The Connection Broker uses the Desktop Hard Assignments section of the user’s policy to determine the policy settings for desktops that are hard-assigned to a client. You can instruct PCoIP clients to connect to their hard-assigned desktop as soon as the client boots. See Direct Connections to Hard-Assigned Desktops for more information. Assigning Desktops to Rogue Users The Connection Broker manages all users that log in using a Leostream client, such as the Leostream Web clients, Leostream Connect, PCoIP zero clients, or any thin client that communicates with Leostream. In some cases, however, users may connect to their desktop without logging in at a Leostream client. For example, users may log into the HP RGS Receiver and connect directly to a desktop running an HP RGS Sender. In this latter case, the Connection Broker considers the user as rogue. If a Leostream Agent is running on the remote desktop, the Connection Broker receives notification of the rogue user login. Connection Broker 8.0 then allows you to treat the rogue user as a Leostream user, and assign the user a policy that manages the user’s session. Rogue user management is enabled at the center level, with override options available for individual desktops. To indicate that the Connection Broker should mange rogue user logins for a particular center. 1. Select the Assign rogue users to desktops from this center option on the Edit Center page. 2. From the Rogue user policy drop-down menu, indicate the policy to assign to the user. The Connection Broker users the Rogue User Assignments section of the policy to determine the power control and release plan to associate with the desktop after the Connection Broker assigns the desktop to the user. You can override both of the previous settings for individual desktops using the related options on the Edit 115 Chapter 6: Working with Desktops and Applications Desktop page. The Connection Broker uses the following logic after receiving notification of a rogue user login to a desktop that is set to assign desktops to rogue users: If the desktop is marked as Unavailable, the Connection Broker logs the rogue user login notification but does not assign the user to the desktop or apply the rogue user policy If the desktop is policy-assigned or hard-assigned to another user or client, the Connection Broker logs the rogue user login notification but does not assign the user to the desktop or apply the rogue user policy If the desktop is available for assignment, the Connection Broker looks for a user on the > Users > Users page that matches the domain and username sent in the rogue user login notification. The Leostream Agent may not be able to send a reliable Domain parameter when it detects a rogue user login. If the Connection Broker locates a matching user on the > Users > Users page, the Connection Broker assigns the desktop to that user and applies the Rogue User Assignments section of the policy listed on that desktop’s Edit Desktop page. If the Connection Broker locates a matching user on the > Users > Users page and the desktop is hard-assigned to that user, the Connection Broker uses the Desktop Hard Assignments section of the policy listed on that desktop’s Edit Desktop page. If the Connection Broker cannot locate a matching user on the > Users > Users page, the Connection Broker creates a new user, assigns the desktop to that user, and applies the Rogue User Assignments section of the policy listed on that desktop’s Edit Desktop page. After the user is assigned to the desktop, the Connection Broker no longer considers them as rogue. Managing Applications The > Resources > Applications page, shown in the following figure, lists the applications and desktops published in your Citrix XenApp centers. 116 Leostream Connection Broker Administrator’s Guide You can group these applications into any number of pools, which can then be assigned to end user’s via policies (see Creating Application Pools). Available Application Characteristics Action Click View to open an ICA connection to this application. Connection Broker uses the ICA-file stored in the Leostream Connect Configuration section of the Default policy. You must have the Citrix XenApp Plugin installed on your client device to launch the application. Name The name of the applications, as defined in XenApp. Type Indicates if the published resource is an application or full desktop. Center The name of the XenApp center that contains the application. Availability Indicates if the application is available for assignment to a user. If the application is disabled in XenApp, the Connection Broker enters Disabled into this column. Otherwise, the Connection Broker marks the application as Available. Filtering the Application List You can filter the list of applications in the > Resources > Applications page using the Filter this list dropdown menu, shown in the following figure. The No filter option lists all applications currently registered with the Connection Broker, divided into a series of pages if applicable. When you create an application pool (see Chapter 7: Creating Desktop and Application Pools) the Connection Broker automatically creates a corresponding filter in the drop-down menu. Select one of these filters to limit the list to applications within the chosen pool. To edit an existing filter or create a new filter: 1. Select Edit an existing filter or Create a new filter from the Filter this list drop-down menu. 2. If editing an existing filter, select the filter to edit from the Select a filter drop-down menu. 117 Chapter 6: Working with Desktops and Applications 3. Enter a name for the filter in the Filter name edit field. 4. Select the pool to associate with this filter from the Pool drop-down menu. 5. Use the controls in the Include data that matches section to further filter the applications from this pool. You can filter applications based on the application name or the Citrix XenApp center that registers it. 6. By default, only the user that creates a filter can use it. To allow other user to access your filter, check the Share the filter with other users option when you create the filter. This filter then appears in the Filter this list drop-down menu of other users that log into this Connection Broker. 7. Click Save. 118 Leostream Connection Broker Administrator’s Guide Chapter 7: Creating Desktop and Application Pools Overview A pool is a collection of desktops or applications. Your policies use pools to control which resources are presented to different users. The Connection Broker places all discovered desktops into the All Desktops pool and all discovered applications into the All Applications pool. Nested pools are pools within another pool, as illustrated for desktops in the following figure. In this figure: The pool Corporate is a subset of the All Desktops pool The RGS and RDP pools are mutually exclusive subsets of the Corporate pool The RGS pool contains a desktop called Romeo. The RDP pool contains a desktop called Juliet. The Corporate pool contains a desktop called Rosaline, as well as the Romeo and Juliet desktops because the Corporate pool contains the RGS and RDP pools. Assignment of desktops from the previously described pools works as follows. The first user assigned a desktop from the Corporate pool is assigned the Rosaline desktop. The second user is assigned either the Romeo or Juliet desktop, assuming both are available. The third user is assigned the remaining desktop. When assigning desktops from the RGS pool, the first user is assigned the Romeo desktop. However, the second user receives a Desktop Unavailable message as the RGS pool is empty. You can define pools in the following ways: From centers (see Defining Pools Using Centers) 119 Chapter 7: Creating Desktop and Application Pools Using desktop attributes (see Defining Pools Using Desktop Attributes) From VMware vCenter Server clusters (see Defining Pools Using VMware vCenter Server Clusters) From VMware vCenter Server Resource Pools (see Defining Pools Using VMware vCenter Server Resource Pools) Via tags (see Defining Pools Using Tags) Using LDAP attributes (see Defining Pools Using LDAP Attributes) Individually selecting resources from the parent pool. (see Selecting Desktops from Parent Pool) The following sections describe how to create the different types of pools. For information on enabling provisioning in a pool, see Chapter 8: Provisioning New Desktops.) Displaying Pools The > Resources > Pools page, shown in the following figure, lists all defined pools of desktops and applications. Initially, the following four default pools are listed. The All Desktops pool contains all your inventoried desktops. You cannot delete this pool. Nested pools are indented to indicate the pool hierarchy. The All Windows Desktops pool is a subset of the All Desktops pools and contains all desktops running a Microsoft Windows operating system. The All Linux Desktops pool is a subset of the All Desktops pools and contains all desktops running a Linux operating system. The All Applications pools always contain all the applications and you cannot delete this pool. Nested pools are indented to indicate the pool hierarchy. You can display the following columns in the table. To add or remove columns from this table, click the customize link at the bottom left side of the page (see Customizing Tables). 120 Leostream Connection Broker Administrator’s Guide The Action column provides options to edit or refresh the pool. The Name column displays the pool’s name. The Display Name column displays the pool’s optional display name, which allows you to display a different user-friendly pool name to end users. The Subset of column indicates this pool’s parent pool. Each pool is indented underneath its parent pool. The In Use column indicates if the pool is referenced in any policies. The Total column shows the total number of desktops or applications in the pool. A desktop or application can belong to more than one pool. For applications, the total indicates the number of published applications; it does not include the number of applications currently in use by end users. The value shown in the Total column must equal the sum of the numbers show in the Available, Unavailable, and Assigned columns. If these values are not equal, click the Refresh link at the top of the page. If these numbers are not equal after refreshing the pool, refresh the centers that host the desktops included in the pool. The Assigned column indicates how many desktops in that pool are already assigned to a user, including desktops that are hard-assigned to a particular user. The Assigned column does not apply to applications. Go to the > Resources > Applications page to see how many applications are currently assigned to users. The Available column indicates how many desktops or applications in that pool are available for assignment to users. For desktop pools, this column includes desktops that are hard-assigned to a particular client, but not desktops that are hard-assigned to a particular user. The Unavailable column shows how many desktops or applications in that pool are unavailable for assignment. For application pools, an application is unavailable if it is disabled in the XenApp farm. The Running column indicates how many of the desktops in this pool are currently running. The Stopped column indicates the number of desktops in this pool that are not running. The Suspended column indicates the number of desktops in this pool that are suspended. The Agent Running column shows the number of desktops in this pool with a running Leostream Agent. Desktops with installed Leostream Agents that are either unreachable or unresponsive are not included in this count. The Logged In column displays the number of desktops in the pool that have a logged in user, including any users that logged in as a rogue user. (A rogue user is a user that logged into a desktop without logging into the Connection Broker.) 121 Chapter 7: Creating Desktop and Application Pools The Connected column indicates the number of logged in users that are actively connected to the session. Users that are logged in, but not connected, have disconnected from their remote session. This column includes rogue users. The Utilization History – Sample Interval column shows how often the Connection Broker stores pool usage data (see Tracking Desktop Usage from Pools). The Utilization History – Retention Period column shows how long the Connection Broker retains pool usage data (see Tracking Desktop Usage from Pools). The Provisioning - Threshold column indicates the lower bound for the number of desktops in this pool that are available for assignment. When the number of available desktops in this pool reaches this threshold, the Connection Broker provisions new desktops. This column appears only if you enable provisioning on the > System > Settings page. The Provisioning - Max Pool Size column shows the upper bound for the number of desktops in this pool. When the total number of desktops in the pool reaches this limit, the Connection Broker no longer provisions new virtual machines, even if the number of available desktops is below the provisioning threshold. The Provisioning - Check Interval column indicates how often the Connection Broker runs a check on the provisioning threshold. This column appears only if you enable provisioning on the > System > Settings page. In addition to this provisioning check interval, Connection Broker always checks the provisioning threshold when the pool is refreshed and when a user is assigned a desktop out of the pool. Changing the provisioning check interval changes the schedule for the pool_stats job associated with this pool. The Provisioning - Template column indicates which VMware vCenter Server template the Connection Broker uses for provisioning. This column appears only if you enable provisioning on the > System > Settings page. The Provisioning - Deletable column indicates if newly provisioned machines in this pool are marked as deletable. This column appears only if you enable provisioning on the > System > Settings page. Clicking on a number in the table opens a page that lists the desktops or applications in that particular state. Unavailable desktops indicate why they are unavailable in square brackets next to the desktop name. If the number of desktops in the generated list does not match the number shown in the > Resources > Pools page, click the Refresh link at the top of the page. The desktops included in the generated list is calculated when you request the list, however the values on the > Resources > Pools page may be stale (see Refreshing Pools). 122 Leostream Connection Broker Administrator’s Guide Creating Desktop Pools To create a new desktop pool: 1. Go to the > Resources > Pools page, shown in the following figure. 2. Click the Create Pool link. The Create Pool form opens. 3. Enter a name for the pool in the Name edit field. 4. If your policies are configured to display a user-friend pool name to end-users, enter that name in the Display name field. Otherwise, leave the Display name field empty. 5. Select a desktop pool from the Subset of Pool drop-down menu. The pool you create is nested inside the selected pool. 6. Select the method for defining the pool from the Define Pool Using drop-down menu. 7. Define the contents of the pool. You can define desktop pools using one of the following methods. Defining Pools Using Centers Defining Pools Using Tags Defining Pools Using Desktop Attributes Defining Pools Using VMware vCenter Server Clusters Defining Pools Using VMware vCenter Server Resource Pools Defining Pools Using LDAP Attributes (Requires an Active Directory center) Selecting Desktops or Applications from Parent Pool 8. Define any logging thresholds in the Logging section (see Logging Desktop Pool Levels and Tracking Desktop Usage from Pools). 9. Define any provisioning settings (see Chapter 8: Provisioning New Desktops). 10. If the pool you are creating consists of virtual machines that were created using Citrix Provisioning 123 Chapter 7: Creating Desktop and Application Pools Server and you plan to connect users to the desktops using Citrix HDX, select the Place desktops in a Shared Citrix XenDesktop Group (see Creating Pools of VMs in a Shared Citrix XenDesktop Group). 11. Click Save. In general, desktops that are part of a pool should not have an associated failover desktop (see Working with Failover Desktops). To provide failover capability for desktops that are part of a pool, create a pool of backup desktops (see Specifying Backup Pools). Creating Application Pools To create a new application pool: 1. Go to the > Resources > Pools page. 2. Click the Create Pool link. The Create Pool form opens. 3. Enter a name for the pool in the Name edit field. 4. If you will configure your policies to display a user-friend pool name to end-users, enter that name in the Display name field. Otherwise, leave the Display name field empty. 5. Select an application pool from the Subset of Pool drop-down menu. The pool you create is nested inside the selected pool 6. Select the method for defining the pool from the Define Pool Using drop-down menu. 7. Define the contents of the pool. You can define application pools using the two following methods, described in the associated sections. Defining Pools Using Centers Selecting Desktops or Applications from Parent Pool 8. Click Save. Defining Pools Using Centers To create a pool of desktops or applications from a center, in the Create Pool form: 1. Select Centers from the Define pool using drop-down menu. The form updates to display the Center Selection fields, shown for desktops in the following figure. 124 Leostream Connection Broker Administrator’s Guide 2. Select one or more centers from the Available centers list. 3. Move the center to the Selected centers list by clicking the Add highlighted items arrow. 4. Use the Distribute new desktop assignments drop-down menu to indicate the method used for distributing desktop assignments across the centers, either: Evenly across all hosts: This option evenly distributes desktop offers across all centers in the pool, when possible. To maximize the benefit of using this option, ensure that the users’ policies set the Desktop selection preference option for this pool to Any available desktops. To center with most available desktops: This option randomly selects an available desktop from the center that contains the most desktops available for assignment. To center with least number of assignments: This option randomly selects a desktop from the available desktops in the center with the least number of assigned desktops. 5. Click Save. Defining Pools Using Desktop Attributes To create a pool using desktop attributes, in the Create Pool form: 1. Select Desktop attributes from the Define pool using drop-down menu. The form updates to display the Desktop Attribute Selection fields, shown in the following figure. 125 Chapter 7: Creating Desktop and Application Pools 2. Select an item from the Desktop attribute drop-down menu. The options include: Name Display name Machine name Hostname or IP address Operating system Memory (in MB) Number of CPUs Number of NICs Computer model BIOS serial number CPU speed (GHz) Notes (defined in the Connection Broker) vCenter Server Notes To pool based on computer model, BIOS serial number, memory, or CPU speed, the desktops must have the latest Leostream Agent installed and the Leostream Agent must have registered the desktop with the Connection Broker. On Linux operating systems, the Leostream Agent determines RAM using the meminfo function. When used in a virtual machine, meminfo may not include reserved memory, resulting in a RAM in the Connection Broker that differs slightly from the RAM reported in vCenter Server. 3. Select the logic condition from the Conditional drop-down menu. 4. Enter an appropriate Text value for the condition. Each row in the Desktop Attribute Selection section reads as a rule that defines desktops in this pool. Connection Broker dynamic tags are not supported in the Text value edit field. 5. Indicate if desktops can match any rule (the OR radio button), or must match all rules (the AND radio button) in the Desktop Attribute Selection section, in order to be included in this pool. 6. Click Save. 126 Leostream Connection Broker Administrator’s Guide Desktops that match the conditions in the Desktop Attribute Selection section are assigned to this pool. If the desktop’s attribute changes for some reason (for example, the desktop is renamed), the desktop is immediately re-assigned to the appropriate pool. Defining Pools Using VMware vCenter Server Clusters This option is available only if your vCenter Server contains clusters. To create a pool using vCenter Server clusters, in the Create Pool form: 1. Select vCenter Server Clusters from the Define pool using drop-down menu. The form updates to display the VMware Cluster section, shown in the following figure. The Available clusters field contains a list of all the clusters, including the name of the center that contains the cluster. For example: [Center_Name] Cluster_Name 2. Select one or more clusters from the Available clusters list. 3. Move these clusters to the Selected clusters list by clicking the Add highlighted items arrow. 4. Click Save. Defining Pools Using VMware vCenter Server Resource Pools This option is available only if your vCenter Server contains Resource Pools. To create a pool using vCenter Server Resource Pools, in the Create Pool form: 1. Select vCenter Server Resource Pools from the Define pool using drop-down menu. The form updates to display the VMware Resource Pool section, shown in the following figure. 127 Chapter 7: Creating Desktop and Application Pools The Available pools field contains a list of all the resource pools, including the name of their parent cluster. For example: [Center :: Primary] Pod1 Represents the resource pool Pod1 residing within the cluster Primary in the center named Center. 2. Select one or more resource pools from the Available pools list. 3. Move these resource pools to the Selected pools list by clicking the Add highlighted items arrow. 4. Click Save. Defining Pools Using Tags A tag is an identifier that can be assigned to a particular desktop. Every tag belongs to one of the four Connection Broker tag groups. You can assign one tag from every tag group to each desktop in your Connection Broker. You can then use these tags to make a desktop a member of a particular pool. Creating Tags To create tags: 1. Go to the > Resources > Tags page. 2. Click Create Tag. The Create Tag form, shown in the following figure, opens. 128 Leostream Connection Broker Administrator’s Guide 3. Enter a name for the tag in the Name field. 4. Select the tag group to place this tag into from the Tag group drop-down menu. 5. If you want to automatically apply this tag to new desktops: a. Select the appropriate condition from the Auto-tag drop-down menu. b. Enter the appropriate text in the Text to match edit field. If you do not want to automatically assign this tag, leave the Text to match edit field empty. The auto-tag feature applies only to centers that have the Continuously apply any AutoTags option selected. See Continuously Applying Tags to Desktops for more information. 6. Click Save. The > Resources > Tags page lists all available tags, as shown in the following figure. You can display tag groups in the table on the > Resources > Desktop page, allowing you to sort and classify desktops by tag group. See Customizing Tables for information on how to add tag groups to the table. 129 Chapter 7: Creating Desktop and Application Pools Naming Tag Groups To rename tag groups: 1. Select > Resources > Tags > Define Tag Groups. The form shown in the following figure opens. 2. Enter new tag group names for any groups you want to rename. 3. Click Save to store the new names. You can set tag group names to any alphanumeric string. Continuously Applying Tags to Desktops You can automatically assign tags to desktops using the Auto-tag feature, shown in the following figure. With the auto-tag feature enabled, when the Connection Broker imports a desktop, it assigns tags to the desktop if the desktop’s name satisfies the logic condition selected in the Auto-tag drop-down menu. To enable the auto-tag feature, you must select the Continuously apply any Auto-Tags option on the > Resources > Centers > Edit Center page, shown in the following figure. The Connection Broker applies autotagging rules to desktops associated with that center during every center refresh interval. 130 Leostream Connection Broker Administrator’s Guide You can automatically assign multiple tags to the same desktop. For example, assume you have the following two tags: Finance, with Auto-tag set to Starts with and Text to match set to Fin English, with Auto-tag set to Ends with and Text to match set to Eng The Connection Broker assigns the Finance tag and the English tag to a desktop named Fin87Eng. Tagging Individual Desktops You can change the tag assignments of a particular desktop using the Tag Editing section of the > Resources > Desktops > Edit Desktop page, shown in the following figure. 131 Chapter 7: Creating Desktop and Application Pools The Tag Editing section does not appear if you have not defined any tags. Select all tags that you want to apply to this desktop and click Save. Changing the tag assigned to a particular desktop can change its pool membership. Changes in pool membership take effect immediately. Simultaneously Tagging Multiple Desktops You can change the tags of multiple desktops by selecting the Bulk Action check boxes on the left hand side of the > Resources > Desktops page and then selecting the Edit action from the drop-down menu at the top of the column. To select all the listed desktops, click the check box at the top of the Bulk action column. If the check boxes are not visible, click the customize link at the bottom of the page and add the Bulk actions column. See Customizing Tables for more information. When editing multiple desktops, the Tag Editing section shows all the tag groups that currently contain tags. Change the relevant tags and click Save. Select Apply Auto-Tags to apply any auto tag rules associated with the selected tags (see Continuously Applying Tags to Desktops). For example, assume you are editing three desktops name XP1, XP2, and Lin1 and select English from the Language tag drop-down menu. The English tag has the following auto-tag rule: Auto-tag: Starts with Text to match: XP If you select Apply Auto-Tags on the Edit Desktop form, when you click Save, the Connection Broker applies the English tag only to XP1 and XP2. If you do not select Apply Auto-Tags, the Connection Broker applies the English tag to all three desktops. Creating Pools Using Tags To create a pool using tags, in the Create Pool form: 1. Select Tags from the Define Pool Using drop-down menu. The form updates to display the Tag Selection fields, shown in the following figure. 132 Leostream Connection Broker Administrator’s Guide The Available tags list is empty if you have not defined any tags. 2. Select one or more tags from the Available tags list. 3. Move the tag to the Selected tags list by clicking the Add highlighted items arrow. 4. Indicate if desktops can match any tag (the OR radio button), or must match all tags (the AND radio button), in order to be included in this pool. 5. Click Save. Example: Using Tags to Define the Contents of a Pool You can use tags to group computers into pools that match your user groups. For example, consider the example where you want to create two pools of desktops, one to offer to your Windows XP support team and another to offer to your Linux support team. First, establish a naming convention for the desktops to place in these pools, for example: The machine name of all Windows desktops starts with Windows. The machine name of all Linux desktops starts with Linux. Before you create desktop centers to register your desktops with the Connection Broker: 1) create a tag group to hold your tags, 2) define the tags in this group, and 3) configure the automatic tag assignment feature, as follows. 1. To create the tag group: a. On the > Resources > Tags page, select Define Tag Groups. The Groups form opens. b. Rename the first tag group to Support Machines, as shown in the following figure. 133 Chapter 7: Creating Desktop and Application Pools c. Click Save. 2. Add a tag for the Windows XP Support team: a. On the > Resources > Tags page, select Create Tag. The Create Tag form opens. b. Enter Windows Team in the Name edit field. c. Select Support Machines from the Tag group drop-down menu. d. Select Starts with from the Auto-tag drop-down menu. e. Enter Windows in the Text to match edit field. f. Click Save. 3. Add a tag for the Linux Support team: a. On the > Resources > Tags page, select Create Tag. The Create Tag form opens. b. Enter Windows Team in the Name edit field. c. Select Support Machines from the Tag group drop-down menu. d. Select Starts with from the Auto-tag drop-down menu. e. Enter Linux in the Text to match edit field. f. Click Save. 4. After you save your tags, create your desktop centers. When the Connection Broker discovers desktops in your centers, it automatically applies these tags to desktops with names that match the auto-tag criterion. The Connection Broker provides a number of advanced methods for building pools of desktops and applications. Consider using one of these predefined pooling methods, before you begin defining tags. 134 Leostream Connection Broker Administrator’s Guide Defining Pools Using LDAP Attributes The LDAP Attribute option allows you to group desktops based on attributes of the desktop’s Computer record in Active Directory. This option is available only after you defined an Active Directory center (see Active Directory Centers). To create a pool using LDAP attributes, in the Create Pool form: 1. Select LDAP attributes from the Define Pool Using drop-down menu. The form updates to display the Attribute Selection fields, shown in the following figure. 2. Select an item from the LDAP attribute drop-down menu. 3. Select the logic condition from the Conditional drop-down menu. 4. Enter an appropriate Text value for the condition. Each row in the Attribute Selection section reads as a rule that defines desktops in this pool. Connection Broker dynamic tags are not supported in the Text value edit field. 5. Indicate if desktops can match any rule (the OR radio button), or must match all rules (the AND radio button) in the Attribute Selection section, in order to be included in this pool. 6. Click Save. Selecting Desktops or Applications from Parent Pool To create a pool by manually selecting desktops or applications, in the Create Pool form: 1. In the Subset of Pool drop-down menu, specify the pool to manually select desktops or applications from. 135 Chapter 7: Creating Desktop and Application Pools 2. Select Selection from parent pool from the Define Pool Using drop-down menu. The form updates to display the Manual Selection fields, shown in the following figure. 3. Select the desired desktops or applications from the Available desktop or Available applications list, respectively. 4. Move the desktops or applications to the Selected desktops or Selected applications list, respectively, by clicking the Add highlighted items arrow. 5. Click Save. Creating Pools of VMs in a Shared Citrix XenDesktop Group You can use the Connection Broker to assign users to virtual machines created by Citrix Provisioning Server, and connect users to these virtual machines using Citrix HDX. To do so, your environment must satisfy the following requirements. 1. The new virtual machines must be hosted on vSphere. 2. The virtual machines must be inventoried in the Connection Broker using a vCenter Server center. 3. The virtual machines must be offered from a single Leostream pool. Leostream allows a desktop to be a member of multiple pools. However, because of restrictions in XenDesktop, if you plan to connect users to a desktop using HDX, ensure that the desktop is in a single Leostream pool. 4. In the Leostream pool, select the Place desktops in a Shared Citrix XenDesktop Group option at the bottom of the Edit Pool form. Citrix Provisioning Server automatically places new virtual machines in a Streamed Citrix XenDesktop Catalog. Therefore, when performing an assignment in Leostream, the Connection Broker must place the cataloged virtual machine into a Shared desktop group. 136 Leostream Connection Broker Administrator’s Guide Specifying Number of Running Desktops in a Pool To avoid making users wait for desktops to power on, you can set a threshold on the minimum number of running desktops available for assignment to users. A desktop is available for assignment if it is not already assigned to another user, or marked as unavailable. Use the Number of available, running desktops in the pool edit field in the Power management section of the Edit Pool page to set the minimum number of available desktops that should be running, for example: The Connection Broker checks the running machine thresholds at the following times: When you edit and save a pool that has a running machine threshold When a user is assigned to a desktop that came from a pool with a running machine threshold Because a desktop may be in multiple pools, the Connection Broker checks the running machine threshold associated with every pool whenever a user assignment occurs. If the pool already contains more available, running desktops than the running machine threshold, then no desktops are powered up. Otherwise, if the number of available, running desktops falls below the threshold, the Connection Broker automatically starts a desktop in the pool. Use power control plans to shut down desktops after they have been used. Joining Pooled Desktops to a Domain If you have new or existing desktops that are part of a local Microsoft Workgroup, you can use Leostream to join those desktops to an Active Directory domain. Before using Leostream to join desktops to a domain, ensure that you do the following. Define the domain on the Connection Broker > System > Settings page. Ensure that you enter the full DNS domain name in the Domain field, not the NetBIOS name. Install a Leostream Agent on the desktops that you want to join to the domain. Ensure that you set the Connection Broker address in the Leostream Agent, appropriately. When creating an image or template to use when provisioning new desktops, ensure that the image is a member of a local Workgroup and that it contains a Leostream Agent that is pointing to your Connection Broker. You create a pool that joins desktops to a domain, as follows: 1. Create a new pool, or edit an existing pool. 137 Chapter 7: Creating Desktop and Application Pools 2. Select the Join virtual machine to a domain option in the Domain Join section, shown in the following figure. 3. Select the domain from the Domain drop-down menu. 4. Optionally, from the Organizaitional Unit drop-down menu, select an OU for the desktops. 5. If you want to reset the desktops hostname when joining it to the domain, select the Set desktop hostname to virtual machine name check box. With this option selected, the Leostream Agent attempts to set the hostname to the value shown in the Name column on the > Resources > Desktops page. The Name field must contain a valid hostname, as follows: The name uses only the standard character set for Computer Name, which includes letters, numbers, and the following symbols: ! @ # $ % ^ & ' ) ( . - _ { } ~ Then name cannot be longer than 15 characters. The Connection Broker attempts to join a desktop to the domain when the Leostream Agent on the desktop registers with the Connection Broker, for example, when you reboot the desktop. At that point, the Connection Broker checks the desktop’s pool membership and instructs the Leostream Agent to join the desktop to a domain, as appropriate. If the desktop is a member of multiple pools, the Connection Broker ignores the domain join request if the pools have conflicting settings in the Domain Join section. The Connection Broker will not move a desktop from one domain to another, nor will it reset the hostname of a desktop that is already joined to a domain. Logging Desktop Pool Levels The Logging section, shown in the following figure, allows you to add information, warnings, or errors to the Connection Broker logs when the number of desktops in the pool drops below a specified threshold. 138 Leostream Connection Broker Administrator’s Guide Use the edit fields to enter lower bounds for the number of available desktops in the pool. The information, warning, and error thresholds must have decreasing values. For example, the threshold for warnings must be less than the threshold for information; the threshold for errors must be less than the threshold for warnings. Whenever the pool limit falls below a specified threshold, the Connection Broker logs the event with the most restrictive threshold. For example, if the warning threshold is 5 and the error threshold is 4, the Connection Broker logs a warning when the pool level drops to four and an error when the pool level drops to three. You can use logging events to issue SNMP traps or integrate them into syslog servers. See Issuing SNMP Traps and Integrating with Syslog Servers for more information. The Connection Broker checks the pool thresholds at the following times. After saving the Edit Pool form, when the selection in the Check provisioning thresholds at least every drop-down menu changed. When a desktop in the pool is assigned to a user. When a desktop in the pool is released from a user. Tracking Desktop Usage from Pools The bottom of the Logging section provides an option to Track historical pool assignments and connections, shown in the following figure. The Sample data every drop-down menu indicates the interval at which the Connection Broker calculates pool assignments and connections. The Retain data for drop-down menu indicates how long the Connection Broker stores the calculated information in the database. At each sample interval, the Connection Broker stores the following information in the pool_history table in the Connection Broker database: pool_id - The associated pool total_vm - Total number of desktops in this pool (available_vm + unavailable_vm) available_vm - Total number of available desktops in this pool. An available desktop may or may not already be assigned to a user unavailable_vm - Total number of unavailable desktops in this pool 139 Chapter 7: Creating Desktop and Application Pools total_agent_running - Total number of desktops with running agent in this pool total_logged_in - Total number of desktops with logged-in users in this pool total_connected - Total number of desktops with connected users in this pool assigned_vm - Total number of assigned desktops in this pool You can use this information to create custom reports that show trends in pool load over a period of time, for example: Number of disconnected sessions = total_logged_in - total_connected Percentage of desktops assigned = assigned_vm / available_vm Percentage of desktops available to be assigned (available_vm - assigned_vm) / available_vm Number of rogue users logged in to desktops in the pool = total_logged_in - assigned_vm Refreshing Pool Statistics The > Resources > Pools page displays information about the number of desktops in each pool based on the pool statistics currently stored in the Connection Broker database. The Connection Broker updates the statistics stored in the database at the following times. When an administrator logs into the Connection Broker When a pool is created When a pool is edited and saved When an administrator navigates to the > Resources > Pools page One day after the last pool statistics refresh When you click the Refresh link at the top of the > Resources > Pools page To improve web browser rendering in environments with heavily populated pools, the Connection Broker may draw the > Resources > Pools page before the pool statistics finish calculating. If the numbers displayed on the > Resources > Pools page appear stale, check the status of the pool_stats job on the > System > Job Queue page. If a pool_stats job has a status of Running, the Connection Broker has not completed the pool statistics calculation. The Connection Broker calculates pool statistics based on the currently known state of each desktop in the pool. If the desktop’s state has changed, but the Connection Broker did not receive notification of the state change, the pool statistics may be incorrect. If the pool statistics do not look correct, refresh the centers that contain the desktops in the pool, and ensure that any Leostream Agents installed on the desktops are properly communicating with the Connection Broker. The Connection Broker dynamically determines desktop membership in a pool during user login, guaranteeing users receive the correct desktops based on the pools in their policy. 140 Leostream Connection Broker Administrator’s Guide Chapter 8: Provisioning New Desktops Overview Provisioning allows you to generate new virtual machines when the number of desktop in a pool reaches a specified lower threshold. For a discussion on creating pools, see Chapter 7: Creating Desktop and Application Pools. When provisioning is triggered, the Connection Broker creates a new virtual machine from a VMware® vCenter Server template or triggers a third party system to create the virtual machine. See the VMware guide for best practices on creating Microsoft® Windows® operating system-based templates for provisioning. Enabling Provisioning of Virtual Machines Before you can use provisioning, you must enable the global provisioning feature, as follows: 1. Go to the > System > Settings page. 2. Select the Virtual machine provisioning option in the Enable Features section, as shown in the following figure. 3. Click Save. Once you have enabled the provisioning option, a new Provisioning section appears in the Edit Pool and Create Pool forms. You can provision new machines using one of the following two methods: vCenter Server templates (see Provisioning from Templates) External URL-based provisioning system (see Provisioning from External Sources) If you do not have vCenter Server templates, you must provision using an external source. In order to provision virtual machines using vCenter Server templates, you must provide your Connection Broker vCenter Server center with the credentials for an account with the following VMware privileges. > Virtual Machine > Provisioning > Deploy Template > Virtual Machine > Inventory > Create 141 Chapter 8: Provisioning New Desktops > Resource > Assign Virtual Machine To Resource Pool > Virtual Machine > Provisioning > Read Customization Specifications > Virtual Machine > Provisioning > Customize See the What privileges do I need to interact with VMware vCenter Server? article on the Leostream Knowledge Center for additional information on these required privileges. Setting Upper and Lower Levels for Pools The Provisioning Limits section, shown in the following figure, allows you to specify lower and upper bounds on the number of available desktops and total desktops in the pool. These limits define when the Connection Broker provisions new machines, as follows. Check provisioning thresholds at least every: Specifies the interval at which the Connection Broker checks the pool’s contents and determines if provisioning should be triggered. This drop-down menu sets the interval for the pool’s pool_stats job in the > System > Job Queue page. Start provisioning when available desktops in pool drops below: Indicates the lower threshold for the number of available desktops in the pool. The Connection Broker provisions a new virtual machine whenever the number of available desktops in the pool drops below this threshold. Any of the following events can trigger provisioning. o The number of available desktops in the pool is below this threshold when the pool is created. o The number of available desktops dips below the lower limit after a user logs into the Connection Broker and is assigned a desktop from this pool. o The number of available desktops dips below the lower limit when the pool’s pool_stats job runs. Stop provisioning when total desktops in pool reaches: Indicates the upper threshold for the total number of desktops in the pool. The Connection Broker does not provision new virtual machines if the total number of desktops in the pool is equal to or greater than this value, even if the number of available desktops dips below the lower limit. 142 Leostream Connection Broker Administrator’s Guide After defining provisioning limits, use the Provisioning Parameters described in the following sections to configure how the Connection Broker provisions new machines. Provisioning in OpenStack Before provisioning instances in an OpenStack environment, you must configure the following: 1. Create master images. These images are displayed in OpenStack on the > Project > Compute > Images page. Ensure that your master images contain an installed Leostream Agent. 2. Configure a network on the OpenStack > Project > Network > Networks page. Ensure that the network ID for this network is included in the Network UUID field of your OpenStack center (see OpenStack Centers). If you do not properly configure a network, the Connection Broker cannot provision new instances in OpenStack. Use the Provisioning Parameters section to configure provisioning in OpenStack: 1. Select the OpenStack center to provision new machines into from the Provision in center dropdown menu. The remainder of the form updates based on the contents of your selection. The following figure shows an example of the Provisioning Parameters section. 2. Select the image to use from the Deploy from template drop-down menu. This menu contains all 143 Chapter 8: Provisioning New Desktops the public and project images available in the OpenStack center you selected. 3. Select the instance size from the Flavor drop-down menu. 4. Enter a name for the virtual machine in the Virtual Machine Name edit field. You can use dynamic tags to create a name from a mixture of static and dynamic variables. See Using Dynamic Tags to Create Provisioning Variables for an example. 5. If the name entered in step four contains the {SEQUENCE} dynamic tag, enter the starting number for the sequence in the Optional sequence number for virtual machine name edit field. The Connection Broker starts naming virtual machines at this number and increments the number for each machine created. 6. Select the Associate floating IP (allocate new IP, if necessary) option if Leostream should automatically assign the new instance with a floating IP address. If this option is not selected, the new instance is available only within the network it was provisioned. 7. Select the Mark newly provisioned desktops as deletable option to indicate that the Connection Broker is allowed to delete this VM from disk. When this option selected, the Edit Desktop page for the newly provisioned VM has the Allow this desktop to be deleted from disk option selected, by default. Use release plans to schedule VM deletion. 8. To call an external URL to perform additional tasks during provisioning, enter the URL into the Notification URL field blank. 9. Click Save. When the number of available desktops in the pool falls below the lower threshold, the Connection Broker creates a new instance from the selected image. Provisioning in Amazon Web Services Before provisioning instances in an AWS environment, you must configure the following: 1. Create master images. These images are displayed as AMIs in your AWS account. 2. Configure a virtual private network for the new desktops. Use the Provisioning Parameters section to configure provisioning in OpenStack: 1. Select the AWS center to provision new machines into from the Provision in center drop-down menu. The remainder of the form updates based on the contents of your selection. The following figure shows an example of the Provisioning Parameters section. 144 Leostream Connection Broker Administrator’s Guide 2. Select the image to use from the Deploy from template drop-down menu. This menu contains all the AMIs available in your account in the AWS region associated with the selected center. 3. Select the instance size from the Instance type drop-down menu. 4. Select the VPC from the Network/Subnet drop-down menu. 5. Enter a name for the virtual machine in the Virtual Machine Name edit field. You can use dynamic tags to create a name from a mixture of static and dynamic variables. See Using Dynamic Tags to Create Provisioning Variables for an example. 6. If the name entered in step four contains the {SEQUENCE} dynamic tag, enter the starting number for the sequence in the Optional sequence number for virtual machine name edit field. The Connection Broker starts naming virtual machines at this number and increments the number for each machine created. 7. Select the Mark newly provisioned desktops as deletable option to indicate that the Connection Broker is allowed to delete this VM from disk. When this option selected, the Edit Desktop page for the newly provisioned VM has the Allow this desktop to be deleted from disk option selected, by default. Use release plans to schedule VM deletion. 8. To call an external URL to perform additional tasks during provisioning, enter the URL into the Notification URL field blank. 9. Click Save. When the number of available desktops in the pool falls below the lower threshold, the Connection Broker creates a new instance from the selected image, and automatically associates a Public IP address with the instance. Provisioning from VMware Templates To provision from a VMware template, you must first create the template in vCenter Server. You can also create a customization file for the template, but this is not required. 145 Chapter 8: Provisioning New Desktops If you do not use a customization file, each machine is provisioned with the same Windows machine name, which may cause conflicts in your network. Use the Provisioning Parameters section to configure provisioning using a vCenter Server template: 10. Select the center to provision new machines into from the Provision in center drop-down menu. The remainder of the form updates based on the contents of your selection. The following figure shows an example of the Provisioning Parameters section. 11. Select the template to use from the Deploy from template drop-down menu. This menu contains all the templates available in the center you selected. 12. Select the customization file from the Guest OS Customization Specification File drop-down menu. 13. Enter a name for the virtual machine in the Virtual Machine Name edit field. You can use dynamic tags to create a name from a mixture of static and dynamic variables. See Using Dynamic Tags to Create Provisioning Variables for an example. 14. If the name entered in step four contains the {SEQUENCE} dynamic tag, enter the starting number for the sequence in the Optional sequence number for virtual machine name edit field. The Connection Broker starts naming virtual machines at this number and increments the number for each machine created. 15. From the Destination folder drop-down menu, select the folder to use for newly provisioned virtual machines. 16. Select the resource pool in which to create the new virtual machine from the Destination resource pool drop-down menu. 17. In the Destination Datastore section, define the data store in which to create the new virtual machines, as follows. 146 Leostream Connection Broker Administrator’s Guide a. If using multiple datastores for new virtual machines, use the Distribute provisioned VMs across multiple datastores drop-down menu to indicate how the Connection Broker should select the datastore for each new VM. Options include: Fill datastores in order: The Connection Broker places new VMs into the first datastore, until that datastore is full. After each datastore fills, the Connection Broker uses the next datastore, in order. Distribute randomly across all datastores: The Connection Broker randomly chooses a datastore from the list of specified datastores. Place on datastore with most free space: The Connection Broker always uses the datastore with the most free space at the time the virtual machine is being provisioned. b. When selecting Fill datastores in order from the Distribute provisioned VMs across multiple datastores drop-down menu, use the Order column to indicate the order in which to fill the datastores. c. From the Datastore drop-down menu, select the datastores that the Connection Broker should use for provisioned machines. d. From the Disk format drop-down menu, select the disk format to use for virtual machines provisioned to each datastore. e. Use the Add rows drop-down menu to specify additional datastores for provisioning. To remove a row from the Destination Datastore table, select <Remove this datastore> from the Datastore drop-down in that row. After you save the form, the datastore associated with this row is no longer used for newly provisioned virtual machines. 18. Select the Create snapshot after provisioning a new virtual machine option to instruct the Connection Broker to snapshot each newly provisioned VMs. These snapshots can be used in power control plans to revert the VM to its original state after each use. 19. Select the Mark newly provisioned desktops as deletable option to indicate that the Connection Broker is allowed to delete this VM from disk. When this option selected, the Edit Desktop page for the newly provisioned VM has the Allow this desktop to be deleted from disk option selected, by default. Use release plans to schedule VM deletion. 20. To call an external URL to perform additional tasks during provisioning, enter the URL into the Notification URL field blank. 21. Click Save. Ensure that the provisioning parameters are configured to guarantee that provisioned virtual machines become members of the pool that invoked the provisioning action. If the provisioned VM does not meet the criteria used to define the pool’s contents, the Connection Broker will not consider the new VM a member of the pool, which can result in unexpected desktop provisioning. 147 Chapter 8: Provisioning New Desktops Creating Configuration Files in VMware vCenter Server You can create configuration files using the Guest Customization Wizard, shown in the following figure. To open the wizard, from the vSphere Client Home page, select Customization Specifications Manager. Select the option to set the computer name to the virtual machine name to allow the Connection Broker to set the machine name using the naming convention you configured in the Connection Broker pool. Provisioning using URL notification If you do not have or do not want to use vCenter Server templates, you can call out to a third party system to perform provisioning by selecting None: URL notification only from the Provision in center drop-down menu. In this case, the Provisioning Parameters section appears as follows. To provision from an external source: 1. Enter a name for the virtual machine in the Virtual machine name edit field. You can use dynamic tags to create a name from a mixture of static and dynamic variables. 148 Leostream Connection Broker Administrator’s Guide 2. If the name entered in step one contains the {SEQUENCE} dynamic tag, enter the starting number for the sequence in the Optional sequence number for virtual machine name edit field. The Connection Broker starts naming virtual machines at this number and increments the number for each machine created. 3. In the Notification URL field, enter the URL to call to perform the provisioning. The Connection Broker sends an HTML-based request to the external provisioning system. For example: http://10.1.1.1/provision?for_pool={POOL_NAME} This URL can contain dynamic tags, such as {POOL_NAME}, that are dynamically changed to provide the external system with the name of the pool requiring another desktop. 4. Click Save. Using Dynamic Tags to Create Provisioning Variables Dynamic tags allow you to create a name or URL from a mixture of static and dynamic variables. The Connection Broker parses and replaces dynamic tags in provisioning strings at run-time. In the URL field, the replacement is URL-encoded. Provisioning strings support the following dynamic tags: {POOL_NAME}: The name of the pool triggering the provisioning {TEMPLATE_NAME}: The name of the template used for deployment {SEQUENCE}: Used for sequential virtual machine names For example, assume you have a template called Sales and entered the number 4 in the Optional sequence number for virtual machine name edit field. If you enter the following string in the Virtual Machine Name: New{TEMPLATE_NAME}{SEQUENCE} The first virtual machine is named NewSales4, the second machine is named NewSales5, and so on. The {SEQUENCE} tag cannot be used in notification URLs. 149 Chapter 9: Configuring User Roles and Permissions Chapter 9: Configuring User Roles and Permissions Overview Roles determine what Connection Broker functionality a particular user can view and use. A particular role consists of a set of permissions, which are grouped into two types. End User Session Permissions: Define what tasks a user has permission to perform when they log into a Connection Broker client, such as the Web client or Leostream Connect, for example: o o o o o Restart their desktops Release their desktops Manage another user’s resources Log in as a local user on the remote desktop Use the Leostream Management API Connection Broker Administrator Web Interface Permissions: Define Connection Broker settings in the Connection Broker Administrator Web interface the user has permission to view or edit. The Connection Broker assigns a role to all users, including the default Connection Broker Administrator. You can create as many roles as required by your environment. By default, the Connection Broker provides two default roles, described in the following sections. The Default Administrator Role The default Administrator role, shown in the following figure, has permission to edit all Connection Broker settings in the Administrator Web interface. You cannot limit the amount of access to the Connection Broker Administrator Web interface provided by the default Administrator role, nor can you delete the default Administrator role. 150 Leostream Connection Broker Administrator’s Guide The default Administrator role includes the following session permissions: Allow user to manage another user’s resources: Check or uncheck this option to turn on and off, respectively, this permission (see Managing another User’s Resources). Allow user to collaborate with other users: Check this option if a user with this role uses the NX session shadowing feature (see “Session Shadowing and Collaboration” in the Leostream Guide for Choosing and Using Display Protocols). Allow user to access the Leostream Management API: The default Administrator role provides permission to access the Leostream Management API. For details and documentation on the Leostream Management API, please contact [email protected]. The Default User Role The default user role allows the user to log in through any client device, including the Leostream Web client, and access their offered desktops and applications. The default User role cannot log into the Connection Broker Administrator Web interface. You can modify the default user role to provide additional session permissions or to provide access to the Connection Broker Administrator Web interface. See Session Permissions for a description of the available session permissions in the default User role. If you do not want to modify the default User role, create new roles that provide the necessary permissions. Creating New Roles To create a new role: 1. Go to the > Users > Roles page, shown in the following figure: 2. Click on the Create Role link to open the Create Role dialog, shown in the following figure: 151 Chapter 9: Configuring User Roles and Permissions 3. Enter a name for the new role in the Name edit field. 4. Configure the End-User Session Permissions to provide access to Connection Broker actions. See Session Permissions for a description of the available session permissions. 5. Select the appropriate option from the User has access to Administrator Web interface drop-down menu to configure which Connection Broker Web interfaces a user with this role is allowed to log into. 6. If the selection in the User has access to Administrator Web interface drop-down menu indicates that the user can log into the Administrator Web interface, use the remainder of the form to specify the Connection Broker Administrator Web interface permissions (see Administrator Web Interface Permissions). 7. Enter any Notes that you wish to save with the role definition. 8. Leave the Active role option selected if you want this role to appear in the Assigning User Role and Policy rules on the > Assignments pages. 9. Click Save. Session Permissions Session permissions, shown in the following figure, define what actions a user with this role is allowed to perform when logged into a Leostream Client. Except where noted, session permissions pertain to users logging in from the Windows and Java versions of Leostream Connect and the Leostream Web client. 152 Leostream Connection Broker Administrator’s Guide Overview The current session permissions are as follows: Allow user to manage another user’s resources: (This option does not apply to the Leostream Web client. It does apply to PCoIP-enabled client devices.) Select this option if a user with this role should be able to view the desktops offered to another user, and then log into those desktops. Use this option for user’s that are allowed to perform administrative tasks on another user’s desktop, or for users that need to log into their own desktop using different credentials from those they provided when logging into the Connection Broker. The managed user must have the same policy as the manager. Allow user to collaborate with other users: (This option applies only to the Leostream Web client.) Select this option if the user connects to their desktop using the NoMachine NX protocol and they need to invite other user’s to shadow their session. Both the user who owns the session and the user who shadows the session must have this permission enabled. The user’s policy indicates which pools contain desktops that support collaboration via shadowing (see “Session Shadowing and Collaboration” in the Leostream Guide for Choosing and Using Display Protocols). Allow user to manually release desktops: (This option does not apply to the Java version of Leostream Connect.) Select this option if a user with this role may manually release a desktop back to its pool. By default, when a user connects to a desktop, the Connection Broker assigns that desktop to that user. When a desktop is assigned to a user, the Connection Broker will not offer that desktop to another user. If a user manually releases one of their desktops back to its pool, the Connection Broker unassigns 153 Chapter 9: Configuring User Roles and Permissions the desktop from that user and invokes the release plan associated with the desktop. If the user is not logged out of the desktop after it is released, the Connection Broker considers the logged in user as a rogue user. Because the desktop is back in its pool, the Connection Broker may offer that desktop to another user. If this new user tries to connect to the desktop, and their policy is set to log off rogue users, the Connection Broker forcefully logs out the original user. If the Prevent user from manually releasing desktop option is selected for a pool in the user’s policy, the user is not able to release desktops from this pool, even though their role gives them the permission. The user can never release a hard-assigned desktop. Allow user to restart offered desktops: Select this option if a user with this role may restart their desktop. The user’s policy indicates which offered desktops can restarted. If the Allow user to reset offered desktop policy option is set to No for a pool in the user’s policy, the user cannot restart the desktops in this pool, even though their role gives them the permission. Allow user to access the Leostream Management API: Select this option if the user executes scripts using the Leostream Management API. For information and documentation on the Leostream Management API, contact [email protected]. Log user in as: (Requires a Leostream Agent on the remote desktop.) Use this option to indicate if the Connection Broker logs the user into the remote desktop using a domain account or local user account. Use local users to support, for example, LDAP or non-domain users that need to log in to remote desktops. Options in the Log user in as drop-down include. o Domain user: When using an Active Directory domain user account, the Connection Broker uses the information specified by the authentication server that authenticated the user when they logged into the Connection Broker. o Local user: When logging in as a local user, the Connection Broker requires an existing user account on the remote desktop. This user account must have the same login name as the user that logged into the Connection Broker. When using this option, you must manually create the appropriate local user account on the remote desktop. If you want the Connection Broker to manage the local user account, use one of the following two options. o Local user (create on login): You can instruct the Connection Broker to create new local user accounts, to avoid manually creating accounts on each remote desktop. When this option is selected, the Connection Broker automatically creates an appropriate local user on the desktop the first time the user logs in. If an appropriate user account already exists, the Connection Broker uses that account. If the existing user account has a different password from the password used to log into the Connection Broker, the Connection Broker changes the password for the local user on the remote desktop. 154 Leostream Connection Broker Administrator’s Guide o Local user (create on login; delete user on logout): You can instruct the Connection Broker to create and delete local user accounts, to avoid managing the accounts on each remote desktop. When this option is selected, the Connection Broker automatically creates an appropriate local user account on the desktop the first time the user logs in. The Connection Broker removes the user account as soon as the user logs out of the desktop. The Connection Broker does not delete the profile folder associated with the user. Any information stored in the profile folder can be recovered by the desktop’s administrator. When the user subsequently logs into the desktop, the Connection Broker creates a new local user account. Because this is a new account, the Windows desktop does not associate this user with the profile created the last time the user logged in. If user’s need persistent access to their profile, use the Local user (create on login) option. o Local user (create on login; delete user and profile on logout): When this option is selected, the Connection Broker automatically creates an appropriate local user account on the desktop the first time the user logs in. The Connection Broker removes the user account and the user’s profile folder as soon as the user logs out of the desktop. The user loses all locally stored information when their profile folder is deleted. Add and remove user from Remote Desktop Users group: (Requires a Leostream Agent on the remote desktop.) Use this option if your users are not already members of the Remote Desktop Users group on their offered Windows desktops. The desktop must already contain a group exactly named “Remote Desktop Users”. By default, Windows desktops do not provide remote access. After you enable remote access for a particular desktop, you must indicate which users are allowed to remotely log into that desktop by placing those users (or one of their group memberships) in the Remote Desktop Users group, shown in the following figure. When a user is part of the Remote Desktop Users group, they can remotely log into the desktop from any client. To restrict the user to log in only through the Connection Broker, do not manually add users to the Remote Desktop Group and, instead, select the Add and remove user from Remote Desktop Users group option. With this option selected, the Connection Broker automatically adds the user to the Remote Desktop Users group when the user logs into the desktop from the Connection Broker. When the user logs out, the Connection Broker automatically removes the user from the Remote Desktop Users group. 155 Chapter 9: Configuring User Roles and Permissions The Connection Broker essentially takes control of the user’s membership in the Remote Desktop Users group. If the user was already a member of the Remote Desktop Users group before they logged into the desktop via Leostream, the Connection Broker removes the user from the group when they log out of the desktop. The Connection Broker adds the user back to the Remote Desktop Users group the next time they log into the Connection Broker. Managing another User’s Resources The Allow user to manage another user’s resources session permission allows a user to log into the Connection Broker and retrieve the list of resources offered to another user. This permission is useful in situations where members of your organization must be able to access their own desktops, while also being able to log in to and troubleshoot other staff members’ desktops. When managing a resource, you log into the other user’s desktops using credentials other than those you provided when logging into the Connection Broker. The following client devices currently support this feature. The Windows version of Leostream Connect The Java version of Leostream Connect PCoIP zero client managed using the Client Management Interface The following sections describe, in general, the functionality behind managing another user’s resources. See the Leostream Connect Administrator Guide and End User’s Manual for information on how to manage another user’s resources from Leostream Connect. See Managing another User’s Resources via PCoIP for information on managing another user’s session from a PCoIP client device. How the Connection Broker Determines the Offered Resource List When you manage another user’s resources, the Connection Broker offers you resources based on the managed user’s policy. The policy assigned to the managed user is determined by the Assigning User Role and Policy section in the Assignments form for each authentication server in the Connection Broker, an example of which is shown in the following figure. . The policy selected in the User Policy drop-down menu is assigned to the managed user based on their membership in a particular group in the authentication server (the selection in the Group drop-down menu), and the location of their client (the selection in the Client Location drop-down menu). The managed user and the manager must be assigned to the same policy. After the Connection Broker finds the managed user’s policy, it looks at the following policy sections to determine what resources to show to the manager. 156 Leostream Connection Broker Administrator’s Guide The Filters section for constraining which desktops to pull from all desktop pools. The When User Logs into the Connection Broker section for all pools in the Desktop Assignment from Pools section, with the exception of the Allow users to reset offered desktops option. You cannot restart a managed dekstop. The selection in the Protocol plan drop-down menu for each pool. The Application Assignment from Pools section. In the Desktop Hard Assignments section, the Display to user as and Protocol plans drop-down menus. All other aspects of the managed user’s policy are ignored. Based on the previously listed sections, the Connection Broker offers you, as the manager, the following resources to manage. All desktops hard-assigned to the managed user. Any Citrix XenApp applications contained in the application pool selected in the Application Assignment from Pools section of the managed user’s policy. For each pool in the Desktop Assignment from Pools section of the managed user’s policy, the desktops determined by the When User Logs into the Connection Broker section, shown in the following figure, after any constraints in the Filters section have been applied. In the previous figure, the Connection Broker offers three desktops from the pool named windows. These desktops must be running, but are not required to have an installed, running Leostream Agent. The desktops are offered by name. When determining which three desktops to offer from the pool, the Connection Broker always offers any desktops that are currently assigned to the managed user. The Connection Broker then picks the remaining desktops based on the availability of desktops in the pool. Based on the configuration in the previous figure, the Connection Broker preferentially selects any desktops that were previously assigned to the user, if that desktop is still available, then randomly selects additional available desktops. The resulting offer list may not exactly match the list of desktops that would be offered to the user. 157 Chapter 9: Configuring User Roles and Permissions Connecting to a Managed Resource The Connection Broker connects you to the managed desktop using the protocol determined by the protocol plan in the managed user’s policy. If the managed user typically connects to their desktops using HP RGS, you must log into their desktop from a client that supports RGS. When you log into a managed resource, the Connection Broker does not assign that resource to you. Because you are not assigned to the desktop: The Connection Broker does not honor any settings in the When User is Assigned to Desktop section of the managed user’s policy. The Connection Broker does not use the selections in the Power control or Release plan drop-down menus in the managed user’s policy. You do not appear in the User column for that desktop in the Connection Broker > Resources > Desktops page. You will not appear in any resource usage reports run from the Connection Broker > Status > Reports page. Managing Your Own Resources Managing your own resources allows you to log into your offered desktops using different credentials from what you provided to the Connection Broker. If your Connection Broker account does not have administrative privileges for your desktop, you can use the manage resource feature to, for example, log into your desktop using administrator credentials. Managing another User’s Resources Managing another user’s resources allows you to perform administrative tasks on the user’s desktop. The user’s policy determines which resources are offered by the Connection Broker. You and the managed user must have the same policy. When you try to log into a managed desktop, if the managed user is still logged in and you provide nonadministrator credentials, you will not automatically log the user out. Only administrators are allowed to automatically log another user out of their desktop. Similarly, because the Connection Broker does not assign you to the desktop you are managing, you are technically a rogue user on that desktop. The Connection Broker may offer that desktop to another user. If you are not logged into the desktop as an administrator and the Connection Broker offers that desktop to a user with a policy that logs out rogue users, the Connection Broker automatically logs you out to accommodate the new user. 158 Leostream Connection Broker Administrator’s Guide Administrator Web Interface Permissions The Connection Broker Administrator Web Interface permissions allow you to provide or deny access to the various tasks involved in managing your Connection Broker. Setting Permission Levels The permissions are controlled by a selection in their associated drop-down menus. The menus may contain any or all of the following options. Select the appropriate option from each permission drop-down menu. No access: Removes the related controls from the Connection Broker Administrator Web interface. With a few exceptions (see Permissions that Control Multiple Connection Broker Pages) each permissions controls one tab in the Connection Broker Administrator Web interface. View only: Shows the related controls on the Connection Broker Administrator Web interface, but does not allow the user to modify the contents. For example, a View only access setting for Pools allows the user to view how the pools are constructed, but does not allow them to save changes to the pool. Full: Allows the user to view and modify this portion of the Connection Broker Administrator Web interface, with the exception of aspects of the interface reserved for Administrator access. Administrator: Allows the user to view and modify all aspects of this portion of the Connection Broker Administrator Web interface (see Providing Administrator Access to Users, Roles, and Desktops). Custom: Allows you to control access to particular functionality on this portion of the Connection Broker Administrator Web interface. See the following sections for more information. Customizing Access to Desktops Customizing Access to the Authentication Server Page Customizing Access to the Maintenance Page Permissions that Control Multiple Connection Broker Pages Most permissions control access to a particular page, section, or functionality in the Connection Broker Administrator Web interface. The following permissions control access to multiple pages. You cannot individually control the access to pages that are controlled by these permissions. The Reports permission controls access to the > Status > Reports page and the > Status > Connection Broker Metrics page. 159 Chapter 9: Configuring User Roles and Permissions The Centers permission controls access to the > Resources > Centers page. In addition, if your Connection Broker selects Use SMS Server call to 1E WakeUp from the Power control for physical machines option on the > System > Settings page, the Centers permission controls access to the > Resources > 1E Power Control page. The Desktops in Pool permission controls the PCoIP host devices displayed on the > Resources > PCoIP Host Devices page. The page lists only PCoIP host devices that are associated with desktops selected in the Desktops in Pool permission or PCoIP host devices that are not associated with any desktop. You must also have a role that provides access to the > Resources > PCoIP Host Devices page. If the Desktops in Pool permission is set to No access the Desktops – Imports permission is ignored. The Connection Broker internally sets the Desktops – Imports permission to No access. Providing Administrator Access to Users, Roles, and Desktops Three permissions provide Administrator and Full access. These permissions are: Downloads Users Roles Desktops in Pool (Custom) > Edit (Custom) > Availability The Administrator permission provides access to additional functionality in these portions of the Connection Broker Administrator Web interface. This level of access is restricted to the highest level of Connection Broker administrators. The following table describes the difference between Full and Administrator level access. Permission Downloads Users Roles Full Access You have access to the > Status > Downloads page where you can download the Leostream Agents and Leostream Connect clients, however you cannot download the Leostream Technical Support logs. You can edit all accounts on the > Users > Users page, with the exception of the main Connection Broker Administrator account. You can edit all roles on the > Users > Roles page, with the exception of the default Connection Broker Administrator role. Administrator Access You have full access to the > Status > Downloads page and you can download the Leostream Technical Support logs using the Download Leostream technical support logs link found at the bottom of any page. You can edit all accounts on the > Users > Users page, including the main Connection Broker Administrator account. You can edit all roles on the > Users > Roles page, including the default Connection Broker Administrator role. 160 Leostream Connection Broker Administrator’s Guide Permission Availability Full Access On the Edit Desktop page, you can mark an Unavailable desktop as Available; you cannot mark an Available desktop as Unavailable or change the deletable state of the desktop. Administrator Access On the Edit Desktop page, you have full control over the availability and deletability of the desktop. Customizing Access to Desktops The following figure shows the available custom permissions for pools of desktops. Using these controls, you can allow different users to administer different pools of desktops, as well as restrict the level of interaction for the desktops in that pool. To set permissions for desktops: 1. Select the pool to set the permissions for from the Desktops in Pool drop-down menu. Select All Desktops to apply these permissions to all desktops. Select a sub-pool to set permissions for desktops in that pool. If you select a sub-pool from the Desktops in Pool drop-down menu, the Connection Broker internally sets the permission for all desktops that are not in that pool to No access. 2. From the Permissions drop-down menu, select the level of access a user with this role should have to the desktops in the selected pool. Select Custom to provide more granular levels of access. 161 Chapter 9: Configuring User Roles and Permissions If you select No access from the Permissions drop-down menu, the Connection Broker removes the > Resources > Desktops page from the Administrator Web interface. 3. If providing custom access to the desktops, use the Power Control, Release, Status, Log, Upgrade Agent, and Edit drop-down menus to determine which actions a user with this role can perform. 4. Select Custom from the Power Control and Edit drop-down menus to set granular permissions for these two options. These options are described in the following sections. 5. Select a number from the [Add Pools] drop-down menu to create a role that sets permissions for multiple pools. You cannot save the role if the Desktops in Pool section contains multiple references to the same pool. Permissions for Power Control The Custom option for the Power Control permission allows you to limit the control a user with this role has over the power state of desktops in a particular pool. Selecting Custom opens the submenus shown in the following figure. The power control permissions determine which actions appear on the Control desktop page, accessed by selecting the Control action on the > Resources > Desktops page. The Reboot permission controls access to the Shutdown and Start action. To provide access to the Power Off and Start action, you must select Full for the Power Off permission. When providing Full access for the Start/Resume permission, the Control desktop page for a virtual machine contains the Start and Resume options. However, the Control desktop page for a desktop from an Active Directory center contains only the Start option. The Suspend option never appears on the Control desktop page for a desktop from an Active Directory center. Permissions for Editing Desktops The Custom option for the Edit permission limits which items on the Edit Desktop page a user with this role can view and modify. Selecting Custom opens the submenus shown in the following figure. 162 Leostream Connection Broker Administrator’s Guide The permissions control individual sections of the Edit Desktop page. If a permission is set to No access, that section does not appear in the Edit Desktop page. If the permission is set to View only, the section appears in the Edit Desktop page, but the contents are read-only. If the permission is set to Full or Administrator, the section appears and is modifiable. The Failover desktop permission controls access to the Failover section of the Edit Desktop page, only. Access to the Failover plan page is controlled by the Policies permission (see Permissions that Control Multiple Connection Broker Pages). For example, if the permissions are set to the levels shown in the previous figure, the Edit Desktop page appears as follows. Desktop Permissions for Multiple Pools The Desktops in Pools section allows you to specify which pools of desktops a user with this role is allowed to access. All desktops in a particular pool are assigned the permissions selected for this pool. A particular desktop can fall into more than one pool. In this case, the Connection Broker assigns the union of all permissions assigned to that desktop from all the pools it resides in. For example, the role shown in the following figure provides full access to the power control actions for the Dev-Windows pool. The role then provides full access to the release actions for the Dev-Win2K3 pool. Because the Dev-Win2K3 pool is a subset of the desktops in the Dev-Windows pool, when a user logs in with this role, Connection Broker 163 Chapter 9: Configuring User Roles and Permissions assigns full access to the power control and release actions for the desktops in the Dev-Win2K3 pool. The Connection Broker always assigns the highest level of permissions for a particular desktop. Customizing Access to the Authentication Servers Page The Authentication Servers permissions allow you to restrict access to the functionality for loading users. When you select Custom from the Authentication Servers drop-down menu, the following additional menus appear. The Edit sub-menu controls the permission level to the Edit Authentication Server form, as follows. Select No access to remove the Edit action from the > Users > Authentication Servers page. Select View only to allow the user to view the Edit Authentication Servers pages, but not allow the user to save changes to the authentication servers. Select Full to allow the user to modify and save settings on the Edit Authentication Servers page. The Load Users sub-menu controls access to the Load User action on the > Users > Authentication Servers page. Select No access to remove the Load User action from the > Users > Authentication Servers page. Select Full to allow the user to modify and save settings on the Edit Authentication Servers page. 164 Leostream Connection Broker Administrator’s Guide Customizing Access to the Maintenance Page The Maintenance permission allows you to restrict access to individual sections of the > System > Maintenance page. When you select Custom from the Maintenance drop-down menu, the following additional menus appear. In each sub-menu, selecting No access hides the associated section of the > System > Maintenance page, with the exception of the database options, which are controlled as follows. Database Administration: Hides/shows the options in the Database options section for backing up, restoring, and switching databases. This option does not apply to the Purge the database option. Purge Database: Hides/shows the Purge the database option in the Database options section. 165 Chapter 10: Building Pool-Based Plans Chapter 10: Building Pool-Based Plans Overview of Policies and Plans The Leostream Connection Broker defines a policy as a set of rules that determine how resources are offered, connected, and managed for a user, including: The desktop and application pools the Connection Broker offers desktops from How many resources from each of these pools are offered to the user If the user’s remote desktops is required to have a running Leostream Agent Which desktops the user can reboot or release Which display protocol is use to connect to these resources If, when, and how the power state of the remote desktop is managed How long the user is assigned to a particular desktop, i.e., is the desktop persistent or temporary Which USB devices are the user allowed to access on their remote desktop And more… The Connection Broker applies portions of the policy based on events that occur in the user’s session. Policy options that configure the end-user experience at login time and when the user is assigned to a desktop are set directly in the Edit Policy page (see Chapter 11: Configuring User Experience by Policy). Other aspects of the policy are configured in Connection Broker plans. The Connection Broker defines plans as building blocks that describe standard behaviors to apply to resources. Each plan can be applied to any number of pools within an unlimited number of policies. Policies use three types of pool-based plans. Protocol plans determine which display protocols can be used to connect to the remote desktop Power control plans determine how the Connection Broker manages the power state of the remote desktops Release plans determine how long the user remains assigned to the remote desktop The Connection Broker provides two other types of plans: location-based plans and desktop-based plans. These plans configure the user experience based on the user’s client device and assigned desktop. See Chapter 12: Configuring User Experience by Client Location for information on location-based plans and Specifying Failover Desktops for information on desktop-based plans. In order to configure your Connection Broker to offer resources to users: 1. Create protocol, power control, and release plans that define the experience you want to provide for your end users. The remainder of this chapter describes this step. 2. Build policies that define which resources to offer to the user, and which plans are applied to the pool in the policy. Chapter 11: Configuring User Experience by Policy describes this step. 166 Leostream Connection Broker Administrator’s Guide 3. If you need to tailor the user experience based on the location of the user’s client, configure the location-based plans. Chapter 12: Configuring User Experience by Client Location describes this step. 4. Finally, assign the policies to users. Chapter 14: Assigning User Roles and Policies describes this step. Protocol Plans Protocol plans define which display protocols the Connection Broker uses when connecting to a desktop from a particular pool. The Connection Broker provides one default protocol plan, which is shown on the > Plans > Protocol page, shown in the following figure. Each protocol plan is separated into sections that apply to different client types, such as Leostream Connect, the Leostream Web client, or a Wyse thin client. Configure the display protocols for each client type separately, using the appropriate section in the protocol plan, shown collapsed in the following figure. How Protocol Plans Work The Connection Broker supports a wide range of display protocols, including: Microsoft RDP and RemoteFX Citrix® HDX and ICA Red Hat SPICE NoMachine NX HP® RGS rdesktop 167 Chapter 10: Building Pool-Based Plans VNC (RealVNC, TightVNC, UltraVNC) Ericom Blaze RDP acceleration Exceed onDemand Teradici PC-over-IP (hardware-based, or software-based when using the VMware Horizon View Direct-Connection Plugin) Sun™ Appliance Link Protocol (ALP) (with Sun Ray uttsc) Sun Adaptive Internet Protocol (AIP) (with Sun Secure Global Desktop ttatsc) Famatech Radmin® The following sections describe creating protocol plans, in general. For specific information on setting up the protocol plan for each supported display protocol, see the Leostream Choosing and Using Display Protocols Guide. A protocol plan tells the Connection Broker: Which display protocols is allowed for a pool What priority each protocol has, i.e., which protocol should the Connection Broker try first, second, etc. What, if any, command line parameters and configuration file should the Connection Broker use when establishing the connection Consider the following section of a protocol plan. The selection in the Priority drop-down menu indicates the order in which the Connection Broker tries to establish a connection using that display protocol. In the previous figure, the Connection Broker first tries Microsoft RDP, which has a priority of 1. If the RDP port is closed, the Connection Broker looks for a protocol with a Priority of 2. When the Connection Broker runs out of display protocols to try, i.e., the Priority drop-down menu for all other protocols in the protocol plan is set to Do not use, the Connection Broker returns a warning and does not establish a connection to the remote desktop. To determine if a particular display protocol can be used, the Connection Broker performs a port check. For example, by default, Microsoft RDP communicates over port 3389. For the above example, if port 3389 is open on the remote desktop, the Connection Broker connects to the desktop using RDP. The Connection Broker cannot perform a port check on the standard port used for Citrix HDX 168 Leostream Connection Broker Administrator’s Guide connections, as the HDX port remains closed until XenDesktop establishes a connection to the desktop. Therefore, if a protocol plan assigns a priority to HDX, you must specify a different port for the Connection Broker to check. The Connection Broker cannot distinguish between display protocols that use the same port, for example Microsoft RDP and rdesktop. Therefore, if a protocol plan sets the priority for Microsoft RDP to 1, and the priority of rdesktop to 2, the Connection Broker always uses RDP when port 3389 is open on the remote desktop, even if you are connecting from a Linux client that supports only rdesktop. In this case, you must create a second protocol plan that assigns a priority of 1 to rdesktop, to support users logging in from a Linux client. Why Protocol Plans? While protocol plans may seem complicated, they actually simplify heterogeneous, enterprise-level deployment. For example, using protocol plans you can: Define behavior once; use it often. By providing reusable components, you can build policies faster. Use the right protocol for each desktop. By setting protocol plans on a pool-by-pool basis in each policy, you can build policies that offer Windows and Linux desktops, and use a display protocol appropriate for each desktop. Set defaults that match your business requirements. By allowing you to set the order in which display protocols are used, you have granular control over your environment Which Protocol Plans Applies? Protocol plans can be specified at three levels. 1. Per pool within a policy (see Configuring Desktop Policy Options): You must specify a protocol plan for each pool in the policy. 2. Per client location (see Creating Locations): You can optionally create per-location protocol plans to support users that move between client devices that require different display protocols, for example: Users that connect to a Windows desktop from Microsoft Internet Explorer Web browsers using ActiveX RDP and from Mozilla Firefox Web browsers using RDP Users that connect to a Windows desktop from the Windows version of Leostream Connect using RDP and from the Java version of Leostream Connect using rdesktop 3. Per user (see Editing User Characteristics): You can optionally create per-user protocol plans to support users with particular requirements, for example, a user that must always have a particular drive redirected while other users should never have any drives redirected. When connecting a user to a desktop, the Connection Broker applies protocol plans, as follows. 169 Chapter 10: Building Pool-Based Plans 1. If a per-user protocol plan is specified for this user, that plan is used for all resources launched by this user, including policy-assigned desktops, hard-assigned desktops, and XenApp applications and desktops in an application pool. 2. If no per-user protocol plan is specified, but the user logged in at a client in a location with a specified protocol plan, the per-location protocol plan is used for all resources launched from this client, including policy-assigned desktops, hard-assigned desktops, and XenApp applications and desktops in an application pool. 3. If no per-user or per-location protocol plan is specified, the Connection Broker launches the resource using the protocol plan specified in the policy based on the pool that contains that resource, or using the protocol plan specified in the policy section pertaining to hard-assigned desktops. Building Protocol Plans To determine how many protocol plans you need, and how they should be configured, think about all the different ways your end users will connect to their desktops, for example: Do all users access their desktops using the same display protocol? If not, which protocols will they use? If these protocols communicate over the same port, you will need a protocol plan for each protocol. For each display protocol that you use, will the command line parameters and configuration file be the same for all users? If not, you will need a protocol plan for each configuration of command line parameters and configuration file. Do your remote desktops support multiple display protocols, such as RDP, RGS, and VNC? If so, and you want to allow different users to access different protocols, you will need a protocol plan that defines the appropriate priorities for each type of user. The above questions are examples of the things you should think about when building protocol plans. Begin with a simple scenario then create your protocol plan as follows. 1. Go to the > Plans > Protocols page. 2. Click the Create Protocol Plan at the top of the page. The Create Protocol Plan form opens. 3. In the Plan name edit field, enter the name to use when referring to this protocol plan. 4. In the Leostream Connect and Thin Clients Writing to Leostream API section, shown in the following figure, configure the display protocols to use when a user logs in using one of the following client devices: The Windows or Java version of Leostream Connect A thin client with an installed Leostream Connect client 170 Leostream Connection Broker Administrator’s Guide A thin client with a customized Leostream client, with the exception of Wyse thin clients running the Wyse ThinOS Users logging in from Leostream Connect can use any of the following display protocols. The following list notes the display protocols supported by the Windows and Java version of Leostream Connect. Display Protocol RDP / Remote FX rdesktop PCoIP (software) Citrix HDX HP® RGS Red Had SPICE NoMachine NX Exceed onDemand VNC Famatech Radmin® Ericom Blaze RDP acceleration Oracle ALP Oracle AIP Required Client Remote Desktop Connection rdesktop VMware View Citrix Receiver HP RGS Receiver SPICE Client NX Enterprise Client or NX Web Companion EOD Client RealVNC, TightVNC, UltraVNC Radmin Viewer Blaze Leostream Connect version Windows and Java Java Windows and Java Windows Windows and Java Windows and Java Windows and Java Windows and Java Windows and Java Windows Windows and Java Sun Ray uttsc Sun Secure Global Desktop ttatsc Java Java For specific information on configuring command line parameters and configuration files for each supported display protocol, see the Leostream Guide for Choosing and Using Display Protocols. 5. In the Citrix XenApp (ICA) Configuration section, shown in the following figure, configure the command line parameters and ICA-file to use when launching a desktop or application published in a Citrix XenApp farm. This section applies to users logging in from any of the following client devices The Windows and Java version of Leostream Connect The Leostream Web client. 171 Chapter 10: Building Pool-Based Plans See “Citrix ICA” in the Leostream guide for Choosing and Using Display Protocols for more information on using this section. 6. In the Web Browser section, shown in the following figure, configure the display protocols to use when a user logs in through the Leostream Web client. See Configuring Remote Protocols for Web Browser Access for a full description of the different display protocols available when logging in through the Leostream Web client. 7. Configure the remainder of the protocol plan, shown in the following figure, if your end users log in through any of the following client devices. Wyse thin clients running the Wyse Thin OS Hardware-based PCoIP clients HP SAM clients 172 Leostream Connection Broker Administrator’s Guide 8. Use the Notes field to store any additional information with your protocol plan. 9. Click Save to store any changes to the plan. Protocol Plans for Wyse WTOS Thin Clients Wyse configuration settings are set in the Wyse Configuration section of the protocol plan, shown in the following figure. You can configure separate configuration files to use when launching desktops with RDP and applications with ICA. By default, the Connection Broker passes the user name and password down to the thin client so that the user is automatically logged into the session. When modifying Wyse configuration files: Ensure that each parameter name and value pair is on a single line Begin the line with the hash or pound (#) symbol to insert a comment Use the Leostream dynamic tags to set session specific variables The Connection Broker automatically adds any required quotation marks around the values for the application, username, and password WTOS variables. If the user’s policy offers more than one desktop, the Connection Broker changes the value of the autoconnect parameter to no. The Connection Broker never automatically launches connections if the user is offered multiple resources. To instruct the Connection Broker to use the Wyse VDA software, add the following parameters to the Desktop configuration file and/or Application configuration file fields in the Wyse Configuration section of the desktop’s protocol plan. 173 Chapter 10: Building Pool-Based Plans WyseVDA={no, yes}: Set to yes to enable Wyse Virtual Desktop Accelerator for all ICA or RDP sessions. WyseVDA_No_MMR={no, yes}: Set to yes to disable acceleration for TCX multimedia (MMR). This parameter is applicable only when WyseVDA is set to yes. WyseVDA_No_USB={no, yes}: Set to yes to disable acceleration for TCX USB peripheral support. This parameter is applicable only when WyseVDA is set to yes. Using Dynamic Tags Configuration files allow you to customize certain display protocol behaviors. The Connection Broker supports dynamic tags in the Command line parameters and Configuration file fields for any of the protocols. When establishing a remote session, the Connection Broker replaces dynamic tags with the appropriate information. The following table contains a complete list of the supported dynamic tags. If the configuration file contains text enclosed in braces that is not included in the list of supported dynamic tags, the Connection Broker does not alter the text in the configuration file. Dynamic Tags {IP} {IP_ADDRESS} {HOSTNAME} {IP_ADDRESS-or-HOSTNAME} {HOSTNAME-or-IP_ADDRESS} {SHORT_HOSTNAME} {USER}, {USER:USER}, {USER:LOGIN_NAME}, or {LOGIN:NAME} Purpose The IP address of the Leostream Agent on the desktop. If no Leostream Agent is installed on the desktop, {IP}is replaced with the hostname of the desktop or, if the hostname is not available or does not resolve, the IP address of the desktop. The IP address of the desktop or, in the case of ICA connections, the IP address of the Citrix XenApp farm that publishes the desktop or application specified by the dynamic tag {CITRIX_RESOURCE}. The hostname of the desktop or, in the case of ICA connections, the hostname of the Citrix XenApp farm that publishes the desktop or application specified by the dynamic tag {CITRIX_RESOURCE}. The IP address of the desktop or, if the IP address is not available, the hostname of the desktop. The hostname of the desktop or, if the hostname is not available, the IP address of the desktop. The short hostname of the desktop, or the hostname cut at the first dot. For example, if the hostname is desktop.example.com, the {SHORT_HOSTNAME} tag returns desktop. The user’s login name. This value corresponds to the value shown in the Login name column on the > Users > Users page. To force the login name on the remote desktop to upper or lower case, include the :lowercase or :uppercase modifier, for example {USER:lowercase} or {USER:LOGIN_NAME:uppercase}. 174 Leostream Connection Broker Administrator’s Guide Dynamic Tags {AD:USER:attribute_name} {NAME} or {USER:NAME} {AD_DN} or {USER:AD_DN} {EMAIL} or {USER:EMAIL} Purpose The value found in the user's Active Directory attribute given by attribute_name. Use this dynamic tag if you need to replace the user’s login name for their remote session with a value different from the login name used for their Leostream session. The user's display name. This value corresponds to the value shown in the Name column on the > Users > Users page. The user's Active Directory Distinguished Name. This value corresponds to the value shown in the AD Distinguished Name column on the > Users > Users page. The user's email address. This value corresponds to the value shown in the Email column on the > Users > Users page. {PRE_EMAIL} or {USER:PRE_EMAIL} The portion of the user's email address before the @ symbol. {POST_EMAIL} or {USER:POST_EMAIL} The portion of the user's email address after the @ symbol. {DOMAIN} {AUTH_DOMAIN} {PLAIN_PASSWORD} {RDP_PASSWORD} {SCRAMBLED_PASSWORD} {STANDARD_RDP_PASSWORD:xxxx} {HOST:IP} {HOST:PORT} {HOST:SECURE_PORT} {SPICE_TICKET} {CLIENT} or {CLIENT:NAME} The name entered into the Domain field for the authentication server that authenticated a user. If the Domain field is empty, the Connection Broker replaces this dynamic tag with the value entered or selected in the Domain field of the login dialog on the user’s client. The name entered in the Authentication server name field of the authentication server that authenticated the current user. The user’s password, in plain text. For Leostream Connect, the user’s password encrypted for RDP usage For NoMachine NX and Citrix XenApp clients, only, the user’s password scrambled to prevent casual eavesdropping For Leostream Connect, a specific password encrypted for RDP usage For use in the SPICE command line parameters, resolves to the IP address of the Red Hat Enterprise Virtualization environment that manages the virtual machine. For use in the SPICE command line parameters, resolves to the port used to establish a SPICE connection to the virtual machine. For use in the SPICE command line parameters, resolves to the secure port used to establish a SPICE connection to the virtual machine. For use in SPICE command line parameters, the secure ticket needed to establish communication between the SPICE client and host. The name of the client device used to log into the Connection Broker. This value corresponds to the value shown in the Name column on the > Clients > Clients page. 175 Chapter 10: Building Pool-Based Plans Dynamic Tags {CLIENT:IP} {CLIENT:MAC} {CLIENT:TYPE} {CLIENT:MANUFACTURER} {CLIENT:UUID} {POOL:NAME} {VM:NAME} {WINDOWS_NAME} {FQDN} Purpose The IP address of the client device used to log into the Connection Broker. This value corresponds to the value shown in the IP Address column on the > Clients > Clients page. The MAC address of the client device used to log into the Connection Broker. This value corresponds to the value shown in the MAC Address column on the > Clients > Clients page. The type of client used to log into the Connection Broker. This value corresponds to the value shown in the Type column on the > Clients > Clients page. The manufacturer of client used to log into the Connection Broker. This value corresponds to the value shown in the Manufacturer column on the > Clients > Clients page. The UUID of the client used to log into the Connection Broker. This value corresponds to the value shown for the Client UUID on the > Clients > Clients page. The name of the pool that contains the desktop that the user is connecting to The name of the desktop the user is connecting to, as shown in the Name field on the > Resources > Desktops page. The guest host name of the desktop, as returned by the Leostream Agent If the user authenticated against an authentication server, the user’s fully qualified name, e.g., cn=Fred,ou=Users,o=Company {NOVELL_FQDN} If user authenticated against an eDirectory authentication server, the fully qualified name in the format cn=Fred.ou=Users.o=Company For ICA connections, the name of the published Citrix resource/application For the RDP configuration file, use {DRIVE:CD} drivestoredirect:s:{DRIVE:CD} to redirect all CD drives found on system. No other drives are directed. For the RDP configuration file, use {DRIVE:DVD} drivestoredirect:s:{DRIVE:DVD} to redirect all DVD drives found on system. No other drives are directed. For use with display plans, either 1 or 0 depending on if the {LEO_SPAN} RDP session should be spanned across multiple monitors. {LOGOUT_URL} The URL to log the user out of the session. {LIST_URL} The URL to view the list of desktops. The value of the client side variable specified in *. So {ENV: {ENV:*} HTTP_COOKIE} might return uid=25157202. Specifies a preferred IP address to use for the connection (see {MATCHED_IP:partial_IP_address} Specifying Subnet for Desktop Connections) Re-maps IP addresses by replacing the non-X portion of the IP {REMAPPED_IP:X.X.X.X} address with the specified tag. {REMAPPED_IP:subnet_mask} Re-maps IP addresses on different subnets. {CITRIX_RESOURCE} 176 Leostream Connection Broker Administrator’s Guide Dynamic Tags {SESSION} {USB_SESSION} Purpose For use with the Java version of Leostream Connect. The session ID associated with session-based RGS Receiver configuration file parameters. Indicates that the Java version of Leostream Connect should manage which remote RGS session has access to USB devices. Using Different Login Names for User Connections In some cases, you may need to use a login name for the user’s remote session that is different from the login name used for the Leostream session. One example is the case where the user logs into Leostream with their Windows Active Directory credential, but needs to use their Linux username to connect to their Linux desktop. For these cases, you can use custom Active Directory attributes and dynamic tags to change the default user login. First, you must populate an Active Directory attributes in the user’s account with the value of the user’s alternate login name. The Active Directory attribute can be a standard attribute, or you can create a custom attribute. For example, create a custom attribute named linuxLogin. Second, in the protocol plan, replace the {USER} dynamic tag with the {AD:USER:attribute_name} dynamic tag. For example, when using the custom attribute named linuxLogin the dynamic tag is {AD:USER:linuxLogin }. If the username varies only by case, you can use the lowercase and uppercase dynamic tag modifiers, instead of specifying a new Active Directory attribute. For example, if the user’s Windows login is JSmith, but their Linux login is jsmith, use the {USER:lowercase} dynamic tag. Specifying Subnet for Desktop Connections When a remote desktop has multiple network interfaces, the Leostream Agent and Connection Broker negotiate which IP address to use for remote connections. You can alternatively use the {MATCHED_IP} dynamic tag to specify a preferred IP address for the Connection Broker to use when establishing the remote connection. For example, you can modify the default line in the RDP configuration file to the following: full address:s:{MATCHED_IP:partial_IP_address} Where partial_IP_address indicates the beginning of the IP address that the Connection Broker should favor for the connection. When specifying partial_IP_address, trailing zeros are optional, for example, {MATCHED_IP:172.29.0.0} is equivalent to{MATCHED_IP:172.29}. The MATCHED_IP dynamic tag instructs the Connection Broker to favor a specific IP address. For example, if the desktop returns two IP addresses of 172.29.229.151 and 10.110.1.14 and the tag is {MATCHED_IP:10.110.1} the IP address used for the connection is 10.110.1.14. If the desktop does not have an IP address beginning with the values to match, the Connection Broker will not establish a remote connection to the desktop. To allow the Connection Broker to fail over to any 177 Chapter 10: Building Pool-Based Plans available IP address, use the following syntax: {MATCHED_IP:partial_IP_address-or-IP} For example, if the tag is {MATCHED_IP:10.110.1-or-IP} and the desktop returned a single IP address of 172.29.229.151 the Connection Broker uses the 172.29.229.151 for the connection even though it does not match the preferred IP address. Dynamic Remapping of Desktop IP Address You can enable display protocol traffic to traverse one or more NATed firewalls by dynamically changing the IP address provided to the remote viewer client to reflect the address of the desktop seen from the client’s perspective as opposed to that seen from within the desktop. To do this, use the {REMAPPED_IP} dynamic tag in place of the {IP} dynamic tag. The Connection Broker takes the IP address of the desktop and applies the IP address mask specified in the dynamic tag so that the address is modified. As an example, imagine an offshore development center than runs on a 192.168.1.xxx network. One of its customers has a series of desktops running on a 172.29.229.xxx network. A NATed firewall makes the transition between the two networks. Therefore, a desktop at 172.29.229.131 appears to the offshore development center as a desktop at 192.168.1.131. To accomplish this transition, in the configuration file, change instances of the {IP} tag to {REMAPPED_IP:192.168.1.X}. To remap IP addresses on multiple subnets, use the advanced form of the {REMAPPED_IP} dynamic tag. This version of the dynamic tag supports specifying a network mask length and a target range for the source and destination. The {REMAPPED_IP:X.X.X.X} syntax can be used to perform DNS resolution without remapping the IP address. Use the wildcard (*) to map all subnets. For example: {REMAPPED_IP:*/24->192.168.1.0} replaces the first 24 bits of the IP address on all subnets with 192.168.1. Therefore, the IP address 10.153.172.5 maps to 192.168.1.5. {REMAPPED_IP:*/8->194.0.0.0} replaces the first 8 bits of the IP address on all subnets with 194. Therefore, the IP address 10.153.174.9 maps to 194.153.174.9. To map different subnets to different IP address ranges, use the syntax in the following example. {REMAPPED_IP:10.153.174.0/24 -> 192.168.204.0, 10.153.172.0/24 -> 192.168.201.0} Each subnet map is separated by a comma. A subnet map can be defined using a wildcard, as described in the earlier {REMAPPED_IP} examples. 178 Leostream Connection Broker Administrator’s Guide In this example, the first 24 bits of IP addresses in the subnet 10.153.174 are mapped to 192.168.204, while the first 24 bits of the IP addresses in the subnet 10.153.172 are mapped to 192.168.201. Therefore: 10.153.174.9 maps to 192.168.204.9 10.153.172.5 maps to 192.168.201.5 10.153.173.7 remains 10.153.173.7 In cases where multiple subnet maps are included, the order of the subnet maps is irrelevant. More specific maps take precedence over less specific maps. When a wildcard is provided, any IP addresses that are not mapped by one of the other rules will be mapped by the wildcard. The Connection Broker always performs wildcard mappings last. Do not specify multiple wildcard mappings. If multiple wildcards are specified, the Connection Broker uses one of the mappings and ignores all other maps. Power Control Plans Power control and release plans allow you to take actions on the user’s session based on the following events: When the user disconnects from their desktop When the user logs out of their desktop When the desktop is released to its pool When the user’s session has been idle for a specified length of time Not all display protocols allow the Connection Broker to perform actions on disconnect events. Available power control plans are shown on the > Plans > Power Control page, shown in the following figure. New Connection Broker installations contain one default power control plan, called Default. You can create as many additional power control plans as needed for your deployment (see Creating Power Control Plans). Using Power Control Options The Connection Broker provides the following options for controlling a desktop: Do not change power state, i.e., take no action Shutdown (attempts to shut down the machine gracefully) 179 Chapter 10: Building Pool-Based Plans Power off (forcefully shuts down the machine) Shutdown and Power off (attempts to shut down the machine gracefully. If a graceful shutdown is not possible, the Connection Broker forcefully shuts down the machine.) Suspend Shutdown and Start (attempts to gracefully shut down the machine before restarting) Power Off and Start (forcefully shuts down the machine before restarting) Revert to snapshot Different power control options apply to different types of machines, as follows. VMware virtual machines: Support all power control options Citrix XenServer, Microsoft Hyper-V, OpenStack, and Red Hat Enterprise Virtualization virtual machines: Support all power control options, with the exception of reverting to a snap shot Physical machines: Support Shutdown and Shutdown and Start if the Leostream Agent is installed on the machines. Physical machines can be powered up using Wake-on-LAN- (see Power Control for Desktops) or using 1E WakeUp for desktop power management. Creating Power Control Plans To build a new power control plan: 1. Select the Create Plan link on the > Plans > Power Control page. The Create Power Control Plan form, shown in the following figure, opens. 2. Enter a unique name for the plan in the Plan name edit field. 3. For each of the four remaining sections: 180 Leostream Connection Broker Administrator’s Guide a. From the Wait drop-down menu, select a time period to wait before applying the power control action. b. From the then drop-down menu, select the power control action to apply. Selecting Do not change power state renders the setting in the Wait drop-down menu irrelevant, as no action is ever taken. 4. Enter any optional Notes. 5. Click Save to create the plan, or Cancel to return to the > Plans > Power Control page without creating the plan. Release Plans Release plans define how long a desktop remains assigned to a user. Available release plans are shown on the > Plans > Release page, shown in the following figure. New Connection Broker installations contain one default release plan, called Default. You can create as many additional release plans as needed for your deployment. Using Release Options The release options allow you to optimize the allocation of computing resources. Release options are triggered after an elapsed time. If you release a desktop back to its pool, the Connection Broker attempts to offer the same desktop to the user the next time they log back into the Connection Broker, if the user’s policy has the Favor previously assigned desktops option selected. This behavior improves performance in some Windows environments. If that desktop is unavailable, the Connection Broker assigns a new desktop. Creating Release Plans To build a new release plan: 1. Select the Create Plan link on the > Plans > Release page. The Create Release Plan form, shown in the following figure, opens 181 Chapter 10: Building Pool-Based Plans 2. Enter a unique name for the plan in the Plan name edit field. 3. In the When User Disconnects from Desktop section: a. To release the desktop to its pool, select a time value from the Release to pool drop-down menu. b. To forcefully log the user out when they disconnect, select a time value from the Forced logout drop-down menu. Select No to keep the user logged in. A user that remains logged in can return to their remote session in the state it was when they disconnected. If the user remains logged into their session, but the desktop was released to its pool, the user is now considered a rogue user. 182 Leostream Connection Broker Administrator’s Guide c. To call any custom WebHook, or HTTP POST, as soon as the user disconnects from one of their remote sessions, enter the URL in the URL to call edit field. Using WebHooks, you can perform additional configuration actions necessary for your environment Citrix HDX performs a console lock when the user disconnects from an HDX connection. Therefore, the Leostream Agent sends the Connection Broker a lock event, not a disconnect event and you cannot use the When User Disconnects from Desktop section for HDX connections. 4. In the When User Logs Out from Desktop section: a. To release the desktop to its pool, select a time value from the Release to pool drop-down menu. The desktop is available for other users only after it is released to the pool. If it is not released to the pool, it remains assigned to the user and will be re-offered to that user the next time they log into the Connection Broker. b. To call any custom WebHook, or HTTP POST, as soon as the user logs out of their remote sessions, enter the URL in the URL to call edit field. Using WebHooks, you can perform additional configuration actions necessary for your environment 5. The Connection Broker requires a Leostream Agent to verify if a Windows disconnect event represents a user disconnect or user logout. If no Leostream Agent is installed on the desktop, the Connection Broker relies on a connection close notification from the user’s client device, to determine when the user’s remote session ends. Use the When Connection is Closed section of the plan to indicate which section of the release Plan to invoke when the Connection Broker receives a connection closed event from the client. The selection made for this option effects which section of the power control plan is invoked. 6. In the When Desktop is Idle section: a. Use the Lock desktop, Disconnect, and Logout drop-down menus to take actions when the user’s session is idle. Multiple actions can be taken, for example, you can lock the desktop after 5 minutes then disconnect after 30 minutes of idle time. b. When using the Logout action, use the Suspend logout until CPU falls below option to monitor the desktop’s CPU levels and perform the logout only after the CPU level falls below the specified threshold for the specified length of time. The Leostream Agent begins monitoring the desktop’s CPU level after the elapsed user idle time specified by the Logout drop-down menu. 7. In the When Desktop is First Assigned section: a. Select a time value from the Release to pool drop-down menu to schedule a release for some elapsed time after the user is first assigned to the desktop. When the Connection Broker policy-assigns a desktop to a user, it places a unassign_after_login job in the job queue. This job automatically releases the desktop to a pool when it runs. 183 Chapter 10: Building Pool-Based Plans b. Select a time value from the Release if user does not log in drop-down menu to schedule a release for some elapsed time after the user is first assigned to the desktop. When the Connection Broker policy-assigns a desktop to a user, it places a check_logon job in the job queue. When the check_logon job runs, if it does not find that the user logged into the desktop, the Connection Broker releases the desktop back to its pool. The Connection Broker cancels the check_logon job when the user logs into the desktop. Releasing the desktop to its pool does not automatically log out the user. After the desktop is released, if the user remains logged in, the Connection Broker considers them rogue user, i.e., a user that is logged into a desktop that is not assigned in the Connection Broker. 8. In the When Desktop is Released section: a. Check the Log user out of the Desktop option to log the user out when the desktop is released back to the pool. Use this option in conjunction with releasing a desktop to its pool in the Time Release After Initial Assignment section to avoid rogue users. b. Check the Delete virtual machine from disk option to have the Connection Broker attempt to delete the virtual machine. Not all virtual machines are deletable (see Release Plan Example: Deleting Virtual Machines After Use) 9. Enter any optional Notes. 10. Click Save to store the changes, or Cancel to return to the > Plans > Release page without creating the plan. Example: Releasing Desktops at Specific Times and Days You can release desktops at a specific time and day after the desktop was initially assigned to the user, as follows. 1. In the Timed Release After Initial Assignment section of the release plan, select Custom from the Release to pool drop-down menu, as shown in the following figure. 2. From the Release at drop-down menu, select the hour of the day to release the desktop. 3. Select the check boxes for each day of the week to release the desktop. The desktop is released at the same time on each selected day. 184 Leostream Connection Broker Administrator’s Guide Example: Deleting Virtual Machines After Use You can schedule virtual machines for deletion after the desktop has been released back to its pool. The Connection Broker can delete a VM only if that VM was registered with the Connection Broker from a vCenter Server center. To enable virtual machine deletion: 1. Mark the virtual machines as deletable, using one of the following methods. a. Go to the Edit Desktop page of an existing virtual machine and select the Allow this desktop to be deleted from disk option. b. When provisioning new machines into Connection Broker pools, select the Mark newly provisioned desktops as deletable option. With this option selected, the Connection Broker automatically selects the Allow this desktop to be deleted from disk option when the provisioned VM appears in the Connection Broker. 2. Create a release plan that instructs the Connection Broker to delete virtual machines by selecting the Delete virtual machine from disk option from the When Desktop is Released section. 3. Create a policy that assigns this release plan to pool of deletable desktops. After a user releases their desktop back to its pool, if that desktop has a release plan that instructs the Connection Broker to delete the desktop, the Connection Broker deletes the virtual machine only if the Allow this desktop to be deleted from disk option is selected at the time the release plan is invoked. The Connection Broker does not store the value of the desktop’s deletable state at the time the desktop was assigned to the user. Therefore, after a desktop is in use, you can change the deletable state to retain or delete the desktop, as necessary. Example: Performing Actions Based on User and System Idle Time Desktops must be running a Leostream Agent in order to perform idle time actions. The following figure shows how to configure a Release Plan to lock the user’s desktop after 5 minutes of user idle time; disconnect the desktop after 15 minutes; and logout the desktop after 30 minutes. After 30 minutes of idle time, the Release Plan instructs the Leostream Agent on the desktop to monitor the desktop’s CPU level and report when the CPU level falls below 5% for 10 minutes. At that point, the Connection Broker performs the logout action. The Connection Broker defines user idle time by the lack of mouse or keyboard actions. 185 Chapter 11: Configuring User Experience by Policy Chapter 11: Configuring User Experience by Policy Overview Connection Broker policies are a set of rules that determine how resources are offered, connected, and managed for a user (see Overview of Policies and Plans in Chapter 10). Setting up a policy includes: Configuring Desktop Policy Options Configuring VMware View Policy Options Offering Resources from a Citrix XenApp Services Site to allow users to connect to any resources that to instruct the Connection Broker as to which pools to offer desktops from and how to manage the desktops in each pool when the user logs in and is assigned to a desktop to allow the user to connect to their VMware View resources from a Leostream Connect log in are assigned by a Citrix Desktop Delivery Controller Configuring Application Policy Options to instruct the Connection Broker as to which resources from a Citrix XenApp farm to offer to a user Configuring Policies for Hard-Assigned Desktops Configuring USB device management. Displaying Available Policies The > Users > Policies page, shown in the following figure, lists the available policies. The list always contains a Default policy, which you can edit, but not delete. The Default policy assigns a single desktop from the All Desktops pool, and keeps the user assigned to that desktop until the user logs out. Additional policies appear in the order you create them, unless you have sorted your policy list. You can modify the order and type of characteristics displayed on this page by clicking the customize link at the bottom left side of the page (see Customizing Tables). The available characteristics are as follows. 186 Leostream Connection Broker Administrator’s Guide Action Drop-down menu or list of links indicating the actions you can perform on a particular policy. Currently, you can Edit or Duplicate a policy. Name The name given in the Edit Policy dialog. Desktop Pools (Offer Count) Lists the desktop pools used by this policy and the number of desktops offered from each pool. For example, the following entry: Operations(2) All Desktops(1) indicates that the policy offers two desktops from the Operations pool and one desktop from the All Desktops pool. Application Pool Indicates the application pool used by this policy. Currently, a policy can pull applications from a single pool. Current Users Indicates how many users are currently assigned desktops from this policy. Current Desktops Indicates the number of desktops currently assigned via this policy. Current Applications Indicates the number of applications currently assigned via this policy. Assignments Indicates the number of authentication servers that include this policy in the authentication server’s assignments table (found on the > User > Assignments) page. You cannot delete a policy that is in use in an authentication server’s assignments table. Max Desktops Indicates the maximum number of desktops a user of this policy can be assigned. This number does not apply to desktops and applications launched from the policy’s Application Pool. Expire Offers Indicates the length of time after login when the user’s session expires. A user cannot connect to additional resources after their session expires. Expire Offers When Desktop is Locked Indicates if the user’s session expires after they lock one of their connected remote desktops. A user cannot connect to additional resources after their session expires. 187 Chapter 11: Configuring User Experience by Policy Adding a New Policy and Configuring General Policy Options To create a new policy: 1. Go to the > Users > Policies page. 2. Click Create Policy. The Create Policy form opens. 3. Enter a unique name for the policy in the Policy Name edit field, shown in the following figure. 4. To enable the Leostream Connect failover functionality, select the Instruct Leostream Connect to store assignments and connection information option. See the Leostream Connect Administrator’s Guide and End User’s Manual for information on using this option. 5. If users of this policy are logging in through the Leostream Web client and have a single desktop assigned to them, select the Auto-launch remote viewer session if only one desktop is offered option. With this option selected, the Connection Broker launches a remote viewing session to the remote desktop as soon as the user logs into the Connection Broker. If a single application is offered, the Connection Broker does not automatically launch the application. Instead, it opens the Web client with a list of the user’s offered application. 6. If users connect to desktops offered by this policy using a display protocol with a Java applet or an external viewer, select the Launch Java applet and External Viewer connections in new window option to indicate these applets and viewers should launch in a new window. By launching these connections in new windows, users continue to have access to their list of offered resources. If this option is not selected, the client launches in the window that contains the user’s list of offered resources and they cannot launch additional connections. You can use the Parameters for connections opened in new window field in protocol plans to 188 Leostream Connection Broker Administrator’s Guide specify window.open parameters for the applet or external viewer. See Launching Connections in New Windows for complete instructions and an example. 7. Select the Hide hover menu when any remote desktop is locked option to instruct Leostream Connect not to open its hover menu after the user locks any of their open desktop connections. Hiding the hover menu allows you to restrict users from launching additional desktops after they lock their connected desktop. The locked connection does not need to be in the forefront. If the user opens multiple desktops, the hover menu does not appear if any of the desktops are locked. Therefore, enabling this feature is most user-friendly when the user’s desktops open in full screen mode. In that case, locking the remote desktop appears to the user as if they locked the client device. This feature is supported by the Java implementation of Leostream Connect, version 2.2.59 and later. 8. By default, if a particular pool does not contain any available desktops, the Connection Broker skips that pool and the user receives no notification. If you want to let the user know when they are missing an offer from a particular pool, select the Inform user when a pool is out of resources option. With this option selected, the user is notified of pools with no available resources, for example: 9. If the policy references protocol plans that allow users to configure display protocol parameters, use the Store user-configured protocol parameters drop-down menu to indicate if settings are stored globally or individually per desktop/client pair. See “User Configurable Protocol Plan Parameters” in the Leostream guide for Choosing and Using Display Protocols for more information. 10. From the Maximum number of desktops assigned drop-down menu, select the maximum number of desktops that a user of this policy can be assigned. This number limits the number of assigned desktops across all pools in the policy, as well as of hard-assigned desktops. This limit does not include desktops or applications launched from the Applications Pool. For example, consider a policy with three pools, configured as follows. Pool 1 offers three desktops Pool 2 offers one desktop Pool 3 offers two desktops This policy offers the user a total of six desktops. If the Maximum number of desktops assigned drop-down menu is set to <No Limit> the user can be assigned, and connect to, all six desktops. If, 189 Chapter 11: Configuring User Experience by Policy however, the Maximum number of desktops assigned drop-down menu is set to 2, the user can be assigned, and connect to, only two desktops. Furthermore, if the user is hard-assigned to one desktop, the hard-assigned desktop counts as one of their assignments. In this case, the user can be assigned, and connect to, only one of their policy assigned desktops before they reach their assignment limit. In either case, if they try to connect to a third desktop, the Connection Broker issues a warning. In the case where the user’s policy does not release their desktops, if the user logs out of those desktops and logs back into the Connection Broker, the broker offers them six desktops. However, the user can launch only the two desktops that are already assigned to them. If they need to access a different desktop, one of the assigned desktops must be released to its pool. 11. Select the Expire user’s session after specified elapsed time option to indicate if the user’s session should expire before the default two day expiration period. Use the associated drop-down to indicate the new expiration period. After the user’s session expires, the user can continue to use any resources that are already connected, however they cannot connect additional USB devices to these desktops or launch additional resources until they log back into the Connection Broker. This option applies to users logging in using Leostream Connect, the Leostream Web client, or any thin client device that writes to the Leostream API. It does not apply to users logging in through a Wyse thin client. If you do not select this option, the Connection Broker automatically expires the user’s session after two days. 12. Select the Expire user’s session as soon as a remote desktop is locked option to force the user to log back into the Connection Broker after they lock their remote desktop. The user’s desktop must be running a Leostream Agent in order for the Connection Broker to receive notifications when the user locks their remote desktop. 13. If you have a custom WebHook that the Connection Broker should call when the user logs in, enter the URL to that WebHook in the URL to call at start of session edit field. See Using WebHooks in Policies for more information on using WebHooks. 14. Configure additional policy options. The remaining sections in this chapter cover these options. 15. When you have finished configuring the policy, click Save. Configuring Desktop Policy Options Policy options for desktop pools allow you to customize the end-user experience, for example, with regards to what desktops they are offered from a pool, how long they can use that desktop, and what happens to the desktop’s power state. You configure policy options separately for each pool in the policy. These options do not apply to desktops that are hard-assigned to the user or their client device. See Configuring Policies for Hard-Assigned Desktops for information on configuring policy options for hard-assigned desktops. 190 Leostream Connection Broker Administrator’s Guide Before configuring desktop policies, ensure that you have an understanding of protocol, power control, and release plans. See Chapter 10: Building Pool-Based Plans for a complete description of plans. Offering Desktops from Pools The Desktop Assignments from Pools section defines the pools a user with this policy is offered desktops from, how the Connection Broker selects desktops from those pools, and what happens when a user connects to one of the offered desktops. This section of the documentation describes the options for finetuning how the Connection Broker selects desktops from pools. See Defining Behaviors for Assigned Desktops for information on configuring what happens when a user opts to connect to a desktop. Setting the Number of Pools in a Policy By default, the Create Policy form contains a single Desktop Assignments from Pools section and, therefore, the policy offers desktops from a single desktop pool. Use the [Add Pools] menu, located at the bottom of the Desktop Assignments from Pools section, to add additional desktop pools. You can add as many pools as you need, in multiples of three, as shown in the following figure. If your policy contains more than one pool, the Pool drop-down menu near the top of each Desktop Assignments from Pools section includes a <Remove this pool> option. Select this option to remove that Desktop Assignments from Pools section of the policy. The Connection Broker removes the pool after you click Save to store the changes to the form. Selecting Primary Pools and Number of Offered Desktops The first step in configuring the Desktop Assignments from Pools section is to select the primary pool and the number of desktops to offer from this pool, as shown in the following figure. By default, the Connection Broker searches the primary pool for desktops to offer based on the remainder of the settings in the When user logs into Connection Broker section. 191 Chapter 11: Configuring User Experience by Policy Specifying Backup Pools The Connection Broker provides two methods for ensuring that users receive an alternative desktop in the event their primary desktop is unreachable: backup pools and failover desktops. Backup pools are available for policy-assigned and hard-assigned desktops. Failover desktops should be used primarily for hardassigned desktops (see Working with Failover Desktops.) Backup pools provide pool-based failover at offer time. In this case, when the user logs in, the Connection Broker selects a desktop from the primary pool and, at that point, determines if the desktop is reachable. If the desktop is not reachable, the Connection Broker selects a desktop from the backup pool. When using backup pools, the user never sees which primary desktop they would have been offered and, therefore, do not necessarily know they are being connected to a backup desktop. Backup pools are available for hard-assigned desktops, or to policy-assigned desktops when a single desktop is offered from the pool Failover desktops provide individual desktop failover at connection time. In this case, the user is offered their primary desktop. The Connection Broker checks if the desktop is reachable only if the user attempts to connect to the desktop. If the desktop is not reachable, the Connection Broker connects the user to the failover desktop. When using failover desktops, the user knows that they have been redirected to a different desktop. You can use Failover plans to provide a user-friendly warning to the user before they are connected to the failover desktop. To enable backup pools in a policy: 1. Select the desired backup pool from the Backup pool drop-down menu, as shown in the following figure. 2. After selecting a backup pool, use from the Use backup pool when options to select the conditions that invoke the backup pool. The available options are: a. Leostream Agent on primary desktop is unreachable: The Connection Broker attempts to contact the Leostream Agent at the port indicated on the Edit Desktop page for the offered desktop. b. Remote viewer port on primary desktop is unreachable: The Connection Broker attempts 192 Leostream Connection Broker Administrator’s Guide to reach the port for the display protocol specified in this pool’s protocol plan, as selected in the Protocol drop-down menu in the Plans section of this policy. c. Primary pool has no available desktops to offer: The Connection Broker cannot find any available desktops in the primary pool, potentially because all desktops are already assigned or marked as unavailable. 3. Select protocol, power control, and release plans to associate with desktops offered from the backup pool (see Assigning Plans). The Connection Broker uses the following logic when pulling a desktop from a primary pool with a specified backup pool. 1. If the Primary pool has no available desktops to offer condition is selected, and the primary pool has no available desktops, the Connection Broker selects a desktop from the backup pool and skips to step 5. 2. If the Connection Broker can pull an available desktop from the primary pool, it checks if the appropriate port on this desktop is reachable. If the port check passes, the Connection Broker: 1. Switches the status to Available, if the desktop was previously Unreachable 2. Offers that desktop from the pool. 3. Skips to step 6 3. If the Connection Broker cannot successfully perform the port check, the Connection Broker marks the desktop as Unreachable on the > Resources > Desktops page, shown in the following figure. The Connection Broker continues to offer desktops that are marked as Unreachable. 4. The Connection Broker then selects a desktop from the backup pool. 5. The Connection Broker does not perform a port check on the backup desktop. The backup desktop is always offered. 6. The Connection Broker repeats step 1 through 5 for each pool in the policy. If you select the Leostream Agent port check as a backup pool condition, ensure that the desktop 193 Chapter 11: Configuring User Experience by Policy offered from the primary pool has a running Leostream Agent by selecting Yes, only if Leostream Agent is running from the Offer running desktops from the Offer running desktops drop-down menu, as shown in the following figure. Otherwise, if the offered desktop does not have an installed and running Leostream Agent, the Connection Broker always fails over to the backup pool. Setting Rules for Selecting Desktops from Pools After you select your pools and backup pools, the remainder of the When User Logs into Connection Broker section, shown in the following figure, defines how the Connection Broker selects which desktops to offer the end-user from these pools. Offer desktops from this pool: Determines which users of this policy are offered desktops from this pool. By default, the To all users of this policy option is selected, and the Connection Broker offers desktops to all users. To restrict this pool to users with specific Active Directory attributes, select the Only to users matching specific attribute rules option. In this case, the form modifies to contain fields for defining rules that limit which users are offered desktops from this pool. For example, the following figure defines a rule that restricts the Connection Broker to offer desktops from this pool only to users who are a member of the Development group. 194 Leostream Connection Broker Administrator’s Guide Select desktops to offer based on: Determines how the Connection Broker decides which desktops to offer. You can select between the following two assignment modes: o User (“follow-me” mode): When selected, the Connection Broker assigns the desktop based only on the user’s identity. In this mode, if the same user credentials are used to log into a second client, the Connection Broker moves any existing desktop connections from the first client device to the user’s new client. In follow-me mode, each user can be simultaneously logged in from only one client. o User and client (“kiosk” mode): When selected, the Connection Broker assigns the desktop based on the client and the user, rather than just the user. In this mode, if the same user credentials are used to log into a second client, the Connection Broker assigns a different desktop to each client. In kiosk mode, one user can simultaneously log in from multiple clients. See Desktop Assignment Modes for more information on the different assignment modes. Display to users as: Configures how desktops are listed by the client. You can display desktops as: o o o o o o o o o o o Desktop name Desktop display name Windows machine name Pool name Pool name: Desktop name Pool name: Desktop display name Pool name: Windows machine name Pool display name Pool display name: Desktop name Pool display name: Desktop display name Pool display name: Windows machine name See Wyse Sysinit Command for information on using this option in conjunction with Wyse thin clients. 195 Chapter 11: Configuring User Experience by Policy Allow users to reset offered desktops: Select an option to allow users to restart their offered desktops. o o o Select Not Allowed to restrict the user from restarting desktops from this pool Select Shutdown and Start to allow the user to restart their desktops using a graceful power down and restart Select Power off and Start to allow the user to restart their desktop using a forceful power down and restart In addition to this policy setting, the user must be assigned a role that gives them permission to restart their desktops (see Session Permissions). Offer running desktops: Use this option if the Connection Broker can offer a running desktop only if it has an installed and running Leostream Agent. o Select Yes, only if Leostream Agent is running if the user should be offered only those desktops with an installed Leostream Agent that is successfully communicating with the Connection Broker. Also, select this option if you are using a port check on the Leostream Agent to determine if the Connection Broker should offer desktops from the backup pool (see Specifying Backup Pools) o Select Yes, regardless of Leostream Agent status to indicate the Connection Broker can ignore the Leostream Agent status when selecting a running desktop to offer from the pool. Offer stopped and suspended desktops: Use this option to indicate if the Connection Broker may offer stopped or suspended desktops. When a user requests a connection to a stopped or suspended desktop, the Connection Broker attempts to start or resume the desktop when the desktop is assigned. o Select No if the Connection Broker should never offer a stopped or suspended desktop. In particular, select this option if the Connection Broker is unable to power up a user’s desktop, for example if the desktop is a physical machine that is not Wake-on-LAN enabled. o Select Yes, only if Leostream Agent is installed to limit the Connection Broker to offer stopped desktops only if the Connection Broker knows the desktop has an installed Leostream Agent. The desktop and its installed Leostream Agent must have been running when the desktop registered with the Connection Broker, or during a subsequent center refresh, for the Connection Broker to learn about the Leostream Agent. o Select Yes, regardless of Leostream Agent status to allow the Connection Broker to offer any stopped desktop. Offer desktops with pending reboot job: Use this option to indicate if the Connection Broker can offer desktops with a scheduled reboot job. The Connection Broker cancels the reboot job as soon as a new user is assigned to the desktop. Uncheck this option if your desktops must finish their scheduled reboot jobs before being assigned to a new user. 196 Leostream Connection Broker Administrator’s Guide This option applies only to reboot jobs that were scheduled by the Connection Broker, for example, by a power control plan. Desktop selection preference: Use this option to indicate if the Connection Broker should look for desktops that were previously assigned to the user. o Favor desktops previously assigned to this user: When this option is selected, the Connection Broker tries to offer a user any desktops that were previously assigned to that user, before offering different desktops from the pool. Select this option to optimize roaming profile performance. You can use the Bulk Edit form for the user’s desktop to remove the user’s affinity to their previously assigned desktop. See Removing Desktop Affinities for more information. o Any available desktops: Select this option to offer any desktops from the pool. Using Pool Filters to Limit Available Desktops in the Pool The Pool Filters section, shown in the following figure, allows you to restrict which desktops the Connection Broker can potentially offer from the pool. A particular pool filter applies only to its associated pool; it does not apply to any other pool in the policy. Each row in the Pool Filters section reads as a rule that checks if a desktop in this pool can be offered by this policy. To specify a filter: 1. Select an attribute from the Desktop attribute drop-down menu. You can filter desktops based on the following attributes: Name Windows machine name vCenter Server annotation (“Notes”) Any Active Directory attribute associated with the desktop, such as managedBy. You must create an Active Directory center for these attributes to appear in the Desktop attribute dropdown menu (see Active Directory Centers). 2. Select a logic condition from the Conditional drop-down menu. 197 Chapter 11: Configuring User Experience by Policy 3. In the Property drop-down menu, indicate the type of attribute to filter against. Options include: User Attribute Client Attribute Text Value You can use certain dynamic tags when filtering based on a text value. In particular, the following dynamic tags are supported. {AD:USER:attribute_name}: Filters based on the value found in the user's Active Directory attribute given by attribute_name. {AD:CLIENT:attribute_name}: Filters based on the value found for the attribute given by attribute_name in the client’s Computer Active Directory object. The user must authenticate with the Connection Broker using Active Directory. If this is the case, the Connection Broker uses the name of the client computer, determined as either the NetBIOS or DNS name, to search for the correct Computer object in Active Directory. 4. In the Value field, select or enter the actual attribute value to test against. Not all clients return their MAC address. If you plan to filter pools using the client MAC address attribute, go to the Edit Client page for each client and ensure that they are correctly returning their MAC address. 5. Indicate if the desktop can match any rule (OR) or must match all rules (AND), in order to be available in this policy. The Connection Broker applies the pool filter and any defined policy-wide filter when determining which desktops can be offered from a particular pool. Defining Behaviors for Assigned Desktops The When User is Assigned to Desktop section, shown in the following figure, controls what happens when a desktop from this pool is assigned to a user. Offered desktops are assigned to the user when the user initiates a connection to the desktop. The following options also apply when a user subsequently connects to a policy-assigned desktop that was never released back to the pool, i.e., the user remained assigned to the desktop after they log out. 198 Leostream Connection Broker Administrator’s Guide Revert the desktop to its most-recent snapshot: Enables a virtual machine to return to a known state when it is assigned. If the virtual machine is powered down, the Connection Broker reverts the machine to its snapshot before attempting to power up the machine. Confirm desktop’s current power state: Select this option to have the Connection Broker check the desktop’s power state when the user requests a connection to the desktop. Use this option if your centers have a long power state refresh interval, which occasionally causes a desktop’s power status in the Connection Broker to be out-of-sync with the desktop’s actual power state. If this option is not selected, the Connection Broker does not confirm that a desktop is running or stopped when assigning the desktop to the user. Consider an example where a desktop’s last known power state is Stopped and the Power on stopped or suspended desktops option is selected. If you manually powered on this desktop from, for example, vCenter Server, the Connection Broker may believe this desktop is stopped even though the desktop is now running. If you do not have the Confirm desktop power state option selected, the Connection Broker sends a power on command to the stopped desktop, which delays the user’s connection to the desktop. Power on stopped or suspended desktops: Select this option to have the Connection Broker send a power on command to any desktop with a current power state of stopped. Log out any rogue users: Forcefully logs out users who logged into a machine without going through the Connection Broker. The desktop must be running the Leostream Agent to use this feature. When a user is logged out, the following error message displays. Enable single-sign-on to desktop console: When selected, allows the Connection Broker to use the Leostream Agent to log users in using single sign-on. Select this option only if the user connects to their desktop using PCoIP or UltraVNC. Other viewers have built-in single sign-on capabilities that are not compatible with the Leostream single sign-on. Selecting this option has no affect if you did not install the single sign-on component of the Leostream Agent. Prevent user from manually releasing desktop: For users logging in with a role that gives them permission to release their desktops (see Session Permissions), this option allows you to restrict the user from manually releasing desktops from this pool. Adjust time zone to match client: Select this option to instruct the Connection Broker to change the time zone of a Windows remote desktop to match the time zone of the user’s client device. The Connection Broker does not revert the time zone to its original value after the user logs out. This option applies when the user logs in from the Windows or Java version of Leostream Connect, or an HP SAM client. 199 Chapter 11: Configuring User Experience by Policy Enable session shadowing (NoMachine NX only): Select this option to allow the user to invite another user to shadow their NoMachine NX session (see “Session Shadowing and Collaboration” in the Leostream Guide for Choosing and Using Display Protocols). View only shadowing, not interactive (NoMachine NX only): Select this option if users who are shadowing the NoMachine NX sessions should not be able to interact with the shadowed session. Assigning Plans The Plans section, shown in the following figure, allows you to associate a protocol, power control, and release plan with the desktops offered from a pool. The selections in the Protocol, Power control, and Release drop-down menus define the plans associated with desktops offered from the primary pool. The Backup pool protocol, Backup pool power control, and Backup pool release drop-down menus define the plans associated with a desktop that is offered from the backup pool. If the primary pool does not have a backup pool, these three drop-down menus are not shown. See Chapter 10: Building Pool-Based Plans for instructions on creating plans. These plans are associated with the desktop at the time that desktop is policy-assigned to the user. The same desktops can be given different plans when offered from another pool or policy. Configuring VMware Horizon View Policy Options Policies allow you to offer VMware Horizon View sessions to users alongside other offered desktop and application. When using this section of the policy, you must configure desktop entitlements in VMware Horizon View prior to the user logging into Leostream. Integrating VMware View with Leostream allows you to do the following. From a Leostream client, offer the user VMware Horizon View desktops and connect to these desktops using the software-based PCoIP protocol. Provide a single login portal for users with access to VMware Horizon View resources, as well as other resources such as virtual machines hosted in Microsoft Hyper-V or applications in a Citrix XenApp farm. Restrict a user’s access to their VMware Horizon View resources, based on the location of the user’s client. Seamlessly integrate the VMware Horizon View Client with the Cisco Systems VPN Client (see Protocol Plans for Cisco Systems VPN Clients) The client device must have an installed VMware Horizon View client. 200 Leostream Connection Broker Administrator’s Guide You can provide the user with login access to multiple VMware Horizon View Servers from a Leostream client. To configure the user’s policy to provide VMware Horizon View access: 1. Go to the Desktop Assignment from VMware View section, shown in the following figure. 2. From the Add VMware View Servers drop-down menu, select the number of VMware View servers to allow the user to log in to using this policy. You can add an unlimited number of View servers to the policy, however you can add only three View servers, at a time, as shown in the following figure. After adding the View servers, the Desktop Assignment from VMware View section appears as in the following figure. 3. In the View Server Name edit field, enter the name to display to the user for this VMware View connection server. For example, if VMware View is entered in the View Server Name edit field, Leostream Connect displays the following. 4. In the View Server URL edit field, enter the full URL to the View connection server. When the user connects to a VMware View connection server, the Leostream Connection Broker signs the user into the View client using the same credentials used to log in to Leostream. After the user is logged in, 201 Chapter 11: Configuring User Experience by Policy the VMware Horizon View Manager controls which desktops are offered to the user and which display protocol is used to connect to those desktops. See the Leostream Connect Administrator’s Manual and End User’s Guide for more information on using View in conjunction with Leostream. If your virtual machines have an installed VMware Horizon View Direct-Conection Plugin, you can manage desktop assigments and PCoIP connections in Leostream. See “PCoIP Connections to VMware Virtual Machines” in the Leostream guide for Choosing and Using Display Protocols for more information. Offering Resources from a Citrix XenApp Services Site You can integrate an existing Citrix XenApp Services Site into the user’s policy to offer users the desktops and applications they are assigned to in the Services Site. Integrating the user’s existing Citrix assignments into Leostream allows you to provide users with a single access point for all their entitled desktops and applications. You must specifically enable this feature by selecting the Resource offers from XenApp Services Site option on the > System > Settings page, as shown in the following figure. After enabling the feature, you can configure the policy, as follows. 1. In the policy form, scroll down to the Desktop Assignment from Citrix XenApp Services Site section, shown in the following figure. 2. In the Site URL for XenApp Services Site enter the URL for the XenApp Services Site, for example: http://xenapp_services_site.yourcompany,com/Citrix/PNAgent 3. When a user with this policy logs into the Leostream Connection Broker, Leostream simulates a log in to the specified Citrix XenApp Services Site to determine which desktops and applications are assigned by XenDesktop and XenApp. Use the Offer desktops and Offer applications check boxes to indicate which of these resources Leostream should offer to the user. 202 Leostream Connection Broker Administrator’s Guide The Connection Broker always uses the Citrix online plug and HDX to connect the user to a resource offered from a Citrix XenApp Services Site. Configuring Application Policy Options Policies can offer applications and desktops that are published in a Citrix XenApp farm to a user that logs into the Connection Broker using Leostream Connect, the Leostream Web client, or a Wyse thin client. To create a policy that assigns resources from an application pool, in the Edit Policy form: 1. Go to the Application Assignment from Pools section, shown in the following figure. 2. Select the appropriate pool from the Application Pool drop-down menu. 3. From the Display to user as drop-down menu, select how you want to display the applications in this pool to the user when they log into their client. You can display the application using: The application name The pool name The pool name followed by the application name Pool display name The pool display name followed by the application name 4. From the Protocol plan drop-down menu, select the protocol plan to apply to these applications and desktops. The Connection Broker users the command line parameters and configuration files in the Citrix XenApp Configuration section of the protocol plan when launching an ICA connection to resources in this pool. 5. Click Save. Connection Broker policies allow you to offer XenApp applications from a single application pool. For information on configuring protocol plans for XenApp applications, see Citrix XenApp Configuration. Configuring Policies for Hard-Assigned Desktops The Desktop Hard Assignments section, shown in the following figure, applies to desktops that are hardassigned to the user, as well as to desktops hard-assigned to the client the user is logging in through. This section includes a subset of the policy options available for policy-assigned desktops. 203 Chapter 11: Configuring User Experience by Policy When User Logs into the Connection Broker Backup pool: Provides a pool of backup desktops to use in the event that the Connection Broker cannot establish a connection to the hard-assigned desktop (see Specifying Backup Pools.) Display to users as: Configures how desktops are listed by the client. You can display desktops as: o Desktop Name o Desktop display name o Windows Machine Name See Wyse Sysinit Command for information on using this option in conjunction with Dell Wyse thin clients. Allow users to reset desktops: Select an option to allow users to restart their offered virtual machines within Leostream Connect. See the Leostream Connect Administrator’s Guide and End User’s Manual for more information. 204 Leostream Connection Broker Administrator’s Guide o o Select Shutdown and Start to perform a graceful reboot. Select Power off and Start to power down the machine forcefully and restart. To use these options, the user must log in with a role that gives them permission to restart their desktops (see Session Permissions) Offer stopped and suspended desktops: Use this option to indicate if the Connection Broker should offer the hard-assigned desktop if it is stopped or suspended. When a user requests a connection to a stopped or suspended desktop, the Connection Broker attempts to start or resume the desktop when the user requests a connection. o Select No if the Connection Broker should never offer a stopped or suspended desktop. In particular, select this option if the Connection Broker is unable to power up a user’s desktop, for example if the desktop is a physical machine that is not Wake-on-LAN enabled. o Select Yes, only if Leostream Agent is installed to limit the Connection Broker to offer stopped desktops only if the Connection Broker knows the desktop has an installed Leostream Agent. The desktop and its installed Leostream Agent must have been running when the desktop registered with the Connection Broker, or during a subsequent center refresh, for the Connection Broker to learn about the Leostream Agent. o Select Yes, regardless of Leostream Agent status to allow the Connection Broker to offer any stopped desktop. Confirm desktop power state: Select this option to have the Connection Broker check the desktop’s power status when the user requests a connection to the desktop. Use this option if your centers have a long power state refresh interval, which occasionally causes a desktop’s power status in the Connection Broker to be outof-sync with the desktop’s actual power status. If this option is not selected, the Connection Broker does not confirm that a desktop is running or stopped when assigning the desktop to the user. Log out any rogue users: Enables you to log out users who logged into a machine without going through the Connection Broker. The desktop must be running the Leostream Agent to use this feature. Enable single-sign-on to desktop console: When selected, allows the Connection Broker to use the Leostream Agent feature to log users in using single sign-on. Select this option only if the user connects to their desktop using PCoIP or UltraVNC. Other viewers have built-in single sign-on capabilities that are not compatible with the Leostream single sign-on. Selecting this option has no affect if you did not install the single sign-on component of the Leostream Agent. Adjust time zone to match client (Leostream Connect and HP SAM only): Select this option to instruct the Connection Broker to change the time zone of a Windows remote desktop to match the time zone of the user’s client device. The Connection Broker does not revert the time zone to its original value after the user logs out. Enable session shadowing (NoMachine NX only): Select this option to allow the user to invite 205 Chapter 11: Configuring User Experience by Policy another user to shadow their NoMachine NX session (see “Session Shadowing and Collaboration” in the Leostream Guide for Choosing and Using Display Protocols). View only shadowing, not interactive (NoMachine NX only): Select this option if users who are shadowing the NoMachine NX sessions should not be able to interact with the shadowed session. When User Disconnects from Desktop A hard-assigned desktop is never released from a user. Therefore, release plans do not apply to hardassigned desktops. You can perform a subset of release actions, using the options described in the following sections. The Forced logout drop-down menu allows you to specify if a user is allowed to disconnect from their desktop. Select Never from the Forced logout drop-down menu to allow the user to disconnect from their desktop, but remain logged into that desktop and retain their session’s state. The next time the user logs in, they are presented with their session in the state it was at when they originally disconnected. To forcefully log a user out of their desktop after they disconnect, select an elapsed time from the Forced logout drop-down menu. After the user is forcefully logged out, their session is terminated and any unsaved changes made in their previous session are lost. The next time the user logs in, they receive a new session. To call any custom WebHook, or HTTP POST, as soon as the user disconnects from their remote sessions, enter the URL in the URL to call edit field. Using WebHooks, you can perform additional configuration actions necessary for your environment When User Logs Out of Desktop To call any custom WebHook, or HTTP POST, as soon as the user logs out of their remote sessions, enter the URL in the URL to call edit field. Using WebHooks, you can perform additional configuration actions necessary for your environment If the user is connecting to the desktop using PCoIP or VNC, you can instruct the Connection Broker to retain the console connection after the user logs out by selecting the Retain console connection (VNC and PCoIP, only) option. With this option selected, the user is returned to the operating system login page, not the client login page. This option is most useful for users logging into desktops that are hard-assigned to particular clients. When Connection is Closed If the user’s hard-assigned desktop does not have an installed and running Leostream Agent, the Connection Broker cannot distinguish between a log out and a disconnect. In this case, the Connection Broker receives a connection closed event from Leostream Connect, and executes the When Connection is 206 Leostream Connection Broker Administrator’s Guide Closed section of the user’s policy. Use this section to indicate if an undistinguishable connection-closed event is treated as a logout or disconnect. When Desktop is Idle If the hard-assigned desktop has an installed, running Leostream Agent, you can perform actions when the user’s remote session is idle. A session is idle when there are no mouse or keyboard actions. Use the Lock Desktop, Disconnect, and Logout drop-down menus to indicate the actions to take after the specified elapsed idle time. You can perform multiple actions, for example, to lock the desktop after 5 minutes of user idle time, then disconnect after 30 minutes of idle time. Assigning Plans to Hard-Assigned Desktops From the Protocol and Power control drop-down menus, select a protocol plan and power control plan to associate with hard-assigned desktops. The Connection Broker never releases hard-assigned desktops back to their pool. Therefore: The power control action in the When Desktop is Released section of the power control plan is never executed. Release plans do not apply to hard-assigned desktops, with the exception of the Forced logout option, which is included in the When User Disconnects from Desktop section previously described. Associating Plans to Rogue Users The Rogue User Assignment section assigns power control and release plans to rogue users after they log into a desktop that is set to manage rogue users. See Assigning Desktops to Rogue Users for complete details. Policy Filters You can use policy filters to narrow down the selection of desktops from all the pools associated with a policy. Policy filters allow you to restrict what type of desktops can be assigned, to the point of strictly assigning a particular desktop to a user. Set these rules in the Policy Filters section, shown in the following figure. Each row in the Policy Filters section reads as a rule that checks if a desktop in the pool can be assigned by 207 Chapter 11: Configuring User Experience by Policy this policy. For a particular pool, the policy filter applies in addition to the pool filter. To specify a policy filter: 1. Select an item from the Desktop attribute drop-down menu to indicate how to filter the desktops, either: Name Windows machine name vCenter Server annotation Any Active Directory attribute associated with the desktop, such as managedBy. You must create an Active Directory center for these attributes to appear in the Desktop attribute dropdown menu (see Active Directory Centers). 2. Select a logic condition from the Conditional drop-down menu. 3. In the Property drop-down menu, indicate the type of attribute to filter against, either: User Attribute Client Attribute Text Value You can use dynamic tags when filtering based on a text value. The following dynamic tags are supported. {AD:USER:attribute_name}: Filters based on the value found in the user's Active Directory attribute given by attribute_name. {AD:CLIENT:attribute_name}: Filters based on the value found for the attribute given by attribute_name in the client’s Computer Active Directory object. The user must authenticate with the Connection Broker using Active Directory. If this is the case, the Connection Broker uses the name of the client computer, determined as either the NetBIOS or DNS name, to search for the correct Computer object in Active Directory. 4. In the Value field, select or enter the actual attribute value to test against. Not all clients return their MAC address. If you plan to filter pools using the client MAC address attribute, go to the Edit Client page for each client and ensure that they are correctly returning their MAC address. 5. Indicate if the desktop can match any rule (OR) or must match all rules (AND), in order to be available in this policy. 6. Select the Look up desktop’s current “managedBy” attribute at every login option if the value of the desktop’s managedBy field frequently changes. If this option is not selected, the Connection Broker caches the managedBy attribute obtained when the center was last refreshed, improving performance at login time. This setting also applies to filters in all Pool Filters sections. 208 Leostream Connection Broker Administrator’s Guide Policy filters apply to all pools in the policy. Use pool filters if you want to filter desktops from a particular pool (see Pool Filters). Policy filters do not apply to applications. Using Dynamic Tags in Policy Filters When creating filters based on text values, you can use dynamic tags to specify all or part of the text. The Connection Broker evaluates dynamic tags when determining which desktops to offer from the pools. For example, in the following figure, the filter uses the {USER} dynamic tag, to reference the login name of the user who logged into the Connection Broker. When determining which desktops to offer this user, the Connection Broker filters the contents of the pool by looking for desktops whose Windows machine name begins with the user’s login name appended with _Windows7. Because the Connection Broker evaluates dynamic tags before offering desktops to the user, certain dynamic tags are not available as filters. The Connection Broker supports the following dynamic tags in policy filters. All dynamic tags listed together resolve to the same value. See Using Dynamic Tags for a complete description of these dynamic tags. {NAME}, {USER:NAME} {USER}, {USER:USER}, {USER:LOGIN_NAME}, {LOGIN_NAME} {FQDN} {NOVELL_FQDN} {DOMAIN} {AUTH_DOMAIN} {AD_DN}, {USER:AD_DN} {EMAIL}, {USER:EMAIL} {PRE_EMAIL}, {USER:PRE_EMAIL} {POST_EMAIL}, {USER:POST_EMAIL} {CLIENT}, {CLIENT:NAME} {CLIENT:IP} {CLIENT:MAC} {CLIENT:TYPE}, {CLIENT:CLIENT_TYPE} {CLIENT:MANUFACTURER} {CLIENT:UUID} Using VMware Custom Attributes in Filters The Connection Broker allows you to filter the desktops in a pool or policy based on the value of up to four vCenter Server custom attributes. Go to the > System > Settings page to indicate which custom attributes you want to use as filters. See Specifying VMware vCenter Server Clusters for Desktop Filters for complete instructions on indicating the custom attributes to use as desktop filters. Custom attributes appear at the bottom of the Desktop attributes drop-down menu in the filters, as shown, 209 Chapter 11: Configuring User Experience by Policy for example, in the following figure. Each custom attribute is labelled as: vCenter Server “attribute_name” where attribute_name is the name of the custom attribute. If the same custom attribute appears in multiple vCenter Servers, the attribute appears once in the drop-down menu. When using this attribute as a filter, the Connection Broker looks at all VMs from all vCenter Servers that contain this attribute. The vCenter Server “Notes” attribute is always available for use as a filter. Example: Persistently Assigning Users to a Particular Desktop Using Filters You can use filters to assign users to a particular desktop and maintain that assignment over multiple logins. To do this, give the desktop a name that contains part, or all, of the user’s login name. Then, filter the pool by restricting the desktop Name attribute to contain the user’s login name, as follows: 1. Select Name from the Desktop attribute drop-down menu. 2. Select contains from the Conditional drop-down menu. 3. Select User Attribute from the Property drop-down menu. 4. Select Name from the Value drop-down menu, as shown in the following figure In this example, when a user signs into the Connection Broker, the policy selects only the desktop whose name contains that user’s login name. 210 Leostream Connection Broker Administrator’s Guide Configuring USB Device Management Policy settings for USB device management apply to all offered desktops from a particular policy. However, users must log into Leostream using either Leostream Connect or a PCoIP Zero Client to utilize the Leostream USB device passthrough feature. Also, you must install the Leostream Agent on the remote desktop. When installing the Leostream Agent, as well as when installing Leostream Connect, ensure that the Enable USB over IP option is selected. If the USB Device Passthrough controls do not appear in your Edit Policy form, enable the global USB passthrough feature, as follows: 1. Go to the > System > Settings page. 2. Select the USB passthrough control option in the Enable Features section. 3. Click Save. With the global feature enabled, the USB Device Passthrough controls appear at the bottom of the Edit Policy page. These controls allow you to specify which USB devices end users can redirect to their remote desktops. By default, policies do not change the USB settings specified by the user’s client. To specify USB redirection on a policy-by-policy basis, select the Allow Connection Broker to manage USB passthrough option, as shown in the following figure. Use the Mode drop-down menu to specify which USB devices end users can assign to desktops, as follows: To pass through all USB devices to the desktop: Select Connect all USB devices from the Mode drop-down menu. To block all USB devices from being passed through to the desktop: Select Block all USB devices from the Mode drop-down menu. Selecting this option blocks the keyboard and mouse from passing through to PCoIP devices. If you want to block all USB devices except the keyboard and mouse from passing through to a PCoIP device, select Connect specific USB devices from the Mode drop-down and select Human Interface Devices from the Device Class drop-down menu. Alternatively, enter the Vendor ID and Product ID of specific human interface devices to pass through. To specify particular devices to passthrough: Select Connect specific USB devices from the Mode drop-down menu. Configure the devices to passthrough, as follows: Select an item from the Device Class drop-down menu to pass through an entire class of devices, or 211 Chapter 11: Configuring User Experience by Policy Enter a Vendor ID and Product ID to pass through a specify type of device. Leostream Connect allows end user’s to attach and detach their offered USB devices from their remote desktops. See the Leostream Connect Administrator’s Guide and End User’s Manual for instructions on working with USB passthrough support. Leostream Connect does not control how the device or any associated applications run or perform on the remote desktop. You must manually install any drivers required by a particular device. Testing Policies To test if your policies are correctly offering desktops from pools: 1. Create and configure an authentication server in your Connection Broker and edit that authentication server’s assignments table so it uses this policy, as shown in the following figure (see Chapter 14: Assigning User Roles and Policies). 2. Use the Test Login link on the > Users > Users page to simulate a user login. The Connection Broker presents a report, indicating if the user was matched to a role and policy rule in the authentication server, and what desktops were selected based on the policy. See Testing User Role and Policy Assignment for more details. Using WebHooks in Policies The Connection Broker can call any custom WebHook, or HTTP POST, at a number of times during the user’s session, including: As soon as the user logs into the Connection Broker. When the user disconnects form a resource When the user logs out of a resource Using WebHooks, you can perform any configuration actions necessary for your environment. Use Connection Broker policies and release plans to call your WebHook. For an introduction into WebHooks, see the following Web page. http://wiki.webhooks.org/ 212 Leostream Connection Broker Administrator’s Guide Defining Custom Actions at Login To execute a WebHook as soon as the user logs into the Connection Broker, enter the WebHook in the URL to call at start of session edit field, shown in the following figure. The URL can contain a limited number of Connection Broker dynamic tags, which the Connection Broker replaces before calling the URL. Dynamic tags, such as {IP}, cannot be used in this URL as the Connection Broker does not have a value to assign to this tag at the time the session starts. If you include an invalid dynamic tag in the URL, the Connection Broker leaves the literal string for the dynamic tag in the URL. For a full list of dynamic tags, see Using Dynamic Tags. Defining Custom Actions on Log Out and Disconnect You use policies or release plans to execute WebHooks when the user logs out or disconnects from one of their desktops. For policy-assigned desktops, specify the WebHook in the release plan For hard-assigned desktops, specify the WebHook in the Desktop Hard Assignments policy In either case, use the URL to call edit fields associated with the When User Disconnects from Desktop and When User Logs Out of Desktop sections, shown in release plans in the following figure, to specify the WebHook to call at each time. 213 Chapter 11: Configuring User Experience by Policy Example WebHook The Connection Broker provides a simple WebHook that returns the Connection Broker status. This WebHook takes the following form: http://cb-address/index.pl?action=cb_status Where cb-address is your Connection Broker IP address or hostname. You can enter this into the URL to call at start of session edit field, as shown in the following figure. When a user logs into the Connection Broker and is assigned this policy, the Connection Broker calls the specified WebHook and registers the results in the Connection Broker logs. For the previous example, the > System > Logs page includes the following information. 214 Leostream Connection Broker Administrator’s Guide Chapter 12: Configuring User Experience by Client Location Overview When a user logs into the Connection Broker from a client device, the Connection Broker registers that client device on the > Clients > Clients page. The Connection Broker also assigns that client to one or more locations. A client location is similar to a desktop pool, in that the location represents a group of clients with similar attributes. Creating Locations You can group clients into locations using reported client attributes such as manufacturer, device type, OS version, or IP address. Similar to desktop pools, client locations can be nested. Locations allow you to tailor the end-user experience based on where the user logs in, including: Assign different roles and policies to users. The roles and policies, in turn, determine which desktops are offered to different users. See Assigning Users to a Role and Policy for information on setting up role and policy rules. Override the protocol plan assigned in the policy. The protocol plan determines which display protocol will be used to connect to the desktop when the user logs into the Connection Broker from this location. Assign printers to the user’s remote desktop. Modify registry keys on the user’s remote desktop. Locations are listed on the > Clients > Locations page, shown in the following figure. You define locations using a series of logic rules based on client attributes. To define a location: 1. On the > Clients > Locations page click Create Location. The following form opens: 215 Chapter 12: Configuring User Experience by Client Location 2. Enter a name for the location in the Name edit field. Client devices that support the Teradici PC-over-IP technology do not support location names larger than 80 characters. Leostream Connect supports longer location names, however it truncates the name in the dialog for managing another user’s resources. 3. From the Subset of location drop-down menu, select the parent location. Only clients that are part of the parent location are eligible to exist in this new location. 4. Use the Attribute Selection section to define which clients reside in this location. a. Select an attribute from the Client attribute drop-down menu, shown in the following figure. b. Select a logic condition from the Conditional drop-down menu. c. Enter or select the appropriate Value for this rule. 5. Indicate if the client can match any rule (OR) or must match all rules (AND), to be in this location. 6. Configure the Plans section, if applicable (see Assigning Plans to Locations). 216 Leostream Connection Broker Administrator’s Guide 7. Click Save. To edit existing locations, select the Edit action for the appropriate location. Using Subnet Masks to Create Locations You can use subnet maps to create a location of all clients on a particular subnet. To do so, in the Attribute Selection section: 1. From the Client attribute drop-down menu, select IP address. 2. From the Conditional drop-down menu, select begins with. 3. In the Value edit field, enter the subnet for this location, specified using the network prefix notation (/n) for the subnet mask. For example: 10.153.174.0/24 creates a location of all clients in the range of 10.153.174.0 to 10.153.174.255 10.153.174.0/25 creates a location of all clients in the range of 10.153.174.0 to 10.153.174.127 10.153.0.0/16 creates a location of all clients with an IP address of 10.153.x.x When using the /n notation, the n is a count of the number of ones in the binary representation of the subnet mask, for example: 255.255.255.128 = /25 255.255.255.192 = /26 etc... Creating Display Plans Display plans provide two key features: 1. Allowing the user to save and restore application window positions. 2. Managing application window positions in a remote session spanned across multiple monitors, for display protocols that do not provide native multi-monitor support. Display plans are created and listed on the > Plans > Display page, shown in the following figure. The Connection Broker provides a single default display plan. You can create as many additional display plans as needed for your environment. 217 Chapter 12: Configuring User Experience by Client Location Each remote desktop must have an installed and running Leostream Agent with the Install end-user experience extension task selected in order to use Leostream display plans. The Default Display Plan and Display Options The Connection Broker provides a default display plan that applies to all clients that are not assigned to another display plan. The Edit Display Plan form for the default display plan in shown in the following figure. All display plans include the following two display options: The Default number of displays if not supplied by client drop-down menu indicates the number of display spaces to split the remote session into, in the event the client device does not provide the Connection Broker with the number of attached monitors. You can use the Attached Displays column on the > Clients > Clients page to see if a particular client device provides the number of attached monitors. If the Attached Displays column displays a zero, the client is not providing the Connection Broker with display information. If the client does provide display information, the Connection Broker always uses that information instead of the valueset in the Default number of displays if not supplied by client drop-down menu. The Assume single monitor if screen width is less than edit field indicates the width (in pixels) of the smallest resolution monitor attached to the client. For example, if clients are attached to monitors with a resolution of 1200x800, enter 1210. Clients attached to two monitors return a total width of 2400 and the Connection Broker applies the display plan. If, however, one of the monitors is disconnected, the client returns a total display width of 1200, which is less than the threshold of 1200, and the Connection Broker assumes a single monitor. 218 Leostream Connection Broker Administrator’s Guide You can edit the default display plan, or create new display plans, to enable Leostream screen management. See Saving and Restoring Application Window Positions and Managing Window Placement for Spanned Sessions for more information on the Leostream screen management options. Saving and Restoring Application Window Positions Often users who travel between client devices, for example, from a trading floor to a conference room and back to a trading floor, move their remote session between client devices with different numbers of attached displays. Certain display protocols, such as HP RGS, can correctly expand and collapse the remote session to fill the available number of monitors. However, these display protocols are unable to manage the position of application dialogs within the session. When a user with carefully positioned applications moves from a four monitors client to a client with one monitor, their applications move to the single display. However, when the user moves back to the client with four displays, the applications remain in the single display and the user must manually reposition all their application windows. To support these use cases, you can allow users to save and restore application dialog positions using Leostream. To create a display plan that enables the Leostream application window positioning feature: 1. Click the Create Display Plan link. The Create Display Plan form opens. 2. Enter a name for the layout in the Name edit field. 3. Configure the Display Options as described in The Default Display Plan and Display Options. 4. Select the Allow user to save and restore application window positions option, as shown in the following figure. 5. Use the Attribute Selection section to define the clients that are assigned to this display plan. a. b. c. d. Select an attribute from the Client attribute drop-down menu. Select a logic condition from the Conditional drop-down menu. Enter or select the appropriate Value for this rule. Indicate if the client can match any rule (OR) or must match all rules (AND), to be in this location. 6. Use the Display Plan Order drop-down menu to reorder the plans. If this is your first display plan, the form does not include the Display Plan Order drop-down menu. The Connection Broker assigns 219 Chapter 12: Configuring User Experience by Client Location the client to the first display plan that matches the client’s attributes. The default display plan is always applied last. 7. Uncheck the Active display plan option if you do not want to apply this display plan to any clients, but do not want to delete the plan. 8. Click Save. The user’s remote desktop must have an installed and running Leostream Agent. See “Saving and Restoring Application Dialog Positions” in the Leostream Agent Administrator’s Guide to see how end users manage their application window positions. Managing Window Placement for Spanned Sessions Certain display protocols, including Microsoft RDP and HP® RGS, are capable of opening the remote session across multiple displays. Some of these display protocols, such as RGS, recognize individual monitors attached to the client device and can, therefore, individually manage the display on each monitor. For display protocols that recognize separate display spaces, you do not need Leostream to manage window positions. Other protocols, such as older versions of RDP, handle multiple monitors as one spanned session. In a spanned session, the display protocol treats the session as a single large display space, instead of as separate display spaces for each attached monitor. For these cases, you can instruct the Leostream Agent to correctly open, position, and maximize application windows on the separate displays that make up the spanned session. The Leostream window placement feature allows end users to do the following: Split or span remote desktop connections over multiple monitors. Restrict the taskbar to the primary monitor. Center the Windows login and logout dialogs, along with most message boxes, in the middle of the primary monitor. Managing the Windows dialogs on a Windows XP desktop requires you to install the Leostream Agent with the Enable multi-display support for Windows logon task selected. Maximize application windows intuitively. For example, if the user places the majority of an application window within one monitor, maximizing the windows fills that monitor. If, on the other hand, the window is resized to cover a large percentage of two monitors, maximizing the windows fills both monitors. Return to single monitor mode if the extra monitors are disconnected from the client. To use the Leostream window placement feature in a spanned RDP sessions, clients that are attached to multiple monitors must have the following characteristics. 220 Leostream Connection Broker Administrator’s Guide All monitors are arranged horizontally. The primary monitor is the left-most monitor. All monitors in the layout have the same resolution. There are between two and 16 monitors. To create a display plan that enables the Leostream window placement feature: 1. Click the Create Display Plan link. The Create Display Plan form opens. 2. Enter a name for the layout in the Name edit field. 3. From the Default number of displays if not supplied by client drop-down menu, select the number of display spaces to split the spanned session into, in the event the client device does not provide the Connection Broker with the number of attached monitors. You can use the Attached Displays column on the > Clients > Clients page to see if a client device returns the number of attached monitors. If the Attached Displays column displays a zero, the client is not providing the Connection Broker with display information. If the client does provide display information, the Connection Broker always uses that information instead of the value set in the Default number of displays if not supplied by client drop-down menu. 4. In the Assume single monitor if screen width is less than edit field, enter the width (in pixels) of the smallest resolution monitor attached to the client. For example, if clients are attached to monitors with a resolution of 1200x800, enter 1210. If clients are attached to two monitors, the total width is 2400 and the Connection Broker applies the display plan. If, however, one of the monitors is disconnected, the client has a total display width of 1200. The Connection Broker sees that this value is less than the threshold of 1210 and assumes a single monitor. 5. Select the Allow Leostream to manage window positions across multiple displays option, as shown in the following figure. 6. Select the Lock taskbar to a primary monitor option to restrict the Windows task bar to span across only the primary (or left-most) monitor. If this option is not selected, the task bar spans across all monitors. 221 Chapter 12: Configuring User Experience by Client Location 7. Select the Enable support for 32-bit applications running on 64-bit OS option if the user’s remote desktop runs a 64-bit operating system and the user runs 32-bit applications. The remote desktop must have an installed Leostream Agent with the Enable multi-display support for 32-bit applications task selected, when using this option. 8. By default, Leostream controls the positioning of all application windows. If you do not want Leostream to control the windows for particular applications, enter the process name for these applications, separated by commas, into the Applications to exclude edit field. All windows associated with these processes will position, maximize, and resize as usual in a spanned remote session. 9. Use the Attribute Selection section to define the clients that are assigned to this display plan. a. b. c. d. Select an attribute from the Client attribute drop-down menu. Select a logic condition from the Conditional drop-down menu. Enter or select the appropriate Value for this rule. Indicate if the client can match any rule (OR) or must match all rules (AND), to be in this location. 10. Use the Display Plan Order drop-down menu to reorder the plans. If this is your first display plan, the form does not include the Display Plan Order drop-down menu. The Connection Broker assigns the client to the first display plan that matches the client’s attributes. The default display plan is always applied last. 11. Uncheck the Active display plan option if you do not want to apply this display plan to any clients, but do not want to delete the plan. 12. Click Save. The display plan applies to all clients that satisfy the client attribute selections, assuming the clients are not assigned to a display plan with a higher priority (order). Individual clients can opt out of screen management. See Opting out of Multi-Monitor Support for more information. Setting Display Protocol Configurations for Multi-Monitor Support You can use the Leostream screen management with any display protocol and client that support multiple displays. You must ensure that the remote session spans all displays, typically by setting the appropriate parameters in the display protocol’s configuration file. The following sections pertain to settings in the Edit Protocol Plan form, described in more detail in Protocol Plans. Microsoft RDP 6 Microsoft RDP 6 can span across multiple monitors when the resolution and orientation of all monitors is 222 Leostream Connection Broker Administrator’s Guide identical. To span multiple monitors, ensure that the Configuration file associated with RDP in the Leostream Connect and Thin Clients Writing to Leostream API section of the protocol plan contains the following line: span monitors:i:{LEO_SPAN} The Connection Broker replaces the LEO_SPAN dynamic tag with 1 if the client is assigned a display plan and with 0 if the client is not assigned a display plan or opts out of Leostream multiple-monitor support. Alternatively, if all users of this policy have multiple-monitors, you can hard-code this line, as follows. span monitors:i:1 Microsoft RDP 7 Microsoft RDP 7 can span across multiple monitors with different resolutions and orientations when the remote desktop is running a Windows 7 operating system or later. To span multiple monitors with different resolutions, ensure that the Configuration file associated with RDP in the Leostream Connect and Thin Clients Writing to Leostream API section of the protocol plan contains the following line: use multimon:i:{LEO_SPAN} The Connection Broker replaces the LEO_SPAN dynamic tag with 1 if the client is assigned a display plan and with 0 if the client is not assigned a display plan or opts out of Leostream multiple-monitor support. Alternatively, if all users of this policy have multiple-monitors, you can hard-code this line, as follows. use multimon:i:1 If the client devices includes RDP 7, but the user connects to a desktop running RDP 6, use the span monitors configuration file parameter, instead of the use multimon parameter. HP RGS HP RGS can set the layout and resolution of the remote session to match the configuration of the client display. To match the client display for clients that are assigned an appropriate display plan, include the following lines in the Configuration file field for RGS in the Leostream Connect and Thin Clients Writing to Leostream API section of the protocol plan. Rgreceiver.IsMatchReceiverResolutionEnabled.IsMutable=0 Rgreceiver.IsMatchReceiverResolutionEnabled={LEO_SPAN}; Rgreceiver.IsMatchReceiverPhysicalDisplaysEnabled.IsMutable=0; Rgreceiver.IsMatchReceiverPhysicalDisplaysEnabled={LEO_SPAN}; The Connection Broker replaces the LEO_SPAN dynamic tag with 1 if the client is assigned a display plan and with 0 if the client is not assigned a display plan or opts out of Leostream multiple-monitor support. Alternatively, you can hard-code the parameters, by replacing {LEO_SPAN} with 1. 223 Chapter 12: Configuring User Experience by Client Location Sun uttsc In the Leostream Connect and Thin Clients Writing to Leostream API section of a protocol plan, ensure that the command line parameters in the Sun Ray sub-section includes the –m parameter, so the session spans multiple monitors. Dell Wyse Thin Clients For Wyse thin clients that support dual heads, for example, the V10L, ensure that the Desktop configuration file field in the Wyse Configuration section of the protocol plan contains the parameter: Fullscreen=yes Wyse thin clients with dual-head support span the remote session across both monitors when the Fullscreen parameter is set to yes. Otherwise, when Fullscreen is set to no, the remote session runs in a windowed screen. Attaching Network Printers When using the Windows version of Leostream Connect, Microsoft RDP provides native printer redirection. To redirect all client printers, include the following line in the RDP configuration file found in the user’s protocol plan. redirectprinters:i:1 For cases that do not use RDP or do not use RDP to redirect printers, the Connection Broker allows you to attach network printers to remote desktops based on the location of the user’s client device. End-users can then access these printers from their remote desktops. Using this location-based printing feature, you can: Register printers in Microsoft® Active Directory® servers with the Connection Broker Manually register a network printer with the Connection Broker Create printer plans, consisting of a group of printers with one default printer Assign printer plans to clients using locations defined in the Connection Broker Provide end-users with access to the network printers physically closest to their client device, no matter what type of client device and display protocol they are using How it Works The Connection Broker determines which printers to attach to a remote desktop based on the location of the user’s client. To configure your Connection Broker, perform the following steps. 1. Register network printers with your Connection Broker, either manually (see Adding Individual Printers) or using Active Directory servers (see Adding Printers from Microsoft Active Directory Servers) 224 Leostream Connection Broker Administrator’s Guide 2. Group printers into printer plans, and assign a default printer to each plan (see Creating Printer Plans) 3. Create client locations (see Creating Locations) 4. Assign a printer plan to a particular client (see Assigning Plans to Clients) or client location (see Assigning Plans to Locations) When a user logs in at a particular client, the Connection Broker does the following. 1. When the user logs into the Connection Broker, the Connection Broker finds the printer plans assigned to all the locations associated with their client device. If the client falls into multiple locations, the Connection Broker uses the printers included in all associated plans. 2. When the user logs into their desktop, the Connection Broker disconnects all network printers already attached to that desktop. Any local printers remain attached. If using the Connection Broker location-based printer feature, do not manually attach any network printers to remote desktops that are connected to by clients managed by the Connection Broker. These attachments are lost when a user logs in from a client associated with a Connection Broker printer plan. 3. The Connection Broker attaches all appropriate printers, and sets the default printer. If no default printer is selected in the printer plan, the Connection Broker leaves the currently selected default printer on the desktop. The Connection Broker detaches the printers in the printer plan when the user logs out or disconnects from the remote desktop. Any printers that were attached to the desktop before the printer plan was applied remain attached to the desktop after the user logs out or disconnects. System Requirements In order for the Connection Broker to successfully attach a network printer to a remote desktop, all of the following requirements must be met. The Leostream Agent must be installed and running on the remote desktop, and reachable by the Connection Broker. The network printers must be shared and DNS accessible. You cannot currently specify the printer by IP address. The network printer must have a fully qualified printer name (UNC name). The user and printer do not need to be in the same domain. However, the domain of the printer must give the user privileges to access the printer. 225 Chapter 12: Configuring User Experience by Client Location If the printer drivers are not installed on the remote desktops, you must have a shared printer driver folder. By default, when you share a printer, a shared folder is automatically created. Do not manually change the permissions or delete this shared folder. If the printer drivers are not installed on the remote desktop, the domain user on the remote desktop must have permissions to install drivers, as determined by the security policies applicable to this user on the desktop. The domain user on the remote desktop must have access to the printers. Registering Printers with the Connection Broker The > Resources > Printers page lists all the printers currently available for assignment by your Connection Broker. You can add printers to this list in two ways. Create a Printer Repository center to register printers from Active Directory services Add individual network printers by entering the printers UNC name Adding Individual Printers In addition to scanning Active Directory servers for all available printers, you can manually specify individual network printers to include in the > Resources > Printers page, as follows. 1. Go to the > Resources > Printers page. 2. Click Add Printer. The Add Printer form, shown below, opens. 3. Enter a display name for the printer into the Name edit field. This is the name the user will see in their printers list on the remote desktop. 4. Enter the printer’s full UNC (Universal Naming Convention) name in the UNC Name field. This name has the following format. \\server\printer The UNC name must be unique. The Connection Broker will not save the form if it has already registered a printer with the same UNC name. 226 Leostream Connection Broker Administrator’s Guide 5. Enter any optional information to store with this printer in the Notes edit field. 6. Click Save. After you click Save, the Connection Broker adds the printer to the > Resources > Printers page. Also, if you did not previously create a Printer Repository Center, the Connection Broker automatically creates this center. Adding Printers from Microsoft Active Directory Servers Create a Printer Repository center to indicate to the Connection Broker which Active Directory servers to scan for printers. You must add an Active Directory authentication server on the > Users > Authentication Servers page before you can add printers from that Active Directory server. If you have not yet defined your authentication servers, complete the steps in Adding Microsoft® Active Directory® Authentication Servers before proceeding with this section.) To create a Printer Repository center: 1. Go to the > Resources > Centers page. 2. Click Add Center. The Create Center form opens. 3. Select Printer Repository from the Type drop-down menu. The form updates, as shown in the following figure. 4. Enter a name for the center into the Name field. 227 Chapter 12: Configuring User Experience by Client Location 5. In the Load Printers from Active Directory section: a. From the Server drop-down menu, select the Active Directory authentication server to scan for printers. The drop-down menu contains only authentication servers already defined in the > Users > Authentication Servers page. b. In the Sub-tree edit field, enter the top of the search path to scan for printers. If you leave this field blank, the Connection Broker uses the sub-tree specified for this authentication server on the > Users > Authentication Servers page. c. In the Filter edit field, enter an optional filter string to limit the type of printers to include in the > Resources > Printers page. The default filter is: (objectclass=printQueue) You can append additional filters to this string, for example: (objectclass=printQueue)(cn=*HP*) The Connection Broker only filters based on the printer’s distinguishedName value. 6. In the Refresh interval drop-down menu, select how often the Connection Broker should refresh the printer list obtained from the Active Directory servers in this center. If you do not regularly add or remove printers, select Manual only, to reduce the number of Active Directory queries. If you select Manual only, use the Refresh action associated with the Printer Repository center to rescan the Active Directory server for printers. 7. Click Save. After you click Save, the Connection Broker scans the included Active Directory servers for printers, and lists these printers on the > Resources > Printers page. If the Connection Broker finds multiple printers with the same UNC Name, it includes only one of the printers in the list. In addition, if you manually added a printer to the list, and that printer has the same UNC name as a printer in the Active Directory tree, the Connection Broker overwrites the manually added printer with the information from the Active Directory entry. If you delete the Printer Repository center after you create printer plans, the Connection Broker removes all printers from the plans. When an empty printer plan is assigned to a location, users logging in from clients in those locations will not see any network printers. Viewing Available Printers The Connection Broker displays all registered printers, and their characteristics, on the > Resources > Printers page, shown in the following figure. This list is empty until you manually add a printer or define a Printer Repository center. 228 Leostream Connection Broker Administrator’s Guide You can modify the order and type of characteristics displayed on this page by clicking the customize link at the bottom left side of the page (see Customizing Tables). The following sections describe the available printer characteristics. Action Drop-down menu or list of links indicating the actions you can perform on a particular printer. Available actions include the following: Edit: Opens the Edit Printer dialog Delete: Deletes this printer from the list. If you delete a printer that was manually added to the list, selecting this action permanently deletes the printer from the Connection Broker. If you delete a printer that was added via the Printer Repository center, the printer may reappear in the list the next time the Connection Broker refreshes the center. Name The printer name, as it will be displayed to users when they connect to their remote desktops. Share Name The printer’s share name, as reported by Active Directory. This field is blank for manually added printers. UNC Name The printer’s UNC name. The Connection Broker requires a unique UNC name for all printers. AD distinguishedName The printer’s distinguishedName, as reported by Active Directory. This field is blank for manually added printers. URL The URL that can be called to reach this printer, as reported by Active Directory. This field is blank for manually added printers. Port The port used to communicate with this printer, as reported by Active Directory. This field is blank for manually added printers. Printer Source Indicates if this printer was manually added to the Connection Broker, or added from the Printer Repository center. 229 Chapter 12: Configuring User Experience by Client Location Color Indicates if Active Directory reported this printer as a color printer (Yes) or black-and-white printer (No). This field always displays No for manually added printers. Duplex Indicates if Active Directory reported that this printer supports duplex mode (Yes) or not (No). This field always displays No for manually added printers. Collate Indicates if Active Directory reported that this printer supports collation (Yes) or not (No). This field always displays No for manually added printers. Staple Indicates if Active Directory reported that this printer can staple (Yes) or not (No). This field always displays No for manually added printers. Printer Server Indicates the printer server that shares this printer. Plan Indicates all the printer plans that reference this printer. UUID The printer’s unique identifier. Identifying Duplicate Printers The Connection Broker identifies duplicate entries for the same printer using the printer’s UNC name. Duplicates may occur if a printer is listed multiple times in Active Directory, or if you manually entered a printer that is also registered in Active Directory. If you have duplicates that were manually added, you can delete them by selecting the Delete action associated with the printer. Creating Printer Plans Connection Broker printer plans allow you to create groups of printers, and indicate which printer is the default. You assign these plans to client based on the client’s locations. The Connection Broker provides a default printer plan called All Printers. When a user logs into a client that is assigned to this default printer plan, the Connection Broker first detaches any existing network printers attached to the remote desktop, then attaches all printers listed in the > Resources > Printers page. You cannot edit the default printer plan. However, you can create additional printer plans, as follows. 1. Go to the > Plans > Printers page, shown in the following figure. 230 Leostream Connection Broker Administrator’s Guide 2. Click Create Plan. The Create Printer Plan form, shown below, opens. 3. Enter a name for the plan in the Plan name edit field. 4. In the Select Printers in Plan section, highlight the printers you want to include in this plan in the Available Items list, and click the Add highlighted items link below the list. 5. Select the default printer for this plan from the Default printer drop-down menu. If you do not define a default printer in the Connection Broker, the Leostream Agent on the remote desktop does not change the currently selected default printer on the desktop. 6. Enter any optional information you want to store with this plan into the Notes edit field. 7. Click Save. After you save the printer plan, it appears in the list on the > Plans > Printers page, as shown in the following figure. 231 Chapter 12: Configuring User Experience by Client Location After creating your printer plans, assign them to clients based on the client’s location (see Assigning Plans to Locations). To see which locations a printer plan is associated with, edit the printer plan and consult the information text to the right of the Edit Printer Plan form. For example, in the following figure, the printer plan is used in the location named Floor 1. If a user logs in from a client device that is assigned a printer plan and the user’s protocol plan is configured to redirect the client printers, the remote desktop has access to the printers from the printer plan and from the client device. Manipulating Registry Keys Registry plans specify a set of local machine Windows registry keys to create or modify on the remote desktop. The Connection Broker applies a registry plan to the remote desktop based on a client’s location. Registry plans currently apply only when the user logs in using Leostream Connect. Use registry plans when registry keys on the remote desktop need to be modified based on the user’s client device 232 Leostream Connection Broker Administrator’s Guide Registry plans are an advanced Connection Broker feature. Aside from casting the data type correctly, the Connection Broker does not perform any validation or error checking on the values you assign to registry keys. Proceed with caution, as incorrectly setting certain registry keys on a desktop can have adverse effects. To use registry plans, go to the > System > Settings page and select Registry plans, as shown in the following figure. After you save the selection in the Settings page, the Registry page appears in the Plans page, shown in the following figure. The Connection Broker does not provide any default registry plan. To create a registry plan, click the Create Registry Plan link. The Create Registry Plan form, shown in the following figure, opens. The next section describes how to use this form. 233 Chapter 12: Configuring User Experience by Client Location Creating Registry Plans To create a registry plan using the Create Registry Form: 1. In the Plan name edit field, enter a name for this plan. You will use this name to assign the plan to a client or location. 2. In the Root edit field for Key 1, shown in the following figure, select the root key. If this registry plan modifies registry keys on a remote desktop running a 32-bit Windows operating system, the two root options have identical results. If the remote desktop is running a 64-bit operating system, the two options are as follows: HKEY_LOCAL_MACHINE: Modifies the key associated with the native 64-bit operating system HKEY_LOCAL_MACHINE - 32-bit: Modifies the key associated with 32-bit applications. 3. In the Path edit field, enter the full path to the key, excluding the root. 4. If the key entered in the Path edit was not previously created on the remote desktop, select the Add key if it does not already exist option. 5. In the (Default) data edit field, enter the value you want to assign to the default value for this key. The default value always has a string data type. Leave this field blank if you do not want to change the existing default value. See Using Dynamic Tags in Registry Plans for information on how to use dynamic tags to configure the default value. 6. For each row in the table, shown in the following figure, enter the following information: a. In the Name edit field, enter the name of the value to set. b. From the Type drop-down menu, select the data type for the value, either STRING or DWORD. c. In the Data edit field, enter the data to assign to this value. See Using Dynamic Tags in Registry Plans for information on how to use dynamic tags to specify the data. d. If this value has not already been created on the remote desktop, check the Add option. 234 Leostream Connection Broker Administrator’s Guide 7. To set more than three values for this key, use the Add Values drop-down menu to add rows to the table. 8. To set more than one registry key, use the Add Keys drop-down menu to add keys to the plan. 9. Use the Notes edit field to store any additional information with the registry plan. 10. Click Save to store any changes. Using Dynamic Tags in Registry Plans The Connection Broker supports a number of dynamic tags for setting the Data field for any of the registry key values, including the (Default) value. You can use any of the following dynamic tags. {EMPTY}: Clears any existing data from the registry key, and leaves the value blank. {AD:USER:attribute_name}: Replaces the existing registry key data with the value found in the user's Active Directory attribute given by attribute_name. {AD:CLIENT:attribute_name}: Replaces the existing registry key data with the value found for the attribute given by attribute_name of the client’s Computer Active Directory object. The user must authenticate with the Connection Broker using Active Directory. If this is the case, the Connection Broker uses the name of the client computer, determined as either the NetBIOS or DNS name, to search for the correct Computer object in Active Directory. {AD:MACHINE:attribute_name}: Replaces the existing registry key data with the value found for the attribute given by attribute_name of the remote desktop’s Computer Active Directory object. The Connection Broker resolves this type of dynamic tag when either of the following conditions is met. o The user is authenticated by the same domain as contains the selected remote desktop. In this case, the remote desktop can be registered with the Connection Broker from any type of center, for example a vCenter Server center. o The remote desktop was registered with the Connection Broker from an Active Directory 235 Chapter 12: Configuring User Experience by Client Location center. In this case, the desktop from the Active Directory center must be marked as Available, not as Duplicate. If the Active Directory desktop is available, the user does not have to authenticate with the same domain as contains the remote desktop. Assigning Plans to Locations Location-based plans allow you to tailor the end user experience based on the user’s client. Connection Broker locations are essentially groups of clients made up of clients with common attributes, such as manufacturer, device type, OS version, IP address, etc. See Creating Locations for information on how to create locations. By default, the Connection Broker does not assign any plans to a location. To assign plans to an existing location: 1. Open the Edit Location form, shown in the following figure. 2. Select the printer plan to associate with this location from the Printer drop-down menu in the Plans section, indicated in the previous figure. Leave the drop-down menu on Select… if you do not want to assign a printer plan to this location. If a client falls into more than one location with a printer plan, the Connection Broker attaches the union of all printers included in all plans. For the default printer, the Connection Broker chooses the first printer in the list, determined as the first printer in the first plan, alphabetically, of all the plans associated with the locations. If your users connect using RDP and RDP printer redirection is turned on, the user’s remote desktop will show the printers attached by any relevant printer plan, as well as any printers redirected by RDP. 3. Select the protocol plan to associate with this location from the Protocol drop-down menu. When 236 Leostream Connection Broker Administrator’s Guide the user logs in from this location, this protocol plan selection overrides the protocol plan selected in the user’s policy. Leave the drop-down menu on <Determined by policy> to use the protocol plan assigned in the policy. 4. Select the registry plan to associate with this location from the Registry drop-down menu. You can override this registry plan on a client-by-client basis, using the Edit Client page (see Editing Clients). If a client falls into multiple locations, the Connection Broker alphabetically sorts the locations, excluding the All location. The Connection Broker then applies the first protocol plan and registry plan it finds in the alphabetically sorted list of location. As a result, the protocol plan and registry plan can come from different locations. The Connection Broker handles printer plans differently. For printer plans, the Connection Broker applies the printer plans for all the locations that the client falls into, ensuring that the user is always able to access the correct printer for their location. The Connection Broker attaches all printers from all the printer plans, setting the first printer as the default. If no printers are associated with any of the printer plans for this location, the user will not have access to any network printers. Example: Creating a Location for a Particular Client Device Often, it is useful to define a location based on the types of clients users are logging in from. For example, you can create a location for all Leostream Connection clients on the 100 network, as follows. 1. On the > Clients > Locations page click Create Location. 2. Enter Leostream Connect in the Name edit field. 3. Configure two rules in the Attribute Selection section, as follows: Restrict the location to Leostream Connect clients by configuring the following: i. Select Device type from the Client attribute drop-down menu ii. Select is equal to from the Conditional drop-down menu iii. Select Leostream API from the Value drop-down menu Restrict the network address to begin with 100 by configuring the following: i. Select IP address from the Client attribute drop-down menu ii. Select begins with from the Conditional drop-down menu iii. Enter 100 into the Value edit field 4. Select The Locations must match all of the attribute rules (AND) 5. Click Save. 237 Chapter 12: Configuring User Experience by Client Location Using the Clients Page The > Clients > Clients page, shown in the following figure, lists all the client devices that have registered with the Connection Broker. Most clients register with the Connection Broker when a user logs in from that client. PCoIP client devices are an exception. The Connection Broker discovers PCoIP client devices if you enable PCoIP support. You can also use the Connection Broker bulk-upload feature to load clients from a CSV-file (see Uploading Data from CSV Files). Available Client Characteristics You can modify the order and type of characteristics displayed on this page by clicking the customize link at the bottom left side of the page (see Customizing Tables). The following sections describe the available client characteristics. Bulk actions Checkboxes that allow you to select multiple clients for performing a batch process, currently, Edit (see Bulk Editing Clients) and Delete (see Deleting Clients). Action Drop-down menu or list of links indicating the actions you can perform on a particular client, currently only Edit (see Editing Clients). Name The name given in the Edit Client dialog. Type An internal Connection Broker variable used to categorize types of clients. Client Binding For PCoIP clients, indicates if this client is a slave or master client in a bonded client pair. If bonded, shows the associated master or slave client. IP Address The client IP address. MAC Address The client MAC address. 238 Leostream Connection Broker Administrator’s Guide Connected Desktop The desktop currently connected to the client device. Assigned Desktop The desktop currently assigned to this client. This column is blank if no desktop is assigned. Desktop Assignment Mode Indicates if the client is hard-assigned to a desktop, or if it allows users to access their policy-assigned desktops. Direct Connect For PCoIP clients, indicates if the Direct connect client to desktop option is selected. Device The type of client device as reported by the client software. Device Version The device’s version information. For Web browser, this field includes the browser’s User Agent String. Chassis Type The chassis type as returned by Leostream Connect. Device UUID A unique identifier for the client device. Client UUID The client UUID as reported by the client device, typically Leostream Connect. Client Software The type of client software running on the client device. Client Software Version The version of the client software running on the client device. Attached Displays Number of monitors attached to the client. Location The client location, if you have created locations and assigned them to clients. A client can be a member of more than one location. See Creating Locations for more information. Language The client language. Operating System The operating system running on the client, if applicable. 239 Chapter 12: Configuring User Experience by Client Location Manufacturer The client manufacturer. Serial number The client serial number. Last used The date and time the client was last used. Language ID The ID associated with the client’s language. Asset Tag The client asset tag. Connection Broker Address The address of the Connection Broker currently managing connections for a PCoIP zero client. Managed Indicates if this PCoIP client is managed by this Connection Broker. If set to Yes, the Configure this client for use with this Connection Broker option is selected on the Edit Client page. Uploaded Indicates if this client was uploaded using the options on the > System > Maintenance page. If set to No, this client appeared on the Clients page after a user logged into the Connection Broker from this client. Filtering the Client List You can filter the list of clients in the > Clients > Clients page using the Filter this list drop-down menu, shown in the following figure. The No filter option lists all clients that have logged into the Connection Broker, divided into a series of pages if applicable. Every time you create a client location (see Creating Locations) the Connection Broker automatically creates a corresponding filter in the drop-down menu. Select one of these filters to limit the list to clients within the chosen location. To edit an existing filter, such as one of the automatically created location filters: 1. Select Edit an existing filter from the Filter this list drop-down menu. The following form opens in a new Web browser. 240 Leostream Connection Broker Administrator’s Guide 2. Select the filter to edit from the Select a filter drop-down menu. 3. Enter a name for the filter in the Filter name edit field. 4. Select the location to associate with this filter from the Location drop-down menu. If you do not want to filter based on any location, select All. 5. Use the controls in the Include data that matches section to further filter the clients. You can filter clients based on the client’s name, asset tag, IP address, and device type, as shown in the previous figure. 6. Click Save. To create a new filter, select Create a new filter from the Filter this list drop-down menu, and follow steps 3 through 6 in the previous process. By default, only the user who creates a filter can use it. To allow other user to access your filter, check the Share the filter with other users option when you create the filter. This filter then appears in the Filter this list drop-down menu of other users that log into this Connection Broker. Editing Clients You can edit a particular client by selecting the Edit action associated with that client. Editing the client allows you to: Change the client name Set the client assignment mode (see Hard-Assigning Clients to Desktop) Specify a display plan (see Creating Display Plans for Screen Management) For PC-over-IP clients, configure monitor resolution (see Editing Client Devices in the Connection 241 Chapter 12: Configuring User Experience by Client Location Broker Web Interface), set the client to connect directly to its hard-assigned host (see Direct Connections to Hard-Assigned Desktops), and bind clients for quad-monitor support (see QuadMonitor Support for PCoIP) Select a printer and registry plan for this client (see Assigning Plans to Clients) Bulk Editing Clients The Bulk Edit option for clients allows you to configure a subset of PCoIP client parameters and to assign Printer and Registry plans to multiple clients, simultaneously. To edit multiple clients: 1. Go to the > Clients > Clients page. 2. In the Bulk Action column, select the checkboxes for all clients to edit. If the Bulk Action column is not displayed, click the customize link below the list to add the column (see Customizing Tables). 3. Select Edit from the drop-down menu at the top of the Bulk Action column. 4. In the Edit n clients form, shown in the following figure, use the PCoIP Client Configuration section to configure parameters for PCoIP clients. This section appears, but does not apply, to other client types. Select <Leave unchanged> for each parameter whose value you do not want to modify. a. For the Configure clients for use with this Connection Broker option: 242 Leostream Connection Broker Administrator’s Guide Select Yes to manage these PCoIP clients by this Connection Broker. When you save the form, the Connection Broker selects the Enable Connection Management option for this PCoIP client, and points the client to this Connection Broker. Select No to switch the PCoIP client back to direct-to-host mode. When you save the form, the Connection Broker unchecks the Enable Connection Management option for this PCoIP client. b. If the PCoIP clients have hard-assigned desktops, use the Direct connect client to desktop option, as follows: Select Yes to enable direct-connection mode (see Direct Connections to HardAssigned Desktops). When using direct-connection mode, you must specify the policy to apply to the connection from the Apply policy options from drop-down menu. Select No to disable direct-connection mode. 5. Use the drop-down menus in the Plans section to set Printer and Registry plans for each client. These drop-down menus apply to all client types. 6. Click Save to apply the changes. Assigning Plans to Clients By default, a client inherits its printer and registry plans from the locations that contain the client. If a client falls into multiple locations, the Connection Broker alphabetically sorts the locations, excluding the All location. The Connection Broker then applies the first registry plan it finds in the alphabetically sorted list of location. The Connection Broker applies the printer plans for all the locations that contain the client. The Connection Broker attaches all printers from all the printer plans, setting the first printer as the default. Use the Printer and Registry drop-down menus in the Plans section of the Edit Client page to override the location settings. When you select a printer plan for the client, only that printer plan is applied. Deleting Clients To remove clients from the client list, select the Edit action for appropriate client. In the Edit client form that opens, click Delete to remove the client. You cannot delete the client you are currently using to log into the Connection Broker Administrator Web interface. To simultaneously delete multiple clients, in the > Clients > Clients page: 243 Chapter 12: Configuring User Experience by Client Location 1. Check the box associated with every client to delete. If check boxes do not appear in your > Clients > Clients table, customize the table so the Bulk action column appears (see Customizing Tables). 2. Select Delete from the Bulk action drop-down menu at the top of the table. 3. Click OK in the confirmation window that appears. Hard-Assigning Clients to Desktop You can hard-assign a desktop to a client so that any user who logs into that client receives the same desktop. Desktops that are hard-assigned to a client are not available for policy assignment. To hard-assign a client to a particular desktop: 1. On the > Clients > Clients page, select the Edit action for appropriate client. The Edit Client form opens. 2. In the Assignment section, select Hard-assigned to a specific desktop from the Desktop assignment mode drop-down menu. 3. Select the appropriate desktop from the Assigned desktop drop-down menu, as shown in the following figure. 4. Click Save. When a user logs into a desktop that is hard-assigned to a client, the Connection Broker uses the settings in the Desktop Hard Assignments section of the user’s policy. The user does not have access to their policyassigned resources when they log into a client that is hard assigned to a desktop. You must install the Leostream Agent on the desktop to use the Forced logout policy option. See Desktop Assignment Modes for more information on different desktop assignment modes. 244 Leostream Connection Broker Administrator’s Guide Hard-Assigning a Display Plan to a Client Typically, display plans are assigned to clients based on the client’s attributes (see Creating Display Plans for Screen Management). In some cases, you may need to hard-assign a particular display plan to a client, or specify that a client does not support multiple monitors. To hard assign a display plan to a client: 1. On the > Clients > Clients page, select the Edit action for appropriate client. The Edit Client form opens. 2. In the Assignment section, select Hard assign to specific plan from the Multi-monitor support drop-down menu. 3. Select the appropriate display plan from the Assigned display plan drop-down menu, as shown in the following figure. 4. Click Save on the Edit Client page. You must install the Leostream Agent, including the end-user experience extension, on desktops that connect to a client with a hard-assigned display plan. Opting out of Multi-Monitor Support If you want to ensure that a particular client is never assigned a display plan, you can opt out as follows: 1. On the > Clients > Clients page, select the Edit action for appropriate client. The Edit Client form opens. 2. In the Assignment section, select Opt out of multi-monitor support from the Multi-monitor support drop-down menu, as shown in the following figure. 245 Chapter 12: Configuring User Experience by Client Location 3. Click Save on the Edit Client page. When a client that opts out of multi-monitor support connects to a remote desktop, the display protocol configuration file in the user’s policy determines if the remote session spans multiple monitors. In this case, however, the Leostream Agent will not handle positioning and resizing of application windows. 246 Leostream Connection Broker Administrator’s Guide Chapter 13: Authenticating Users Overview User authentication is the process of determining who a user is based on the credentials they supply. Common types of user credentials include username and password, smart cards, or fingerprints. The Connection Broker authenticates users by checking the user’s credentials against the different authentication servers you registered with the Connection Broker. Based on the user’s identity, the Connection Broker then offers the appropriate desktops and applications. The Connection Broker can authenticate users against any of the following external authentication systems. Microsoft® Active Directory® (see Adding Microsoft® Active Directory® Authentication Servers) Novell® eDirectory® (see Adding Novell® eDirectory® Authentication Servers) Any third party authentication system based on OpenLDAP™ (see Adding OpenLDAP Authentication Servers) Network Information Service (NIS) (see Authenticating with NIS) In addition, you can treat the Connection Broker as a local authentication system by manually defining users and their login credentials within the Connection Broker (see Locally Authenticated Users). The > Users > Authentication Servers page, shown in the following figure, lists your external authentication servers. In multi-domain environments, the Connection Broker queries the authentication servers according to their Position variable. If the user does not specify the domain, the Connection Broker logs the user into the first domain that authenticates the user. If a particular user name exists in multiple domains, the Connection Broker can treat that as the same user, or as a different user, as described in the following section. Unique Versus Non-Unique User Identification For multi-domain environments, the Connection Broker can handle a unique login name in one of the following ways. 1. Unique across domains: Indicates that a particular user name applies to a unique physical user across all corporate domains 247 Chapter 13: Authenticating Users 2. Non-unique across domains: Indicates that a particular user name does not apply to a unique physical user on each corporate domain. In this case, a particular username is used by a different user on each domain. You switch between these two modes using the Login name unique across domains option on the > System > Settings page, shown in the following figure. When this option is selected: The Connection Broker assumes that a particular user name belongs to a unique physical end user. The > Users > Users page maintains a single record for a particular user name. For example, if a user with user name jsmith logs into the Development domain on Monday, the Connection Broker creates a record for this user. If, on Tuesday, a user with the user name jsmith logs into the QA domain, the Connection Broker replaces the original record with this new information. When logging into the Connection Broker, entering or selecting <Any> for the domain indicates that the Connection Broker should search for the user in all authentication servers. For first time users, the Connection Broker logs the user into the first authentication server that successfully authenticates the user. For returning users, the Connection Broker checks the authentication server the user first logged into, then searches other authentication servers if the user is not found in their previous authentication server. When this option is not selected: The Connection Broker assumes that a particular user name belongs to different physical end users in each domain. The > Users > Users page maintains multiple records for a particular user name. For example, The Connection Broker creates two records for two users with the same user name jsmith, logging into two different domains. When logging into the Connection Broker, entering <None> for the domain indicates that the Connection Broker should search first for a user that was created locally in the Connection Broker. If a local user is not found, the Connection Broker then searches through the remaining authentication servers. The Connection Broker breaks this rule if a fully qualified username, such as UPN, is entered into the user name field. In this case, the Connection Broker does not look for a local user; it looks for the user in the appropriate domain. 248 Leostream Connection Broker Administrator’s Guide Types of User Authentication The Connection Broker currently supports the following authentication systems: Username, only, authentication Username and password authentication Smart card authentication Fingerprint authentication RADIUS authentication (see Enabling RADIUS Authentication) Username Authentication User authentication requires the user to enter only their username. This form of authentication is also called an unauthenticated login. The Connection Broker assigns a desktop based on the policy associated with their username, without validating the user’s password. The Connection Broker removes any leading and trailing edge spaces when the user enters their username. In this case, the Connection Broker assumes that another system is authenticating the user, such as the operating system within the desktop. Using unauthenticated logins, you can: Hard-code the client, such as Leostream Connect, with the user’s username. Then, when the user launches the client, the Connection Broker automatically assigns their desktop and directs the user to their desktop for authentication. Allow users who have authenticated through an SSL VPN to log into the Connection Broker without having to reenter their credentials. Allow users to authenticate using a fingerprint reader without requiring a password. Allow users to log into the Connection Broker using their Windows username, but enter Linux credentials on their remote desktop. To enable unauthenticated logins: 1. Select Enable the unauthenticated login feature on the > System > Settings page, shown in the following figure. 249 Chapter 13: Authenticating Users 2. If your users are logging in through Leostream Connect (on Windows or Linux), select the Allow unauthenticated logins (hides password field) option, shown in the following figure. With this option selected, the Password field is not shown on the Login dialog, making it clear to end users that a password is not required. 3. For each authentication server that you want to permit unauthenticated logins, select the Allow unauthenticated logins option in the Other section of the Edit Authentication Server page, shown in the following figure. If you select the Allow unauthenticated logins option selected and your user enters a password, the Connection Broker validates the password. If the user enters an invalid password, the Connection Broker rejects the login. Users must enter either a valid password, or leave the password blank. User Name and Password Authentication By default, the Connection Broker authentications users using the username and password they entered in the Web browser, thin client, or fat client. The Connection Broker can also authenticate users using client side certificates. See Using Client Side Certificates for more information. 250 Leostream Connection Broker Administrator’s Guide The Connection Broker removes any leading and trailing edge spaces when the user enters their username. Smart Cards The Connection Broker supports smart cards with Leostream Connect for Windows, Sun Ray™ clients, and Wyse® WTOS clients. Inserting the smart card triggers the desktop assignment process. Once the desktop is assigned to the user, the desktop’s operating system queries the smart card and requests that the user enters their PIN in order to confirm their identity. For Wyse thin clients, the subject name on the smart card must be in UPN format in order for the Connection Broker to recognize a card entered into the smart card reader. If you are using smart cards over an SSL connection, the Connection Broker requires a certificate from an authority that recognizes the certificate on the smart card. Obtain an appropriate root certificate from your certificate authority and use your VMware virtualization layer console to load that certificate into the Connection Broker. Do not use the > System > Maintenance page to load this certificate. For information on using smart cards with Leostream Connect, see the Leostream Connect Administrator’s Guide and End User’s Manual. For information on using smart cards with thin clients, see the Leostream Clients Guide. Fingerprint The Connection Broker supports fingerprint authentication with Leostream Connect when using the DigitalPersona® Pro for Active Directory® fingerprint identity solution from DigitalPersona, Inc. When using fingerprint authentication with the Connection Broker: 1. The user enters their username and, optionally, password into Leostream Connect. 2. Leostream Connect sends the username to the Connection Broker. 3. The Connection Broker responds with the desktops to offer to that user. 4. When the user selects their remote desktops, Leostream Connect opens a connection to that desktop. 5. The user then swipes their fingerprint into the login page for each desktop to sign into the remote desktop. To use DigitalPersona Pro for Active Directory, install the following components: DigitalPersona Pro for Active Directory Server 4.2.4 on your domain controller, where your Active Directory server is installed. 251 Chapter 13: Authenticating Users DigitalPersona Pro for Active Directory Workstation 4.2.5 on your remote desktops. DigitalPersona Pro for Active Directory Workstation 4.2.5 on your client desktops, where Leostream Connect is installed and the fingerprint reader is connected. Fingerprint support with Leostream Connect requires that you allow the client desktop to redirect the fingerprint data to the remote desktop. See “Using DigitalPersona Pro with Leostream Connect” in the Leostream Connect Administrator’s Guide and End User’s Manual detailed instructions on setting up fingerprint redirection. Adding Microsoft® Active Directory® Authentication Servers Before adding a new authentication server, you must enter a DNS entry on the > System > Network page. You can add an Active Directory authentication server, as follows: 1. Go to the > Users > Authentication Servers page. 2. Click the Add Authentication Server link. The Add Authentication Server form opens. 3. In the Authentication Server name field, enter a unique name to identify this authentication server. If this name is not the domain name associated with this authentication server, you must specify the domain name in the Domain field, described in step 4. 4. In the Domain edit field, enter the domain name associated with this authentication server. 5. Use the Include domain in drop-down option to indicate if this domain should be displayed to end users logging in from a client device that includes a Domain field. See Populating the Domain DropDown and Setting Default Domain for information on setting the default domain. 6. In the Connection Settings section, shown in the following figure: a. Select Active Directory from the Type drop-down list. b. From the Specify address using drop-down menu, indicate if you are using a DNS SRV record to define the authentication server, or if you are manually entering the server’s address information. 252 Leostream Connection Broker Administrator’s Guide Select DNS SRV record to indicate that the DNS record is defined by the ldap SRV record. The Connection Broker does not query the SRV record at every authentication request. Instead, the Connection Broker honors any TTL value associated with the record, for example, and queries the SRV record only after the TTL expires. Select Hostname or IP addresses to manually enter the address information. c. If defining the authentication server using hostnames or IP addresses, enter hostnames or IP addresses in the Hostname or IP address edit field. To associate multiple authentication servers with this authentication server record, enter multiple authentication server addresses separated by blank spaces. d. If defining the authentication server using hostnames or IP addresses, enter the port number into the Port edit field. If you entered multiple authentication server addresses in the Hostname or IP address edit field, all authentication servers must use the same port. e. Use the Algorithm for selecting from multiple addresses drop-down menu to indicate how the Connection Broker selects an address from the list when authenticating a particular user login. Select one of the following options. f. Random: The Connection Broker randomly selects an address from the list. Circular / Round Robin: The Connection Broker uses the addresses in the order they are entered in the Hostname or IP address edit field. For example, the first user is authenticated using the first address, the second user is authenticated using the second address, etc. The Connection Broker circles back to the first address in the list after all addresses have been used. Sequential / Failover: The Connection Broker continues to use the first address in the list until that address can no longer be reached. Click on the Encrypt connection to authentication server using SSL (LDAPS) checkbox if you need a secure connection to the authentication server. The port number automatically changes to 636. Edit the Port edit field if you are not using port 636 for secure connections. 7. In the Search Settings section, shown in the following figure, enter the username and password for an account that has read rights to the user records. If you plan to create an Active Directory center, the account requires read rights to computer records, as well. 253 Chapter 13: Authenticating Users 8. If you are using proximity cards to identify the user, enter the Active Directory attribute that stores the user’s proximity card ID in the Match proximity card ID against this field (Leostram Connect, only) edit field. The Connection Broker uses this field to match the proximity card ID to a username (see “Chapter 5: Smart Card, Biometric and Proximity Card Support” in the Leostream Connect Administrator’s Guide and End User’s Manual). 9. The CAS Authentication section allows you to enable CAS authentication for users logging in through a Web browser. This section appears in the form only if the Enable CAS feature option is selected in the > System > Settings page. See Authenticating Users in the Web Client for more information. 10. The Forward Users to another Connection Broker section allows you to support traveling users who log into a local Connection Broker, but whose desktops are associated with their home Connection Broker. This section appears only if the Connection Broker forwarding feature is selected on the > System > Settings page. Forwarding users to their home Connection Broker adds global scalability, redundancy, and enduser performance to your system. See Global User Redirection for information on how to use Connection Broker forwarding. 11. The User Login Search section, shown in the following figure, defines where and how the Connection Broker looks for a user in the Active Directory tree. a. In the Sub-tree: Starting point for user search field, enter the fully qualified path in LDAP format to the point on the authentication server tree from which you want the Connection Broker to search for users. For Active Directory authentication servers, to determine the relevant settings go to the Microsoft Windows server running the Active Directory services and open the Active Directory Users and Computers. The left-hand side lays out the domain tree. The authentication tree is below the domain tree. The authentication tree contains a series of branches. These branches can be divided into a number of different types, the two most important types being Container (CN) and Organization Unit (OU). The branches can contain further sub-branches, or objects, including Users, Computers, or Printers. For example, to configure a search tree that starts at a domain called leostream.net enter: DC=leostream, DC=net 254 Leostream Connection Broker Administrator’s Guide where DC means Domain Component, or the individual components of the name of the authentication server. b. In the Match Login name against this field edit field, enter the attribute that the Connection Broker should match the user’s entered login name against. The default for Active Directory authentication is sAMAccountName. c. In the Field that defines user display name edit field, enter one or more authentication server attributes to use as the contents of the Name field on the > Users > Users page. Use commas to separate multiple values. The Connection Broker uses the first attribute with a valid entry. d. If your users log into the Connection Broker using an RF IDeas proximity card, use the Match proximity card ID against this field edit field to indicate the attribute in Active Directory that contains the user’s proximity card ID. 12. In the Other section, configure any additional options for this authentication server. The settings in this section allow you to do the following: a. Query order: Sets the Position property of this authentication server. The Connection Broker uses the position to determine the order in which it searches for users in your different authentication servers. b. Allow unauthenticated logins: Allows users in this authentication server to log in using only a username. This option appears only if the Enable the unauthenticated login feature is select on the > System > Settings page. c. Allow login with an expired password: Allows users with a valid, but expired, password to log into the Connection Broker and be assigned to a desktop. The Windows operating system prompts the user to reset their password. d. Verbose error message for failed login: When selected, presents the user with a detailed explanation if their login fails. For Web browser logins, additional information is provided only if the login page includes the Domain drop-down menu (see Adding a Domain Field). e. Active authentication server: Indicates that the Connection Broker should search this authentication server for users. f. Query for group information: When creating a new authentication server, this option indicates if the Connection Broker automatically loads the group information from Active Directory. Loading group information can place a significant load on the Connection Broker. This option will not appear when you subsequently edit the authentication server, To change the setting for the Query for group information option after initially creating the authentication server, go to the > Users > Assignments page associated with that authentication server. 255 Chapter 13: Authenticating Users g. Notes: Optional notes for this authentication server. 13. Click Save to store the authentication server. At this point, test your authentication server to ensure your setup is complete and accurate. See Testing the Authentication Server for more information. Loading Users The Connection Broker loads users from the external authentication server when the user first logs into the Connection Broker. Therefore, in most circumstances, you do not need to pre-load users. In fact, loading users from authentication servers with a large number of users can take a considerable amount of time. If you need to hard-assign user’s to desktops before the user logs in, you can load individual users from an authentication server using the Load users action. Preload individual users into the Connection Broker, as follows: 1. Select the Load users action for the appropriate authentication server on the > Users > Authentication Servers page, as shown in the following figure. 2. In the Load Users from form that opens, shown in the following figure, define the scope to choose from when selecting users to load. Select one of the following options and configure the search scope, as follows. Select a specific user: Enter the username for the user you want to load. The Connection Broker looks for user records with usernames that exactly match the name entered in this 256 Leostream Connection Broker Administrator’s Guide field. The format of the username is defined by the setting of the Match Login name against this field edit field in the authentication server. Select from recently created users: Enter a number, in hours. The Connection Broker looks for user records that were created anywhere in the range from the present time back to the indicated number of hours ago. Select from users that match an expression: Enter an LDAP expression. The Connection Broker looks for user records that satisfy the LDAP expression. Select users from a group: Select the group to load users from. The Connection Broker displays only users in this group. This option appears only if the authentication server has the Query for group information option selected. Select from all the users: Select this option to select from all users in the authentication server. 3. Click Next >. 4. In the dialog that opens, shown in the following figure, select which users in this group to import from the Available users list at the left. 5. Click the Add highlighted items link to add the users to the Selected users list. 6. Click Save. The selected users are loaded into the > Users > Users page. To load additional users from this authentication server, click the Load more users link. Adding Novell® eDirectory® Authentication Servers Before adding a new authentication server, you must enter a DNS entry on the > System > Network page. To add a new eDirectory authentication server: 1. Go to the > Users > Authentication Servers page 257 Chapter 13: Authenticating Users 2. Click the Add Authentication Server link. The Add Authentication Server page opens. 3. In the Authentication server name edit field, enter a unique name for this authentication server. If this name is not the domain name associated with this authentication server, you must specify the domain name in the Domain field, described in step 4. 4. In the Domain edit field, enter the domain name associated with this authentication server. 5. Use the Include domain in drop-down option to indicate if this domain is displayed to end users logging in from a client device that includes a Domain field. See Populating the Domain Drop-Down and Setting Default Domain for information on setting the default domain. 6. In the Connection Settings section, shown in the following figure: a. Select eDirectory from the Type drop-down list. b. From the Specify address using drop-down menu, indicate if you are using a DNS SRV record to define the authentication server, or if you are manually entering the server’s address information. Select DNS SRV record to indicate that the DNS record is defined by the ldap SRV record. The Connection Broker does not query the SRV record at every authentication request. Instead, the Connection Broker honors any TTL value associated with the record, for example, and queries the SRV record only after the TTL expires. Select Hostname or IP addresses to manually enter the address information. c. If defining the authentication server using hostnames or IP addresses, enter hostnames or IP addresses in the Hostname or IP address edit field. To associate multiple authentication servers with this authentication server record, enter multiple authentication server addresses separated by blank spaces d. If defining the authentication server using hostnames or IP addresses, enter the port number into the Port edit field. If you entered multiple authentication server addresses in the Hostname or IP address edit field, all authentication servers must use the same port. e. Use the Algorithm for selecting from multiple addresses drop-down menu to indicate how the Connection Broker selects an authentication server from the list when authenticating a 258 Leostream Connection Broker Administrator’s Guide particular user login. Select one of the following options. f. Random: The Connection Broker randomly selects an address from the list. Circular / Round Robin: The Connection Broker uses the addresses in the order they are entered in the Hostname or IP address edit field. For example, the first user is authenticated using the first address, the second user is authenticated using the second address, etc. The Connection Broker circles back to the first address in the list after all addresses have been used. Sequential / Failover: The Connection Broker continues to use the first address in the list until that address can no longer be reached. Click on the Encrypt Connection to Authentication Server using SSL (LDAPS) checkbox if you need a secure connection to the authentication server. The port number automatically changes to 636. Edit the Port edit field if you are not using port 636 for secure connections. Check this option if you receive an “Administrator credentials were refused” error message when attempting to authenticate users. This option can help if you are failing because of eDirectory confidentiality. 6. In the Search Settings section, shown in the following figure, enter the username and password for an administrator account that has read rights to the user records. For eDirectory, this entry typically takes the following form: cn=admin,o=myorg Where myorg is the domain name set in your Connection Broker > System > Network page. If your administrator account is within a group, include that information in the login name, as well. For example, assume your administrator account is in the DEV group inside of the myorg domain. The login name then takes the following form: cn=admin,ou=DEV,o=myorg 7. The CAS Authentication section allows you to enable CAS authentication for users logging in through a Web browser. This section appears in the form only if the Enable CAS feature option is selected in the > System > Settings page. See Authenticating Users in the Web Client for more information. 259 Chapter 13: Authenticating Users 8. The Forward Users to another Connection Broker section allows you to support traveling users who log into a local Connection Broker, but whose desktops are associated with their home Connection Broker. This section appears only if the Connection Broker forwarding feature is selected on the > System > Settings page. Forwarding users to their home Connection Broker adds global scalability, redundancy, and end-user performance to your system. See Global User Redirection for information on how to use Connection Broker forwarding. 9. The User Login Search section, shown in the following figure, defines where and how the Connection Broker looks for a user in the eDirectory tree. a. In the Sub-tree: Starting point for user search edit field, enter the fully qualified path to the point on the authentication server tree from which you want the Connection Broker to search for users. The default sub-tree is the domain name, expressed, for example, as o=leostream.net. The default eDirectory sub-tree name is set to your Connection Broker domain name. If you are setting up a different eDirectory domain, the default name is incorrect and the Connection Broker will not correctly populate the groups. Ensure that you set the sub-tree to your eDirectory domain in order to correctly find groups. For example, if your Connection Broker is in the company.net domain, the default sub-tree is o=company.net. However, if your eDirectory setup is in the edomain domain, manually edit the sub-tree to o=edomain. b. In the Match Login name against this field edit field, enter the attribute that the Connection Broker matches the user’s entered login name against. For eDirectory, the default is CN. When a user authenticated through eDirectory logs into the Connection Broker, they must enter the full eDirectory path to their user name. For example, assume you have the following eDirectory structure: Domain: o = myorg Group: ou = finance Name: cn = Mary When matching the user’s login credentials against CN, this user must enter the following username when they log into the Connection Broker: Mary.finance.myorg 260 Leostream Connection Broker Administrator’s Guide 10. In the Other section, configure any additional options for this authentication server. The settings in this section allow you to do the following: a. Query order: Sets the Position property of this authentication server. The Connection Broker uses the position to determine the order in which it searches for users in your different authentication servers. b. Allow unauthenticated logins: Allows users in this authentication server to log in using only a username. This option appears only if the Enable the unauthenticated login feature is select on the > System > Settings page. c. Allow login with an expired password: Allows users with a valid, but expired, password to log into the Connection Broker and be assigned to a desktop. The Windows operating system prompts the user to reset their password. d. Verbose error message for failed login: When selected, presents the user with a detailed explanation if their login fails. For Web browser logins, additional information is provided only if the login page includes the Domain drop-down menu (see Adding a Domain Field). e. Active authentication server: Indicates that the Connection Broker should search this authentication server for users. f. Query for group information: When creating a new authentication server, this option indicates if the Connection Broker automatically loads group information from eDirectory. Loading group information can place a significant load on the Connection Broker. This option will not appear when you subsequently edit the authentication server, To change the setting for the Query for group information option after initially creating the authentication server, go to the > Users > Assignments page associated with that authentication server. Ensure that you uncheck this option if you are using a non-standard eDirectory tree. With this option unchecked, you can manually configure the search query in the > Users > Assignments page. g. Notes: Optional notes for this authentication server. 11. Click Save to store the authentication server. At this point, test your authentication server to ensure your setup is complete and accurate. See Testing the Authentication Server for more information. You cannot load users that are authenticated using eDirectory. The Connection Broker loads users the first time the user signs into the Broker. 261 Chapter 13: Authenticating Users Using Novell® Single Sign On The GINA (Graphical Identification and Authentication) is a Microsoft Windows® XP (but not Windows Vista®) operating system component. Novell ZENworks replaces this GINA with the user's own interface, which changes the look and the feel of that sign-on screen, and more importantly how remote users authenticate when they connect using RDP. To ensure that the Connection Broker single sign-on functions correctly in this environment: 1. Use the Microsoft RDP client to connect to a remote Windows desktop running the Novell ZENworks GINA. 2. If you can log in and get full access to resources, save the RDP configuration file and open it in a text editor. 3. Use this file as a reference when modifying the RDP configuration file stored on the policy page of the Connection Broker. When configuring the Microsoft RDP configuration file for single sign-on with Leostream Connect, it is important to use the Novell Fully Qualified Domain Name, which has the format .cn=Fred.ou=Users.o=Company and is contained within the {NOVELL_FQDN} dynamic tag. For more information, refer to the Novell application note on eDirectory naming conventions. If you can connect but cannot get full access to resources, read the Novell support documents 10087621, and 10052847. In particular, check the setting of the following registry keys: HKLM\SOFTWARE\Microsoft\Windows NT\CurrentVersion\WinLogon\AutoAdminLogon Value: 1 Data Type: REG_SZ HKLM\Software\Novell\Login\AutoAdminLogon Value: 1 = enabled 0 = disabled Data Type: REG_SZ If you are using version 4.91 SP4 of the Novell client, you must create the following registry key in order to perform single sign-on. The Leostream Agent automatically sets these registry keys when the user logs in. If you are not using the Leostream Agent, you must manually set the registry keys on the remote desktop. In HKEY_LOCAL_MACHINE\SOFTWARE\Novell\Login, create a reg_sz key called TSClientAutoAdminLogon. If you are experiencing problems with single sign-on when using this version of the Novell client, see the related Novell forum for more information. Adding OpenLDAP Authentication Servers The Connection Broker can authenticate users from any OpenLDAP™ directory service. Register your OpenLDAP directory service with the Connection Broker, as follows. 262 Leostream Connection Broker Administrator’s Guide 1. Go to the > Users > Authentication Servers page 2. Click the Add Authentication Server link. The Add Authentication Server form opens. 3. In the Authentication server name edit field, enter a unique name for this authentication server. If this name is not the domain name associated with this authentication server, you must specify the domain name in the Domain field, described in step 4. 4. In the Domain edit field, enter a name to use for this authentication server. 5. Use the Include domain in drop-down option to display this domain to end users logging in from a client device that includes a Domain field. See Populating the Domain Drop-Down and Setting Default Domain for information on setting the default domain. 6. In the Connection Settings section, shown in the following figure: a. Select OpenLDAP from the Type drop-down list. b. From the Specify address using drop-down menu, indicate if you are using a DNS SRV record to define the authentication server, or if you are manually entering the server’s address information. Select DNS SRV record to indicate that the DNS record is defined by the ldap SRV record. The Connection Broker does not query the SRV record at every authentication request. Instead, the Connection Broker honors any TTL value associated with the record, for example, and queries the SRV record only after the TTL expires. Select Hostname or IP addresses to manually enter the address information. c. If defining the authentication server using hostnames or IP addresses, enter hostnames or IP addresses in the Hostname or IP address edit field. To associate multiple authentication servers with this authentication server record, enter multiple authentication server addresses separated by blank spaces d. If defining the authentication server using hostnames or IP addresses, enter the port number into the Port edit field e. Use the Algorithm for selecting from multiple addresses drop-down menu to indicate how the Connection Broker selects an authentication server from the list when authenticating a 263 Chapter 13: Authenticating Users particular user login. Select one of the following options. f. Random: The Connection Broker randomly selects an address from the list. Circular / Round Robin: The Connection Broker uses the addresses in the order they are entered in the Hostname or IP address edit field. For example, the first user is authenticated using the first address, the second user is authenticated using the second address, etc. The Connection Broker circles back to the first address in the list after all addresses have been used. Sequential / Failover: The Connection Broker continues to use the first address in the list until that address can no longer be reached. Click on the Encrypt Connection to Authentication Server using SSL (LDAPS) checkbox if you need a secure connection to the authentication server. The port number automatically changes to 636. Edit the Port edit field if you are not using port 636 for secure connections. 6. In the Search Settings section, shown in the following figure, enter the username and password for an account that has read rights to the user records. For OpenLDAP, this entry typically takes the form cn=Manager,dc=myorg, where myorg is the domain name specified in the Connection Broker > System > Network page. To perform an anonymous bind, leave the Login and Password fields blank. You must leave both fields blank or the Connection Broker will not save the form. 7. The CAS Authentication section allows you to enable CAS authentication for users logging in through a Web browser. This section appears in the form only if the Enable CAS feature option is selected in the > System > Settings page. 8. The Forward Users to another Connection Broker section allows you to support traveling users who log into a local Connection Broker, but whose desktops are associated with their home Connection Broker. This section appears only if the Connection Broker forwarding feature is selected on the > System > Settings page. Forwarding users to their home Connection Broker adds global scalability, redundancy, and end user performance to your system. See Global User Redirection for information on how to use Connection Broker forwarding. 9. The User Login Search section, shown in the following figure, defines where and how the Connection Broker looks for a user in the OpenLDAP tree. 264 Leostream Connection Broker Administrator’s Guide c. In the Sub-tree: Starting point for user search edit field, enter the fully qualified path in LDAP format to the point on the authentication server tree from which you want the Connection Broker to search for users. The default OpenLDAP sub-tree name is the domain name set in the Connection Broker > System > Network page, expressed, for example, as dc=leostream,dc=net. Ensure that you reset the sub-tree to the correct path in your OpenLDAP authentication server in order to authenticate users. For example, if your Connection Broker is in the company.net domain, the default sub-tree is dc=company,dc=net. However, if the top of the OpenLDAP tree is at company.com, manually edit the sub-tree to dc=company,dc=com. d. In the Match Login name against this field edit field, enter the attribute that the Connection Broker should match the user’s entered login name against. For OpenLDAP, the default is uid. 10. In the Other section, configure any additional options for this authentication server. The settings in this section allow you to do the following: a. Query order: Sets the Position property of this authentication server. The Connection Broker uses the position to determine the order in which it searches for users in your different authentication servers. b. Allow unauthenticated logins: Allows users in this authentication server to log in using only a username. This option appears only if the Enable the unauthenticated login feature is select on the > System > Settings page. c. Allow login with an expired password: Allows users with a valid, but expired, password to log in into the Connection Broker and be assigned a desktop. The operating system should be configured to prompt the user to reset their password. d. Verbose error message for failed login: When selected, presents the user with a detailed explanation if their login fails. For Web browser logins, additional information is provided only if the login page includes the Domain drop-down menu (see Adding a Domain Field). e. Active authentication server: Indicates that the Connection Broker should search this authentication server for users. f. Notes: Optional notes for this authentication server. 265 Chapter 13: Authenticating Users 11. Click Save to store the authentication server. At this point, test your authentication server to ensure your setup is complete and accurate. See Testing the Authentication Server for more information. OpenLDAP allows you to encrypt users’ passwords using DES, MD5, or SHA, or to store the passwords in plain text. You must use MD5 or SHA encryption, or plain text when using OpenLDAP with the Connection Broker. The Connection Broker cannot decrypt passwords encrypted using DES. Authenticating with NIS NIS (Network Information Service) provides a central directory of user and group information in a computer network. To authenticate Connection Broker users against a NIS server, create an authentication server, as follows. 1. Go to the > Users > Authentication Servers page 2. Click the Add Authentication Server link. The Add Authentication Server form opens. 3. In the Authentication server name edit field, enter a unique name for this authentication server. If this name is not the domain name associated with this authentication server, you must specify the domain name in the Domain field, described in step 4. 4. In the Domain edit field, enter the domain name associated with this authentication server. 5. Use the Include domain in drop-down option to indicate if this domain is displayed to end users logging in from a client device that includes a Domain field. See Populating the Domain Drop-Down and Setting Default Domain for information on setting the default domain. 6. Select NIS from the Type drop-down menu. The form changes, as shown in the following figure. 266 Leostream Connection Broker Administrator’s Guide 7. In the Hostname or IP address edit field, enter the NIS server address. 8. In the Other section, configure any additional options for this authentication server. The settings in this section allow you to do the following: a. Query order: Sets the Position property of this authentication server. The Connection Broker uses the position to determine the order in which it searches for users in your different authentication servers. b. Allow unauthenticated logins: Allows users in this authentication server to log in using only a username. This option appears only if the Enable the unauthenticated login feature is select on the > System > Settings page. c. Verbose error message for failed login: When selected, presents the user with a detailed explanation if their login fails. For Web browser logins, additional information is provided only if the login page includes the Domain drop-down menu (see Adding a Domain Field). d. Active authentication server: Indicates that the Connection Broker should search this authentication server for users. e. Notes: Optional notes for this authentication server. Leostream currently supports a limited number of Unix password formats. The encrypted password in the /etc/shadow file must start with $1$. Password starting with $6$ (using SHA-512) are not supported. 267 Chapter 13: Authenticating Users Populating the Domain Drop-Down and Setting Default Domain The appearance of the Domain field on Leostream Connect and the Leostream Web client depends on a number of settings in the Connection Broker. For example: To include the Domain field on the login screen, select the Add domain field to login page option in the Authentication Server Features section of the > System > Settings page. By default, the Domain field is an edit field. To convert the edit field to a drop-down menu, select the Show domain as drop-down option in the Authentication Server Features section of the > System > Settings page. If you have a single authentication server, the Domain field remains an edit field, even if you select the Show domain as drop-down option. When showing the domain field as a drop-down menu, you must select which authentication servers appear in the drop-down menu and specify the default domain value. Use the Include domain in dropdown option on the Edit Authentication Server page to configure the contents of the Domain drop-down menu, as follows. Select No if you do not want to include the authentication server in the Domain drop-down menu. Select Yes if you want to include the authentication server in the Domain drop-down menu, but do not want to set this authentication server as the default. Select Yes, as default, as shown in the following figure, if you want to include the authentication server in the Domain drop-down menu and set this authentication server as the default. The default domain value is used the first time any user logs in from a particular client device. Leostream Connect and the Leostream Web client cache any subsequent domain selection, and display that domain value the next time any user launches the client. If the Domain field is not shown as a drop-down menu, the domain that selects Yes, as default from the Include domain in drop-down option is shown in the Domain edit field. 268 Leostream Connection Broker Administrator’s Guide Testing the Authentication Server After you create the authentication server, test it using the > Users > Authentication Servers > Test page, shown in the following figure. To access the Test page, click the Test action associated with the authentication server. Enter the name and, optionally, password of a user in the authentication server and click Authenticate. The Connection Broker queries the authentication server and presents the user’s information. The user’s role and policy are shown at the bottom of the report. If the Connection Broker cannot bind with the authentication server, it displays the associated LDAP bind error. The following table describes some common bind errors. Code 525 Definition User not found Notes The specified username is invalid 52e Invalid credentials Not permitted to logon at this time The user name is valid, however the password is not correct The user name and password are valid, however the account is restricted from logging in at this particular time of day The user name and password are valid, however the password has expired The user name and password are valid, however the account is currently disabled The user name and password are valid, however the account has expired The user name and password are valid, however the password must be reset before they can log in The user name and password are valid, however the account is locked 530 532 Password expired 533 Account disabled 701 Account expired 733 User must reset password 755 Account locked If the Connection Broker can bind with the authentication server, but displays the error LDAP Error: Unable to locate the user, first ensure that you correctly entered the user name for the test. If the user name is correct, check the permissions for the account used to create the authentication server in your Connection Broker. The account must have at least Read permissions for user objects in the authentication server. For example, in Active Directory, check the access control list (ACL) for the Users group, as follows. 269 Chapter 13: Authenticating Users 1. In the Active Directory Users and Computers dialog, right-click on the Users node in the console tree. 2. Select Properties from the right-click menu. 3. In the Users Properties dialog, go to the Security tab. 4. Ensure that the account you entered when defining your Authentication Server in the Connection Broker is part of a group included in the Group and user names list. If the user does not fall into any of the groups in this list, you must add the necessary group, or individual user, to this list. 5. After an appropriate group or user is included in the Group and user names list, check the Permissions list to ensure that this user has Read permissions for users, as shown in the following figure. If the user has Read permissions in this list, check the Special Permissions (by clicking the Advanced) button to ensure that the account does not inherit a Deny permission. If your authentication server account does not have, or is explicitly denied, Read permissions for users, the Connection Broker successfully binds with the authentication server, but displays the LDAP Error: Unable to locate the user error. The following article provides a summary on checking and setting Active Directory permissions: http://www.tech-faq.com/active-directory-objects.shtml Locally Authenticated Users To treat the Connection Broker as a local authentication system, manually add users to the > Users > Users page. You can manually add individual users, or use the bulk upload method to add multiple users. See Uploading Users for information on using CSV-files to upload multiple users. To manually create an individual local user: 1. Go to the > Users > Users page. 270 Leostream Connection Broker Administrator’s Guide 2. Click the Create User link to open the Create User dialog, shown in the following figure. 3. Enter a Display Name for the new user. This is the value that appears in the Name column of the > Users > Users page. 4. Enter an optional Email address for the user. Users can subsequently change their email address settings. 5. Enter a Login name for the user, using the same format as used for logging into Microsoft Windows® operating systems. The Connection Broker does not treat login names as case sensitive. 6. Enter an initial password for the user in the Password and Re-type password edit fields. Users can subsequently change their password. Passwords are case sensitive. 7. Leave the Active user option selected to allow the user to log into the Connection Broker. Deselect this option if you want to prohibit the user from logging into the Connection Broker without deleting the record. 8. Select the appropriate Role for the user from the drop-down menu. See Managing User Roles and Permissions for information on creating new roles to customize user access to the Connection Broker interface. Select Administrator to make this user an Administrator. 9. Select the appropriate Policy for the user from the drop-down menu. 10. To override the protocol plans used in the selected policy, choose a protocol plan from the Protocol drop-down menu. See Which Protocol Plans Applies? for a description of how the Connection Broker selects the plan to use. 271 Chapter 13: Authenticating Users 11. Enter any Notes to save with the user definition. 12. Click Save. Managing Users The Connection Broker maintains a list of all users currently managed by the Connection Broker. The database contains one pre-configured user called Administrator, with a login name admin, password leo, and Administrator role. Additional users appear in the Connection Broker in one of the following ways: 1. The Connection Broker automatically enters users into the database the first time they sign into the system. 2. You can manually enter individual users into the database (see Manually Creating Users). 3. You can upload users from a CSV-file (see Uploading Users). 4. You can load users from external authentication servers, including Microsoft® Active Directory®, Novell® eDirectory®, and OpenLDAP™ servers. Displaying User Characteristics The > Users > Users page, shown in the following figure, lists all users entered into the Connection Broker database. You can modify the order and type of characteristics displayed on this page by clicking the customize link at the bottom left side of the page (see Customizing Tables). The following sections describe the available user characteristics. Bulk actions Checkboxes that allow you to select multiple users for performing a batch process; currently, only Remove (see Removing Multiple Users). Actions Drop-down menu or list of links indicating the actions you can perform on a particular user. Available actions include some or all of the following: Edit: Open the Edit User form for this user. Sign out: Log the user out of a desktop session, if any active sessions exist. See Logging Users Out for more information. 272 Leostream Connection Broker Administrator’s Guide Test Login: Determine the role, policy, and desktop assignment that will be used when this user logs in. See Testing User Role and Policy Assignment for more information. Name The user’s name as entered into the Name field on the Edit User page. Login name The name used to authenticate the user against the authentication server when they log in. Active Indicates if this is an active user, i.e., if they can sign in through the Connection Broker and be assigned a desktop. Uploaded Indicates if this user was uploaded using the options on the > System > Maintenance page. If set to No, this user was either imported from an authentication server or manually created. Email The user’s email address. Signed in Indicates when the user last signed into a desktop via the Connection Broker. If the user never signed in, this field is empty. Role The user’s role. Policy The user’s policy. Protocol Plan Override The user’s protocol plan, if specified. The user’s protocol plan overrides any protocol plan set by the user’s policy or by the location of the user’s client device. Authentication Server The authentication server used to authenticate the user and assign their role and policy. AD distinguished Name The user’s Active Directory distinguished name. AD Email The user’s Active Directory email address. AD userPrincipalName The user’s Active Directory UPN name. AD CN The user’s Active Directory CN name. 273 Chapter 13: Authenticating Users AD sAMAccountName The user’s Active Directory sAMAccount name. Client/IP Address The client name and/or IP address the user last logged in from. Logging Users Out To manually disconnect or log out a user, select the Sign out action associated with that user, as shown in the following figure. The Sign Out User page displays a list of the desktops currently assigned to the user, the desktop’s power status, and the action that occurs after you click Sign out. For example, in the following figure the application is running and is released when the user is signed out. Click Sign out. The resulting action is listed at the top of the > User > Users page. Removing Multiple Users Removing users from the > Users > Users page releases a Connection Broker license from each user. To simultaneously remove multiple users, in the > Users > Users page: 1. Check the box associated with every user to remove. If check boxes do not appear in your > Users > Users table, customize the table so the Bulk action column appears (see Customizing Tables). 2. Select Remove from the Bulk action drop-down menu at the top of the table. 3. Click OK in the confirmation window that appears. Editing User Characteristics You can edit a subset of the user’s characteristics by selecting the Edit action for that user. The Edit User form opens, as shown in the following figure. 274 Leostream Connection Broker Administrator’s Guide This form displays some or all of the following user characteristics: Name: Enter the name to display in the Name column on the > Users > Users page. For Active Directory users, this value defaults to the user’s displayName attribute. This is not the same as the user’s login name. Email address: Enter the user’s email address. Login name/Password: Enter the user name and password for this user. These fields are only editable if you manually created this user. Otherwise, the Connection Broker displays the username, and indicates what authentication server is used to authenticate the user. HID proximity number: If users log in with a proximity card, this field displays the HID number associated with their card. You cannot edit this number. If the user is issued a new proximity card, select the Clear the HID proximity number checkbox and save the form to enroll the new HID. Active user: Check this option to allow the Connection Broker to assign desktops to this user. This option is editable only if you created the user locally in the Connection Broker. Role/Policy: Select the role and policy to assign to this user. These fields are only available if you manually created this user. Otherwise, the authentication server determines the role and policy. Users and administrators that are signed into the Connection Broker cannot edit their own role. Protocol: Select the protocol plan to assign to this user. If a user has a specified protocol plan, that protocol plan is always used, and overrides any protocol plans specified by the user’s policy or by the location of the user’s client device. 275 Chapter 14: Assigning User Roles and Policies Chapter 14: Assigning User Roles and Policies Overview The Connection Broker uses roles and policies to determine what resources to offer to a particular user and the level of access the user has to these resources. A role is a set of permissions that defines the functionality an end user is allowed to access when they log into the Connection Broker, including the level of access to the Connection Broker Administrator Web interface (see Chapter 9: Configuring User Roles and Permissions) A policy is a set of rules that determine how desktops are offered, connected, and managed for a particular user (see Chapter 11: Configuring User Experience by Policy) To determine which role and policy to assign to a particular user, the Connection Broker performs the following steps. 1. After the user provides their login credentials, the Connection Broker searches the authentication servers defined on the > Users > Authentication Servers page, shown in the following figure, for a user that matches those credentials (see Chapter 13: Authenticating Users). 2. The Connection Broker then looks on the > Users > Assignments page, shown in the following figure, for the assignment rules associated with the authentication server that authenticated the user. For example, if the Connection Broker authenticated the user in the Leostream domain in the previous figure, the Connection Broker would look in the Leostream assignment rules in the following figure. 3. The assignment rules, shown for example in the following figure, assign a role and policy to the user based on the user’s attributes in the authentication server and the location they are logging in from. 276 Leostream Connection Broker Administrator’s Guide The Client Location drop-down menu contains the locations you created in the > Clients > Locations page. To assign a rule, the Connection Broker searches down the rows in the Assigning User Role and Policy table. As soon as the Connection Broker finds a match between the user’s attribute/location and a row in the rules, the user is assigned that particular role and policy. If the user/location combination matches multiple rules, the Connection Broker uses the first rule based on the order defined by the Order column. If there are no matches, the Connection Broker assigns the role and policy selected in the Default Role and Default Policy drop-down menus, respectively. For example, in the previous figure: If: The user’s memberOf attribute is Sales AND The user is logging into the system from any (All) client location Then: The user’s role is User The user’s policy is Default If: The user’s memberOf attribute is RDPGroup AND The user is logging into the system from any (All) client location Then: The user’s role is RDPgroup The user’s policy is TestRelease Otherwise: The user’s role is User The user’s policy is Default The Connection Broker provides the following options for assigning roles and policies to users. Assigning Roles and Policies Based on Group Membership 277 Chapter 14: Assigning User Roles and Policies Assigning Roles and Policies Based on any Attribute Assigning Roles and Policies Based on Multiple Attributes Assigning Roles and Policies Based on Group Membership If the Query for group information option was checked when you initially created the associated authentication server, the Edit Assignment form for this authentication server appears as in the following figure. In this configuration, the Connection Broker matches the selection in the Group drop-down menu to the following attributes: memberOf for Active Directory authentication server groupMembership for eDirectory authentication servers You cannot use this method when authenticating users in an OpenLDAP directory or NIS authentication server. If you modified your groups since you last signed into your Connection Broker, you must sign out and sign back in to have your Connection Broker reflect the authentication server changes. To assign rules based on the user’s group attribute: 1. Select the group attribute from the Group drop-down menu 2. If you are using locations, select a location from the Client Location drop-down menu 3. Assign permissions to this group and client location pair by selecting an item from the User Role drop-down menu 4. Assign a policy to this group and client location pair by selecting an item from the User Policy dropdown menu 278 Leostream Connection Broker Administrator’s Guide If you need to assign roles and policies based on a different authentication server attribute, uncheck the Query for group information option at the bottom of the Edit Assignments form. After you save the form, the format of the Assigning User Role and Policy section changes. The following section describes how to define rules using any attribute. To assign roles and policies based on multiple attributes, see Assigning Roles and Policies Based on Multiple Attributes. Assigning Roles and Policies Based on any Attribute If the Query for group information option was not selected when you created your authentication server, or if you unselected the Query for group information option on the Edit Assignment form, the Edit Assignment form appears as shown in the following figure. To assign rules based on a specific user attribute: 1. Enter the attribute to use when searching though the rules in the attribute: Attribute edit field. To search by group Use memberOf for Active Directory authentication server Use groupMembership for eDirectory authentication servers Use ou for an organizationalPerson in an OpenLDAP authentication servers The Attribute field supports matching against the leostream_dn property. 2. Select an option from the Conditional drop-down menu to restrict how the user’s attribute should match the entry in each rule, either: 3. Contains Starts with Exactly matches LDAP expression (see Assigning Roles and Policies Based on Multiple Attributes) Enter a string in the Attribute Value edit field, which is used to match the user to this rule. 279 Chapter 14: Assigning User Roles and Policies 4. If you are using locations, select a location from the Client Location drop-down menu 5. Assign a role by selecting an item from the User Role drop-down menu. 6. Assign a policy by selecting an item from the User Policy drop-down menu. For Active Directory and eDirectory, if you have not entered any assignment rules, the Edit Assignments form contains the Query for group information option at the bottom of the form. If you are using memberOf or groupMembership to define rules, and want a list of all available groups, check the Query for group information option at the bottom of the Edit Assignments form and save the form. After you save the form, the format of the Assigning User Role and Policy section changes to include a drop-down menu containing the authentication server groups. (see Assigning Roles and Policies Based on Group Membership). Assigning Roles and Policies Based on Multiple Attributes The advanced configuration of the Assigning User Role and Policy section, shown in the following figure, provides the option to use LDAP filters to identify users for a particular role and policy rule. To assign roles and policies based on multiple attributes: 1. Select LDAP expression from the Conditional drop-down menu, as shown in the previous figure. The Attribute field no longer applies and becomes non-editable. 2. In the Attribute Value edit field, enter an LDAP filter expression. For information on valid LDAP filter expressions, see the following Microsoft TechNet article: http://technet.microsoft.com/en-us/library/aa996205(EXCHG.65).aspx For example, if the user must be a member of both Operations and RDPGroup to be assigned this role and policy, enter the following in the Attribute Value edit field: (&(memberOf=CN=Operations,CN=Users,DC=leostream,DC=net)(memberOf=CN=RDPGroup,CN=Users,DC=leostream,DC=net)) Conversely, if the user can be a member of either Operations or RDPGroup to be assigned this role and policy, enter the following in the Attribute Value edit field: (|(memberOf=CN=Operations,CN=Users,DC=leostream,DC=net)(memberOf=CN=RDPGroup,CN=Users,DC=leostream,DC=net)) You can also assign the role and policy based on multiple attributes. For example, if the user must be a member of the Operations group and have a country code of 1, enter the following in the Attribute Value edit field: 280 Leostream Connection Broker Administrator’s Guide (&(countryCode=1)(memberOf=CN=Operations,CN=Users,DC=leostream,DC=net)) 3. If you are using locations, select a location from the Client Location drop-down menu. 4. Assign a role by selecting an item from the User Role drop-down menu. 5. Assign a policy by selecting an item from the User Policy drop-down menu. When the Connection Broker steps through the assignment rules, it queries the associated authentication server to see if the LDAP filter matches the user. Reordering User Role and Policy Rules Use the Order column to reorder the rows in the Assigning User Role and Policy section. To move a row, type a new row number into the Order edit box at the beginning of the row. You can enter new row numbers for as many rows as you want to move. To store the changes, click Save. The new row numbers are not stored until you save the changes. Make sure you do not navigate away from the Edit Assignments page without clicking Save. Assigning Roles without Policies You may have users that have access to the Connection Broker Administrator Web interface who do not have resources assigned to them by the Connection Broker. For these users: 1. Create a role that gives the user access to the Administrator Web interface, only (see Administrator Web Interface Permissions) and configure the permissions for this role, as necessary. 2. In the Assigning User Role and Policy section, select this role from the User Role drop-down menu 3. Select <No policy> from the User Policy drop-down menu. For example, in the previous figure: If: The user’s memberOf attribute is Domain Admins AND The user is logging into the system from any (All) client location Then: 281 Chapter 14: Assigning User Roles and Policies The user’s role is Power User The user is not assigned a policy When a user that matches this rule logs into the Connection Broker Web client, they are taken directly to the Administrator Web interface, where they see the functionality their role gives them permission to access. Using the Default Role and Policy The Default Role and Default Policy drop-down menus, shown in the following figure, specify what happens if the user is found in the authentication server, but does not match any of the defined assignment rules. If you do not want to assign a desktop to users who do not match one of the assignment rules, select <None- prevent user login> from the Default Policy drop-down menu. Testing User Role and Policy Assignment The Test Login action provides an easy and efficient method for checking if your user role and policy rules are assigning desktops correctly. This feature simulates a user logging in and reports back on how the Connection Broker matches that user to a role and policy, and assigns desktops. Test a user login, as follows: 1. Go to the > Users > Users page. 2. Click the Test Login link. The Test Login page, shown in the following figure, opens. 3. In the User Name edit field, enter the name of the user you want to simulate logging in. This user does not need to be registered in your Connection Broker. 282 Leostream Connection Broker Administrator’s Guide 4. Choose a domain to log the user into from the Domain drop-down menu. 5. Use the Filter client list by location drop-down menu to restrict the clients shown in the Clients drop-down menu. You create these locations on the > Clients > Locations page. If you are not using locations, select All. If you perform a test login for a client that is in multiple locations, selecting a location in this dropdown menu does not guarantee that the test login uses this location. The Connection Broker uses its programmed logic to determine the client location. 6. Select the client the user is logging in from the Client drop-down menu. The items available in the Client menu reflect the clients available in the selected location. 7. Click Run Test. The bottom of the page updates to show the current test results. For example: 283 Chapter 14: Assigning User Roles and Policies In this example, the test results begin by reporting the user, location, and client you specified in the Test Login form. The Connection Broker then searches for the user in the domains you specified in the Test Login form. The line: 284 Leostream Connection Broker Administrator’s Guide in authentication server “LEOSTREAM” found user Indicates that the user jtest was found in the authentication server named LEOSTREAM. If the user is found, the report lists the user’s authentication server attributes. Click the (show Active Directory attributes) link next to this line to see the details of this user’s authentication server account. The Connection Broker tries to map the user’s authentication server attributes to a rule in the Assigning User Role and Policy section of the associated Edit Assignments page. If the Connection Broker finds an entry that matches the user’s authentication server attribute, it assigns the role and policy in that row to the user. If no match is found, the Connection Broker assigns the Default policy to the user. In the previous example, the lines: “cn” contains “Joe”, location “Leostream Connect” matched User will have role “User” and policy “RFIdeas” Indicate that a rule was matched and that the Connection Broker assigns the user to the role User and policy RFIdeas. The report lists the pools associated with the assigned policy and shows the policy settings for each pool. The bottom of the section for each pool indicates which desktops the user is offered from this pool and the display protocol used to connect the user to that desktop. Click the (show) link to display the command line parameters or configuration file that will be used to establish the connection. 285 Chapter 15: Using the Leostream Web Client Chapter 15: Using the Leostream Web Client Overview The Leostream Web client allows users to log in to Leostream from any type of client device type and web browser, including tablets. Depending on the display protocol used to connect the user to the desktop, additional client software may be required. If your users log in to Leostream using an Apple or Android tablet, ensure that their tablet has an installed app that can launch the display protocol used to connect them to their desktops. When using a Web browser, end users and administrators all log in using the Connection Broker Sign In page. By default, the Connection Broker Sign In page is at the following URL. https://cb-address Where cb-address is your Connection Broker IP address or hostname. For information on customizing the appearance of the Sign In page, see Customizing the Sign In Page. From the Connection Broker Sign In page, the Connection Broker provides two different Web interfaces. 1. The Leostream Web client, shown in the following figure, is specialized for end users accessing their desktops and applications. 2. The Connection Broker Administrator Web interface, shown in the following figure, allows Connection Broker administrators to access the functionality their role gives them permission to view or modify. 286 Leostream Connection Broker Administrator’s Guide When the default Connection Broker Administrator signs in, they are always taken to the Connection Broker Administrator Web interface. For other users, the user’s Connection Broker role determines which of the two Web interfaces they first see. If the user’s role gives them permission to access only the Web client, the user enters the Leostream Web client and sees their offered resources. If the user’s role gives them permission to access only the Administrator Web interface, the user goes directly into the Administrator Web interface, with access only to the pages that user’s role allows. If the user’s role gives them permission to access the Web client and the Administrator Web interface, the end user enters the Web client, which then contains an additional link to open the Administrator view. Authenticating Users from the Connection Broker Sign In Page You can authenticate users that log in from the Connection Broker Sign In page using one of the following three methods Username, password, domain CAS authentication The Connection Broker receives the user credentials via an SSL encrypted session. Username and Password Authentication By default, users enter their user name and password in the Sign in page, shown in the following figure. You can optionally allow the user to select their domain, by including the Domain field on the Sign in page. See Adding a Domain Field for complete instructions. CAS Authentication Central Authentication Service (CAS) is a single sign-on protocol designed to allow untrusted Web applications to authenticate users against a trusted central server. To enable CAS authentication: 287 Chapter 15: Using the Leostream Web Client 1. On the > System > Settings page, select the Enable CAS feature option in the Authentication Servers Features section, shown in the following figure. 2. Click Save on the Settings page. 3. On the > Users > Authentication Servers > Edit page for the authentication server associated with your CAS system, select Enable CAS authentication, as shown in the following figure. The CAS Authentication section does not appear in the Edit Authentication Server page if you have not selected the Enable CAS feature option in the > System > Settings page. 4. Enter the fully qualified domain name (FQDN) or IP address of your CAS server, in the URL edit field. 5. Click Save to save the authentication server settings. 6. Reboot your Connection Broker. To use CAS authentication, direct users to: https://cb-address /cas Where cb-address is replaced by your Connection Broker’s hostname or IP address. If this option is enabled, users are automatically redirected to the CAS authentication server Web page for authentication. After users are authenticated by CAS, they are automatically logged into the Connection Broker interface. The Connection Broker determines the user’s policy using the username returned by the CAS authentication server. The Connection Broker cannot obtain the user’s password from the CAS server, only their username. Therefore, single sign-on is not possible. 288 Leostream Connection Broker Administrator’s Guide Adding a Domain Field Select the Add domain field to login page option on the > System > Settings page to add a Domain field to the Sign In page, and allow users to select which authentication server to search for their account. The Domain field is either an editable text field where the user can type their domain name, or a dropdown menu of available domain names, based on the setting of the Show domain as drop-down option in the Authentication Server Features section (see Enabling Authentication Server Features). When using a drop-down menu, to populate the Domain drop-down menu with the name of a particular authentication server, select either Yes or Yes, as default from the Include in drop-down menu option on the > Users > Authentication Servers > Edit Authentication Server page for each authentication server, as shown in the following figure. The Domain drop-down menu contains only the authentication servers that have Yes or Yes, as default selected in the Include in drop-down menu option. The Domain menu also contains an additional option that depends on the setting for the Login name unique across domains option. If the Login name unique across domains option is not selected, the Domain drop-down menu contains a <None> option. Selecting <None> instructs the Connection Broker to authenticate users only if they are defined locally in the Connection Broker. If the Login name unique across domains option is selected, the Domain drop-down menu contains an <Any> option. Selecting <Any> instructs the Connection Broker to search through all the authentication servers in the order of their priority. See Unique Versus Non-Unique User Identification for more information on using the Login name unique across domains option. Working with Resources in the Web Client The Resources box displays all the desktops and applications offered to the user that logged into the Leostream Web client. For example, the following figure shows the Resources box when a user is offered two desktops and two applications. 289 Chapter 15: Using the Leostream Web Client Filtering the Resource List If the user is offered a large number of resources, they can use the Show drop-down menu to limit the Resources box to either desktops or applications. For example, to list only the offered desktops, select Desktops, as shown in the following figure. Changing the Resource List Format By default, the Web client displays offered resources using large icons. To switch to a list view, Select List from the View menu at the top-right of the Resources panel, shown in the following figure. The Resources panel now displays a list as shown in the following figure. Selecting Icon reverts the display to a grid of resources with large icons. Refreshing the Resource List 290 Leostream Connection Broker Administrator’s Guide At any point after logging in, end users can refresh the contents of the Resources box by clicking the Refresh List link, shown in the following figure. Refreshing the list may do any of the following. Offer new desktops and applications, depending on the user’s policy Update the available links for each resource, if the user’s role has been modified to give them different permissions Remove or modify the contents of the Message Board, if the Connection Broker Administrator Web interface was modified, as such. Connecting to Desktops from the Web Client If the Web client is not configured to automatically launch a desktop connection, end users can launch individual desktops by clicking the Connect link associated with that desktop, as shown in the following figure. The Web client displays a Connecting status until the remote session is established. If the user is offered a single desktop, and their policy enables the Auto-launch remote viewer session if only one desktop is offered option, the Web client displays the Connecting status and connects to their desktop as soon as the user logs in. Restarting Desktops The Web client includes a Restart link for any desktops that the user is allowed to power cycle. The user’s role and policy determine which desktops provide the restart action, as follows: The user’s role must select the Allow user to restart offered desktops option. 291 Chapter 15: Using the Leostream Web Client The user’s policy must select either Shutdown and start or Power off and start from the Allow users to reset offered desktops drop-down menu associated with one or more pools. If the user’s desktop is unresponsive or needs to be restarted for any reason, click the Restart link, shown in the following figure, to perform a restart action. The Allow users to reset offered desktops drop-down menu in the policy determines how the restart is performed. Releasing Desktops The Connection Broker assigns a desktop to a user as soon as that user attempts to connect to the desktop. As long as the desktop remains assigned to that user, it is not offered to any other user. The Web client includes a Release link for any desktops that the user is allowed to release back to its pool. The user’s role and policy control which desktops provide the release action, as follows: The user’s role must select the Allow user to manually release desktops option. The user’s policy must not select the Prevent user from manually releasing desktop option. If the user needs to release their desktop for any reason, click the Release link, shown in the following figure. The release plan associated with the desktop is invoked as soon as the desktop is released. If the user remains logged into the desktop after it is released, the Connection Broker considers that user as rogue. Connecting to Applications from the Web Client 292 Leostream Connection Broker Administrator’s Guide End user can launch desktops and applications offered from a XenApp farm by clicking the Launch link associated with that resource, as shown in the following figure. The Connection Broker launches the resource using either the Citrix XenApp Plugin or Citrix Client for Java, based on the protocol plan associated with that desktop. See Citrix XenApp ICA for information on configuring how to launch Citrix XenApp resources. Customizing the Web Client Message Board By default, the Leostream Web client contains a message board on the right-hand side of the page. You can change the contents of the message board, or hide the Message Board for all Connection Broker users. For information on modifying the contents of the message board, see Setting Message Board Text. To remove the message board from the Web client: 1. In the Connection Broker Administrator Web interface, go to the > System > Settings page. 2. In the Web Browser Configuration section, uncheck the Show Message Board in Web Client option. 3. Click Save. Opening the Administrator Web Interface Users with a role that allows them to access the Connection Broker Administrator Web interface can open the interface in one of two ways. 1. Go directly to the Administrator Web interface URL: https://cb-address/admin Where cb-address is the Connection Broker IP address or fully hostname. This URL always opens the Administrator Web interface. 2. Click the Open Administrator View link in the Leostream Web client, shown in the following figure. 293 Chapter 15: Using the Leostream Web Client If the user is assigned a single resource and their policy is configured to automatically launch that resource, the user cannot access the Open Administrator View link. In this case, the user must use the full URL to the Administrator Web interface. The Administrator Web interface shows only the pages the user’s role allows them to access. See Administrator Web Interface Permissions for a complete description of setting up access permissions to the Administrator Web interface. Launching Connections in New Windows If you have users that are offered multiple resources, and these users log in using the Leostream Web client, you can allow them to connect to multiple resources by opening each connection in a new browser window, as follows. 1. Edit the user’s policy 2. At the top of the Edit Policy page, select the Launch Web client connections in new window option, shown in the following figure. This option applies to Citrix ICA and NoMachine NX clients implemented as Java applets and to the External viewer option in the protocol plan. 3. To configure the appearance of the new window, edit the user’s protocol plan. 4. For each protocol, use the Parameters for connections opened in new window edit field to configure the appearance of the new window. For example, the following figure shows this field for the Citrix JICA client. 294 Leostream Connection Broker Administrator’s Guide The Connection Broker uses the Javascript window.open function to launch the new window. For a list of parameters, see: http://www.w3schools.com/jsref/met_win_open.asp Enter parameters as a comma-separated list, for example: left=0,height=500,width=700,toolbar=1,status=1 Setting URL for User Logout By default, when the user logs out of the Leostream Web client, they return to the Connection Broker Sign in page. Use the URL redirect on user logout edit field on the > System > Settings page to specify a different Web page for users to visit when they log out of the Leostream Web client. Display Protocols for Web Client Access The Web Browser section of protocol plans, shown in the following figure, contains the following options for launching desktops via the Web client: ActiveX RDP Microsoft RDP Exceed onDemand Citrix HDX VNC NoMachine NX Juniper SSL VPN External viewer – any third party viewer that can be accessed via a URL In addition, users can establish ICA connections to applications and desktops published in a Citrix XenApp Farm (see Citrix XenApp ICA) 295 Chapter 15: Using the Leostream Web Client The settings in the Priority drop-down menus indicate the order in which the Connection Broker uses the display protocols when connecting to a desktop. The Configuration file then configures the display protocol settings. The following sections describe the different display options available when a user logs in from the Web browser. For more details on different display protocols, see the Leostream Guide for Choosing and Using Display Protocols. Microsoft® ActiveX® RDP Viewer If you set the Priority of the ActiveX RDP to 1, when a user launches their desktop, the Connection Broker downloads and launches the ActiveX RDP client. The ActiveX RDP client is supported only when users log in from a Microsoft Internet Explorer Web browser version 10 or earlier. Internet Explorer 11 does not support the ActiveX RDP client. When using a browser that does not support ActiveX, select RDP in the protocol plan. If the ActiveX RDP client fails to launch, ensure that the Microsoft Terminal Services Client/RDP Control Add-on is enabled in Internet Explorer. 1. Open the Manage Add-ons dialog. 2. Select the Microsoft Terminal Services/RDP Client Control (redist) item. If it is not displayed, change the filter to display all add-ons. 3. Enable the add-on. 4. Click OK. Disconnecting or logging off from the remote desktop causes the ActiveX session to terminate and returns the user to the Connection Broker Sign In page. To connect to another resource, the user must log back into the Connection Broker. The format of the configuration file for the ActiveX RDP viewer differs from that of a regular RDP client. The 296 Leostream Connection Broker Administrator’s Guide default configuration file takes the following form. MsRdpClient.server = "{IP}" MsRdpClient.UserName = "{USER}" MsRdpClient.AdvancedSettings.ClearTextPassword = "{PLAIN_PASSWORD}" MsRdpClient.Domain = "{DOMAIN}" MsRdpClient.FullScreen = TRUE MsRdpClient.DesktopWidth = Min(1600,screen.width) MsRdpClient.DesktopHeight = Min(1200,screen.height) MsRdpClient.Width = Min(1600,screen.width) MsRdpClient.Height = Min(1200,screen.height) MsRdpClient.AdvancedSettings2.RedirectDrives = FALSE MsRdpClient.AdvancedSettings2.RedirectPrinters = TRUE MsRdpClient.AdvancedSettings2.RedirectPorts = FALSE MsRdpClient.AdvancedSettings2.RedirectSmartCards = FALSE MsRdpClient.Connect The ActiveX RDP client requires a clear text password to perform single sign-on to the end user’s desktop. For security purposes, the Connection Broker wraps the ActiveX RDP configuration file in a Java script wrapper, to ensure that the clear text password cannot be viewed using the Web browser’s View Source option. This solution cannot be used when a user is logging in through a NAT’d VPN. For protocol plans assigned to users who connect over a NAT’d VPN, select the Allow connection through NAT’d VPNs option, shown in the following figure. When using ActiveX RDP, users must hit Connect on the confirmation dialog shown in the following figure to establish the connection. The Connection Broker cannot automatically dismiss this warning dialog. RDP Viewer Set the Priority drop-down menu associated with RDP to 1 to use the native Microsoft RDP client to 297 Chapter 15: Using the Leostream Web Client establish the remote session. For RDP connections, specify the RDP-file that establishes the connection to desktops launched from the Web client. This configuration file contains dynamic tags that specify parameters such as user name and desktop IP address. See Using Dynamic Tags for information on using dynamic tags in configuration files. When setting up the configuration file and client device for Web client logins, ensure the following. Do not use the password 51:b parameter in the configuration file. The Web client cannot encrypt the user’s password. Do not save credentials from the client device’s native RDP client. If a user previously saved credential by checking the Allow me to save credentials option on the Remote Desktop Connection login page, ensure that you delete the credential before trying to log into that remote desktop from the Connection Broker. The Leostream Choosing and Using Display Protocols guide, available on the Leostream Resources Manuals Web page, contains a complete description of how to write a configuration file for RDP. The Connection Broker downloads the configuration file in the same way as any other server initiated file download. If your Web browser blocks the download, modify the browser’s security settings to allow downloads from your Connection Broker. After the browser downloads the file, it prompts the user to open or save the file. Opening the file launches the RDP session, where the user must enter their password. Single sign-on is not available when using the native RDP client from a Web browser. Some Web browsers prompt users to download the RDP file used to launch the Connection to the desktop. To avoid this prompt, the first time the Connection Broker tries to download an RDP file, right-click on the download tab associated with that file and select Always open this kind of file. When the user subsequently launches additional desktops, the Web browser automatically launches the connection without prompting the user. Exceed onDemand Exceed onDemand from OpenText provides pixel perfect screen and color rendering for professionals in design and manufacturing industries, allowing organizations to deliver complex 2-D and 3-D applications to a global work force with LAN-like performance. For more information on Exceed onDemand, visit the OpenText Web site. Set the Priority drop-down menu associated with Exceed onDemand to 1 to establish a session to an Exceed onDemand server. In the Configuration file field, enter the EOD file to use to launch the connection. You can obtain a default EOD file by saving a connection document from within the Exceed onDemand client. See “Exceed onDemand” in the Leostream guide for Choosing and Using Display Protocols for complete information on integrating Leostream and Exceed onDemand. 298 Leostream Connection Broker Administrator’s Guide Citrix HDX Set the Priority drop-down menu associated with Citrix HDX to 1 to use HDX to establish the remote session. Users can establish HDX connections to desktops assigned by Leostream or to desktops already assigned to them by Citrix XenDesktop. See “Citrix HDX” in the Leostream guide for Choosing and Using Display Protocols for complete information on integrating Leostream and Citrix XenDesktop. VNC Set the Priority drop-down menu associated with VNC to 1 to use a VNC viewer to establish the remote session. Use the Configuration file field to customize the connection. See the Leostream guide for Choosing and Using Display Protocols, available on the Leostream Resources Manuals Web page, for a description of how to write configuration files for VNC. NoMachine NX Set the Priority drop-down menu associated with NoMachine NX to 1 to use the NoMachine NX protocol to connect to a Linux desktop. When connecting from the Leostream Web clients, users can use one of the following NX clients to establish the connection. The NX Web Companion The user must log in from a Java-enabled Web browser, and the client device must be running Java version 6 or later. If an earlier version of Java is installed on the client device, the NX Web companion will not launch, and the user will be presented with a blank Web browser screen. A natively installed NX client The NX client must be installed on the client device before the user logs in to Leostream See “Launching NX Connections from the Web Client” in the Leostream guide for Choosing and Using Display Protocols for instructions on configuring protocol plans to launch an NX client. When using the NX Web Companion, the first time a user connects to a desktop from a particular client device, the Connection Broker prompts the user to install the NX plug-in. Juniper SSL VPN Set the Priority drop-down menu associated with Juniper SSL VPN to 1 for users logging into the Connection Broker Web client through a Juniper SSL VPN device. The Configuration File edit field should be the full URL to launch a terminal server session to a desktop through the SSL VPN, for example: https://sslvpn.yourcompany.com/dana/term/winlaunchterm.cgi?host={IP}&screenSize=fullScreen &colorDepth=32&user=<USERNAME>&password=<PASSWORD> 299 Chapter 15: Using the Leostream Web Client You must include either http:// or https:// at the beginning of the Web page. The Connection Broker replaces the {IP} dynamic tag with the hostname or IP address of the user’s remote desktop. The Juniper device replaces the <USERNAME> and <PASSWORD> dynamic tag with the user’s credentials. See Juniper Networks® SSL VPN Setup for more information. The Juniper device does not inform the Connection Broker when the user logs out or disconnects from their remote desktop. Therefore, to invoke actions specified in a user’s release plan after logging in via a Juniper SSL VPN, you must install a Leostream Agent on the remote desktop. External Viewer The External viewer option allows you to enter HTML or a URL to any third-party remote viewer that can be launched from a Web browser. The external viewer option is useful when building a protocol plan for users connecting through an SSL VPN device or for users that need to launch other URL based protocols, such as SSH or VMware View. To launch an external viewer, set the Priority drop-down menu associated with External Viewer to 1. Optionally, to return the user to a particular URL when the user logs out, enter the URL in the URL redirect on user logout edit field. By default, the external viewer launches in the same window that displays the user’s list of offered resources. For instructions on launching the viewer in a new browser window, see Launching Connections in New Windows. External Viewer URLs In the Configuration file edit field, enter the URL that redirects the user to the external viewer. The Connection Broker reaches out to the external server to run the URL. If you cannot run the URL from the external server, because of a security warning or other problem, load the external viewer that is launched by the URL directly into the Connection Broker. See Installing and Removing Third Party Content for information on how to load third party files into the Connection Broker After the external viewer is uploaded, enter the path to the uploaded viewer in the Configuration file edit field. The filename has the following form: https://cb-address/tpc/filename Where cb-address is your Connection Broker IP address or hostname and filename is the name of your uploaded viewer. 300 Leostream Connection Broker Administrator’s Guide Entering HTML-Code for External Viewers In the Configuration file edit field, enter HTML code that redirects the user to an external viewer. The Connection Broker returns the HTML to the user. Launching SSH, VMware View, and FTP as External Viewers The Connection Broker recognizes a limited number of clients with Uniform Resource Indentifier (URI) schemes. If the Connection Broker recognizes the URI, the Connection Broker evaluates the URL entered into the Configuration file, instead of returning the URL to the user. In particular, you can use this functionality to launch the following connection types from the Leostream Web client. FTP SSH VMware View – to virtual machines with an installed VMware Horizon View Agent DirectConnection Plug-In Use dynamic tags when constructing the URLs to ensure that the Connection Broker establishes the connection to the correct resource. For example, enter the following code into the Configuration file for the External Viewer to launch VMware View. vmware-view://{HOSTNAME}/{VM:NAME}?desktopProtocol=PCOIP Example: Launching the Elusiva Java Remote Desktop Protocol Client The Elusiva Java Remote Desktop Protocol (RDP) Client allows you to provide single sign-on access to Windows remote desktops for users logging in to the Connection Broker from a Web browser, such as Google Chrome, that does not support ActiveX RDP. The following example describes how to upload and launch the Elusiva RDP Client: 1. Download and save the open source Elusiva Java RDP Client for Java 1.4 file (JavaRDP141.1.jar) from the following Web site: http://www.elusiva.com/opensource/ 2. Go to the Connection Broker > System > Maintenance page. 3. Select the Install third-party content option. 4. Click Next. 5. In the Install Third Party Content form, enter or browse for the JavaRDP14-1.1.jar file downloaded in step one. 6. Click Install. 301 Chapter 15: Using the Leostream Web Client 7. If you are using a cluster of Connection Brokers, repeat steps 2 through 6 for each Connection Broker in your cluster to ensure that the user has access to the client software regardless of which Connection Broker processes their login. 8. Go to the Connection Broker > Plans > Protocol page. 9. Create or edit the protocol plan to assign to users who will use the Elusiva RDP Client. 10. In the Web Browser section of the protocol plan, set the Priority of the External viewer to 1. Set all other priorities to Do not use. 11. In the Configuration file field for the external viewer, enter the following code. <html> <head> <title>Connection Broker Title</title> </head> <body> <applet name='rdp' code='com.elusiva.rdp.applet.RdpApplet' archive='JavaRDP14-1.1.jar' codebase='tpc' width='30%' height='30%'> <param name='server' value='{IP}'> <param name='port' value='3389'> <param name='username' value='{USER}'> <param name='password' value='{PLAIN_PASSWORD}'> <param name='domain' value='{DOMAIN}'> </applet> </body> </html> 12. Click Save. Ensure that the user’s policy specifies this protocol plan for desktops that should be connected using the Elusiva RDP client. Citrix XenApp ICA Use the Citrix XenApp (ICA) Configuration section of the protocol plan, shown in the following figure, to determine how to connect to desktops and applications published in a XenApp farm. The setting of the Use the Citrix Client for Java when connecting from a Web browser option, shown in the following figure, determines which client the Connection Broker uses. 302 Leostream Connection Broker Administrator’s Guide If the Use the Citrix Client for Java when connecting from a Web browser option is not selected, the Connection Broker requires an installed Citrix XenApp Plugin on the client device. To launch the connection, the Connection Broker downloads an ICA-file based on the settings in the Citrix Plugin section of the protocol plan, shown in the previous figure. The Web browser’s security settings must allow downloading files. If the XenApp Plugin is not installed on the client device, the Connection Broker opens a dialog to download the ICA-file. However, the user is not able to launch the application. If end users do not have an installed Citrix XenApp Plugin, configure their protocol plans to use the Citrix Client for Java. If the Use the Citrix Client for Java when connecting from a Web browser option is selected, the Connection Broker uses the Citrix Client for Java to launch the XenApp resources. The Citrix Client for Java is a Java applet that is downloaded and run when the user launches one of their applications. No additional software needs to be installed on the client device when selecting this option. Ensure that the appropriate Java version is available in your Web browser when using the Citrix Client for Java. Consult your Citrix documentation for Java version requirements. For more on using ICA with the Connection Broker, see the Leostream Choosing and Using Display Protocols guide, available on the Leostream Resources Manuals Web page. Using Client-Side Certificates Server-side certificates on Web servers prove that the Web site is who it claims to be, as well as enable an SSL tunnel to be setup between the user and the server. Client-side certificates allow the user to prove who they are, by having their username placed into a 303 Chapter 15: Using the Leostream Web Client certificate that is held by the Web browser and passed to the Connection Broker when the user goes to the Sign In page. The user is prompted when the Connection Broker requests the certificate and can block the request. If the Connection Broker retrieves a certificate, the broker first checks to see that the certificate is signed by a certificate signing authority recognized by the Microsoft® Active Directory® authentication server. Typically, this is the Microsoft Certificate Server associated with the Active Directory installation. To obtain a client-side certificate: 1. Point your Web browser at the relevant server to request a User Certificate from. 2. If you are prompted for your user credentials, enter the credentials to be placed into the certificate. 3. Select Request a certificate, as shown in the following figure. 4. In the warning dialog that opens, click Yes to accept that the certificate be created for you. 5. Once the certificate is issued, Click Install this certificate. The following warning informs you that the certificate is going to be added to your certificate cache. 304 Leostream Connection Broker Administrator’s Guide 6. Click Yes to install the certificate. Once the certificate is installed and recognized, the next time a user signs in, the Connection Broker prompts the user to allow the broker to read the certificate. The Connection Broker uses the certificate to determine the user name and domain, and prompts the user only for their password, as shown in the following figure. 305 Chapter 16: SSL VPN Integration Chapter 16: SSL VPN Integration Overview The Connection Broker is a management layer, not a proxy solution. Therefore, the display protocol does not travel through the Connection Broker. For external access to desktops, the Connection Broker uses your existing hardware based SSL VPN device, allowing you to provide secure access to traveling users without needing to qualify another SSL VPN solution. How SSL VPNs work An SSL VPN performs two functions: Authentication Encryption of data as it passes over the Internet from the user’s computer to the corporate network. Authentication Users typically access an SSL VPN using a Web browser. Their Web browser recognizes the SSL certificate in the SSL VPN server as being valid and containing the correct address. The addition of Leostream to an existing SSL VPN does not change the security model. The SSL VPN must pass the user’s username and password to the Connection Broker in order for the user to have single sign-on to the broker. This information transfer can be problematic if the SSL VPNs authenticates against a stand-alone Radius server, rather than against an LDAP server such as Microsoft Active Directory®. In addition if the SSL VPN requires only the username and cryptographic key, the SSL VPN cannot pass sufficient information for single sign-on. The simplest solution is for the SSL VPN to first authenticate against the radius server, and then to authorize against the Connection Broker. The latter step passes the user credentials to the Connection Broker. Networking and Encryption SSL VPNs break the standard model of networking. They take data packets from the corporate network, or the user’s computer, and send them across a connection established at the application level. To do so, they act as a form of advanced reverse proxy. In the user’s computer, the networking layer thinks it is talking to a device on the local network. At corporate end, the corporate computers also think they are talking to a local device. The key element of an SSL VPN is a virtual network adapter. The adaptor appears to the operating system as a normal network adapter, but instead sends it to an application. This application could be an SSL VPN application that encrypts the data and sends it across a pipe to another SSL VPN application that sends it to another virtual network adapter so it reappears. 306 Leostream Connection Broker Administrator’s Guide In the simplest case, the network within the user’s computer is bridged with the corporate network, but this requires both networks to be within the same subnet. For example, assume the user has an IP address of 172.29.229.151 and the server they are talking to has an IP address of 172.29.229.23. It does allow LAN broadcasts (required by services such as Windows NetBIOS file sharing and network neighborhood browsing). The other option is routing, where the user’s computer is on one subnet, with an address of 192.168.2.151, and the corporate network is on another subnet 172.29.229.xxx with a server at 172.29.229.151. This is more efficient because only traffic destined for the remote system passes over the SSL VPN encrypted tunnel, but it requires routes to be setup that link each subnet. The networking operation is carried out at the end user’s computer in one of two ways. The first approach is to install an SSL VPN client after which all the user’s applications have access to the remote network. The second option is to run either a Microsoft ActiveX® or Java™ client in the browser. This performs the equivalent function but requires that particular browser window be open. As soon as it is closed, the connection is broken. After the SSL VPN sets up a network connection, either the Leostream Connect client can be run on the user’s computer or, for a zero install setup, the ActiveX RDP viewer is run within Microsoft Internet Explorer®. Juniper Networks® SSL VPN Setup The Leostream Connection Broker integrates with the Juniper Networks® SSL VPN providing users with secure access to their resources from outside the corporate network. Configuring your Juniper Networks SSL VPN and Connection Broker to work together consists of the following steps. 1. Configure the Juniper Networks SSL VPN administrator interface to include the following: a. User Roles to enable access to the Resource Profiles defined for the Leostream Connection Broker. If your users log in from client devices running different operating systems, such as Windows or Macintosh, you will need different roles for each user. b. Web Application Resource Profiles defined for the Leostream Connection Broker. The type of Web Application Resource Profile you create depends on the type of connections your users are establishing. In these Resource Profiles, you’ll set Web Access Control and Single Sign-on auto-policies to allow connection(s) to backend resources and provide single sign-on to the Connection Broker. 2. Build Connection Broker protocol plans for users who connect via the Juniper Networks SSL VPN. Juniper Networks and Leostream use common terms such as Roles and Policies, but these terms relate 307 Chapter 16: SSL VPN Integration to different concepts in the two products. The following sections describe these steps in more detail. For complete instructions on working with the Juniper Networks Secure Access administrator interface, see the Administration Guide available from the Juniper Networks Web site. Configuring Juniper Networks Roles The first step in integrating Leostream and Juniper Networks is to create Juniper Networks Roles and map these Roles to users via the Juniper Networks User Realms. After creating Roles, you create Resource Profiles for your Connection Broker and assign those Resource Profiles to these Roles. The number of Juniper Networks Roles you need, and their configuration, depends on what viewing clients are used to launch connections and on the number of different viewing clients you need to support. If all users use the same set of viewing clients, you can use one Role. If you have users logging in from client devices running different operating systems, such as Microsoft Windows and Apple Macintosh, and you want to use different viewing clients for each operating system, you need two Roles. Building a General Role for Leostream You create a general Role for your Leostream Connection Broker, as follows. 1. Select the Users > User Roles > New User Role menu from the left-side of your Juniper Networks device Central Manager. 2. In the Name edit field, provide a descriptive name for this role. 3. Optionally, enter a description for this role in the Description edit field, for example: 4. After a user logs into the Juniper Networks device, the default start page typically displays a list of bookmarks for the user’s offered Resource Profiles, one of which points to the Leostream Connection Broker. You can, instead, automatically log the user into the Connection Broker after they log into the Juniper Networks device by over-riding the default start page. To automatically log the user into Leostream, ensure that the UI Options check box in the Options section is selected if you want to over-ride the default start page associated with all User Roles 5. In the Access features section, select the Web check box to provide access to your Leostream Connection Broker, as shown in the following figure 308 Leostream Connection Broker Administrator’s Guide 6. Click Save Changes at the bottom of the form to finish creating the new role To have this role go to the Connection Broker Sign In page, instead of displaying a bookmark for the Connection Broker, modified the General UI Options, as described in Expanding Roles to Bypass the Connection Broker Bookmark. Additional Role configuration may be necessary depending on the type of viewing clients your users launch. The following sections can be combined to build Roles that allow users to launch a variety of client types. To configure the Role to allow users to connect to desktop using a Java RDP or Citrix JICA client, see Expanding the Role for Java RDP and Citrix JICA Clients To configure the Role to use winlaunchterm.cgi to launch Microsoft RDP connections to desktops and Citrix ICA connections to applications, see Expanding the Role to use winlaunchterm.cgi for RDP, ICA, and HDX Connections To configure the Role to use JSAM to launch Citrix applications, see Expanding the Role to use JSAM for ICA and HDX Connections 309 Chapter 16: SSL VPN Integration Expanding the Role for Java RDP and Citrix JICA Clients Users that log into the Juniper Networks device from client devices running a Linux or Macintosh operating system need to use a Java RDP client to launch connections to desktops. The Juniper Networks winlaunchterm.cgi script does not support these operating systems. To create a Role: 1. Create a Role using the procedure described in Configuring Juniper Networks Roles. 2. Any Resource Policies associated with this role must include a Java Access Control Policy. If this Role launches Java RDP clients but uses JSAM to launch Citrix ICA connections, you must manually create a Java Access Control Policy and assign it to this Role. See Building Java Access Control Policies for instructions. After the Role is complete, create a Web Resource Profile for your Connection Broker (see Configuring Resource Policies). Expanding the Role to use winlaunchterm.cgi for RDP, ICA, and HDX Connections For users logging in from a Windows client, you can build a Role that uses the winlaunchterm command to launch RDP and ICA connections. To create the Role: 1. Create a Role using the general procedure described in Configuring Juniper Networks Roles. 2. In this Role, click on the General tab. 3. In the General tab, click on the Overview tab. 4. In the Access features section, select the Terminal Services check box. Your role now has two check boxes selected, as shown in the following figure 310 Leostream Connection Broker Administrator’s Guide 5. Click Save Changes at the bottom of the form. 6. Within this role, go to the Terminal Services tab. 7. In the Terminal Services tab, go to the Options tab. 8. Select the User can add sessions option, as shown in the following figure. 9. Click Save Changes. 10. In order to use winlaunchterm.cgi to establish RDP connections, you must create the following Resource Policies and assign them to this Role. Web Rewriting Policy – If you do not create a Web Rewriting Policy, clicking on the Connect link for a desktop after logging into Leostream produces no results. Terminal Services Access Control Policy – If you do not create a Terminal Services Access Control Policy, clicking Connect link for a desktop after logging into Leostream launches the RDP connection to the desktop, but the connection fails. This role is appropriate for any client device that launches RDP, ICA, or HDX connections using the Juniper Networks winlaunchterm command, called from a Leostream protocol plan or directly by the Juniper Networks device. After the Role is complete, create a Web Resource Profile for your Connection Broker. See Configuring Resource Policies for more information. Expanding the Role to use JSAM for ICA and HDX Connections 311 Chapter 16: SSL VPN Integration Users logging into the Juniper Networks device from client devices running a Linux or Macintosh operating system can use JSAM to launch Citrix ICA or HDX connections. These users can alternatively use the Citrix JICA client for ICA connections (see Expanding the Role for Java RDP and Citrix JICA Clients) To create a Role that supports JSAM: 1. Create a Role using the procedure described in Configuring Juniper Networks Roles. 2. In this Role, click on the General tab. 3. In the General tab, click on the Overview tab. 4. In the Access features section, select the following options, as shown in the following figure a. Secure Application Manager b. Under Secure Application Manager, select Java version 5. Click Save Changes at the bottom of the form. After the Role is complete, create a Web Resource Profile for your Connection Broker. See Configuring Resource Policies for more information. Expanding Roles to Bypass the Connection Broker Bookmark If your users log into the Juniper Networks device to access only the Leostream Connection Broker, you can configure their Juniper Networks Role to skip the Bookmarks page and, instead, directly log the user into Leostream. To configure a Role to log directly into the Connection Broker: 1. From the Central Manager menus, select the Users > User Roles. 2. From the list of Roles, click the name of the role that will log users into Leostream. 312 Leostream Connection Broker Administrator’s Guide 3. In this role’s General tab, click on the UI Options tab. 4. Scroll down to the Start page section. 5. Select the Custom page option. 6. In the Start page URL, enter the URL to your Connection Broker, including the port number, as shown, for example, in the following figure. 7. Select the Also allow access to directories below this url option. 8. Click Save Changes. Defining Role Mappings Use Role Mappings within your User Realms to assign the correct Role to users, based on the type of client they use. For example, the following procedure creates a rule that assigns a user logging in using a Safari Web browser to the Leostream – Mac role. 1. Select the User Realms > Users > Role Mapping menu from the left-side of your Juniper Networks device Central Manager. 2. Click New Rule. 3. From the Rule based on drop-down menu, select Custom Expressions. Custom Expressions allow you to define rules that filter users based on their Web browser type. 4. Click Update next to the Rule based on drop-down menu. 5. In the Name edit field, provide a unique name for this Role Mapping Rule, for example, Leostream – Mac. 6. If you do not already have a custom expression that filters by Web browser type, click Expressions in the Rule: If user has any of these custom expressions… section. Otherwise, skip to step 7. a. In the Expressions tab of the Server Catalog for Production dialog that opens, enter a name for the new custom expression in the Name edit field. 313 Chapter 16: SSL VPN Integration b. In the Expressions edit field, enter the following string to distinguish Safari Web browsers. To distinguish other types of Web browsers, modify your custom expression, accordingly. userAgent = '*AppleWebKit' For example: c. Click Add Expression. d. Click Close to return to the form for creating the new Rule. 7. From the Available Expressions list, select your custom expression. 8. Click Add-> next to the Available Expressions list. 9. From the Available Roles list in the ...then assign these roles section, select the role to associated with this expression. In this example, because the custom expression is filtering on the Safari Web browser, the Leostream – Mac Role is selected. 10. Click Add->. 11. If a user assigned to a role by this rule should not be assigned to any other role, select the Stop processing rules when this rule matches option. 12. Click Save Changes. The rules in the Role Mapping table are processed from top-down. If you have multiple Rules for users logging into Leostream, place the most restrictive Rule first, followed by roles with decreasing restrictions. 314 Leostream Connection Broker Administrator’s Guide For example, in the following figure, the first rule assigns the Leostream – Mac role based on the custom expression created in the previous procedure. Users logging in from a Safari Web browser satisfy this Rule. All other users fall through the first Rule and satisfy the second Rule, thereby being assigned to the Leostream – Windows Role. Configuring Connection Broker Web Resource Profiles in Juniper Networks Leostream integrates with Juniper Networks via Web Resource Profiles. The type of Resource Profile you use depends on the type of connections your users make through the Juniper Networks device, as follows. Custom: A Custom Resource Profile is used if users connect to desktops using a Java RDP, Microsoft RDP, launched using winlaunchterm.cgi, or JICA client. Citrix Web Interface/JICA: A Citrix Web Interface/JICA Resource Profile is used if users connect to Citrix resources using ICA or HDX, using the native Citrix client. The configuration of a Citrix WI Resource Profile differs depending on if you are using winlaunchterm or JSAM to launch the Citrix client. The following sections create Resource Profiles for three use cases. You particular use case may include parts or combinations of the following procedures. Creating Custom Resource Profiles for Microsoft RDP, Java RDP, and Citrix JICA Connections The procedure described in this section creates a Resource Profile that can be used for the following connection types: Standard Microsoft RDP client connections created by the Juniper Networks winlaunchterm script. This option uses the Juniper SSL VPN section of the Leostream Connection Broker protocol plan. Java RDP client connections created by a URL defined in the Connection Broker. This option uses the External Viewer section of the Leostream Connection Broker protocol plan. Citrix ICA connections established using the Citrix JICA client. This option uses the Citrix Client for Java section of the Leostream Connection Broker protocol plan. 315 Chapter 16: SSL VPN Integration This type of Resource Profile is not appropriate if your users establish HDX connections to XenDesktop resources. In this case, build a Citrix Web Interface Resource Profile (see Creating Citrix Web Interface Profiles for winlaunchterm.cgi RDP and ICA Connections or Creating Citrix Web Interface Profiles for Java RDP and JSAM ICA Connections). To create a Custom Resource Profile for Leostream: 1. Select the Users > Resource Profiles > Web menu from the left-side of your Juniper Networks device Central Manager. 2. Click New Profile. 3. From the Type list, select Custom. 4. Enter a name into the Name edit field. 5. Optionally enter a description into the Description edit field. 6. Enter your Connection Broker URL into the Base URL edit field. Ensure that you include the port number, for example: https://broker_address.mycompany.com:443 7. Ensure that the auto-policy for Web Access Control is enabled. Your form appears similar to the following figure. 8. If you plan to use Java RDP or Citrix JICA clients for connections, turn on the auto-policy for Java Access Control, as follows. 316 Leostream Connection Broker Administrator’s Guide a. Click the Show ALL autopolicy types >> button b. Check the Autopolicy: Java Access Control option. The section expands, as shown in the following figure. c. In the edit field below the Resource table header, enter the following text. *:3389 If you establish RDP connections on a non-standard RDP port, change 3389 to your specific port number. d. Leave the default selection of Allow socket access in the Action drop-down menu. e. Click Add. f. By default, the Juniper Networks device resigns Java applets using a self-signed certificate. To have the Juniper Networks device resign the Java applet with an uploaded certificate, select the Sign applets with uploaded code-signing certificates. Consult the Juniper Networks documentation for more information on uploading and using code-signing certificates. The Java access control policy should appear similar to the following figure. 9. If you want the Juniper Networks device to pass the user’s credentials to the Connection Broker, providing single sign-on from the Juniper Networks device to the Connection Broker and the user’s resources, enable the Single Sign-on auto-policy. See Configuring Single Sign-On to Leostream for instructions. 317 Chapter 16: SSL VPN Integration 10. Click Save and Continue. 11. To assign Roles to this Resource Profile: a. In the Roles tab that opens, select the Role to which this Resource Profile applies. Ensure that the Role is configured correctly based on what type of RDP connection is being established. b. Click Add->. c. Click Save Changes. The Juniper Networks device automatically generates a bookmark for the Resource Profile that points to the Leostream Connection Broker Sign In page. You can opt to not display this bookmark to the Leostream user and, instead, automatically open the Sign In page after the user logs into the Juniper Networks device. See Expanding Roles to Bypass the Connection Broker Bookmark for instructions. Users assigned to this type of Resource Profile should have Connection Broker policies that use protocol plans set to either the Juniper SSL VPN or External Viewer option. See Configuring Protocol Plans in the Connection Broker for information on configuring Connection Broker protocol plans. Creating Citrix Web Interface Profiles for winlaunchterm.cgi RDP and ICA Connections Users logging in from a Windows client device can use the Juniper Networks winlaunchterm.cgi command to instantiate both RDP and ICA connections. In this case, you create a Citrix Web Interface/JICA Resource Profile, as follows. 1. Select the Users > Resource Profiles > Web menu from the left-side of your Juniper Networks device Central Manager. 2. Click New Profile. 3. From the Type list, select Citrix Web Interface/JICA. 4. Enter a name into the Name edit field. 5. Optionally enter a description into the Description edit field. 6. Enter your Connection Broker URL into the Web Interface (NFuse) URL edit field. Ensure that you include the port number, for example: https://broker_address.mycompany.com:443 7. Select the Non-Java ICA Client with Web Interface (NFuse) option. You form appears similar to the following figure, at this point. 318 Leostream Connection Broker Administrator’s Guide 8. In the Citrix settings section: a. In the MetaFrame servers section, for the Server address, enter the following text. *:* b. Click Add. c. For the ICA Client Access option, select ICA client connects over CTS client. Your Citrix setting section appears similar to the following figure. 9. Ensure that the auto-policy for Web Access Control is enabled. 10. If you want the Juniper Networks device to pass the user’s credentials to the Connection Broker, providing single sign-on from the Juniper Networks device to the Connection Broker and the user’s resources, enable the Single Sign-on auto-policy. See Configuring Single Sign-On to Leostream for instructions. 11. Click Save and Continue. 12. To assign Roles to this Resource Profile a. In the Roles tab that opens, select the Role to which this Resource Profile applies. Ensure 319 Chapter 16: SSL VPN Integration that this role is configured as described in Expanding the Role to use winlaunchterm.cgi for RDP and ICA Connections. b. Click Add->. c. Click Save Changes. The Juniper Networks device automatically generates a bookmark for the Resource Profile, which points to the Leostream Connection Broker Sign In page. You can opt to not display this bookmark to the Leostream user and, instead, automatically open the Sign In page after the user logs into the Juniper Networks device. See Expanding Roles to Bypass the Connection Broker Bookmark for instructions. Users assigned to this type of Resource Profile should have Connection Broker policies that use protocol plans set to the Juniper SSL VPN option. See Configuring Protocol Plans in the Connection Broker for information on configuring Connection Broker protocol plans. Creating Citrix Web Interface Profiles for Java RDP and JSAM ICA Connections Users logging in from a Linux or Macintosh client device can use the Juniper Networks JSAM functionality to instantiate ICA connections, while using a Java RDP client for desktop connections. In this case, even though you launch desktop and applications, you create a Citrix Web Interface/JICA Resource Profile, as follows. 1. Select the Users > Resource Profiles > Web menu from the left-side of your Juniper Networks device Central Manager. 2. Click New Profile. 3. From the Type list, select Citrix Web Interface/JICA. 4. Enter a name into the Name edit field. 5. Optionally enter a description into the Description edit field. 6. Enter your Connection Broker URL into the Web Interface (NFuse) URL edit field. Ensure that you include the port number, for example: https://broker_address.mycompany.com:443 7. Select the Non-Java ICA Client with Web Interface (NFuse) option. You form appears similar to the following figure, at this point. 320 Leostream Connection Broker Administrator’s Guide 8. In the Citrix settings section: a. In the MetaFrame servers section, for the Server address, enter the following text. *:* b. Click Add. c. For the ICA Client Access option, select ICA client connects over JSAM. d. If you modified your ICA ports, ensure that you enter the correct port numbers in the Citrix Ports edit field. 9. Ensure that the auto-policy for Web Access Control is enabled. 10. If you want the Juniper Networks device to pass the user’s credentials to the Connection Broker, providing single sign-on from the Juniper Networks device to the Connection Broker and the user’s resources, enable the Single Sign-on auto-policy. See Configuring Single Sign-On to Leostream for instructions. 11. Click Save and Continue. 12. To assign Roles to this Resource Profile a. In the Roles tab that opens, select the Role to which this Resource Profile applies. Ensure that this role is configured as described in Expanding the Role for Java RDP and Citrix JICA Clients and/or Expanding the Role to use JSAM for ICA Connections. b. Click Add->. c. Click Save Changes. The Juniper Networks device automatically generates a bookmark for the Resource Profile, which points to the Leostream Connection Broker Sign In page. You can opt to not display this bookmark to the Leostream user and, instead, automatically open the Sign In page after the user logs into the Juniper Networks device. 321 Chapter 16: SSL VPN Integration See Expanding Roles to Bypass the Connection Broker Bookmark for instructions. Users assigned to this type of Resource Profile should have Connection Broker policies that use protocol plans set to the External Viewer option. See Configuring Protocol Plans in the Connection Broker for information on configuring Connection Broker protocol plans. Assigning the Connection Broker Resource to the Juniper Networks Role After you create and save Resource Profiles, you can add or modify the Roles associated with those Resource Profiles using the Roles tab. To access and use the Roles Tab. 1. Select the Users > Resource Profiles > Web menu from the left-side of your Juniper Networks device Central Manager. 2. Click on the name of the Resource Profile in the list. 3. Go to the Roles tab. 4. To add a Role: a. Select your Connection Broker role in the Available Roles list. b. Click Add ->. 5. To remove a Role: a. Select your Connection Broker role in the Selected Roles list. b. Click Remove. 6. Click Save Changes. Configuring Resource Policies Configuring a Web Rewriting Policy By default, the SSL VPN dynamically rewrites the Connection Broker URL. To avoid this, create a Selective Rewrite Web Resource Policy that instructs the Juniper Networks Secure Access device to not rewrite the Connection Broker URL, as follows. 1. Select the Users > Resource Policies > Web menu from the left-side of your Juniper Networks device Central Manager. 2. If the Rewriting tab is not displayed on the Web Access Policies page, click the Customize button located to the right of the tabs. In the Customize View dialog that opens, shown in the following figure: 322 Leostream Connection Broker Administrator’s Guide 1. Click the All pages link. 2. Click OK. You should notice a number of tabs appear on the form. 3. Click the Rewriting tab. 4. Click the Selective Rewriting tab. 5. Click New Policy. 6. Create a new Selective Rewrite policy, as follows: 1. Enter a name for the policy in the Name edit field, for example, Don’t-Rewrite-LeostreamCB-Response. 2. In the Resources list, enter the hostname or IP address for your SSL VPN outside the firewall. This is not the Connection Broker IP address; it is the external URL of the Juniper Networks device that the users connect to. For example: https://sslvpn.yourcompany.com/* 3. In the Roles section, select your Leostream Role from the Available roles list. 4. Click Add-> to move the Role into the Selected roles list. 5. In the Actions section, select Don’t rewrite content, Redirect to target web server. 6. Click Save Changes. Your configuration should look similar to the following figure. 323 Chapter 16: SSL VPN Integration 324 Leostream Connection Broker Administrator’s Guide The Juniper Networks device applies Resource Policies from top to bottom. After creating the new Rewriting Policy, ensure that you move it above the default Initial Rewrite Policy, as shown in the following figure. Setting up a Terminal Services Access Control Policy By default, the SSL VPN blocks access to Remote Desktop/Terminal Server (3389/tcp). If your initiate an RDP connection using the winlaunchterm command, you must define a Terminal Services Access Control Policy, as follows. 1. Select the Users > Resource Policies > Terminal Services > Access Control menu from the left-side of your Juniper Networks device Central Manager. 2. Click New Policy. 3. Enter a name for the policy in the Name edit field. 4. Optionally provide a description for the new Resource Policy in the Description field. 5. In the Resources section, enter the following text to allow access to port 3389. *:3389 6. In the Roles section, select your Leostream Role from the Available roles list. 7. Click Add-> to move the Role into the Selected roles list. 8. In the Action section, select Allow access. 9. Click Save Changes. Your configuration should look similar to the following figure. 325 Chapter 16: SSL VPN Integration Building Java Access Control Policies Custom Resource Profiles and Citrix Web Interface/JICA Resource Profiles that use the CTS client provide a Java Access Control auto-policy. Citrix Web Interface/JICA Resource Profiles that use JSAM do not provide a Java Access Control auto-policy and, therefore, if this Resource Profile is assigned by a user that also launches RDP connections using a Java RDP client, you must manually create a Java Access Control Policy, as follows. 1. Select the Users > Resource Policies > Web > Java ACL menu from the left-side of your Juniper Networks device Central Manager. 2. Click New Policy. 3. Enter a name for the policy in the Name edit field. 326 Leostream Connection Broker Administrator’s Guide 4. Optionally provide a description for the new Resource Policy in the Description field. 5. In the Resources section, enter the following text: *:* 6. In the Roles section, select your Leostream Role that will access Java RDP clients from the Available roles list. 7. Click Add-> to move the Role into the Selected roles list. 8. In the Action section, select Allow socket access. Your form appears similar to the example in the following figure. 9. Click Save Changes. Configuring Single Sign-On to Leostream Optionally, you can enable an advanced policy to forward the user’s credentials to the Leostream Connection Broker. With single sign-on enabled, the user is automatically logged into the Connection 327 Chapter 16: SSL VPN Integration Broker and their offered resources. To enable single sign-on: 1. Select the Resource Profiles > Web menu from the left-side of your Juniper Networks device Central Manager 2. Click on the name of the Web Application Resource Profile to edit. 3. Click the Show ALL autopolicy types >>> button. 4. Select Autopolicy: Single Sign-on option. 5. Select the radio button for Remote SSO. 6. Select the POST the following data option. 7. In the Resource edit field, enter the URL for your Connection Broker. 8. In the Post URL edit field, enter the URL to your Connection Broker Sign in page, for example: https://leostream-cb.yourcompany.com:443/index.pl 9. Ensure that the Deny direct logon for this resource and Allow multiple POSTs to this resource options are not selected. 10. In the table of post parameters, enter the following information: Label user password __save _DATA_FIELDS _FORM_SUBMIT Name user password __save _DATA_FIELDS _FORM_SUBMIT Value <USERNAME> <PASSWORD> Sign In password,user 1 User modifiable? Not modifiable Not modifiable Not modifiable Not modifiable Not modifiable Please note the single (‘_’) and double (‘__’) underscores used in the example, and that the value for <USERNAME> and <PASSWORD> must include the less than and greater than signs. All fields are case sensitive. The Leostream Connection Broker Web Resource Profile form looks similar to the following figure. 328 Leostream Connection Broker Administrator’s Guide 11. Click Save Changes. You can use the Send the following data as request headers to pass additional information about the client to the Connection Broker. The information appears in the HTTP head string, which you can view if you edit the client in the Connection Broker. You can use the HTTP header string to create client locations, for example. Configuring Protocol Plans in the Connection Broker The following sections describe how to create Connection Broker protocol plans to use in conjunction with a Juniper Networks device. After you create the protocol plan, associated it with pools in the policies assigned to your users that log in remotely. Launching Connections using winlaunchterm.cgi and Microsoft RDP You can configure a Connection Broker protocol plan that sends a Terminal Services request to the Juniper Networks device. Use this protocol plan with Juniper Network Web Resource Profile configured to use winlaunchterm.cgi (see Creating Custom Resource Profiles for Microsoft RDP, Java RDP, and Citrix JICA Connections. The following procedure configures a protocol plan that users the winlaunchterm.cgi command to launch the Microsoft RDP client. 1. Open the Edit Protocol Plan page for the protocol plan to assign to the desktops for users who log in through the SSL VPN. 329 Chapter 16: SSL VPN Integration 2. Select 1 from the Priority drop-down menu for Juniper SSL VPN in the Web Browser section, as shown in the following figure. 3. Select Do not use from the Priority drop-down menu for all other protocols in the Web Browser section, as shown in the following figure. 4. Enter the URL in the Configuration file edit field, for example: https:// sslvpn.yourcompany.com /dana/term/winlaunchterm.cgi?host={IP}&screenSize=fullScreen&colorDepth=32&use r={DOMAIN}\<USER>&password=<PASSWORD> Where sslvpn.yourcompany.com is the external address of your Juniper IVE. In this URL: Parameters are case sensitive You can combine using ampersand characters (&) You can set variables using Connection Broker or Juniper dynamic tags. The Connection Broker replaces the {IP} dynamic tag with the hostname or IP address of the user’s remote desktop. The Juniper device replaces the <USER> and <PASSWORD> dynamic tag with the user’s credentials. You can include the following additional options in the URL: screensize (screenSize=fullScreen, screenSize=800x600, screenSize=1024x768, screenSize=1280x1024) connectDrives (connectDrives=Yes, connectDrives=No) connectPrinters (connectPrinters=Yes, connectPrinters=No) 330 Leostream Connection Broker Administrator’s Guide Launching Connections using a Java RDP Client You can use the External Viewer option in Connection Broker protocol plans to launch desktop connections using a third-party Java RDP client. Use this protocol plan with Juniper Network Web Resource Profiles that contain the necessary Java Access Control Policy. The following list includes examples of third-party Java RDP clients. Elusiva Open Source Java Remote Desktop Protocol client You must manually sign the Elusiva Java RDP client before you can use it within your Connection Broker. See Signing the Elusiva Open Source Java RDP Client for instructions. HOB Inc., HOBLink JWT Java client Version 7.0 of the Juniper IVE includes a Hob RDP Java applet, which is launched using a bookmark created for a Terminal Service Resource Profile. Currently, Juniper Networks bookmarks cannot be launched programmatically. Therefore, you cannot use the integrated Hob RDP Java applet in your Leostream environment. To launch a Java RDP client from the Connection Broker, you must upload the client into the Connection Broker and use the External viewer option in the protocol plan, as follows. 1. Download the Java client you plan to use and store it in a location that is accessible to all the Connection Broker’s in your cluster. 2. In your Connection Broker, go to the > System > Maintenance page. 3. Select the Install third party content option, as shown in the following figure. 4. Click Next. The following page opens. 331 Chapter 16: SSL VPN Integration 5. Enter the full path to the Java client you downloaded in step one. If using the Elusiva Java RDP client, ensure that you sign the client before uploading it into the Connection Broker (see Signing the Elusiva Open Source Java RDP Client). 6. Click Install. The file is uploaded into your Connection Broker’s Web servers /tpc directory. For example, the full file name is: https://cb-address/tpc/filename Where cb-address is your Connection Broker hostname or IP address and filename is the name of your Java RDP client file. 7. If you have a cluster of Connection Brokers, repeat steps 2 through 6 for each Connection Broker in the cluster. 8. On the > Plans > Protocols page, open the Edit Protocol Plan page for the protocol plan to assign to the desktops for users who log in through the SSL VPN. 9. Select 1 from the Priority drop-down menu for External viewer in the Web Browser section. 10. In the Configuration file edit field, enter HTML code that launches the Java RDP client. For example, for Elusiva Java RDP, enter the following text. <html> <head> <title>Connection Broker Title</title> </head> <body> <applet name='rdp' code='com.elusiva.rdp.applet.RdpApplet' archive='JavaRDP14-1.1.jar' codebase='tpc' width='30%' height='30%'> <param name='server' value='{IP}'> <param name='port' value='3389'> <param name='username' value='{USER}'> <param name='password' value='{PLAIN_PASSWORD}'> <param name='domain' value='{AUTH_DOMAIN}'> </applet> </body> </html> 332 Leostream Connection Broker Administrator’s Guide For the HobLink JWT client, enter the following text. <HTML> <HEAD> <meta http-equiv="Content-Type" content="text/html"> <TITLE>Leostream Connection Broker</TITLE> <STYLE type="text/css"> p,h1,h2,h3,h4 { font-family:Verdana,Arial,sans-serif; } </STYLE> </HEAD> <BODY background="lib/back.gif"> <APPLET CODE="hob.hltc.JHLTCap01.class" MAYSCRIPT WIDTH=1 HEIGHT=1 ARCHIVE="lib/jwtwebJ2.jar,lib/jmf.jar" CODEBASE="tpc/HobSoft" ALIGN="baseline"> <PARAM name="PROFILE" value="PROFILE_NAME"> <PARAM name="USERID" value="{USER}"> <PARAM name="PASSWORD" value="{PLAIN_PASSWORD}"> <PARAM name="DOMAIN" value="{AUTH_DOMAIN}"> <PARAM name="IPADDRESS" value="{IP}"> <PARAM name="AUTOCON" value="yes"> <PARAM name="java_arguments" value="-Dsun.java2d.noddraw=true"> </APPLET> </center> </BODY> </HTML> In the HobLink JWT client example, the parameter PROFILE_NAME is the name of the HobLink profile file that you uploaded into the Connection Broker. In the previous example, it resides in the HobLink installation directory indicated by the codebase ,i.e., tpc/HobSoft. In both of the previous examples, the codebase parameter indicates the directory within the Connection Broker virtual appliance where the applet code exists. If you uploaded the client using the Install third party content option, the code is found in the tpc directory. If you uploaded the client into the virtual appliance using another method, ensure that you modify the code base appropriately. 11. Ensure that no other protocol in the Web Browser section has a Priority set to 1. 12. Click Save to save the protocol plan. 13. Use this protocol plan in the policies that are assigned to users logging in through the Juniper Networks device. Signing the Elusiva Open Source Java RDP Client You can configure the Juniper SSL VPN device to re-sign Java applets that the device intermediates. In order for the device to re-sign the applet, however, the applet must be signed when it is originally handed to the device. To sign the Java applet with a self-signed certificate: 333 Chapter 16: SSL VPN Integration 1. On a machine that includes a Java 2 SDK, invoke the following keytool command to create a self- signed certificate for the Java RDP client. Run this command on a single line. keytool -genkey -keyalg RSA -keysize 1024 -validity 365 -keystore mystore -storepass ab453r -alias mycert 2. When prompted, provide the necessary information to create the certificate. 3. After the certificate is created, invoke the following command to sign the Java RDP client. jarsigner -keystore mystore -storepass ab453r JavaRDP14-1.1.jar mycert If you prefer, you can sign the Java applet with a certificate generated by a certificate authority, such as Verisign. Refer to the Elusiva Web site for more information. Launching HDX Connections To launch HDX connections, set the Priority for Citrix HDX to 1 in the Web Browser section of the protocol plan. Set the Priority for the remaining protocols in this section to Do not use. For more information on configuring HDX for use within Leostream, see the Leostream Choosing and Using Display Protocols guide, available on the Leostream Resources Manuals Web site. Launching ICA or JICA Connections Connections to XenApp applications and desktops are configured in the Citrix (XenApp) ICA Configuration section of the protocol plan. Use this section of the protocol plan, shown in the following figure, with Juniper Network Web Resource Profiles that launch Citrix ICA connections. By default, the protocol plan uses the Citrix Plugin section to pass an ICA file to the Juniper device. Depending on the user’s Resource Profile, the Juniper Networks device uses either the Citrix Terminal 334 Leostream Connection Broker Administrator’s Guide Services client or JSAM to launch the native Citrix client. To, instead, use the Citrix JICA client to launch the ICA session, select the Use the Citrix Client for Java hen connecting from a Web browser option. With this option selected, the Connection Broker launches the Citrix JICA client that is hosted in the Leostream Connection Broker. See the Leostream Choosing and Using Display Protocols guide, available on the Leostream Resources Manuals Web page for more information on using the Citrix JICA client with Leostream. The Citrix JICA client can be used with Resource Profiles that include a Java Access Control Resource Policy. Cisco® 55xx SSL VPN Setup The Leostream Connection Broker integrates with Cisco ASA 5500 Series clientless (Web) SSL VPN devices. Using a clientless Cisco SSL VPN, you can provide end-users with secure Web-based access to their desktops in the datacenter, as depicted in the following figure. 1. User opens a connection to the SSL VPN 5. 5500 series forwards Connection Broker generated Web page to user LAN Traveling User Firewall 6. RDP session setup between Microsoft ActiveX RDP client in user’s Web browser and desktop CISCO ASA 5540 SERIES Adaptive Security Appliance POWER STATUS ACTIVE VPN FLASH Cisco ASA 5500 Series 3. 5500 series performs username / password authentication against Connection Broker 2. 5500 series does 2-factor authentication against the RSA ACE Server Desktops in the Data Center 4. Connection Broker returns user specific Web page and ActiveX plug-in RSA ACE Server Connection Broker Active Directory or LDAP Configuring your Cisco SSL VPN and Connection Broker to work together consists of the following steps. 1. Use the Cisco SSL VPN ASDM interface to configure the following: A bookmark for the Connection Broker A policy that applies the bookmark to a group of users 2. Setup the Connection Broker protocol plan to launch an ActiveX RDP session when accessed through the Cisco SSL VPN. The user must log in using a Microsoft Internet Explorer Web browser. The following sections describe these steps in more detail. For complete instructions on working with the 335 Chapter 16: SSL VPN Integration Cisco SSL VPN ASDM interface, see the ASDM User Guide available from the Cisco Web site. General Cisco SSL VPN Setup Before you begin integrating your Cisco SSL VPN with your Connection Broker, ensure that you have done the following. Install software version 8.0 or higher on the Cisco ASA device. Install ASDM version 6.1. The following examples use version ASDM version 6.1. Ensure that your inside and outside network connections are properly configured. For example, in the following figure the SSL VPN has an IP address of 192.168.1.1, and has two configured networks. The inside network is named CorpNetwork, and the outside network is named outside_network. You can optionally turn on HTTP redirection for the outside network, to allow users to reach the SSL VPN URL using either HTTP or HTTPS. To enable HTTP redirection: 1. Open the Advanced node in the Remote Access VPN tree. 2. Select HTTP Redirect, as shown in the previous figure. 3. Double-click on the entry for your outside network, labeled outside_network in the previous figure. The following dialog opens. 336 Leostream Connection Broker Administrator’s Guide 4. Check Redirect HTTP to HTTPS to turn on redirection. 5. Enter the HTTP port number. 6. Click OK. Configure your DNS server on both the inside and outside network, as shown in the following figure. If the outside network is not aware of your DNS, you may see name resolution errors when users try to connect to their desktops on the internal network. You can set up the Cisco SSL VPN using the ASDM Web interface, the command line, or some combination of both. If you are using the command line interface, see the Cisco Security Appliance Command Reference for information on the available commands. Note that certain commands can be run only in a certain mode. See the “Using the Command Line Interface” section of the previously reference guide for more information. The remainder of this section describes how to use the ASDM Web interface to configure your SSL VPN to work with the Connection Broker. 337 Chapter 16: SSL VPN Integration Setting up the Cisco SSL VPN to Work with the Connection Broker Configuring a Connection Broker Bookmark To create a bookmark for your Connection Broker, navigate to the Clientless SSL VPN Access > Portal > Bookmarks node in the Remote Access VPN tree, shown in the following figure. Either add a new bookmark list, or add the Connection Broker bookmark to an existing list. To edit an existing bookmark list: 1. Select the bookmark list. 2. Click Edit. To create a new bookmark list: 1. Click Add. The Add Bookmark List dialog, shown in the following figure, opens. 2. In the Bookmark List Name edit field, enter a name for this bookmark list, for example ConnectionBroker. 338 Leostream Connection Broker Administrator’s Guide Add a bookmark to the new or existing bookmark list, as follows. 1. Click Add. The Add Bookmark dialog, shown in the following figure, opens. 2. Enter a name for the bookmark into the Bookmark Title edit field. 3. Select https from the URL drop-down menu. 4. Enter your Connection Broker hostname or IP address into the URL edit field. 5. The remaining fields can be left at their default values, including selecting the Get option for the URL Method advanced option. Click OK on the Add Bookmark page. 6. Click OK on the Bookmark List dialog. The new or updated Connection Broker bookmark list appears in the Clientless SSL VPN Access > Portal > Bookmarks node, as shown in the following figure. 339 Chapter 16: SSL VPN Integration Single Sign-On URL Post Cisco ASA 5500 Series SSL VPN devices support forms-based authentication pass-through. You can use a Post URL method with the appropriate parameters to achieve single sign-on through the Connection Broker bookmark. To perform single sign-on, the Connection Broker requires a form post with the following format: http://cb.yourcompany.com/index.pl?user=userName&password=pwd&_DATA_FIELDS= password%2Cuser&_FORM_SUBMIT=1 Where: cb.yourcompany.com is your Connection Broker address userName is the name of the user to log in pwd is the user’s password Look at the list of Clientless SSL VPN Macro Substitutions for a list of available parameters to pass through the user name and password. Assigning the Bookmark to a Group Policy To create a group policy with access to your Connection Broker bookmark, navigate to the Clientless SSL VPN Access > Group Policies node in the Remote Access VPN tree. Create a new policy, or edit an existing policy, and ensure that the Bookmark List assigned to that policy contains your Connection Broker bookmark. For example, in the following figure, the default group policy selects the ConnectionBroker bookmark list created in the previous section. 340 Leostream Connection Broker Administrator’s Guide Connection Broker bookmarks do not require port forwarding or smart tunnelling. Assigning Users to a Group Policy You can define users locally in the SSL VPN device, or set up an LDAP attribute map to use existing Microsoft Active Directory authentication servers. In either case, ensure that your users are correctly assigned to the group policy that contains your Connection Broker bookmark. Configuring Protocol Plans in the Connection Broker To configure a Connection Broker protocol plan for users logging in through the Cisco SSL VPN 1. Go to the Edit Protocol Plan page for the protocol plan used in that user’s policy. 2. Select 1 from the Priority drop-down menu for ActiveX RDP the Web Browser section, as shown in the following figure. 3. Select Do not use from the Priority drop-down menu for all other protocols in the Web Browser section, as shown in the previous figure. 4. Edit the default configuration file into the Configuration file edit field, as required. 5. If the user is logging in through a NAT’d VPN, select the Allow connections through NAT’d VPNs option. If this option is not selected, the user’s credentials will not be properly passed through and they will not be able to access their desktops. Cisco provides a customized Microsoft ActiveX controller that must be installed on each client that a user logs in through. 341 Chapter 16: SSL VPN Integration Logging in Through the Cisco SSL VPN To log in through the Cisco SSL VPN, point your Web browser to the URL of the clientless SSL VPN appliance. The Logon page opens, for example: When you click Logon, the Cisco SSL VPN passes your username and security token to an RSA server for authentication. If the authentication is successful, your bookmarks page opens, for example: Click on your Connection Broker bookmark to open the Connection Broker Sign In page, shown in the following figure. This Web page is similar to the normal Connection Broker Sign In page, with the addition of the Cisco toolbar, show on the left side of this figure. Log into the Connection Broker and, if necessary, select the desktop you want to launch. If you have never connected through your current client, the Cisco SSL VPN prompts you to download an ActiveX controller. You can return to your bookmarks page by clicking the Home button in the Cisco toolbar. Using the Cisco Systems VPN Client with Leostream Connect The Windows version of Leostream Connect can automatically establish a secure tunnel using the Cisco 342 Leostream Connection Broker Administrator’s Guide Systems VPN Client, providing seamless and secure single sign-on for end users. Leostream Connect uses vpngui.exe to launch the tunnel and then automatically connects the user to their remote desktop using the protocol defined in the Leostream Connect and Thin Clients Writing to Leostream API section of the protocol plan. To enable this feature, check the Use Cisco VPN client to establish secure tunnel for connections option at the bottom of the Leostream Connect and Thin Clients Writing to Leostream API section of the protocol plan, shown in the following figure. When the Cisco option is selected, as shown in the previous figure, the Profiles edit field appears. Enter a valid profile (the contents of a PCF-file) in the Profiles edit field, for example: [main] Description=Authentication to your domain Host=enter-cisco-vpn-ip AuthType=1 GroupName=dev GroupPwd= enc_GroupPwd=enter-password EnableISPConnect=0 ISPConnectType=0 ISPConnect= ISPPhonebook= ISPCommand= Username=enter-username SaveUserPassword=0 UserPassword= enc_UserPassword= NTDomain= EnableBackup=0 BackupServer= EnableMSLogon=1 MSLogonType=0 EnableNat=1 TunnelingMode=0 TcpTunnelingPort=10000 CertStore=0 CertName= CertPath= CertSubjectName= CertSerialHash= SendCertChain=0 PeerTimeout=90 EnableLocalLAN=0 After you define your protocol plan, assign it to the pools of desktops used in each policy, as shown in the following figure. 343 Chapter 16: SSL VPN Integration When the protocol plan enables login through the Cisco VPN Client, Leostream Connect assumes the VPN client is available. The user cannot connect to their desktops if the client device does not have an installed Cisco VPN Client. Therefore, you must create separate protocol plans for users that will log in from clients that may or may not have an installed Cisco VPN Client. Use these two protocol plans in different policies, and assign the policies to the user based on the user’s location. For example, in the following figure, the user is assigned the RemotePolicy when they log in from home, but is assigned the OfficePolicy when they log in at the office. The policy RemotePolicy uses a protocol plan that enables the Cisco VPN Client feature while the policy OfficePolicy disables Cisco VPN Client logins. For information on creating locations, see Creating Locations. For information on assigning policies to users, see Chapter 14: Assigning User Roles and Policies. Oracle Secure Global Desktop Setup Oracle Secure Global Desktop (SGD) Software is a Web browser-based application that delivers desktop to nearly any client device, using RDP and the Oracle AIP protocols. The following sections describe general SGD server setup and Leostream integration. 344 Leostream Connection Broker Administrator’s Guide General Oracle Secure Global Desktop Server Setup For new SGD installations, in order to integrate Leostream with SGD, you must first configure your SGD server, as follows. 1. Go to your SGD administrator Web interface, shown in the following figure, at the following address: http://hostname/sgdadmin Where hostname is the IP address or host name of your SGD server. 2. Log in with your root username and password. 3. In the list of Secure Global Desktop Servers, click on the link associated with the SGD server you want to integrate with Leostream. For new installations, there is a single item in this list, corresponding to the SGD server you logged into, as shown in the following figure. You are now editing the SGD server configuration 345 Chapter 16: SSL VPN Integration 4. Click on the General tab, and configure the following: a. In External DNS Names enter: *:sgd-hostname where sgd-hostname is the fully qualified domain name of your SGD server b. Check User Login 5. Click the Jump To Navigation View link above the General tab, shown in the following figure. 6. Click on the Global Settings tab. 7. Click Change Secure Global Desktop Authentication, as shown in the following figure. 8. Follow the instructions in the window that opens to configure your authentication systems and domain. 9. After you have configured your authentication systems, click the Licenses tab. 10. Enter your license keys. Installing Leostream Connect The Java version of Leostream Connect can be used in conjunction with the Secure Global Desktop software to provide end users with a consistent experience when logging in from local clients and through the SGD Web browser. To use Leostream Connect with SGD, first install Leostream Connect on the SGD Server, as follows. 1. Download the Leostream Connect installation file. 346 Leostream Connection Broker Administrator’s Guide 2. Run the installer, using the following command: java -jar LeostreamConnectJava-x.x.x.x.jar Where x.x.x.x is the version number at the end of the installer file name. 3. Step through the installer as instructed in the Leostream Installation Guide. When you reach the page for Additional Tasks, ensure that you select the SunGlobalDesktop option, as shown in the following figure. 4. Click Next. 5. In the Leostream Connect Configuration page, shown in the following figure, enter the appropriate name for your SGD application. 6. Click Next. If the SGD name was entered correctly, the installer automatically configures a Leostream Application for use with SGD. If you do not know the appropriate SGD name, leave the edit field blank and click Next to finish the Leostream Connect installation. 347 Chapter 16: SSL VPN Integration 7. After you install Leostream Connect, if you did not configure the name of the SGD server in step 6, manually configure your SGD server, as described in the following section. Adding a Leostream Application If you left the name of the SGD application blank when installing Leostream Connect, you must manually add a Leostream Connect application, as follows. 1. In the SGD Administration Console, go to the Applications tab. 2. Click the New button in the All Objects Under Applications section, shown in the following figure. A new window opens. 3. In the Create a New Object window: a. Enter LeostreamConnectJava (or your name of choice) in the Name edit field b. Select X Application c. Click Create The Create a New Object window closes and the new application appears in the All Objects Under Applications list. 4. Click on the LeostreamConnectJava link in the All Objects Under Applications list to edit the application. 5. In the General tab, shown in the following figure, click on the Edit button to modify the icon displayed to the end-user. 348 Leostream Connection Broker Administrator’s Guide 6. Click on the Launch tab and enter the following information: a. In Application Command enter: /opt/tarantella/bin/jdk.i3li_1.6.0_13/jre/bin/java The jdk.i3li_1.6.0_13 portion of the path will differ in your installation. Use the JDK version number associated with the version found on your SGD server b. In Arguments for Command enter the following command, as one line: -DLeostreamLogDir=/opt/leostream/logs -DLeostreamConfFile=/opt/leostream jar /opt/leostream/LeostreamConnect.jar Where the directory /opt/leostream will differ based on your Leostream Connect installation directory in your Secure Global Desktop server. The directory used to store the logs must be writeable by all users. You can omit the LeostreamLogDir option. In this case, the log files are stored in the .leostream directory for every user that logs into the SGD server. c. Select ssh for the Connection Method. d. Enter –X into the ssh Arguments field. e. In Login Script, replace the default with leo_unix.exp. f. Check the Enabled checkbox associated with Keep Launch Connection Open. g. In the Session Termination drop-down menu, select No Visible Windows. h. Click Save. The following figure shows the configured Launch tab. 349 Chapter 16: SSL VPN Integration 7. Click on the Presentation tab and enter the following information: a. In the Window Type drop-down menu, select Kiosk. b. Check Enable Kiosk Mode Escape. c. In the Window Manager edit field, enter the path to the Window Manager to use for this application, for example: /usr/bin/gnome-wm d. Select Custom Color for the Window Color, and enter in your color choice. Leostream recommends entering white or blue. e. In the Color Depth drop-down menu, select 16-bit - Thousands of colors. f. Click Save. The configured Presentation tab appears as shown in the following figure. 350 Leostream Connection Broker Administrator’s Guide 8. Click on the Client Device tab and enter the following information: a. Check the Sent to the Remote Session checkbox in the Window Management Keys section. This checkbox is disabled if you did not set the Window Type to Kiosk in step 7. b. Click Save. The following figure shows the configured Client Device tab. 9. Click on the Jump To Navigation View link above the set of tabs. 351 Chapter 16: SSL VPN Integration 10. In the All Objects Under Applications list, click on the Applications link, shown in the following figure. It should have the type Group. 11. Click on the Members tab, shown in the following figure. 12. In the Editable Members section, click Add. 352 Leostream Connection Broker Administrator’s Guide 13. In the Add Application Member window that opens, shown in the following figure: a. Check the box before your LeostreamConnectJava application. b. Click Add, as shown in the following figure. You must mark the LeostreamConnectJava application as an editable member to assign Leostream Connect as a usable application for all users. Logging in to Secure Global Desktop with Leostream Connect End users can access their Leostream assigned desktops via SGD by going to the following Web page: http://hostname/sgd Where hostname is the IP address or host name of your SGD server. When the user enters their credentials into the SGD login page, they are presented with the SGD Webtop. Leostream Connect appears as one of the applications in the Webtop. When the user clicks the Leostream Connect application, a new Leostream window opens. Leostream Connect automatically authenticates and user, logs them into the Connection Broker, and displays the user’s available resources. If the user is assigned a single desktop, Leostream Connect automatically logs the user into that desktop. The user does not need to reenter their credentials at any point in this process. Currently, users must have a local account on the SGD server. 353 Chapter 16: SSL VPN Integration F5® FirePass® SSL VPN Setup The F5® FirePass® SSL VPN supports HTTP form-based authentication, as shown in the following figure. To configure: 1. 2. 3. 4. Enter the Connection Broker address in the Start URL and Form Action fields Enter user as the Form parameter for user name Enter password as the Form parameter for password In the Hidden form parameters and values enter: _FORM_SUBMIT=1 _DATA_FIELDS=password,user 5. In the Successful logon detection, select By presence of a specific cookie, and enter a Cookie name of uid. You can test the login using the User name and Password fields at the bottom of the page. 354 Leostream Connection Broker Administrator’s Guide Chapter 17: Using Leostream with Teradici® PCoIP® Remote Workstation Cards Overview Teradici® PC-over-IP® (PCoIP®) technology provides an optimal end-user experience when connecting users to hosted desktops by delivering a true PC experience over standard IP networks. For more information on the PCoIP protocol, please visit http://www.teradici.com/pcoip-technology. This document describes connections from PCoIP zero clients to workstations with a PCoIP Remote Workstation card, which is also covered in the Leostream Quick Start Guide with Teradici PCoIP. Leostream supports additional PCoIP scenarios, which are described in the following documents. 1. For PCoIP connections from a PCoIP zero client to a virtual machine running a VMware Horizon View Direct-Connection Plugin, see “Establishing Connections using a PCoIP Zero Client” in the Leostream Guide to Choosing and Using Display Protocols. 2. For PCoIP connections from any PCoIP client (zero client, mobile client, or soft client) to a remote workstation running the Teradici Workstation Access Software, see the Quick Start guide on Using Leostream to Manage Remote Workstations with the Teradici Workstation Access Software. 3. For information on building a virtual workspaces solution using Leostream with the Teradici Pervasive Computing Platform, see the quick start guide for Using Leostream with the Teradici Pervasive Computing Platform. 4. For PCoIP connections from Leostream Connect or the Leostream Web client to a VMware View client to a virtual machine running a VMware Horizon View Direct-Connection Plugin (see “PCoIP Connections to VMware Virtual Machines” in the Leostream Guide to Choosing and Using Display Protocols available on the Leostream Resources Manuals web page.) The Leostream Connection Broker manages three distinct components in environments that include workstations with PCoIP Remote Workstation cards. Desktop operating systems: Leostream manages connections to remote workstations running Microsoft® Windows® and Linux operating systems. Desktops that support the PCoIP protocol appear in the > Resources > Desktops page of the Connection Broker. PCoIP Remote Workstation Cards: Leostream automatically pairs the PCoIP Remote Workstation card, the PCoIP hardware technology used to transfer information from the desktop to the client, to the desktop operating system running in the workstation. PCoIP Remote Workstation cards appear in the > Resources > PCoIP Host Devices page of the Connection Broker. PCoIP Zero Clients: A number of client vendors, such as Amulet Hotkey and Dell Wyse, have 355 Chapter 17: PCoIP Setup and Configuration embedded PCoIP processors into their end-point, zero client hardware. With the single purpose of image decompression and decoding, the PCoIP processor eliminates endpoint hard drives, graphic processors, operating systems, applications and security software. PCoIP client devices appear in the > Clients > Clients page of the Connection Broker. Enabling PCoIP Support in the Connection Broker In order to manage desktops that use PCoIP technology, you must enable the global PCoIP feature, as follows. 1. Go to the > System > Settings page. 2. Select the PCoIP Remote Workstation Card support option, shown in the following figure. 3. Click Save. 4. You must reboot the Connection Broker after enabling this feature, as follows: a. b. c. d. Go to the > System > Maintenance page. Select the Reboot the Connection Broker option. Click Next. Sign back into the Connection Broker, after the reboot completes. After you enable the PCoIP feature and reboot your Connection Broker, the Connection Broker adds the following items to the Web interface: The > Resources page contains a new PCoIP Host Devices section. The > Resources > PCoIP Host Devices page lists the PCoIP Remote Workstation cards registered with your Connection Broker. The > Resources > Centers page contains a new PCoIP Devices center. This center instructs the Connection Broker on how often to refresh the information associated with your PCoIP devices, as well as configures firmware updates and client bonding. Enabling Single Sign-On to Remote Workstations Leostream provides single sign-on to desktops running Windows and Linux operating systems when connecting using PCoIP. Currently, Leostream supports single sign-on for Ubuntu and Red Hat Linux operating systems. 356 Leostream Connection Broker Administrator’s Guide To enable single sign-on when logging into a Windows workstation from a PCoIP zero client, you must install the Leostream Agent on the remote desktop. Select the Enable single sign-on for PCoIP VNC task when installing the Leostream Agent on the desktop. On a Windows operating system, the single sign-on task installs the Leostream Credential Provider. To enable single sign-on for a Linux workstation, you must install the Java version of the Leostream Agent with both the Enable SSO option and Desktop Experience option selected. Registering PCoIP Remote Workstation Cards Before you configure your Connection Broker to manage PCoIP devices, you must inventory your PCoIP Remote Workstation cards in your Connection Broker and associate each card with the operating system running on the workstation. You can use any of the following techniques to introduce PCoIP devices into the Connection Broker. DNS SRV records – Configuring a PCoIP DNS SRV record registers PCoIP Remote Workstation cards and PCoIP zero clients with the Connection Broker Add individual PCoIP Remote Workstation cards Bulk upload of a CSV-file These techniques are described in the following sections. Discovering PCoIP Devices Using a DNS SRV Record PCoIP Remote Workstation cards and PCoIP zero clients automatically discover the location of the Connection Broker through your network’s DNS server. When a PCoIP client or PCoIP Remote Workstation card starts, it queries your DNS server for an SRV record that points to the Connection Broker. The Leostream Agent running in the desktop operating system queries a different SRV record to find the location of the nearest Connection Broker. The two relevant DNS records are: Leostream Agent: _connection_broker PCoIP devices: _pcoip-broker When you add a PCoIP zero client to your network, the client contacts the Connection Broker specified in the DNS SRV record. If the PCoIP Zero client is set to direct-connect to a host, Leostream switches the client’s session type to Connection Management Interface and points the client to the Connection Broker specified in the DNS SRV record. If the PCoIP zero client already has a session type of Connection Management Interface, the Connection Broker does not change the client to point to the Connection Broker in the DNS SRV record. In this case, you must manually enter the new Connection Broker address (see Updating the Connection Broker Address in Registered Clients). When you add a new PCoIP Remote Workstation card to your network, the card also contacts the 357 Chapter 17: PCoIP Setup and Configuration Connection Broker specified in the DNS SRV record. In this case, the Connection Broker adds the card to the > Resources > PCoIP Host Devices page, but does not change the cards session type. PCoIP Remote Workstation cards do not need a session type of Connection Management Interface to be managed by Leostream. The > System > Network page displays information about your DNS SRV records. You can also check for the DNS SRV records using nslookup. Once you start nslookup, enter the following commands at the nslookup prompt: set querytype=SRV _pcoip-broker._tcp.domain.name Where domain.name is your domain name If the record exists, nslookup returns the priority, weight, port, and SRV hostname. Otherwise, it returns a message indicating the record is not found. See the “Setting Connection Broker DNS Service Locations (SRV)” section of the Installation Guide for information on configuring Connection Broker SRV records. Adding Individual PCoIP Remote Workstation Cards You can add individual PCoIP Remote Workstation cards to the Connection Broker, as follows: 1. Go to the > Resources > PCoIP Host Devices page. 2. Click the Add PCoIP Host Device link, as shown in the following figure. 3. In the Add PCoIP Host Device form that opens: a. Enter a name for the PCoIP host device in the Name edit field. b. If available, enter the device’s DNS name in the Hostname edit field. c. Enter the device’s IP address in the IP Address edit field. d. If the Power control available option is selected, the Connection Broker sends power-up commands directly to the Teradici PCoIP host card. If this option is not selected, the Connection Broker uses the method selected in the Power control for physical machines option on the > System > Settings page. e. Click Save. 358 Leostream Connection Broker Administrator’s Guide Uploading PCoIP Remote Workstation Cards If the Hardware PCoIP Support option is selected on the > System > Settings page, the > System > Maintenance page contains an Upload PCoIP host devices option. Select this option to upload PCoIP Remote Workstation cards into the Connection Broker. In order for the Connection Broker to associated PCoIP Remote Workstation cards with the desktops they are installed in, the cards must be present in the Connection Broker before the Leostream Agent on the desktop registers with the broker. By default, the uploaded CSV-file modifies existing PCoIP Remote Workstation cards, but does not create new cards. To create new cards select the Allow creation of new PCoIP host devices option, shown in the following figure. Specify new PCoIP Remote Workstation using either the ip or hostname field, but not using both fields. New cards cannot be created using an id field. If you do not select the Allow creation of new PCoIP host devices option, the Connection Broker indicates if it cannot find an existing card and skips that row in the CSV-file. When uploading PCoIP Remote Workstation card data, the CSV-file must have the following format. The CSV-file must be comma delimited Quotes must be double quotes The first row must contain the field names, separated by commas with no additional blank spaces, and the data must be in the remaining rows The field names must match the field names in the terahost table in the data dictionary The only modifiable fields are: o o o o o o name serial_number mac ip hostname notes One of the following fields is required and must uniquely identify the client o id (for updating existing PCoIP host devices, only) o o ip hostname (either ip or hostname must be specified, but do not enter both) After uploading a CSV-file of PCoIP Remote Workstation cards, the Connection Broker performs a scan of the PCoIP Devices center, and updates the PCoIP Remote Workstation card records with any additional 359 Chapter 17: PCoIP Setup and Configuration information provided by the card. For a list of field names and values in the client table, go to: https://cb-address/download/account_db.html#terahost Where cb-address is your Connection Broker address. Deleting PCoIP Remote Workstation Cards You can remove PCoIP Remote Workstation cards from the > Resources > PCoIP Host Devices page using any of the following methods. 1. Click the Delete action associated with a particular PCoIP Remote Workstation card 2. Select the Bulk action check box for multiple PCoIP Remote Workstation cards and then select Delete from the bulk action drop-down menu, as shown in the following figure. If bulk action check boxes do not appear in your > Resources > PCoIP Host Devices table, customize the table so the Bulk action column appears (see Customizing Tables). Adding Desktops that Support PCoIP Connections You can register physical workstations with the Connection Broker using either the Uncategorized Desktops or Active Directory center. Adding Blades Using the Uncategorized Desktops Center If you installed and started the Leostream Agent on the desktops prior to adding any entries to your > Resources > Centers page, the Connection Broker automatically creates an Uncategorized Desktops center, and imports the desktops into that center when the Leostream Agent registers with the broker. If you created any center prior to the Agent registering with the Connection Broker, the Connection Broker does not automatically create the Uncategorized Desktops center. In this case, you must manually add the center to inventory the desktops. See Uncategorized Desktops for instructions on creating the Uncategorized Desktops center. 360 Leostream Connection Broker Administrator’s Guide Adding Workstations Using a Microsoft® Active Directory® Center The Connection Broker can inventory desktops in your Active Directory services. After you add an Active Directory authentication server to the Connection Broker (see Adding Microsoft® Active Directory® Authentication Servers), you can add the desktops associated with that domain to the Connection Broker inventory by creating an Active Directory center (see Active Directory Centers). After you add the Active Directory center, the Connection Broker imports all the desktops in that center and contacts the Leostream Agents running within the desktops. If the Connection Broker reaches the Leostream Agent, it displays the Leostream Agent’s version in the Leostream Agent column on the > Resources > Desktops page. The Leostream Agent attempts to discover each blade’s UUID from the BIOS, and passes this information to the Connection Broker. The Leostream Agent also provides the Connection Broker with information about any PCoIP host card installed in the desktop. If the PCoIP host cards are already inventoried in the Connection Broker, the broker automatically associates the correct PCoIP host card with the desktop. If the Leostream Agent cannot obtain information about the host card, you must manually associate the PCoIP host card with the desktop (see Associating PCoIP Host Cards and Desktops). Duplicate Blades Adding an Active Directory center after the Connection Broker imports desktops into the Uncategorized Desktops center results in duplicate entries in the > Resources > Desktops page. The Connection Broker always marks the entries in the Uncategorized Desktops center as the duplicate. A duplicate occurs anytime the Connection Broker registers a desktop from multiple centers. For example, the following figure shows two desktops named blade2 and BLADE2. The Connection Broker marks blade2 in the Uncategorized Desktops center as a duplicate of BLADE2 in the Active Directory Center. To remove duplicate blades, delete the Uncategorized Desktops center, as follows. 1. Go to the > Resources > Centers page. 2. Select the Edit action associated with the Uncategorized Desktops center. 3. In the Edit Center dialog, shown in the following figure, click Delete. 361 Chapter 17: PCoIP Setup and Configuration Troubleshooting Missing Desktops If desktops are not appearing in your > Resources > Desktops list, check for the following conditions. Is the desktop powered on? Is the Leostream Agent installed and running on the desktop? If your desktops are imported into the Connection Broker using the Uncategorized Desktops center, the Leostream Agent must be installed, running, and able to communicate with the Connection Broker. Stopping and restarting the Leostream Agent forces the Leostream Agent to register with the Connection Broker. To stop and start the Leostream Agent: 1. Open the Leostream Agent control panel 2. Go to the Status tab 3. Click the Stop and/or Start button. Is the DNS SRV record for your Connection Broker configured correctly? If this record is not correct, the Leostream Agent on the desktop cannot find the Connection Broker. If you do not have, or do not want to create, an SRV record for the Connection Broker, hard-code the Connection Broker IP address into the Leostream Agent, as follows. 1. Open the Leostream Agent control panel. 2. Go to the Options tab. 3. Enter the Connection Broker address into the Address edit field in the Leostream Connection Broker section. 4. Click OK. Associating PCoIP Host Cards and Desktops The Connection Broker automatically associates host cards with the blades on which they are installed, if the blade has an installed and running Leostream Agent version 5.5.95. The PCoIP host card must be running firmware version 4.1.2.14565 or higher. For TERA2 PCoIP cards associated with a Windows operating system, you must install the PCoIP Agent on 362 Leostream Connection Broker Administrator’s Guide the Windows desktop in order for the Leostream Agent to obtain the information needed to perform the automatic host card mapping. Automatic PCoIP Host Card Matching for a Windows Desktop The Connection Broker uses the following procedure to match PCoIP host cards to the correct Windows desktops. 1. Load the PCoIP Devices into the PCoIP Devices center. You can accomplish this step using various methods, as described in Adding PCoIP Host and Desktop Portal Cards. After you load a PCoIP host card into the Connection Broker, the Connection Broker calls the host card using either its IP address or hostname, in order to obtain additional host card information, such as MAC address. 2. Install the Leostream Agent onto the desktop, or restart the Leostream Agent if it was previously installed. When the Leostream Agent starts, it searches the registry for entries in the following key: HKEY_LOCAL_MACHINE\SYSTEM\CurrentControlSet\Enum\PCI\ The Leostream Agent selects entries that contain 6549, the Teradici vendor code, 1200 and 2200, the TERA1 and TERA2 host card codes, respectively. For TERA2 cards, the Leostream Agent relies on the PCoIP Agent to return information about the PCoIP host card. 3. The Leostream Agent sends the Connection Broker all PCoIP information that can be identified from the registry key or PCoIP Agents, including MAC address. The Leostream Agent cannot retrieve the PCoIP host card name or IP address from the registry or PCoIP Agent. 4. In addition, the Leostream Agent sends desktop information to the Connection Broker, including the desktop hostname and IP address. 5. The Connection Broker matches the PCoIP host card MAC address provided by the Leostream Agent to the MAC address of a host card inventoried in the PCoIP Devices center. Based on the desktop information provided by the Leostream Agent, the Connection Broker maps the identified host card record to the desktop record. Automatic PCoIP Host Card Mapping for a Linux Desktop The Connection Broker uses the following procedure to match PCoIP host cards to the correct Linux desktops. 1. Load the PCoIP Devices into the PCoIP Devices center. You can accomplish this step using various methods, as described in Adding PCoIP Host and Desktop Portal Cards. After you load a PCoIP host card into the Connection Broker, the Connection Broker calls the host card using either its IP address or hostname, in order to obtain additional host card information, such as MAC address. 2. Install the Leostream Agent onto the desktop, or restart the Leostream Agent if it was previously 363 Chapter 17: PCoIP Setup and Configuration installed. When the Leostream Agent starts, it issues the following command to search for Teradici PCI information: lspci –xxxx –d6549:* 3. The Leostream Agent sends the Connection Broker all PCoIP information that can be identified from the PCI, including MAC address. The Leostream Agent cannot retrieve the PCoIP host card name or IP address from the PCI. 4. In addition, the Leostream Agent sends desktop information to the Connection Broker, including the desktop hostname and IP address. 5. The Connection Broker matches the PCoIP host card MAC address provided by the Leostream Agent to the MAC address of a host card inventoried in the PCoIP Devices center. Based on the desktop information provided by the Leostream Agent, the Connection Broker maps the identified host card record to the desktop record. Confirming and Editing Host Card Mappings To confirm or edit the blade/host card mapping: 1. Go to the > Resources > Desktops page. 2. Select the Edit action associated with the appropriate desktop. 3. Use the drop-down menus in the PCoIP Host Device section, shown in the following figure, to assign PCoIP host card associated with this desktop. a. If the desktop contains a single PCoIP host card, select that card from the Primary/Master Host Device drop-down menu. b. For desktops with two PCoIP host cards, select the second card from the Secondary/Slave Host Device drop-down menu. Desktops with two PCoIP cards can simultaneously attach to two PCoIP client devices, providing support for larger monitor configurations (see QuadMonitor Support for PCoIP). 364 Leostream Connection Broker Administrator’s Guide 4. Click Save. If your PCoIP host cards are not correctly associated with the appropriate desktops, the Connection Broker cannot use PCoIP to connect a PCoIP client to the desktop. PCoIP Protocol Plan Options The Connection Broker always establishes a PCoIP connection from a PCoIP client device to a PCoIP workstation or blade. When using PCoIP, the protocol plan is used only to configure the port to check when using backup pools or failover desktops. By default, the Connection Broker checks port 8080. If you want to change the default port: 1. Go to the > Plans > Protocols page. 2. Click the Create Protocol Plan at the top of the page. The Create Protocol Plan form opens. 3. Scroll down to the Teradici PCoIP Client Configuration section, shown in the following figure. 365 Chapter 17: PCoIP Setup and Configuration 4. Enter the new port in the Alternate port for remote viewer port check edit field. 5. Click Save to save the form. For more information on backup pools and failover desktops, see Specifying Backup Pools or Working with Failover Desktops. Managing PCoIP Client Devices Resetting PCoIP Zero Clients You can use the Reset action on the > Clients > Clients page, shown in the following figure, to reset any PCoIP zero client inventoried in the Connection Broker. Clicking Reset instructs the Connection Broker to reboot the PCoIP zero client, disconnecting any user with an active PCoIP connection at that client. When the user is disconnected, the Connection Broker invokes the When User Disconnects from Desktop section of the user’s release plan. The Reset option is available only for PCoIP zero clients. Direct Connections to Hard-Assigned Desktops If a PCoIP client is hard-assigned to a desktop, you can configure the client to establish the PCoIP connection to that desktop without requiring a preliminary login to the Connection Broker. In this configuration, when the client boots and registers with the Connection Broker, the broker returns the hardassigned desktop information and the client immediately connects to the desktop. The user authenticates at the desktop operating system. Direct connections are useful if the desktop operating system requires the user to accept a legal disclaimer prior to logging into the desktop, for example. To retain the PCoIP connection when the user logs out of the Windows operating system select the Retain console connection (VNC and PCoIP, only) option in the Desktop Hard Assignments section of the user’s policy. With this option selected, the user is returned to the operating system login page, not the client login page. You configure a client to perform a direct connection, as follows. 366 Leostream Connection Broker Administrator’s Guide 1. Go to the > Clients > Clients page. 2. Click the Edit link associated with the client you want to direct connect to its hard-assigned desktop. 3. In the Assignment section of the Edit Client form, shown in the following figure, click the Direct connect client to desktop option. This option does not appear until you switch the Desktop assignment mode drop-down menu to Hard-assigned to specific desktop.For information on hard-assigning a client to a desktop, see Hard-Assigning Clients to Desktop. 4. The Connection Broker requires a policy to define how the hard-assigned desktop is managed. Typically, this policy is determined by the identity of the user who logs into the Connection Broker. In direct-connection mode, no user logs into the Connection Broker prior to the desktop connection. Therefore, you must specify the policy to apply in the Apply policy options from dropdown menu. 5. Click Save on the Edit Cient form to save the changes. Use the Bulk Edit option to enable direct-connection mode on multiple clients, simultaneously (see Bulk Editing Clients). If the clients are not inventoried in the Connection Broker, upload a CSV-file of client information to create the clients and enable the direct-connection flag (see Uploading Clients). Local Leostream Options on PCoIP Client Devices If the Connection Broker manages the PCoIP zero client using the Connection Management Interface, you can set two Leostream options locally on the PCoIP client device. To change local options: 1. Click Connect. 2. When prompted for your username and password, enter only the password for the PCoIP zero client. Leave the username empty. Contact your client vendor for your default password. 3. In the dialog that opens: Select Set the terminal name to set the name displayed in the > Clients > Clients list. 367 Chapter 17: PCoIP Setup and Configuration Select Un-manage the terminal to remove this device from management by the Connection Broker. In this case, when the user clicks Connect on the client, the client discovers hosts on its own, without going through the Connection Broker. Working with Firmware Version 5.0 Teradici firmware version 5.0 requires TLSv1.1. To use firmware version 5.0 with Leostream, ensure that you enable TLSv1.1 or higher in your Connection Broker, as follows. 1. Go to the > System > Settings page. 2. In the Connection Broker Security Options section, check Enable TLSv1.1 protocol, for example: 3. Click Save. Editing Client Devices in the Connection Broker Web Interface When the Connection Broker discovers a PCoIP client device, it list the device on the > Clients > Clients page, shown in the following figure. Select the Edit action associated with a particular client device to open the Edit Client form, shown in the following figure. 368 Leostream Connection Broker Administrator’s Guide The fields in this form allow you to set the following: Name: Enter the client name to display in the > Clients > Clients list. Configure this client for use with the Connection Broker: Select this option to send logins through this client to the Connection Broker. If you deselect this option, the Connection Broker does not manage this client, i.e., when a user logs in through this client, they are connected directly to a blade. Not selecting this option is equivalent to selecting the Un-manage the terminal option in the local Leostream options on the client’s user interface. If you select the Configure this client for use with this Connection Broker option, the Connection Broker updates the PCoIP zero client’s Session parameters to set the Connection Type to Connection Management Interface and the DNS Name or IP Address to the IP address of the managing Connection Broker. The Connection Broker determines the managing Connection Broker in this sequence: o o o The Connection Broker VIP address on the > System > Network page. The Connection Broker DNS SRV record, _connection_broker The Connection Broker IP address Display this client’s name with the login prompt: Select this option to include this client’s name on the login dialog when a user logs in through this client. Screen resolution of display 1: Select the resolution to use for the first monitor attached to this client. Screen resolution of display 2: Select the resolution to use for the second monitor attached to this client, if applicable. 369 Chapter 17: PCoIP Setup and Configuration Desktop assignment mode: Select Hard-assigned to a specific Desktop to restrict this client to only log into a particular blade. Otherwise, select Policy-driven to allow the user’s policy to determine the blade to offer. Assigned desktop: Select the desktop to assign to this client. This field appears only if Hardassigned to a specific Desktop is selected in the Desktop Assignment Mode drop-down menu. Direct connect client to desktop: If the client has a hard-assigned desktops, select this option to instruct the client to connect to the desktop immediately, without requiring a Connection Broker login. Use the Apply policy options from drop-down menu to indicate which Connection Broker policy to use for the connection. See Direct Connections to Hard-Assigned Desktops for more information. Registry: Select the registry plan to apply to the remote desktop when a user logs into the desktop from this client device. Client Binding: Use this section to bind two clients together in a master/slave configuration, providing additional monitor support for workstations/blades with two PCoIP host cards. Use the Select slave client drop-down menu to pair the client you are editing with another client. The client being edited becomes the master client; the client selected in the Select slave client drop-down menu is the slave. See Quad-Monitor Support for PCoIP for more information Updating the PCoIP Client Device Firmware You can remotely update the PCoIP client device firmware, assuming the device is already running version 19, or later, by going to the > Clients > Clients > Edit Client page. Click the upgrade to version link on the right -hand side of the page, shown in the following figure. Disconnecting from a PCoIP Client Device Press the Session Disconnect button to send a disconnect message to the Connection Broker, which disconnects the session and returns the user to the Connect screen on the PCoIP client device. Locking a PCoIP Client Device If you manually lock the system, the Connection Broker automatically disconnects the PCoIP session to the remote desktop. 370 Leostream Connection Broker Administrator’s Guide Quad-Monitor Support for Tera1 PCoIP Clients All Tera1 PCoIP host cards and PCoIP desktop portals cards are capable of supporting up to two monitors. Therefore, to support four monitor, the desktop must contain two PCoIP host cards, and each of these cards must connect to a separate PCoIP desktop portal card in a client. To provide a seamless user experience while supporting quad-monitor configurations, you must bind the two PCoIP desktop portal cards in the clients in a master/slave configuration. The master PCoIP client connects to the desktop’s primary/master PCoIP host card. End user’s log into the Connection Broker using the keyboard/mouse attached to the master client. The slave PCoIP client connects to the desktop’s secondary/slave PCoIP host card. When the user logs in through the master client, the slave client automatically connects to its host card without requiring any action from the user. After the two clients are bound, when the user logs into the master client, the Connection Broker automatically connects the slave client to the other PCoIP device, providing single sign-on with quadmonitor support. The following sections describe how to set up your Connection Broker to support these quad-monitor configurations. Configuring Desktops for Quad-Monitor Support The first step in configuring any PCoIP deployment is associating the PCoIP host cards with the desktops that contain them. The Connection Broker displays the host cards in the > Resources > PCoIP Host Devices page. In some cases, when the desktop has two host cards, you must manually associate the PCoIP host cards with the desktop, as follows. 1. Go to the Edit Desktop page for the desktop with two PCoIP host cards. 2. Go to the PCoIP Host Device section, shown in the following figure. 3. From the Primary/Master Host Device, select the PCoIP host card to connect to PCoIP desktop portal in the master client device. 4. From the Secondary/Slave Host Device, select the PCoIP host card to connect to PCoIP desktop portal in the slave client device. 5. Click Save. Desktops with two PCoIP host cards provide quad-monitor support when logged into from a pair of master/slave bonded PCoIP clients. 371 Chapter 17: PCoIP Setup and Configuration Manually Binding Two Clients The > Clients > Clients page contains separate entries for every PCoIP desktop portal card contained in a client device. Therefore, client devices such as Amulet Hotkey quad-head desktop portals, which contain two PCoIP desktop portal cards in a single device, result in two entries on the > Clients > Clients list. To support quad-monitors with Tera1 cards, you must bind two PCoIP desktop portal cards into a master/slave configuration. To specify a pair of bonded clients, go to the Edit Client page for the master client. Use the Select slave client drop-down menu in the Client Binding section, shown in the following figure, to select a slave client to bind to this master client. If you display the Client Binding column on the Clients page, the Connection Broker displays information about how clients are bound together, including which clients are masters and which are slaves, as shown in the following figure. A slave client becomes read-only. If you need to set the screen resolution on the slave client, do so before binding the client to its master. All other settings for the slave client are configured on the Edit Client page for the master client. Automatically Binding Two Clients The Connection Broker can automatically binds two PCoIP clients together if the clients have sequential MAC addresses. The Connection Broker always designates the master client as the client with the even MAC address, and the slave client as the client with the sequential odd MAC address. To turn on automatic bind clients: 1. Go to the > Resources > Centers page. 2. Select the Edit action associated with the PCoIP Devices center. The Edit Center page opens. 3. In the Automatic Client Bonding section, select the Automatically bind PCoIP Devices with sequential MAC addresses. 372 Leostream Connection Broker Administrator’s Guide 4. In the Minimum MAC address field, enter an even MAC address to use as the minimum MAC address in the range of clients to bind together. Enter the MAC address as six pairs of characters delimited by colons, dashes, or periods. 5. In the Maximum MAC address field, enter an odd MAC address to use as the maximum MAC address in the range of clients to bind together. Enter the MAC address as six pairs of characters delimited by colons, dashes, or periods. For example, if using Amulet Hotkey quad-head desktop portals, the following figure instructs the Connection Broker to bind the PCoIP desktop portal cards in the range 00:17:FD:00:00:00 thru 00:17:FD:FF:FF:FF. 6. Click Save. 7. After the PCoIP Devices center is saved, select the Refresh action associated with the center, to bind any clients already loaded into the Connection Broker. The Connection Broker continues to bind new clients every time the PCoIP Devices center is refreshed. Managing another User’s Resources via PCoIP If you log into the Connection Broker with a role that has the Allow user to manage another user’s resources option selected, PCoIP client devices allow you to log in to the desktops offered to another user. For a description of the feature for managing another user’s resources, see the “Managing Resources” section in the Leostream Connect Administrator’s Guide and End User’s Manual. To manage another user’s resources from a PCoIP client: 1. Log into the PCoIP client using your usual credentials. 2. In the Select a desktop dialog, select Manage desktops >>. 3. Click OK. 4. In the Manage desktops dialog that opens, enter the User name, Domain, and Location for the user whose resources you need to manage. 5. Click OK. The Select a desktop dialog now displays a list of desktops that would be offered to that user. 6. Select the desktop you want to manage, and click OK. 7. The Connection Broker launches a PCoIP connection to the desktop, and prompts you for the 373 Chapter 17: PCoIP Setup and Configuration username and password to use to log into that desktop. Typically, if you are assigned a single desktop, the Connection Broker automatically launches a PCoIP connection to that desktop. However, if you have a role that allows you to manage another user’s desktops, the desktop does not automatically launch. You must launch the desktop from the Select a desktop dialog. 374 Leostream Connection Broker Administrator’s Guide Chapter 18: Scaling Deployments Considerations for Production Deployments Desktop deployment is mission critical to many businesses. As such, you want to scale your Connection Broker deployment in a manner that ensures: Availability Disaster Recovery Capacity Availability and disaster recovery ensure that your users are always able to log in through the Connection Broker. To achieve high availability, you must ensure that if a Connection Broker fails, another broker is available to handle connections. For disaster recovery, you must ensure that, if an entire datacenter goes down, users are able to log in to resources in a disaster recovery datacenter. Capacity describes the number of users that can simultaneously log into your Connection Broker with reasonable latency. It is possible to design your Connection Broker deployment to have high availability, while still having capacity issues. To accomplish these goals in a production-class environment, create systems that ensure the redundancy, resiliency, and scalability of your deployment, including: Create a Connection Broker cluster with sufficient Connection Brokers to handle user logins in the event that a server hosting one of the Connection Broker fails. For added resiliency ensure that you place individual Connection Brokers on different servers. Integrate with global and local load balancers, to optimize Connection Broker performance. Establish a schedule for backing up your Connection Broker database. Implement your site standard database backup procedure, to ensure that your data is protected. Create weekly snapshots of each Connection Broker virtual machine. By backing up the entire Connection Broker virtual machine, you do not need a separate backup procedure for the underlying Connection Broker operating system. Create monthly clones of each Connection Broker virtual machine. Leostream recommends storing these backups in an off-site location. Test your restore process to ensure that the media can be read, and that procedures are correctly documented. Use DNS to configure your Connection Broker IP addresses. (See the Leostream DNS Setup Guide) Never perform a Connection Broker upgrade without first taking a snapshot of your existing Connection Broker virtual machine. Always test upgrades in an isolated deployment, before rolling out to your production environment. 375 Chapter 18: Scaling Deployments Using Clusters to Maximize Availability A Connection Broker cluster is a group of Connection Brokers that share the same PostgreSQL or Microsoft SQL Server® 2012 or 2014 database. A common cluster uses three to five Connection Brokers. Benefits of Using a Cluster Clusters address the three scalability goals, as follows: Availability: Using clusters enhances availability by allowing any Connection Broker instance to handle the necessary system functions without operator intervention. If one Connection Broker in the cluster fails, user logins are processed by the other Connection Brokers, resulting in no break in the end-user experience. Connection Broker instances that are not handling logins automatically process other system tasks. Disaster Recovery: Using clusters also allows you to mitigate system or site failures. Run each Connection Broker in the cluster on a different virtualization host, to ensure resiliency to a host failure. Place Connection Brokers or entire clusters in different datacenters or regions, to support disaster recovery scenarios. Capacity: The number of logins per second that can be handled depends on the overall structure of your Connection Brokers, database, and authentication server. Typically, each Connection Broker can handle five logins per second. To increase this throughput, add additional Connection Brokers on different hosts and spread the traffic between the Connection Brokers using a load balancer. The throughput scales linearly when using up to ten Connection Brokers. If the authentication server infrastructure cannot handle the load, the Connection Broker buffers login requests and the login time climbs quickly. After two minutes, the login requests time out and the user must log in again. Creating a Cluster To create a cluster of Connection Broker: 1. Install a standalone Connection Broker. By default, the Connection Broker uses an internal database. Because Connection Brokers run within virtual machines, their performance varies according to the overall load on that host, in addition to the load on the particular Connection Broker. Ensure that your Connection Brokers have sufficient resources on your virtualization host. 2. Optionally configure this Connection Broker with centers, pools, authentication servers, etc. At this point, any information you enter into the Connection Broker is stored in its internal database. Often, at this stage, you are working on a proof-of-concept for your deployment. 3. To begin building a Connection Broker cluster, first obtain the address and credentials for a PostgreSQL or Microsoft SQL Server 2012 or 2014 database server. You must connect all the 376 Leostream Connection Broker Administrator’s Guide Connection Broker in you cluster to the same database. 4. To connect the first Connection Broker to the external database, go to the Connection Broker > System > Maintenance page. 5. Select one of the options to switch to an external database and click Next. 6. In the Database form, switch this Connection Broker to the new external database. When switching the database, note the database name and Site ID for this Connection Broker. See Switching to an External Database for complete instructions. If you use asynchronous mirroring, or use synchronous mirroring and do not have a witness server, you can create a DNS alias for your database server to facilitate failing over from the primary to mirrored database. Use this DNS alias name as the hostname for the external database. Alternatively, you can configure your Connection Broker to be mirror-aware (see Database Mirroring). When you switch your first Connection Broker over to an external database, the Connection Broker creates a new database with the name you specified and automatically populates the database with the information currently available in the Connection Broker internal database. 7. To add additional Connection Brokers to the cluster, install individual Connection Brokers virtual appliances on different virtualization hosts. These Connection Brokers can be located in any data center, as long as the Connection Broker can communicate with your SQL Server database. 8. For each additional Connection Brokers, go to the Connection Broker > System > Maintenance page. 9. Use the Switch to remote database option to switch these Connection Brokers to the same database created in step 6. Each Connection Broker must be given a unique Site ID. Because the Connection Broker database already exists, information stored in the additional Connection Broker internal databases is not copied over. The additional Connection Brokers are simply attached to the existing SQL Server database. All Connection Brokers in the cluster work off of a common job queue. When a new Connection Broker is added to the cluster, a heartbeat job for that Connection Broker appears in the > System > Job Queue page. This heartbeat job checks the Connection Broker status every five minutes, and is used to monitor the status of each Connection Broker when collecting Connection Broker Metrics and when reporting Connection Broker status on the > System > Cluster Management page. Using the Cluster Management Page The > System > Cluster Management page, shown in the following figure, displays the Connection Brokers and their characteristics. You can modify the order and type of characteristics displayed on this page by clicking the customize link at the bottom left side of the page. 377 Chapter 18: Scaling Deployments You can display any or all of the following characteristics. Actions Links indicating the actions you can perform on a particular Connection Broker, including: Edit Network: Opens the Network Configuration page associated with this Connection Broker. You can edit network settings only for Connection Brokers with a status of Running. Remove: Removes this Connection Broker from the cluster. You can remove a Connection Broker only if its status is Unavailable or Stopped. Name The Connection Broker virtual appliance hostname, by default, leostream. IP Address The Connection Broker IP address, as entered into the Bridged interface in the > System > Network page. Status Indicates the availability of each Connection Broker for processing jobs in the job queue. Possible status values are as follows. Running: Indicates this Connection Broker is running and available to process jobs in the job queue. Stopped: Indicates the heartbeat job associated with this Connection Broker has been cancelled. A stopped Connection Broker cannot process jobs in the job queue. The Connection Broker cancels the heartbeat job for a particular Connection Broker if the broker is powered off using options available on the > System > Maintenance page or from the virtual appliance console. When a stopped Connection Broker is powered back up, a new heartbeat job is added to the job queue, and the Connection Broker status updates to Running. The Connection Broker status is not properly updated if you power down the virtual appliance using power controls available in a virtualization management tool, such as vCenter Server. If you power down the virtual machine in any way other than through the VM console or using the > System > Maintenance page, you must wait for three consecutive heartbeat jobs to fail before the Connection Broker status is updated. Unavailable: Indicates that the cluster cannot determine the status of this Connection Broker. 378 Leostream Connection Broker Administrator’s Guide Unavailable Connection Brokers cannot process jobs in the job queue. The > System > Cluster Management page marks a Connection Broker as unavailable after that Connection Broker misses three consecutive heartbeats. A missed heartbeat occurs when the heartbeat job associated with that Connection Broker cannot run. Because the heartbeat job attempts to run every five minutes, the Connection Broker is marked as unavailable after 15 minutes, as described in the following figures. A Connection Broker can become unavailable due to connectivity issues or when it was powered off using the power controls in the virtualization environment in which the Connection Broker is installed. Version The Connection Broker version. Site ID The identification number used to represent each Connection Broker in the queue. Use the Site ID to determine which Connection Broker processed each job in the > System > Job Queue page. UUID The unique identifier for each Connection Broker. MAC The Connection Broker MAC address. Booted The day and time when the Connection Broker was last booted up. 379 Chapter 18: Scaling Deployments Modifying Cluster-Wide Time Zone Settings All Connection Brokers in the cluster must use the same time zone setting. After a Connection Broker is added to a cluster, the Time and Date settings on the > System > Settings page become static. To change the time zone for all Connection Brokers in the cluster 1. Go to the > System > Cluster Management page. 2. Select the Set Time Zone link, as shown in the following figure. The Set Time Zone form opens. 3. Select the correct time zone from the Time zone drop-down menu, shown in the following figure. 4. Use the Synchronization section to synchronize with an external NTP. 5. You must restart each Connection Broker in your cluster. Removing Connection Brokers from a Cluster When building and testing your production environment, you may connect and disconnect any number of Connection Brokers from the external database at the cluster’s core. Switch the Connection Broker back to its internal database, using the Switch to internal database option on the > System > Maintenance page, to remove the Connection Broker from the cluster. When you remove a Connection Broker from a cluster all Finished, Cancelled, or Aborted jobs listed on the > System > Job Queue page are removed. Pending jobs remain assigned to the Broker. The Connection Broker cannot be removed from the cluster until it fails three consecutive heartbeat checks. Powering down a Connection Broker does not automatically remove that Connection Broker from the cluster. 380 Leostream Connection Broker Administrator’s Guide To remove the Connection Broker from the cluster, after three heartbeat jobs fail and the Connection Broker status changes to Stopped or Unavailable on the > System > Cluster Management page, go to the > System > Cluster Management page and click the Remove link associated with the Stopped or Unavailable Connection Broker. When the Connection Broker is removed from the cluster, all pending jobs in the Job Queue are reassigned to other available Connection Brokers in the cluster. The Connection Broker automatically rejoins the cluster and begins processing new Job Queue entries after it is rejoined to the cluster. Updating Connection Broker Clusters to New Connection Broker Versions All Connection Brokers in your cluster must run the same Connection Broker version. See the “Updating Connection Brokers in a Cluster” section of the Connection Broker Virtual Appliance Administrator’s Guide available on the Leostream Resources Manuals Web page for instructions on how to upgrade the Connection Brokers in your cluster to the latest version Spreading a Cluster across Multiple Datacenters/Regions If your end users are spread across different regions, consider placing some of the Connection Brokers in your cluster in each region. By configuring your cluster to work with your global traffic management or load balancing systems, you can ensure that users log into the Connection Broker closest to their physical location. In addition, spreading your Connection Brokers across different regions provides disaster recovery and supports continued user logins in situations where a particular datacenter goes down. Consider the following configuration. 381 Chapter 18: Scaling Deployments This configuration consists of: A load balancer or global traffic management system Two Connection Brokers in New York Two Connection Brokers in Boston A principal SQL Server database in New York A mirrored database in Boston All components, including components used solely as backups, should be continuously monitored to ensure that they are operational. During normal operation, the New York Connection Brokers and Boston Connection Brokers connect to the principal Leostream database in New York. When a user logs in, the load balancer or GTM offers the Connection Broker closest to the user; New York users connect to a New York Connection Broker, Boston users connect to a Boston Connection Broker. Connection Brokers that are not processing user login jobs handle other work queue jobs. For example, if users are logging in only from New York, the Boston Connection Brokers process other (non-login) work queue jobs, reducing the load on the New York Connection Broker. If the New York Connection Brokers stop responding, the load balancer directs New York and Boston users to the Boston Connection Brokers. If the New York primary Leostream database is still available, the Boston Connection Brokers continue to use that database. If the New York datacenter is completely unavailable and the principal Leostream database is offline, the mirrored database becomes the principal database (either manually or automatically, depending on the database configuration). The Connection Broker times out the first database request after five seconds. After the first five second timeout, the Connection Broker makes two additional database connection attempts, each with a three minute timeout. After a connection to the database is established, it is held open as long as possible. Although you could experience some five second timeouts over the WAN, the database connection should be made during the second or third timeout attempt. Managing Different Clusters in Different Datacenters If you want to handle a larger number of desktops or separately manage different region in your organization, you can create multiple clusters and use DNS to scale out across the clusters, as shown in the following figure. 382 Leostream Connection Broker Administrator’s Guide There are three switch points that can be used to determine which Connection Broker a user logs into, as depicted by the following figure. 1. Global DNS determines the initial data center and cluster to use. Typically, a global DNS infrastructure redirects users to a particular data center according to a set of rules, often depending on the IP address of the user’s client. This solution works well when there is a clear mapping between IP address ranges and locations, but does not work at all when a user moves to a different geographic location and requires access to their standard desktop. You can combine DNS with your Microsoft® Active Directory® service to use the domain membership of the client computer to determine the DNS response. 2. A local load balancer decides which Connection Broker in the cluster to use. 3. That Connection Broker, if necessary, redirects users to their home Connection Broker if they roamed outside their region and were incorrectly routed by Global DNS. 383 Chapter 18: Scaling Deployments Individual clusters function independently of each other and, therefore, each cluster should manage a unique set of resources (virtual machines, blades, applications, etc.) although all clusters can manage the same users. If you do manage particular resources in multiple clusters, conflicts may arise. For example, in the figure at the beginning of this section, if Cluster 1 assigns desktop A to user A, Cluster 2 does not know about that assignment. Therefore, the Connection Brokers in Cluster 2 could offer desktop A to another user and, depending on Connection Broker settings, log user A out of their session. Building a Cluster for Disaster Recovery The section Spreading a Cluster across Multiple Datacenters/Regions shows how to support disaster recover scenarios using a single Connection Broker cluster. Instead, you can replicate your entire Connection Broker cluster in your disaster recover datacenter, as shown in the following figure. In this case, the Global DNS directs the user to the primary or disaster recover datacenter, depending on the mode of operation. Distributing User Logins Using DNS for Load Balancing Your DNS server provides an inexpensive method for distributing user connections between Connection Brokers in a cluster and can allow you to meet your system capacity requirements. Using DNS, you can regionalize your Connection Broker, i.e., when a user logs into the Broker, they have access to the local DNS name server and, hence, the local Connection Broker. You can override this regional behavior, i.e., send your users to their home Connection Broker, using the Connection Broker’s user redirection feature. 384 Leostream Connection Broker Administrator’s Guide To use DNS for software-based load balancing, create multiple DNS A records for your Connection Broker. If you are using a DNS SRV records for your Connection Broker, point your SRV record to the named record, for example: _connection_broker = cb.yourCompany.com When a user signs in, DNS uses a simple round robin scheme to determine which Connection Broker to send the user to. User session information is stored in the Connection Broker that processes the user’s login. If the DNS record’s TTL expires during the user’s session, the client device may try to direct the user to a different Connection Broker in the cluster, for example, when the user refreshes their list of offered desktops. When a Connection Broker switch occurred, earlier versions of the Connection Broker would expire the user’s session and the user would be required to log back into Leostream. Starting with Connection Broker version 7.7, if the client switches to a new Connection Broker, the new Connection Broker queries the original Connection Broker for the user’s session information and their session continues uninterrupted on the new Connection Broker. If the new Connection Broker cannot contact the original Connection Broker to retrieve the user’s session information, the Connection Broker expires the user’s session and they must log back into Leostream. A simple DNS system cannot detect failure of a single Connection Broker host, and continues to hand that Connection Broker address to users. A user assigned to a failed Connection Broker address must wait until the connection times out before another Connection Broker address is tried. Therefore, using DNS for load balancing is suitable only for systems that can stand a moderate amount of delay during failover. To satisfy your availability requirements, look for a vendor-enhanced DNS system or switch to a hardwarebased load balancer. Using Commercial Load Balancers For better Connection Broker availability, use a load balancer to spread user connections around the clustered Connection Brokers. All traffic uses Web services, so your Connection Broker cluster behaves as a large Web server farm. If a Connection Broker fails, the load balancer redirects traffic away from the failed device. There are a variety of algorithms for the load balancing calculation. Leostream recommends round-robin, with a keepalive for a particular Connection Broker based on load. The keepalive URL for a particular Connection Broker is: https://CB_ADDRESS/index.pl?action=is_alive Where CB_ADDRESS is your Connection Broker address. If the Connection Broker is processing a nominal load, the query responds with an HTTP status of 200 (OK) and displays CB_IS_OKAY in the Web browser. Once the Connection Broker becomes heavily loaded, the query returns an HTTP status of 503 (Service Unavailable). If the keepalive query returns status 503, route traffic away from that Connection Broker until the keepalive returns an HTTP status of 200 (OK) and displays CB_IS_OKAY in the Web browser. 385 Chapter 18: Scaling Deployments Because Connection Brokers run within virtual machines, their performance varies according to the overall load on that host, in addition to the load on the particular Connection Broker. Ensure that your Connection Brokers have sufficient resources on the host. The load balancer also can use the Connection Broker XML RPC API to determine the health of the Connection Broker. Citrix™ NetScaler™ Setup Setup the Citrix™ NetScaler™ to perform two actions: Server monitoring Load balancing For full command line information, see the Citrix NetScaler Application Switch Command Reference Guide. To monitor Connection Broker and database health use the HTTP-ECV functionality to allow the NetScaler to probe a particular URL on the Connection Broker. If it receives CB_IS_OKAY, the NetScaler application knows that the Connection Broker and the whole backend system are online. Issue the following Web query to monitor the status of the Connection Broker: https://CB_ADDRESS/index.pl?action=is_alive Where CB_ADDRESS is your Connection Broker address. If the Connection Broker is processing a nominal load, the query responds with an HTTP status of 200 (OK) and displays CB_IS_OKAY in the Web browser. Once the Connection Broker becomes heavily loaded, the query returns an HTTP status of 503 (Service Unavailable). If the keepalive query returns status 503, route traffic away from that Connection Broker until the keepalive returns an HTTP status of 200 (OK) and displays CB_IS_OKAY in the Web browser. The following line gives the relevant command line for NetScaler. > add monitor <name> http-ecv –send “GET /index.pl?action=is_alive” –recv “CB_IS_OKAY” For load balancing, use the Least Response Time, which is the time between the first request and the first byte of the first response that is returned. Use the set lb vserver command with an argument of –lbmethod LEASTRESPONSETIME. Set the persistence to 300 seconds. F5® BIG-IP® Load Traffic Manager™ (LTM) Setup Configure the F5® LTM system for both server monitoring and load balancing. For server monitoring, use the Extended Content Verification (ECV) HTTP or HTTPS pre-configured monitors http or https. These monitors send a particular Send String, which must be set to GET 386 Leostream Connection Broker Administrator’s Guide /index.pl?action=is_alive, and expect to receive a particular Receive String of CB_IS_OKAY. Otherwise, the LTM system marks that Connection Broker as down. Also, set the following parameters: Load Balancing Method = Fastest Node Persistence = Source Address Affinity Connection Broker User Redirection You can use the Connection Broker user redirection feature to redirect users to the appropriate Connection Broker and, hence, desktop. By redirecting the user, you can setup the user’s policies and pools of desktops only in their home Connection Broker. If the user logs in through a different Connection Broker, that Connection Broker forwards the end user to their home Connection Broker. Example: User Redirection Scenario Consider the scenario where an American user goes to London, England, but needs to be connected to their standard desktop in New York. To accomplish this task: Setup DNS in each region to point to the local Connection Broker cluster. Ensure that the authentication server used by each Connection Broker recognizes the American user. Configure the Connection Broker cluster in London to redirect the user to the New York Connection Broker cluster. When the American user logs in through a thin client in London, the following occurs: 1. The thin client looks up cb.company.com in DNS and is sent to the Connection Broker at cb.uk.company.com. 2. The cb.uk.company.com Connection Broker looks up the user in the authentication system. 3. Based on the user’s attributes in the authentication server, the cb.uk.company.com Connection Broker determines that the user should be forwarded to the New York Connection Broker. 4. The cb.uk.company.com Connection Broker sends a redirect command to the thin client, which includes the new DNS address for that user’s Connection Broker, for example, cb.us.user.com. 5. The thin client receives the redirect and logs directly into the correct Connection Broker. 6. The cb.us.user.com Connection Broker instructs the thin client to connect to the correct desktop. The following figure depicts the previous redirection scenario. 387 Chapter 18: Scaling Deployments Setting up User Redirection in the Connection Broker A Connection Broker determines a user’s home Connection Broker using rules set up in your authentication servers. You can setup redirection, or forwarding, rules independently for each authentication server in the Connection Broker. Before you can set redirection rules, you must enable the user forwarding feature. To enable user forwarding, check the Connection Broker forwarding option on the > System > Settings page, as shown in the following figure. Set the redirection rules, as follows: 1. Go to the > Users > Authentication Servers > Edit page for the relevant authentication server. 2. Scroll to the Forward Users to another Connection Broker section. 3. In the Attribute edit field, enter the attribute from within the authentication server schema to use to determine the criteria for redirection, for example, distinguishedName 4. Select a logic condition from the Match drop-down menu, which is used to compare the attribute to the list of possible values, for example, Contains. 5. In the Forwarding rules field, enter rules as a set of commands. Enter the list of attribute values and associated destinations as a series of rules in the following format: 388 Leostream Connection Broker Administrator’s Guide Value > Destination The Connection Broker tests the value on the left side of the greater than sign against the attribute entered in the Attribute edit field. If the string is found in the attribute in a way that satisfies the restriction in the Match drop-down menu, the Connection Broker returns the value on the right of the greater than sign. For example, in the following figure, if the user’s distinguishedName contains the string OU=US, the Connection Broker forwards the user to boston.us.company.com: The forwarding rules are case sensitive. Enter one rule per line. The same value can be associated with different destination. In this way, when the Connection Broker searches down the list, if the first destination Connection Broker is not available, the destination associated with the next matching value is used. 6. Select the default behavior for when none of the forwarding rules apply: Reject login: Does not allow the user to log in through any Connection Broker Log in to this Connection Broker: Logs the user in through the local Connection Broker Applying Forwarding only to Users that are already Assigned Desktops User redirection can take into account whether a user has already been assigned a desktop by a particular Connection Broker cluster. To add this restriction, append the forwarding rule with the if_assigned_only flag, separated from the forwarding rules by one or more spaces. For example: OU=US > boston.us.company.com if_assigned_only In this case, the user is forwarded to the boston.us.company.com Connection Broker only if they are already assigned a desktop managed by that Connection Broker. 389 Chapter 18: Scaling Deployments Using an External Database In order to share information between Connection Brokers in a cluster, you must use an external data base. The Connection Broker supports PostgreSQL and Microsoft SQL Server 2012 and 2014 database servers. Sizing the External Database Database Space Requirements The Connection Broker uses the database to store all logs and information about each center, desktop, user, etc. Each desktop and unique user requires approximately 1KB of storage space. Every user login and logout creates approximately 5KB of log entry. By default, logs are retained for 30 days. Therefore, for example, if a user has five desktops that they access every day of the week, that user requires 150KB of database storage. As another example, a system with 1000 active users and 2000 desktops logging in once a day Monday through Friday requires approximately 150MB of database storage. These estimates assume you have not deleted records from your system. For example, if you delete a center, the Connection Broker marks the desktop records associated with that center as deleted, however does not remove the records from the database. The database grows when you delete and recreate records. See Removing Deleted Database Records for information on when the Connection Broker purges records that are marked as deleted. Database Transaction Requirements Most of the load on the database occurs when users log into and log out of the system. When there is no user activity, the Connection Broker activity consists of tasks such as scanning centers, refreshing pools, checking Connection Broker heartbeats, etc. While the load is split across multiple Connection Brokers, all brokers connect to a common database. Therefore, the load on the database rises with the number of logins per second. Each login request requires 30 database queries. A single Connection Broker handling 5 logins a second generates 150 database queries a second. Three Connection Brokers handling 15 logins per second generates 450 queries a second. To determine the hardware requirement, pick an industry benchmark. For this application, we use TPC-H (http://www.tpc.org/tpch/default.asp), an ad-hoc, decision support benchmark. Studying the TPC results suggests that a load of 75 logins per second can be comfortably handled by a four processor, with a total of eight cores 2.8 GHz processor system with 32G of memory. Removing Deleted Database Records When you delete a record from the Connection Broker, such as a user, policy, or center, the Connection Broker marks it (and any associated records, such as desktops from a center) as deleted in the Connection Broker database. Records that are marked as deleted are purged from the database after 180 days, plus the length of time the log is retained, as set by the Days to retain log entries option on the Log Settings page. 390 Leostream Connection Broker Administrator’s Guide For example, if the Days to retain log entries option on the Log Settings page is set to 30 days, deleted records are purged from the database after 210 days. The Connection Broker purges deleted items out of the following database tables. client client_group client_group_attribute display_layout display_layout_attribute plan_failover plan_power_control plan_printer plan_protocol plan_protocol_config_param plan_registry plan_release policy policy_assignment policy_attribute policy_usb pool pool_attribute printer remote_authentication remote_authentication_assign role role_permission tag tag_a tag_b tag_c tag_d user vc_cluster vc_cluster_optional vc_datastore vc_resource_pool vc_spec_file viewfilter viewfilter_rule vm Items are purged out of additional database tables, as follows. log entries are removed according to Days to retain log entries option on the Log Settings page pool_history entries are removed according to the selection in the Retain data for drop-down menu in the Track historical pool assignments and connections section on the Edit Pool page Completed work_queue entries are removed after two days 391 Chapter 18: Scaling Deployments vc_host entries are removed after two days Deleted user_session entries are removed after seven days Deleted ad_attribute entries are removed every four hours Switching to an External Database The Connection Broker supplies an internal database that stores all configuration data when the broker is running as a standalone appliance. To enable Connection Broker clustering and failover, you must switch from the internal database to an external database. Currently, the Connection Broker supports PostgreSQL and Microsoft SQL Server 2012 and 2014 databases. To switch to an external database: 1. Go to the > System > Maintenance page. 2. Select either the Switch to PostgreSQL database or Switch to Microsoft SQL server database option and click Next. The following Remote database form opens. 3. Enter a name in the Database name edit field. 4. Enter the database’s hostname or IP address in the Principal hostname or IP Address edit field. You may create a DNS alias for your database server and use this DNS alias name as the hostname for the database. 5. Change the default outbound port listed in the Port edit field, if necessary. If you are using a named instance of Microsoft SQL Server, ensure that you enter the correct port number for that instance. You can view the ports associated with this instance in the Protocols for instance_name dialog associated with this instance. 6. In the User name and Password edit fields, enter a username (including the domain) and password for a user with access to the database. Under normal operation, the Connection Broker creates, deletes and updates rows in the database. During upgrades it may also create, delete and/or update tables and indices in the database. Ensure that you assign the database user to the following Microsoft SQL Server permissions to support these functions: db_ddladmin db_datawriter 392 Leostream Connection Broker Administrator’s Guide db_datareader 7. Enter a unique Site ID. If you are using a cluster of Connection Brokers, each broker must have a unique Site ID. You can enter the site ID associated with a Connection Broker that was removed from the cluster. The new Connection Broker takes over any jobs in the work queue associated with the previous Connection Broker. 8. Click Switch. The Connection Broker takes one of the following actions: If a database with the specified name does not exist: The Connection Broker creates a new database with that name and automatically populates the database with the information currently available in the Connection Broker. If database with the specified name does exist: The Connection Broker switches to using the new external database. If the external database is empty, the Connection Broker populates the database with the information currently in the internal database. If the external database is already configured, the information in the internal database is retained, however the information is not copied over. If the database being switched to is for an older Connection Broker version, the Connection Broker displays the following warning. Click Switch to complete the switch to the external database. The Connection Broker upgrades the old database. Any older versions of the Connection Broker that are pointing to this database will switch into maintenance mode. If the Connection Broker successfully switched the database, the following message displays: The database was successfully switched. The Connection Broker restarts after you switch databases. If the Connection Broker loses its connection to the database, an error message appears in the Connection Broker logs. You can use that error message to issue an SNMP trap. Database Mirroring Similar to using Connection Broker clusters to increases the availability of your Connection Brokers, you can use database mirroring to increase the availability of your Microsoft SQL Server database. You can run mirroring in either synchronous (high-safety) or asynchronous (high performance) mode. 393 Chapter 18: Scaling Deployments In high-performance mode, the transactions commit without waiting for the mirror server to write the log to disk, which maximizes performance. In high-safety mode, a committed transaction is committed on both partners, but at the risk of increased transaction latency. Mirroring is implemented on a per-database basis and works only with databases that use the full recovery model. Database mirroring maintains two copies of a single database that reside on different server instances of SQL Server Database Engine. Log shipping can be used as a supplement to database mirroring, to build a highly available and disaster resistant database configuration. For automated database failover, use synchronous mirroring with a witness server to synchronize and orchestrate the databases during failover. Using synchronous mirroring is typically fine as the amount of data transmitted to the database by the Connection Broker is small, in the order of 5KB per user login. However, using synchronization may slow down the number of logins per second that the Connection Broker can handle. Asynchronous mirroring can be useful in scenarios where the principal and mirror servers are separated by a significant distance. Using asynchronous data replication, the replication does not slow down the principal database. In this scenario, you must write the scripts that force the database failover. Regardless of what type of mirroring you use, if the principal database fails, users cannot log into the Connection Broker until the Connection Broker switches over to the mirrored database, i.e., role switching occurs and the mirror is now the principal database. After the role switch occurs, if you configure your Connection Broker to be database mirror-aware, the Connection Broker automatically begins communicating with the new principal database (see Setting up Database Mirror-Awareness). If you do not configure your Connection Broker to be database mirror-aware, you can use a DNS alias name for your database server, and manually edit DNS to perform the database switch (see Using DNS Alias Names). If you are using asynchronous mirroring the mirrored database may suffer some data loss. In particular, the database may miss updates to individual objects such as: Running jobs in the > System > Job Queue may not be marked as Finished Policy-driven desktop assignments may not be updated in the database when the users log in or log out. Your environment’s tolerance for this data loss depends on your configuration. For example, if users retain their desktop assignments after logging out or disconnecting, your environment has a lower chance of desktops recording an incorrect user assignment. In addition, if your Connection Broker refreshes your Centers on a periodic basis, some missing data will be recaptured. For example, if a desktop was shutting down during the database failover and the shutdown event was lost, the next Center refresh determines the desktop is stopped and updates the database it accordingly. Your database transaction log continues to grow until it is backed up. If the transition log fills, users can no longer log into the Connection Broker. Therefore, you must periodically backup your database transition log. After the transition log is backed up, even though the database does not shrink the transaction log, the database begins reusing the existing space allocated to the transaction log. 394 Leostream Connection Broker Administrator’s Guide Setting up Database Mirror-Awareness To set up your Connection Broker to be aware that your database is mirrored: 1. Switch your Connection Brokers to an external database (see Switching to an External Database) and create a database on your principal Microsoft SQL Server. 2. Create a database on the mirrored SQL Server location, with the same name as your principal Leostream database. 3. Launch the SQL Server Management Studio (SSMS) for the SQL Server Database Engine that contains your principal Leostream database. 4. Ensure that the Leostream database has a Recovery model set to Full, as shown in the following figure. 5. Create a Full backup of your principal Leostream database. 6. Backup the transition logs of your principal Leostream database and store it in the same destination as the full database backup. The Device Content for the backup of your principal Leostream database appears similar to the following: 7. Launch the SQL Server Management Studio for the SQL Server Database Engine that contains your 395 Chapter 18: Scaling Deployments mirrored Leostream database. 8. Restore the database backup into the mirrored database. Ensure that you select Overwrite the existing database and Leave the database non-operational option when restoring the database, as shown in the following figure. 9. Restore the transition log backup to the mirrored database. Again, ensure that you select the Leave the database non-operational option when doing the restore. The mirrored database should display the state (Restoring…) in the SSMS Object Explorer. 10. Return to the SSMS of the principal SQL Server. 11. From the Task menu associated with the principal Leostream database, select Mirror… to setup the mirror configuration. Use the Operating mode radio buttons to select synchronous or asynchronous mirroring. For complete instructions, please see the Microsoft documentation. 12. After your mirrored database is configured, return to the > System > Maintenance page in your Connection Broker. 13. Select the Configure mirror database for failover option. 14. Click Next. The Add mirror form opens, as shown in the following figure. 396 Leostream Connection Broker Administrator’s Guide 15. Enter the database hostname or IP address in the Mirror hostname or IP Address edit field. The mirrored database must already exist on this database server, and must have the same name as the principal database. 16. Change the default outbound port listed in the Port edit field, if necessary. 17. Click Save. 18. Repeat steps 12 through 17 for each Connection Broker in your cluster. The Connection Broker has not been qualified against SQL Server 2012 AlwaysOn Availability Groups feature. Using DNS Alias Names To use a DNS alias for your database server to facilitate failing over from the primary to mirrored database: 1. Create a DNS alias for your database server. 2. Switch your Connection Brokers to an external database (see Switching Databases) and create a database on your principal SQL Server. Use the DNS alias name from step 1 as the hostname for the external database on the Remote database form. 3. Create a database on the mirrored SQL Server location, with the same name as your principal Leostream database. 4. Launch the SQL Server Management Studio (SSMS) for the SQL Server Database Engine that contains your principal Leostream database. 5. Ensure that the Leostream database has a Recovery model set to Full, as shown in the following figure. 6. Create a full backup of your principal Leostream database. 7. Backup the transition logs of your principal Leostream database and store it in the same destination as the full database backup. The Device Content for the backup of your principal Leostream database appears similar to the following: 397 Chapter 18: Scaling Deployments 8. Launch the SQL Server Management Studio for the SQL Server Database Engine that contains your mirrored Leostream database. 9. Restore the database backup into the mirrored database. Ensure that you select Overwrite the existing database and Leave the database non-operational option when restoring the database, as shown in the following figure. 10. Restore the transition log backup to the mirrored database. Again, ensure that you select the Leave the database non-operational option when doing the restore. The mirrored database should display the state (Restoring…) in the SSMS Object Explorer. 398 Leostream Connection Broker Administrator’s Guide 11. Return to the SSMS of the principal SQL Server. 12. From the Task menu associated with the principal Leostream database, select Mirror… to setup the mirror configuration. Use the Operating mode radio buttons to select synchronous or asynchronous mirroring. For complete instructions, please see the Microsoft documentation. 13. In the event the primary database fails, taking your Connection Broker offline, manually perform a database role switch and then modify the DNS alias to point to the new principal database server. After the DNS alias updates, the Connection Broker is online. 399 Chapter 19: Monitoring the Connection Broker Chapter 19: Monitoring the Connection Broker Searching for Connection Broker Objects You can search for particular objects in Connection Broker tables, such as desktops and users, using the following two methods. The global search page scans all tables, searching for all objects with common names, notes, or users The per-page search focuses on a single table, searching for particular object types Global Search The Search tab, shown in the following figure, allows you to locate particular objects within the Connection Broker. You can search for objects based on the following object attributes. Name: All Connection Broker objects have a name. The name is displayed in the Name column of any Connection Broker table, for example, the Name column on the > Resources > Desktops page. When searching the > System > Logs page, the name corresponds to the contents of the Description column. Notes: All Connection Broker objects allow you to include notes. When searching the > System > Logs page, the notes field corresponds to the contents shown when you expand the show details link, shown below. For other Connection Broker objects the name and notes fields are displayed in the Edit form for 400 Leostream Connection Broker Administrator’s Guide that object, as shown, for example, in the following figure. User: Only desktop objects and log entries have an associated user. The user corresponds to the name of the user that is currently assigned to that desktop or is the subject of the log entry, as displayed in the User column on the > Resources > Desktops page or > System > Log page, respectively. Use the Search Criteria section to define the type of search. For example, to search for all objects with a name that starts with qa: 1. Select name from the first Search Criteria drop-down menu. 2. Select begins with from the second Search Criteria drop-down menu. When the search criteria is set to is equal to and you are using an internal Connection Broker database, the search string is case sensitive. If you are using a Microsoft® SQL Server® database, an is equal to search is not case sensitive. 3. Type qa into the Search Criteria edit field. 4. Click Check all to select all objects in the Search Objects section. The Global Search form appears as shown in the following figure. 401 Chapter 19: Monitoring the Connection Broker To search only for particular objects, click Uncheck All and select the individual objects. 5. Click Search. The search results display the object type and name. The entries in the Name column of the search results are hyperlinks that go to one of the following two locations. If the entry in the Object column corresponds to a log entry, click on the name to display additional information about that log entry. For example, clicking on the text in the Name column of the following log opens the displayed log entry information. If the entry in the Object column corresponds to any other entity, such as a pool or policy, click on the name to go to the Edit form for that object. The following figure displays part of an example search report. Per-Page Search You can quickly search for objects in a particular Connection Broker table using the local search functions provided on each page. Each table allows you to search for objects based on the contents of any column that is filtered based on alphabet, for example, the Name or Machine Name columns on the > Resource > Desktops page. To search for objects on a page: 1. From the filter drop-down menu associated with the column you want to search based on, select the Search option, as shown in the following figure. 402 Leostream Connection Broker Administrator’s Guide 2. In the search edit field that opens, enter the text to search for. For example, the following search will look for desktops with a name that begins with qa. By default, the Connection Broker searches for objects that begin with the entered text. You can use the following wildcards to modify the search. The percent (%) wildcard matches any character string. For example: QA% searches for any string that begins with QA %DEV% searches for any string that contains DEV %PROD searches for any string that ends with PROD and does not contain trailing blanks The underscore wildcard (_) matches any one character in a fixed position. For example: _EE_ searches for any four-letter string whose two middle characters are EE %DEV_TEST% searches for any string that contains the pattern DEV_TEST. The strings DEV_TEST1, MYDEV-TEST, and MY-DEV-TEST2 all match this pattern. 3. Click Search to perform the search. The filter drop-down menu for that column now contains the text you entered for your search, and the contents of the table shows the results. For example, the following figure displays the results for the search for desktops with a name that begins with qa. 4. To change the contents of the table, change the selection for the filter drop-down menu. The filter 403 Chapter 19: Monitoring the Connection Broker table contains your search string until you select another filter and navigate away from the page. For example, the following figure shows the contents of the filter drop-down menu used in this example. Generating Connection Broker Reports The Connection Broker provides a set of predefine reports on resource usage. Go to the > Status > Reports page to view the available reports, as shown in the following figure. Each report is a static snapshot of the specified information, at the time the report is generated. Connection Broker metric reports allow you to monitor the performance of each Connection Broker in a cluster Resource usage reports list the users and desktops currently assigned by the Connection Broker The policy report is a summary of all policies in the Connection Broker The three history reports track resource usage over time. You can download many of the reports to a CSV-file by clicking the download link at the bottom of the report. Reporting Connection Broker Metrics Connection Broker metrics provide information on disk space, load average, etc., for the Connection Brokers in your cluster. The reported metrics are configured on the > Resources > Connection Broker 404 Leostream Connection Broker Administrator’s Guide Metrics page, and the report generated using the Connection Broker Metrics link on the > Status > Reports page. See the following sections for more information on configuring and generation this report. The Connection Broker collects seven default types of metrics: Used disk space Free disk space Used memory Available memory Load average in the last minute Load average in the last 5 minutes Load average in the last 15 minutes. These metrics are collected at intervals configured on the > Resources > Connection Broker Metrics page, for as long as the Connection Broker has a valid heartbeat. The heartbeat job checks the status of each Connection Broker in the cluster every five minutes. If a Connection Broker skips two heartbeats, the report no longer contains metrics for that Connection Broker. When the heartbeat resumes, the Connection Broker reappears in the report. Generating Connection Broker Metrics Reports In order to generate a Connection Broker Metrics Report, you must enable metrics collection, as follows. 1. Go to the > System > Settings page. 2. Select Connection Broker metrics, as shown in the following figure. 3. Click Save. If your Connection Broker is running stand-alone, i.e., not in a cluster, the broker automatically begins collection metrics for itself. If the Connection Broker is part of a cluster, the broker must first restart all other Connection Brokers in the cluster before it can begin collecting metric data. After Connection Broker metrics are being collected, you can generate a report on the > Status > Reports page. Click the Connection Broker Metrics link to generate the report. The following figure shows an example report for a single Connection Broker. 405 Chapter 19: Monitoring the Connection Broker For each Connection Broker with a valid heartbeat, the report indicates the time the metric was last collected and its value, along with the overall peak and average value for the metric. The time of the Last heartbeat indicates the last time a valid heartbeat was returned by this Connection Broker. A Connection Broker may skip a heartbeat for any of the following reasons. The Connection Broker is shutdown The Connection Broker was removed from the cluster by pointing it to another database The Connection Broker work queue has stalled. If a Connection Broker skips two heartbeats, and the Connection Broker is not marked as Stopped, the status for that Connection Broker changes to Unavailable. Connection Brokers that are stopped or unavailable can be hidden from the report by clicking the Do not display link, shown in the following figure. You can return hidden Connection Brokers to the report by clicking the Show all Connection Broker in this report link at the top of the Connection Broker Metrics report. Load average is a measure of CPU. It is a statistical concept, similar to a moving average, which shows how many processes had to wait for the Connection Broker processor to execute their jobs over the selected time interval. Different load average values indicate the Connection Broker responsiveness. For example, a load average of 8-10 may indicate that the Connection Broker CPU is becoming moderately busy, and that there will be a delay in processing jobs. 406 Leostream Connection Broker Administrator’s Guide Configuring Connection Broker Metrics You configure how often Connection Broker metrics are collected, how long data is retained, and if logging events should occur on the > Status > Connection Broker Metrics page, shown in the following figure. To configure a particular metric, click the Edit action associated with that metric. The Edit Connection Broker Metric form, shown in the following figure, opens. To modify how often the metric is collected, select a new item from the Frequency drop-down menu. To modify how long the data is retained, select a new item from the Days to retain attribute information drop-down menu. To stop collection this particular metric, uncheck the Collect option. If the Collect option is selected, use the Logging Thresholds section to trigger logging events that can be monitored with SNMP and syslog servers. 407 Chapter 19: Monitoring the Connection Broker The Connection Broker changes the collection schedule as soon as you click Save. The next scheduled collection for that metric will be determined by the frequency, offset from the current time. Logging Connection Broker Metric Thresholds You can instruct the Connection Broker to log events when any of the Connection Broker metrics exceed a specified threshold. Use the Logging Thresholds section, shown in the following figure to turn on logging and specify the thresholds. You must be collecting the metric before the Logging Thresholds section appears. The setting in the Log as drop-down menu indicates what type of event the Connection Broker should log, either: information, warning, or error. Set the Log as drop-down menu to No Logging to disable logging for this metric. When logging is enabled, use the Log if less than or equal to and Log if greater than or equal to edit fields to set upper and lower bounds on the logging threshold. For example: If Log if less than or equal to is set to 5 and Log if greater than or equal to is set to 10, the Connection Broker logs the selected event whenever the metric is less than or equal to 5 OR greater than or equal to 10. If Log if less than or equal to is set to 10 and Log if greater than or equal to is set to 5, the Connection Broker logs the selected event whenever the metric is greater than or equal to 5 AND less than or equal to 10 You can use logging event to trigger SNMP traps or in conjunction with syslog servers, to monitor the Connection Broker health. See Issuing SNMP Traps and Integrating with Syslog Servers for more information. Reporting Resource Usage The Resource Usage report, shown in the following figure, lists the different resources (desktops and applications) that are currently in use or hard-assigned to an end user. 408 Leostream Connection Broker Administrator’s Guide The Resource Usage report contains a snapshot at the time the report is generated, and is not dynamically updated. To view trends in resource usage, periodically run the report, download the report to a CSV-file, and use a third-party tool to analyze the files. The columns in this report provide the following information. User Name: Name of the user assigned to the resource. Authentication Server: The authentication server used to authenticate the user when they initially logged into the Connection Broker. Organization Unit: The user’s OU, if applicable Client: The name of the client device where the user logged into the Connection Broker. Policy: The policy that the Connection Broker assigned to the user when they logged into the broker. Policy does not apply to hard-assigned desktops. Assignment Mode: The method used to assign the resource to the user; either policy-assigned or hardassigned. Protocol Type: The display protocol used to connect to this resource. Role: The role assigned to the user by the authentication server that the Connection Broker used to authenticate the user. Resource: The name of the assigned resource. Pool: The pool from which the assigned resource was taken. User Status: The user’s status, either Assigned or Signed In. A status of Signed In indicates that the user is actively logged into the resource. A user may be assigned a resource but not actively signed into that resource, for example, if the user disconnects from the resource and their policy leaves them assigned to the desktop upon disconnect. Generating Resource Usage Summary Reports The Resource Usage (summary) report gives an overview of the number of assigned resources, and their source. The Resource Usage (summary) report contains a snapshot at the time the report is generated, and is not dynamically updated. The following figure shows an example Resource Usage (summary) report. 409 Chapter 19: Monitoring the Connection Broker The sections in this report provide the following information. Total users assigned to resources: The number of users assigned to a resource (desktop or application) in the Connection Broker. Users may not be actively logged into the assigned resource. Total resources assigned: The number of resources assigned to all users. This number is not an indication of license use. Users assigned to multiple resources consume a single Connection Broker license. Average number of assigned resources per user: Total users assigned to resources divided by total resources assigned. Number of resources per Authentication Server: The number of resources assigned to users in each authentication server. This number can show which authentication servers contains users that are more actively using the Connection Broker. If applicable, the report shows an indented list of these users’ organizational units. The total number of indented resources equals the number of resources for the authentication server, as a whole. Number of resources per Policy: The number of resources that are assigned by each policy. Number of resources per Pool: The number of resources that are assigned from each pool. This number can show pools that are more heavily loaded with users. Number of resources per Role: Number of resources assigned to users with various Connection Broker roles. Number of resources per Type: Number of desktops and applications assigned to users. The total equals the value for Total resources assigned. 410 Leostream Connection Broker Administrator’s Guide Policy Reports The Policy report provides a summary of all settings for all policies in your Connection Broker. To generate the report, click the Policy link on the > Status > Reports page. The following figure shows part of an example report. User Login History Reports User login histories indicate the number of users that logged in to the Connection Broker over a specified period of time, and indicate: When peak login times occur The overall load on your system How often and when individual users log in To generate a user login history report, click the User Login History link on the > Status > Reports page. The User Login History form, shown in the following figure, opens. 411 Chapter 19: Monitoring the Connection Broker The User Login History form allows you to configure the time period, frequency, and display parameters for the report, as follows. 1. From the first Display report for last drop-down menu, select the length of history to display. 2. From the second Display report for last drop-down menu, select the time interval for grouping information. For example, the configuration for the Display report for last drop-down menus in the following figure results in a weekly report for the last four weeks. 3. To list Connection Broker logins for a particular user, select that user from the User drop-down menu. Select <All> do display an overview of all user activity. 4. Use the options in the Display results as section to select summary tables to generate. a. Authentication Servers: Summarizes the number of user logins that were authenticated in each defined authentication server. b. Policy: Summarizes the number of times each policy was assigned to a logged in user. c. Role: Summarizes the number of times each role was assigned to a logged in user 5. Click Report to generate the report. The following figure displays an example user login history report. Any generated summary tables appear after the history. The following figure displays an example summary for authentication servers, policies, roles, and user. A per-user summary is always displayed, and shows the total number of logins for each user over the selected time period. 412 Leostream Connection Broker Administrator’s Guide User Connection History Reports User connection histories show the number of users that requested connections to desktops after logging in to the Connection Broker. Connection histories can help you identify: The overall load on your system How many times a particular user requested a desktop To generate a user connection history report, click the User Connection History link on the > Status > Reports page. The User Connection History form, shown in the following figure, opens. The User Connection History form allows you to configure the time period, frequency, and display parameters for the report, as follows. 1. From the first Display report for last drop-down menu, select the length of history to display. 2. From the second Display report for last drop-down menu, select the time interval for grouping information. For example, the configuration for the Display report for last drop-down menus in the previous figure results in a report for the last 30 days summarized daily. 413 Chapter 19: Monitoring the Connection Broker 3. Click Report to generate the report. The following figure displays an example user connection history report. Integrating with Syslog Servers The Connection Broker can function as a syslog sender, to forward log messages over the network. Integration with syslog servers allows for more effective compliance and auditing. To enable the Connection Broker as a syslog sender: 1. Go to the > System > Log page, shown in the following figure. 2. Select the Settings link. The Log Settings form opens. 3. Select the type of messages to send to the syslog server from the Events to Log section. You can send some or all of the following: o Information o Warnings o Errors 4. Select the Enable syslog to remote host option. 5. Enter the host name or IP address of your syslog server into the Remote host name or IP address edit field. 6. Click Save. The Events to Log section also defines the information shown in the Connection Broker logs (see Customizing the Log Contents). 414 Leostream Connection Broker Administrator’s Guide Viewing the Connection Broker Log The > System > Log page, shown in the following figure, displays a log of Connection Broker activity. You can modify the columns included on this page by clicking the customize link at the bottom left side of the page (see Customizing Tables). The logs show the different stages of user connection, e.g., when a user signs in, is offered and assigned desktops, logs out, etc. Using the logs, you can: Diagnose problems with your policy logic related to power and assignment controls, by looking at logs related to powering up and down desktops, and releasing desktops back to the pool. Monitor the system load, such as the number of logins over a period of time. Monitor user access Customizing Log Levels To customize the type of events the Connection Broker logs, click the Settings link on the > System > Log page. Clicking on this link opens the Log Settings dialog, shown in the following figure. Select the events you want to log and click Save. The Syslog section pertains to interacting with syslog servers (see Integrating with Syslog Servers) 415 Chapter 19: Monitoring the Connection Broker Purging Connection Broker Logs If your log files grow rapidly, you can purge the log file, as follows: 1. Click the Settings link on the > System > Logs page. 2. Select the Purge the entire log now option. 3. Click Save. After you click Save, the Connection Broker wipes out the current log file and starts creating a new log with the items you selected in the Log Settings form. If you do not manually purge the log file, the Connection Broker automatically purges the logs after 30 days. To change the automatic purge interval, enter a different number in the Days to retain log entries edit field. Available Log Characteristics Each row in the log provides some or all of the following information. Date The date the entry was logged. Level The log level for this entry, either: information, warning, or error. The log contains entries for the level selected on the Log Settings form. Object The type of Connection Broker object that invoked the action logged in this entry. Object name The name of the object that invoked the action logged in this entry. Description A detailed account of the logged event. If available, click the show details link to expand the log entry. User The user associated with this log event. Client The client device associated with this log event, typically shown for login events. Event The category this log entry falls into. You can filter on events to create lists of activities, such as user login and logout (see Filtering the Log List). The Connection Broker reports the following types of events. Center scan 416 Leostream Connection Broker Administrator’s Guide Connection Broker alert Connection Broker login Connection Broker logout Connection Broker reboot Connection Broker shutdown Database backup Database restore Database switch Desktop Agent upgrade Desktop CPU utilization Desktop assign Desktop connect Desktop connect request Desktop connection close Desktop delete Desktop idle time Desktop lock Desktop offer Desktop pause Desktop protocol override Desktop provisioning Desktop reboot Desktop release Desktop release (manual) Desktop resume Desktop revert to snapshot Desktop start Desktop stop Desktop suspend Desktop unlock Desktop user disconnect Desktop user login Desktop user login (rogue) Desktop user logout Desktop user logout (rogue) Network start Network stop Object create Object delete Object update Pool out of resources Session expired Policy Where applicable, the Connection Broker policy associated with this event. 417 Chapter 19: Monitoring the Connection Broker Role The Connection Broker role assigned to the user shown in the User column. Authentication Server Where applicable, the Connection Broker authentication server associated with this event. Pool Where applicable, the Connection Broker pool associated with this event. Protocol Plan The protocol plan associated with this event. Display Plan The display plan associated with this log event. User Session ID The session ID assigned to the user associated with this log event. Filtering the Log List Log filters can be used to generate customized views for the logs, which can then be downloaded to a CSVfile. To create a log filter: 1. Select Create a new filter from the Filter this list drop-down menu, as shown in the following figure. The Create a new filter page opens, shown in the following figure. This page opens only if you allow popups from your Connection Broker. 418 Leostream Connection Broker Administrator’s Guide 2. In the Create a new filter page, enter a descriptive name for your filter in the Filter name edit field. 3. Use the rows in the Include data that matches section to filter the displayed logs. You can filter the logs based on any number of log entry attributes. 4. If you specify multiple rows in the Include data that matches section, specify if the filter ANDs or ORs the rows together, as follows. a. Select Any of the following to perform an OR operation b. Select All of the following to perform an AND operation 5. Click Save to save the log. To display only log entries that satisfy this filter, select the filter name from the Filter this list drop-down menu. Use global filters along with column-based filters to create customized list of log entries. You can then click the export link to download a CSV-file of the log list for analysis. Using Logs to Track Connection Broker Configuration Changes The Connection Broker generates log entries when certain Connection Broker configurations are changed, such as when editing a desktop or changing a pool setting. To view configuration changes, filter the logs based on one of the following events. Object create Object delete Object update An Object update event can be triggered by any of the following: The object is manually edited in the Connection Broker Administrator Web interface The object is updated in the Connection Broker database A center scan updates the object 419 Chapter 19: Monitoring the Connection Broker The Leostream Agent reports a change that causes the object to be updated The entry in the Users column indicates which user made the configuration change. Changes that were automatically made by the Connection Broker, for example, changes made to a client when a user logs into the Connection Broker form that client, show Connection Broker in the Users column. Exporting the Log Contents You can extract the contents of the Connection Broker log in a number of ways: Download a CSV-file Click the Download Leostream technical support logs link If the Connection Broker Web server is unable to start, use the Connection Broker virtual machine console to gather a log package for Leostream Technical Support. See the Connection Broker Virtual Appliance Guide for instructions. CSV-File To download a CSV: 1. Go to the > System > Log page 2. Click the export link at the bottom-left of the page. 3. When prompted, save the CSV-file The CSV-file contains the entire contents of the > System > Log, not just the information on the currently displayed page. Downloading Logs When you click on the Download Leostream technical support logs link at the bottom of any page of the Connection Broker Web interface, the broker downloads a ZIP-file containing all the information stored in the broker. To extract the log information from the ZIP-file: 1. Extract the downloaded .zip file. 2. In the directory you unzipped the downloaded logs into, go to the logs directory. 3. From the logs directory, extract the sql-log.zip file, into a directory called sql-log. The sql-log.directory contains a file called sql-log.txt, which is a tab delimited file containing the contents of the > System > Log table. You can import this table into an Excel spreadsheet for analysis. 420 Leostream Connection Broker Administrator’s Guide Users are referenced in the table by their user ID. 4. To see the mapping between users and user IDs, extract the sql-user.zip file. The Connection Broker does not include any password information in the downloaded log files. Viewing the Job Queue The > System > Job Queue page, shown in the following figure, displays the Connection Broker work queue, including all completed, running, and pending jobs. You can modify the columns included on this page by clicking the customize link at the bottom left side of the page (see Customizing Tables). The job queue contains Connection Broker processes that are independent of the Web interface. The ID number indicates the order in which the Connection Broker placed jobs into the queue. The higher the ID number, the more recently the Connection Broker placed the job into the queue. Recurring jobs, such as center scans, appear with a status of either pending or running. Pending jobs indicate the next time the Connection Broker runs the job, as well as the start and finish time for the last time the job ran, as shown in the following figure. If you think your Connection Broker is not functioning correctly, use the job queue as a diagnostics tool. If you requested an action and it hasn’t taken place, check if the action is pending in the job queue. If upwards of 30 or more jobs are pending, the work queue may have stopped and you should reboot the Connection Broker 421 Chapter 19: Monitoring the Connection Broker Rescheduling Pending Jobs The Connection Broker allows you to reschedule any pending work queue jobs. By rescheduling certain types of jobs, such as scanning centers, you can ensure that no Connection Broker jobs not related to handling logins occur during times of peak user login. To see all pending work queue jobs, go to the > System > Job Queue page, and select Pending from the Status column’s drop-down menu, as shown in the following figure. To reschedule one or more pending jobs: 1. On the > System > Job Queue page, check the checkbox before each pending job you want to reschedule. If the Bulk Actions column of checkboxes is not available, use the customize link at the bottom of the table to add this column (see Customizing Tables). 2. From the bulk action drop-down menu, select Reschedule, as show in the following figure. 3. The Reschedule n jobs form opens, where n is the number of jobs you selected, as shown in the following figure. In this form: a. In the edit field, enter a numeric value for the amount of time to push the job forward. 422 Leostream Connection Broker Administrator’s Guide b. From the drop-down menu, select the units for this value: minutes or hours. c. Click OK. The time shown in the Scheduled column for the selected jobs moves forward by the amount of time you selected. Purging Completed Jobs To purge completed jobs from the job queue table: 1. Click on the Settings link at the top of the > System > Job Queue page 2. Select the Purge all complete jobs option 3. Click Save The Connection Broker removes all completed jobs from the job queue table, leaving any pending jobs in the queue. Purging Pending and Running Jobs Connection Brokers that are clustered around a common PostgreSQL or Microsoft SQL Server database are identified by their site ID. If you change the site ID for a Connection Broker or remove that Connection Broker from the cluster, pending or running jobs associated with that site ID occasionally remain in the job queue. The pending jobs never run and running jobs never finish, as they are associated with a Connection Broker that is no longer part of the cluster. Certain jobs, such as pool_stats jobs that refresh pool contents, can be run by any Connection Broker in the cluster. If pending pool_stats , poll, or poll_power_state jobs are associated with Connection Broker that are no longer part of the cluster, another Connection Broker will pick up the job when that job is scheduled to run. You do not need to delete these pending jobs. If you have a cluster of Connection Brokers accessing a single work queue, you can delete pending or running jobs using the following two methods. The Job Queue Settings dialog provides an option to purge all pending or running jobs associated with a particular Connection Broker site ID. Use this option when you need to delete all the jobs for a Connection Broker that was removed from the cluster. The Bulk action drop-down menu provides a Cancel option that allows you to purge individual pending or running jobs from the work queue. Purge pending and running jobs only if the Connection Broker associated with that site ID is no longer part of your Connection Broker cluster. Purging jobs associated with an existing Connection Broker can compromise the functioning of your Connection Broker To purge all the pending or running jobs associated with a particular Connection Broker site ID: 423 Chapter 19: Monitoring the Connection Broker 1. Click Settings on the > System > Job Queue page. The Job Queue Settings dialog opens, as shown in the following figure. 2. Check the Purge all jobs for site option. 3. From the associated drop-down menu, select the site ID associated with the pending and running jobs to purge. Ensure that the selected site ID is no longer part of your Connection Broker cluster. 4. Click Save. To purge individual pending or running jobs: 1. Ensure that the Bulk action column is displayed on your Connection Broker > System > Job Queue page. See Customizing Tables for information on how to display this column. 2. Select the checkbox in the Bulk action column for all pending and running jobs you want to cancel. 3. Select the Cancel option from the bulk action drop-down menu, as shown in the following figure. Using Web Queries to Obtain Connection Broker Status You can monitor the Connection Broker using any of the following Web queries. These queries are useful, for example, if you use global or local load balancers and want to monitor the Connection Broker health at regular intervals. https://CB_ADDRESS/index.pl?action=is_alive https://CB_ADDRESS/index.pl?action=cb_online https://CB_ADDRESS/index.pl?action=cb_status https://CB_ADDRESS/index.pl?action=cb_version Where CB_ADDRESS is your Connection Broker address. These queries perform the following functions. 424 Leostream Connection Broker Administrator’s Guide is_alive: Responds with CB_IS_OKAY if all of the following conditions are met: 1) the Connection Broker and its database are online, 2) all authentication servers defined in the Connection Broker are available, and 3) the Connection Broker load average is equal to or less than four. If the Connection Broker cannot communicate with the database, the query returns an HTTP status of 503 (Service Unavailable). The query also returns an HTTP status of 503 (Service Unavailable) if the Connection Broker load average is above four or if any of the authentication servers defined in the Connection Broker are unavailable. cb_online: Responds with CB_IS_OKAY if the Connection Broker and its database are online. If the Connection Broker cannot communicate with the database, or the Connection Broker is in maintenance mode, the query returns an HTTP status of 503 (Service Unavailable). This query is being deprecated in favor of the is_alive query. cb_status: Responds with CB_IS_OKAY if the Connection Broker database is online. The query returns a brief description of the problem in ERROR_MESSAGE if the database is not online. This function always returns a 200 Success header. You can also use the cb_status Web query to check if a user is assigned to a desktop, for example: https://CB_ADDRESS/index.pl?action=cb_status&if_assigned_only=username Where CB_ADDRESS is your Connection Broker address and username is the user to check. If the user is assigned a desktop, the Connection Broker responds with CB_IS_OKAY. If the user is not assigned any desktops, the query returns the following error message. ERROR_MESSAGE=username does not have an assigned desktop cb_version: Prints the current version of the Connection Broker. Use the Leostream XML-RPC based API to retrieve additional Connection Broker status information. Using the XML API The Connection Broker has a published Application Programming Interface (API) that allows you to control the broker using XML-RPC (eXtensible Markup Language – Remote Procedure Calls). Using XML-RPC, you can: Go around policy logic to assign desktops. Determine who is logged into a virtual machine. Query the status of a virtual machine. To enable the XML-RPC interface: 1. Go to the > System > XML API page, shown in the following figure. 425 Chapter 19: Monitoring the Connection Broker 2. Select the Enable XML-RPC option. 3. You can enter optional information about how you are using the XML-RPC into the Notes edit field. Do not enter actual XML-RPC calls, as the Connection Broker does not evaluate this field. 4. Click Save. 5. Place XML-RPC calls in your internal systems, to pull information from the Connection Broker. Enabling XML-RPC allows you to use the Broker, VM, Pool, User, and Center APIs. To view documentation on how to use these APIs, click the Documentation link below the Enable XML-RPC check box, shown in the previous figure. The Connection Broker always allows calls to the ThinWin API used by thin client devices. If you enable XML-RPC, commands are sent to and from the Connection Broker via https://cbaddress/RPC2, where cb-address is your Connection Broker IP address. To restrict certain users from using the XML API, assign them a role with the permission for XML API set to No access. See Chapter 9: Configuring User Roles and Permissions for more information on creating roles. Testing the XML-RPC API To test the XML-RPC API, click the Test link at the bottom of the > System > XML API page, as shown in the following figure. 426 Leostream Connection Broker Administrator’s Guide The following RPC Test form opens: 1. Enter the name of an XML-RPC function in the Function name edit field, for example VM.Status. For a list of support functions, open the XML documentation by clicking the Documentation link below the Enable XML-RPC check box. 2. Enter the name and value of each parameter required by the function. 3. Click Process. The Connection Broker pushes the request through the XML-RPC post and returns the function results. Issuing SNMP Traps The Connection Broker provides basic SNMP trap support. Leostream sends traps using SNMPv2c format. The Connection Broker does not support SNMP queries. You can only send requests using traps. To setup SNMP support: 1. Go to the > System > SNMP page, shown in the following figure. 427 Chapter 19: Monitoring the Connection Broker 2. Enter the hostname or IP address of the SNMP management system in the SNMP Manager hostname or IP address edit field. To send traps to multiple SNMP servers, enter multiple addresses separated by a comma. If you specify multiple SNMP servers, the Connection Broker sends the trap to all servers. To specify a non-standard SNMP port, use the format host:port. 3. Enter the community name in the Community edit field. 4. In the Events to Log section, select the events that should trigger the sending of a trap to the SNMP management system. You can send traps an any or all errors, warnings, and informational log events. 5. In the Leostream MIB Version, select which MIB version to use. The Leostream MIB has a Root OID (Organizational Identifier) of 1.3.6.1.4.1.18102. Version 1 of the Leostream MIB has a single OID of 1.3.6.1.4.1.18102.50. Version 2 of the Leostream MIB contains a hierarchical set of OIDs based on the different pages in the Connection Broker Web interface. Certain traps are sent using these OIDs. Traps that have not been migrated to the new version of the Leostream MIB use the original OID of 1.3.6.1.4.1.18102.50. 6. Click Save. To setup the management system to recognize the Leostream traps, click on the link associated with the version of the MIB you will use. Copy the Leostream MIB and compile the MIB into the SNMP system using the supplied complier. The compiler creates a compiled version of the MIB which is stored alongside all the other compiled MIBs within the management system. The management system then displays the traps sent by the Connection Broker. Both versions of the MIB report the following information: 428 Leostream Connection Broker Administrator’s Guide The level of the trap: 2 for errors; 3 for warnings; 4 for information The UUID of the object affected, if applicable A text string describing the problem, in the format object_name : message_text 429 Chapter 20: Maintaining the Connection Broker Chapter 20: Maintaining the Connection Broker Overview The > System > Maintenance page, shown in the following figure, allows you to: Update your Connection Broker Install new license keys Manage the Connection Broker database Manage SSL certificates Reboot or shutdown the Connection Broker Load and remove files Upload user, client, and desktop data into the Connection Broker The page also displays Connection Broker information, including your license expiration date. The Connection Broker information displayed on the right side of the > System > Maintenance page displays the current Connection Broker version and the last time it was updated. You can remotely determine the Connection Broker version by querying: http://cb-address/version where cb-address is your Connection Broker address. 430 Leostream Connection Broker Administrator’s Guide Updating Connection Brokers For a complete description of updating Connection Brokers, see the Connection Broker Virtual Appliance Administrator’s Guide, available at: http://www.leostream.com/resources/documentation/cb_virtual_appliance.pdf Removing the Update Option In production environments, you may want to lock the Connection Broker version by prohibiting administrators from checking for updates. You can do so by removing the Check for updates option from the > System > Maintenance page. To remove this option: 1. Go to the Connection Broker Console panel in your virtualization layer’s management tool, shown in the following figure. 2. Press Ctrl+C to go to the Leostream administrator login page, shown in the following figure. 3. Enter the username and password. The default username is leo and password is leo. The Leostream administrator menu, shown in the following figure, opens. 431 Chapter 20: Maintaining the Connection Broker 4. Select Advanced and hit <Enter>. The Advanced settings options, shown in the following figure, appear. 5. Select Upgrade and hit <Enter>. 6. When prompted for confirmation, hit <Enter>. The > System > Maintenance page no longer shows the Check for updates option. To restore this option, repeat steps 1 through 6 in the previous process. Upgrading Leostream Connect and Leostream Agent Connection Broker updates includes the latest version of the Leostream Connect clients and Leostream Agents. You can view and download these versions on the > Status > Downloads page, shown in the following figure. The Connection Broker can automatically upgrade Leostream Connect and Leostream Agent installations on clients and remote desktops running older versions of these components. By default, no automatic upgrades are performed. Upgrading Leostream Connect Use the Upgrade client to latest version drop-down menu on the > System > Settings page, shown in the following figure, to push Leostream Connect upgrades out to client devices. 432 Leostream Connection Broker Administrator’s Guide Select one of the options in this menu, to indicate when the client should be updated, as follows: Never: Do not update Leostream Connect. In this case, you must manually update end users’ clients. Always: Always update Leostream Connect. In this case, the first time an end user runs Leostream Connect and an update is available, they are warned that an update is in process. Leostream Connect restarts when the update is finished. Prompt user: Lets the user decide if they want to update Leostream Connect. In this case, when the user launches Leostream Connect and an update is available, the client prompts the user to install the update. The Connection Broker continues to prompt the user every time the client is launched, until the upgrade is completed. The Connection Broker runs the same tasks during the upgrade as you specified for the original Leostream Connect installation. Upgrading Leostream Agents You can push Leostream Agent out to remote desktops using the Upgrade option on the > Resources > Desktops page, shown in the following figure. The Leostream Agent Version column on the > Resources > Desktops page displays the currently installed version for each desktop. If this version is lower than the Leostream Agent version shown on the > Status > Downloads page, the Connection Broker adds the Upgrade option to the Actions list. The Connection Broker runs the same tasks during the upgrade as you specified for the original Leostream Agent installation and always requests a desktop reboot after the installation completes. If you did not start 433 Chapter 20: Maintaining the Connection Broker the Leostream Agent at the end of the original installation, the Connection Broker will not automatically start the Leostream Agent after the upgrade. In this case, you must manually restart the agent. To update an individual desktop, click the Upgrade action associated with that desktop. To simultaneously upgrade the Leostream Agents on multiple desktop: 1. Ensure that the Bulk actions column is shown on the > Resources > Desktops page (see Performing Bulk Actions). 2. In the Bulk actions column, select the checkbox associated with each desktop that has a Leostream Agent you want to upgrade. 3. From the drop-down menu at the top of the Bulk actions column, select Edit. 4. In the Edit desktops form that opens, select the Upgrade Agent to latest version option. 5. Click Save. The Connection Broker updates the Leostream Agents on all the selected desktops. Entering a New License Key To enter a new license key: 1. Go to the > System > Maintenance page. 2. Select the Install new license option in the Update section. 3. Click the Next button. 4. In the form that opens, enter your new license key. 5. Click on the License Agreement link to open the Connection Broker End User License Agreement. 6. Read the agreement and, if you accept it, select the I have read and accept the License Agreement check box. 7. Click Save. Switching Databases The Connection Broker can operate with either an internal or with an external PostgreSQL or Microsoft SQL Server 2012 or 2014 database. Using an external database allows you to scale out your deployment by clustering several Connection Brokers around a single database. 434 Leostream Connection Broker Administrator’s Guide A cluster is defined as two or more Connection Brokers all communicating with the same PostgreSQL or Microsoft SQL Server database. Connecting to a PostgreSQL Database By default, the Connection Broker uses an internal database. To connect the Connection Broker to an external PostgreSQL database: TODO: Add version information 1. Go to the > System > Maintenance page. 2. Select the Switch to PostgreSQL database option. The following Remote database form opens. 3. Enter a name for the database in the in the Database name edit field. Do not use hyphens or other invalid characters in the database name. 4. Enter the PostgreSQL hostname or IP address in the Principal hostname or IP Address edit field. 5. Change the default outbound port listed in the Port edit field, if necessary. 6. Enter a username and associated password for a user with access to the database, in the User name and Password edit fields, respectively. 7. Enter a unique Site ID. If you are using a cluster of Connection Brokers, each broker must have a unique Site ID. You can enter the site ID associated with a Connection Broker that was removed from the cluster. The new Connection Broker takes over any jobs in the work queue associated with the previous Connection Broker. 8. Click Save. The Connection Broker takes one of the following actions: If a database with the specified name does not exist: The Connection Broker creates a new database with that name and automatically populates the database with the information currently available in the Connection Broker. 435 Chapter 20: Maintaining the Connection Broker If database with the specified name does exist: The Connection Broker switches to using the new external database. Any information in the internal database is not moved into the external database. If the database being switched to is for an older Connection Broker version, the Connection Broker displays the following warning. Click Switch to complete the switch to the external database. The Connection Broker upgrades the old database. Any older versions of the Connection Broker that are pointing to this database switch into maintenance mode (see Connection Broker Maintenance Mode). If the Connection Broker successfully switched the database, the following message displays: The database was successfully switched. Connecting to a Microsoft SQL Server Database By default, the Connection Broker uses an internal database. To switch to a Microsoft SQL Server database: 9. Go to the > System > Maintenance page. 10. Select the Switch to Microsoft SQL Server database option. The following Remote database form opens. 11. Enter a name for the database in the in the Database name edit field. Do not use hyphens or other invalid characters in the SQL Server database name. 12. Enter the SQL Server hostname or IP address in the Principal hostname or IP Address edit field. 436 Leostream Connection Broker Administrator’s Guide 13. Change the default outbound port listed in the Port edit field, if necessary. If you are using a named instance of SQL Server, ensure that you enter the correct port number for that instance. You can view the ports associated with this instance in the Protocols for instance_name dialog associated with this instance. 14. Enter a username (including the domain) and associated password for a user with access to the database, in the User name and Password edit fields, respectively. 15. Enter a unique Site ID. If you are using a cluster of Connection Brokers, each broker must have a unique Site ID. You can enter the site ID associated with a Connection Broker that was removed from the cluster. The new Connection Broker takes over any jobs in the work queue associated with the previous Connection Broker. 16. Click Save. The Connection Broker takes one of the following actions: If a database with the specified name does not exist: The Connection Broker creates a new database with that name and automatically populates the database with the information currently available in the Connection Broker. If database with the specified name does exist: The Connection Broker switches to using the new external database. Any information in the internal database is not moved into the external database. If the database being switched to is for an older Connection Broker version, the Connection Broker displays the following warning. Click Switch to complete the switch to the external database. The Connection Broker upgrades the old database. Any older versions of the Connection Broker that are pointing to this database switch into maintenance mode (see Connection Broker Maintenance Mode). If the Connection Broker successfully switched the database, the following message displays: The database was successfully switched. The Connection Broker restarts whenever you switch databases. 437 Chapter 20: Maintaining the Connection Broker After you switch to an external database, the Connection Broker stops updating its internal database with configuration changes. Therefore, if you switch back to the internal database, the Connection Broker configuration reverts to the setup at the point when the original switch to the external database occurred. Possible Database Error Messages If an incorrect IP address for the database is entered, or the database is not running, the following error is displayed: ERROR 2003: Can’t connect to database. If an incorrect username or password is entered, the error message is shown on the database page as follows: ERROR 1045: Access denied. After the database is switched, the Connection Broker continues to function as before but all data is written to the database. If the Connection Broker no longer logs into the database, the following error message displays: Unable to connect to the database. To determine the source of the error, go to https://cb-address/database_error.pl, where cbaddress is your Connection Broker address. Switching Site IDs After a Connection Broker joins a cluster, you can change the Site ID associated with that Connection Broker. Changing Site IDs allows you, for example, to instruct a Connection Broker to take over any jobs in the work queue associated with that Site ID. To change the Site ID: 1. Select the Switch to remote database option on the > System > Maintenance page. The following Remote database form opens. 2. Enter the appropriate site ID in the Site ID edit field. 3. Click Save. Changing the site ID, or any other remote database parameter, is conceptually identical to connecting the 438 Leostream Connection Broker Administrator’s Guide Connection Broker to a new database. When switching site IDs, the Connection Broker performs all the steps associated with switching to a new database, including restarting the Connection Broker. Connecting to the Internal Connection Broker Database You can easily switch any Connection Broker that is attached to an external database back to its internal database. To switch back to the internal database: 1. Go to the > System > Maintenance page. 2. Select the Switch to internal database option. The following Internal database form opens. 3. Click Switch to switch back to the internal database. 4. Click Cancel to leave the form without switching back to the internal database. After you switch the Connection Broker back to its internal database: The Connection Broker removes itself from the cluster associated with the external database. The internal database is configured exactly as it was directly before the Connection Broker was switched to the external database. The internal database does not reflect any of the changes in the external database. Backing Up and Restoring an Internal Connection Broker Database This feature is not available if your Connection Broker uses an external database. If you are using an external database, back up the database using the standard tools and techniques for PostgreSQL or Microsoft SQL Server databases. You can download an internal Connection Broker database and additional Connection Broker settings, as follows: 1. Select the Backup internal database option in the Database options section in the > System > Maintenance page. 2. Click Next. The following Backup Internal Database form opens. 439 Chapter 20: Maintaining the Connection Broker 3. Enter a file name for the downloaded configuration, or use the default file name. 4. Click Submit. The Connection Broker adds the postscript .tgz to any filename and downloads the file to the browser’s default download folder on your machine. You can restore a downloaded Connection Broker database, as follows: 1. Select the Restore database from backup option in the > System > Maintenance page. 2. Click Next. The following Restore Database from Backup dialog opens. 3. Enter the full path to the configuration file or locate the file using the Browse button. 4. Click Submit to upload the file. This file overwrites the previous Connection Broker configuration database. Backing up Your Connection Broker Recommended Practices Leostream recommends the following schedule for backing up your Connection Broker virtual machine: Make monthly clones Take weekly snapshots By backing up the entire Connection Broker virtual machine, you do not need a separate backup procedure for the underlying Connection Broker operating system. If you are using an external database, implement your site standard database backup procedure to protect the data. As with any backup procedure, test the restore process to make sure it is well documented and works as expected. 440 Leostream Connection Broker Administrator’s Guide If you are using an internal database, use the > System > Backup page to schedule regular backups to an external FTP server. See the following section for more information. Scheduling Connection Broker Backups The > System > Backup page, shown in the following figure, allows you to schedule routine backups of your Connection Broker internal data base. The scheduled backup does not back up information stored in an external PostgreSQL or Microsoft SQL Server database. If your Connection Broker is attached to an external database, the schedule backup includes: The unused data in the internal database, which is stale compared to the external database The external database connection information (IP, username, password), the local networking information (static IP or DHCP, static address, gateway, and DNS), and local SSL cert and key To schedule automatic remote backups: 1. Select Enabled from the Enable remote backup drop-down menu. Toggle the selection back to Disabled to turn off remote backup. 2. Enter a string into the Filename prefix edit field. The Connection Broker stores your backup files 441 Chapter 20: Maintaining the Connection Broker with the name prefix_DATETIME.tgz, where prefix is the string you enter in this edit field. 3. Select the time to run the backup from the Hour to run drop-down menu. 4. Select all the days to run the backup. 5. Enter the full path to the FTP host in the FTP host edit field. 6. Enter the user name in the FTP user edit field. 7. Enter the user’s password in the FTP password edit field. 8. Optionally enter a directory to copy the backup file to in the Remote directory edit field. 9. If you want to run the backup as soon as you click Save, in addition to the times you configured in this form, select the Perform a backup now option. 10. Click Save. Generating and Installing Self-Signed SSL Certificates Connection Broker 7.8 includes a default Leostream certificate, used to encrypt communication between the Connection Broker and the Leostream Agents and Leostream Connect clients. You can replace this certificate with a self-signed certificate, or with a certificate from an authorized certificate issuing authority. Self-signing certificates are simpler and lower cost. Certificates from a certificate authority are recognized by browsers and, therefore, browsers do not generate a certificate warning. To create a self-signed certificate: 1. Go to the > System > Maintenance page. 2. Select the Generate and install a self-signed SSL certificate option, shown in the following figure. 442 Leostream Connection Broker Administrator’s Guide 3. Click Next. The following form opens, requesting the information needed to generate an SSL certificate. For a self-signed certificate, you have more flexibility in completing the information in this form, but you should follow guidelines if you want to transition to a certificate signed by a certificate signing authority in the future. Certificate signing authorities require official documentation to support each variable. 4. Enter some or all of the following information. The Site name is required. All other fields are optional. You can typically find this information by going to your organization’s official Web site, finding a secure page, and then using your browser to examine the certificate. Country name: The IANA two letter country code (see http://www.iana.org/cctld/cctldwhois.htm for the official list). 443 Chapter 20: Maintaining the Connection Broker State or Province Name (full name): The full name of your state or province. Do not enter abbreviations. Locality name: The city in which your company is incorporated. Organization Name: The name by which your organization is officially recognized. Organizational Unit Name: The department name. Site name: (Required) Either a DNS name or IP address. It is recommended that you add the Connection Broker address into your DNS system then use the DNS name rather than the IP address. In this way, you can change the IP address of the Connection Broker without having to create new certificates. Administrative email: The email address of the person responsible for certificate maintenance. 5. Click Save. The Connection Broker creates the certificate request and installs the certificate. The Web interface is then encrypted with this certificate. The Connection Broker displays a message when the installation is complete. Generating and Installing Third Party SSL Certificates To generate the information needed to request an SSL certificate from a third party certificate signing authority: 1. Go to the > System > Maintenance page. 2. Select the Generate a SSL certificate request (CSR) option. 3. Click Next. The following form opens, requesting the information needed to generate an SSL certificate. 444 Leostream Connection Broker Administrator’s Guide 4. Enter the SSL certification information, described in the previous section. 5. Click Save. The Connection Broker generates the CSR, and displays a message page. 6. Click the Click here link in the message page to download the CSR file. 7. Cut-and-paste this block of text from the browser into the entry form for the certificate application. The text must be copied as plain text. Either cut-and-paste the text from the browser window into another browser window or into a plain text email (not HTML enhanced). Installing a Signed SSL Certificate and Intermediate Certificate After the signed SSL certificate arrives from the certificate signing authority, you can install it on the Connection Broker, as follows. This method can be used to upload the signed certificate, the intermediate certificate, or both certificates, as required. 1. Go to the > System > Maintenance page. 2. Select the Install signed SSL certificate or intermediate certificate option. This option appears only after you generate an SSL certificate request. 3. Click Next. The following dialog opens. 4. Browse for the SSL certificate. 5. If needed, enter or browse for the intermediate certificate or CA bundle file. 6. Click Install the certificate(s). After the certificate is uploaded, the Connection Broker restarts in order to use the new certificate. You cannot install a certificate that was not generated from the Connection Broker’s CSR. Sharing SSL Credentials between Connection Brokers In deployments where you are clustering Connection Brokers, you want all brokers to use identical SSL credentials. To do this, setup the credentials on one Connection Broker and then share the credentials with 445 Chapter 20: Maintaining the Connection Broker other brokers, as follows. To download the SSL credentials: 1. Go to the > System > Maintenance page 2. Select the Download the SSL credentials for installation on another Connection Broker option, as shown in the following figure. 3. Click Next. The following form opens 4. In the File name field, enter a file name for the downloaded SSL credentials. 5. Click Create the credentials file. The Connection Broker generates a .tgz file containing the SSL credentials and opens a Web page that allows you to download the credentials. 6. Click the Click here link in the Web page that opens and save the file locally on your machine. To install these SSL credentials on another Connection Broker: 1. Go to the > System > Maintenance page 2. Select the Install the SSL credentials from another Connection Broker option, as shown in the following figure. 446 Leostream Connection Broker Administrator’s Guide 3. Click Next. The following form opens 4. Enter or browse for the file name of the SSL credentials to install. 5. Click Load the SSL credentials. Uninstalling an SSL Certificate You can uninstall an SSL certificate as follows: 1. Go to the > System > Maintenance page. 2. Select the Uninstall the SSL certificate option, as shown in the following figure. This option only appears if you have installed a self-signed SSL certificate or a CSR. You cannot uninstall the default Leostream certificate. 447 Chapter 20: Maintaining the Connection Broker 3. Click Next. The Uninstall the SSL certificate page, shown in the following figure, opens. 4. Click the Uninstall button to finish the process. After the certificate is uninstalled, the Connection Broker restarts and uses the default Leostream certificate. The Connection Broker deletes the certificate’s private key from the Connection Broker database when you uninstall the certificate. Restarting the Connection Broker You can restart the Connection Broker, as follows: 1. Select the Reboot the Connection Broker option on the > System > Maintenance page. 2. Click Next. The Connection Broker does not prompt you to confirm this action. The broker begins to reboot after five seconds. After the reboot completes, you must sign back into your Connection Broker. Shutdown the Connection Broker You can shutdown the Connection Broker, as follows: 1. Select the Shutdown the Connection Broker option on the > System > Maintenance page. 2. Click Next. The Connection Broker does not prompt you to confirm this action. The Connection Broker shuts down after 5 seconds. The Connection Broker virtual machine does not completely power down, only the guest operating system powers down. In this way, the Connection Broker holds on to any allocated memory and can quickly power back up. To power up the Connection Broker in vCenter Server, use the Restart option. Purging the Database You can clear out the Connection Broker internal database, as follows: 1. Select the Purge the database option on the > System > Maintenance page. 2. Click Next. The following form opens. 448 Leostream Connection Broker Administrator’s Guide 3. To purge the database, click Purge. 4. The following message appears if the purge was successful. The Connection Broker cannot restore a purged database. The Connection Broker purges the following items from the database: Authentication Servers Centers Clients Locations Logs Policies Pools Desktops Applications PCoIP Host Cards Users Roles Tags Message board Job queue The Connection Broker does not purge the following items from the database: License key SSL certificate External database connection information Network setup General, SNMP, and log settings Remote backup settings and FTP site information Skins 449 Chapter 20: Maintaining the Connection Broker Installing and Removing Third Party Content You can upload arbitrary Web content into the Connection Broker Web server using the Install third party content option. You can use installed Web content to do the following: Use custom ActiveX or Java remote viewer provided by a third party Load graphics, allowing you to include your logo in the Connection Broker Web interface To upload a file: 1. Go to the > System > Maintenance page. 2. Select the Install third party content option, as shown in the following figure. 3. Click Next. The following page opens. 4. Enter the full path to the content to upload, or browse to the file. 450 Leostream Connection Broker Administrator’s Guide 5. Click Install. The file is uploaded into your Connection Broker’s Web servers /tpc directory. For example, the full file name is: https://cb-address/tpc/filename Where cb-address is your Connection Broker address and filename is the name of your uploaded file. 6. If you are using a cluster of Connection Brokers, repeat steps 1 through 5 for each Connection Broker in the cluster. For instructions on how to use uploaded files to customize the logo on the Connection Broker Web browser Sign In page, see Adding Customized Text and Images. To remove an uploaded file: 1. Go to the > System > Maintenance page. 2. Select the Remove third party content option at the bottom of the form. 3. Click Next. A page opens, listing the content you have loaded into your Web server. For example: If you have not uploaded any files, the Connection Broker displays a warning. 4. Select all the items to remove. 5. Click Remove. Uploading Data from CSV Files The Connection Broker allows you to create users and clients, as well as hard-assign users to desktops, by loading CSV formatted files into the Connection Broker database. To upload a file: 1. Select the radio button associated with the data you want to upload, either Upload users, Upload desktops, Upload clients, or Upload PCoIP host devices. 2. Click Next. 3. In the dialog that opens, enter or browse for the file to upload. 4. Click Upload. 451 Chapter 20: Maintaining the Connection Broker Uploading Users To upload users into the Connection Broker, the CSV-file must have the following format. The CSV-file must be comma delimited Quotes must be double quotes The first row must contain the field names, separated by commas with no additional blank spaces, and the data must be in the remaining rows The field names must match the field names in the user table in the data dictionary, including case The file must contain the login field, which is used to uniquely identify the user The xxx_id linkage fields (e.g., role_id) can contain either the numeric ID of the associated record or the name of the associated record The following fields cannot be edited: o o o o o id deleted created updated last_login For a list of field names in the users table, go to: https://cb-address/download/account_db.html#user Where cb-address is your Connection Broker address. For example, a file with the following contents loads four users into the Connection Broker. The > Users > Users page for the previous example appears similar to the following. 452 Leostream Connection Broker Administrator’s Guide If the value specified by login already exists in the Connection Broker and the user is remotely authenticated, the Connection Broker modifies the existing user record. If the value specified by login already exists in the Connection Broker as a remotely authenticated user and you are uploading a local user, a new user is created. The Uploaded column on the > Users > Users page displays Yes for users that were uploaded from a CSV-file. If you do not specify the authentication_method field, the Connection Broker assumes the user is authenticated by one of the authentication servers defined on the > Users > Authentication Server page. The first time the uploaded user logs into the Connection Broker, the Authentication Server column updates with the name of the authentication server used to authenticate the user and assign a policy. Uploading Desktop Assignments You can load a CSV-file to modify desktops already in the Connection Broker. You cannot create new desktops using the bulk upload feature. When uploading desktop data, the CSV-file must have the following format. The CSV-file must be comma delimited Quotes must be double quotes The first row must contain the field names, separated by commas with no additional blank spaces, and the data must be in the remaining rows The field names must match the field names in the vm table in the data dictionary The only modifiable fields are: o display_name – Text to enter into the desktop’s Display name field. o user_assignment_mode – This case-sensitive field can take one of the following two values: H: Indicates the desktop is hard assigned to the user P: Indicates the desktop is policy assigned to the user o user_id – Either the numeric ID or name of the assigned user One of the following fields is required and must uniquely identify the desktop: o o o id name uuid For a list of field names in the desktops table, go to: https://cb-address/download/account_db.html#vm Where cb-address is your Connection Broker address. Note: The bulk upload feature allows you to incorrectly policy-assign a desktop to a user via the CSV-file. If the CSV-file policy-assigns a desktop to a user, but the user’s actual policy does not assign that desktop to the user, the user will not be presented with the desktop assigned by the CSV-file. 453 Chapter 20: Maintaining the Connection Broker Uploading Clients By default, the uploaded CSV-file modifies existing clients, but does not create new clients. To create new clients select the Allow creation of new clients option, shown in the following figure. Specify new clients using the name, mac, or serial_number field. New clients cannot be created using an id field. If you do not select the Allow creation of new clients option, the Connection Broker provides a message indicating it cannot find the client, and skips that row in the CSV-file. When uploading client data, the CSV-file must have the following format. The CSV-file must be comma delimited Quotes must be double quotes The first row must contain the field names, separated by commas with no additional blank spaces, and the data must be in the remaining rows The field names must match the field names in the client table in the data dictionary The only modifiable fields are: o o o o o client_assignment_mode client_type direct_to_host_policy_id (for PCoIP clients, only) ip vm_id One of the following fields is required and must uniquely identify the client o id (for updating existing clients, only) o ip (for PCoIP clients, only) o name o mac o serial_number The vm_id and direct_to_host_policy_id fields can contain either the numeric ID of the associated record or the name of the associated record To upload PCoIP clients, set the client_type to blade. Specifying a policy in the direct_to_host_policy_id field automatically selects the Direct connect client to desktop option for the client and sets the Apply policy options from drop-down menu to the entered policy. The direct_to_host_policy_id field does not apply to any other client type. If the uploaded CSV-file contains PCoIP clients, the Connection Broker performs a scan of the PCoIP Devices center, and updates the PCoIP client records with any additional information provided by the client. For a list of field names and values in the client table, go to: https://cb-address/download/account_db.html#client 454 Leostream Connection Broker Administrator’s Guide Where cb-address is your Connection Broker address. Checking Component Version Numbers You can find version information for the Connection Broker, Leostream Connect, and Leostream Agent in the following locations: The Connection Broker version number appears at the bottom left of every page of your Connection Broker Web interface. For Leostream Connect: o If a user has logged into the Connection Broker via Leostream Connect, the Leostream Connect version number appears in the Version column of the > Clients > Clients page. o If Leostream Connect is running, select the About tab on the Options dialog, available from the Leostream Connect system tool tray menu. For the Leostream Agent: o If you installed the Leostream Agent on a desktop, the agent’s version number appears in the Leostream Agent Version column on the > Resources > Desktops page. o On the remote desktop, the version is displayed in About tab of the Leostream Agent Control Panel dialog. 455