1
A−A−P Recipe Executive
A−A−P Recipe Executive
Table of Contents
A−A−P Recipe Executive....................................................................................................................................1
Bram Moolenaar......................................................................................................................................1
Tutorial................................................................................................................................................................3
Chapter 1. Getting Started........................................................................................................................3
Installation...............................................................................................................................................3
Chapter 2. Compiling a Program.............................................................................................................4
A "Hello world" (of sorts)........................................................................................................................4
Using Aap to compile "hello.c"...............................................................................................................4
Other things to do with "hello world"......................................................................................................5
Several Source Files.................................................................................................................................5
Variables and Assignments......................................................................................................................6
Comments................................................................................................................................................7
Dependencies...........................................................................................................................................7
Compiling Multiple Programs.................................................................................................................9
Kinds of things you can build................................................................................................................10
Chapter 3. Publishing a Web Site..........................................................................................................10
Uploading The Files...............................................................................................................................10
Generating a HTML File.......................................................................................................................11
Using ":rule" to Generate Several HTML Files.....................................................................................12
Chapter 4. Distributing a Program.........................................................................................................13
Downloading..........................................................................................................................................13
Uploading...............................................................................................................................................14
Chapter 5. Building Variants.................................................................................................................14
One Choice.............................................................................................................................................14
Two Choices..........................................................................................................................................15
Chapter 6. Using Python........................................................................................................................17
Expressions............................................................................................................................................17
Conditionals...........................................................................................................................................17
Scope......................................................................................................................................................18
Loops.....................................................................................................................................................18
Python Block..........................................................................................................................................19
Expressions for Files..............................................................................................................................19
Further Reading.....................................................................................................................................20
Chapter 7. Version Control with CVS...................................................................................................20
Downloading (Checkout).......................................................................................................................21
Getting Past A Firewall..........................................................................................................................21
Uploading (Checkin)..............................................................................................................................22
Further Reading.....................................................................................................................................22
Chapter 8. Filetypes and Actions...........................................................................................................22
A New Type of File...............................................................................................................................22
Defining a Filetype by Suffix................................................................................................................23
Defining a Compile Action....................................................................................................................24
Another Use of Filetypes.......................................................................................................................24
Chapter 9. More Than One Recipe........................................................................................................25
Children.................................................................................................................................................25
Sharing Settings.....................................................................................................................................26
Sharing Modules....................................................................................................................................27
i
A−A−P Recipe Executive
Table of Contents
Tutorial
Executing a Recipe................................................................................................................................28
Fetching a Recipe...................................................................................................................................28
Chapter 10. Commands in a Pipe...........................................................................................................29
Changing a timestamp...........................................................................................................................29
Creating a file from pieces.....................................................................................................................30
Pipe output in a variable........................................................................................................................31
Creating a file from scratch....................................................................................................................31
Chapter 11. A Ported Application..........................................................................................................32
The Port Recipe......................................................................................................................................32
Using CVS.............................................................................................................................................35
User Manual......................................................................................................................................................36
Chapter 12. How it all works.................................................................................................................36
How Recipes Are Executed...................................................................................................................36
Common Recipe Structure.....................................................................................................................37
Building A Target In The First Step......................................................................................................38
Nesting The Steps..................................................................................................................................38
Using Multiple Recipes.........................................................................................................................39
Recipe Execution Details.......................................................................................................................39
Use Of Variables....................................................................................................................................40
Special Characters..................................................................................................................................40
Line Syntax............................................................................................................................................41
Chapter 13. Dependencies, Rules and Actions......................................................................................42
Build Commands...................................................................................................................................42
The Production Commands...................................................................................................................43
Attributes for the Production Commands..............................................................................................44
Rules And Dependencies.......................................................................................................................45
Command block sections.......................................................................................................................46
Multiple targets......................................................................................................................................46
Automatic dependency checking...........................................................................................................47
Attributes Overruling Variables.............................................................................................................48
Virtual Targets.......................................................................................................................................48
Source Path............................................................................................................................................49
Depending On A Directory....................................................................................................................49
Build Command Signature.....................................................................................................................50
Chapter 14. Variants..............................................................................................................................51
The BDIR Variable................................................................................................................................51
Compile only when needed....................................................................................................................51
Building multiple variants at once.........................................................................................................52
Chapter 15. Publishing...........................................................................................................................53
Using Secure Copy................................................................................................................................54
Using Another Method..........................................................................................................................55
Changing A Url......................................................................................................................................55
Distributing Generated Files..................................................................................................................56
Copying All Files At Once....................................................................................................................56
Publishing images for HTML files........................................................................................................57
Chapter 16. Fetching..............................................................................................................................57
ii
A−A−P Recipe Executive
Table of Contents
User Manual
Fetching And Updating..........................................................................................................................57
The Fetch Attribute................................................................................................................................58
Defining Your Own Method..................................................................................................................59
Caching..................................................................................................................................................60
Chapter 17. Installing.............................................................................................................................60
Destination Directories..........................................................................................................................62
Uninstall.................................................................................................................................................64
Installing in non−standard places..........................................................................................................64
Chapter 18. Version Control..................................................................................................................65
Operating On All Files...........................................................................................................................65
Using Subversion...................................................................................................................................67
Using Another Version Control System................................................................................................67
Chapter 19. Using CVS.........................................................................................................................68
Obtaining A Module..............................................................................................................................68
Fetching.................................................................................................................................................68
Checking In............................................................................................................................................69
Distributing Your Project With CVS.....................................................................................................70
Using Sourceforge.................................................................................................................................71
Chapter 20. Issue Tracking....................................................................................................................72
Bug Reporting........................................................................................................................................72
Bug Fixing.............................................................................................................................................72
Chapter 21. Using Python......................................................................................................................73
Using Python Lines................................................................................................................................73
Using Aap variables in Python..............................................................................................................73
Using Python Expressions.....................................................................................................................74
Python Block..........................................................................................................................................76
Useful Python Items...............................................................................................................................76
Chapter 22. Porting an Application.......................................................................................................77
The Port Recipe......................................................................................................................................78
Variables................................................................................................................................................79
Dependency Format...............................................................................................................................80
Dependencies For Various Steps...........................................................................................................81
Steps.......................................................................................................................................................82
Port Description.....................................................................................................................................86
Chapter 23. Automatic Configuration....................................................................................................86
Chapter 24. Using Autoconf..................................................................................................................88
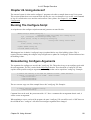
Running The Configure Script...............................................................................................................88
Remembering Configure Arguments.....................................................................................................88
Variants And Configure.........................................................................................................................89
Running Autoconf..................................................................................................................................89
Using A Distributed Configure Script...................................................................................................89
Skipping Configuration..........................................................................................................................89
A Complete Example.............................................................................................................................90
Chapter 25. Automatic Package Install..................................................................................................91
How Does It Work?...............................................................................................................................91
Adding Support For a Package..............................................................................................................92
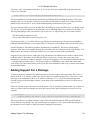
Installing on MS−Windows...................................................................................................................93
iii
A−A−P Recipe Executive
Table of Contents
User Manual
Building and Installing on Unix.............................................................................................................93
Installing a Specific Package.................................................................................................................95
Cleaning Up...........................................................................................................................................95
Chapter 26. Debugging a Recipe...........................................................................................................95
Messages................................................................................................................................................96
Chapter 27. Differences from make.......................................................................................................96
Build if file does not exist......................................................................................................................97
Use Of Environment Variables..............................................................................................................97
Signatures Instead Of Timestamps........................................................................................................97
Chapter 28. Customizing Filetype Detection and Actions.....................................................................98
Filetype Detection..................................................................................................................................98
Executing Actions................................................................................................................................100
Default Actions....................................................................................................................................101
Specifying Actions...............................................................................................................................102
Specifying Actions in Python..............................................................................................................105
Chapter 29. Customizing Automatic Depedencies..............................................................................105
Custom Dependency Checking............................................................................................................106
Missing Include Files...........................................................................................................................106
Chapter 30. Customizing Default Tools..............................................................................................107
Building in a different way..................................................................................................................107
Adding A New Tool.............................................................................................................................108
Using A Specific Tool.........................................................................................................................108
Chapter 31. Adding A Language Module............................................................................................109
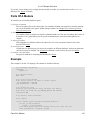
Module Name.......................................................................................................................................109
Module directories...............................................................................................................................109
Parts Of A Module...............................................................................................................................110
Example...............................................................................................................................................110
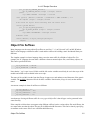
Object File Suffixes.............................................................................................................................111
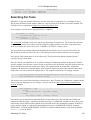
Searching For Tools.............................................................................................................................112
Actions, Rules and Routes...................................................................................................................113
Reference Manual...........................................................................................................................................115
Chapter 32. Aap Command Line Arguments......................................................................................115
Three Kinds Of Arguments..................................................................................................................115
Options.................................................................................................................................................115
Chapter 33. Recipe Syntax...................................................................................................................118
Chapter 34. Variables and Scopes.......................................................................................................121
Using Variables....................................................................................................................................121
RC−style expansion.............................................................................................................................122
Variable Indexing.................................................................................................................................123
Using Scopes........................................................................................................................................123
Predefined Scopes................................................................................................................................123
User Scopes..........................................................................................................................................125
Variables In Build Commands.............................................................................................................126
Chapter 35. Common Variables...........................................................................................................127
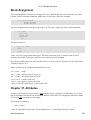
Chapter 36. Assignments.....................................................................................................................134
Assignment..........................................................................................................................................134
iv
A−A−P Recipe Executive
Table of Contents
Reference Manual
Block Assignment................................................................................................................................136
Chapter 37. Attributes..........................................................................................................................136
Sticky Attributes..................................................................................................................................138
The check attribute...............................................................................................................................138
Handling Circular Dependencies.........................................................................................................139
Chapter 38. Filetype Detection............................................................................................................140
The Program.........................................................................................................................................140
Detection..............................................................................................................................................141
The Python Module.............................................................................................................................141
Format Of Filetype Detection Rules....................................................................................................141
Chapter 39. Standard Modules.............................................................................................................143
Chapter 40. Standard Tools..................................................................................................................145
Chapter 41. A−A−P Python functions.................................................................................................145
Python functions grouped by functionality..........................................................................................146
Alphabetical list of Python functions...................................................................................................147
Chapter 42. A−A−P Commands..........................................................................................................155
Commands grouped by functionality...................................................................................................155
Alphabetical list of Commands............................................................................................................157
Common arguments for Commands....................................................................................................181
URLs....................................................................................................................................................182
Appendixes.......................................................................................................................................................184
Appendix A. License...........................................................................................................................184
v
A−A−P Recipe Executive
Bram Moolenaar
For Aap version 1.071
Copyright © 2002−2003 Stichting NLnet Labs
The license for copying, using, modifying, distributing, etc this documentation and the A−A−P files can be
found in Appendix A, License.
2004 Oct 02 19:08:59 GMT
Abstract
This is the documentation for version 1.071 of the Recipe Executive, commonly known as the "aap"
command. It is part of the A−A−P project.
The web site of A−A−P can be found here: http://www.a−a−p.org/
The HTML version of this manual can be read on−line: http://www.a−a−p.org/exec/index.html As a single
file: http://www.a−a−p.org/exec/exec.html.
The PDF version of this manual can be found here: http://www.a−a−p.org/exec/exec.pdf
The plain text version of this manual: http://www.a−a−p.org/exec/exec.txt.
Table of Contents
I. Tutorial
1. Getting Started
2. Compiling a Program
3. Publishing a Web Site
4. Distributing a Program
5. Building Variants
6. Using Python
7. Version Control with CVS
8. Filetypes and Actions
9. More Than One Recipe
10. Commands in a Pipe
11. A Ported Application
II. User Manual
12. How it all works
13. Dependencies, Rules and Actions
14. Variants
15. Publishing
16. Fetching
17. Installing
18. Version Control
A−A−P Recipe Executive
1
A−A−P Recipe Executive
19. Using CVS
20. Issue Tracking
21. Using Python
22. Porting an Application
23. Automatic Configuration
24. Using Autoconf
25. Automatic Package Install
26. Debugging a Recipe
27. Differences from make
28. Customizing Filetype Detection and Actions
29. Customizing Automatic Depedencies
30. Customizing Default Tools
31. Adding A Language Module
III. Reference Manual
32. Aap Command Line Arguments
33. Recipe Syntax
34. Variables and Scopes
35. Common Variables
36. Assignments
37. Attributes
38. Filetype Detection
39. Standard Modules
40. Standard Tools
41. A−A−P Python functions
42. A−A−P Commands
IV. Appendixes
A. License
List of Tables
2.1. items in a dependency
12.1. Special characters in the ":print" command
17.1. Install targets
17.2. Settings for the install target
33.1. Notation
35.1. Naming scheme for variables
35.2. Standard Variables
37.1. Virtual Targets
37.2. Sticky attributes
37.3. supported check attribute values
39.1. Variables of the D module
A−A−P Recipe Executive
2
Tutorial
Table of Contents
1. Getting Started
2. Compiling a Program
3. Publishing a Web Site
4. Distributing a Program
5. Building Variants
6. Using Python
7. Version Control with CVS
8. Filetypes and Actions
9. More Than One Recipe
10. Commands in a Pipe
11. A Ported Application
Chapter 1. Getting Started
Aap is a program that builds (compiles and links) other programs, much like the venerable make(1) program.
However, Aap uses the power of Python to make the "recipes" (instructions on how to build a program) more
readable and more flexible. Aap can also replace the age−old autotools and make toolchain.
Aap does not trade power for complexity. For many programs, you need only list the name of the program, the
sources and libraries it needs, and Aap does the rest. A powerful module system makes adding new
programming languages to Aap's repertoire fairly straightforward.
Aap supports C, C++, D, Qt's moc, KDE's dcopidl, and libtool.
Installation
To start using Aap you must have two applications:
• Python version 1.5 or later
• Aap
Python is often installed already. Try this:
python −V
If you get a "Command not found" error you still need to install Python. Help for this can be found on the
Python web site: www.python.org/download/.
For obtaining and installing Aap look here: www.a−a−p.org/download.html.
A summary for the impatient:
• Create a directory called "aap/Exec".
• Download the latest Aap zip archive and unpack it in the new directory.
• Run "./aap install" or "aap install".
Tutorial
3
A−A−P Recipe Executive
To check if your Aap program is working, type this command:
aap −−help
You should get a list of the command line arguments. Note that there are two dashes before "help". You can
read details about the command line arguments in Chapter 32, Aap Command Line Arguments.
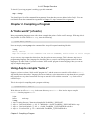
Chapter 2. Compiling a Program
A "Hello world" (of sorts)
Most programming languages start with a short example that prints a "hello world" message. With Aap, this is
also possible. In a file called main.aap, enter the following:
:print Hello, World!
Now run Aap by entering aap at the command line. Aap will respond something like this:
% aap
Hello, World!
Aap: No target on the command line and no $TARGET, build rules or "all" target
As you can see, Aap outputs the desired text, but also prints an error message. This is because Aap is not a
programming language, but a language for describing how to compile and build programs (written in other
languages). In other words, if you have written a "hello world" program in some language, then you can use
Aap to compile that program.
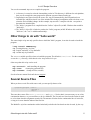
Using Aap to compile "hello.c"
Suppose you have written a "hello world" program in C, and the sources are stored in a file called hello.c.
Aap already knows about the C language (and several others), so the instructions to Aap about how to compile
this program are very short. Instructions for Aap are stored in a file with the extension .aap. Such a file is
called a recipe.
This is the recipe for compiling such a program with Aap:
:program hello : hello.c
Write this text in a file main.aap, in the same directory as hello.c. Now invoke Aap to compile
hello.c into the program hello:
1
2
3
4
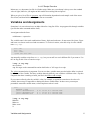
% ls
hello.c
main.aap
% aap
Aap: Creating directory "/home/mool/tmp/build−FreeBSD4_5_RELEASE"
Aap: cc −I/usr/local/include −g −O2 −E −MM hello.c > build−FreeBSD4_5_RELEASE/hello.c.aap
Aap: cc −I/usr/local/include −g −O2 −c −o build−FreeBSD4_5_RELEASE/hello.o hello.c
Aap: cc −L/usr/local/lib −g −O2 −o hello build−FreeBSD4_5_RELEASE/hello.o
Chapter 2. Compiling a Program
4
A−A−P Recipe Executive
You see the commands Aap uses to compile the program:
1. A directory is created to write the intermediate results in. This directory is different for each platform,
thus you can compile the same program for different systems without cleaning up.
2. Dependencies are figured out for the source file. Aap will automatically detect dependencies on
included files and knows that if one of the included files changed compilation needs to be done, even
when the file itself didn't change. In this example, Aap uses the C compiler with the −MM option to
determine the included files.
3. The "hello.c" program file is compiled into the "hello.o" object file (on MS−Windows that would be
"hello.obj").
4. The "hello.o" object file is linked to produce the "hello" program (on MS−Windows this would be
"hello.exe", the ".exe" is added automatically).
Other things to do with "hello world"
The same simple recipe not only specifies how to build the "hello" program, it can also be used to install the
program:
% aap install PREFIX=try
Aap: Creating directory "try/bin/"
Aap: Copied "test/hello" to "try/bin/hello"
Aap: /usr/bin/strip 'try/bin/hello'
The PREFIX variable specifies where to install the program. The default is /usr/local. For the example
we use the try directory, which doesn't exist. Aap creates it for you.
Other ways that this recipe can be used:
aap uninstall undo installing the program
aap clean
cleanup the generated files
aap cleanALL cleanup all files (careful!)
See the reference manual for details about :program.
Several Source Files
When you have several files with source code you can specify them as a list:
:program myprogram : main.c
version.c
help.c
There are three source files: main.c, version.c and help.c. Notice that it is not necessary to use a line
continuation character, as you would have to do in a Makefile. The list ends at a line where the indent is equal
to or less than what the assignment started with. The amount of indent for the continuation lines is irrelevant,
so long as it's more than the indent of the first line.
The Makefile−style line continuation with a backslash just before the line break can also be used, by the way.
Other things to do with "hello world"
5
A−A−P Recipe Executive
Indents are very important, just like in a Python script. Make sure your tabstop is always set to the standard
value of eight, otherwise you might run into trouble when mixing tabs and spaces!
When you give a list of files to :program, Aap will determine dependencies and compile each of the source
files in turn, and then link them all together into an executable.
Variables and Assignments
Sometimes it is convenient to have an abbreviation for a long list of files. Aap supports this through variables
(just like the make command and the shell).
An assignment has the form:
variablename = expression
The variable name is the usual combination of letters, digits and underscore. It must start with a letter. Upper
and lower case letters can be used and case matters. To see this in action, write this recipe in a file with the
name try.aap:
foo = one
Foo = two
FOO = three
:print $foo $Foo $FOO
Aap normally reads the recipe from main.aap, but you can tell it to read a different file if you want to. Use
the −f flag for this. Now execute the recipe:
% aap −f try.aap
one two three
Aap: No target on the command line and no build rules or "all" target in a recipe
The :print command prints its argument. You can see that a variable name preceded with a dollar is replaced
by the value of the variable. The three variables that only differ by case each have a different value. Aap also
complains that there is nothing to build, just like in the hello world example.
If you want text directly after the variable's value, for example, to append an extension to the value of a
variable, the text may be impossible to distinguish from a variable name. In these cases you must put
parenthesis around the variable name, so that Aap knows where it ends:
all:
MakeName = Make
:print $(MakeName)file
:print $(MakeName).txt
:print $MakeName−more
# 'f' can be in a variable name
# '.' can be in a variable name
# '−' is not in a variable name
% aap −f try.aap
Makefile
Make.txt
Make−more
%
Variables and Assignments
6
A−A−P Recipe Executive
All Aap commands, except the assignment, start with a colon. That makes them easy to recognize.
Some characters in the expression have a special meaning. The :print command also handles a few arguments
in a special way. To avoid the special meaning use the $(x) form, where "x" is the special character. For
example, to print a literal dollar use $($). See the user manual for a complete list.
Comments
Someone who sees this recipe would like to know what it's for. This requires adding comments. These start
with a "#" character and extend until the end of the line (like in a Makefile and Python script).
It is also possible to associate a comment with a specific item:
# A−A−P recipe for compiling "myprogram"
:program myprogram { comment = MyProgram is really great } :
main.c
# startup stuff
version.c
# just the date stamp
help.c
# display a help message
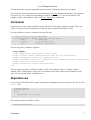
Now run Aap with a "comment" argument:
% aap comment
target "myprogram": MyProgram is really great
target "clean": delete generated files that are not distributed
target "cleanmore": delete all generated files
target "cleanALL": delete all generated files, AAPDIR and build−* directories
target "install": install files
target "uninstall": delete installed files
%
The text inside curly braces is called an attribute. In this case the attribute name is "comment" and the
attribute value is "MyProgram is really great". An attribute can be used to attach extra information to a file
name. We will encounter more attributes later on.
Dependencies
Let's go back to the "Hello world" example and find out what happens when you change a source file. Use this
hello.c file:
#include <stdio.h>
#include "hello.h"
main()
{
printf("Hello %s\n", world);
}
The included "hello.h" file defines "world":
#define world "World!"
Comments
7
A−A−P Recipe Executive
If you run Aap, the "hello" program will be built as before. If you run Aap again you will notice that nothing
happens. Aap remembers that "hello.c" was already compiled. Now try this:
% touch hello.c
% aap
%
If you have been using the "make" program you would expect something to happen. But Aap checks the
contents of the file, not the timestamp. A signature of "hello.c" is computed and if it is still the same as before
Aap knows that it does not need to be compiled, even though "hello.c" is newer than the "hello" program.
Aap uses the mechanism of dependencies. When you use the :program command Aap knows that the target
depends on the sources. When one of the sources changes, the commands to build the target from the sources
must be executed. This can also be specified explicitly:
hello$EXESUF : $BDIR/hello$OBJSUF
:do build $source
$BDIR/hello$OBJSUF : hello.c
:do compile $source
The generic form of a dependency is:
target : list−of−sources
build−commands
The colon after the target is important, it separates the target from the sources. It is not required to put a space
before it, but there must be a space after it. We mostly put white space before the colon, so that it is easy to
spot. There could be several targets, but that is unusual.
There are two dependencies in the example. In the first one the target is "hello$EXESUF", the source file is
"$BDIR/hello$OBJSUF" and the build command is ":do build $source". This specifies how to build the
"hello$EXESUF" program from the "$BDIR/hello$OBJSUF" object file. The second dependency specifies
how to compile "hello.c" into "$BDIR/hello$OBJSUF" with the command ":do compile $source". The
"BDIR" variable holds the name of the platform−dependent directory for intermediate results, as mentioned in
the first example of this chapter. In case you need it, the $EXESUF variable Aap is empty on Unix and ".exe"
on MS−Windows.
The relation between the two dependencies in the example is that the source of the first one is the target in the
second one. The logic is that Aap follows the dependencies and executes the associated build commands. In
this case "hello$EXESUF" depends on "$BDIR/hello$OBJSUF", which then depends on "hello.c". The last
dependency is handled first, thus first hello.c is compiled by the build command of the second dependency,
and then linked into "hello$EXESUF" by the build command of the first dependency.
Now change the "hello.h" file by replacing "World" with 'Universe":
#define world "Universe!"
If you now run Aap with "aap hello" or "aap hello.exe" the "hello" program will be built. But you never
mentioned the "hello.h" file in the recipe. How did Aap find out the change in this file matters? When Aap is
run to update the "hello" program, this is what will happen:
Comments
8
A−A−P Recipe Executive
1. The first dependency with "hello$EXESUF" as the target is found, it depends on
"$BDIR/hello$OBJSUF".
2. The second dependency with "$BDIR/hello$OBJSUF" as the target is found. The source file "hello.c"
is recognized as a C program file. It is inspected for included files. This finds the "hello.h" file.
"stdio.h" is ignored, since it is a system file. "hello.h" is added to the list of files that the target
depends on.
3. Each file that the target depends on is updated. In this case "hello.c" and "hello.h". No dependency
has been specified for them and the files exist, thus nothing happens.
4. Aap computes signatures for "hello.c" and "hello.h". It also computes a signature for the build
commands. If one of them changed since the last time the target was built, or the target was never
built before, the target is considered "outdated" and the build commands are executed.
5. The second dependency is now finished, "$BDIR/hello$OBJSUF" is up−to−date. Aap goes back to
the first dependency.
6. Aap computes a signature for "$BDIR/hello$OBJSUF". Note that this happens after the second
dependency was handled, it may have changed the file. It also computes a signature for the build
command. If one of them changed since the last time the target was built, or the target was never built
before, the target is considered "outdated" and the build commands are executed.
Now try this: Append a comment to one of the lines in the "hello.c" file. This means the file is changed, thus
when invoking Aap it will compile "hello.c". But the program is not built, because the produced intermediate
file "$BDIR/hello$OBJSUF" is still equal to what it was the last time. When compiling a large program with
many dependencies this mechanism avoids that adding a comment may cause a snowball effect. (Note: some
compilers include line numbers or a timestamp in the object file, in that case building the program will happen
anyway).
Compiling Multiple Programs
Suppose you have a number of sources files that are used to build two programs. You need to specify which
files are used for which program. Here is an example:
1.
2.
3.
4.
5.
6.
7.
Common = help.c util.c
all : foo bar
:program foo : $Common foo.c
:program bar : $Common bar.c
This recipe defines three targets: "all", "foo" and "bar". "foo" and "bar are programs that Aap can build from
source files. But the "all" target is not a file. This is called a virtual target: A name used for a target that does
not exist as a file. Let's list the terminology of the items in a dependency:
Table 2.1. items in a dependency
source
source file
virtual source
target
target file
item on the right hand side of a dependency
source that is a file
source that is NOT a file
on the left hand side of a dependency
target that is a file
Compiling Multiple Programs
9
A−A−P Recipe Executive
virtual target
node
file node
virtual node
target that is NOT a file
source or target
source or target that is a file
source or target that is NOT a file
Aap knows the target with the name "all" is always used as a virtual target. There are a few other names which
Aap knows are virtual, see Table 37.1. For other targets you need to specify it with the "{virtual}" attribute.
The first dependency has no build commands. This only specifies that "all" depends on "foo" and "bar". Thus
when Aap updates the "all" target, this dependency specifies that "foo" and "bar" need to be updated. Since
the "all" target is the default target, this dependency causes both "foo" and "bar" to be updated when Aap is
started without an argument. You can use "aap foo" to build "foo" only. The dependencies for "all" and "bar"
will not be used then.
The two files help.c and util.c are used by both the "foo" and the "bar" program. To avoid having to
type the file names twice, the "Common" variable is used.
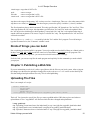
Kinds of things you can build
Not everything you want to build is a program. Your recipe might need too build a library or a libtool archive.
In these cases, :lib, :dll or :ltlib provide the same level of automation as :program does for programs. The
:produce command is more generic, you can use this to build various kinds of things.
If all else fails, you can use Aap like the make program and explicitly list the commands you need to build
your project.
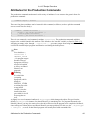
Chapter 3. Publishing a Web Site
If you are maintaining a web site it is often a good idea to edit the files on your local system. After trying out
the changes you then need to upload the changed files to the web server. A−A−P can be used to identify the
files that changed and upload these files only. This is called publishing.
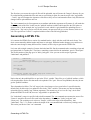
Uploading The Files
Here is an example of a recipe:
Files = index.html
project.html
links.html
images/logo.png
:attr {publish = scp://[email protected]/public_html/%file%} $Files
That's all. You just need to specify the files you want to publish and the URL that says how and where to
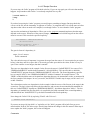
upload them to. Now "aap publish" will find out which files have changed and upload them:
% aap publish
Aap: Uploading ['/home/mool/www/foo/index.html'] to scp://[email protected]/public_html/index.html
Aap: scp '/home/mool/www/vim/index.html' '[email protected]:public_html/index.html'
Aap: Uploaded "/home/mool/www/vim/index.html" to "scp://[email protected]/public_html/index.html"
Kinds of things you can build
10
A−A−P Recipe Executive
%
The first time you execute the recipe all files will be uploaded. Aap will create the "images" directory for you.
If you had already uploaded the files and want to avoid doing it again, first run the recipe with: "aap publish
−−touch". Aap will compute the signatures of the files as they are now and remember them. Only files that are
changed will be uploaded from now on.
The :attr command uses its first argument as an attribute and further arguments as file names. It will attach the
attribute to each of the files. In this case the "publish" attribute is added, which specifies the URL where to
upload a file to. In the example the "scp" protocol is used, which is a good method for uploading files to a
public server. "ftp" can be used as well, but this means your password will go over the internet, which is not
safe. The special item "%file%" is replaced with the name of the file being published.
Generating a HTML File
It is common for HTML files to consist of a standard header, a body with the useful info and a footer. You
don't want to manually add the header and footer to each page. When the header changes you would have to
make the same change in many different files. Instead, use the recipe to generate the HTML files.
Let's start with a simple example: Generate the index.html file. Put the common header, containing a logo and
navigation links, in "header.part". The footer, containing contact info for the maintainer, goes in "footer.part".
The useful contents of the page goes in "index_body.part". Now you can use this recipe to generate
"index.html" and publish it:
Files =
index.html
images/logo.png
:attr {publish = scp://[email protected]/public_html/%file%} $Files
all: $Files
publish: $Files
:publishall
index.html: header.part index_body.part footer.part
:cat $source >! $target
Notice that only the published files are put in the "Files" variable. These files get a "publish" attribute, which
tells Aap that these are the files that need to be uploaded. The ".part" files are not published, thus they do not
get the "publish" attribute.
Three dependencies follow. The "all" target is the virtual target we have seen before. It specifies that the
default work for this recipe is to update the files in the "Files" variable. This means you don't accidentally
upload the files by running "aap" without arguments. The normal way of use is to run "aap", check if the
produced HTML file looks OK, then use "aap publish" to upload the file.
For "index.html" a target is specified with a build command. The :cat command concatenates the source files.
"$source" stands for the source files used in the dependency: "header.part, "index_body.part" and
"footer.part". The resulting text is written to "$target", which is the target of the dependency, thus
"index.html". The ">!" is used to redirect the output of the :cat command and overwrite any existing result.
This works just like the Unix "cat" command.
Generating a HTML File
11
A−A−P Recipe Executive
In the dependency with the "publish" target the :publishall command is used. This command goes through all
the files which were given a "publish" attribute with the :attr command. Note that this does not work:
# This won't work.
Files = index.html {publish = scp://[email protected]/public_html/%file%}
Using a "publish" attribute in an assignment will not make it used with the :publishall command.
Using ":rule" to Generate Several HTML Files
Your web site contains several pages, thus you need to specify how to generate each HTML page. This
quickly becomes a lot of typing. We would rather specify once how to make a "xxx.html" file from a
"xxx_body.part" file, and then give the list of names to use for "xxx" (if you have assocations with the name
"xxx_body.part" that is your own imagination! :−). This is how it's done:
Files =
*.html
images/*.png
:attr {publish = scp://[email protected]/public_html/%file%} $Files
all: $Files
publish: $Files
:publishall
:rule %.html : header.part %_body.part footer.part
:cat $source >! $target
This is very similar to the example that only generates the "index.html" file. The first difference is in the value
of "Files": It contains wildcards. These wildcards are expanded when they are used where a file name is
expected. The expansion is not done in the assignment! More about that later. In the three places where $Files
is used the wildcard expansion results in a list of all "*.html" files in the current directory and all "*.png" files
in the "images" directory.
The second difference is that there is no specific dependency for the "index.html" file but a :rule command. It
looks very much the same, but the word "index" has been replaced by a percent character. You could read the
rule command as a dependency where the "%" stands for "anything". In the example the target is
"anything.html" and in the sources we find "anything_body.part". Obviously these two occurrences of
"anything" are the same word.
If you have made HTML pages, you know they contain a title. We ignored that until now. The following
recipe will handle a title, stored in the file "xxx_title.part". You also need a file "start.part", which contains the
HTML code that goes before the title.
Files =
*.html
images/*.png
:attr {publish = scp://[email protected]/public_html/%file%} $Files
all: $Files
publish: $Files
:publishall
:rule %.html : start.part %_title.part header.part %_body.part footer.part
:cat $source >! $target
Using ":rule" to Generate Several HTML Files
12
A−A−P Recipe Executive
Notice that "%" is now used three times in the :rule command. It stands for the same word every time.
After writing this recipe you can forget what changes you made to what file. A−A−P will take care of
generating and uploading those HTML files that are affected. For example, if you change "header.part", all the
HTML files are generated and uploaded. If you change "index_title.part" only "index.html" will be done.
There is one catch: You must create an (empty) xxx.html file the first time, otherwise it will not be found with
"*.html". And you have to be careful not to have other "xxx.html" files in this directory. You might want to
explicitly specify all the HTML files instead of using wildcards.
The same problem with wildcards happens for the image files. There is a solution for this: use the
get_html_images() function. You can find an example in the section called Publishing images for HTML
files.
A similar recipe is actually used to update the A−A−P website. It's a bit more complicated, because not all
pages use the same header.
Chapter 4. Distributing a Program
Open source software needs to be distributed. This chapter gives a simple example of how you can upload
your files and make it easy for others to download and install your program.
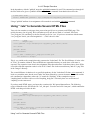
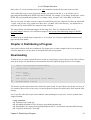
Downloading
To make it easy for others to obtain the latest version of your program, you give them a recipe. That is all they
need. In the recipe you describe how to download the files and compile the program. Here is an example:
1
2
3
4
5
6
7
8
9
10
11
Origin = ftp://ftp.mysite.org/pub/theprog
:recipe {fetch = $Origin/main.aap}
Source = main.c
version.c
Header = common.h
:attr {fetch = $Origin/%file%} $Source $Header
:program theprog : $Source
The first line specifies the location where all the files can be found. It is good idea to specify this only once. If
you would use the text all over the recipe it is more difficult to read and it would be more work when the URL
changes.
Line 3 specifies where this recipe can be obtained. After obtaining this recipe once, it can be updated with a
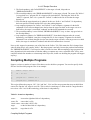
simple command:
% aap refresh
Aap: Updating recipe "main.aap"
Aap: Attempting download of "ftp://ftp.mysite.org/pub/theprog/main.aap"
Aap: Downloaded "ftp://ftp.mysite.org/pub/theprog/main.aap" to "/home/mool/.aap/cache/98092140.aap"
Aap: Copied file from cache: "main.aap"
Chapter 4. Distributing a Program
13
A−A−P Recipe Executive
%
The messages from Aap are a bit verbose. This is just in case the downloading is very slow, you will have
some idea of what is going on.
Lines 5 to 7 define the source files. This is not different from the examples that were used to compile a
program, except that we explicitly mention the header file used.
Line 9 specifies where the files can be fetched from. This is done by giving the source and header files the
fetch attribute. The :attr command does not cause the files to be fetched yet. When a file is used
somewhere and it has a fetch attribute, then it is fetched. Thus files that are not used will not be fetched.
A user of your program stores this recipe as main.aap and runs aap without arguments. What will happen
is:
1. Dependencies will be created by the :program command to build "theprog" from main.c and
version.c.
2. The target "theprog" depends on main.c and version.c. Since these files do not exist and they
do have a fetch attribute, they are fetched.
3. The main.c file is inspected for dependencies. It includes the common.h file, which is
automatically added to the list of dependencies. Since common.h does not exist and has a fetch
attribute, it is fetched as well.
4. Now that all the files are present they are compiled and linked into "theprog".
Uploading
You need to upload the files mentioned in the recipe above. This needs to be repeated each time one of the
files changes. This is essentially the same as publishing a web site. You will need to upload both the source
files and the recipe itself. The {publish} attribute can be used for this. You can add the following two lines to
the recipe above in order to upload all the files:
URL = scp://[email protected]//pub/theprog/%file%
:attr {publish = $URL} $Source $Header main.aap
Now you can use aap publish to upload your source files as well.
Chapter 5. Building Variants
A−A−P provides a way to build two variants of the same application. You just need to specify what is
different about them. A−A−P will then take care of putting the resulting files in a different directory, so that
you don't have to recompile everything when you toggle between two variants.
For the details see :variant in the reference manual.
One Choice
Quite often you want to compile an application for release with maximal optimizing. But the optimizer
confuses the debugger, thus when stepping through the program to locate a problem, you want to recompile
without optimizing. Here is an example:
Uploading
14
A−A−P Recipe Executive
1
2
3
4
5
6
7
8
9
10
11
Source = main.c version.c gui.c
:variant Build
release
OPTIMIZE = 4
Target = myprog
debug
DEBUG = yes
Target = myprogd
:program $Target : $Source
Write this recipe as "main.aap" and run Aap without arguments. This will build "myprog" and use a directory
for the object files that ends in "−release". The release variant is the first one mentioned, that makes it the
default choice.
The first argument for the :variant command is Build. This is the name of the variable that specifies
what variant will be selected. The names of the alternatives are specified with a bit more indent in lines 4 and
7. For each alternative two commands are given, again with more indent. Note that the indent not only makes
it easy for you to see the parts of the :variant command, they are essential for Aap to recognize them.
To select the "debug" variant the Build variable must be set to "debug". A convenient way to do this is by
specifying this on the command line:
% aap Build=debug
This will build the "myprogd" program for debugging instead of for release. The DEBUG variable is
recognized by Aap. The object files are stored in a directory ending in "−debug". Once you finished
debugging and fixed the problem in, for example, "gui.c", running Aap to build the release variant will only
compile the modified file. There is no need to compile all the C files, because the object files for the "release"
variant are still in the "−release" directory.
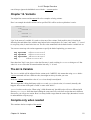
Two Choices
You can extend the Build variant with more items, for example "profile". This is useful for alternatives that
exclude each other. Another possibility is to add a second :variant command. Let us extend the example
with a selection of the user interface type.
1
2
3
4
5
6
7
8
9
10
11
12
13
14
15
16
17
Source = main.c version.c gui.c
:variant Build
release
OPTIMIZE = 4
Target = myprog
debug
DEBUG = yes
Target = myprogd
Gui ?= motif
:variant Gui
console
motif
Source += motif.c
gtk
Source += gtk.c
Two Choices
15
A−A−P Recipe Executive
18
19
20
21
DEFINE += −DGUI=$Gui
:program $Target : $Source
The :variant command in line 12 uses the Gui variable to select one of "console", "motif" or "gtk".
Together with the earlier :variant command this offers six alternatives: "release" with "console", "debug"
with "console", "release" with "motif", etc. To build "debug" with "gtk" use this command:
% aap Build=debug Gui=gtk
In line 11 an optional assignment "?=" is used. This assignment is skipped if the Gui variable already has a
value. Thus if Gui was given a value on the command line, as in the example above, it will keep this value.
Otherwise it will get the value "motif".
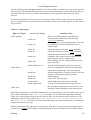
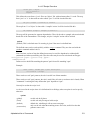
Environment variables
Environment variables
are not used for variables
in the recipe, like make
does. When you happen
to have a Gui
environment variable,
this will not influence
the variant in the recipe.
This is especially useful
if you are not aware of
what environment
variables are set and/or
which variables are used
in the recipe. If you
intentionally want to use
an environment variable
this can be specified with
a Python expression (see
the next chapter).
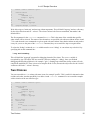
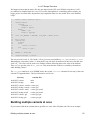
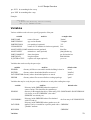
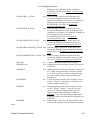
In line 15, 17 and 19 the append assignment "+=" is used. This appends the argument to an existing variable.
A space is inserted if the value was not empty. For the variant "motif" the result of line 15 is that Source
becomes "main.c version.c gui.c motif.c".
The "motif" and "gtk" variants each add a source file in line 15 and 17. For the console version no extra file is
needed. The object files for each combination of variants end up in a different directory. Ultimately you get
object files in each of the six directories ("SYS" stands for the platform being used):
directory
build−SYS−release−console
build−SYS−debug−console
build−SYS−release−motif
build−SYS−debug−motif
build−SYS−release−gtk
Two Choices
contains files
main, version, gui
main, version, gui
main, version, gui, motif
main, version, gui, motif
main, version, gui, gtk
16
A−A−P Recipe Executive
build−SYS−debug−gtk
main, version, gui, gtk
See the user manual for more examples of using variants.
Chapter 6. Using Python
In various places in the recipe Python commands and expressions can be used. Python is a powerful and
portable scripting language. In most recipes you will only use a few Python items. But where needed you can
do just about anything with it.
Expressions
(Almost) anywhere you have a value, such as a text string, you can use a Python expression instead. For
instance, you could use a Python expression to retrieve the value of an environment variable for use in a
recipe, or use an expression to compute some strange value.
Expressions are written between backticks (` `) and must be valid Python expressions. Some examples:
1
2
myhome = `os.environ.get("HOME")`
label = `"L"+str(17*22)`
The first example line shows how to retrieve an environment variable by using Python's built−in
os.environ module. The second shows how you can use Python to compute something within an Aap
recipe. It doesn't do anything useful, but it uses Python to compute the value L374, and then Aap assigns that
value to the variable label.
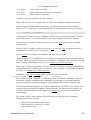
Note
Using
environment
variables is
probably not
portable.
Conditionals
When a recipe needs to work both on Unix and on MS−Windows you quickly run into the problem that the
compiler does not use the same arguments. Here is an example how you can handle that.
1
2
3
4
5
6
7
@if OSTYPE == "posix":
INCLUDE += −I/usr/local/include
@else:
INCLUDE += −Ic:/vc/include
all:
:print INCLUDE is "$INCLUDE"
The first and third line start with the "@" character. This means a Python command follows. The other lines
are normal recipe lines. You can see how these two kinds of lines can be mixed.
The first line is a simple "if" statement. The OSTYPE variable is compared with the string "posix". If they
compare equal, the next line is executed. When the OSTYPE variable has a different value the line below
Chapter 6. Using Python
17
A−A−P Recipe Executive
@else: is executed. Executing this recipe on Unix:
% aap
INCLUDE is "−I/usr/local/include"
%
OSTYPE has the value "posix" only on Unix and Unix−like systems. Executing the recipe on MS−Windows,
where OSTYPE has the value "mswin":
C:> aap
INCLUDE is "−Ic:/vc/include"
C:>
Note that the Python conditional commands end in a colon. Don't forget to add it, you will get an error
message! The indent is used to form blocks, thus you must take care to align the "@if" and "@else" lines.
You can include more lines in a block, without the need for extra characters, such as { } in C:
@if OSTYPE == "posix":
INCLUDE += −I/usr/local/include
LDFLAGS += −L/usr/local
@else:
INCLUDE += −Ic:/vc/include
LDFLAGS += −Lc:/vc/lib
Scope
In Aap commands a variable without a scope is searched for in other scopes. Unfortunately, this does not
happen for variables used in Python. To search other scopes you need to prepend "_no." before the variable
name. Changing the above example to print the result from Python:
@if OSTYPE == "posix":
INCLUDE += −I/usr/local/include
@else:
INCLUDE += −Ic:/vc/include
all:
@print 'INCLUDE is "%s"' % _no.INCLUDE
Loops
Python has a "for" loop that is very flexible. In a recipe it is often used to go over a list of items. Example:
1
2
3
4
5
6
@for name in [ "solaris", "hpux", "linux", "freebsd" ]:
fname = README_$name
@if os.path.exists(fname):
Files += $fname
all:
:print $?Files
The first line contains a list of strings. A Python list uses square brackets. The lines 2 to 4 are executed with
the name variable set to each value in the list, thus four times. The indent of line 5 is equal to the @for line,
Scope
18
A−A−P Recipe Executive
this indicates the "for" loop has ended.
Note how the name and fname variables are used without a dollar in the Python code. You only put a dollar
before a variable name in the argument of an Aap command. Not in Python code and not on the left hand side
of an assignment.
In line 2 the fname variable is set to "README_" plus the value of name. The os.path.exists()
function in line 3 tests if a file exists. Assuming all four files exist, this is the result of executing this recipe:
% aap
README_solaris README_hpux README_linux README_freebsd
%
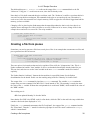
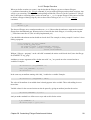
Python Block
When the number of Python lines gets longer, the "@" characters become annoying. It is easier to put the lines
in a block. Example:
:python
Files = ''
for name in [ "solaris", "hpux", "linux", "freebsd" ]:
fname = "README_" + name
if os.path.exists(fname):
if Files:
Files = Files + ' '
Files = Files + fname
all:
:print $Files
This does the same thing as the above recipe, but now using Python commands. As usual, the :python
block ends where the indent is equal to or less than that of the :python line.
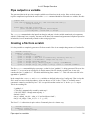
When using the :python command, make sure you get the assignments right. Up to the "=" character the
Python assignment is the same as the recipe assignment, but what comes after it is different.
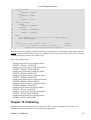
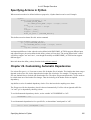
Expressions for Files
In many places a Python expression can be used. For example, the glob() function can be used to expand
wildcards:
Source = `glob("*.c")`
Python users know that the glob() function returns a list of items. Aap automatically converts the list to a
string, because all Aap variables are strings. A space is inserted in between the items and quotes are added
around items that contain a space.
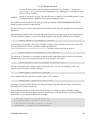
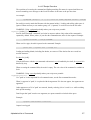
Using glob() is dangerous
It is actually a bit dangerous
to get the list of source files
with the glob() function,
because a "test.c" file that
Python Block
19
A−A−P Recipe Executive
you temporarily used will
accidentally be included. It
is often better to list the
source files explicitly.
Why use glob() when you can use wildcards directly? The difference is that the expansion with glob()
takes place immediately, thus $Source will get the expanded value. When using wildcards directly the
expansion is done when using the variable, but that depends on where it is used. For example, the :print
command does not do wildcard expansion:
pattern = *.c
expanded = `glob(pattern)`
all:
:print pattern $pattern expands into $expanded
When "foo.c" and "bar.c" exist, the output will be:
% aap
pattern *.c expands into foo.c bar.c
%
The following example turns the list of source files into a list of header files:
Source = `glob("*.c")`
Header = `sufreplace(".c", ".h", Source)`
all:
:print Source is "$Source"
:print Header is "$Header"
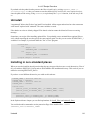
Running Aap in a directory with "main.c" and "version.c"?
% aap
Source is "version.c main.c"
Header is "version.h main.h"
%
The sufreplace() function takes three arguments. The first argument is the suffix which is to be replaced. The
middle argument is the replacement suffix. The last argument is the name of a variable that is a list of names,
or a Python expression. In this example each name in Source ending in ".c" will be changed to end in ".h".
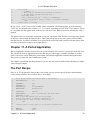
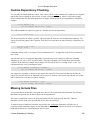
Further Reading
The User manual Chapter 21, Using Python has more information. Documentation about Python can be found
on its web site: http://www.python.org/doc/
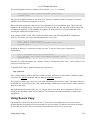
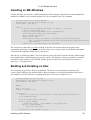
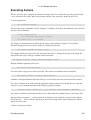
Chapter 7. Version Control with CVS
CVS is often used for development of Open Source Software. A−A−P provides facilities to obtain the latest
version of an application and for checking in changes you made.
Further Reading
20
A−A−P Recipe Executive
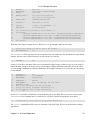
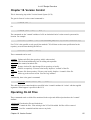
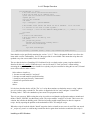
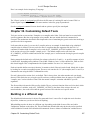
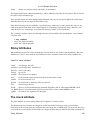
Downloading (Checkout)
For downloading a whole module you only need to specify the location of the CVS server and the name of the
module. Here is an example that obtains the A−A−P Recipe Executive:
CVSROOT = :pserver:[email protected]−a−p.sf.net:/cvsroot/a−a−p
all:
:fetch {fetch = cvs://$CVSROOT} Exec
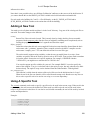
Write this recipe as "main.aap" and run aap. The directory "Exec" will be created and all files in the module
obtained from the CVS server:
% aap
Aap: CVS checkout for node "Exec"
Aap: cvs −d:pserver:[email protected]−a−p.sf.net:/cvsroot/a−a−p checkout 'Exec'
cvs server: Updating Exec
U Exec/Action.py
U Exec/Args.py
[....]
%
If there is a request for a password just hit enter (mostly there is no password).
The :fetch command takes care of obtaining the latest version of the items mentioned as arguments.
Usually the argument is one module, in this example it is "Exec". That CVS needs to be used is specified with
the fetch attribute. This is a kind of URL, starting with "cvs://" and then the CVS root specification. In the
example the CVSROOT variable was used. This is not required, it just makes the recipe easier to understand.
If the software has been updated, you can get the latest version by running "aap" again. CVS will take care of
obtaining the changed files.
Note that all this only works when you have the "cvs" command installed. When it cannot be found Aap will
ask you want Aap to install it for you. Whether this works depends on your system.
Getting Past A Firewall
Firewalls may block the use of a CVS connection. Some servers have setup another way to connect, so that
firewalls will not cause problems. This uses port 80, normally used for http connections. Here is the above
example using a different "pserver" address:
CVSROOT = :pserver:anonymous@cvs−pserver.sf.net:80/cvsroot/a−a−p
all:
:fetch {fetch = cvs://$CVSROOT} Exec
This doesn't always work through a proxy though. If you have problems connecting to the CVS server, try
reading the information at this link.
Downloading (Checkout)
21
A−A−P Recipe Executive
Uploading (Checkin)
You are the maintainer of a project and want to distribute your latest changes, so that others can obtain the
software with a recipe as used above. This means you need to checkin your files to the CVS server. This is
done by listing the files that need to be distributed and giving them a commit attribute. Example:
CVSUSER_FOO = johndoe
CVSROOT = :ext:[email protected]:/cvsroot/foo
Files = main.c
common.h
version.c
:attr {commit = cvs://$CVSROOT} $Files
Write this as "cvs.aap" and run aap −f cvs.aap revise . What will happen is:
1. Files that you changed since the last checkin will be checked in to the CVS server.
2. Files that you added to the list of files with a commit attribute will be added to the CVS module.
3. Files that you removed from the list of files with a commit attribute will be removed from the CVS
module.
This means that you must take care the Files variable lists exactly those files you want to appear in the CVS
module, nothing more and nothing less. Be careful with using something like *.c, it might find more files
that you intended.
Note: This only works when the CVS module was already setup. Read the CVS documentation on how to do
this. The A−A−P user manual has useful hints as well.
In the example the CVSUSER_FOO variable is explicitly set, thus this recipe only works for one user. Better is
to move this line to your own default recipe, e.g., "~/.aap/startup/default.aap". Then the above recipe does not
explicitly contain your user name and can also be used by others.
Once you tested this recipe and it works, you can easily distribute your software with aap −f cvs.aap
revise. You don't have to worry about the exact CVS commands to be used. However, don't use this when
you want to checkin only some of the changes you made. And the example does not work well when others
are also changing the same module.
Further Reading
The User manual Chapter 18, Version Control has more information about version control and Chapter 19,
Using CVS about using CVS.
Chapter 8. Filetypes and Actions
A−A−P can recognize what the type of a file is, either by looking at the file name or by inspecting the
contents of the file. The filetype can then be used to decide how to perform an action with the file.
A New Type of File
Suppose you are using the "foo" programming language and want to use A−A−P to compile your programs.
Uploading (Checkin)
22
A−A−P Recipe Executive
Once this is has been setup you can compile "hello.foo" into the "hello" program with a simple recipe:
:program hello : hello.foo
You need to explain Aap how to deal with "foo" files. This is done with a recipe:
:filetype
suffix foo foo
:action compile foo
:sys foocomp $?FOOFLAGS $source −o $target
:route foo object
compile
For Unix, write this recipe as "/usr/local/share/aap/startup/foo.aap" or "~/.aap/startup/foo.aap". The recipes in
these "startup" directories are always read when Aap starts up.
Now try it out, using the simple recipe at the top as "main.aap":
% aap
Aap: foocomp hello.foo −o build−FreeBSD4_5_RELEASE/hello.o
Aap: cc −L/usr/local/lib −g −O2 −o hello build−FreeBSD4_5_RELEASE/hello.o
%
The "foo.aap" recipe does three things:
1. The :filetype command is used to tell A−A−P to recognize your "hello.foo" file as being a "foo"
file.
2. The :action command is used to specify how the "foocomp" compiler is used to compile a "foo"
program into an object file. The user can set the FOOFLAGS variable to options he wants to use. The
convention is that the option variable is in uppercase, starts with the filetype and ends in "FLAGS".
3. The :route command is used to specify which actions are to be used to turn a "foo" file into an
"object" file.
Defining a Filetype by Suffix
The :filetype command is followed by the line "suffix foo foo". The first word "suffix" means that
recognizing is done by the suffix of the file name (the suffix is what comes after the last dot in the name). The
second word is the suffix and the third word is the type. Quite often the type is equal to the suffix, but not
always. Here are a few more examples of lines used with :filetype:
:filetype
suffix fooh foo
suffix bash sh
It is also possible to recognize a file by matching the name with a pattern, checking the contents of the file or
using a Python script. See the user manual.
Defining a Filetype by Suffix
23
A−A−P Recipe Executive
Defining a Compile Action
The lower half of "foo.aap" specifies the compile action for the "foo" filetype:
:action compile foo
:sys foocomp $source −o $target
The :action command has two arguments. The first one specifies the kind of action that is being defined.
In this case "compile". This action is used to make an object file from a source file. The second argument
specifies the type of source file this action is used for, in this case "foo".
Below the :action line the build commands are specified. In this case just one, there could be more. The
:sys command invokes an exteral program, "foocomp", and passes the arguments. In an action $source is
expanded to the source of the action and $target to the target. These are obtained from the :do command
that invokes the action. Example:
:do compile {target = `src2obj("main.foo")`} main.foo
This :do command invokes the compile action, specified with its first argument. The target is specified as an
attribute to the action, the source is the following argument "main.foo". When executing the :do command
the filetype of "main.foo" is detected to be "foo", resulting in the compile action for "foo" to be invoked. In
the build command of the action $source and $target are replaced, resulting in:
:sys foocomp main.foo −o `src2obj("main.foo")`
Note that in many cases $target is passed implicitly from a dependency and does not appear in the :do
command argument.
Another Use of Filetypes
When building a program you often want to include the date and time when it was built. A simple way of
doing this is creating a source file "version.c" that contains the timestamp. This file needs to be compiled
every time your program is built. Here is an example how this can be done:
1
2
3
4
5
6
7
8
:program prog : main.c work.c
:attr prog {filetype = myprog}
:action build myprog object
version_obj = `src2obj("version.c")`
:do compile {target = $version_obj} version.c
:do build {filetype = program} $source $version_obj
The target "prog" is explicitly given a different filetype in line 3. The default filetype for a program is
"program", here it is set to "myprog". This allows us to specify a different build action for "prog".
Write the recipe as "main.aap" (without the line numbers) and execute it with aap. The first time all the files
will be compiled and linked together. Executing aap again will do nothing. Thus the timestamp used in
"version.c" will not be updated if the files were not changed. If you now make a change in "main.c" and run
aap you will see that both "main.c" and "version.c" are compiled.
Defining a Compile Action
24
A−A−P Recipe Executive
The :action command in line 5 has three arguments. The first one "build" is the kind of action, like before.
The second argument "myprog" specifies the target filetype, the third one "object" the source filetype. Thus
the template is:
:action kind−of−action target−filetype source−filetype
This order may seem a bit strange. Remember that putting the target left of the source also happens in a
dependency and an assignment.
There are three commands for the build action, lines 6 to 8. The first one assigns the name of the object file
for "version.c" to version_obj. "version.c" was not included in the :program command at the top, it is
compiled here explicitly in line 7. This is what makes sure "version.c" is compiled each time "prog" is built.
The other source files will be compiled with the default rules for :command.
Finally the :do build command in line 8 invokes the build action to link all the object files together. Note
that the filetype for the build action is explicitly defined to "program". This is required for this :do command
to use the default action for a program target. Otherwise the action would invoke itself, since the filetype for
$target is "myprog".
For more information about customizing filetype detection and actions see Chapter 28, Customizing Filetype
Detection and Actions.
Chapter 9. More Than One Recipe
When you are working on a project that is split up in several directories it is convenient to use one recipe for
each directory. There are several ways to split up the work and use a recipe from another recipe.
Children
A large program can be split in several parts. This makes it easy for several persons to work in parallel. You
then need to allow the files in each part to be compiled separately and also want to build the complete
program. A convenient way to do this is putting files in separate directories and creating a recipe in each
directory. The recipe at the top level is called the parent. Here is an example that includes two recipes in
subdirectories, called the children:
1
2
3
4
:child core/main.aap
:child util/main.aap
# sets Core_obj
# sets Util_obj
:program theprog : core/$*Core_obj util/$*Util_obj
In the first two lines the child recipes are included. These specify how the source files in each directory are to
be compiled and assign the list of object files to Core_obj and Util_obj. This parent recipe then defines
how the object files are linked together to build the program "theprog".
In line 4 a special mechanism is used. Assume that Core_obj has the value "main.c version.c". Then
"core/$*Core_obj" will expand into "core/main.c core/version.c". Thus "core/" is prepended to each item in
Core_obj. This is called rc−style expansion. You can remember it by thinking of the "*" to multiply the
items.
Chapter 9. More Than One Recipe
25
A−A−P Recipe Executive
An important thing to notice is that the parent recipe does not need to know what files are present in the
subdirectories. Only the child recipes contain the list of files. Thus when a file is added, only one recipe needs
to be changed. The "core/main.aap" recipe contains the list of files in the "core" directory:
1
2
3
4
5
6
7
8
Source =
main.c
version.c
CPPFLAGS += −I../util
_top.Core_obj = `src2obj(Source)`
all: $_top.Core_obj
Variables in a child recipe are local to that recipe. The CPPFLAGS variable that is changed in line 4 will
remain unchanged in the parent recipe and other children. That is desired here, since finding header files in
"../util" is only needed for source files used in this recipe.
The Core_obj variable we do want to be available in the parent recipe. That is done by prepending the
"_top" scope name. The generic way to use a scope is:
{scopename} . {variablename}
Several scope names are defined, such as "_recipe" for the current recipe and "_top" for the toplevel recipe.
The full list of scope names can be found in the reference manual, chapter Chapter 34, Variables and
Scopes"Recipe Syntax and Semantics". When a variable is used without a scope name, it is looked up in the
local scope and surrounding scopes. Thus the variables from the parent recipe are also available in the child.
But when assigning to a variable without a scope, it is always set in the local scope only. To make the variable
appear in another scope you must give the scope name.
The value of Core_obj is set with a Python expression. The src2obj() function takes a list of source file
names and transforms them into object file names. This takes care of changing the files in Source to prepend
$BDIR and change the file suffix to $OBJSUF. It also takes care of using the "var_BDIR" attribute if it is
present.
In the last line is specified what happens when running aap without arguments in the "core" directory: The
object files are built. There is no specification for how this is done, thus the default rules will be used.
All the files in the child recipe are defined without mentioning the "core" directory. That is because all parent
and child recipes are executed with the current directory set to where the recipe is. Note the files in
Core_obj are passed to the parent recipe, which is in a different directory. That is why the parent recipe had
to prepend "core/" when using Core_obj. This is so that the child recipe doesn't need to know what its
directory name is, only the parent recipe contains this directory name.
Sharing Settings
Another mechanism to use a recipe is by including it. This is useful to put common variables and rules in a
recipe that is included by several other recipes. Example:
CPPFLAGS += −DFOOBAR
:rule %$OBJSUF : %.foo
:sys foocomp $source −o $target
Sharing Settings
26
A−A−P Recipe Executive
This recipe adds something to CPPFLAGS and defines a rule to turn a ".foo" file into an object file. Suppose
you want to include this recipe in all the recipes in your project. Write the above recipe as "common.aap" in
the top directory of the project. Then in "core/main.aap" and "util/main.aap" put this command at the top:
:include ../common.aap
The :include command works like the commands in the included recipe were typed instead of the
:include command. There is no change of directory, like with the :child command and the included
recipe uses the same scope.
In the toplevel recipe you need include "common.aap" as well. Suppose you include it in the first line of the
recipe, before the :child commands. The children also include "common.aap". The CPPFLAGS variable
would first be appended to in the toplevel recipe, then passed to the child and appended to again. That is not
what is supposed to happen.
To avoid this, add the {once} option to the :include command. This means that the recipe is only included
once and not a second time. The child recipes use:
:include {once} ../common.aap
And the parent uses:
1
2
3
4
5
6
7
8
:include {once} common.aap
:child core/main.aap
# sets Core_obj
:child util/main.aap
# sets Util_obj
all: theprog$EXESUF
theprog$EXESUF : core/$*Core_obj util/$*Util_obj
:do build $source
You might argue that another way would be to put the :include command at the top of the parent recipe, so
that the children don't have to include "common.aap". You could do this, but then it is no longer possible to
execute a child recipe by itself.
Note that using :include like this will always use the _top scope for the variables set in the included recipe.
Be careful that the _recipe scope isn't used in one of the child recipes.
Sharing Modules
Sometimes a group of settings is so generally useful that you want to use it in many different projects. A
typical example of such a group of settings is language support for a specific programming language. In order
to add support for a new language (say, D), you need to define actions, set variables, etc. It is tedious to use
:include, so Aap allows you to store such settings in a module.
A module is a recipe like any other, except it is stored in the main Aap directory (along with the system
default.aap). You can read a module with the :import command. This works very much like the
:include command, except:
1. The recipe is read from the main Aap directory.
2. Each module is imported only once.
Sharing Modules
27
A−A−P Recipe Executive
Aap includes modules for standard languages and build systems. It does not read these recipes by default
because they add additional overhead, even when you do not use the languages they specify. Therefore,
support for the D language, using libtool to build libraries, and KDE support (among others) is included in
modules that you can use when needed. A full list of modules can be found in Chapter 31, Adding A
Language Module.
Executing a Recipe
Besides :child and :include there is a third way to use another recipe: :execute. This command
executes a recipe. This works as if Aap was run as a separate program with this recipe, except that it is
possible to access variables in the recipe that has the :execute command. Here is an example:
:program prog : main.c common.c
test:
:execute test.aap test
:print $TestResult
This recipe uses the :program command as we have seen before. This takes care of building the "prog"
program. For testing a separate recipe is used, called "test.aap". The first argument of the :execute
command is the recipe name. Further arguments are handled like the arguments of the aap command. In this
case the target "test" is used.
The "test.aap" recipe sets the TestResult variable to a message that summarizes the test results. To get this
variable back to the recipe that executed "test.aap" the "_parent" scope is used:
@if all_done:
_parent.TestResult = All tests completed successfully.
@else:
_parent.TestResult = Some tests failed!
It would also be possible to use the :child command to reach the "test" target in it. The main difference is
that other targets in "test.aap" could interfere with targets in this recipe. For example, "test.aap" could define a
different "prog" target, to compile the program with specific test options. By using :execute we don't need
to worry about this. In general, the :child command is useful when splitting up a tree of dependencies in
parts, while :execute is useful for two tasks that have no common dependencies.
Fetching a Recipe
So far we assumed the included recipes were stored on the local system. It is also possible to obtain them from
elsewhere. The example with children above can be extended like this:
1
2
3
4
5
6
7
8
9
Origin = ftp://ftp.foo.org/recipes
:include {once} common.aap {fetch = $Origin/common.aap}
:child core/main.aap {fetch = $Origin/core.aap}
:child util/main.aap {fetch = $Origin/util.aap}
all: theprog$EXESUF
theprog$EXESUF : core/$*Core_obj util/$*Util_obj
:do build $source
Executing a Recipe
28
A−A−P Recipe Executive
The fetch attribute is used to specify the URL where the recipe can be obtained from. This works just like
fetching source files. Notice in the example that the file name in the URL can be different from the local file
name. When Aap reads this recipe and discovers that a child or included recipe does not exist, it will use the
fetch attribute to download it. The fetch attribute can also be used with the :execute command.
Once a recipe exists locally it will be used, even when the remote version has been updated. If you explicitly
want to get the latest version of the recipes used, run aap −R or aap fetch.
Chapter 10. Commands in a Pipe
A selection of commands can be connected together with a pipe. This means the output of one command is the
input for the next command. It is useful for filtering text from a variable or file and writing the result in a
variable or file.
Changing a timestamp
This example shows how you can change the timestamp in a file. It is done in−place.
all:
:print Setting date in foobar.txt.
:cat foobar.txt
| :eval re.sub('Last Change: .*\n', 'Last Change: ' + DATESTR + '\n', stdin)
>! foobar.txt
Lets see how this works:
% cat foobar.txt
This is example text for the A−A−P tutorial.
Last Change: 2002 Feb 29
The useful contents would start here.
% aap
Setting date in foobar.txt.
% cat foobar.txt
This is example text for the A−A−P tutorial.
Last Change: 2002 Oct 21
The useful contents would start here.
%
The last command in the example consists of three parts. First comes the :cat command. It reads the
"foobar.txt" file and passes it throught the pipe to the next command. "cat" is short for "concatenate". This is
one of the good−old Unix commands that actually does much more than the name suggests. In this example
nothing is concatenated. Below you will see examples where it does.
The second part of the example is the :eval command. This is used to read the text coming in through the
pipe and modify it with a Python expression. In this case the expression is a "re.sub()" function call. This
Python function takes three arguments: A pattern, a replacement string and the text to operate on. All
occurences of the pattern in the text are changed to the replacement string. The pattern "Last Change: .*\n"
matches a line with the date that was inserted previously. The replacement string contains DATESTR, which is
an Aap variable that contains today's date as a string, e.g., "2002 Oct 19". The text to operate on is stdin.
This is the variable that holds the text that is coming in through the pipe.
Chapter 10. Commands in a Pipe
29
A−A−P Recipe Executive
The third and last part >! foobar.txt redirects the output of the :eval command back to the file
"foobar.txt". Using just ">" would cause an error, since the file already exists.
Note that in a Unix shell command this pipe would not work: The "foobar.txt" would be overwritten before it
was read. In Aap this does not happen, the commands in the pipe are executed one by one. That makes it
easier to use, but it does mean the text is kept in memory. Don't use pipes for a file that is bigger than half the
memory you have available.
Changing a file in−place has the disadvantage that the normal dependencies don't work, since there is no
separate source and target file. Often it is better to use a file "foobar.txt.in" as source, change it like in the
example above and write it as a new file. The recipe would be:
foobar.txt: foobar.txt.in
:print Setting date in $target.
:cat $source
| :eval re.sub('Last Change: .*\n', 'Last Change: ' + DATESTR + '\n', stdin)
>! $target
Creating a file from pieces
Sometimes you need to generate a file from several pieces. Here is an example that concatenates two files and
puts a generated text line in between.
manual.html: body.html footer.html
@import time
:eval time.strftime("%A %d %B %Y", time.localtime(time.time()))
| :print $(lt)BR$(gt)Last updated: $stdin$BR
| :cat body.html − footer.html >! $target
There are quite a few items here that need to be explained. First of all, the "@import time" line. This is a
Python command to load the "time" module. So far we used modules that Aap has already loaded for you.
This one isn't, and since we use the "time" module in the next :eval command it needs to be loaded
explicitly.
The Python function "strftime()" formats the date and time in a specified format. See the Python
documentation for the details. In this case the resulting string looks like "Monday 21 October 2002".
The output of the :eval command is piped into a :print command. The variable stdin contains the
output of the previous command. Note that "$(lt)" is used instead of "$lt". The meaning is exactly the same:
the value of the lt variable. Without the extra parenthesis it would read "$ltBR", which would be the value of
the "ltBR" variable.
The resulting text is:
<BR>Last updated: Monday 21 October 2002\n
Note that the first "BR" is the HTML code for a line break, while the "$Br" at the end is the Aap variable that
contains a line break (here displayed as "\n").
Finally, the :cat command concatenates the file "body.html", the output of the :print command and the
file "footer.html". Thus the "−" stands for where the pipe input is used. The result is redirected to target,
which is "manual.html".
Creating a file from pieces
30
A−A−P Recipe Executive
Pipe output in a variable
The generated date in the previous example could be used elsewhere in the recipe. Since we don't want to
repeat a complicated expression the result of the :eval command should be redirected to a variable, like this:
@import time
:eval time.strftime("%A %d %B %Y", time.localtime(time.time()))
| :assign Datestamp
manual.html: body.html footer.html
:print $(lt)BR$(gt)Last updated: $Datestamp$Br
| :cat body.html − footer.html >! $target
The :assign command takes the input from the pipe and puts it in the variable mentioned as its argument,
which is "Datestamp" here. Actually, the same can be done with a normal assignment and a Python expression
in backticks, but we intentionally wanted to show using a pipe here.
Creating a file from scratch
It is also possible to completely generate a file from scratch. Here is an example that generates a C header file:
1
2
3
4
5
6
7
8
9
:include config.aap
pathdef.c: config.aap
:print Creating $target
:print >! $target /* pathdef.c */
:print >> $target /* This file is automatically created by main.aap */
:print >> $target /* DO NOT EDIT! Change main.aap only. */
:print >> $target $#include "vim.h"
:print >> $target char_u *default_vim_dir = (char_u *)"$VIMRCLOC";
:print >> $target char_u *all_cflags = (char_u *)"$CC −c −I$srcdir $CFLAGS";
The first :print command displays a message, so that it's clear "pathdef.c" is being generated. The next line
contains ">!" to overwrite an existing file. It doesn't matter if the file already existed or not, it now only
contains the line "/* pathdef.c */". The third and following lines contain ">>". This will cause each line to be
appended to "pathdef.c".
In the example the VIMRCLOC and srcdir variables are defined in the recipe "config.aap". That is why this
file is used as a source in the dependency. Also note the use of "$#" in line 7. Since "#" normally starts a
comment it cannot be used directly here. "$#" is a special item that results in a "#" in the :print output.
This is the resulting file:
/* pathdef.c */
/* This file is automatically created by main.aap */
/* DO NOT EDIT! Change main.aap only. */
#include "vim.h"
char_u *default_vim_dir = (char_u *)"/usr/local/share/vim61";
char_u *all_cflags = (char_u *)"cc −c −I. −g −O2";
The list of ">>" redirections is quite verbose. Fortunately there is a shorter way:
1
2
3
:include config.aap
pathdef.c: config.aap
:print Creating $target
Pipe output in a variable
31
A−A−P Recipe Executive
4
5
6
7
8
9
10
11
12
text << EOF
/* pathdef.c */
/* This file is automatically created by main.aap */
/* DO NOT EDIT! Change main.aap only. */
$#include "vim.h"
char_u *default_vim_dir = (char_u *)"$VIMRCLOC";
char_u *all_cflags = (char_u *)"$CC −c −I$srcdir $CFLAGS";
EOF
:print $text >! $target
In line 4 "text << EOF" is used. This is called a block assignment. The following lines, up to the matching
"EOF" line, are assigned to the variable text. You can use something else than "EOF" if you want to. It must
be a word that does not appear inside of the text as a line on its own. White space before and after the word is
ignored.
The indent of the text in the block assignment is removed. The indent of the first line is used, the same amount
of indent is removed from the following lines. Thus if the second line has two more spaces worth of indent
than the first line, it will have an indent of two spaces in the result. Half a tab is replace with four spaces when
necessary (a tab always counts for up to eight spaces).
Chapter 11. A Ported Application
When an application already exists but for your system it requires a few tweaks, a port recipe can do the work.
This can also be used for applications that work fine but you want to apply a number of patches or to add a
feature. The recipe can be distributed, so that others can install the application without knowing the details.
This works very much like the FreeBSD ports system.
This chapter is specifically for doing the port. If you are only interested in another kind of building you might
want to skip this chapter.
The Port Recipe
Since A−A−P is prepared for doing all the work, usually you only need to specify the relevant information,
such as where to find the files involved. Here is an example:
1
2
3
4
5
6
7
8
9
10
11
12
13
14
15
16
17
18
19
20
# A−A−P port recipe for Vim 6.1 plus a few patches.
RECIPEVERSION =
1.0
PORTNAME =
LASTPATCH =
PORTVERSION =
MAINTAINER =
vim
003
6.1.$LASTPATCH
[email protected]
CATEGORIES =
editors
PORTCOMMENT =
Vim − Vi IMproved, the text editor
PORTDESCR << EOF
This is the description for the Vim package.
A very nice editor, backwards compatible to Vi.
You can find all info on http://www.vim.org.
EOF
:recipe {fetch = http://www.a−a−p.org/ports/vim/main.aap}
WRKSRC =
BUILDCMD =
vim61
make
Chapter 11. A Ported Application
32
A−A−P Recipe Executive
21
22
23
24
25
26
27
28
29
30
31
32
33
34
35
36
37
38
39
40
TESTCMD =
INSTALLCMD =
PREFIX =
make test
make install DESTDIR=$PKGDIR
/usr/local
MASTER_SITES ?=
PATCH_SITES =
ftp://ftp.vim.org/pub/vim
ftp://ftp.us.vim.org/pub/vim
$*MASTER_SITES/patches
DISTFILES =
unix/vim−6.1.tar.bz2
version1 =
PATCHFILES =
`range(1, int(LASTPATCH) + 1)`
6.1.00$*version1
#>>> automatically inserted by "aap makesum" <<<
do−checksum:
:checksum $DISTDIR/vim−6.1.tar.bz2 {md5 = 7fd0f915adc7c0dab89772884268b030}
:checksum $PATCHDISTDIR/6.1.001 {md5 = 97bdbe371953b9d25f006f8b58b53532}
:checksum $PATCHDISTDIR/6.1.002 {md5 = f56455248658f019dcf3e2a56a470080}
:checksum $PATCHDISTDIR/6.1.003 {md5 = 0e000edba66562473a5f1e9b5b269bb8}
#>>> end <<<
Well, that is the longest example we have had so far. Let's go through it from top to bottom.
1
2
# A−A−P port recipe for Vim 6.1 plus a few patches.
RECIPEVERSION =
1.0
RECIPEVERSION tells Aap what version of Aap this recipe was written for. If in the future the recipe format
changes, this line causes Aap to interpret it as Aap version 1.0 would do.
4
PORTNAME =
vim
Setting PORTNAME to the name of the port is what actually triggers Aap to read this recipe as a port recipe. It
makes the other settings to be used to set up a whole range of targets and build commands. The result is that
you can do aap install to install the application, for example. Note that PORTNAME does not include the
version number.
5
6
7
8
9
10
11
12
13
14
15
LASTPATCH =
PORTVERSION =
MAINTAINER =
003
6.1.$LASTPATCH
[email protected]
CATEGORIES =
editors
PORTCOMMENT =
Vim − Vi IMproved, the text editor
PORTDESCR << EOF
This is the description for the Vim package.
A very nice editor, backwards compatible to Vi.
You can find all info on http://www.vim.org.
EOF
In lines 5 to 15 a number of informative items about the port are specified. These are used in various places.
LASTPATCH is not a standard item, it is used here to only have to define the patchlevel in one place.
17
:recipe {fetch = http://www.a−a−p.org/ports/vim/main.aap}
The :recipe command specifies where to obtain the recipe itself from. We have seen this before, nothing
special here.
Chapter 11. A Ported Application
33
A−A−P Recipe Executive
19
20
21
WRKSRC =
BUILDCMD =
TESTCMD =
vim61
make
make test
The assignments in lines 19 to 21 specify how building is to be done. WRKSRC is the directory below which
the source files are unpacked. The default is "$PORTNAME−$PORTVERSION". The archive used for Vim
uses "vim61" instead, thus this needs to be specified. The "CMD" variables set the commands to be used to
build the application. The default is to use Aap. Since Vim uses "make" this needs to be specified.
22
23
INSTALLCMD =
PREFIX =
make install DESTDIR=$PKGDIR
/usr/local
Installing a port is done by creating a binary package and installing that package. This makes it possible to
copy the package to another system and install it there without the need to compile from sources. Lines 22 and
23 specify how to do a "fake install" with Vim. This copies all the files that are to be installed to a specific
directory, so that it is easy to include them in the package. PREFIX specifies below which directory Vim
installs its files.
25
26
27
MASTER_SITES ?=
PATCH_SITES =
ftp://ftp.vim.org/pub/vim
ftp://ftp.us.vim.org/pub/vim
$*MASTER_SITES/patches
MASTER_SITES and PATCH_SITES specify the sites where the Vim files can be downloaded from. The
first is for the archives, the second for the patches. Note the use of "$*" in line 27, this causes "/patches" to be
appended to each item in MASTER_SITES instead of appending it once at the end of the whole list.
29
DISTFILES =
unix/vim−6.1.tar.bz2
DISTFILES is set to the name of the archive to download. This is appended to items in MASTER_SITES to
form the URL.
31
32
version1 =
PATCHFILES =
`range(1, int(LASTPATCH) + 1)`
6.1.00$*version1
Lines 32 and 33 specify the list of patch file names. The Python function "range()" is used, this returns a list
of numbers in the specified range (up to and excluding the upper number). Note the user of "int()" to turn the
patch number in LASTPATCH into an int type, all Aap variables are strings.
for three patch files this could also have been typed, but when the number of patches grows this mechanism is
easier. The example only works up to patch number 009. To make it work for numbers from 100 up to 999:
version1 =
version2 =
version3 =
PATCHFILES =
34
35
36
37
38
39
40
`range(1, 10)`
`range(10, 100)`
`range(100, int(LASTPATCH) + 1)`
6.1.00$*version1 6.1.0$*version2
6.1.$*version3
#>>> automatically inserted by "aap makesum" <<<
do−checksum:
:checksum $DISTDIR/vim−6.1.tar.bz2 {md5 = 7fd0f915adc7c0dab89772884268b030}
:checksum $PATCHDISTDIR/6.1.001 {md5 = 97bdbe371953b9d25f006f8b58b53532}
:checksum $PATCHDISTDIR/6.1.002 {md5 = f56455248658f019dcf3e2a56a470080}
:checksum $PATCHDISTDIR/6.1.003 {md5 = 0e000edba66562473a5f1e9b5b269bb8}
#>>> end <<<
Chapter 11. A Ported Application
34
A−A−P Recipe Executive
Finally the "do−checksum" target is defined. This part was not typed, but added to the recipe with aap
makesum. This is done by the port recipe maintainer, when he has verified that the files are correct. When a
user later uses the recipe Aap will check that the checksums match, so that problems with downloading or a
cracked distribution file are found and reported.
Using CVS
The port recipe specifies which source files and patches to download, thus it has to be adjusted for each
version. This is good for a stable release, but when you are releasing a new version every day it is a lot of
work. Another method is possible when the files are available from a CVS server. Adding these lines to the
recipe will do it:
CVSROOT ?=
CVSMODULES =
CVSTAG =
:pserver:[email protected]:/cvsroot/vim
vim
vim−6−1−$LASTPATCH
The first line specifies the cvsroot to use. This is specific for the cvs program. CVSMODULES is the name of
the module to checkout. Mostly it is just one name, but you can specify several. Specifying CVSTAG is
optional. If it is defined, like here, a specific version of the application is obtained. When it is omitted the
latest version is obtained.
Much more about the port recipe can be found in Chapter 22, Porting an Application.
Using CVS
35
User Manual
Table of Contents
12. How it all works
13. Dependencies, Rules and Actions
14. Variants
15. Publishing
16. Fetching
17. Installing
18. Version Control
19. Using CVS
20. Issue Tracking
21. Using Python
22. Porting an Application
23. Automatic Configuration
24. Using Autoconf
25. Automatic Package Install
26. Debugging a Recipe
27. Differences from make
28. Customizing Filetype Detection and Actions
29. Customizing Automatic Depedencies
30. Customizing Default Tools
31. Adding A Language Module
Chapter 12. How it all works
How Recipes Are Executed
Executing recipes is a two step process:
1. recipe processing
Read and parse the toplevel recipe, child recipes and included recipes. Commands at the recipe level
are executed. Build commands (commands for dependencies, rules, actions, etc.) are stored.
2. target building
Build each of the specified targets, following dependencies. Build commands are executed.
Generally, one can say that in the first step the specification for the building is read and stored. In the second
step the actual building is done.
In a simple recipe the first step is used to set variables and define dependencies. In the second step the
dependencies are followed and their commands are executed to build the specified target.
:print executed during the first step
target1 : source1 source2
:print executed during the second step
User Manual
36
A−A−P Recipe Executive
An exception is when Aap was started to execute a command directly. The recipe processing step will still be
done, but instead of building a target the specified command is executed. Example, using the recipe above:
% aap −c ':print $BDIR'
executed during the first step
build−FreeBSD4_5_RELEASE
%
Common Recipe Structure
A recipe used for building an application often has these parts:
1. global settings, include recipes with project and/or user settings
2. automatic configuration
3. specify variants (e.g., debug/release)
4. build rules and actions
5. explicit dependencies
6. high level build commands ( :program, :dll, etc.)
You are free to use this structure or something else, of course. This is an explanation that you can use as a
base. Many times you will be able to use this structure as a starting point and make small modifications where
it is needed.
Now let us look into each part in more detail.
1. global settings, include recipes with project and/or user settings
When the recipe is part of a project, it's often useful to move settings (and rules) that apply to the
whole project to one file. Then use the :include command in every recipe that can be used to build
something.
User preferences (e.g. configuration choices) should be in a separate file that the user edits (using a
template).
2. automatic configuration
Find out properties of the system and handle user preferences. This may result in building the
application in a different way. See Chapter 24, Using Autoconf.
3. specify variants
Usually debug and release, but can include many more choices (type of GUI, small or big builds,
etc.). This changes the value of BDIR. See Chapter 14, Variants.
4. build rules and actions
Rules that define dependencies and build commands that apply to several files, defined with :rule
commands. Actions can be defined for what is not included in the default actions or to overrule the
defaults actions to do a different way of building.
5. explicit dependencies
Dependencies and build commands that apply to specific files. Use these where the automatic
dependency checking doesn't work and for exceptions.
Common Recipe Structure
37
A−A−P Recipe Executive
6. high level build commands
:program, :dll, etc. can be used for standard programs, libraries, etc. This comes last, so that
explicitly defined dependencies for building some of the items can be used.
For larger projects sections can be moved to other recipes. How you want to do this depends on whether these
sub−recipes need to be executed by themselves and who is going to maintain each recipe. More about that
below.
Building A Target In The First Step
Since commands at the recipe level are executed in the first step, some building may already be done.
Especially the :update command gives you a powerful mechanism. This means you can already build a
target halfway the first step. Note that only dependencies that have already been encountered will be used
then.
A good use for the :update command at the recipe level is to generate a recipe that you want to include.
Useful for automatic configuration. You would do something like this:
config.aap : config.aap.in
:print executing the configuration script...
:sys ./conf.sh < $source > $target
:update config.aap
:include config.aap
First a dependency is specified with build commands for the included recipe. In this case the "config.aap.in"
file is used as a template. The command :update config.aap invokes building "config.aap". If it is
outdated (config.aap.in was changed since config.aap was last build) the build commands are executed. If
"config.aap" is up−to−date nothing happens. Then the :include config.aap includes the up−to−date
"config.aap" recipe.
Nesting The Steps
In the second step commands of dependencies are executed. One of these commands may be :execute.
This means another recipe is read and targets are build. These are again the first and second step mentioned
before, but now nested inside the second step. Here is an example that executes a recipe when "docfile.html"
is to be build:
docfile.html :
:execute docs/main.aap $target
This construction is useful when you do not want to read the other recipe in the first step. Either because it is a
large recipe that is not always needed, because the recipe does not always exist, or because the recipe must
first be build by other commands. Here is an example of using a depencency on a recipe:
docfile.html : docs/main.aap
:execute docs/main.aap $target
docs/main.aap: docs/main.aap.in
:cd docs
:sys ./conf.sh < main.aap.in > main.aap
Building A Target In The First Step
38
A−A−P Recipe Executive
The :execute command can also be used at the recipe level. This means another recipe is executed during
the first step. A good example for this is building an application in different variants:
# build the GTK version
:execute main.aap Gui=GTK myprog
:move myprog myprog−GTK
# build the Motif version
:execute main.aap Gui=Motif myprog
:move myprog myprog−Motif
Using Multiple Recipes
There are many ways to split up a project into multiple recipes. If you are building one application, you
mostly build the whole application, using a toplevel recipe. This recipe specifies the configuration, specifies
variants and sets variables for choices. Separate recipes are used to handle specific tasks. For example, you
can move related sources to a sub−directory and put a recipe in that directory to build those sources. For this
situation you use the :child command.
When a project gets bigger, and especially when working together with several people, you may want to be
able to split the project up in smaller pieces, which each can be build separately. To avoid replicating
commands, you should put the configuration, variants and setting variables in a separate recipe. Each recipe
can use the :include command to use this recipe. You need to take care that the recipe is not included twice,
because commands like :route give an error when repeated and appending to variables must only be done
once. Aap will read a recipe only the first time it is included when you add the {once} argument to the
:include command.
Recipe Execution Details
The two−step processing of recipes is part of all the work that Aap does. There are a few other steps. This is
what happens when Aap is run:
1. Read the startup recipes, these define default rules and variables. These recipes are used:
− default.aap from the distribution
− all recipes in system and user Aap directories (see below)
2. Recipe processing: Read the recipe main.aap or the one specified with the "−f" argument and check
for obvious errors. Then execute the toplevel items in the recipe. Dependencies and rules are stored.
Also read included and child recipes and execute the toplevel items in them.
3. Apply the clever stuff to add missing dependencies and rules. This adds a "clean" rule only if the
recipe didn't specify one, for example.
4. Target building. The first of the following that exists is used:
− targets specified on the command line
− items specified with :program, :dll and :lib
− the "all" target
5. If the "finally" target is specified, execute its build commands. Each recipe can have its own "finally"
target, they are all executed.
Using Multiple Recipes
39
A−A−P Recipe Executive
The startup recipes are read from directories that depend on the system. For Unix systems files in two
directories are used:
− /usr/local/share/aap/startup/*.aap
− ~/.aap/startup/*.aap
For other systems one directory is used, the first one that can be found from this list:
− $HOME/aap/startup/*.aap
− $HOMEDRIVE/$HOMEPATH/aap/startup/*.aap
− c:/aap/startup/*.aap
$HOME, $HOMEDRIVE and $HOMEPATH are environment variables, not Aap variables.
Use Of Variables
Variables with uppercase letters are generally used to pass choices and options to actions. For example, $CC
is the name of the C compiler and $CFLAGS optional arguments for the C compiler. The list of predefined
variables is in the reference manual here.
To avoid clashing with an existing or future variable that is defined by Aap, use one or more lower case letters
or prepend "MY". Examples:
$n
$sources
$FooFlags
$MYPROG
Also be careful with chosing a name for a user scope, it must be different from all variables used in recipes!
Prepending "s_" is recommended. Examples:
$s_debug.CFLAGS
$s_ovr.msg
Special Characters
Some characters in expressions have a special meaning. And a command like :print also handles a few
arguments in a special way. This table gives an overview of which characters you need to watch out for when
using the :print command:
Table 12.1. Special characters in the ":print" command
:print argument
$($)
$(`)
$(#)
$(>)
resulting character
$
` (backtick)
#
>
Use Of Variables
40
A−A−P Recipe Executive
$(<)
$(|)
<
|
Example:
all:
:print tie $(#)2 $(`)green$(`) $(|) price: $($) 13 $(<) incl vat $(>)
Write this in the file "try.aap". Executing it results in:
% aap −f try.aap
tie #2 `green` | price: $ 13 < incl vat >
%
Line Syntax
Aap parses the recipe into a sequence of lines. A line is a sequence of characters terminated by a newline. You
can escape the newline with a backslash to continue a logical line over more than one physical line, as
follows:
1
2
3
4
One line
A longer line \
that continues \
over three physical lines.
You can always use backslash continuations to continue lines in Aap. Indentation does not matter.
In many constructions, Aap also supports Python−style line continuations, where a line is continued by
increasing the indentation of subsequent physical lines. The above example would look different with
Python−style continuation:
1
2
3
4
One line
A longer line
that continues
over three physical lines.
As you can see, the "block" of lines with an increased amount of indentation is considered to belong to the
line above it.
Python−style line continuations are supported in all Aap constructions except when the command cannot be
recognized if the linebreak comes early. For example, in dependencies the colon separating the targets from
the sources cannot be in a continuation line. This does not work:
myprog
: mysource
:print This Does Not Work!
It is also not possible to split a dependency by indent when it does not have build commands:
myprog :
mysource
this = Does Not Work
Line Syntax
41
A−A−P Recipe Executive
You must use a backslash in this situation:
myprog : \
mysource
this = OK
Chapter 13. Dependencies, Rules and Actions
Build Commands
There are several methods to specify build commands to update a target:
1. A dependency
This is more or less the same as how this is used in a Makefile: One or more targets, a colon and any
number of sources. This specifies that the target(s) depends on the source(s). When build commands
are given these are the commands to build the target(s) from the source(s). Without build commands
the dependency is only used to check if the target is outdated and needs to be build.
2. A rule
Specified with a :rule command. A "%" in the target(s) and source(s) stands for any string. This is
used to specify a dependency that is to be used for files that match the pattern.
3. An action
Specified with a :action command. Unlike dependencies and rules an action does not specify a
build dependency. It must be invoked by other build commands with the :do command.
Nearly all recipe commands can be used in the build commands. But these are not allowed, they can only be
used at the recipe level:
a dependency specification
:rule
:route
:totype
:clearrules
:delrule
:program
:dll
:lib
:recipe
:variant
In short: all commands that define dependencies cannot be used in build commands. But don't forget you can
use :execute to do just about anything.
Chapter 13. Dependencies, Rules and Actions
42
A−A−P Recipe Executive
The Production Commands
The commands :program, :lib, :dll and :ltlib are called production commands because they explicitly state
what things Aap should produce and what sources are involved. Everything the production commands can do,
can be done by hand with dependencies as well, but the automation the production commands provide is quite
useful. This section discusses how the production commands can be used and the variables that affect them.
The form of each of the production commands is :command targets : sources. It is unusual to have
more than one target, since both targets would be built from the same sources, but it is allowed. The list of
sources should list the actual, original sources, i.e. only files that are actually written by the programmer and
that exist on disk. It is these sources that will be packaged together for distributing the program or library in
source form.
Each production command transforms all of the sources into objects using compile actions. The sources are
transformed into object files of a particular type e.g. libraries use files with type "libobject". Once all of the
sources have been compiled, a build action is invoked to turn the object files into the target. The table below
lists the production commands and the actions used.
Some of the production commands can use different programs to produce the final product, depending on
settings in the recipe. In particular, you may need to chose to link a program with the compiler or through
libtool, depending on whether your program links to any libtool libraries or not. The alternatives are listed in
the table below as well. To select an alternative form to build the final product, set the filetype of the target to
a specific value, e.g.
:program myProgram { filetype=ltprogram } : source.c
This example uses the ltprogram alternative build command to build the program "myProgram."
Command
Object
Type
Build
Command
Build Alternatives
(normal)
Uses the C compiler to link all the objects into a program. Uses
$LIBS and $LDFLAGS.
:program object
build
ltprogram
Uses libtool to link all the objects into a program. Uses $LIBS
and $LDFLAGS, but also adds $LTLIBS and $LT_RPATH if
defined.
(normal) Uses the ar utility to link all the objects into a static library.
:lib
libobject buildlib
Uses $ARFLAGS.
(normal) Uses the C compiler to link the objects into a dynamic (shared)
library. The object files are different from regular library objects, and
:dll
dllobject builddll
use a different extension. Uses $SHLINK, and $LDFLAGS, as well as
$SHLINKFLAGS.
(normal) Uses the libtool utility to link the objects together. Uses
:ltlib
ltobject buildltlib
$LDFLAGS.
In case you do want to have Aap figure out how to turn source files in to objects and then combine them into a
target, but the target is not one of the types mentioned above, you can use the :produce command.
The Production Commands
43
A−A−P Recipe Executive
Attributes for the Production Commands
The production commands understand a wide variety of attributes. Let us return to the generic form of a
production command:
:command targets : sources
There are four places attributes can be inserted in this command, as follows (we have split the command
across several lines for clarity):
1
2
3
4
:command { command−attributes }
targets { per−target−attributes } :
{ source−global−attributes }
sources { per−source−attributes }
There is one commonly−used command−attribute: installvar. The production commands add their
targets to the variable named in this attribute. This defaults to the "normal" variable, as listed in Table 17.2.
Assigning an empty value, through { installvar = }, prevents a target from being installed at all. This
is useful for internal helper programs and libraries used during the build process.
Note
You should use {
installvar =
INSTALL_LTLIB
} for program targets
that have filetype
ltprogram, since they
need to be installed
as if they are libtool
libraries, not
programs.
Warning
It is a bad idea
(excepting
ltprograms, which
belong in
INSTALL_LTLIB)
to add targets to the
wrong install
variable, since the
install action that
gets called for it will
be wrong then as
well.
A slightly less−used command−attribute is objecttype, which changes the object file type from the
default, (dllobject, for instance, for shared libraries), to something else. For programs that need to be
linked by libtool, you may also want to force the object files used in the program to be compiled with libtool,
since mixing non−libtool objects and libtool libraries can cause problems. For this, use the { objecttype
= ltobject } as well, so that libtool programs will usually have build commands like:
Attributes for the Production Commands
44
A−A−P Recipe Executive
:program { filetype = ltprogram } { objecttype = ltobject } ...
The attributes assigned in the per−target−attributes are used in the build and install actions of the target.
Typical attributes assigned here are installdir and keepdir. Variables that affect the build step can be
assigned too, such as var_LIBS and var_LDFLAGS.
The attributes for sources are used for the compile steps of the build process, and useful attributes here are
var_INCLUDE (if one source file needs special include files) and filetype. The attributes in the
source−global−attributes position apply to all the sources in the list, and per−source−attributes apply only to
the source file immediately preceding the attribute.
An example that uses all of these settings is:
1 :ltlib { installvar = } conduit_knotes.la
2
{ add_LIBS = −lkdeui } :
3
{ add_INCLUDE = −I$BDIR/knotes }
4
knotes/KNotesIface.h { filetype=stub } { var_LTOBJSUF=_stub.lo }
5
knotes/knotes−factory.cc
Here we see a libtool library that is not installed (line 1), which must be linked with an additional library (line
2). All of the sources are compiled with an extra include directory (line 3). The first source file (line 4) has
additional complications and uses a different compile action due to its filetype. The last source file (line 5) is
compiled with normal flags extended only by the source−global−attribute on line 3.
Rules And Dependencies
When a target is to be build Aap first searches for an explicit dependency with build commands that produces
the target. This dependency may come from a high level build command such as :program. When such a
dependency is not found then the rules defined with :rule are checked:
1. All the matching rules without commands are used, but only if the source already exists. Thus this
cannot be used to depend on a file that is still to be created.
2. One rule with commands will be selected, in this order of preference:
A rule for which the sources exist.
A rule for which one of the sources does not exist and was not defined with the {sourceexists}
option.
If there are multiple matches, the rule with the longest pattern is used. Thus if you have these two
rules:
:rule test/%.html : test/%.in
:do something
:rule %.html : %.in
:do something−else
The first one will be used for a file "test/foo.html", the second one for a file "./foo.html". If there are
two with an equally long pattern, this is an error.
TRICK: When the source and target in a rule are equal, it is skipped. This avoids that a rule like this becomes
cyclic:
Rules And Dependencies
45
A−A−P Recipe Executive
:rule %.jpg : path/%.jpg
:copy $source $target
Command block sections
Sometimes it is useful to execute commands when a target does NOT require updating. For example, to give a
message. And sometimes commands need to be executed no matter if the target is outdated. For example to
add an attribute to the target.
You can add sections to build commands of rules and dependencies. Three kinds of sections are possible:
>always − always executed.
>build − executed when building the target.
>nobuild − executed when NOT building the target.
The sections can be used in arbitrary order and may appear multiple times. All section headers must have the
same amount of indent. The commands in the sections must have more indent than the section headers.
Example:
foo.out : foo.in
>always
# Always attach an attribute to the target
:attr {output = yes} $target
>build
# Only when $target requires updating
:copy $source $target
>nobuild
# Only when $target does not require updating
:print $target is up−to−date
Multiple targets
When a dependency with build commands has more than one target, this means that the build commands will
produce all these targets. This makes it possible to specify build commands that produce several files at the
same time. Here is an example that compiles a file and at the same time produces a documentation file:
foo.o foo.html : foo.src
:sys srcit $source −o $(target[0]) −−html $(target[1])
People used to "make" must be careful, they might expect the build commands to be executed once for each
target. Aap doesn't work that way, because the above example would be impossible. To run commands on
each target this must be explicitly specified. Example:
dir1 dir2 dir3 :
@for item in target_list:
:mkdir $item
The variable "target_list" is a Python list of the target items. Another such variable is "source_list", it is the
list of source files (this excludes virtual items; "depend_list" also has the virtual items). An extreme example
of executing build commands for each combination of sources and targets:
Command block sections
46
A−A−P Recipe Executive
$OutputFiles : $InputFiles
@for trg in target_list:
:print start of file >! $trg
@for src in source_list:
:sys foofilter −D$trg $src >> $trg
When multiple targets are used and there are no build commands, this works as if each target depends on the
list of sources. Thus this dependency:
t1 t2 : s1 s2 s3
Is equivalent to:
t1 : s1 s2 s3
t2 : s1 s2 s3
Thus when t1 is outdated to s1, s2 or s3, this has no consequence for t2.
Automatic dependency checking
When a source file includes other files, the targets that depend on the source file also depend on the included
files. Thus when "foo.c" includes "foo.h" and "foo.h" is changed, the build commands to produce "foo.o" from
"foo.c" must be executed, even though "foo.c" itself didn't change.
Aap detects these implied dependencies automatically for the types it knows about. Currently that is C and
C++. Either by using gcc or a Python function the "#include" statements are found in the source code and
turned into a dependency without build commands.
This works recursively. Thus when "foo.c" includes "foo.h" and "foo.h" includes "common.h", the
dependency will look like this:
foo.c : foo.h common.h
For other types of files than C and C++ you can add your own dependency checker. For example, this is how
to define a checker for the "tt" filetype:
:action depend tt
:sys tt_checker $source > $target
The "tt_checker" command reads the file "$source" and writes a dependency line in the file "$target". This is a
dependency like it is used in a recipe. In a Makefile this has the same syntax, thus tools that produce
dependencies for "make" will work. Here is an example:
foo.o : foo.tt
foo.hh
include/common.hh
This is interpreted as a dependency on "foo.hh" and "include/common.hh". Note that "foo.o" and "foo.tt" are
ignored. Tools designed for "make" produce these but they are irrelevant for Aap.
Since the build commands for ":action depend" are ordinary build commands, you can use Python commands,
system commands or a mix of both to do the dependency checking.
Automatic dependency checking
47
A−A−P Recipe Executive
More about customizing dependency checking in Chapter 29, Customizing Automatic Depedencies.
Attributes Overruling Variables
Most variables like $CFLAGS and $BDIR are used for all source files. Sometimes it is useful to use a
different value for a group of files. This is done with an attribute that starts with "var_". What follows is the
name of the variable to be overruled. Thus attribute "var_XYZ" overrules variable "XYZ".
The overruling is done for:
dependencies
rules
actions
The attributes of all the sources are used. In case the same attribute is used twice, the last one wins.
Another method is to use an "add_" attribute. This works like "var_", but instead of overruling the variable
value it is appended. This is useful for variables that are a list of items, such as $DEFINE. Example:
:attr thefile.c {add_DEFINE = −DEXTRA=yes}
The value of the attribute is only appended when it does not appear yet, to avoid adding it two or more times.
Another method is to define a scope name. This scope is then used to find variables before searching other
scopes, but after using the local scope. For example, to specify that the "s_opt" scope is to be used when
compiling "filter.c":
OPTIMIZE = 0
DEBUG = yes
:program myprog : main.c filter.c version.c
:attr {scope = s_opt} filter.c
s_opt.OPTIMIZE = 4
s_opt.DEBUG = no
Note that you can set the values of the variables in the user scope after adding the scope attribute to "filter.c".
Virtual Targets
A virtual target is a target that is not an actual file. A Virtual target is used to trigger build commands without
creating a file with the name of the target. Common virtual targets are "clean", "all", "publish", etc.
When a target is virtual it is always built. Aap does not remember if it was already done a previous time.
However, it is only build once for an invocation of Aap. Example:
clean:
:del {r}{f} temp/*
To remember the signatures for a virtual target use the "remember" attribute:
version {virtual}{remember} : version.txt.in
Attributes Overruling Variables
48
A−A−P Recipe Executive
:print $Version | :cat − $source >! version.txt
Now "aap version" will only execute the :print command if version.txt.in has changed since the last time this
was done.
Using {remember} for one of the known virtual targets (e.g., "all" or "fetch") is unusual, except for "publish".
When using {remember} for a virtual target without a dependency, it will only be built once. This can be used
to remember the date of the first invocation.
all: firsttime
firsttime {virtual}{remember}:
:print First build on $DATESTR > firstbuild.txt
The difference with a direct dependency on "firstbuild.txt" is that when this file is deleted, it won't be built
again.
Source Path
The sources for a dependency are searched for in the directories specified with $SRCPATH. The default is ".
$BDIR", which means that the sources are searched for in the current directory and in the build directory. The
current directory usually is the directory in which the recipe is located, but a :cd command may change this.
The "srcpath" attribute overrules using $SRCPATH for an item. Example:
:attr bar.c {srcpath = ~/src/lib}
To avoid using $SRCPATH for a source, so that it is only found in the current directory, make the "srcpath"
attribute empty:
foo.o : src/foo.c {srcpath=}
When setting $SRCPATH to include the value of other variables, you may want to use "$=", so that the value
of the variable is not expanded right away but when $SRCPATH is used. This is especially important when
appending to $SRCPATH before a :variant command, since it changes $BDIR. Example:
SRCPATH $+= include
Warning: Using the search path means that the first encountered file will be used. When old files are lying
around the wrong file may be picked up. Use the full path to avoid this.
Depending On A Directory
When a target depends on the existence of a directory, it can be specified this way:
foodir/foo : foodir {directory}
:print >$target this is foo
The directory will be created if it doesn't exist. The normal mode will be used (0777 with umask applied).
When a different mode is required specify it with an octal value: {directory = 0700}. The number must start
Source Path
49
A−A−P Recipe Executive
with a zero.
Build Command Signature
A special kind of signature is used to check if the build commands have changed. An example:
foo.o : {buildcheck = $CFLAGS} foo.c
:sys $CC $CFLAGS −c $source −o $target
This defines a check for the value of $CFLAGS. When this value changes, the target is considered outdated.
When something else in the build command changes, e.g., $CC, this does not cause the target to become
outdated.
The default buildcheck is made from the build commands themselves. This is with variables expanded before
the commands have been executed. Thus when one of the commands is ":sys $CC $CFLAGS $source" and
$CC or $CFLAGS changes, the buildcheck signature changes. The :do commands are also expanded into the
commands for the action specified. However, this only works when the action and filetype can be estimated.
The action must be specified plain, not with a variable, and the filetype used is the first of:
1. a filetype attribute specified after action
2. if the first argument doesn't contain a "$", the filetype of this argument
3. the filetype of the first source argument of the dependency.
To add something to the default check for the build commands the $commands variable can be used.
Example:
Version = 1.4
foo.txt : {buildcheck = $commands $Version}
:del {force} $target
:print >$target this is $target
:print >>$target version number: $Version
If you now change the value of $Version, change one of the :print commands or add one, "foo.txt" will be
rebuilt.
To simplify this, $xcommands can be used to check the build commands after expanding variables, thus you
don't need to specify $Version:
foo.txt : {buildcheck = $xcommands}
However, this only works when all $VAR in the commands can be expanded and variables used in Python
commands are not expanded.
To avoid checking the build commands, use an empty buildcheck. This is useful when you only want the
target to exist and don't care about the command used to create it:
objects : {buildcheck = }
:print "empty" > objects
Sometimes you might change the build commands in a recipe, which would normally mean the target should
be updated, but you are sure that this isn't necessary and want to avoid executing the build commands. You
Build Command Signature
50
A−A−P Recipe Executive
can tell Aap to ignore the buildcheck once with the −−contents option.
Chapter 14. Variants
You might first want to read the tutorial for a few examples of using variants.
Here is an example how build variants can be specified. This will be used to explain how it works.
:variant Opt
some
OPTIMIZE = 2
much
OPTIMIZE = 6
*
OPTIMIZE = 1
"Opt" is the name of a variable. It is used to select one of the variants. Each possible value is listed in the
following line and further lines with the same indent. In the example these are "some" and "much". "*" is used
to accept any value, it must be the last one. The first value mentioned is the default when the variable isn't set.
You can now start Aap with various arguments to specify the kind of optimizing you want to use:
aap Opt=some
will set OPTIMIZE to 2
aap Opt=much
will set OPTIMIZE to 6
aap Opt=other will set OPTIMIZE to 1
aap
will set OPTIMIZE to 2
Note that when "Opt" is not given a value the first entry is used, resulting in OPTIMIZE being set to 2. But
when it is set to a value that isn't mentioned the last entry "*" is used.
The BDIR Variable
The $BDIR variable will be adjusted for the variant used. CAREFUL: this means that using $BDIR before
:variant commands will use a different value, that might not always be what you want.
Inside the :variant command the value of $BDIR has already been adjusted.
When a target that is being build starts with $BDIR and $BDIR doesn't exist, it is created. (Actually, this
happens when an item in the path is "build" or starts with "build−".
$BDIR is relative to the recipe. When using ":child dir/main.aap" the child recipe will use a different build
directory dir/$BDIR. Note that when building the same source file twice from recipes that are in different
directories, you will get two results. Best is to always build a target from the same recipe (that makes it easier
to understand the recipe anyway).
Compile only when needed
This continues the last example of the tutorial.
Chapter 14. Variants
51
A−A−P Recipe Executive
We happen to know that the main.c file does not depend on the GUI used. With the recipe above it will
nevertheless be compiled again for every GUI version. Although this is a small thing in this example, in a
bigger project it becomes more important to skip compilation when it is not needed. Here is the modified
recipe:
1
2
3
4
5
6
7
8
9
10
11
12
13
14
15
16
17
18
19
20
21
22
23
Source = main.c version.c gui.c
:variant Build
release
OPTIMIZE = 4
Target = myprog
debug
DEBUG = yes
Target = myprogd
:attr {var_DEFINE = $DEFINE} {var_BDIR = $BDIR} main.c
Gui ?= motif
:variant Gui
console
motif
Source += motif.c
gtk
Source += gtk.c
DEFINE += −DGUI=$Gui
:program $Target : $Source
The only new line is line 11. The "main.c" file is given two extra attributes: var_DEFINE and var_BDIR.
What happens is that when "main.c" is being build, Aap will check for attributes of this source file that start
with "var_". The values will be used to set variables with the following name to the value of the attribute.
Thus DEFINE gets the value of var_DEFINE. This means that the variable is overruled by the attribute
while building "main.c".
The var_BDIR attribute is set to "$BDIR" before the second :variant command. It does not yet have the
selected GUI appended there. The list of directories used is now:
directory
build−SYS−release
build−SYS−debug
build−SYS−release−console
build−SYS−debug−console
build−SYS−release−motif
build−SYS−debug−motif
build−SYS−release−gtk
build−SYS−debug−gtk
contains files
main
main
version, gui
version, gui
version, gui, motif
version, gui, motif
version, gui, gtk
version, gui, gtk
Building multiple variants at once
If you want to build all the variants that are possible, use a few lines of Python code. Here is an example:
Building multiple variants at once
52
A−A−P Recipe Executive
1
2
3
4
5
6
7
8
9
10
11
12
13
14
15
16
17
18
19
10
21
22
23
24
:variant license
trial
DEFINE += −DTRIAL
demo
DEFINE += −DDEMO
full
DEFINE += −DFULL
:variant language
chinese
DEFINE += −DCHINESE
bulgarian
DEFINE += −DBULGARIAN
*
DEFINE += −DENGLISH
build:
:print Building with $license license for language $language.
:print DEFINE=$DEFINE
all:
@for a in ['trial', 'demo', 'full']:
@
for c in ['chinese', 'bulgarian', 'english']:
:execute main.aap build license=$a language=$c
#license
#language
Invoking Aap without arguments builds the "all" target, which loops over all possible variants and invokes the
:execute command with the "build" target. The reason to use the "build" target is that without it the "all" target
would be built again and result in an endless loop.
This is the resulting output:
Building with trial license for language chinese.
DEFINE=−DTRIAL −DCHINESE
Building with trial license for language bulgarian.
DEFINE=−DTRIAL −DBULGARIAN
Building with trial license for language english.
DEFINE=−DTRIAL −DENGLISH
Building with demo license for language chinese.
DEFINE=−DDEMO −DCHINESE
Building with demo license for language bulgarian.
DEFINE=−DDEMO −DBULGARIAN
Building with demo license for language english.
DEFINE=−DDEMO −DENGLISH
Building with full license for language chinese.
DEFINE=−DFULL −DCHINESE
Building with full license for language bulgarian.
DEFINE=−DFULL −DBULGARIAN
Building with full license for language english.
DEFINE=−DFULL −DENGLISH
Chapter 15. Publishing
Publishing means distributing the files of your project. This is a generic mechanism. You can use it to
maintain a web site or to release a new version of your application.
Chapter 15. Publishing
53
A−A−P Recipe Executive
The most straightforward way to publish a file is with the :publish command:
:attr {publish = ftp://ftp.my.org/upload/%file%} myfile
:publish myfile
This uses the "publish" attribute on each of the files. When the "publish" attribute is missing the "commit"
attribute is used. If both are missing this is an error.
When a file didn't change since the last time it was published, it won't be published again. This works with
signatures, like building a target. The remote file is the target in this case. But Aap won't read the remote file
to compute the signature, it will remember the signature from when the file was last uploaded (otherwise
checking for outdated files would be slow).
In the example %file% is used. This is replaced with the name of the file being published, including the
directory. This means you can use the same attribute for several files:
Files = myfile yourfile hisfile
:attr {publish = ftp://ftp.my.org/upload/%file%} $Files
:publish $Files
Including the directory is sometimes not what you want. To only use the last part of the path use
%basename%.
Files = one/myfile two/yourfile three/hisfile
:attr {publish = ftp://ftp.my.org/common/%basename%} $Files
:publish $Files
The three files will be uploaded to the "common" directory. The directory names "one", "two" and "three" will
not be used on the ftp server.
To publish all files with a "publish" attribute start Aap like this:
aap publish
If the "publish' target is defined explicitly it will be executed. Otherwise, all files with the "publish" attribute
are given to the :publish command, just like using the :publishall command.
The "publish" attribute may consist of several items. Publishing will use all these items. This means a file can
be distributed to several sites at once. This is unlike fetching, which stops as soon as the file could be obtained
from one of the items.
When publishing fails for one of the sites, e.g., because the server is down, this is remembered. When you
publish again, uploading is done only for that site. The destinations for which pusblishing worked will be
skipped then.
Using Secure Copy
Uploading files requires write access to the server. There are several methods for this, but some have the
disadvantage that your password is sent as normal text over the internet. Or someone in between can change
the files that you send out. There is one that provides sufficient security: scp or secure copy.
Using Secure Copy
54
A−A−P Recipe Executive
To publish a file to a server through secure copy use a URL in this form:
:publish file {publish = scp://[email protected]/dir/%file%}
"myname" is your login name on the server "the.server.com". The "file" will be written there as "dir/file",
relative to your login directory.
This requires the "scp" command, which is not a standard item. If it does not appear to exist then Aap will
offer you to install it for you. If the automatic mechanism fails you will have to install it yourself. You might
also want to do this if you have specific preferences for how the scp command is to be installed (versions of
scp exist with different kinds of encryption).
To avoid having to type a password each time you need to use public keys. For MS−Windows you can find
information here:
http://the.earth.li/~sgtatham/putty/0.53b/htmldoc/Chapter8.html
This is for the PuTTY version of scp, which is what Aap installs for you if you let it. For Unix try man
ssh−keygen. Use "SSH protocol version 2" if possible.
You can specify the command to be executed with the $SCP variable, see the reference manual. Example:
SCP = scp −i c:/private/keyfile
Using Another Method
Using "rsync" has an advantage if you have files with only a few changes. The rsync program will only
transfer the differences. This adds a bit of overhead to find out what changed, thus it's a bit slower when
copying whole files.
Aap uses the same secure channel as with "scp" by default. This can be changed with the $RSYNC variable,
see the reference manual.
If your server does not support "scp", you might want to use "rcp". However, this is insecure, information is
transferred unencoded over the internet and making a connection is not secure. Only use this when "scp" is
not possible.
Using "rcp" means changing the "scp://" part of the URL to "rcp://". The $RCP variable holds the name of the
command, see the reference manual.
You can also use "ftp". Some web servers require this, even though ftp sends your password as plain text over
the internet, thus it is insecure. Aap uses the Python ftp library, thus an external command is not needed and
there is no variable to specify the command.
Changing A Url
When you switch to another server you need to change the "publish" attribute. The next time you invoke Aap
for publishing it will automatically upload all the files to the new server.
Using Another Method
55
A−A−P Recipe Executive
If you didn't actually change to another server, but the URL used for the server changed, invoke Aap once
with the "−−contents" argument:
aap publish −−contents
This will cause only files that changed to be published. It avoids that all the files with a changed "publish"
attribute are published again. It will still upload files that you changed since the last upload and newly added
files. But be careful: files that you once uploaded, deleted from the list of files and now added will NOT be
uploaded!
Distributing Generated Files
When publishing a new version of an application, you might want to include a number of generated files. This
reduces the number of tools someone needs to use when installing the application. For example, the
"configure" script that "autoconf" produces from "configure.in" can be included.
To avoid these generated results to be generated again when the user runs aap, explicitly specify a signature
file to be used and distribute this signature file together with the generated files. For example, suppose you
have a directory with these files you created:
main.aap
prog.c
Additionally there is the file "version.c" that is generated by the "main.aap" recipe. It contains the date of last
modification. To avoid it being generated again, include the "mysign" file in the distribution. The files to be
distributed are:
mysign
main.aap
prog.c
version.c
In the "main.aap" recipe the "signfile" attribute is used for the dependency that generates version.c:
version.c {signfile = mysign} : prog.c
:print char *timestamp = "$TIMESTR"; >! $target
The result is that "version.c" will only be generated when "prog.c" has changed. When the "signfile" attribute
would not have been used, "version.c" would have been generated after unpacking the distributed files.
Copying All Files At Once
The "finally" target is always executed after the other targets have been successfully built. Here is an example
that uses the "finally" target to copy all files that need to be uploaded with one command.
Source = *.html
all: remote/$*Source {virtual} {remember}
CFile =
:rule remote/% : %
_recipe.CFile += $source
Distributing Generated Files
56
A−A−P Recipe Executive
finally:
@if _recipe.CFile:
:copy $_recipe.CFile ftp://my.org/www
Warning: When the :copy command fails, aap doesn't know the targets were not made properly and won't do it
again next time. Using the "publish" attribute works better.
Publishing images for HTML files
When publishing HTML files you most likely also want to publish the image files referenced by them. You
can use a wildcard to select the images files, but this may include images that are not actually used. You can
explicitly specify the images, but if you miss one your locally tested web site won't work properly on the
server.
A good solution is to parse the HTML files and figure out what images are used in them. However, only
image files that can be found locally should be included, not ones that are on other web sites. The
get_html_images() function can be used for this, as shown in an example:
Files = index.html
contact.html
forward.html
Files += `get_html_images(Files)`
:attr {publish = scp://[email protected]/public_html/%file%} $Files
all: publish
Note that this still isn't perfect. Only images in plain "IMG" tags will be found and only when they use a
relative path name. Thus images from Javascript or PHP code will not be included.
Chapter 16. Fetching
Fetching And Updating
A convention about using the "update" and "fetch" targets makes it easy for users to know how to use a recipe.
The main recipe for a project should be able to be used in three ways:
1. Without specifying a target.
This should build the program in the usual way. Files with a "fetch" attribute are obtained when they
are missing.
2. With the "fetch" target.
This should obtain the latest version of all the files for the program, without building the program.
3. With the "update" target.
This should fetch all the files for the program and then build it. It's like the previous two ways
combined.
Here is an example of a recipe that works this way:
Publishing images for HTML files
57
A−A−P Recipe Executive
Status
Source
Header
Target
=
=
=
=
status.txt
main.c version.c
common.h
myprog
$Target : $Source $Status
:cat $Status
:do build $source
# specify where to fetch the files from
:attr {fetch = cvs://:pserver:[email protected]:/cvsroot/myproject} $Source
:attr {fetch = ftp://ftp.myproject.org/pub/%file%} $Status
Note that the header file "common.h" is given a "fetch" attribute, but it is not specified in the dependency. The
automatic dependency checking will notice the file is used and fetch it when it's missing.
When using files that include a version number in the file name, fetching isn't needed, since these files will
never change. To reduce the overhead caused by checking for changes, give these files a "constant" attribute
(with a non−empty non−zero value). Example:
PATCH = patches/fix−1.034.diff {fetch = $FTPDIR} {constant}
To fetch all files that have a "fetch" attribute start Aap with this command:
aap fetch
When the "fetch" target is not specified in the recipe or its children, it is automatically generated. Its build
commands will fetch all nodes with the "fetch" attribute, except ones with a "constant" attribute set
(non−empty non−zero). To do the same manually:
fetch:
:fetch $Source $Header $Status
Or use the :fetchall command.
NOTE: When any child recipe defines a "fetch" target no automatic fetching is done for any of the recipes.
This may not be what you expect.
When there is no "update" target it is automatically generated. It will invoke the "fetch" target and the default
target(s) of the recipe. To do something similar manually:
update: fetch $Target
The Fetch Attribute
The "fetch" attribute is used to specify a list of locations where the file can be fetched from. The word at the
start defines the method used to fetch the file:
ftp
http
scp
from ftp server
from http (www) server
secure copy
The Fetch Attribute
58
A−A−P Recipe Executive
rcp
rsync
file
remote copy (aka insecure copy)
remote sync
local file system
from CVS repository For a module that was already checked out the part after "cvs://" may be
cvs
empty, CVS will then use the same server (CVSROOT) as when the checkout was done.
other
user defined
These kinds of locations can be used:
ftp://ftp.server.name//full/path/file
ftp://ftp.server.name/relative/path/file
http://www.server.name/path/file
scp://host.name/path:path/file
rcp://host.name/path:path/file
rsync://host.name/path:path/file
cvs://:METHOD:[[USER][:PASSWORD]@]HOSTNAME[:[PORT]]/path/to/repository
file:~user/dir/file
file:///etc/fstab
For a local file there are two possibilities: using "file://" or "file:". They both have the same meaning. "file:" is
preferred, because the double slash is usually used before a machine name: "method://machine/path". A file is
always local, thus leaving out "//machine" is the logical thing to do.
Note that for an absolute path, relative to the root of the file system, you use either one or three slashes, but
not two. Thus "file:/etc/fstab" and "file:///etc/fstab" are the file "/etc/fstab". A relative path has two or no
slashes, but keep in mind that moving the recipe will make it invalid. You can also use "file:~/file" or
"file://~/file" for a file in your own home directory, and "file:~jan/file" or "file://~jan/file" for a file in the
home directory of user "jan".
In the "fetch" attribute the string "%file%" can be used where the path of the local target is to be inserted. This
is useful when several files have a common directory. Similarly "%basename%" can be used when the last
item in the path is to be used. This removes the path from the local file name, thus can be used when the
remote directory is called differently and only the file name is the same. Examples:
:attr {fetch = ftp://ftp.foo.org/pub/foo/%file%} src/include/bar.h
Gets the file "src/include/bar.h" from "ftp://ftp.foo.org/pub/foo/src/include/bar.h".
:attr {fetch = ftp://ftp.foo.org/pub/foo/src−2.0/include/%basename%}
src/include/bar.h
Gets the file "src/include/bar.h" from "ftp://ftp.foo.org/pub/foo/src−2.0/include/bar.h".
Defining Your Own Method
To add a new fetch method, define a Python function with the name "fetch_method", where "method" is the
word at the start. The function will be called with four arguments:
dict
a dictionary with references to all variable scopes (for expert users only)
machine the machine name from the url: what comes after the "scheme://" upto the first slash
Defining Your Own Method
59
A−A−P Recipe Executive
path
the path from the url: what comes after the slash after "machine"
fname the name of the file where to write the result
The function should return a non−zero number for success, zero for failure. Or raise an IOError exception
with a meaningful error. Here is an example:
:python
def fetch_foo(dict, machine, path, fname):
from foolib import foo_the_file, FooError
try:
foo_the_file(machine, path, fname)
except FooError, e:
raise IOError, 'fetch_foo() failed: %s' % str(e)
return 1
Note that a version control function overrules a fetch function. Thus if "foo_command()" is defined
"fetch_foo" will not be called.
Caching
Remote files are downloaded when used. This can take quite a bit of time. Therefore downloaded files are
cached and only downloaded again when outdated.
The cache can be spread over several directories. The list is specified with the $CACHE variable.
NOTE: Using a global, writable directory makes it possible to share the cache with other users, but only do
this when you trust everybody who can login to the system! Someone who wants to do harm or make a
practical joke could put a bogus file in the cache.
A cached file becomes outdated as specified with the "cache_update" attribute or the $CACHEUPDATE
variable. The value is a number and a name. Possible values for the name:
day number specifies days
hour number specifies hours
min number specifies minutes
sec number specifies seconds
The default is "12 hour".
When a file becomes outdated, its timestamp is obtained. When it differs from when the file was last
downloaded, the file is downloaded again. When the file changes but doesn't get a new timestamp this will not
be noticed.
When fetching files the cached files are not used (but may be updated).
Chapter 17. Installing
This section contains details about the installation of the produced programs and other items. Those other
items can be libraries (produced by the :lib, :dll, or :ltlib commands), header files for the API of a
library, documentation (like manpages or info files), and as a catch−all, "data."
Caching
60
A−A−P Recipe Executive
Usually installing is done with aap install. If you do not define an "install" target in the recipe, Aap will
add one for you. The default install target invokes up to 15 other install targets, one for each kind of item you
can install. This makes it easy to customize the installation of some particular kind of item (e.g. libtool
archives).
The default install target invokes two or three other targets: install−platform, install−shared, and (optionally,
only if you define it in the recipe) install−local. Each of these invokes other install targets for specific kinds of
files, as follows:
Table 17.1. Install targets
High−level Target
install−platform
Lower−level Targets
install−exec
install−sbin
install−lib
install−dll
install−ltlib
install−conf
install−platform−local
install−shared
install−data
install−man
install−info
install−include
install−shared−local
install−local
Install these Files
This is for installing platform−dependent files.
Install programs (generally produced through
:program command).
Install programs for system administration. These may
have additional security considerations, hence a
separate target.
Install static libraries (from the :lib command).
Install shared libraries (from the :dll command).
Install shared libtool libraries (from the :ltlib
command). These require special treatment by the
libtool program, hence a separate target.
Install platform−specific configuration files (such as
pkg−config files).
A catch−all for things that don't fit anywhere else.
This is for installing files shared between platforms.
Install data for the package. This would typically
include translation files, examples (if they're not in the
manpage), and images used by the package.
Install manpages.
Install GNU−style info pages.
Installs header files (also known as includes).
A catch−all for things that don't fit anywhere else.
this is an optional target that you can define for extra
installing, without changing the other install targets.
Each of these dependencies is only added automatically if you do not define it yourself. In other words, if you
do not define a dependency with install−data as a target, Aap will add such a dependency internally.
Unless you need special processing for specific kinds of items, you should rarely need to define any of the
install targets yourself. The exceptions are install−platform−local, install−shared−local
and install−local, which you can define without disturbing Aap's normal mechanisms for installing the
programs and libraries you create.
All these dependencies that Aap adds are at the toplevel. Thus there is only one of each for all the recipes in
your project. See below for an example of including the path of an item. Note that this works different from
Caching
61
A−A−P Recipe Executive
the "clean" and "cleanmore" targets. These can exist multiple times, each parent and child recipe can have
one.
All of Aap's default install targets operate in roughly the same fashion: specific actions are invoked for each
install target. The default actions all use top−level variables named INSTALL_target which collect
filenames to install. Other toplevel variables control where those files are installed (targetDIR) and what
file mode is used (targetMODE). This table shows the specific settings for each of the default install targets:
Table 17.2. Settings for the install target
default
default
mode
directory
mode
install−exec $INSTALL_EXEC
installexec $EXECDIR
bin/
$EXECMODE
0755
install−sbin
$INSTALL_SBIN
installsbin
$SBINDIR
sbin/
$EXECMODE
0755
install−lib
$INSTALL_LIB
installlib
$LIBDIR
lib/
$LIBMODE
0644
install−dll
$INSTALL_DLL
installdll
$DLLDIR
lib/
$DLLMODE
0755
No default settings for libtool libraries have been added to Aap yet. It
install−ltlib
$INSTALL_LTLIB
seems likely that DLLDIR and DLLMODE will be used.
install−conf $INSTALL_CONF
installconf $CONFDIR
etc/
$CONFMODE
0644
[a]
install−data
$INSTALL_DATA
installdata
$DATADIR
share/
$DATAMODE
0644
[b]
install−man $INSTALL_MAN
installman $MANDIR
man/
$MANMODE
0644
install−info
$INSTALL_INFO
installinfo
$INFODIR
info/
$INFOMODE
0644
install−include $INSTALL_INCLUDE installinclude $INCLUDEDIR include/ $INCLUDEMODE 0644
[a]
A subdirectory will be added with the name $PKGNAME. You must set this variable to the name of your
application! In the rare situation that you need to install into multiple directories you may set $PKGNAME to
an empty string and prepend the directory name to your data files.
target
variable
action
directory
[b]
A subdirectory will be added that uses the extension of the file. For "foo.1" the directory is "man1", for
"foo.2" it is "man2", and so on.
The :program command adds its target to the $INSTALL_EXEC variable. The :lib command adds its target to
the $INSTALL_LIB variable. The :dll command adds its target to the $INSTALL_DLL variable. The :ltlib
command adds its target to the $INSTALL_LTLIB variable.
The "installexec" action will strip the program by default, if the "strip" program can be found. If you don't
want this add the {nostrip} attribute to the program or set $STRIP to an empty value.
You can also overrule the default actions by one of your own. The install_files() function can be useful then.
See the default.aap recipe for examples.
Destination Directories
All the install targets prepend a path to the directory they install into. The directory mentioned above is
appended.
$DESTDIR Normally empty, which means that the root directory is used. Set this when you don't want to
Destination Directories
62
A−A−P Recipe Executive
$PREFIX
install to the local machine, but still pretend to install in the root. Examples: "~/dummyroot",
"scp://foo.org/". Yes, you can do remote installing this way! Although not everything that works
locally will work remotely.
Default is "/usr/local/" on Unix. This specifies where to install to. The installed program is aware
of being installed here, $PREFIX may be put in configuration files.
The variables are concatenated. For example, programs are installed in $DESTDIR$PREFIX$EXECDIR.
Slashes are added in between where needed.
The directories that are used are automatically created when needed. Note that "uninstall" does not delete the
directories!
When installing the path to a file is normally removed. Thus when you produced a program "results/myprog"
it will be installed as "myprog". If you need to keep the path use the "keepdir" attribute on the file name.
INSTALL_INCLUDE += sys/myheader.h {keepdir}
As an alternative to {keepdir}, there is the {installdir} attribute, which explicitly sets the relative path of the
file to be installed. Files with an {installdir} attribute are installed in
$DESTDIR$PREFIX$targetDIR$installdir. The above setting could also be done as:
INSTALL_INCLUDE += sys/myheader.h {installdir=sys}
The advantage of {installdir} over {keepdir} is that the relative paths (from toplevel recipe to file and from
install directory to the desired install location) need not be the same. For instance:
INSTALL_INCLUDE += api/2.2/c/myheader.h {installdir=sys}
The above mentioned mode variable is used to set the mode bits of the file after installing. If this is not
wanted, use the {keepmode} attribute. Example:
INSTALL_DATA += myscript.sh {keepmode}
To use another mode for a specific file add the {mode = 0555} attribute:
INSTALL_DATA += myscript.sh {mode = 0750}
Installing to a remote machine should work, although setting the file mode may not always work properly,
depending on the transfer method used.
Keep in mind that installation is done from the top directory. In a child recipe that is located in another
directory you need to specify the path to the file to install relative to the top directory. Using the $TOPDIR
variable and rc−style expansion should work. Example:
# Filenames relative to the child directory
child_INSTALL_DATA = myscript.sh myicon.png
# Now add those filenames, relative to the top
INSTALL_DATA += $TOPDIR/$*child_INSTALL_DATA
Destination Directories
63
A−A−P Recipe Executive
If you hard code the paths from the parent to the files to install, say by writing INSTALL_DATA +=
child/myscript.sh, then you cannot execute the child recipe by itself (as if it were a toplevel recipe),
since the paths will be wrong. Using $TOPDIR, or equivalently the topdir function, is the safe way to do
so.
Uninstall
"aap uninstall" deletes the file that "aap install" has installed. All the targets and actions have the same name
with "install" replaced with "uninstall". The same variables are used.
Files that do not exist are silently skipped. Files that do exist but cannot be deleted will cause a warning
message.
Sometimes your recipe offers installing optional files. You probably want to uninstall those optional files as
well, without requiring the user the specify the same options again. For this you can set the $UNINSTALL_*
variables. For example, if you install either the "foo" or "bar" program:
:variant What
foo
Target = foo
UNINSTALL_EXEC = bar$EXESUF
bar
Target = bar
UNINSTALL_EXEC = foo$EXESUF
:program $Target : $Sources
Installing in non−standard places
When you need to install in other directories than the ones Aap provides there are several alternatives. First of
all, you could use $INSTALL_DATA and set $DATADIR to the installation directory. This works if you are
otherwise not using $INSTALL_DATA.
If you have several different directories you could use this scheme:
INSTALL_ITEM1 = file1.txt file2.txt
INSTALL_DIR1 = somewhere
INSTALL_ITEM2 = file3.txt file4.txt
INSTALL_DIR2 = elsewhere
install−local:
@install_files(_no.INSTALL_DIR1, _no.INSTALL_ITEM1, '0644')
@install_files(_no.INSTALL_DIR2, _no.INSTALL_ITEM2, '0644')
uninstall−local:
@uninstall_files(_no.INSTALL_DIR1, _no.INSTALL_ITEM1)
@uninstall_files(_no.INSTALL_DIR2, _no.INSTALL_ITEM2)
In the Python reference chapter you can find explanations for install_files() and uninstall_files()
You could also add a command to set the protection flags of the installed files: :chmod
$INSTALL_DIR1/$*INSTALL_ITEM1.
Uninstall
64
A−A−P Recipe Executive
Chapter 18. Version Control
This is about using Aap with a Version Control System (VCS)
The generic form of version control commands is:
:command file ...
Or:
:command {attr = val} ... file ...
The commands use the "commit" attribute of a file to obtain the kind of version control system and its
location. For example:
:attr foo.c {commit = cvs://:ext:[email protected]−a−p.sf.net:/cvsroot/a−a−p}
For CVS it is also possible to only specify the method. CVS will then use the same specification for the
repository as used when checking the files out.
:attr foo.c {commit = cvs://}
These commands can be used:
:commit
:checkout
:checkin
:unlock
:add
:remove
:tag
Update each file in the repository. Add it when needed.
Like fetch and additionally lock for editing when possible.
Like commit, but unlock file.
Remove lock on file, don't change file in repository or locally.
Add file to repository. File must exist locally. Implies a "commit" of the file.
Remove file from repository. File may exist locally. Implies a "commit" of the file.
Add a tag to the current version. Uses the "tag" attribute.
Additionally, there is the generic command:
:verscont action {attr = val} ... file ...
This calls the Version control module as specified in the "commit" attribute for "action" with the supplied
arguments. What happens is specific for the VCS.
Operating On All Files
These commands work on all the files mentioned in the recipe and child recipes that have the "commit"
attribute:
:checkoutall Checkout the files and locks them.
:commitall Commit the files . Files missing in the VCS will be added. No files will be removed.
:checkinall Just like :commitall and also remove any locks.
Chapter 18. Version Control
65
A−A−P Recipe Executive
:unlockall
Unlock the files.
Inspect directories and add items that do not exist in the VCS but are mentioned in the recipe(s)
:addall
with a "commit" attribute. Uses the current directory or specified directories. May enter
directories recursively.
Inspect directories and remove items that do exist in the VCS but are not mentioned or do not
:removeall have a "commit" attribute. Careful: Only use this command when it is certain that all files that
should be in the VCS are explicitly mentioned and do have a "commit" attribute!
:reviseall
Just like using both :checkinall and :removeall.
:tagall
Add a tag to all items with a "commit" and "tag" attribute.
Related to these commands are targets that are handled automatically when not defined explicitly. When
defining a target for these, it would be highly unexpected if it works differently.
Normally uses the files you currently have to update the version control system. This can be
used after you are done making a change. Default is using :commitall.
aap
Update all files from the VCS that have a "commit" attribute. When the VCS supports locking
checkout all files will be locked. Without locking this does the same as "aap fetch".
aap
Do :checkin for all files that have been checked out of the VCS. For a VCS that doesn't do file
checkin
locking this is the same as "aap commit".
aap unlock Unlock all files that are locked in the VCS. Doesn't change any files in the VCS or locally.
Do :add for all files that appear in the recipe with a "commit" attribute that do not appear in
aap add
the VCS.
Do :removeall: remove all files that appear in the VCS but do not exist in the recipe with a
"commit" attribute or do not exist in the local directory. This works in the current directory
aap remove
and recursively enters all subdirectories. Careful: files with a search path may be accidentally
removed!
Do :tagall: tag all files with a "commit" and "tag" attribute. The tag name should be defined
aap tag
properly in the recipe, although "aap tag TAG=name" can be used if the recipe contains
something like: :attr {tag = $TAG} $FILES
Same as "aap checkin" followed by "aap remove": checkin all changed files, unlock all files
aap revise
and remove files that don't have the "commit" attribute.
aap commit
For the above the "−l" or "−−local" command line option can be used to restrict the operation to the directory
of the recipe and not recurse into subdirectories.
A variable can be used to set the default change log entries:
LOGENTRY=message
This variable is used for new, changed and deleted files that don't have a {logentry} attribute.
When it's desired to commit one directory at a time the following construct can be used:
source_files = *.c
include_files = include/*.h
commit−src {virtual}:
:commit $source_files
:removeall .
commit−include {virtual}:
Chapter 18. Version Control
66
A−A−P Recipe Executive
:commit $include_files
:removeall include
Note that this is not possible when the sources and include files are in one directory, :removeall only works
per directory.
Using Subversion
Subversion is a new version control system that is going to replace CVS. It has many advantages, such as
atomic commits. But version 1.0 is not ready yet (although the current versions appear to be very stable and
usable).
Subversion support is not implemented yet. For the time being you can retrieve files from a Subversion
repository by using a URL. That works, because subversion is using an Apache server. You can obtain a copy
of single files by specifying the URL in the fetch attribute. Obviously you can't commit changed files this
way.
Using Another Version Control System
To add support for a new version control system, define a Python function with the name
"method_command", where "method" is the word at the start of the commit attribute. The function will be
called with five arguments:
recdict
a dictionary with references to all variable scopes (for expert users only)
the name of the repository defined with the "commit" attribute with the "scheme://" part
name
removed.
the dictionary holding attributes for the specified repository; e.g., for "{commit = foo://
commit_dict
{arg = blah}}" it is (in Python syntax): { "name" : "foo://", "arg" : "blah" }
nodelist
a list of the nodes on which the action is to be performed
action
the name of the action to be executed; can be "fetch", "commit", etc.
The function should a list of nodes that failed. When the action worked without errors an empty list should be
returned.
For an example look at cvs_command() in the VersContCvs.py file of the Aap sources.
A second function that is to be defined is "method_list". It should return a list of the files that are currently in
a specified directory in the repository. Return an empty list if there are no files. The function will be called
with these arguments:
recdict
name
commit_dict
dirname
recursive
a dictionary with references to all variable scopes (for expert users only)
the name of the repository defined with the "commit" attribute with the "scheme://" part
removed.
the dictionary holding attributes for the specified repository; e.g., for "{commit = foo://
{arg = blah}}" it is (in Python syntax): { "name" : "foo://", "arg" : "blah" }
name of the directory to be listed
boolean indicating whether recursive listing is to be done
For an example look at cvs_list() in the VersContCvs.py file of the Aap sources.
Using Subversion
67
A−A−P Recipe Executive
Chapter 19. Using CVS
A common way to distribute sources and working together on them is using CVS. This requires a certain way
of working. The basics are explained here. For more information on CVS see http://www.cvshome.org.
Obtaining A Module
The idea is to hide the details from a user that wants to obtain the module. This requires making a toplevel
recipe that contains the instructions. Here is an example:
CVSROOT = :pserver:[email protected]:/cvsroot/myproject
:child mymodule/main.aap {fetch = cvs://$CVSROOT}
all fetch:
:fetch {fetch = cvs://$CVSROOT} mymodule
Executing this recipe will use the "fetch" target. The :fetch command takes care of checking out the whole
module "mymodule" from the CVS repository with the specified name.
Note that this toplevel recipe cannot be obtained from CVS itself, that has a chicken−egg problem.
Fetching
The child recipe "mymodule/main.aap" may be totally unaware of coming from a CVS repository. If this is
the case, you can build and install with the recipe, but not fetch the files or send updates back into CVS. You
need to use the toplevel recipe above to obtain the latest updates of the files. This will then update all the files
in the module. However, the toplevel recipe itself will never be fetched.
To be able to fetch only some of the files of the module, the recipe must be made aware of which files are
coming from CVS. This is done by using an "fetch" attribute with a URL−like specification for the CVS
server: {fetch = cvs://servername/dir}. Since CVS remembers the name of the server, leaving out the server
name and just using "cvs://" is sufficient. Example:
source = foo.c version.c
header = common.h
:attr {fetch = cvs://} $source $header
:program myprogram : $source
If you now do "aap fetch" with this recipe, the files foo.c, version.c and common.h will be updated from the
CVS repository. The target myprogram isn't updated, of course.
Note: When none of the used recipes specifies a "fetch" target, one will be generated automatically. This will
go through all the nodes used in the recipe and fetch the ones that have an "fetch" attribute.
The recipe itself may also be fetched from the CVS repository:
:recipe {fetch = cvs://}
To update a whole directory, omit the "fetch" attribute from individual files and use it on the directory.
Example:
Chapter 19. Using CVS
68
A−A−P Recipe Executive
source = main.c version.c
:attr {fetch = cvs://} .
:program myprog : $source
Alternatively, a specific "fetch" target may be specified. The automatic updates are not used then. You can
specify the "fetch" attribute right there.
fetch:
:fetch {fetch = cvs://} $source
If you decided to checkout only part of a module, and want to be able to get the rest later, you need to tell
where in the module of the file can be found. This is done by adding a "path" attribute to the cvs:// item in the
fetch attribute. Example:
fetch:
:fetch {fetch = $CVSROOT {path = mymodule/foo}} foo.aap
What will happen is that aap will checkout "mymodule/foo/foo.aap", while standing in two directories
upwards. That's required for CVS to checkout the file correctly. Note: this only works as expected if the
recipe is located in the directory "mymodule/foo"!
If the "path" attribute is omitted, A−A−P will obtain the information from the "CVS/Repository" file. This
only works when something in the same directory was already checked out from CVS.
Checking In
When you have made changes to your local project files and want to upload them all into the CVS repository,
you can use this command:
:reviseall
You must make sure that _ALL_ files in the current directory and below that you want to appear in CVS have
the "commit" attribute, and no others! Files that were previously not in CVS will be added ("cvs add file") and
that exist in CVS but don't have a "commit" attribute are removed ("cvs remove file"). Then all files are
committed ("cvs commit file").
For CVS you need to mark binary files specifically, otherwise checking out may result in a wrong file (esp. on
MS−Windows). In Aap this is done by adding the "binary" attribute to binary files. Example:
Files = main.c version.c logo.png {binary}
To be able to commit changes you made into the CVS repository, you need to specify the server name and
your user name on that server. Since the user name is different for everybody, you must specify it in a recipe
in your ~/.aap/startup/ directory. For example:
CVSUSER_AAP = foobar
The name of the variable starts with "CVSUSER" and is followed by the name of the project. That is because
you might have a different user name for each project.
Checking In
69
A−A−P Recipe Executive
The method to access the server also needs to be specified. For example, on SourceForge the "ext" method is
used, which sends passwords over an SSH connection for security. The name used for the server then
becomes:
:ext:[email protected]−a−p.sf.net:/cvsroot/a−a−p
You can see why this is specified in the recipe, you wouldn't want to type this for commiting each change!
Distributing Your Project With CVS
This is a short how−to that explains how to start distributing a set of files (and directories) using CVS.
1. Copy the files you want to distribute to a separate directory
Mostly you have various files in your project for your own use that you don't want to distribute. These
can be backup files and snippets of code that you want to keep for later. Since the cvs command
below imports all files it can find, you need to have a directory tree with exactly those files you want
to store in CVS. Best is to to make a copy of the project. On Unix:
cp −r projectdir tempdir
Then delete all files you don't want to distribute. Be especially careful to delete "AAPDIR" directories
and hidden files (starting with a dot). It's better to delete too much than too few: you can always add
files later.
2. Import the project to the CVS repository
Move to the newly created directory ("tempdir" in the example above). Import the whole tree into
CVS with a single command. Example:
cd tempdir
cvs −d:ext:[email protected]:/cvsroot/myproject import mymodule myproject start
Careful: This will create at least one new directory "mymodule", which you can't delete with CVS
commands. This will create the module "mymodule" and put all the files and directories in it. If there
are any problems, read the documentation available for your CVS server.
3. Checkout a copy from CVS and merge
Move to a directory where you want to get your project back. Create the directory "myproject" with
this example:
cvs −d:ext:[email protected]:/cvsroot/myproject checkout mymodule
You get back the files you imported in step 2, plus a bunch of "CVS" directories. These contain the
administration for the cvs program. Move each of these directories back to your original project.
Example:
mv myproject/CVS projectdir/CVS
mv myproject/include/CVS projectdir/include/CVS
If you have many directories, one complicated command does them all:
Distributing Your Project With CVS
70
A−A−P Recipe Executive
cd myproject
find . −name CVS −exec mv {} ../projectdir/{} \;
This is a bit tricky. Another method is to copy all the files from your original project into the newly
created directory. But then you have to be careful not to change relevant file attributes, which is tricky
as well. Obviously, the best solution is to have all files you need in CVS, so that you don't have to
copy any files.
4. Commit changes
After making changes to your project and testing them, it's time to check them in. In the recipe you
use for building, add a "commit" attribute to all the files that should be in CVS. The :reviseall
command then does the work for you (see above). Example:
Files = $source $header main.aap
:attr {commit = cvs://:ext:[email protected]:/cvsroot/myproject} $File
:reviseall
Careful: $Files must contain all files that you want to publish in this directory and below. If $Files has
extra files they will be added in CVS. Files missing from $Files will be removed from CVS.
You must assign $CVSUSER_MYPROJECT your user name on the CVS server. Usually you do this
in one of your personal A−A−P startup files, for example "~/.aap/startup/main.aap".
Using Sourceforge
If you are making open source software and need to find a place to distribute it, you might consider using
SourceForge. It's free and relatively stable. They provide http access for your web pages, a CVS repository
and a server for downloading files. There are news groups and maillists to support communication. Read more
about it at http://sf.net.
Since you never know what happens with a free service, it's a good idea to keep all your precious work on a
local system and update the files on SourceForge from there. If several people are updating the SourceForge
site, either make sure everyone keeps copies, or make backup copies (at least weekly).
You can use A−A−P recipes to upload your files to the SourceForge servers. To avoid having to type
passwords each time, use an ssh client and put your public keys in your home directory (for the web pages) or
on your account page (for the CVS server). Read the SourceForge documentation for how to do this.
For uploading web pages you can use a recipe like this:
Files = index.html
download.html
news.html
images/logo.gif
:attr {publish = rsync://[email protected]//home/groups/m/my/myproject/htdocs/%file
$Files
Start this recipe with the "publish" target. If you don't have the "rsync" command you might want to use "scp"
instead. The effect is the same, but "rsync" works more efficient.
For sourceforge, set environment variable CVS_RSH to "ssh". Otherwise you won't be able to login. Do
Using Sourceforge
71
A−A−P Recipe Executive
"touch ~/.cvspass" to be able to use "cvs login" Upload your ssh keys to your account to avoid having to type
your password each time.
Chapter 20. Issue Tracking
Bug Reporting
A recipe used to install an application should offer the "report" target. This is the standard way for a user to
report a problem. The recipe should then help the user with reporting a problem as much as possible.
An example is to send the developer an e−mail. Commands in the recipe are used to put useful information in
the message, so that the user only has to fill in his specific problem. Example:
report:
tmpfile = `tempfname()`
:syseval foobar −−version | :assign Version
:print >$tmpfile Using foobar version: $Version
:print >>$tmpfile system type: `os.name`
@if os.name == "posix":
:print >>$tmpfile system details: `os.uname()`
:print >>$tmpfile
:print >>$tmpfile State your problem here
:do email {subject = 'problem in FOOBAR'}
{to = [email protected]}
{edit}
{remove}
$tmpfile
The "foobar −−version" command is used to obtain the actual version of the "foobar" program being used.
Replace "foobar" with the actual name of your program.
When a web form is to be filled in, give the user hints about what information to fill in certain fields and start
a browser on the right location. Example:
report:
:do view {async} http://www.foo.org/bugreport/
tmpfile = `tempfname()`
:print >$tmpfile
use this information in the bug report:
:print >>$tmpfile program version: $VERSION
:print >>$tmpfile system type: `os.name`
:do view {remove} $tmpfile
Obviously this is a bit primitive, the user has to copy text from the text viewer to the browser. Try using a
better method, filling fields of the form directly if you can.
Bug Fixing
Once a bug has been fixed, the developer needs to update the related bug report. The "tracker" target is the
standard way for a developer to get to the place where the status of the bug report can be changed.
Since trackers work in many different ways the recipe has to specify the commands. Example:
Chapter 20. Issue Tracking
72
A−A−P Recipe Executive
tracker:
:do view {async} http://www.foo.org/tracker?assigned_to=$USER
This is very primitive. The developer still has to locate the bug report and change the status and add remarks.
The above example at least lists the bug reports for the current user.
Chapter 21. Using Python
Python commands can be used where Aap commands are not sufficient. This includes flow control, selecting
the commands to be executed and repeating commands.
Using Python Lines
Single lines of Python code can be included in the recipe by prepending "@". This is most often used for flow
control:
@if os.path.isdir("/usr/local/bin"):
:copy $File /usr/local/bin
You can write multiple Python commands, just prefix a "@" to every line. Do remember that the amount of
indent is used to form command blocks. The indent that is used excludes the "@" character. When there is a
non−white character after the "@", the "@" is removed. When there is white space after the "@" it is replaced
with a space. Generally you don't need to worry about this, if the indenting looks right it probably is.
The main advantage of using single Python lines is that they can be mixed freely with Aap recipe command
lines. You can use Python lines both at the recipe level and in build commands. Again, just make sure the
indent indicates command blocks.
To learn using Python start at the Python web site: http://www.python.org/doc/
Using Aap variables in Python
You can use all the Aap variables in Python code. You don't use the "$", Python syntax does not use a dollar
for variables.
When using a scope name, as in "_recipe.var", the variable otherwise looks the same as in Aap commands.
But when omitting a scope name it works differently. While "$var" in Aap searches for "var" in the "_no"
scope, this does not happen for Python. Python only looks in the current scope. Thus you must explicitly
specify "_no.var" in Python code to get the same effect as "$var" in an Aap command.
In the following example a local variable "system" is used:
CFLAGS = −DFOO
all:
system = $OSTYPE
@if system == "posix":
@
flags = _recipe.CFLAGS
The same thing could be done by accessing $OSTYPE directly from Python:
Chapter 21. Using Python
73
A−A−P Recipe Executive
CFLAGS = −DFOO
all:
@if _no.OSTYPE == "posix":
@
flags = _recipe.CFLAGS
Using Python Expressions
In an assignment, command arguments and most other places a Python expression can be used in backticks.
Expanding this is done before expanding $VAR items, because this allows the possibility to use the Python
expression to result in the name of a variable. Example:
foovaridx = 5
Foo = $Src`foovaridx`
Is equivalent to:
Foo = $Src5
The result of the Python expression in backticks should be a string or a list of strings. A list is automatically
converted to a white−separated string of all list items.
A Python expression cannot be used for the variable name in an assignment. This doesn't work:
`varname` = this does not work
If you really need this, use a Python command instead:
@eval(varname + ' = "value"')
When using a function from a module, it must be imported first. Example:
@from httplib import HTTP
Connection = `HTTP('www.microsoft.com')`
For your convenience these things are imported for you already:
from glob import glob
from RecPython import *
The RecPython module defines the Python functions listed in Chapter 41, A−A−P Python functions.
A backtick in the Python expression has to be escaped to avoid it being recognized as the end of the
expression:
CMD = `my_func("$(`)grep −l foo *.c$(`)")`
contains the Python expression:
my_func("`grep −l foo *.c`")
Using Python Expressions
74
A−A−P Recipe Executive
In the result of the Python expression $ characters are doubled, to avoid them being interpreted as the start of
a variable reference. Otherwise Python expressions with arbitrary results would always have to be filtered
explicitly. When the resulting string is used the $$ will be reduced to a single $ again.
The result of the expression is used as a string in place of the expression and the backticks. Example:
Foo = foo/`glob("*.tmp")`
Would be equivalent to:
Foo = foo/one.tmp two.tmp
Note that "foo/" is only prepended to the whole result, not each white−separated item. If you do want rc−style
expansion, use two commands:
TT = `glob("*.tmp")`
Foo = foo/$*TT
Equivalent to:
Foo = foo/one.tmp foo/two.tmp
Note that a following attribute is only attached to the last item resulting from the Python expression.
Source = `glob('*.c')` {check = md5}
Can be equivalent to:
Source = foo.c bar.c {check = md5}
To apply it to all items, use the :attr command:
Source = `glob('*.c')`
:attr {check = md5} $Source
Watch out for unexpected results when rc−style expansion is done for $*VAR. Example:
VAR = one two
Foo = $*VAR/`glob("*.tmp")`
Would result in:
Foo = one/one.tmp two/one.tmp two.tmp
because the `` part is expanded first, thus the assignment is executed like:
Foo = $*VAR/one.tmp two.tmp
The backticks for a Python expression are also recognized inside quotes. Thus you need to escape the special
meaning there:
Using Python Expressions
75
A−A−P Recipe Executive
Foo = "this$(`)file" that$(`)file
Backtick expressions can be used inside a string if you really need this:
DIR = /home/foo /home/bar
:print "`DIR + "/fi le"`"
results in:
"/home/foo /home/bar/fi le"
Compare this to:
:print "$*DIR/fi le"
which results in:
"/home/foo/fi le" "/home/bar/fi le"
Python Block
A block of Python commands is started with a :python command. If no terminator string is specified the
python code ends where the indent is equal to or less than the :python command:
Source = foo.c bar.c
:python
for i in items:
Source = Source + " " + i
Target = foo
Optionally a terminator string may be specified. The indent of the Python code may then drop below the
indent of the :python command.
The terminator cannot contain white space. A comment may follow. The Python block continues until the
terminator string is found in a line by itself. It may be preceded and followed by white space and a comment
may follow. Example:
@if ok:
:print finding include files
:python EOF
# start of the Python block
include = glob("include/*.c")
EOF
# end of the Python block
Useful Python Items
A list of Python functions defined by Aap can be found in the reference manual, Chapter 41, A−A−P Python
functions.
VAR = `os.environ.get('VAR', 'default')`
Obtain environment variable $VAR. If it is not set use "default".
Python Block
76
A−A−P Recipe Executive
@os.environ["PATH"] = mypath
Set an environment variable.
files = `glob("*.ext")`
Obtain a list of files matching "*.ext". Aap will take care of turning the list that glob() returns into a string,
using quotes where needed.
The difference with using "*.ext" directly is that the expansion is done right here, not later when $files is used.
The catch with using glob() here is that when a file name contains a wildcard character it may be expanded
again. So long as that expansion fails or matches the same file name it is still OK, but it becomes rather
unpredictable. Use wildescape() when needed.
choice = `raw_input("Enter the value: ")`
Prompt the user to enter a value.
tempfile = `tempfname()`
Get a file name to use for temporary files. The file will not exist. See tempfname().
If you create it you need to make sure it is deleted afterwards. Example:
tempfile = `tempfname()`
@try:
:print >$tempfile start of file
:print >>$tempfile $this variable may not exist and cause an error
:cat $tempfile
@finally:
# this is executed whether there is an error or not
:del $tempfile
Exception handling can be useful to handle situations where you know something might fail. Example:
@try:
:sys links −dump exec.html >exec.txt
@except:
:sys lynx −dump −nolist exec.html >exec.txt
This will execute the "links" command. If this fails for some reason (e.g., because a new version of "links"
does not support the "−dump" argument) then the "lynx" command will be used.
Chapter 22. Porting an Application
Porting an application means starting with the original sources and changing them a little bit to make the
application compile and install on a specific system. An Aap port recipe offers a simple way to create a port,
because all the standard work does not need to be specified.
NOTE: not all features mentioned here fully work. Make sure you test your port recipe before publishing it.
Chapter 22. Porting an Application
77
A−A−P Recipe Executive
The Port Recipe
The basic idea is that you assign values to a number of predefined variables. Aap will then generate the steps
for building and installing the package, using the values you have specified. The presence of the
"PORTNAME" variable triggers Aap to handle the recipe as a port recipe. The list of variables is in the next
section.
This is thee list of steps performed when executing Aap without arguments, in this order:
early check to see if dependencies can be met; abort without doing anything if something is
known to fail
fetchdepend handle dependencies for fetch and checksum
fetch
get the required files
checksum
check if the files have correct checksums
extractdepend handle dependencies for extract and patch
extract
unpack archives
patch
apply patches
builddepend handle dependencies for configuring and building
config
do pre−building configuration
build
build
testdepend
handle dependencies for testing
test
check if building was done properly
package
create a binary package
install
install the binary package
rundepend
handle runtime dependencies
installtest
test if the package fully works and was installed properly
For each step a dependency with build commands is added. The purpose of each step is further explained
below.
dependcheck
Meaning of "dependency"
The term "dependency" is
ambiguous here. You should
be able to guess from the
context whether it is used for
a dependency of one
software package on another
package, or a dependency of
a target file on a source file.
You can do part of the work by starting Aap with one of the step names. The steps before it will also be
executed if necessary. For example, "aap package" will do all the steps necessary to generate the binary
package but not install it.
If your port requires non−standard stuff, you can specify your own build commands. You can replace the
normal step, prepend something to it and append something to it:
do−XXX
replace the body of a step
The Port Recipe
78
A−A−P Recipe Executive
pre−XXX do something before a step
post−XXX do something after a step
Example:
post−test:
# delete the directory used for testing
:del {r}{f} $WRKDIR/testdir
Variables
Various variables need to be set to specify properties of the port.
variable
PORTNAME
PORTVERSION
PORTREVISION
CVSMODULES
MAINTAINER_NAME
MAINTAINER
PORTCOMMENT
PORTDESCR
IS_INTERACTIVE
used for
example value
name of the port
"foobar"
app version number
"3.8alpha"
port patchlevel (optional)
"32"
names of CVS modules to checkout (optional) Exec
maintainer name (optional)
John Doe
maintainer e−mail (optional)
[email protected]
short description
get foo into the bar
long description
blah blah blah
requires user input (optional)
yes or no
Variables that can be used by the port recipe:
variable
WRKDIR
DISTDIR
PATCHDISTDIR
PKGDIR
used for
directory all files are extracted in and the building is done in
directory where downloaded distfiles are stored
directory where downloaded patches are stored
directory where files are stored before creating a package
default value
"work"
"distfiles"
"patches"
"pack"
Variables that may be set by the port recipe, defaults are set only after reading the recipe:
variable
WRKSRC
CVSWRKSRC
PATCHDIR
BUILDDIR
Variables
used for
default value
Directory inside $WRKDIR where the unpacked
sources end up. This should be the common top
directory in the unpacked archives. When using CVS $PORTNAME−$PORTVERSION
it is always set to $CVSWRKSRC (also when
$WRKSRC was already set).
Directory inside $WRKDIR where files obtained
the first entry in $CVSMODULES
with CVS end up.
Directory inside $WRKDIR where patches are to be
applied. Can be overruled for a specific patch with a $WRKSRC
"patchdir" attribute.
$WRKSRC
79
A−A−P Recipe Executive
Directory inside $WRKDIR where building is to be
done.
Directory inside $WRKDIR where testing is to be
TESTDIR
done.
Directory inside $WRKDIR where $INSTALLCMD
INSTALLDIR
is to be done.
Set to the command used to configure the
CONFIGURECMD
application. Usually "./configure".
Set to the command used to build the application.
BUILDCMD
Usually just "make".
Set to the command used to test the application.
TESTCMD
Usually "make test".
Set to the command used to do a fake install of the
INSTALLCMD
application.
$WRKSRC
$WRKSRC
nothing
"aap"
"aap test"
"aap install
DESTDIR=$PKGDIR"
Dependency Format
Dependencies on other modules are specified with the various DEPEND_ variables. The format of these
variables is a list of items.
NOTE: Although you can currently specify dependencies, the code for checking them has not been
implemented yet! Thus the user will have to figure it out by himself...
Items are normally white space separated, which means there is an "and" relation between them. Alternatively
"|" can be used to indicate an "or" relation.
DEPENDS = perl python
DEPENDS = perl | python
# require both perl and python
# require perl or python
Parenthesis can be used to group items. Parenthesis must be used when combining "or" and "and" relations.
Example:
DEPENDS = (foo bar) | foobar
DEPENDS = foo bar | foobar
DEPENDS = foo (bar | foobar)
# Either both "foo" and "bar" or "foobar"
# Illegal
# "foo" and either "bar" or "foobar"
When a dependency is not met the first alternative will be installed, thus the order of "or" alternatives is
significant.
Each item is in one of these formats:
name−version_revision
name
name−regexp
name>=version_revision
name>version_revision
name<=version_revision
name<version_revision
Dependency Format
a specific version and revision
any version
a version specified with a regular expression (shell style)
any version at or above a specific version and revision
any version above a specific version and revision
any version at or below a specific version and revision
80
A−A−P Recipe Executive
any version below a specific version and revision name!version_revision any
version but a specific version and revision
In the above "_revision" can be left out to ignore the revision number. It actually works as if there is a "*"
wildcard at the end of each item.
"name" can contain wildcards. When a part is following it is appended at the position of the wildcard (or at −9
if it comes first).
foo−*
matches foo−big, foo−big−1.2 and foo−1.2
foo−*!1.2 matches foo−big, foo−big−1.2 and skips foo−1.2
The version specifications can be concatenated, this creates an "and" relation. Example:
foo>=1.2<=1.4 versions 1.2 to 1.4 (inclusive)
foo>=1.2!1.8 versions 1.2 and above, excluding 1.8
xv>3.10
versions above 3.10, accepts xv−3.10a
The "!" can be followed by parenthesis containing a list of specifications. This excludes the versions matching
the specifications in the parenthesis. Example:
foo>=1.1!(>=1.3<=1.5) versions 1.1 and higher, but not versions 1.3 to 1.5
foo>=6.1!6.1[a−z]*
version 6.1 and later but not 6.1a, 6.1rc3, etc.
When a dependency is not met the newest version that meets the description is used.
For systems that do not allow specifying dependencies like this in a binary pacakge, the specific package
version that exists when generating the package is used.
Dependencies For Various Steps
The various variables used to specify dependencies:
DEPEND_FETCH
DEPEND_EXTRACT
DEPEND_BUILD
DEPEND_TEST
DEPEND_RUN
DEPENDS
Required for fetching files. Also for computing checksums.
Required for unpacking archives.
Required for building but not necessarily for running; these are not included
in the binary package; items may also appear in DEPEND_RUN.
Required for testing only; don't include items that are already in
DEPEND_RUN.
Required for running; these will also be included in the generated binary
package.
Used for DEPEND_BUILD and DEPEND_RUN when empty.
Only the dependencies specified with DEPEND_RUN will end up in the generated binary package. When
using a shared library, it is recommended to put a dependency on the developer version (includes header files)
in DEPEND_BUILD and a dependency on the library itself in DEPEND_RUN. The result is that when
installing binary packages the header files for the library don't need to be installed.
Dependencies For Various Steps
81
A−A−P Recipe Executive
The "CONFLICTS" variable should be set to specify modules with which this one conflits. That means only
one of the two packages can be installed in the same location. It should still be possible to install the packages
in different locations. The format of CONFLICTS is identical to that of the DEPENDS_ variables.
NOTE: Although you can currently specify dependencies and conflicts, the code for checking them has not
been implemented yet! Thus the user will have to figure it out by himself...
Dependencies are automatically installed, unless "AUTODEPEND" is "no". The dependencies are normally
satisfied by installing a port. When a satisfying port can not be found a binary package is installed. The ports
and packages are first searched for on the local system. When not found the internet is searched.
The order of searching can be changed with "AUTODEPEND":
binary
source
source {path = /usr/ports
http://ports.a−a−p.org}
only search for binary packages, default locations
only search for ports, default locations
only search for ports in /usr/ports and on the ports.a−a−p.org
web site.
Steps
These are the individual steps for installing a ported application. Each step up to "install" depends on the
previous one. Thus "aap install" will do all the preceding steps. But the steps that have already been
successfully done in a previous invocation of Aap will be skipped. The "rundepend", "installtest", "clean", etc.
targets do not depend on previous steps, they can be used separately.
dependcheck
Check if required dependencies can be fulfilled.
This doesn't install anything yet, it does an early check if building and/or installing the port will
probably work before starting to download files.
This uses all the DEPEND_ variables that will actually be used. Fails if something is not available.
fetchdepend
Check dependencies for fetch and checksum.
Uses DEPEND_FETCH, unless disabled with AUTODEPEND=no
fetch
Get required files.
If $CVSMODULES is set and $CVS is not "no", obtain files from CVS:
Uses $CVSROOT or cvsroot attribute in $CVSMODULES.
$CVSWRKSRC is where the files will end up (default is first member in $CVSMODULES).
Also obtain $CVSDISTFILES if defined.
Also obtain $CVSPATCHFILES if defined.
Use a post−fetch target if directories need to be renamed.
else
Steps
82
A−A−P Recipe Executive
if $DISTFILES is set obtain them
if $PATCHFILES is set obtain them
Use MASTER_SITES for [CVS]DISTFILES. Use PATCH_SITES for [CVS]PATCHFILES. The
[CVS]DISTFILES are put in $DISTDIR. The [CVS]PATCHFILES are put in $PATCHDISTDIR.
The directory can be overruled with a {distdir = dir} attribute on individual patch files.
Files that already exist are skipped (if there is a checksum error, delete the file(s) manually).
checksum
Check if checksums are correct.
The port recipe writer must add the "do−checksum" target with :checksum commands to verify that
downloaded files are not corrupted. Example:
# >>> automatically inserted by "aap makesum" <<<
do−checksum:
:checksum $DISTDIR/foo−1.1.tgz {md5 = 2341423423423423434}
:checksum $PATCHDISTDIR/foo−patch3.gz {md5 = 3923858739234}
# >>> end <<<
The "aap makesum" command can be used to generate the lines.
extractdepend
Check dependencies for extract and patch.
Uses DEPEND_EXTRACT, unless disabled with AUTODEPEND=no
extract
Unpack archives in the right place. Use $EXTRACT_ONLY if defined, otherwise $DISTFILES or
$CVSDISTFILES when CVS was used.
Uses the "extract" action. To extract a new type of archive:
add filetype detection for this type of archive
define an "extract" action for this filetype
Extraction is done in $WRKDIR. A subdirectory may be specified with the "extractdir" attribute on
each archive.
DISTFILES = foo−1.1.tgz
foo_doc−1.1.tgz {extractdir = doc}
patch
Apply patches not applied already.
$PATCHCMD defines the patch command, default: "patch −p < ". The patch file name is appended,
unless "%s" appears in the string, then it's replaced by the file name.
A "patchcmd" attribute on each patch file may specify a patch command that overrules
$PATCHCMD.
The patches are applied in $WRKDIR/$PATCHDIR (default: $WRKSRC). A "patchdir" attribute on
each patch file may overrule the value of $PATCHDIR.
builddepend
Steps
83
A−A−P Recipe Executive
Check dependencies for configure and build.
Uses DEPEND_BUILD, unless disabled with "AUTODEPEND=no".
config
Perform configuration.
Executes the command specified with CONFIGURECMD. Usually autoconf, imake, etc. May be
empty.
build
Run the command specified with BUILDCMD. When empty "aap" is used. Useful values are
"gmake", "make", etc. An argument may be included. Example: "BUILDCMD=make foo"
Done in $WRKDIR/$BUILDDIR, default: $WRKDIR/$WRKSRC
testdepend
Check test dependencies.
Uses DEPEND_TEST.
check if all required items are present try to install them automatically, unless disabled
AUTODEPEND=no This is skipped when "SKIPTEST=yes"
test
Check if building was done properly.
Executes TESTCMD. When it is empty "aap test" is used. Example: "TESTCMD=make testall"
This is skipped when "SKIPTEST=yes" Done in $WRKDIR/$TESTDIR, default:
$WRKDIR/$WRKSRC
package
Create a package with selected files, usually including the compiled program.
There are two methods to select files to be included in the package:
1. Specify the list of files below $WRKDIR, with a "dest" attribute where they should end up.
Assign the list to $PACKFILES. Example:
PACKFILES = $WRKSRC/bin/prog {dest = /usr/local/bin/prog}
$WRKSRC/man/prog.1 {dest = usr/local/man/man1/prog.1}
2. Specify a command to fake−install into $PKGDIR and use all files that end up there. Set
$INSTALLCMD to the command to be used. Example:
INSTALLCMD = "aap install DESTDIR=$PKGDIR"
Set INSTALLDIR to the directory inside $WRKDIR where the files are put. Default is
$WRKSRC. $PKGDIR/$PREFIX is where files end up.
A packing list is generated with the files that exist in the package. Then "pkg_create" is executed to
actually create the package. Arguments are given such that $PORTDESCR is used as the description
of the package and $PORTCOMMENT for a short explanation of what the package is for.
install
Install the binary package.
Steps
84
A−A−P Recipe Executive
This executes the "pkg_add" command in a separate shell. You are asked to type the root password.
This is reasonably safe, since the shell is only connected to Aap and it can only install a package.
Exception: This updates the "rundepend" and "installtest" targets after updating the post−install target.
This allows doing "aap install", which is a lot more obvious than "aap installtest".
rundepend
Check runtime dependencies.
Check if all required items specified with $DEPEND_RUN are present and tries to install them
automatically, unless $AUTODEPEND is "no".
This is skipped if $SKIPRUNTIME is "yes". The pre−rundepend and post−rundepend are still done,
they should check $SKIPRUNTIME themselves.
"aap rundepend" will _not_ cause previous steps to be updated.
installtest
Test if the installed package works.
This is empty by default, specify a "do−installtest" target to actually do something.
Note that when $SKIPRUNTIME is "yes" the dependencies have not been verified and running the
application might not work.
uninstall
Uninstall the binary package. Not implemented yet!
Execute pkg_delete or equivalent. Does not depend on other steps.
clean
Delete all generated, unpacked, patched and CVS files.
Does not delete the downloaded files. Does not depend on other steps. Does not clean packages this
one depends on.
distclean
Delete everything except the toplevel recipe. After this all steps must be redone.
Does not depend on other steps. Does not clean packages this one depends on.
makesum
Generates a "do−checksum" dependency that checks if the fetched files were not corrupted.
If the recipe already contained a "do−checksum" dependency that was generated it is replaced.
Otherwise a new one is appended. Do not change the markers before and after the "do−checksum"
dependency, otherwise you end up with two of these when doing "aap makesum" again.
Does not depend on other steps. The files must already be present. You can use "aap fetch
−−nofetch−recipe" to obtain the files, if needed (it obtains the files but not the recipes).
srcpackage
Generate a package with recipe and source files. Not implemented yet!
Puts the main recipe and all downloaded files into an archive. The resulting archive can be installed
without downloading.
Depends on the "fetch" target.
Steps
85
A−A−P Recipe Executive
Port Description
The text to describe the port is usually a page full of plain text. Here is an example:
PORTDESCR << EOF
This is the description of the port.
A very important application indeed.
See our website http://myport.org.
EOF
In the rare situation that "EOF" actually appears in the text you can use anything else, such as "THEEND".
Chapter 23. Automatic Configuration
The :conf command is used to discover properties of the compiler and the system. With this information a
program can be compiled to work on many different systems without the user to manually specify the
properties. For Unix systems an alternative is using Autoconf, see Chapter 24, Using Autoconf.
TODO The ":conf" command is still under development.
:conf init
Clean the configuration environment.
configure checks were done before.
Only needed when
:conf language lang
Use "lang" as the language for tests that do not have a
{language} attribute.
Only "C" and "C++" are currently supported. "C" is the
default.
A test will be done if the compiler for the language
works. If not all tests for the language will fail.
Example:
:conf language C++
:conf header [mainoptions] headername [itemoptions] ...
Check for C or C++ header file(s) "headername".
Uses current value of INCLUDE.
Defines HAVE_headername if "headername" is available.
mainptions:
oneof
first of the items that works is used, at
least one is required
required
all items are required to exist
itemoptions:
header
text included in the test program
language
C or C++
Examples:
:conf header X11/Shell.h
:conf header {oneof} sys/time.h times.h
:conf function [mainoptions] functionname [itemoptions] ...
Check for C or C++ function(s) "functionname".
Uses the current value of $LIBS.
Defines HAVE_functionname if "functionname" is available.
Options: see ":conf header"
Example:
:conf function bcopy
Port Description
86
A−A−P Recipe Executive
:conf type [mainoptions] typename [itemoptions] ...
Check for C or C++ type(s) "typename".
Uses the current value of $LIBS.
Defines HAVE_typename if type "typename" is available.
Options: see ":conf header".
Additional itemoption:
fallback
type definition to use for the type when
it is not available
Example:
:conf type size_t {fallback = unsigned long}
:conf lib [mainoptions] libname,funcname [itemoptions] ...
Check for library/libraries by testing if "funcname"
exists when using the "libname" library.
Uses the current value of $LIBS and appends "−llibname"
if the test succeeds. Also appends to $_conf.LIBS.
Defines HAVE_libname if library "libname" is available.
Options: see ":conf header".
Example:
:conf lib iconv,iconv_open
:conf write header filename
Write the HAVE_ and other symbols collected so far into
"filename".
Example:
:conf write header $BDIR/config.h
:conf write recipe filename
Write the settings in the _conf scope into "filename".
Example:
:conf write recipe $BDIR/config.aap
The _conf scope stores variables set by configure tests. For example,
$_conf.LIBS the libraries that ":conf lib" found. The _conf scope is used in
the tree of scopes just before the toplevel scope, after all callstack and
recipe tree scopes.
Special characters in header, function and type names are changed to an
underscore before defining the HAVE_ symbol. Lowercase characters are changed
to uppercase.
The preprocessor symbols that are gathered from the tests are available in
the $_conf.have dictionary. Example:
:conf header sys/time.h
@if _conf.have["HAVE_SYS_TIME_H"]:
:print we have time
@else:
:print sorry, no time.
":conf write recipe" writes the variables in the _conf scope.
variables you do not want to be written. Example:
saveLIBS = $?_conf.LIBS
_conf.LIBS =
:conf lib foo,foobar
_conf.FOOLIB = $_conf.LIBS
_conf.LIBS = $saveLIBS
Port Description
You can remove
87
A−A−P Recipe Executive
Chapter 24. Using Autoconf
The autoconf system is often used to configure C programs to be able to compile them on any Unix system.
This section explains how to use autoconf with Aap in a nice way. An alternative is to use the :conf command
of Aap. It is much easier to use and also works on non−Unix systems. See Chapter 23, Automatic
Configuration.
Running The Configure Script
A recipe that uses the configure script that autoconf generates can start like this:
$BDIR/config.h $BDIR/config.aap :
configure config.arg config.h.in config.aap.in
:sys ./configure `file2string("config.arg")`
:move {force} config.h config.aap config.log
config.cache config.status $BDIR
config.arg:
:touch {exist} config.arg
:update $BDIR/config.aap
:include $BDIR/config.aap
What happens here is that the "config.aap" target is updated before any of the building is done. This is
required, because running the configure script will generate or update the "config.aap" file that influences how
the building is done.
Remembering Configure Arguments
The arguments for configure are stored in the "config.arg" file. This makes it easy to run configure again with
the same arguments. The file is read with the file2string() function. There should be a "config.txt" file that
explains all the possible configure arguments, with examples that can be copied into "config.arg". Example:
# Select the library to be used for terminal access.
# series of libraries will be tried. Useful values:
−−with−tlib=curses
−−with−tlib=termcap
−−with−tlib=termlib
When omitted a
The user can now copy one of the example lines to his "config.arg" file. Example:
# select specific terminal library
−−with−tlib=termcap
Comment lines can be used, they must start with a "#". Note: a comment after an argument doesn't work, it
will be seen as an argument.
When updating to a new version of the program, the same "config.arg" file can still be used. A "diff" between
the old and the new "config.txt" will show what configure arguments have changed.
Chapter 24. Using Autoconf
88
A−A−P Recipe Executive
Variants And Configure
"config.aap" and "config.h" are put in $BDIR, because they depend on the current system. They might also
depend on the variant to be built. In that case the :variant statement must be before the use of $BDIR.
However, if the variant is selected by running configure, the variant must come later. "config.aap" and
"config.h" are then updated when selecting another variant.
For the program to find "config.h" in $BDIR you must add an option to the C compiler. And you have to
notify the compiler that the file exists, so that it will be included:
INCLUDE += −I$BDIR
DEFINE += −DHAVE_CONFIG_H
The "config.cache", "config.log" and "config.status" files are also moved to $BDIR. This means they are not
available when running "./configure" again., This may be a bit slower, since the cache isn't used, but it is
much more reliable. And you can view the log of each variant that was build.
Running Autoconf
For a developer there also needs to be a method to generate the configure script from configure.in. This needs
to be done even before configure is run. Prepending this to the example above should work:
configure {signfile = mysign} : configure.in
:sys autoconf
Normally the "configure" script is distributed with the program, so that a user does not need to install and run
autoconf. The "{signfile = mysign}" attribute on the target is used to avoid running autoconf when the user
builds the program and the "configure" and "configure.in" files are still as they were distributed. The
signatures in the "mysign" file, which you must include in the distribution, will match and Aap knows that
"configure" is up−to−date. If using the "mysign" file was omitted, there would be no signature for the
"configure" target and Aap would decide to run autoconf. When you change "configure.in" its signature will
be different from what is stored in "mysign" and autoconf will be run.
Using A Distributed Configure Script
If you are porting an application that already has a configure script you can filter it to make it work with Aap.
This means you can use the unmodified configure.in.
configure_aap : configure
:cat configure
| :eval re.sub("Makefile", "config.aap", stdin)
>! configure_aap
:chmod 755 configure_aap
Now you need to execute "configure_aap" instead of "configure" in the first example above.
Skipping Configuration
Running configure can take quite a bit of time. And when you are not going to build anything that can be
annoying. For example, "aap comment" doesn't require configure to run.
Variants And Configure
89
A−A−P Recipe Executive
Also, configure doesn't work on a non−Unix system. When you have taken care in your code to handle this
you can simply skip configure. This line above all the configure code should take care of this:
@if osname() == "posix" and has_build_target():
The has_build_target() function checks for a target that will do some kind of building, which means configure
must be run.
A Complete Example
Using all the parts mentioned above together we have a fairly complete method to handle running autoconf
and configure. This code is used in the recipe that builds the Exuberant Ctags program.
#
# On Unix we run configure to generate config.h and config.aap.
# This is skipped if there is no building to be done (e.g., for "clean").
#
@if osname() == "posix" and has_build_target():
# "config.h" and "config.aap" are generated in $BDIR, because the are
# different for each system.
# Tell the compiler to find config.h in $BDIR.
INCLUDE += −I$BDIR
DEFINE += −DHAVE_CONFIG_H
# Run autoconf when needed, but avoid doing this always, not everybody has
# autoconf installed. Include "mysign" in the distribution, it stores the
# signature of the distributed configure script.
configure {signfile = mysign} : configure.in
@if not program_path("autoconf"):
:print Can't find autoconf, using existing configure script.
@else:
:sys autoconf
# Filter the configure script created by autoconf to generate config.aap
# instead of Makefile. This means we can use the unmodified configure.in
# distributed with ctags.
configure_aap : configure
:cat configure
| :eval re.sub("Makefile", "config.aap", stdin)
>! configure_aap
:chmod 755 configure_aap
# Dependency to create config.aap by running the configure script.
# The "config.arg" file is used for configure arguments.
:attr config {virtual} {comment = Do configuration only}
config $BDIR/config.h $BDIR/config.aap :
configure_aap config.arg config.h.in config.aap.in
:sys ./configure_aap `file2string("config.arg")`
# Move the results into $BDIR. This also means the cache isn't used
# the next time, it is unreliable.
:move {force} config.h config.aap config.log config.cache
config.status $BDIR
# Create an empty config.arg when it's missing.
config.arg:
:touch {exist} config.arg
A Complete Example
90
A−A−P Recipe Executive
# Update config.aap before including it. Forcefully when the "reconfig"
# target is used.
@if "reconfig" in var2list(_no.TARGETARG):
:del {force} config.cache config.status
:update {force} $BDIR/config.aap
@else:
:update $BDIR/config.aap
:include $BDIR/config.aap
Chapter 25. Automatic Package Install
Aap provides a very powerful feature: When a program is required and it does not exist on the system, it can
be installed automatically.
Suppose a recipe specifies that a file is to be uploaded to a server with secure copy. This requires the "scp"
command. When Aap cannot find this command it offers you the choice to install it. Aap will check what kind
of system you have and find a recipe for it. This recipe is executed and it will install the package for you.
Either by obtaining an executable program or by fetching the sources and building them. Then the original
recipe continues and uses the "scp" command that has just been installed.
Note: This requires an internet connection!
How Does It Work?
The first step is to detect if a required program is present on the system. This is done internally when "scp" or
"cvs" is to be used. You can also check explicitly in a recipe with the :assertpkg command. This uses the
$PATH environment variable. Aap will also look in its own directory, because this is where previously
installed programs are sometimes located. Also see the :progsearch command and the program_path()
function.
When the program is not found, the user is asked what is to be done:
Cannot find package "scp"!
1. Let Aap attempt installing the package
2. Retry (install it yourself first)
q. Quit
Choice:
When the user types "1" the automatic install will be invoked. That will be explained below. An alternative is
to install the package yourself. This is useful if you know how to do this or when you don't think the
automatic mechanism will work. After the package has been installed you can enter "2" and Aap continues
executing the recipe. The last choice is "a", which means you give up and abort executing the recipe.
In situations where the package name differs from the command name, or there are more complicated
requirements, you can write a check yourself. When a package needs to be installed the :installpkg command
can be used to have Aap install the package.
To install a package automatically Aap will download a recipe and execute it. To be able to execute the recipe
in a proper environment a directory is created. On Unix this will be "~/.aap/packages/{package−name}/". The
Chapter 25. Automatic Package Install
91
A−A−P Recipe Executive
"boot.aap" recipe is downloaded from the A−A−P web site. This uses a simple PHP script that selects the
recipe to use. Example:
http://www.a−a−p.org/package.php?package=scp&osname=posix
The downloaded recipe contains further instructions for building and/or installing the package. This can be
anything, thus it is very flexible. Usually the recipe finds out what kind of system you are using and selects
another recipe to be used for it. Or it uses the standard package mechanism of your system.
If you are running a BSD system you probably have the BSD ports system installed (if not, you should install
it!). This is a very well maintained system that takes care of installing almost any software you can think of.
The only disadvantage is that you need to be super−user to use it. Aap will ask you if you want to do this:
The devel/templ port appears to exist.
Do you want to become root and use the port? (y/n)
If you respond with "y" you will be asked to type the root password and Aap will invoke the commands to
build and install the BSD port. If you respond with "n" the generic Unix method will be used (if there is one).
On MS−Windows it will often be possible to download an executable file. This works without asking
questions. Since there is no standard directory for executables, they are often placed in the Aap directory. You
might want to move them to a directory in $PATH if you want to use them at the command line.
On generic Unix systems (Posix, Linux) the recipe will attempt to download a source archive, unpack it and
build and install it. This mostly works, but may fail on some systems. You may have to do some steps
manually then, possibly by running "configure" with specific arguments. You can find the downloaded files in
"~/.aap/packages/{package−name}/". The Aap message log "AAPDIR/log" may contain hints about what
went wrong. If you know the solution, please report this to the maintainer of the recipe, so that it can be made
to work automatically.
Adding Support For a Package
To make it possible to automatically install a package at least one recipe needs to be written. This recipe is
placed on the A−A−P website, so that every Aap user can find it without typing a URL. You need to e−mail
this recipe to the maintainer of the A−A−P website: webmaster AT a−a−p.org. Chose the package name
carefully, because it must be unique. Mostly it is the name of the command that was to be executed, such as
"scp" or "cvs".
If there is only one recipe it must take care of all systems. This is useful for a Python module, for example. Or
when you want to redirect to another site where the recipes for this specific package are stored. Here is an
example:
all install:
:execute generic.aap {fetch = http://www.foo.org/recipes/%file%} $buildtarget
This recipe redirects everything to another recipe, which is downloaded from the URL specified with the
"fetch" attribute. Note that the "all" and "install" targets are supported. "all" is used to build the package (as
the current user) and "install" to install it (possibly requiring root privileges).
Adding Support For a Package
92
A−A−P Recipe Executive
Installing on MS−Windows
For MS−Windows you often have a different method to install a package. Especially when the command to be
installed is available as one executable program. Here is an example for the "scp" command:
# Package recipe for SCP on MS−Windows.
# Maintainer: Bram Moolenaar <Bram@a−a−p.org>
# Last Update: 2003 May 1
install:
# We use the scp command from PuTTY, it appears to work well.
# For info about PuTTY see:
# http://www.chiark.greenend.org.uk/~sgtatham/putty/
:print This will install SCP on MS−Windows.
dir = "`Global.aap_bindir`"
:mkdir {force} $dir
:fetch {fetch = http://the.earth.li/~sgtatham/putty/latest/x86/pscp.exe
ftp://ftp.chiark.greenend.org.uk/users/sgtatham/putty−latest/x86/pscp.exe}
$dir/scp.exe
# That's all, it doesn't need to be installed.
The actual work is done with one :fetch command. It specifies two locations where the program can be
downloaded. Specifying several locations is useful, because servers may be down or unreachable from behind
a firewall (some companies disable access to ftp servers).
Note the use of "Global.aap_bindir". This is the directory where Aap itself is located with "bin" added. Putting
the executable there avoids asking the user to make a choice. This directory is always searched for executable
commands, it does not have to be in $PATH. Double quotes are used for the case the directory contains a
space (e.g., "C:\Program Files").
Building and Installing on Unix
For Unix things are generally a bit more complicated. The best is to use the package mechanism of the
system. Using a BSD port was mentioned above. Most systems have an equivalent mechanism. When this is
not available you need to fall back to compiling from sources. Here is an example for "cvs":
# Package recipe for CVS on Posix.
# Maintainer: Bram Moolenaar <Bram@a−a−p.org>
# Last Update: 2003 May 1
PREFIX =
name = cvs−1.11.5
tarname = $(name).tar.gz
all install:
# There is no check for a BSD port here, because BSD systems should have a
# cvs command already.
# Ask the prefix before compiling.
@if not _recipe.PREFIX:
@_recipe.use_asroot, _recipe.PREFIX = ask_prefix("cvs")
@if not _recipe.PREFIX:
:error No prefix given
# Should use a port recipe for this...
Installing on MS−Windows
93
A−A−P Recipe Executive
@if buildtarget == "all":
# Get the sources and build the executable.
# This can be done by an ordinary user.
:print This will build "cvs" on Posix machines.
:update get−tar
:sys tar xfz $tarname
:cd $name
:sys ./configure −−prefix=$PREFIX
# The GSSAPI stuff breaks the build for me on FreeBSD. If we can find
# a solution it can work on other systems..
:cat config.h | :eval re.sub('#define HAVE_GSSAPI\\b', '', stdin) >! config.h
:sys make
@else:
# Install the executable.
# This may need to be done by root.
:cd $name
@if _recipe.use_asroot:
# Assume the directories already exist...
:asroot make $buildtarget
@else:
:sys make $buildtarget
get−tar {virtual}: $tarname {fetch = http://ftp.cvshome.org/$name/%file%}
Note that this recipe specifically mentions the version "1.11−5". This is a bit unusual. Better is to refer to the
latest stable version. Unfortunately, for CVS the proper link is not available. This means the recipe has to be
updated every time a new stable version is released.
The user has the choice of installing CVS for himself or for everybody on the system. Aap has a build−in
function for this: ask_prefix(). When the user is root it will return "1" and "/usr/local/" without asking,
assuming the super−user will want to install for everybody (why else would he be doing this as root?). Normal
users will be asked to make a choice:
Select where to install cvs:
1. become root and install in "/usr/local/"
2. become root and install in specified location
3. install in your home directory "/home/mool/"
4. install in a specified location
a. abort
choice:
It is obvious what the choices will do. The "cvs" recipe then continues to obtain the sources, using ":update
get−tar" to allow using a cached file. The archive is unpacked with "tar" and "configure" is run before
invoking "make". This is the standard way how most Unix programs are build.
There is one extra step: While testing the recipe it was discovered that the configuration makes a mistake and
defines "HAVE_GSSAPI", but that doesn't work. The recipe modifes "config.h" to fix this. This is not a nice
solution, but it makes the building work. This kind of porting would actually better be done in a separate
recipe. And by reporting the problem to the maintainers of the CVS configure script.
When the recipe is invoked with the "install" target the choice to install as root or not is used. This was stored
in "_recipe.use_asroot" to avoid having to make the choice again when invoked a second time (the recipe is
Installing on MS−Windows
94
A−A−P Recipe Executive
first invoked with "all" to build the program as the current user and then with "install" to do the actuall install,
possibly as super−user). The :asroot command passes the command to a separate shell with root privileges.
The user is asked confirmation for every executed command for safety.
Installing a Specific Package
This automatic package installation system is a nice way of installing a program without the need to know
how it's done. You can also use it to install a package directly:
% aap −−install scp
This will attempt to install the "scp" package on your system. It works just like when Aap discovered that the
"scp" command was needed for executing a recipe.
Obviously not just any package is available. Quite a few currently, but hopefully this will grow when people
submit their packages. When a package cannot be found you get an error message:
% aap −−install foobar
Aap: Creating directory "/home/mool/.aap/packages/foobar"
Aap: Entering directory `/home/mool/.aap/packages/foobar'
Aap: Attempting download of "http://www.a−a−p.org/package.php?package=foobar&osname=posix"
Aap: Downloaded "http://www.a−a−p.org/package.php?package=foobar&osname=posix" to "boot.aap"
Aap: Error in recipe "/home/mool/.aap/packages/foobar/boot.aap" line 3: Sorry, package 'foobar' is not available.
%
Cleaning Up
Currently Aap does not delete the files downloaded and generated while installing a package. This is useful
especially when something fails, so that you can read the log file "AAPDIR/log" and/or do part of the
installation manually. But this does mean disk space is used.
In the comments produced while installing the package you can see which directory is used for the files. This
depends on the system and environment variables. It should be one of these:
$HOME/.aap/packages
$HOME/aap/packages
$HOMEDRIVE$HOMEPATH/aap/packages
C:/aap/packages
It is fairly safe to delete the "packages" directory and everything it contains.
In case you are really low on disk space, you might want to check the Aap install directory for any programs
that you no longer want to use. This is only relevant on MS−Windows.
Chapter 26. Debugging a Recipe
The log file shows what happened while A−A−P was executing. Often you can figure out what went wrong by
looking at the messages.
Installing a Specific Package
95
A−A−P Recipe Executive
The log file is named "AAPDIR/log". It is located in the directory of the main recipe. If you executed aap
again and now want to see the previous log, it is named "AAPDIR/log1". Older logs are "AAPDIR/log2",
"AAPDIR/log3", etc. This goes up to "AAPDIR/log9".
Messages
The kind of messages given can be changed with the MESSAGE variable. It is a comma separated list of
message types for which the message is displayed. Other messages are still written in the log file.
name
all
error
warning
note
depend
info
extra
system
result
changedir
display message for
everything
errors (Aap cannot continue)
warnings (things that are wrong but Aap can still continue)
notes (warnings about things that are probably OK)
dependencies, the reasoning about what to build
general info (file copy/delete, up/downloads)
extra info (why something was done)
system (shell) commands that are executed
the result of system (shell) commands
changing directories
The command line arguments "−v" and "−s" can be used to make the most often used selections:
Aap argument
(nothing)
−v
−−verbose
−s
−−silent
$MESSAGE value
error,warning,system,info
all
all
error
error
Other values can be assigned at the command line. For example, to only see error and dependency messages:
aap MESSAGE=error,depend (other arguments)
Don't forget that excluding "error" means that no error messages are displayed!
No matter what messages are displayed, all messages are written in the log file. This can be used afterwards to
see what actually happened.
Chapter 27. Differences from make
An Aap recipe has the same structure as a Makefile. But there are many differences. The most important and
unexpected ones are mentioned here.
Messages
96
A−A−P Recipe Executive
Build if file does not exist
In a Makefile a dependency with only a target is not executed if the target exists. With Aap the build
commands will be executed in more situations:
• when the build commands were never executed
• when the build commands have changed
For example, this dependency is often used in a Makefile to create a symbolic link when it doesn't exist yet:
gvim:
ln −s vim gvim
The Aap recipe for this would be:
gvim:
:symlink vim gvim
When running Aap with this recipe for the first time and the "gvim" link already exists, you will get an error
message.
To avoid this problem, set the buildcheck attribute to an empty string:
gvim: {buildcheck=}
:symlink vim gvim
Note: if the symbolic link exists but the file that it points to doesn't exist you still get an error. That's probably
what you want.
Use Of Environment Variables
The "make" program uses all environment variables for variables in the Makefile. This can cause unexpected
results, because you may have a large number of environment variables and some of them you didn't set
yourself thus don't even know about them.
Aap does not use environment variables for recipe variables. A few environment variables are explicitly used.
For example, $PATH is used to locate programs. To access an environment variable Python code must be
used. The "os.environ" dictionary stores them. Example:
Home = `os.environ.get("HOME")`
Note that some systems are case sensitive (e.g., Unix), some systems are not (e.g., MS−Windows).
Signatures Instead Of Timestamps
Make checks for outdated files by comparing timestamps. A target file is considered out−of−date when it's
older than one of the source files. This means that Make will not notice a source file that was changed back to
an older version. And Make has big problems when a source file has a timestamp in the future (happens when
the system clock is turned back for some reason). The target will always be older, thus Make will build it
Build if file does not exist
97
A−A−P Recipe Executive
every time.
The default check for Aap is to use MD5 signatures. This means a target is considered out−of−date if one of
the source files is different from when this target was last build. Additionally, a signature is made for the build
commands. If you change the commands that build the target it will also be considered out−of−date. Mostly
this means Aap will build the target in many more situations.
If you want Aap to use timestamps like Make does, set the $DEFAULTCHECK variable to "newer". Also see
the check attribute, it can be used to change the check for a specific dependency.
Chapter 28. Customizing Filetype Detection and Actions
See Chapter 8, Filetypes and Actions for a simple example how to define a new filetype.
Filetype Detection
A−A−P detects the type of a file automatically. This is used to decide what tools can be used for a certain file.
The detection often uses the name of the file, especially the suffix. Extra suffixes like ".in" and ".gz" are
ignored. Sometimes the contents of the file is inspected. for example, on Unix a shell script is recognized by
"#!/bin/sh" in the first line.
To manually set the file type of an item add the "filetype" attribute. This overrules the automatic detection.
Example:
foo.o : foo.x {filetype = cpp}
Most detection is already built in. If this is not sufficient for your work, filetype detection instructions can be
used to change the way file type detection works. These instructions can either be in a file or directly in the
recipe:
:filetype filename
:filetype
suffix p pascal
script .*bash$ sh
The advantage of using a file is that it will also be possible to use it when running the filetype detection as a
separate program. The advantage of using the instructions directly in the recipe is that you don't have to create
another file.
For the syntax of the file see Chapter 38, Filetype Detection.
It is sometimes desired to handle a group of files in a different way. For example, to use a different optimizer
setting when compiling C files. An easy way to do this is to give these files a different filetype. Then define a
compile action specifically for this filetype. Example:
:attr {filetype = c_opt} bar.c foo.c
:action compile c_opt
OPTIMIZE = 3
:do compile $source
Chapter 28. Customizing Filetype Detection and Actions
98
A−A−P Recipe Executive
When you define an action (or a route), Aap checks that the filetypes you use are known filetypes,
i.e. mentioned somewhere in a :filetype command. If you just make up filetypes and use them in actions, Aap
will give you a warning. This helps detect misspellings and the like. However, for the "optimized C" filetype
above, this leads to a warning where you do not want one: c_opt is a proper filetype in this context. In order
to declare a filetype without giving any rules to detect files of that type, use declare in a :filetype
command:
:filetype
declare c_opt
The detected filetypes never contain an underscore. A−A−P knows that the underscore separates the normal
filetype from the additional part. When no action is found for the whole filetype, it is tried by removing the
"_" and what comes after it. (This isn't fully implemented yet!)
Care should be taken that an action should not invoke itself. For example, to always compile "version.c" when
linking a program:
:attr {filetype = my_prog} $TARGET
:action build my_prog object
:do compile {target = version$OBJSUF} version.c
:do build {target = $target} {filetype = program}
$source version$OBJSUF
Without "{filetype = program}" on the :do build" command, the action would invoke itself, since the filetype
for $TARGET is "my_prog".
Attributes on source arguments of the :do that start with "var_" are passed on to the executed action as
variables. Examples:
:do build foo.c {var_OPTIMIZE = 2}
:attr {var_OPTIMIZE = 2} foo.c
:do build foo.c
In the same way an attribute starting with "add_" is added to a variable. Example:
:do build foo.c {add_DEFINE = −DBIG}
The value of the attribute is not added when it already appears in the variable. This avoids adding it two or
more times.
Variable values for the executed action can also be passed by giving an attribute just after the action:
:do build {OPTIMIZE = 2} foo.c
And yet another method is to define a user scope and use this for the action:
s_foo.OPTIMIZE = 4
:do build {scope = s_foo} foo.c
Chapter 28. Customizing Filetype Detection and Actions
99
A−A−P Recipe Executive
Executing Actions
The user can select how to perform an action for each type of file. For example, the user may specify that the
"view" action on a file of type "html" uses Netscape, and the "edit" action on a "html" file uses Vim.
To start an application:
:do actionname filename
This starts the action "actionname" for file "filename". Variables to be used by the commands can be specified
after the action as attributes:
:action convert default
:sys convertcmd $?arg $source >$target
...
:do convert {arg = −r} filename
The filetype is automatically detected from the file name(s) and possibly its contents. To overrule the
automatic filetype detection, specify the filetype as an attribute on the file:
:do convert filename {filetype = text}
This changes the filetype of the source file, the input of the action. To change the filetype of the output, the
target of the action, use a "filetype" attribute on the action name:
:do convert {filetype = html} filename {filetype = text}
Multiple filename arguments can be used:
:do action file1 file2 file3
For some actions a target can or must be specified. This is done as an attribute on the action name:
:do convert {target = outfile} infile1 infile2
Attributes of the input filenames other than "filetype" are not used to select the action that will be executed.
The "async" attribute can be used to start the application without waiting for it to finish. However, this only
works for system commands and when multi−tasking is possible. Example:
:do email {async} {remove} {to = piet} {subject = done building} logmessage
The "remove" attribute specifies that the files are to be deleted after the command is done, also when it fails.
When the filetype contains a "_" and no action can be found for it, the search for an action is done with the
part before the "_". This is useful for specifying a variant on a filetype where some commands are different
and the rest is the same.
"action" is usually one of these:
Executing Actions
100
A−A−P Recipe Executive
view
edit
Look at the file. The "readonly" attribute is normally set, it can be reset to allow editing.
Edit the file.
email
Send the file by e−mail. Relevant attributes:
edit
subject
to
edit before sending
subject of the message
destination
Build the file(s), resulting in a program file. The "target" attribute is needed to specify the output
file.
Build the file(s), resulting in object file(s). The "target" attribute may be used to specify the output
compile
file. When "target" is not specified the action may use a default, usually `src2obj(fname)`. See here
Unpack an archive. Requires the program for unpacking to be available. Unpacks in the current
extract
directory.
Run the preprocessor on the file. The "target" attribute can be used to specify the output file. When
preproc it is missing the output file name is formed from the input file name with `src2obj(fname, sufname
= None)` and then appending ".i".
reference Run a cross referencer, creating or updating a symbol database.
strip
Strip symbols from a program. Used to make it smaller after installing.
build
Examples:
:do
:do
:do
:do
:do
view COPYRIGHT {filetype = text}
edit configargs.xml
email {edit} bugreport
build {target = myprog} main.c version.c
compile foo.cpp
Default Actions
These are defined in the default.aap recipe.
:action edit default
Uses the environment variable $VISUAL or $EDITOR. Falls back to "vi" for Posix systems or
"notepad" otherwise. You can set the Aap variable $EDITOR to the editor program to be used.
The {line = 999} attribute can be used to specify a line number to jump to. The {byte = 999} attribute
can be used to jump to a character position in the file.
:action edit gif,jpeg,png
Uses the environment variable $PAINTER. You can set the Aap variable $PAINTER to the image
editor program to be used.
The {line = 999} attribute can be used to specify a line number to jump to. The {byte = 999} attribute
can be used to jump to a character position in the file.
:action depend
The default dependency checker. Works for C and C++ files. Uses gcc when available, because it is
faster and more reliable. Uses an internal function otherwise. This attempts to handle the situation that
a header file doesn't exist (when it needs to be fetched or build) but that is not fully implemented yet.
:action view html,xml,php
Uses the environment variable $BROWSER. Searches a list of known browsers if it's not set.
Default Actions
101
A−A−P Recipe Executive
:action email default
Uses the environment variable $MAILER. Falls back to "mail".
:action build default default
Does: ":sys $CC $LDFLAGS $CFLAGS −o $target $source $?LIBS"
:action compile object c,cpp
Does ":sys $CC $CPPFLAGS $CFLAGS −c −o $target" $source
:action preproc default c,cpp
Does ":sys $CC $CPPFLAGS −E $source > $target"
Specifying Actions
Applications for an action−filetype pair can be specified with this command:
:action action in−filetype
commands
This associates the commands with action "action" and filetype "in−filetype". The commands are A−A−P
commands, just like what is used in the build commands in a dependency.
The "in−filetype" is used for the source of the action, the type of the target is undefined. It is also possible to
specify an action for turning a file of one filetype into another filetype. This is like a :rule command, but using
filetypes instead of patterns.
:action action out−filetype in−filetype
commands
Actually, specifying an action with one filetype is like using "default" for the out−filetype.
Several variables are set and can be used by the commands:
$fname
$source
$filetype
$targettype
$action
The first file name of the :do command.
All the file names of the :do command.
The detected or specified filetype for the input.
The detected or specified filetype for the output.
The name of the action for which the commands are executed.
Furthermore, all attributes of the action are turned into variables. Thus when ":do action {arg = −x} file " is
used, $arg is set to "−x". Example for using an optional "arg" attribute:
:action view foo
:sys fooviewer $?arg $source
In Python code check if the {edit} attribute is specified:
:action email default
# when $subject and/or $to is missing editing is required
@if not globals().get("subject") or not globals().get("to"):
edit = 1
@if globals().get("edit"):
:do edit $fname
:sys mail −s $subject $to < $fname
Specifying Actions
102
A−A−P Recipe Executive
"action" and "ftype" can also be a comma−separated list of filetypes. There can't be any white space though.
Examples:
:action view html,xml,php
:sys netscape −−remote $source
:action edit,view text,c,cpp
:sys vim $source
"filetype" can be "default" to specify an action used when there is no action specifically for the filetype.
When using a variable in the commands of an action without specifying a scope, or using the "_no" scope, its
value is obtained from the first scope where it is defined from this list:
1. The local scope, the scope of the action commands.
2. Invoking command blocks. That is, the scope of the command block that invoked the action with a
:do command. Then the scope of the command block that invoked that command block, and so on.
This excludes the toplevel.
3. The recipe in which the ":do" command was invoked, its parent and so on. This goes on until and
including the toplevel.
4. The recipe in which the action was defined, its parent and so on. This goes on until the toplevel.
The meaning of this all is that when using a variable such as $FOOCMD, you can give it a default value in the
recipe where the action is defined. The location where the action is later invoked from can define a different
value. Example:
FOOCMD = foocc
done =
:action compile object foo
:sys $FOOCMD $source > $target
_recipe.done += $−source
:action foolist default
:print Compiled $_recipe.done
The action can be used like this:
all:
FOOCMD = foocc −O
# used instead of the default $FOOCMD
:do compile {target = opt/piet.o} piet.f
done = nothing
# This has no effect
:do foolist any
In action the "done" variable is used with the "_recipe" scope prepended, thus a "done" variable in the scope
of the commands that invoked this action will not be used.
Note that the "async" attribute of the :do command may cause the :sys command to work asynchronously.
That is done because the "async" attribute is turned into the "async" variable for the :action commands. If you
don't want a specific :sys command to work asynchronously, reset "async":
:action view foo
tt = $?async
async =
:sys foo_prepare
async = $tt
:sys foo $source
Specifying Actions
103
A−A−P Recipe Executive
However, since two consecutive :sys commands are executed together, this should do the same thing:
:action view foo
:sys foo_prepare
:sys foo $source
Quite often the program to be used depends on whether it is available on the system. For example, viewing
HTML files can be done with netscape, mozilla, konquerer or another browser. We don't want to search the
system for all kinds of programs when starting, it would make the startup time quite long. And we don't want
to search each time the action is invoked, the result of the first search can be used. This construct can be used
to achieve this:
BROWSER =
:action view html
@if not _recipe.BROWSER:
:progsearch _recipe.BROWSER netscape mozilla konquerer
:sys $_recipe.BROWSER $source
The generic form form :progsearch is:
:progsearch varname progname ...
The "_recipe" scope needs to be used for variables set in the commands and need to be used after the action is
finished.
The first argument is the variable name to which to assign the resulting program name. When none of the
programs is found an error message is given. Note that shell aliases are not found, only executable programs.
When the action uses a temporary file, make sure it is deleted even when one of the commands fail. The
Python try/finally construction is ideal for this. Example:
:action filter .pdf .txt
tmp = `tempfname()`
@try:
:sys extract_docs $source >$tmp
:sys docs2pdf $tmp $target
@finally:
:delete $tmp
:print Converted $source to $target
When the ":sys" commands execute without trouble the ":delete" and ":print" commands are executed. When
the first ":sys" commands causes an exception, execution continues with the ":delete" command and then the
exception is handled. Thus the second ":sys" command is skipped and the ":print" command is not reached.
More examples:
:action compile object c,cpp
:sys $CC $CPPFLAGS $CFLAGS −c $source
:action build object
:sys $CC $LDFLAGS $CFLAGS −o $target $source
Specifying Actions
104
A−A−P Recipe Executive
Specifying Actions in Python
When an action needs to be defined with more properties, a Python function can be used. Example:
:python
define_action("buildme", 1, """
@if DEFER_ACTION_NAME:
:do $DEFER_ACTION_NAME {target = $target} $source
@else
:sys me < $source > $target
""",
outtypes = ["me"],
intypes = ["moo"],
defer_var_names = ["BUILDME_ACTION"])
This defines an action almost like this :action command
:action buildme {primary} me moo
@if _no.get("BUILDME_ACTION"):
:do $BUILDME_ACTION {target = $target} $source
@else:
:sys me < $source > $target
An important difference is that when the action defined with $BUILDME_ACTION supports different input
and output filetypes, the action defined with define_action() will use these. The action defined with ":action"
will always support "me" and "moo", even though the actually used $BUILDME_ACTION action supports
different types.
More info about the define_action() function in the reference manual.
Chapter 29. Customizing Automatic Depedencies
For various file types A−A−P can scan a source file for header files it includes. This implies that when a target
depends on the source file, it also depends on the header files it includes. For example, a C language source
file uses #include lines to include code from header files. The object file generated from this C source needs to
be rebuilt when one of the header files changes. Thus the inclusing of the header file has an implied
dependency.
Aap defines a series of standard dependency checks. You don't need to do anything to use them.
The filetype used for the dependency check is detected automatically. For files with an ignored suffix like
".in" and ".gz" no dependency checking is done.
To avoid all automatic dependency checks, set the variable "AUTODEPEND" to "off":
AUTODEPEND = off
To avoid automatic dependencies for a specific file, set the attribute "autodepend" to "off":
foo.o : foo.c {autodepend = off}
Specifying Actions in Python
105
A−A−P Recipe Executive
Custom Dependency Checking
You can add your own dependency checks. This is done with an :action command. Its arguments are "depend"
and the file types for which the check works. A block of commands follows, which is expected to inspect
$source and produce the detected dependencies in $target, which has the form of a dependency. Simplified
example:
:action depend c,cpp
:sys $CC $CFLAGS −MM $source > $target
The build commands are expected to generate a file that specifies the dependency:
foo.o : foo.c foo.h
The first item (before the colon) is ignored. The items after the colon are used as implied dependencies. The
source file itself may appear, this is ignored. Thus these two results have the same meaning: a dependency on
"foo.h":
foo.xyz : foo.c foo.h
foo.o : foo.h
Comments starting with "#" are ignored. Line continuation with "\" is supported. Only the first (continued)
line is read.
Aap will take care of executing the dependency check when the source changes or when the command
changes (e.g., the value of $CC and $CFLAGS). This can be changed with a "buildcheck" attribute after
"depend". In the following example only a change in $CFLAGS is noticed. A change in $CC or the ":sys"
command does not cause generating the target.
:action depend {buildcheck = $CFLAGS} c
:sys $CC $CFLAGS −MM $source > $target
Aap expects the dependency checker to only inspect the source file. If it recursively inspects the files the
source files include, this must be indicated with a "recursive" attribute. That avoids Aap will take care of this
and do much more work than is required. Example:
:action depend {recursive} c,cpp
:sys $CC $CFLAGS −MM $source > $target
Missing Include Files
It is possible that an include file is not typed in by the user, but is generated with commands. This file may
then need to be generated to be able to figure out the dependencies.
This can be complicated, because the generated include file may again include other files. Thus the
dependency check needs to be repeated after the file has been generated.
To make it easier to handle this situation, Aap provides the :sysdepend command. It will take care of
executing a shell command to figure out the dependencies, catching the output to check for error messages,
build targets that can't be found and repeat until it is done.
Custom Dependency Checking
106
A−A−P Recipe Executive
Here is an example for the imaginary 'f' language:
:action depend {recursive} f
:sysdepend {filepat = .*File "([^:]*)" Not found}
$FCC $FFLAGS −−depend $source > $target
The "filepat" option of :sysdepend specifies how the file name of a missing file can be located. This is a
Python regular expression, where the file name matches in the first group in parenthesis.
See the :sysdepend command for more details and an option to specify the search path.
Chapter 30. Customizing Default Tools
Tools are used to execute actions. Examples are a compiler and a linker. Each tool must be executed with
specific arguments. But the recipe attempts to be portable, thus not include the literal command to be
executed. The mechanism described in this chapter takes care of translating the generic action into invoking a
specific tool with its arguments.
It all starts with an action. Let us use the C compile action as an example. In the default recipe a default C
compile action is defined. This one works for most C compilers that take arguments like the Unix "cc"
command. If another kind of compiler is to be used, the $C_COMPILE_ACTION variable is set to the name
of the action to be used, for example "compile_msvc". The default compile action will check the
$C_COMPILE_ACTION variable and invoke the "compile_msvc" action instead of using its generic compile
command.
During startup the default recipe will check for existence of tools for C and C++. A specific sequence of tools
is checked for, depending on the platform. Thus in MS−Windows "msvc" will be checked for, while on Unix
this doesn't happen. This is implemented with a Python module. For msvc it is "tools/msvc.py".
Each tool module defines an exists() function. It contains a check if the tool can be found. Mostly this is done
by looking for a certain executable program. The msvc tool searches for "cl" (the compiler) and "vcvars32" (a
command to start using the MSVC command line tools).
If a tool is detected, the actions for it are defined. This is always done, also when another tool was already
detected. This allows the user to invoke specific actions or switch toolchain where he wants to. For MSVC the
"compile_msvc" action is defined. That is like the normal "compile" action but with MSVC specific
arguments.
The first tool that is detected will be used by default. The use_actions() function of the tool is invoked, which
sets a number of variables, such as $C_COMPILE_ACTION, to the name of the action to be used. As
mentioned above, the result will be that the generic actions will invoke the tool−specific action.
Building in a different way
The default build action works for object files generated from C source files. It might also work for other
object files, in that case you do not need to do anything.
When building needs to be done in a different way, depending on the kind of source files used, add a
"buildaction" attribute to the object file. This will make the default build action invoke the action specified
with "buildaction" instead of the default build commands. Sources without a "buildaction" attribute do not
Chapter 30. Customizing Default Tools
107
A−A−P Recipe Executive
influence this choice.
Note that it is not possible to have two different "buildaction" attributes on the sources of the build action. If
you want to handle this set the $BUILD_ACTION variable to the build action that can handle this.
If a tool needs to do building for C and C++ files differently, set the $C_BUILD_ACTION and/or
$CXX_BUILD_ACTION variables to the action that will do the building.
Adding A New Tool
You need to write a Python module and place it in the "tools" directory. Copy one of the existing tool files to
start with. Then make changes to the functions:
exists()
Return True if the tool can be located. This is mostly done by simply checking for an executable
program with the program_path() function. But you might do something more complicated, such as
running the program with a "−−version" argument and check the output.
define_actions()
Define the actions that this tool can accomplish. Each action name should be formed from the basic
action name with "_toolname" appended. Thus a compile action for the MSVC compiler uses the
action name "compile_msvc". You can define this action for several file types.
The action usually supports using variables, so that the user can modify them in a recipe. Some
variables are generic and can be used by all tools, such as $CFLAGS. Your tool may need to translate
it from the generic form to the tool−specific argument. For example, if $DEFINE contains
"−DFOO=foo" you might have to translate this to "/D:FOO=foo".
You can also support specific variables for your tool. For example $MSVC is used to specify the
name of the compiler. You give it a default value in the toplevel scope, but only when the user didn't
do that already. The toplevel scope can be obtained from the Global module: "Global.globals".
use_actions(scope)
This function is called when the actions of the tool will be used as the default actions in "scope".
When the tool is the first one found it will be called from the startup code. But the user may also use
this to select a specific tool to be used in one recipe, or even one dependency.
Using A Specific Tool
The :usetool command can be used to specify a specific tool to be used in the current scope. When used in the
toplevel recipe the tool becomes the default tool. When used in a child recipe the tool will be used in that
recipe or by all actions invoked there. It can also be used in build commands, the tool will be used by invoked
actions and dependencies.
Example:
:usetool mingw
:update prog_A
:usetool msvc
:update prog_B
Adding A New Tool
108
A−A−P Recipe Executive
This actually works by defining the tool−specific actions and defining variables such as
$C_COMPILE_ACTION in the current scope.
Chapter 31. Adding A Language Module
This chapter explains how to add support for a language to Aap. Both for your own setup and for a module
that is to be included in an Aap release.
Although the text explains modules for a language, this can also be used for adding a module for other
purposes. It is a generic method to have Aap load a module that defines actions, sets variables, etc.
In a recipe a module can be used with the :import command. Thus when your recipe uses Java, you would add
this line:
:import java
For the standard modules see Chapter 39, Standard Modules.
Module Name
It is important to chose a good name for the module, because it must be unique on your system. For a
programming language simply use the name of the language. For Java you would use "java", for the D
language "d". In case there are variants of a language that are different enough to justify using a different
module, add something to the name to make this clear. You can use letters, digits and the underscore.
Examples: "foo", "foo2004", "foo_latest".
If you have a specific module with different functionality, you could prepend "my". For example, "myjava".
After the module has been imported, the variables in it can be accessed through the "m_name" scope, where
"name" is the name of the module. For example the variable "$m_d.DMD" holds the command used for the
"d" language to execute the compiler.
Note: It is not possible to have a variable and a scope with the same name. Thus if you have a module called
"foo", which uses the scope "m_foo", you cannot have a variable "m_foo" anywhere in a recipe.
Since the modules are Aap recipes the file names always end in ".aap".
Module directories
Modules that are included with Aap are located in the Aap sub−directory "modules". If you are working on a
module that is to be submitted for a next Aap release you may also want to put the module there for testing.
But be aware that this directory may be overwritten or deleted when updating Aap!
Modules that you want to share with all users on your system should be placed in a system−wide directory.
For Unix this usually is /usr/local/share/aap/modules. This can be changed with $AAPSYSDIR.
Modules that you only use for yourself are placed in $HOME/.aap/modules (for Unix and Mac OS X),
$HOME/aap/modules/, $HOMEDRIVE/$HOMEPATH/aap/modules/ or c:/aap/modules/
(MS−Windows).
Chapter 31. Adding A Language Module
109
A−A−P Recipe Executive
If you only want to change a few settings after the module is loaded, you can place these in the modules2
directory. See :import for details.
Parts Of A Module
In a module you will usually find these parts:
(1) filetype recognition
How to recognize files used in the module. For a module included with Aap this is normally missing,
since it can be added to the generic Python filetype module. See Chapter 28, Customizing Filetype
Detection and Actions.
(2) default values
Give default values to variables used in the commands further on. The user can change these values if
he needs to. It is a good habit to put all specific command names, directories and arguments in a
variable.
(3) object file suffixes
If the language uses different suffixes for object files, for static or dynamic libraries, this can be
specified. See below.
(4) search for tools
Usually there are different ways to invoke the compiler on different platforms. And on one platforms
various tools may be installed. The :toolsearch command is used to locate the tools. See below.
(5) actions, rules and routes
The generic methods for compiling and building. See below.
Example
This example is for the "D" language. This module is included with Aap.
# (1) Filetype recognition
:filetype
suffix d d
# (2) Default values
DMD = dmd
# (3) Object file suffixes
# dll and lib objects are equal to normal objects.
_top.D_LIBOBJSUF = $OBJSUF
_top.D_DLLOBJSUF = $OBJSUF
# (4) Search for tools
# Actions are installed for every toolchain that exists.
# The first one found sets $D_COMPILE_ACTION and friends.
:toolsearch dmd
# (5) Actions, Rules and Routes
# :do compile
:action compile object,libobject,dllobject,default d
@if not _no.get("target"):
target = `src2obj(fname)`
# Use the d_build action for building and also for :dll and :lib.
:attr {buildaction = d_build} $target
Parts Of A Module
110
A−A−P Recipe Executive
@if _no.get("D_COMPILE_ACTION"):
:do $D_COMPILE_ACTION {target = $target} $source
@else:
:sys $DMD $?DFLAGS −of$target −c $source
:rule {global} {default} %$OBJSUF : {buildcheck = $DMD $?DFLAGS } %.d
:do compile {target = $target} $source
# :do build for object files resulting from "d" source files.
:action d_build default
@if _no.get("D_BUILD_ACTION"):
:do $D_BUILD_ACTION {target = $target} $source
@else:
:sys $DMD $?DLINKFLAGS −of$target $source
# default route
:route {default} d object,libobject,dllobject
compile
Object File Suffixes
Many languages use the same object file suffixes as used for C: ".o" on Unix and ".obj" on MS−Windows.
But for some languages a different suffix is used and the suffixes for building a static and shared library are
different.
The simplest example is when a language always uses the same suffix for all kinds of object files. For
example, the "d" language does not make a difference between normal object files, static library objects, etc.
This can be specified like this:
_top.D_DLLOBJSUF = $OBJSUF
_top.D_LIBOBJSUF = $OBJSUF
Note that the "_top" scope is used. If this would be left out the variables would only be set in the scope of the
module and would not be available in the user recipe.
The name of the variable is made from the filetype in upper case, and underscore and the name of the generic
variable. The src2obj() function will look for these variables. Note that the filetype is used, not the module
name!
An extreme example is when all suffixes are different:
_top.FOO_OBJSUF = .fo
_top.FOO_DLLOBJSUF = .dfo
_top.FOO_LIBOBJSUF = .lfo
_top.FOO_LTOBJSUF = .tfo
An advantage of using a different suffix for every type of object file is that all types can be generated in the
same directory.
If the compiler or linker does not support using different suffixes, but the various object files are different, the
user must make sure that the object files are put in different build directories. This can be done by specifying
an attribute on the source files to use a different build directory:
Object File Suffixes
111
A−A−P Recipe Executive
:program foo : foo.c
# uses $BDIR
:dll foo : foo.c {var_BDIR = $BDIR−dll}
:lib foo : foo.c {var_BDIR = $BDIR−lib}
Searching For Tools
When there is only one compiler that always uses the same (type of) arguments you can simply invoke it
directly from the actions in the module. Otherwise, Aap can search for tools that are currently installed. The
working of tools is explained in Chapter 30, Customizing Default Tools
As an example, let's look at how Aap searches for C compilers:
@if osname() == 'mswin':
:toolsearch msvc mingw gcc icc bcc
@elif osname() == 'os2':
:toolsearch icc gcc msvc
The :toolsearch command is used with a list of tools that need to be checked for. The first tool for which the
exists() function returns True is then used. This works by setting variables to the name of the action to be
used. For example, the "msvc" tool sets $C_COMPILE_ACTION to "compile_msvc".
The list of tools to be searched depends on the platform. Note that the "msvc" tool is the first choice for
MS−Windows, but the last choice for OS/2. This ordering is based on what works best for most people.
Note that for Unix systems there is no search for tools. That is because the default command for the C
compiler "always" works there.
There is one trick you should be aware of, which is using the "buildaction" attribute on object files. When a
specific compiler is used to turn a source file into an object file, this often means a specific action needs to be
used to turn this object file into a program or library. The compile action must then add a "buildaction"
attribute to the object file, so that the generic build action can inspect the object files and invoke the proper
build action. You can see this in the example above: The compile action for the "d" language contains:
# Use the d_build action for building and also for :dll and :lib.
:attr {buildaction = d_build} $target
The action is not executed when the target is already up−to−date. Therefore the "buildaction" attribute should
also be set by the dependency or rule, using a ">always" section. See the section called Command block
sections. Example:
:rule %$OBJSUF : $.cpp
>always
:attr {buildaction = cxx_build} $target
>build
:do compile {target = $target} $source
Note that the generic build action cannot handle the situation that object files with different "buildaction"
attributes are linked together. And object files that do not have a "buildaction" attribute are taken along, Aap
assumes they can be linked together with the object files that specify the "buildaction" attribute. If this does
not do what you intend, you can specify another build action to use with $BUILD_ACTION. Similarly,
$BUILDDLL_ACTION and $BUILDLIB_ACTION are used for building libraries. Look in the distributed
default.aap for the details.
Searching For Tools
112
A−A−P Recipe Executive
Actions, Rules and Routes
Actions are used to specify how files are to be compiled and build into a program or library. Rules are used to
specify which actions to use for files matching a pattern. Routes are used to specify which actions to use to
turn one filetype into another. Thus these three items are closely related.
The most obvious thing for a language module is to define an action for compiling the language. Here is an
excerpt from the "d" module:
:action compile object,libobject,dllobject,default d
@if not _no.get("target"):
target = `src2obj(fname)`
# Use the d_build action for building and also for :dll and :lib.
:attr {buildaction = d_build} $target
@if _no.get("D_COMPILE_ACTION"):
:do $D_COMPILE_ACTION {target = $target} $source
@else:
:sys $DMD $?DFLAGS −of$target −c $source
This action is specified for all kind of object files, including dllobject and libobject. If compiling for a library
has to be done differently you should specify a separate action for libobject and/or dllobject.
The action starts with checking if $target is set. In rare cases it isn't set and needs to be derived from $source.
Since the object file suffixes have been defined (see above) calling src2obj() takes care of this. $fname is the
first item in $source.
When a D file has been compiled into an object file it needs to be build in a special way. To accomplish this
the "buildaction" attribute of the target is set to "d_build". This action is also defined in the D module.
The check for $D_COMPILE_ACTION takes care of invoking the action that was defined by a tool. The first
tool found with :toolsearch will set this variable. It can later be changed with a :usetool command.
When $D_COMPILE_ACTION is not set, the default command to compile a D file is executed with :sys.
This happens when no appropriate tool could be found. Often this is used for Unix, where the compile
command is the same for various compilers. The user may set $m_d.DMD to the name of the compiler to be
used and set $DFLAGS to additional arguments. What could be added here is using $DINCLUDE and
$DDEFINE, like what $INCLUDE and $DEFINE do for C. A compiler may also use $DEBUG and
$OPTIMIZE. Note that these can't be directly used as an argument but must be translated.
The other actions defined in the module are similar. You can see in the example for the D module how the
build action is defined:
:action d_build default
@if _no.get("D_BUILD_ACTION"):
:do $D_BUILD_ACTION {target = $target} $source
@else:
:sys $DMD $?DLINKFLAGS −of$target $source
Defining a rule is optional. The :rule command selects the source and target based on a match of the file name
with a pattern. This is useful when a list of source files is defined without telling how they are to be turned
into object files. This is the way the rule is defined in the D module:
Actions, Rules and Routes
113
A−A−P Recipe Executive
:rule {global} {default} %$OBJSUF : {buildcheck = $DMD $?DFLAGS } %.d
:do compile {target = $target} $source
The {global} option is needed to make the rule available everywhere (otherwise it would only work in the
module recipe). The {default} option allows overruling this rule without getting a warning.
The :route command is used to tell Aap how to turn a source file into an object file. This is used for the
:program, :dll and :lib commands. For the D language it's simply a matter of invoking the compile action. for
other languages it may consist of several steps with intermediate results.
:route {default} d object,libobject,dllobject
compile
Actions, Rules and Routes
114
Reference Manual
Table of Contents
32. Aap Command Line Arguments
33. Recipe Syntax
34. Variables and Scopes
35. Common Variables
36. Assignments
37. Attributes
38. Filetype Detection
39. Standard Modules
40. Standard Tools
41. A−A−P Python functions
42. A−A−P Commands
Chapter 32. Aap Command Line Arguments
Three Kinds Of Arguments
aap [option]... [assignment]... [target]...
The order of arguments is irrelevant. Options are explained in the next section.
Assignments take the form "VAR=value". This works just like putting this at the top of the main recipe used.
But the shell used to start Aap may require escaping special characters, such as spaces. Putting the argument
in double quotes often works (but not always).
Targets specify what needs to be done. If no target is given, one of the targets in the recipe is executed, see
Recipe Execution Details.
Variables in the targets are expanded. This makes it possible to build a target in a directory whose name is set
in the recipe. For example, to build a target in $BDIR:
aap '$BDIR/foo.o'
Note: you must make sure that the variable is not expanded by the shell. In the example this is done by putting
the argument in single quotes. This works for most Unix shells. To use a target with a $ character in the name
use $($) in place of the $.
Options
An option must appear only once, except for the ones that are noted to be allowed multiple times.
−a
−−nocache
For a remote file, don't use a cached copy. Download it once for this invocation. Note that the file
Reference Manual
115
A−A−P Recipe Executive
may be downloaded anyway, because it is not always possible to check if the cached copy is still
valid. Use the {usecache} or {constant} attribute on a file to use the cached version whenever
possible, see :fetch.
−c command
−−command command
After reading the recipe, execute command. May appear several times, all the commands are
executed.
Commands to be executed can be specified on the command line. This is useful, for example, to fetch
individual files:
aap −c ":fetch main.c"
aap −c ":commit common.h"
Since the recipe is first read (and all child recipes), the attributes that are given to "main.c" will be
used for fetching.
The commands are executed before updating targets. When no target is specified nothing is built, only
the specified commands are executed. But the toplevel commands in the recipe are always executed,
before executing the command arguments.
Keep in mind that the shell must not change the argument, use single quotes to avoid $VAR to be
expanded by the shell:
aap −c ':print $SOURCE'
−−changed file
The file file is considered changed, no matter whether it was really changed. Targets build from
file will also be considered changed, recursively.
Similar to the recipe command :changed file.
−C
−−contents
Only take action when file contents was changed, not when build commands or attributes changed.
For normal dependencies the buildcheck is ignored. This means that the build commands can be
changed without causing them to be executed. The commands are executed anyway when one of the
sources is out−of−date.
For publishing the "publish" attribute is ignored. The file is still published when its contents changed
since the last time it was published to any destination, or if it was never published.
The signatures are updated as usual (unless −−nobuild is used as well). Thus the new buildcheck and
"publish" attribute are stored. This is useful if the buildcheck or "publish" argument changed in a way
that you know does not require building or publishing.
−d flags
−−debug flags
Switch on debugging for flags. Not implemented yet.
−f file
−−recipe file
Specify the main recipe to read. When an URL is used the recipe is downloaded to the current
directory before it is used. The name is the last part of the path. If it already exists the user is asked
Reference Manual
116
A−A−P Recipe Executive
whether it should be overwritten. Example:
cd /usr/local/share/vim/vim62/runtime
aap −f ftp://ftp.vim.org/pub/vim/runtime/main.aap
When the file is "NONE" no recipe is read. This is useful when only a command is to be executed.
Example:
aap −f NONE −c ':print $AAP'
−F
−−force
Force rebuilding everything. That a target is already up−to−date is ignored.
−h
−−help
Print a help message and exit. Does not read a recipe.
−I directory
−−include directory
Add a directory to search for included recipes. This option may appear multiple times.
−−install package
Install the package package. Only works for those packages that are supported, such as "cvs" and
"rcp".
Does not read a recipe in the usual way, only the specified package is installed.
−j number
−−jobs number
Maximum number of parallel jobs. Not implemented yet.
−k
−−continue
Continue after encountering an error.
When an error is detected in a block of build commands, the execution of that block is aborted.
Building continues for other targets, but a target that depends on a target that failed to build will not
be build.
To continue execution after an error in the same block of commands use the Python ":try" statement.
Example:
@try:
:print this is an $error
@except UserError, e:
:print caught error: `str(e)`
Not fully implemented, still stops at some errors. Careful: When an error has side effects strange
things may happen.
−l
−−local
Do not recurse into subdirectories. Only applies to "add" and "remove" targets on the command line.
Also for "revise" for its remove action.
−n
−−nobuild
Only print messages about what will be done, don't execute build rules. Commands at the toplevel and
Reference Manual
117
A−A−P Recipe Executive
commands to discover dependencies are executed, but system commands, commands that download,
upload, write or delete files and version control commands are skipped.
Note: since no files are downloaded, :child commands won't work for not existing recipes.
−N
−−nofetch−recipe
Do not fetch recipes when using the "fetch" and "update" targets. Useful if the current recipe is to be
used while files must be fetched.
−−profile file
Profile the execution of A−A−P and write the results in file. This file can then be examined with
the standard Python module "pstats". The PrintProfile.py script can be used for this (it is located with
the other Aap modules).
−R
−−fetch−recipe
Fetch the recipe and child recipes. This is impled by using a "refresh", "fetch" or "update" target,
unless "−−nofetch−recipe" is used.
−S
−−stop
Stop building after encountering an error. This is the default, thus this option has no effect. Also see
−−continue.
−s
−−silent
Print less information, see $MESSAGE.
−t
−−touch
Update signatures on targets without executing build commands. After doing this the specified targets
and intermediate results are considered up−to−date.
Commands at the toplevel will be executed, except system commands, commands that write a file and
version control commands.
−u
−−up
−−search−up
Search the directory tree upwards for the main.aap recipe. Useful when in a sub−directory of a large
project, where the main.aap recipe is an unknown number of directory levels upwards.
−V
−−version
Print version information and exit. Does not read a recipe.
−v
−−verbose
Print more information, see $MESSAGE.
−−
End of options, only targets and assignments follow. Use this when a target starts with a "−".
Chapter 33. Recipe Syntax
This defines the recipe syntax. It is not very strict, but you should be able to understand what is allowed and
what isn't.
Chapter 33. Recipe Syntax
118
A−A−P Recipe Executive
The intention is that recipes are always encoded in UTF−8. Currently this is not fully supported yet.
US−ASCII works in any case.
Table 33.1. Notation
|
()
[]
""
...
EOL
INDENT
INDENT2
separates alternatives
grouping a sequence of items or alternatives
optional items (also does grouping)
contains literal text; """ is one double quote
indicates the preceding item or group can be repeated
an end−of−line, optionally preceded by a comment
an amount of white space, at least one space
an amount of white space, at least one space more than INDENT
A comment starts with "#" and continues until the end−of−line. It continues in the next line if the last
character in the line is a backslash. A comment may appear where white space may appear, but not inside
quotes.
# comment \
continued comment
# another comment
White space may be inserted in between items. It is often ignored, but does have a meaning in a few places.
Line continuation may be done with a backslash immediately before an end−of−line. It is not needed for items
that use extra indent to indicate that it continues on the next line.
The backslash can be also used for line continuation in Python commands. A leading @ char and white space
before it is removed. Example:
@ python command \
@
continued python command \
still continued
When lines are joined because a command continues in a line with more indent, the line break and leading
white space of the next line are replaced with a single space. An exception is when the line ends in "$BR":
The $BR is removed, the line break is inserted in the text and leading white space of the next line is removed.
All indent is computed with a tabstop setting of eight spaces.
For items that have a build_block, the start of the build block is the line with the smallest indent that is larger
than the indent of the line that started the item. The lines before this are continuation lines of the command
itself. Example:
mytarget : source1
source2
:print $source
something
Chapter 33. Recipe Syntax
# continuation line of dependency
# first line of the build block
# continuation line of :print command
119
A−A−P Recipe Executive
aapfile
aap_item
::= ( [ aap_item ] EOL ) ...
::= dependency | rule | variant | toplevel_command | build_command
dependency
targets
sources
build_block
::= targets ":" [ attribute ... ] [ sources ] [ EOL build_block ]
::= item_list
::= item_list
::= INDENT build_command [ EOL [ INDENT build_command ] ] ...
rule
::= :rule [ attribute ... ] pattern ... ":" [ attribute ... ] pattern ... [ EOL build_block ]
variant
variant_item
::= ":variant" variable_name ( EOL variant_item ) ...
::= INDENT varvalue EOL INDENT2 build_block
toplevel_command
::= child_command | clearrules_command | delrule_command | dll_command |
lib_command | program_command | recipe_command | route_command |
rule_command | totype_command | variant_command
build_command
::= assignment | block_assignment | python_item | generic_command
assignment
block_assignment
::= variable_name [ "$" ] ( "=" | "+=" | "?=" ) item_list
::= variable_name [ "$" ] ( "<<" | "+<<" | "?<<" ) marker ( EOL item_list ) ... EOL [
INDENT ] marker
python_item
python_line
python_block
::= python_line | python_block
::= "@" python_command
::= ":python" EOL ( INDENT python_command EOL ) ...
generic_command
::= ":" command_name [ command_argument ]
# An item_list can contain white−separated items and Python style expressions.
item_list
item
simple_item
attribute
expression
string_expr
python_expr
non_white_item
variable_reference
::= item [ white_space item ] ...
::= simple_item [ attribute ... ]
::= ( expression | non_white_item ) ...
::= "{" attribute_name [ "=" item_list ] "}"
::= string_expr | python_expr
::= """ text """ | "'" text "'"
::= "`" python−expression "`"
::= non−white−text | variable_reference
::= "$" [ expand_type ] ... (variable_ext_name | "(" variable_ext_name ")" | "{"
variable_ext_name "}" )
Chapter 33. Recipe Syntax
120
A−A−P Recipe Executive
expand_type
variable_ext_name
variable__name,
attribute_name
scope_name
user_scope_name
::= "?" | "−" | "+" | "*" | "=" | "'" | '"' | "\" | "!"
::= [ scope_name "." ] variable_name [ "[" index "]" ]
::= ascii−letter [ ascii−letter | ascii−number | "_" ] ...
::= ( "_no" | "_stack" | "_tree" | "_up" | "_recipe" | "_top" | "_default" | "_start" |
"_parent" | "_caller" | user_scope_name )
::= ascii−letter [ ascii−letter | ascii−number | "_" ] ...
Chapter 34. Variables and Scopes
Using Variables
A variable value is normally a string. The meaning of the value depends on where it is used. For example, "*"
is interpreted as a wildcard when a variable is used where a file name is expected. Thus the wildcard is not
expanded in the assignment. If you need it, use a Python expression to expand wildcards.
When using Python you can assign any type of value to a variable. Only a few types are supported for
variables used in Aap commands:
String
Integer or Long converted to a string
ExpandVar object used for delayed expansion of variables
In Python code the ExpandVar object needs to be expanded before you can use the value it contains. Use the
var2string() function for that.
Normally using $VAR gets what you want. Aap will use the kind of quoting expected and add attributes when
needed. This depends on the place where the variable is used. However, when you want something else, this
can be specified:
$var depends on where it's used
$?var when the variable is not set or defined use an empty string instead of generating an error
$−var without attributes (may collapse white space)
$+var with attributes
$*var use rc−style expansion (may collapse white space)
$/var slashes changed to backslashes (for MS−Windows commands)
$=var
$'var
$"var
$\var
no quotes or backslashes
aap quoted (using ' and/or " where required, no backslashes)
quoted with " (doubled for a literal ")
special characters escaped with a backslash
Chapter 34. Variables and Scopes
121
A−A−P Recipe Executive
$!var depends on the shell, either like $'var or $"var
In most places $var is expanded as $+'var (with attributes, using ' and " for quoting). The exceptions are:
:sys
$−!var no attributes, shell quoting
$n in $(v[$n]) $−=var no attributes, no quoting
:del
$−'var no attributes, normal quoting
The quoted variables don't handle the backslash as a special character. This is useful for MS−Windows file
names. Example:
prog : "dir\file 1.c"
:print $'source
Results in: "dir\file 1.c"
Be careful with using "$\var" and quotes, you may not always get what you wanted.
RC−style expansion
RC−style expansion means that each item in a variable is concatenated to the item immediately before and
after the variable. Example:
var = one two three
:print dir/$*var
Results in:
dir/one dir/two dir/three
For the expansion the variable is used as a list of white−separated items. Quotes can be used to include white
space in an item. Use double quotes around a single quote and single quotes around a double quote. Escaping
the meaning of quotes with a backslash is not supported.
When using rc−style expansion of a variable that is empty, the result is empty. Example:
aa =
:print bla$*aa
This prints an empty line. The "bla" is omitted, because the rc−style expansion has zero items.
When concatenating variables and using rc−style expansion, the attributes of the last variable overrule the
identical attributes of a previous one.
v1 = foo {check = 1}
v2 = bar {check = 2}
vv = $*v1$v2
Is equivalent to:
RC−style expansion
122
A−A−P Recipe Executive
vv = foobar{check = 1}{check = 2}
When using rc−style expansion, quotes will not be kept as they are, but removed and re−inserted where used
or necessary. Example:
foo: "file 1.c" foo.c
:print "dir/$*source"
Results in:
"dir/file 1.c" "dir/foo.c"
Variable Indexing
To get one item out of a variable that is a list of items, use an index number in square brackets. Parenthesis or
curly braces must be used around the variable name and the index. The first item is indexed with zero.
Example:
BAR = beer coffee cola
:print $(BAR[0])
BAR_ONE = $(BAR[2])
:print $BAR_ONE
Results in:
beer
cola
Using an index for which no item exists gives an empty result. When $MESSAGE includes "warning" a
message is printed about this.
Using Scopes
A dot is considered part of the variable name. It separates the scope name from the variable name within that
scope. However, a trailing dot is not part of the variable name, so that this works:
:print $result.
# print the result
In Python code you need to explicitly specify the scope name. When no scope name is given only the local
scope is used. To get the equivalent of an Aap command that does not specify a scope, you need to use the
"_no" scope in Python. The same example as above but now with a Python expression looks like this:
:print `_no.result`.
# print the result
Predefined Scopes
Aap defines a scope for each recipe and each block of commands.
Variable Indexing
123
A−A−P Recipe Executive
A user may also define a specific scope, see below. These scope names must start with an alphabetical name.
Scope names starting with an underscore are used for predefined scopes.
Each time a block of commands is executed a new scope is created. Thus when executing the commands for a
dependency a second time, its scope will not contain items from the first time.
A variable may exist in several scopes with a different value. To specify which scope is to be used, a scope
name is prepended before the variable name, using a dot to separate the two.
These scope specifiers can be used to access a specific scope:
_recipe The current recipe. Useful in build commands that are defined in the recipe.
_top
The toplevel recipe. This can be regarded as the global scope.
The scope of default values, after the defaults settings have been done, but before reading user or
_default
system startup recipes. Cannot be used in the recipe that sets the default settings.
The scope of startup values, as it was before reading the toplevel recipe. Cannot be used in the recipe
_start
that sets the default settings and in the startup recipes.
The scope of variables set on the command line. Can be used to obtain the values set when Aap was
_arg
executed or arguments of the :execute command. Although the scope is writable, thus you can mess
it up...
_parent The parent recipe. Only valid in a child recipe.
The scope of the command block that invoked the current command block. Can only be used in
_caller
command blocks of dependencies, rules, actions and :tree.
These scope specifiers can be used to search scopes to find a variable. The first scope in which the variable
exists is used.
_no
_stack
_tree
_up
No scope, equal to leaving out the scope specifier in recipe commands, but required in Python
commands. First looks in the current scope, then "_stack" and then "_tree".
Uses the scope of the command block that invoked the current scope, the command blocks that
invoked that scope, and further up the call stack. Excludes the toplevel. Can only be used in
command blocks of dependencies, rules and actions.
Uses the scope of the current recipe, its parent, the parent of its parent, etc., up to the toplevel.
In the toplevel recipe it is equal to "_top".
First uses "_stack" and then "_tree", but excludes the current scope.
These are the scopes searched for a variable with the "_up" scope when it is used in a build command block:
1. Invoking command blocks. That is, the scope of the command block that invoked the current
command block with an :update command or because of a dependency. Then the scope of the
command block that invoked that command block, and so on. This excludes the toplevel.
2. The recipe in which the command block was defined, its parent and so on. This goes on until and
including the toplevel.
This is used both for reading a variable and assigning a new value. It is an error when assigning a new value
to a variable that does not exist.
For the commands of an action the sequence is slightly different:
Variable Indexing
124
A−A−P Recipe Executive
1. Invoking command blocks. That is, the scope of the command block that invoked the action with a
:do command. Then the scope of the command block that invoked that command block, and so on.
This excludes the toplevel.
2. The recipe in which the ":do" command was invoked, its parent and so on. This goes on until and
including the toplevel.
3. The recipe in which the action was defined, its parent and so on. This goes on until the toplevel.
The "_no" scope is used for a variable in recipe commands without a specified scope. Thus these two are
equivalent:
:print $foobar
:print $_no.foobar
But in Python commands a variable without a specified scope is always in the local scope. You must use
"_no" to get the same effect:
foo = $bar
@foo = bar
@foo = _no.bar
# finds "bar" in local or "_up" scope
# finds "bar" in local scope only
# finds "bar" in local or "_up" scope
When reading a variable with the "_no" scope it is first looked up in the local scope. If it does not exist, the
"_stack" and "_tree" scopes are used, as explained above.
When writing a variable without a specified scope it is always put in the local scope. A specific situation
where this may lead to an unexpected result is appending:
foo += something
This is equivalent to:
foo = $foo something
This obtains the value of "foo" from the first scope where it is defined, but it is set in the current scope. To
change the variable where it is defined use the "_no" scope explicitly:
_no.foo += something
User Scopes
The user can define a new scope by assigning a value to a variable, using the scope name:
s_debug.foo = xxx
This creates the scope "s_debug" if it didn't exist yet. The variable "foo" within that scope is assigned the
value "xxx".
The scope name must start with an alphabetic character. Following characters may be letters, digits and the
underscore.
A user defined scope is only used when explicitly specified. The "_no" and "_up" scopes do not use it.
User Scopes
125
A−A−P Recipe Executive
The scope can be accessed from everywhere, except recipes that create a new toplevel scope have their own
set of user defined scopes. That is when using :execute or ":child {nopass}". ":execute {pass}" and :child do
share the user scopes.
There cannot be a scope name and a variable with the same name. This applies to variables in ALL scopes!
Thus when you have a scope "foo" in one place, you cannot use the variable "foo" anywhere else. The only
exception is that you can use the variable "foo" in scopes that have been abandoned when the user scope "foo"
is created, but that is tricky.
Recommendation: Let user scope names start with "s_".
A user scope can be specified for a dependency:
s_foo.OPTIMIZE = 4
...
foo : {scope = s_foo} foo.c
:do build $source
A user scope can be specified for a rule:
:rule %.a : {scope = s_aaa} %.b
A user scope can be specified for an action:
:do foobar {scope = s_some} foo.bar
Variables In Build Commands
A dependency and a rule can have a list of commands. For these commands the following variables are
available:
$source
$source_list
$source_dl
$depend
$depend_list
$depend_dl
$target
$target_list
$target_dl
$buildtarget
$match
The list of input files as a string.
The list of input files as a Python list.
Only for use in Python commands: A list of dictionaries, each input item is one entry.
The list of dependencies (source files plus virtual dependencies) as a string.
The list of dependencies (source files plus virtual dependencies) as a Python list.
Only for use in Python commands: A list of dictionaries, each dependency item is one
entry.
The list of output files as a string.
The list of output files as a Python list.
Only for use in Python commands: A list of dictionaries, each output item is one entry.
The name of the target for which the commands are executed. It is one of the items in
$target.
For a rule: the string that matched with %
Example:
doit {virtual}:
:print building $target
Variables In Build Commands
126
A−A−P Recipe Executive
prog : "main file.c" doit
:print building $target from $source
Results in:
building doit{virtual=1}
building prog from "main file.c"
Note that quoting of expanded $var depends on the command used.
The Python lists $source_list and $target_list can be used to loop over each item. Example:
$OUT : foo.txt
@for item in target_list:
:print $source > $item
Note the difference between $source and $depend: $source only contains real files, $depend also contains
virtual dependencies.
The list of dictionaries can be used to access the attributes of each item. Each dictionary has an entry "name",
which is the (file) name of the item. Other entries are attributes. Example:
prog : file.c {check = md5}
@print sourcelist[0]["name"], sourcelist[0]["check"]
Results in: file.c md5
Chapter 35. Common Variables
This is a complete list of the variables that are currently used inside Aap, except the variables specifically
used for porting, see Chapter 22, Porting an Application for that.
This list will be extended when more features are being added. To avoid the problem that your own variables
interfere with the use of common Aap variables, do not use variable names with only upper case letters.
Suggested scheme:
Table 35.1. Naming scheme for variables
$STANDARD_VARIABLE global variable defined by Aap
$YourVariable
global variable used in your recipe(s)
$local_variable
local variable used in build commands
The following table lists the predefined variables. These types are used:
Aap
conf
user
auto
set by Aap and mostly not changed by the user
set depending on the configuration of the system, may be modified by the user
set by the user
value updated when using commands (e.g., :program), may also be appended to by the user
Chapter 35. Common Variables
127
A−A−P Recipe Executive
Table 35.2. Standard Variables
name
$#
$$
$AAP
type
description
Aap A single #. OBSOLETE, use $(#)
Aap A single $. OBSOLETE, use $($)
Aap Command that was used to start Aap, including the Python interpreter
used. Example:
:asroot $AAP install
$AAPSYSDIR
conf
$AAPVERSION
Aap
$AR
$ARFLAGS
$BDIR
$BR
$BROWSER
conf
user
conf
Aap
conf
$BUILD_ACTION
conf
$BUILDDLL_ACTION
conf
$BUILDLIB_ACTION
conf
$BUNZIP2
$C_COMPILE_ACTION
conf
conf
$CXX_COMPILE_ACTION conf
$CACHEPATH
conf
Chapter 35. Common Variables
Note that this can be a command and an argument, e.g.:
"/usr/local/bin/python1.5 /usr/local/share/aap/Main.py".
List of system directories to search for startup recipes, modules and
tools. Default value is /usr/local/share/aap, although this may
be different on some systems. When the directory doesn't exist the
default is empty.
Version number of Aap. E.g., 31 (version 0.031) or 1003 (version
1.003). Also see $VERSIONSTR.
Name of archiver program: combines object files into a static libray.
Arguments for $AR (default: "r" or "/nologo").
Directory to write build files in. Modified by the :variant command.
A line break.
HTML browser to be used for the "view" action for HTML, XML and
PHP files. The default value comes from the "BROWSER" environment
variable or a list of known browser commands (netscape mozilla
konquerer grail iexplore mosaic lynx w3m).
When not empty, specifies the action name to be executed for building.
Usually for building a program from object files with a specific tool. A
"buildaction" attribute on one of the object files is used before
$BUILD_ACTION. See Chapter 30, Customizing Default Tools.
When not empty, specifies the action name to be executed for building a
dynamic (shared) library. A "buildaction" attribute on one of the object
files should be respected by the action specified with
$BUILDDLL_ACTION. See Chapter 30, Customizing Default Tools.
When not empty, specifies the action name to be executed for building a
static library. A "buildaction" attribute on one of the object files should
be respected by the action specified with $BUILDLIB_ACTION. See
Chapter 30, Customizing Default Tools.
Program to use for ".bz2" compressed files. Default value is "bunzip2".
When not empty, specifies the action name to be executed for compiling
a C file into an object, dllobject, libobject or ltobject file. See
Chapter 30, Customizing Default Tools.
When not empty, specifies the action name to be executed for compiling
a C++ file into an object, dllobject, libobject or ltobject file. See
Chapter 30, Customizing Default Tools.
List of directories to search for cached downloaded files. Default for
Unix:
/var/aap/cache
~/.aap/cache
128
A−A−P Recipe Executive
aap/cache
For MS−Windows, OS/2:
$HOME/aap/cache
aap/cache
Directories that don't exist are skipped. When using a relative name, it is
relative to the current recipe. Thus the recipe specified with :child
dir/main.aap uses a different cache directory. When this variable is
set, currently cached files are flushed. Otherwise this only happens
when exiting. Thus this command can be used to flush the cache:
CACHEPATH = $CACHEPATH
$CACHEUPDATE
$CC
$CFLAGS
$CHILDDIR
$CLEANDIRS
$CLEANFILES
$CLEANMOREDIRS
$CLEANMOREFILES
$COMPILE_ACTION
$CONFDIR
$CONFMODE
$CPPFLAGS
$CVS
$CVSCMD
$CXX
$CXXFLAGS
$CXXSHLINK
$CXXSHLINKFLAGS
user Timeout after which cached files may be downloaded again. For the
possible values see the explanation in the user manual.
conf Command to execute the C compiler (default: "cc").
user Arguments always used for $CC. NOTE: it's not $CCFLAGS! This is
inconsistent, used for historic reasons.
Aap In a child recipe: The directory of the child recipe relative to the parent
recipe. When using: :child subdir/main.aap $CHILDDIR will be
"subdir" in the child recipe.
auto Names of directories that the "clean" target should remove.
auto Names of files that the "clean" target should remove. The :program
command adds files to this.
user Names of directories that the "cleanmore" target should remove.
user Names of files that the "cleanmore" target should remove.
conf Obsolete. See $C_COMPILE_ACTION and
$CXX_COMPILE_ACTION.
Aap Sub−directory to install configuration files into. Default value: "etc/".
Aap Mode to use for installed configuration files. Default value: "0644"
(read/write for the user, readable for the group and others).
user Arguments for $CC when compiling sources (not when linking objects).
These are raw arguments, not always portable. Use $INCLUDE and
$DEFINE when possible.
conf Cvs program to use. No arguments are allowed. May include spaces.
When not set "cvs" is used.
user Cvs command to use. This overrules $CVS and may include arguments.
E.g. "cvs −z 9". Spaces in the program name must be escaped as
expected for the shell. When not set $CVS is used.
conf Command for compiling C++ files
user Arguments always used for $CXX.
conf Name of linker used to combine object files from C++ sources into a
shared (dynamic) library. Default value: "$CXX" for Unix, not used for
MS−Windows.
user Arguments for $CXXSHLINK. Default value: "−shared" for Unix, not
used for MS−Windows.
Chapter 35. Common Variables
129
A−A−P Recipe Executive
$DATADIR
$DATAMODE
Aap Sub−directory to install data files into. Default value: "share/".
Aap Mode to use for installed data files. Default value: "0644" (read/write
for the user, readable for the group and others).
$DATESTR
Aap Date as a string in the form "2002 Month 11". This does not change
while Aap is running. Also see $TIMESTR and $GMTIME.
$DEBUG
user The kind of debugging to be done. "yes" means debugging is enabled.
The variable is not set by default. For an example see the tutorial.
$DEFAULTCHECK
Aap Check to use when none is speficied. Defaults to "md5", can be set to
"time" or "newer". "time" means that a file is outdated when its
timestamp is different from when it was last used. "newer" means a
target is outdated when one of the source files has a more recent
timestamp. Also see the check attribute.
$DEFER_ACTION_NAME Aap Only available in the commands of an action: the name the action to
which the work should be deferred.
$DEFINE
user Preprocessor symbols. Used in the same place as $CPPFLAGS. Form:
"−DNAME" or "−DNAME=value". The tools will convert this to the
argument the compiler actually uses.
$DESTDIR
user Directory used to install in a different root directory. Useful for a "fake"
install. Also see $PREFIX.
$DISTDIRS
Aap Names of directories that should be distributed as a whole. If there is
one file in this directory that should not be distributed use $DISTFILES.
$DISTFILES
auto Names of files that are used as a source in the recipe and should be
distributed. The :program command adds files to this.
$DLLCFLAGS
user Extra arguments to compile a C program into a dynamic (shared) object
file. The default is currently "−fPIC", but since that only works with gcc
it will soon be changed.
$DLLCXXFLAGS
user Extra arguments to compile a C++ program into a dynamic (shared)
object file. The default is currently "−fPIC", but since that only works
with gcc it will soon be changed.
$DLLDIR
Aap Sub−directory to install shared (dynamic) library files into. Default
value: "lib/".
$DLLMODE
Aap Mode to use for installed shared (dynamic) library files. Default value:
"0755" (readable and executable for everybody, writable for the user).
$DLLOBJSUF
Aap Suffix for an object file to be included in a dynamic (shared) library.
Default: ".o" for Unix, ".obj" for MS−Windows.
$DLLPRE
conf Prefix for a dynamic (shared) library. Default: "lib" for Unix, empty for
others.
$DLLSUF
conf Suffix for a dynamic (shared) library. Default: ".dll" for MS−Windows,
".so" for Unix.
$EDITOR
conf Editor to be used for the "edit" action. The default value comes from the
"VISUAL" or "EDITOR" environment variable. When these are not
defined it falls back to "vi" On Unix and "notepad" otherwise.
$EXECDIR
Aap Sub−directory to install programs files into. Default value is "bin/".
$EXECMODE
Aap Mode to use for installed programs. Default value: "0755" (readable and
executable for everybody, writable for the user).
$EXESUF
conf
Chapter 35. Common Variables
130
A−A−P Recipe Executive
$GMTIME
Aap
$HASGCC
conf
$HASGCCXX
conf
$INCLUDE
user
$INCLUDEDIR
$INCLUDEMODE
Aap
Aap
$INFODIR
$INFOMODE
Aap
Aap
$LD
conf
$LDFLAGS
$LEX
user
Aap
$LEXFLAGS
$LEXPP
user
Aap
$LEXPPFLAGS
$LIBDIR
$LIBMODE
user
Aap
Aap
$LIBOBJSUF
conf
$LIBPRE
conf
$LIBS
user
Chapter 35. Common Variables
Suffix for an executable file. Default value: ".exe" for MS−Windows,
empty for others.
Time in seconds since 1970 Jan 1. This always uses GMT, it ignores
time zones and daylight saving. But it depends on the system time to be
set correctly! The value does not change while Aap is running, it is the
time when Aap was started. Also see $TIMESTR and $DATESTR.
Indicates whether gcc can be used to scan C sources for dependencies. It
is initialized empty. When dependency scanning is to be done a
configure check is run to see if $CC can be used for dependency
checking. $HASGCC is then set to "yes" or "no". You can set
$HASGCC to empty to force running the check again, set it to "no" to
avoid using $CC for dependency checking or set it to "yes" to skip the
configure check and use $CC for dependency checking.
Indicates whether gcc can be used to scan C++ sources for
dependencies. Just like $HASGCC does this for C.
Directories to find include files. Used in the same place as
$CPPFLAGS. Form: "−Ipath". The tools will convert this to the
argument the compiler actually uses.
Sub−directory to install include files into. Default value: "include/".
Mode to use for installed include files. Default value: "0644"
(read/write for the user, readable for the group and others).
Sub−directory to install info files into. Default value: "info/".
Mode to use for installed info files. Default value: "0644" (read/write
for the user, readable for the group and others).
Command to execute the linker. The default is empty, in which case
$CC is used. But when $USECXXLD is set (happens when a C++ file
was compiled) the default becomes $CXX.
Arguments for linking, before the object files. The default is empty.
Program to turn a lex file into C. The default is empty. When the "lex"
action is invoked Aap will search for "flex" and "lex" and set $LEX to
the found program.
Flags for $LEX. There is no default value.
Program to turn a lex++ file into C++. The default is empty. When the
"lexpp" action is invoked Aap will search for "flex++", "lex++", "flex"
and "lex" and set $LEX to the found program.
Flags for $LEXPP. There is no default value.
Sub−directory to install static library files into. Default value: "lib/".
Mode to use for installed static library files. Default value: "0644"
(read/write for the user, readable for the group and others).
Suffix for an object file to be included in a static library. Default value:
".o" for Unix, ".obj" for MS−Windows.
Prefix for static library. The default is empty on MS−Windows, "lib" on
Unix.
Arguments for linking, after the object files. Convention: Always use
"−lname", the tools will translate it into the flags that the linker actually
uses. Also see $LTLIBS
131
A−A−P Recipe Executive
$LIBSUF
$LIBTOOL
$LNKSUF
$LOGENTRY
$LTOBJSUF
$LTLIBPRE
$LTLIBS
$LTLIBSUF
$MANDIR
$MANMODE
$MESSAGE
conf Suffix for a static library. Default value: ".lib" for MS−Windows, ".a"
for Unix.
conf Actual name of the "libtool" program, used to build libtool libraries and
for building programs that use libtool libraries. Default value: "libtool
−−silent".
conf Suffix for a (symbolic) link. Default is empty.
user Default message for the version control change log. Used when a file is
committed (also when it was deleted and the delete is committed).
conf Suffix for an object file to be included in a libtool library. Default value:
".lo".
conf Prefix for libtool library. The default is "lib".
user Arguments for linking, after the object files but before $LIBS. When
$LTLIBS is set "libtool" will be used for building, see $LIBTOOL
(when the platform supports it). Convention: Always use "−lname", the
tools will translate it into the flags that the linker actually uses.
conf Suffix for a libtool library. Default value: ".la".
Aap Sub−directory to install man pages into. Default value: "man/". Note
that Aap will append "man1", "man2", etc. when installing manual
pages.
Aap Mode to use for installed man pages. Default value: "0644" (read/write
for the user, readable for the group and others).
user Comma separated list of message types which are printed. Possible
values:
note
note message
warning
warning message
error
error message
system
executed system command
result
result of :sys command
info
informational message
extra
extra informational message
changedir changing directories
depend
message about dependencies
all
all messages
Default value: "error,warning,system,info". When the −s or −−silent
option is used: "error". When the −v or −−verbose option is used: all
possible values.
$OBJSUF
$OPTIMIZE
$OSNAME
Instead of removing "print" from $MESSAGE it is possible to use the
:log command to write text to the log file.
Aap Suffix for an object file. Default value: ".o" for Unix, ".obj" for
MS−Windows.
user A number from zero to nine. Zero means no optimization, nine means
maximum optimization. The default is two. For an example see the
tutorial.
Aap The name of the operating system and its version (on systems that
support it). For instance, FreeBSD 4.9 gives $OSNAME the value
Chapter 35. Common Variables
132
A−A−P Recipe Executive
$OSTYPE
Aap
$PAINTER
conf
$PREFIX
user
$RANLIB
conf
$RANLIBFLAGS
$RCP
user
conf
$RECIPEVERSION
user
$RSYNC
user
$SBINDIR
$SCP
Aap
user
$SHLINK
conf
$SHLINKFLAGS
user
$SOURCE
$STRIP
user
conf
$STRIPFLAGS
$TAR
$TARGET
user
conf
user
Chapter 35. Common Variables
FreeBSD4_9_STABLE. Systems that do not support name and
version yield what Python's os.name yields − usually the same as
$OSTYPE except for MS−Windows and MS−DOS. This name is
usually incorporated in $BDIR as well, as build−OSNAME.
Type of operating system used:
posix
Unix−like (Linux, BSD)
mswin
MS−Windows (98, XP)
msdos
MS−DOS (not MS−Windows)
os2
OS/2
mac
Macintosh (OS X gives "posix")
java
Java OS
riscos
Risc OS
ce
MS−Windows CE
Graphical editor to be used for the "edit" action. The default value
comes from the "PAINTER" environment variable.
Directory normally used for the top directory to install to. When empty
it defaults to "/usr/local". Use a single slash to install in the root
directory. Also see $DESTDIR.
Program to run on created static library. Default is not set. When the
"ranlib" action is invoked it will search for the "ranlib" program and set
the $RANLIB variable.
Arguments for $RANLIB. The default is not set.
Remote copy program to use for rcp://. The default is not set, which
means "rcp −p" is used. May also include arguments.
Version of A−A−P the recipe was written for, set by the user. Uses the
format "1.0", "1.3". Currently not used, but in a later version of Aap it
can be use for backward compatible behavior.
Remote sync program to use for rsync://. The default is not set, which
means "rsync −p −−rsh=ssh −−copy−links" is used (preserve file
attributes, use secure shell connection, copy what symbolic link points
to).
Sub−directory to install "sbin" files into. Default value: "sbin/".
Secure copy program to use for scp://. The default is not set, which
means "scp −C −p" is used. May also include arguments, e.g.: "scp −i
c:/private/keyfile".
Name of linker used to combine object files into a shared (dynamic)
library. Default value: "ld" for Unix, "link" for MS−Windows.
Arguments for $SHLINK. Default value: "−shared" for Unix, "/nologo
/dll" for MS−Windows.
List of source files. OBSOLETE
Program to run on installed program. Default is empty. When the "strip"
action is involved Aap will search for the "strip" command and set
$STRIP to the found program.
Arguments for $STRIP. The default is not set.
Tar program to use. Default value is "tar".
List of target files, usually the name of the resulting program.
OBSOLETE
133
A−A−P Recipe Executive
$TARGETARG
$TIMESTR
$TOPDIR
$UNZIP
$USECXXLD
$VERSIONSTR
$YACC
$YACCFLAGS
$YACCPP
$YACCPPFLAGS
$bar
$br
$empty
$gt
$lt
$pipe
Aap Target(s) specified on the command line.
Aap Time as a string in the form "23:11:09". This always uses GMT, it
ignores time zones and daylight saving. But it depends on the system
time to be set correctly! The value does not change while Aap is
running, it is the time when Aap was started. Also see $GMTIME and
$DATESTR.
Aap In a child recipe: The directory of the child recipe relative to the
toplevel recipe. When using: ":child subdir/main.aap" in the toplevel
recipe, $TOPDIR will be "subdir" in the child recipe. In the toplevel
recipe $TOPDIR is empty.
conf Unzip program to use for ".zip" archives. Default value is "unzip".
Aap When set to "yes" the default for the build program becomes $CXX
instead of $CC. Only used when $LD is not set. The compile action for
C++ files sets this variable to "yes". The default value is "no".
Aap Version of A−A−P being used as a string, e.g., "0.100". Also see
$AAPVERSION.
conf Program to turn a yacc file into C. The default value is empty. When the
"yacc" action is invoked Aap will search for "yacc" and "bison" and set
$YACC to the found program.
user Flags for $YACC. The default value is not set.
Aap Program to turn a yacc++ file into C++. The default value is empty.
When the "yaccpp" action is invoked Aap will search for "bison" and
"yacc" and set $YACC to the found program.
user Flags for $YACCPP. The default value is not set.
Aap A single |. OBSOLETE, use $(|).
Aap A line break. OBSOLETE, use $BR
Aap Empty. Can be used to get leading white space with :print.
OBSOLETE, use $( )
Aap A single >. OBSOLETE, use $(>).
Aap A single <. OBSOLETE, use $(<).
Aap A single |. OBSOLETE, use $(|).
Chapter 36. Assignments
Assignment
overview:
var = value
var += value
var ?= value
var $= value
var $+= value
var $?= value
assign
append (assign if not set yet)
assign only when not set yet
assign, evaluate when used
append, evaluate when used
assign only when not set, evaluate when used
Chapter 36. Assignments
134
A−A−P Recipe Executive
Assignment with "+=" or "$+=" appends the argument as a separate item. This is actually done by inserting a
space. But when the variable wasn't set yet and when it is empty it works like a normal assignment:
VAR += something
is equal to:
@if globals().get("_no.VAR"):
@
VAR = _no.VAR + " " + "something"
@else:
@
VAR = "something"
Assignment with "?=" only does the assignment when the variable wasn't set yet. A variable that was set to an
empty string also counts as being set. Thus when using "aap VAR=" the empty value overrules the value set
with "?=".
VAR ?= something
is equal to:
@if not globals().has_key("_no.VAR"):
VAR = something
When using "$=", "$+=" or "$?=" variables in the argument are not evaluated at the time of assignment, but
this is done when the variable is used. The expansion is done in the scope where it is used, thus the result may
depend on when and where the variable is used..
VAR = 1
TT $= $VAR
VAR = 2
:print $TT
prints "2".
A variable with delayed evaluation cannot be used directly in Python code, because it is set the the class
ExpandVar. See the var2string() function for expanding the variable in Python code.
When first setting a variable with "$=" and later appending with "+=" the evaluation is done before the new
value is appended:
VAR = 1
TT $= $VAR
TT += 2
VAR = 3
:print $TT
prints "1 2"
Note that evaluating a python expressions in `` is not postponed.
Chapter 36. Assignments
135
A−A−P Recipe Executive
Block Assignment
The normal assignment command uses a single line of text. When broken into several lines they are joined
together, just like with other commands. $BR can be used to insert a line break. Example:
foo = first line$BR
second line$BR
third line $BR
The block assignment keeps the line breaks as they are. The same example but using a block assignment:
foo << EOF
first line
second line
third line
EOF
The generic format is:
{var} << {term}
line1
...
{term}
{term} can be any string without white space. The block ends when {term} is found in a line by itself,
optionally preceded by white space and followed by white space and a comment.
The amount of indent to be removed from all the lines is set by the first line. When the first line should start
with white space use $( ).
All the variations of the assignment command can be used:
var << term
var +<< term
var ?<< term
var $<< term
var $+<< term
var $?<< term
assign
append (assign if not set yet)
only assign when not set yet
evaluate when used
append, evaluate when used
only when not set, evaluate when used
Chapter 37. Attributes
Attributes can be added to an item with the :attr command and by using them in a dependency or rule. Note
that an assignment does not directly associate the attribute with a node. This only happens when the variable
is used in an :attr command or a dependency.
The form for an attribute is:
{name = value}
"value" is expanded like other items, with the addition that "}" cannot appear outside of quotes.
Block Assignment
136
A−A−P Recipe Executive
This form is also possible and uses the default value of 1:
{name}
Examples:
bar : thatfile {check = $MYCHECK}
foo {virtual} : somefile
The "virtual" attribute is used for targets that don't exist (as file or directory) but are used for selecting the
dependency to be built. These targets have the "virtual" attribute set by default:
Table 37.1. Virtual Targets
Target
all
clean
cleanmore
cleanALL
Commonly used for
build the default targets
remove generated files that are not distributed (added automatically)
remove all generated files (added automatically)
remove all generated files, AAPDIR and build−* directories below the toplevel recipe
test
check
install
uninstall
tryout
run tests
same as "test"
build and install for use (added automatically)
uninstall for use (added automatically)
build and install for trying out
reference generate or update the cross−reference database
fetch
update
obtain the latest version of each file
fetch and build the default targets
checkout
commit
checkin
unlock
add
remove
revise
tag
checkout (and lock) from version control system
commit changes to VCS without unlocking
checkin and unlock to VCS
unlock files from a VCS
add new files to VCS
remove deleted files from VCS
like checkin + remove
add a tag to the current version
prepare
publish
prepare for publishing (generated docs but no exe)
distribute all files for the current version
Block Assignment
137
A−A−P Recipe Executive
finally
always executed last (using "aap finally" is uncommon)
The targets marked with "(added automatically)" will be added by Aap if they are not present. This is done for
the toplevel and each child recipe.
These specific targets may have multiple build commands. They are all executed to update the virtual target.
Normally there is up to one target in each (child) recipe.
Note that virtual targets are not related to a specific directory. Make sure no other item in this recipe or any
child recipe has the same name as the virtual target to avoid confusion. Specifically using a directory "test"
while there also is a virtual target "test". Name the directory "testdir" to avoid confusion.
The "comment" attribute can be used for targets that are to be specified at the command line. "aap comment"
will show them.
% aap comment
target "all": build everything
target "foo": link the program
Sticky Attributes
When attributes are used in a rule or dependency, most of them are only used for that dependency. But some
attributes are "sticky": Once used for an item they are used everywhere for that item. Sticky attributes are:
Table 37.2. Sticky attributes
virtual
remember
directory
filetype
constant
fetch
commit
publish
force
depdir
var_BDIR
signfile
virtual target, not a file
virtual target that is remembered
item is a directory
type of file
file contents never changes
list of locations where to fetch from (first one that works is used)
list of locations for VCS
list of locations to publish to (they are all used)
rebuild a target always
directory to put an automatically generated dependency file in; when omitted $BDIR is used
directory to put the related object or generated file in; when omitted $BDIR is used
file used to store signatures for this target
The check attribute
The check attribute is used to specify what kind of signature is used for an item.
The default check for a file that was changed is an md5 checksum. Each time a recipe is executed the
checksums for the relevant items are computed and stored in the file "AAPDIR/sign". The next time the recipe
is executed the current and the old checksums are compared. When they are different, the build commands are
Sticky Attributes
138
A−A−P Recipe Executive
executed. This means that when you put back an old version of a file, rebuilding will take place even though
the timestamp of the source might be older than the target.
Another check can be specified with {check = name}, where "name" is the kind of check. Example:
foo.txt : foo.db {check = time}
:sys db_extract $source >$target
The default check is "md5". This is specified with the $DEFAULTCHECK variable. You can set this variable
to "time" or "newer" to use timestamps instead of md5 signatures. The value of $DEFAULTCHECK is used
when a node does not have a "check" attribute.
Table 37.3. supported check attribute values
time
Build the target when the timestamp of the source differs from the last time the target was built.
Build the target if its timestamp is older than the timestamp of the source. This is what the good old
newer
"make" program uses.
Build the target if the md5 checksum of the source differs from the last time the target was built. This
md5
is the default.
Like "md5", but ignore changes in comments and amount of white space. Appropriate for C
c_md5
programs. Slows down computations considerably.
none Don't check time or contents, only existence. Used for directories.
When mixing "newer" with other methods, the build rules are executed if the target is older than the source
with the "newer" check, or when one of the signatures for the other items differs.
The "AAPDIR/sign" file is normally stored in the directory of the target. This means it will be found even
when using several recipes that produce the same target. But for targets that get installed in system directories
(use an absolute path), virtual targets and remote targets this is avoided. For these targets the "AAPDIR/sign"
file is stored in the directory of the recipe that specifies how to build the target.
To overrule the directory where the "sign" file is written, use the attribute {signdirectory = name} for the
target. To overrule the file where the signatures are written, use the attribute {signfile = name} for the target.
"name" cannot end in "sign".
Handling Circular Dependencies
Two attributes can be used to handle circular dependencies:
update Can be set to "no" to avoid updating a source that a target depends on.
recursive Can be set to a number, which indicates the maximum recursive depth allowed.
The use can best be illustrated with an example:
:attr {recursive = 3} index file.out
index: file.out {update = no}
# Get the current checksum for the index file.
@sum = get_md5("index")
Handling Circular Dependencies
139
A−A−P Recipe Executive
# Generate the new index file from the output file.
:system wc file.out >$target
# Update the output file if the index file changed.
@if sum != get_md5("index"):
:update file.out
file.out: file.in index {update = no}
# Make sure index exists.
@if not os.path.exists("index"):
:print empty > index
# Generate the output file.
:cat $source >! $target
# Need to generate the index file again.
:update index
all: file.out
The goal is to produce the file "file.out". It is created from "test.in" and "index". The "index" is created from
"file.out", which includes the "index" file, thus a circular dependency exists. The idea is to repeat generating
"file.out" until it no longer changes.
The "recursive" attribute is set to 3 for "index" and "file.out". This allows rebuilding "file.out" three times
before giving up.
In the first dependency the "{update = no}" attribute is used to avoid updating "file.out". The build commands
first update the "index" file before using :update to update "file.out". But this is only done when the index file
has changed. That is where the circular dependency stops: When the generated index file no longer changes.
In the second dependency a similar thing is done: The "index" file is not updated before executing the build
commands but as part of the build commands.
Chapter 38. Filetype Detection
The filetype detection module basically takes a file name and returns the type of the file.
The A−A−P filetype detection is a separate module. You can use the filetype detection in recipes, as a
standalone program and from any Python program.
A filetype name is made of lowercase ASCII letters and digits: a−z and 0−9.
The Program
Usage:
Filetype.py [−I ruledir] ...
[−f rulefile] ... filename
This will print the filetype of "filename" on stdout. When the type could not be detected the result is the string
"None".
Chapter 38. Filetype Detection
140
A−A−P Recipe Executive
The "−I ruledir" argument can be used to specify a directory to load *.afd (Aap Filetype Detection) files from.
These add rules for filetype detection. These are the default directories which are always scanned:
/usr/local/share/aap/afd/
~/.aap/afd/
The "−f rulefile" argument can be used to specify a file to load rules from.
Detection
Detection is done in this order:
1. early Python items
2. check the file name extensions
3. match the regular expressions with the file name
4. check the first line in the file for a matching script name
5. later Python items
When on a non−Posix system, the file name is forced to be lower case, so that case differences are ignored.
The rules must use lower case names for this to work properly. Rules with an upper case letter will only match
on a Posix system (this can be used for *.H to be recognized as cpp only on systems that make a difference
between *.h and *.H).
The Python Module
The "ft_detect" function can be called to detect the type of file "fname":
from Filetype import ft_detect
type = ft_detect(fname)
A string with the detected filetype is returned. If the type is not recognized, ft_detect() returns the None value.
To ignore extra suffixes like ".in", ".gz", add an extra non−zero argument:
type = ft_detect(fname, 1)
To influence the messages given, add an extra "dict" argument. The "MESSAGE" item will be used, see its
explanation in the main documenation.
For more info about the Filetype module, see the comments at the start of Filetype.py.
Format Of Filetype Detection Rules
Blank lines and lines starting with "#" (preceded by any amount of white space) are ignored.
These filetype detection lines are supported:
suffix suffix type
Detection
141
A−A−P Recipe Executive
Add detection of a filetype with a file name suffix. When a file name ends in .{suffix} it gets filetype
{type}. {suffix} is taken literally, it is not a regular expression.
When {type} is "ignore" filetype detection is done on the file name with this suffix is removed. For
example, "suffix gz ignore" causes "foo.c.gz" to be handled like "foo.c".
When {type} is "remove" a previously defined filetype detection for {suffix} is removed. This can be
used to remove a suffix rule and add another kind of detection instead.
regexp regexp type [append] [tail]
Add detection of a filetype with a Python regular expression. When {regexp} matches with the name
of a file it gets filetype {type}.
When "tail" is given, matching is done with the tail of the filename (without the path).
When {type} is "remove" a previously defined filetype detection for {regexp} is removed.
When "append" isn't given, the new detection is put before existing regexp detections, thus overruling
them. When "append" is used it is put after the existing regexp detections.
script script type [append]
Add detection of a filetype by examining the first line of the file. When it starts with "#!" and {script}
matches with the script program name it gets filetype {type}.
{script} is used as a Python regular expression. It must match at the start of the program name. Use
".*" to ignore a path. End with "$" to match at the end of the program name
When {type} is "remove" a previously defined filetype detection for {script} is removed.
When "append" isn't given, the new detection is put before existing script detections. When "append"
is used the new detection is put after the existing script detections.
python [after] [append] [suffixlist]
python−code
Add detection of a filetype by executing Python code. When the optional "suffixlist" is specified the
Python code is only executed when the file name matches a suffix in this comma separated list of
suffixes. This speeds up detection by only executing the Python code on relevant files. For example,
to only check *.bas and *.frm files:
python bas,frm
The code is executed with these variables set:
fname
the name of the file
fname_base the last part of the path
ignore
1 if extra suffixes are to be ignored, 0 otherwise
When the code detects the filetype it must assing it to the variable "type".
An IOError in the code is ignored. Other errors are reported. Thus an open() call can be used without
handling exceptions (when the file doesn't exist).
Detection
142
A−A−P Recipe Executive
When "after" isn't given, the detection is done before the suffix, regexp and script detection. When
"after" is given it's done last.
When "append" isn't given, the new detection is put before existing python detections. When
"append" is used it is put after the existing python detections. The Python−code can use the ft_detect()
function on a modified fname when needed. Example:
python after
if ignore and fname[−1] == '~':
type = ft_detect(fname[:−1], ignore)
This is actually one of the default rules. When the file name ends in "~" detection is done on the name
with this character removed. This finds the type of backup files.
declare type
Declare {type} to be a recognized filetype. This is needed for filetypes that are recognized through
Python code only. All other filetypes (those that appear in suffix, regexp, and script rules) need not be
separately declared.
When you use an unknown filetype in a recipe, Aap prints a warning to alert you to the possibility of
a misspelling. The declare rule is needed because Aap cannot tell what filetype the Python code is
capable of detecting, so the declare rule is used to tell Aap specifically that the filetype {type} is a
known and recognized type.
In the above the first argument can be put in quotes to include white space. {type} can only consist of ASCII
lowercase letters and digits.
Chapter 39. Standard Modules
There is no standard module for the "C" language. This language is supported without the need to import a
module.
The following modules are distributed with Aap:
d
Support for the "D" programming language. With this module imported, :program, :dll and
:lib commands can be used as easily as with C or C++. To customize compilation and linking, the
variables below can be filled. See also Chapter 40, Standard Tools for supported D tools.
Table 39.1. Variables of the D module
name
$D_COMPILE_ACTION
$D_BUILD_ACTION
Chapter 39. Standard Modules
type description
Aap When not empty, specifies the action name to be
executed for compiling a D file into an object,
dllobject or libobject file. See Chapter 30, Customizing
Default Tools.
Aap When not empty, specifies the action name to be
executed for building a program or library from object
files compiled by a D compiler. A "buildaction"
143
A−A−P Recipe Executive
$D_BUILDDLL_ACTION
Aap
$D_BUILDLIB_ACTION
Aap
$D_BUILDONESTEP_ACTION
Aap
$D_BUILDDLLONESTEP_ACTION Aap
$D_BUILDLIBONESTEP_ACTION Aap
$DFLAGS
$DLINKFLAGS
user
user
$DIMPORT
user
$DVERSION
user
$DDEBUG
user
$DIMPLIB
user
attribute on one of the object files is used before
$D_BUILD_ACTION. See Chapter 30, Customizing
Default Tools.
When not empty, specifies the action name to be
executed for building a dynamic link library from
object files compiled by a D compiler. A "buildaction"
attribute on one of the object files is used before
$D_BUILDDLL_ACTION. See Chapter 30,
Customizing Default Tools.
When not empty, specifies the action name to be
executed for building a static library from object files
compiled by a D compiler. A "buildaction" attribute on
one of the object files is used before
$D_BUILDLIB_ACTION. See Chapter 30,
Customizing Default Tools.
When not empty, specifies the action name to be
executed for building a program directly from D
source. See Chapter 30, Customizing Default Tools.
When not empty, specifies the action name to be
executed for building a dynamic link library directly
from D source. See Chapter 30, Customizing Default
Tools.
When not empty, specifies the action name to be
executed for building a static library directly from D
source. See Chapter 30, Customizing Default Tools.
Compiler arguments passed to the D compiler.
Arguments passed to the linker; in most cases libraries
to link with.
Import directories used for the D compiler. Always use
the "−Ipath" form and don't use it for other switches.
A−A−P will convert it to what the compiler actually
uses. This variable is also used when checking for
dependencies.
Version arguments passed to the D compiler. Always
use the "−version=..." form, the tool will convert it to
what the compiler actually uses.
Debug arguments passed to the D compiler. Always
use the "−debug"/"−debug=..." form, the tool will
convert it to what the compiler actually uses. To
enable symbolic debug information, set the the
$DEBUG to "yes". For other language independent
debugging switches, like enabling profiling hooks, use
$DFLAGS.
If this variable is set to 'yes', an import library will be
created when building a dll on the Windows platform.
libtool
Chapter 39. Standard Modules
144
A−A−P Recipe Executive
Adds support for GNU libtool, so that you can use it to build shared libraries in a portable manner.
Automatically imported if you use a :ltlib command.
qt
Adds support for the Qt library.
Chapter 40. Standard Tools
A tool has been made for several compilers on different platforms. Tools can be selected for use by the
:usetool and :toolsearch commands.
The following tools are distributed with Aap:
bcc
Adds support for the Borland C++ compiler tools.
dmd
Support for the Digital Mars D compiler.
The "{onestep}" option is supported for this compiler. Also, if the :dll target is used, it will check for
existence of DllMain. If it isn't found, it will be added. Export definitions are delegated to the
programmer through using either '.def'−files or the 'export' attribute (recommended). Note that DMD
currently supports dll's only for the Win32 platform.
In addition to using the variables in the D module,the tool uses the $DEBUG and the $OPTIMIZE
variables if set. If $OPTIMIZE is set to a value larger than 0, the "−O" switch is passed to the
compiler. Optimization is on by default. If $DEBUG is set to "yes", the "−g" switch will be passed to
the compiler. For other language independent switches like "−gt", use the $DFLAGS variable. The
language dependent debug switches should be put in the $DDEBUG variable.
gcc
Adds support for the GNU C compiler tools.
icc
Support for the IBM C compiler tools.
mingw
Adds support for the GNU C compiler tools under the MinGW environment.
msvc
Support for the MicroSoft Visual compiler tools.
Chapter 41. A−A−P Python functions
This chapter documents the Aap specific functions that can be used in Python code.
Chapter 40. Standard Tools
145
A−A−P Recipe Executive
Python functions grouped by functionality
Variable Values
expand2dictlist()
expand2list()
expand2string()
wildescape()
var2dictlist()
var2list()
var2string()
get_attr()
get_var_attr()
Expands wildcards and turns it into a list of dictionaries.
Expands wildcards and turns it into a list of items.
Expand wildcards, "~user" and "~/user".
Avoid expansion of wildcard characters.
Turns a string into a list of dictionaries.
Turns a string into a list of items.
Does delayed evaluation of "var" when necessary.
Returns a dictionary with the attributes of a node.
Returns the value of a specific attribute used in a list of items.
Dependencies
has_target()
has_targetarg()
has_build_target()
src2obj()
skipbuild()
Checks the kind of dependencies a target has.
Checks if one of the arguments was used as an Aap argument.
Checks if Aap was started that builds something.
Transform source file names into object file names.
Returns non−zero when build commands are to be skipped.
Installing
ask_prefix()
do_BSD_port()
do_Debian_pkg()
install_files()
uninstall_files()
Ask the user for an installation prefix.
Attempt to install a BSD port.
Attempt to install a Debian package.
Install files to a specified directory.
Uninstall files from a specified directory.
Filesystem
file2string()
program_path()
tempfname()
var_abspath()
childdir()
parentdir()
topdir()
basedir()
Return the contents of a file as a string.
Search for a program and return the full path.
Returns the name of a temporary file.
Turn filenames into absolute paths.
Prepend $CHILDDIR to every item in the argument.
Prepend $PARENTDIR to every item in the argument.
Prepend $TOPDIR to every item in the argument.
Prepend $BASEDIR to every item in the argument.
Various
aap_has()
redir_system()
sort_list()
Check if Aap supports a feature.
Execute a system command are return its stdout.
Sort a list and return the resulting list.
Python functions grouped by functionality
146
A−A−P Recipe Executive
get_html_images()
suffix()
sufreplace()
sufadd()
define_action()
Extract list of images used in a HTML file.
Return the filename suffix.
Replace filename suffix in a list of filenames.
Add filename suffix in a list of filenames.
Define an action.
Alphabetical list of Python functions
aap_has(name)
Returns non−zero if Aap supports feature "name". These features can be checked:
: command−name Whether the command "command−name" is supported.
Example:
@if aap_has(":tree"):
:tree . {filename = .*\.aap}
:print recipe found: $name
ask_prefix(name)
Ask the user where to install the package "name". Returns a tuple (asroot, prefix). "asroot" is a
boolean indicating whether the package is to be installed as root (using :asroot). "prefix" is the root
for the install.
If the user is root it will return (1, "/usr/local/") without asking. When aborted it returns an empty
prefix.
basedir(arg)
Prepend $BASEDIR to every item in "arg". This makes items with a path relative to the toplevel
recipe relative to the current recipe. Example:
LibFiles = `basedir(LibNames)`
Also see topdir() and var_abspath().
childdir(arg)
Prepend $CHILDDIR to every item in "arg". This makes items with a path relative to the child recipe
relative to the parent recipe. Example:
_parent.DISTFILES += `childdir(DISTFILES)`
Can only be used in a child recipe. Also see parentdir(), topdir() and var_abspath().
define_action(action, primary, commands, attr = {}, intypes = [],
outtypes = [], defer_var_names = [], outfilename = '')
Define an action with the name "action". Also see the section called Specifying Actions.
The "primary" argument must be zero for a normal action, one for a primary action. A primary action
is the preferred way to turn the specified input filetypes into the output filetypes.
The "commands" argument is a string with the Aap commands that are executed for the action.
Normally a multi−line string is used. Make sure the indent of each command is correct!
Alphabetical list of Python functions
147
A−A−P Recipe Executive
The optional "attr" argument specifies extra attributes for the action.
The optional "intypes" argument specifies the list of input filetypes. When omitted the get_in_types()
function must be specified, see below.
The optional "outtypes" argument specifies the list of output filetypes. When omitted the
get_out_types() function must be specified, see below.
The optional "defer_var_names" argument specifies a list of variable names that are used to make the
action invoke another action. The special name "{buildaction}" can be used to check the "buildaction"
attribute of the source files for a specific build action to be used.
For example, if "defer_var_names" is ["BUILD_ACTION", "{buildaction}"] then first
$BUILD_ACTION is looked at. If it is defined its value is used as the name of the action to be
invoked. If it is not set then the "buildaction" attribute of the source files is obtained.
In the "commands" argument the $DEFER_ACTION_NAME variable can be used, it is set to the
found action name. Otherwise it is empty.
The optional "outfilename" argument specifies a string that forms the target file name. It normally
includes "$source". When this argument is defined the action can be used in a route with a following
action. Example: "$(source).c". The target file name is the source file name with ".c" appended.
Return Value: The define_action() function returns an Action object. This can be used to overrule the
get_out_types() and get_in_types() functions. These should return a list of the currently supported
output and input filetypes for the action. See the "default.aap" recipe for more examples. The
defer_action_name() function can also be overruled. It must return the name of an action to defer the
work to or None. Example:
:python
act = define_action("buildme", 1, """
@if DEFER_ACTION_NAME:
:do $DEFER_ACTION_NAME {target = $target} $source
@else:
:sys me < $source > $target
""",
outtypes = ["me"],
intypes = ["moo"])
def buildme_name(source = ""):
name = get_var_attr(source, "buildaction")
if name:
return name
return None
act.defer_action_name = buildme_name
def buildme_outtypes(source = "", intype = None):
if intype and intype not in self.intypes:
return []
return ["me"]
Note that the defer_action_name() function must support an optional argument "source", which is a
string containing the source files used. In the example the "buildaction" attributes of the source files
are used to find a specific action to be used for building.
do_BSD_port(name, target)
Alphabetical list of Python functions
148
A−A−P Recipe Executive
Attempt to install the BSD port "name". This includes the directory in which the port lives, e.g.:
"devel/templ".
The BSD port system will take care of dependencies. This may result in many more ports to be
installed than the one you asked for.
"target" is passed to the "make" command for the port. When "target" is "all" the port is build but not
installed. When "target" is "install" it will be build and installed.
When needed the user will be asked to enter the root password. The "make" command is run in a
separate root shell (every command must be confirmed for security reasons).
Returns non−zero for success.
do_Debian_pkg(name, target)
Attempt to install the Debian package "name". This is the name that "apt−get" uses.
When not on a Debian system or when "apt−get" cannot be found the function returns with a zero
value.
The Debian "apt−get" will take care of dependencies. This may result in many more packages to be
installed than the one you asked for.
"target" specifies what to do. When "target" is "install" the package will be installed.
When needed the user will be asked to enter the root password. The "make" command is run in a
separate root shell (every command must be confirmed for security reasons).
Returns a non−zero number for success.
expand2dictlist(expr)
Turns a variable with a string value into a list of dictionaries. Each dictionary has a "name" entry for
the item itself and other entries are attributes. Wildcards in "expr" are expanded. See var2dictlist() for
not expanding wildcards. Example:
source = file1 {force} file2 file3
@for item in expand2dictlist(source):
@
if item.get("force"):
:print forced item: `item["name"]`
expand2list(expr)
Turns a variable with a string value into a list of items. Attributes are discarded. Delayed evaluation is
taken care of.
Wildcards in "expr" are expanded. See var2list() for not expanding wildcards. Example:
source = file1 file2 file3
@for fname in expand2list(source):
:sys prog $fname
expand2string(expr)
Expand wildcards, "~user" and "~/user" in "expr". Returns the expanded string. "expr" is handled as a
list of items, white space is collapsed into a single space.
file2string(fname, dict = None)
Reads the file "fname" and concatenates the lines into one string. Lines starting with a '#' are ignored.
One space is inserted in between joined lines, other white space (including CR and VT) at the start
Alphabetical list of Python functions
149
A−A−P Recipe Executive
and end of a line is removed.
When "fname" doesn't exist or can't be read an error message is given and an empty string is returned.
Aap does continue with the following commands.
"dict" is used to obtain the value for $MESSAGE. The default is None. To avoid the error message
for a not existing file use something like this:
@foofile = file2string("foo", {"MESSAGE" : ""})
get_attr(name)
Returns a dictionary with the attributes of "name". If "name" is unknown or has no attributes, an
empty dictionary is returned. Example:
:attr {logical = yes} foobar
@print "foobar attributes: ", get_attr("foobar")
get_html_images(files, add_dir = 1)
Returns a list of the images used in HTML files. The argument "files" can be a Python list of file
names (e.g., what glob() returns) or an Aap list of files (white separated). Only images with a relative
path and no URL are included and each name is included only once.
Since the image file names are relative to the HTML file name, the directory of the HTML file is
prepended to the image file name. If this is not wanted set the "add_dir" argument to zero. The
returned file names are then as they appear in the HTML files.
This function is useful to make a list of image files that needs to be uploaded to a web server.
Example:
Files = index.html burp.html contact.html
Files += `get_html_images(Files)`
Note that this function is not perfect, it only works for relative file names, ignores Javascript and PHP,
etc.
get_var_attr(expr, attr_name)
"expr" is handled as a list of items with attributes. For each item the attribute "attr_name" is obtained.
If the item in "expr" does not specify an attribute it is obtained from the node (attributes previously
added with :attr). If none of the items has an attribute "attr_name" the function returns None. if two
items have a different value for attribute "attr_name" a UserError exception is raised. Otherwise the
value of attribute "attr_name" is returned. Example:
action = `get_var_attr(source, "buildaction")`
@if action:
:do $action $source
has_target(target)
Returns a number, depending on whether a dependency exists in which "target" is a target item:
0 there is no dependency for "target"
1 a dependency for "target" exists, there is no dependency with build commands
2 a dependency for "target" with build commands exists
Example:
Alphabetical list of Python functions
150
A−A−P Recipe Executive
@if not has_target("fetch"):
has_targetarg(targets)
Returns non−zero if one of the items in "targets" was used as a build target in the aap command.
Example:
@if has_targetarg("commit tar"):
:include maintainer.aap
has_build_target()
Returns non−zero if Aap was started with a target that will build something or no target at all (the
default target is expected to build something). Returns zero if the only targets are "clean",
"cleanmore", "cleanALL" or "fetch".
Useful to skip configuration when it's pointless.
install_files(dir, sources, mode)
Install the files specified in "sources" in the directory "$DESTDIR/$PREFIX/dir". Set the file
protection to "mode". Attributes on the items in "sources" can change the destination directory and
mode, see the section called Destination Directories.
"dir" can be any directory. When "dir" is an absolute path (starts with a slash) then $PREFIX is not
prepended. $DESTDIR is always prepended.
Note that only the tails of the filenames in "sources" are used, thus installing "foo/bar.txt" into the
"/tmp" directory results in "/tmp/bar.txt".
"mode" is normally a string with octal digits, e.g., "0644".
Example:
Files = test/foo.txt test/bar.txt
Dir = /usr/local/share
...
install−local:
@install_files(_no.Dir, _no.Files, '0644')
For uninstalling see uninstall_files()
parentdir(arg)
Prepend $PARENTDIR to every item in "arg". This makes items with a path relative to the parent
recipe relative to the current recipe. Example:
ImgFiles = `parentdir(ImgNames)`
Can only be used in a child recipe. Also see childdir() and var_abspath().
program_path(name, path = None, pathext = None, skip = None)
Returns the path for program "name". This uses the $PATH environment variable or os.defpath if it
isn't set.
Additionally, the directory where Aap is installed and the "bin" subdirectory are searched. This finds
tools supplied with Aap and installed packages. This is not done when the optional "path" argument is
supplied.
On MS−Windows and OS/2 also checks with extensions added. This uses the $PATHEXT
Alphabetical list of Python functions
151
A−A−P Recipe Executive
environment variable if set (The separator used is ';' if there is one, the system−dependent separator
otherwise). Otherwise the extnsions ".exe", ".com", ".bat", ".cmd" are used. When "name" includes a
suffix (a dot in the last component) adding extensions is not done.
Returns the first program found. Returns None when "name" could not be found.
Only finds executable files, not ordinary files.
Optional arguments:
path
pathext
skip
search path to use instead of $PATH; when a string items are separated with os.pathsep
extensions to try. Can be a list or a string. When a string is used items must be
separated with os.pathsep
name of directory to skip, "name" is not found in this directory
Example, search for program "foo.py" and "foo.sh":
p = `program_path("foo", pathext = [ '.py', '.sh' ])`
redir_system(cmd, use_tee = 1)
Execute shell commands "cmd" and return two items: a number indicating success and the stdout.
By default "tee" is used to display the output as well as redirecting it. When no output is desired set
"use_tee" to zero. Example:
ok, text = redir_system("ls", 0)
if ok:
print "ls output: %s" % text
else:
print "ls failed"
skipbuild()
Returns non−zero when build commands are to be skipped. This is when Aap was started with the
−−nobuild or −−touch argument.
sort_list(list)
sorts a list and returns the list. Example:
INP = `sort_list(glob("*.inp"))`
The Python list.sort() method doesn't return the sorted list.
src2obj(source, sufname = "OBJSUF", auto = 1)
Transform a string, which is a list of source files, into the corresponding list of object files. Each item
in "source" is changed by prepending $BDIR and changing or appending the suffix specified with
"sufname" (defaults to $OBJSUF).
The attribute "var_BDIR" is used instead of $BDIR when the attribute exists. The attribute "suffix" is
used for the suffix instead of using the "suffix" argument when the attribute exists.
When the "auto" argument is non−zero (the default) then the filetype of the source file will be
prepended to the "sufname" (in upper case and adding an underscore). Thus for a Java source file,
$JAVA_OBJSUF will be used. When it does not exists "sufname" is used. When this is not wanted
the "auto" argument must be set to zero.
suffix(name)
Alphabetical list of Python functions
152
A−A−P Recipe Executive
Return the filename suffix. If there isn't one an empty string is returned. Example: suffix("foo.c")
returns "c".
Note that the dot isn't included, while variables like $OBJSUF do include the dot.
sufadd(suf, expr, always = 0)
Returns "expr" with suffix "suf" appended. When "always" is non−zero the suffix is also added to
items that already have a suffix. If "always" is omitted or zero the suffix is only added to items
without a suffix. "expr" can be a list of filenames. Example:
libs = `sufadd(".lib", libs)`
sufreplace(from, to, expr)
Returns "expr" with all occurences of the suffix "from" changed to "to". When "from" is empty any
suffix is changed to "to". When "from" is None the suffix "to" is also appended to items that do not
have a suffix yet. "expr" can be a list of filenames. Example:
OBJECT = `sufreplace("", OBJSUF, SOURCE)`
tempfname()
Returns the name of a file which does not exist and can be used temporarily.
The recipe should take of deleting the file, but Aap may delete the directory in which the file resides
when it exits. Thus don't depend on the file to continue to exist after Aap exits.
topdir(arg)
Prepend $TOPDIR to every item in "arg". This makes items with a path relative to the current recipe
relative to the toplevel recipe. Example:
_top.DISTFILES += `topdir(DISTFILES)`
Also see childdir() and var_abspath().
uninstall_files(dir, sources)
Uninstall the files specified in "sources" from the directory "$DESTDIR/$PREFIX/dir". When given
the same arguments as install_files() it will delete the installed files.
Example:
Files = test/foo.txt test/bar.txt
Dir = /usr/local/share
...
uninstall−local:
@uninstall_files(_no.Dir, _no.Files)
var_abspath(var)
Returns "var" with all filenames turned into absolute paths. Prepends the current directory to each
item in "var" which isn't an absolute path name. Example:
:print `var_abspath("foo bar")`
Running this in "/home/mool/test" results in:
/home/mool/test/foo /home/mool/test/bar
var2dictlist(var)
Turns "var" into a list of dictionaries. "var" must be a string or a variable. Each dictionary has a
"name" entry for the item itself and other entries are attributes. Example:
Alphabetical list of Python functions
153
A−A−P Recipe Executive
source = file1 {force} file2 file3
@for item in var2dictlist(source):
@
if item.get("force"):
:print forced item: `item["name"]`
See expand2dictlist() for expanding wildcards.
var2list(var)
Turns "var" into a list of items. "var" must be a string or a variable. Attributes are discarded. Delayed
evaluation is taken care of. Example:
source = file1 file2 file3
@for fname in var2list(source):
:sys prog $fname
See expand2list() for expanding wildcards.
var2string(var)
Does delayed evaluation of "var" when necessary. Variables that should be expanded when used use
the ExpandVar class and cannot be used directly. The unexpanded value is accessible with "var.val".
Illustration:
bar = aaa
foo $= $bar
bar = bbb
:print $$foo: $foo
:print Unexpanded: `foo.val`
:print Expanded: `var2string(foo)`
Output:
$foo: bbb
Unexpanded: $bar
Expanded: bbb
This also takes care of changing a Python list and other variable types to a string. A None value is
turned into an empty string.
wildescape(expr)
Return the string "expr" with wildcard characters escaped, so that expanding wildcards will result in
"expr". This puts the characters '*', '?' and '[' inside []. Example:
files = `glob("images/*")`
:attr {asdf} `wildescape(files)`
Equivalent to:
:attr {asdf} images/*
While developing Aap some functions have been renamed. The old names are still available to keep old
recipes from working. But some day these will be removed.
obsolete name
new name
aap_sufreplace() sufreplace()
aap_abspath() var_abspath()
Alphabetical list of Python functions
154
A−A−P Recipe Executive
aap_expand()
expandvar()
var2string()
expand2string()
Chapter 42. A−A−P Commands
Commands grouped by functionality
Dependencies
:program
Define the sources for an executable program.
:lib
Define the sources for a static library.
:ltlib
Define the sources for a library to be made with libtool.
:dll
Define the sources for a shared (dynamically loaded) library.
:produce
Generic way to build something from sources.
:totype
Use routes to turn one filetype into another.
:rule
Define build commands for files matching a pattern.
:delrule
Delete a specific rule.
:clearrules
Delete all rules.
:update
Update a target, build it when it is outdated.
:changed
Mark a file as changed.
Recipes
:child
:include
:import
:execute
:recipe
Read a child recipe.
Include another recipe.
Include a module from the Aap distribution.
Execute a recipe.
Define the URL where the recipe can be obtaind from.
Actions
:action
:do
:route
:filetype
Define commands for an action.
Invoke an action.
Define a route of actions to turn one filetype into another.
Define filetype detection.
Up− and Downloading
:fetch
Download files.
:fetchall
Download all files with a "fetch" attribute.
:publish
Upload the specified files.
:publishall
Upload all files with a "publish" attribute.
:mkdownload Create a recipe to download files.
:proxy
Define a proxy server.
Version control
Chapter 42. A−A−P Commands
155
A−A−P Recipe Executive
:add
:addall
:checkin
:checkinall
:checkout
:checkoutall
:commit
:commitall
:remove
:removeall
:reviseall
:tag
:tagall
:unlock
:unlockall
:verscont
Add a file to the version control repository.
Add all files with a "commit" attribute to the version control repository.
Checkin a file into the version control repository.
Checkin all files with a "commit" attribute into the version control repository.
Checkout a file from the version control repository.
Checkout all files with a "commit" attribute from the version control repository.
Commit files to the version control repository.
Commit all files with a "commit" attribute to the version control repository.
Remove a file from the version control repository.
Remove all file without the "commit" attribute from the version control repository.
combination of :checkinall and :removeall.
Add a tag in the version control repository for a file.
Add a tag in the version control repository for all files with the "commit" attribute .
Unlock a checked out file.
Unlock all checked out files with the "commit" attribute.
Generic version control command.
System commands
:asroot
Execute a command as the system administrator.
:sys
Execute a system command.
:system
Execute a system command.
:start
Run a system command asynchronously.
:syseval
Execute a system command and catch the output.
:sysdepend Execute a system command to figure out dependencies.
:syspath
Execute one of a number of commands.
Pipe commands
:assign
Assign stdin to a variable.
:cat
List or concatenate files.
:print
Print a message
:log
Write a message to the log file
:tee
Echo stdin to stdout and also write it in a file.
:eval
Evaluate a Python expression
:syseval
Execute a system command and catch the output.
File system commands
:copy
Copy files.
:move
Rename or move a file.
:symlink
Create a symbolic link.
:chmod
Change the protection bits of a file.
:del
Delete files.
:delete
Delete files.
Chapter 42. A−A−P Commands
156
A−A−P Recipe Executive
:deldir
:mkdir
:touch
:tree
:cd
:chdir
:pushdir
:popdir
Delete directories.
Create a directory.
Create a file and/or update its timestamp.
Execute commands for a directory tree.
Change directory.
Change directory.
Change directory and remember the previous one.
Change to an older directory.
Various
:attr
:attribute
:buildcheck
:exit
:quit
:pass
:variant
:python
:conf
:progsearch
:assertpkg
:installpkg
:usetool
:toolsearch
Attach attributes to items.
Attach attributes to items.
Add a string to the build command signature.
Stop execution.
Stop execution.
Do nothing.
Define build variants.
Execute Python commands.
Do a configuration check.
Search for an executable program.
Check if a package is present, install it when not.
Install a package unconditionally.
Specify what tool to use.
Search for tools that can be used.
Alphabetical list of Commands
This is the alphabetical list of all A−A−P commands. Common arguments are explained at the end.
Some commands can be used in a pipe. A pipe is a sequence of commands separated by '|', where the output of
one command is the input for the next command. Example:
:cat foo | :eval re.sub('this', 'that', stdin) | :assign bar
Unix tradition calls the output that can be redirected or piped "stdout". Reading input from a pipe is called
"stdin".
In the commands below [redir] indicates the possibility to redirect stdout.
:action action filetype−out [filetype−in]
Define the commands for an action. See Chapter 28, Customizing Filetype Detection and Actions.
:action makeme {primary} me moo
:sys me < $source $gt; $target
Alphabetical list of Commands
157
A−A−P Recipe Executive
The optional {primary} attribute, just after the action name, indicates that this is the preferred action
to be used for turning the specified input filetypes into the specified output filetypes.
See :do for executing actions.
:add [{attr = val}...] fname...
Version control command, also see Chapter 18, Version Control.
Add the files to the repository. The files must exist locally. Implies a "commit" of the files.
:addall [option...] [{attr = val}...] [directory...]
Version control command, also see Chapter 18, Version Control.
Apply the :add command to all files in the directory that have been given the "commit" attribute in
the recipe (and child recipes) but do not exist in the repository.
options
{l} {local}
don't do current directory recursively
{r} {recursive} do handle arguments recursively
When no directory argument is given, the current directory is used. It is inspected recursively, unless
the "{local}" option was given.
When directory arguments are given, each directory is inspected. Recursively when the "{recursive}"
option was given.
When no "commit" attribute is specified here, it will be obtained from any node.
:asroot command
Execute shell command "command" in a separate shell with super−user privileges. Only the first time
the root password will have to be entered. Each executed command must be confirmed by the user
(for safety).
The command will be executed in the current directory of the recipe. Variables in "command" will be
expanded (no attributes, shell quoting). stdin and stdout are redirected, this cannot be used for
interactive commands.
On non−Unix systems and when running Aap as root this command is equivalent to :system .
When the user types "n" to refuse executing the command, $sysresult will be set to a non−zero value.
If the command is executed successfully $sysresult is set to zero. When the command fails an error
message is generated.
To execute recipe commands you need to start Aap, for example:
:asroot $AAP −c 'copy {r} foodir /usr/local/share'
$AAP includes the Python interpreter, so that it works the same way as how the current Aap was
started.
:assertpkg package...
For each argument check if the command by that name can be found. If not, ask the user and attempt
installing the package for it.
Alphabetical list of Commands
158
A−A−P Recipe Executive
Option: {optional} after the package name indicates the user may chose not to install the package.
Without this option the user cannot chose to continue without the package being installed.
See Chapter 25, Automatic Package Install about using packages. See :installpkg for installing a
package unconditionally.
:assign varname
Assign stdin to a variable. Can only be used after a "|".
See here about using stdin.
:attr [{attrname}...] itemname [{attrname}...]
:attribute [{attrname}...] itemname [{attrname}...]
Any "{attrname"} given before the items is added to each item in the list of items "itemname ...". The
"{attrname"} give later are only added to the item just before it.
A node is created for each "itemname". This also means wildcards in item names will be expanded.
Example:
:attr {fetch = cvs://} foo.c patch12 {constant}
This adds the "fetch" attribute to both foo.c and patch12, and the "constant" attribute only to patch12.
This does the same in two commands:
:attr {fetch = cvs://} foo.c patch12
:attr {constant} patch12
Note: the attributes are added internally. When using ":print $var" this only shows the attributes given
by an assignment, not the ones added with :attr.
:buildcheck argument...
Doesn't do anything. Placeholder for variables that are used but don't show up in build commands, so
that they will be included in the buildcheck.
:cat [redir] fname...
Concatenate the arguments and write the result to stdout. Files are read like text files. The "−"
argument can be used to get the output of a previous pipe command. When redirecting to a file this
output file is created before the arguments are read, thus you cannot use the same file for input.
See here for [redir].
:cd dir...
Change directory to "dir". When "dir" is "−" it goes back to the previous directory (it is an error if
there was no previous :cd command in the current command block).
When multiple arguments are given, they are concatenated with path separators inserted where
needed. This is similar to doing a :cd for each argument, except that each argument but the first one is
as handled as a relative path:
:cd
/tmp
/usr/local
bin
Is equivalent to:
:cd
:cd
/tmp
./usr/local
Alphabetical list of Commands
159
A−A−P Recipe Executive
:cd
bin
If the target directory does not exist this command fails. Use :mkdir first if needed (note: :mkdir does
not contatenate its arguments!).
Note that at the start of each command block Aap changes directory to the directory of the recipe.
WARNING: variables with a relative path become invalid! This includes $source and $target. Use
var_abspath(). when needed.
:changed [option...] name...
Consider file "name" changed, no matter whether it was really changed.
Similar to the command line argument "−−changed FILE".
options
{r} {recursive} Targets build from file "name" will also be considered changed, recursively.
:chdir dir
Same as :cd .
:checkin [{attr = val}...] fname...
Version control command, also see Chapter 18, Version Control.
Commit the files to the repository and unlock them. Just like :commit and :unlock.
:checkinall [{attr = val}...]
Version control command, also see Chapter 18, Version Control.
Apply the :checkin command to all files in the recipe (and child recipes) that have the "commit"
attribute.
:checkout [{attr = val}...] fname...
Version control command, also see Chapter 18, Version Control.
Obtain the latest version of the files from the repository. Lock the files for editing if possible.
:checkoutall [{attr = val}...]
Version control command, also see Chapter 18, Version Control.
Apply the :checkout command to all files in the recipe (and child recipes) that have the "commit"
attribute.
:checksum file...
For each file argument compute the MD5 checksum and compare it to the "md5" attribute of the file.
An error is generated when a file doesn't exist or when the checksums differ.
This command is useful to check if a downloaded file was not damaged when downloading it.
:child [{nopass}] name
Read recipe "name" as a child. Works like the commands were in the parent recipe, with a number of
exceptions:
1. When "name" is in another directory, change to that directory and accept all items in it
relative to that directory.
2. Build commands defined in the child are executed in the directory of the child. Thus it works
as if executing the child recipe in the directory where it is located.
3. The child recipe defines a new scope. Variables set there without a scope specification will be
Alphabetical list of Commands
160
A−A−P Recipe Executive
local to the child recipe.
4. When the {nopass} option is used, the child recipe is used as if it is a toplevel recipe.
Variables from the parent recipe are not available to the child.
5. Build commands defined in the child recipe will be executed in the scope of that recipe.
The "fetch" attribute is supported like with :include.
The :child command can only appear at the recipe level.
:chmod [option...] mode name...
Change the protection flags of a file or directory. Currently "mode" must be an octal number, like
used by the Unix "chmod" command. Useful values:
mode
755
444
600
660
meaning
executable for everyone, writable by user
read−only
read−write for the user only
read−write for user and group
options
{c} {continue} when an item with a wildcard does not have matches continue with the next item
{f} {force}
don't give an error when the file doesn't exist
:clearrules
Delete all rules. Also see :delrule.
:commit [{attr = val}...] fname...
Version control command, also see Chapter 18, Version Control.
Update the repository for each file that was changed. This is also done for a file that didn't change, it's
up to the version control software to check for an unchanged file (it might have been changed in the
repository).
Do checkout/checkin when checkout is required.
Don't change locking of the file.
Uses a "logentry" attribute when a log entry is to be done. When there is no "logentry" attribute the
$LOGENTRY variable is used. If neither is given you are prompted to enter a message.
Adds new files when needed.
Creates directories when needed (CVS: only one level).
:commitall [{attr = val}...]
Version control command, also see Chapter 18, Version Control.
Apply the :commit command to all files in the recipe (and child recipes) that have the "commit"
attribute.
:conf checkname [arg...]
Configuration command. See Chapter 23, Automatic Configuration.
:copy [option...] from... to
Alphabetical list of Commands
161
A−A−P Recipe Executive
Copy files or directory trees. "from" and "to" may be URLs. This means :copy can be used to upload
and download a file, or even copy a file from one remote location to another. Examples:
:copy
:copy
:copy
:copy
:copy
:copy
file_org.c file_dup.c
{r} onedir twodir
*.c backups
http://vim.sf.net/download.php download.php
$ZIP ftp://upload.sf.net//incoming/$ZIP
ftp://foo.org/README ftp://bar.org//mirrors/foo/README
Note that "ftp://machine/path" uses "path" relative to the login directory, while "ftp://machine//path"
uses "/path" absolutely.
When "from" and "to" are directories, "from" is created in "to". Unlike the Unix "cp" command,
where this depends on whether "to" exists or not. Thus:
:copy {recursive} foo bar
will create the directory "bar/foo" if it doesn't exist yet. If the contents of "foo" is to be copied without
creating "bar/foo", use this:
:copy {recursive} foo/* bar
options
{c} {continue}
{e} {exist} {exists}
{f} {force}
{i} {interactive}
{k} {keepdir}
{m} {mkdir}
{p} {preserve}
{q} {quiet}
{r} {recursive}
{u} {unlink}
when an item with a wildcard does not have matches continue with the next
item
don't overwrite an existing file or directory
forcefully overwrite an existing file or dir (default)
before overwriting a local file, prompt for confirmation (currently doesn't
work for remote files)
keep the directory of the source file if the target is a directory; the targetfile
name is the target directory with the source file name appended
create destination directory when needed
preserve file permissions and timestamps as much as possible
don't report copied files
recursive, copy a directory tree. "to" is created and should not exist yet.
when used with {recursive}, don't copy a symlink, make a copy of the file
or dir it links to
Wildcards in local files are expanded. This uses Unix style wildcards. When there is no matching file
the command fails (also when there are enough other arguments).
When (after expanding wildcards) there is more than one "from" item, the "to" item must be a
directory.
For "to" only local files, ftp://, rcp://, rsync:// and scp:// can be used. See "URLs" for info on forming
URLs.
Attributes for "from" and "to" are currently ignored.
Alphabetical list of Commands
162
A−A−P Recipe Executive
:del [option...] file...
:delete [option...] file...
Delete files and/or directories.
options
{f} {force}
don't fail when a file doesn't exist
{r} {recursive} delete directories and their contents recursively.
{q} {quiet}
don't report deleted files
Wildcards in local files are expanded. This uses Unix style wildcards. When there is no matching file
the command fails (also when there are enough other arguments).
When deleting a symbolic link, the link itself is deleted, not the file or directory it refers to.
CAREFUL: if you make a mistake in the argument, anything might be deleted. For example,
accidentally inserting a space before a wildcard:
:del {r} dir/temp *
To give you some protection, the command aborts on the first error. Thus if "dir/temp" didn't exist in
the example, "*" would not be deleted.
:deldir [option...] dir...
Delete a directory. Fails when the directory is not empty.
options
{c} {continue}
when an item with a wildcard does not have matches continue with the next item
don't fail when a directory doesn't exist; still fails when it exists but is not a
{f} {force}
directory or could not be deleted
{q} {quiet}
don't report deleted directories
:delrule [option...] tpat... spat...
Delete an existing rule. Can be used when one of the default rules would be used when this is not
wanted.
options
{q} {quiet} don't complain when there is no matching rule
Also see :clearrules.
:dll [option...] target : [{attr = val}...] source...
Specify that "target" is a shared (dynamic) library, build from "source". Dependencies will be added
to compile "source" into an object file and combine the object files together into "target".
When the basename of "target" does not contain a dot, $DLLPRE will be prepended and $DLLSUF
will be appended. The original name becomes an alias name for the target, so that this works:
all: foo bar
:dll foo : foo.c
:dll bar : bar.c
On Unix this builds libfoo.so and libbar.so.
Alphabetical list of Commands
163
A−A−P Recipe Executive
See :produce for the most important options. The default values used for ":dll" are: $DLLSUF for
"targetsuffix", $DLLPRE for "targetprefix" $DLLOBJSUF for "objectsuffix", "dllobject" for
"objecttype", "INSTALL_DLL" for "installvar" and "builddll" for "buildaction".
In addition, the "{onestep}" option explained for :command can be used.
"{attr = val}" is an optional attribute that apply to the generated dependencies. Use the "scope"
attribute to specify a user scope to be used before other scopes (except the local scope) in the
generated dependencies.
The target will be added to $INSTALL_DLL. Use the "installvar" option to select another variable
name. Use {installvar=} when installing the target is not wanted. The target and intermediate files will
be added to $CLEANFILES. The source files will be added to $DISTFILES, except the ones with a
{nodist} attribute.
Can only be used at the recipe level.
:do action [fname...]
Execute an action. The commands executed may depend on the types of the first input file and/or the
output file. See Chapter 28, Customizing Filetype Detection and Actions.
Attributes just after the "action", except the options mentioned below, are passed as variables to the
build commands. The name of the attribute is used as the name of the variable. Prepending "var_" is
optional.
:do build {target = prog} foo.c
options
The "filetype" attribute can be used to override the output filetype used to select the action
to be executed. Example:
{filetype}
:do build {filetype = libtoolexe} $Objects
When this option is not used the filetype of the target is used. The filetype of source files
must be given with the source file.
The "scope" attribute has a special meaning: define the user scope from which variables are
obtained first. Variables in this scope overrule variables in the recipe or other scopes. Only
variables in the local scope come first.
{scope}
s_opti.DEFINE = −DFOOBAR
...
:do build {scope = s_opti} foo.c
The "remove" attribute can be used to delete all the arguments after the action was
executed. This also happens when the action failed. This can be used when the argument is
a temporary file. Example:
{remove}
tmp = `tempfname()`
:print >tmp Buy more Spam!
:do email {remove} {to = [email protected]} {subject = Spam} tmp
See :action for defining actions.
:eval [redir] python−expression
Alphabetical list of Commands
164
A−A−P Recipe Executive
Filter stdin using a Python expression. See here for [redir]. When not used after "|" evaluate the
Python expression.
The Python expression is evaluated as specified in the argument. The "stdin" variable holds the value
of the input as a string, it must be present when :eval is used after "|".
See var2string() for information about using Aap variables in the Python expression.
The expression must result in the filtered string or something that can be converted to a string with
str(). This becomes stdout. The result may be empty. Examples:
:print $foo | :eval re.sub('<.*?>', '', stdin) > tt
:eval os.name | :assign OSNAME
Note that the expression must not contain a "|" preceded by white space, it will be recognized as a
pipe. Also there must be no ">" preceded by white space, it will be recognized as redirection.
:execute [{pass}] name [argument...]
Execute recipe "name" right away. This works like executing aap on "name".
The recipe is executed in a new scope. This is used as the toplevel scope, unless the "{pass}" option is
used.
The "fetch" attribute is supported like with :include.
Optional arguments may be given, like on the command line. This is useful for specifying targets and
variable values. "−f recipe" is ignored. Example:
TESTPROG = ./myprog
:execute test.aap test1 test2
The following command line options are also used for the executed recipe. Thus when Aap was
started with the −−nobuild argument, this will also be applied to recipes executed with :execute. All
other command line arguments are not passed on.
−C −−contents
−k −−continue
−F −−force
−n −−nobuild
−a −−nocache
−N −−nofetch−recipe
−s −−silent
−S −−stop
−t −−touch
−v −−verbose
This command is useful when a recipe does not contain dependencies that interfere with sources and
targets in the current recipe. For example, to build a command the current recipe depends on. For
example, when the program "mytool" is required and it doesn't exist yet, execute a recipe to build and
install it:
Alphabetical list of Commands
165
A−A−P Recipe Executive
@if not program_path("mytool"):
:execute mytool.aap install
:sys mytool
See the program_path() function.
Another example: build two variants:
:execute build.aap GUI=motif
:execute build.aap GUI=gtk
:exit
Quit executing recipes. When used in build commands, the "finally" targets will still be executed. But
a :quit or :exit in the commands of a "finally" target will quit further execution.
:fetch [{attr = val}...] file...
Fetch the files mentioned according to their "fetch" or "commit" attribute. When a file does not have
these attributes or fetching fails you will get an error message.
An attribute that appears before the files it is applied to all files.
Files that exist and have a "fetch" attribute with value "no" are skipped.
The name "." can be used to update the current directory:
:fetch . {fetch = cvs://$CVSROOT}
The "{usecache}" attribute can be used to use a cached version of the file. This skips downloading
when the file was downloaded before, but may use an older version of the file.
"{nocache}" does the opposite: never use a cached file.
The "{constant}" attribute can be used to skip fetching a file that already exists. This is useful for a
file that will never change (when it includes a version number). Implies "{usecache}".
:fetchall [{attr = val}...]
Fetch all the files in the recipe (and child recipes) that have the "fetch" attribute.
Extra attributes for fetching can be specified here, they overrule the attributes of the file itself.
:filetype [argument...]
Specify filetype detection. See Chapter 28, Customizing Filetype Detection and Actions.
:import name
Read a module stored in the main Aap directory or elsewhere. This happens in a special scope, does
not change directory, and has no effect on the recipe containing the :import command except that
the actions, filetypes and routes defined in the module become available globally. This is the easiest
way to add additional language support to Aap. See Chapter 31, Adding A Language Module.
The recipe(s) read have the name of the module with ".aap" appended. Thus for ":import java" the
"java.aap" recipe is used.
The directories searched for module recipes depend on the platform. The first module that is found is
used, further directories are not searched. For Unix systems three directories are used:
− ~/.aap/modules/
Alphabetical list of Commands
166
A−A−P Recipe Executive
− /usr/local/share/aap/modules/
− The modules directory of the Aap installation
For other systems these directories are used:
− $HOME/aap/modules/
− $HOMEDRIVE/$HOMEPATH/aap/modules/
− c:/aap/modules/
− The modules directory of the Aap installation
$HOME, $HOMEDRIVE and $HOMEPATH are environment variables, not Aap variables.
Additionally, recipes in the "modules2" subdirectory are loaded. This can be used to do additional
settings without modifying a distributed module. All found recipes are loaded, ignoring wether a
recipe was already found. The same list of directories is used as mentioned above, with "modules"
replaced with "modules2". Although there is no "modules2" directory in the distribution, thus the last
item in the directory lists above is not used.
The scope that is used for the module recipe can be accessed from elsewhere under the name of the
module with "m_" prepended. Thus when doing ":import java" the "m_java" scope is available. The
recipes from the "modules2" directory use this same scope.
:include [option...] name
Read recipe "name" as if it was included in the current recipe. Does not change directory and file
names in the included recipe are considered to be relative to the current recipe, not the included
recipe.
The −I or −−include command line argument can be used to specify directories to look for the recipe.
The current directory is always searched first. When the recipe name is an absolute path or starts with
a dot (e.g., "./foo.aap") only the current directory is used.
The "fetch" attribute can be used to specify a list of locations where the recipe can be fetched from. If
the recipe is fetched, it is stored under the specified "name" in the current directory.
options
{q}
Don't give a warning for a file that can't be read. Used to optionally include a recipe.
{quiet}
{o}
Don't include the recipe if it was already read. Useful for project settings that are only to
{once} be included once, while you have sub−projects that can be build independendly.
:installpkg package...
Install packages. Each argument is the name of a package. This works like :assertpkg but without
checking if the package is already present or asking the user whether it should be installed.
See Chapter 25, Automatic Package Install about using packages.
:lib [option...] target : [{attr = val}...] source...
Specify that "target" is a static library, build from "source". Dependencies will be added to compile
"source" into an object file and combine the object files together into "target".
When the basename of "target" does not contain a dot, $LIBPRE will be prepended and $LIBSUF
will be appended. The original name becomes an alias name for the target, so that this works:
Alphabetical list of Commands
167
A−A−P Recipe Executive
all: foo bar
:lib foo : foo.c
:lib bar : bar.c
On Unix this builds libfoo.a and libbar.a.
See :produce for the most important options. The default values used for ":lib" are: $LIBSUF for
"targetsuffix", $LIBPRE for "targetprefix" $LIBOBJSUF for "objectsuffix", "libobject" for
"objecttype", "INSTALL_LIB" for "installvar" and "buildlib" for "buildaction".
In addition, the "{onestep}" option explained for :command can be used.
"{attr = val}" is an optional attribute that apply to the generated dependencies. Use the "scope"
attribute to specify a user scope to be used before other scopes (except the local scope) in the
generated dependencies.
The target will be added to $INSTALL_LIB. Use the "installvar" option to select another variable
name. Use {installvar=} when installing the target is not wanted. The target and intermediate files will
be added to $CLEANFILES. The source files will be added to $DISTFILES.
Can only be used at the recipe level.
:log [text...]
Write the arguments to the log file AAPDIR/log. This is like :print, but the text is not echoed. The
output cannot be redirected or piped, since there isn't any.
:ltlib [option...] target : [{attr = val}...] source...
Specify that "target" is a library, build from "source" with the libtool program. Dependencies will be
added to compile each "source" into an object file and combine the object files together into "target".
Very similar to :lib.
Using libtool requires importing the libtool module. Since :ltlib will not work without it, the libtool
module is automatically imported.
See :produce for the options. The default values used for ":ltlib" are: $LTLIBSUF for "targetsuffix",
$LTLIBPRE for "targetprefix" $LTOBJSUF for "objectsuffix", "ltobject" for "objecttype",
"INSTALL_LTLIB" for "installvar" and "buildltlib" for "buildaction".
The target will be added to $INSTALL_LTLIB. Use the "installvar" option to select another variable
name. Use {installvar=} when installing the target is not wanted. The target and intermediate files will
be added to $CLEANFILES. The source files will be added to $DISTFILES.
Can only be used at the recipe level.
:mkdir [option...] dir...
Create directory. This fails when "dir" already exists and is not a directory.
Each argument is handled separately (they are not concatenated like with :cd!). A "mode" attribute on
a directory can be used to specify the protection flags for the new directory.
Example:
:mkdir {r} ~/secret/dir {mode = 0700}
Alphabetical list of Commands
168
A−A−P Recipe Executive
The default mode is 0644. The effective umask may reset some of the bits though.
options
{f} {force}
{q} {quiet}
{r}
{recursive}
Don't fail when a directory already exist; still fails when it is not a directory or could
not be created.
don't report created directories.
Also create intermediate directories, not just the deepest one.
Note: automatic creation of directories can be done by adding the {directory} attribute to a source
item.
:mkdownload name file...
Generate a recipe "name" that downloads the specified files. Each file must have a "fetch" attribute,
which is used in the generated recipe.
When the file "name" already exists it is overwritten without warning.
Wildcards in "file ..." are expanded. Not in "name".
MD5 checksums are generated and used in the recipe to fetch a file only when the checksum differs.
Example of one item:
file = foobar.txt
@if get_md5(file) != "a5dba5bce69918c040703e9b8eb35f1d":
:fetch {fetch = ftp://foo.org/files/%file%} $file
When there is a "fetch" attribute on "name", this will be used to add a :recipe command at the start of
the generated recipe.
:move [option...] from... to
Move files or directories. Mostly like :copy, except that the "from" files/directories are renamed or,
when renaming isn't possible, copied and deleted.
options
{c} {continue}
{e} {exist}
{exists}
{i} {interactive}
{m} {mkdir}
{q} {quiet}
when an item with a wildcard does not have matches continue with the next item
don't overwrite an existing file or directory
before overwriting a local file, prompt for confirmation (currently doesn't work
for remote files)
create destination directory when needed
don't report moved files
:pass
Do nothing. Useful to define a target with build commands to avoid a dependency is added
automatically.
clean:
:pass
:popdir
Change back to directory on top of the directory stack, undoing a previous :pushdir. It is an error if
the directory stack is empty (more :popdir than :pushdir used).
Alphabetical list of Commands
169
A−A−P Recipe Executive
:print [redir] [text...]
Print the arguments on stdout. Without arguments a line feed is produced. $var items are expanded,
otherwise the arguments are produced literally, including quotes:
:print "hello"
results in:
"hello"
Leading white space is skipped, but white space in between arguments is kept. To produce leading
white space write the first space as an escaped character:
:print $( )
indented text
results in:
indented text
When used in a pipe the stdin variable holds the input.
See here for [redir]. See :log for writing a message to the log file without echoing.
:produce what [option...] target : [{attr = val}...] source...
Specify that "target" has filetype "what" and is build from "source ...". Aap will add dependencies to
invoke the actions that will accomplish the task of building "target".
For specific types of targets separate commands are available. You don't need to specify the
mandatory options then. For building a normal program use :program, for building a shared library
use :dll, for building a static library use :lib, for building a libtool library use :ltlib.
The building is split up in two parts:
1. Dependencies are added to compile the source files into files specified with the "objecttype"
option. The routes specified with :route are used to decide which actions to invoke. These
:route commands must precede the :produce command! Each step in the route becomes a
separate dependency, so that intermediate results are produced. This is similar to what the
:totype command does.
2. The second step is to build the "target" from the "objecttype" files. This invokes the action
defined with "buildaction", using "what" as the target filetype. The "what" filetype is declared
when necessary, to avoid a warning for defining an action for an unknown filetype.
When the basename of "target" does not contain a dot, the "targetsuffix" option will be appended and
"targetprefix" prepended. The original name becomes an alias name for the target, so that this works:
all: foo bar
:produce drink $drinkoptions foo : foo.c
:produce snack $snackoptions bar : bar.c
options
targetsuffix
(optional) appended to the target if it doesn't contain a dot
Alphabetical list of Commands
170
A−A−P Recipe Executive
targetprefix
comment
objectprefix
objectsuffix
objecttype
installvar
buildaction
(optional) prepended to the target if it doesn't contain a dot
(optional) description of type of building displayed for "aap −−comment
target". A "comment" attribute on the target overrules this.
(optional) prefix for the intermediate results.
(optional) suffix for the intermediate results.
(mandatory) filetype for the intermediate results.
(optional) name of the install variable to add the target to (default:
INSTALL_EXEC) Set to an empty value to omit installing
(mandatory) name of the action used to turn the intermediate results into the
target
Can only be used at the recipe level.
:program [option...] target : [{attr = val}...] source...
Specify that "target" is a program, build from "source ...". Dependencies will be added to compile
"source ..." into an object file and link the object files together into "target".
When the basename of "target" does not contain a dot, $EXESUF will be appended. The original
name becomes an alias name for the target, so that this works:
all: foo bar
:program foo : foo.c
:program bar : bar.c
On MS−Windows this builds foo.exe and bar.exe.
See :produce for the most important options. The default values used for ":program" are: $EXESUF
for "targetsuffix", nothing for "targetprefix" $OBJSUF for "objectsuffix", "object" for "objecttype",
"INSTALL_EXEC" for "installvar" and "build" for "buildaction".
In addition, "{onestep}" can be used to make A−A−P build the program without creating intermediate
object files if it is supported by the tools (see Chapter 40, Standard Tools). This solution might be
faster for very fast compilers.
"{attr = val}" is an optional attribute that apply to the generated dependencies. Use the "scope"
attribute to specify a user scope to be used before other scopes, but after the local scope, in the
generated dependencies.
The target will be added to $INSTALL_EXEC. Use the "installvar" option to select another variable
name. Use {installvar=} when installing the target is not wanted. The target and intermediate files will
be added to $_recipe.CLEANFILES. The source files will be added to $_recipe.DISTFILES, except
the ones with a {nodist} attribute.
Can only be used at the recipe level.
:progsearch varname progname...
Check if an executable progname exists in $PATH. If not, check further arguments. The first one
found is assigned to variable varname. If none of the progname could be found varname will be
set to an empty string.
Example:
Alphabetical list of Commands
171
A−A−P Recipe Executive
:progsearch BROWSER netscape opera
@if BROWSER:
:sys $BROWSER readme.html
:proxy [protocol] address
Specify a proxy server. Examples:
:proxy ftp ftp://ftp.proxy.net:1234
:proxy http://www.someproxy.com:1080
The "protocol" can be "ftp", "http" or "gopher". When omitted "http" is used. Case doesn't matter.
The {address} is a URL with the port number included. The result of this command is that an
environment variable is set, as the Python library "urllib" requires. Therefore it must be done early in
the startup phase, before accessing the internet.
:publish [{attr = val}...] file...
Publish the files mentioned according to their "publish" or "commit" attribute.
Creates directories when needed (for CVS only one level).
:publishall [{attr = val}...]
Publish all the files in the recipe (and child recipes) that have the "publish" attribute and changed
since the last time they were published.
Note that this doesn't fall back to the "commit" attribute like :publish does.
:pushdir dir
Change directory to "dir". The current directory is pushed onto the directory stack, so that :popdir
goes back to the old current directory.
Note that at the start of each command block Aap changes directory to the directory of the recipe.
WARNING: variables with a relative path become invalid! This includes $source and $target. Use
var_abspath(). when needed.
:python
python−command−block
A block of Python code. The block ends when the indent drops to the level of :python or below.
:python terminator
python−command−block
terminator
A block of Python code. The block ends when "terminator" is found on a line by itself. The Python
commands may have any indent.
White space before and after "terminator" is allowod and a comment after "terminator" is also
allowed. "terminator" can contain any characters except white space.
:quit
See :exit.
:recipe {fetch = URL... }
Location of this recipe. The "fetch" attribute is used like with :child: a list of locations. The first URL
that works is used.
When aap was started with the "fetch" argument, fetch the recipe and restart reading it. Using the
"fetch" or "update" target causes this as well. The commands before :recipe have already been
executed, thus this may cause a difference from executing the new recipe directly. The values of
Alphabetical list of Commands
172
A−A−P Recipe Executive
variables are restored to the values before executing the recipe.
Fetching a specific recipe is done only once per session.
:remove [{attr = val}...] fname...
Version control command, also see Chapter 18, Version Control.
Remove the files from the repository. The file may still exist locally. Implies a "commit" of the file.
:removeall [option...] [{attr = val}...] [directory...]
Version control command, also see Chapter 18, Version Control.
Apply the :remove command to all files in the directory that exist in the repository but do hot have
been given a "commit" attribute in the recipe (and child recipes).
Careful: Only use this command when it is certain that all files that should be in the VCS are
explicitly mentioned and do have a "commit" attribute!
options
{l} {local}
don't do current directory recursively
{r} {recursive} do handle arguments recursively
When no directory argument is given, the current directory is used. It is inspected recursively, unless
the "{local}" option was given.
When directory arguments are given, each directory is inspected. Recursively when the "{recursive}"
option was given.
When no "commit" attribute is specified here, it will be obtained from any node.
:reviseall [{attr = val}...]
Version control command, also see Chapter 18, Version Control.
Just like using both :checkinall and :removeall on the current directory recursively.
:route [option...] typelist... typelist [{attr = value}...]
action filename
...
action
Specify the actions to be used to build sources with a filetype in the first "typelist" into targets with a
filetype in the last "typelist". One or more steps can be defined, resulting in intermediate results.
Each "typelist" is usually a single filetype name, but the first and the last can also be a comma
separated list of filetype names. The route is defined for each combination of the mentioned filetypes.
The last "typelist" may have attributes. These are passed to the final target. A useful attribute is
"buildaction", which tells the build action which special action has to be used for this item.
There must be an "action" line for each step. The number of steps is the number of "typelist" minus
one. All "action" lines except the last one must define a "filename". This is the file used for the result
of the action, which becomes the input for the next action. If the filename is not an absolute path
$BDIR will be prepended (the "var_BDIR" attribute is used if present on the source file).
Example:
Alphabetical list of Commands
173
A−A−P Recipe Executive
:route yacc c object
yacc $(source).c
compile
This defines the route from a "yacc" file to an "object" file, with an intermediate "c" result. The step
from "yacc" to "c" is done with an action called "yacc". It will be invoked like this:
:do yacc {target = $(source).c} $source
The step from "c" to "object" is done with a "compile" action. It will be invoked like this:
:do compile {target = $target} $(source).c
The steps will be generated as separate dependencies. Thus, for the above example, when an included
header file of the intermediate C file changes, only the "compile" action will be invoked.
options
{default} This is a default route. No warning is given if the route is redefined later.
The defined routes can be used explicitly with the :totype command. They are also used with the
:produce command and derivatives.
Note: In a later version of Aap the defined routes may be used for dependencies without build
commands and without a matching rule. Thus the routes may be used as rules based on filetypes.
:rule [option...] tpat... : [{attr = val}...] spat...
command−block
Define a rule to build files matching the pattern "tpat" from a file matching "spat".
Example:
:rule %.html : header.part %.part footer.part
:cat $source > $target
There can be several "tpat" patterns, the rule is used if one of them matches.
There can be several "spat" patterns, the rule is used if they all exist (or no better rule is found). When
"commands" is missing this only defines that "tpat" depends on "spat".
Can only be used at the recipe level.
A rule is used in the recipe where it is defined and in its siblings, unless an option is used to specify
otherwise.
options
{global}
{local}
{default}
{sourceexists}
use this rule in all places
use this rule only for targets in this recipe
default rule, redefining it will not cause a message
only use the rule when the matching source file exists; useful for rules that
generate source code
Alphabetical list of Commands
174
A−A−P Recipe Executive
"attributes" can be used to set attributes for when applying the rule.
The "skip" attribute on 'tpat' can be used to skip certain matches.
$target and $source can be used in "commands" for the actual file names. $match is what the "%" in
the pattern matched.
Alternative: instead of matching the file name with a pattern, :action uses filetypes to specify
commands. On non−Unix systems the pattern should contain only lower case letters and forward
slashes, because the name it is compared with is made lower case and backslashes have been replaced
with forward slashes.
:rule is introduced in Chapter 3, Publishing a Web Site of the tutorial. Also see :delrule and :clearrules
.
:start command
Like :sys and :system, but don't wait for the commands to finish. Errors of the executed command are
ignored.
Runs in the same terminal, which will cause problems when the command waits for input. Open a
new terminal to run that command in. Example:
:start xterm −e more README
WARNING: Using :start probably makes your recipe non−portable.
:symlink [option...] from to
Create a symbolic link, so that "to" points to "from". Think of this as if making a copy of "from"
without actually copying the file.
Only for Unix and Mac OS X.
options
{q} or {quiet} Don't complain when "to" already exists.
{f} or {force} Overwrite an existing "to" file or symlink
:sys [option...] command
:system [option...] command
Execute "cmds" as system (shell) commands. Example:
:system filter <foo >bar
:sys reboot universe
The following lines with more indent are appended, replacing the indent with a single space.
Example:
:sys echo one
two
This echos "one two".
options
{i} or {interactive} don't log output (see below)
Alphabetical list of Commands
175
A−A−P Recipe Executive
{q} or {quiet}
{l} or {log}
{f} or {force}
Don't echo the command
Redirect all output to the log file, do not echo it
Ignore a non−zero exit value
{interactive} and {log} cannot be used at the same time.
When using the {f} or {force} argument the exit value of the command is available in $sysresult.
Output is logged by default. If this is undesirable (e.g., when starting an interactive command)
prepend "{i}" or "{interactive}" to the command. It will be removed before executing it. Example:
:system {i} vi bugreport
Aap attempts to execute consecutive commands with one shell, to speed up the execution. This will
not be done when the {f} or {force} attribute is used, these commands are executed separately.
Aap waits for the command to finish. Alternatively you can use :start, which runs the command
asynchronously.
When the "async" variable is set and it is not empty, :sys works like :start, except that consecutive
commands are executed all at once in one shell.
Also see :asroot for executing a shell command with super−user privileges.
On MS−Windows several commands use a forward slash for options and require using backslashes in
file names. But in Aap most file names use forward slashes. To obtain the value of variable "var" with
slashes replaced with backslashes use "$/var". See Chapter 34, Variables and Scopes.
When using a variable as an argument, it may need to be put in quotes to avoid it being interpreted as
two arguments when it contains a space. To obtain the value of variable "var" with quotes for the shell
use "$!var". See Chapter 34, Variables and Scopes.
WARNING: Using :sys or :system probably makes your recipe non−portable.
:sysdepend {filepat = pattern} [{srcpath = path ...}] command
Execute shell command "command". It is supposed to figure out automatic dependencies. When an
included file cannot be found by the shell command, an error message is expected that indicates
which file is missing. Aap will then attempt to fetch or update the file and run "command" again.
Error messages that match "pattern" are recognized and handled in a special way. The "pattern" must
contain one group (a pattern in parenthesis), which matches the file name in an error message. The
files where the pattern matches are then updated, like :update is invoked. The command is then
executed again.
The "srcpath" option is used to find the files from the error messages. When it is omitted the
following directories are searched:
1. Directories from the $INCLUDE variable.
2. The first directory in the $source variable.
3. The current directory.
Alphabetical list of Commands
176
A−A−P Recipe Executive
The repetition of executing the command and finding matching file names is repeated until there are
no more matching error messages or the list of file names is the same as the previous time.
An example:
:sysdepend {filepat = .*: ([^:]*): File not found} depcheck $source > $target
Be careful to exactly match the filename with the pattern inside (). Leading and trailing white space is
ignored. When necessary to use another group, use "(?:pattern)" to avoid it's used as the file name.
WARNING: Using :sysdepend probably makes your recipe non−portable.
:syseval [{stderr}] [redir] command
Execute shell command "command" and write its output to stdout. Only stdout of the command is
captured by default. When {stderr} is just after the command name, stderr is also captured. Example:
:syseval hostname | :assign HOSTNAME
When used in a pipe, the stdin is passed to the command. Example:
:print $var | :syseval sort | :assign var
Leading and trailing blanks, including line breaks, are removed. Thus the last line never ends in a
newline character.
See here for [redir].
Note the difference with the :sys command: redirection in :sys is handled by the shell, for :syseval it is
handled by Aap.
When executing the command fails, the result is empty. The exit value of the command is available in
$exit.
WARNING: Using :syseval probably makes your recipe non−portable.
:syspath path arg...
Use "path" as a colon separated list of command names, use the first command that works.
When %s appears in "path", it is replaced with the arguments. If it does not appear, the arguments are
appended.
Other appearences of % in "path" are removed, thereby reducing %% to % and %: to : while avoiding
their special meaning.
Don't forget that "path" must be one argument, use quotes around it to include white space.
Example:
:syspath 'vim:vi:emacs' foobar.txt
Output is not logged.
Alphabetical list of Commands
177
A−A−P Recipe Executive
Note: on MS−Windows it's not possible to detect if a command worked, the first item in the path will
always be used.
WARNING: Using :syspath probably makes your recipe non−portable.
:tag [{attr = val}...] fname...
Version control command, also see Chapter 18, Version Control.
Adds a tag to the current version of the files in the repository. Uses the "tag" attribute.
:tagall [{attr = val}...]
Version control command, also see Chapter 18, Version Control.
Adds a tag to all items with a "commit" and "tag" attribute. The tag should be simple name without
special characters (no dot or dash).
:tee [redir] fname...
Write stdin to each file in the argument list and also write it to stdout. This works like a T shaped
connection in a water pipe. Example:
:cat file1 file2 | :tee totfile | :assign foo
:toolsearch toolname...
Specify a list of tools. The Python code for each tool is imported and its "exist()" function invoked.
The first tool that exists becomes the default tool for the language(s) it supports. See Chapter 30,
Customizing Default Tools for more info.
For Unix systems three directories are used:
− ~/.aap/tools/
− /usr/local/share/aap/tools/
− The tools directory of the Aap installation
For other systems these directories are used:
− $HOME/aap/tools/
− $HOMEDRIVE/$HOMEPATH/aap/tools/
− c:/aap/tools/
− The tools directory of the Aap installation
$HOME, $HOMEDRIVE and $HOMEPATH are environment variables, not Aap variables.
Important: The "tools" directory must have a __init__.py file, so that it is recognized as a
package. The __init__.py file may be empty.
:totype [option...] targettype : [attribute...] source...
Specify that each item in "source ..." is to be turned into filetype "targettype". Dependencies will be
added to turn each source file into a file of type "targettype". How this is done must have been defined
with :route commands before using the :totype command!
Example:
:totype footy {suffix = .foo} : aaa.cpp bbb.y
Alphabetical list of Commands
178
A−A−P Recipe Executive
This turns the file "aaa.cpp" into a file "aaa.foo" with filetype "footy". Since "aaa.cpp" is recognized
as a file with filetype "cpp", this will use the route from "cpp" to "footy". "bbb.y" is turned into
"bbb.foo". "bbb.y" is recognized as a file with filetype "yacc", this will use the route from "yacc" to
"footy".
If the resulting "targettype" files are additionally to be build together into a program you can use the
:program command instead. A more generic form is the :produce command.
The filename of each target is made from the source file name, prepending $BDIR. The "prefix" and
"suffix" attributes of "targettype" are used ("prefix" is prepended, "suffix" replaces an existing suffix).
When "targettype" is "object" the default for "suffix" is $OBJSUF, for "dllobject" the default is
$DLLOBJSUF and for "libobject" the default is $LIBOBJSUF. Otherwise the "suffix" attribute must
be specified to avoid that the source and target have the same file name.
[attributes] are optional attributes that apply to the generated dependencies. Use the "scope" attribute
to specify a user scope to be used before other scopes (except the local scope) in the generated
dependencies.
The targets and any intermediate files will be added to $_recipe.CLEANFILES. The source files will
be added to $_recipe.DISTFILES, except the ones with a {nodist} attribute.
Can only be used at the recipe level.
:touch [option...] name...
Update timestamp of file or directory "name".
options
{f} {force}
{e} {exist}
create the file when it doesn't exist
create the file when it doesn't exist, don't update timestamp when the file already
exists
If "name" doesn't exist and {force} and {exist} are not present the command fails.
If "name" doesn't exist and {force} or {exist} is present an empty file will be created.
If "name" does exist and {exist} is present nothing happens.
A "directory" attribute can be used to specify a non−existing "name" is to be created as a directory.
There is no check if an existing "name" actually is a directory.
A "mode" attribute can be used to specify the mode with which a new file or directory is to be
created. The value is in the usual octal form, e.g., "0644".
:tree dirname [option...]
command−block
Inspect the directory tree "dirname" and invoke the command block for each selected file and/or
directory. In the command block $name has the name of the selected item.
Example:
:tree headers {filename = log}
:delete $name
Alphabetical list of Commands
179
A−A−P Recipe Executive
This deletes all "log" files below the "headers" directory, possibly including "headers/log" and
"headers/sub/log".
The dirname itself is not part of the selected items.
options
{filename = pattern} Select files where this Python re pattern matches the whole filename.
{dirname = pattern} Select directories where this Python re pattern matches the whole filename.
Exclude files and directories where this Python re pattern matches the
{reject = pattern}
basename (the last component in the path). Directories are still entered. For
example, when the pattern is "CVS" a file "CVS/Entries" can still be included.
Do not enter directories where this Python re pattern matches the basename
{skipdir = pattern}
(the last component in the path).
Include only files that match the pattern in the file contents. Does not apply to
{contents = pattern}
directories.
When neither the "filename" nor "dirname" is given, all files are selected, as if {filename = .*} was
used.
When the system ignores case for filenames the patterns will ignore case differences for "filename",
"dirname" and "reject". The pattern for "contents" is used with matching case.
The pattern for "filename", "dirname" and "reject" must match the whole name, "^" is prepended and
"$" is appended. The pattern for "contents" is matched with every line in the file, including the
newline character, and may match part of the line.
Hidden and system files are found as well, but the directory entries "." and ".." are never selected.
The selected entries are ordered depth−first. For example, "tree foo" would select:
foo/sub/f1
foo/sub/subsub/f2
foo/sub/subsub/
foo/sub/f3
foo/sub/
foo/f4
Symbolic links to are not followed. The symbolic link itself is included in the results (if the pattern
matches). Use os.path.islink() to test for symbolic links. Hard links are not detected and may cause an
infinite loop.
Example that creates a list of C files, skipping "old" directories and "test_" files:
source =
:tree . {filename = .*\.c} {skipdir = old} {reject = test_.*}
source += $name
:unlock [{attr = val}...] fname...
Version control command, also see Chapter 18, Version Control.
Remove any lock on the files, don't change the file in the repository.
Alphabetical list of Commands
180
A−A−P Recipe Executive
:unlockall [{attr = val}...]
Version control command, also see Chapter 18, Version Control.
Apply the :unlock command to all files in the recipe (and child recipes) that have the "commit"
attribute.
:update [{force}] [{searchpath = path...}] target...
Update "target" now, if it is outdated or when "{force}" is used.
One or more targets can be specified, each will be updated.
The "searchpath" argument can be used to search for the target in a series of directories. Each item in
"searchpath" is prepended to the target name, unless it is an absolute path. The updating stops when a
path plus target is found that can be successfully updated.
When this appears at the top level, a dependency or rule for the target to be used must already have
been specified, there is no look−ahead.
When the target exists and no dependency or rule applies, the file is considered updated.
:usetool toolname
Specify a specific tool to be used. When used in the toplevel recipe the tool becomes the default tool.
Can also be used in a child recipe. See Chapter 30, Customizing Default Tools for more info.
:variant varname
value
commands
...
Define build variants. The "varname" is the name of a variable that selects one of the possible "value"
items.
The last "value" item can be a star. This item will be used when the value of "varname" does not
match one of the other values.
When the variable "varname" is not set or has an empty value, the first entry is used.
The value of $BDIR is changed by appending a dash and the value of "varname". The value is
modified to avoid using an illegal filename.
See the User manual Chapter 14, Variants for examples.
Can only be used at the recipe level.
:verscont action [{attr = val}...] fname...
Version control command, also see Chapter 18, Version Control.
Perform the version control "action" on the files. This uses the "commit" attribute. What happens is
specific for the VCS.
Common arguments for Commands
[redir]
Redirect the output of a command. Can be one of these items:
Common arguments for Commands
181
A−A−P Recipe Executive
> fname write output to file "fname"; fails when "fname" already exists
>! fname write output to file "fname"; overwrite an existing file
>> fname append output to file "fname"; create the file if it does not exist yet
| command pipe output to the following "command"
The redirection can appear anywhere in the argument, except inside quotes. The normal place is either
as the first or the last argument. The pipe to the next command must appear at the end.
The file name can be a URL. The text will first be written to a local file and then the file is moved to
the final destination.
The white space before the file name may be omitted. White space before the ">" and "|" is required.
To avoid recognizing the ">" and "|" for redirection and pipes, use $gt and $pipe.
When a command produces text on stdout and no redirection or pipe is used, the stdout is printed to
the terminal.
URLs
In various places URLs can be used to specify remote locations and the method how to access it.
http://machine/path
HTTP protocol, commonly used for web sites. read−only "machine" can also be "machine:port".
ftp://machine/path
FTP protocol. "machine" can also be "machine:port". When ":port" is omitted the default port 21 is
used.
For authentication the ~/.netrc file is used if possible (unfortunately, the Python netrc module has a
bug that prevents it from understanding many netrc files).
Alternatively, login name and password can be specified just before the machine name:
ftp://user@machine/path
ftp://user:password@machine/path
When ":password" is omitted, you will be prompted for entering the password.
Either way: ftp sends passwords literally over the net, thus THIS IS NOT SECURE! Should use
"scp://" instead.
scp://machine/path
SCP protocol (using SSH, secure shell). Requires the "scp" program installed (Aap will attempt
installing it for you when needed). Additionally a user name can be specified:
scp://user@machine/path
"path" is a relative path to the directory where "ssh" logs in to. To use an absolute path prepend a
slash:
scp://machine//path
URLs
182
A−A−P Recipe Executive
The resulting path for the "scp" command uses a ":" instead of the first slash.
Uses "scp −C" by default. Set the $SCPCMD variable to use another command.
rcp://machine/path
RCP protocol (using rcp, "remote copy"). Very much like using "scp://", but WITHOUT SECURITY.
Requires the "rcp" program installed (Aap will attempt installing it for you when needed).
Uses "rcp" by default. Set the $RCPCMD variable to use another command.
rsync://machine/path
RSYNC protocol (using rsync, "remote sync"). Like using "scp://", but only the difference between
files is transported. This is slower for transferring a whole file but a lot faster if a file has few changes.
Requires the "rsync" program installed (Aap will attempt installing it for you when needed). Uses
"rsync −−rsh==ssh" by default. Set the $RSYNCCMD variable to use another command.
URLs
183
Appendixes
Table of Contents
A. License
Appendix A. License
LICENSE FOR A−A−P PROJECT FILES
The files of the A−A−P project that refer to this file can be copied,
modified, distributed and used as described in the license below. If
this license does not meet your needs, contact the copyright holder(s)
to negotiate an alternate license.
Contact information for stichting NLnet Labs can be found at:
http://www.nlnetlabs.nl
Further information about the A−A−P project can be found at:
http://www.a−a−p.org
GNU GENERAL PUBLIC LICENSE
Version 2, June 1991
Copyright (C) 1989, 1991 Free Software Foundation, Inc.
59 Temple Place, Suite 330, Boston, MA 02111−1307 USA
Everyone is permitted to copy and distribute verbatim copies
of this license document, but changing it is not allowed.
Preamble
The licenses for most software are designed to take away your
freedom to share and change it. By contrast, the GNU General Public
License is intended to guarantee your freedom to share and change free
software−−to make sure the software is free for all its users. This
General Public License applies to most of the Free Software
Foundation's software and to any other program whose authors commit to
using it. (Some other Free Software Foundation software is covered by
the GNU Library General Public License instead.) You can apply it to
your programs, too.
When we speak of free software, we are referring to freedom, not
price. Our General Public Licenses are designed to make sure that you
have the freedom to distribute copies of free software (and charge for
this service if you wish), that you receive source code or can get it
if you want it, that you can change the software or use pieces of it
Appendixes
184
A−A−P Recipe Executive
in new free programs; and that you know you can do these things.
To protect your rights, we need to make restrictions that forbid
anyone to deny you these rights or to ask you to surrender the rights.
These restrictions translate to certain responsibilities for you if you
distribute copies of the software, or if you modify it.
For example, if you distribute copies of such a program, whether
gratis or for a fee, you must give the recipients all the rights that
you have. You must make sure that they, too, receive or can get the
source code. And you must show them these terms so they know their
rights.
We protect your rights with two steps: (1) copyright the software, and
(2) offer you this license which gives you legal permission to copy,
distribute and/or modify the software.
Also, for each author's protection and ours, we want to make certain
that everyone understands that there is no warranty for this free
software. If the software is modified by someone else and passed on, we
want its recipients to know that what they have is not the original, so
that any problems introduced by others will not reflect on the original
authors' reputations.
Finally, any free program is threatened constantly by software
patents. We wish to avoid the danger that redistributors of a free
program will individually obtain patent licenses, in effect making the
program proprietary. To prevent this, we have made it clear that any
patent must be licensed for everyone's free use or not licensed at all.
The precise terms and conditions for copying, distribution and
modification follow.
GNU GENERAL PUBLIC LICENSE
TERMS AND CONDITIONS FOR COPYING, DISTRIBUTION AND MODIFICATION
0. This License applies to any program or other work which contains
a notice placed by the copyright holder saying it may be distributed
under the terms of this General Public License. The "Program", below,
refers to any such program or work, and a "work based on the Program"
means either the Program or any derivative work under copyright law:
that is to say, a work containing the Program or a portion of it,
either verbatim or with modifications and/or translated into another
language. (Hereinafter, translation is included without limitation in
the term "modification".) Each licensee is addressed as "you".
Activities other than copying, distribution and modification are not
covered by this License; they are outside its scope. The act of
running the Program is not restricted, and the output from the Program
is covered only if its contents constitute a work based on the
Appendixes
185
A−A−P Recipe Executive
Program (independent of having been made by running the Program).
Whether that is true depends on what the Program does.
1. You may copy and distribute verbatim copies of the Program's
source code as you receive it, in any medium, provided that you
conspicuously and appropriately publish on each copy an appropriate
copyright notice and disclaimer of warranty; keep intact all the
notices that refer to this License and to the absence of any warranty;
and give any other recipients of the Program a copy of this License
along with the Program.
You may charge a fee for the physical act of transferring a copy, and
you may at your option offer warranty protection in exchange for a fee.
2. You may modify your copy or copies of the Program or any portion
of it, thus forming a work based on the Program, and copy and
distribute such modifications or work under the terms of Section 1
above, provided that you also meet all of these conditions:
a) You must cause the modified files to carry prominent notices
stating that you changed the files and the date of any change.
b) You must cause any work that you distribute or publish, that in
whole or in part contains or is derived from the Program or any
part thereof, to be licensed as a whole at no charge to all third
parties under the terms of this License.
c) If the modified program normally reads commands interactively
when run, you must cause it, when started running for such
interactive use in the most ordinary way, to print or display an
announcement including an appropriate copyright notice and a
notice that there is no warranty (or else, saying that you provide
a warranty) and that users may redistribute the program under
these conditions, and telling the user how to view a copy of this
License. (Exception: if the Program itself is interactive but
does not normally print such an announcement, your work based on
the Program is not required to print an announcement.)
These requirements apply to the modified work as a whole. If
identifiable sections of that work are not derived from the Program,
and can be reasonably considered independent and separate works in
themselves, then this License, and its terms, do not apply to those
sections when you distribute them as separate works. But when you
distribute the same sections as part of a whole which is a work based
on the Program, the distribution of the whole must be on the terms of
this License, whose permissions for other licensees extend to the
entire whole, and thus to each and every part regardless of who wrote it.
Thus, it is not the intent of this section to claim rights or contest
your rights to work written entirely by you; rather, the intent is to
exercise the right to control the distribution of derivative or
Appendixes
186
A−A−P Recipe Executive
collective works based on the Program.
In addition, mere aggregation of another work not based on the Program
with the Program (or with a work based on the Program) on a volume of
a storage or distribution medium does not bring the other work under
the scope of this License.
3. You may copy and distribute the Program (or a work based on it,
under Section 2) in object code or executable form under the terms of
Sections 1 and 2 above provided that you also do one of the following:
a) Accompany it with the complete corresponding machine−readable
source code, which must be distributed under the terms of Sections
1 and 2 above on a medium customarily used for software interchange; or,
b) Accompany it with a written offer, valid for at least three
years, to give any third party, for a charge no more than your
cost of physically performing source distribution, a complete
machine−readable copy of the corresponding source code, to be
distributed under the terms of Sections 1 and 2 above on a medium
customarily used for software interchange; or,
c) Accompany it with the information you received as to the offer
to distribute corresponding source code. (This alternative is
allowed only for noncommercial distribution and only if you
received the program in object code or executable form with such
an offer, in accord with Subsection b above.)
The source code for a work means the preferred form of the work for
making modifications to it. For an executable work, complete source
code means all the source code for all modules it contains, plus any
associated interface definition files, plus the scripts used to
control compilation and installation of the executable. However, as a
special exception, the source code distributed need not include
anything that is normally distributed (in either source or binary
form) with the major components (compiler, kernel, and so on) of the
operating system on which the executable runs, unless that component
itself accompanies the executable.
If distribution of executable or object code is made by offering
access to copy from a designated place, then offering equivalent
access to copy the source code from the same place counts as
distribution of the source code, even though third parties are not
compelled to copy the source along with the object code.
4. You may not copy, modify, sublicense, or distribute the Program
except as expressly provided under this License. Any attempt
otherwise to copy, modify, sublicense or distribute the Program is
void, and will automatically terminate your rights under this License.
However, parties who have received copies, or rights, from you under
this License will not have their licenses terminated so long as such
Appendixes
187
A−A−P Recipe Executive
parties remain in full compliance.
5. You are not required to accept this License, since you have not
signed it. However, nothing else grants you permission to modify or
distribute the Program or its derivative works. These actions are
prohibited by law if you do not accept this License. Therefore, by
modifying or distributing the Program (or any work based on the
Program), you indicate your acceptance of this License to do so, and
all its terms and conditions for copying, distributing or modifying
the Program or works based on it.
6. Each time you redistribute the Program (or any work based on the
Program), the recipient automatically receives a license from the
original licensor to copy, distribute or modify the Program subject to
these terms and conditions. You may not impose any further
restrictions on the recipients' exercise of the rights granted herein.
You are not responsible for enforcing compliance by third parties to
this License.
7. If, as a consequence of a court judgment or allegation of patent
infringement or for any other reason (not limited to patent issues),
conditions are imposed on you (whether by court order, agreement or
otherwise) that contradict the conditions of this License, they do not
excuse you from the conditions of this License. If you cannot
distribute so as to satisfy simultaneously your obligations under this
License and any other pertinent obligations, then as a consequence you
may not distribute the Program at all. For example, if a patent
license would not permit royalty−free redistribution of the Program by
all those who receive copies directly or indirectly through you, then
the only way you could satisfy both it and this License would be to
refrain entirely from distribution of the Program.
If any portion of this section is held invalid or unenforceable under
any particular circumstance, the balance of the section is intended to
apply and the section as a whole is intended to apply in other
circumstances.
It is not the purpose of this section to induce you to infringe any
patents or other property right claims or to contest validity of any
such claims; this section has the sole purpose of protecting the
integrity of the free software distribution system, which is
implemented by public license practices. Many people have made
generous contributions to the wide range of software distributed
through that system in reliance on consistent application of that
system; it is up to the author/donor to decide if he or she is willing
to distribute software through any other system and a licensee cannot
impose that choice.
This section is intended to make thoroughly clear what is believed to
be a consequence of the rest of this License.
Appendixes
188
A−A−P Recipe Executive
8. If the distribution and/or use of the Program is restricted in
certain countries either by patents or by copyrighted interfaces, the
original copyright holder who places the Program under this License
may add an explicit geographical distribution limitation excluding
those countries, so that distribution is permitted only in or among
countries not thus excluded. In such case, this License incorporates
the limitation as if written in the body of this License.
9. The Free Software Foundation may publish revised and/or new versions
of the General Public License from time to time. Such new versions will
be similar in spirit to the present version, but may differ in detail to
address new problems or concerns.
Each version is given a distinguishing version number. If the Program
specifies a version number of this License which applies to it and "any
later version", you have the option of following the terms and conditions
either of that version or of any later version published by the Free
Software Foundation. If the Program does not specify a version number of
this License, you may choose any version ever published by the Free Software
Foundation.
10. If you wish to incorporate parts of the Program into other free
programs whose distribution conditions are different, write to the author
to ask for permission. For software which is copyrighted by the Free
Software Foundation, write to the Free Software Foundation; we sometimes
make exceptions for this. Our decision will be guided by the two goals
of preserving the free status of all derivatives of our free software and
of promoting the sharing and reuse of software generally.
NO WARRANTY
11. BECAUSE THE PROGRAM IS LICENSED FREE OF CHARGE, THERE IS NO WARRANTY
FOR THE PROGRAM, TO THE EXTENT PERMITTED BY APPLICABLE LAW. EXCEPT WHEN
OTHERWISE STATED IN WRITING THE COPYRIGHT HOLDERS AND/OR OTHER PARTIES
PROVIDE THE PROGRAM "AS IS" WITHOUT WARRANTY OF ANY KIND, EITHER EXPRESSED
OR IMPLIED, INCLUDING, BUT NOT LIMITED TO, THE IMPLIED WARRANTIES OF
MERCHANTABILITY AND FITNESS FOR A PARTICULAR PURPOSE. THE ENTIRE RISK AS
TO THE QUALITY AND PERFORMANCE OF THE PROGRAM IS WITH YOU. SHOULD THE
PROGRAM PROVE DEFECTIVE, YOU ASSUME THE COST OF ALL NECESSARY SERVICING,
REPAIR OR CORRECTION.
12. IN NO EVENT UNLESS REQUIRED BY APPLICABLE LAW OR AGREED TO IN WRITING
WILL ANY COPYRIGHT HOLDER, OR ANY OTHER PARTY WHO MAY MODIFY AND/OR
REDISTRIBUTE THE PROGRAM AS PERMITTED ABOVE, BE LIABLE TO YOU FOR DAMAGES,
INCLUDING ANY GENERAL, SPECIAL, INCIDENTAL OR CONSEQUENTIAL DAMAGES ARISING
OUT OF THE USE OR INABILITY TO USE THE PROGRAM (INCLUDING BUT NOT LIMITED
TO LOSS OF DATA OR DATA BEING RENDERED INACCURATE OR LOSSES SUSTAINED BY
YOU OR THIRD PARTIES OR A FAILURE OF THE PROGRAM TO OPERATE WITH ANY OTHER
PROGRAMS), EVEN IF SUCH HOLDER OR OTHER PARTY HAS BEEN ADVISED OF THE
POSSIBILITY OF SUCH DAMAGES.
Appendixes
189
A−A−P Recipe Executive
END OF TERMS AND CONDITIONS
How to Apply These Terms to Your New Programs
If you develop a new program, and you want it to be of the greatest
possible use to the public, the best way to achieve this is to make it
free software which everyone can redistribute and change under these terms.
To do so, attach the following notices to the program. It is safest
to attach them to the start of each source file to most effectively
convey the exclusion of warranty; and each file should have at least
the "copyright" line and a pointer to where the full notice is found.
<one line to give the program's name and a brief idea of what it does.>
Copyright (C) <year> <name of author>
This program is free software; you can redistribute it and/or modify
it under the terms of the GNU General Public License as published by
the Free Software Foundation; either version 2 of the License, or
(at your option) any later version.
This program is distributed in the hope that it will be useful,
but WITHOUT ANY WARRANTY; without even the implied warranty of
MERCHANTABILITY or FITNESS FOR A PARTICULAR PURPOSE. See the
GNU General Public License for more details.
You should have received a copy of the GNU General Public License
along with this program; if not, write to the Free Software
Foundation, Inc., 59 Temple Place, Suite 330, Boston, MA 02111−1307 USA
Also add information on how to contact you by electronic and paper mail.
If the program is interactive, make it output a short notice like this
when it starts in an interactive mode:
Gnomovision version 69, Copyright (C) year name of author
Gnomovision comes with ABSOLUTELY NO WARRANTY; for details type `show w'.
This is free software, and you are welcome to redistribute it
under certain conditions; type `show c' for details.
The hypothetical commands `show w' and `show c' should show the appropriate
parts of the General Public License. Of course, the commands you use may
be called something other than `show w' and `show c'; they could even be
mouse−clicks or menu items−−whatever suits your program.
You should also get your employer (if you work as a programmer) or your
school, if any, to sign a "copyright disclaimer" for the program, if
necessary. Here is a sample; alter the names:
Appendixes
190
A−A−P Recipe Executive
Yoyodyne, Inc., hereby disclaims all copyright interest in the program
`Gnomovision' (which makes passes at compilers) written by James Hacker.
<signature of Ty Coon>, 1 April 1989
Ty Coon, President of Vice
This General Public License does not permit incorporating your program into
proprietary programs. If your program is a subroutine library, you may
consider it more useful to permit linking proprietary applications with the
library. If this is what you want to do, use the GNU Library General
Public License instead of this License.
Appendixes
191