1
Installation – Electronic auto-sense
and Rear-vented auto-timer dryers
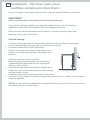
Flush venting
The dryer is vented through a hole in the wall, using a
galvanised metal pipe or flexible hose. This is suitable for floor
and wall mounted dryers installed against an outside wall.
Kit Vent External 400 mm Hose Part No. 460754
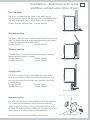
Movable venting
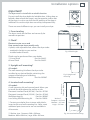
Fig. 6 Flush venting
The dryer is vented using a flexible hose through a hole in the
wall. This allows the dryer to be moved from the wall slightly.
Suitable for floor mounted dryers only.
Flexible Hose 2 m
Part No. 503858
Window venting
A flexible hose is used to vent the dryer through a window.
Maximum hose length is 2 metres.
Flexible Hose 2 m
Part No. 503858
Flexible Hose 0.4 m
Part No. 460601
Fig. 7 Movable venting
Venting duct
The dryer is vented using an extendible duct that allows
venting to a window or through an existing wall vent. The
duct can be used with a flexible hose. Specially suitable for
inverted dryers.
Venting Duct Kit
Part No. P6451
Flexible Hose 2 m
Part No. 503858
Fig. 8 Venting duct
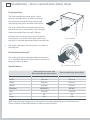
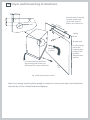
Internal venting
Included with the dryer is a vent deflector (Part No. 460822P).
This screws on to the back of the dryer over the exhaust
outlet. If external venting is not possible the deflector must
be fitted. The outlet of the vent deflector must be clear of any
obstructions to ensure normal and safe operation.
Note: not all parts may be available in all countries.
Fig. 9 Internal venting
7