1
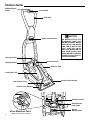
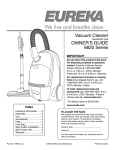
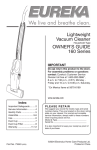
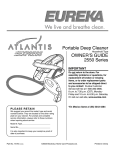
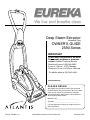
Deep Steam Extractor
Household Type
OWNERʼS GUIDE
2590 Series
IMPORTANT
Do not return this product to the store.
For assembly problems or questions
contact: Eurekaʼs Customer Service
Division toll free at 1-800-282-2886*,
8 a.m. to 7:30 p.m., (CST), Monday Friday and 10 a.m. to 6:30 p.m. Saturday.
*En Mexico llame al (55) 5343-4384
www.eureka.com
PLEASE RETAIN
We suggest you record the model, type and serial
numbers below. They are located on the silver rating
plate on your cleaner. For prompt and complete
service information, always refer to these numbers
when inquiring about service.
Model & Type___________________________
Serial No. ______________________________
It is also important to keep your receipt as proof of
date of purchase.
Part No. 73569A (10/04)
©2004 Electrolux Home Care Products Ltd.
Printed in China
Index
Important Safeguards ........................... 2
General Information .............................. 2
Grounding Instructions ......................... 3
Before You Begin .................................. 3
Feature Guide – Parts .......................... 4
OptiHeat ............................................... 5
Set Up .................................................. 5
Use ....................................................... 6
Clean Up & Storage ............................ 7
Bare Floor Cleaning ............................. 8
Upholstery & Stair Cleaning ................. 9
Warranty ............................................. 10
Problem Solving ..................................11
GENERAL INFORMATION
NOTE: Thoroughly clean carpet,
upholstery and stairs with a
vacuum cleaner before using
this portable deep cleaner.
Automatic Suction Shut-Off
The automatic suction shut-off functions when
the recovery tank is full of liquid. As the tank fills,
the float (inside the recovery tank) rises until it
shuts off the suction causing the motor sound
to become high pitched. When this happens,
empty the recovery tank.
The automatic suction shut-off also functions if
the portable deep cleaner tips over. To continue
use, turn the portable deep cleaner OFF and
set it upright. Wait a few seconds to allow the
motor to come to a complete stop. Restart the
portable deep cleaner.
Service Information
The instructions in this booklet serve as a guide
to routine maintenance. For additional service
information telephone our toll free number for
the nearest Eureka Authorized Warranty Station.
You should know the model, type and serial
numbers when you call:
USA: 1-800-282-2886
Mexico: (55) 5343-4384
Canada: 1-800-282-2886
If you prefer, you can write to:
Electrolux Home Care Products North America,
Service Division. P.O. Box 3900, Peoria, IL
61612, USA. In Canada write to Electrolux Home
Care Products North America, 866 Langs Drive,
Cambridge, Ontario N3N 2N7. Refer to The
Eureka Limited Warranty for complete service
information.
DO NOT OIL the motor or the agitator
at any time. The bearings have a seal
and are permanently lubricated.
2
IMPORTANT SAFEGUARDS
When using an electrical appliance, basic precautions should always be
followed, including the following:
READ ALL INSTRUCTIONS BEFORE USING THIS
CARPET SHAMPOOER/EXTRACTOR.
WARNING
To reduce the risk of fire, electric shock, or injury.
•
Do not immerse product. Use only on surfaces moistened by cleaning
process.
•
Do not use outdoors or expose to rain.
•
Use only commercially available floor cleaners intended for machine
application.
•
Do not leave the Extractor when plugged in. Turn OFF the switch
and unplug the electrical cord when not in use and before servicing.
•
Do not allow to be used as a toy. Close attention is necessary when
used by or near children.
•
Use only as described in this manual. Use only manufacturerʼs
recommended attachments.
•
Do not use with damaged cord or plug. If the Extractor is not working
properly, has been dropped, damaged, left outdoors, or dropped into
water, return it to a service center immediately.
• Do not pull or carry by cord, use cord as a handle, close a door on
cord, or pull cord around sharp edges or corners. Do not run the
Carpet Shampooer/Extractor over cord. Keep cord away from heated
surfaces.
•
Connect to a properly grounded outlet only (refer to Grounding
Instructions).
•
Do not use extension cords or outlets with inadequate current carrying
capacity.
•
Turn off all controls before unplugging.
•
Do not unplug by pulling on cord. To unplug, grasp the plug, not the
cord.
•
Do not handle plug or Extractor with wet hands.
•
Do not put any object into openings. Do not use with any opening
blocked; keep free of dust, lint, hair, and anything that may reduce
airflow.
•
This Extractor creates suction. Some models also contain a moving
agitator brush. Keep hair, loose clothing, fingers, and all parts of body
away from openings and moving parts.
•
Do not pick up anything that is burning or smoking, such as cigarettes,
matches, or hot fireplace or barbecue ashes.
•
Do not use without recovery tank in place.
•
Use extra care when cleaning on stairs.
•
If the machine tips over during use, shut it off immediately, set it upright,
and wait for the motor to stop completely. This allows the float to return
to normal position and permits proper airflow through the cleaner.
•
Do not use to pick up gasoline, acetone, perfumes, colognes, paint
thinners and other flammable liquids or use in places where they may
be present.
•
Operate and store indoors in an area above 32°F where the machine
will not freeze.
•
Keep your work area well lighted.
SAVE THESE INSTRUCTIONS
Grounding Instructions
This appliance must be grounded. If it should malfunction or breakdown, grounding provides a path of least resistance for
electric current to reduce the risk of electric shock. This appliance is equipped with a cord having an equipment-grounding
conductor and grounding plug. The plug must be plugged into an appropriate outlet that is properly installed and grounded
in accordance with all local codes and ordinances.
DANGER
Improper connection of an equipment-grounding conductor can result in risk of electric shock. Check with a qualified electrician
or service person if you are in doubt as to whether the outlet is properly grounded. Do not modify the plug provided with the
appliance. If it will not fit the outlet, have the proper outlet installed by a qualified technician.
This appliance is for use on a nominal 120 volt circuit and has a grounding plug that looks like the plug illustrated in Figure
A. A temporary adapter which looks like the adapter illustrated in Figure B may be used to connect this plug to a two-pole
receptacle, as shown, if a properly grounded outlet is not available. The temporary adapter should be used only until a properly
grounded outlet, Figure A, can be installed by a qualified electrician. The green colored rigid ear, lug, or the like extending
from the adapter must be connected to a permanent ground such as a properly grounded outlet box cover. Whenever the
adapter is used, it must be held in place by a metal screw.
NOTE: In Canada, the use of a temporary adapter is not permitted by the Canadian Electrical Code.
Grounded Outlet Box
Grounded Outlet Box
Adapter
Grounding Blade
is Longest of the
Three Blades
Figure A
BEFORE YOU BEGIN
A. Vacuum Carpet
NOTE: Never use this extractor as a standard
vacuum cleaner.
For best results, vacuum carpets with a vacuum
cleaner that has an agitator. The bristles of the
agitator help loosen and remove soil that is deep in
the carpet nap.
B. Pretest for Color Fastness
Before cleaning the carpet, we recommend testing
the carpet for color fastness. Moisten a white towel
with the cleaning solution. Test a small hidden area
of the carpet in a closet or in a corner. Gently rub the
cloth over the carpet. Check each color. If the towel
does not pick up any color, it should be safe to use
the cleaning solution on the entire area. See page 9
for additional information.
C. Remove Furniture
Remove as much furniture from the room as possible.
Place aluminum foil or plastic film under or around the
legs and bases of the remaining furniture to prevent
stains. Leave the foil or plastic in place until the carpet
is completely dry. Use masking tape or pins to hold
furniture skirts and draperies up out of the way.
Metal Screw
Grounding Tab
Figure B
Helpful Hints for Deep-Cleaning Carpet
Follow the instructions in this ownerʼs guide. Here are a few
extra hints that will make deep-cleaning carpet easier.
• Before you begin using the extractor, vacuum carpet
thoroughly.
• Do not use the extractor for dry vacuuming as this
can damage the unit.
• Use consistent forward and reverse strokes over the
carpet surface.
• Ventilate the room while cleaning to speed drying.
• If the carpet shampooer/extractor is difficult to push
when operating, try pushing the cleaner at a different
90 degree angle so it moves with the grain and not
against the grain of the carpet fibers.
Do Not Use on Oriental rugs.
After Cleaning
• Allow carpets to dry thoroughly. Try to keep children
and pets off the carpet until it is completely dry.
• Use towels or white cloths to step on if you must walk
on the area before it is dry.
• Wipe cleaning solution from woodwork and wood
furniture immediately to prevent damage to the wood
or upholstery.
• If furniture must be placed back in the room before the
carpet is dry, use aluminum foil or plastic under the
furniture legs to prevent staining the carpet.
3
Feature Guide
Shampoo/Rinse
Button
Power Switch
Cord Hook
NOTICE
Upper Handle Release
Carrying Handle
ON MODELS WITH THE
ACCESSORY HOSE, YOU
MAY NOTICE SMALL WATER
DROPLETS IN THE WATER
LINE. THIS IS DUE TO THE
FACT THAT ALL UNITS
ARE 100% INSPECTED ON
THE PRODUCTION LINE
USING WATER TO ASSURE
PROPER FUNCTION OF
THE ACCESSORIES.
Hose Inlet Cover
Shampoo Bottle
Recovery Tank
Clean Water Tank
Clear Suction Cover
Suction Cover Release
Suction Cover Release
Shampoo Contol
Quick Release
Cord Hooks
Store Electrical Cord
4
• Wrap cord around cord hooks.
Handle
Release Pedal
OptiHEAT™ Heat Retention System (Available on Some Models Only)
IMPORTANT: Fill clean water tank with hot tap water. Do not use boiling water.
Why is heated cleaning better?
Testing has shown that cleaning with hot tap water at the normal household temperature (110º to 120º) actually cleans better
than cold water or water at room temperature. Using water at temperatures above the normal level does not significantly
increase cleaning ability.
What is OptiHEAT™?
Eureka's exclusive OptiHEAT™, Heat Retention System, maintains the temperature of the clean water so you are always
cleaning at the optimal temperature. The unique OptiHEAT™ tank system is designed to keep hot tap water within the optimal
temperature zone for a normal period of use.
STEP
1
SET UP
IMPORTANT: For best results, begin with a clean surface by vacuuming surface or
item before using the extractor.
NOTE: Familiarize yourself with the parts of the extractor by reading this ownerʼs
manual before using.
A. Fill Shampoo Bottle
If handle is folded, lift handle to operating position.
1) Lift up and pull out the shampoo bottle, fill with
Eureka Carpet & Upholstery Concentrate only.
2) Close cap tightly, and replace shampoo bottle.
3) Gently push until the shampoo bottle snaps into
place.
Shampoo
Bottle
B. Fill Clean Water Tank
1) Lift up and pull out clean water tank.
2) Fill tank to the designated fill line with hot tap water
(not boiling), replace cap.
3) Gently push until the clean water tank snaps back
into position.
Cap
Clean
Water
Tank
NOTE: When moving the extractor from one location to another, always make sure the recovery and clean water
solution tanks are completely empty. Then tilt the unit slightly backward and roll on rear wheels, fold the looped
handle and use the carrying handle for transporting up and down stairs.
5
STEP
2
USE
A. Carpet Cleaning
1) Adjust shampoo control, from
MAX = for heavy traffic areas to
RINSE = clear water only.
Shampoo
Control
2) Plug in cord.
3) Lift handle to operating position.
Shampoo/
Rinse
Button
Handle
Release Pedal
4) Push power switch to II position for agitation of brush.
Power Switch
II Brushes
I Suction Only
0 OFF
Carrying
Handle
5) Push the handle foot release and recline handle to use position.
Push shampoo/rinse button and hold to apply solution and
move the unit forward and then backward at a moderate pace
two times. As the nozzle moves over the carpet, the cleaning
solution is sprayed onto the carpet. At the same time the nozzle
picks up the dirty water and places it in the recovery tank. It is
important to move the unit in a steady motion.
6) Release the button to stop the solution flow. Avoid oversoaking.
7) Move the extractor over the carpet several more times without
pushing the shampoo/rinse button. This removes excess water
and helps the carpet dry faster.
8) Repeat steps 5, 6, and 7 on heavily soiled areas.
B. Transporting the Extractor
When moving the unit from one location to another, always make
sure the recovery and clean water solution tanks are completely
empty. Then tilt the unit slightly backward and roll on rear wheels
or use the carrying handle for transporting up and down stairs.
(See page 4)
C. Emptying the Recovery Tank
CAUTION: Turn off the power switch and unplug the extractor to empty the recovery tank.
1) Pull straight up to remove the recovery tank from the unit.
2) Remove the automatic shut-off (see illustration) and empty contents
into a suitable water drain.
3) Rinse out the waste water recovery tank thoroughly.
4) Remove and clean the float and filter by rinsing it with water after each
use. Place the same float and filter back into the recovery tank.
5) Gently push the tank all the way into unit until secure.
6) Resume cleaning or store.
D. Automatic Shut-Off
The automatic suction shut-off functions when the waste water recovery tank is
full of liquid. This can be detected by a noticeable difference in the motor sound.
Immediately turn off the unit when this happens and empty the recovery tank.
6
Automatic
Suction
Shut-Off
Filter
Recovery
Tank
STEP
3
CLEAN UP AND STORAGE
Before storing the extractor for long periods of time, it is a good idea to set the shampoo
control on rinse and push the spray button for 10 seconds. This flushes the shampoo residue
from the pump. Place cleaner on a surface where water can easily be cleaned up. If any
attachments have been used clear hose line in same way.
A. Empty the Recovery Tank
See page 6 for instructions.
B. Clean Suction Cover
CAUTION: Turn off the power switch and unplug the electrical cord before cleaning.
1) Slide the suction cover release tabs up on each side of the suction cover.
2) Remove the suction cover and clean the area of dirt and lint.
3) Replace the suction cover by sliding the tabs on top of the suction cover into the top slots on the hood.
Suction
Cover
Suction Cover
Release Tabs
C. Folding the Handle for Compact Storage
1) Turn upper handle release to collapse the upper handle.
2) Press on handle release pedal to fully collapse handle.
Upper Handle
Release
Handle
Release
Pedal
Upper
Handle
Release
7
CLEAN UP AND STORAGE (Continued)
D. Store the Accessories
1. Replace all accessories into appropriate slots on tool caddy.
2. Tool caddy fits perfectly on top of the extractor for storage, (see below) or you can store tool caddy by hanging it
on the wall with screws (slots on back of tool caddy will slide over screws to secure to the wall).
Screw Holes
(on back of unit)
Hose
Squeegee
Attachment
(not included
on all models)
Foam Pad
Attachment
(not included
on all models)
Brush
Attachment
Upholstery
Attachment
(Turbo
upholstery
attachment not
included on all
models)
BARE FLOOR CLEANING (Not included on all models)
NOTE: Do not use on natural hardwood floors.
NOTE: Use Eureka Carpet & Upholstery Concentrate only.
CAUTION: Turn off the power switch and unplug the extractor to empty the recovery tank.
CAUTION: Always attach the foam pad and squeegee for bare floor cleaning.
Brush Attachment
A. Pull brush attachment out of
cleaner base.
8
Foam Pad Attachment
(not included on all models)
B. Replace brush attachment with
foam pad attachment.
Squeegee Attachment
(not included on all models)
C. Attach squeegee on front of
suction cover.
UPHOLSTERY AND STAIR CLEANING:
Before You Begin
B. Check the stuffing material if
possible
Fabric Code Ratings:
• W for wet clean.
• S-W for solvent-dry or wet clean.
• S for solvent-dry clean only. Do not wet clean.
A. Vacuum Upholstery or Stairs
Vacuum upholstery and stairs with a vacuum cleanerʼs
attachment tool. Use a crevice tool for hard to reach areas
such as tufts and corners.
IMPORTANT:
Cleaning some upholstery fabrics
with a wet cleaning solution may
damage the fabric. Know what the
fabric content is and how to clean it
before using a cleaning solution on
upholstery fabrics.
Most manufacturers care code their fabrics with cleaning
methods. Some very delicate and unusual fabrics are DRY
CLEAN ONLY. If in doubt of the fabric type, call a dealer or
take a cushion or arm cover to a dealer for advice.
Look inside the cushions or on the underneath side. If filling
is a dark color, it may bleed through and discolor the fabric.
Most stuffing material that is white to light yellow is colorfast
and will not bleed colors through to the fabric covering.
C. Test clean a hidden area
Be sure to test clean a hidden area several hours before
starting to clean. Let the test area dry completely. Inspect
for changes in color, bleeding, stretching, or shrinking. Test
another area if in doubt.
D. Pretest for Color Fastness
Before cleaning the upholstery, we recommend testing it
for color fastness. Moisten a white towel with the cleaning
solution. Test a small area of the cushion back. Gently rub
the cloth over the area. Check each area for color bleeding.
If the towel does not pick up any color, it should be safe to
use the cleaning solution on the entire area.
CAUTION: Be extra careful when cleaning on stairs.
To prevent the carpet shampooer/extractor from falling, do not place the unit on stairs. It is suggested that
the carpet shampooer/extractor be placed at floor level to clean the lower portion of the stairs and be securely
placed at the top of the stairway to clean the upper portion of the stairs.
A. Lift up the hose inlet cover.
B. Slide the accessory hose into the slot until it clicks into place.
C. Attach the upholstery brush to the end of the hose.
Attachment
Release
Solution
Trigger
Upholstery
Brush
Hose Inlet Plug
Turbo
Upholstery Brush
(On some models)
9
UPHOLSTERY AND STAIR CLEANING
(Continued)
THE EUREKA LIMITED WARRANTY
What This Warranty Covers
Your Eureka cleaner is warranted to be free from all defects in material and
workmanship in normal household use for a period of one year. The warranty is granted
only to the original purchaser and members of his or her immediate household. The
warranty is subject to the following provisions.
Attachment
Release
What This Warranty Does Not Cover
• Parts of the cleaner that require replacement under normal use, such as disposable dust
bags, filters, drive belts, light bulbs, and brush roll bristles, impellers and cleaning.
• Damages or malfunctions caused by negligence, abuse, or use not in accordance with
the Ownerʼs Guide.
• Defects or damages caused by unauthorized service or the use of other than Genuine
Eureka parts.
What the Manufacturer Will Do
Solution
Trigger
Upholstery
Brush
The manufacturer will, at its option, repair or replace a defective cleaner or cleaner part
that is covered by this warranty. As a matter of warranty policy, the manufacturer will
not refund the consumerʼs purchase price.
Warranty Registration
Please fill out and return the warranty registration card accompanying your cleaner.
Obtaining Warranty Service
D. Place the Upholstery Nozzle at the top of the cleaning
area.
E. Pull up and hold the solution release trigger and pull the
nozzle backward at a moderate pace for no more than
five seconds to avoid over soaking.
F.
Release the trigger at the end of the stroke.
G. Lift nozzle and start again at the top. Apply one to three
spraying strokes. Avoid over-soaking the area.
NOTE: As the nozzle moves over the surface, the
cleaning solution sprays onto the surface. At
the same time the nozzle picks up the dirty
water and places it in the recovery tank.
H. Move the nozzle over the surface several more times
without engaging the trigger. This removes excess water
and helps the surface dry faster.
I.
Press release button on top of hose to release
attachment.
J.
After using attachment make sure hose inlet cover is
fully closed.
K. Clean upholstery brush attachment after use. Press
attachment release to remove from hose, pull suction
cover open, rinse under warm running water. Replace
on hose or store in caddy.
To obtain warranty service you must return the defective cleaner or cleaner part along
with proof of purchase to any Eureka Authorized Warranty Station.
You will find the nearest location in the Yellow Pages, under “Vacuum Cleaners
– Service and Repair.” Be certain that the Warranty Station is “Eureka Authorized.”
For the location of the nearest Eureka Authorized Warranty Station or for service
information, telephone toll free:
USA: 1-800-282-2886
Mexico: (55) 5343-4384
Canada: 1-800-282-2886
If you prefer you can write to Electrolux Home Care Products North
America, P O Box 3900, Peoria, Illinois 61612, USA. In Canada write
to Electrolux Home Care Products Canada, 866 Langs Drive, Cambridge,
Ontario N3H 2N7.
If it is necessary to ship the cleaner outside your community to obtain warranty repair,
you must pay the shipping charges to the Eureka Authorized Warranty Station.
Return shipping charges will be paid by the Warranty Station. When returning
parts for repair, please include the model, type, and serial number from the data plate
on the cleaner.
Further Limitations and Exclusions
Any warranty that may be implied in connection with your purchase or use of the
cleaner, including any warranty of Merchantability or any warranty for Fitness For
A Particular Purpose is limited to the duration of this warranty. Some states do not
allow limitations on how long an implied warranty lasts, so the above limitations may
not apply to you.
Your relief for the breach of this warranty is limited to the relief expressly provided
above. In no event shall the manufacturer be liable for any consequential or incidental
damages you may incur in connection with your purchase or use of the cleaner. Some
states do not allow the exclusion or limitation of incidental or consequential damages,
so the above limitation or exclusion may not apply to you.
This warranty gives you specific legal rights. You may also have other rights which
vary by state.
GENUINE
EUREKA PRODUCT
Questions & Answers about Genuine Eureka Products
Q: Why should I use only Genuine Eureka paper bags, belts, and parts in my Eureka
vacuum cleaner?
A: Using Genuine Eureka Products, which are made to exacting specifications and
engineered with emphasis on quality, performance, and customer satisfaction,
ensures the long life and cleaning efficiency of your vacuum cleaner. Overall,
this saves you money and helps to keep your home clean.
Q: How can I be sure I am using only genuine Eureka products in my vacuum
cleaner?
A: Typically, packaged products and paper bags can be identified by a “Genuine
Eureka Product” symbol (see illustration above). For further identification
assistance, you may call our toll-free number, 1-800-282-2886, for the location
of a nearby Eureka Authorized Warranty Station.
Q: Are there any differences between “made to fit” or “imitation” and Genuine
Eureka paper bags, belts, and parts?
A: Yes, there are some very important differences in materials, quality, and
reliability. Many customers have mistakenly purchased “imitation” paper
bags and parts while thinking they purchased genuine. Unfortunately, many
of these customers discovered the differences after they experienced related
difficulties.
For Genuine Eureka Value, Accept No Imitations!
10
11